HOLIDAY DONATION DRIVE - SUPPORT MSW - DO YOUR PART TO KEEP THIS GREAT FORUM GOING! (Only 20 donations so far - C'mon guys!)
×


mbp521
-
Posts
1,002 -
Joined
-
Last visited
Content Type
Profiles
Forums
Gallery
Events
Everything posted by mbp521
-
 Thank you Roger. During my research on these boats I’ve read that they were notoriously hard to control. One reason being the small rudder size and the other being the placement of the paddle wheel in relation to the rudders. These factored in with swift river currents probably made it a task that only seasoned pilots could manage. By the way, I’m curious as to the name of the book you are referring to. I’m always up for reading up more on Vicksburg and the campaigns of these boats. -Brian
 -
Thanks Keith. A little bit of extra work but it sure helps keep everything in line. If I ever do another scratch build, this will be the first thing I build. -Brian
-
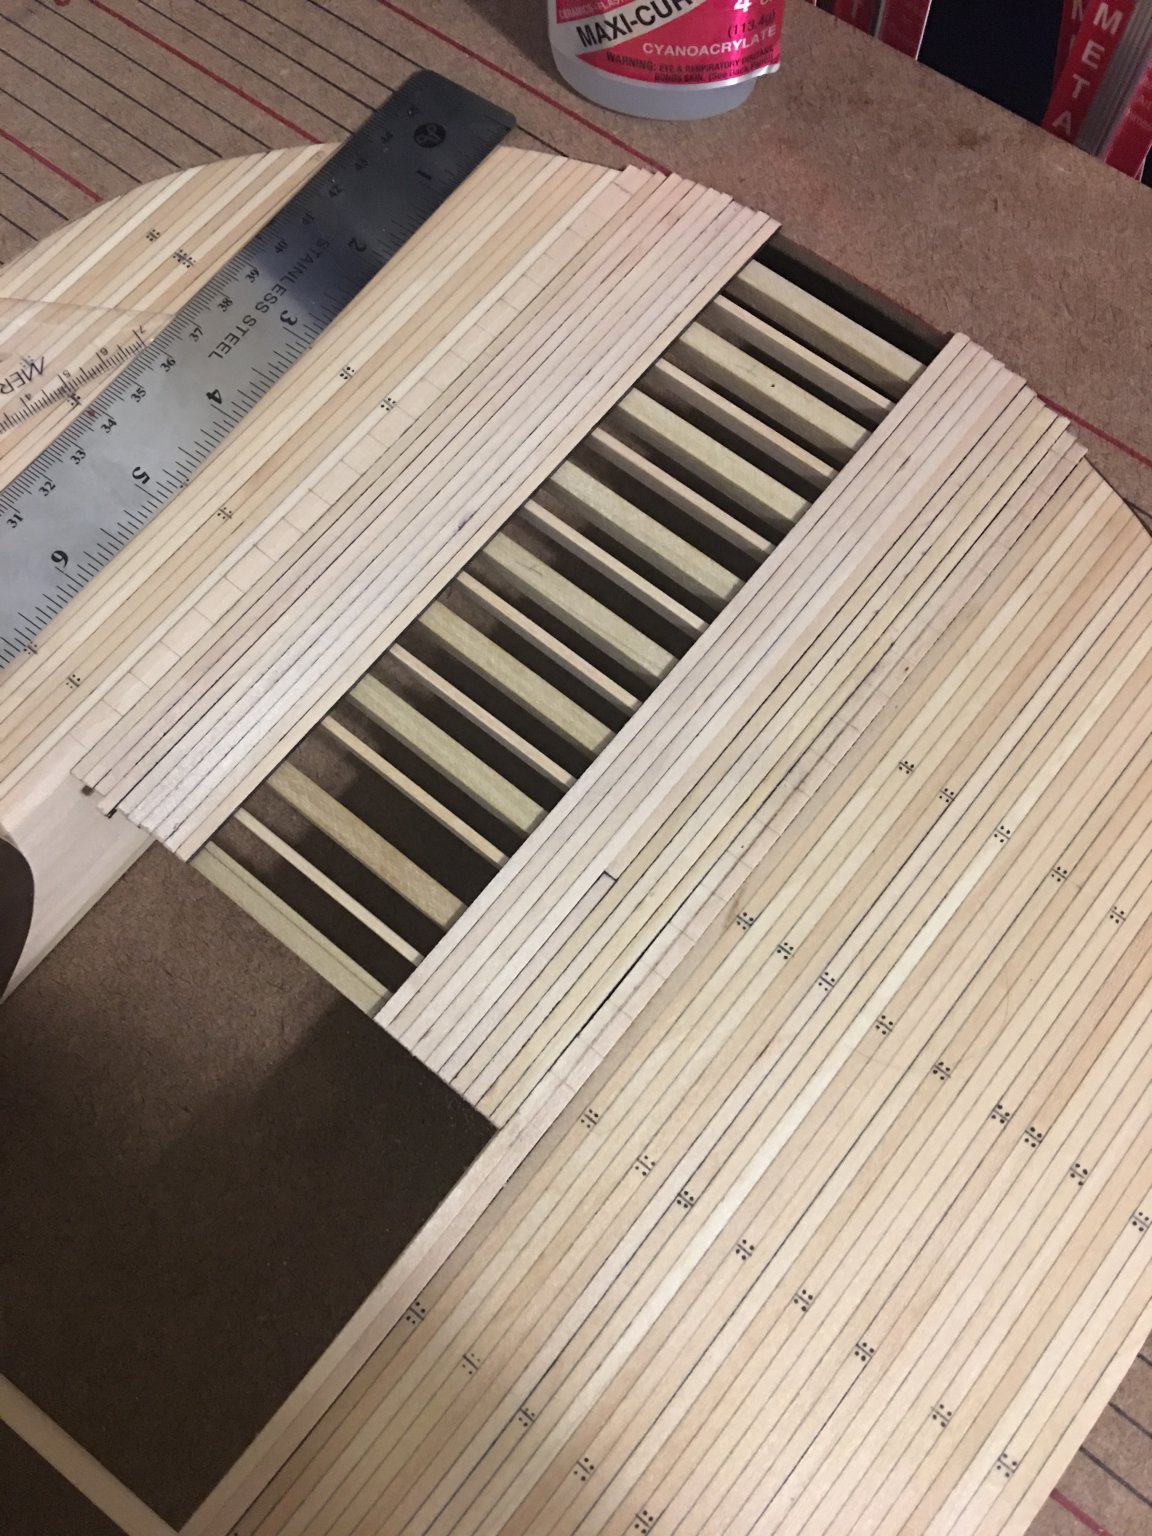
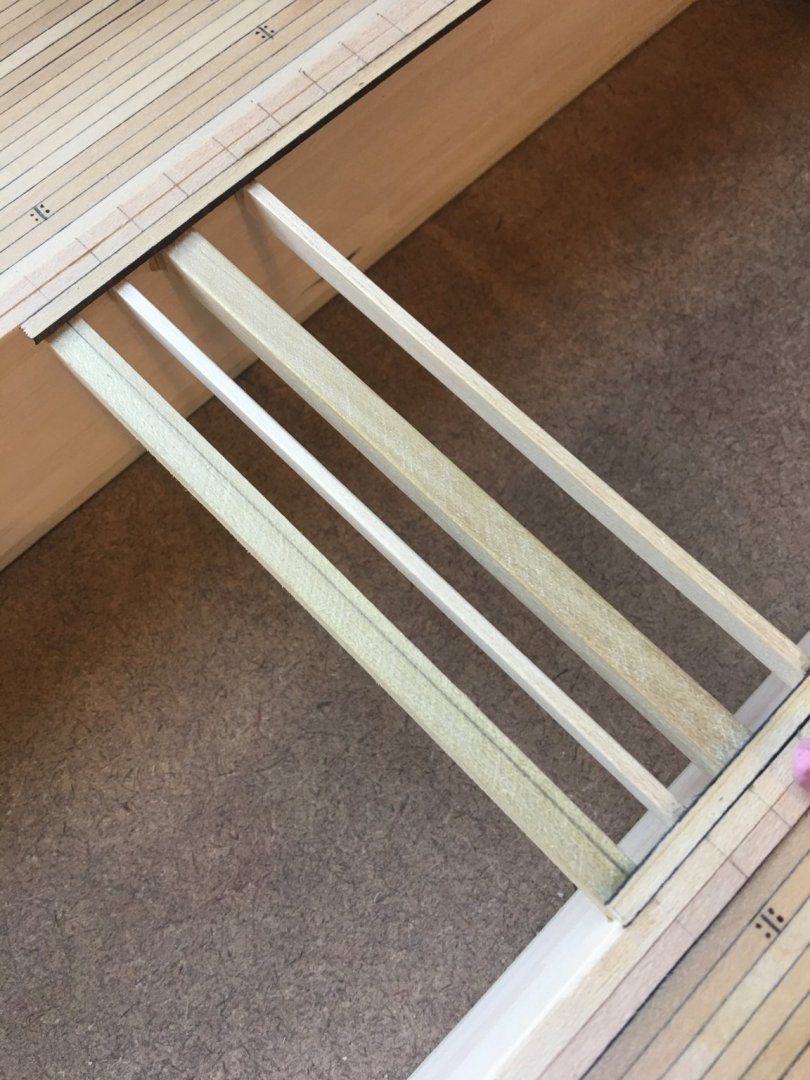
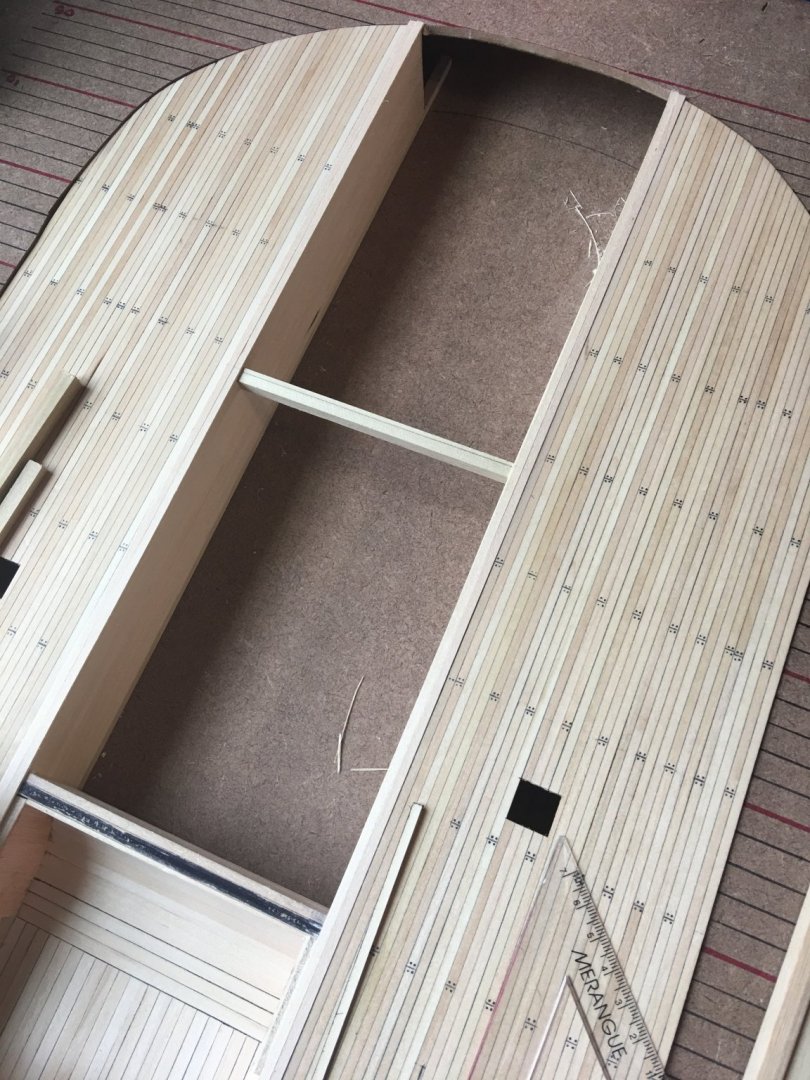
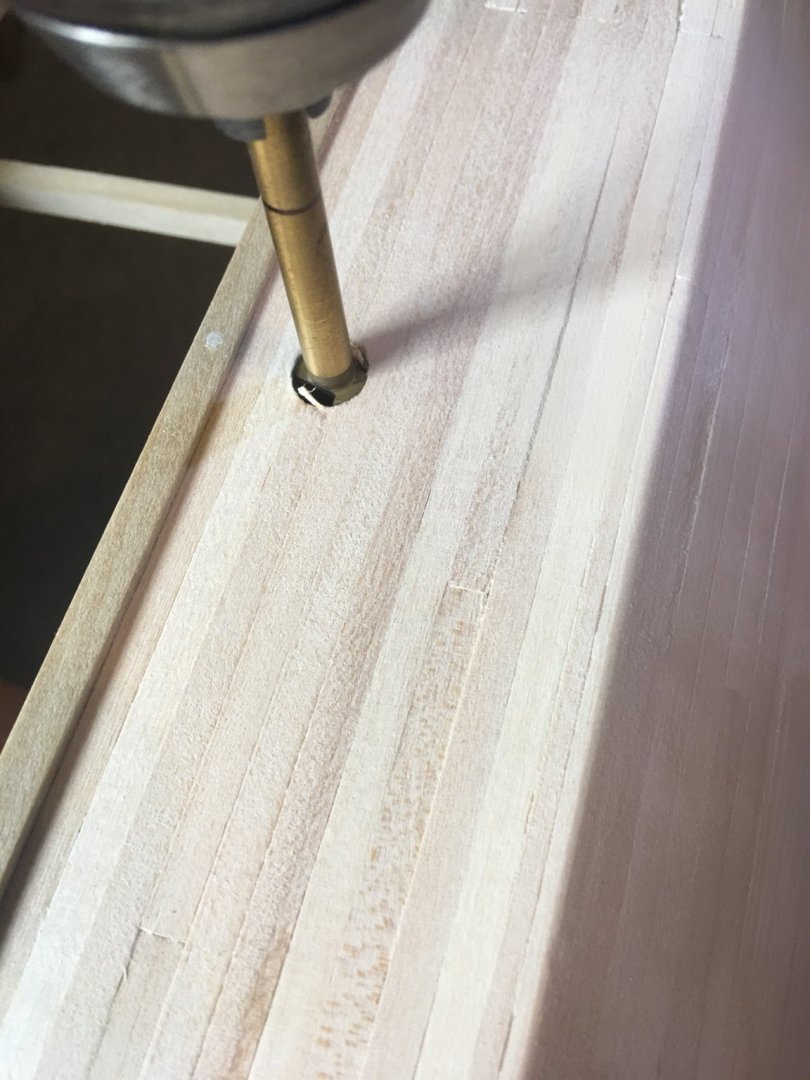
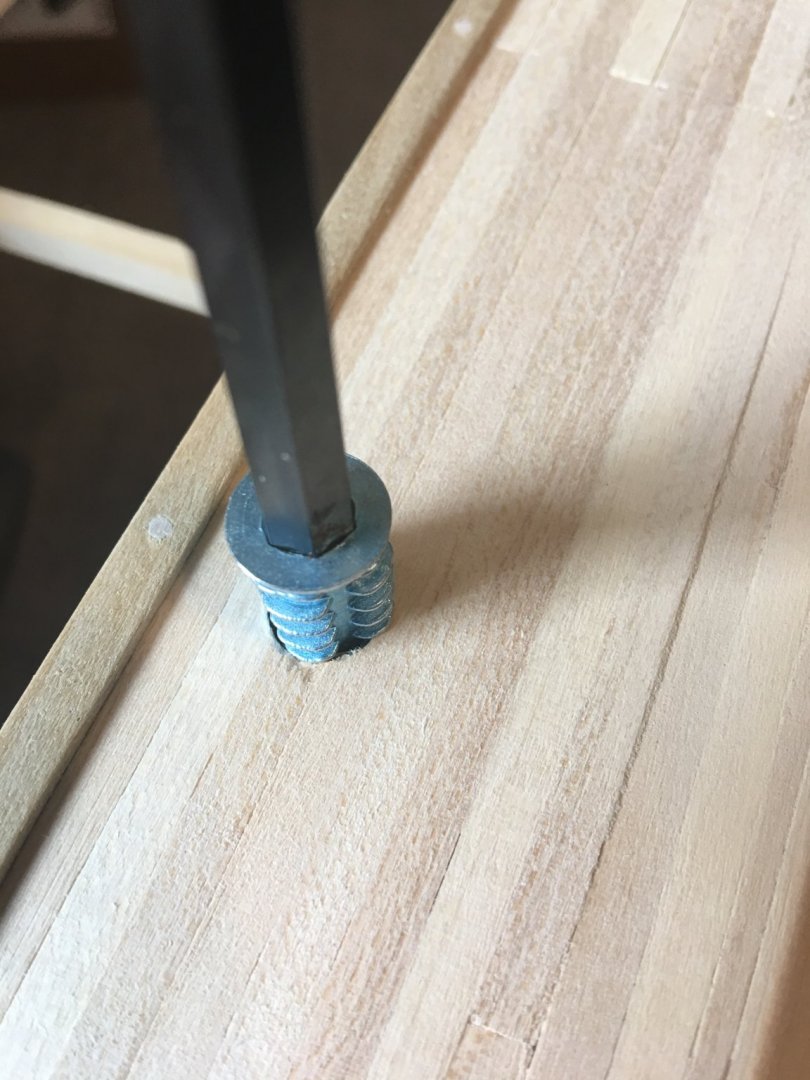
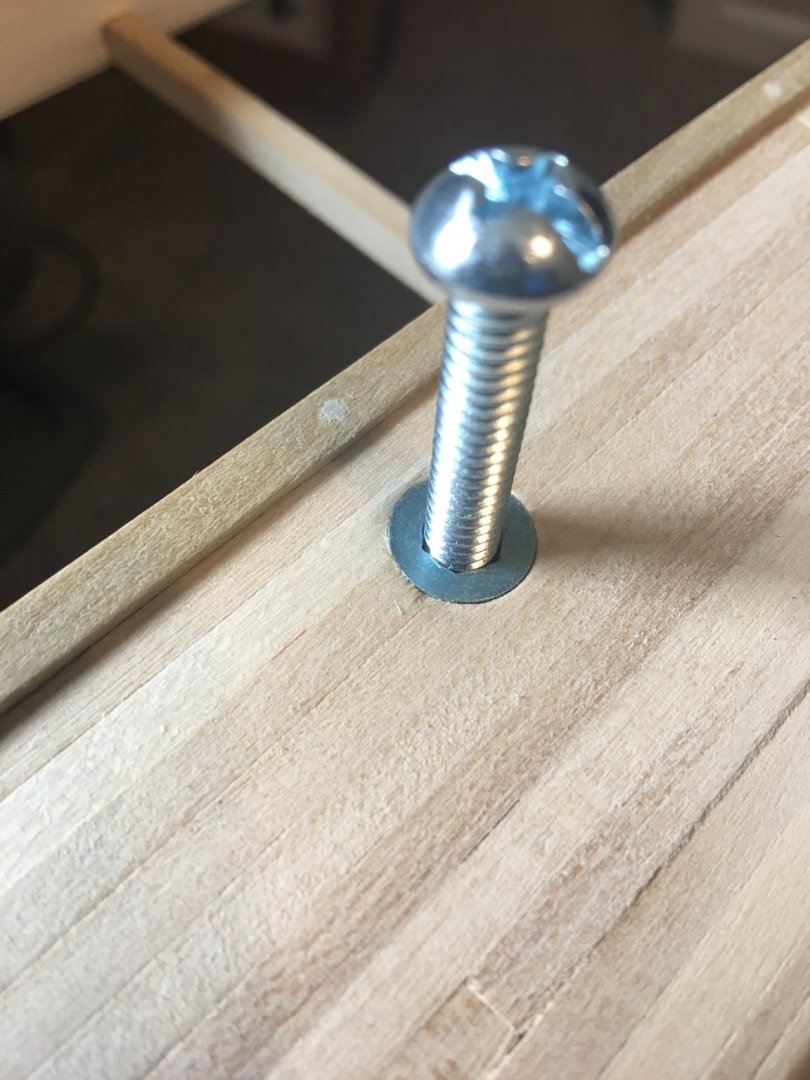
Hello again Everyone, So I managed to get the build jig set up this past week, and in hindsight I realized that I should have done this from the beginning. It sure makes lining everything up so much easier. I didn't take any pictures of its construction, I guess I was just excited to get to building it and completely forgot about taking them. Anyway, basic construction was two sheets of 1/4" MDF with 1"x4"s cut to length and sandwiched between them the height of the hull. I then tuned the hull over, traced out it's profile and cut that out. I then lined up the Bob Hill plans (yes, I used these, but first I made sure that the framing stations lined up with the HSR ones and they did perfectly) with the hull opening, taped it in place then marked all of the frames. This is where I started taking the pictures. Oh, and I went into town and had the scaled plans printed so that I didn't run the risk of the ones I printed and taped together throwing my frame lines out of whack. Next I installed the pedestal mounts in the hull so that I could secure it to the jig. I for the mounts I used these 1/4" threaded inserts that you drill the pilot hole and insert with an Allen wrench. These things were pretty cool. I like them better than using T-nuts because if they strip out, you can replace them without tearing apart the model. Drilling the pilot hole. Installing the insert. Testing the fit with the temp screws that I am going to use to hold the boat in place while it is in the jig. And the whole setup in place. The red lines are every fifth frame, as called out on the plans. I then went in and marked all the rest of the frame lines in black so I have a perfect reference for all of the frames. Also, as you can see by my simulated nail lines, The stations gradually migrated out of line with the frame stations. This was where I was having trouble keeping things lined up and prompted me to build the jig. Lesson learned. Luckily most of these won't be seen since they will be hidden by cannons or the Officers Quarters. Now that this part is done, it's time to move on to finishing the gun deck framing and planking. First frame in place. And now they can be lined up where they are supposed to be. First frame going in. A few more frames in place. All frames in place. The wider frames have knee braces mounted to their undersides. These will be installed once the boat is removed from the building jig. Aft planking going in. And finally, the engine holds cut out, the deck all sanded and four coats of wipe-on poly applied. Things ought to start moving along a little better now that I have the build jig as a guide to work off of. I am going to start work this week on the boilers and getting the brickwork laid down in the boiler hold. Haven't quite figured out how I am going to do the bricks yet. I've seen several methods in different builds from powdered mixes to cutting small pieces of wood and painting them up. Not real sure yet, but I am open to any suggestions to other methods used that might be easier. Anyway, that's all for now. Thanks for looking. -Brian


- 739 replies
-
- 14
-

-
One can only wonder how odiferous that could get within the closed confines of Iron Clads. I guess eventually you would get used to it. -Brian
-
Kurt, Thank you for the information. Out of curiosity, I went to the Howard Museum website looking for the books you referenced. Is there a specific link to them or do you have to email them for information? -Brian
-
Hello all, I’d like to pose a question to some of the experts out there about boiler construction. Since there isn’t a whole lot of documentation on the construction of the City Class Iron Clads, a lot has been open to interpretation and research on the remains of the USS Cairo. Since these boats incorporated a lot of techniques from standard Steamboats I was wondering about how the hulls or decks were protected from the heat of the boilers and fire boxes. Going by the build of my Chaperon, the boiler was constructed with legs that supported the boiler tubes and there was an ash pit at the front of the fire boxes that I can only assume was brick lined to protect the wooden deck from hot embers that would escape while shoveling coal in. However, there were really no details on what was beneath the boiler tubes. In one build that I ran across there are pictures of what looks like a shallow pit with a some sort of substrate filled in to keep the heat from the wood planks below it. Was this a standard practice, or were other methods used like brick lining or something else? One other thought was that the entire boiler assembly was wrapped in asbestos blankets, but again I am not sure of the methods used during this time period and my guess is that whatever materials were readily available at the time were used. And given the fact that the recovered boilers from Cairo didn’t show any evidence of blanketing, this may not have been the case. I’ve studied the pictures of the USS St. Louis build going on, but it’s hard to make a determination as to what they have come up with, since most of the pictures of the boilers show it off the boat or already installed. Any suggestions or information would be greatly appreciated. -Brian
-
Tim, Keep them coming. Can’t wait for the next installment. -Brian
-
Patrick, Coming along nicely. You are definitely right, this hull is so much easier to build and plank than the full rigged ships. -Brian
-
Tim, Thanks for the update. Things are coming along. This is an absolutely beautiful build. I recently started work on my scratch built USS Cairo and have been using this build as a guide. Y’alls research on this really helps answer many of the questions and roadblocks that I have been running into trying to get it right. -Brian
-
Eric, I agree with your assumption, the slots do not seem to be cut square. Of course with all of the kits I have built all of the parts we cut just perfectly so that everything lines up just right. (Cough, cough). Seriously though, you are right on track with adjusting the slots to enable the centerline of the deck to line up with the keel. None of this will be seen when the planking is in place. -Brian
-
Dafi, Its simply amazing at the amount of detail you put in such a tiny space. Beautiful work. -Brian
-
Thank you Keith. At 1:48 scale there is actually plenty of room to work in the hold. Although, once the boiler is installed it’ll be tight quarters though. -Brian
-
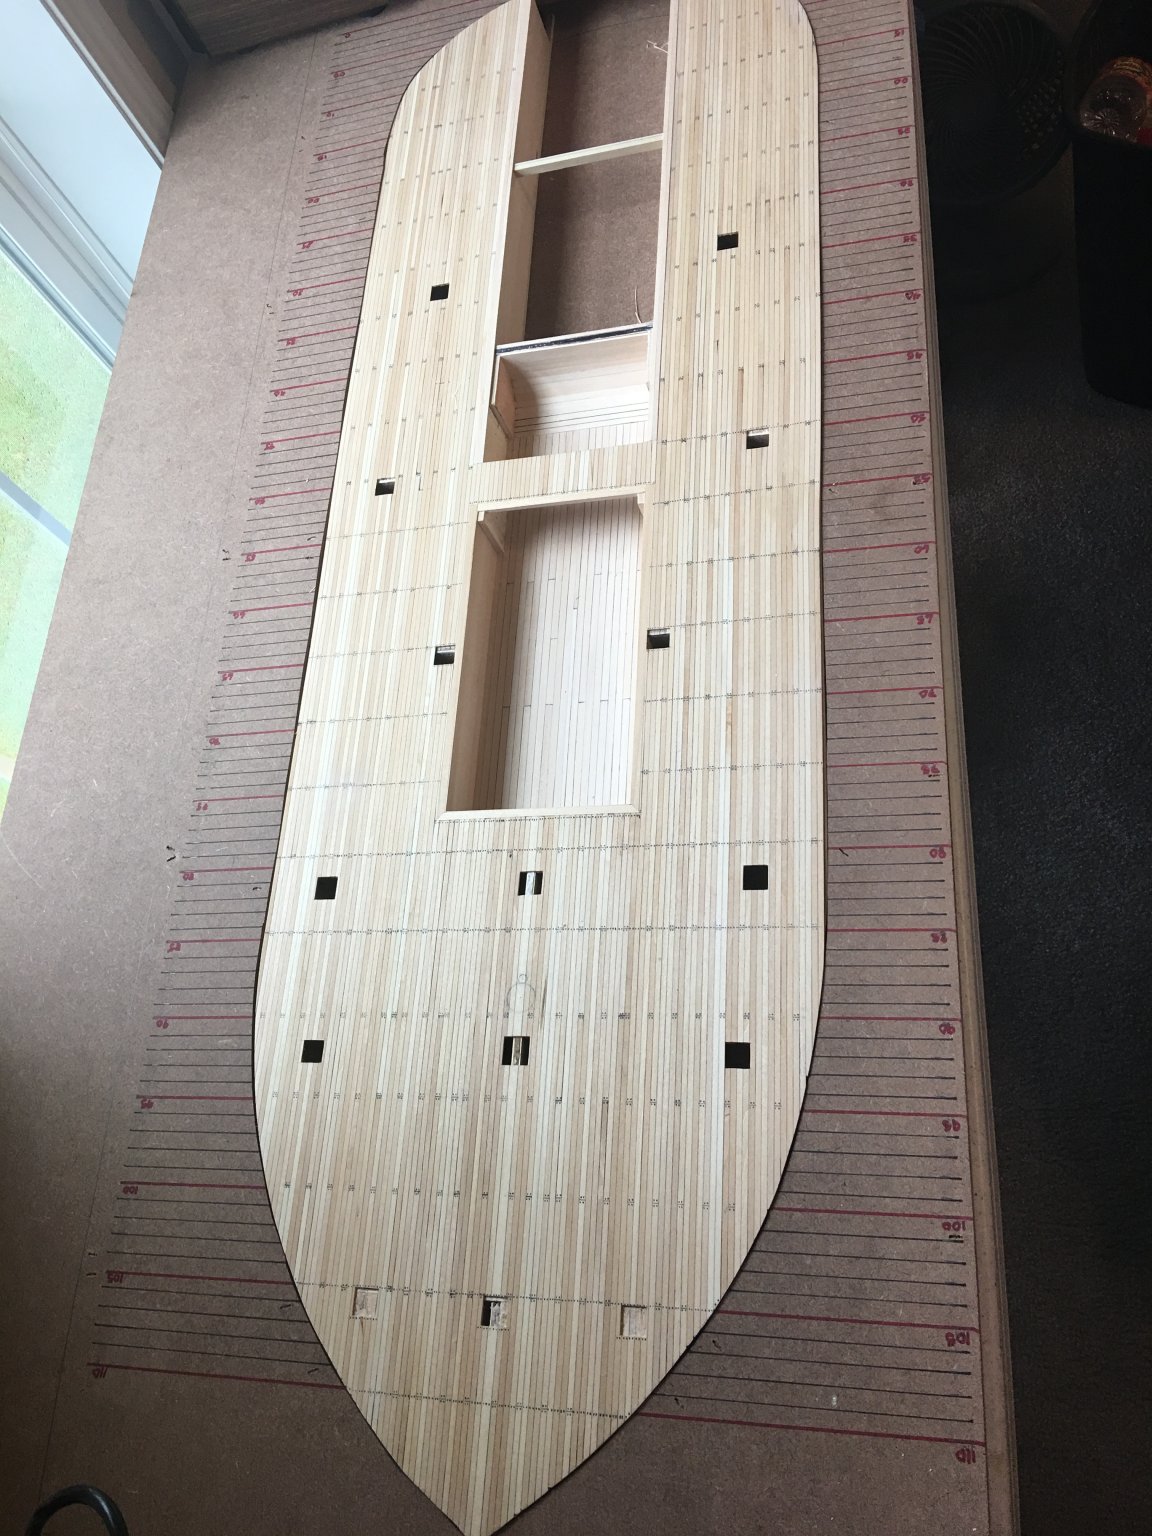
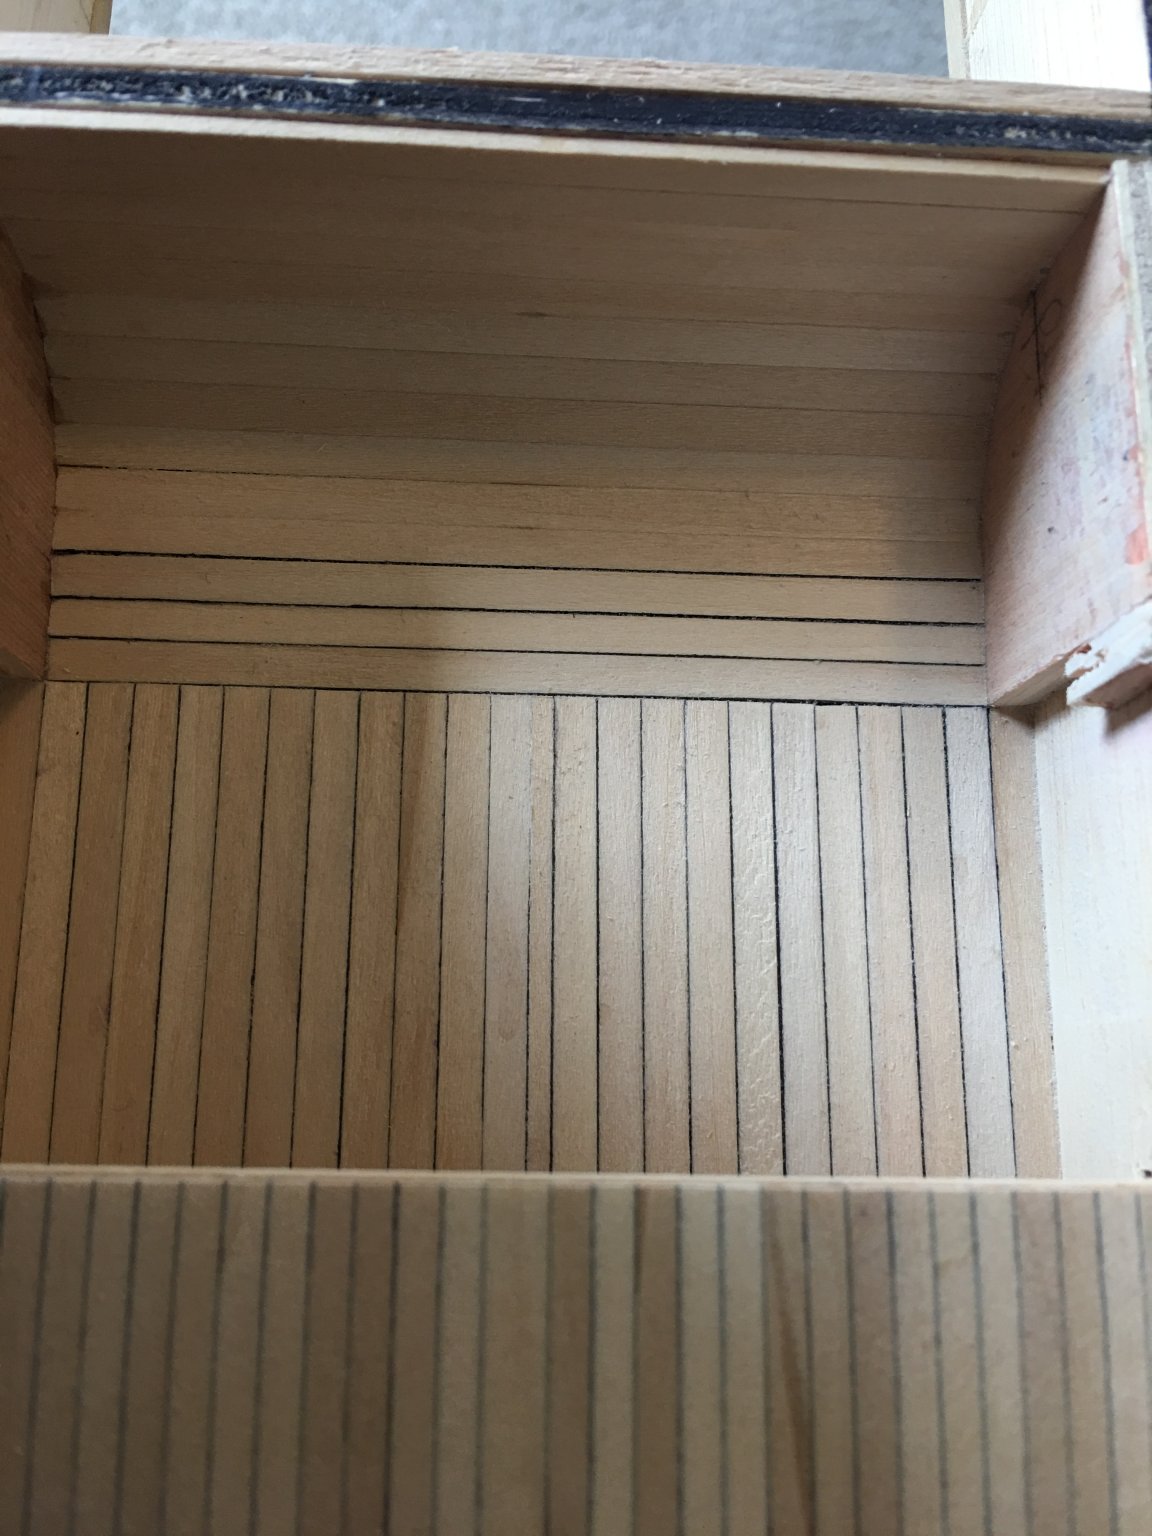
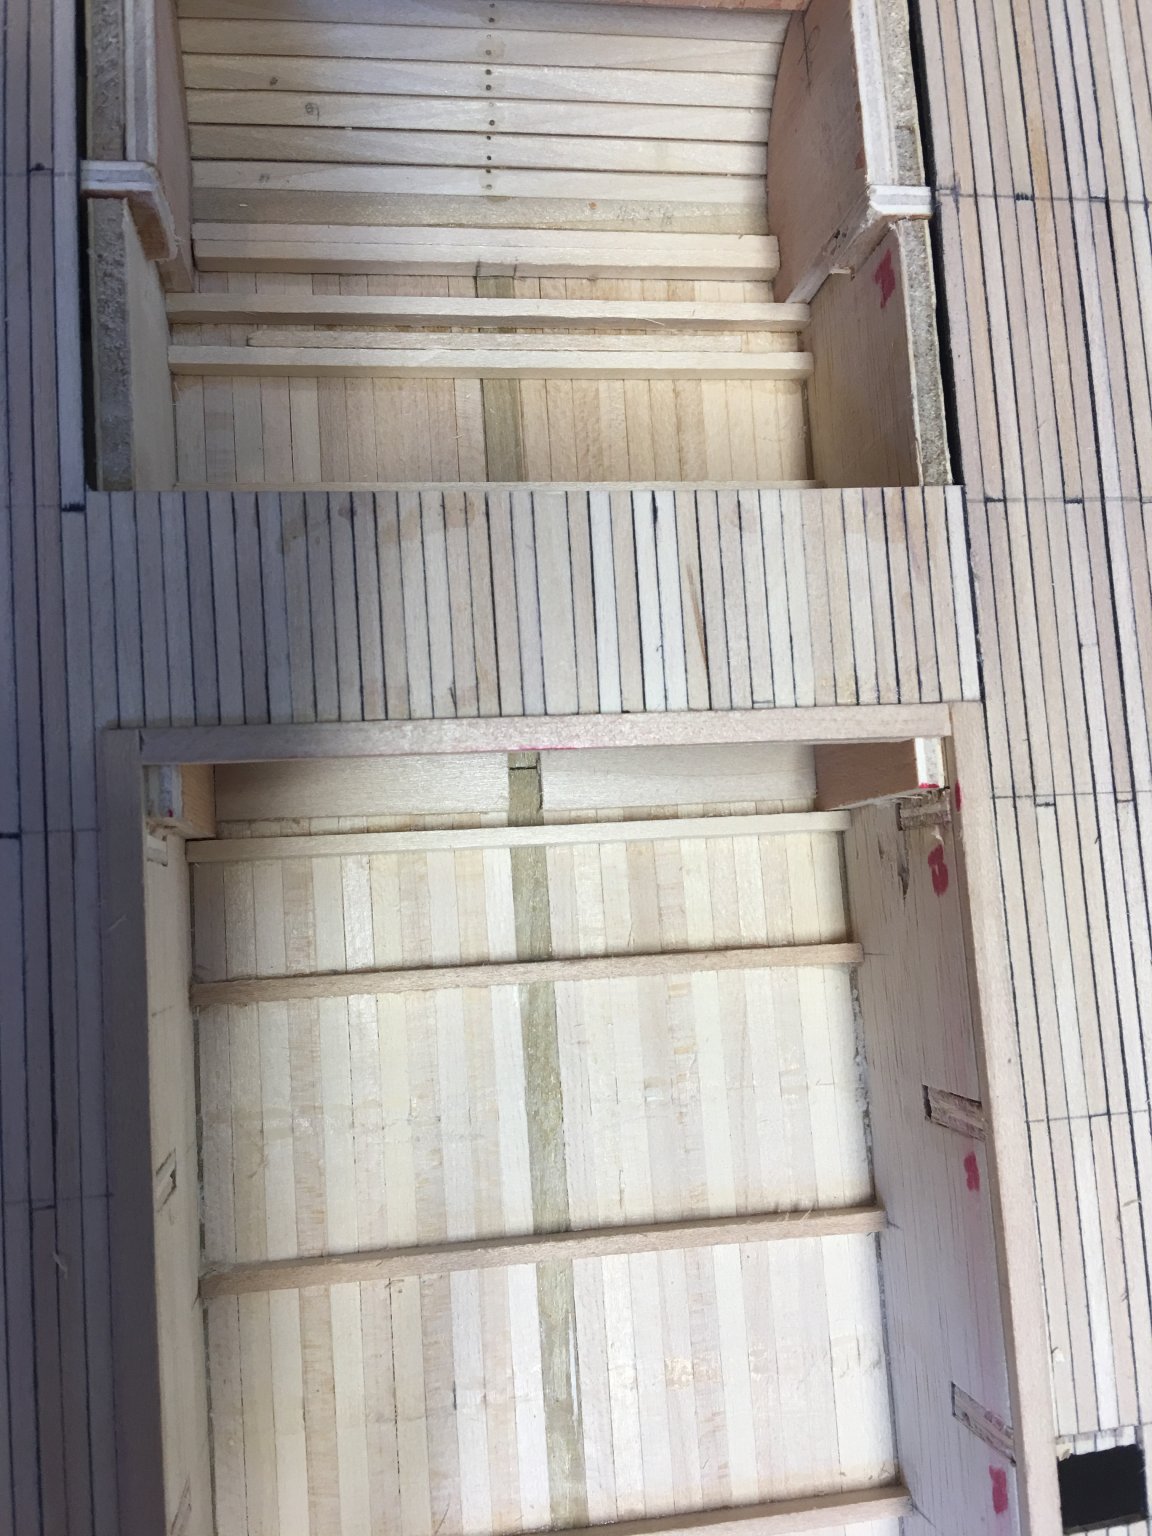
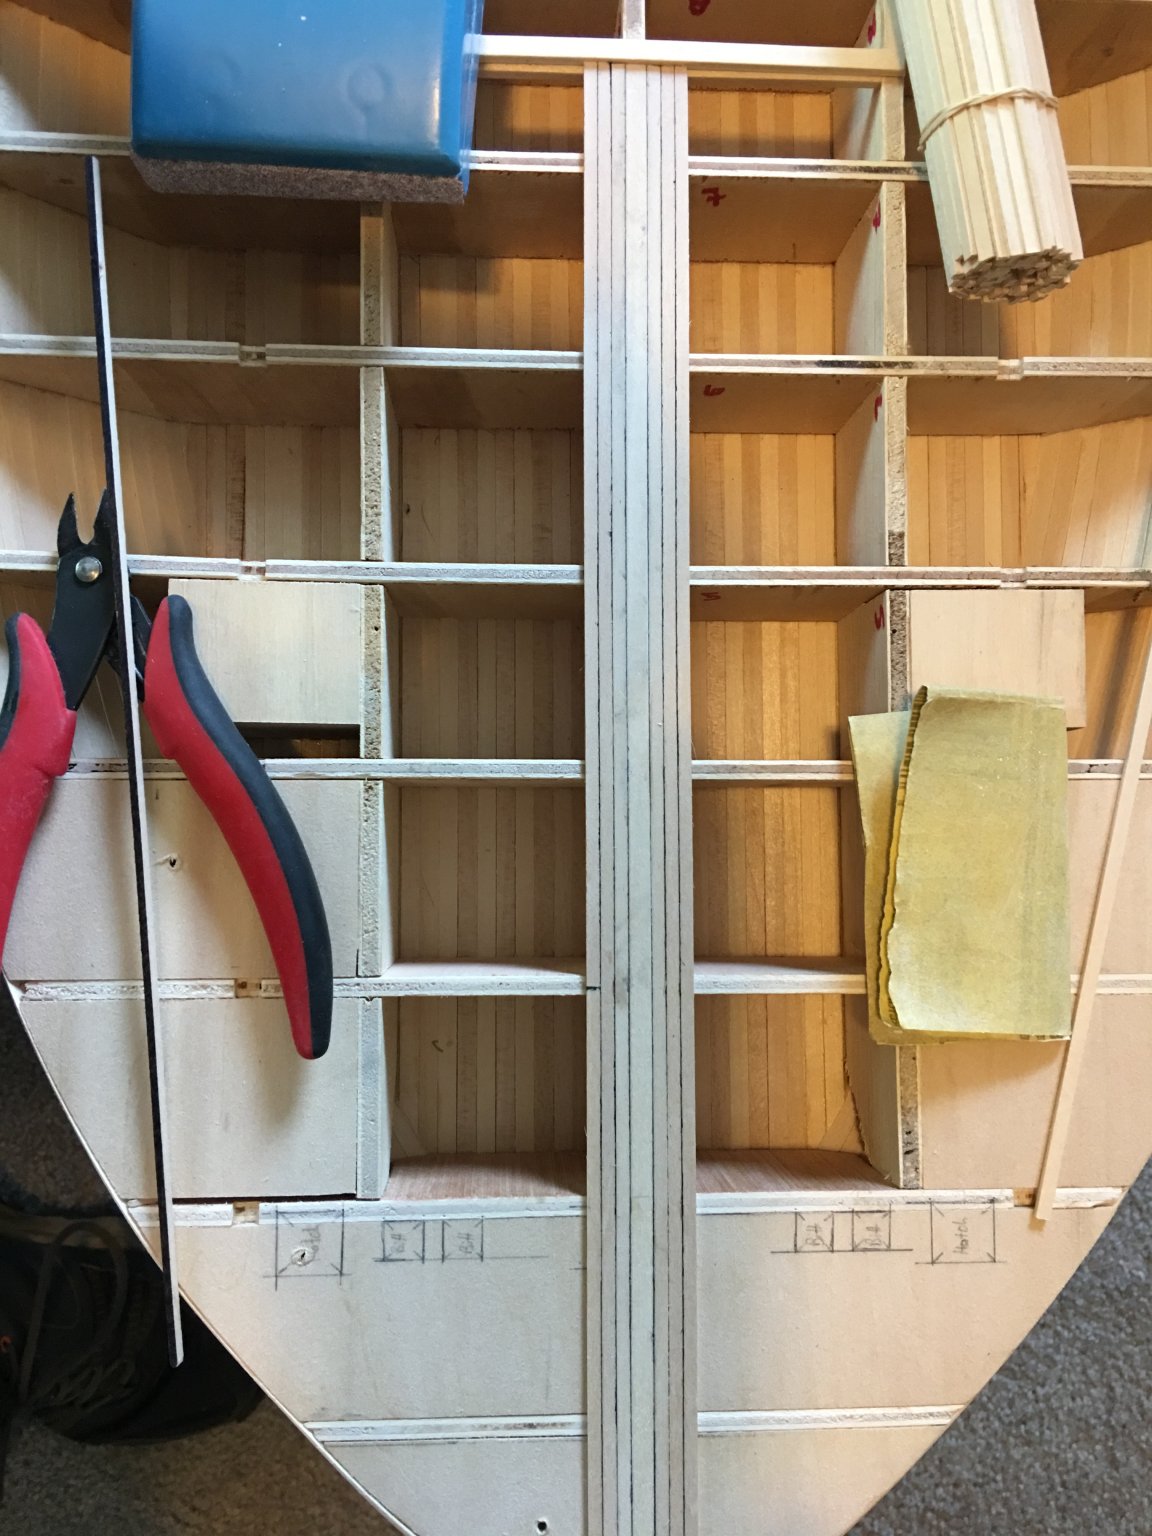
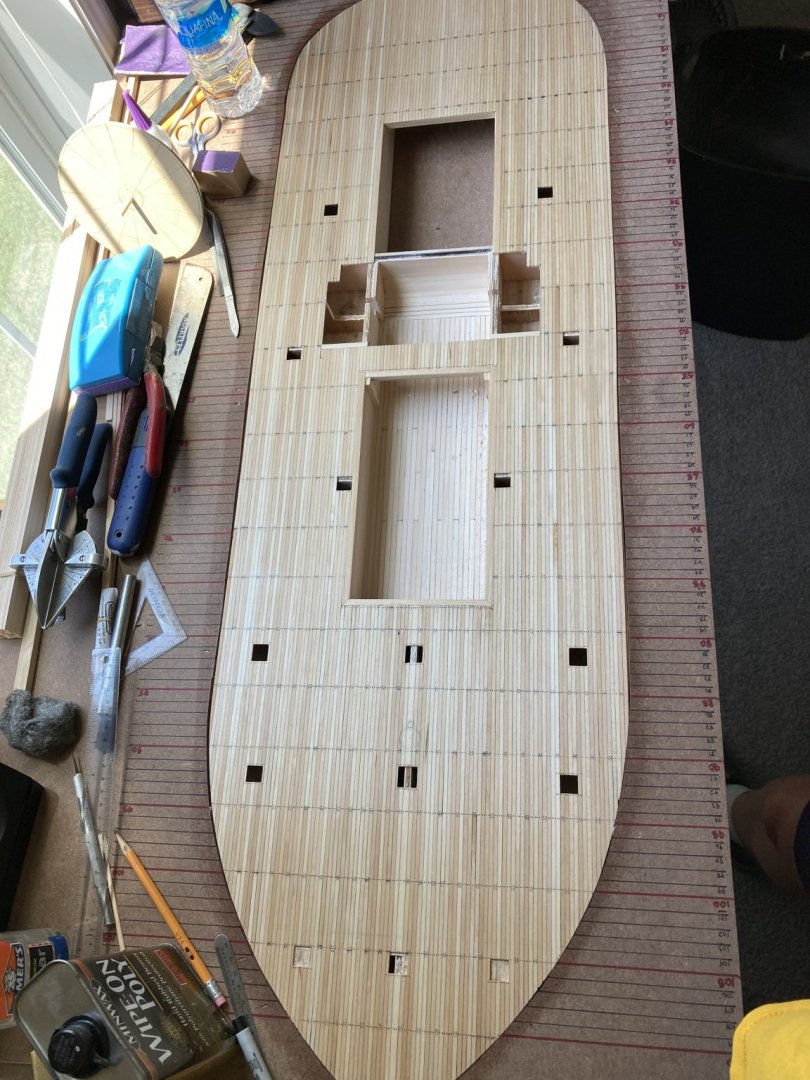
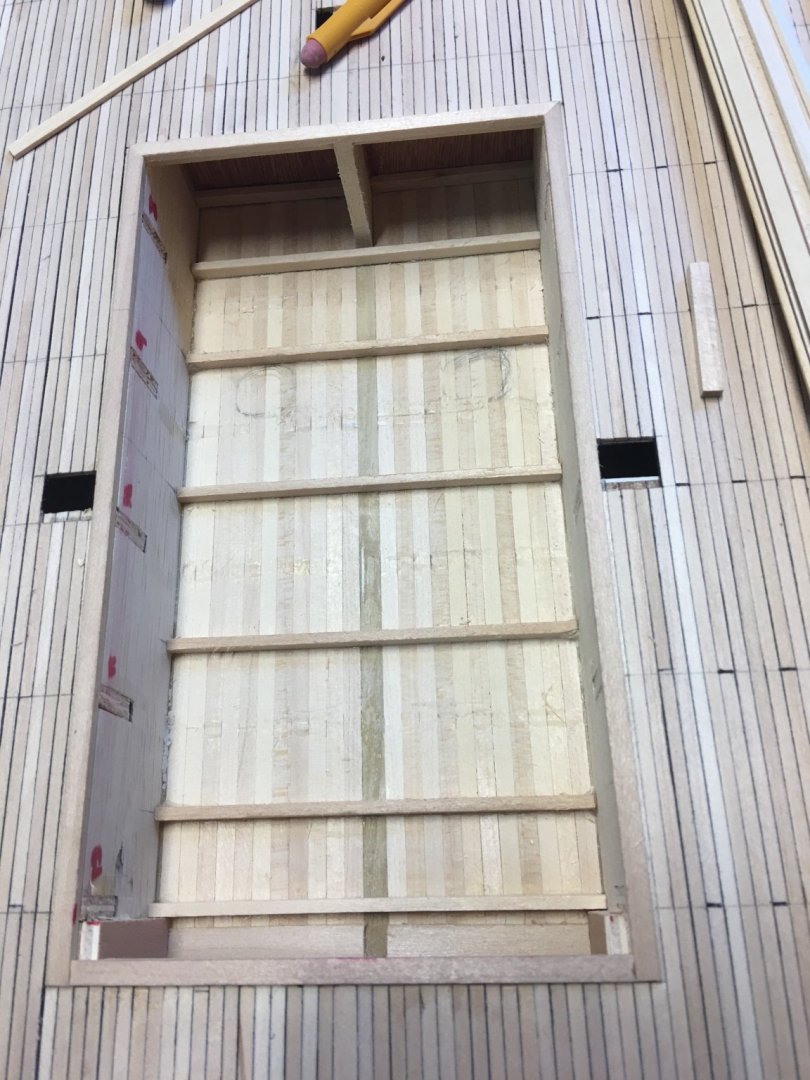
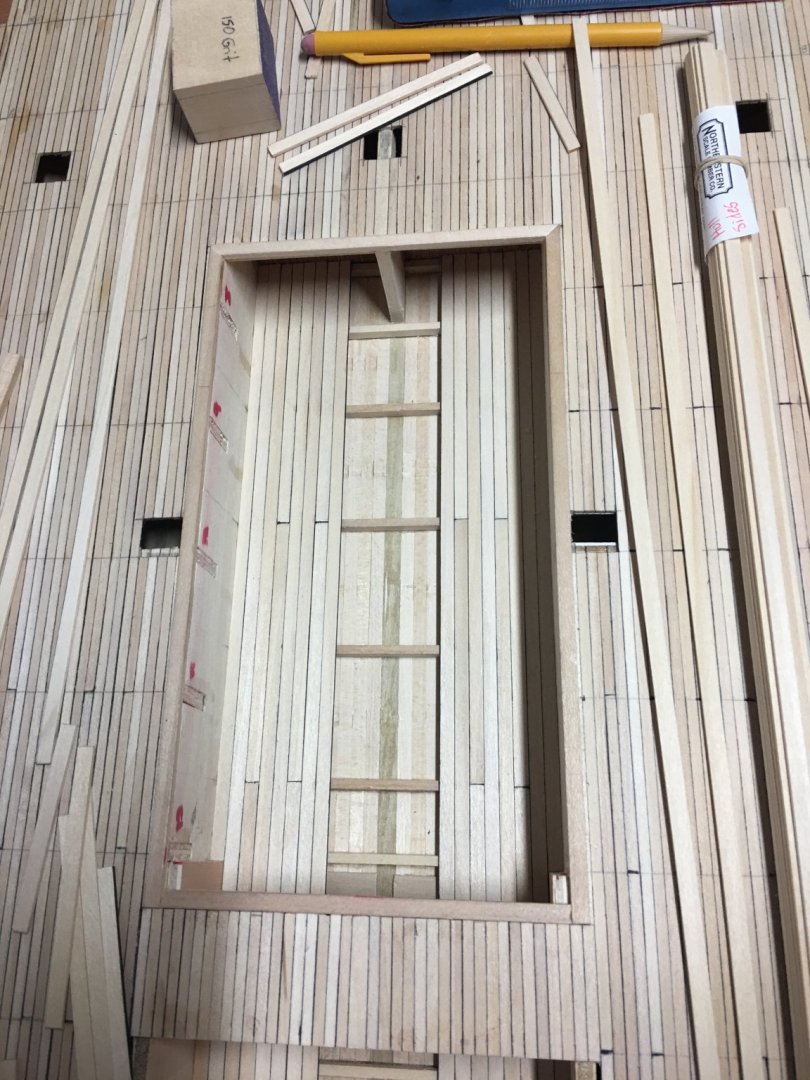
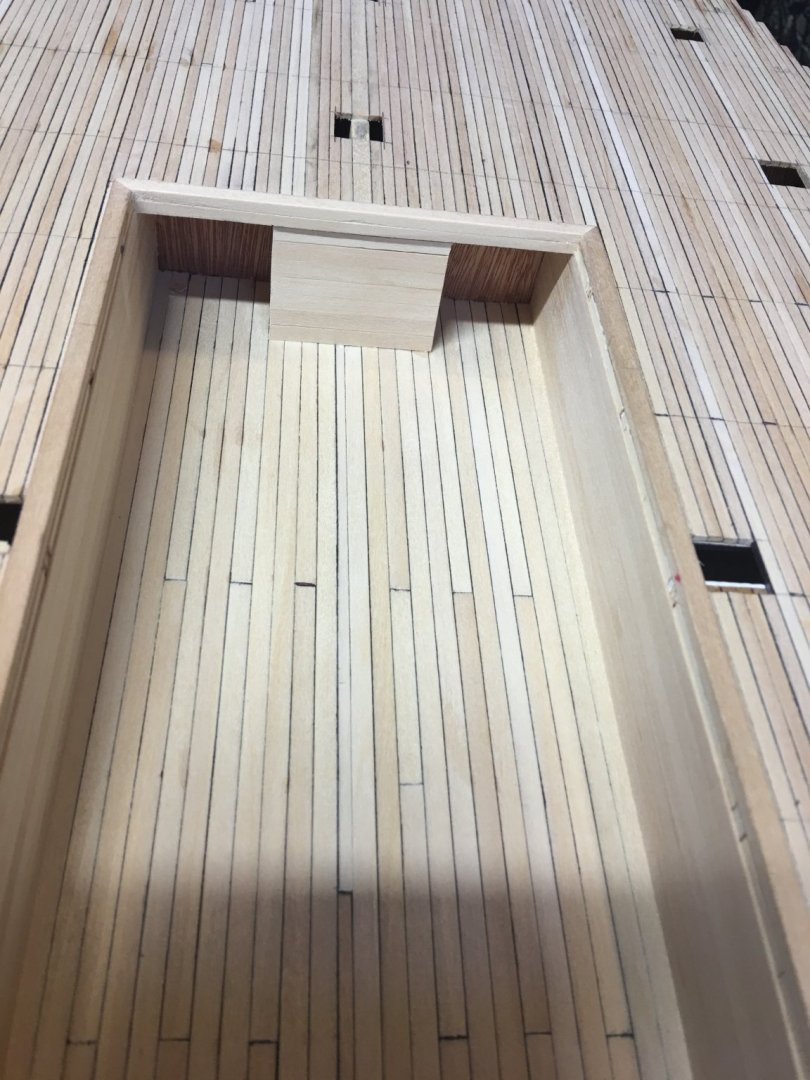
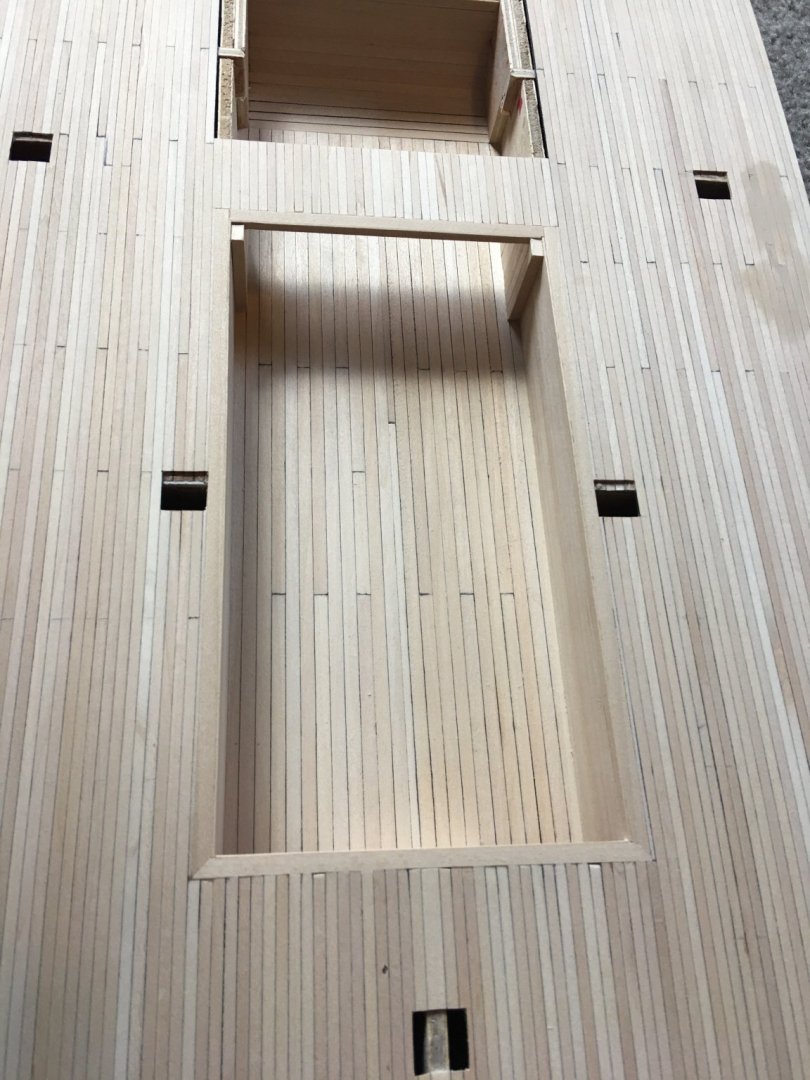
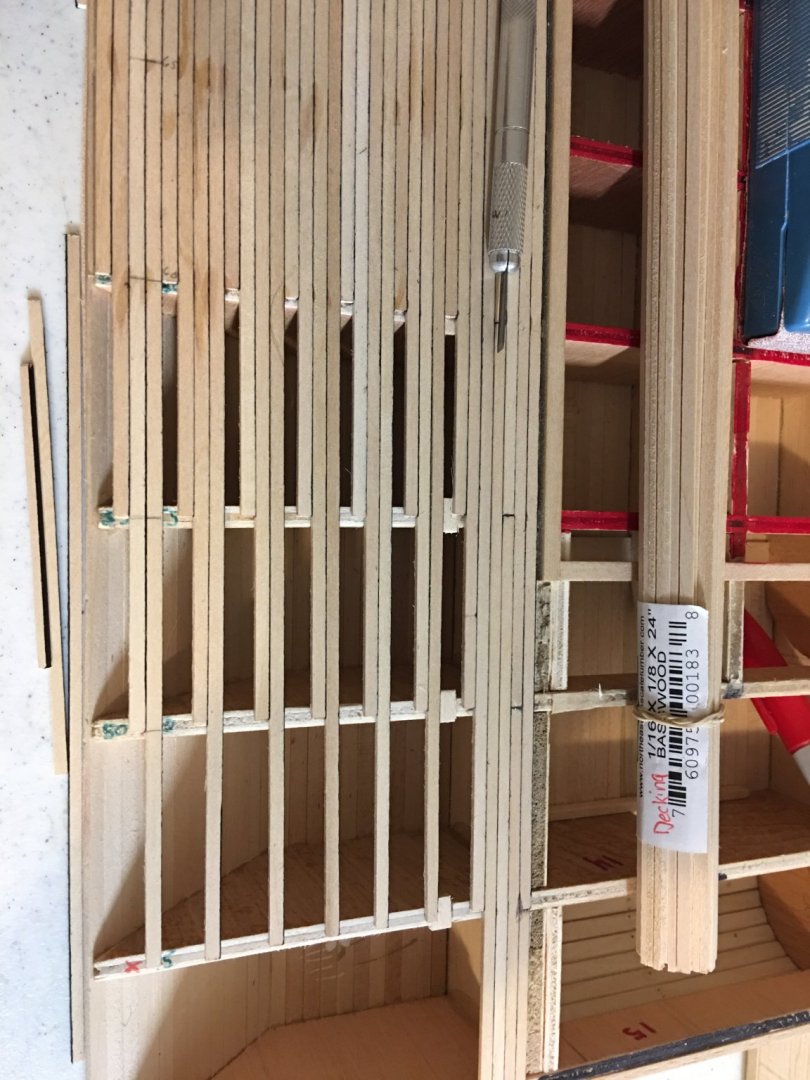
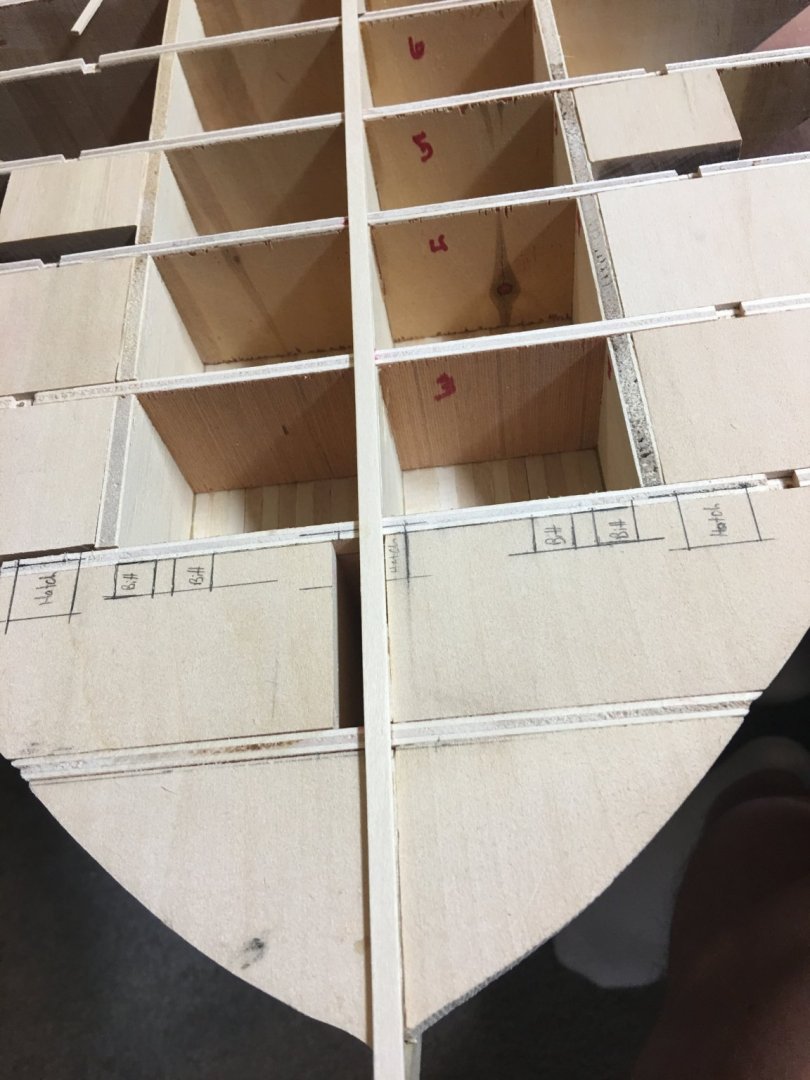
Hello again everyone, I'm back from a much needed vacation. Not a whole lot was accomplished this time around, haven't had a lot of build time having to playing catch up at work but I did manage to get a few post-worthy things done. So with my change of mind to go ahead and do some of the interior of the model, I got the bulkheads cleared out from the boiler hold. This was a task that I wish I had thought about prior to building the hull since it would have been much easier to do with all of the glued hull planks. However, I managed to get them removed without too much damage. Here the bulkheads are removed and I am going in with the sub framing for the boiler decking. I figured that since the next forward bulkhead was further forward then the boiler hold that I would also build out the forward coal bunkers as well. Floor planking going in. Floor planking completed and the curved hull planking going in. Curved hull planking completed. Forward coal bunkers trimmed out. And finally the deck sanded down and the boiler hold trimmed out. I am going to simulate the port and starboard coal bunker doors as closed since I don't want to cut into the false keel boards. I'm too afraid this will weaken the hull if I cut into them too much. Besides, they will be in a location where they are not easily seen. I had started cutting out the hatchways and realized that it is very difficult to keep the framing lines straight, so one of my next tasks is going to build a cradle for the hull to sit in so that I can keep everything lined up properly. I've seen this methods done on several builds and it seems to have helped those builds. We'll see how this goes. Until next time. Thanks for looking and all of the likes. -Brian


- 739 replies
-
- 18
-
-
Vaddoc, I may have to look into that. The place I get my wood from mostly deals in Basswood, Mahogany and Cherry, but I’m sure there are many other places to purchase scale lumber from. -Brian
-
Eric, Great job on the build frame. Looks like you may be able to save it and use for other builds. Glad to hear the “wet and weight” method worked to straighten the keel. -Brian
-
Vaddoc, Thank you. The girls were tickled that they got to help, and the smiles on their faces was priceless. I chose basswood wood because I am familiar with it from many of the kits that I’ve built in the past. It’s rather inexpensive, it’s an easy wood to work with and cleans up nicely. Since most of this model is going to be painted I didn’t want to go with the more expensive alternatives. -Brian
-
Glad, The details of this build are simply amazing. It’s almost as if the pictures were take on the deck of the actual Cutty. Beautiful job! -Brian
- 200 replies
-
- 1
-
-
- cutty sark
- clipper
- (and 1 more)
-
I was lost the minute I scrolled to the picture. I guess you just have to match them up part for part to know which piece to replace. Tedious process, but one that will be worth it in the end. Looking good though. -Brian
-
Eric, Glad to see you are under way. Of course there will challenges along the way, that’s what makes the hobby so enjoyable. Where’s the fun in everything going smoothly. Im with Kurt on this one, build the frame the wet and weight the keel until dry. It’s amazing at how straight it will get. I’ve done this method on all of my full rigged ships and the results were perfect. Hope your stresses subside soon so you can focus on more enjoyable things. -Brian
-
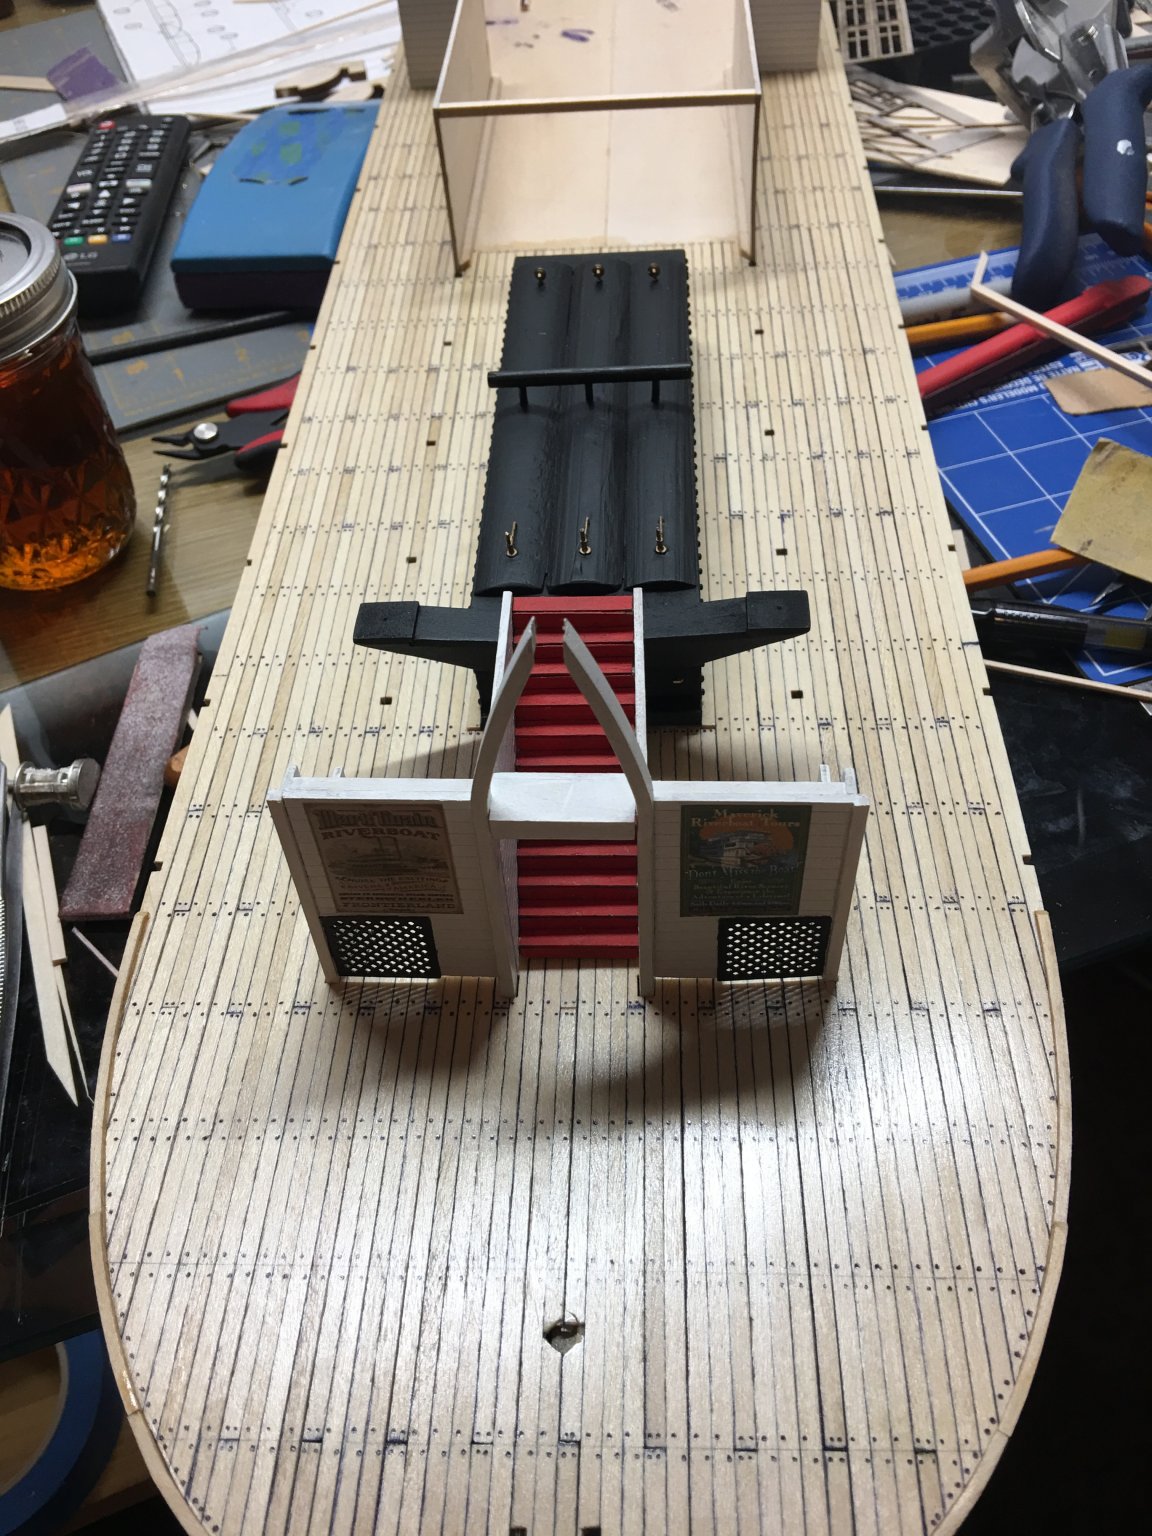
Patrick, Thank you for the kind words. I have no doubts that your Chaperon will turn out great. I’ll definitely be following along and help out in any way I can. That’s one of the great things about this forum, plenty of people out there with a wealth of knowledge to help out with advice when it’s needed. According to the experts the decks were painted red, I chose to leave mine natural out of personal preference. I tried my best to keep the boat as close to the original as possible for historical accuracy. However, when it came to my paint scheme I took a few liberties with it. -Brian
- 133 replies
-
- 2
-
-
- chaperon
- model shipways
- (and 2 more)
-
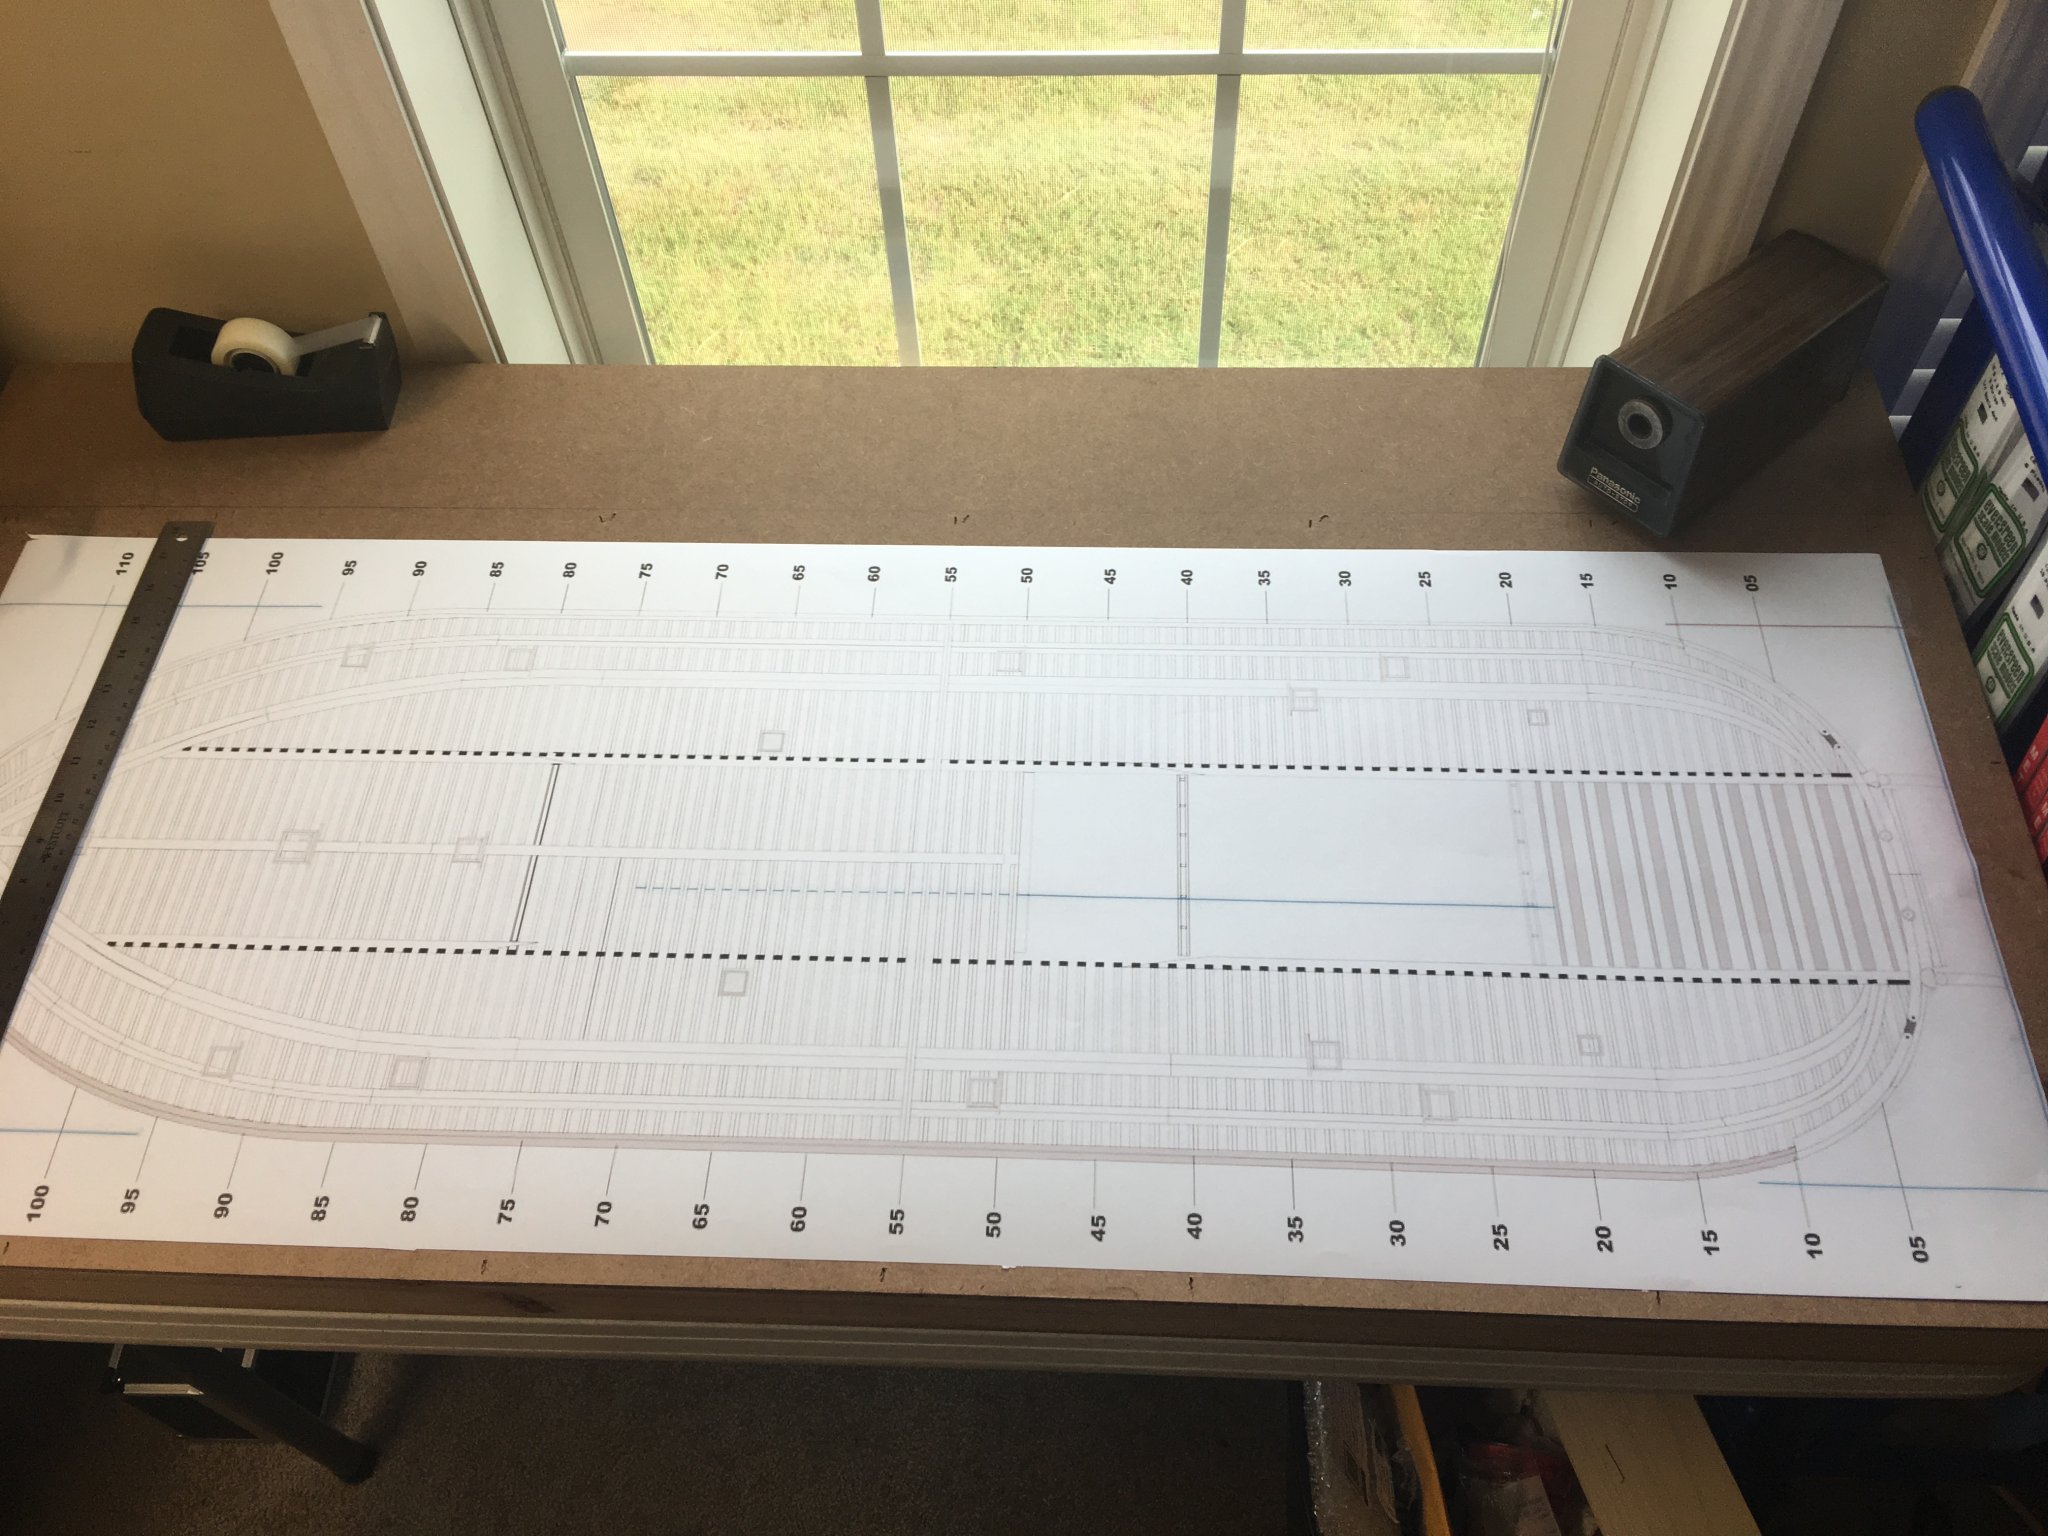
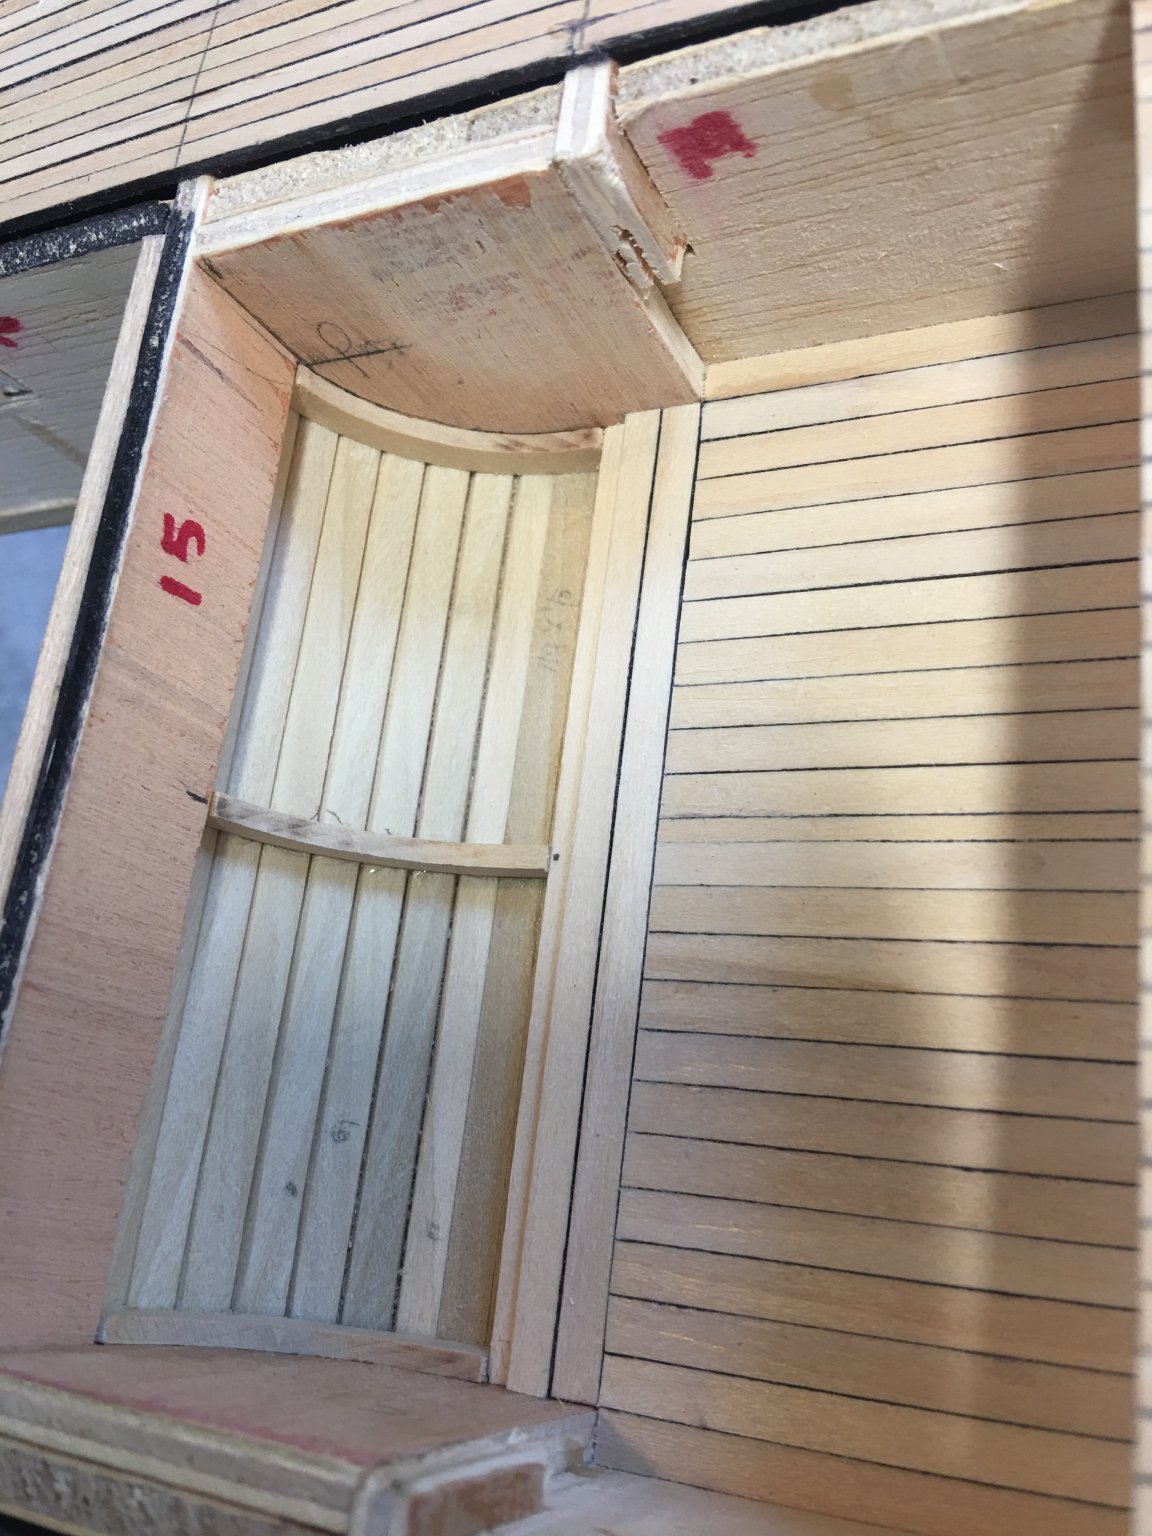
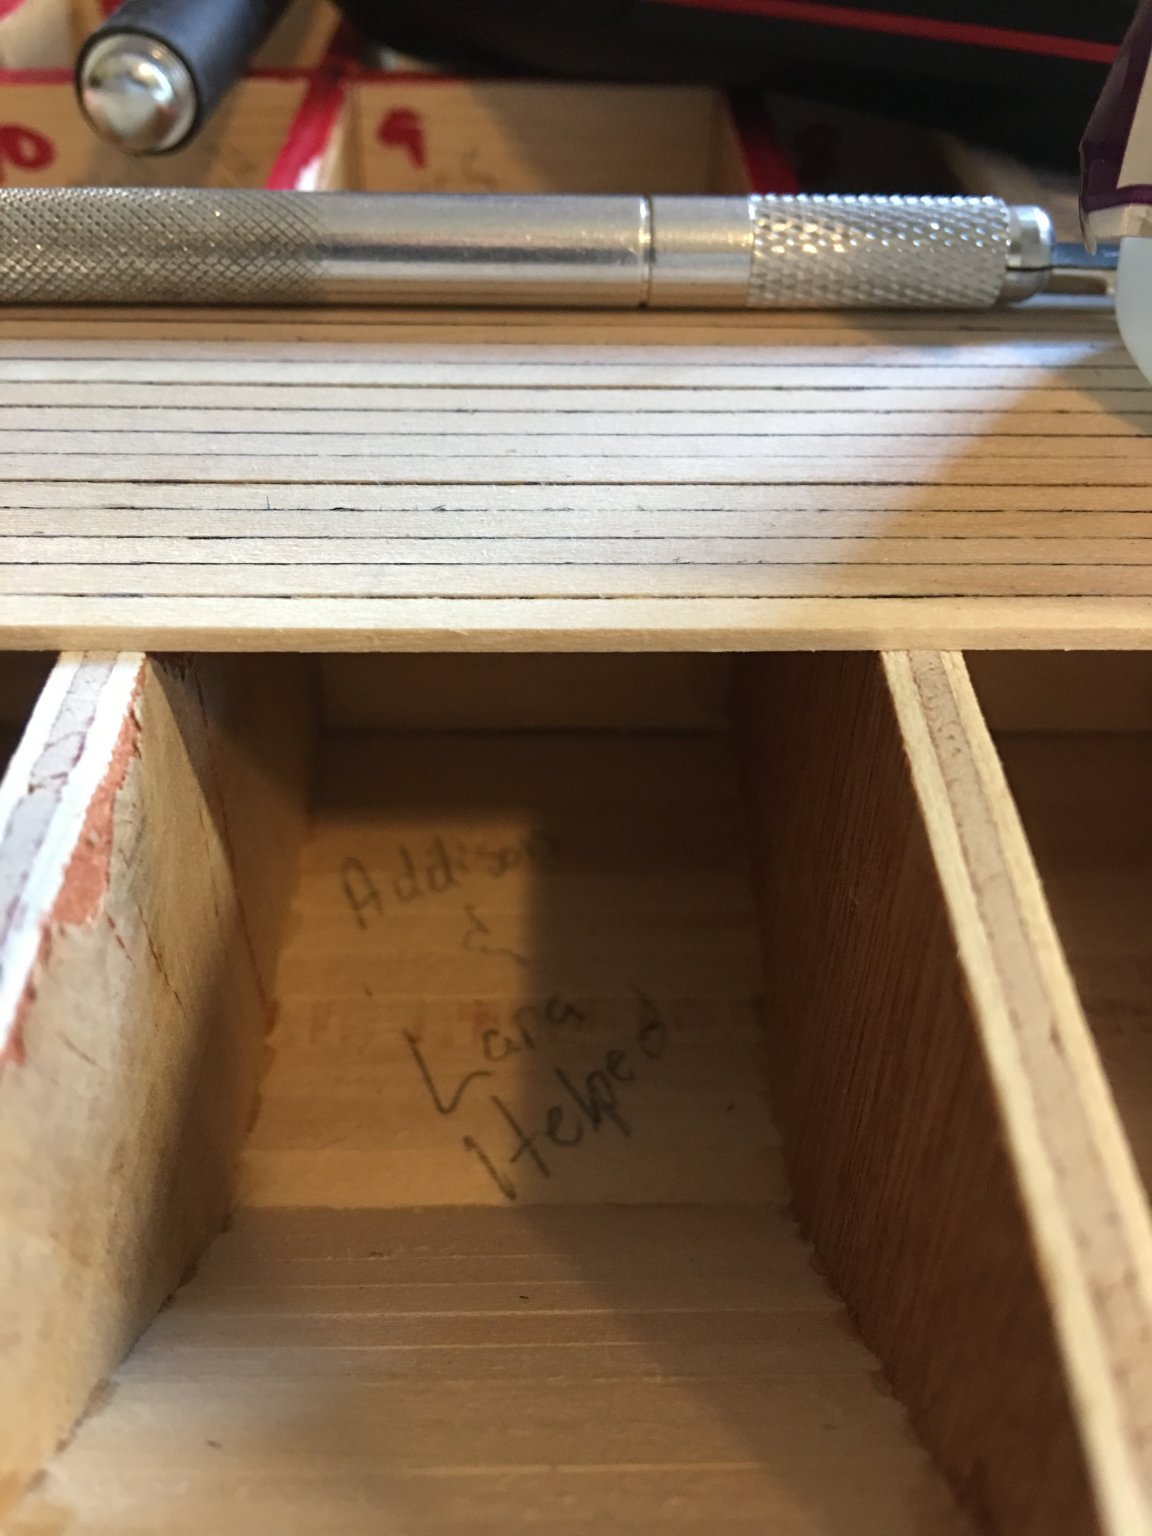
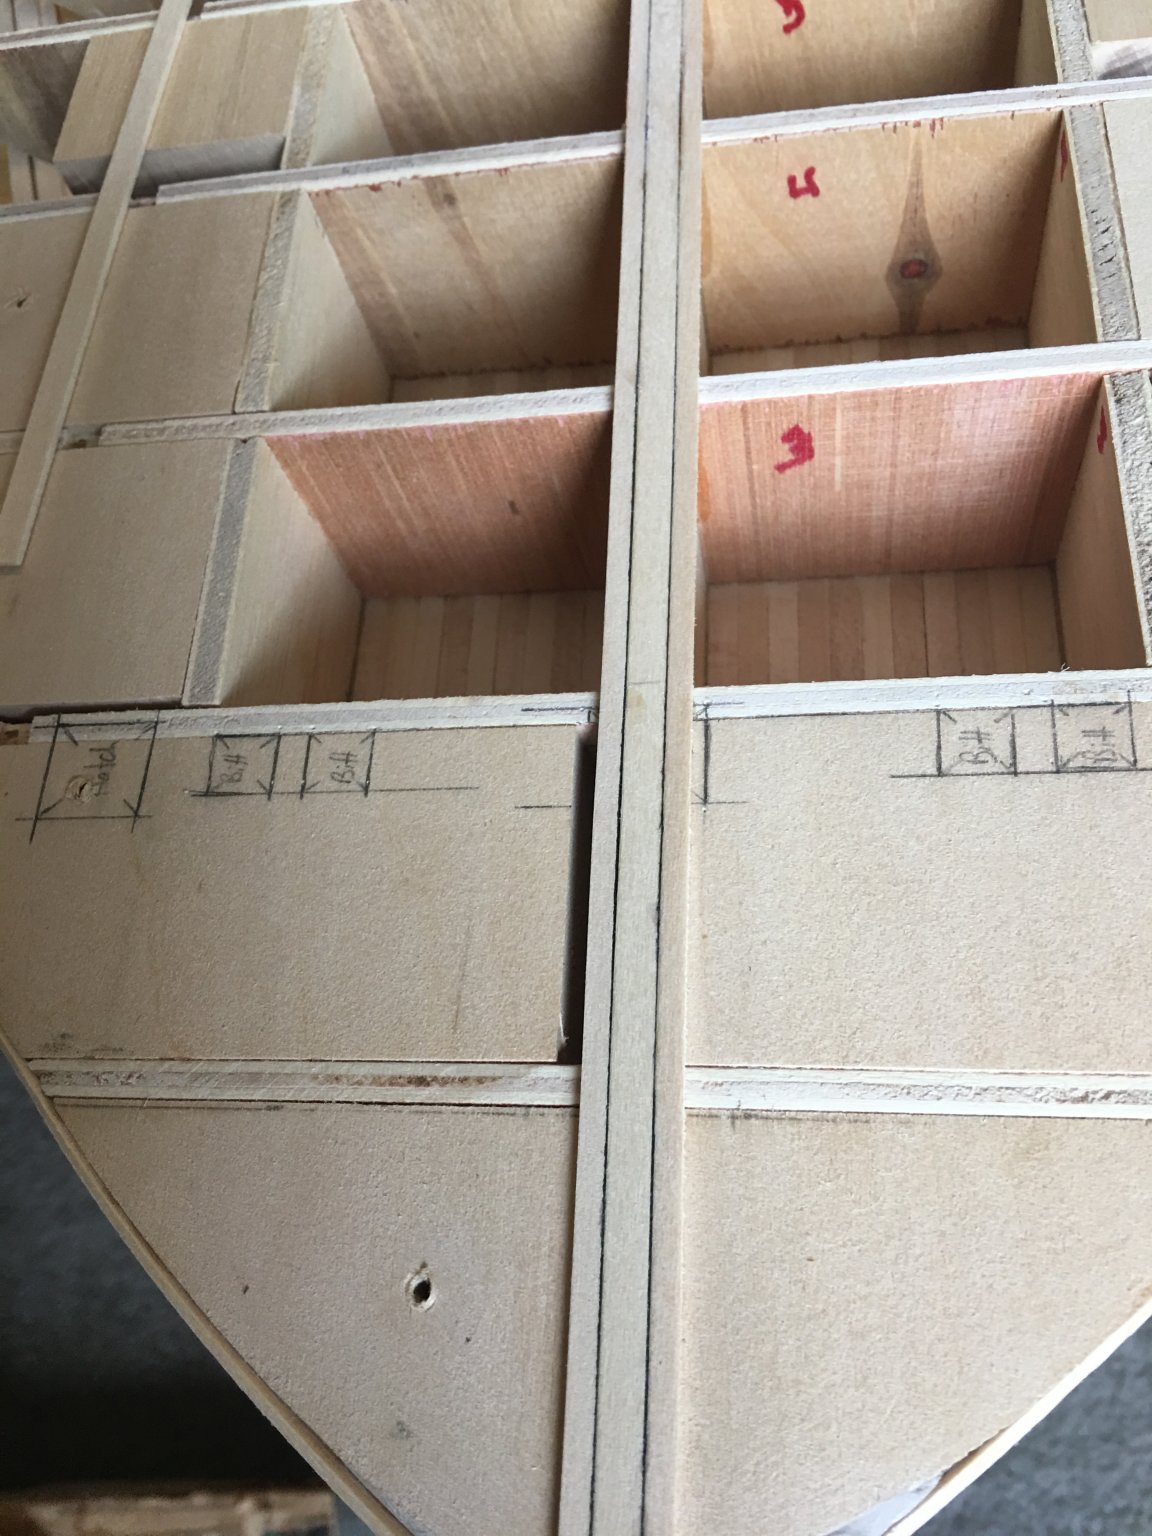
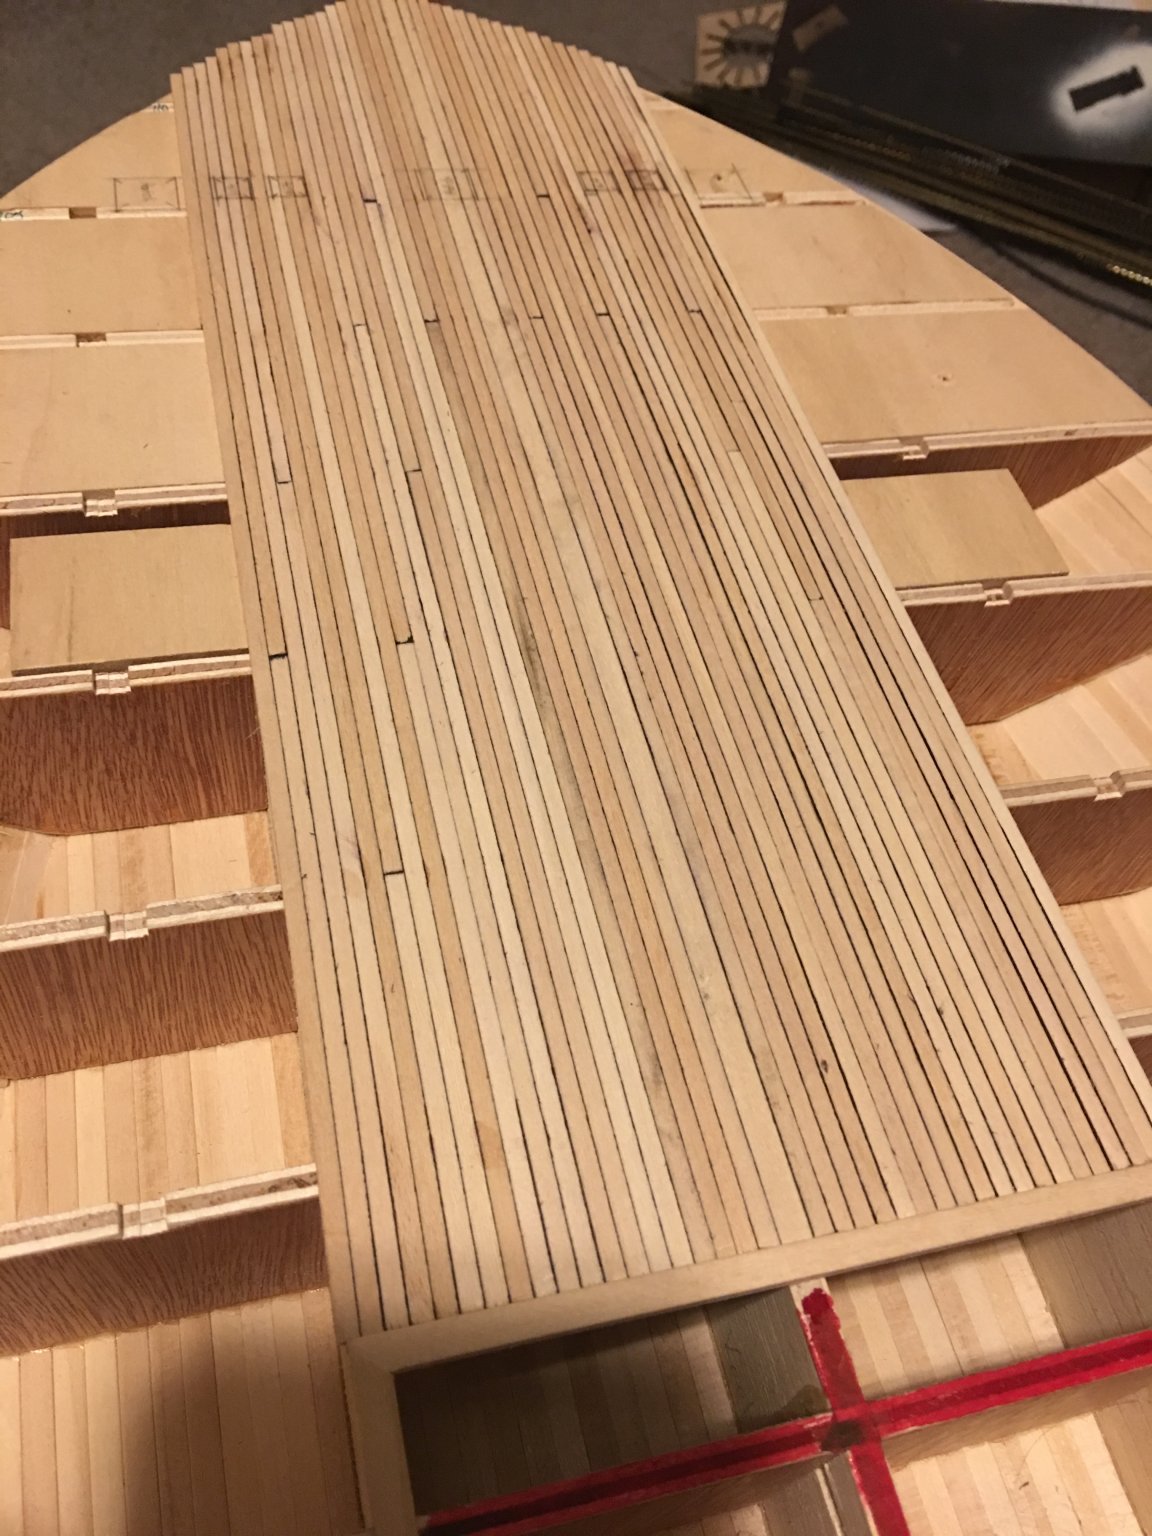
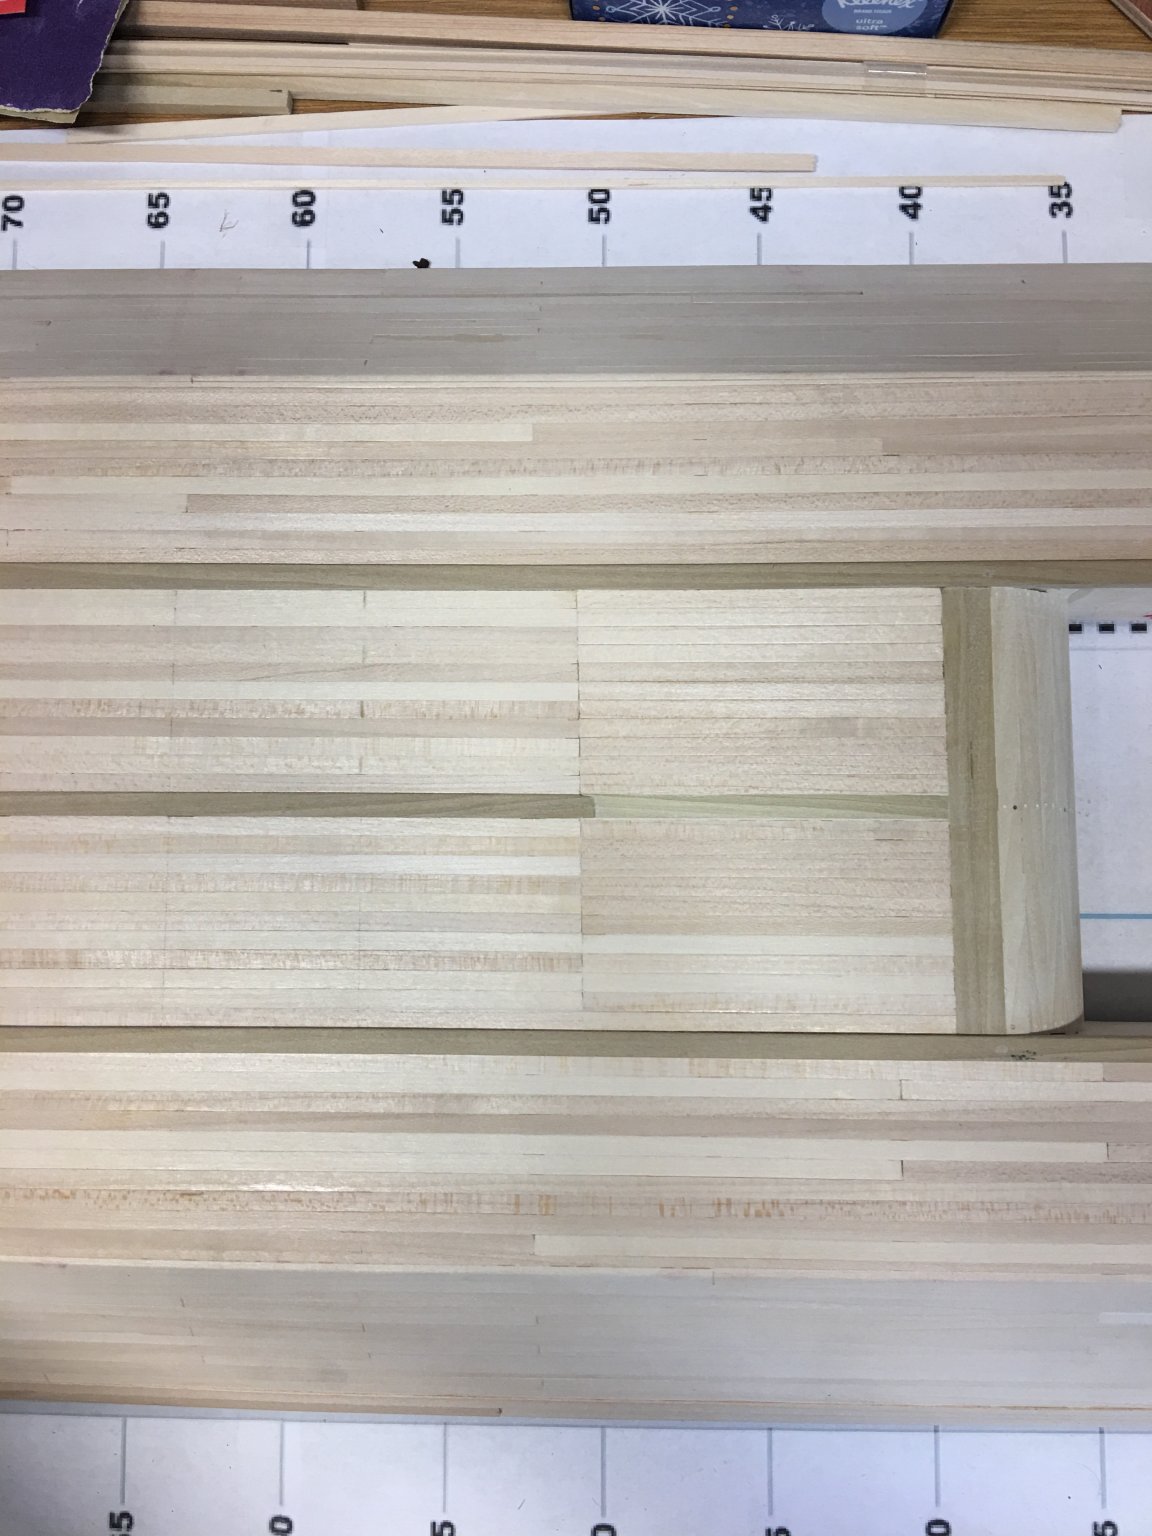
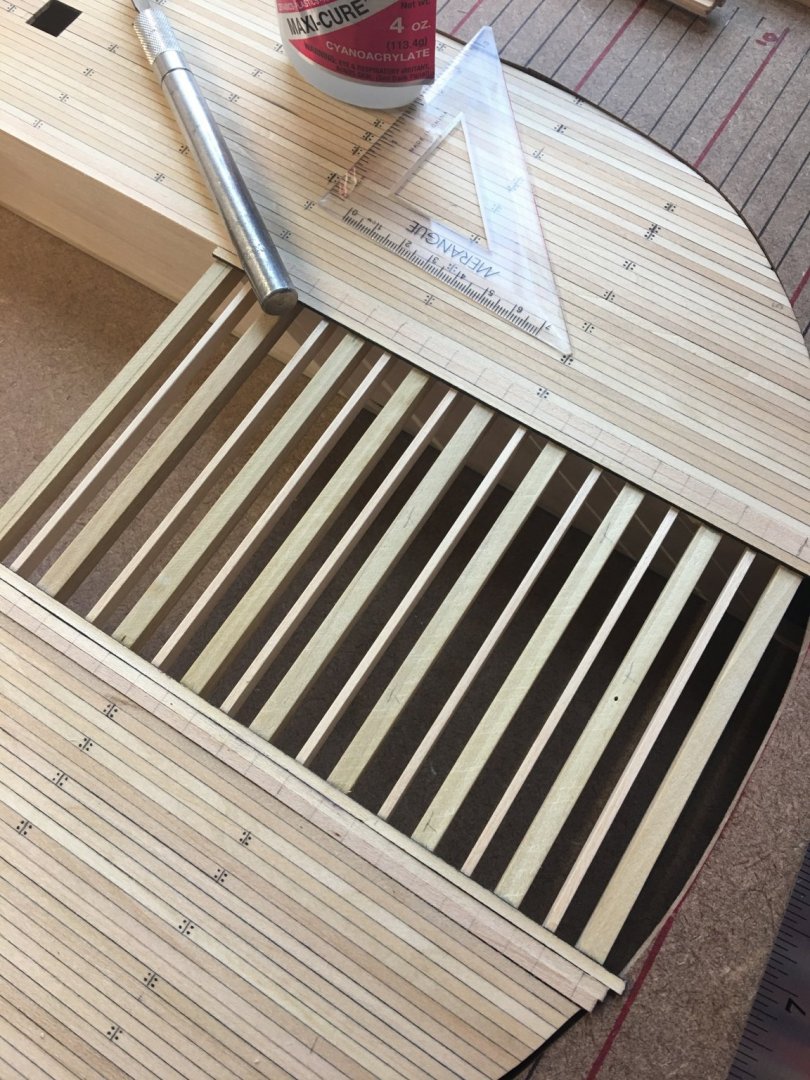
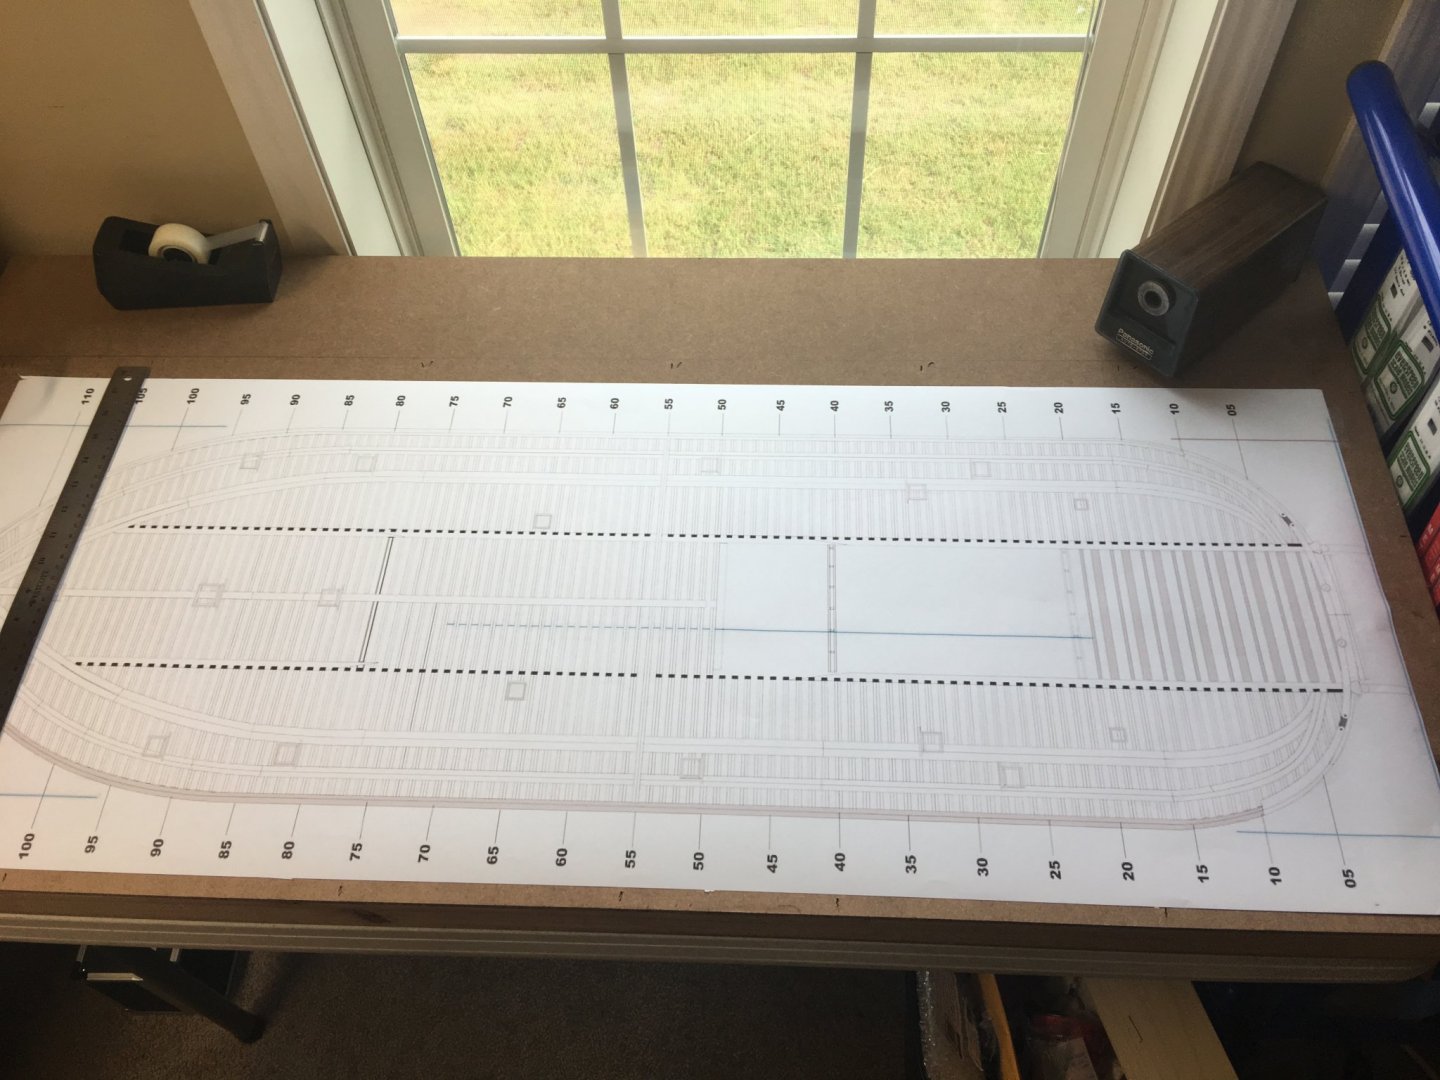
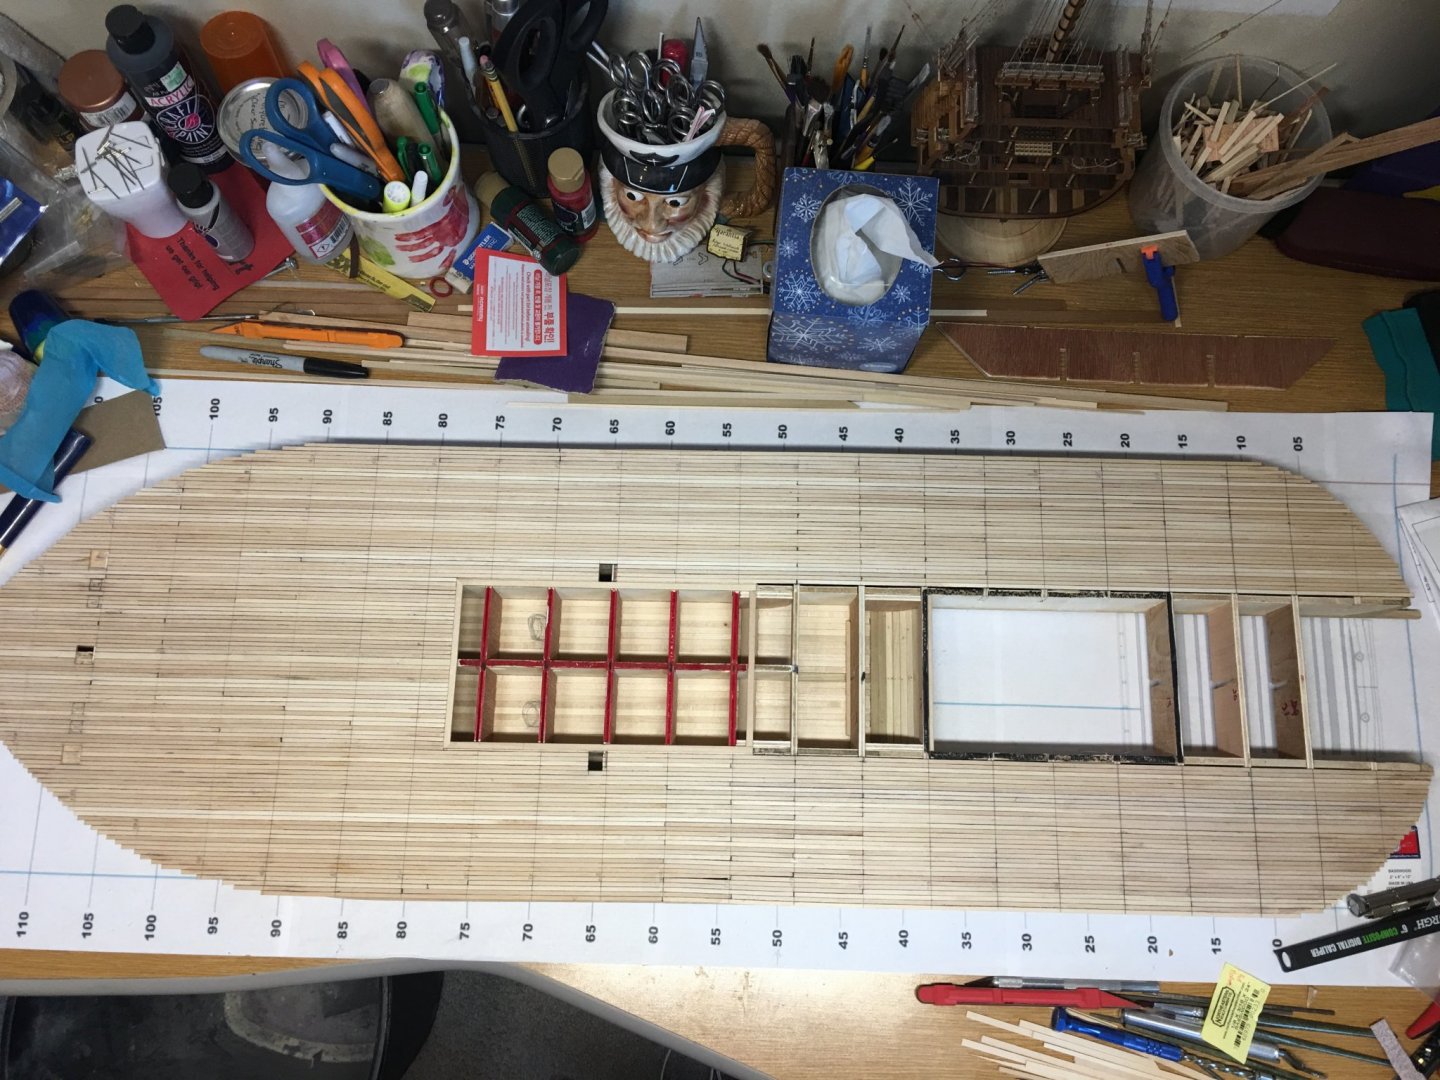
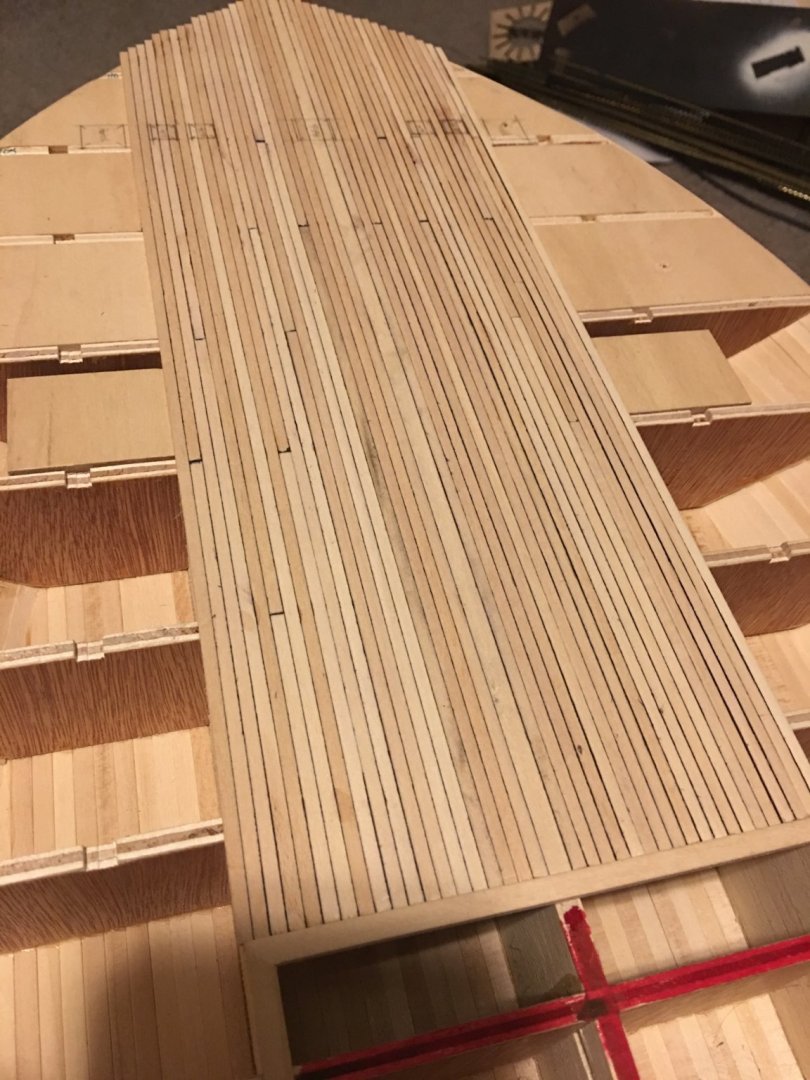
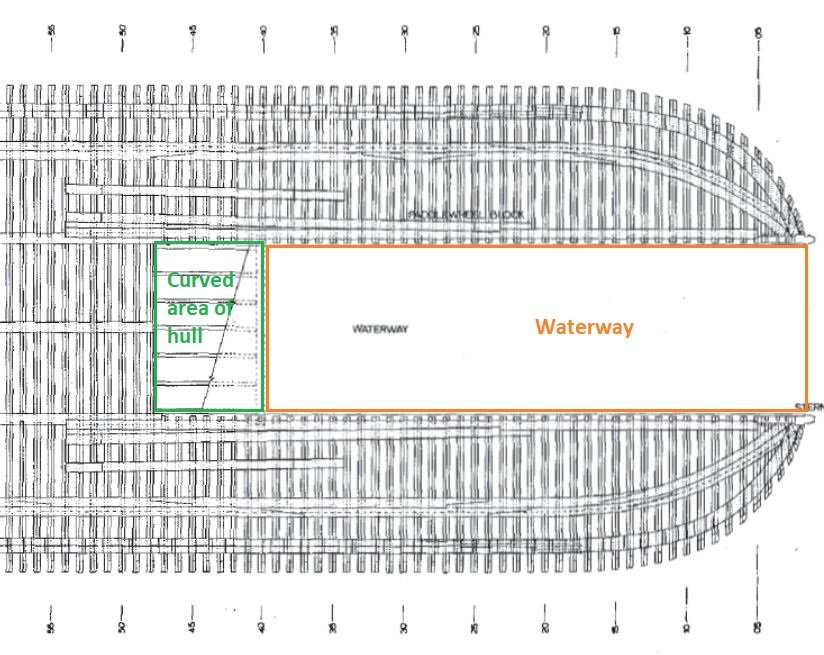
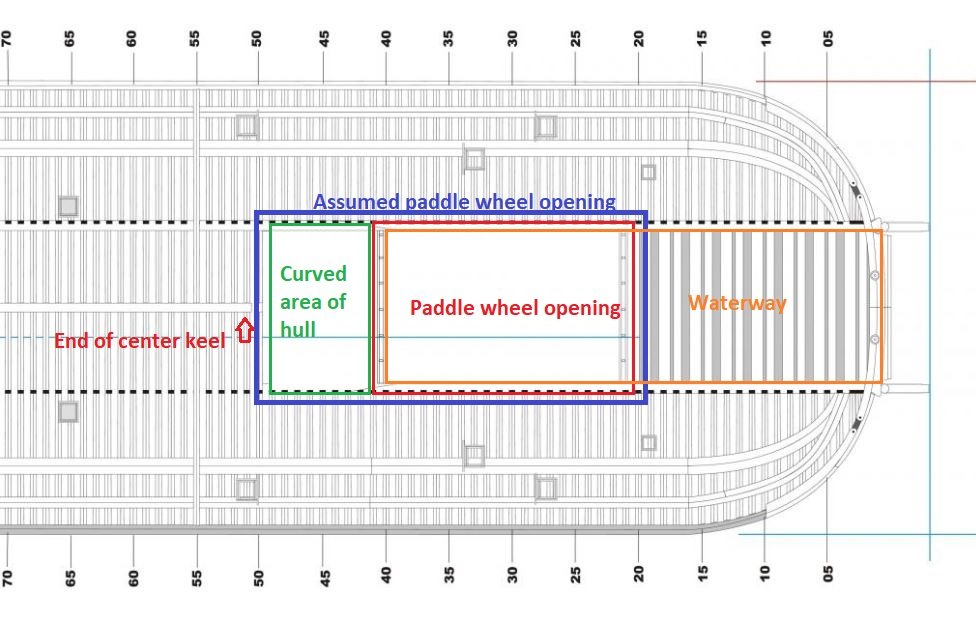
Hello again Everyone, I'm back with another update. It's been a little slow going, I've been making some adjustments to another error I ran across. This error was partly my fault for not looking at both sets of plans and misinterpreting the ones that I was going by. From here on out, I am going to build this primarily from the HSR plans and just use the Bob Hill plans for clarity purposes and placement of some deck features. So when I originally built the hull I was using the Bob Hill plans. Where I screwed up was thinking that the paddle wheel opening was further forward that it actually was. When I built it I misread the forward paddle wheel opening (shown in red on the diagram below) as the axle for the paddle wheel and the curved hull area (shown in green below) as the forward wall of the waterway. So to correct this I moved the forward waterway wall back from frame 50 to frame 40. I then rebuilt the curved hull area from just aft of frame 45 to frame 40. Hull after the adjustment. After all that, I finally started work on the deck planking. This was a long drawn out process due to the fact that I had a change of heart and decided that I am going to go ahead and do a little of the inside detailing. I still haven't ironed out all of the plans yet, but I am to try and make it to where one side or the other swings open (or removes) to show the cannons, engine, boiler and crew quarters. I figured that since I was going to go through the effort of building this boat that I might as well go for it all. Starting of the deck planking. For these I used 1/16"x 1/8" basswood strips to fit the correct scale of the plans. Center strip was 1/16"x1/4" basswood. The red area is the boiler hold. I am going to have to remove the bulkheads from this area to install the boiler and some of the coal in the fire room. This will be done after I get the support beams on the aft pontoons behind the paddle wheel. These beams will help hold the hull in place since I don't want to take any chances on possibly weakening it by removing the bulkheads. More of the planking in place. My granddaughters came for a visit while I was working on the boat and they insisted that I let them help. It's hard to argue with a three and four year old. Not to mention my heart melts when they give me the "puppy dog eyes". So I caved and gave them both a piece of wood to sand and since they "helped" I felt obliged to put their names on the boat as well. Finished deck planking. Next step is to mark out all of the hatchways and get them cut out. Then I'll put the aft pontoon beams in and remove the unneeded bulkheads. Thank you for looking and all the likes and kind comments. -Brian


- 739 replies
-
- 18
-
-
Patrick, I just found your build. I completed this same kit just a couple of months ago. I’m definitely going to following along with great interest. -Brian
-
Patrick, At the sake of hijacking Russ' magnificent build. I had the same issue with mine, I wasn't too keen on the joint lines on the Main and Boiler decks and 1/32" strips are exactly what I used on my build to cover them up. The strips were thin enough that there was not enough difference to be noticeable and the comings were thick enough to hide the additional planks. -Brian

- 23 replies
-
- 3
-
-
- model shipways
- chaperon
- (and 1 more)
-
Eric, Glad to see you back. Looking forward to this build with great anticipation. If it’s anything like you Arabia build we should be thoroughly entertained. -Brian