HOLIDAY DONATION DRIVE - SUPPORT MSW - DO YOUR PART TO KEEP THIS GREAT FORUM GOING! (Only 60 donations so far out of 49,000 members - C'mon guys!)
×


Overworked724
-
Posts
1,259 -
Joined
-
Last visited
Content Type
Profiles
Forums
Gallery
Events
Everything posted by Overworked724
-
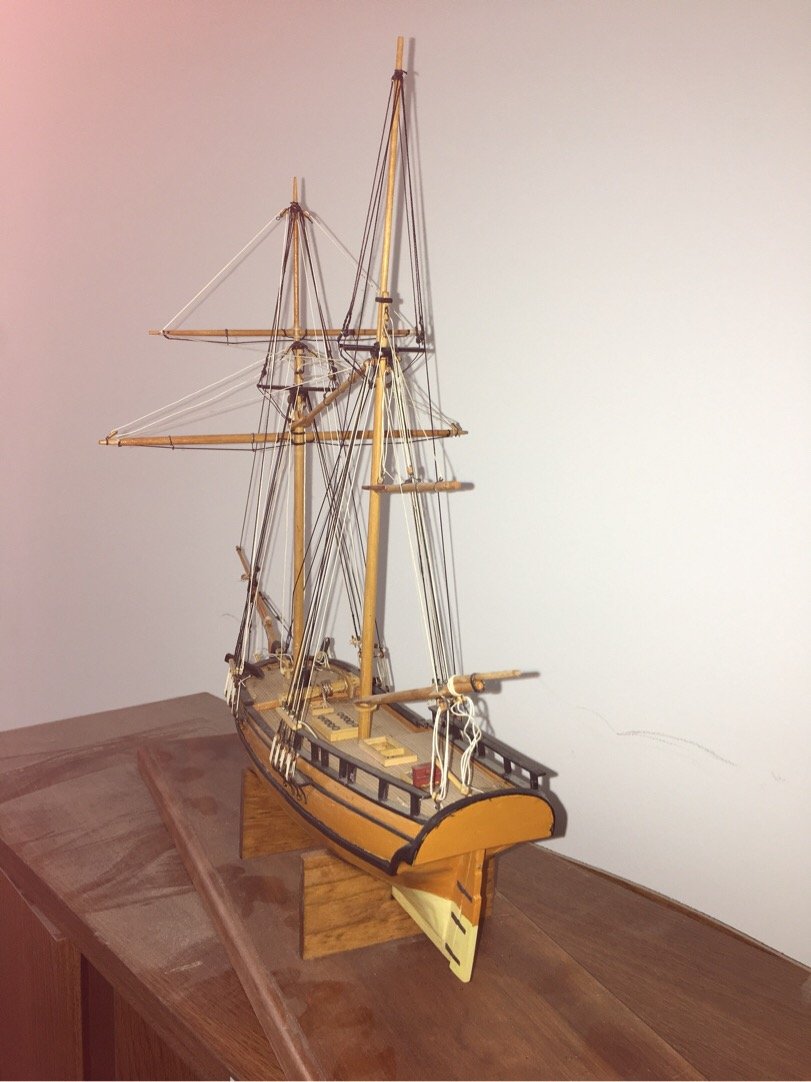
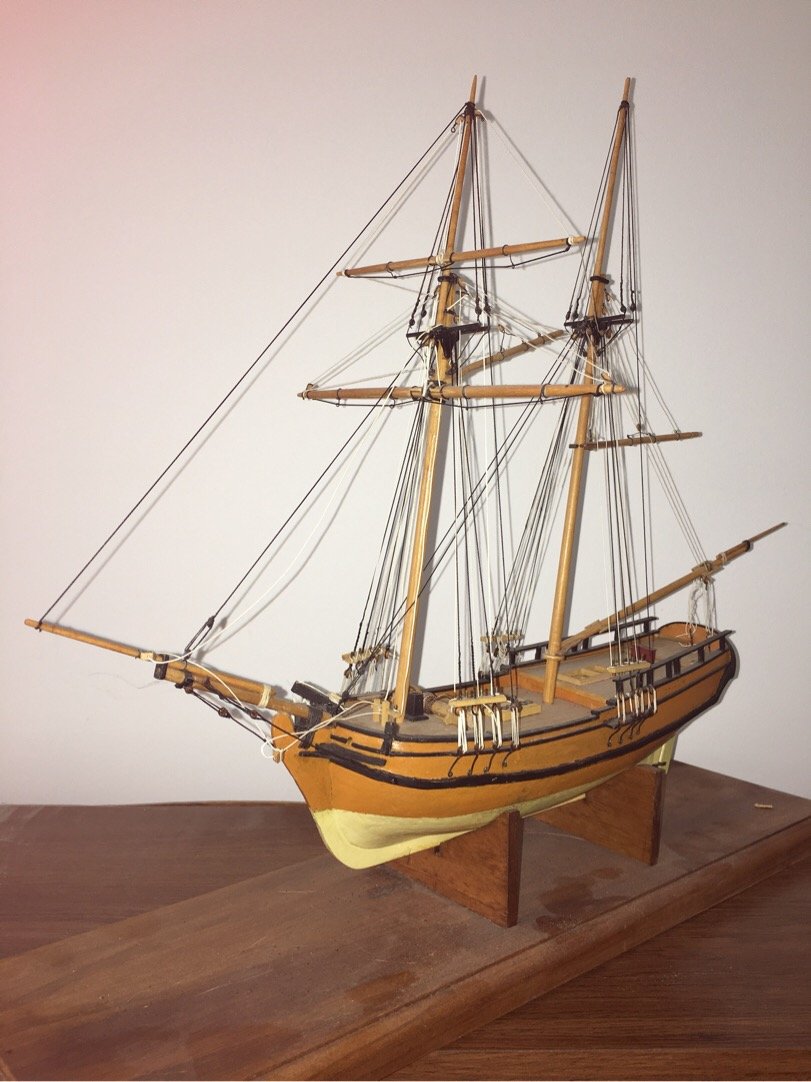
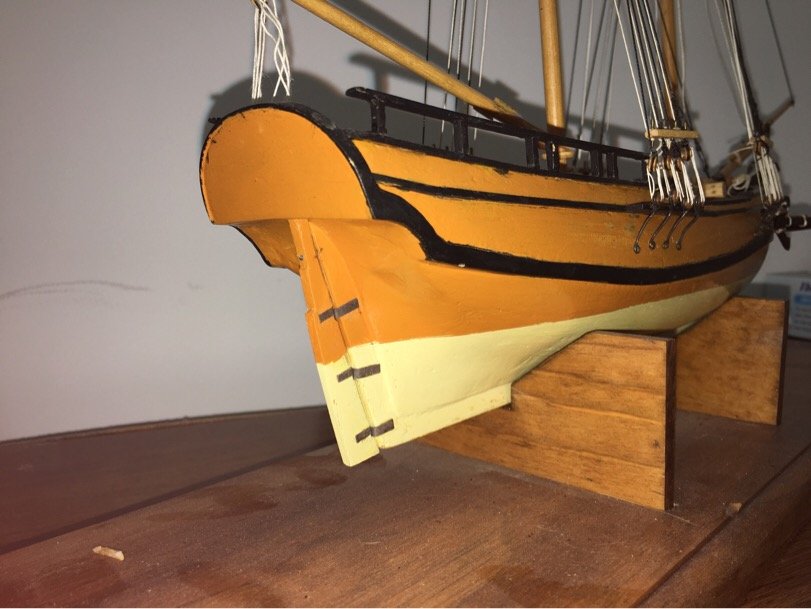
 Yes! She's sitting in the box right now. It's the Charles Stuart Royal Yacht by Woody Joe (Japanese company) - plank on frame.
- 449 replies
-
- 4
-

-
- sultana
- model shipways
- (and 2 more)
-
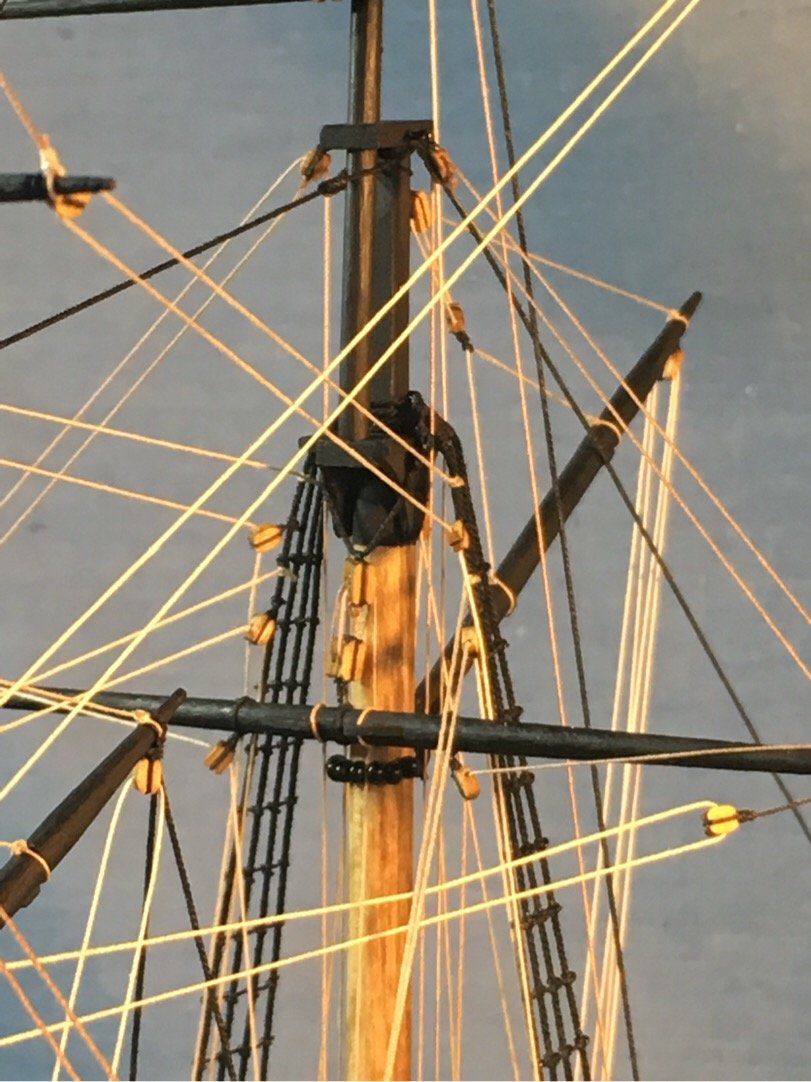
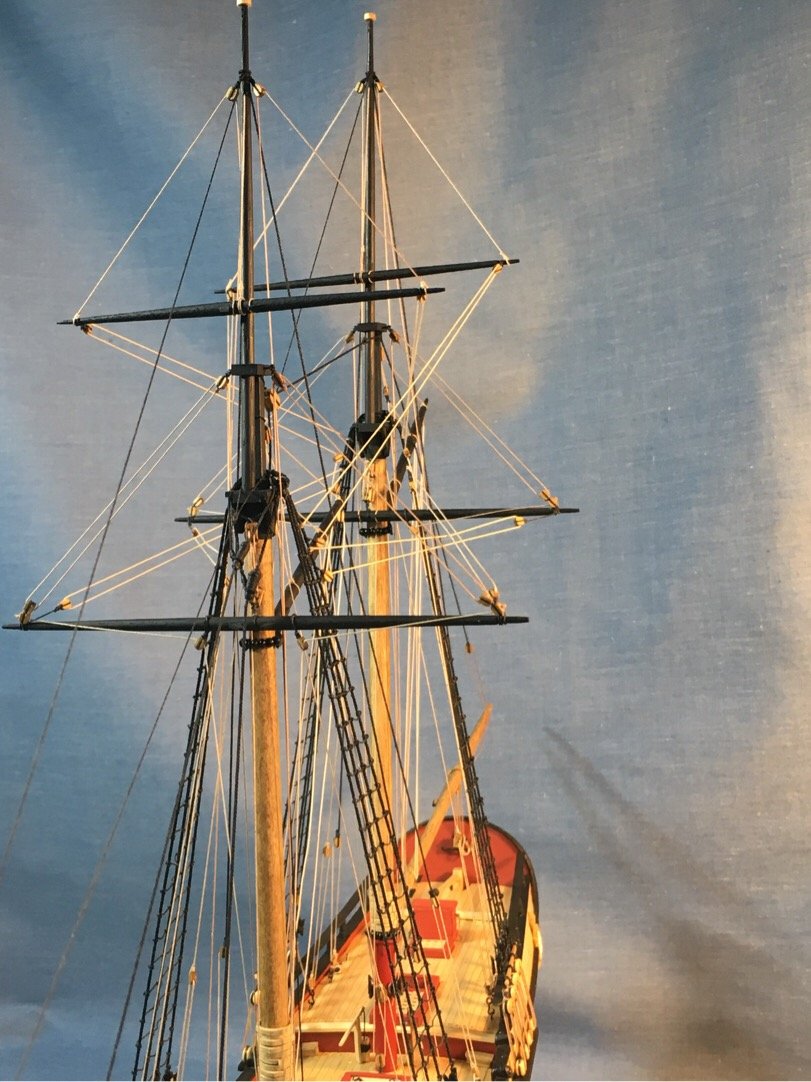
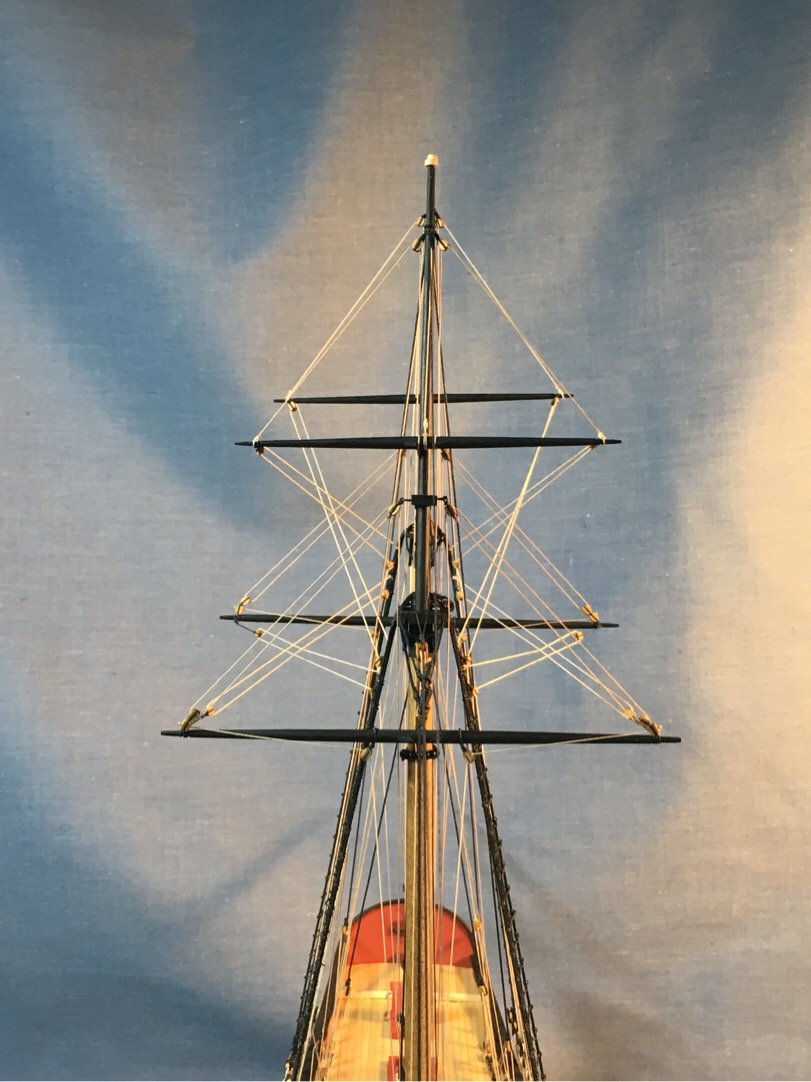
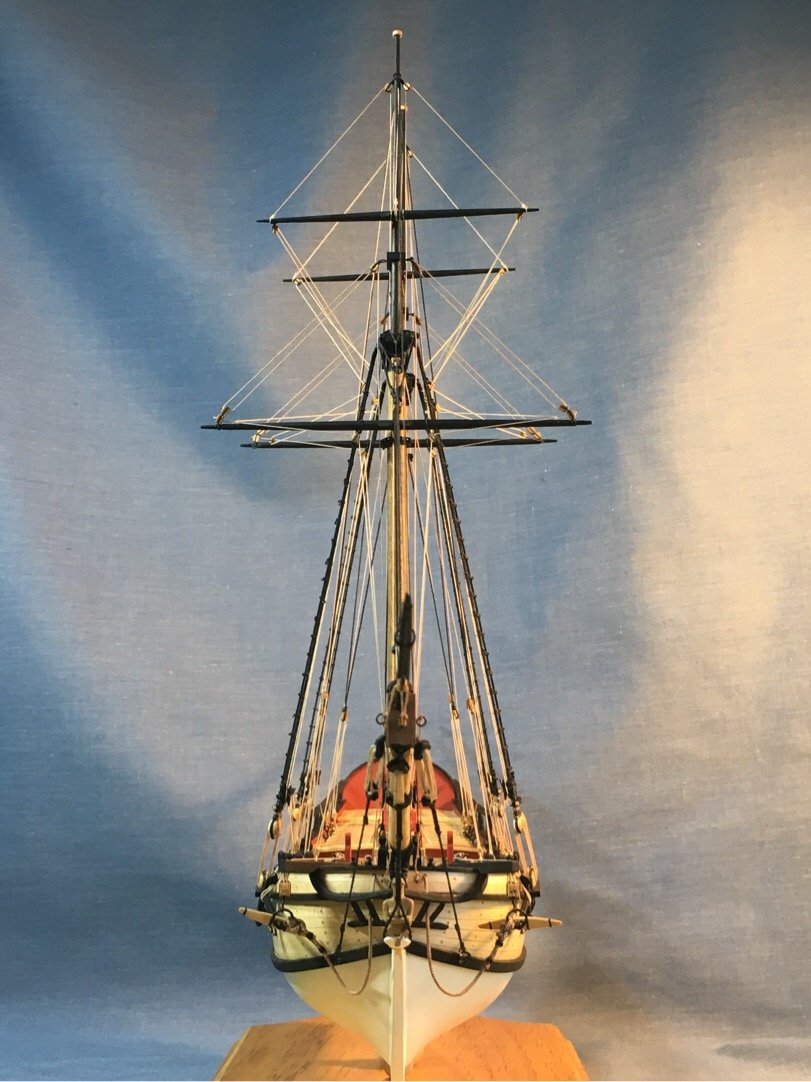
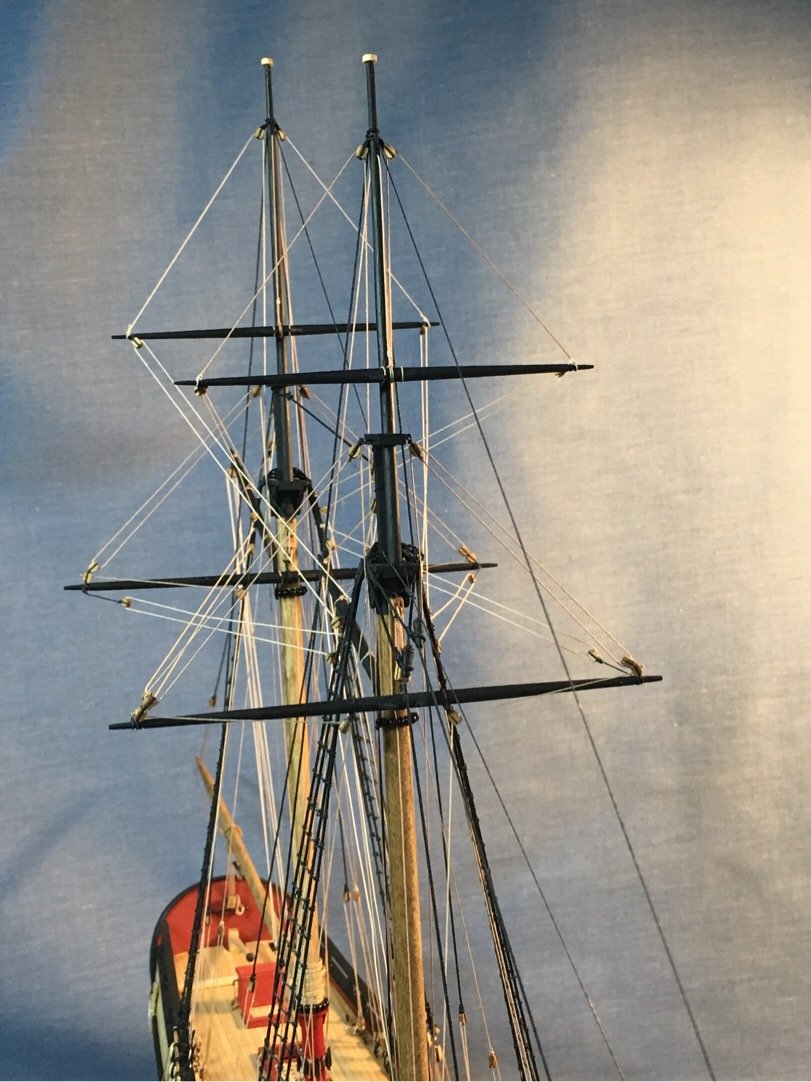
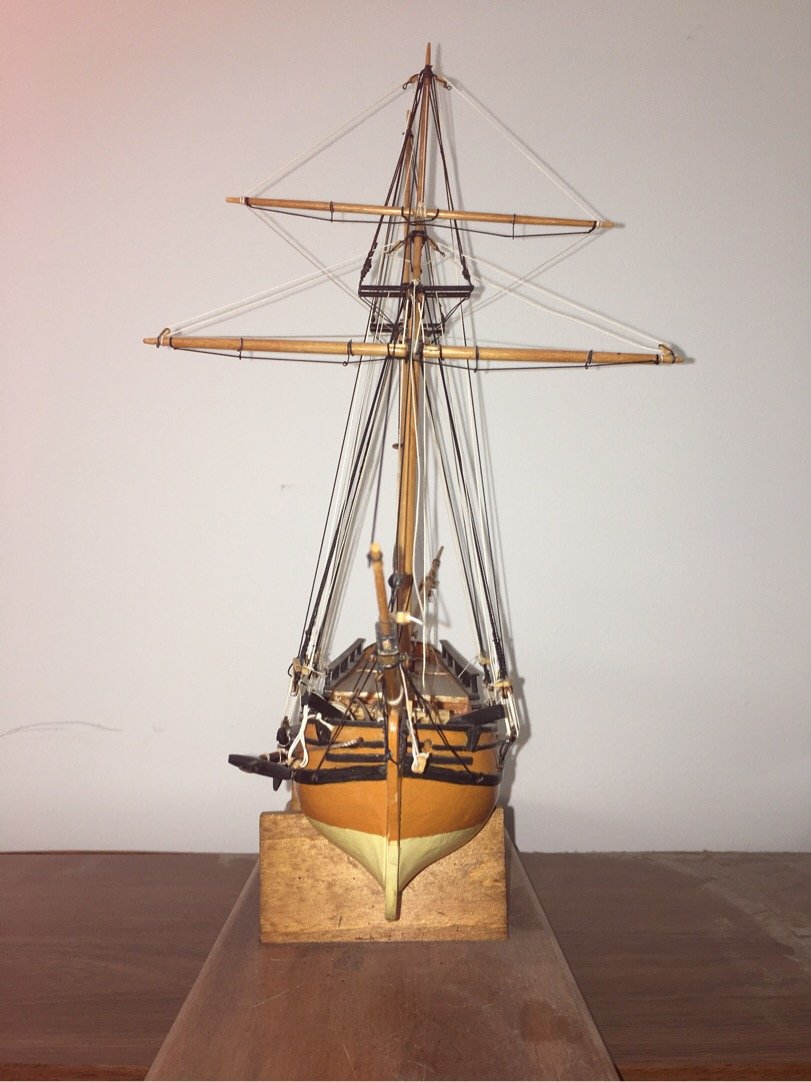
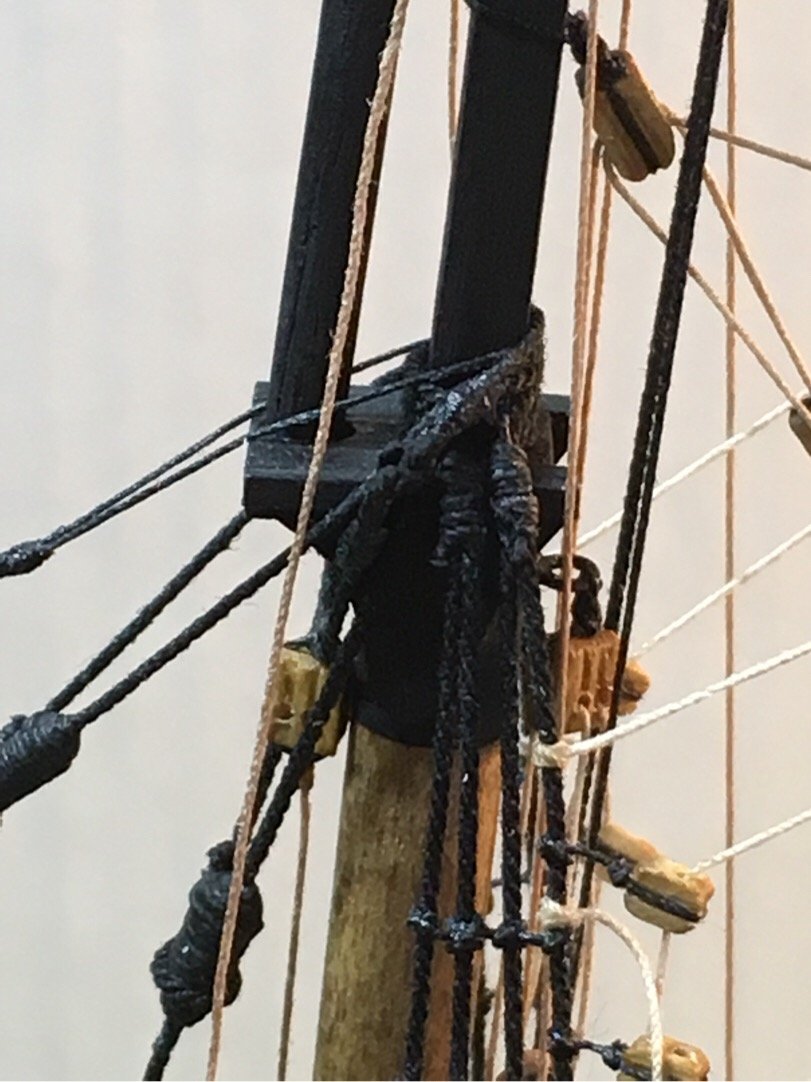
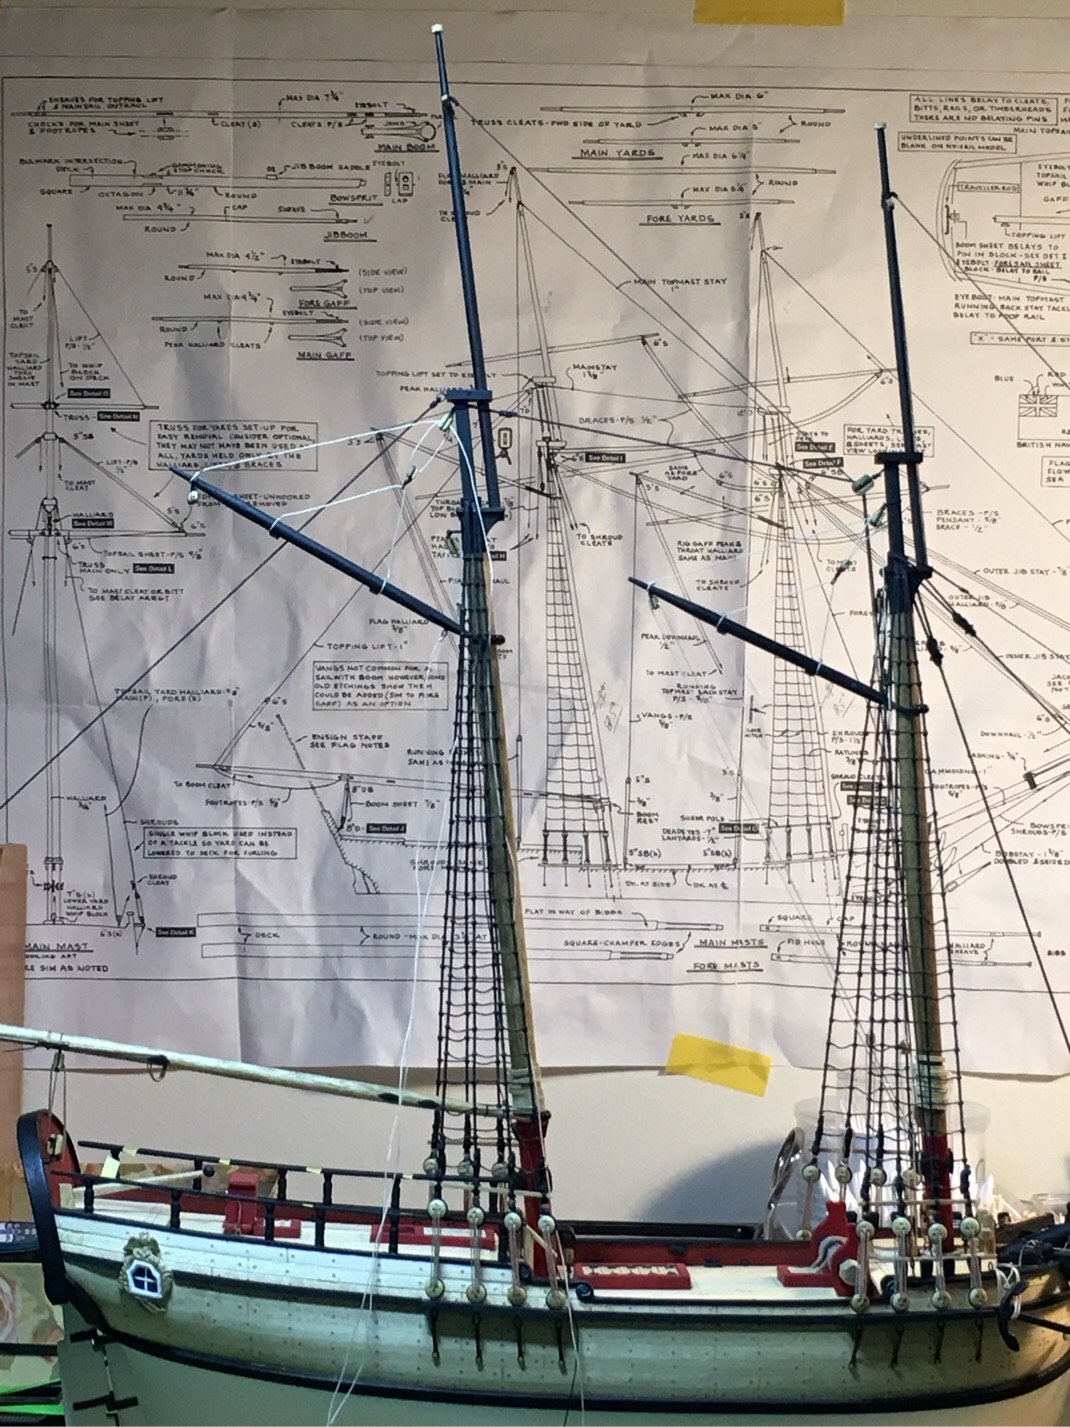
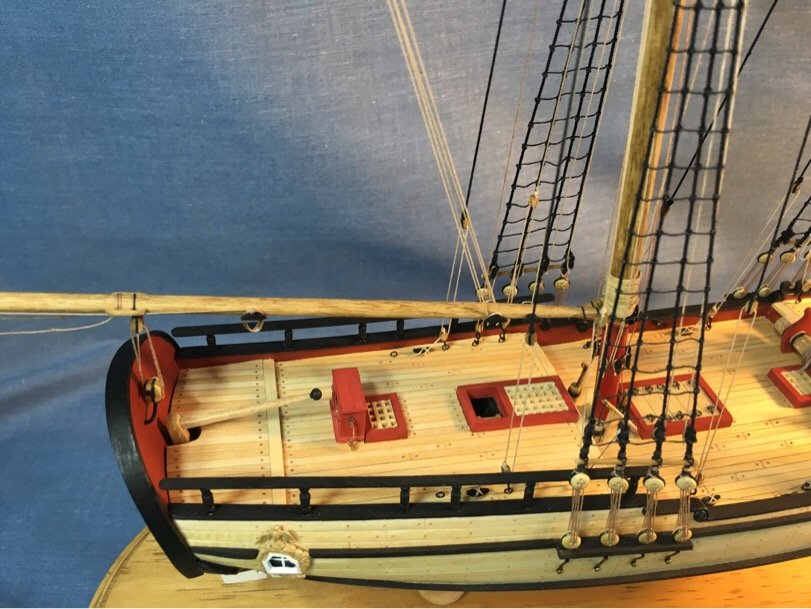
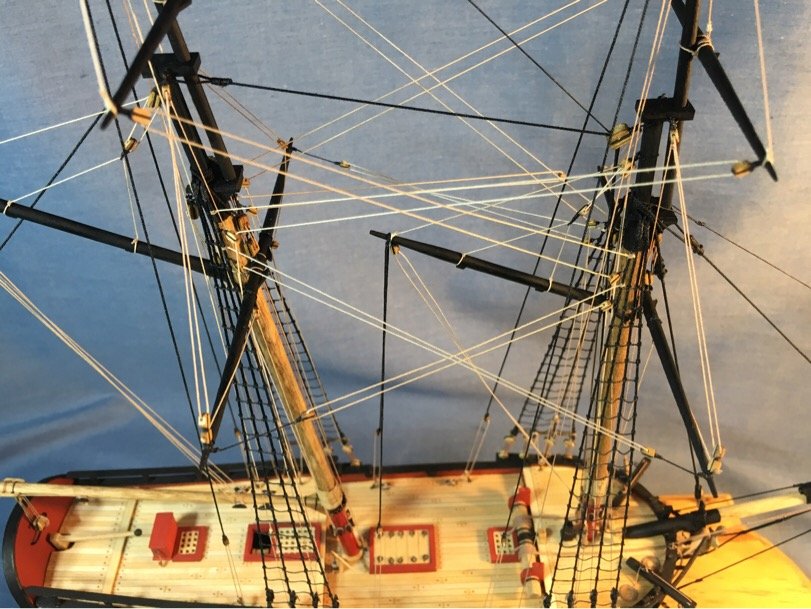
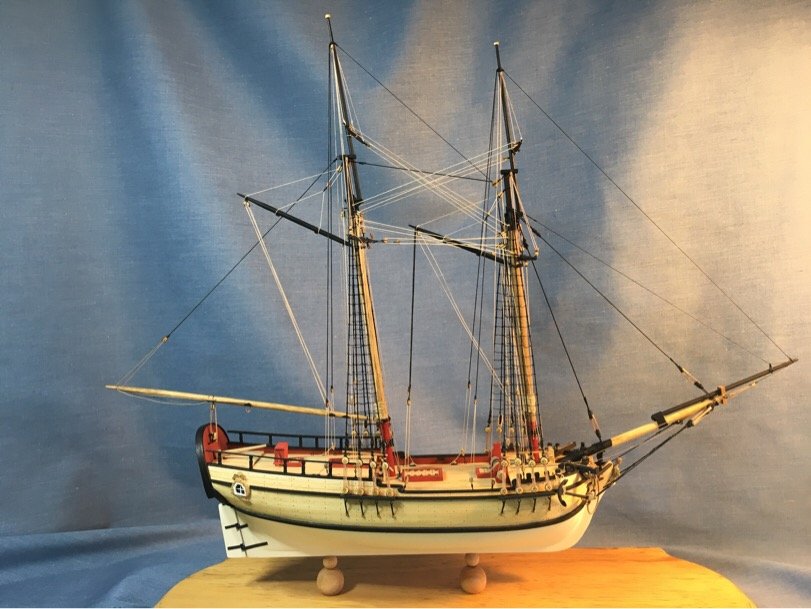
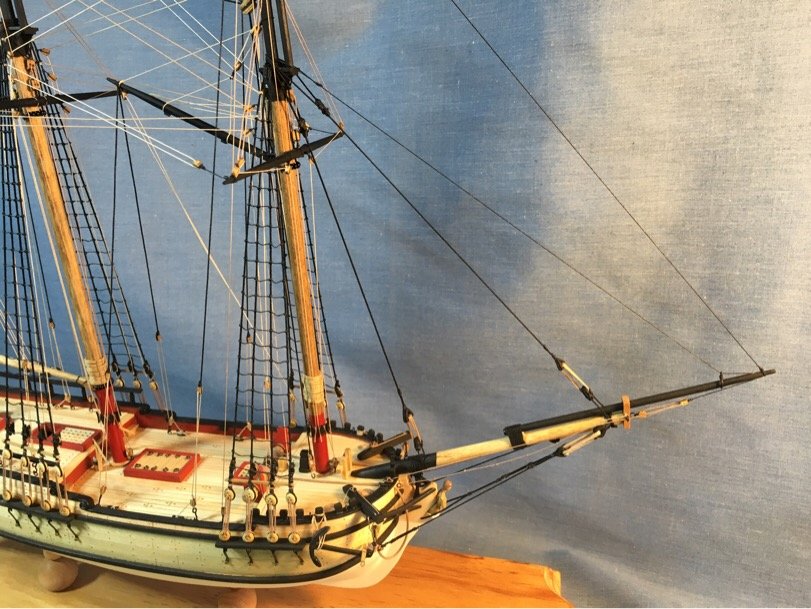
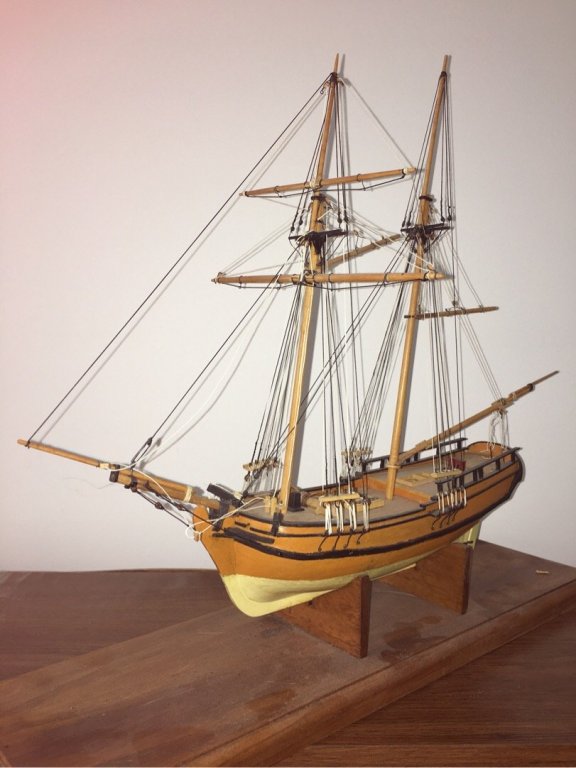
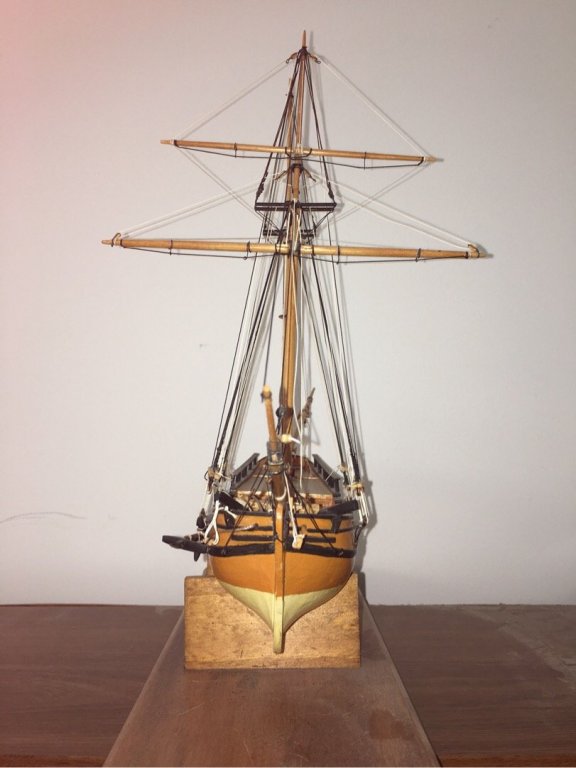
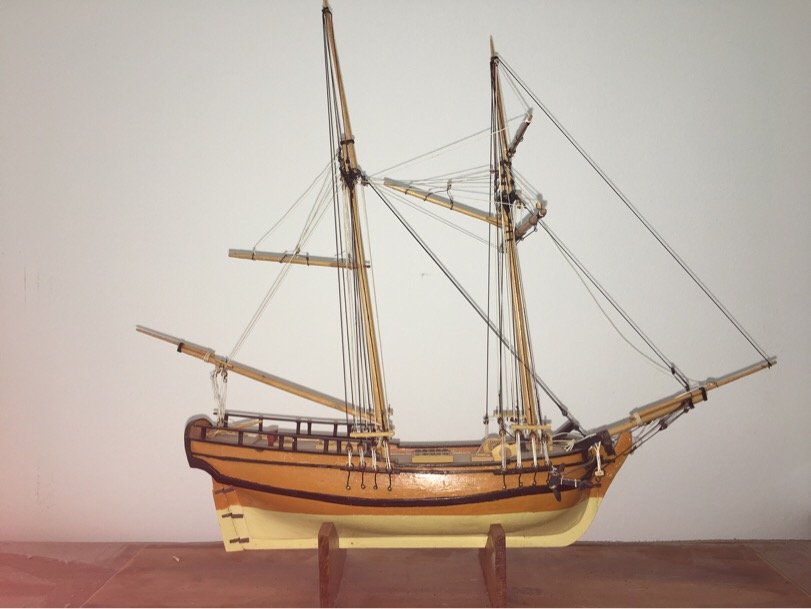
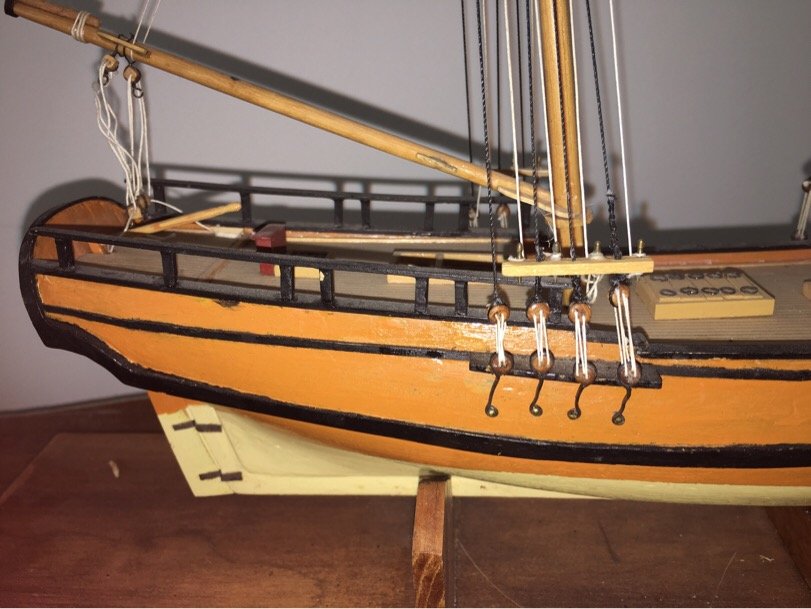
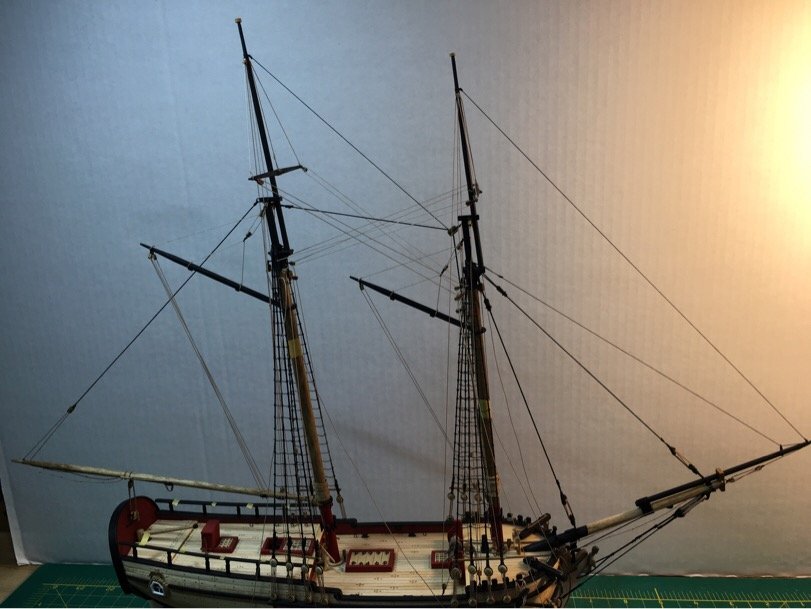
Well, if I could get a dollar for every mulligan I've needed during the rigging stage I could take my wife to dinner (with drinks). A few observations of my own before I post pics: - Rigging becomes complicated by the visual noise of other rigging as you add more, which leads to occasional twisted/fouled lines (which need redone) - I got into the habit of giving myself LOTS of extra rope/thread when rigging - resulting in a lot of waste...most of my rigging rope/thread went into the circular file rather than on the ship...I'm not very efficient! - Get some extra long toothpicks...you have no idea how much you will need them - My little cheapie make shift tool from my previous post is a marvel - I practically attacked the cleats with it without fear - Rigging really teaches you a lot about a ship! - Using a blue bed sheet as a background really helps when photographing rigging Here is my progress update: - Running backstays are in for both fore and main masts - Lower yards are in on both fore and main masts - Sheet lines are in on both lower yards - Braces are in on both lower yards - Lifts are in on both lower yards - Vangs are in on fore gaff Here are some spur of the moment decisions: - I followed Chuck and installed cleats on the quarter deck to belay the main mast backstays rather than tie them to the cap rail - which would have looks a bit weird anyways - I tied off the sheet lines to the mast cleats on the fore mast rather than to the bitts....deciding to tie off the outer and inner jib halliards to the bitts instead (may be wrong on this call, but what the hell.) - Added a mast cleat on the direct front of the fore mast to belay the lower yard halliard from the block rather than shunt it to the bitts...(again, might be wrong, but what the hell.) - Am going to add the detail (ropes/paint touch ups, etc.) after I'm done adding the outer and inner jib rigging. (Again, may be a poor choice, but what the hell.) And now some pics: Moving on to jib rigging, flags, guns and touch ups.... Getting there!!!! Happy Easter!


- 449 replies
-
- 8
-
-
- sultana
- model shipways
- (and 2 more)
-
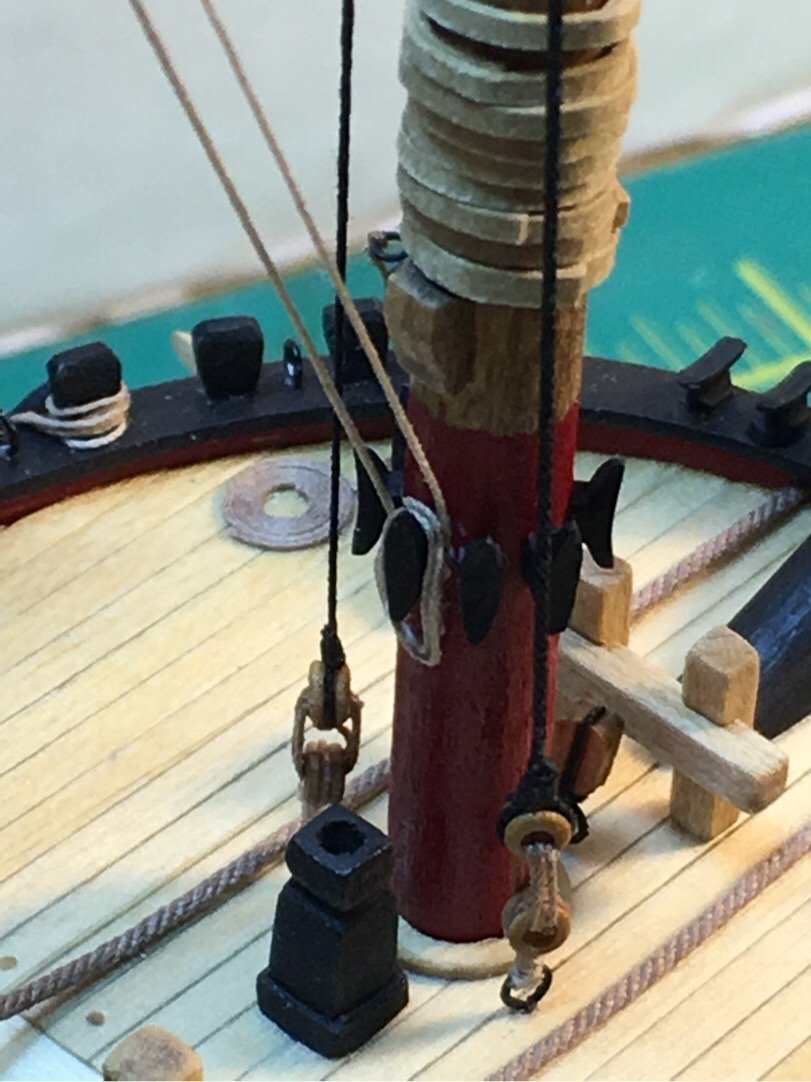
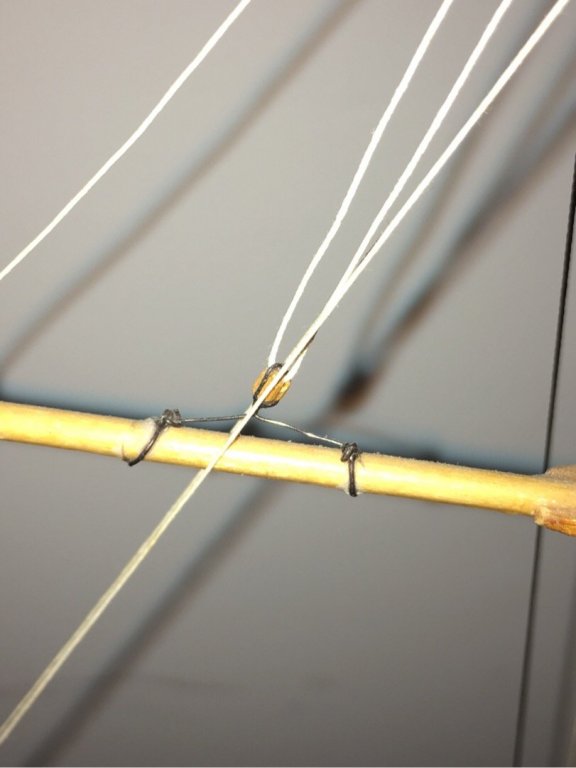
Actually, you did the same thing I did. I reversed it, then realized after I’d set it on the model! Then, I removed it, remade the mouse, but forgot to thread the line before attaching the closed heart at the other end! So, I ended up doing this 3x! That’s the only reason I know! But in truth, I think it looks great and would just move on! You are doing great! Enjoying your (our?) Sultana build!
- 360 replies
-
- 1
-
-
- sultana
- model shipways
- (and 1 more)
-
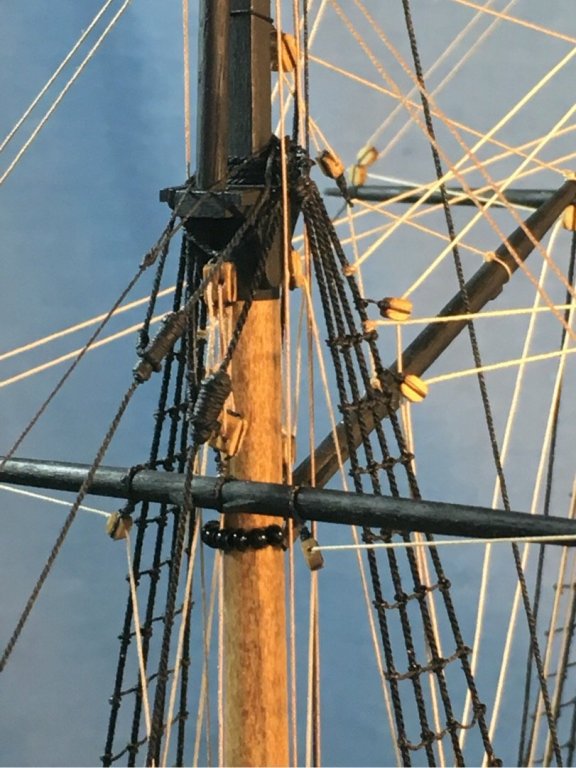
Just curious. You may wish to check the mouse on the stay is the correct orientation. In Chuck’s practicum, he rigged his backwards as well but noticed too late. I believe yours is rigged in the reverse orientation. The loop should fit around the narrow ‘nose’ of the mouse as in your figure. Nice work on the stays, though!
-
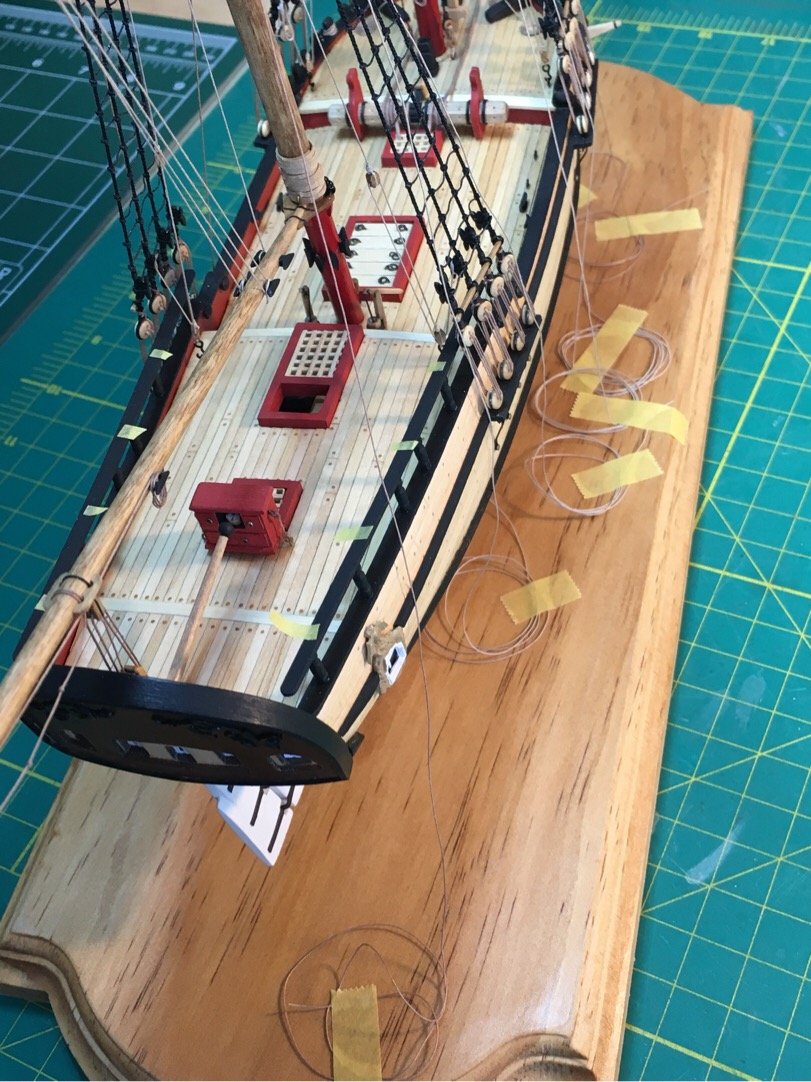
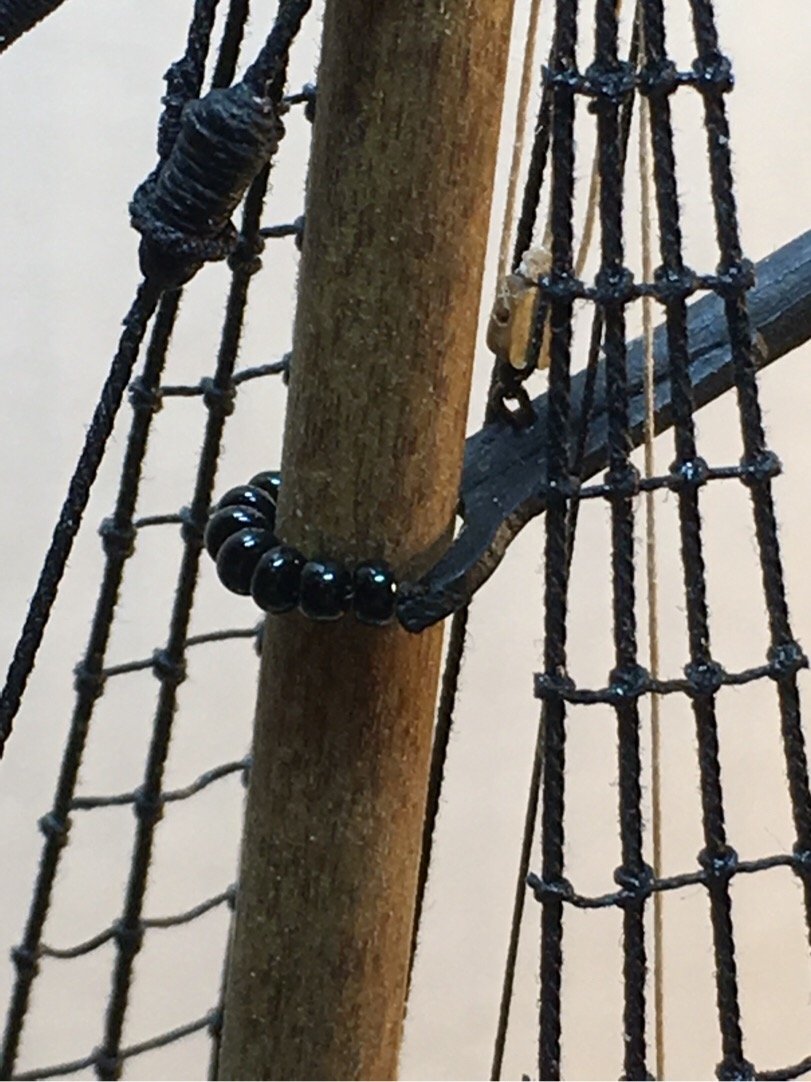
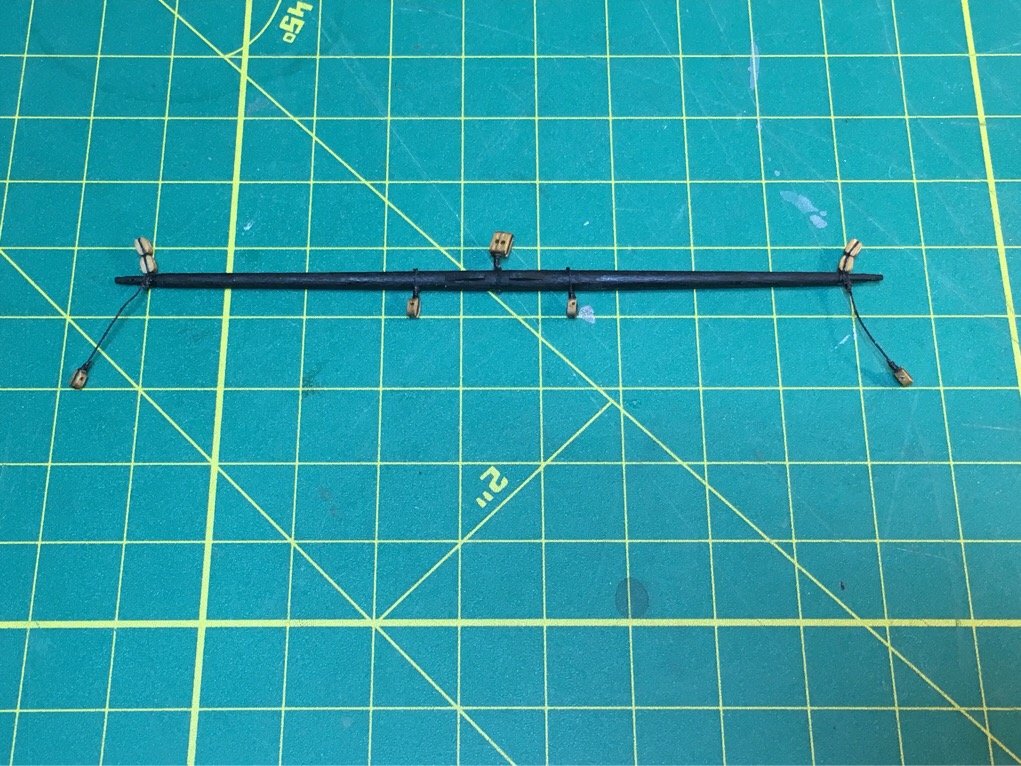
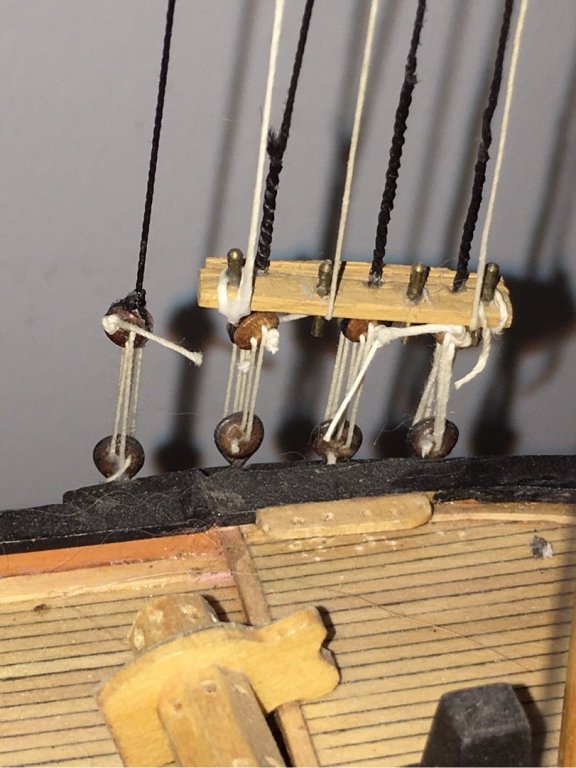
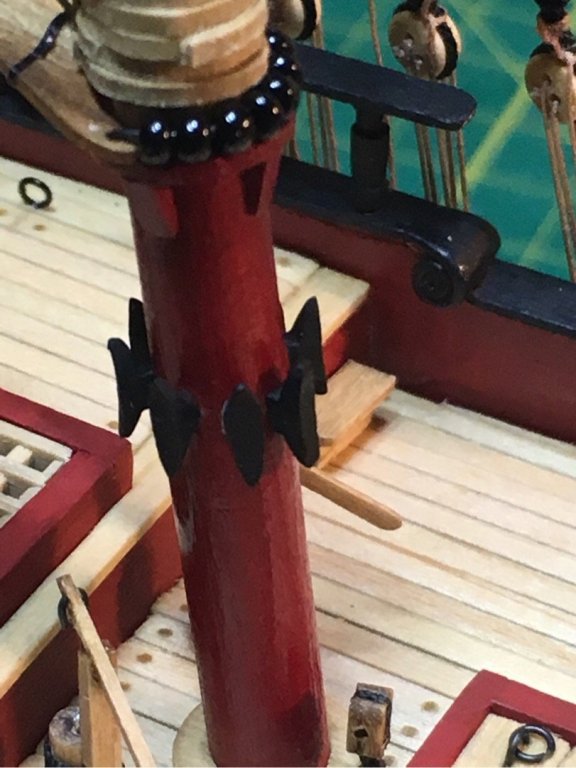
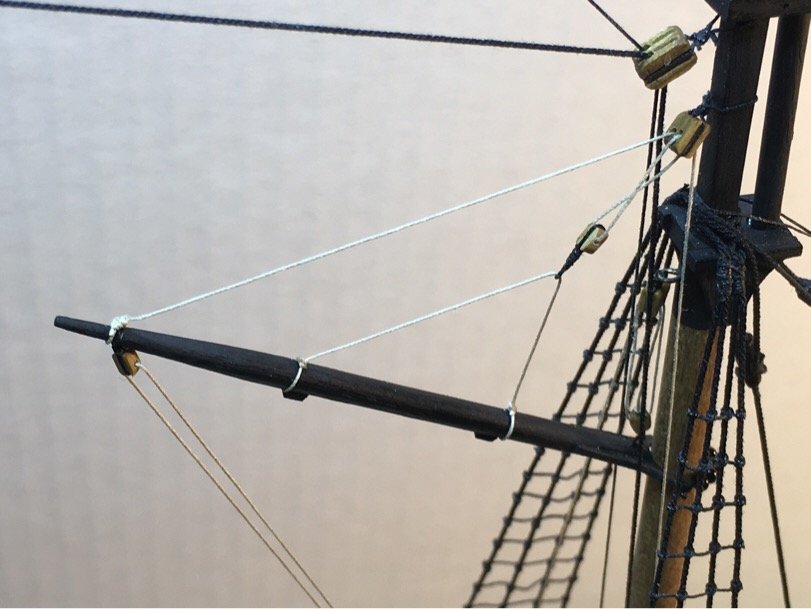
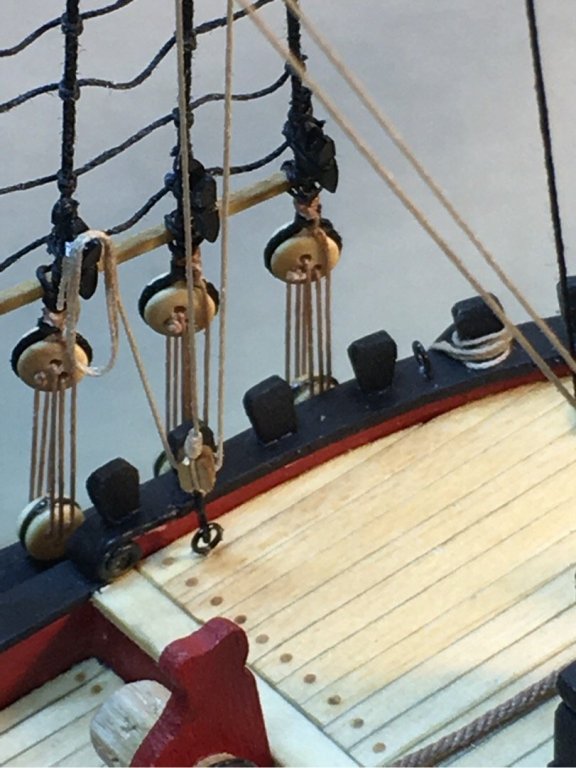
Got my lower yards setup. Both look identical. Little blocks are pain. Had some difficulty getting them lined up correctly. Now the fun part...getting them on the ship. Moving on...
- 449 replies
-
- 3
-
-
- sultana
- model shipways
- (and 2 more)
-
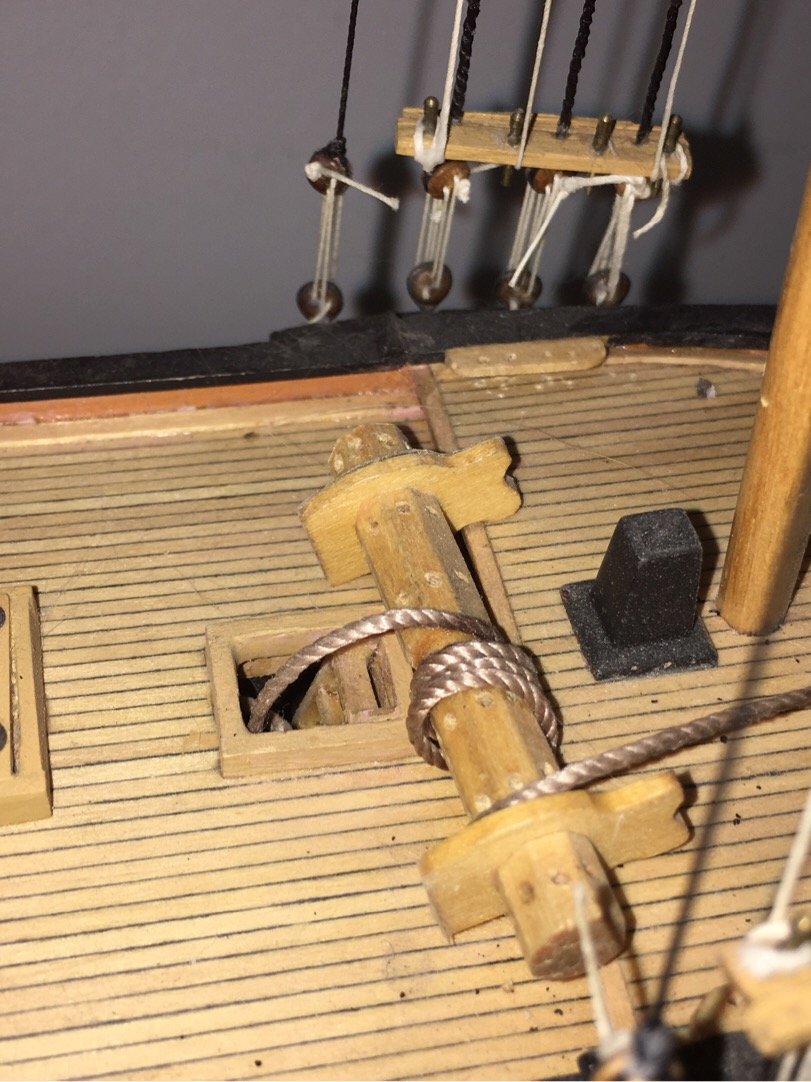
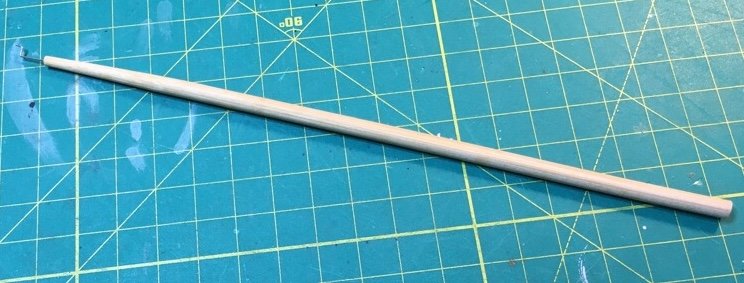
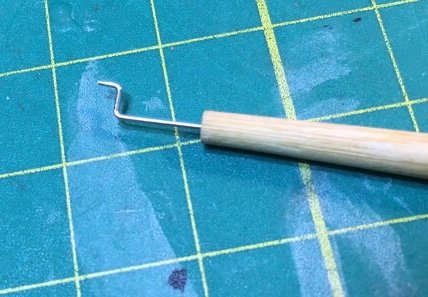
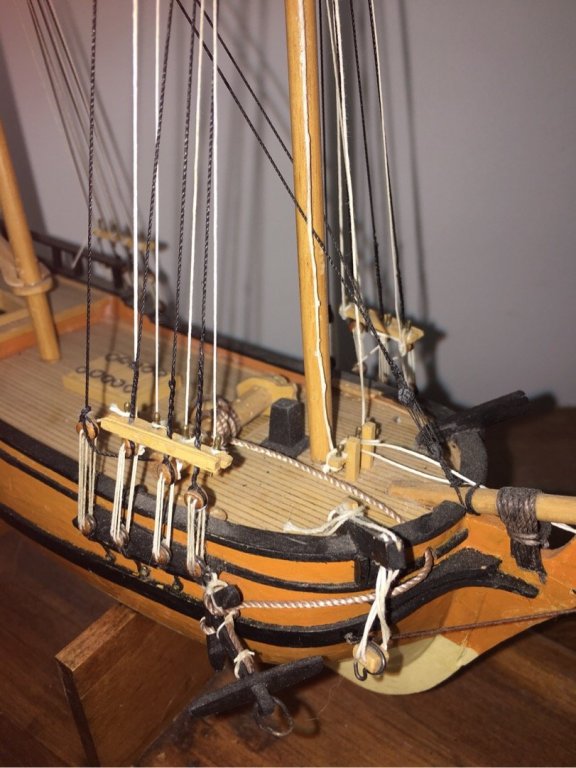
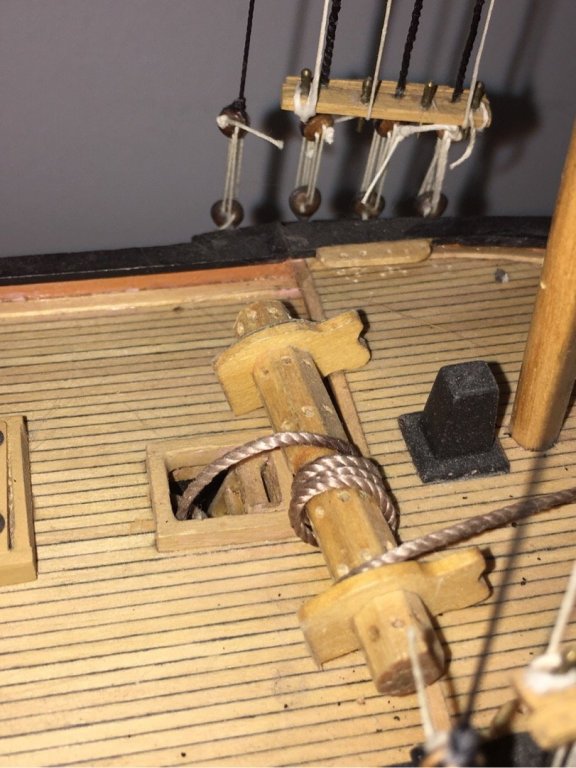
Like most ship modelers, I invested in tools for rigging. Although they might have their uses, I finally ended up making a tool to more easily help me get the rope wrapped around cleats. This is really hard to do when there is rigging in the way, or you are at a bad angle, which is always the case for shroud and mast cleats. I took a bamboo chop stick, drilled a hole in it, then bent a paper clip into the following shape. The bent end or very tip is only about 1/8” or so. I filed the end to make sure to rope slides off with ease. I find I can easily maneuver the rope using the inside corner of the ‘L’...twirling the tool as I wrap thread around a cleat...it’s kind of fun. It has been a lifesaver and made connecting the rope to cleats less stressful and much much quicker!!! I wonder if other folks on this forum have made their own tools? If you have a tool to help with rigging, please feel free to post on this blog. I need all the help I can get.
- 449 replies
-
- 5
-
-
- sultana
- model shipways
- (and 2 more)
-
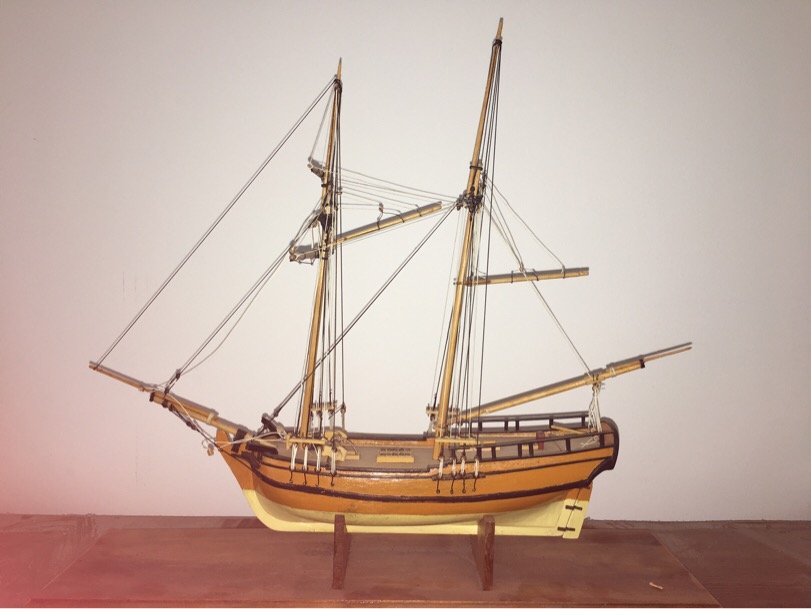
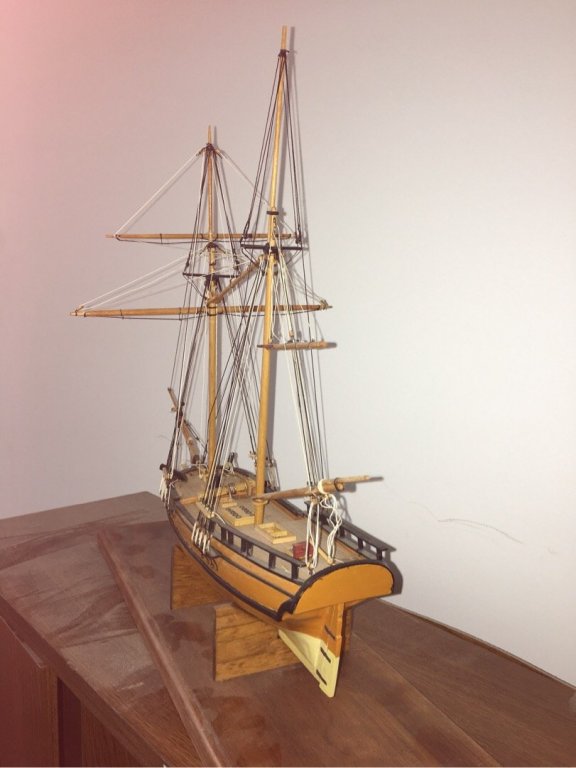
And now for something completely different. I went to a garage sale for a fellow modeler I did not know. Lo and behold...on a dusty bookshelf rested an old Sultana!! Not fully complete, but there nonetheless!!! It was an epiphany. I looked at it for quite a while. I could pick it apart and find fault, but that is not right. Rather, I now recognize how many hours of work went into the model to get her to this point. The fact she remains unfinished matters not one wit. She retains a place of honor on a shelf. Perhaps representing the first of many. Moments remembered and skills gained. Dreams of men and events which shaped the reason the model exists in the first place. I see the hours, the care, the frustration, the joy, the pride, the love, and the peace. My fellow shipwrights...it simply isn’t right that I don’t share the gentleman’s work. Rough...yes. But I’ve learned a lot just by reviewing the pics. Here you go...a Sultana from another age. Before Chuck wrote a practicum to help the ‘new born shipwright attack the Sultana!’ I admire the fellow modeler who perseveres in this model. It reminds me that there is something to learn on every model, and that every model is beautiful!!! Enjoy!


- 449 replies
-
- 8
-
-
- sultana
- model shipways
- (and 2 more)
-
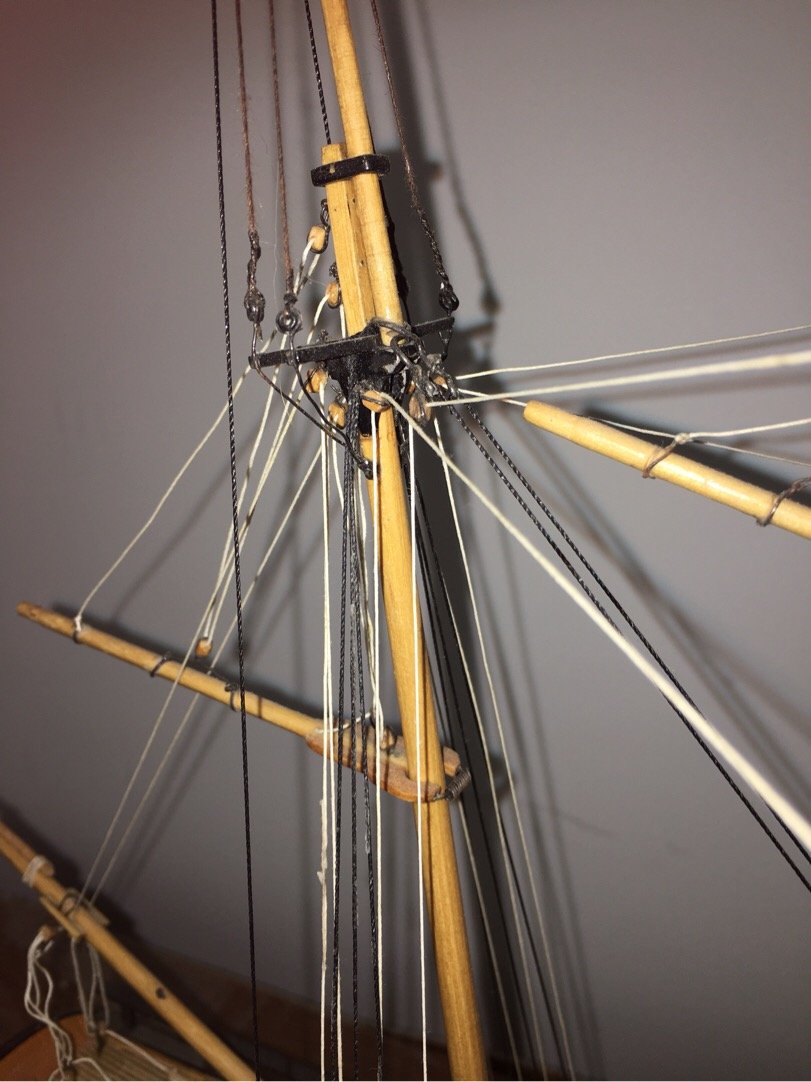
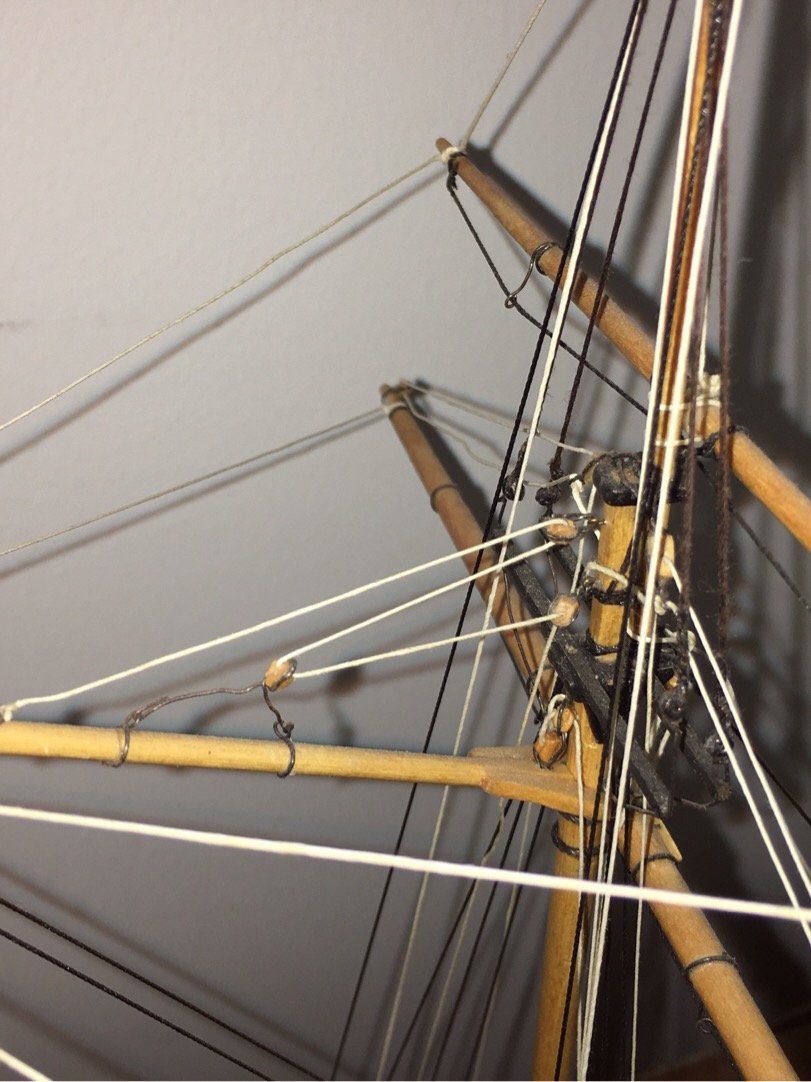
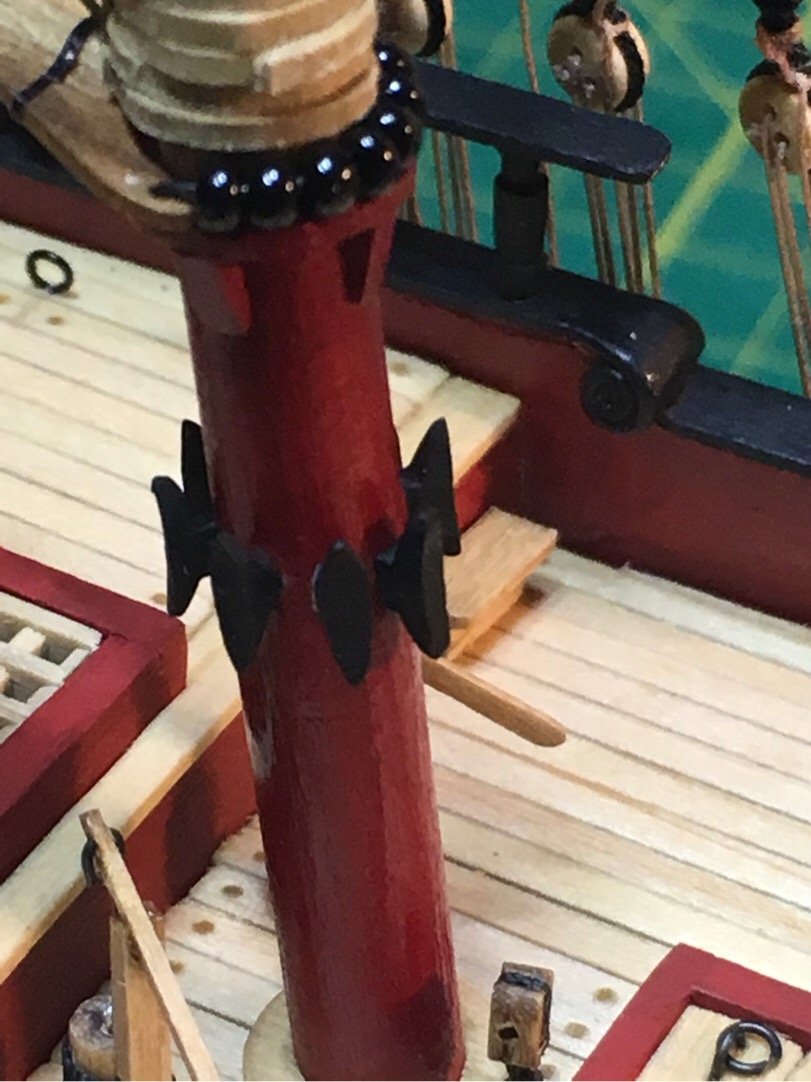
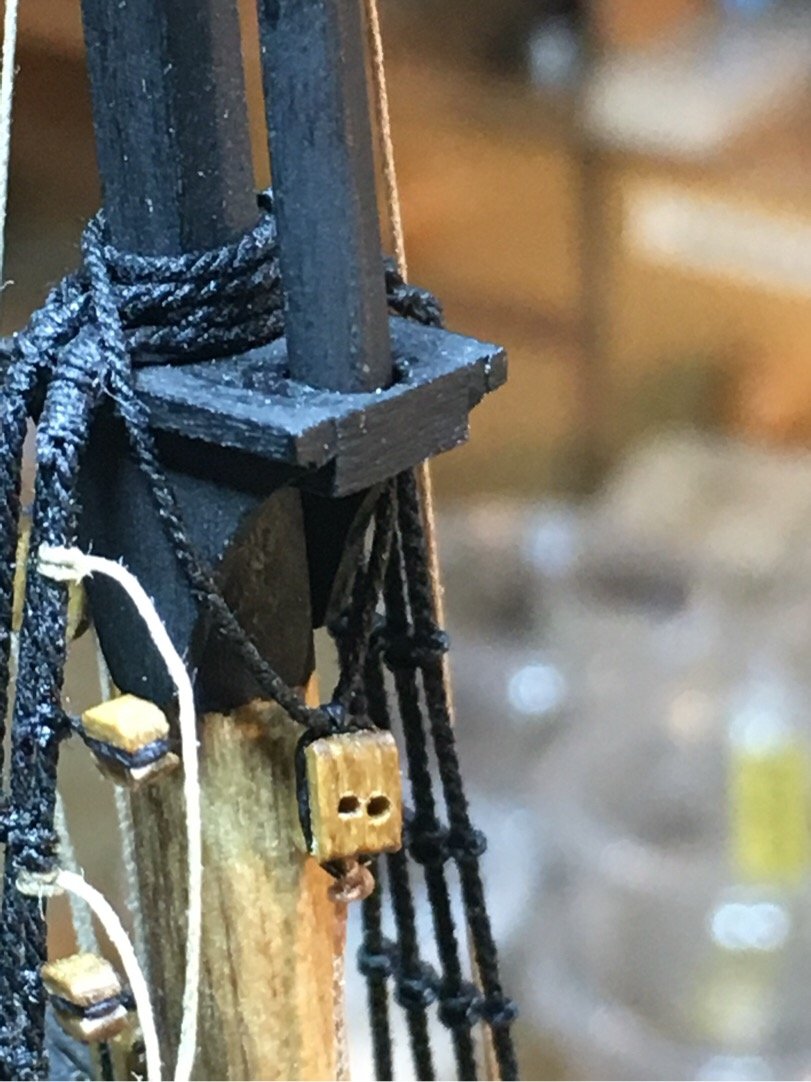
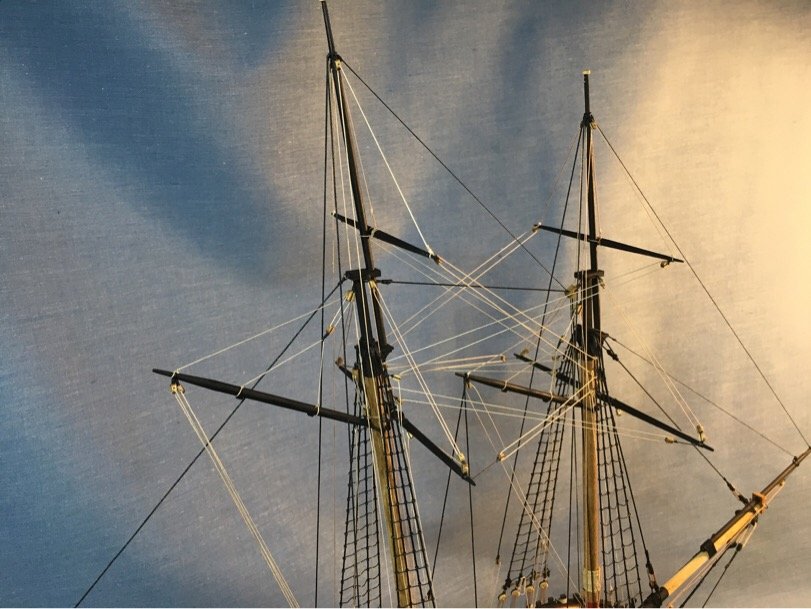
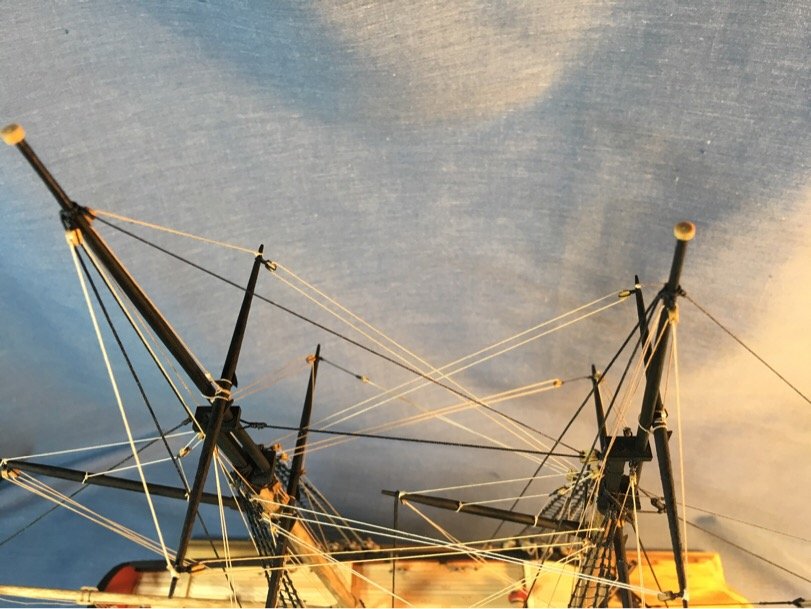
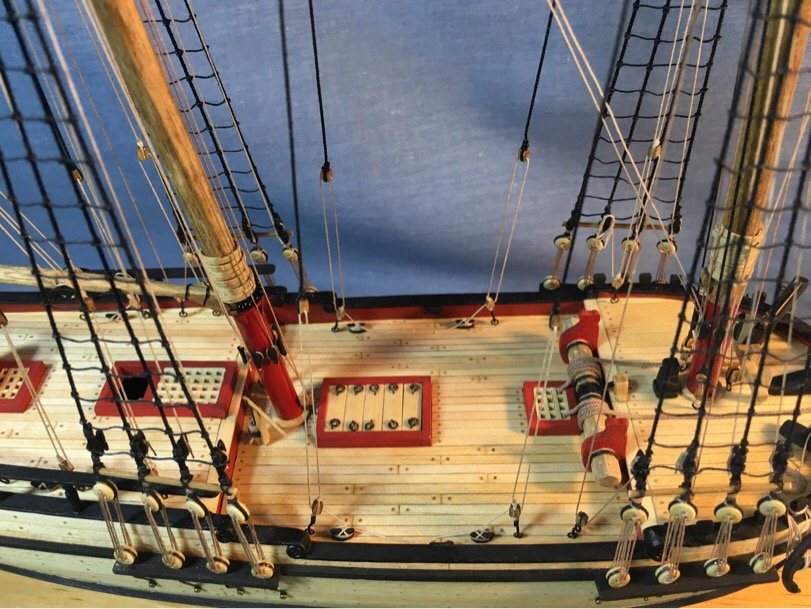
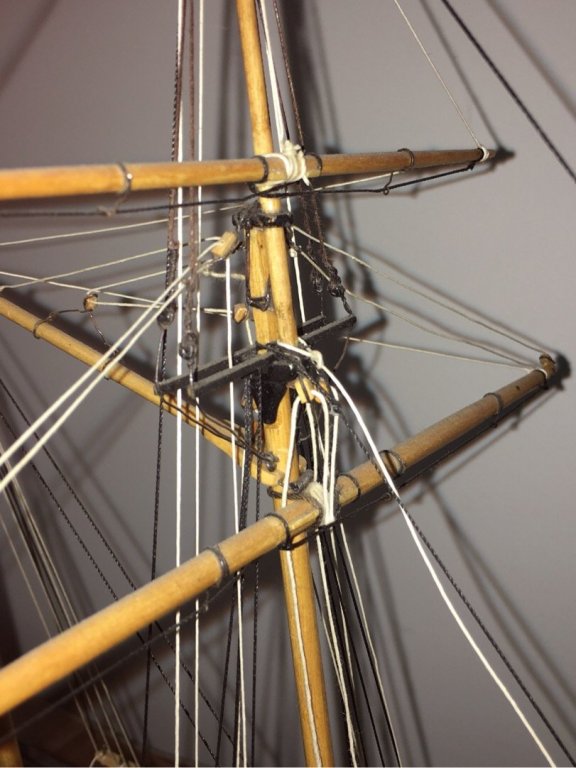
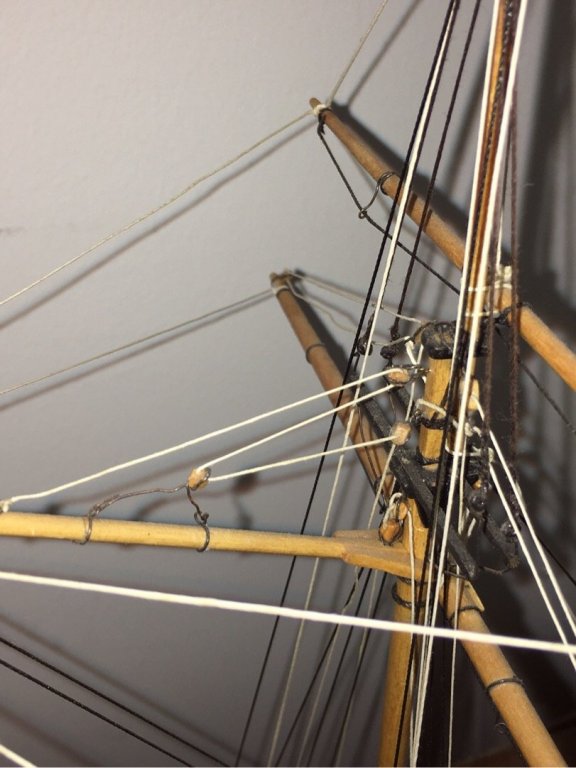
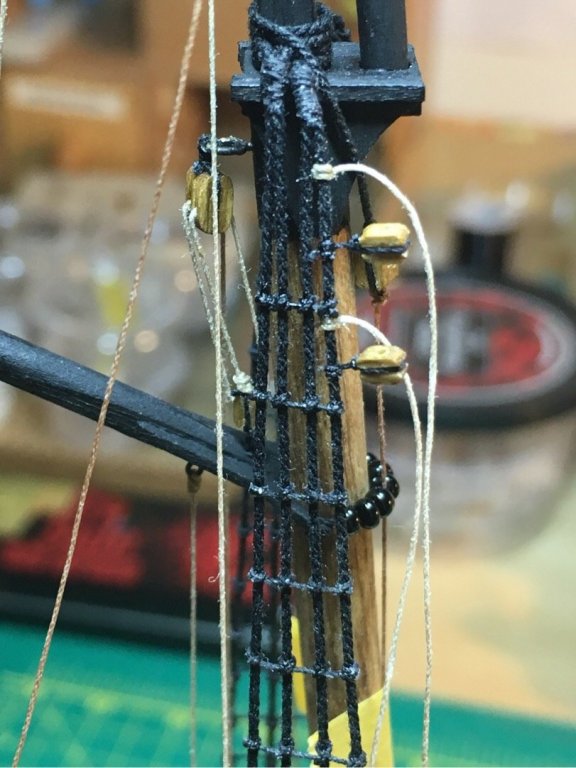
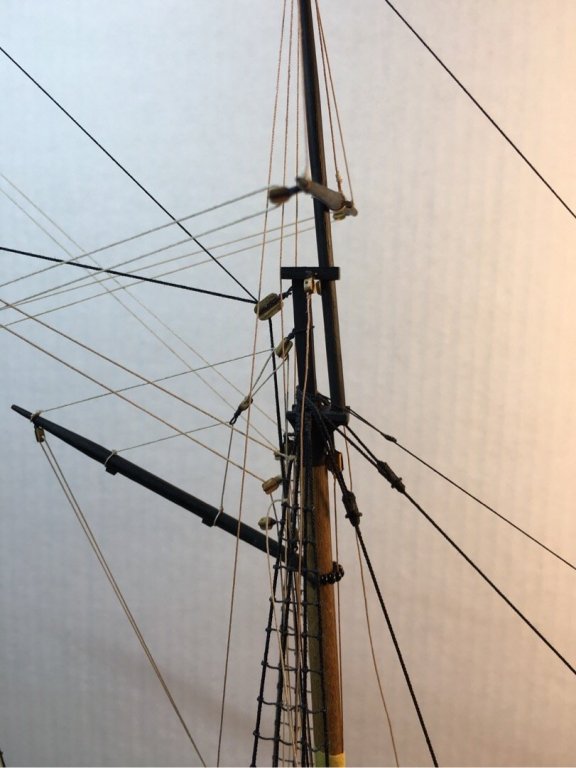
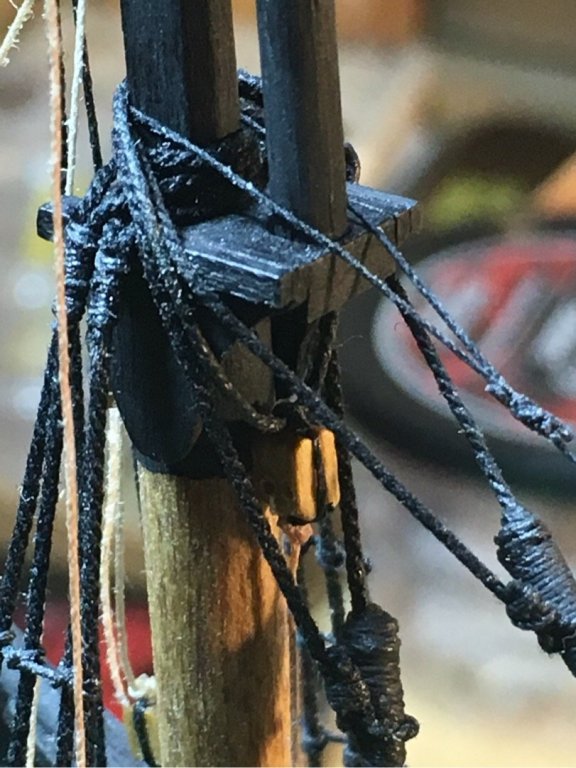
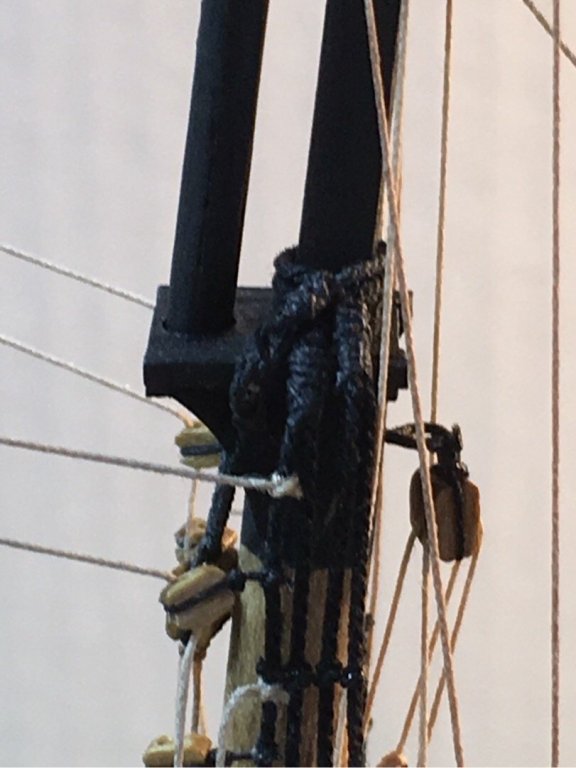
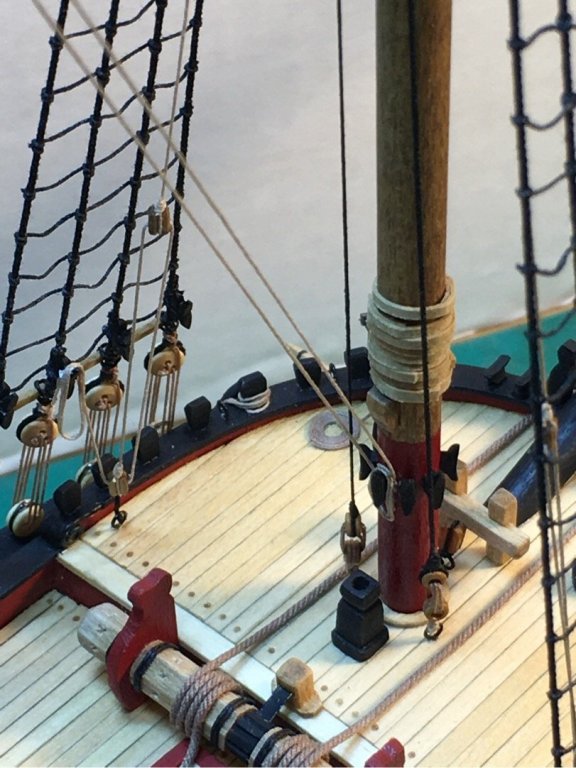
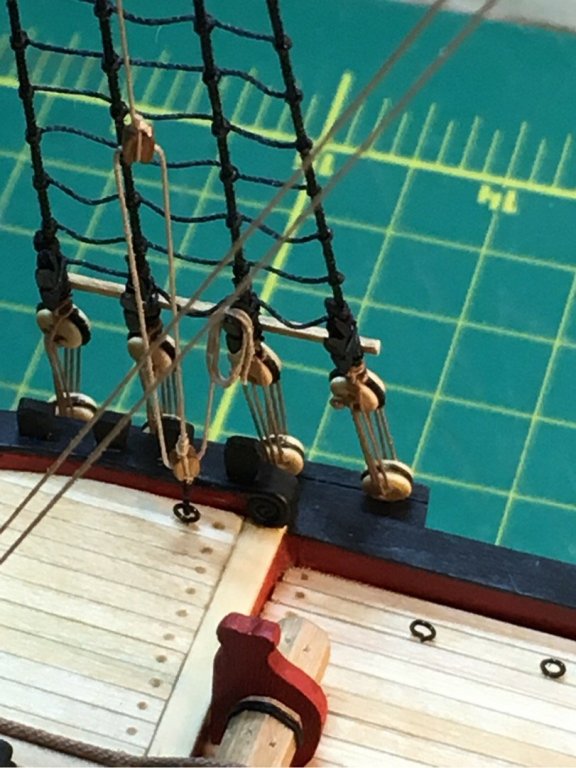
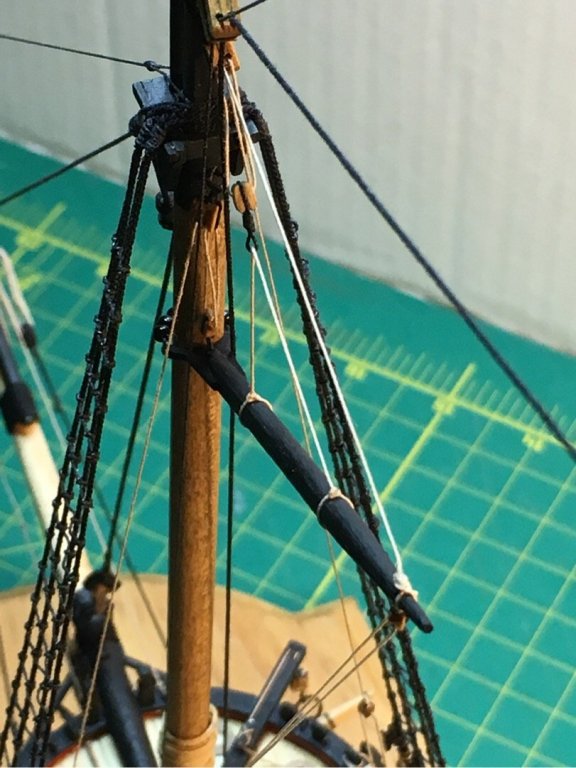
Ok. Actually had time to get some stuff done. I redid the blocks on the mast caps. Also, opted to paint the lanyard connecting the ends of the slings black. Looks better. Will remember to use miniature rope next time. Also got the upper yards, lifts, and braces in...now working on rigging up the lower yards. Rigging the blocks to the outside of the shrouds is the hardest part. And now...some pics. Is it me...or is masking tape more important than the rigging rope? Attaching ropes and blocks to shrouds. Fun stuff. My new cleat for the lower yard halliard for the main mast. Sling #1 on the Mainmast. Sling #2 on the Foremast. I now know why putting mice on the jib stays is problematic. Little bastards get in the way!!! And that FRICKING BLOCK for the lower mast halliard refused to lay forward!!! Upper mast on the foremast. Yes...I know there is a tilt. I like imperfection!!! But, you’ll notice both upper masts have the same tilt. Painted the connecting lanyards on the slings. Moving on...to set up my lower yards!!!! Cheers folks.


- 449 replies
-
- 5
-
-
- sultana
- model shipways
- (and 2 more)
-
Get a dremel with a sanding barrel - turn it on...and sharpen them by spinning the blunted tip against the spinning barrel. Takes one sec..and you can reuse the toothpicks for applying touches of PVA or CA glue. I love toothpicks....things are miracles! Looking great!!!
- 222 replies
-
- 1
-
-
- sultana
- model shipways
- (and 1 more)
-
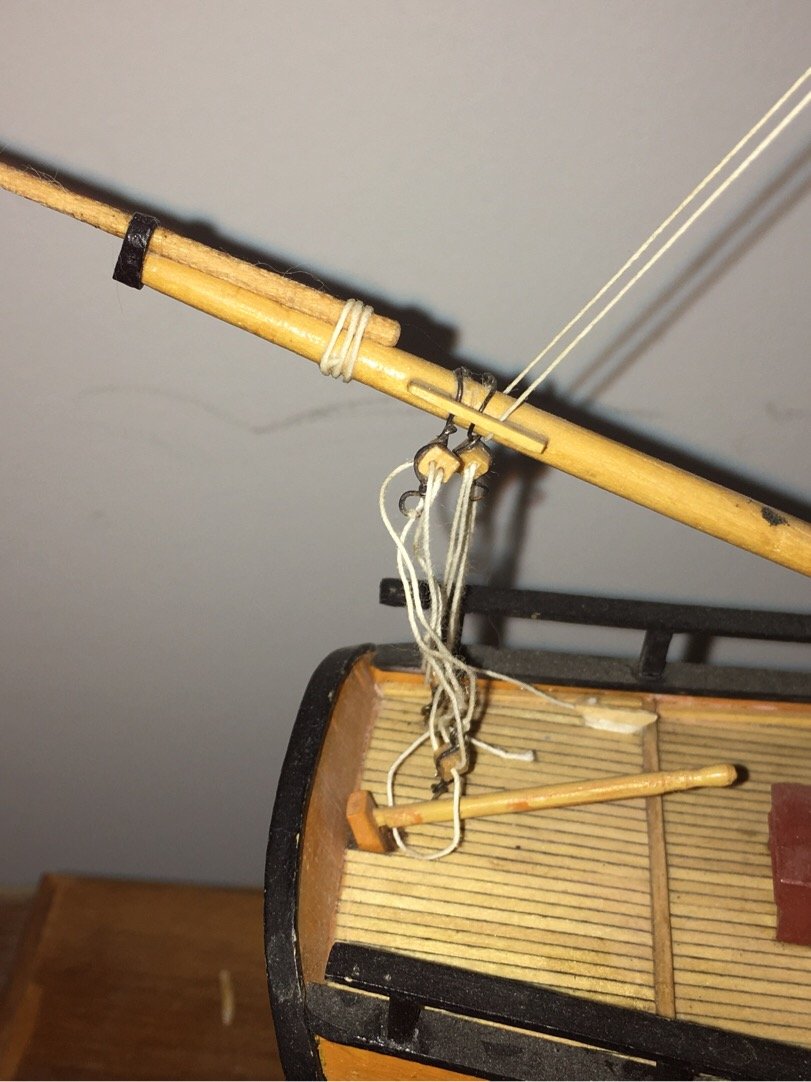
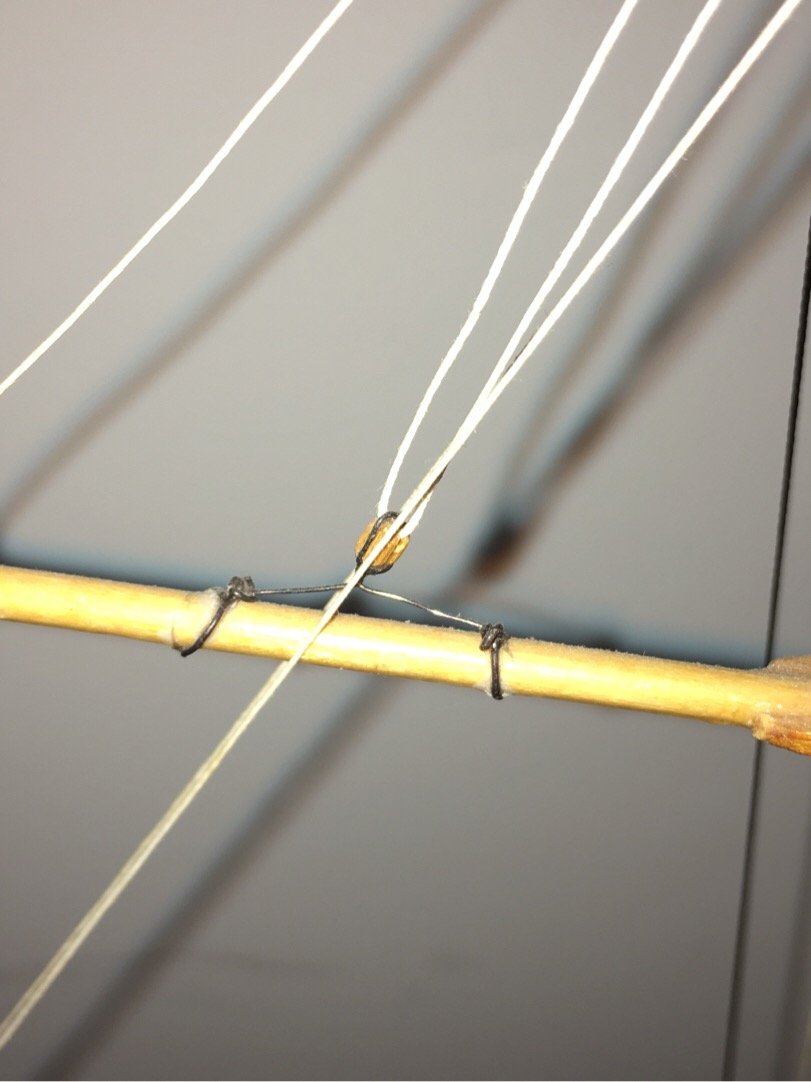
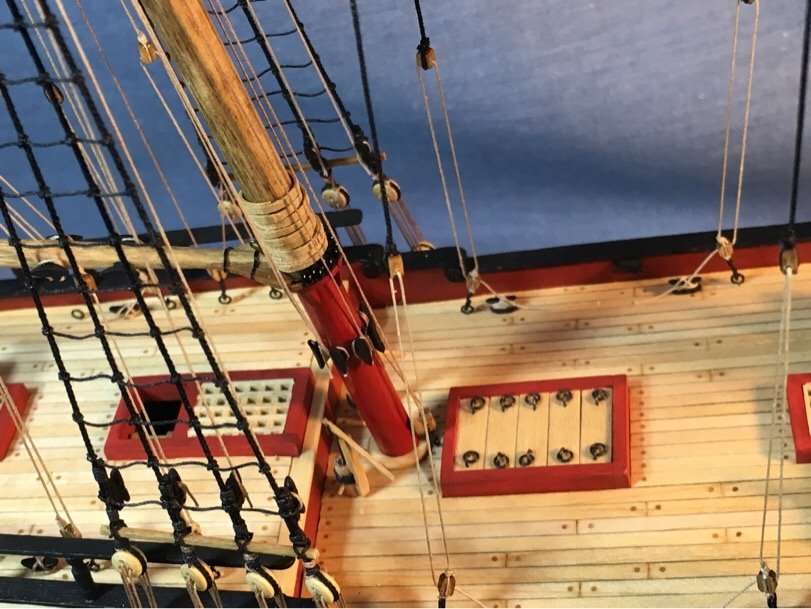
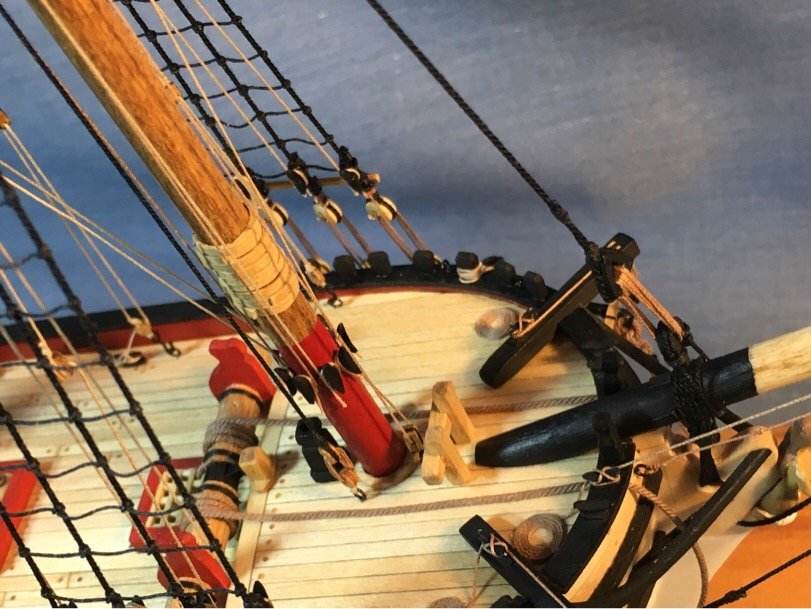
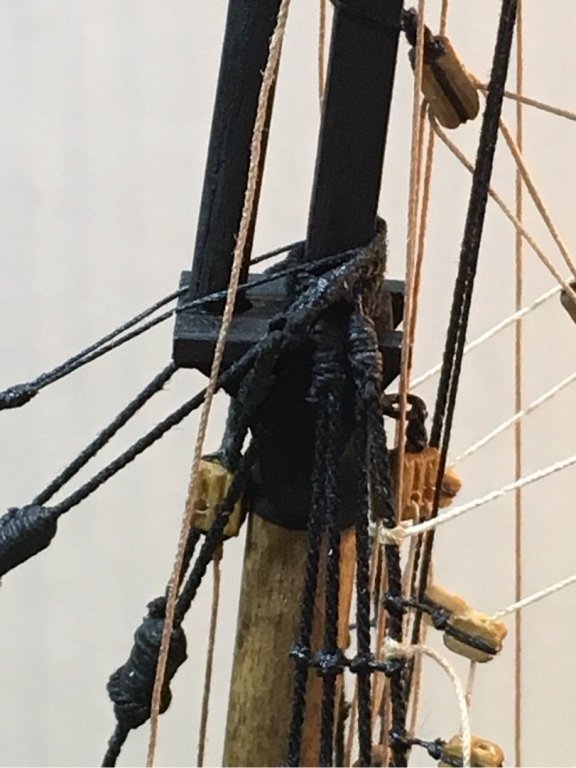
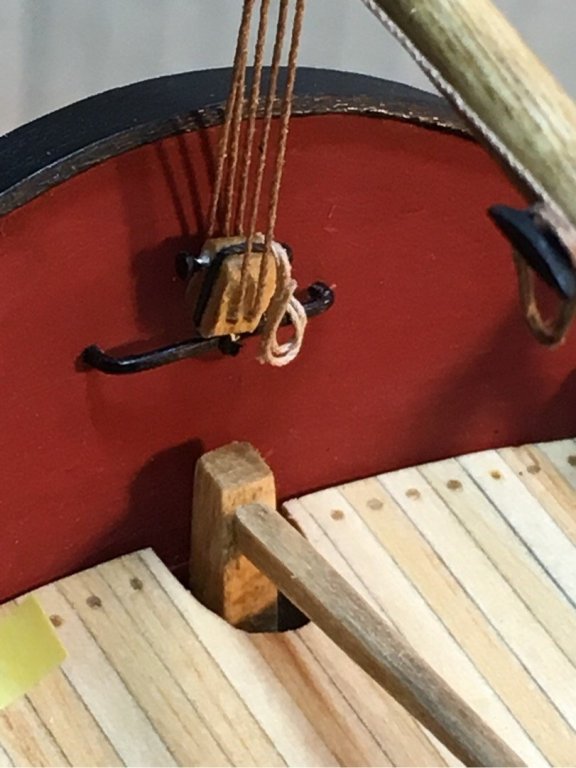
Well - some problems needed addressing: First: the main gaff is on...correctly this time. Problem was that I had rigged the tackle for the throat and peak halliards incorrectly. I had forgot to run the rigging line back through the single block connected to the eyebolts on the deck. Felt like an idiot... But I was able to take my mulligan without damage to the ship, and only minor damage to my blossoming confidence! Second: I rigged the slings to fore and main masts which support the lower yards. The sling on the fore mast was a bit tricky as the jib stays sort of get in the way...however, I managed to get them in without too much trouble. I actually used a lighter tan thread for connecting the two ends of the sling after wrapping around the mast heads. In retrospect, I should have used the tan or brown rope I had...but thought the thread would be easier to manage - and in fact it was. Problem is it looks like I have blond seizing on the lower yard slings! Maybe I'll paint it black...still thinking. Third: This was a doozy. I was looking at the rigging plan and realized I had put the mast cleat intended for the lower yard halliard on the main mast one the WRONG SIDE. Yep...as the Swedish Chef would say..."VERT DER FERK!!!!" I was and am a bit peeved that it literally took me a year to figure it out...the single block attached to the eye bolt in front of each mast should lies directly opposite (and below) the respective mast cleat used to tie up the lower yard halliard!!! So, I was looking at the fore mast...no problem! There was the block and it companion cleat right next to it on the mast. Then I looked at the main mast....and blinked about 50 times, then checked the plans...then got a stiff scotch. The cleat was on the wrong side. So, I've prepped another cleat and will try my best to apply it true. However, there is simply no way for my to remove the cleat which was placed on the opposite side of the mast. The main boom is in the way, and I won't be able to make a clean job of the removal. So...that cleat is staying on the model. This weekend should be fun...after I get done pre-rigging the lower yards...I should be in a position to make some steady progress. So, after I install the main mast cleat, I'll be attacking, in this order - the Upper and Lower Yards, Vangs and Back Stays, then inner/outer jib boom rigging. That should be a couple weeks out...and then I can focus on placing the flags and see if I can create a good method for adding the name on the transom. The Good Lord willing I make it that far without self imploding...then it's time to put on the finishing touches and place her under glass. I dream of that day... a pic of me sipping scotch as I admire my handiwork (and how well I hid my mistakes)! Moving on...
- 449 replies
-
- 3
-
-
- sultana
- model shipways
- (and 2 more)
-
And I just realized...you have the same toothpicks I have!!! I swear to God...couldn’t find those things outside of Japan! The shaped ends come in handy if you want to use them for your stanchions!!
- 222 replies
-
- 1
-
-
- sultana
- model shipways
- (and 1 more)
-
Fantastic!!!! You’ll love how the cross grain of the toothpicks will make the stain pop. I used Tung Oil. I have a suggestion on how to get perfectly aligned straight lines. Use the same Tamiya tape you are using. Lay it down on the deck/hull with the edge where you want your treenails to be. Then take a T-pin or pin sized awl and score a hole/dent in the wood plank right at the edge of the tape. Then use the scored dent or hole as a guide which will give you perfectly lined up holes when you drill the actual holes with your pin vise or dremel.
- 222 replies
-
- 1
-
-
- sultana
- model shipways
- (and 1 more)
-
Not many pics to post. A couple updates....needed to step back and redo the tackle on the main gaff. Made an idiotic error...happens. I am getting better at judging how much CA to touch onto the model which won’t prevent me from doing a rigging ‘mulligan’. Made the slings for the lower yards. Don’t know why those were such a huge challenge, but they turned out ok. Set them up with halliards before attempting to put them on the ship. Prepared the blocks with hooks and rope for remaining tackle needed for vangs and backstays. Prepared remaining blocks needed for the rest of the running rigging. On a side note...I’ve been using the rope from Syren (Chuck’s Model ship company). I’ve compared what you get in the kits vs the Syren rope and there is no comparison. Was so impressed, I decided to invest in my own rope maker (Rope rocket). No time to put it together and learn some new techniques...so planned on relying on the rope I purchased...but found he no longer makes black rope! Doh!!!! And worse...I’ve been using black rope for standing rigging/strops/seizing. And even worse...I just ran out of black rope! Sigh...life goes on...adapt and overcome. Will rig up my lower yards this week and hopefully continue to make steady progress on the running rigging.... Moving on!
- 449 replies
-
- 3
-
-
- sultana
- model shipways
- (and 2 more)
-
Wonderful ideas! I wish I had planked my decks BEFORE I completed the planking above the deck level to create the bulkheads. Your idea for caulking is also novel. Love how much you are using 'scratch building via technology' in this build. Really fun to watch. Have you thought about how you are going to mount it? Just wondering as once you are adding bulkheads, cap rails, etc. it can be troublesome to drill holes in your keel. Great job so far!!!
- 222 replies
-
- 1
-
-
- sultana
- model shipways
- (and 1 more)
-
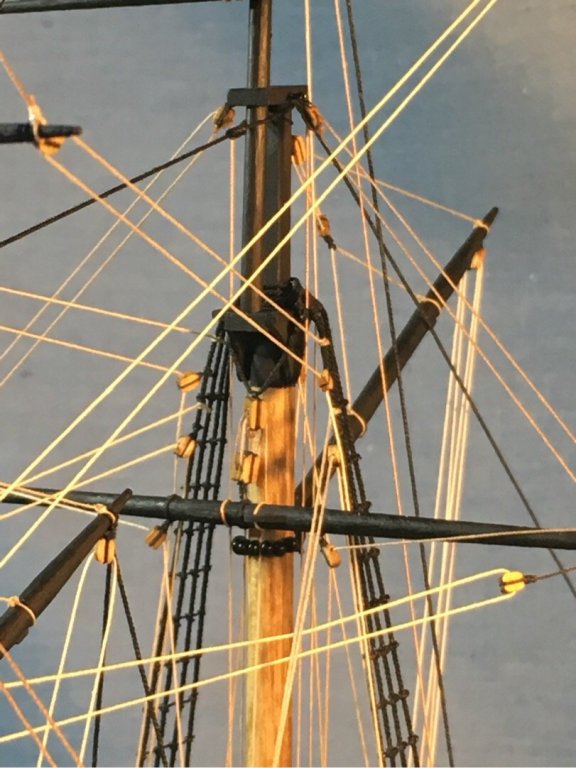
Work continues on the main gaff. Humbling to realize how incredibly massive and clumsy my fingers are!!! They aren’t really...but when working on the growing cobweb of delicately connected sticks, they DO get in the way. Slow going. Moving on...!!!!

- 449 replies
-
- 6
-
-
- sultana
- model shipways
- (and 2 more)
-
Very nice jig! 👍🏽
-
Added some rope details. Also made up the tackle and installed the Fore gaff. Slow going. But result was pretty good. Trying to take my time. Moving on!


- 449 replies
-
- 7
-
-
- sultana
- model shipways
- (and 2 more)
-
Absolutely fantastic! You created something beautiful there, mate! Awesome job.
-
If I could do it over, I think I’d have made the scupper holes early...before I built up the planking to create the bulkheads. Part of my hesitation in putting in scuppers was that I had a strong suspicion I’d have wrecked my deck planking in the process. Just FYI in the event you wanted to put in authentic scuppers vs the ‘show’ scuppers. Watching with great interest!!!!
- 222 replies
-
- 1
-
-
- sultana
- model shipways
- (and 1 more)
-
Not sure. You could look at the Schooner Sultana education ship and see if they have pics of her without people on it...I know she isn’t hauling much.