Overworked724
-
Posts
1,266 -
Joined
-
Last visited
Content Type
Profiles
Forums
Gallery
Events
Everything posted by Overworked724
-
 A bit o’ widdlng can do wonders!
 -
Completely agree with John. He basically summarized what I ended up doing. It’s at the point I gave up on perfection and stopped being afraid of progress (even in the face of imperfect results) that I really got hooked! Just go for it. Wood filler is my favorite tool. 😂
- 36 replies
-
- 2
-

-
- sultana
- model shipways
- (and 1 more)
-
Well, I can honestly tell you I was there... It’s possible you are overthinking. I’d recommend you take a step back. Focus on symmetry instead of accuracy. Shape your hull as you have it...ignore the stern for a while and focus on other areas. This is actually the hardest part of the build...faring the hull is a marathon of patience. Solid hulls are a pain pain in the butt...even Chuck mentioned solid hulls are, in many ways, more difficult than plank on frame. It’s a frustrating hobby...but you will breath easier once you are past the faring.
-
Nice pics! Everyone has preferences. I prefer the older look: wooden stocks for the anchors, the black painted pintles/gudgeons, black gammoning, and not going with a broad black band above the wales (seems to my eye a bit rough - I like her 'lines'). However - I'm sure anything you choose will be great! Keep in mind that ships at all ages also got painted and refit, so who is to say a mix of some of those changes are not accurate for the time you are portraying?
- 222 replies
-
- 1
-
-
- sultana
- model shipways
- (and 1 more)
-
Really nicely done! Paint job is superb. Was it brush or airbrush?
- 222 replies
-
- 1
-
-
- sultana
- model shipways
- (and 1 more)
-
It’s almost a dead on match! 👍🏽
-
😁 Thanks for the smile, @Kurt Johnson! In truth, this is my first model! But, she is riddled with ‘tactfully camouflaged’ mistakes! Can’t wait to start the next project!
- 449 replies
-
- 2
-
-
- sultana
- model shipways
- (and 2 more)
-
Nice job! What paint did you use? Everyone seems to have a favorite.
- 222 replies
-
- 1
-
-
- sultana
- model shipways
- (and 1 more)
-
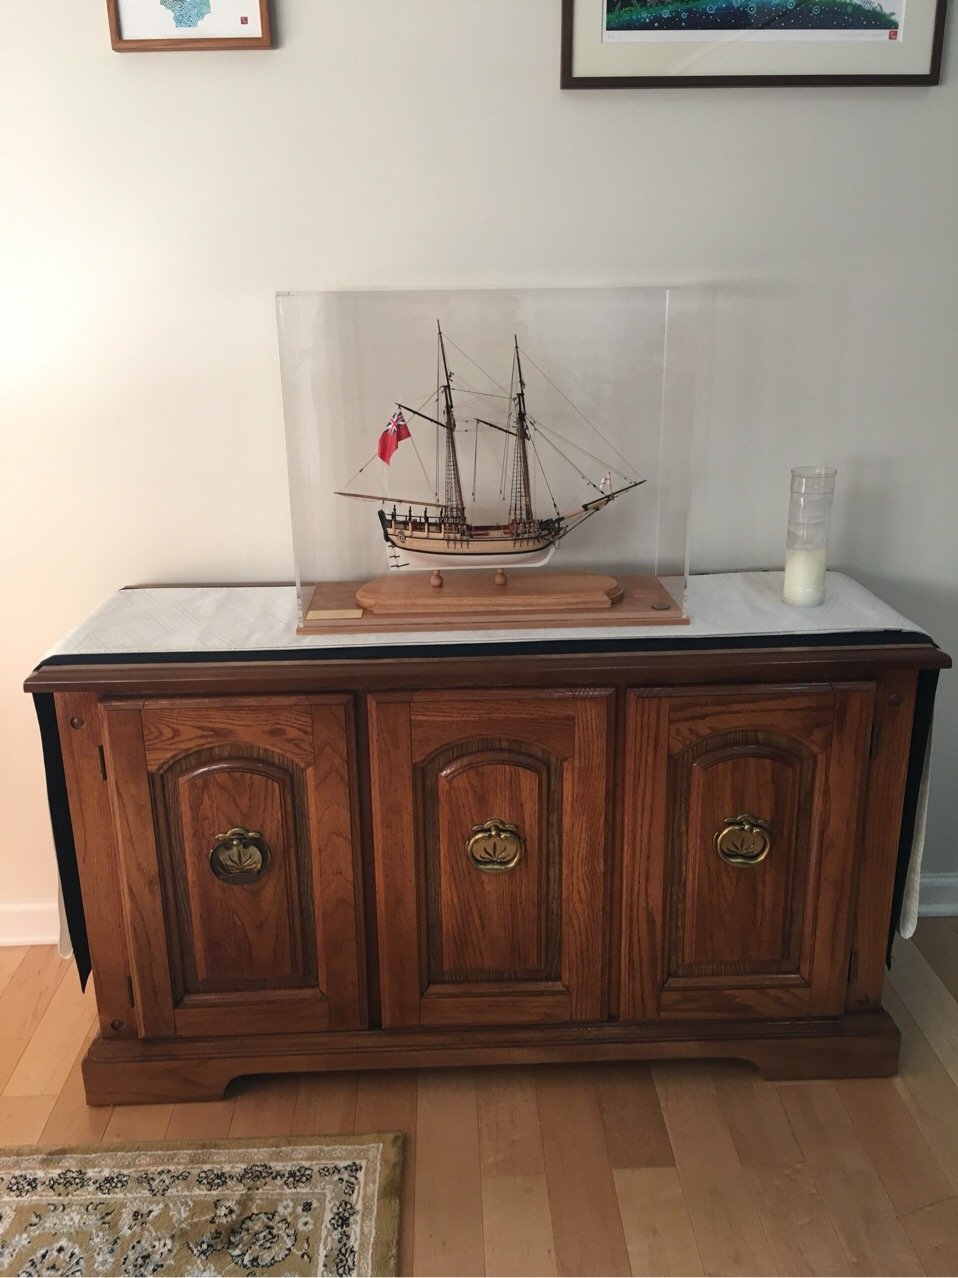
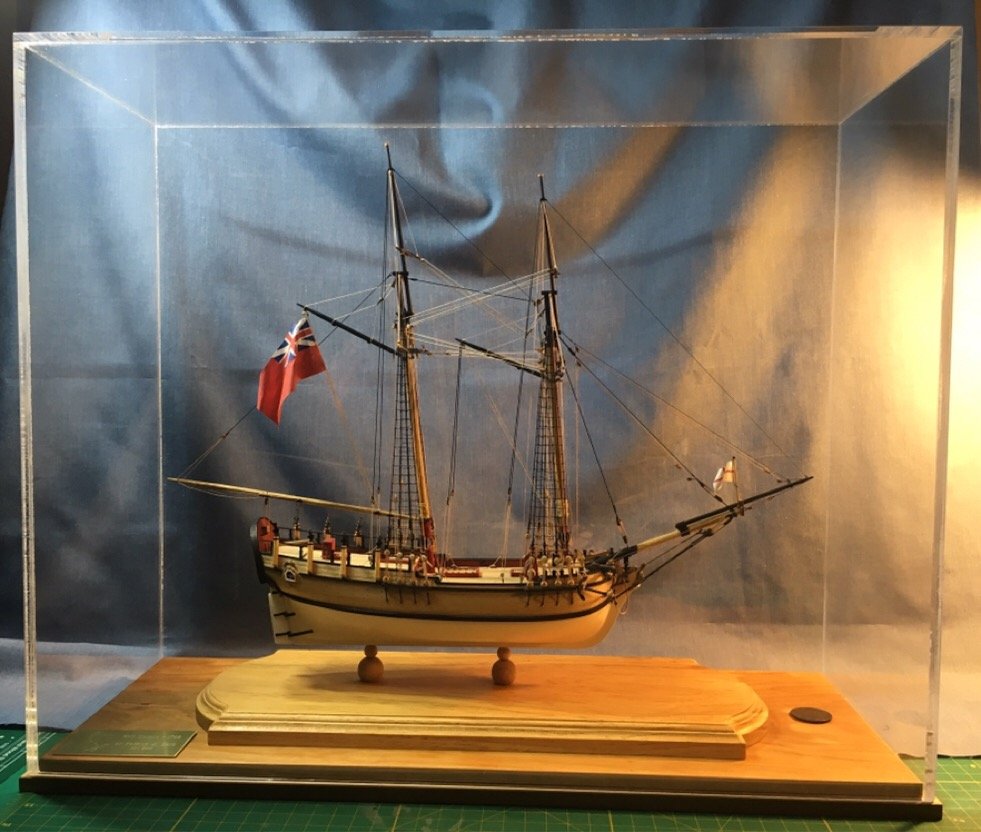
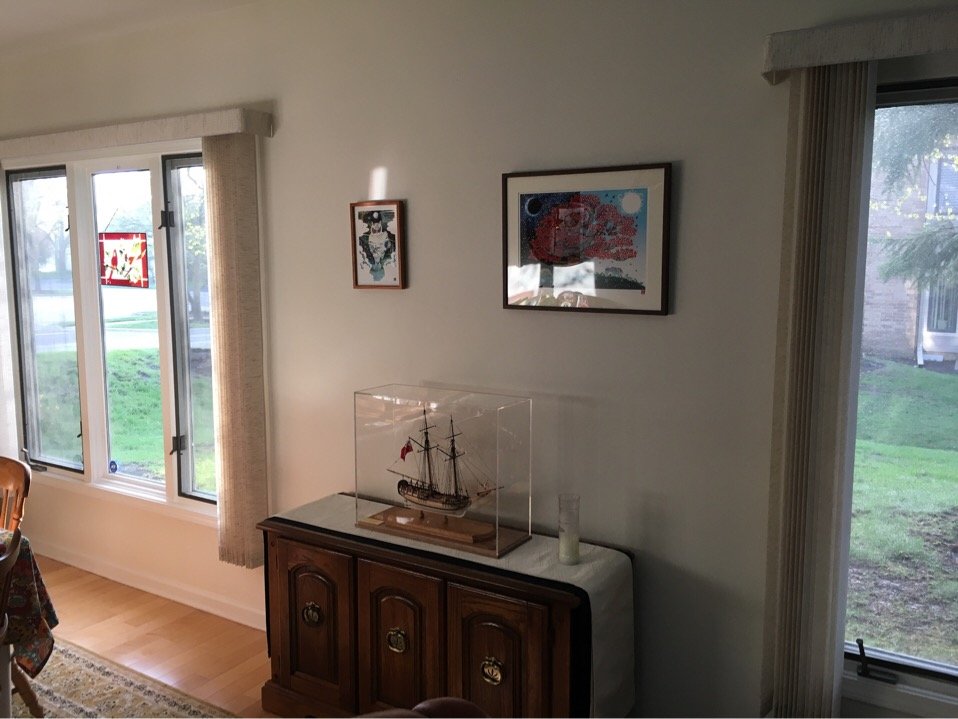
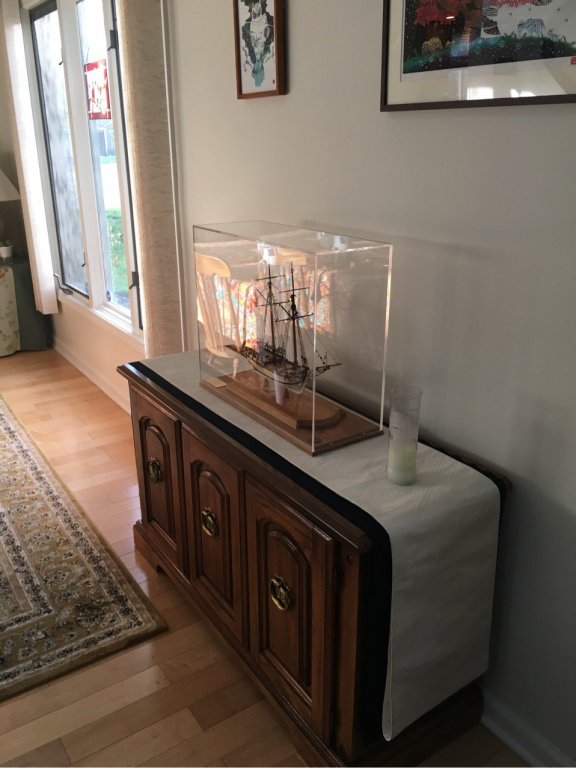
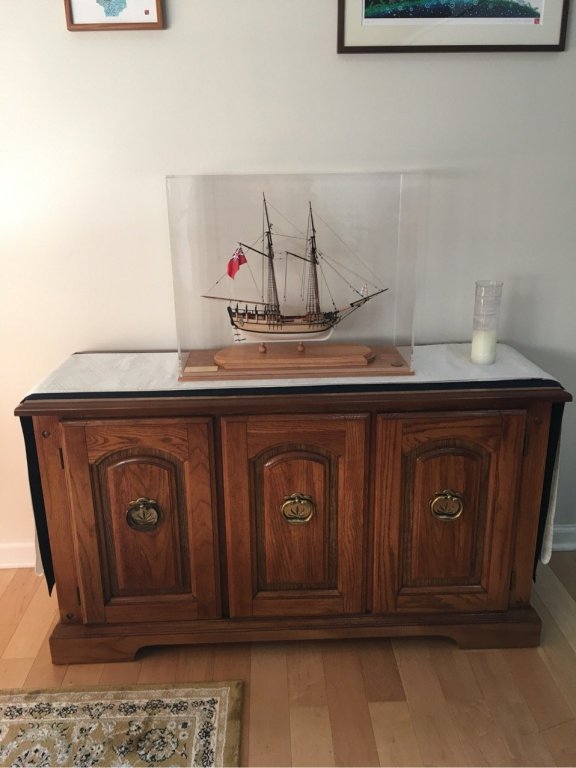
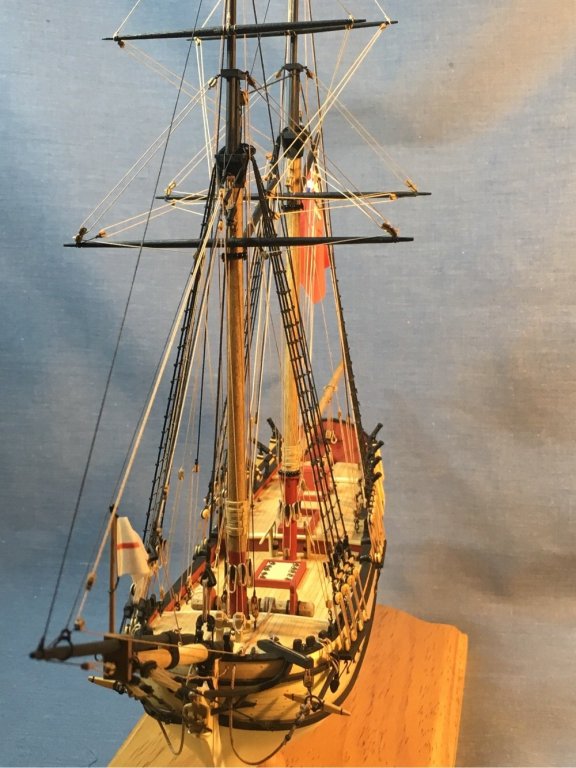
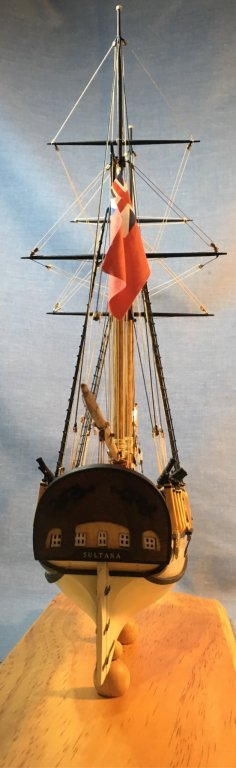
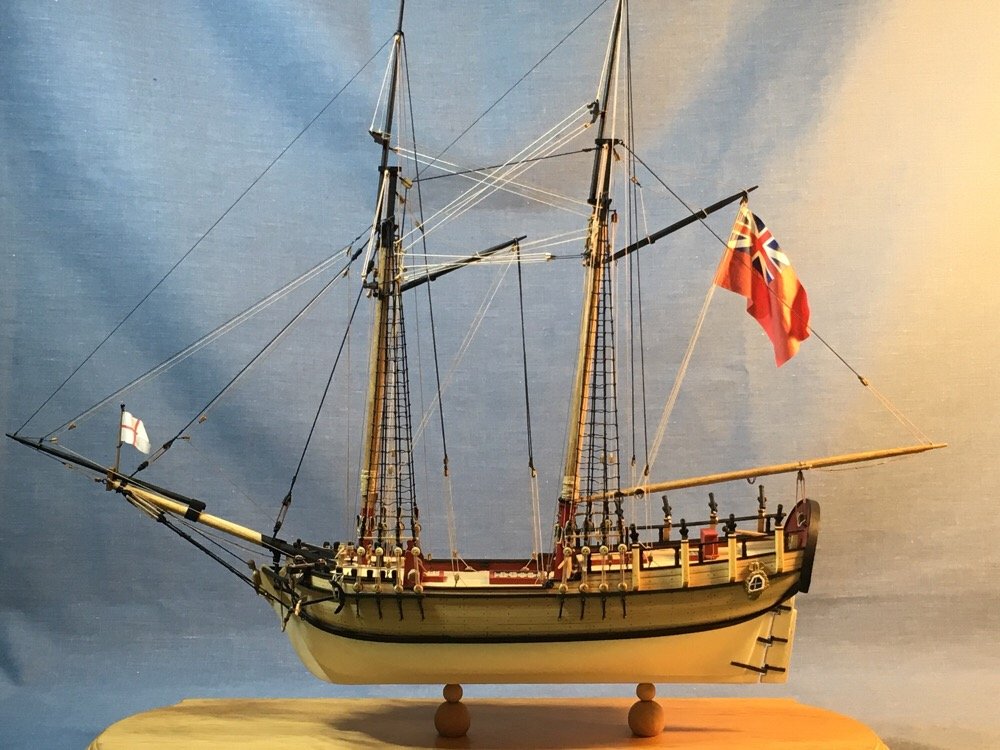
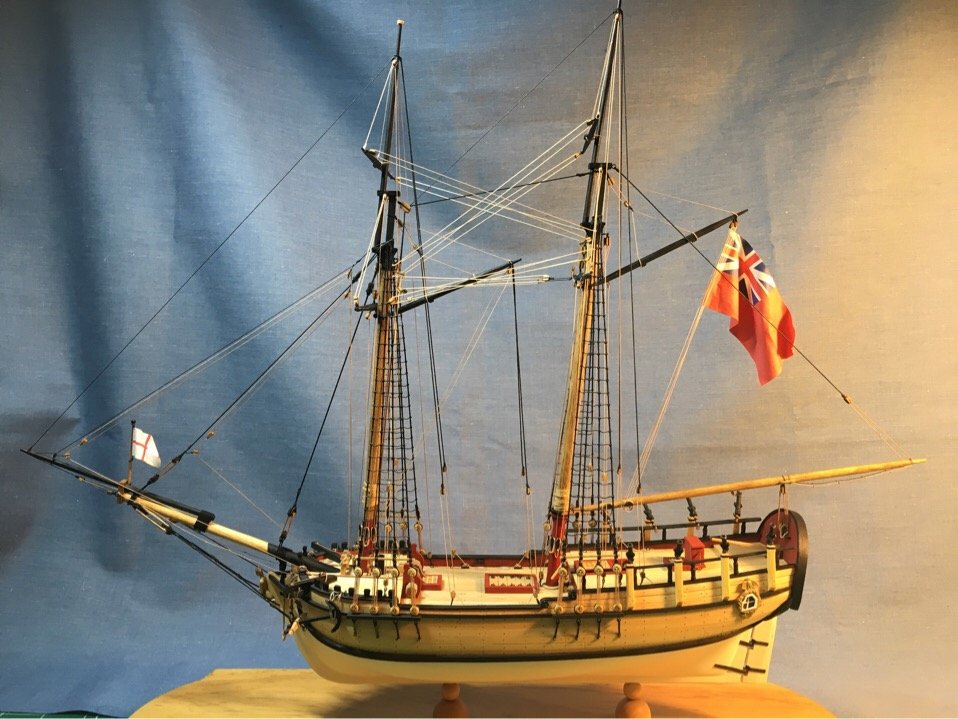
And here it is...She is in her new home on the Admiral’s server!! This is my final post for this already too long building blog! See you mates around the forum! Next build to start summer 2019! Enjoy!!!
- 449 replies
-
- 9
-
-
- sultana
- model shipways
- (and 2 more)
-
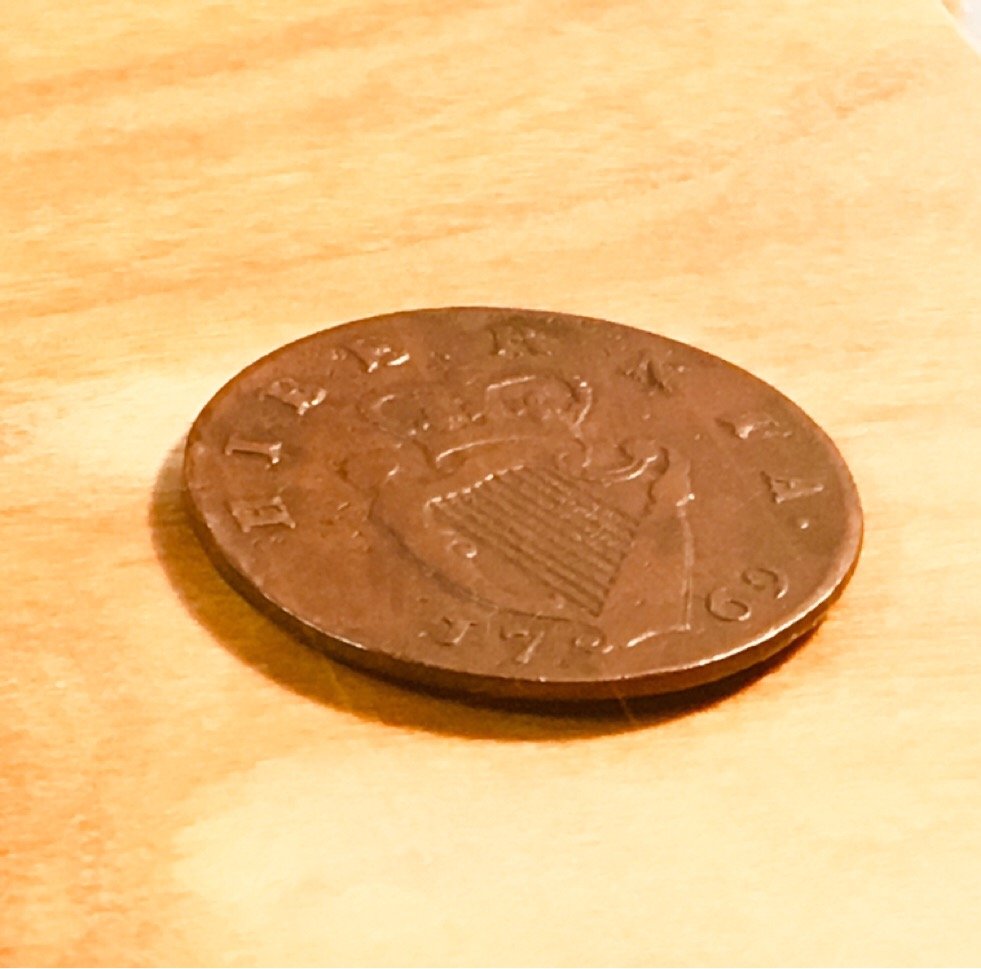
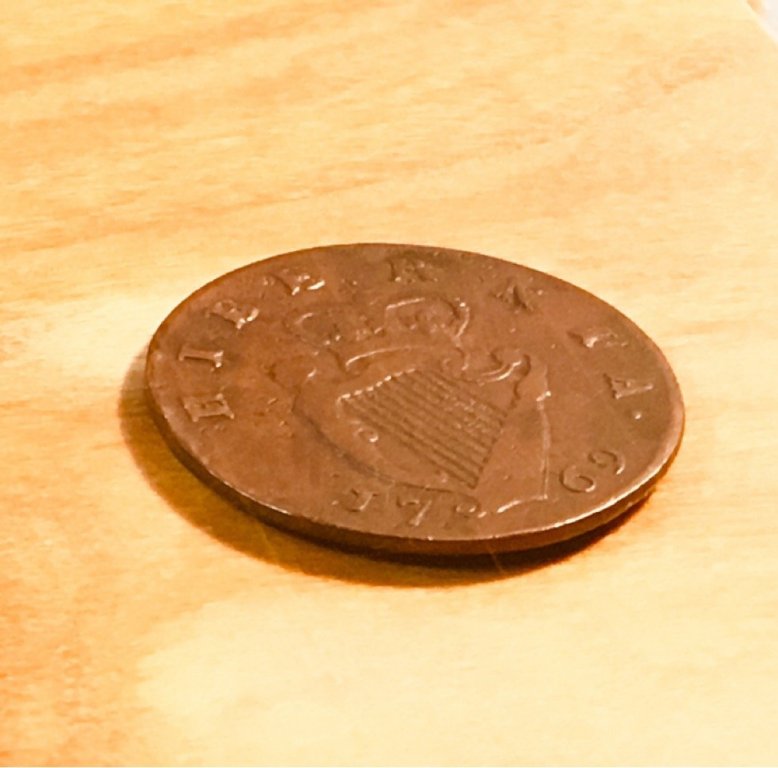
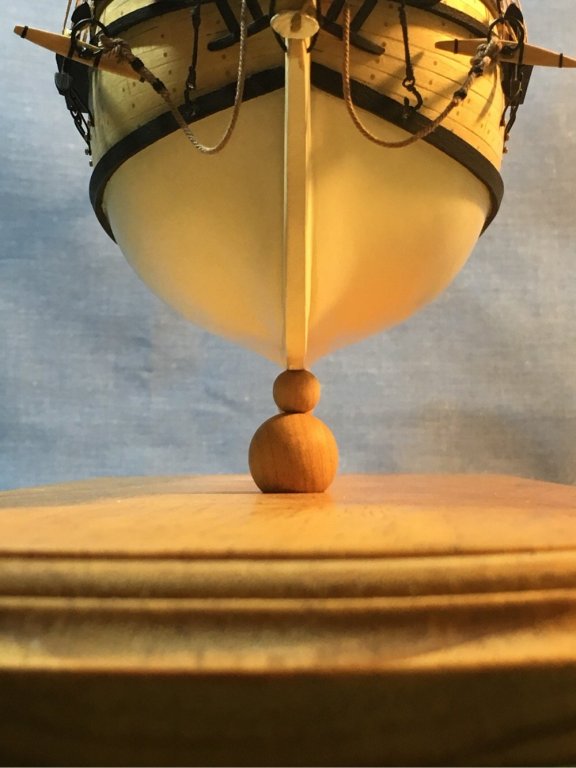
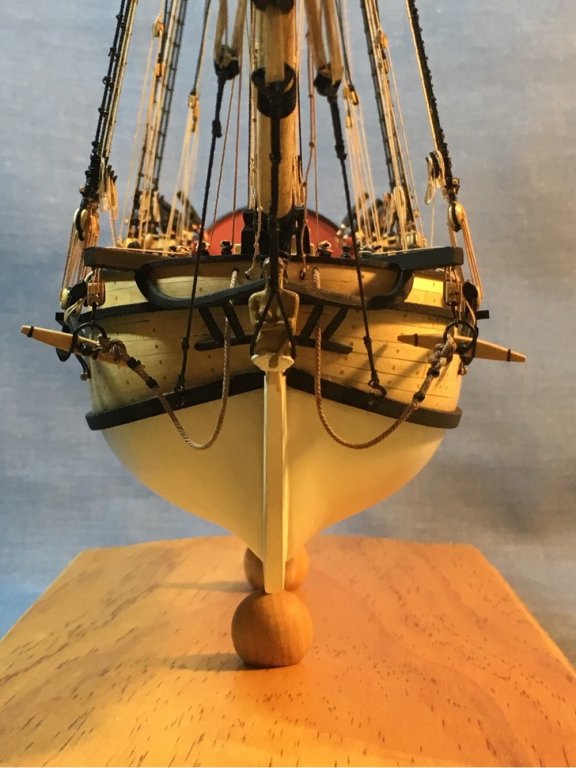
And finally under plexiglass. Looks too big but in fact I have exactly 2” off top, bottom and sides. I got a 1769 colonial half pence to put in front of the bow. This is actually a 250yr old coin which was in circulation in the colonies when Sultana was on duty being the King of England’s tax enforcer. (There are thousands of these coppers, and it’s a cheap coin...but the history can really make you dream.) Who knows...this half pence may even have been collected under the Sultana’s watch as part of port taxes paid for tea off loaded from an East India Trading Co. ship docked in Boston! Cool stuff! Moving on...to the final destination!!! The Admiral’s dining room! Last pic for this blog to come tomorrow!!!

- 449 replies
-
- 9
-
-
- sultana
- model shipways
- (and 2 more)
-
Dear @lmagna, @ccoyle, @GrandpaPhil, @thibaultron, @DocBlake, @jablackwell, @yvesvidal, @Estoy_Listo, @Bill Brown, @Sea Hoss, and @captgino, Sincere thanks for your very kind kudos! In truth, I was equally motivated by the occasional 'thumbs up' and supportive comments from you all on this forum as I was by my own shipmates at Midwest Model Shipwrights! Looking back, I would still choose the Sultana as my first wood model ship - if simply for the opportunities to think outside of the box to solve little problems, as well as develop some useful skill sets. True, the Sultana was not a fully planked hull...but my next build will be. Also, since rigging will no longer be an unknown terror , I can be doubly focused on approaching the planking and woodwork. My next build will be the Woody Joe model Charles Royal Yacht. (Should be fun...the directions are in Japanese!) That project will start in June or July, so I can focus on work, home, and trying my hand at rope making! (Yes...I bought a Syren Rope Rocket...I'll be posting my efforts in another section of the forums when I have something to post!) Thanks again, All!!!
- 449 replies
-
- 3
-
-
- sultana
- model shipways
- (and 2 more)
-
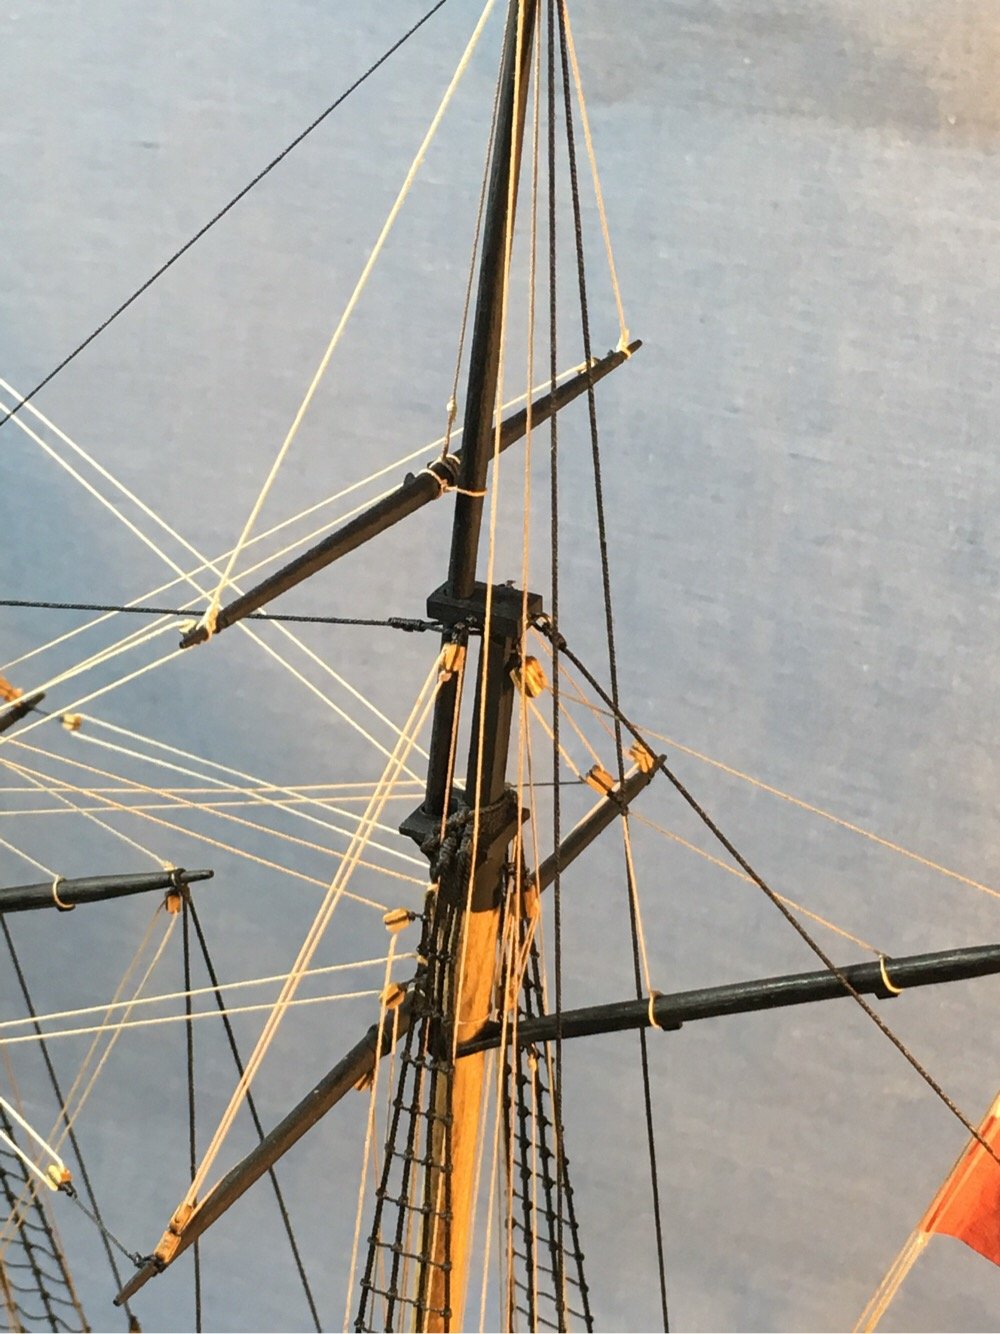
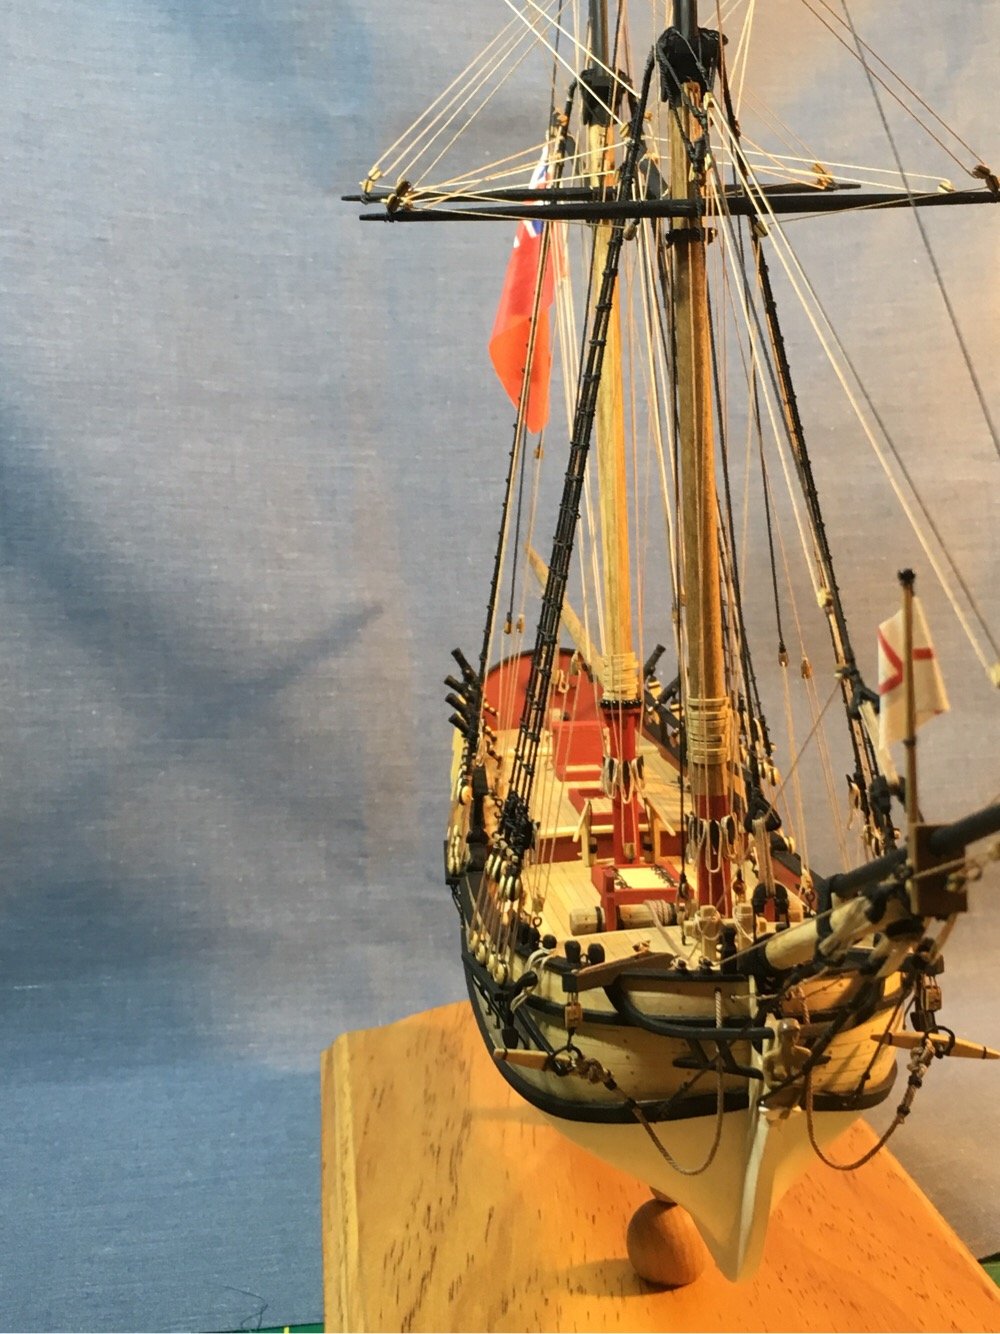
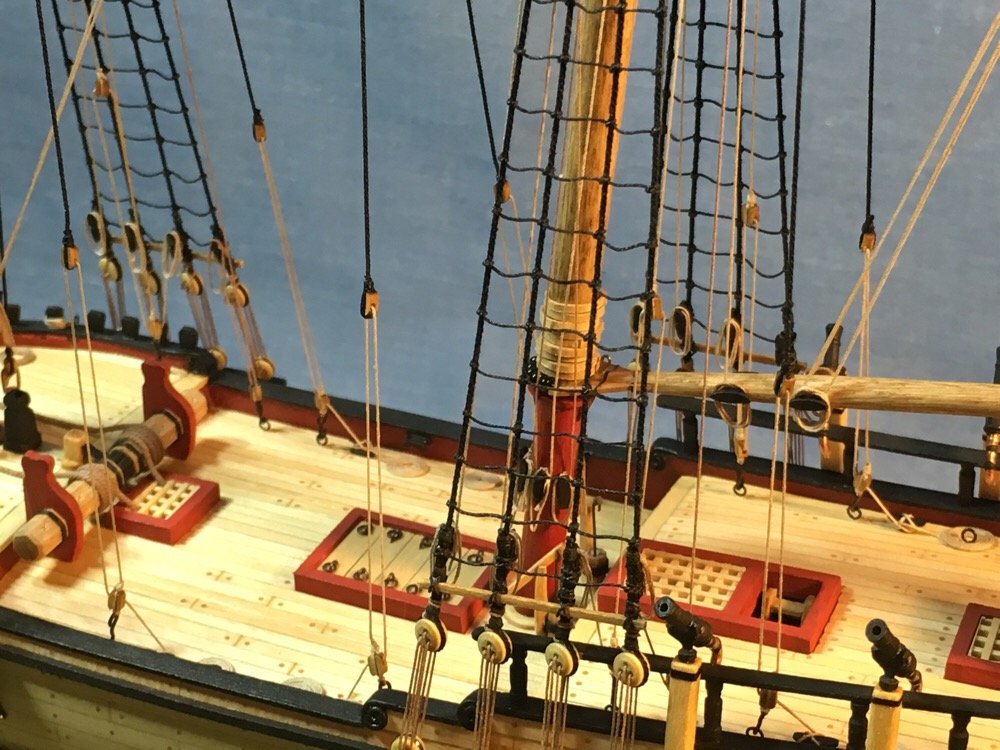
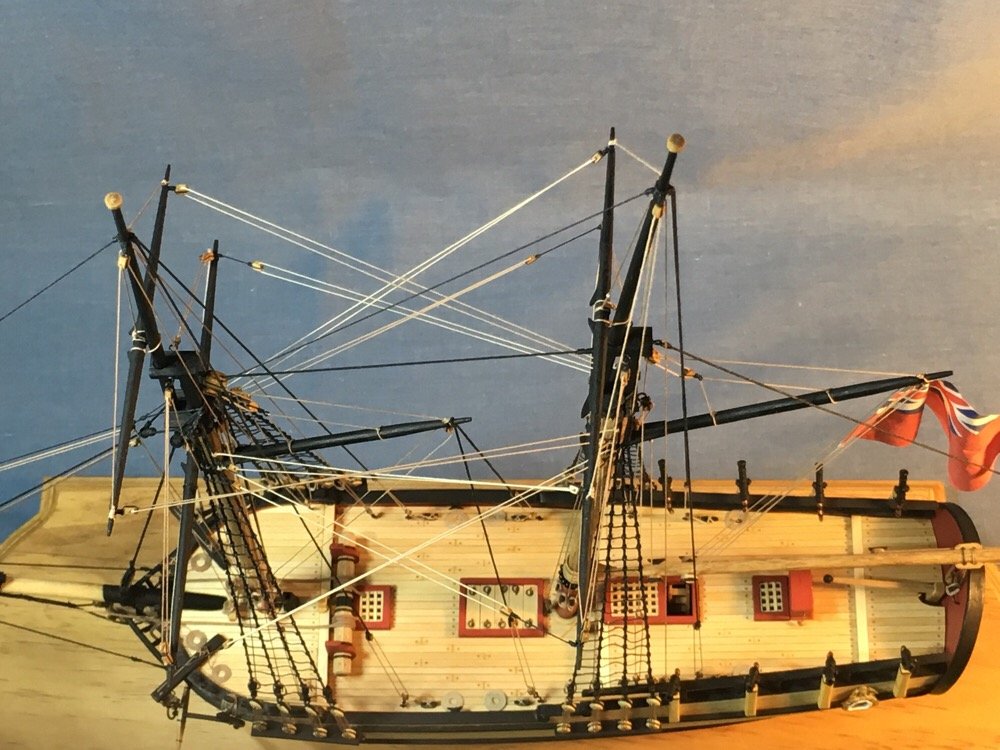
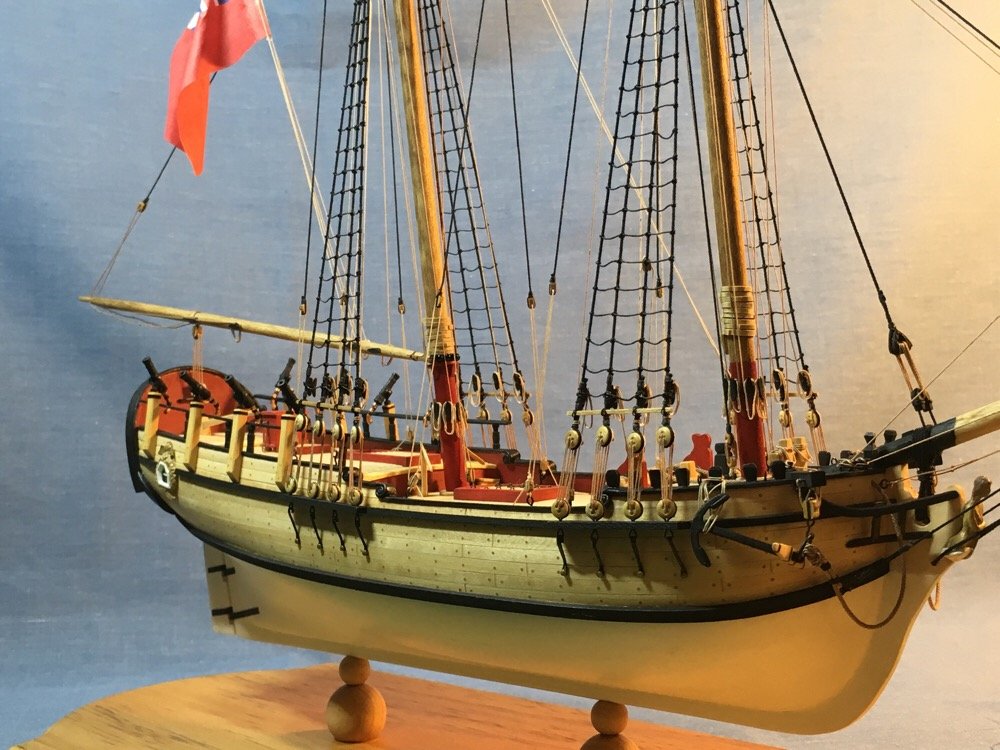
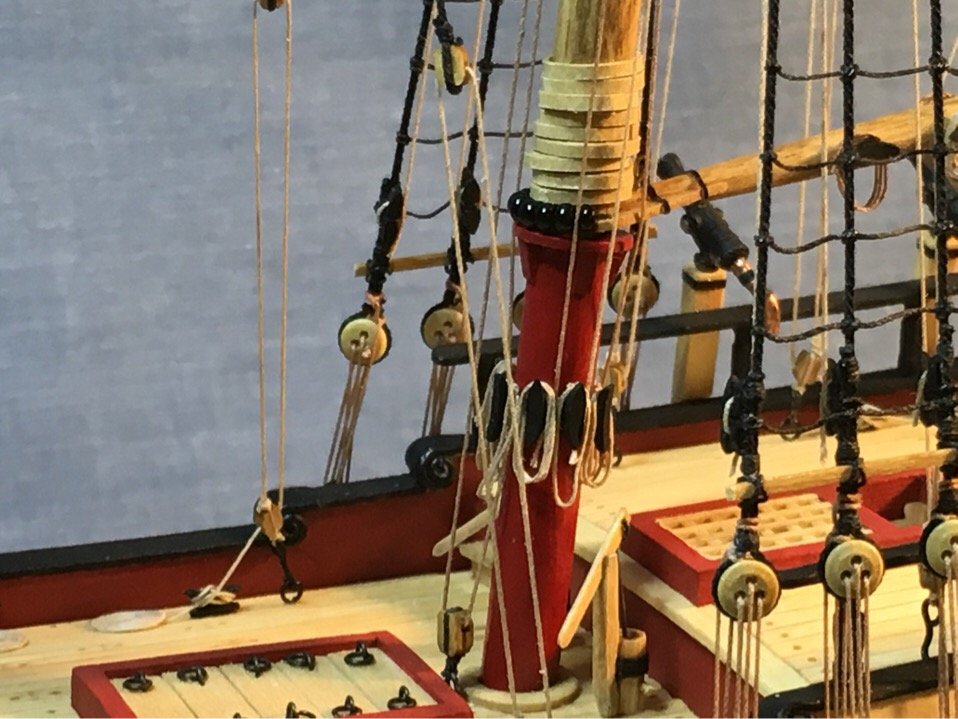
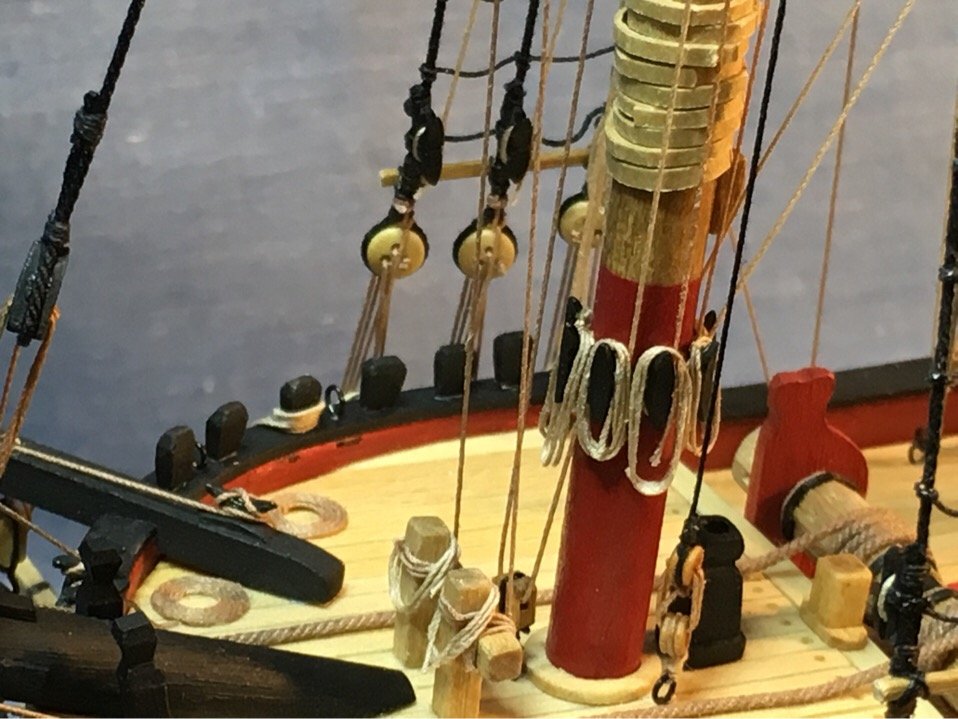
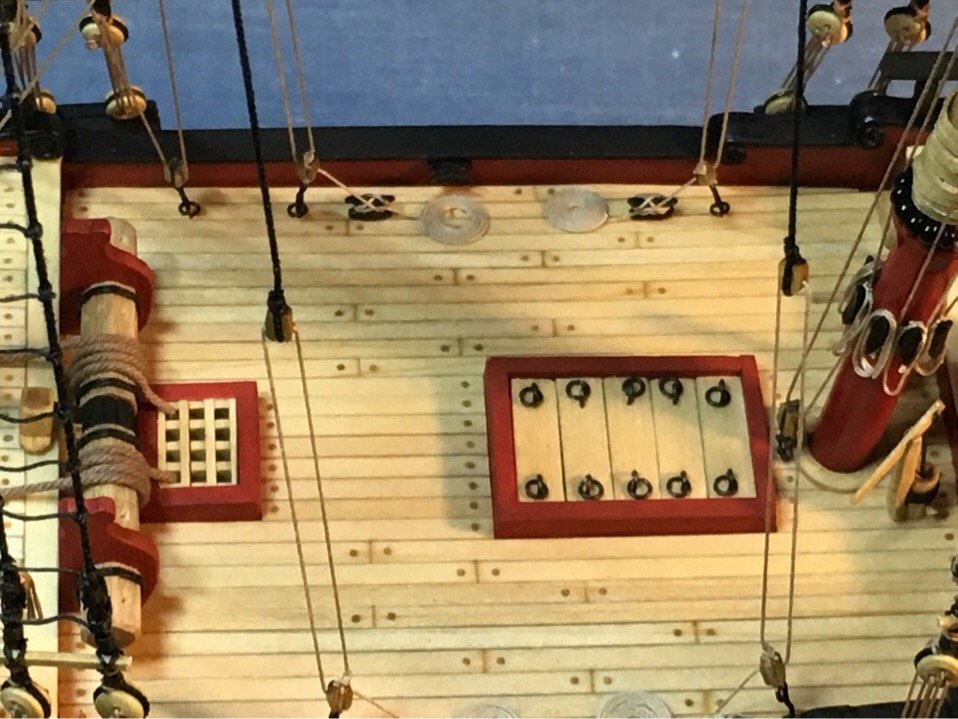
Well folks. The rope coils on the mast cleats were my last bug bear. They were a real pain, but I believe I started to recognize the issues...namely making them too narrow makes them twice as hard to get on. But that was the last thing. No ships boat...would only detract what I think is a respectable first wooden ship build. That being said...she’s finished! I owe special thanks to my Admiral(!), my ship model club, and to Chuck Passaro for a great crutch in writing the Sultana practicum. Even with that, it was still challenging and I learned a lot!!! So...here are the Launch Photos. I post a few more when I put her under glass in the next few days. I'm pretty proud of my first model ship...definitely not a bad result


- 449 replies
-
- 14
-
-
- sultana
- model shipways
- (and 2 more)
-
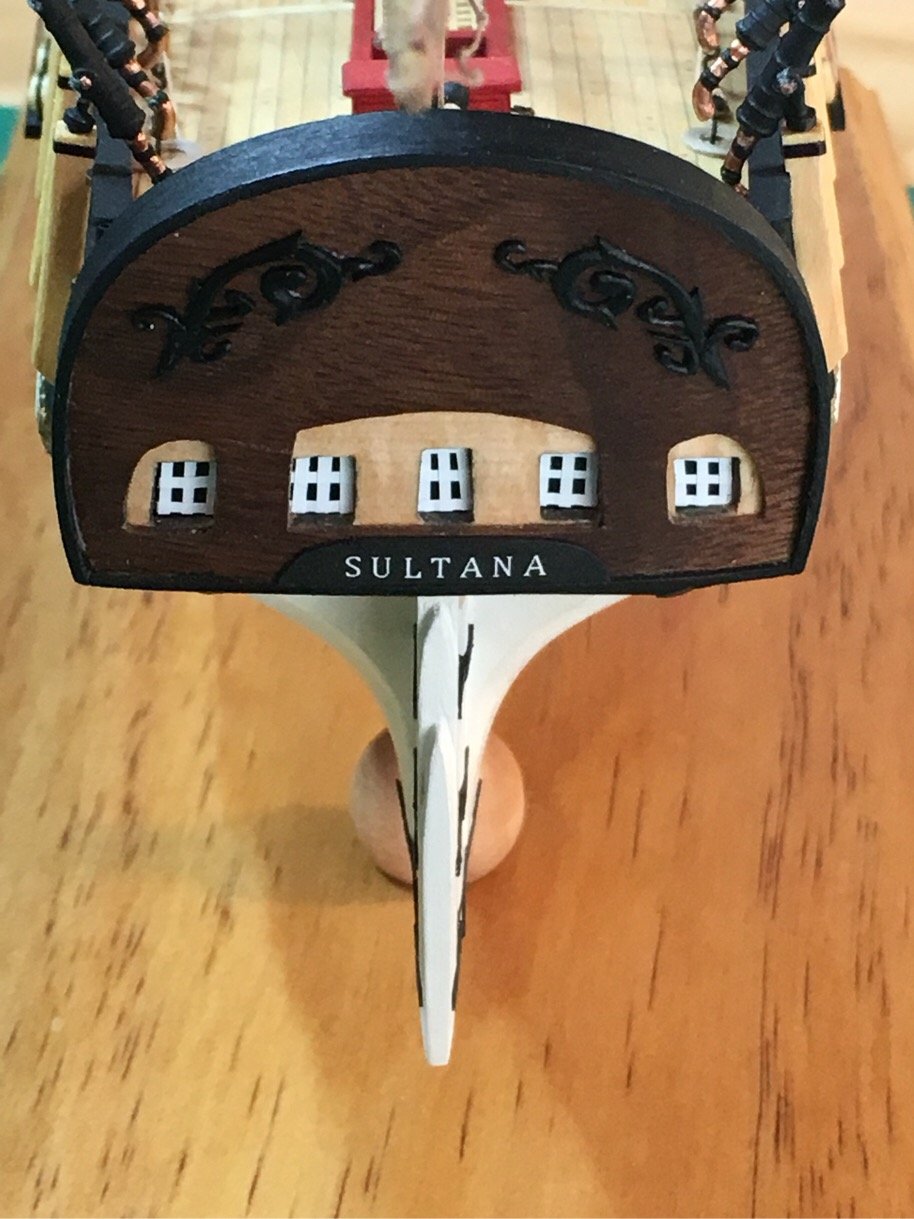
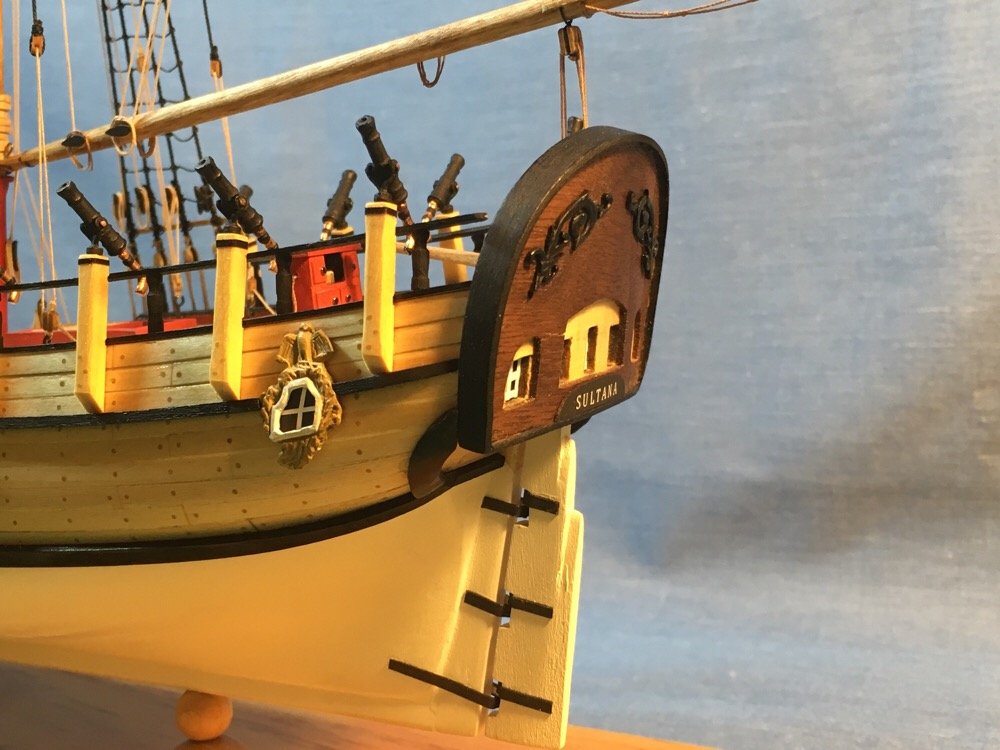
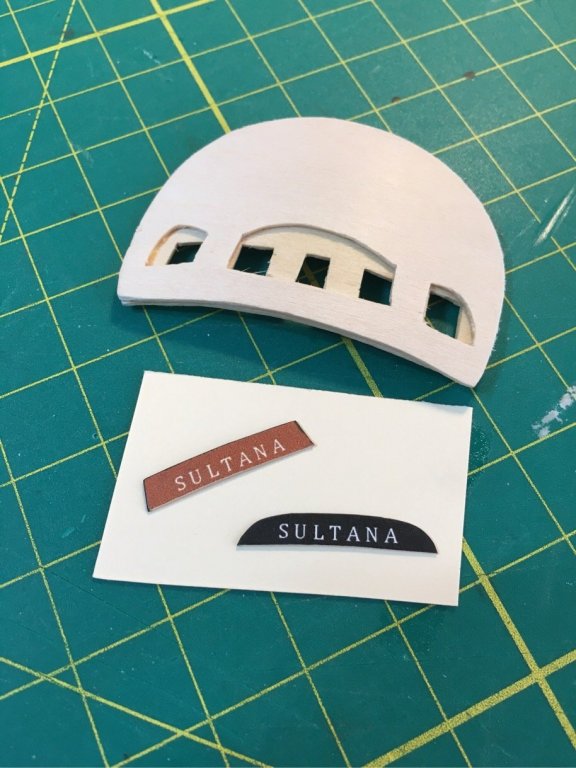
The windows on the transom are one area I wish I could redo...but that ship sailed...pardon the pun. More to follow!
- 449 replies
-
- 2
-
-
- sultana
- model shipways
- (and 2 more)
-
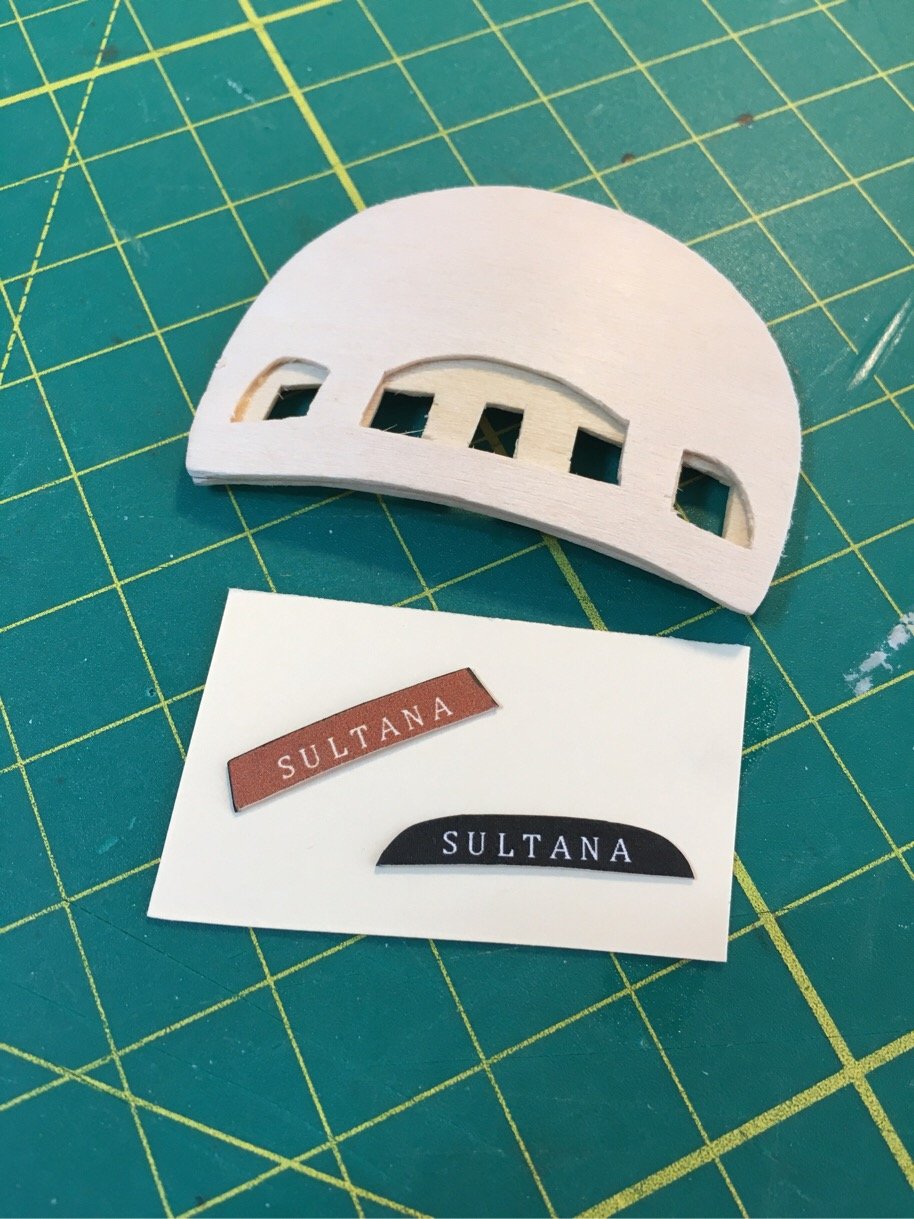
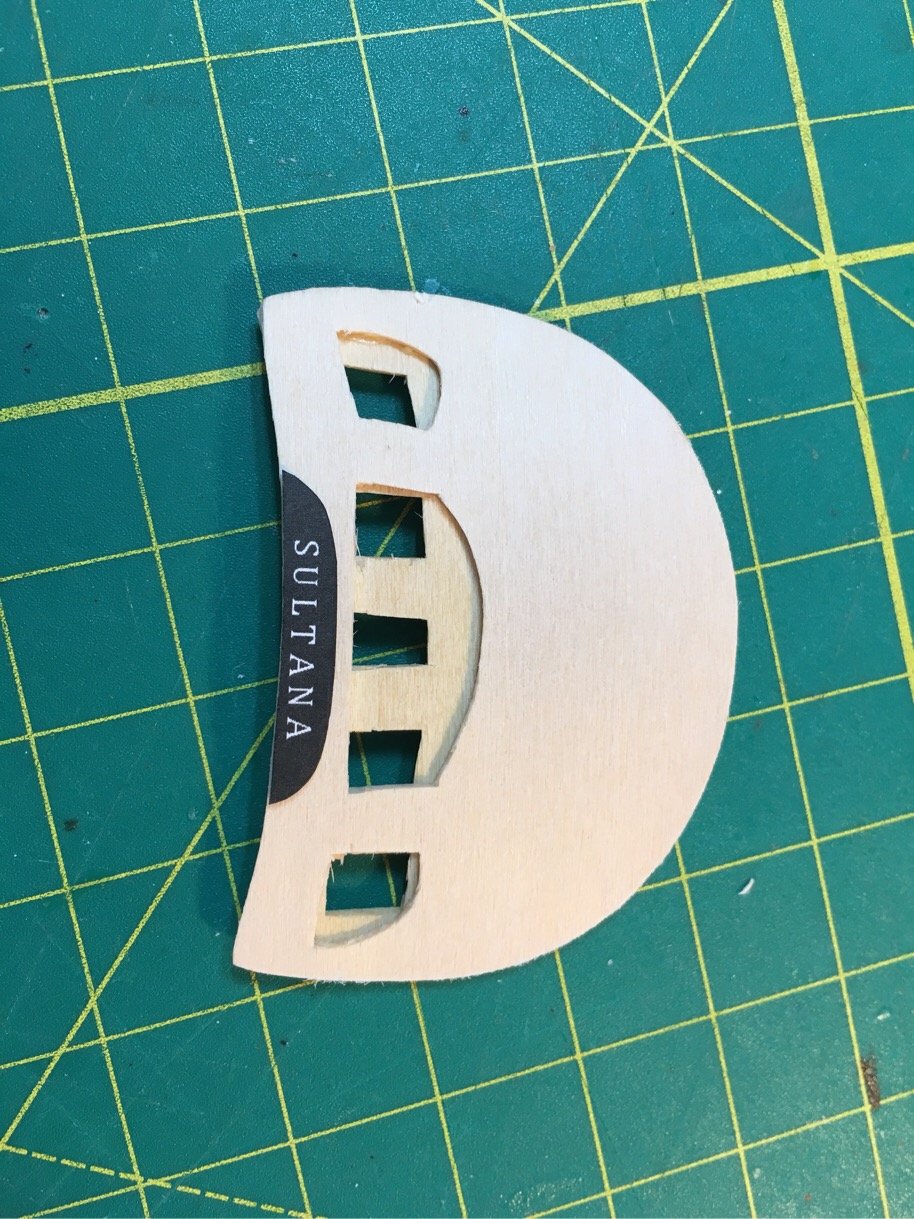
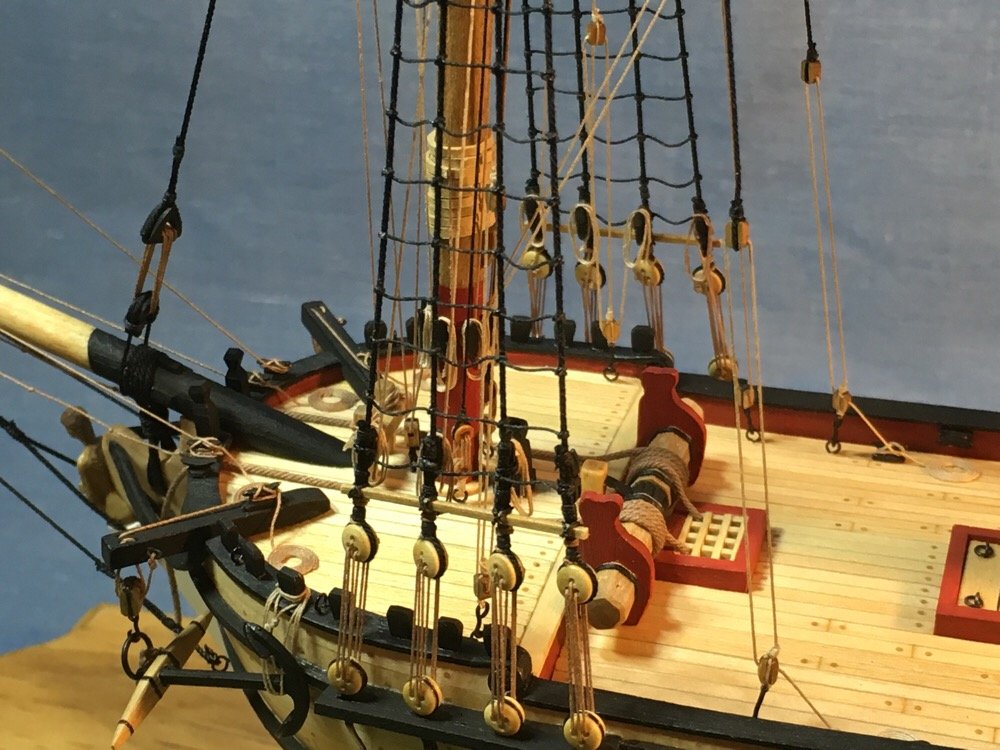
Decided to take a break from the rope coil brainstorming for the shroud cleats and attack the name plate. Ok. I know there are a lot of ways to make a nameplate, but I’m thinking cheap, easy, quick and simple. For the first timer like me, I decided to go with the direct approach. I worked off the ship using using my old transom mockups as a fitting template. I used MS Word to make a couple background color options (brown and black) with the SULTANA written in white. This is easy in Word...just insert a figure, choose a square, change the fill background to the color you want, type in the content in the square, select your font and font size. Tadaaaa! I pasted the cutout names to a yellow Manila folder. Then I cut out the shape of the plate...I had made a template name plate, and simply traced the shape...then cut it out. The Manila folder backing makes the tiny name plate easier to handle, and matches the width of the ‘lip’ I created when I wrapped the transom in wood used in the border rail. Then I tailored the shape and width I wanted and test fit on the mock-up. The yellow edge is easily masked by running a black Sharpie marker along the edge. The I simply put some carpenters glue on the back of the plate (the Manila folder backing is stiff but pliable, and really makes gluing much easier) and applied to the back of the transom. It doesn’t have to be rocket science...it just needs to look realistic. Moving on to shroud cleat coils!!!


- 449 replies
-
- 6
-
-
- sultana
- model shipways
- (and 2 more)
-
Hull shaping tools for me...sandpaper and wood blocks of varying shapes. Hobby Lobby or Lowe’s will have large 1” dowels. Cut them an wrap/staple sandpaper around the blocks. This will give you square as well as rounded sides to shape and contour the lines. Do do a little at a time! This was the hardest part if you ask me.
- 36 replies
-
- 1
-
-
- sultana
- model shipways
- (and 1 more)
-
Yup...I over sanded on the camber in mine....wood filler for the win.
- 36 replies
-
- 1
-
-
- sultana
- model shipways
- (and 1 more)
-
Hi Andrea This is where kits with frames (plank on bulkhead) make things easier. Solid hull faring is a bit of a pain. Drawing the centerline is part art and part science for a solid hull if you ask me. I found myself using the templates as I sanded, but you must have the centerline drawn before you start sanding. The templates you use for faring the hull need to be calibrated against the centerline. But...if you oversand, wood is forgiving and you can use wood filler....which I used copiously! I was the same as you...terrified of making a mistake. Read my blog...paralysis by analysis was my main flaw. So just go for it....make mistakes. It’s half The Fun!
- 36 replies
-
- 1
-
-
- sultana
- model shipways
- (and 1 more)
-
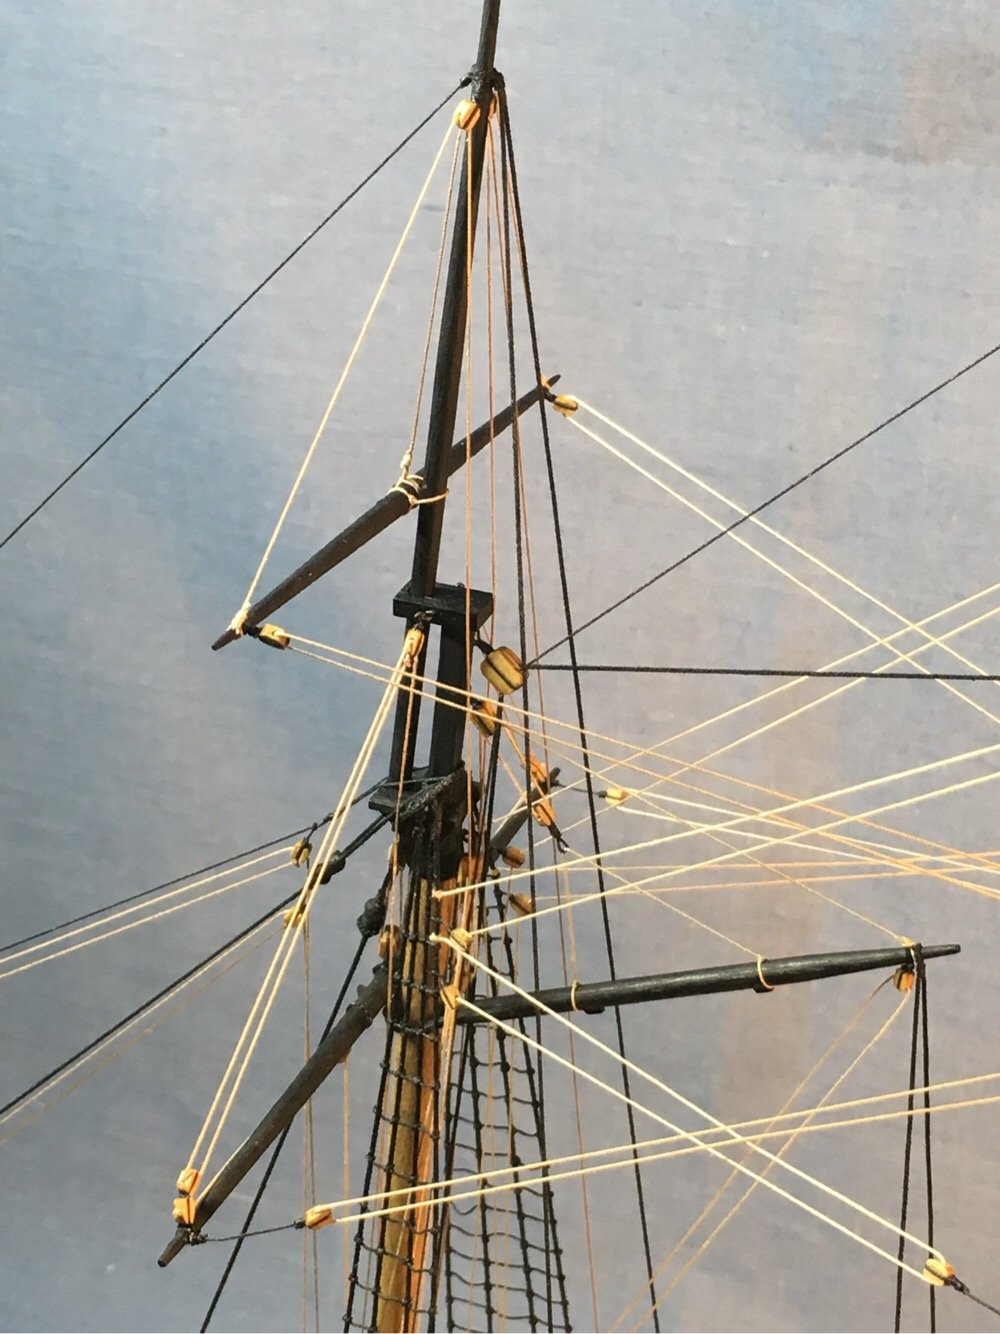
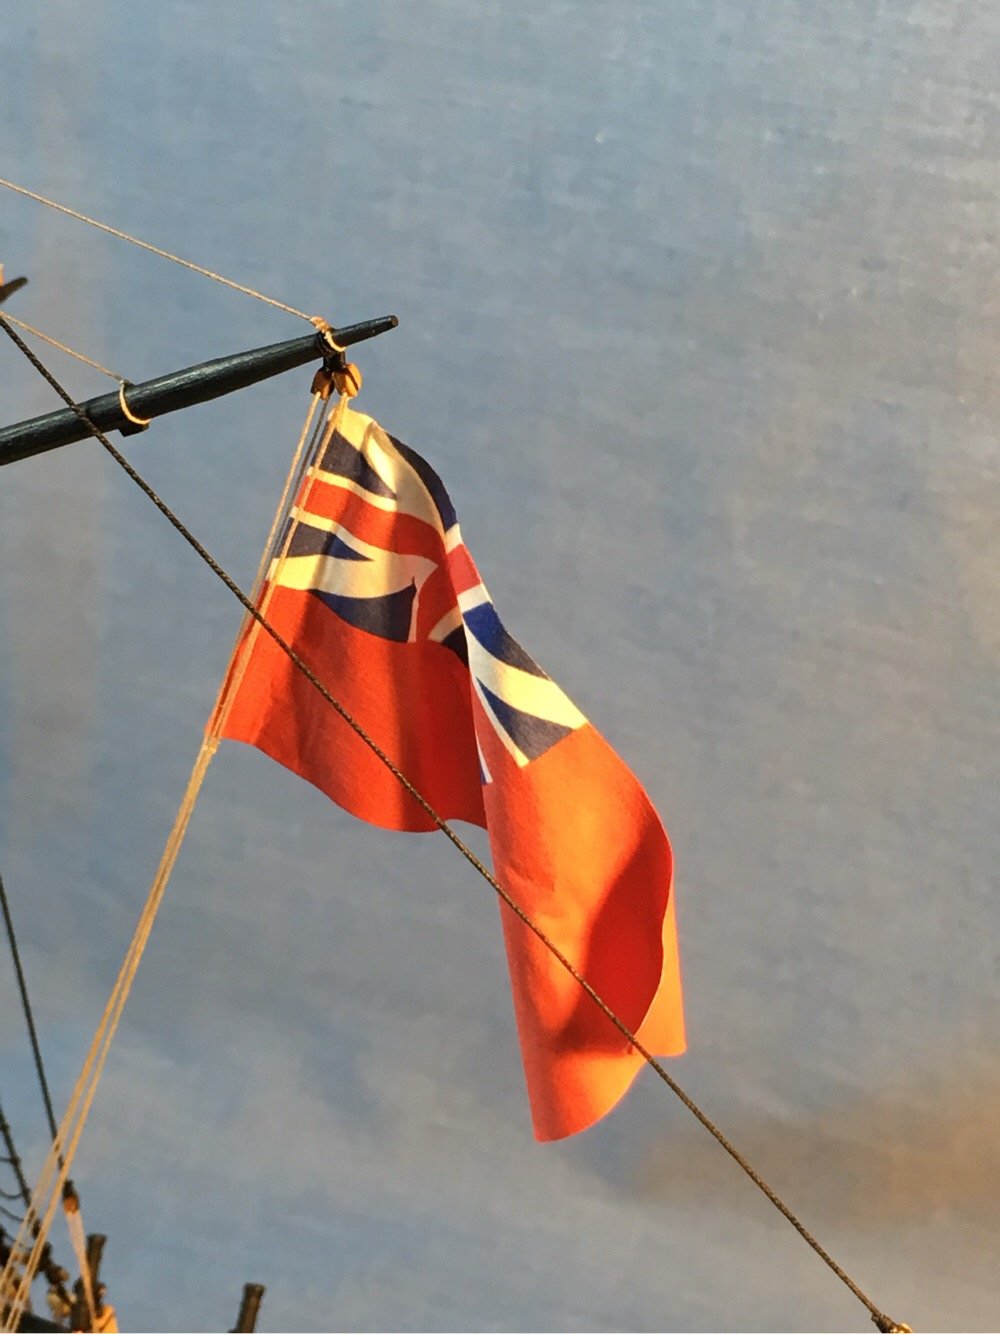
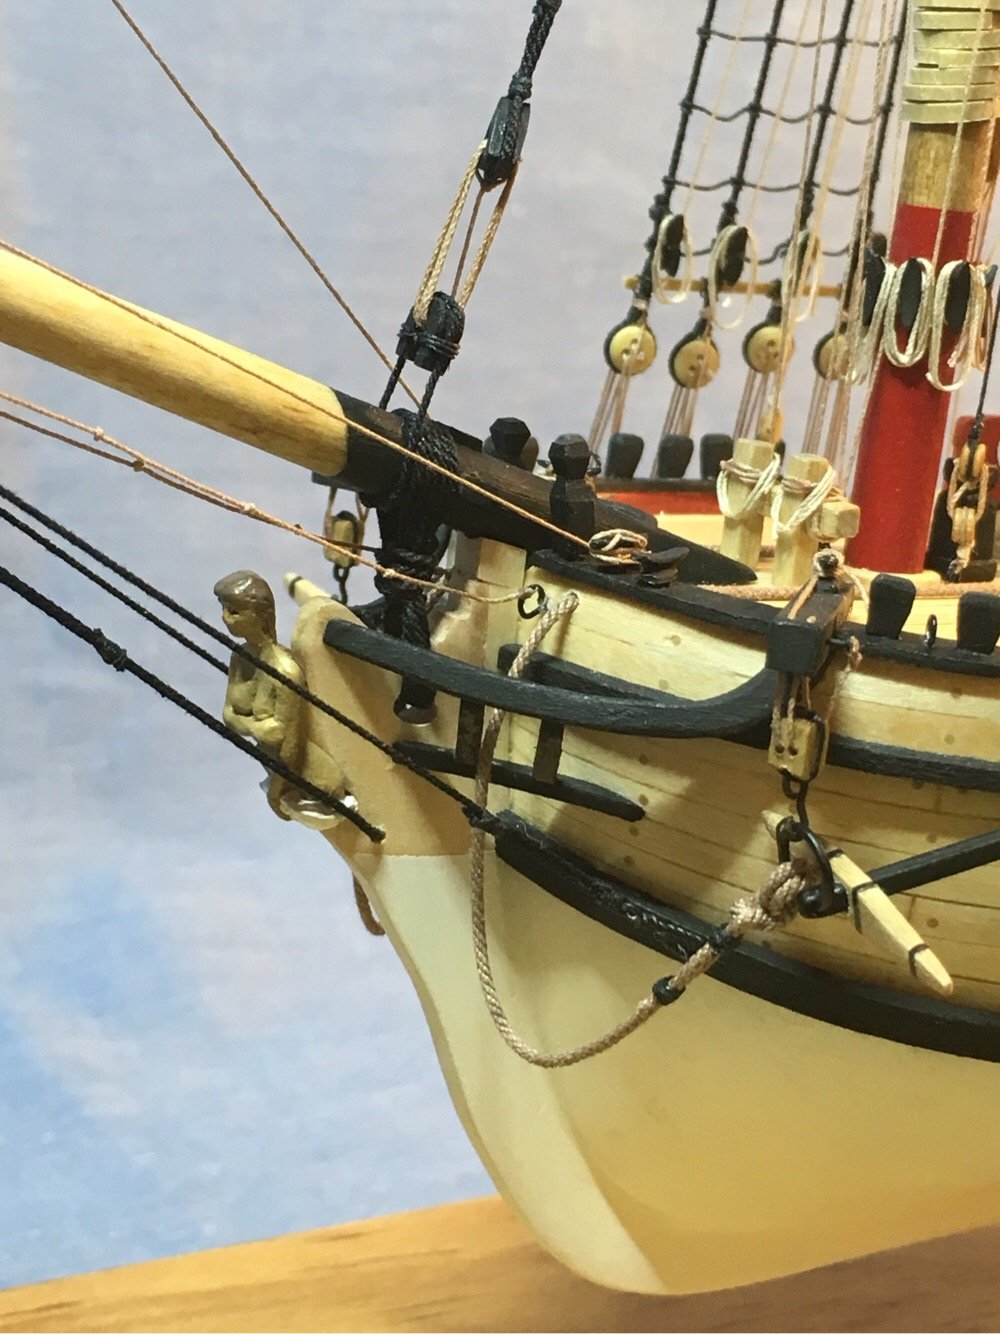
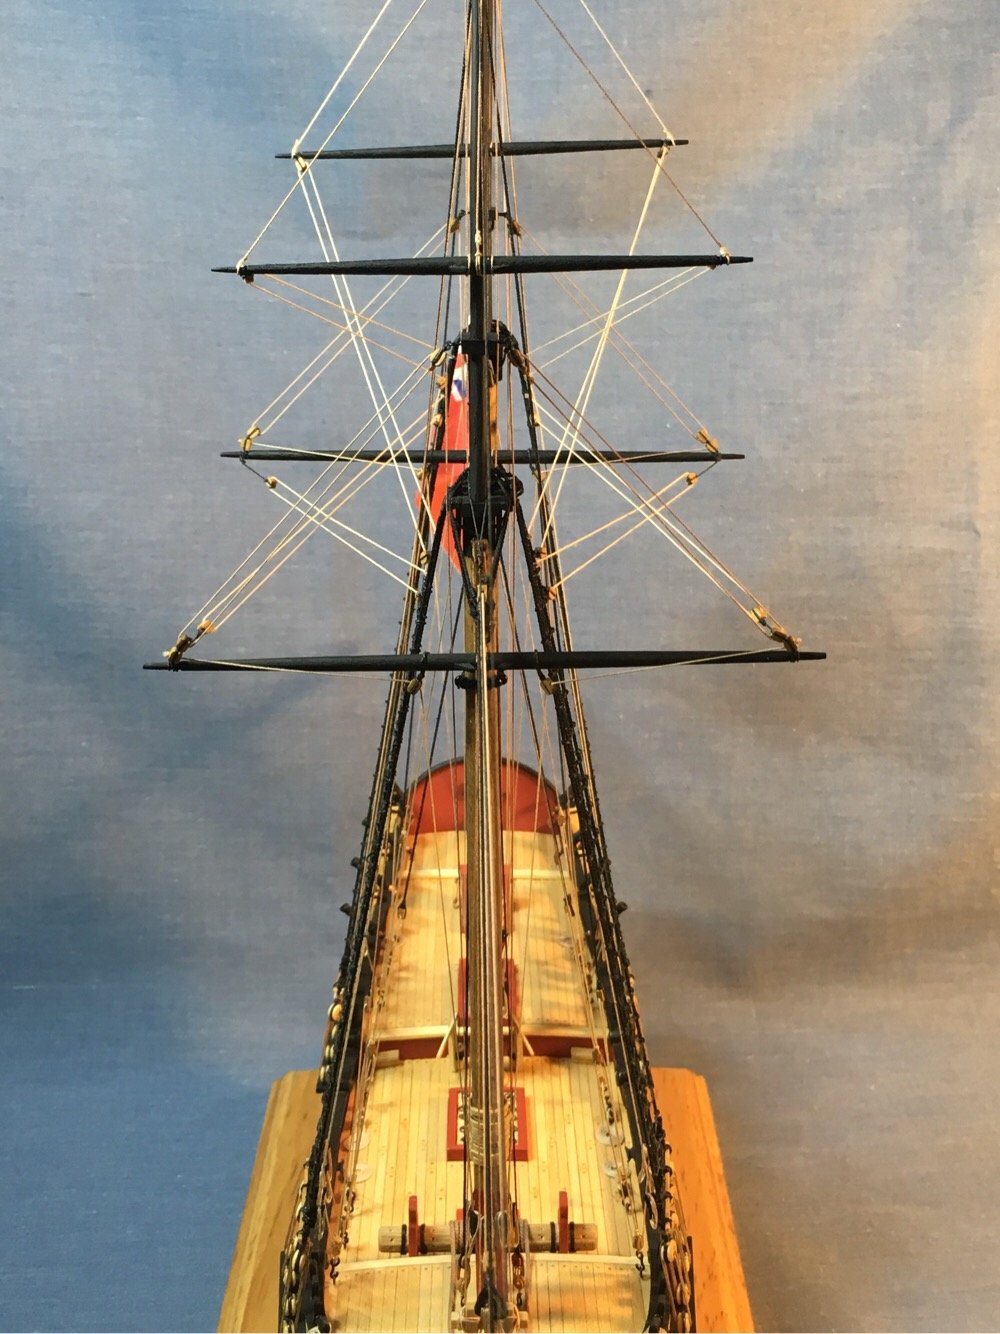
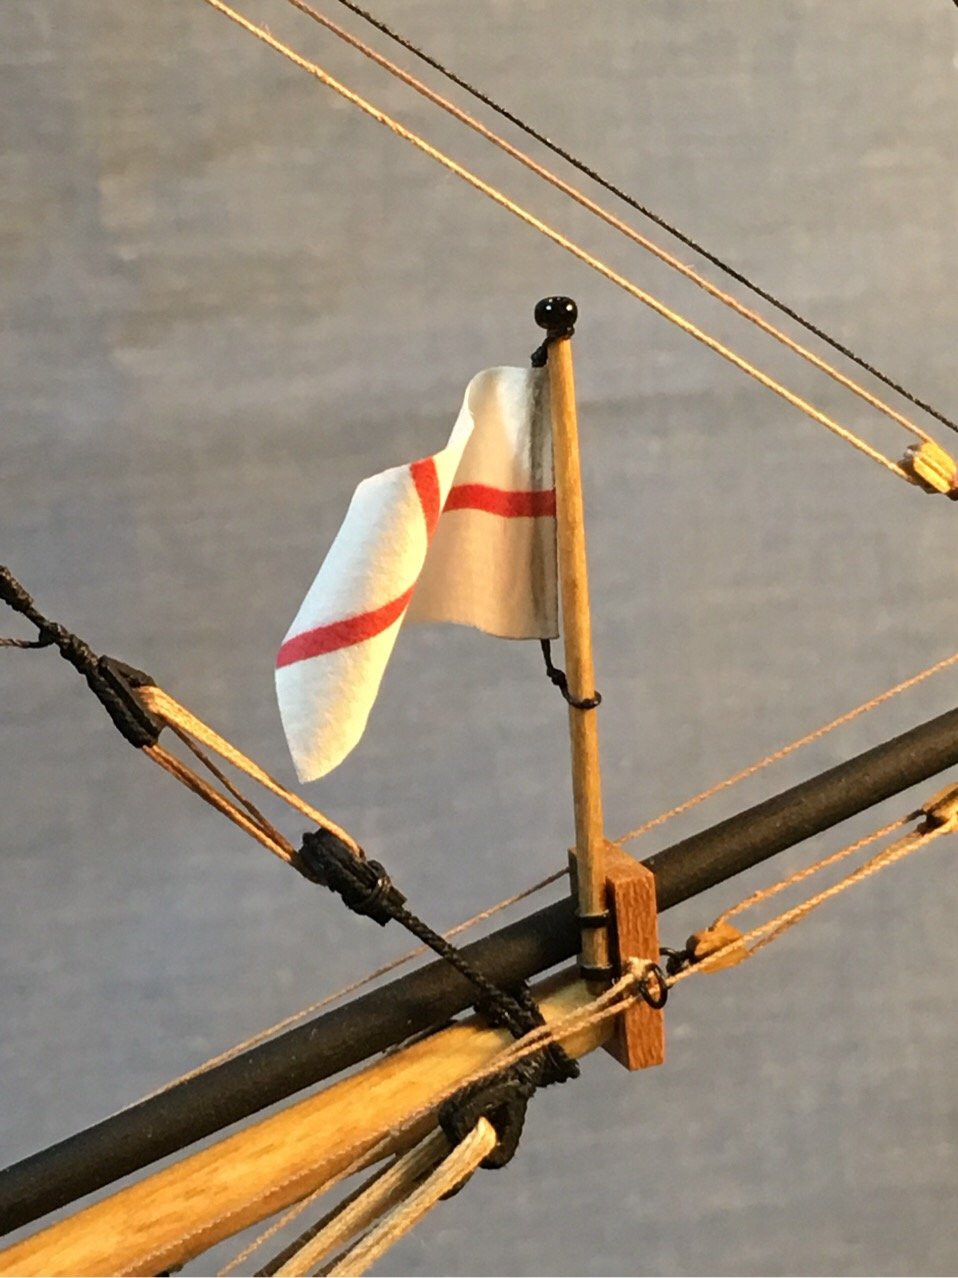
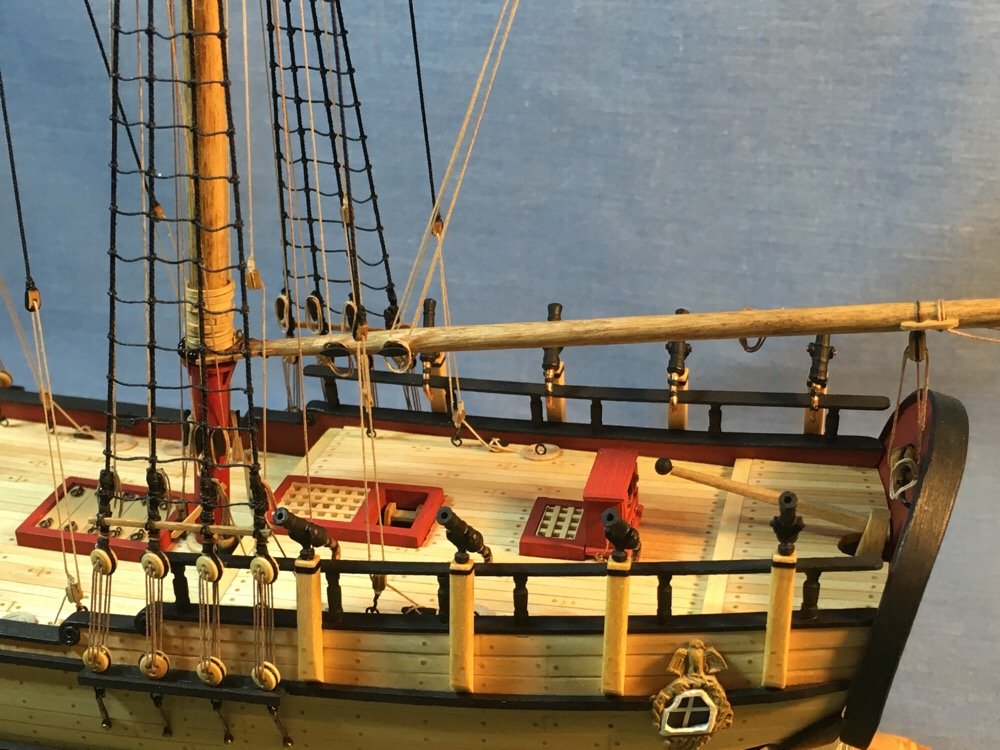
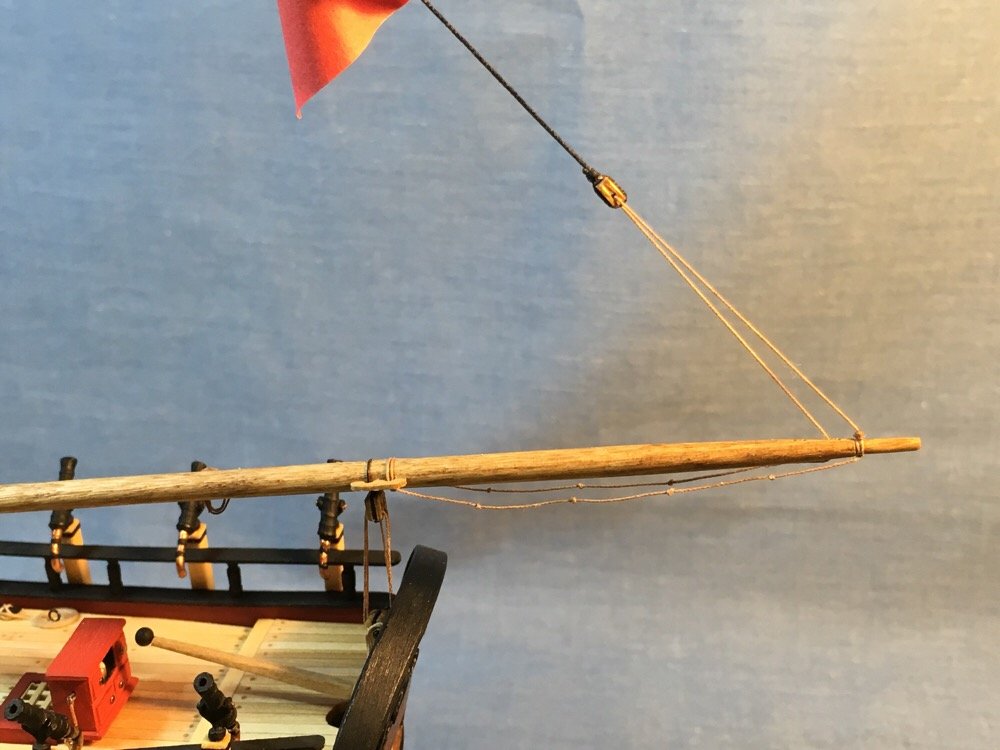
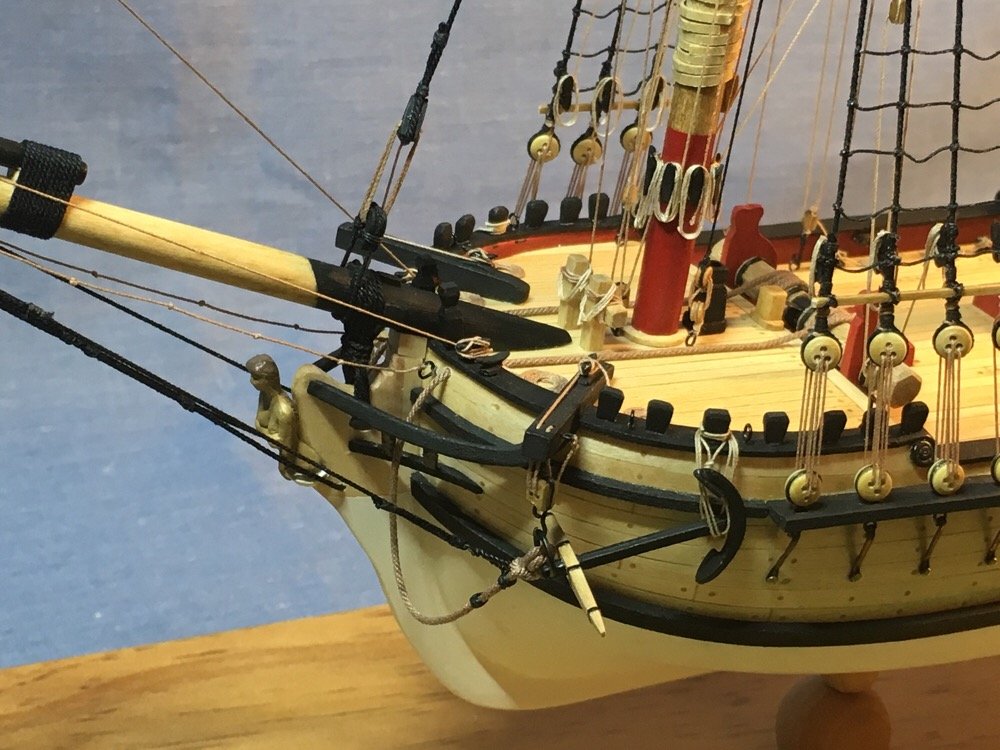
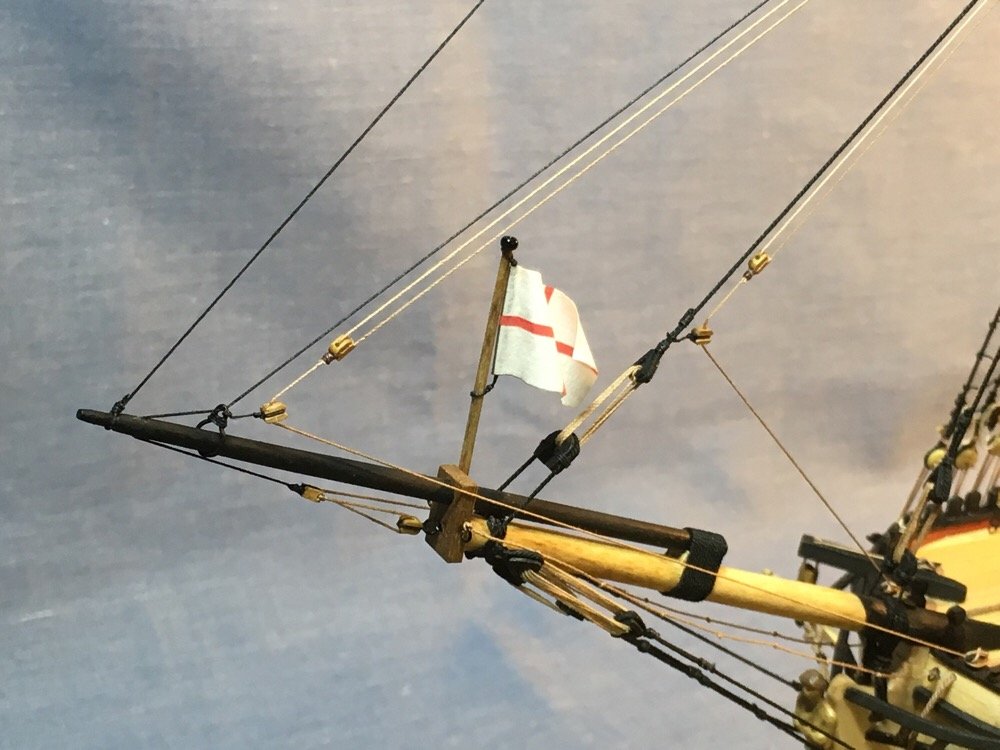
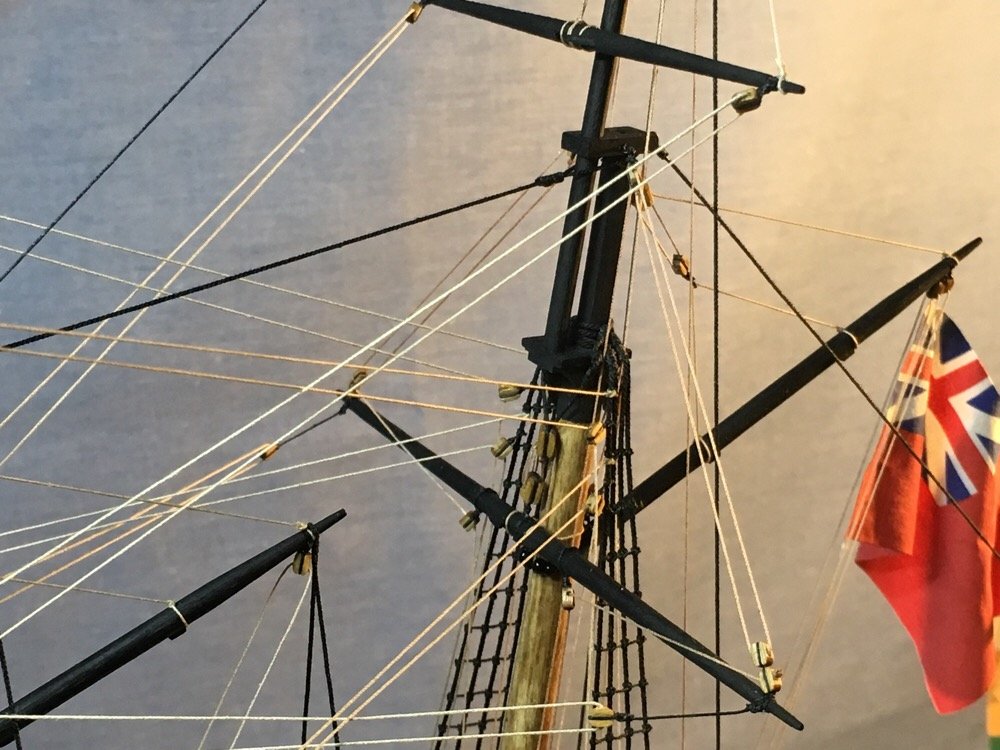
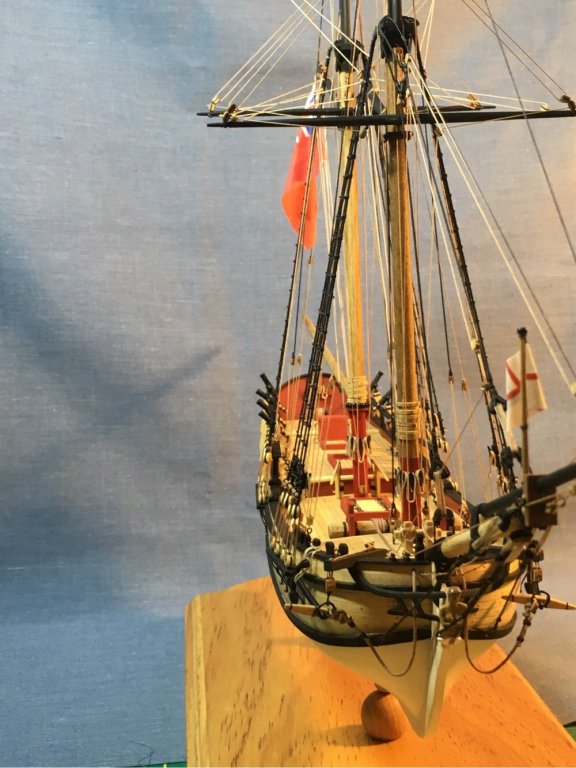
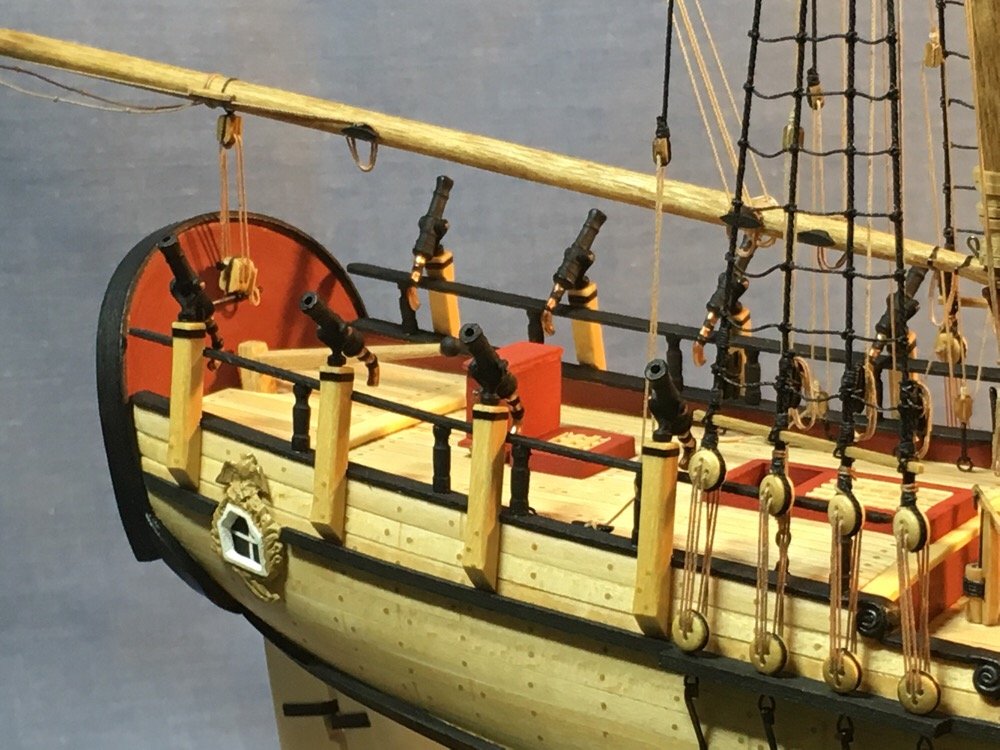
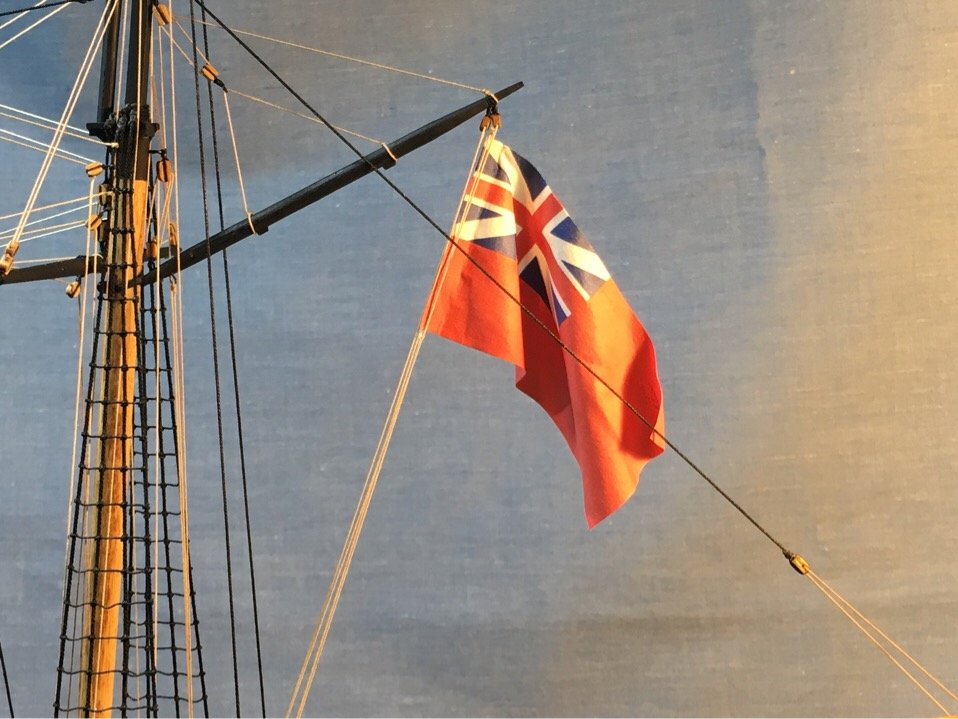
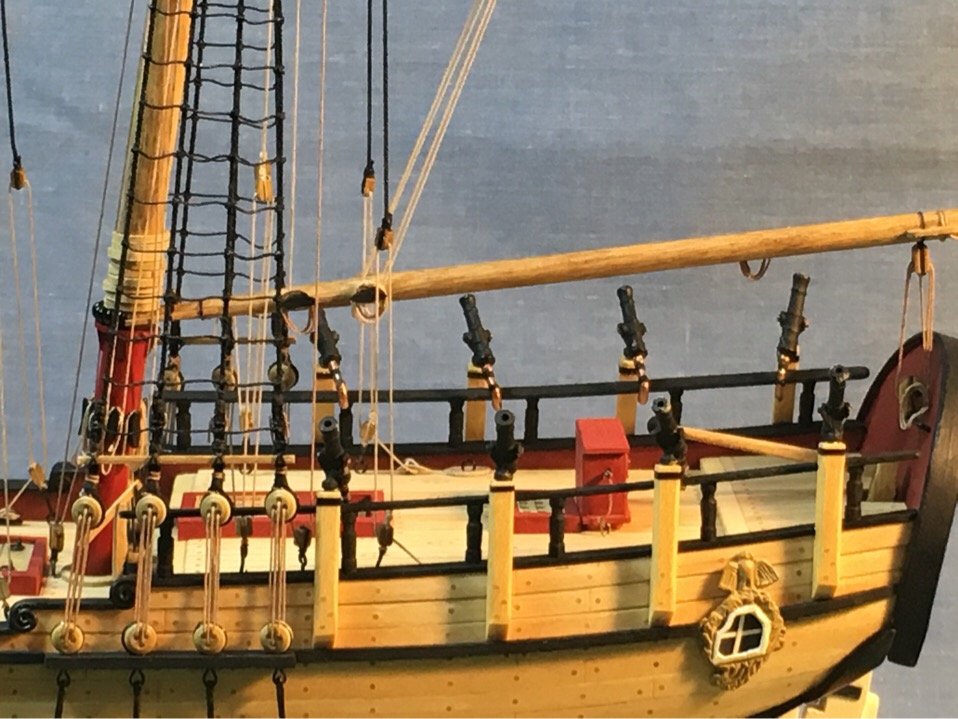
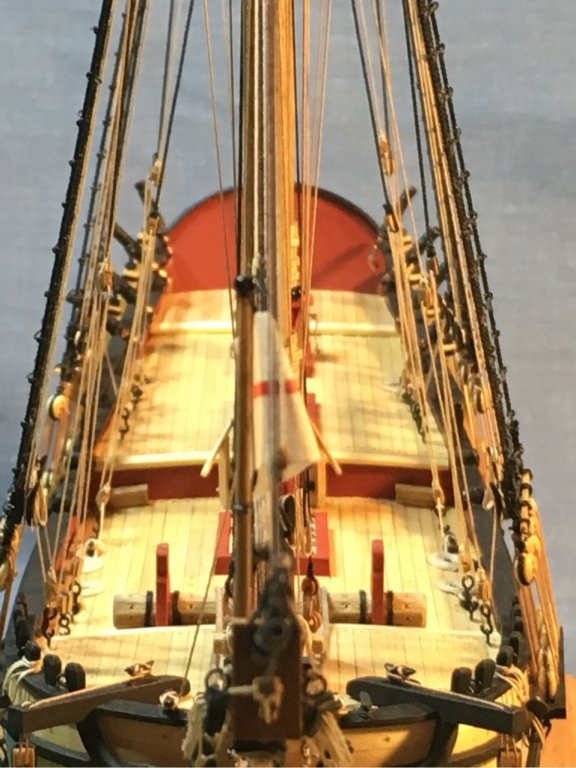
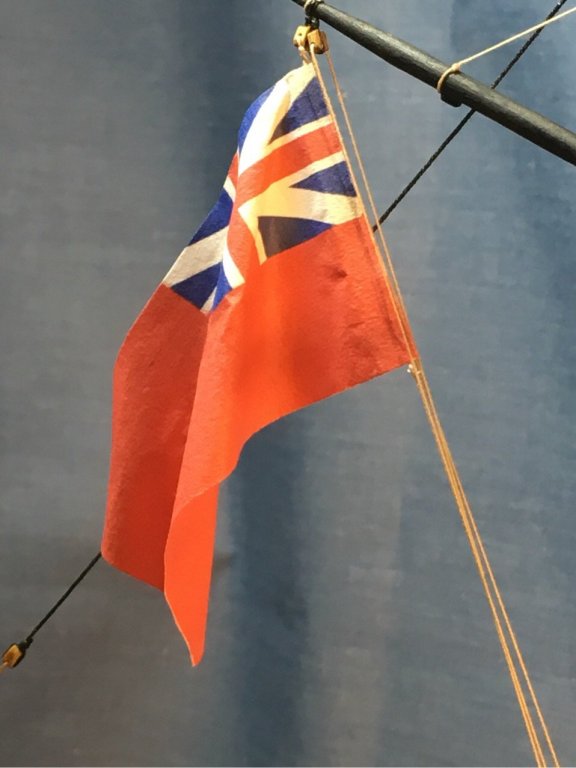
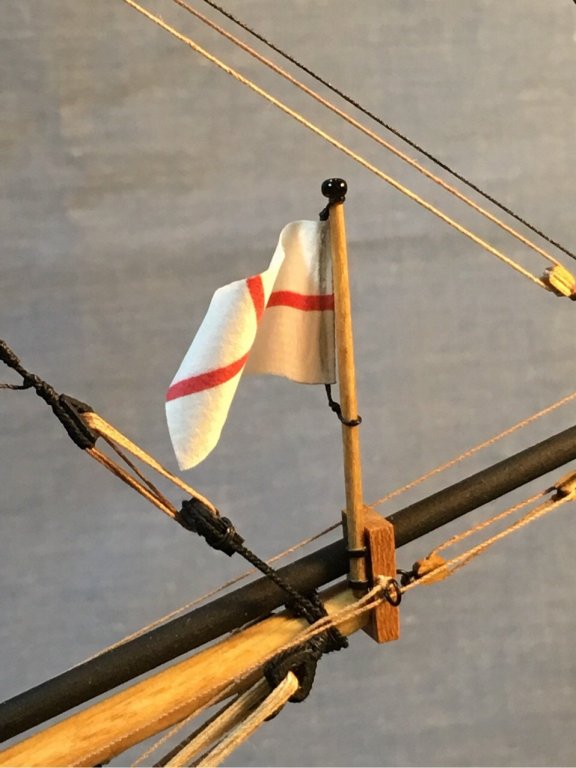
Decided to mount the jackstaff version 2.0 since the Admiral made it a special request. Trying to mount it on the ship was not nearly as difficult as it would have been to tie on the flag if I’d mounted it first...so good decision on my part. Next time, I’ll mount it but with holes for ball trucks. Trickiest part of mounting it was making sure it was true vertical. Here are the flags...followed Chuck’s recommendation and left out the pennant. Also mounted the cannon stocks and test fit the cannon. I’ll retouch them before glueing them in. I know the plan call for 4 cannon mounted on the bow, and I made them...but I like the look of the ship without them...so I left them off. My ship...my rules. Lastly, I got the rope coils mounted on the mast cleats. Also got the coils made and planted on the deck. Leaving me with the shroud cleats rope coils, and the nameplate for the transom. Moving on...that light is shining pretty darned bright at the end of the tunnel!!!

- 449 replies
-
- 7
-
-
- sultana
- model shipways
- (and 2 more)
-
And another minor stall...my jackstaff needs to be remade...the flag is too close to the bowsprit cap. Also, the rope coils do not sit as neatly as I'd like, so will rethink the jig and how to make the coils. I did get the flag set up on the flag halliard off the main gaff. Looks very nice. Photos later...taking my time now. Enjoying the details... Moving on...!
- 449 replies
-
- 1
-
-
- sultana
- model shipways
- (and 2 more)
-
Are you using a dremel for faring, or hand sanding with blocks? Looks fantastic! Just pulled up a chair.
-
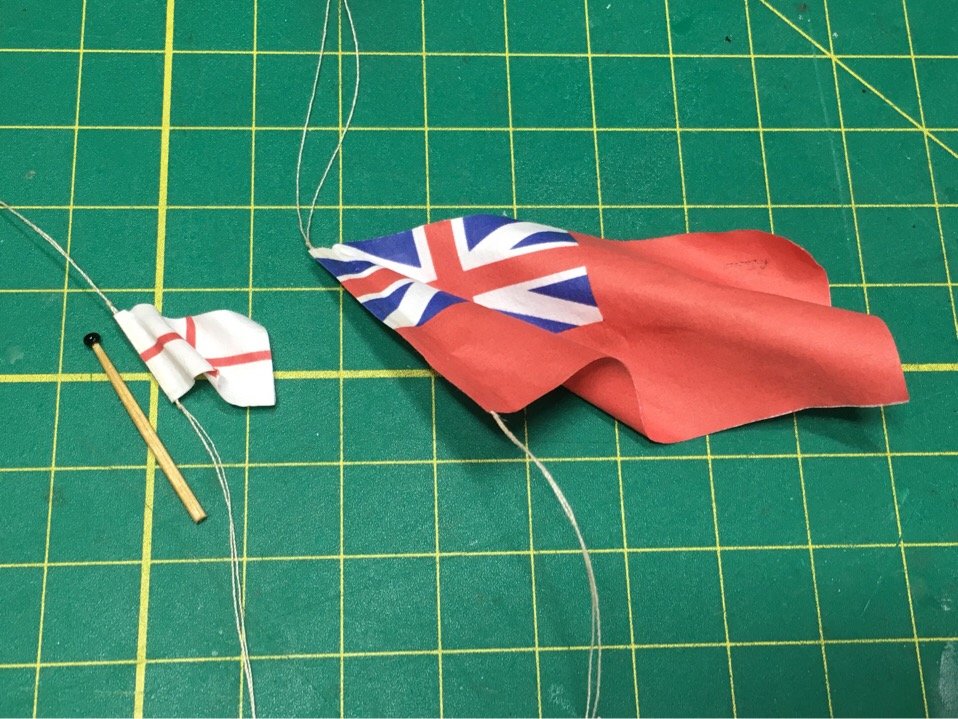
After doing preemptive damage control on my almost forgotten anniversary (Admiral still has the delusion I never forget anything), I was able to continue with trim work. Flags were prepped as discussed in my blog earlier. The washi paper is extremely delicate when wet, but easy to shape. I feel I got pretty close to a wavy flag. Used two lines (sewing thread) through them to make them easier to tie to the rope/jackstaff. I prepped the jackstaff as pre Chuck’s method. I filed down a toothpick, stained it, and added a bead to the top. Looks good. (Same beads I used for the parrels) I’ll add the simulated iron bands this evening and decide if I’ll put it on the ship or not. Moving on!!!
- 449 replies
-
- 5
-
-
- sultana
- model shipways
- (and 2 more)