


Overworked724
-
Posts
1,263 -
Joined
-
Last visited
Content Type
Profiles
Forums
Gallery
Events
Everything posted by Overworked724
-
 What technique did you use to make your hooks? Pics??
 -
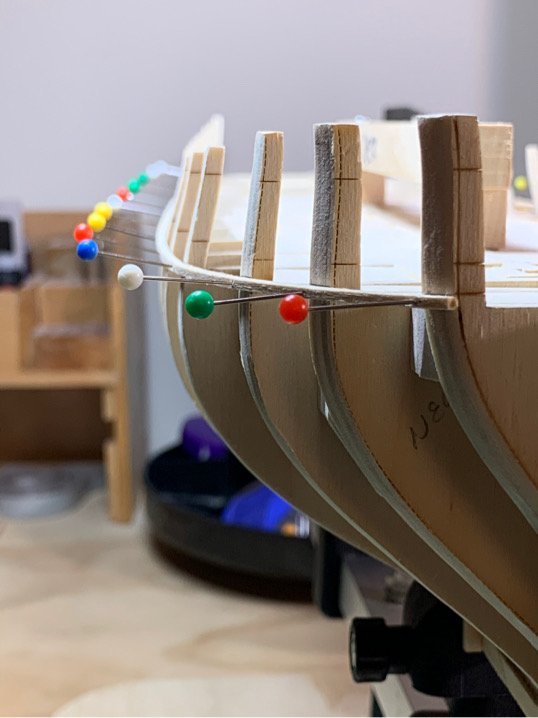
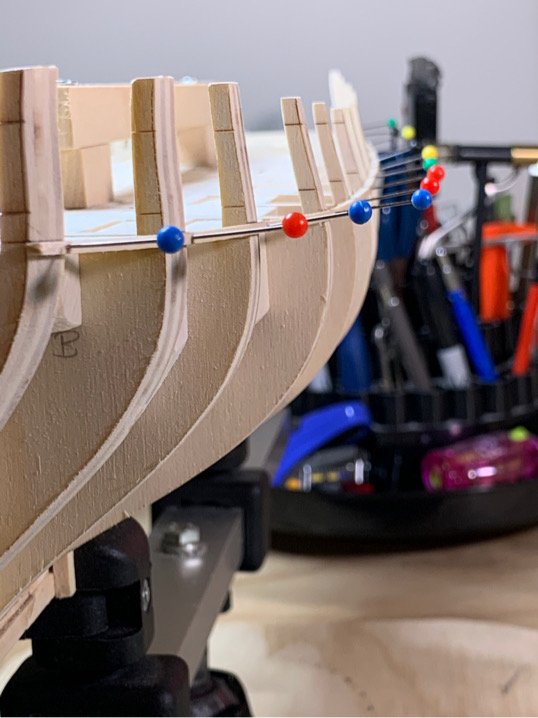
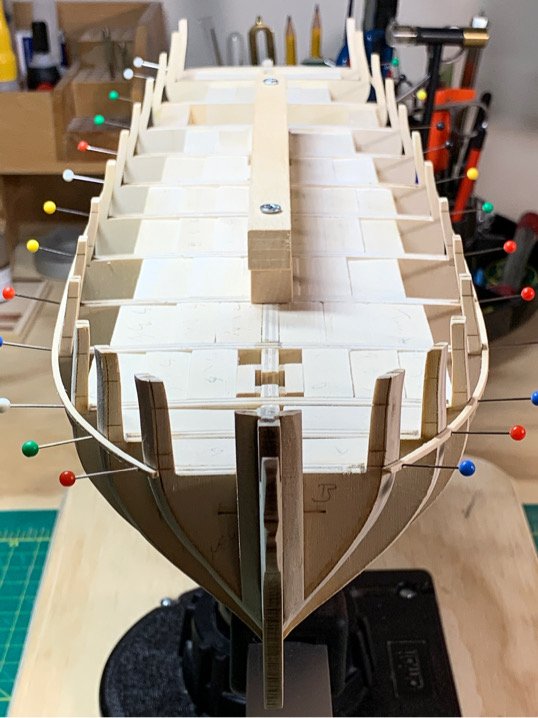
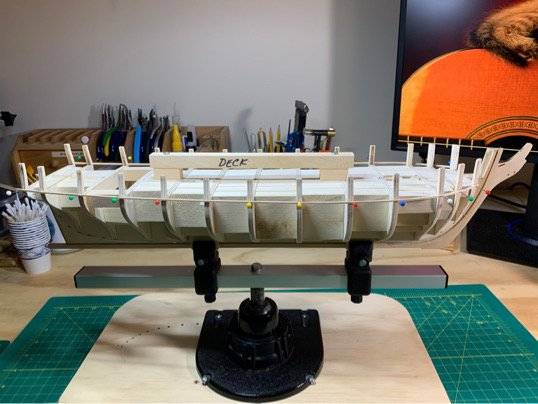
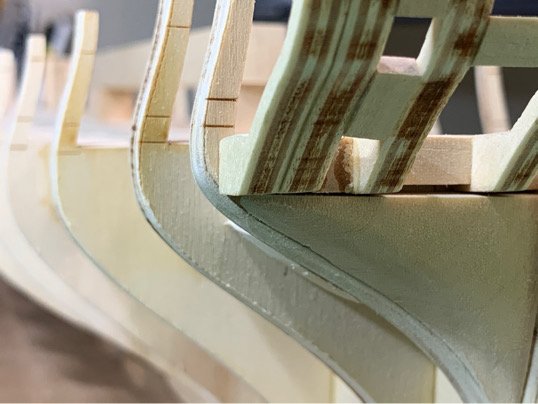
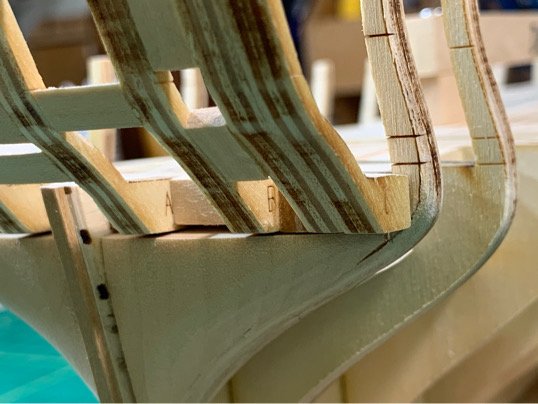
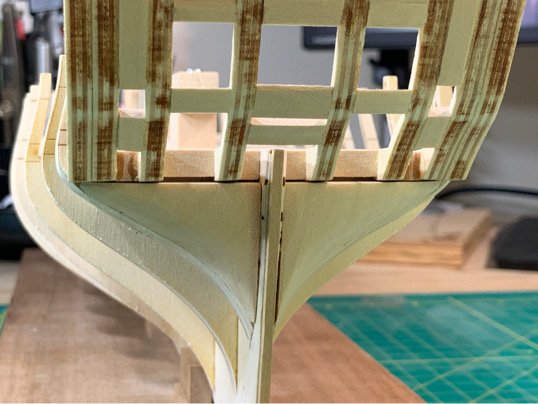
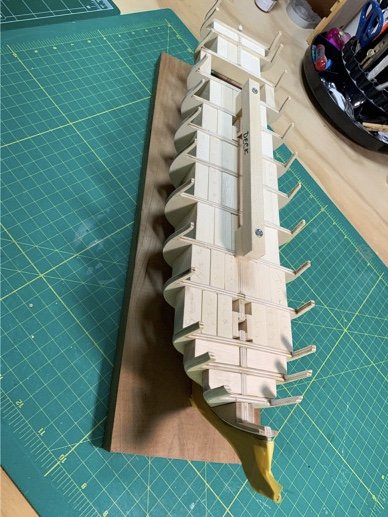
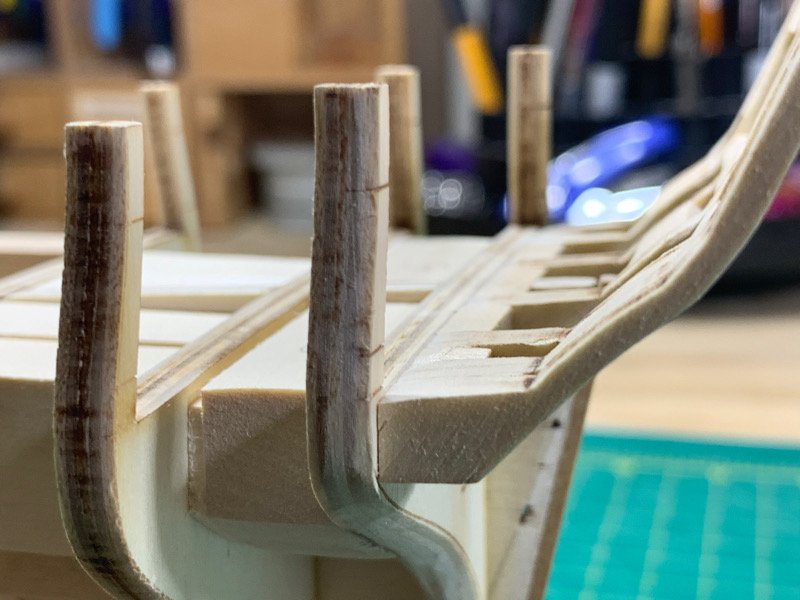
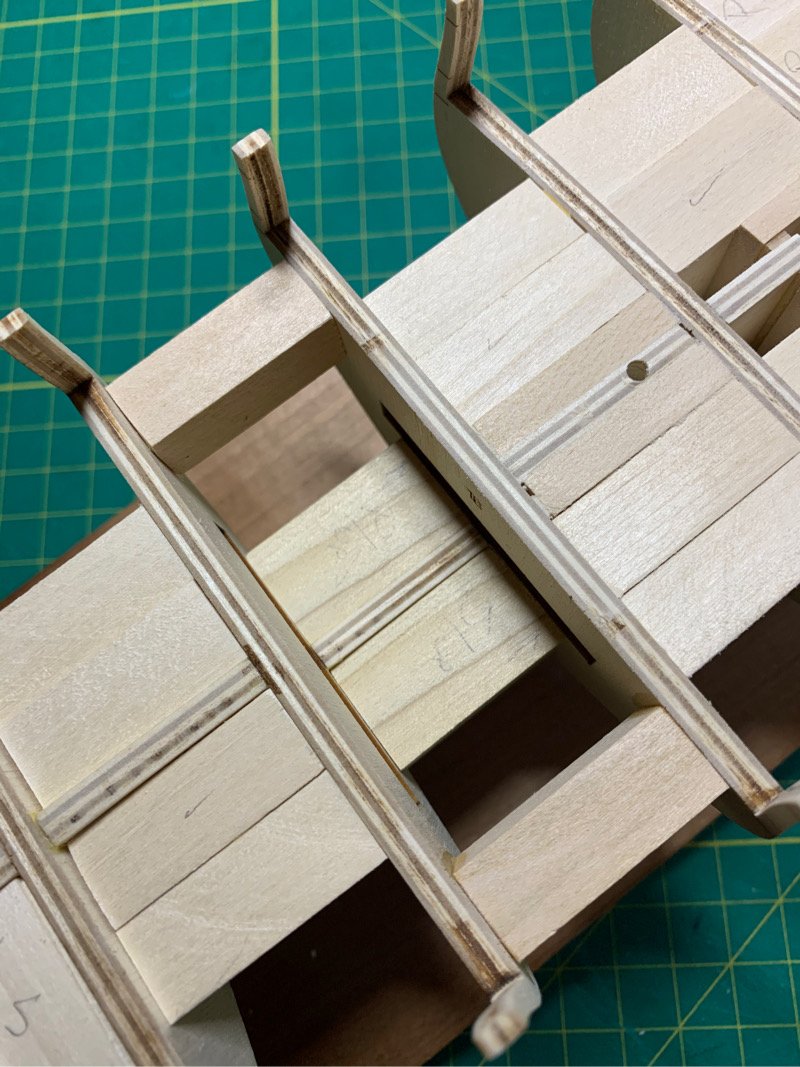
Well, been an exciting day. Glued to TV watching the SpaceX launch. Amazing stuff. Made me feel like a kid again! Afterwards, retired to the shipyard (actually sent to Shipyard by a grumpy Admiral!) to see if I couldn’t get the battens affixed on both sides to start my gunport sills. My mistake was thinking it would be easy. I had a hard time getting both sides aligned and giving me a good sweep from stem to stern. My other mistake was assuming it would be easy to get the battens in! But I’m the end I did...I think I’m close...so I’ll call it good and move on... Here are some pics. I figure it was worth the additional time in the long run. Moving on...
-
Very clean work! She's looking beautiful! I'm sure once the planks are laid down and you have a chance to sand her even, any waviness, if there is any, won't be noticeable. Also consider that with the deck furniture, rigging, etc...that the visual line of the deck from stem to stern will be broken up by visual obstructions. This will also mask any minor waviness. Looking awesome!
- 950 replies
-
- 1
-

-
- syren
- model shipways
- (and 1 more)
-
Thanks, Novastorm. Actually, watching your and Walrus' Syren builds gives me a lot of background and inspiration. Good to have folks on the board doing the same kit....it truly helps as I've only completed one ship...and that one took me a while! 😃
-
Are you kidding me!!! The work on your Bluenose is awesome. I'm not even close to your level! 😃.
-
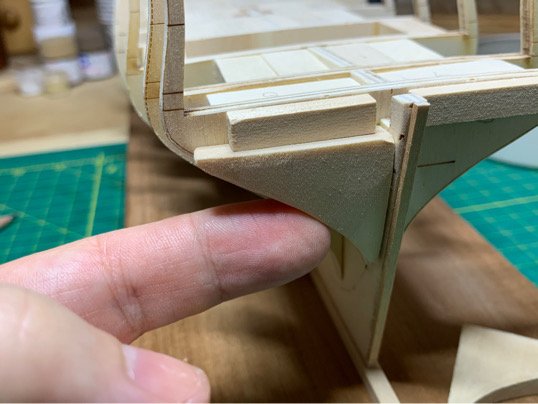
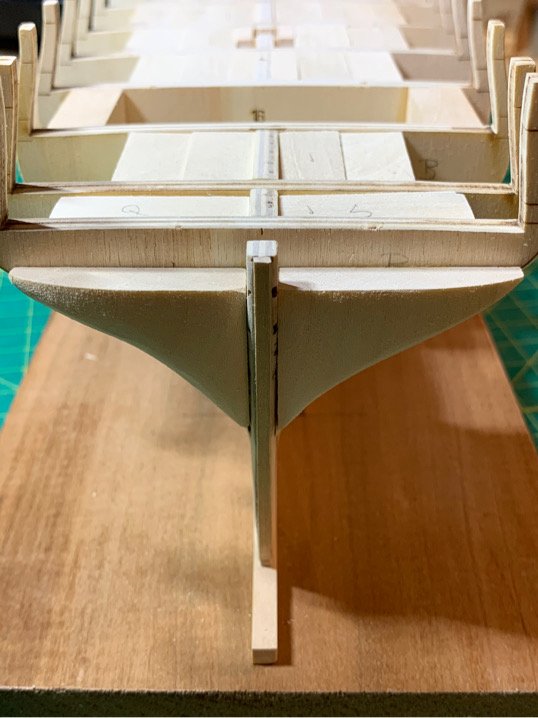
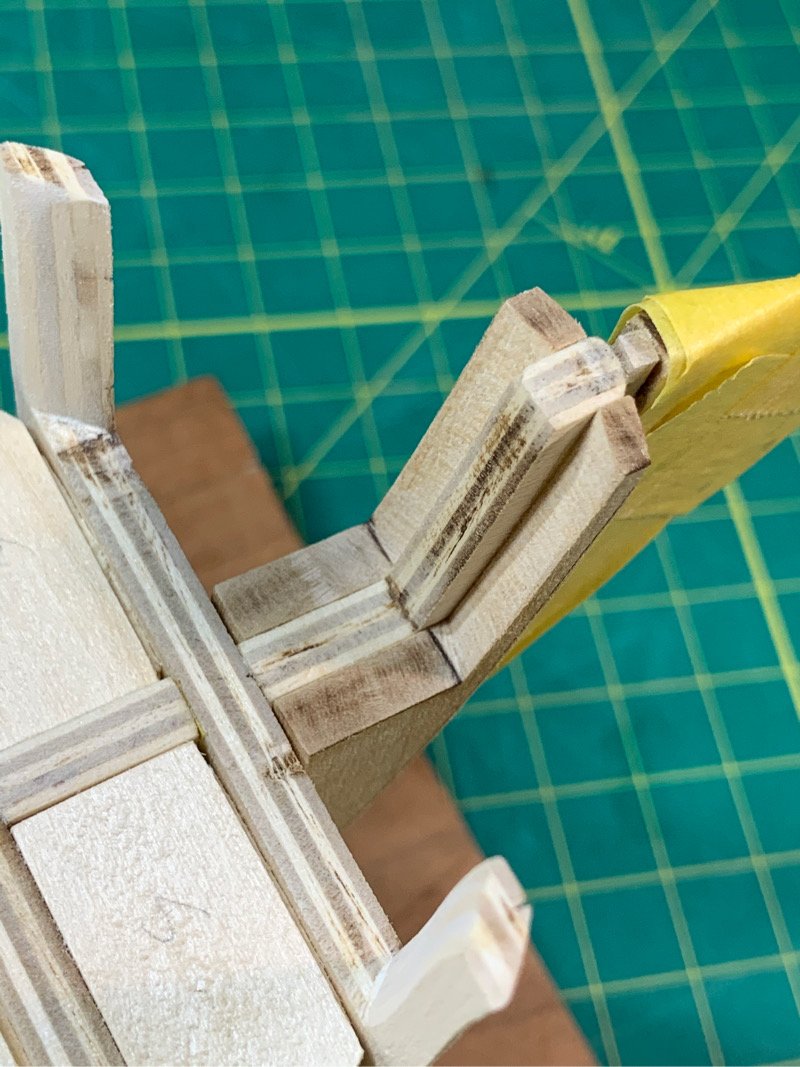
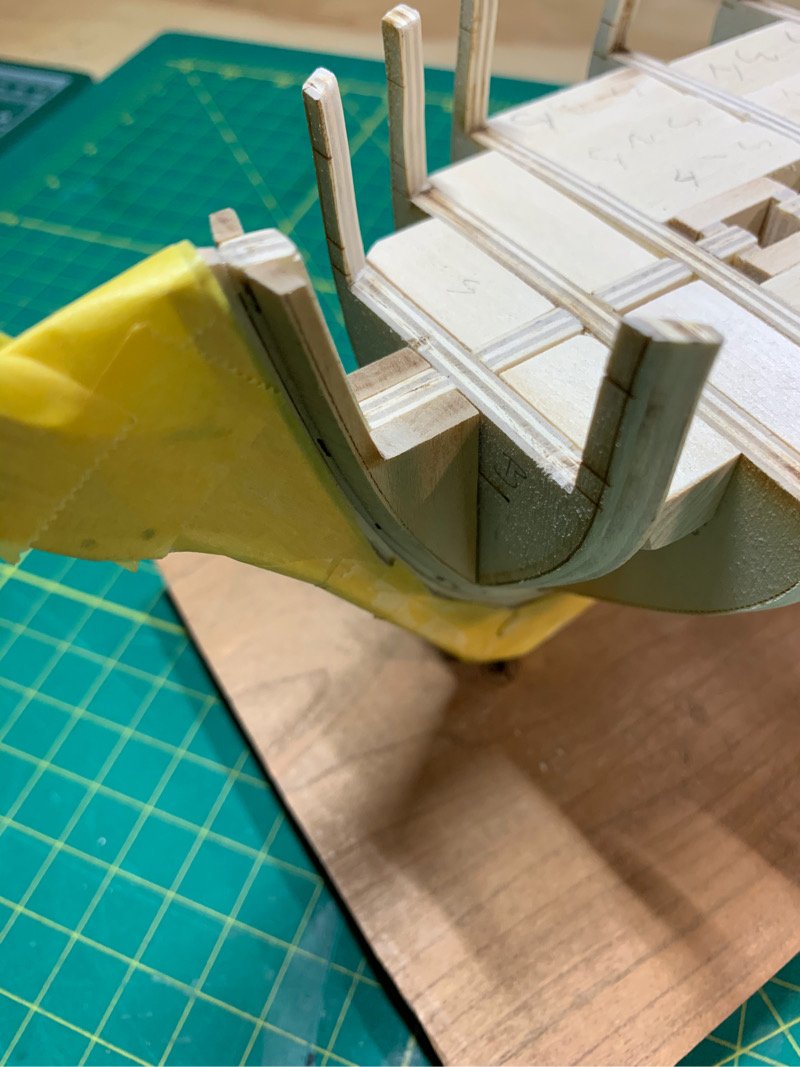
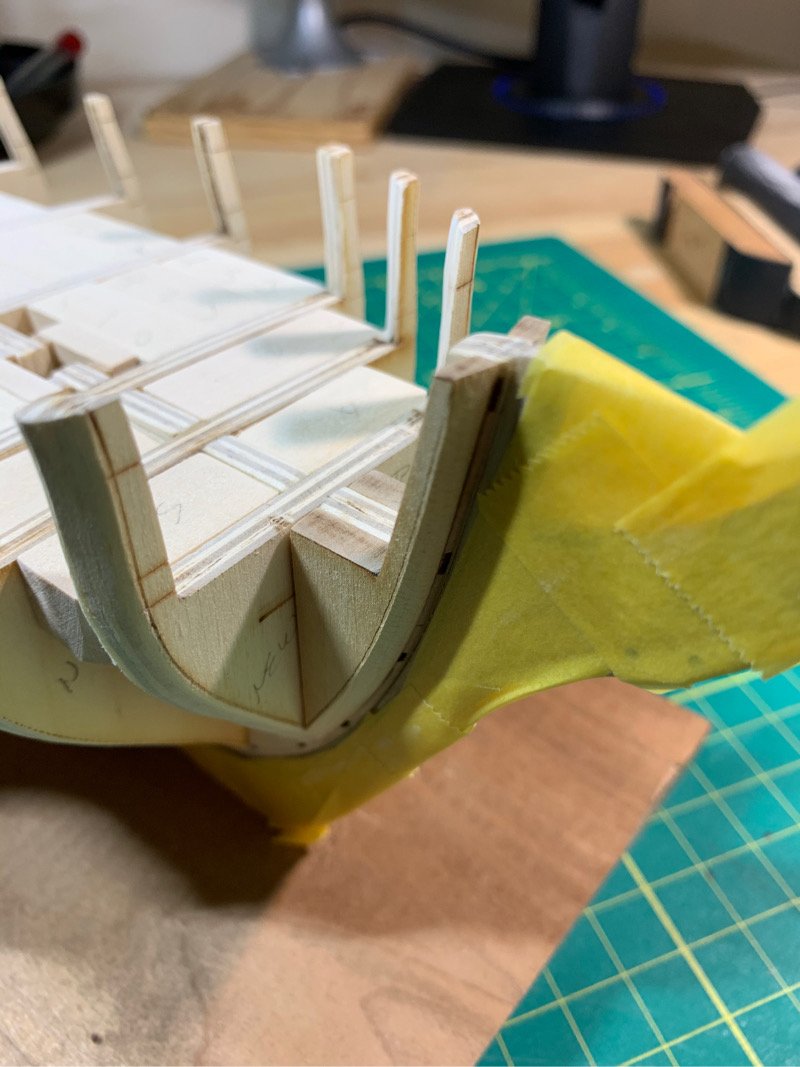
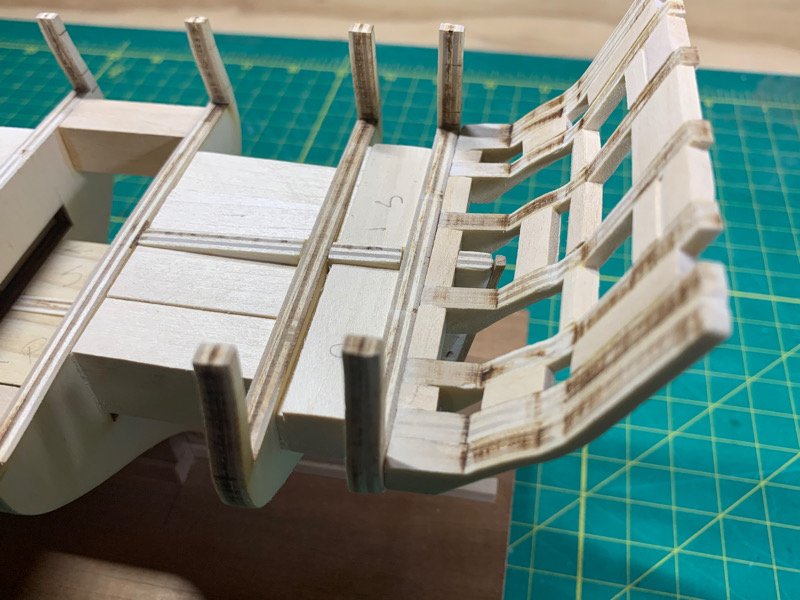
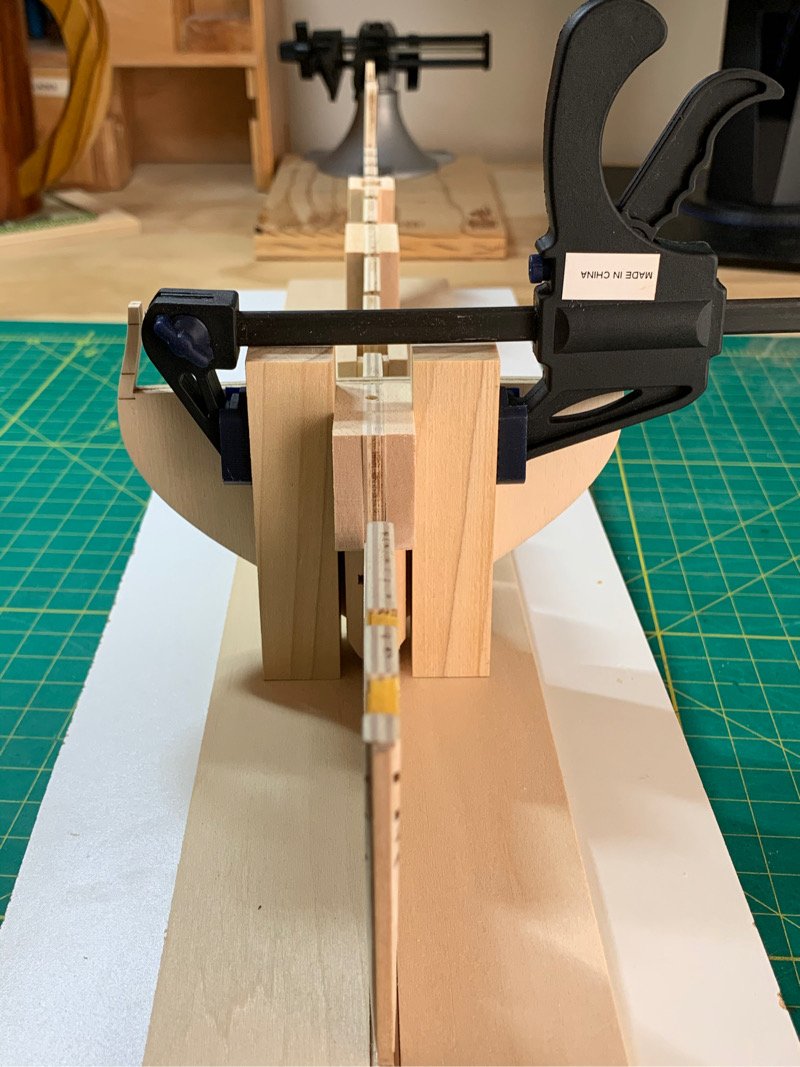
So, I've been putzing with the transom. I know the gun and sweep ports are on the agenda, but I really wanted to have the tail end of the ship addressed before I started futzing with setting up the sills. If you recall, I diverged from Chuck's awesome practicum in that I made the transom off the ship as a separate piece. This was actually not as hard as I had thought. (See below - attached to spare frame using double sided tape) Attaching the transom now will be simple - but since I absolutely suck at sanding, I knew if I attached the transom, then added the filler blocks, I'd probably wreck the transom in the process of sanding/shaping them. So, made a couple of solid wood stern fillers which I roughly shaped. Once I got them glued in place, I attached the deck mounting block and mounted the ship upside down. (I use an Amati keel clamp which I have attached to a rectangular piece of 3/4" plywood - it's solid as a rock) The mount allows me to get solid purchase on the ship without worrying about snapping off little bits. I'm not very good at holding things very steady, so this process gave me confidence in shaping/sanding the solid piece stern fillers. I am not entirely certain the shaping is perfect - I'm not a sculptor. But, it 'feels' about right and it's a good start - at least sufficient for me to visualize what I will need to do with the transom. After I did a quick dry fit, I could easily see that I would be best served to add a small bit of wood at the edges of the transom to help hold the lower planks, as well as see where I will need to shave down the sides of the transom. The only question I have is....how in the hell do people cut away sections of the transom?? I have no idea...but I have a feeling I'll be sanding it away a bit at a time with my Dremel. Again - I'm sure this is not the normal way it's done. But I like the idea of being able to slowly chip away at the stern section without committing fully to attaching the transom. I guess I'm just not that confident, and I'd prefer go slow. The planking scares me...maybe I'm procrastinating to delay the inevitable!! One other thing which I've decided is how to close the gaps between the bulkheads (where the deck planks will be placed). I believe adding a false deck would be best and provide the best support. A while back, I invested in some birch (I think) sheets that are 1/50" thick. Perfect for the purpose without adding too much to the height of the deck...so I'll take the 0.020" of additional thickness when setting up the sill runs. That's it....moving on (in my own, meandering, and certainly novice kind of way!!)

-
Gotta say, you and Walrus are my guiding lights! Beautiful and meticulous work. Your thinking and preparedness show in your results. Really enjoying your build!!!!
-
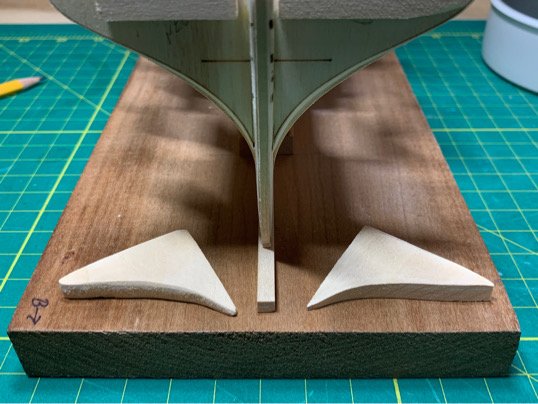
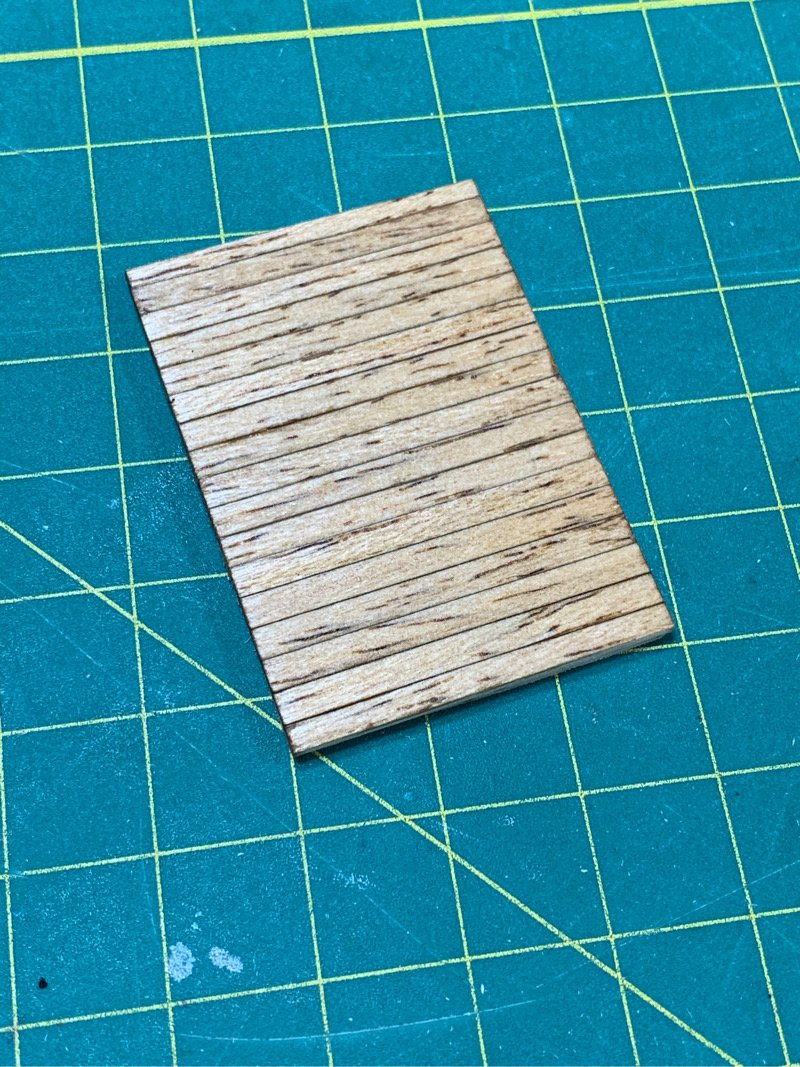
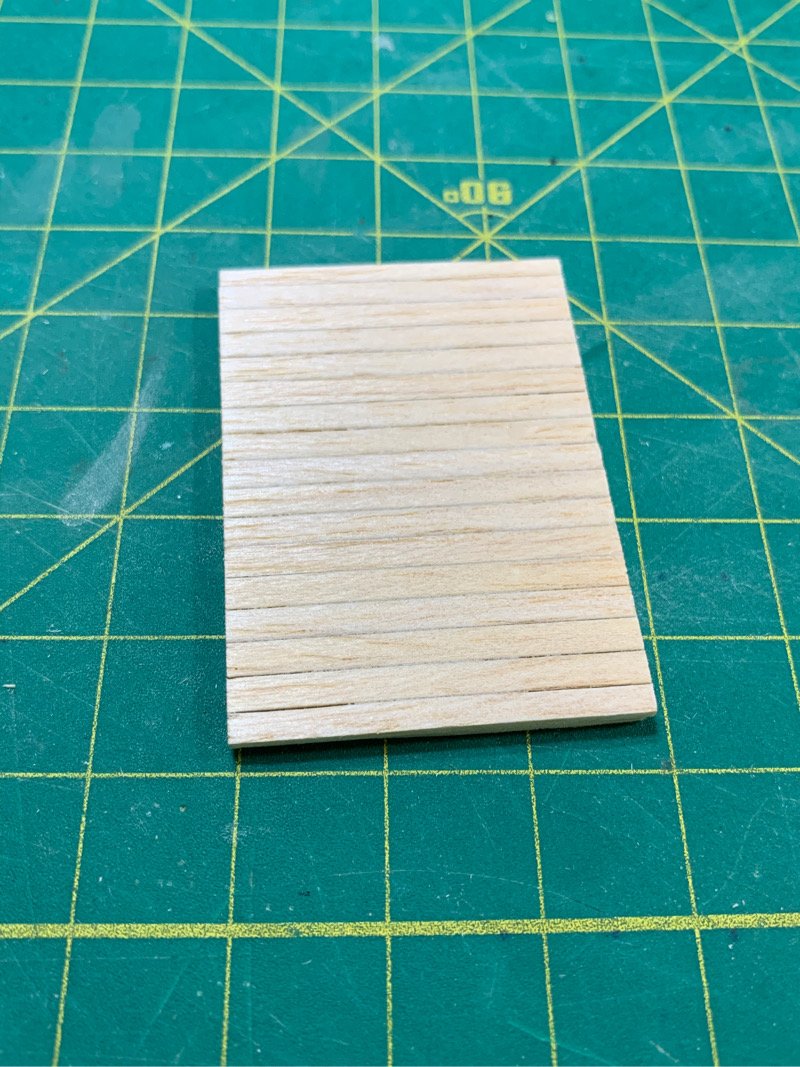
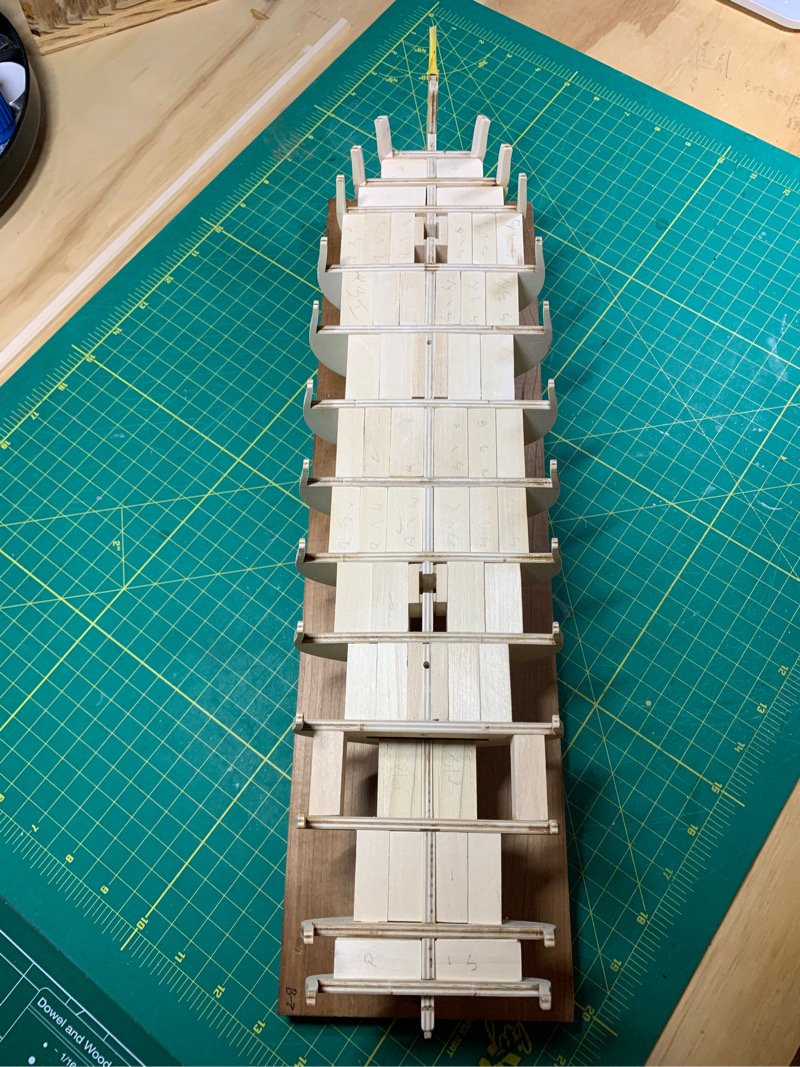
Finally got some time to work in the shipyard! I had already decided to prep the false deck off the ship and then slide it in when I was ready. Took a piece of 1/32" balsa, cut my planks, used a pencil on one facing edge of the planks where they meet (I don't like heavy line between planks), glued in and stained with Minwax Golden Oak. I might redo the false deck since the basswood strip I used had some serious graining...it's most overwhelming...but I put it on the ship and it looks fine. I might leave it depending on my mood. As it is only viewed briefly peering down the ladder, it may be just fine. Here are some pics. I also shaped and added my bow fillers. It's minor progress - but it is progress!!!

-
Outstanding. Love the wood! Very clean. 👍🏽
-
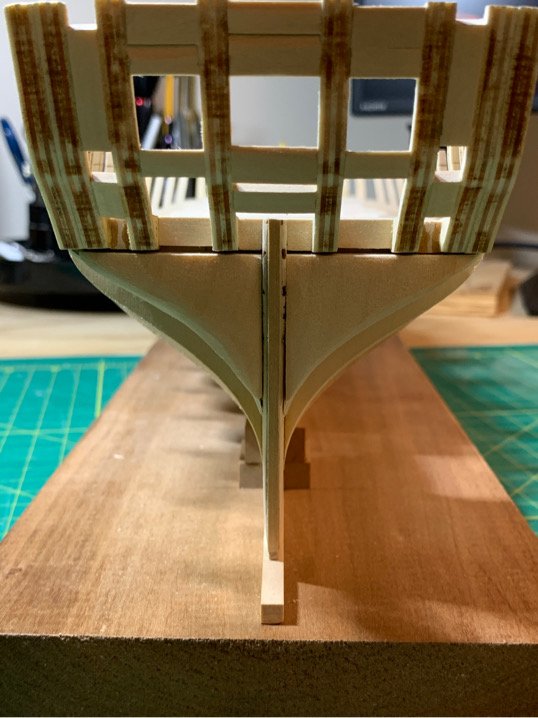
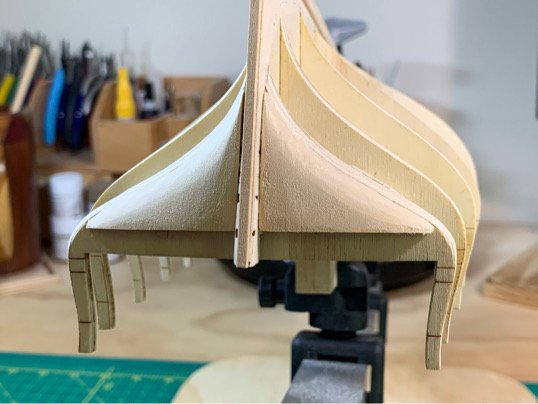
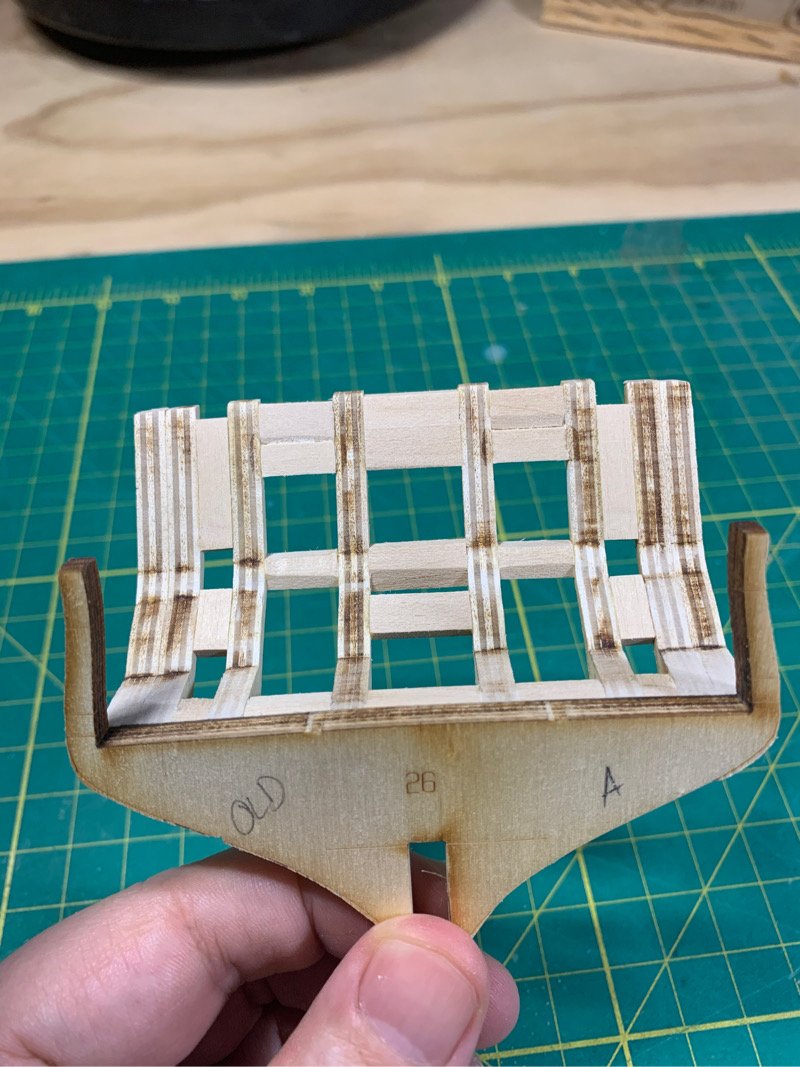
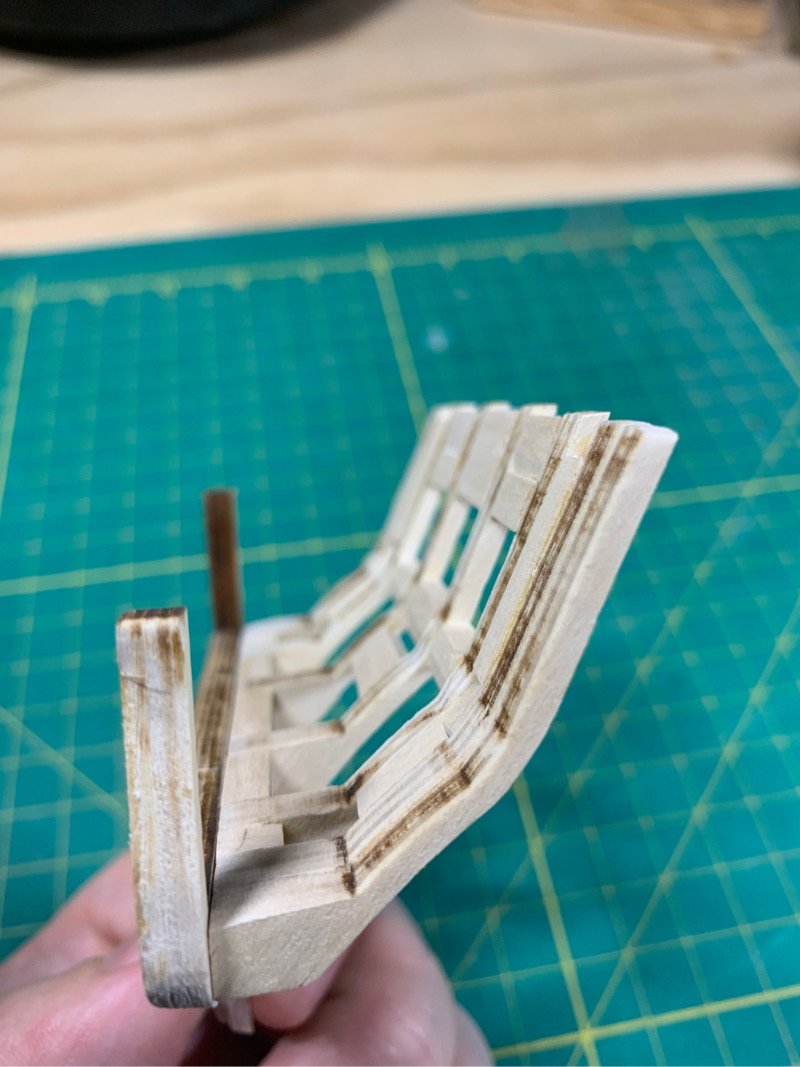
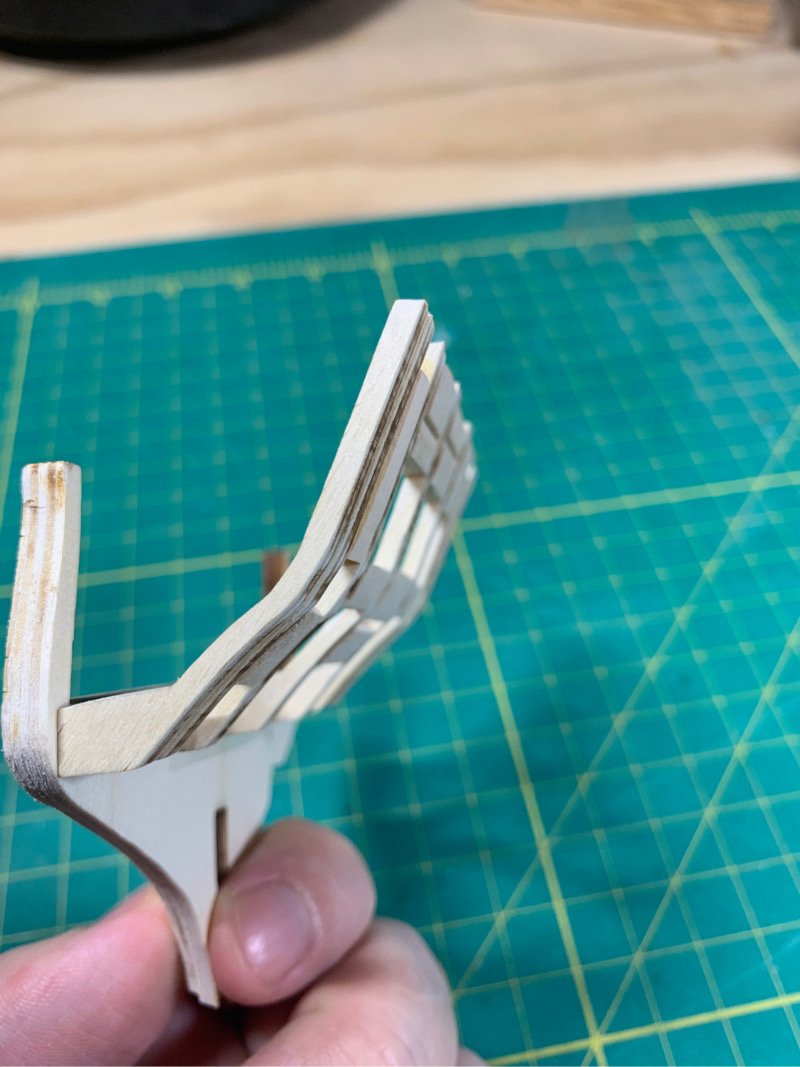
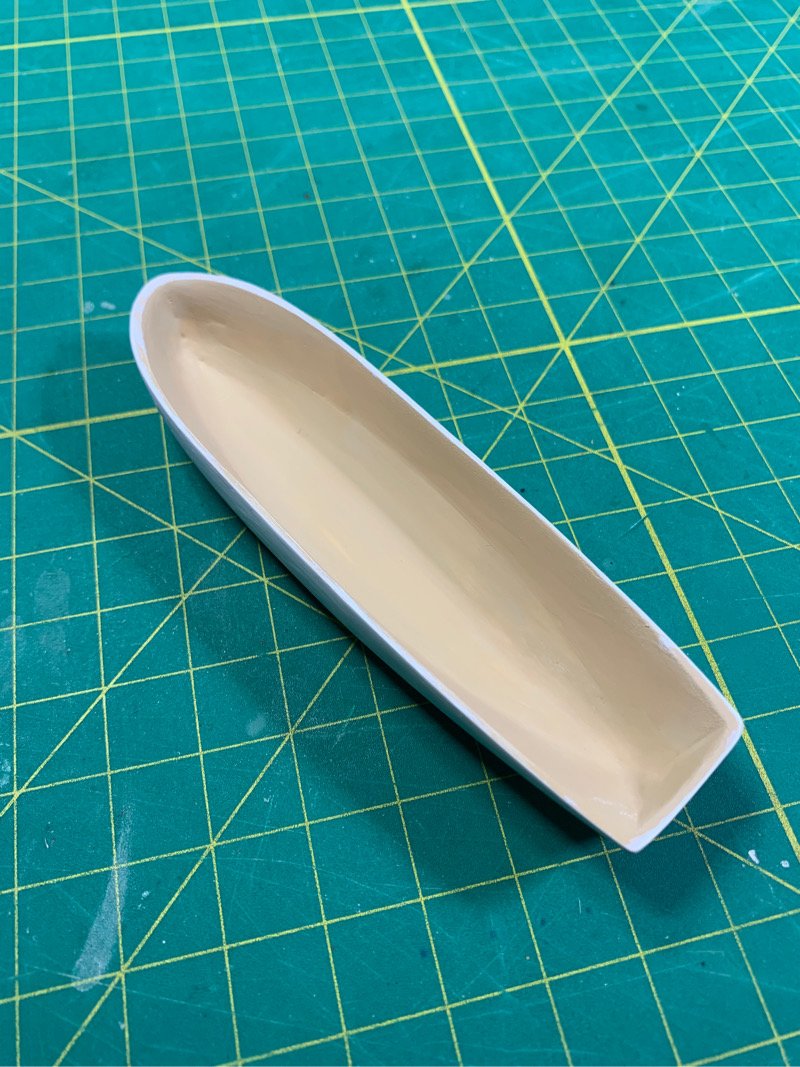
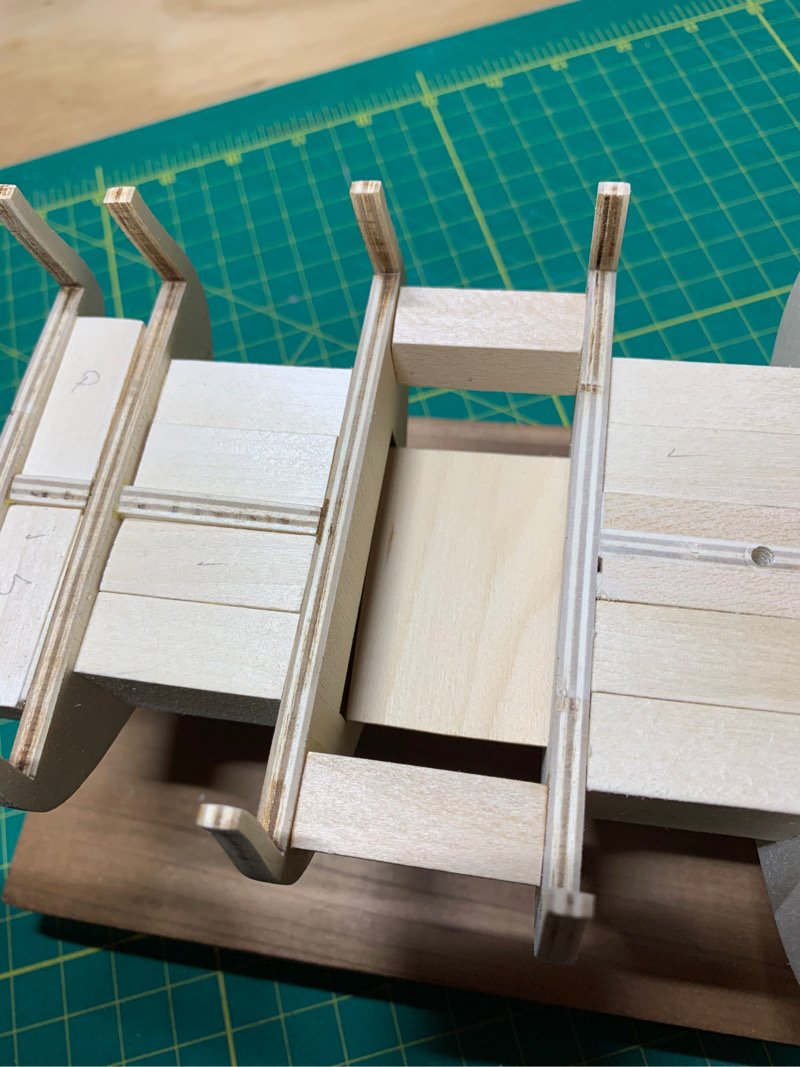
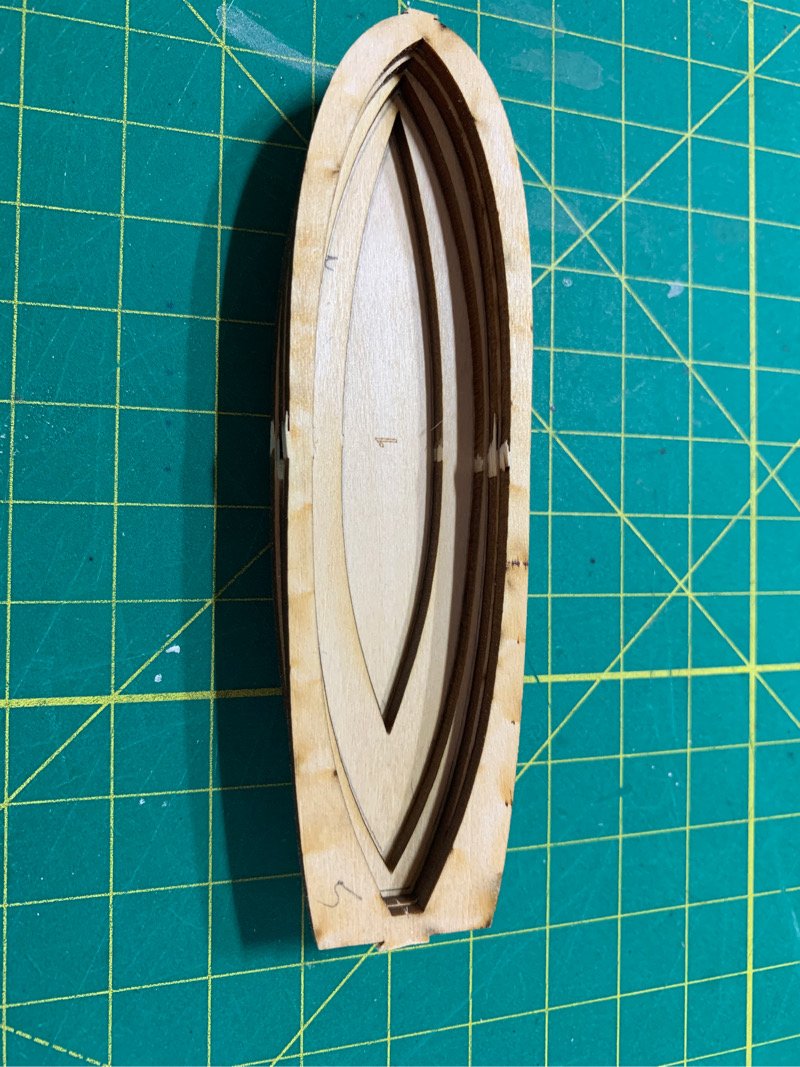
Okay...so I putzed around with the ship’s boat a bit more. Some wood filler and a few watery coats of white (Tamiya) paint and the exterior looks pretty decent. The interior may need a darker shade of some earthier color. Beige might be a bit historically off. This is where I’ll stop on the initial work on the ship’s boat. Will take this up a bit later in the build, but I’m pretty satisfied with the result for my lack of experience. Now speaking of lack of experience...I decided to do something ridiculous. I’m awful at sanding....takes me forever! The transom kind of scared me after reading the practicum and watching some of the other build logs. So, I decided to do something a bit out of the box...and build the transom in a way I might be able to manage the sanding a bit easier without going crazy. I decided to build the transom off the ship as separate piece to be added later. Was not as hard as I had thought it might be...I made a little jig to align the separate sections correctly and ensure the gun ports were at the right height. Having it as a separate section gives me a bit of artistic freedom in how I can add and shape the supporting sections for the stern. Maybe not be the best way of building and adding the transom, but it’s a hobby! 🤣 Sometimes you just have to do it your own way! You’ll note that in the pics above I am using a spare stern frame I had available to temporarily ‘attach’ (using some double sided tape) the transom piece to the frame...the earlier frames were warped, so after Model Shipways provided some replacements, I had a spare stern frame to use as a tool to help me prep the transom off the ship. Below are pics of the sanded down transom piece (before trimming the sides...that comes later) dry fit on the ship. Good fit... And.....moving on!
-
It is statements like these that make me realize that I am one of the majority on this forum....we are, but our nature and love of this hobby...nitpicking perfectionists! 😂
- 950 replies
-
- 2
-
-
- syren
- model shipways
- (and 1 more)
-
Great job on transom and sanding! She’s looking extremely fine....hope I can come close to your work. You are really taking great care and it shows!
- 950 replies
-
- 1
-
-
- syren
- model shipways
- (and 1 more)
-
Looks brilliant! Sharp work!👍🏽👍🏽👍🏽
-
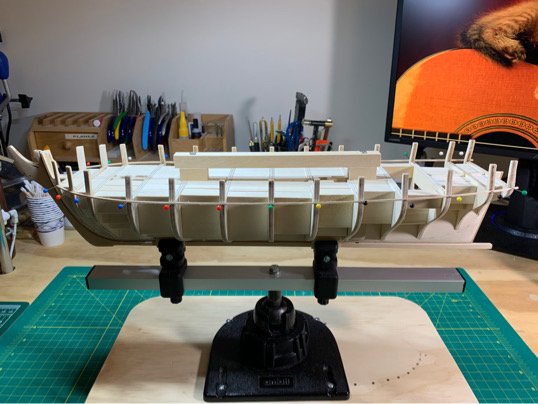
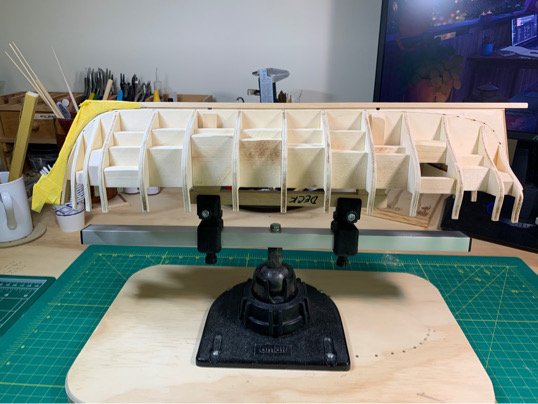
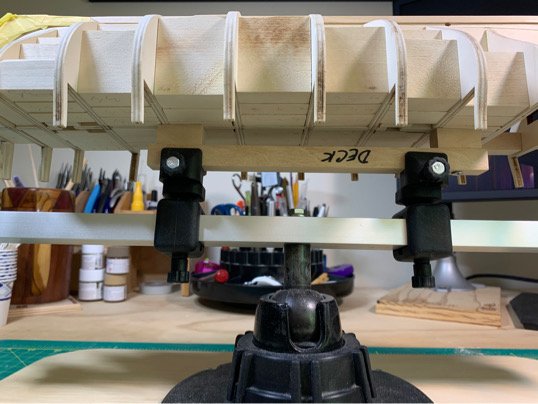
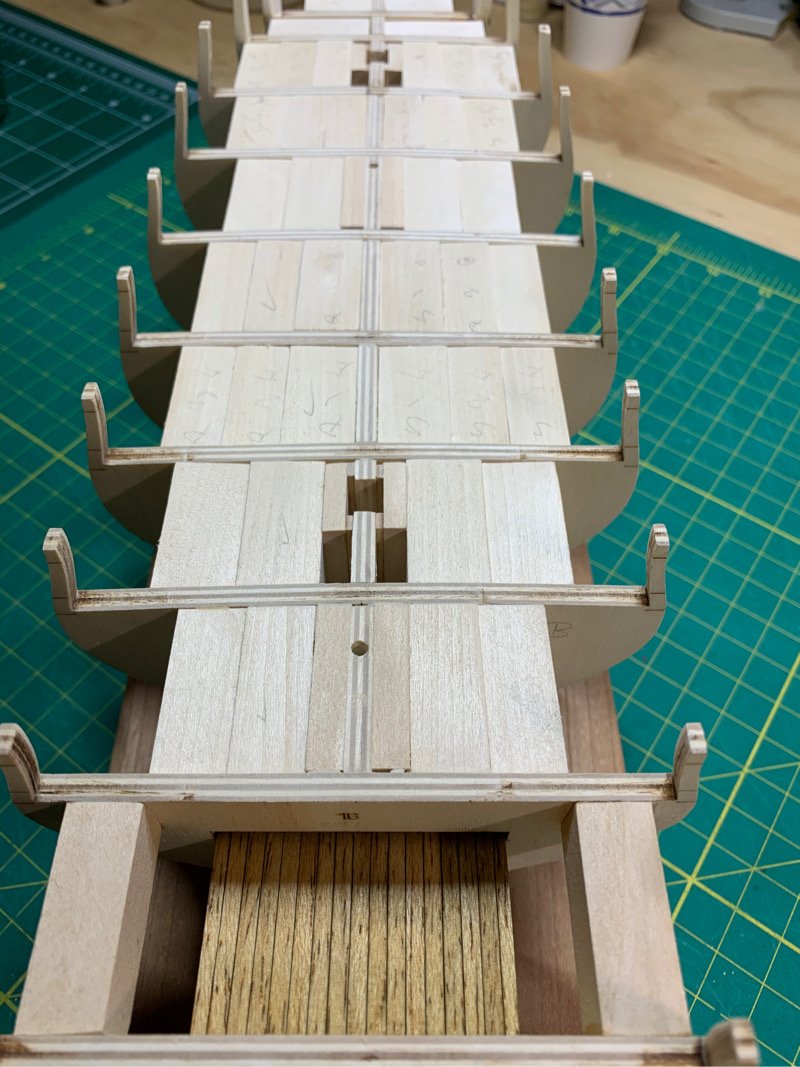
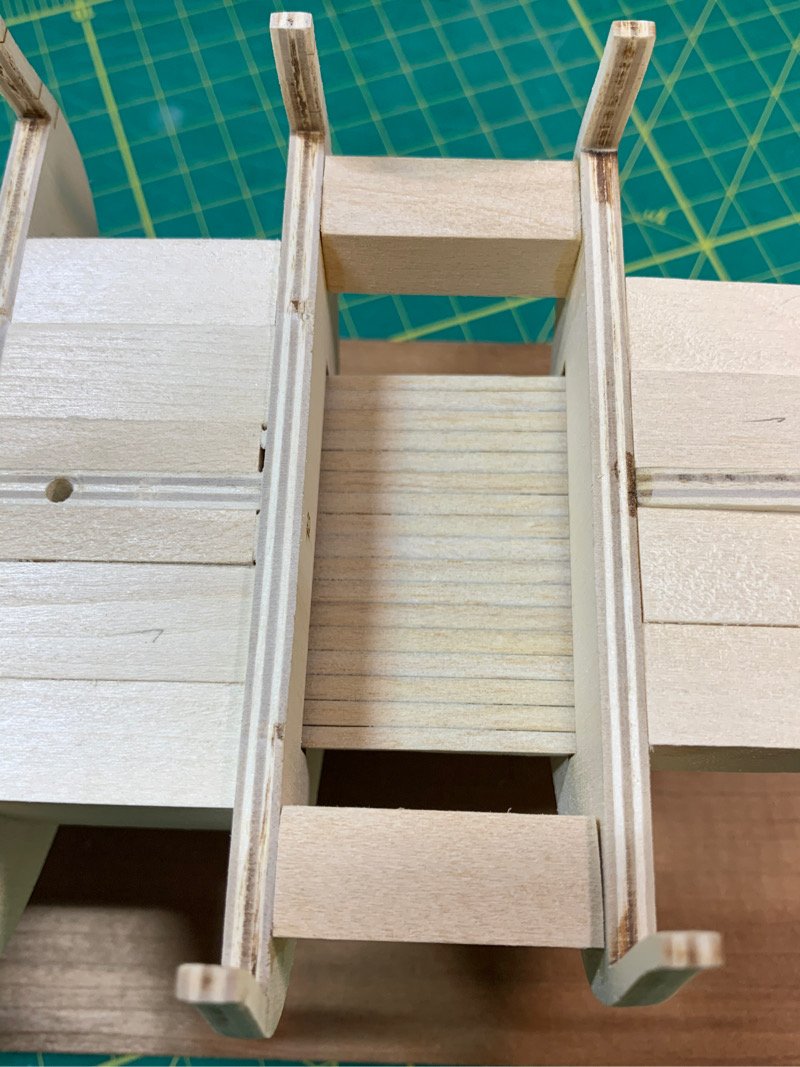
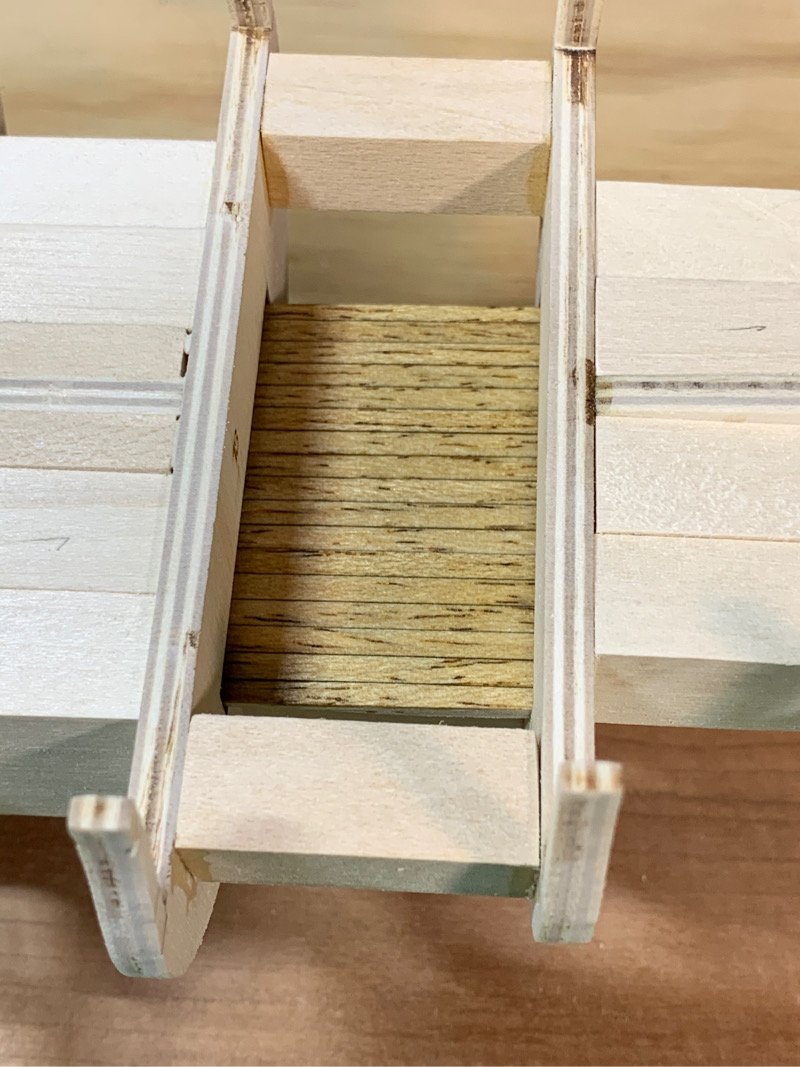
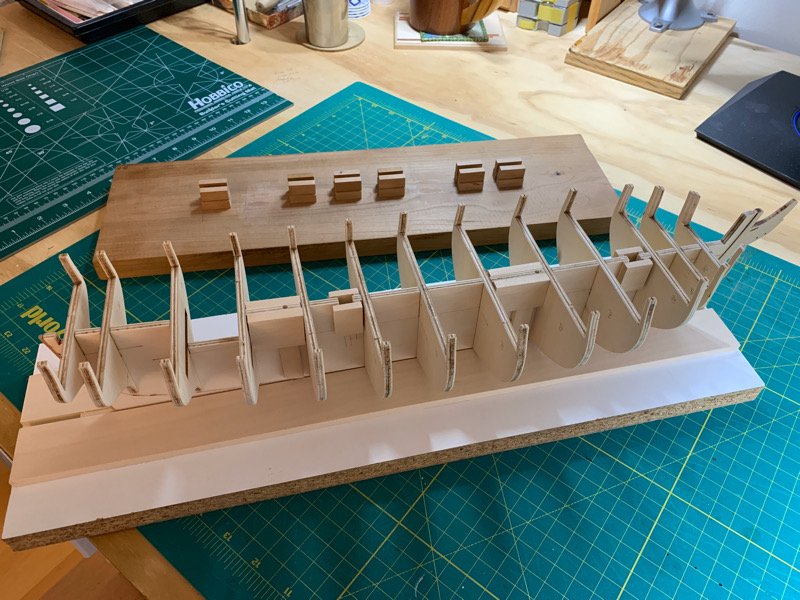
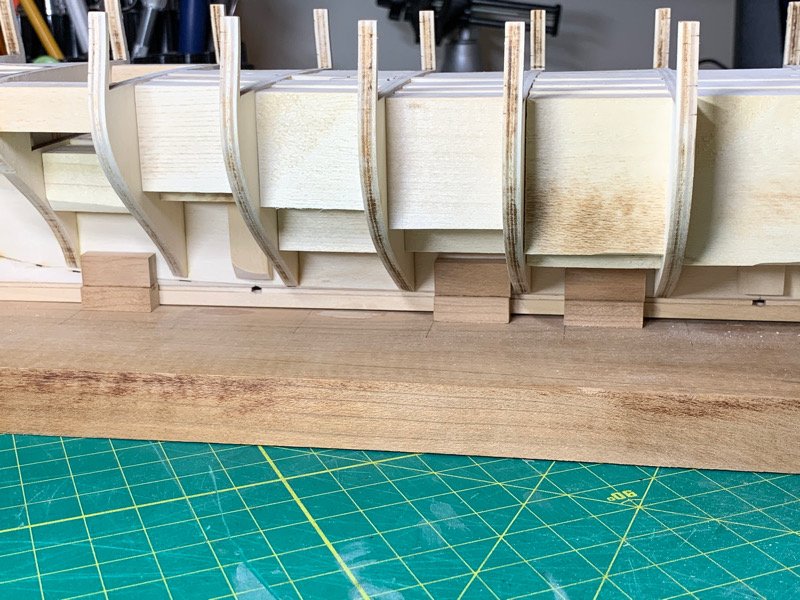
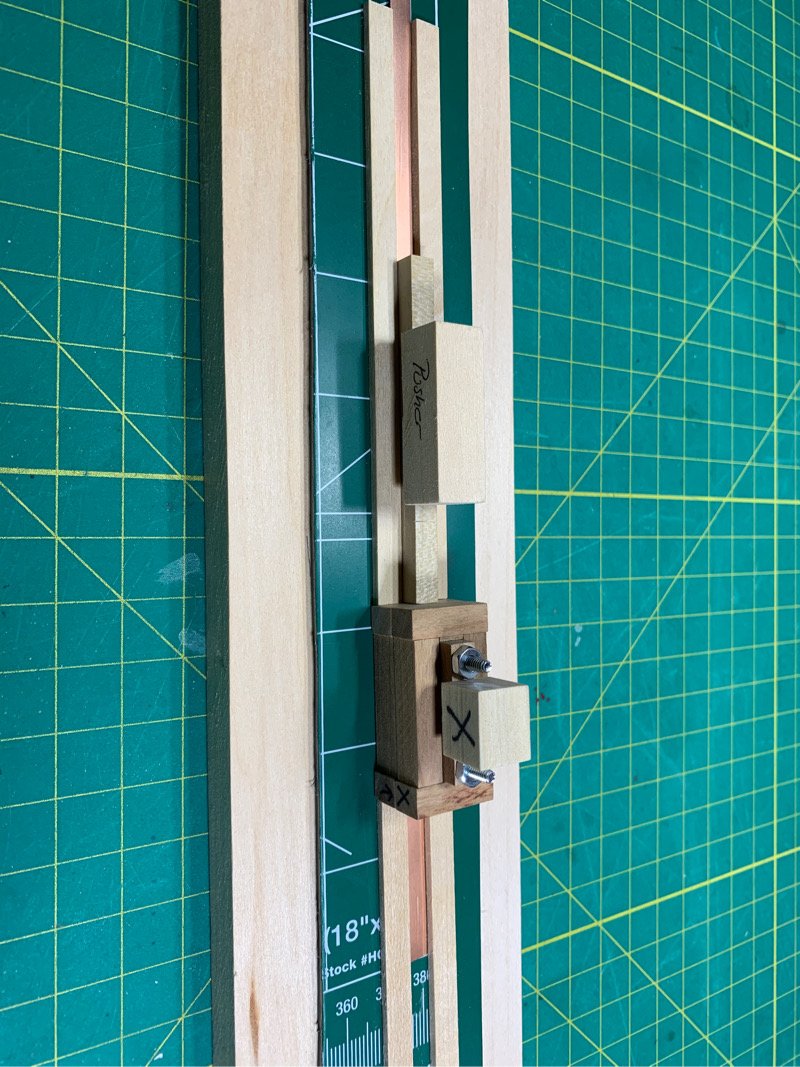
Spent time on the frames and filler blocks. You’ll note that I made one board for ‘holding’ the ship and one for use in adding the frames. The white board just has sections of wood to center and hold the keel straight but I’m always worried I’ll hit the ship and snap the keel off. 😆 The holder with the cherry wood base has holders with a much higher profile and reinforces the bulkhead former. Feels really solid and I’ll use this now for building. But it all worked out...and I was able to get the frames (even the slightly warped ones) trued up. Buddy of mine had some spare 1/2”x2” sections of basswood. Since I did not have enough balsa, I improvised and used the basswood layered blocks. I can add the balsa to the bow and stern sections where the curvature is a bit tricky. I did a fairly good job trueing up the spine of the bulkhead former. Very little skew left and what there is is not perceptible. I also added a couple of smaller blocks between the top of the frames which bracket the false deck. I wanted stability and they shouldn’t show once the main deck is on. I cut a piece of 1mm basswood which I can use to lay down the deck planks for the false deck. When I’m ready to plank the main deck, I can slip the false deck in and secure it without an issue. Spent some time continuing to sand/refine the hull of the ship's boat, as well as plinking away at making some brass plates. (What an onerous chore). Ended the day making some of my own sanding files. Moving on!!!
-
Thanks. I am watching your build as well. I think we had roughly the same minor twist. Hard to get rid of it...and I’m sick of staring at it without making progress. So...onward. The other issue was some warped frames but I think the blocks can address this as well. Fingers crossed.
-
Too late. 🤣 I spoke with a club mate and he agrees with Chuck that the misalignment will hopefully work it’s way out upon adding fillers. My twist is not too bad, almost imperceptible. But I can see it when looking down the long axis of the bulkhead former. Sigh. My impatience is a reflection of my frustration with this blasted quarantine. 😤
-
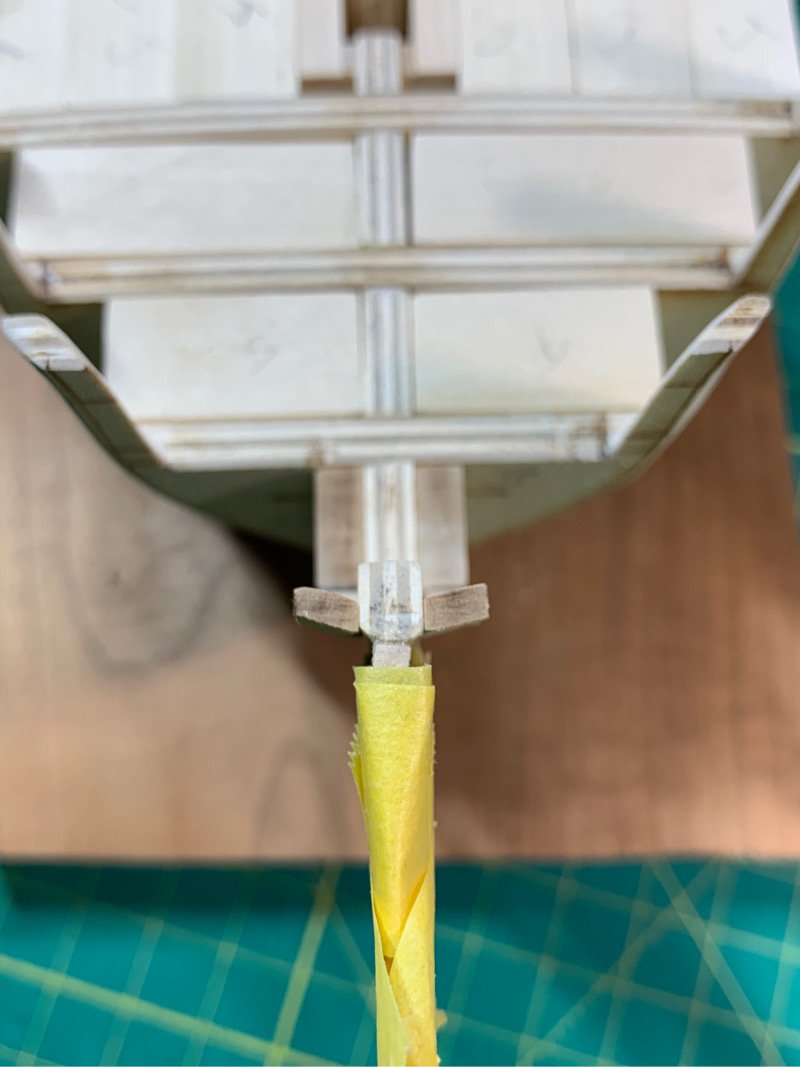
Decided to err on the side of caution. Put in some pins to support the keel and stem. Nervous but moving on. The bulkhead former has that slight twist. Moving on...

-
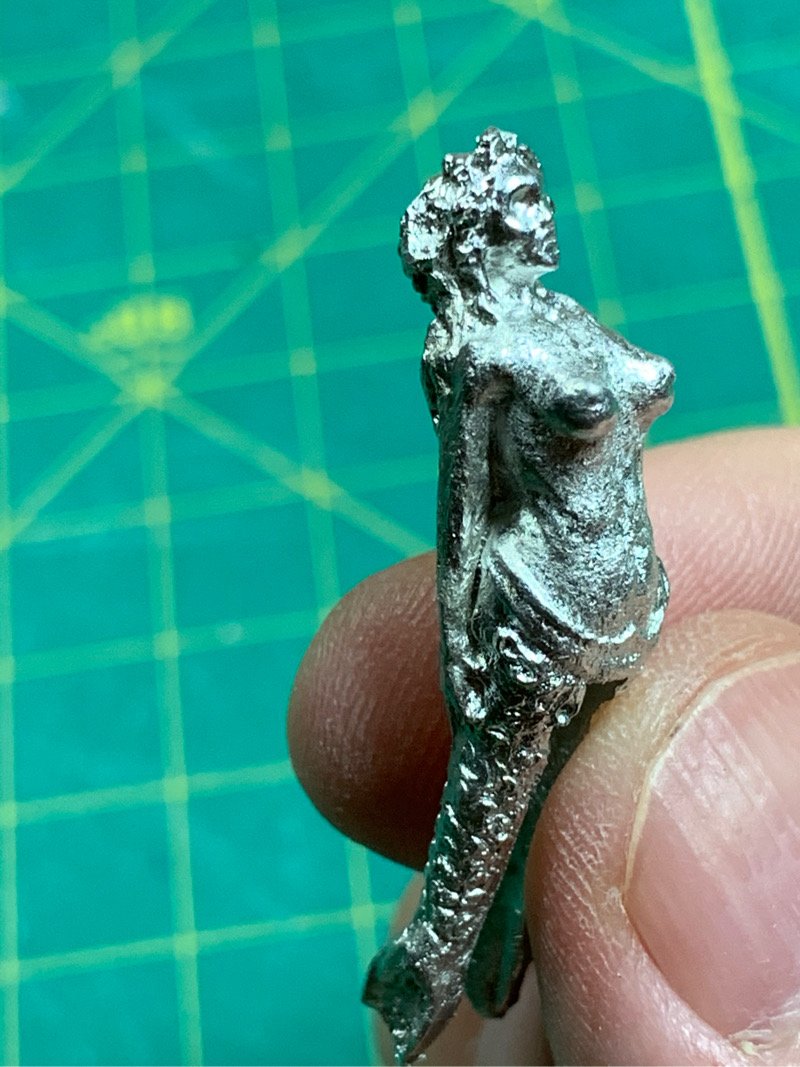
Nice article! The close ups of those figureheads do give some good perspective on how I might paint the mermaid figurehead. It’s interesting how the paint colors were equally stark and garish. Perhaps way back when the palette to choose from was limited.
-
Thank you for the reference, CPDDET! I’ll take a look. Also, I have a reference I acquired a couple months ago which has some excellent history on details from stem to stern! But sadly, I’m not a very good sculptor or carver.

-
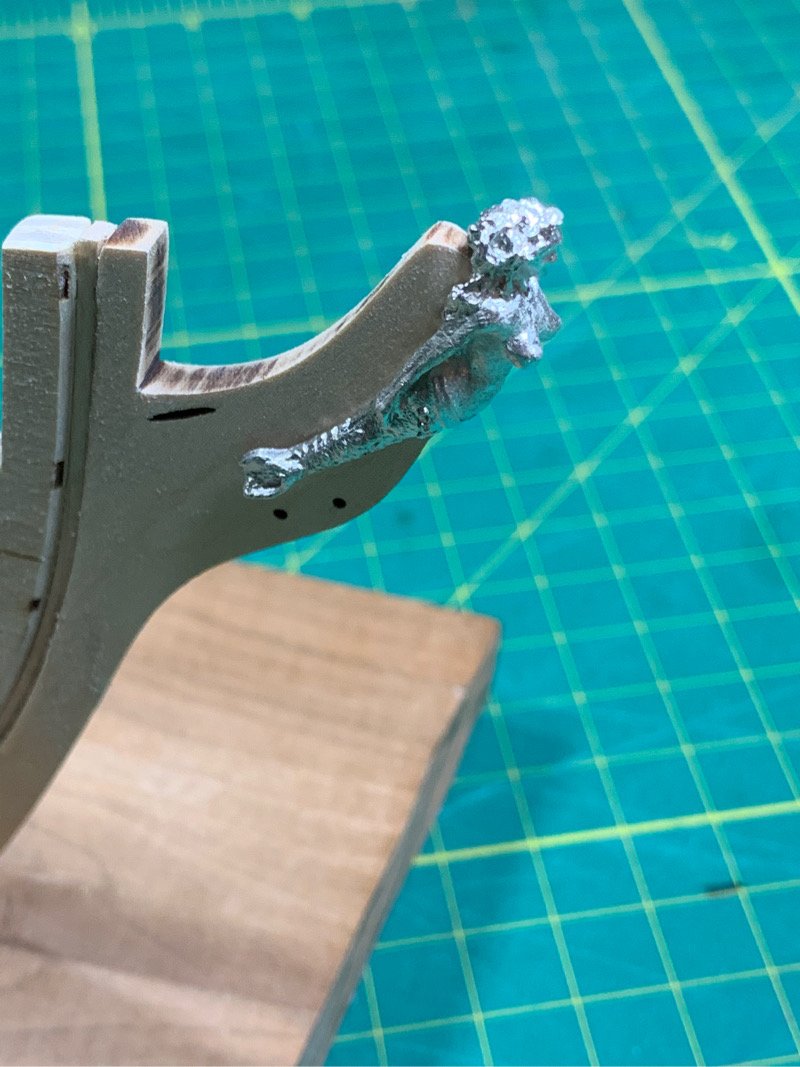
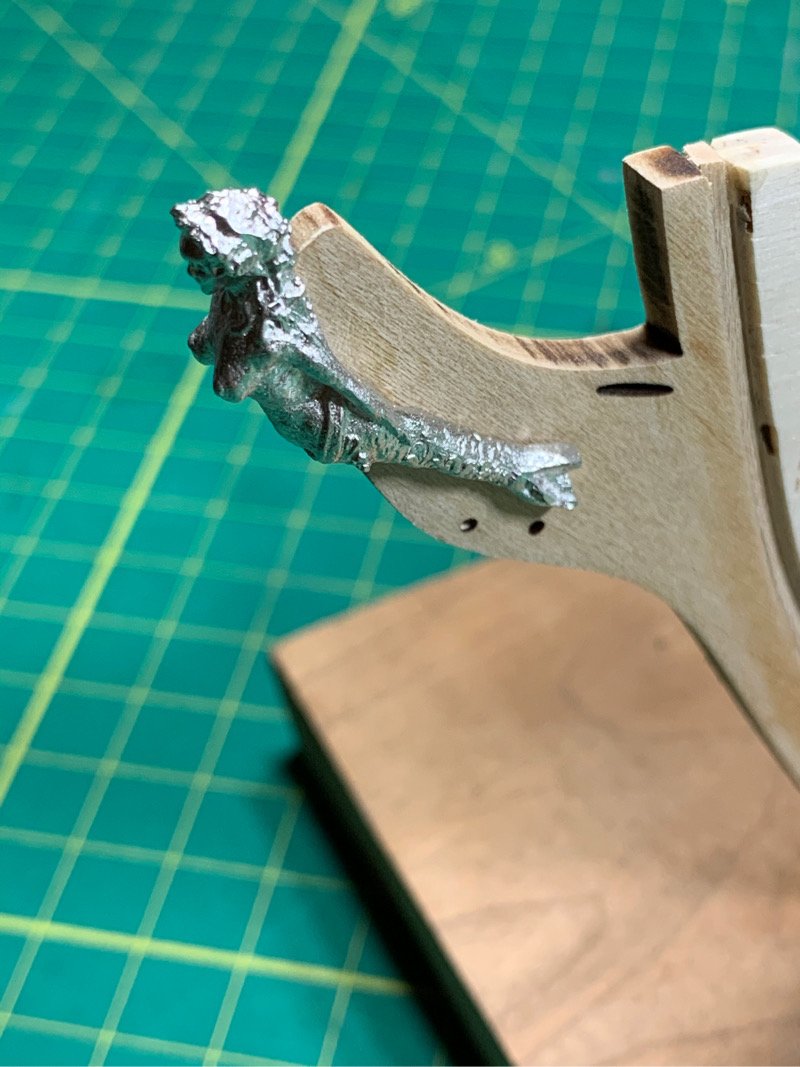
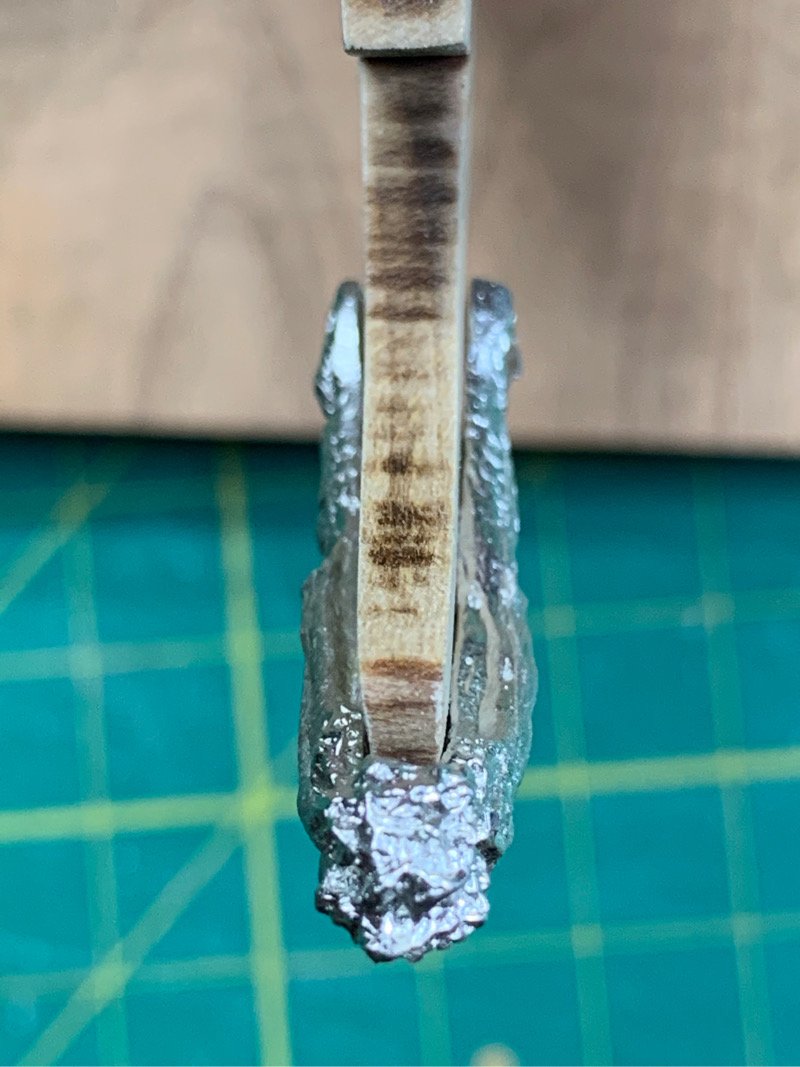
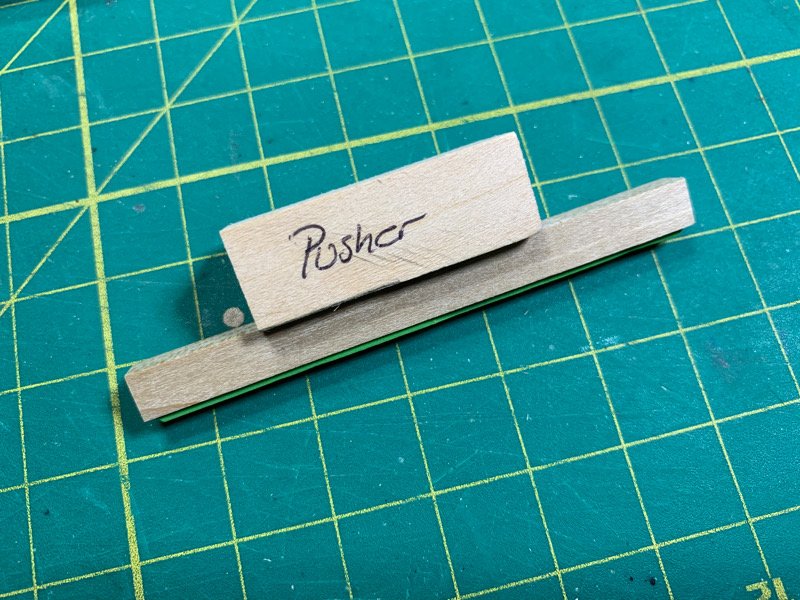
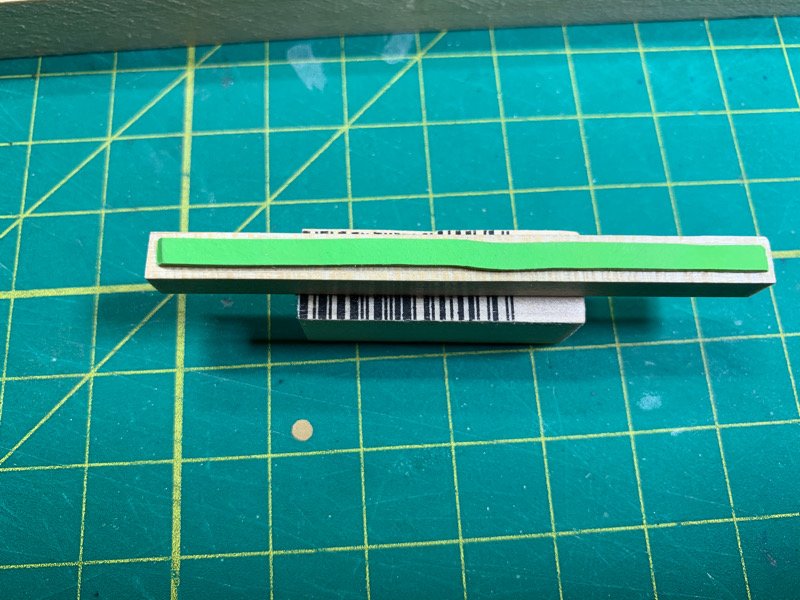
Slow day today. I decided I would pre-fit the figurehead and found the stem was still a bit too wide. Sanded it down to fit and it looks OK. The figurehead itself is actually in really good shape and it will be fun painting it at that stage much much later. I decided to try the copper plate jig a couple of times and found I was leaving too many fingerprints on the tape. In order to reduce my fingerprints, I decided to make a little jig to push/pull the tape through the tracks. It was simple enough to make using a section of quarter inch square dowel and gluing a cutoff off section of rubber band to the bottom. The rubber band ‘grabs’ the tape really well by applying only minimal downward pressure. There was no marring or bruising of the tape and it works as either a puller or pusher. I added an additional section of wood on top to act as a handle and make it easier to manipulate. It works like a charm! Moving on!!!
-
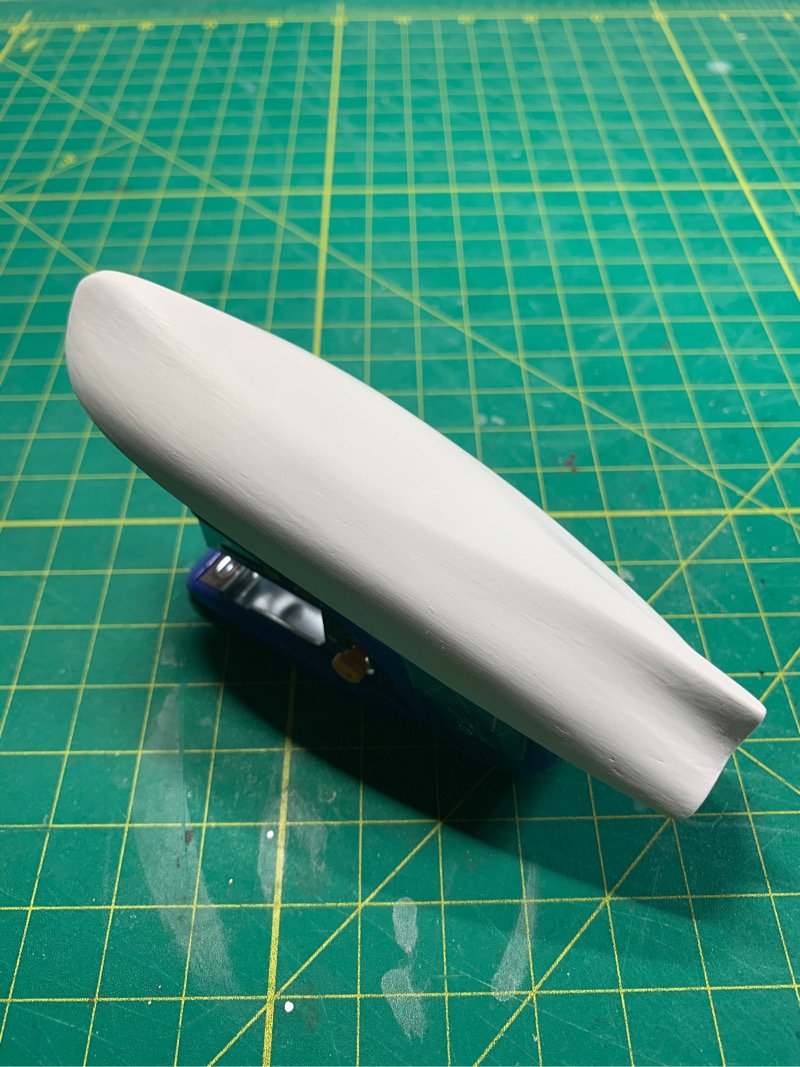
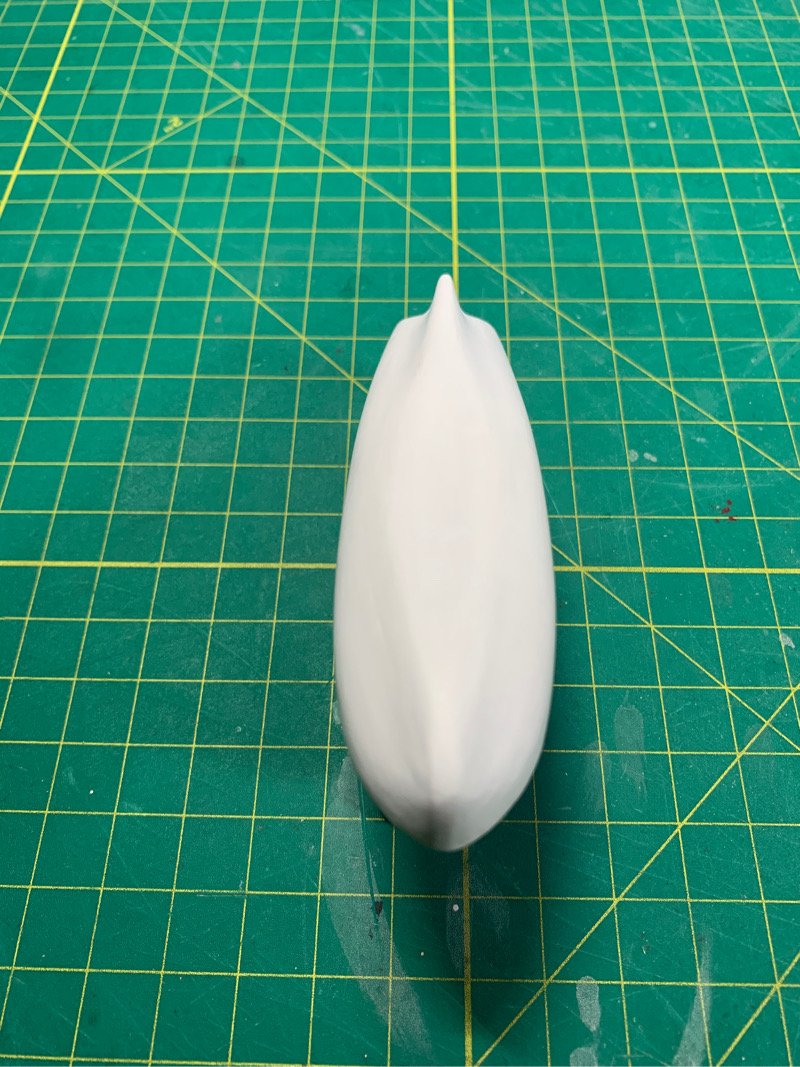
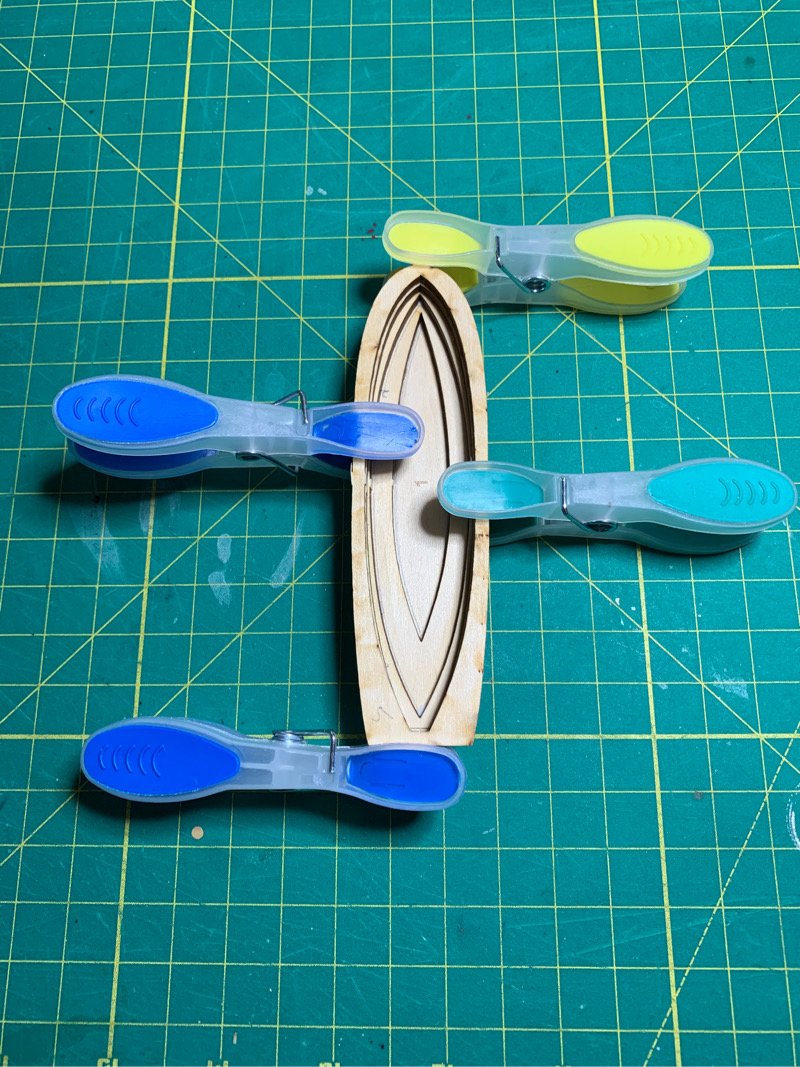
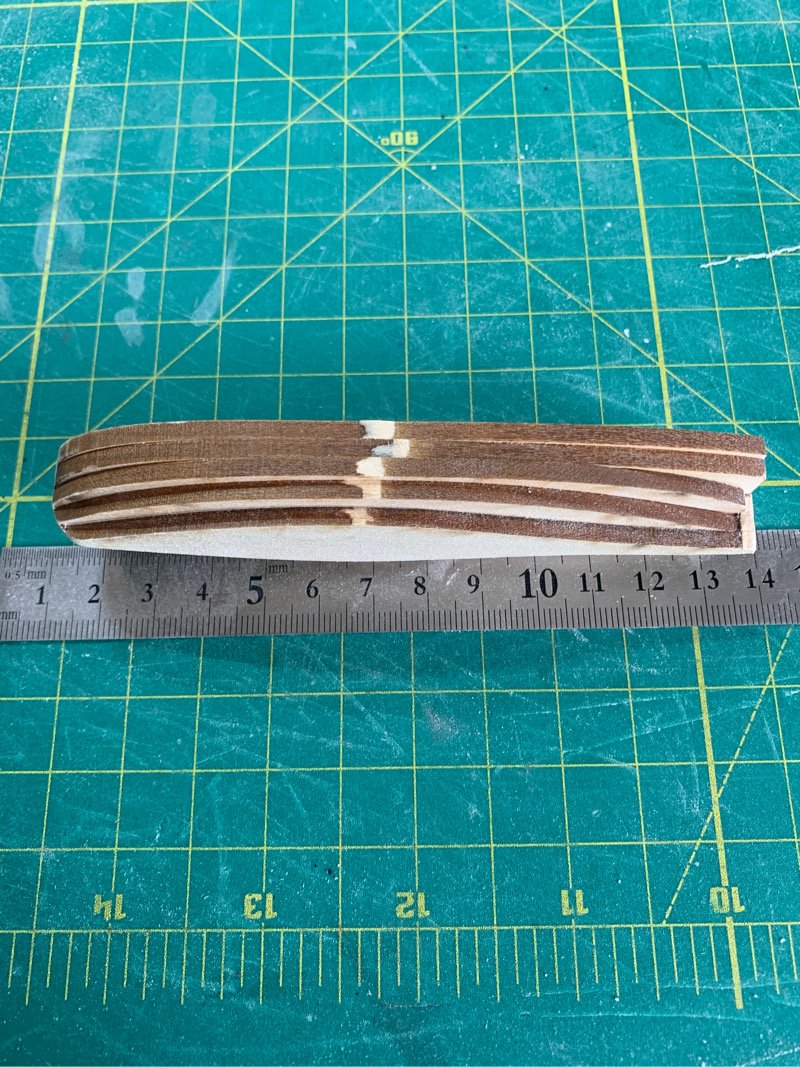
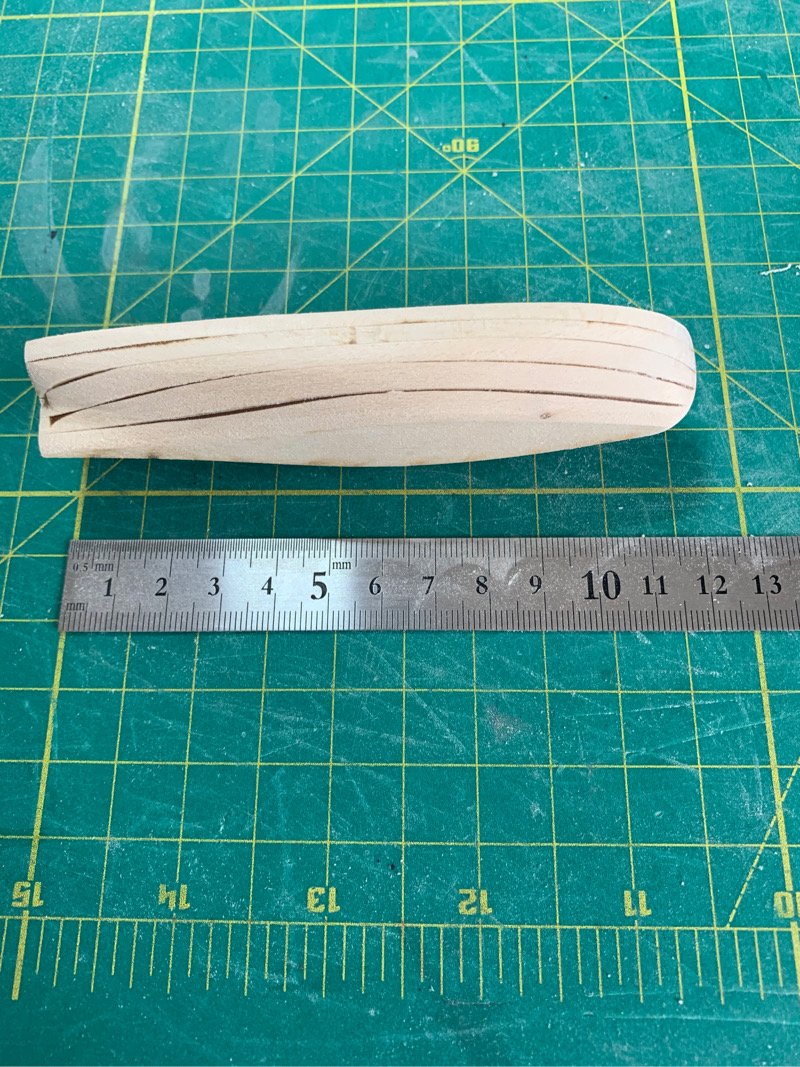
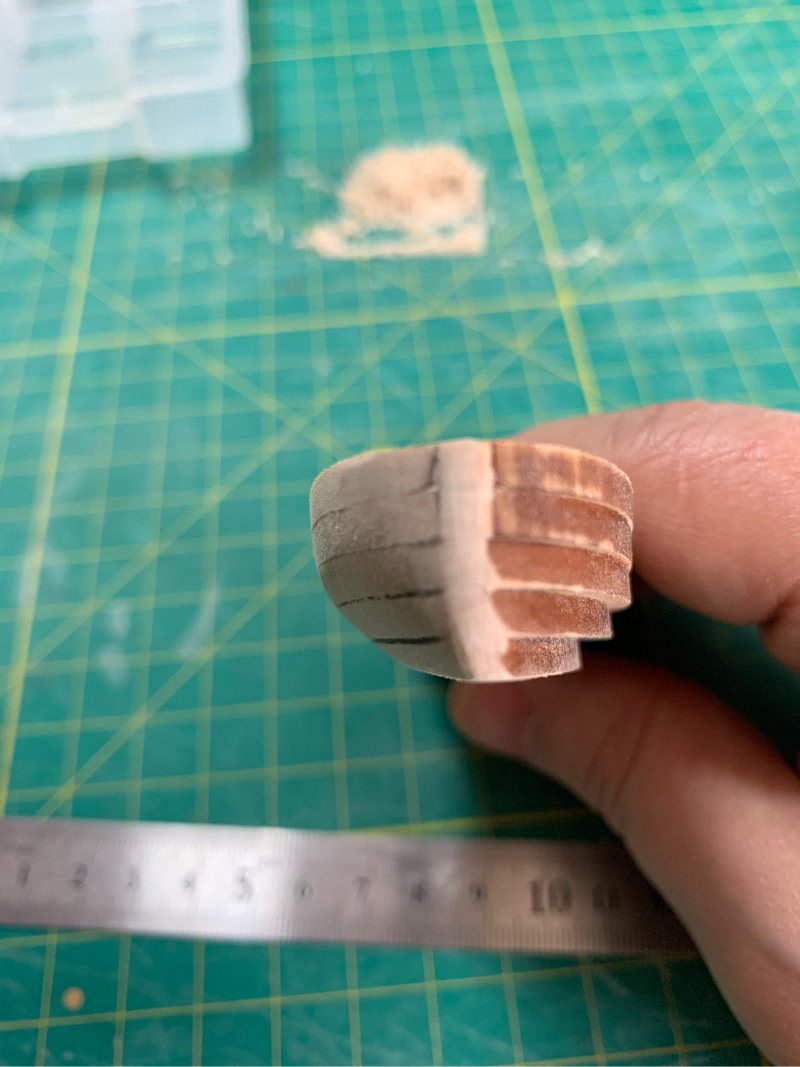
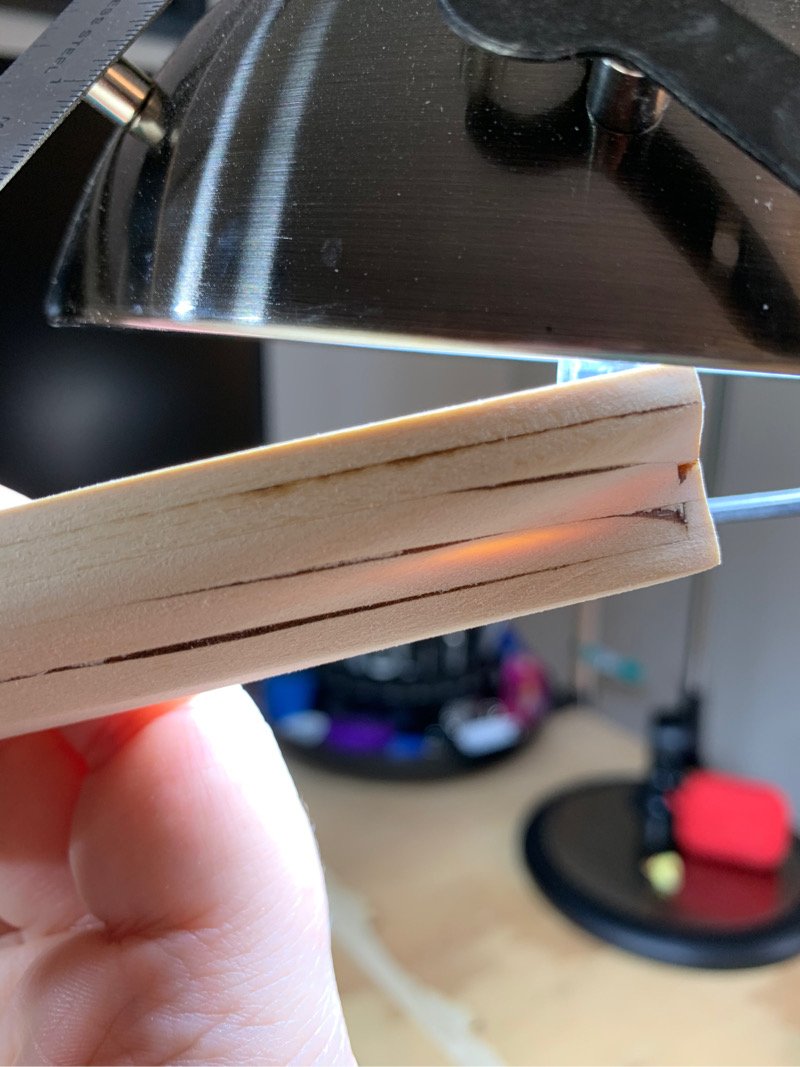
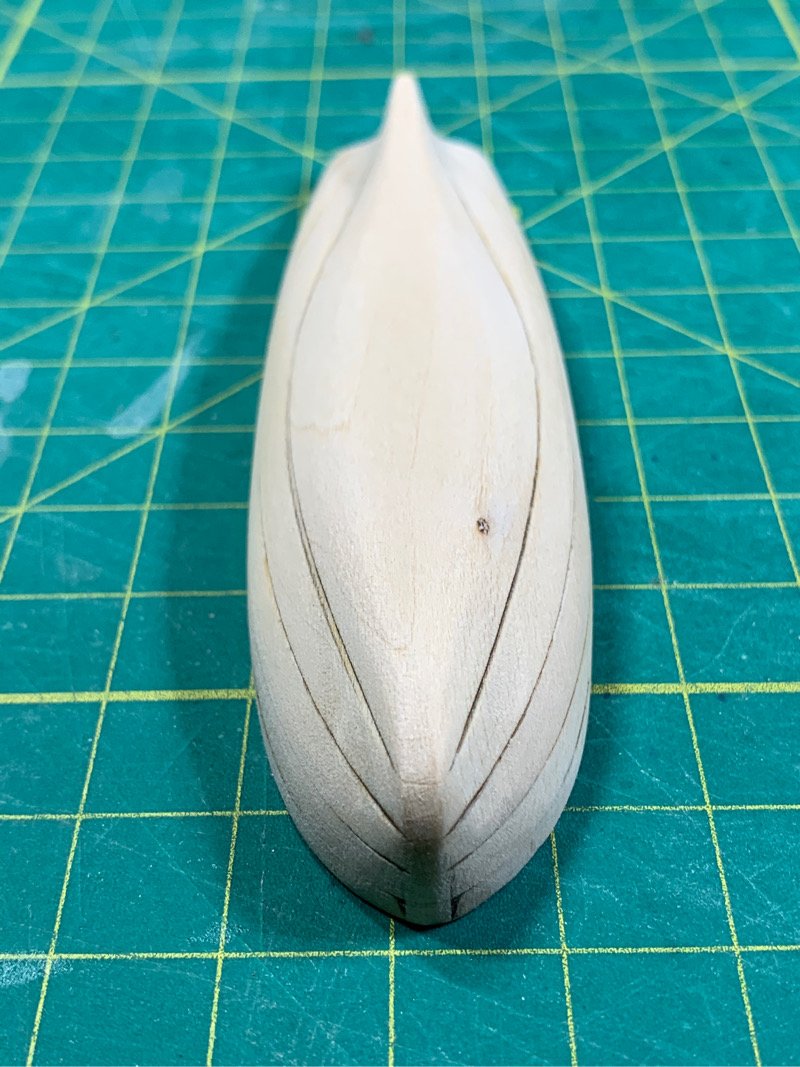
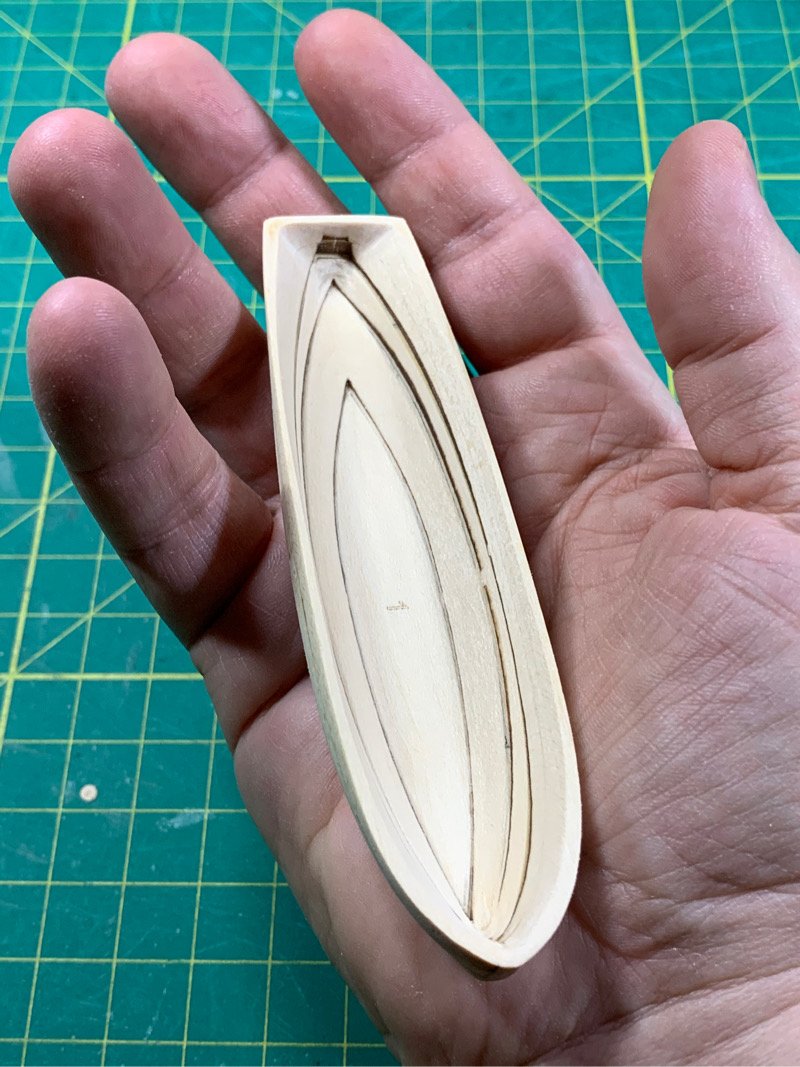
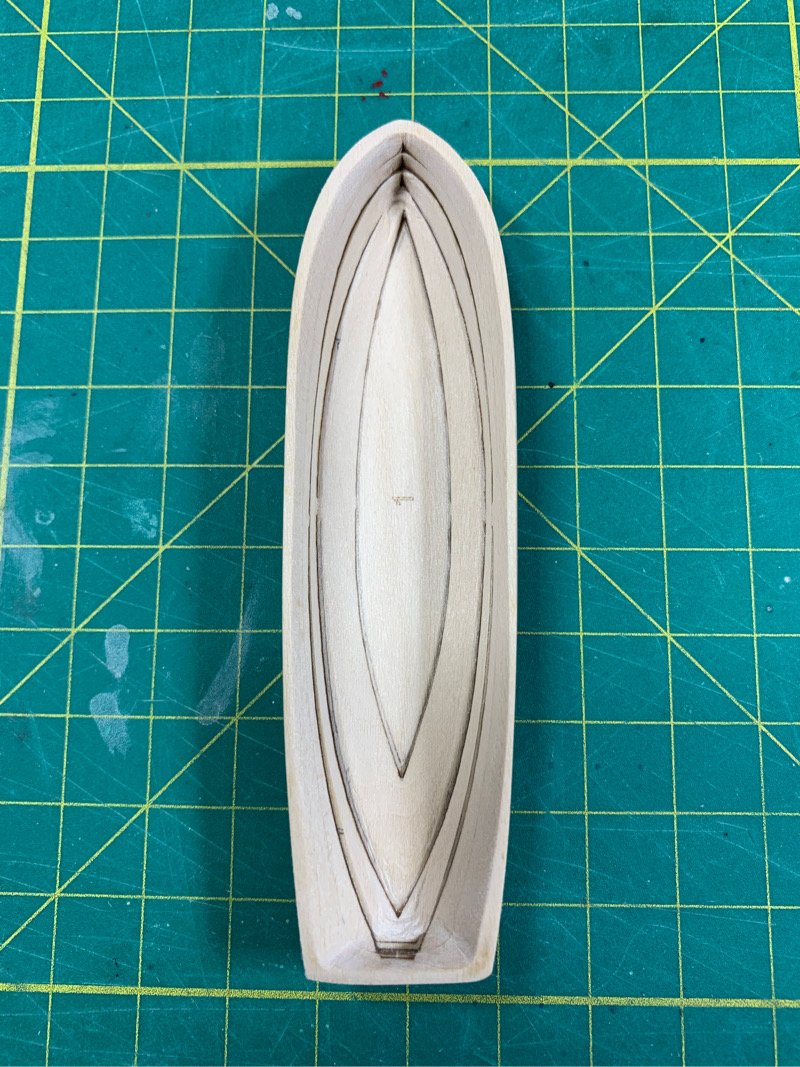
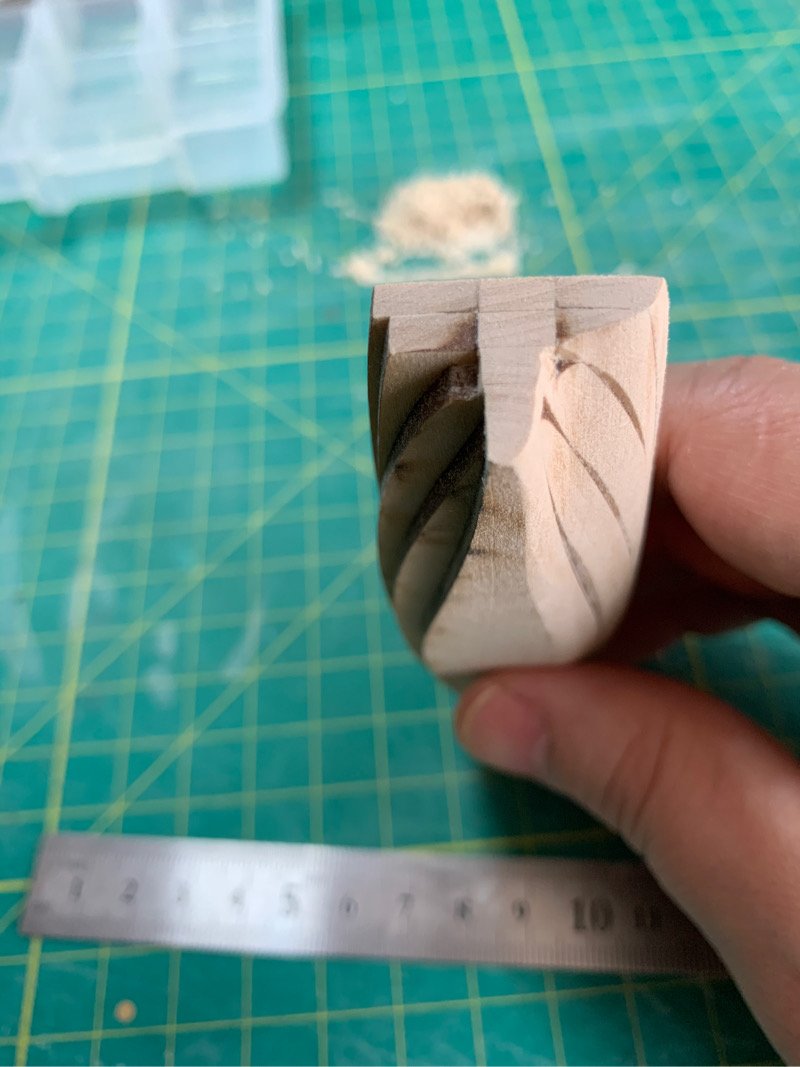
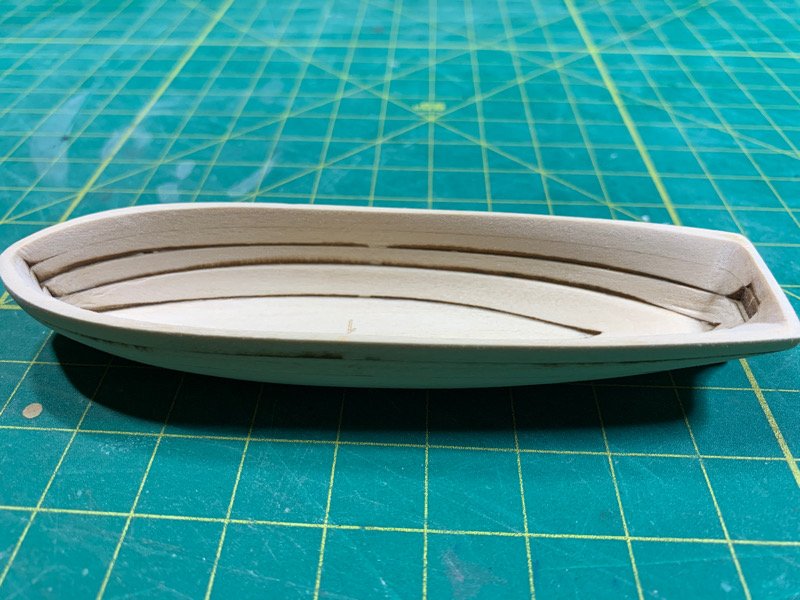
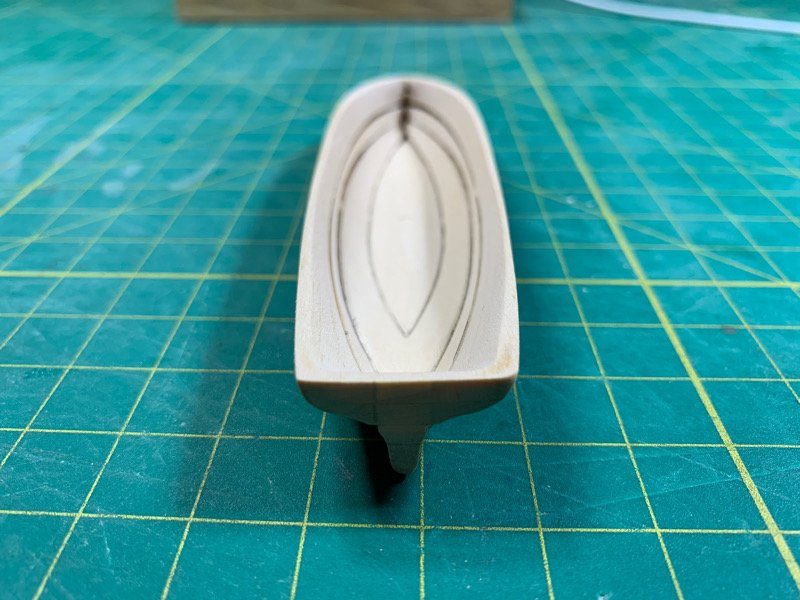
Decided to take a side road and start the body of the ship’s long boat. In truth, I was kind of intimidated by the long boat on the Sultana kit. The other build logs do such a beautiful job of making the ship’s boat, and I could not imagine how I could get a good boat shape without brutalizing the wood. So....many hours later...I’ve got a decent start on my ship’s boat. Not a bad result. I used all hand sanding. Took my time and many breaks. And to top it off...I figured out how to make a perfectly triangular 1mm dowel from square one!! Moving on!!!
-
I drilled mine to about 1”. A shallow hole give you more room to play. I personally like a solid mast. You can always sand down the base or the mast (dowel) to give you more ‘play’ to adjust the angle. Another nice thing about a deeper hole is you can (if your masts are well aligned and the hole a snug fit) forego glue altogether. I think it’s a personal choice. But your holes look great. I’m sure it will turn out beautiful regardless. 😃