Overworked724
-
Posts
1,266 -
Joined
-
Last visited
Content Type
Profiles
Forums
Gallery
Events
Everything posted by Overworked724
-
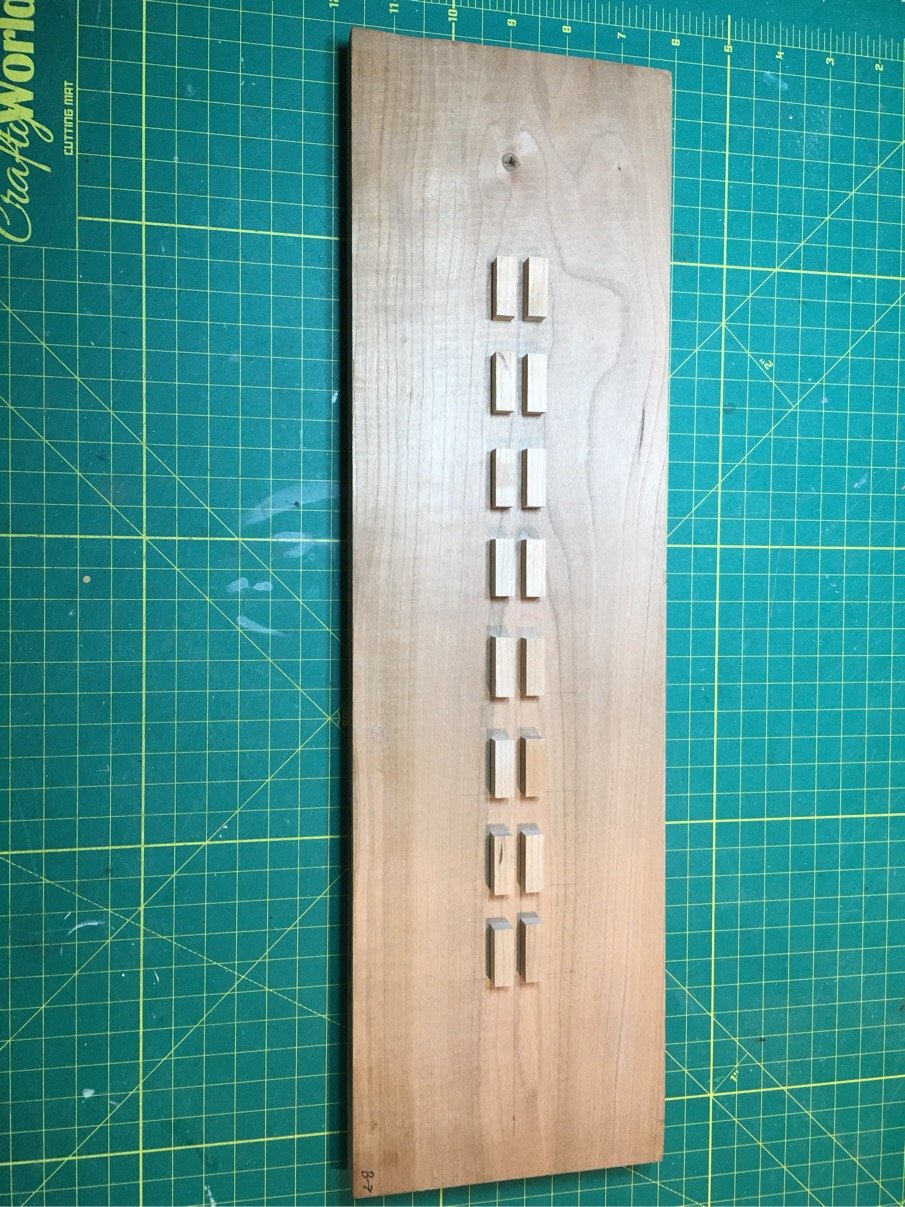
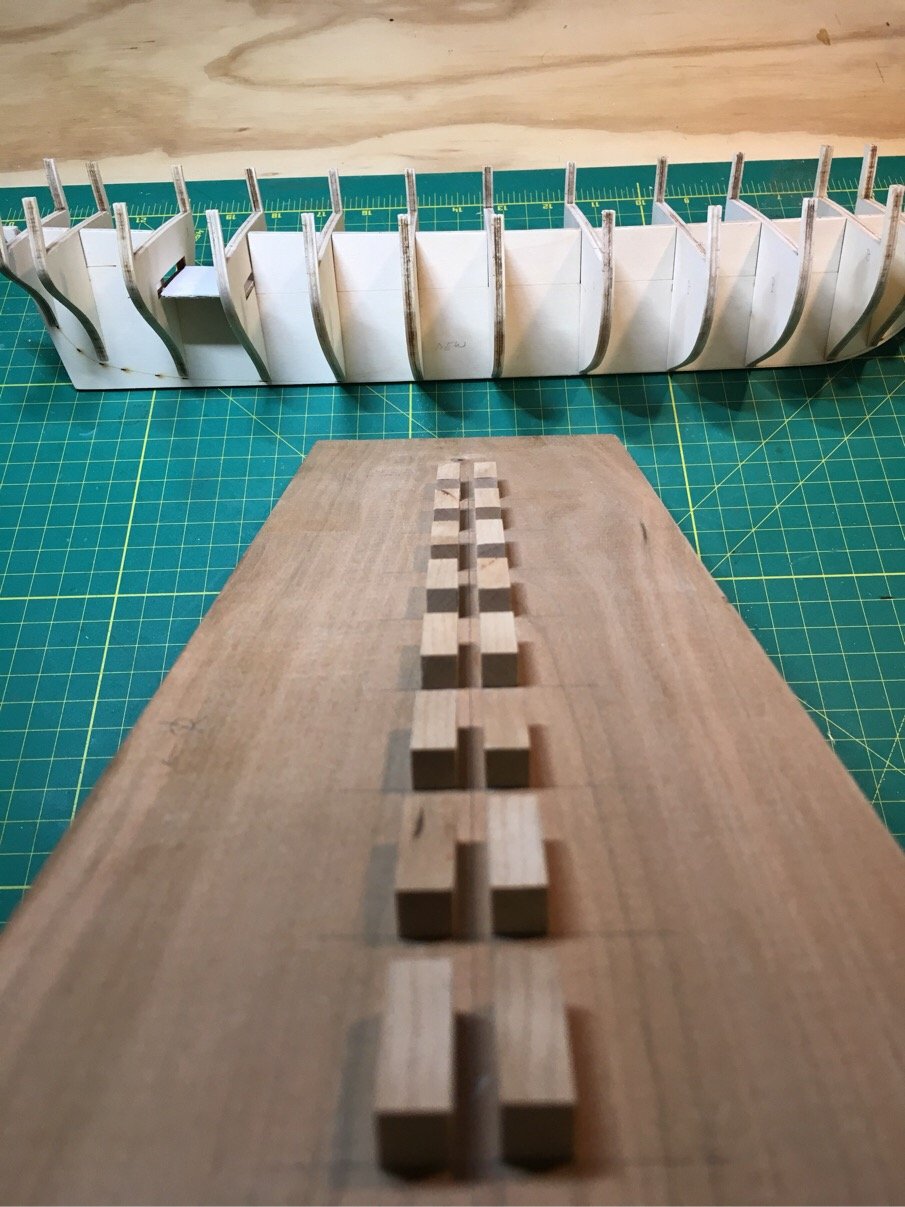
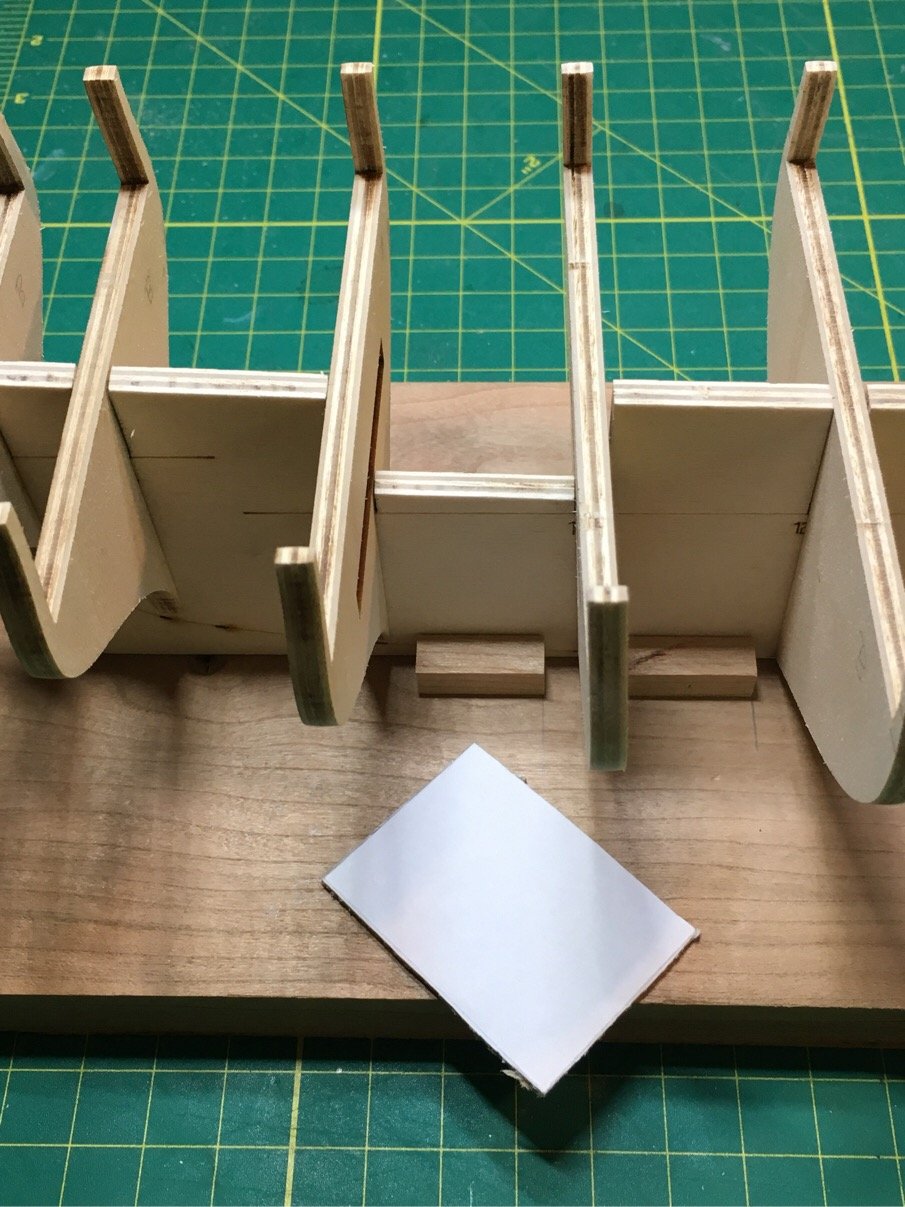
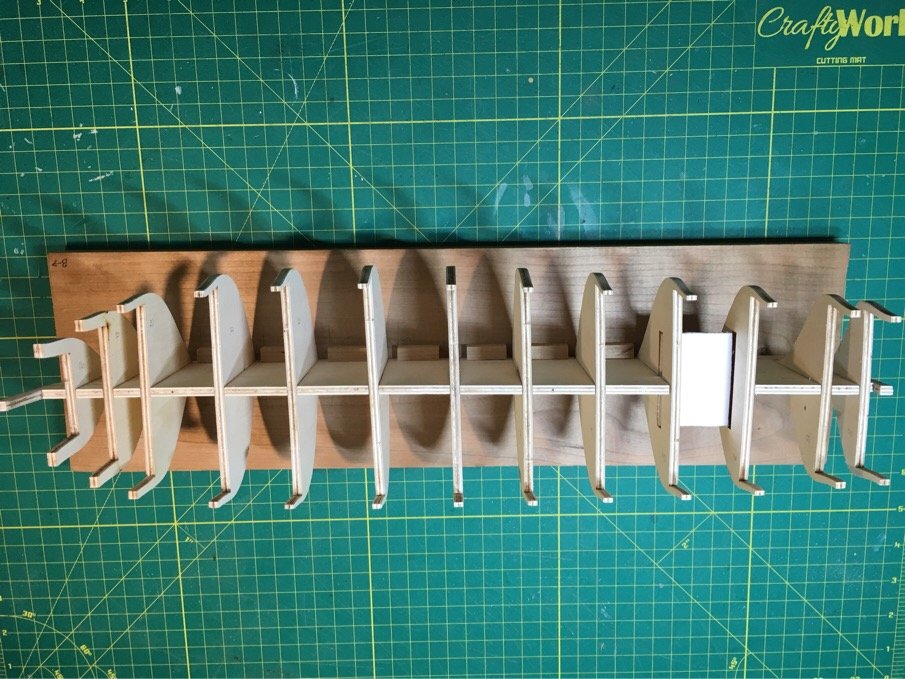
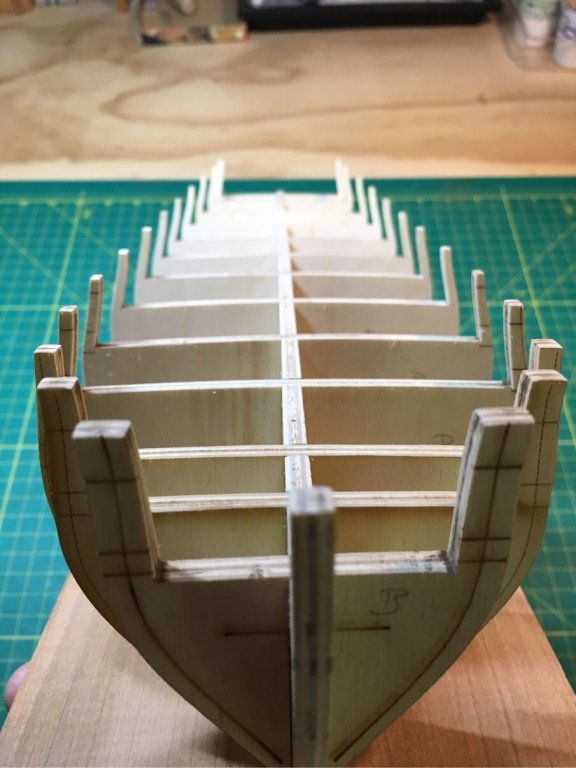
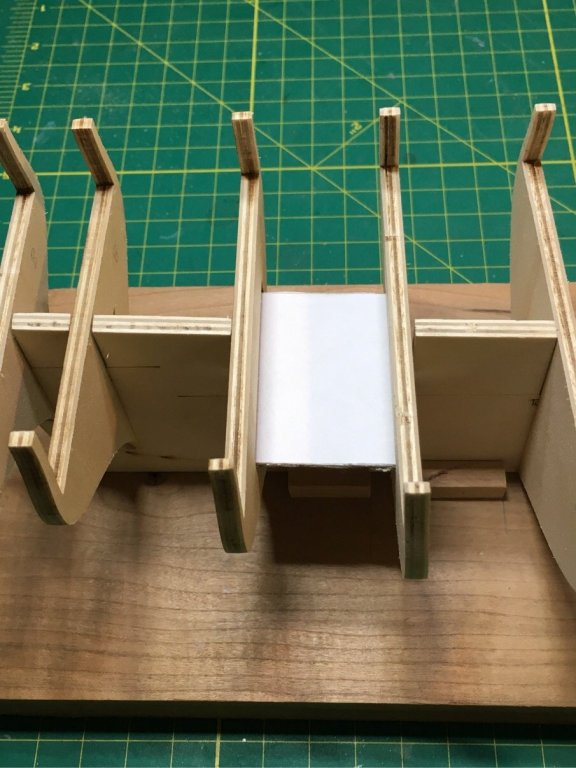
 Got a chance to spend time in shipyard! Some slow but steady progress. Took it slow and got the majority of the char off the bulkhead former, frames and the stern pieces. Gentle sanding...you can see they still look a bit ‘dirty’ but they are smooth surfaces and should provide good purchase with glue. Very gentle sanding on the stern pieces! Dry fit the frames - there is enough wiggle room for a good fit and still ensure square alignment. Will use fillers in between frames as others have done when the time comes. Going to take my dear sweet time on this part since I know how misalignment will ruin the day. Played around with an the false second deck. Will simply build it on a thin piece of wood and slide it in place. Used a cardboard cutout as a trial piece. Seems to work ok. Some ‘baby’ pics below. Off and running!!!
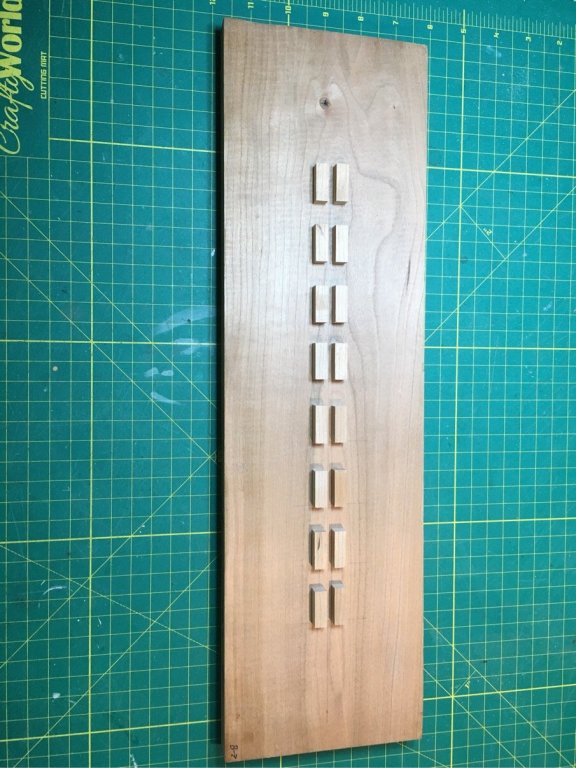


-
Advise on a particular model-1st build
Overworked724 replied to Christa's topic in New member Introductions
Great advice! Agree that if there is a full build log with pics it aid your comfort level in progression through the stages of your build. Good luck!👍🏽 -
Advise on a particular model-1st build
Overworked724 replied to Christa's topic in New member Introductions
I vote for the Model Shipways Sultana. LOL But I’m biased...it’s the only wooden ship model I’ve made so far! -
Greetings from North Yorkshire, England
Overworked724 replied to Niallmhor's topic in New member Introductions
Welcome!!! -
Not much progress. Just sanding the parts and enjoying the new build. On a related note...I am going to enjoy every step of my new build! I’m sooo excited when I walk in the shipyard with my new lady...and all the problems she is going to cause!!! Haha. Sanding...sanding... Moving on.
-
Hi Peter - those are interesting clips you used for clamping. Do you know where you got them or what they are called? They look like they don't have hard 'jaws'.
-
Looking good!!!
-
Hi all, Since my build log will be one of many Syren build logs...I don't wish to muddy the waters by posting the 'new box' pictures! I think people have seen enough. But I can post a couple of updates. (pics to follow later on 1) The USS Syren kit arrived in good shape from Model Expo but a couple of the parts, namely the bulkhead former (BF) and larger frames were badly warped. I contacted Model Expo and they immediately shipped replacement parts which came within the week! Great response time...and no 'pink' wood. I checked the BF right off and was satisfied it was fairly true. - Overall, kit looks pretty good! 2) Having unboxed and verified the parts, I realized later that I'd inadvertently trashed the part with the stem/stern pieces. I felt like an idiot...and Model Expo was, again, both swift and accommodating. They sent me a replacement - no questions asked. I'm not in the habit of destroying a model kit before I've started to build it...that was a first. =-) 3) I only worked with basswood on the Sultana, and never having laid my hands on any other types of wood aside from some walnut (awful stuff. I decided to invest in some sample pieces of Alaskan Yellow Cedar and Boxwood (now back in stock) from Syren. The investment would pay dividends and it gives me some options in messing around with something other than my surplus of basswood strips. Besides, it's not like the wood has an expiry! - After looking at the boxwood, I can understand what the excitement is about...it's very nice wood. Tight grain, holds an edge, cuts like butter, doesn't have that 'hairy' look after you sand it...wow! Ship build update (pics later): - Built a simple stand from scrap wood similar to other folks on this forum to keep my little Syren upright as I start working on getting her skeleton together - Cut out the frames and started sanding off the char - not too much sanding! But...I see lot's of sanding...in my future
-
In truth...I forgot to bring it! Plan to bring it next month for sure! On a a side note...the Admiral approved of my choice to switch from the Stuart Royal Yacht to the USS Syren about 5 minutes after we visited the USS Constitution last month in Boston!!! LOL...lesson learned...take your wife on visits to historic ships. 😁
-
Absolutely stunning work! I’m just starting mine and have been reading your build log...what a fantastic work of art to be incredibly proud of!!!
- 242 replies
-
- 1
-

-
- syren
- model shipways
- (and 1 more)
-
Hi All! Well, as promised, I decided to start my next ship after a brief hiatus following the launch of my HMS Sultana. But...I decided to follow other folks who jumped into the USS Syren! It really seemed like the best choice for a number of reasons. - The Sultana gave me a good base for my skill set, but the Syren will expand on it in a step wise manner (Gaff rigged schooner to a more complex Brig) - The Syren and Sultana are built at the same scale, giving me a bit more confidence in applying what I learned building the Sultana - The Syren will be my first plank on bulkhead (POB), and represents a new skillset I have yet to really develop - namely planking - There are a lot fo great completed build logs on the Syren here...so lots of immediate knowledge from other modelers just a click away - The practicum written Chuck Passaro for the USS Syren is priceless! I work a lot, and during my Sultana build the various 'breathers' I took did not slow me down, since the practicum gave me a mental placeholder and seamless way to pick up where I left off without breaking stride. (In other words, the practicum I think really aids those modelers who often need to step away for weeks or months occasionally!) So...it's from here that I will start my new Syren build. Moving on...
-
Oh my GOD!!! I know you might be in pain....and I really do hope you heal quickly and without issue! But DAMN!...I can totally relate to your passion for your ship!! Watching with interest! Get better soon!
- 1,135 replies
-
- 2
-
-
- model shipways
- syren
- (and 2 more)
-
I think your doing splendidly! You seem to be coming to the home stretch!
- 360 replies
-
- 1
-
-
- sultana
- model shipways
- (and 1 more)
-
Just started following, Jesse! Beautiful work. Will be attempting this build in the near future and you are setting the bar very high indeed!
- 1,306 replies
-
- 5
-
-
- syren
- model shipways
- (and 1 more)
-
Great news, Andrea! To be honest, if You read my blog you will find I over sanded, over carved, and generally made way too many 'mistakes' in my entire build. They are also your best teachers...you are probably getting the sense of confidence that comes with wood being 'forgiving'. Wood filler - great stuff that... Keep up the good fight!! Watching with interest!
-
Dave - you should absolutely blow that horn! I was reviewing my pics of your work on my phone. Honestly, your build log pics don't do your work justice. I particularly loved your Battle Station which I think was absolutely flawless. The craftsmanship and detail are still making me shake my head. Very Very well done and twice deserved!
- 128 replies
-
- 4
-
-
- mordaunt
- battle station
- (and 1 more)
-
That's the best thing about the forum! We can learn from each other! I've gotten some excellent ideas for new jigs/techniques from your blog as well. You are doing great and I will continue to follow your progress!
-
I don't know if it's accurate either! But I think it looks terrific...nice effect!
-
Hi Dave So glad to see you in Mannitowoc and have an opportunity to see your Battle Station in person! It really was inspiring and your attention to detail was absolutely incredible! Had a question - where did you get the variety of woods used in your build? Pat
- 128 replies
-
- 4
-
-
- mordaunt
- battle station
- (and 1 more)
-
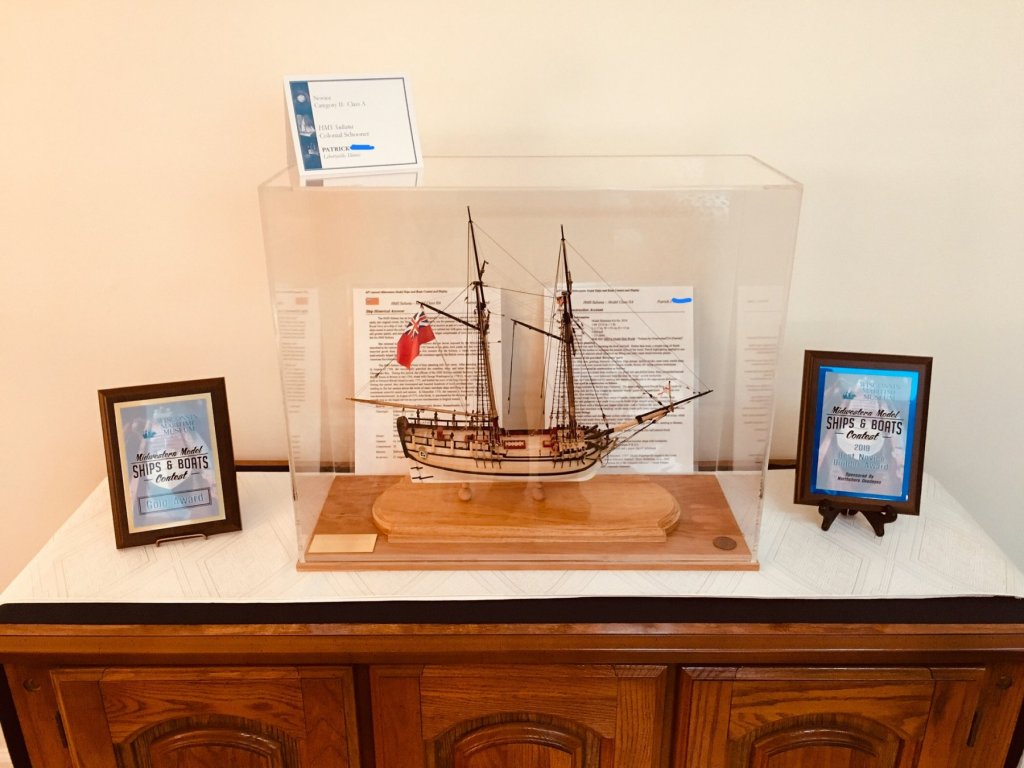
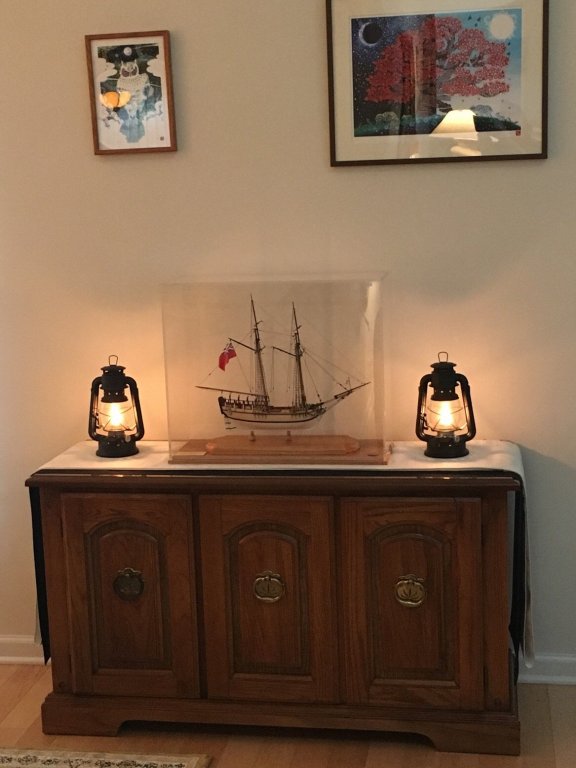
Thank you @DocBlake and @Red Rhino! As Doc Blake mentioned, I entered my HMS Sultana as a contestant in The 43rd Annual Midwestern Model Ships & Boats Contest and Display at the Mannitowoc Maritime Museum in Wisconsin. I was really happy to receive a Gold Award at the Novice level, but both surprised and honored to receive the Best Novice Builder award! It was really a wonderful event this year and great timing for me to enter my little ship in the event! (And the people/modelers are just awesome!!) But even more meaningful to me was closing the final chapter of this blog/build on such a high note! So, as my final build entry, I’m posting the picture of my ‘little ship that could’ in her place of honor on our dining room server, upon her return from the Maritime Museum, bordered by her two awards, with the build log and historic log in the background! Moving on...to my next build/project!!!
- 449 replies
-
- 13
-
-
- sultana
- model shipways
- (and 2 more)
-
Very cool trick with the deadeyes! Looking good!
-
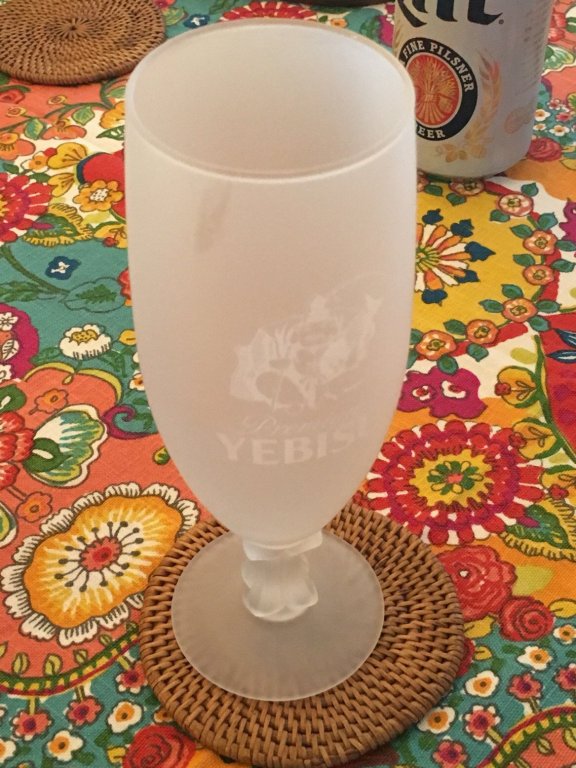
And celebrating with sushi and a cold pilsner (Miller lite) in a color changing glass!! Could not help but post one last photo! Cheers, Shipmates!!!

- 449 replies
-
- 7
-
-
- sultana
- model shipways
- (and 2 more)
-
Awesome. Liking it!!! Darned good job!!!