Ian_Grant
-
Posts
1,668 -
Joined
-
Last visited
Content Type
Profiles
Forums
Gallery
Events
Everything posted by Ian_Grant
-
 Bill, the reef points are used to tie the sail to the yard when reducing sail. Crewmen standing on the foot rope bring the front and rear ends of the reef points up over the yard (after gathering the unwanted sail neatly) and tie them in a - wait for it - reef knot. To help the men pull the sail up with the wind blowing, there are also "reef tackles"; ropes which attach to the leech (side) of the sail at the end of the reef band (horizontal reinforcing strip sewn along where the reef points pierce the sail). Men hauling on these tackles pull the sail up to the yard to let the men on the yard gather it and tie it off. I do not know how multiple reef bands were handled; did the reef tackle just attach to the lowest band? ... did they take in a reef, tie off the reef points, then shift the tackle connection down to the nest lower band (implying they had to take in sail one reef at a time even when wanting to reduce sail drastically?). Might make sense since I expect they would want all the successive rows of reef points tied off. Which begs the question of how, when loosing sail, would the men on the foot rope know which knots in front of them were for which set of reefs? We need a greater mind than mine to answer this.
 -
Bill, those are the bowlines, used to haul the windward side of the sail hard forward when sailing "close to" (as close as a square rigger can get) the wind. They can prevent the sail being taken aback and perhaps damaged if there's a gust from a little more upwind.
- 1,503 replies
-
- 3
-

-
- Le Soleil Royal
- Heller
- (and 1 more)
-
This is another phenomenal build, Glen! Can't wait to see it bottled. We haven't had any days below -7C yet. We did have one big snowfall which allowed two or three glorious days of Nordic skiing in Gatineau Park but recent rain and melt has ruined it again. 😭
- 174 replies
-
- 4
-
-

-
- Waa Kaulua
- bottle
- (and 1 more)
-
God Bill, do you work non-stop? Sails look great!
-
Thanks Phil! I looked around just earlier tonight. National Maritime Museums Greenwich has a lines plan about 2m long (!). There are also a side elevation and some deck elevations at the Science Museum UK. What they lack is an athwartships elevation showing the deck cabins which appear to be of an unusual design I can't quite make out. Also, Model Boats Dec 2008 issue has a model of the ship, if I can find it. Revell also has/had a kit, but pricey. But first, let's get this galley completed!
- 505 replies
-
- 3
-
-
- Quadrireme
- radio
- (and 1 more)
-
I seem to recall some other builder saying you can get hull lines for the Great Eastern but limited info on deck layouts and superstructure.
- 505 replies
-
- 1
-
-
- Quadrireme
- radio
- (and 1 more)
-
Hi Vic! Too much! At the start of the hull buiId, I overestimated the weight of the hull and mechanisms and electronics, then designed a full bilge to handle that displacement. It turned out less than estimated so I had to add ballast to make up the difference. I'd have to look back in the log but I think the ballasted weight for correct waterline came to 24-25 lbs. Not easy to carry with all the oars projecting!
- 505 replies
-
- 3
-
-
- Quadrireme
- radio
- (and 1 more)
-
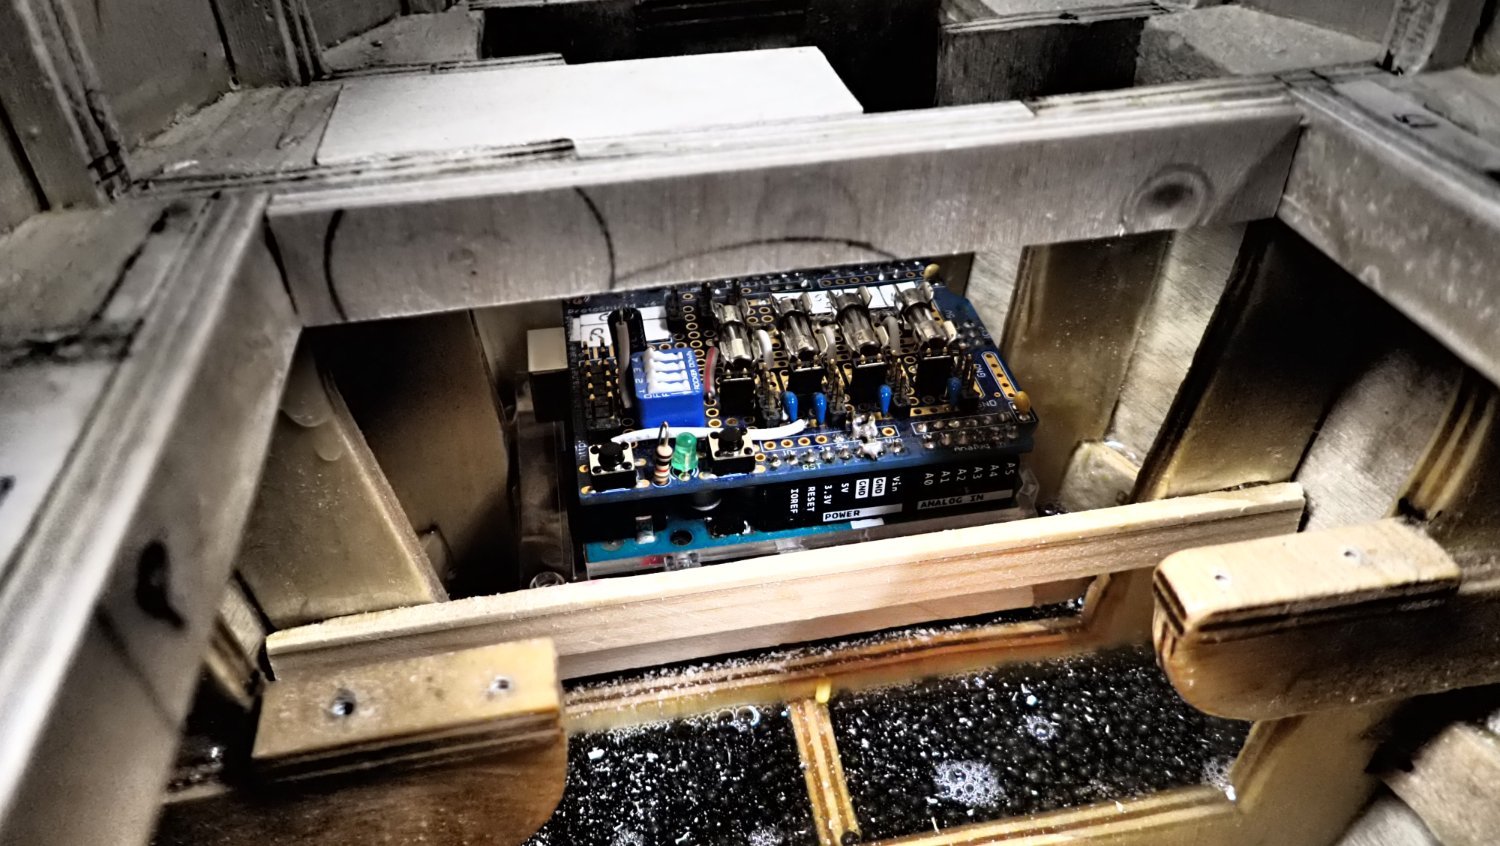
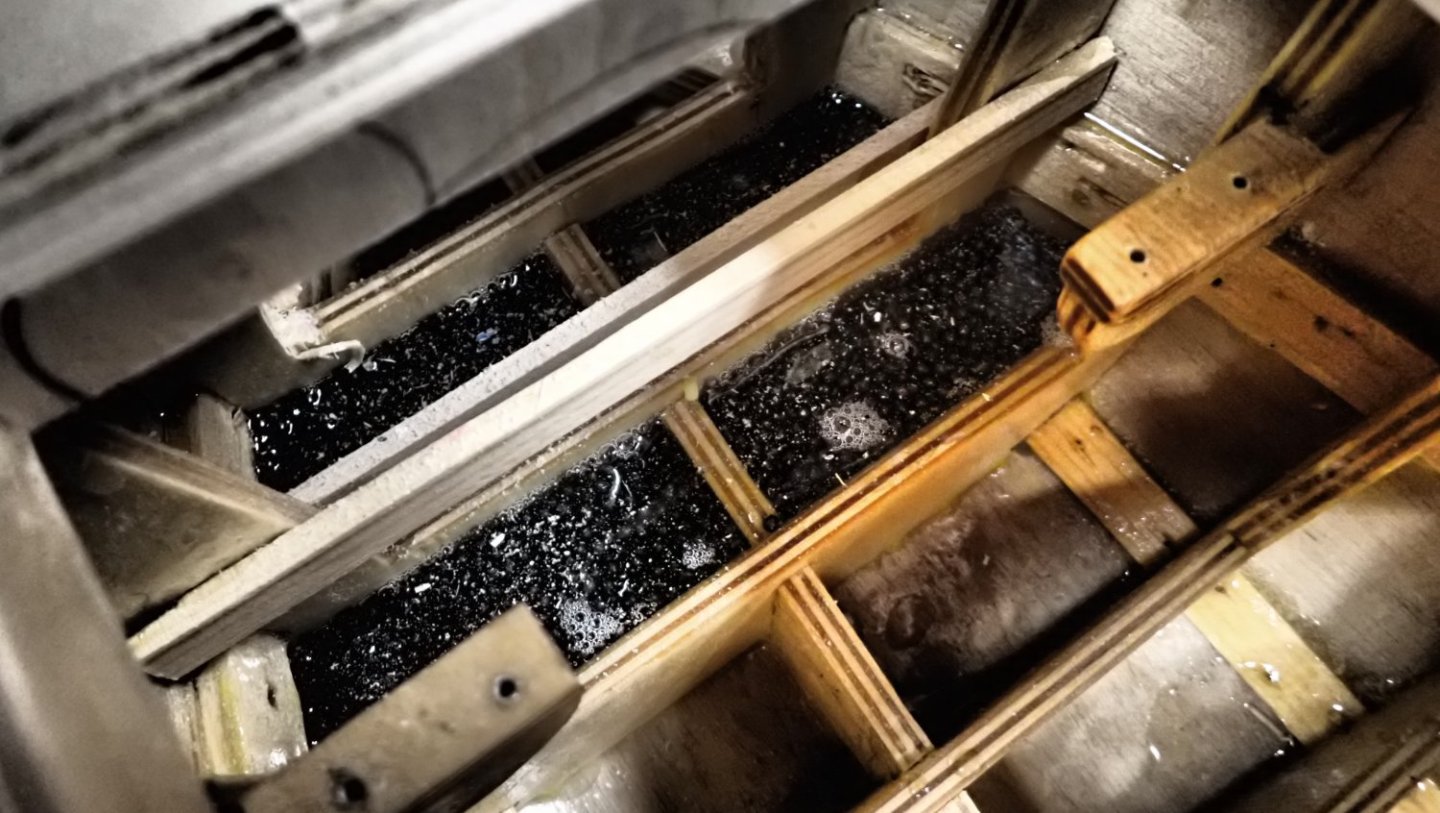
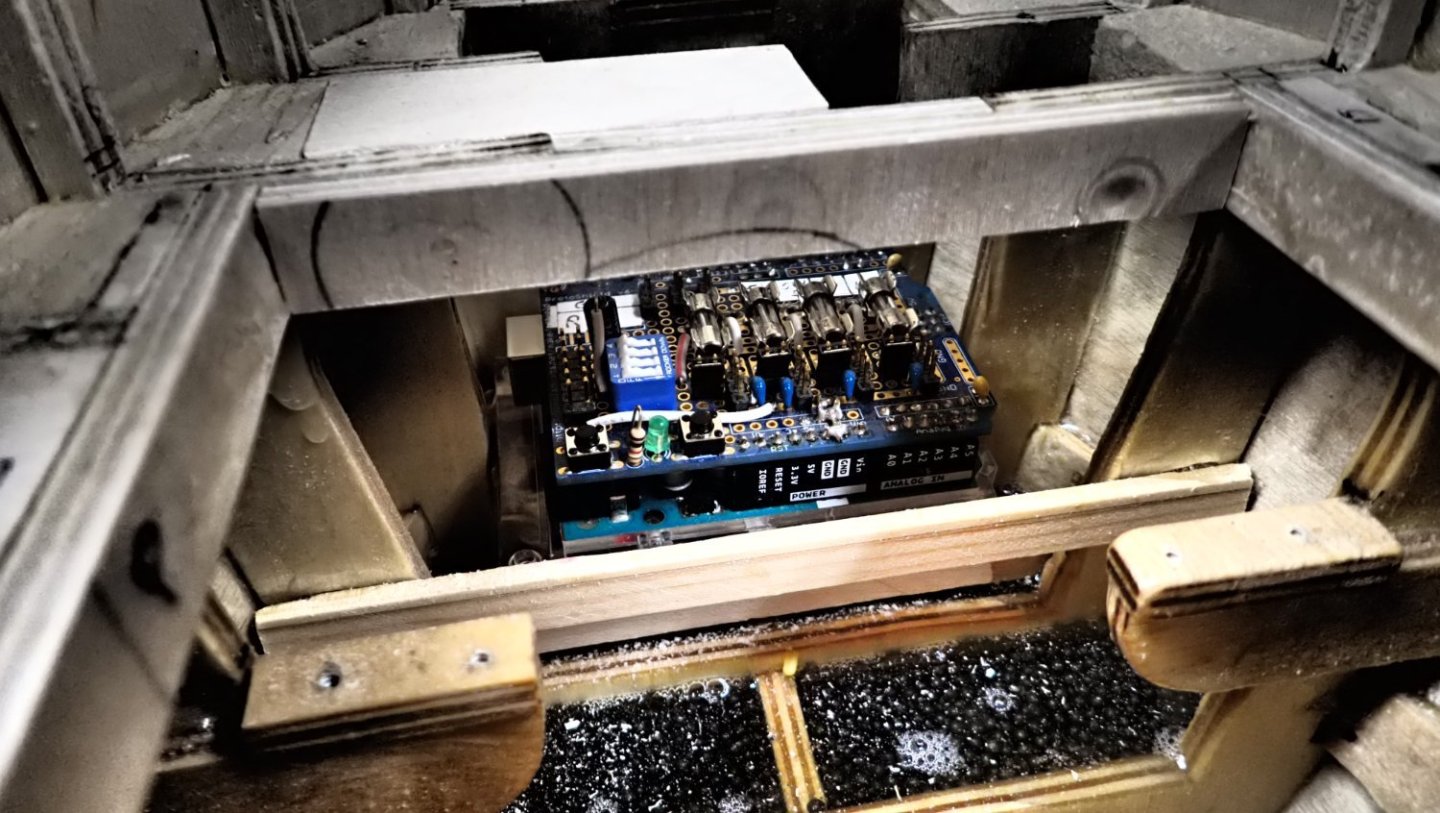
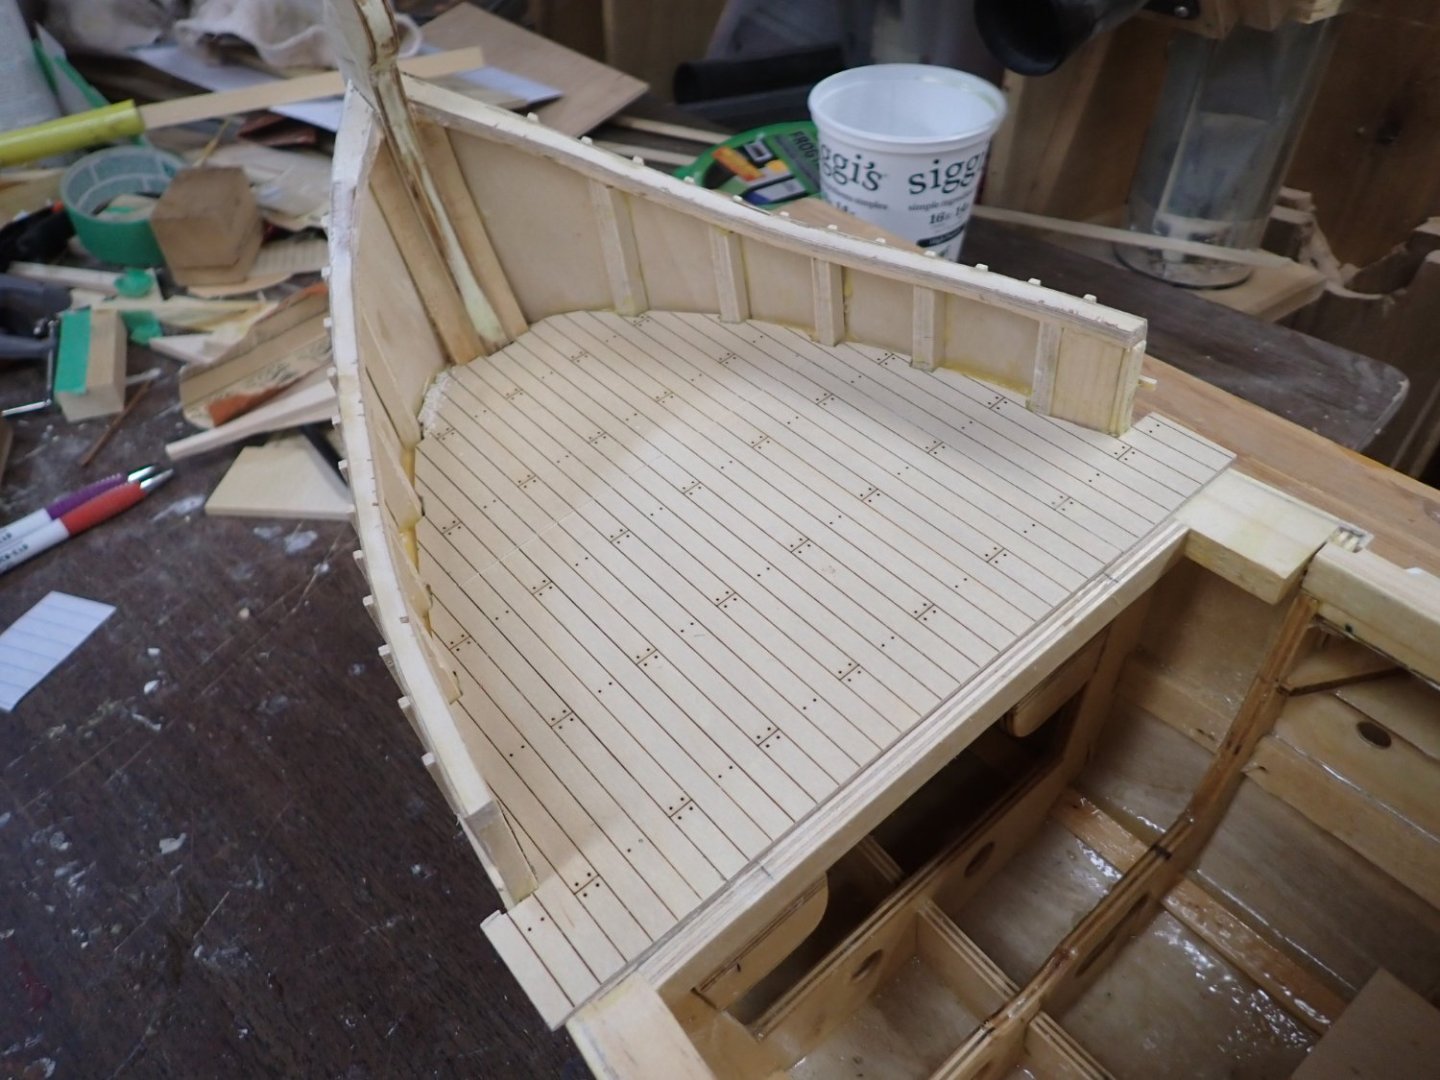
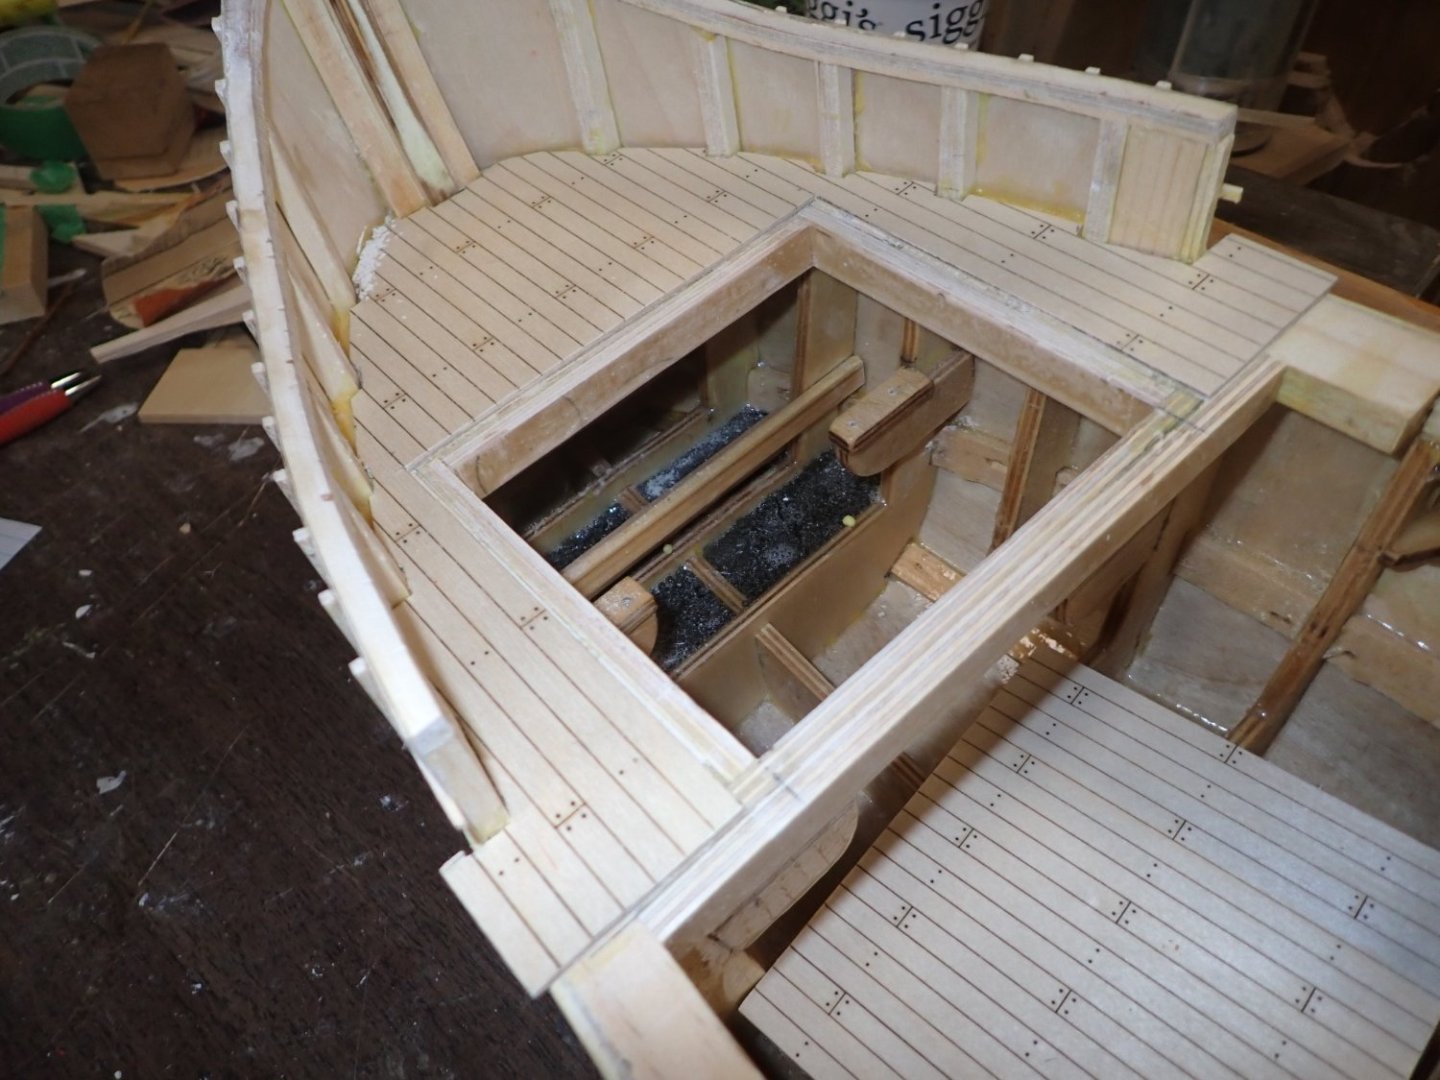
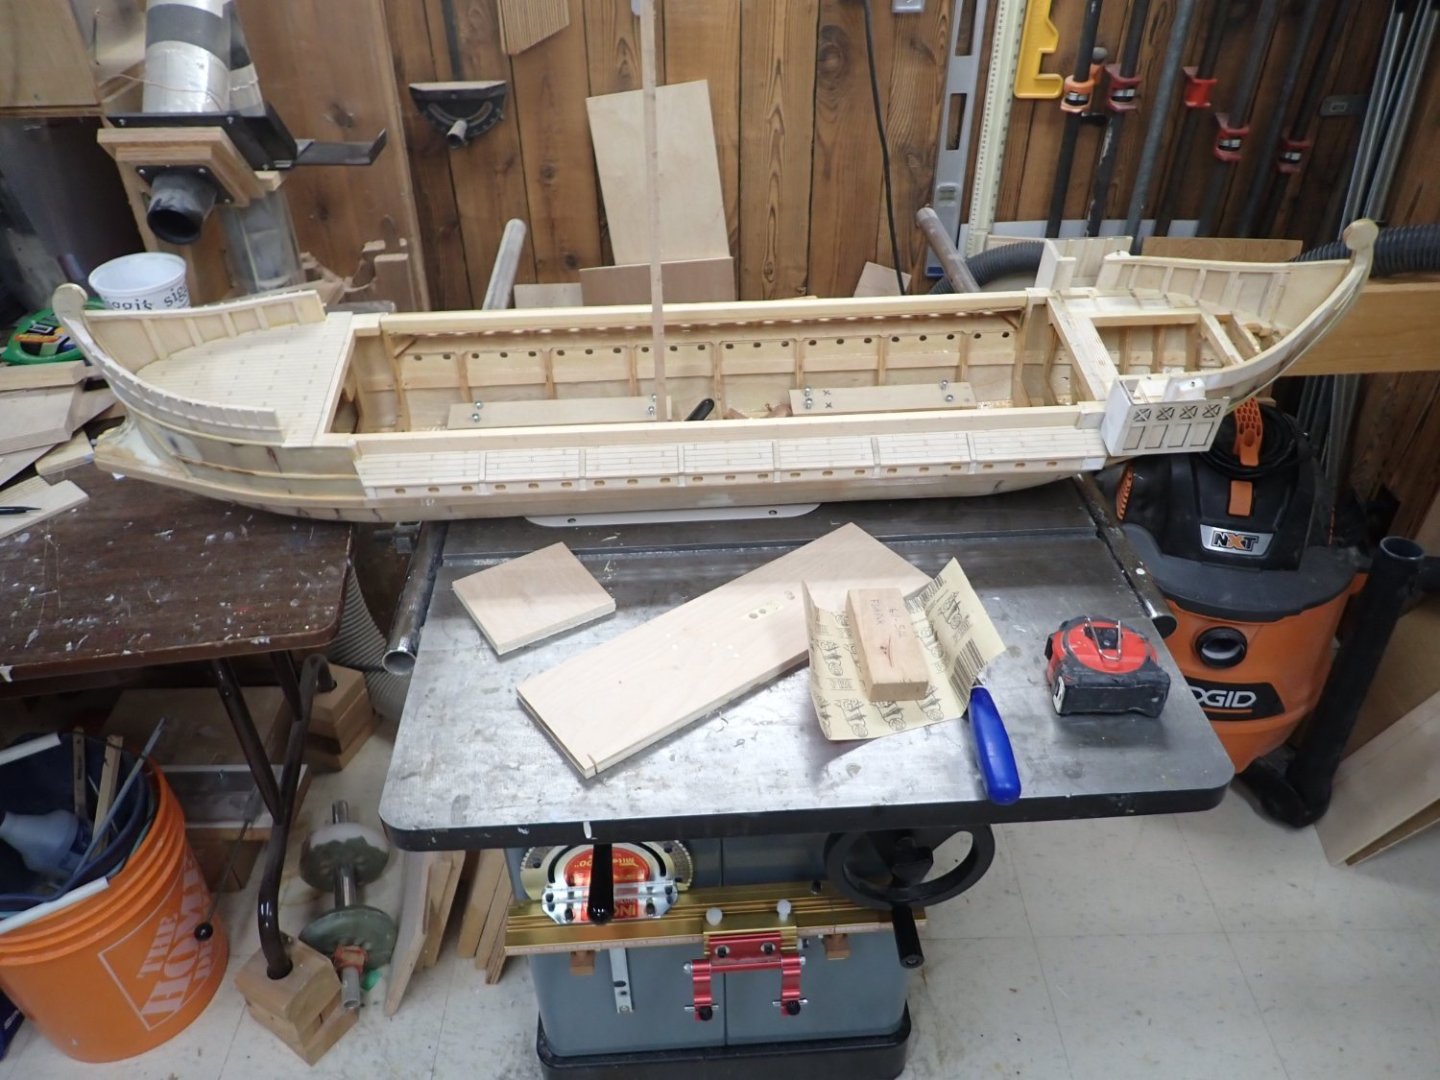
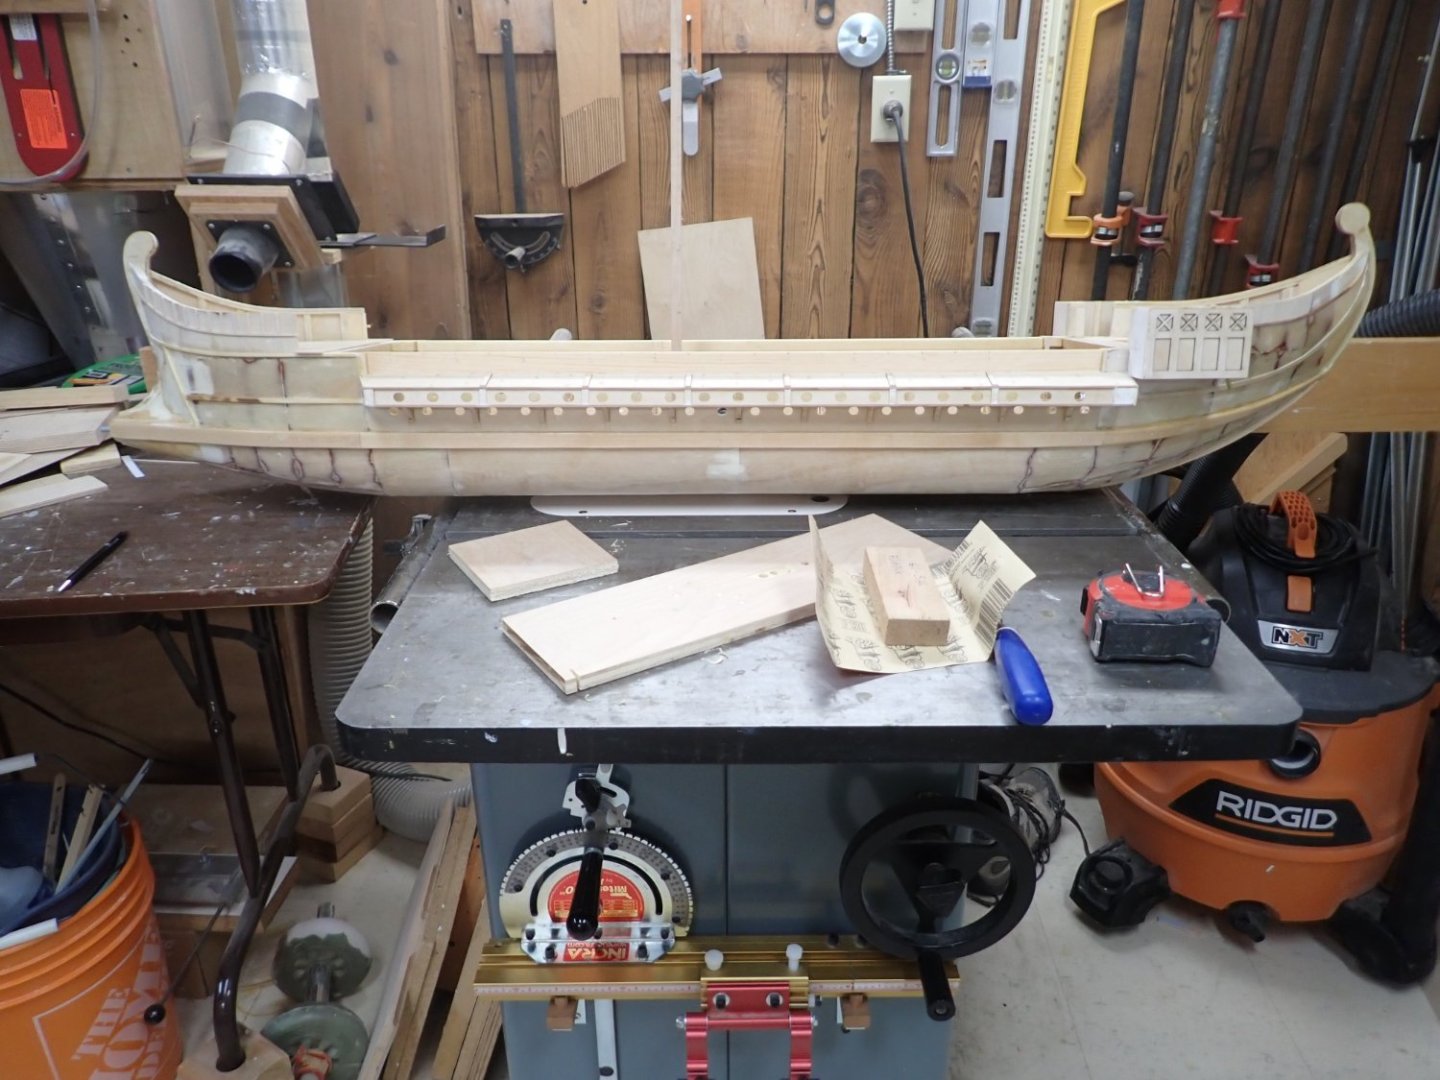
Milestone - got a piece of deck glued on! Beforehand, added fixed ballast in the form of lead shot in bilge compartments, covered/mixed with epoxy resin. I put 3/4 of what was needed in the bow in the last water test. Will finalize fixed ballast at the end of the build. Some ballast will be in shiftable packets in bilge compartments in the engine room. The bow ballast is much lower than in the pool tests, where the packets were too big to slip into these spaces and so sat high up. Stability should be better now. Fixed ballast covered in epoxy: Then I added a couple of sticks of wood to form a little cradle for the Arduino, under the shelter of the fixed portion of the foredeck. This fixed part is needed as far back as the bitts for the artemon. That piece of ply on the port side provides solid mounting for the bitts, which will be offset because the artemon passes by the stem on its port side. Then added the foredeck and forward access hatch. Just a flat deck, KISS. I've made the laser files to etch the greatest portion of the deck, 30" long, which covers the engine room but sadly I couldn't get a laser booking before Tuesday. People must be busy making stuff for Christmas. In the meantime I need to make the frame of beams this large deck will be glued to. Oh, I also drew the rudder to 3D print. I will do a first test print in white so as not to waste precious transparent filament. Looking good. The upright stick marks where the mast will be; I'm planning my deck furniture. Made a CAD drawing to 3D print some hatch gratings, and also laser etch files for four walls and a platform for the archery tower which will sit between the boarding gaps and the mast.
- 505 replies
-
- 11
-
-

-
- Quadrireme
- radio
- (and 1 more)
-
Stay sails (stays'ls). They're named by prefacing "stys'l" by the name of the stay they are set on. You could omit them, or have them furled (peaks hauled down by the "downhaul" lines and furled to the foot of the stay. Might look a little odd with no fore topmast stays'l set? Maybe that's ok if the sprit-topsail is set? But I don't know about this century's practice. Builders' preference.
- 1,503 replies
-
- 1
-
-
- Le Soleil Royal
- Heller
- (and 1 more)
-
Wow, that's really family-friendly! Ha Ha! I was thinking more along the lines of "ordo, filii canino!". Err, the translator doesn't translate back to the same English from the Latin??!! English "Row, you sons of bit***s" >>>>>> "Ordo, filii canino" >>>>>> "order, the children of the dog". No wonder it is difficult to construe Latin. Glad I never had to take it.
- 505 replies
-
- 5
-

-
- Quadrireme
- radio
- (and 1 more)
-
Funny you should mention sound, Vic. Just last night I was at the local RC boat club's annual auction and one of the boats up for grabs had a sound recording of a marine diesel running. Maybe I could have background noise and shouts in Latin. Speaking of the auction, it was ridiculous. Fast electric boats with brushless water-cooled motors and 100A water-cooled ECSs going for - wait for it - two dollars! One chap scored two Spektrum transmitters, one 5 and one 6 channel, for five bucks. I wasn't in the market for anything there except I did buy a plan for the SS Klondike, a stern paddle wheeler that I actually walked around on in Whitehorse this past summer. Might be interesting to build an RC paddle-wheeler although I was thinking about maybe the Great Eastern, ....maybe.....?
- 505 replies
-
- 4
-
-
-
- Quadrireme
- radio
- (and 1 more)
-
Yes, "spectacle iron" rings a bell.....👍
-
Lots of spare channels in that receiver; you could use them to switch on lights, sound a horn, etc. Maybe we'll see that you did as this epic build unfolds......
-
In a nutshell: "degrees off wind" is the angle between your course and where the wind is coming from. No one can get to zero. Your diagram is showing the two boat types sailing as close to straight upwind as they can. A square rigger can get to within about 65 degrees of the wind. Fore and aft rigged vessels can get closer (like the yacht in your diagram). If you are shallow draft, like your canoes, and with a rounded bilge, then the hull's innate ability to resist sideways movement is limited. If you're trying to sail, say, 90 degrees off the wind (ie a "broad reach" with the wind from abeam) then the wind blows you not only along the course you want but also downwind to some degree or other. This is leeway. One can compensate by pointing a little closer to the wind and in a perfect world cancel leeway. It's like when you see a small plane on a windy day moving across the sky but not quite in the direction its nose is pointing.
- 174 replies
-
- 3
-
-
-
- Waa Kaulua
- bottle
- (and 1 more)
-
I was trying to get my eyes to "see" the sails as billowing away from the viewer but it doesn't work. The rising/setting sun is somewhere to the right, so given the shadowing on the sails they're billowing towards the viewer. The tell-tale shows the wind coming from somewhere forward. I think the boat is going a point into the wind. I see the guy sitting at the stern but he does not seem to be holding anything, nor is the rudder in the water. Actually no one is doing anything much. Could they have heaved to for a break? There's no wake evident.
- 174 replies
-
- 4
-
-
- Waa Kaulua
- bottle
- (and 1 more)
-
Cut 1mm lengths off toothpicks! 😬 Gives a sense of how tiny your boat really is. Great work as always. It does look better with the deck lower down!
- 174 replies
-
- 6
-
-
-
- Waa Kaulua
- bottle
- (and 1 more)
-
Here is the equipment they have available. They have plans to add more. It's great for me as I can walk to that branch in just under 30 minutes. Regarding those kids; they might have been 12 or 13 not 10. It's hard for me to guess now, in relative dotage to them. https://biblioottawalibrary.ca/en/imagine-space
- 505 replies
-
- 4
-
-
- Quadrireme
- radio
- (and 1 more)
-
The makerspace was opened in collaboration with the US embassy; someone enterprising must have known someone there.
- 505 replies
-
- 3
-
-
- Quadrireme
- radio
- (and 1 more)
-
Thought I should expand on this. Their closet has sheet MDF, plywood, paper card, and lexan, all at very low prices. If you bring your own material, there is no charge for using either of the laser cutters. As I said there is a very low charge for plastic filament you consume in the 3D printers but no additional charges. The three printers are Makerbot Replicator+ marketed for educational institutions. They are really no muss, no fuss. There's no fiddling trying to get the base perfectly level; when your print is done you unplug the plastic baseplate (they are covered in masking tape to prevent the hot print from melting to them) and flex them to release your print. I've never seen them have a problem during printing. Ten year old kids are there using them sometimes, downloading dragons or whatever from Thingiverse. Lots of fun!
- 505 replies
-
- 4
-
-
- Quadrireme
- radio
- (and 1 more)
-
Geez Marc, you keep raising issues that I will have to deal with when I get to my stashed SR. 😬 You made an excellent job of it. Not sure if I could keep them round and evenly tapered working manually. Will see if/when I get there. Keep up the beautiful work. Merry Christmas!
- 2,459 replies
-
- 5
-
-
-
- heller
- soleil royal
- (and 9 more)
-
Bill, I know what you mean. I was hugely impressed when I went to a place that uses a blast of water to cut metal or whatever. I just wanted him to cut some porcelain tiles neatly for my fireplace but when I walked in it was slicing through 1" aluminum like it was butter.
-
Yes it's quite a deal; they're not out to make money on it even though there are tens of thousands of dollars worth of machines to maintain. They also can supply MDF sheets out of their closet in various thicknesses at ridiculously low prices, wholesale I suppose. Good question about the steering platform shape....the books I have show them square but possibly no one really knows for certain.
- 505 replies
-
- 2
-
-
- Quadrireme
- radio
- (and 1 more)
-
They just charge for the plastic you use, by weight according to what the maker software calculates will be needed. For example, the ram cost me $1.60, speaking of which I printed it again with some changes and also in four pieces so the decorative elements came out perfectly.
- 505 replies
-
- 3
-
-
-
- Quadrireme
- radio
- (and 1 more)