Baker
-
Posts
4,286 -
Joined
-
Last visited
Content Type
Profiles
Forums
Gallery
Events
Everything posted by Baker
-
 besides building model ships, there is also. work. family. households. chores in the house. etc..
- 137 replies
-
- 1
-

-
- Golden Hinde
- Revell
- (and 2 more)
-
Welcome back 👍
-
Greetings, new to the site and new to timber ship building.
Baker replied to Scotty W's topic in New member Introductions
Nice model And -
Hey all from the Dungeness crab capital of the world Newprt or
Baker replied to Samtheman's topic in New member Introductions
-
-
Great work. Good luck finishing her.
-
GTX Boxer and 2 MAN trucks by Baker - FINISHED - Revell - 1/72
Baker replied to Baker's topic in Non-ship/categorised builds
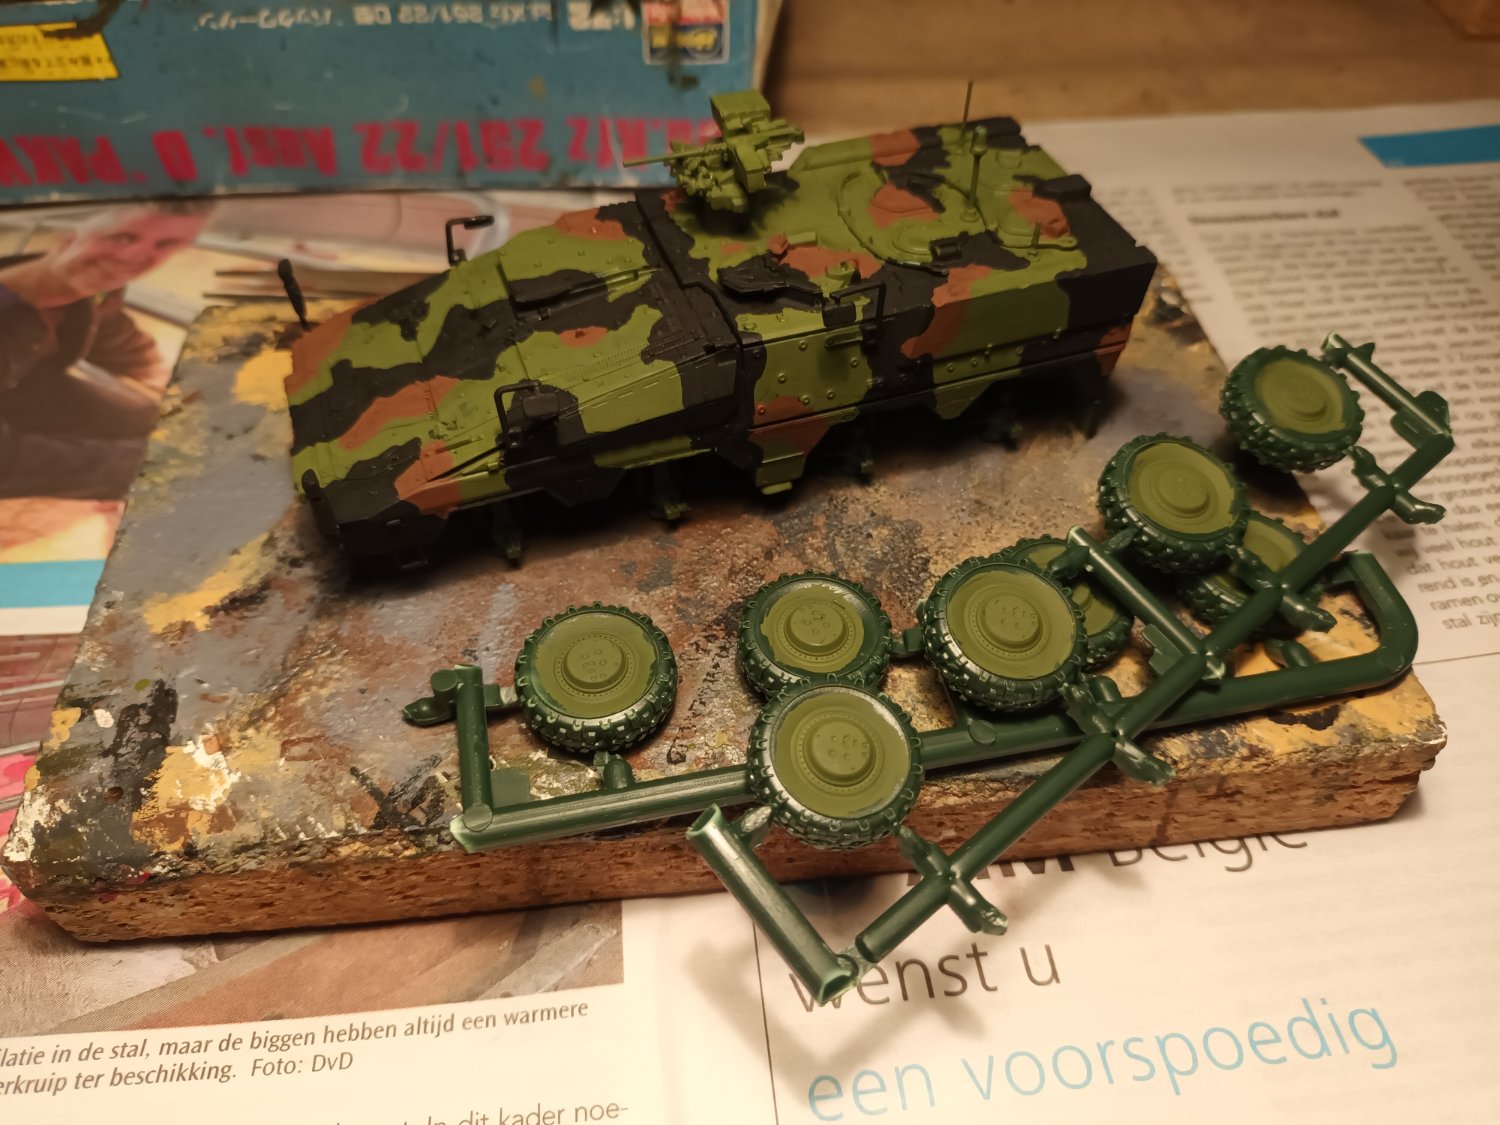
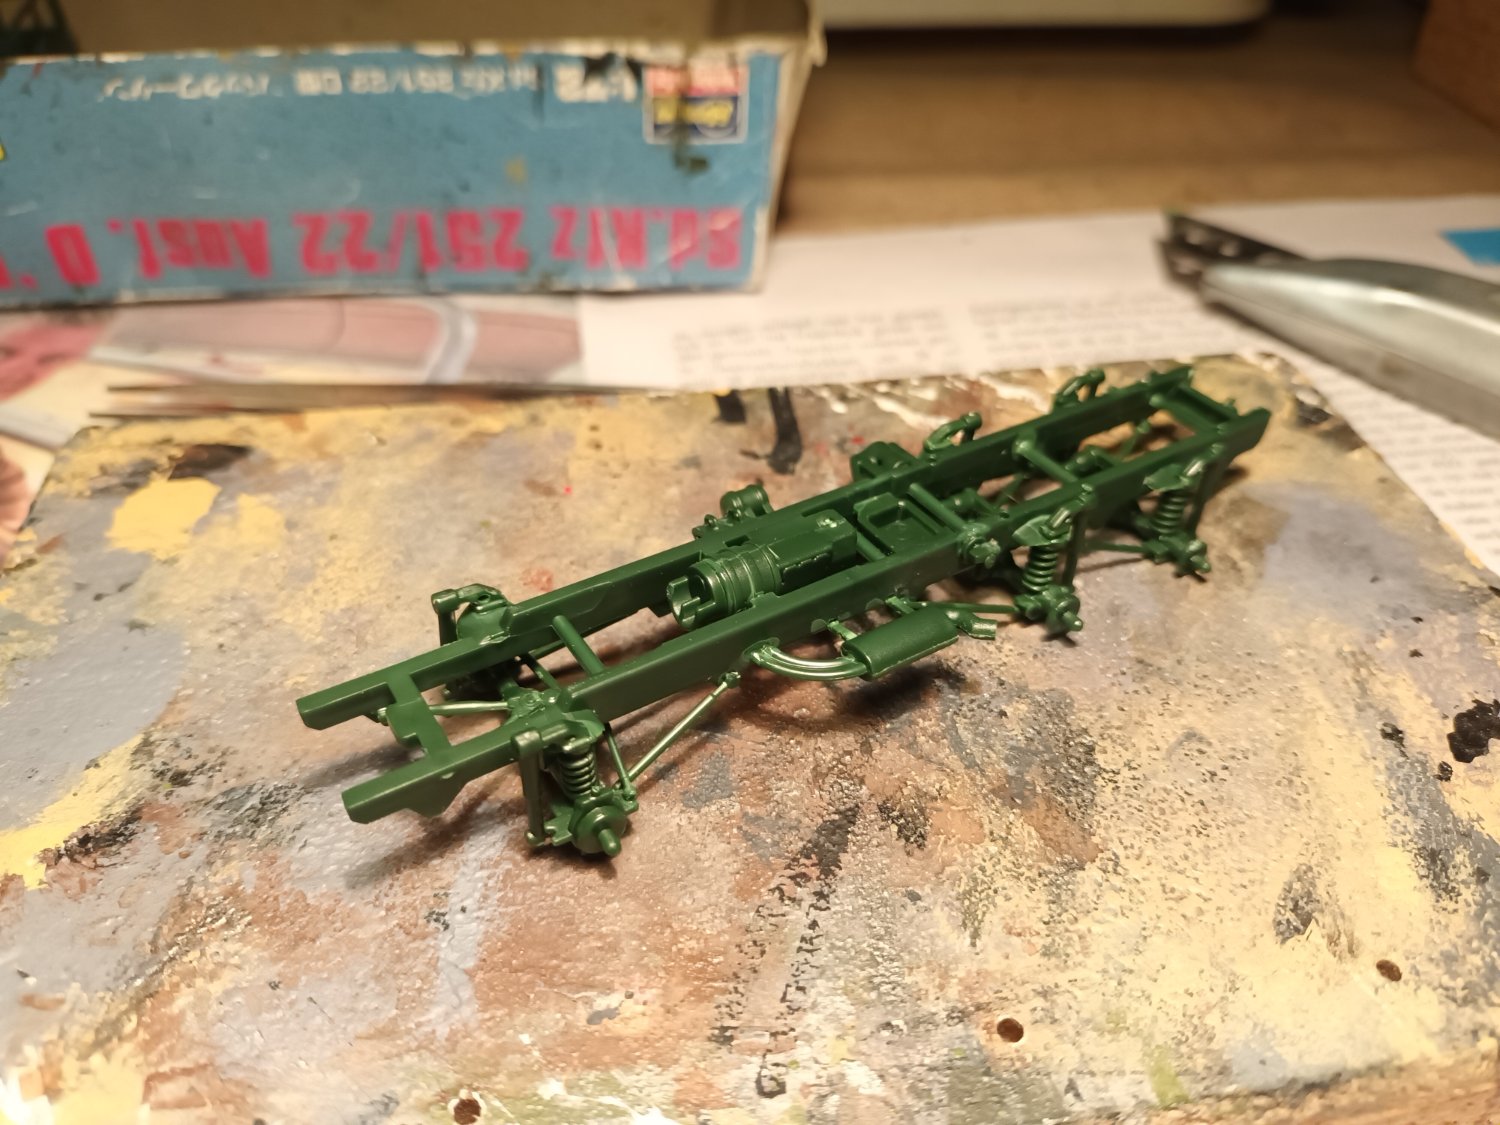
The 6 X 6 chassis deserves some better pictures. And the Boxer is painted in the standard NATO colors (Tamiya) Thanks for following


- 18 replies
-
- 10
-
-
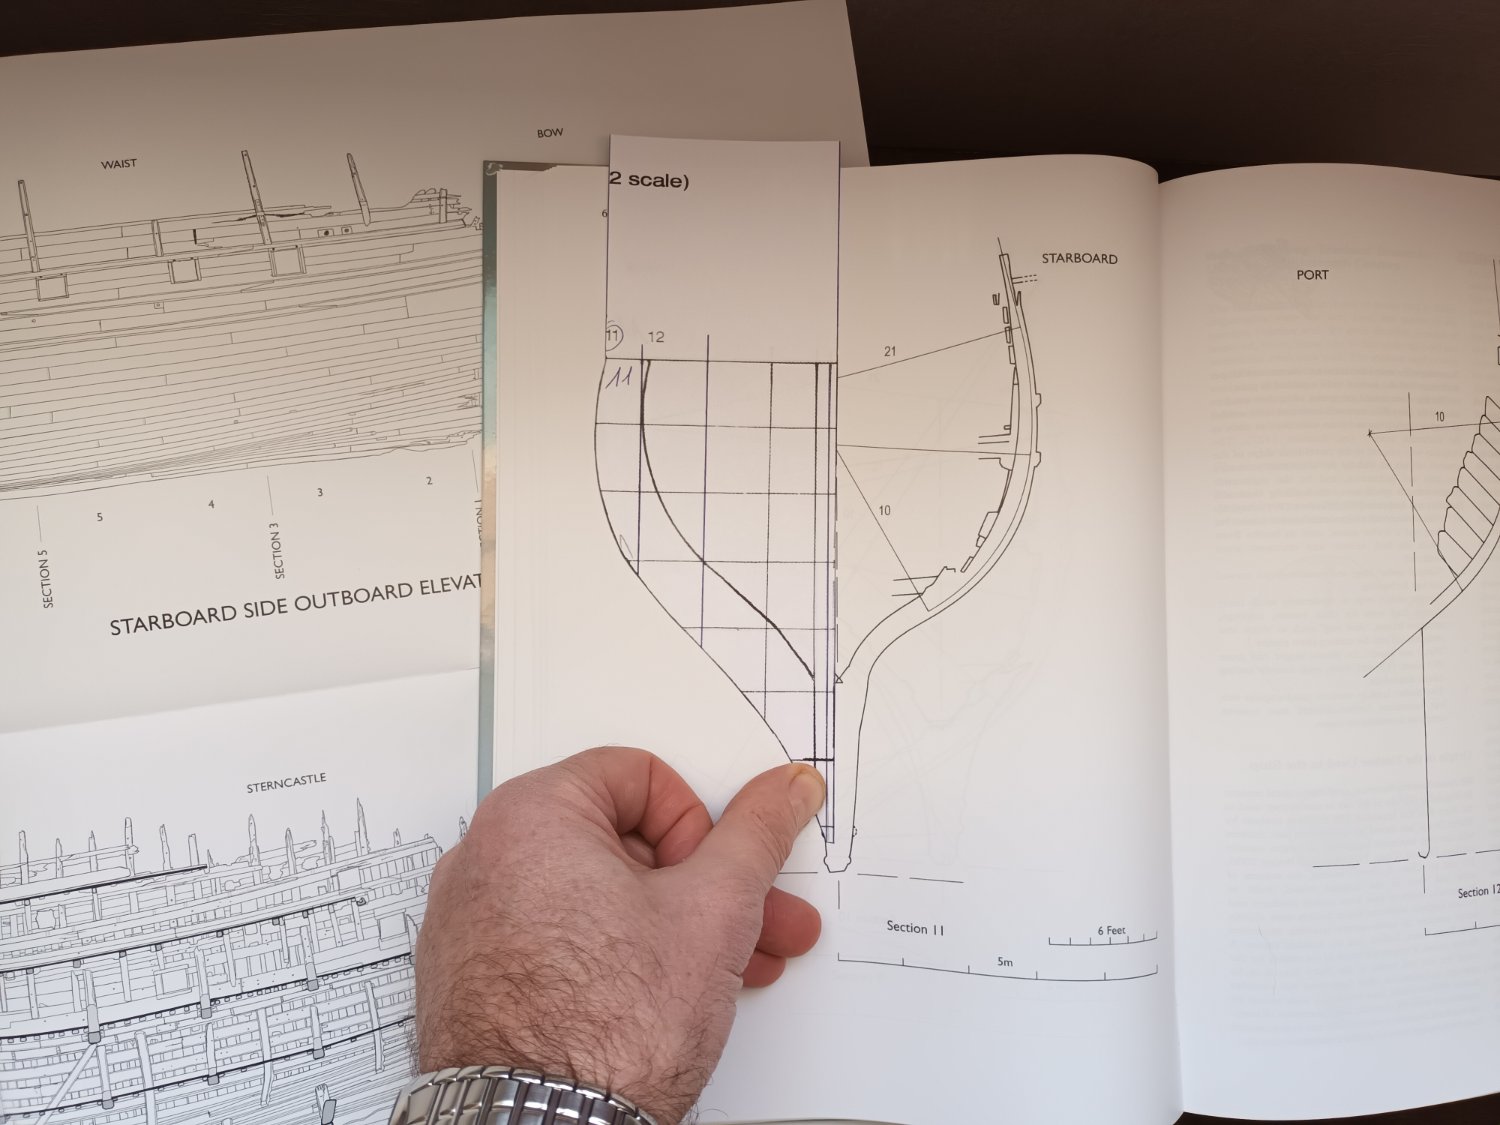
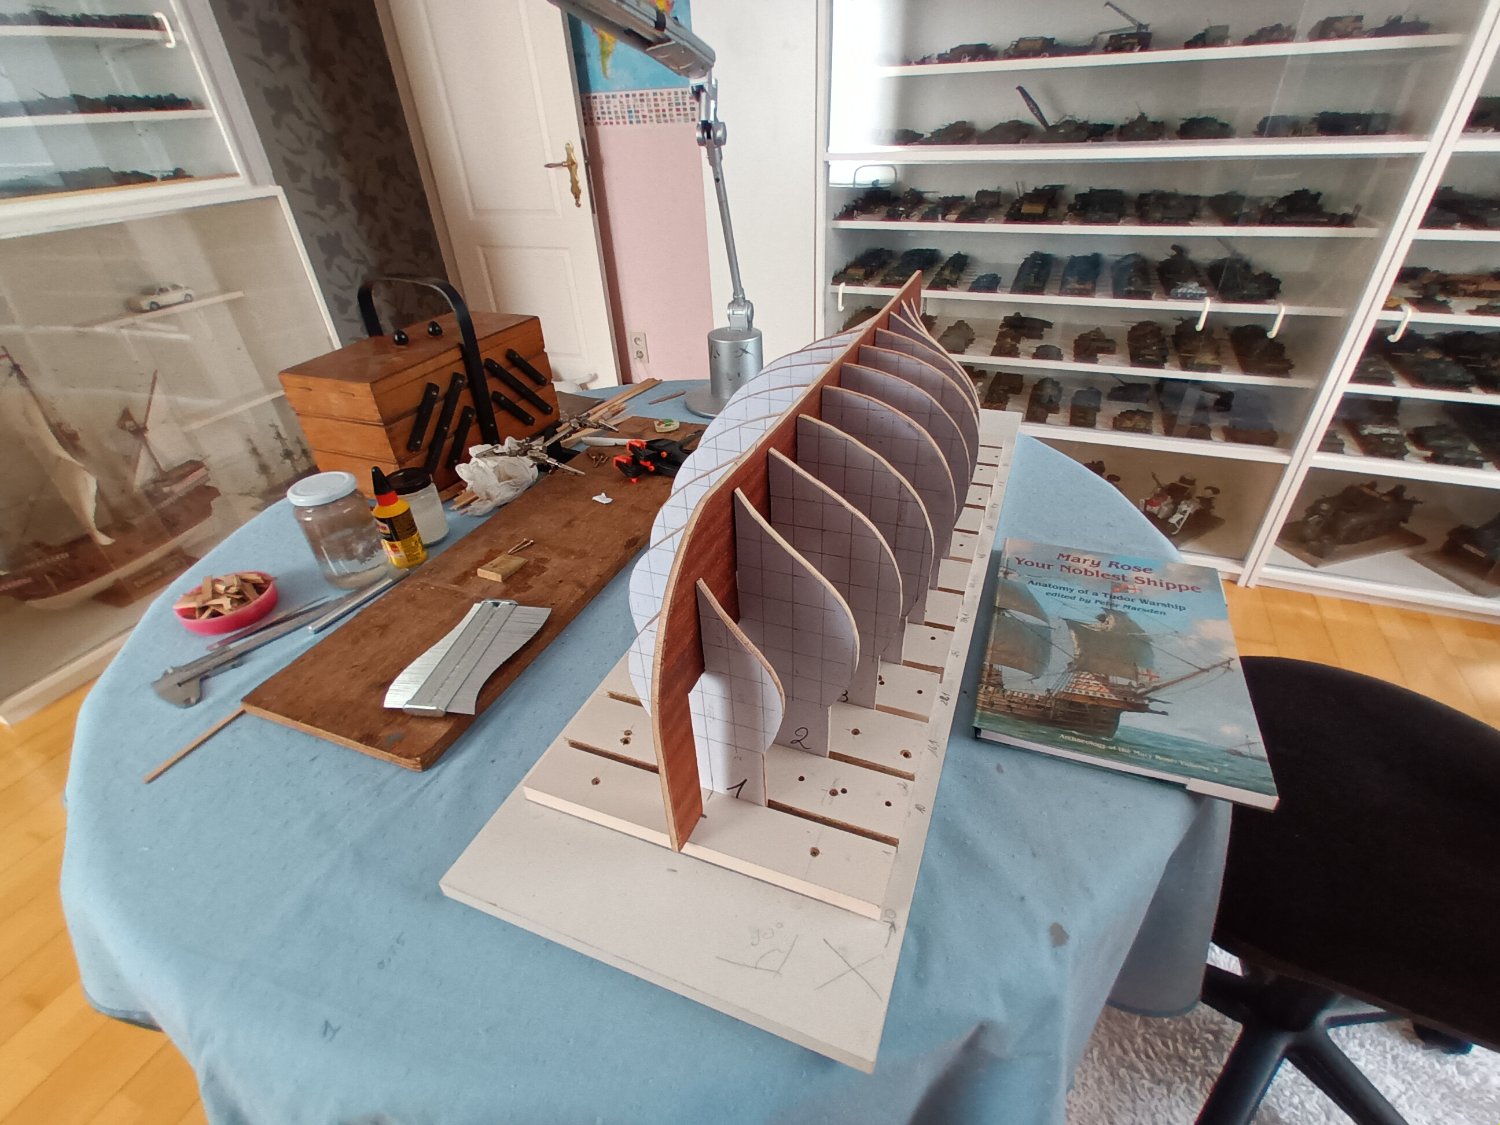
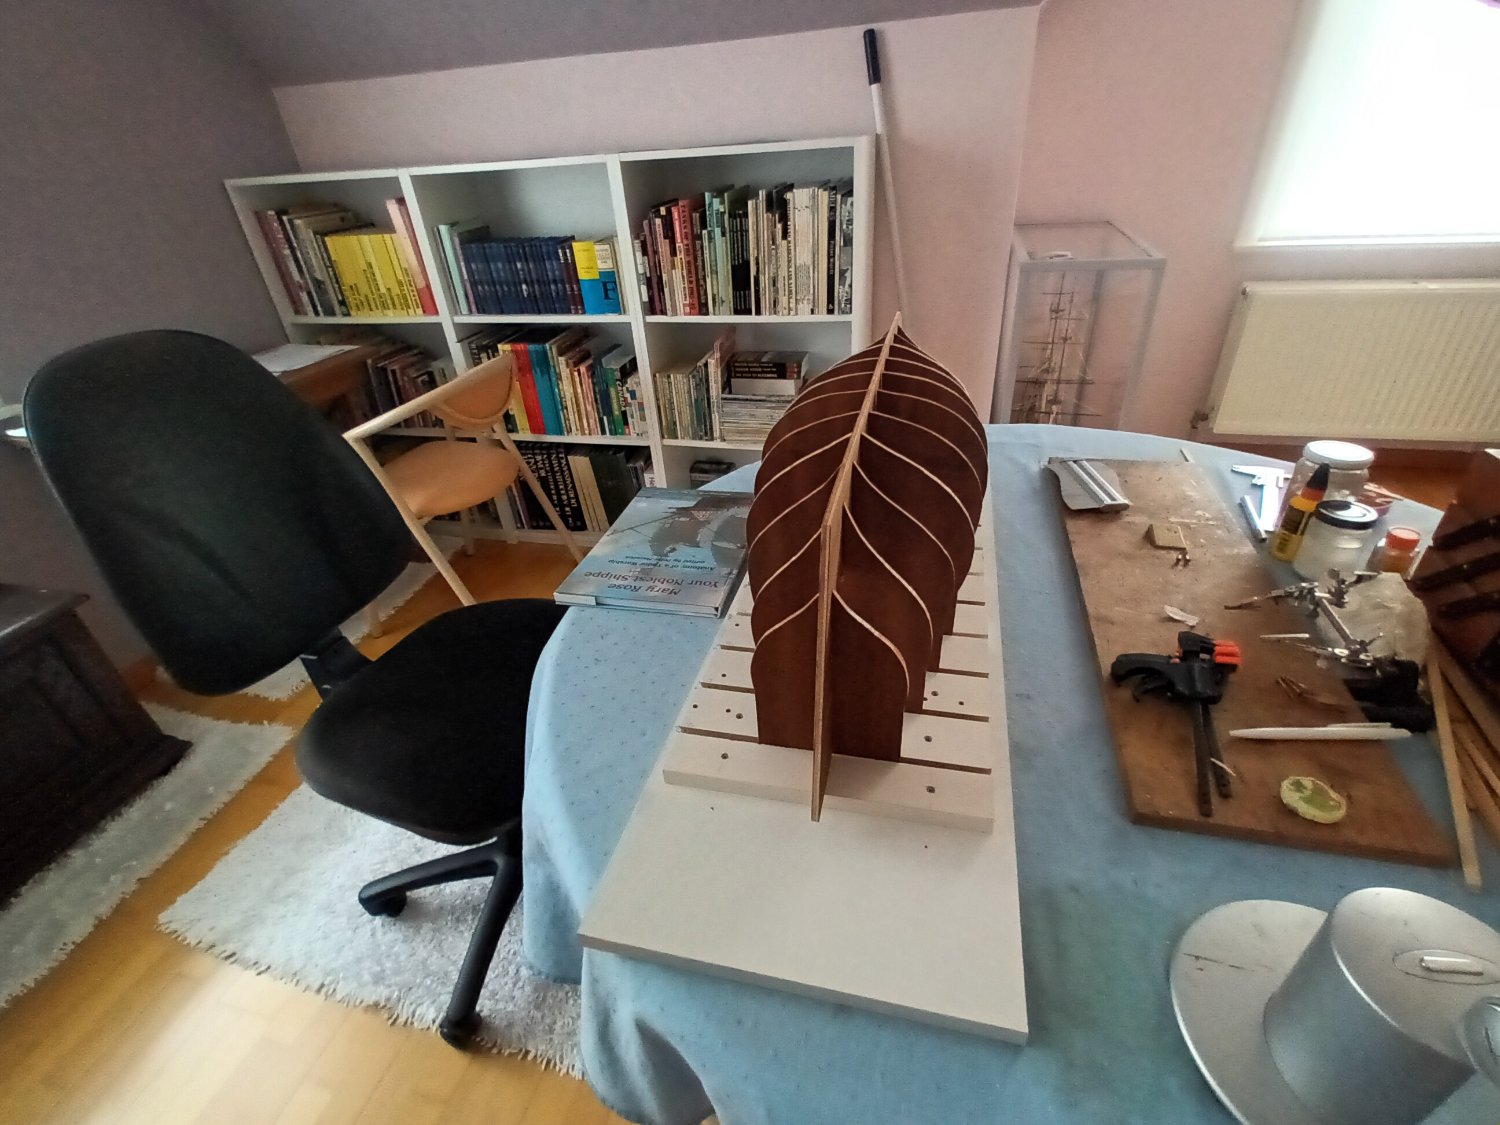
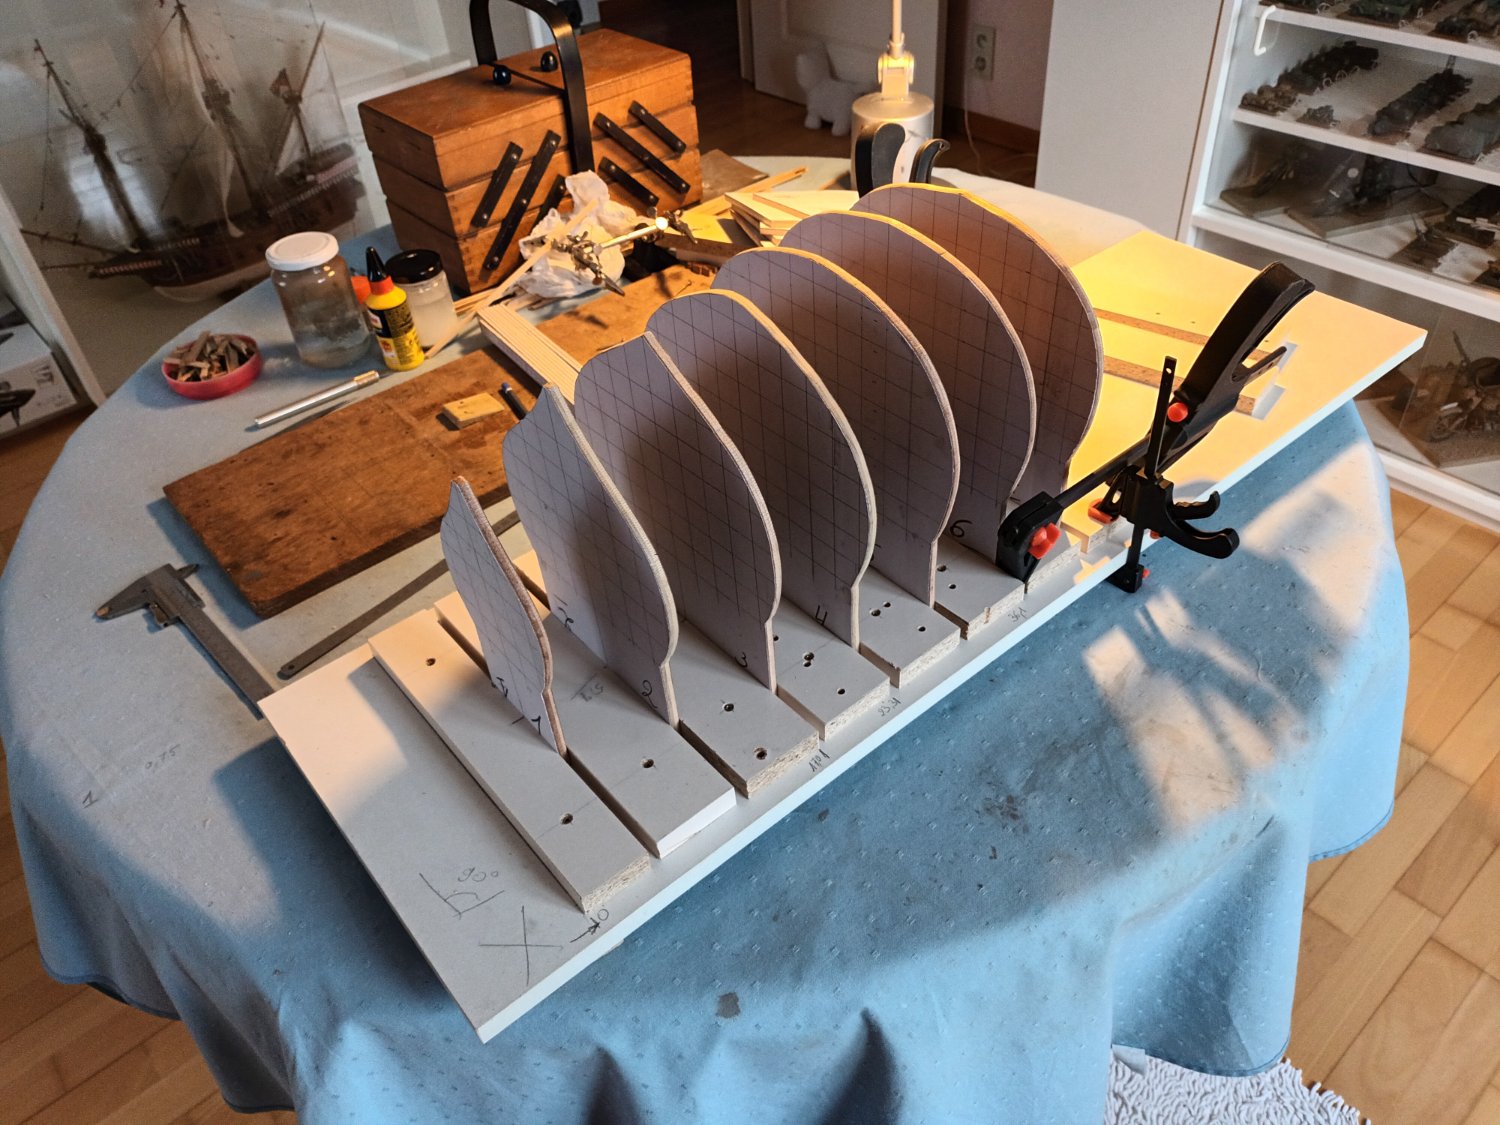
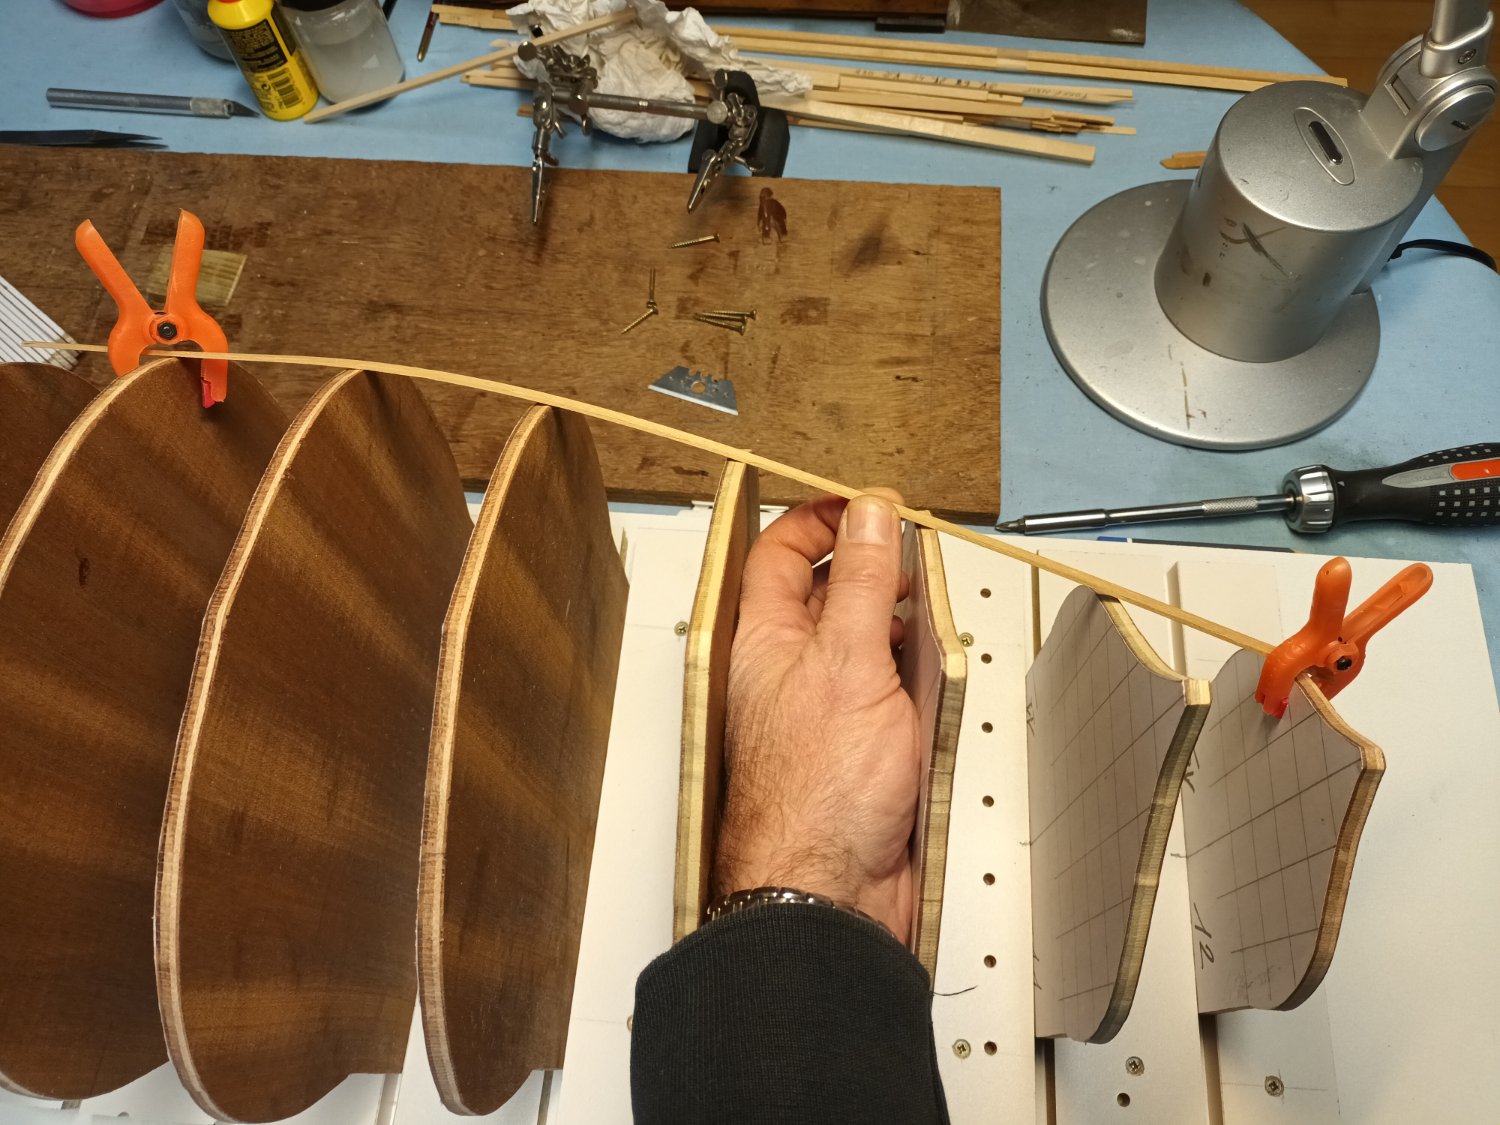
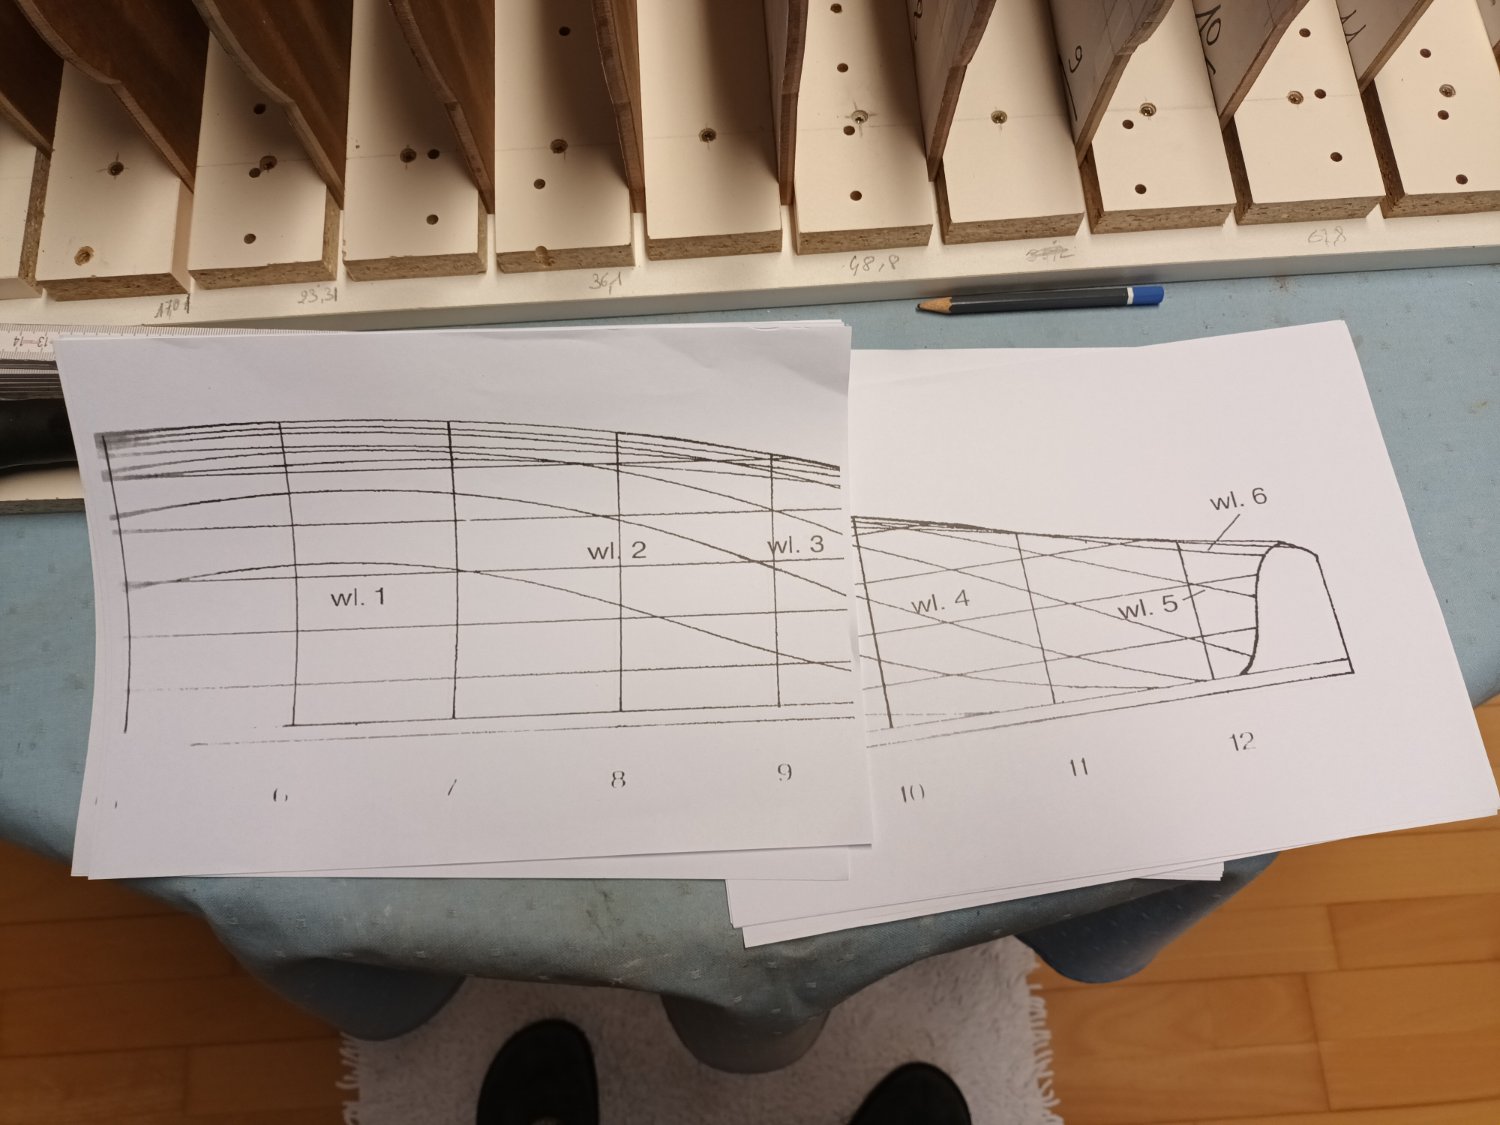
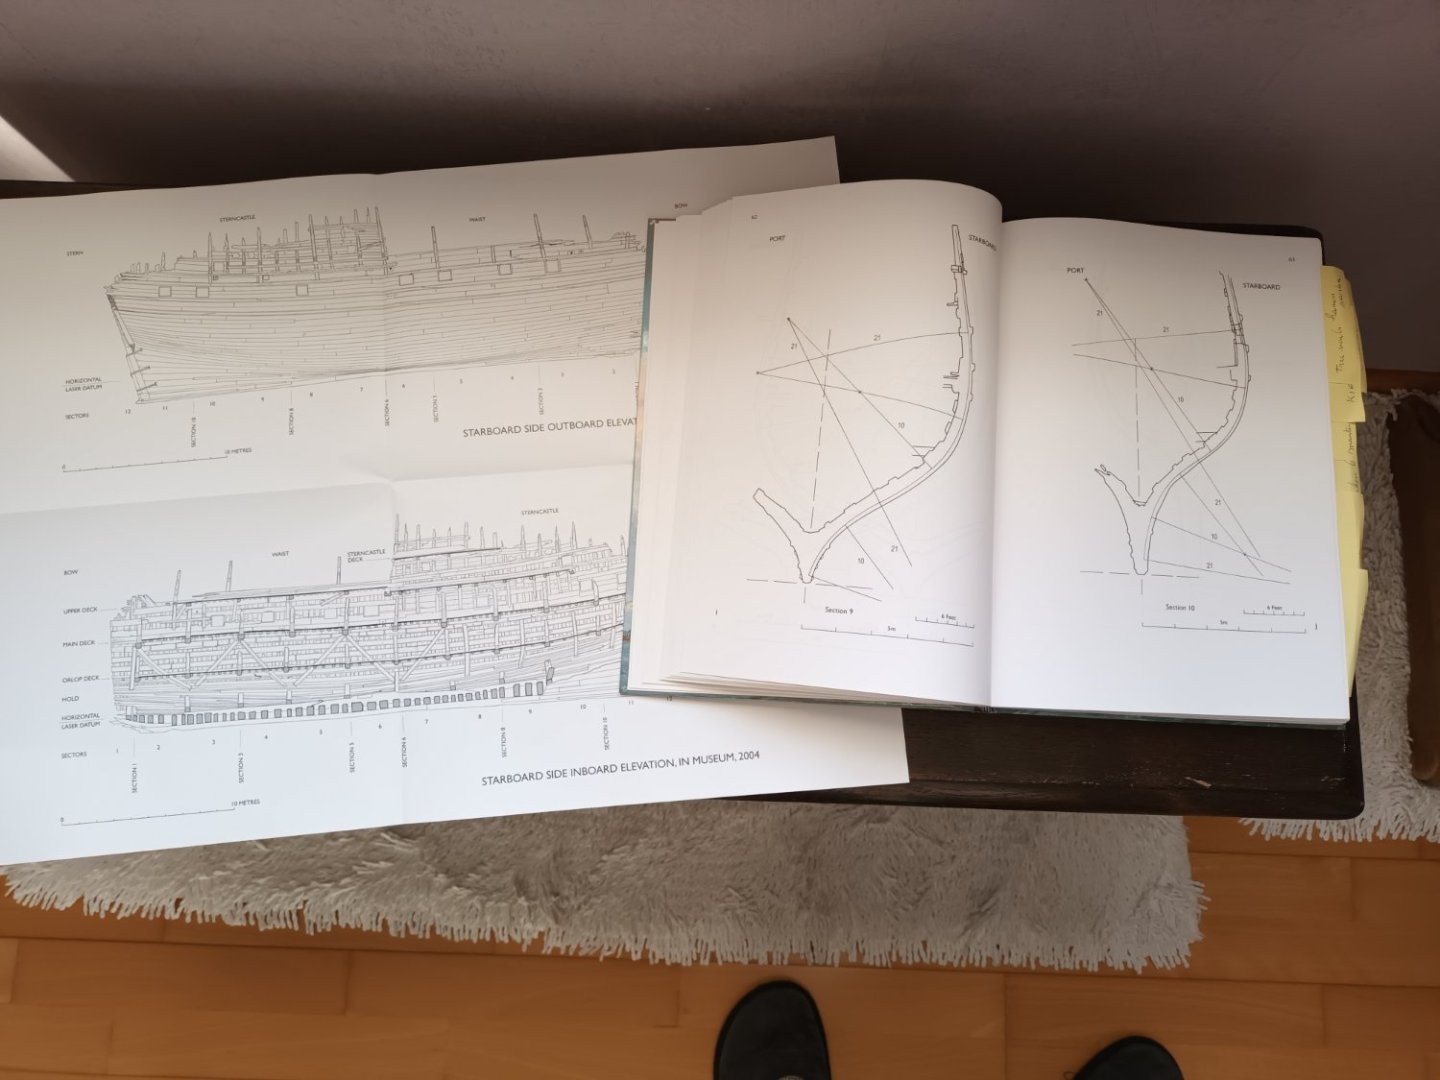
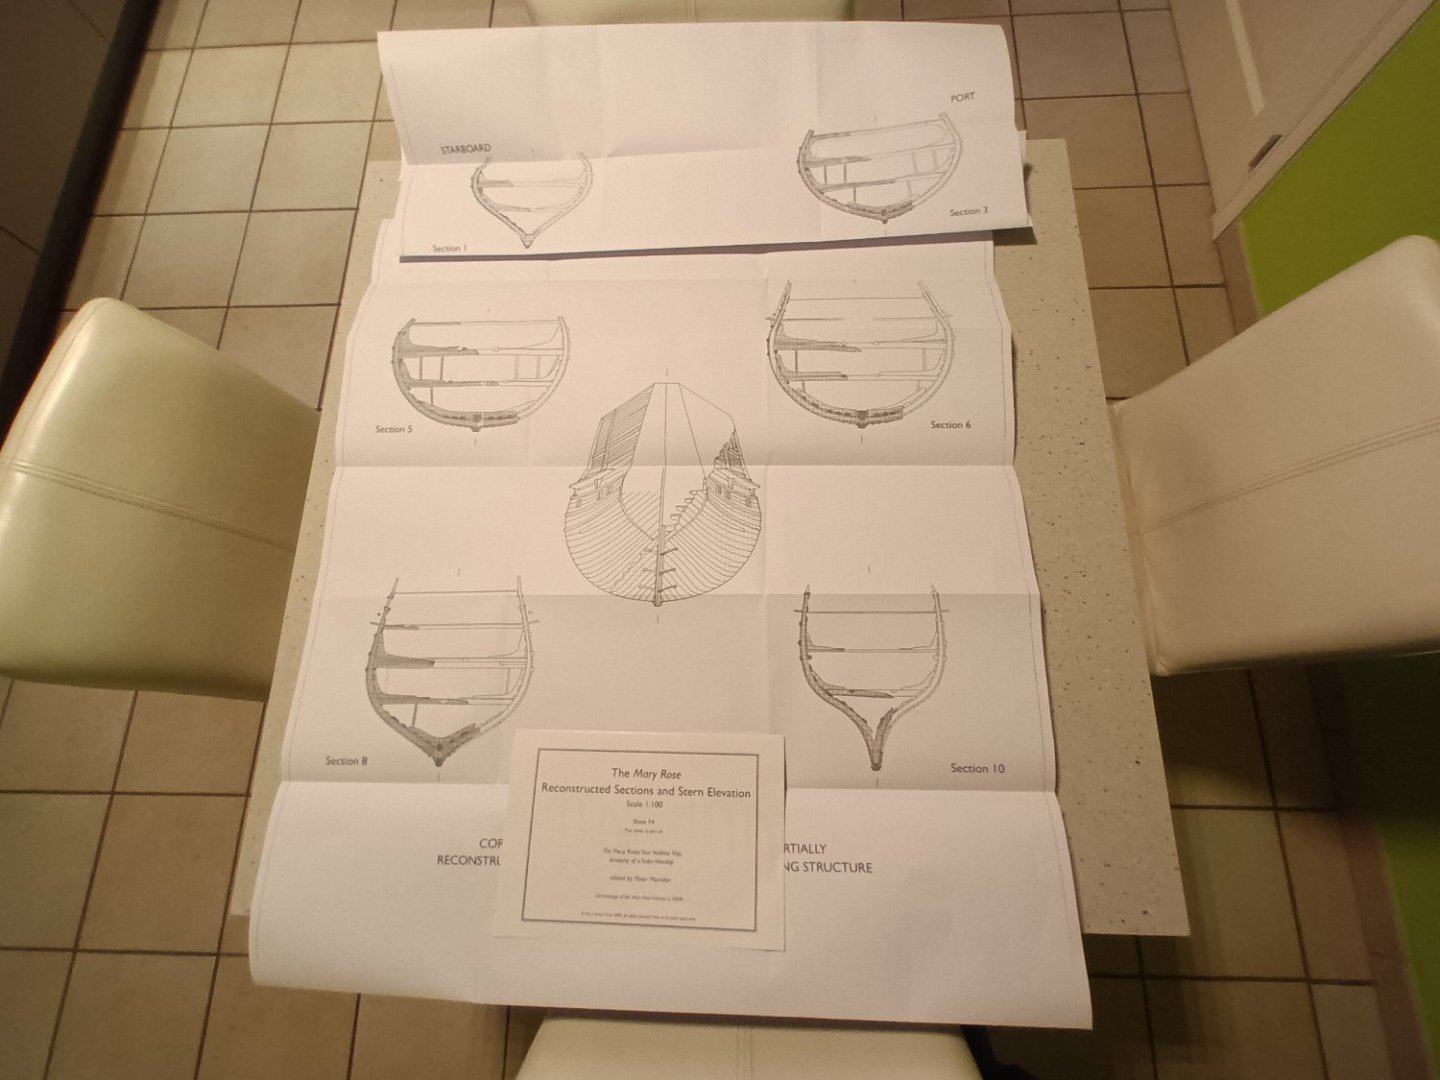
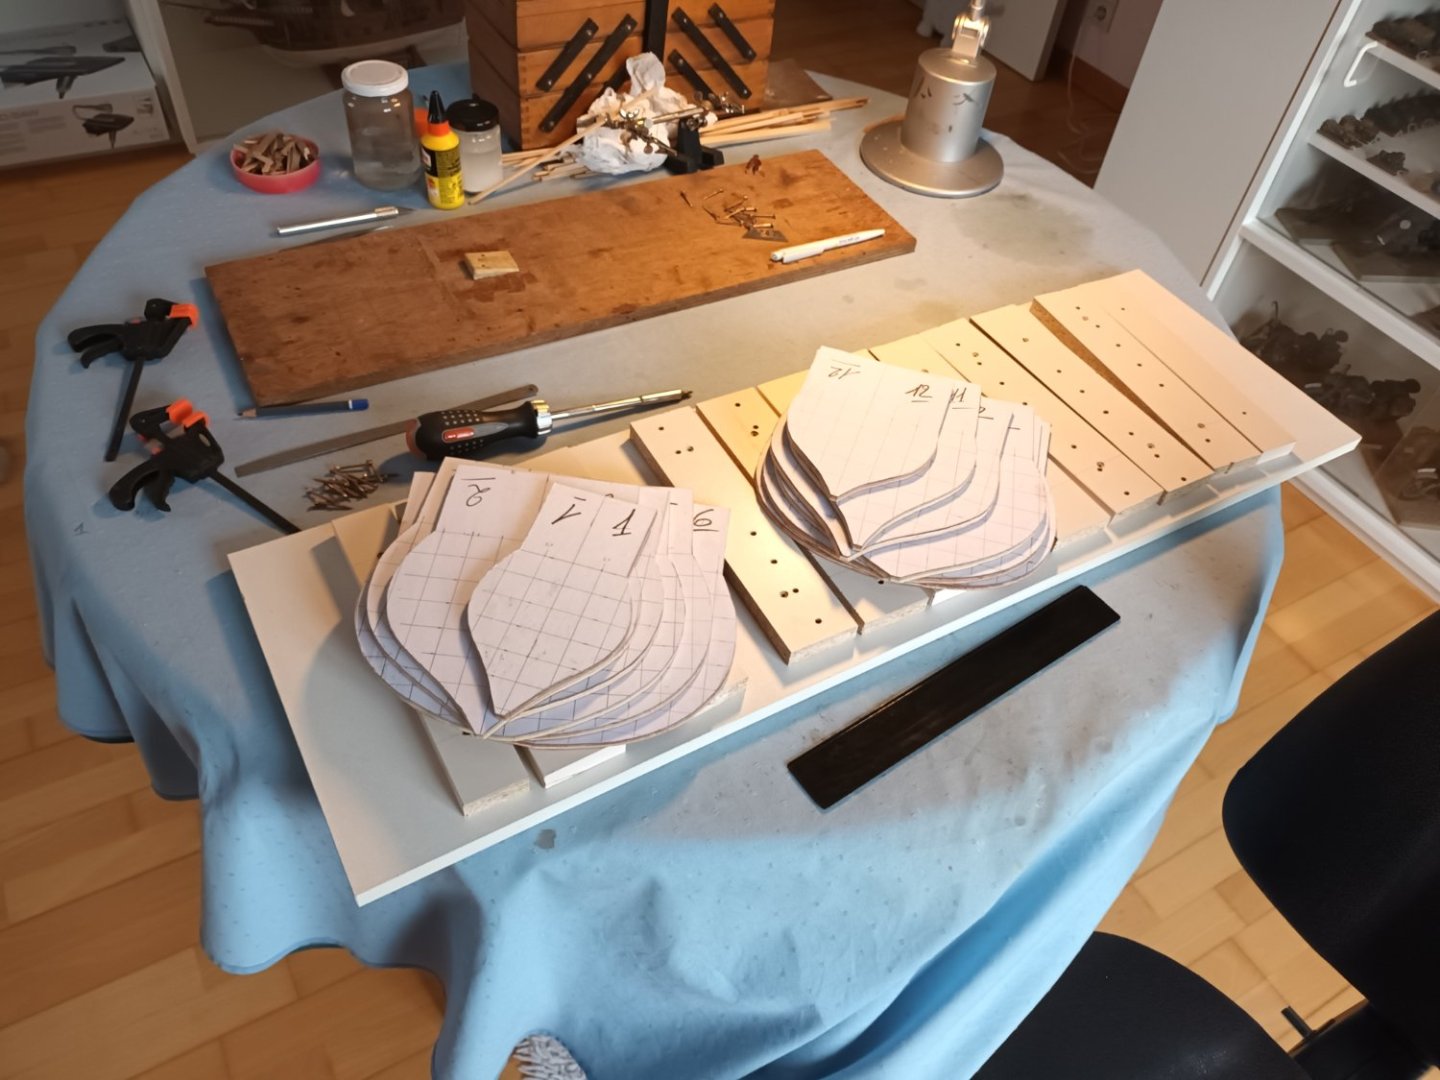
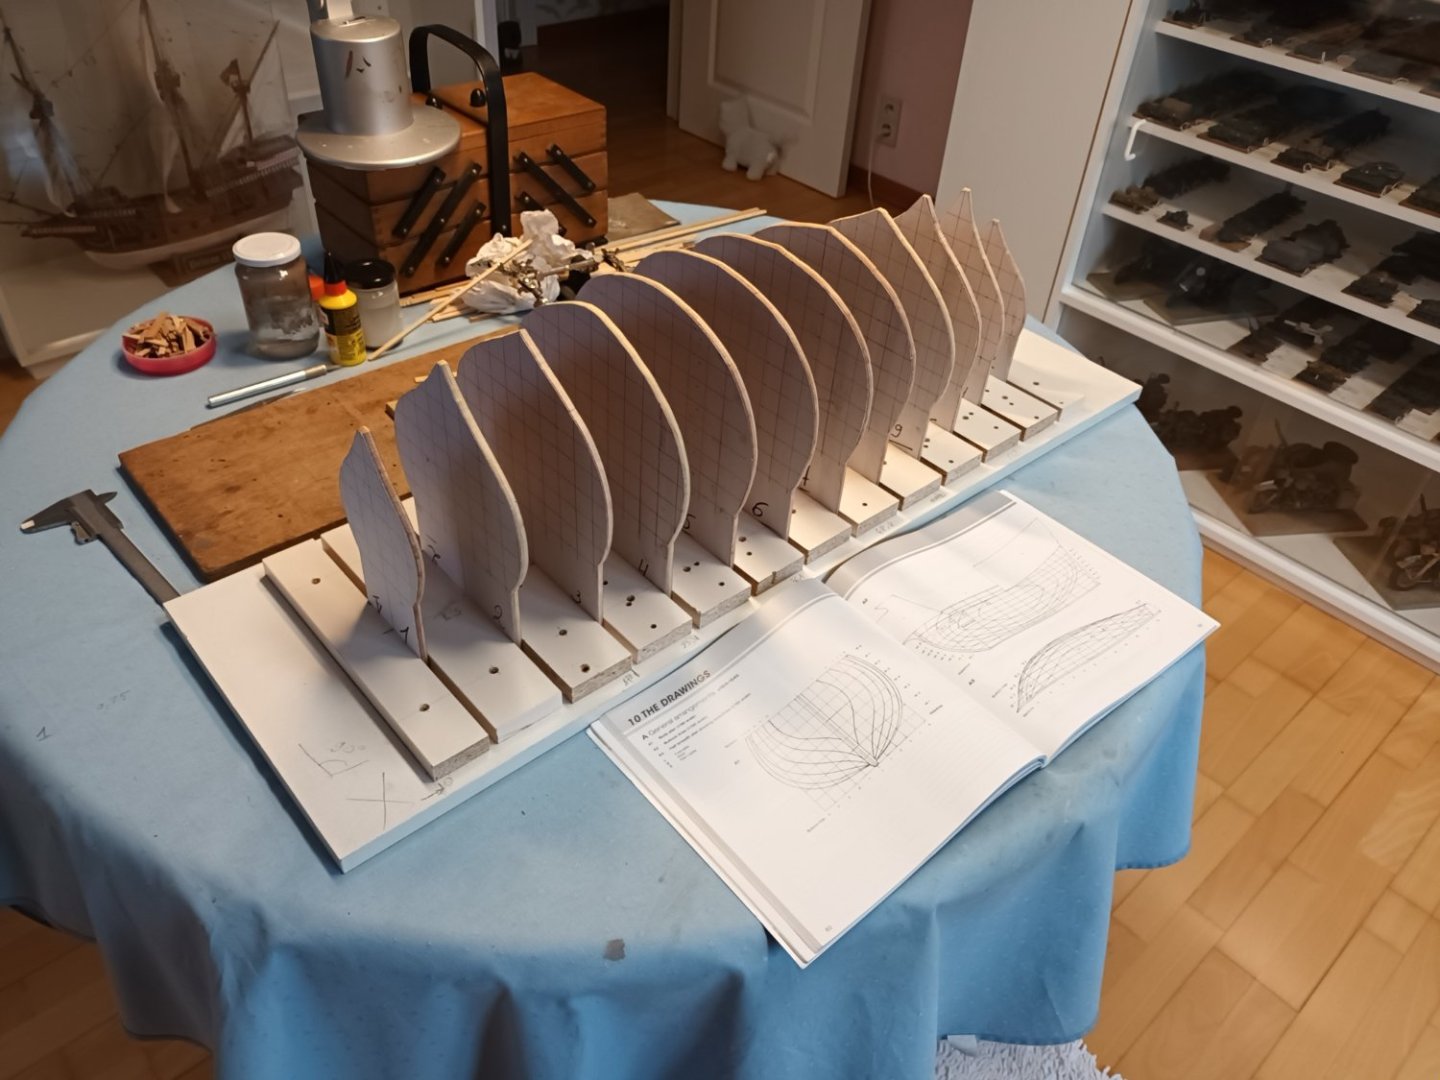
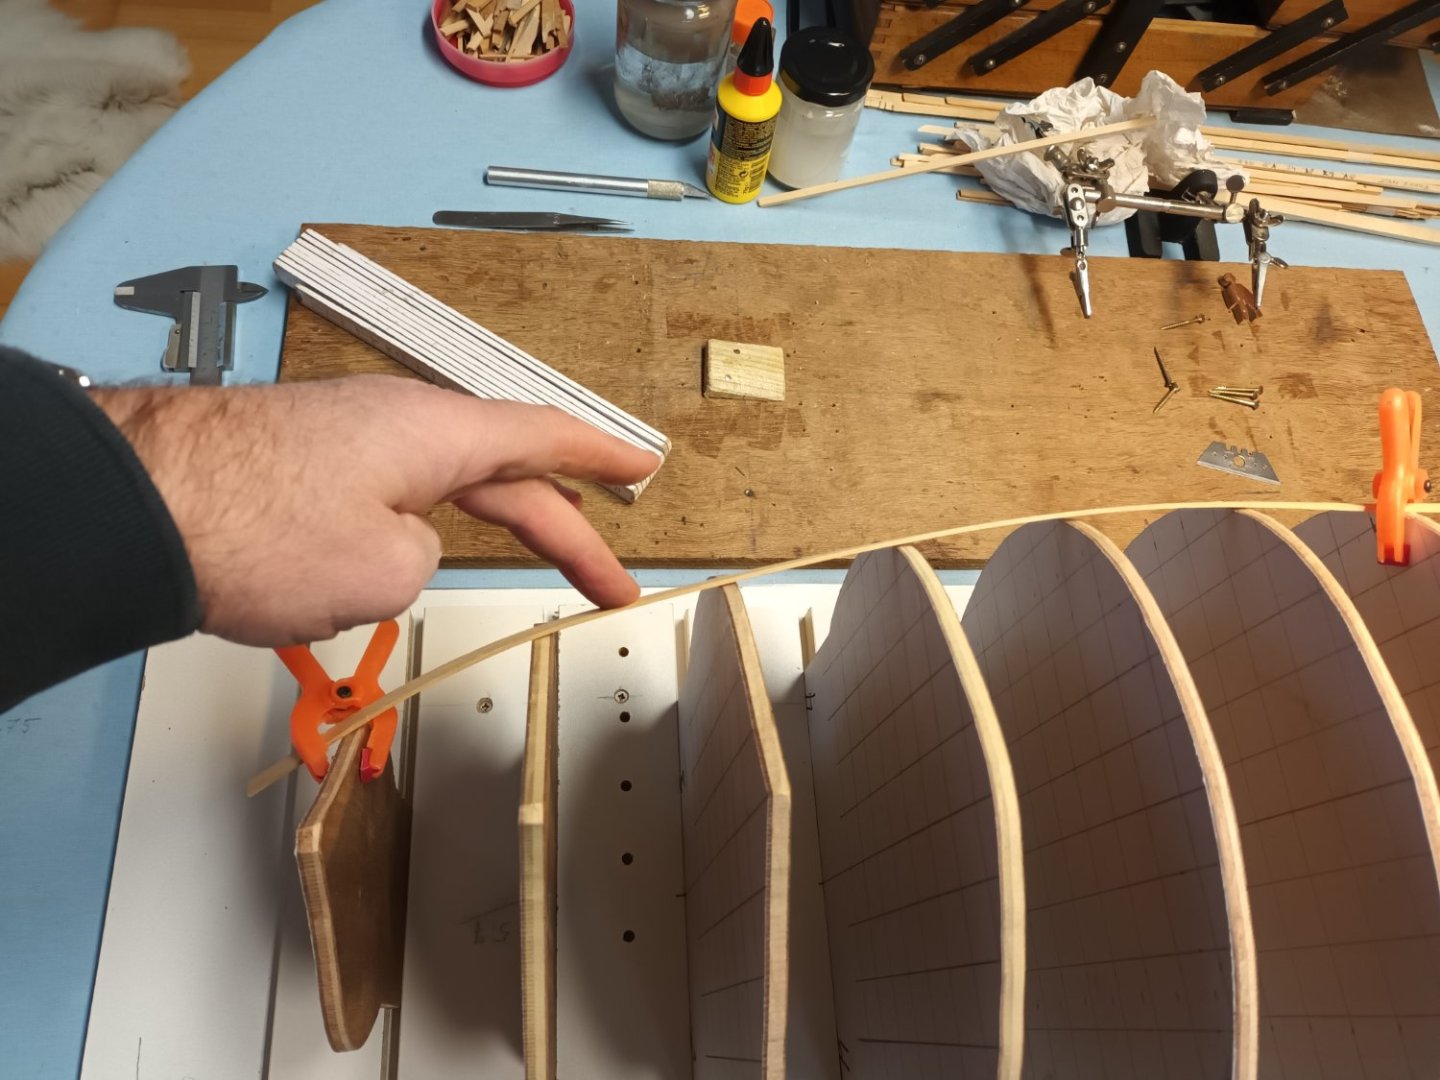
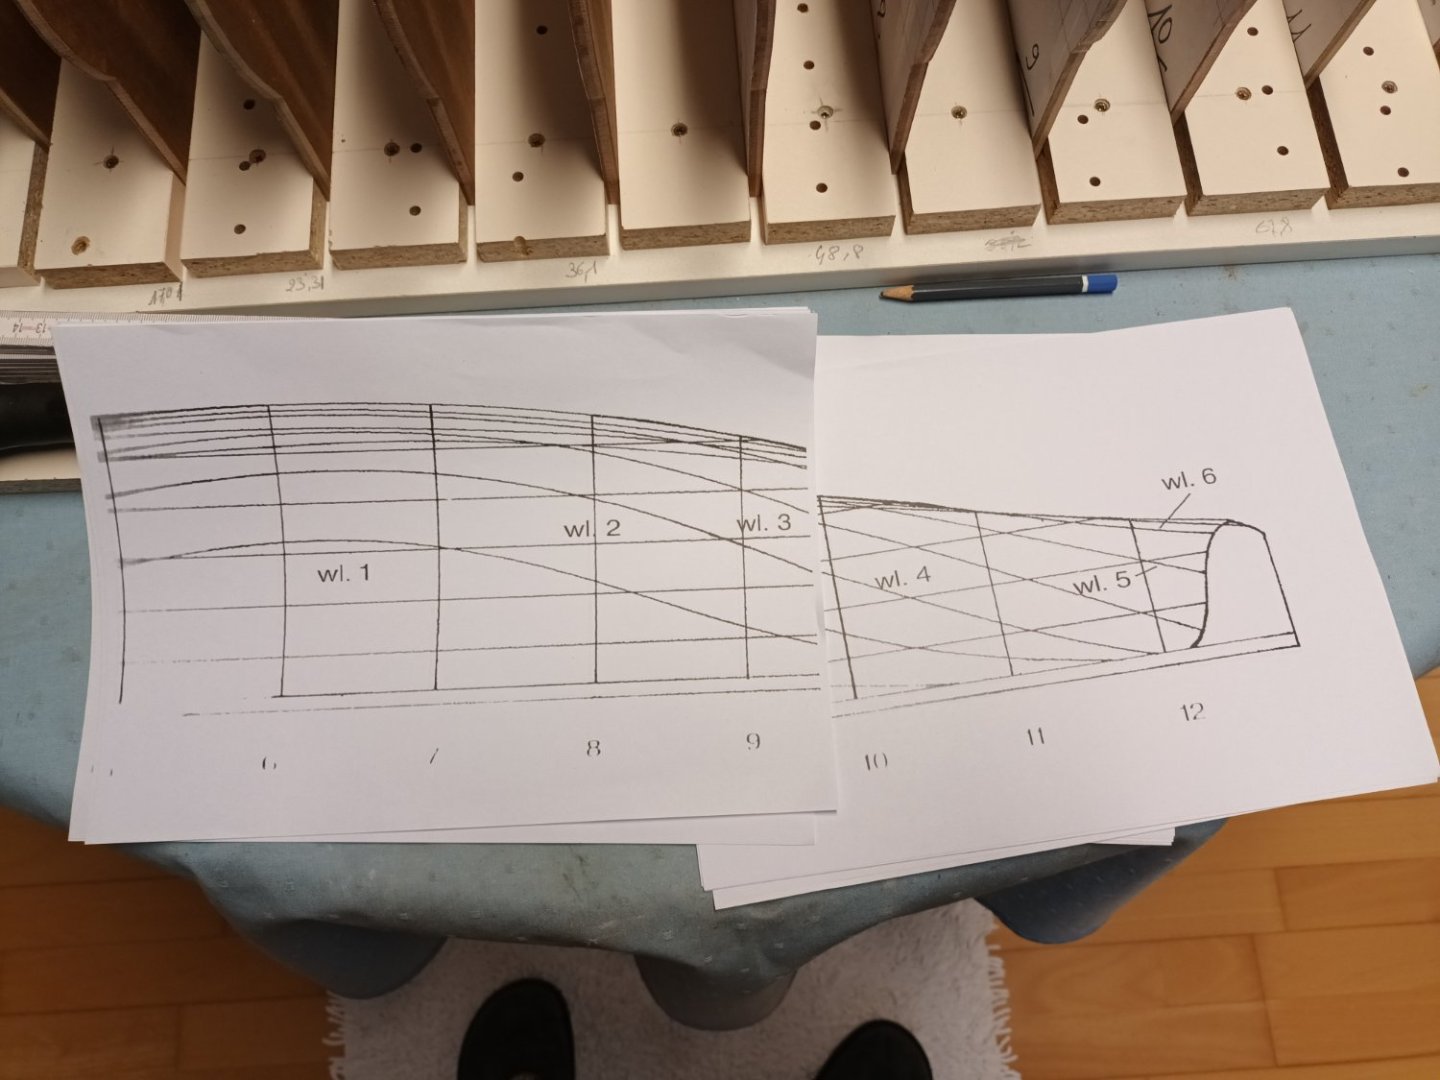
Thanks everyone for your interest A dummy plywood "keelplate" is made. This showed that the mutual distance between the bulkheads was too great. So everything has been disassembled and the intermediate supports have been made 3mm narrower. The new arrangement is now in proportion to the keel, stern, stem. The shape of the front and rear bulkheads don't look right on sight (i think). I used the drawing from the book Anatomy of the ship (AOTS) and It looks if these are "taken" from MR Noblest Shippe (MRNS) The AOTS scheme has 12 frames. The MRNS has also detailed "sections" and frames. That is why the drawing of the sections (MR noblest shippe) has been enlarged by 200%. I spent a few hours at work today at the engineering department...😇 The intention is to make masters with these to check if the shape of the bulkheads matches with the sections. This will also help to determine the position of the decks more easily. The deck of the cannons is open (a real deck, no holes in the hull with dummy cannons) @Ondras71 This is indeed going to be a large model. @Veszett Roka The keel will consist of 3 pieces from 2 different types of wood. The idea is to install it first.


-
Glad everything is okay with you. Great models (as always) 👍
- 153 replies
-
- 1
-
-
- Ancre
- Bruno Orsel
- (and 2 more)
-
-
I think this kit is almost as OLD as me. Forgive revell these little mistakes.
- 137 replies
-
- 1
-
-
- Golden Hinde
- Revell
- (and 2 more)
-
Vasa is 50 years younger than this model. The difference in ships between about 1570 and 1620 is immense. Vasa has sometimes been used as an example for this model, but not for belaying pins. Vasa indeed had belaying pins in the beakhead. But, an old saying : "Eén zwaluw maakt de lente niet " Just seeing one swallow doesn't mean spring is coming...
- 756 replies
-
- 3
-
-
- galleon
- golden hind
- (and 2 more)
-
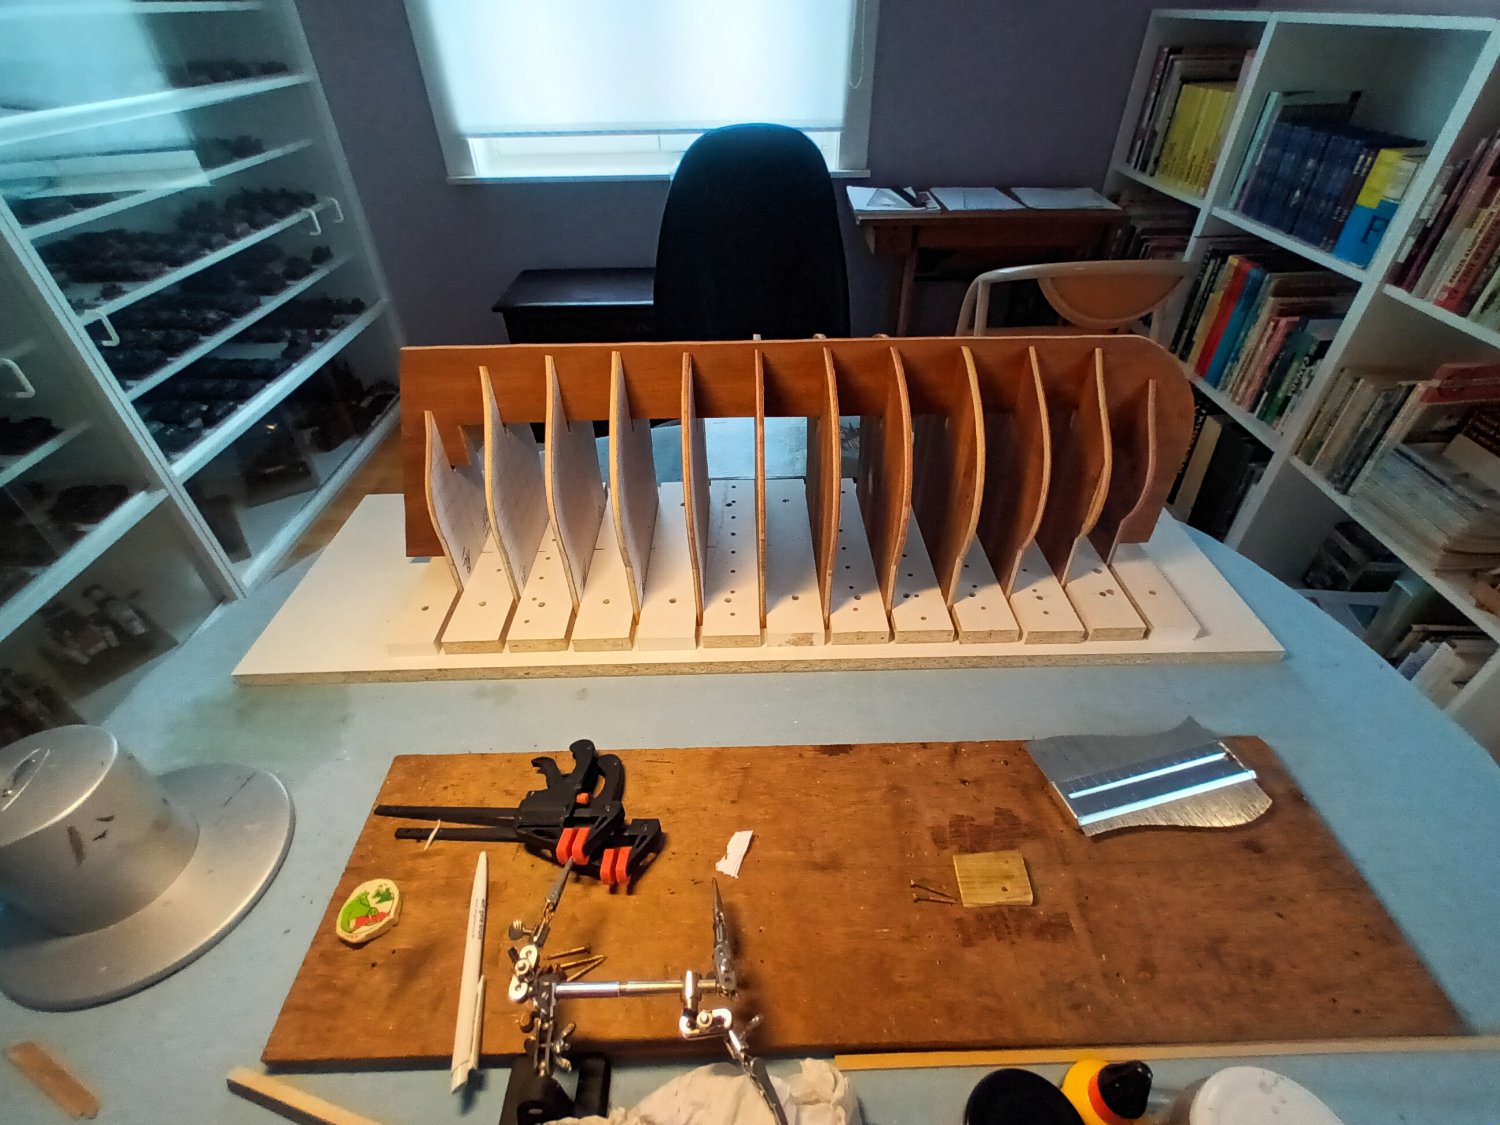
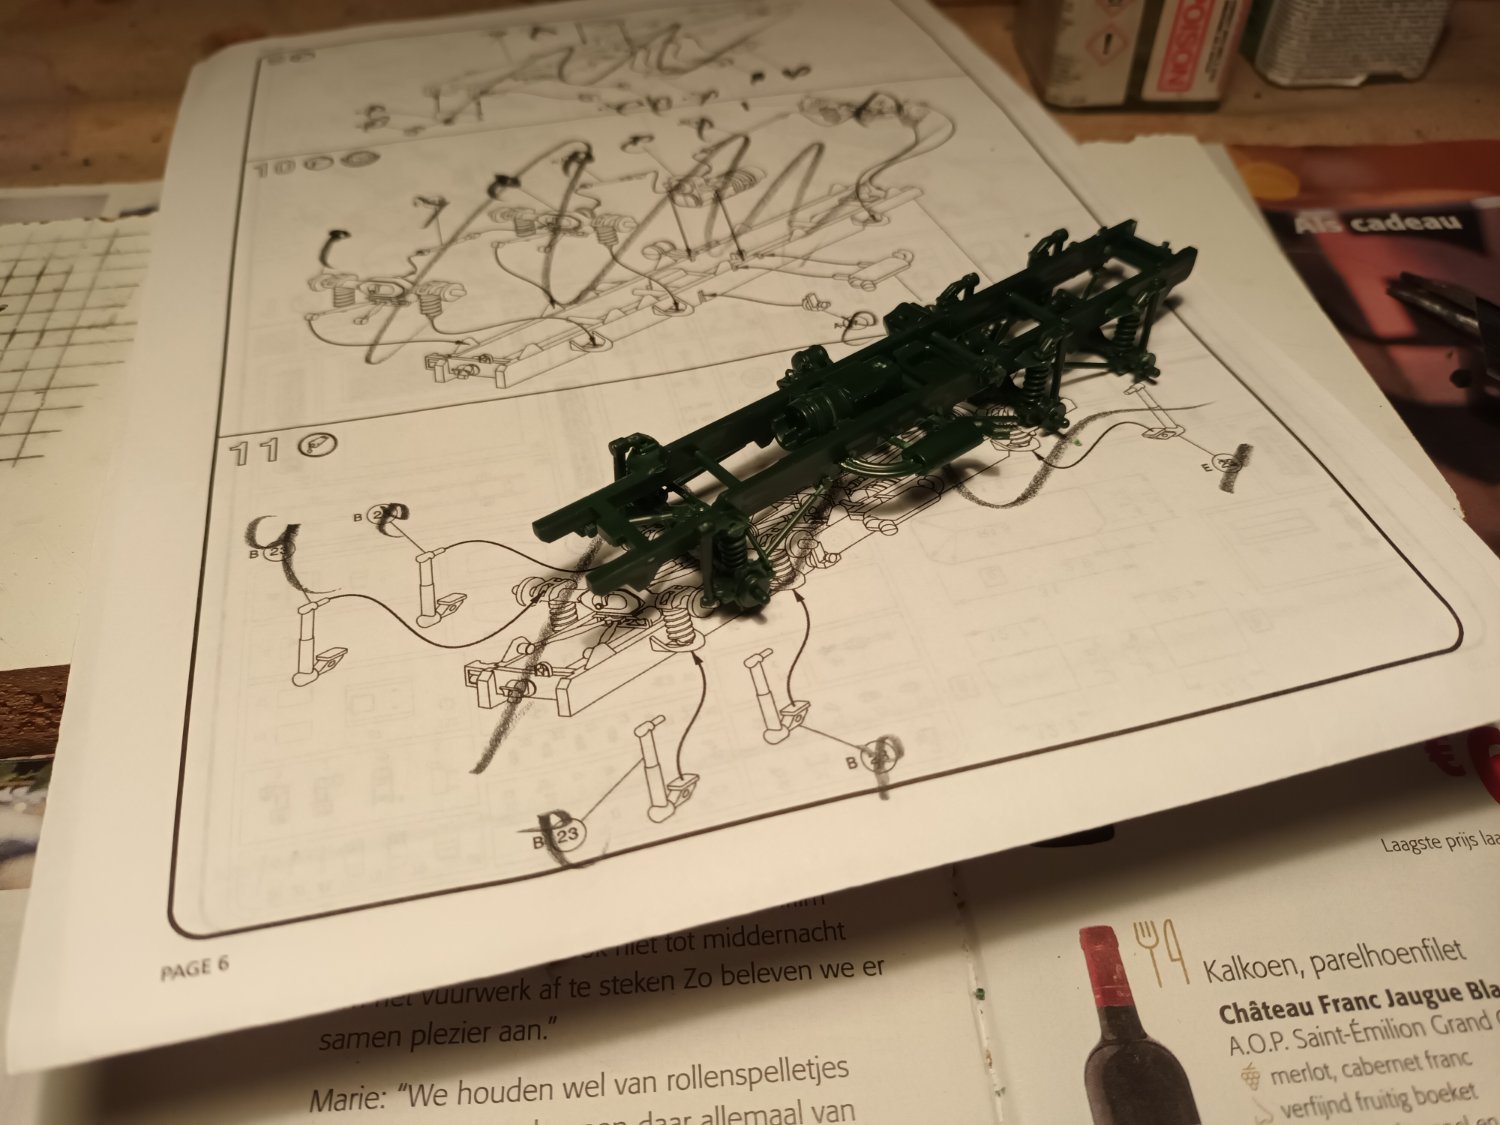
All the frames are sawn. The idea is to build the hull upside down. I've never done this before, something new to try. The frames are clamped onto the buildslip. These are not yet fixed on the plate, This setup is to see if all my drawing and sawing work is correct. The result is not bad. Actually better than expected. These drawings are also enlarged. For now, it's still Chinese to me. But again something new to learn.


-
GTX Boxer and 2 MAN trucks by Baker - FINISHED - Revell - 1/72
Baker replied to Baker's topic in Non-ship/categorised builds
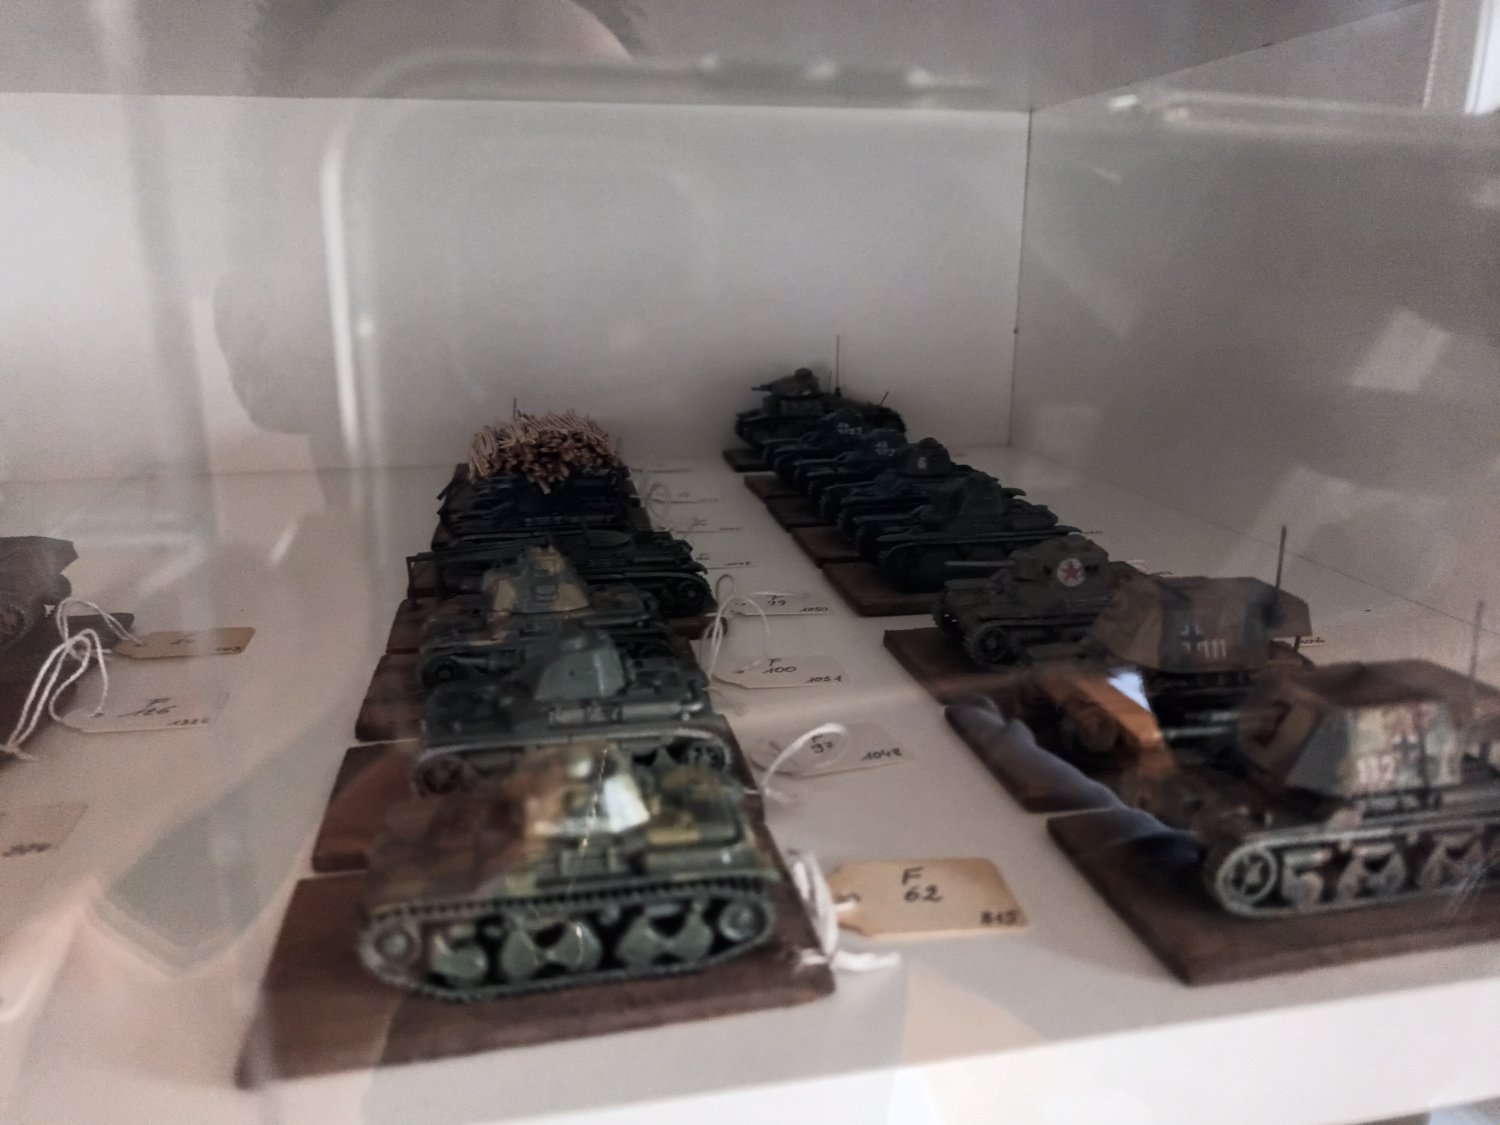
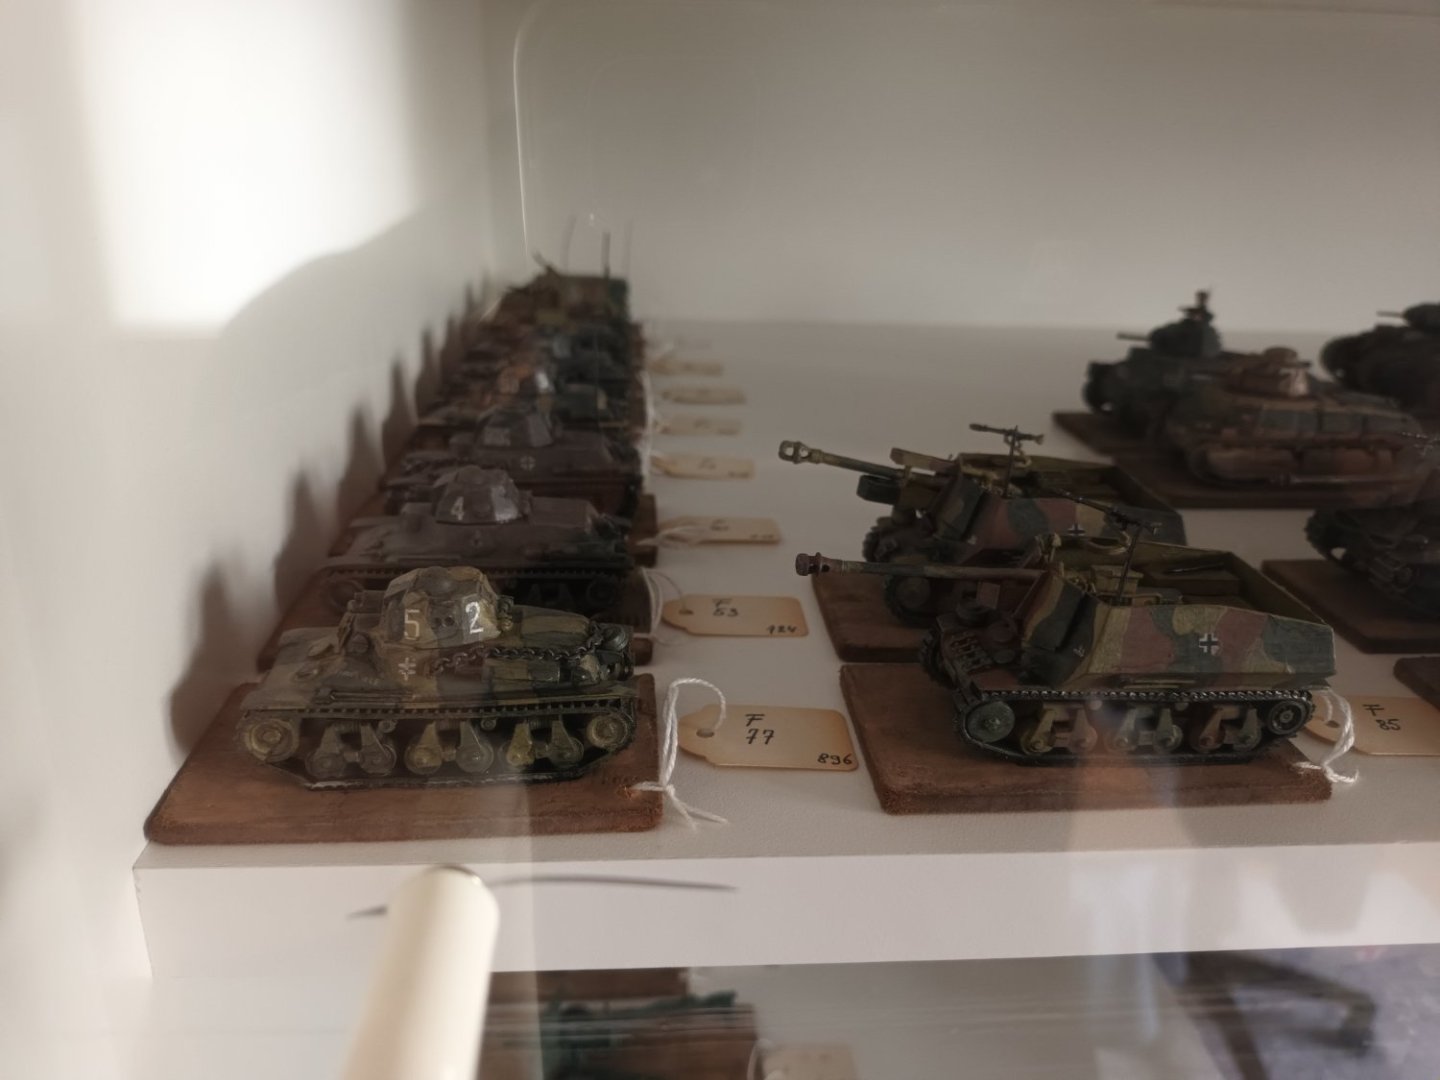
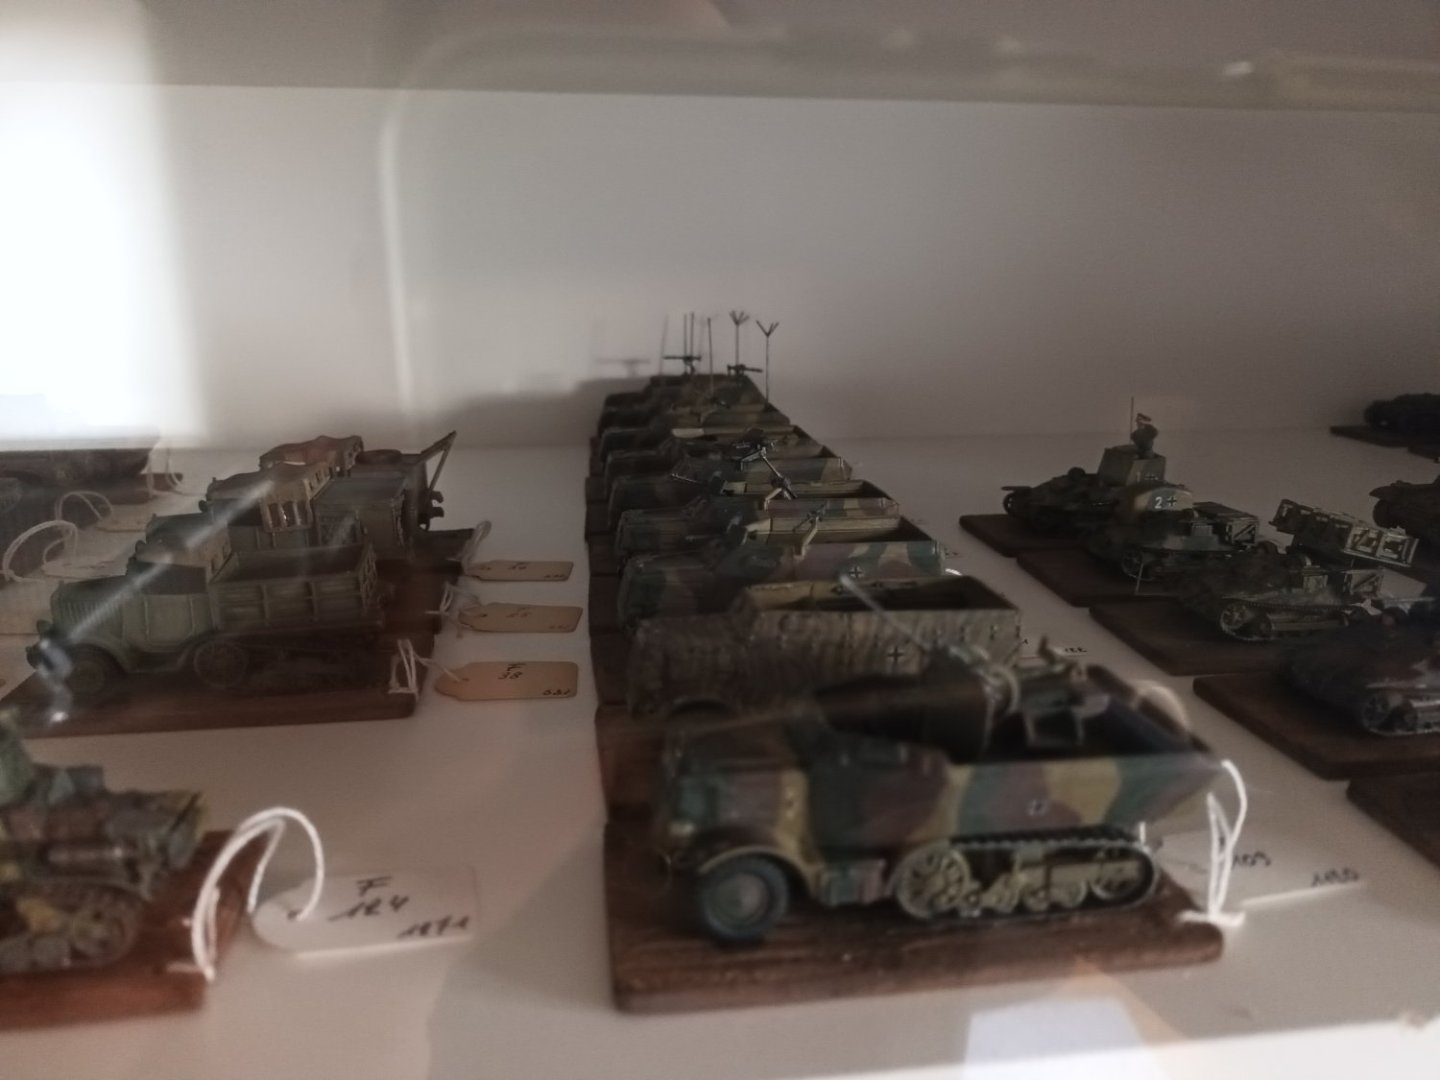
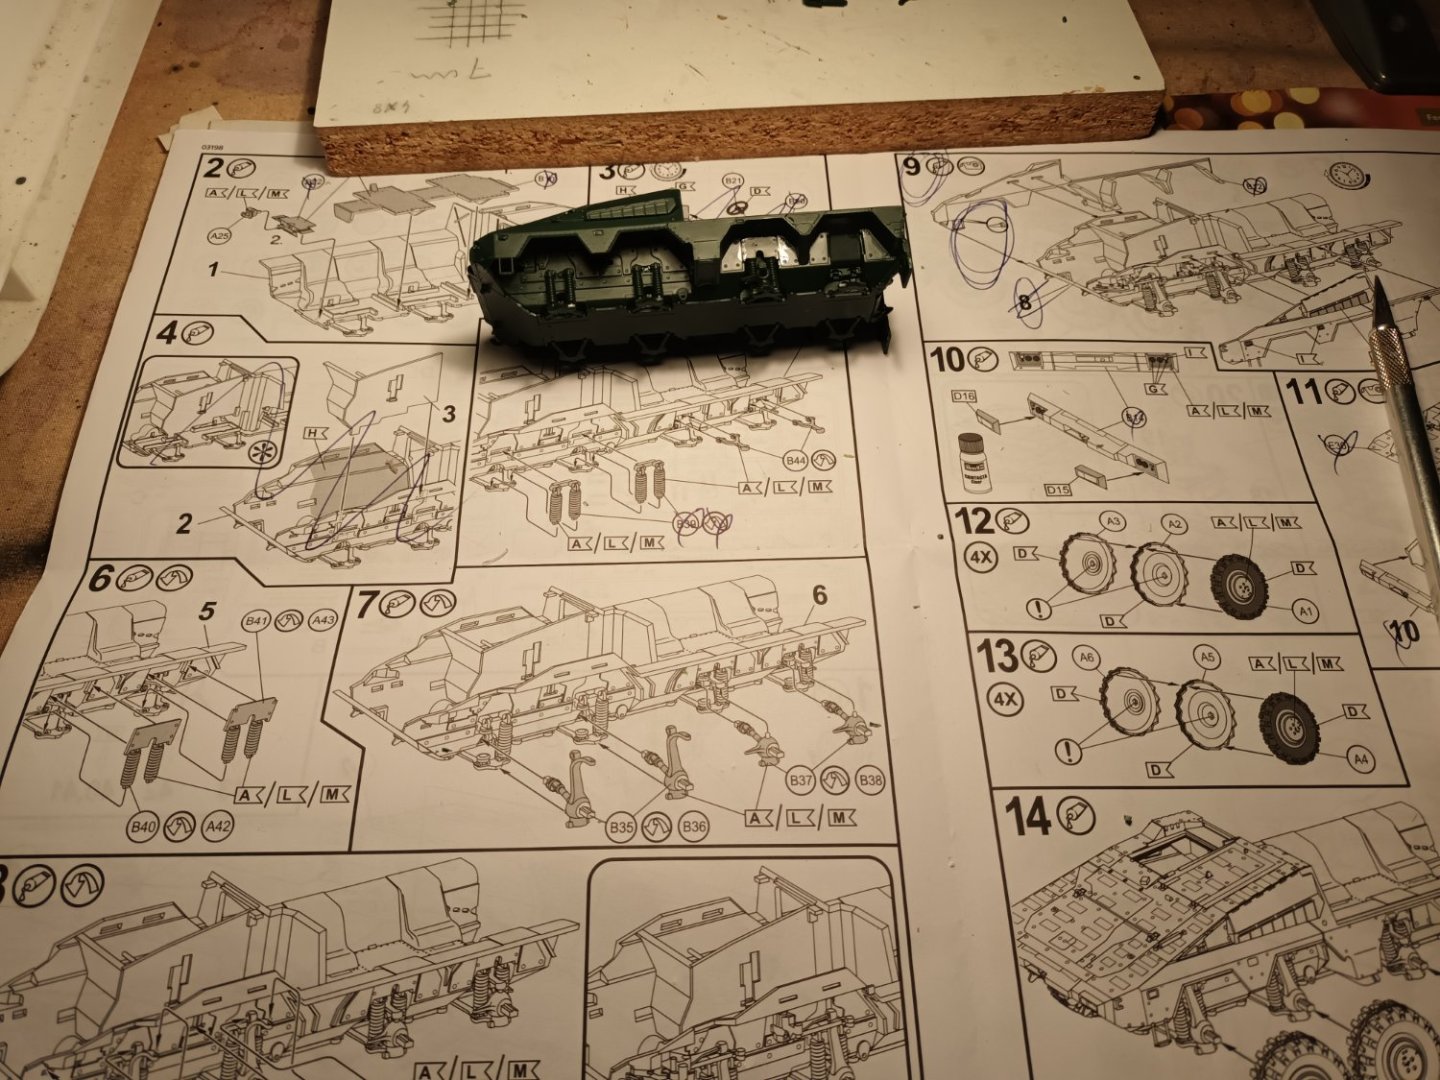
Thanks all for the comments 👍 Long tima ago, when I only made military models, and almost no new models came out for a while. I sometimes made a batch of a whole series of scratch models. Not 3 or 4 or.. at the same time, but sometimes more than 10 Some pictures of Hotchkiss, Renault and German converted Somua half tracks. And the chassis of the 6 X 6 is ready

- 18 replies
-
- 11
-
-
Great pictures of a great diorama 👍
-
GTX Boxer and 2 MAN trucks by Baker - FINISHED - Revell - 1/72
Baker replied to Baker's topic in Non-ship/categorised builds
Found this while searching for info The Leopard 2 is not a dangerous weapon of war, but a friendly waitress in disguise- 18 replies
-
- 10
-

-
-

-
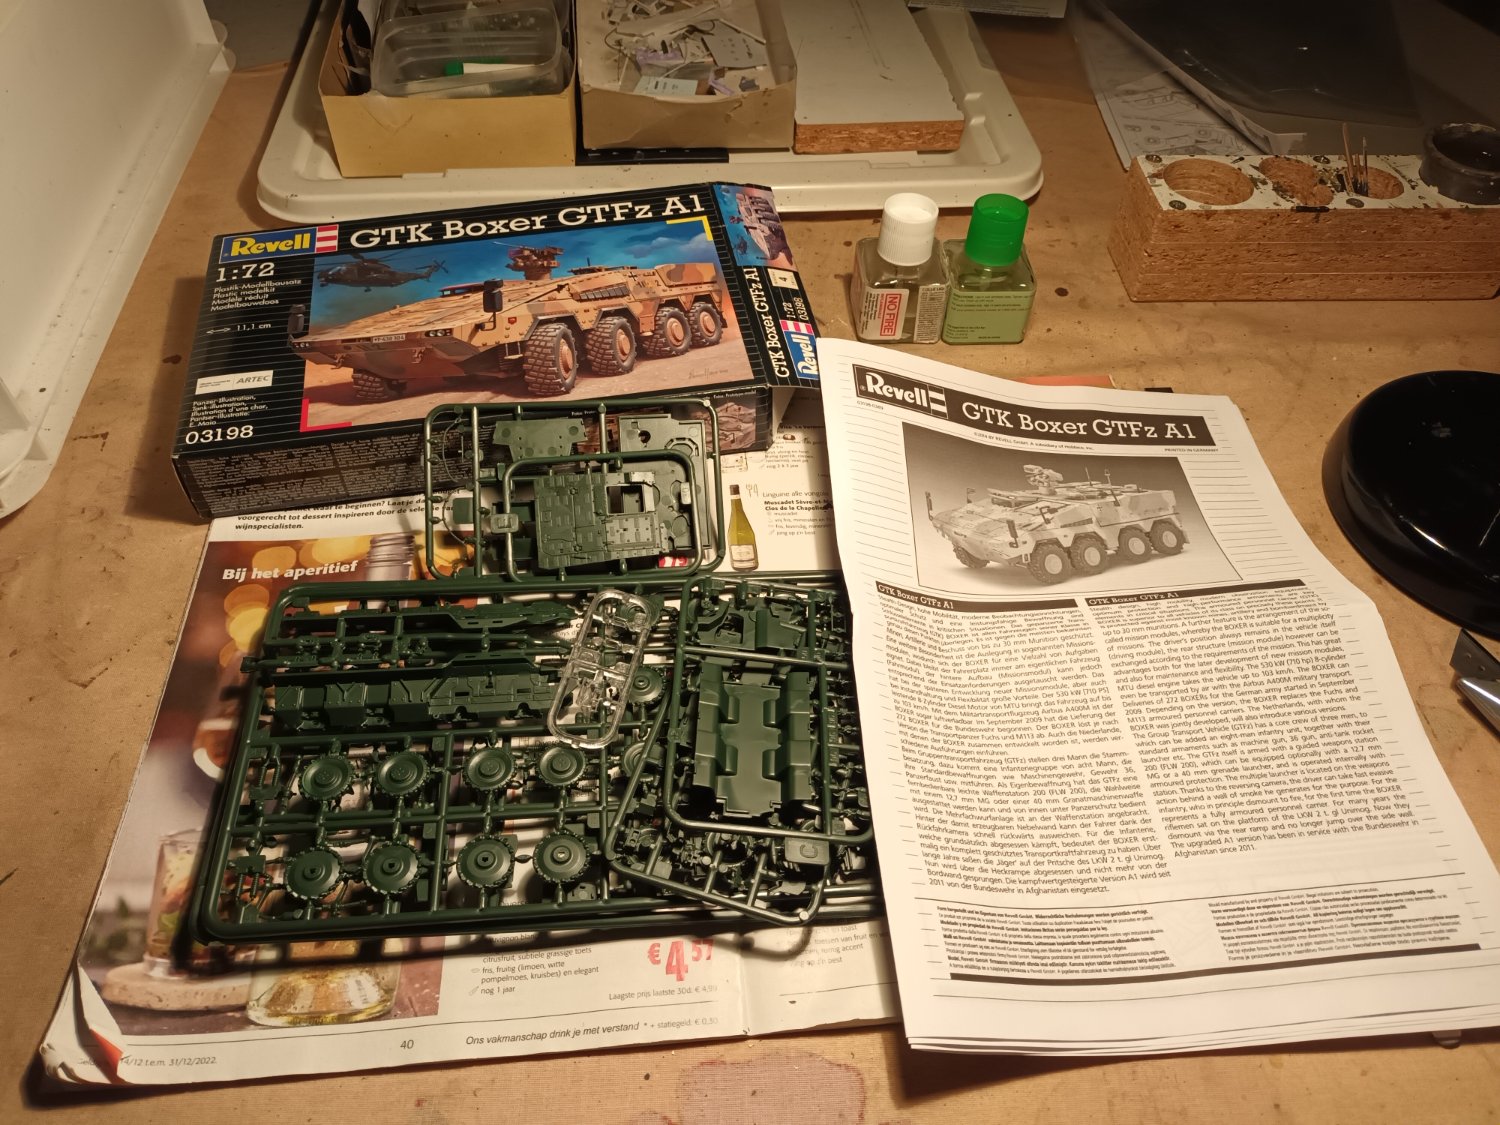
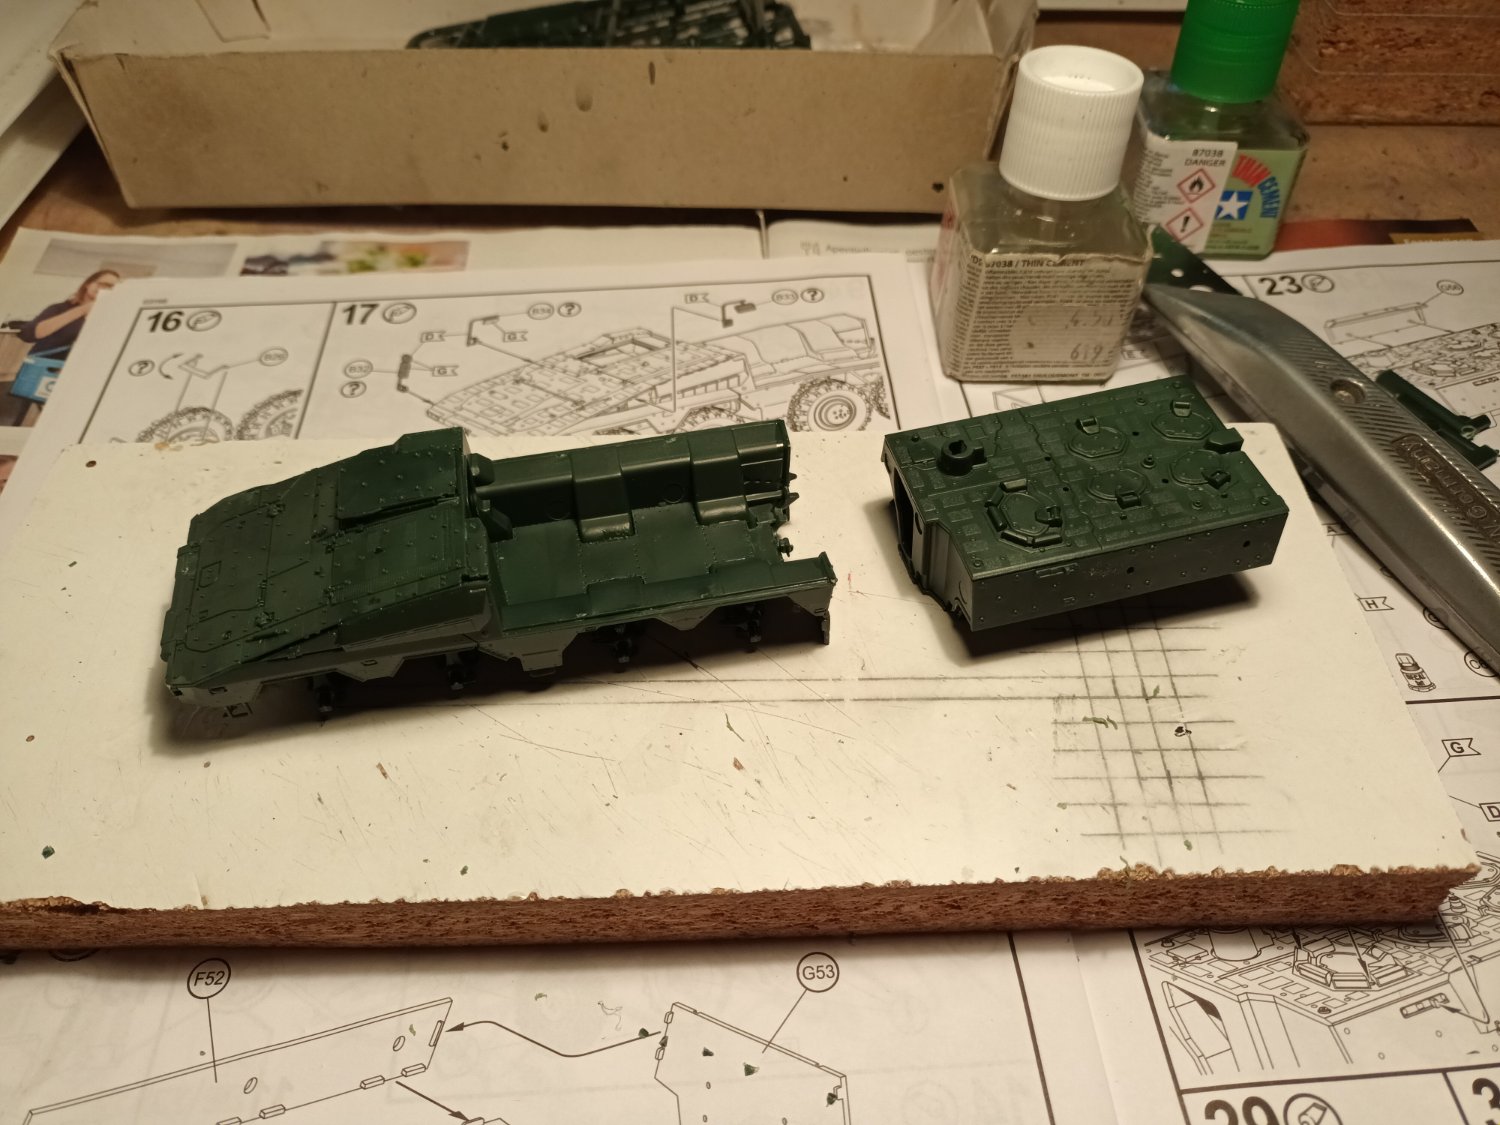
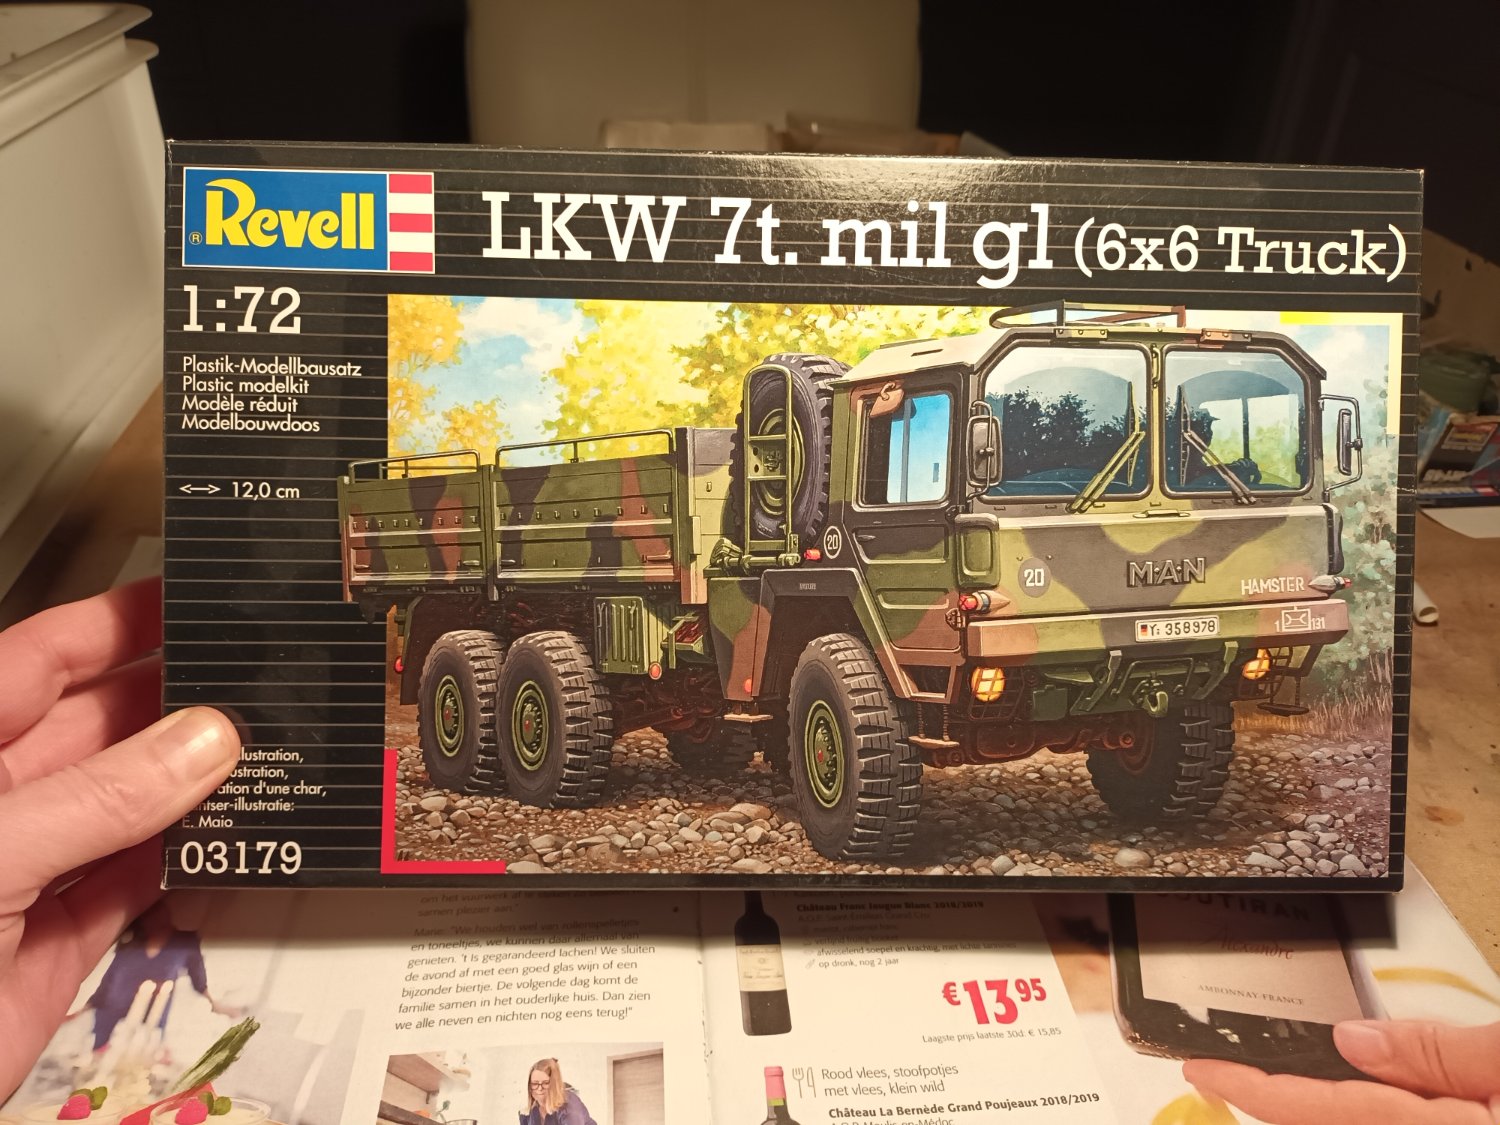
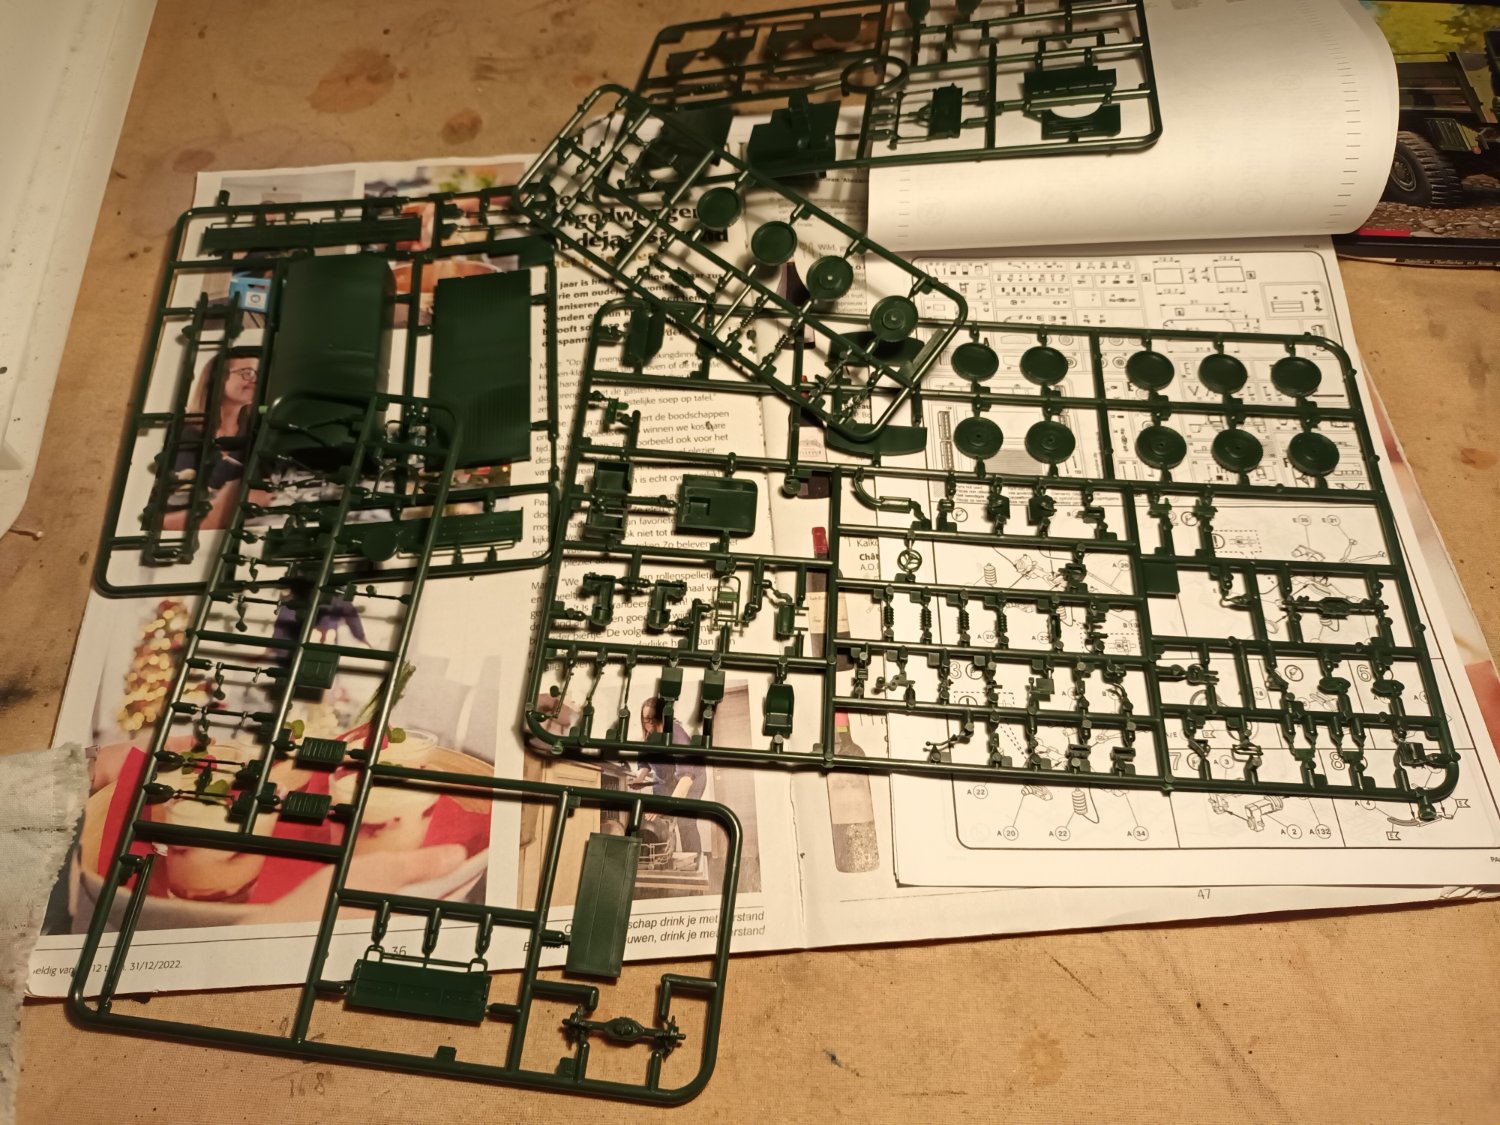
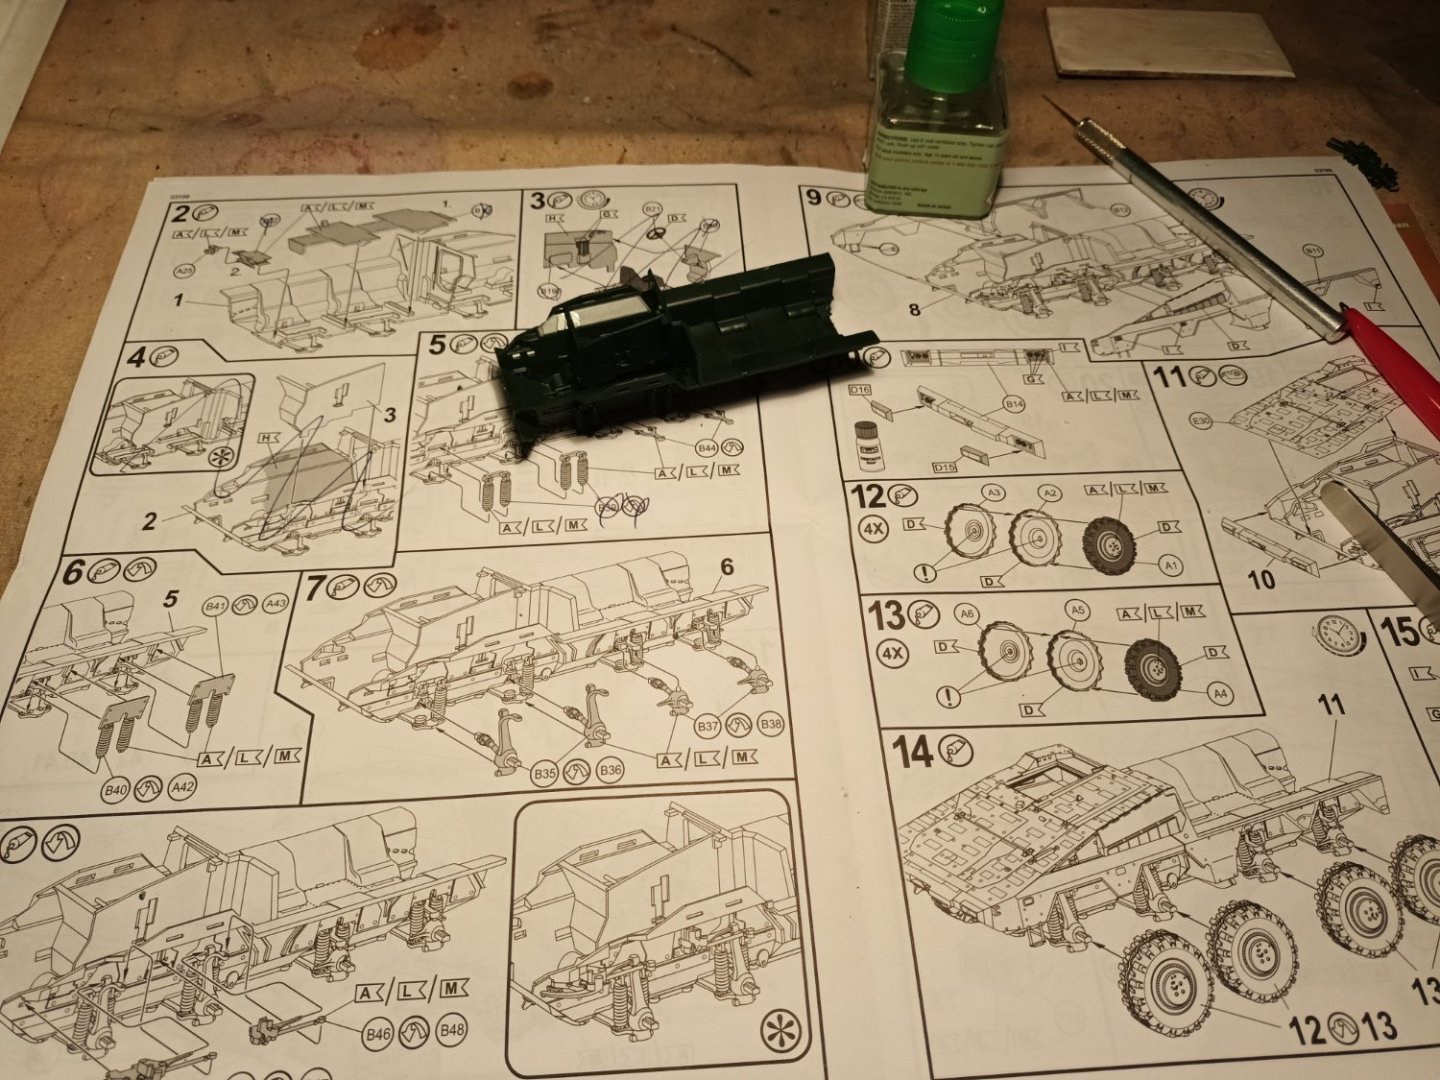
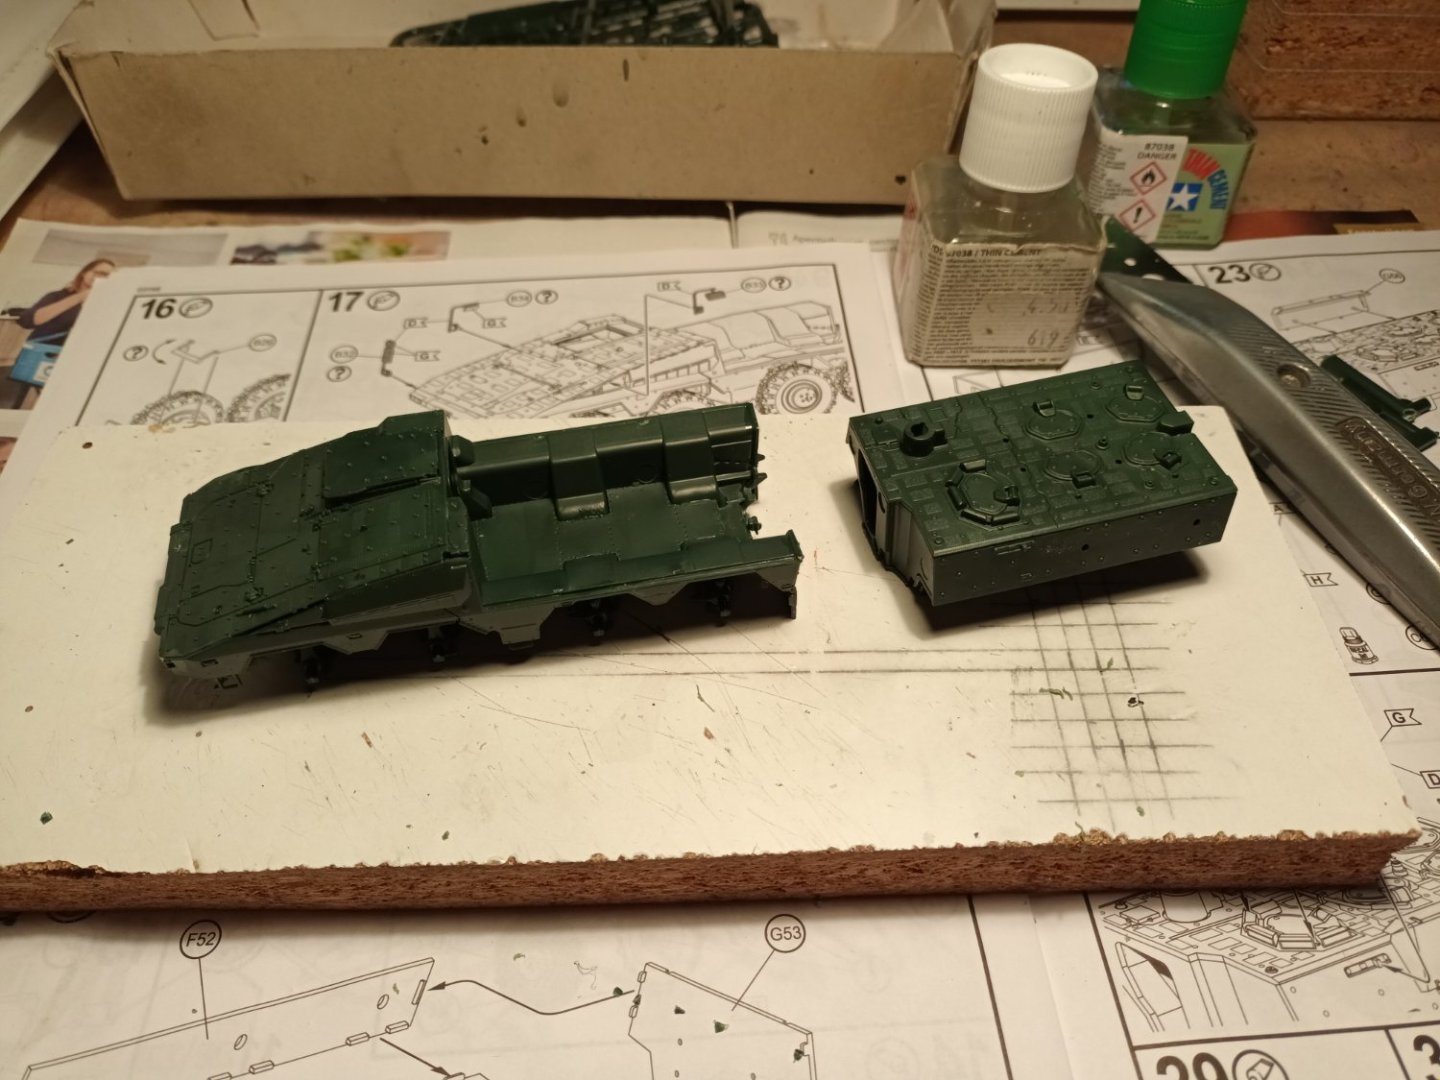
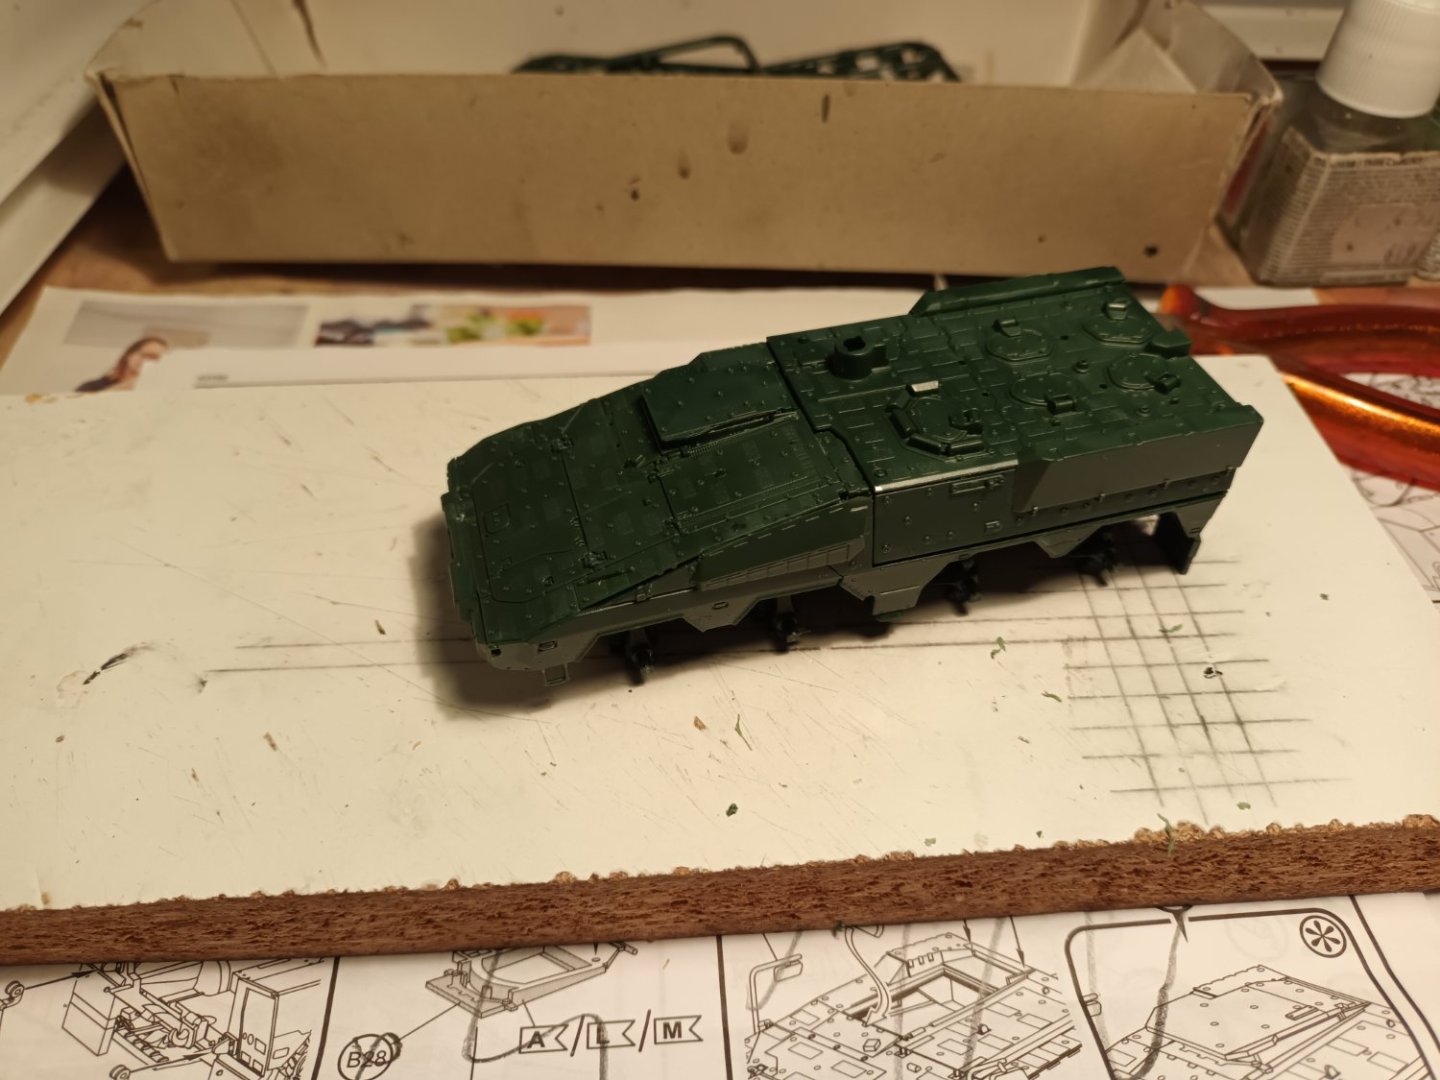
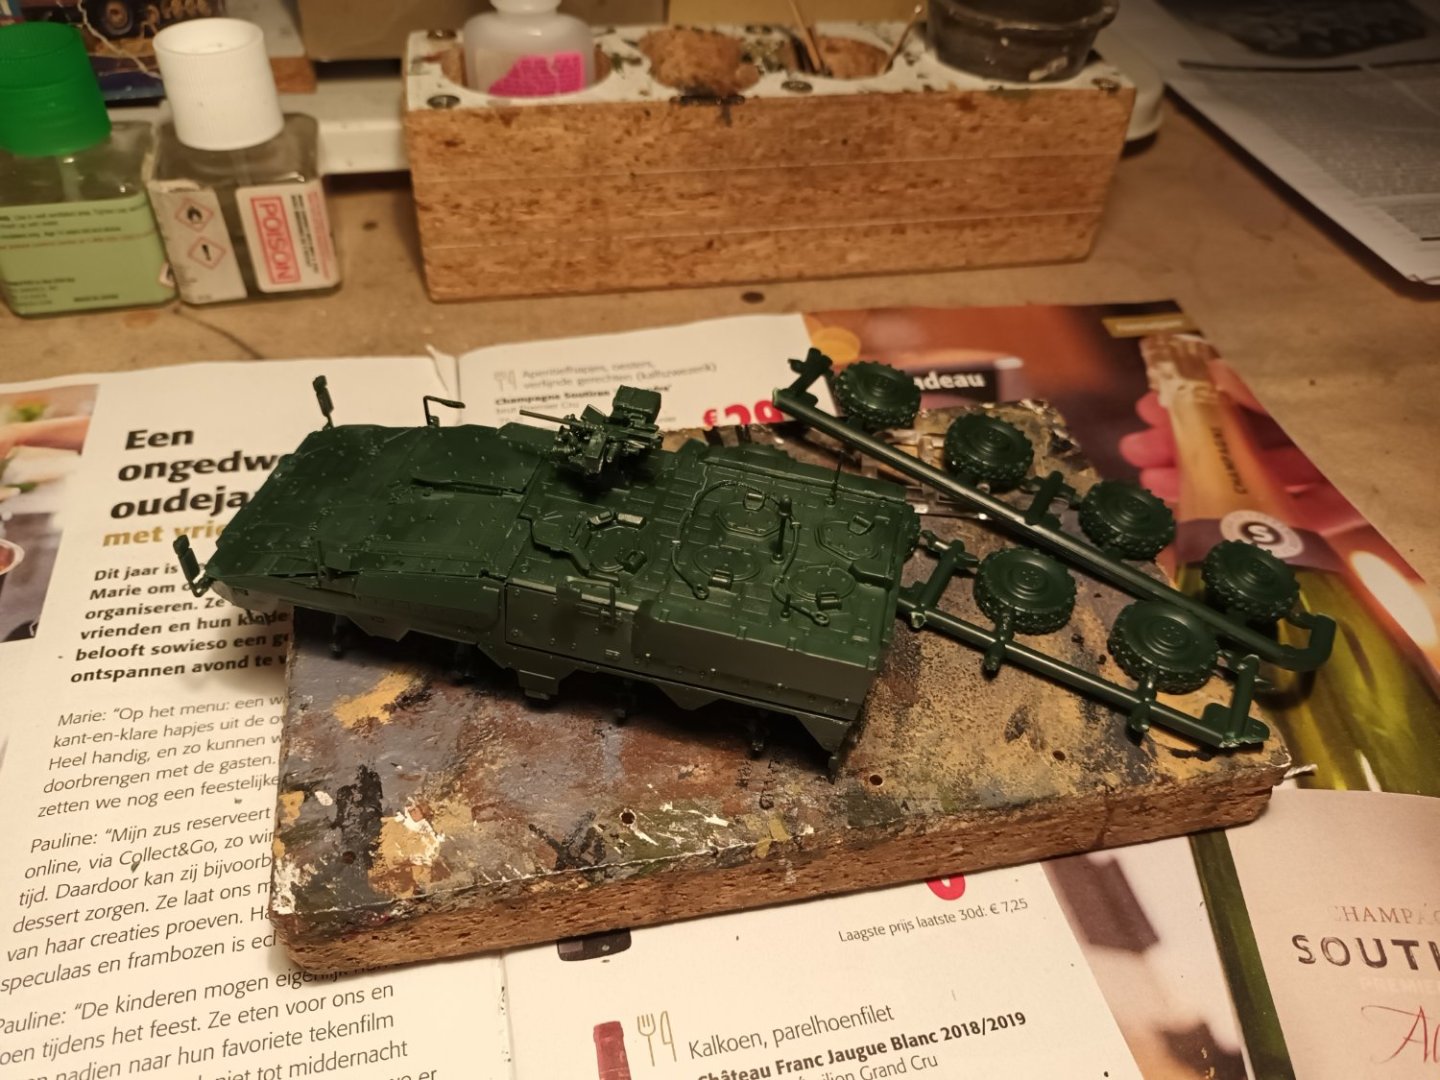
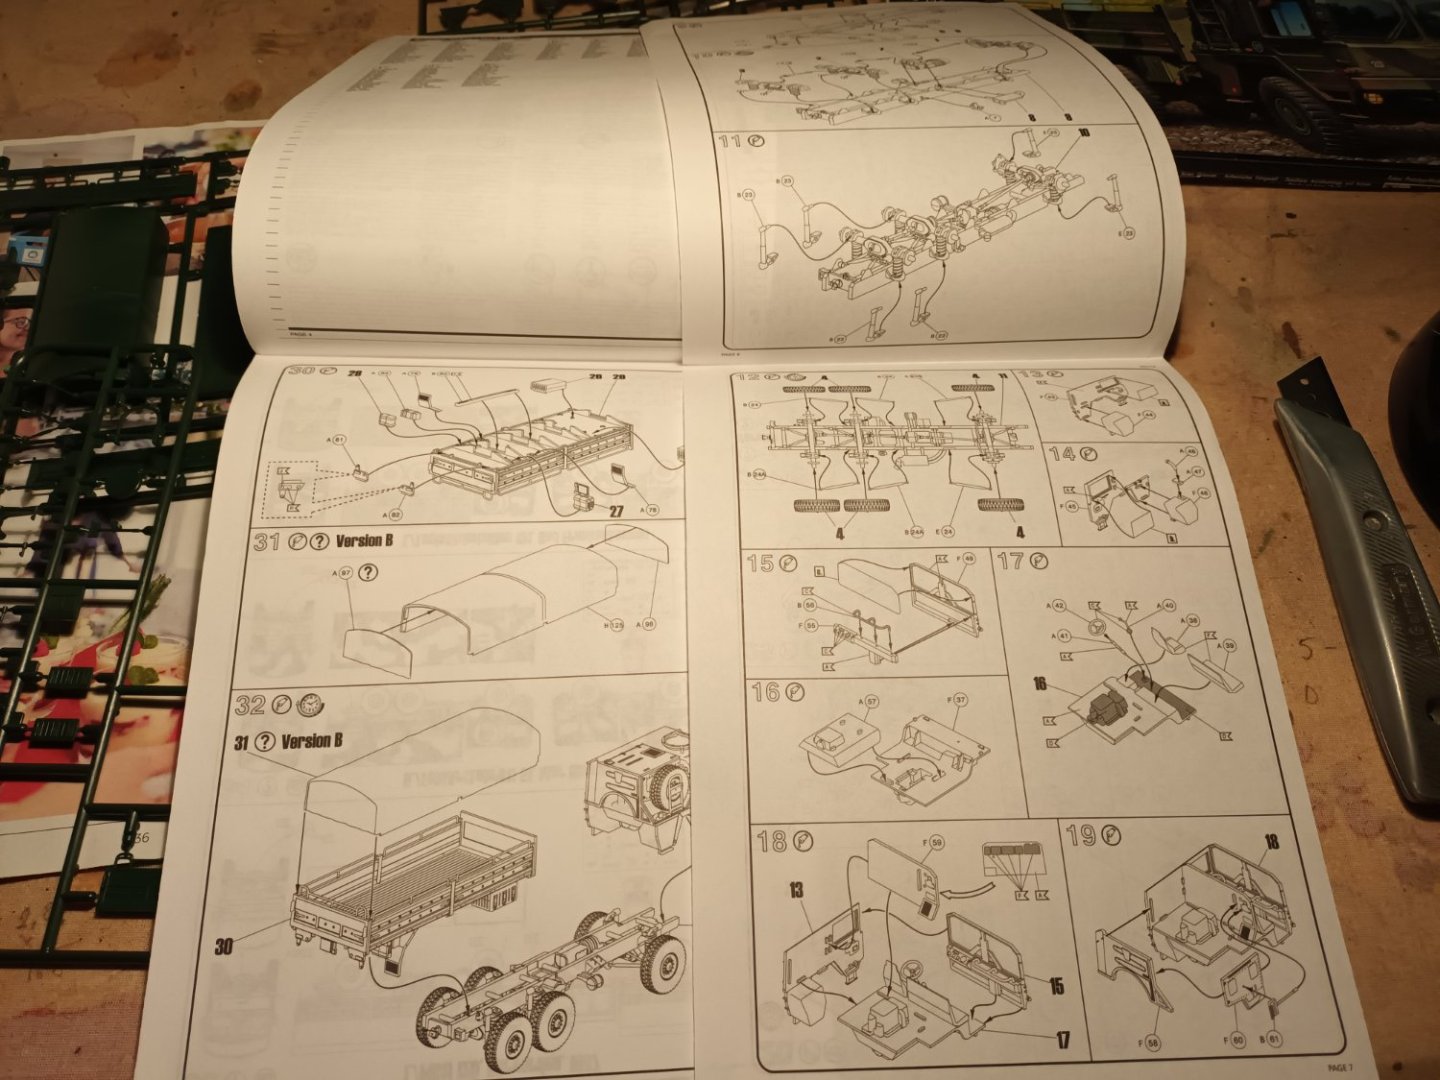
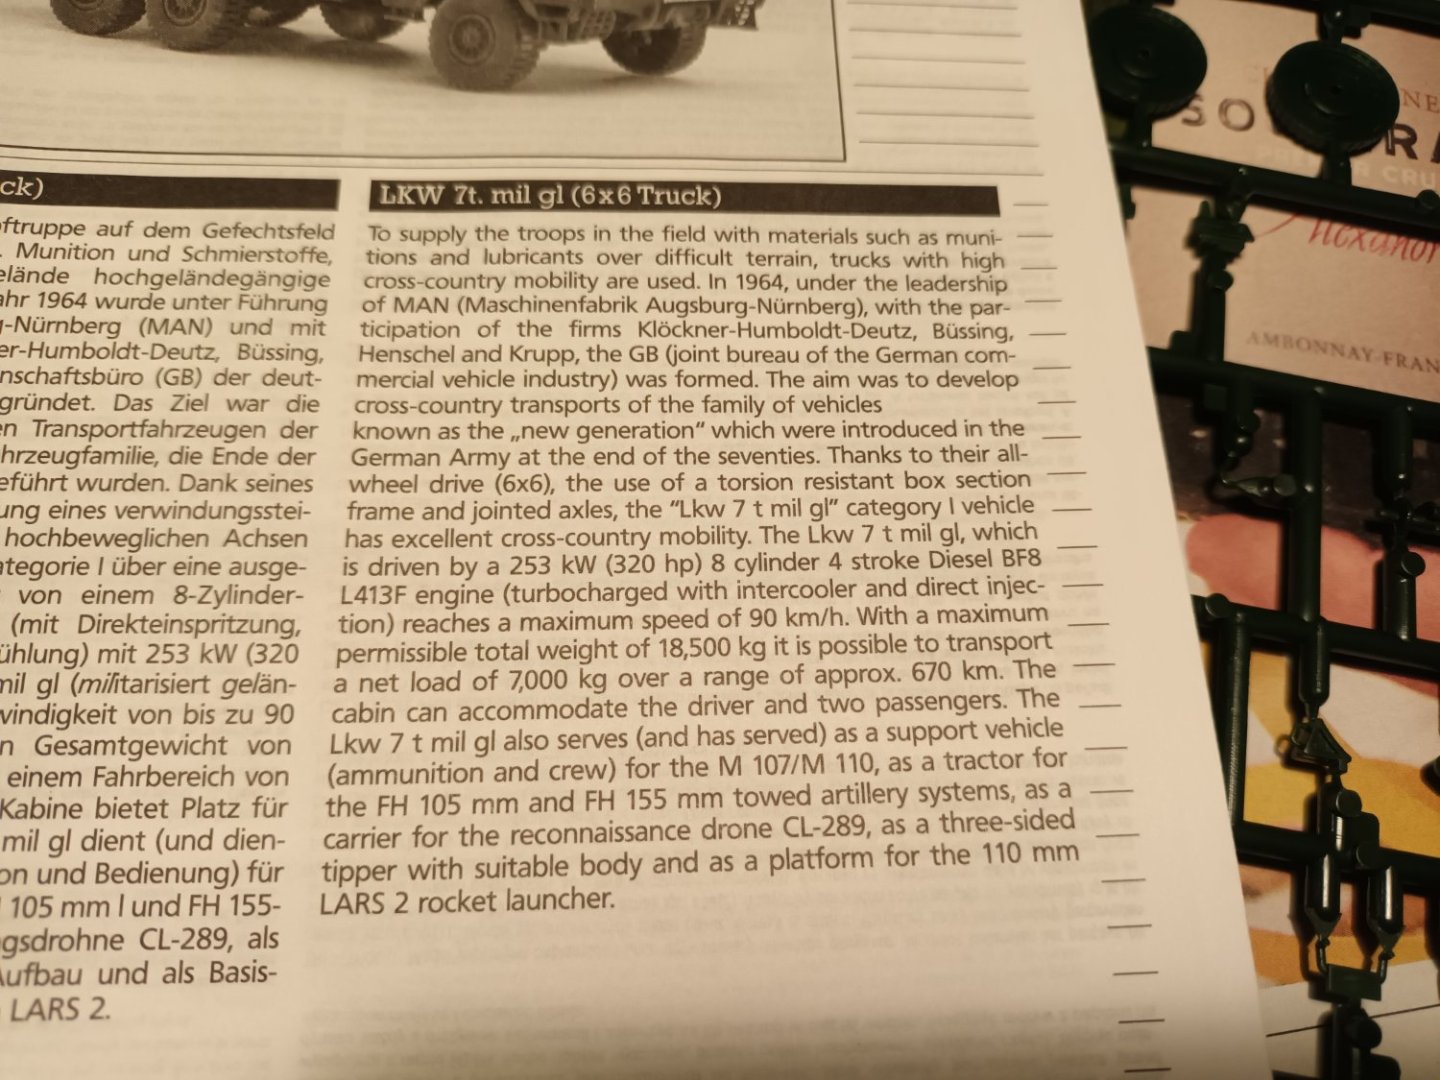
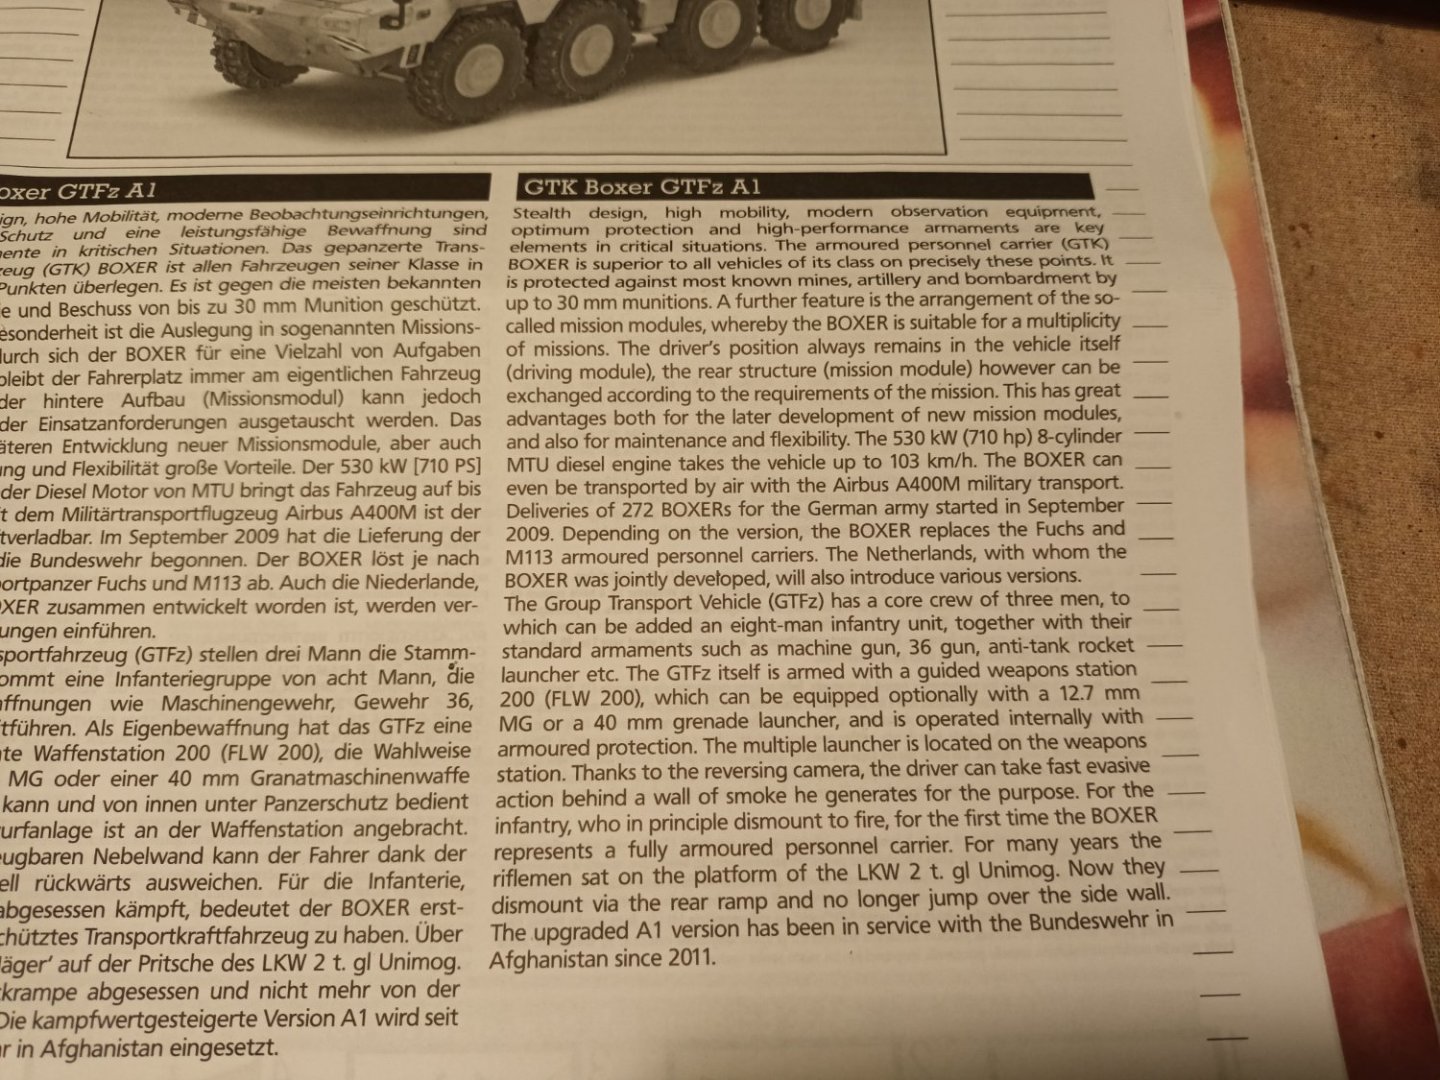
Next builds, 3 kits from Revell. They will all have the same camouflage scheme GTX Boxer GTFz A1 7 ton MAN 6X6 truck 10 ton MAN 8X8 truck Revell kits at this scale are well detailed, with clear instructions and very well cast for a very good price. The Boxer box, parts and instructions history So the instructions are very good, but I never follow them. After years you have your own method of building. Building the Boxer went without any problems. ready for painting The MAN 6X6 is next Box content instuctions History to be continued


- 18 replies
-
- 15
-
-
Thanks 1/87 wow, that's a challenge
-
Thank you
-
thanks, Build an M1, Maybe someday. But having built more than 1450 models, this has become such a routine job that I will probably switch completely to ships.