Baker
-
Posts
4,301 -
Joined
-
Last visited
Content Type
Profiles
Forums
Gallery
Events
Everything posted by Baker
-
 Be careful making the openings the planking is quite thin. I have an idea for your cannons, but no time today to make a sketch of it.
 -
Looks good. There are several buildlogs of this model I have had great satisfaction with this kit. Will follow with interest. And if you have any questions i will try to answer
-
M29 Weasel family 1/72 (scratch) by Backer Finished
Baker replied to Baker's topic in Non-ship/categorised builds
Thank you for these nice comments. -
Finnish T26 tank by Baker - FINISHED - Mirage - 1/72 - PLASTIC
Baker replied to Baker's topic in Non-ship/categorised builds
Started on the chassis Closing the openings in the hull (inside) Outside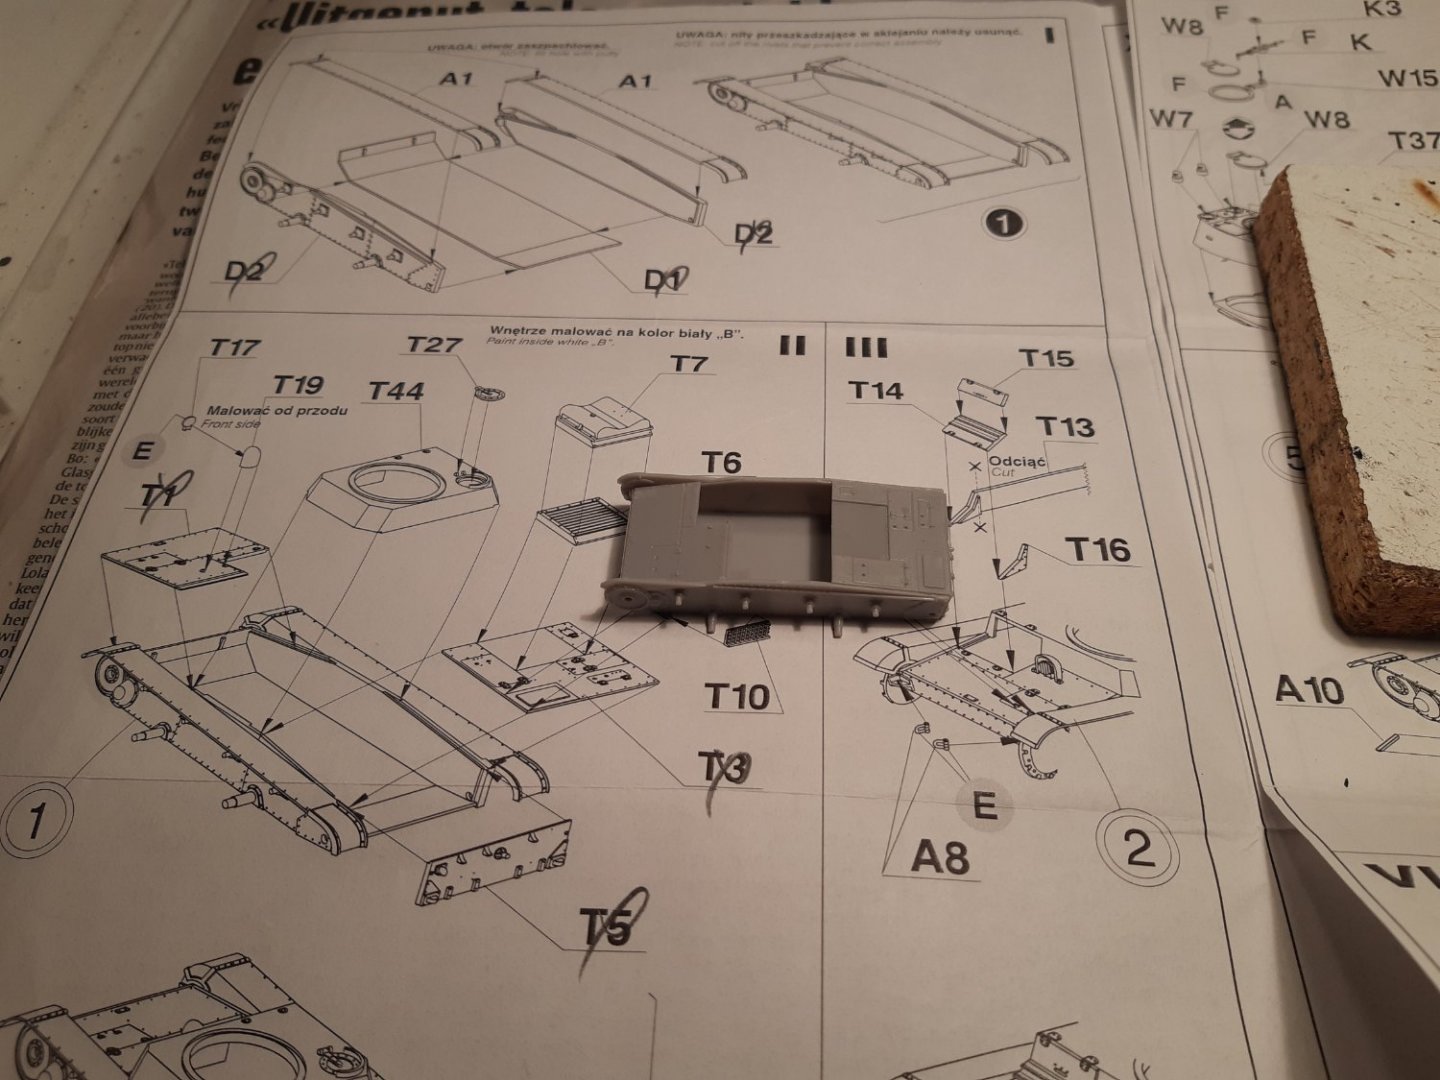
-
M29 Weasel family 1/72 (scratch) by Backer Finished
Baker replied to Baker's topic in Non-ship/categorised builds
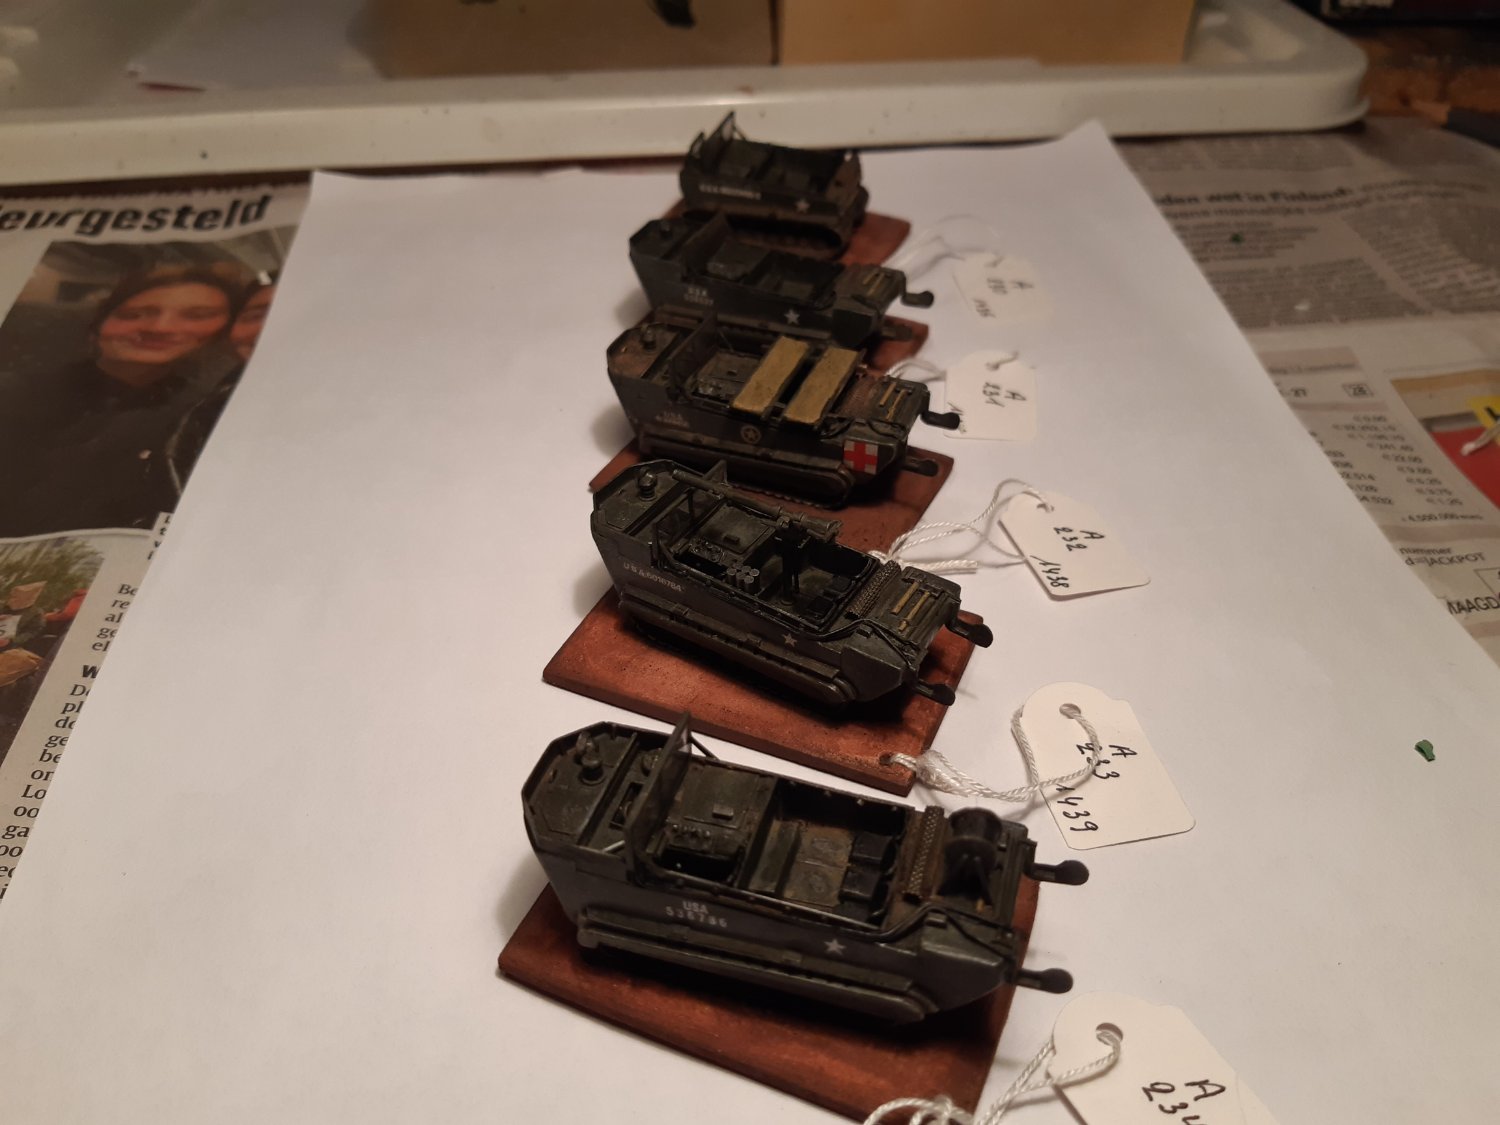
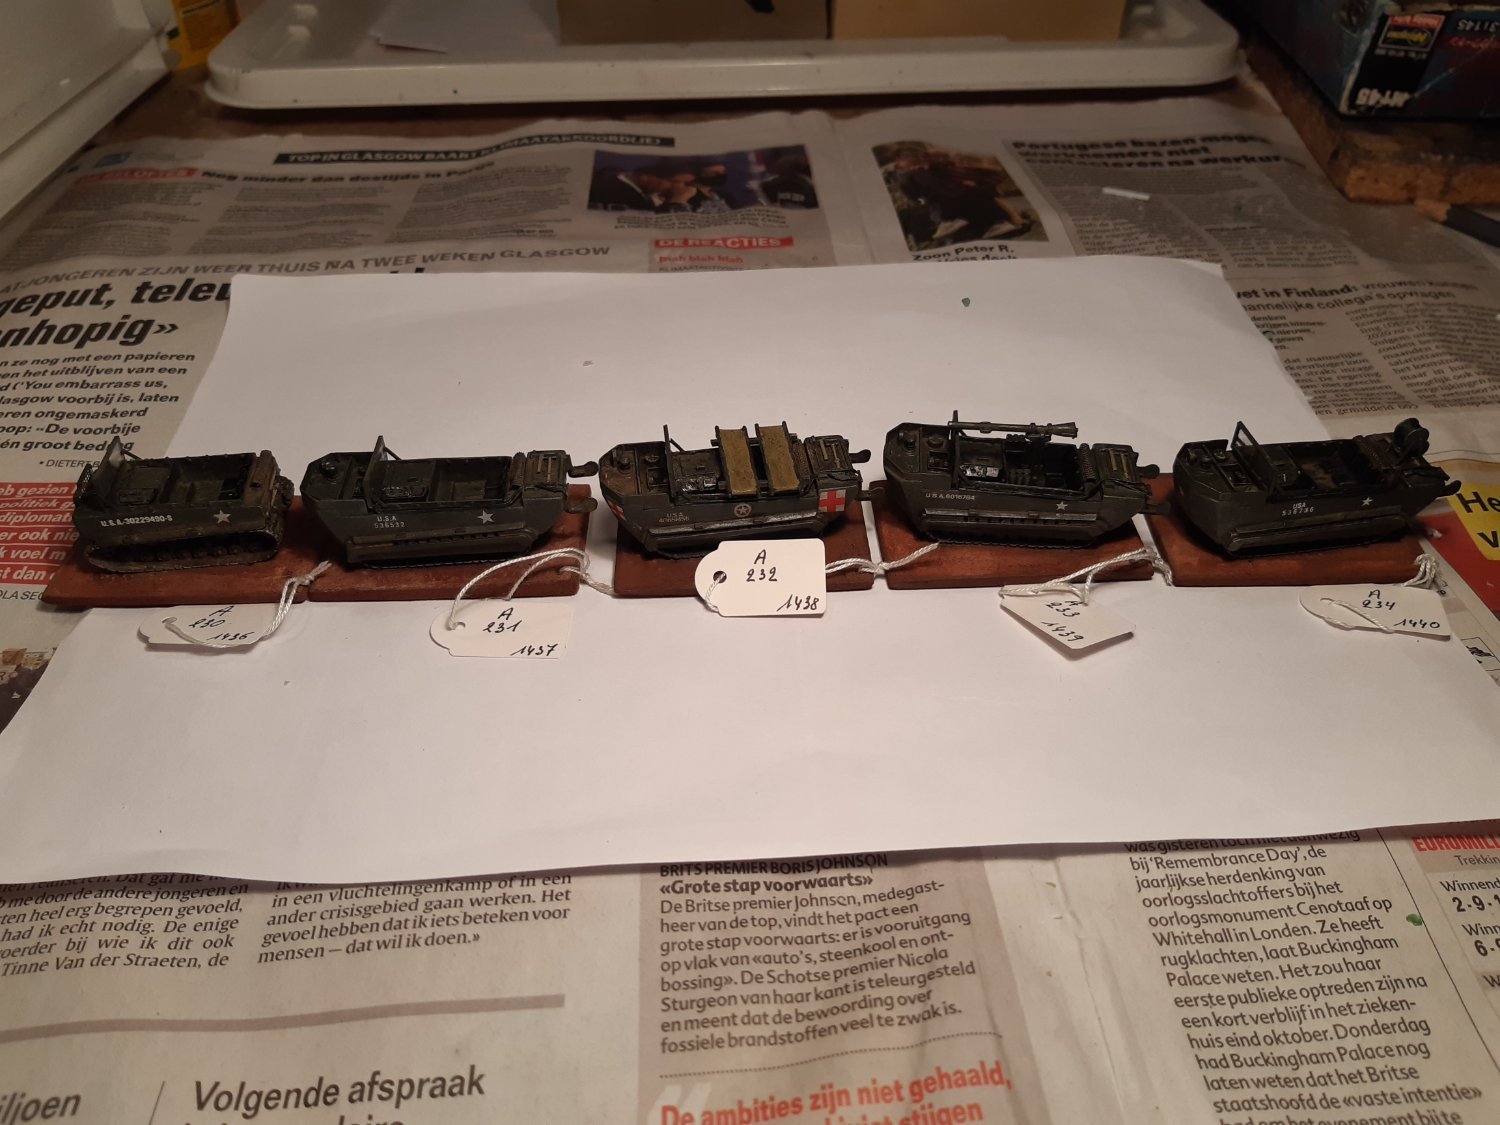
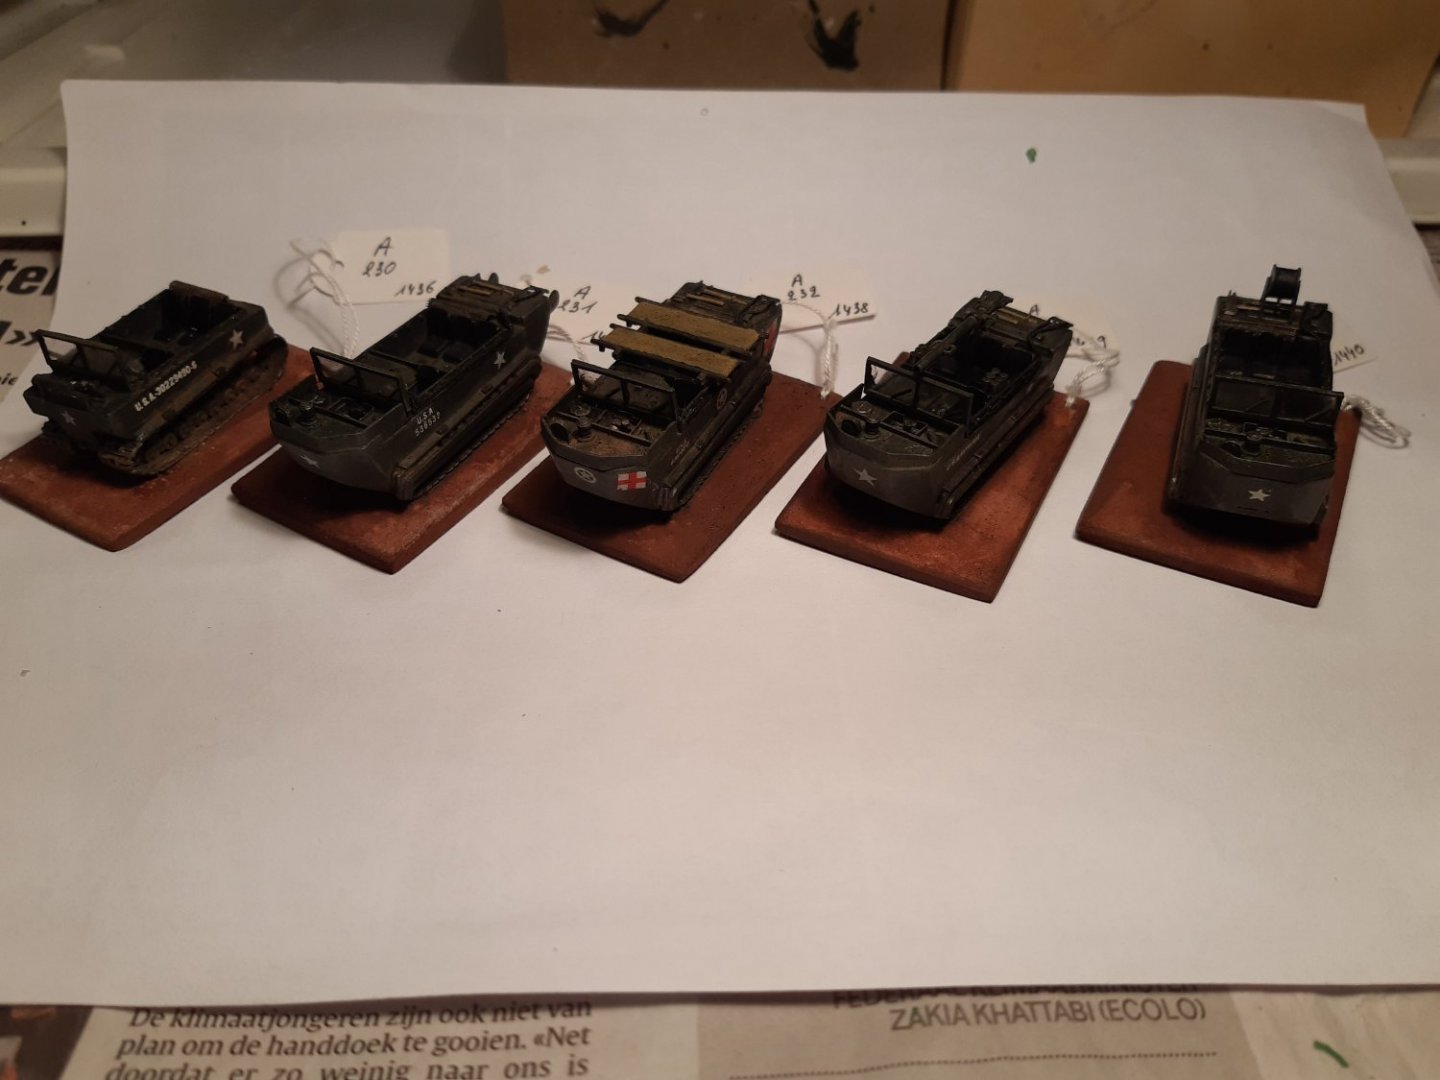
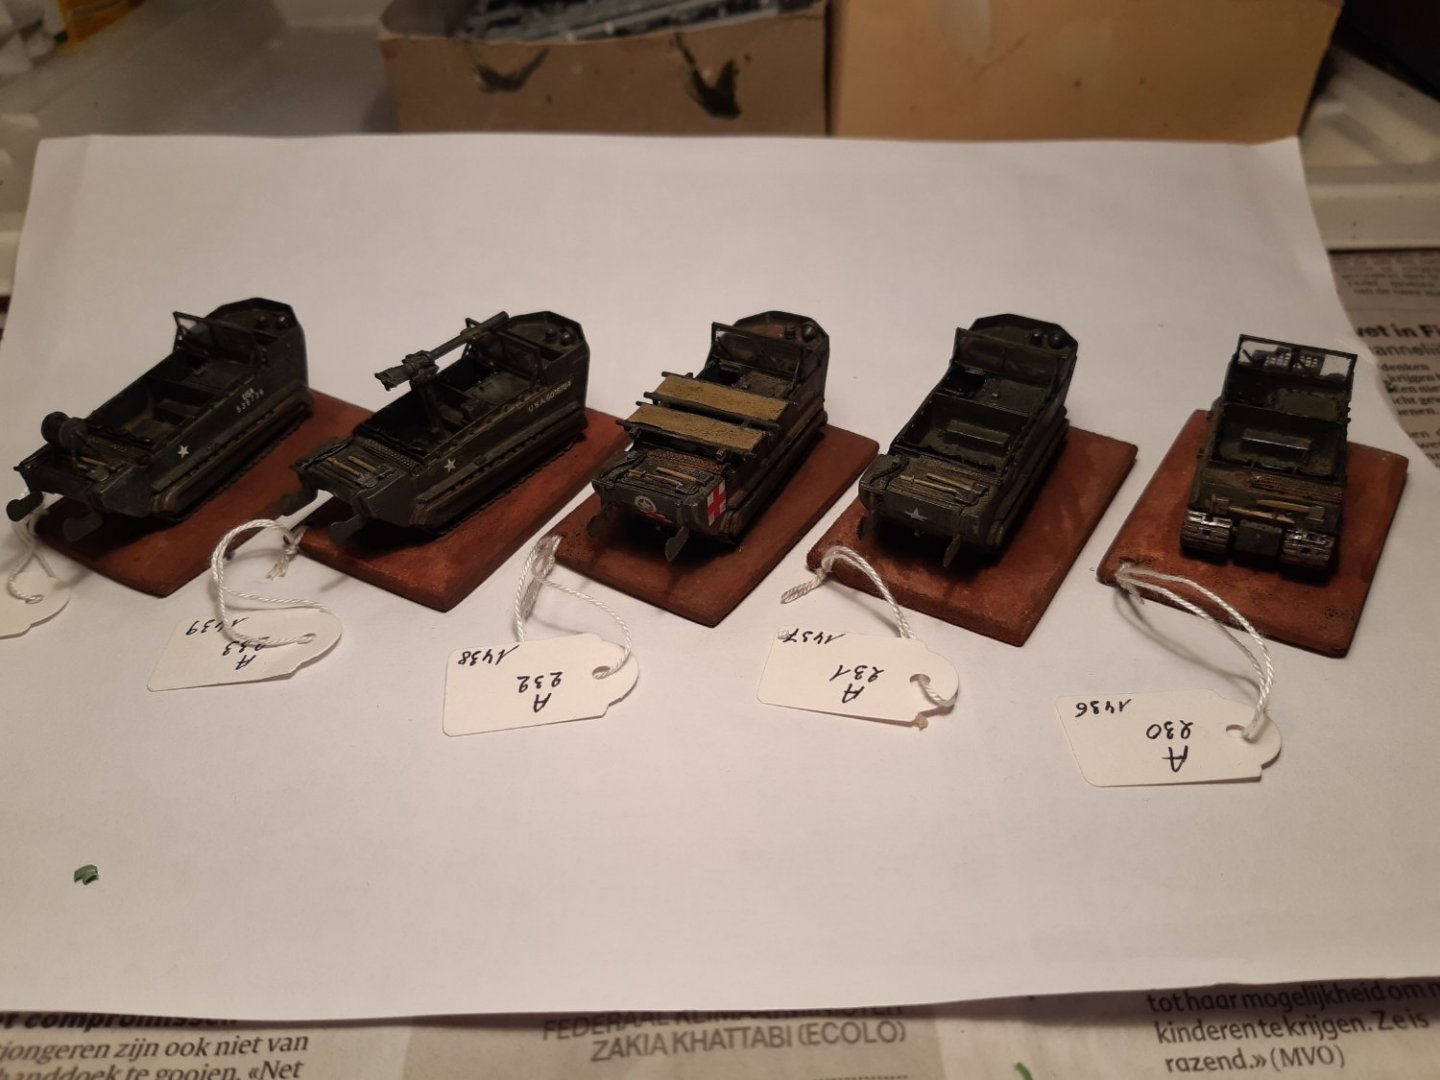
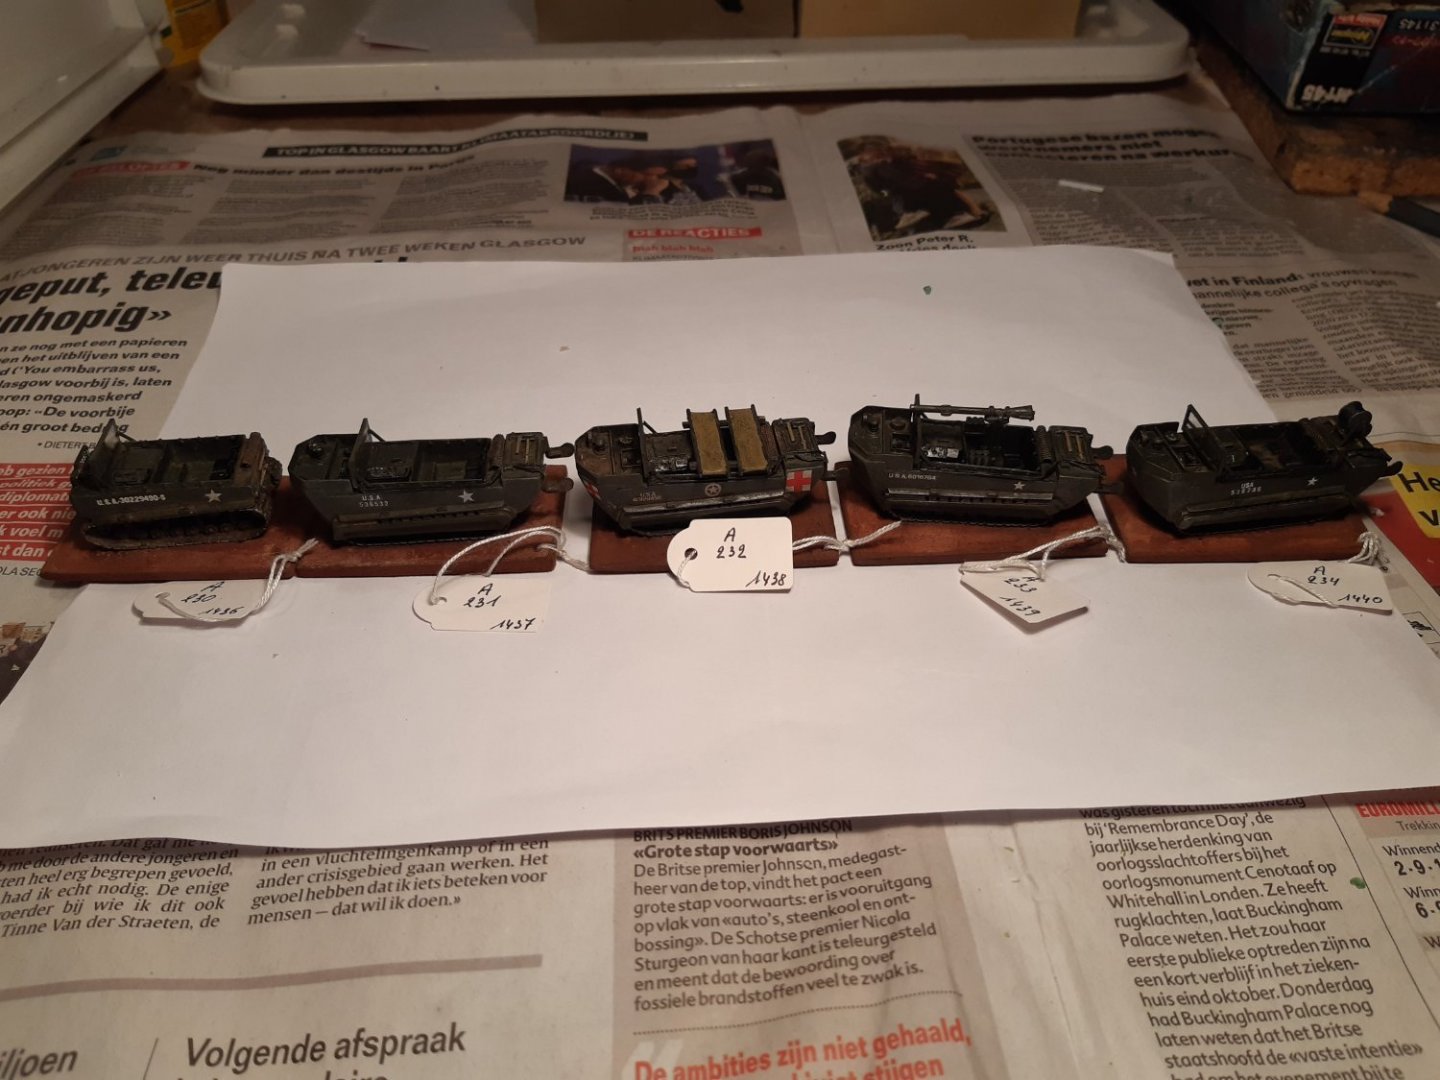
Hooray Hooray The 5th and last one is ready. The build of these models started a long time ago, was stopped and forgotten. They were found again and are finally finished. All 5 ready and tagged like 5 ducks in a row 😉 It was probably great to go for a fun ride in the mud To everyone who followed this for following, comments and likes


.jpg.6ca89bc859e1bb534dae37f9c9319eac.jpg)
- 50 replies
-
- 10
-

-
Roter Löwe 1597 by Ondras71
Baker replied to Ondras71's topic in - Build logs for subjects built 1501 - 1750
Very nicely done Ondrass 👍 -
Sorry to read this. Building something that you don't enjoy is indeed not good ☹️ Good luck with the Surprise 👍
- 35 replies
-
- 2
-

-
-
- Mantua
- Sovereign of the Seas
- (and 1 more)
-
M29 Weasel family 1/72 (scratch) by Backer Finished
Baker replied to Baker's topic in Non-ship/categorised builds
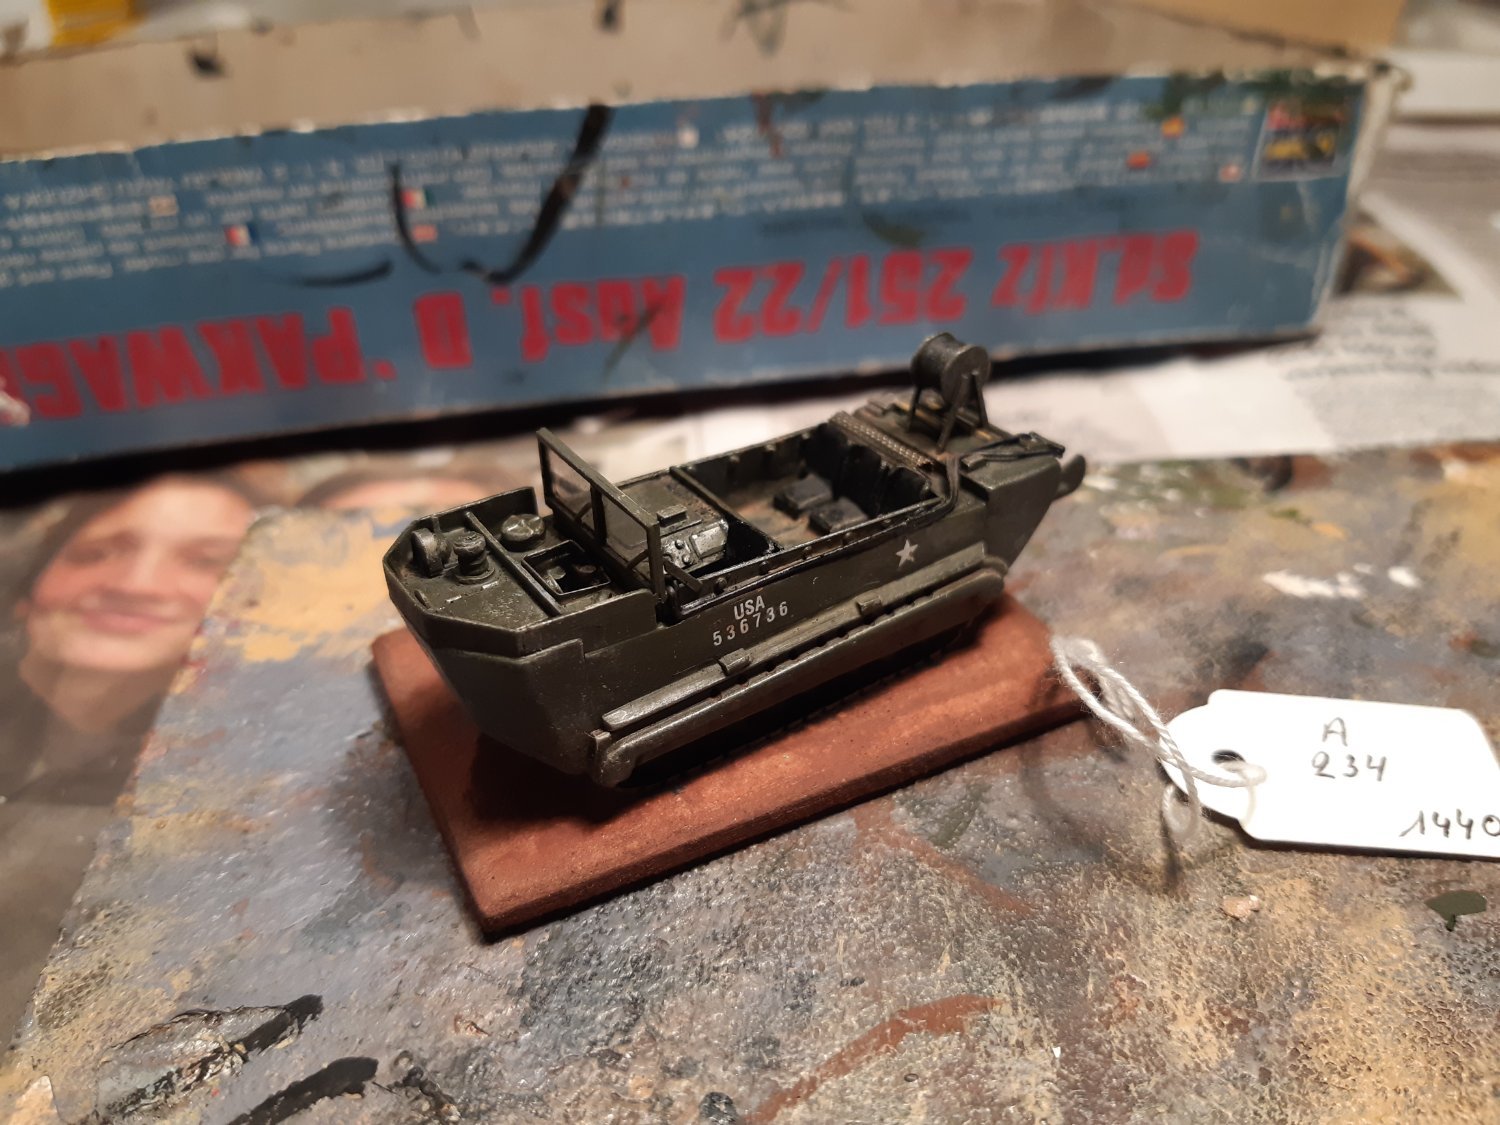
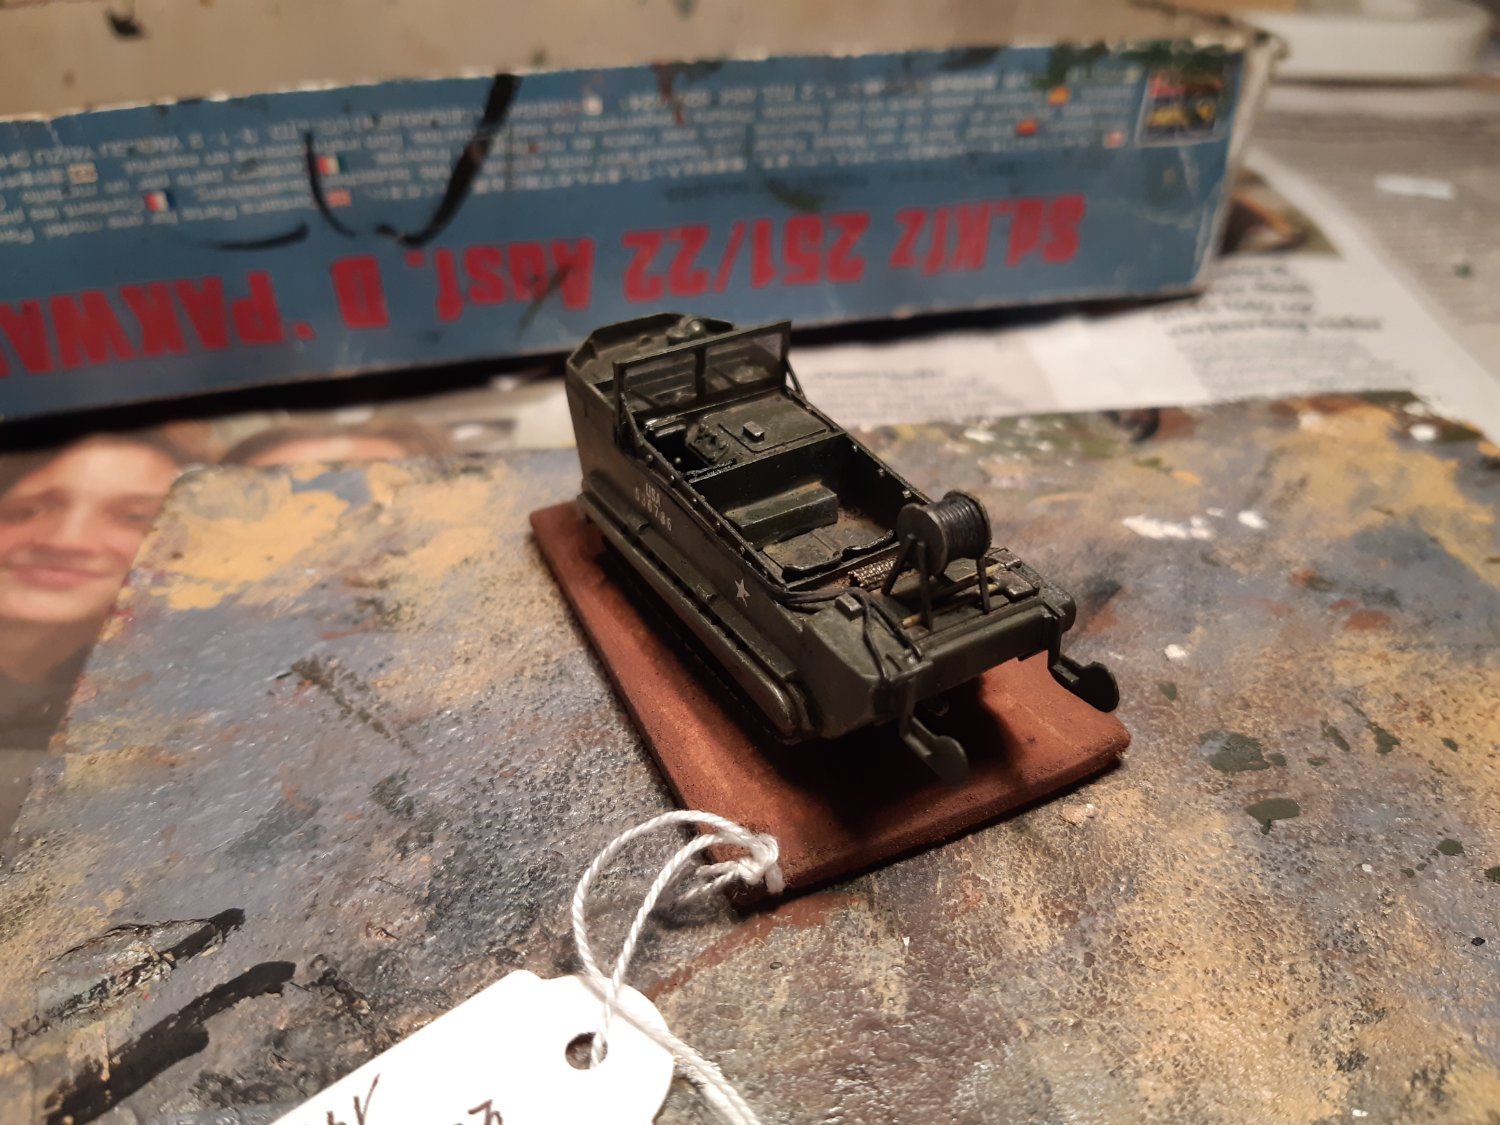
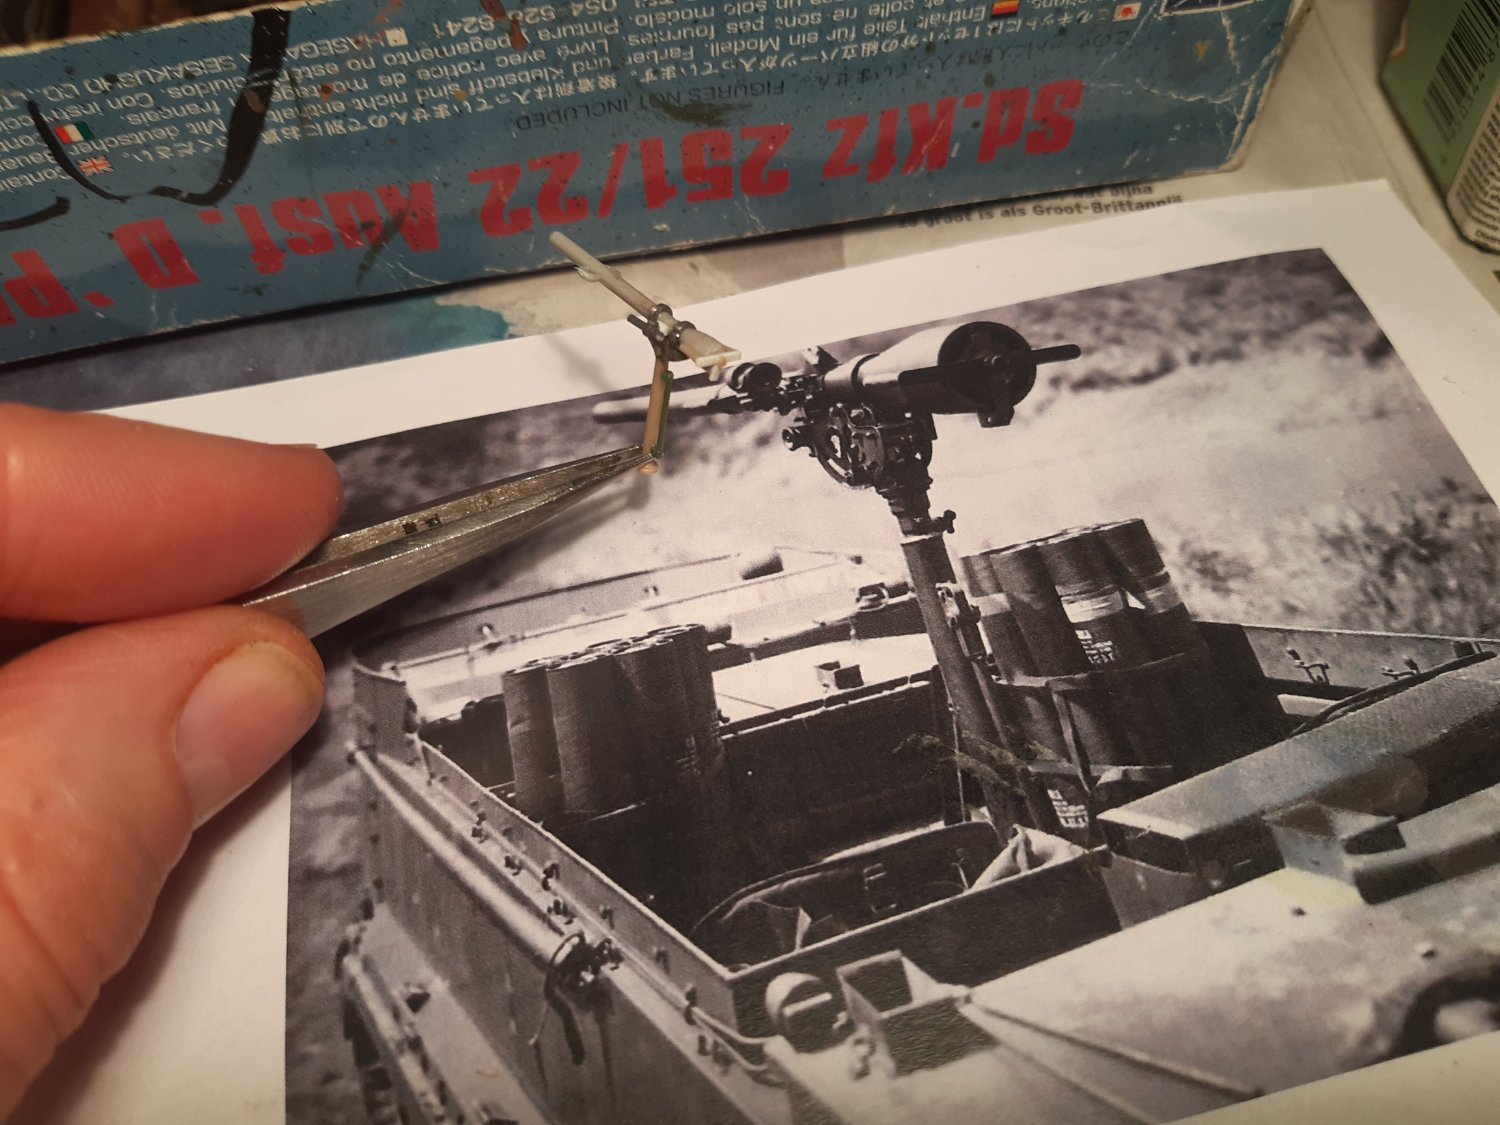
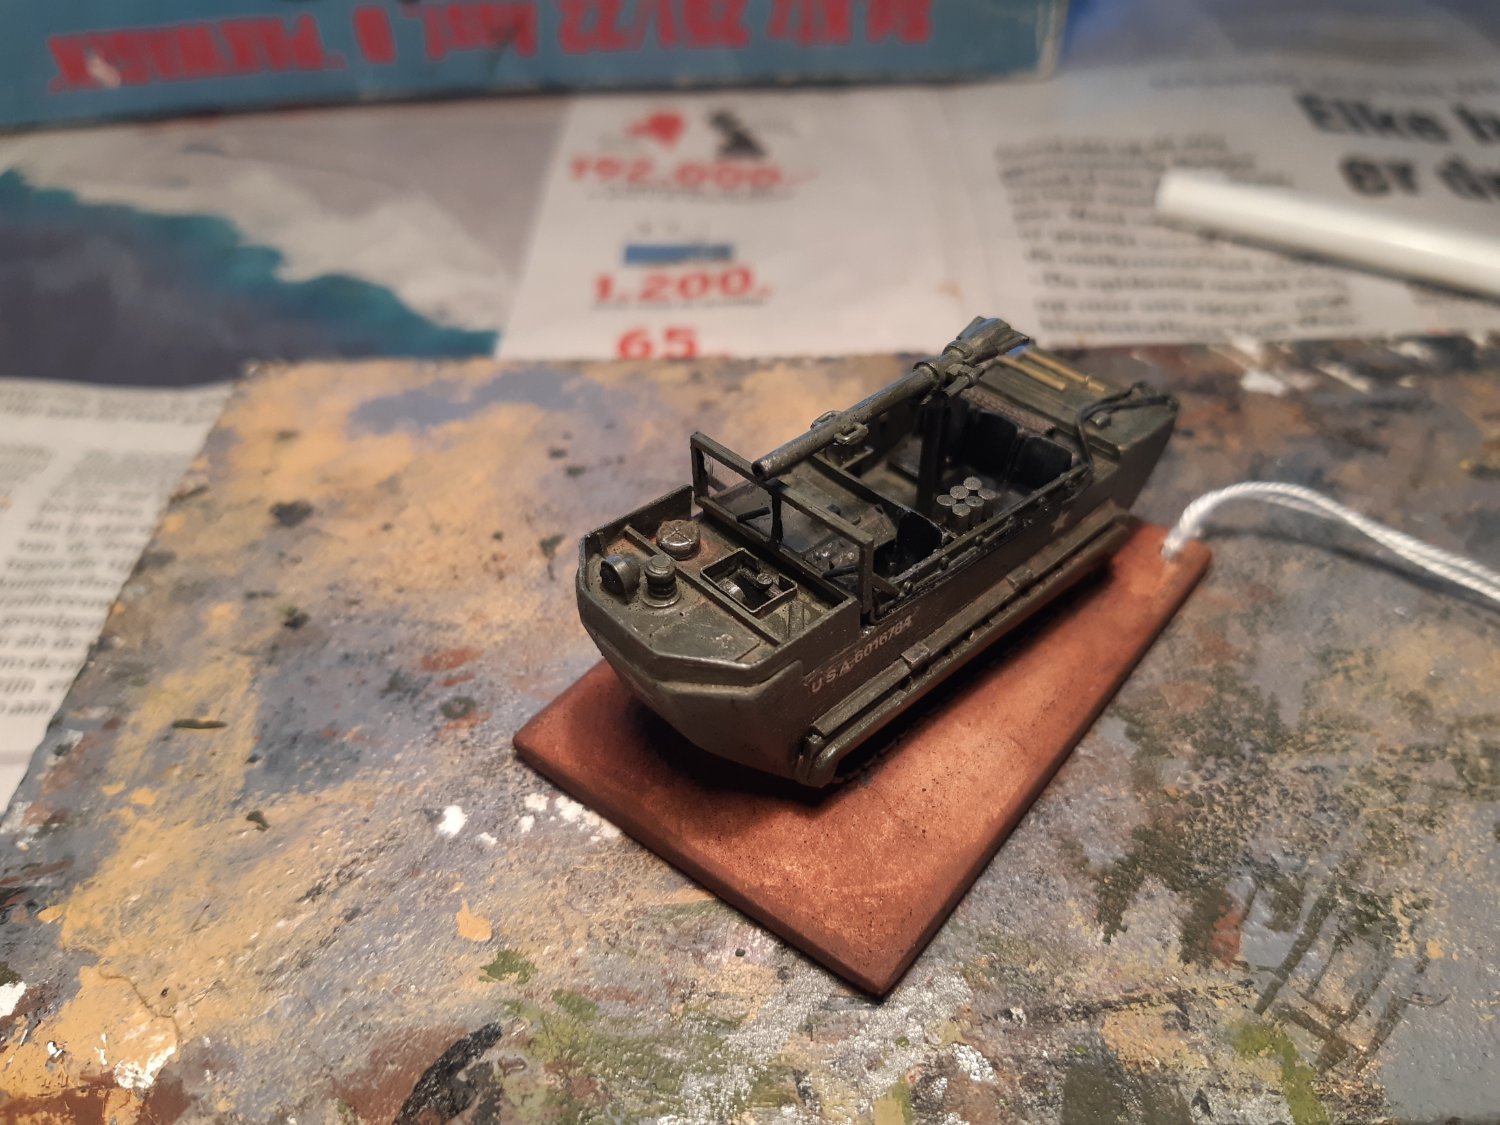
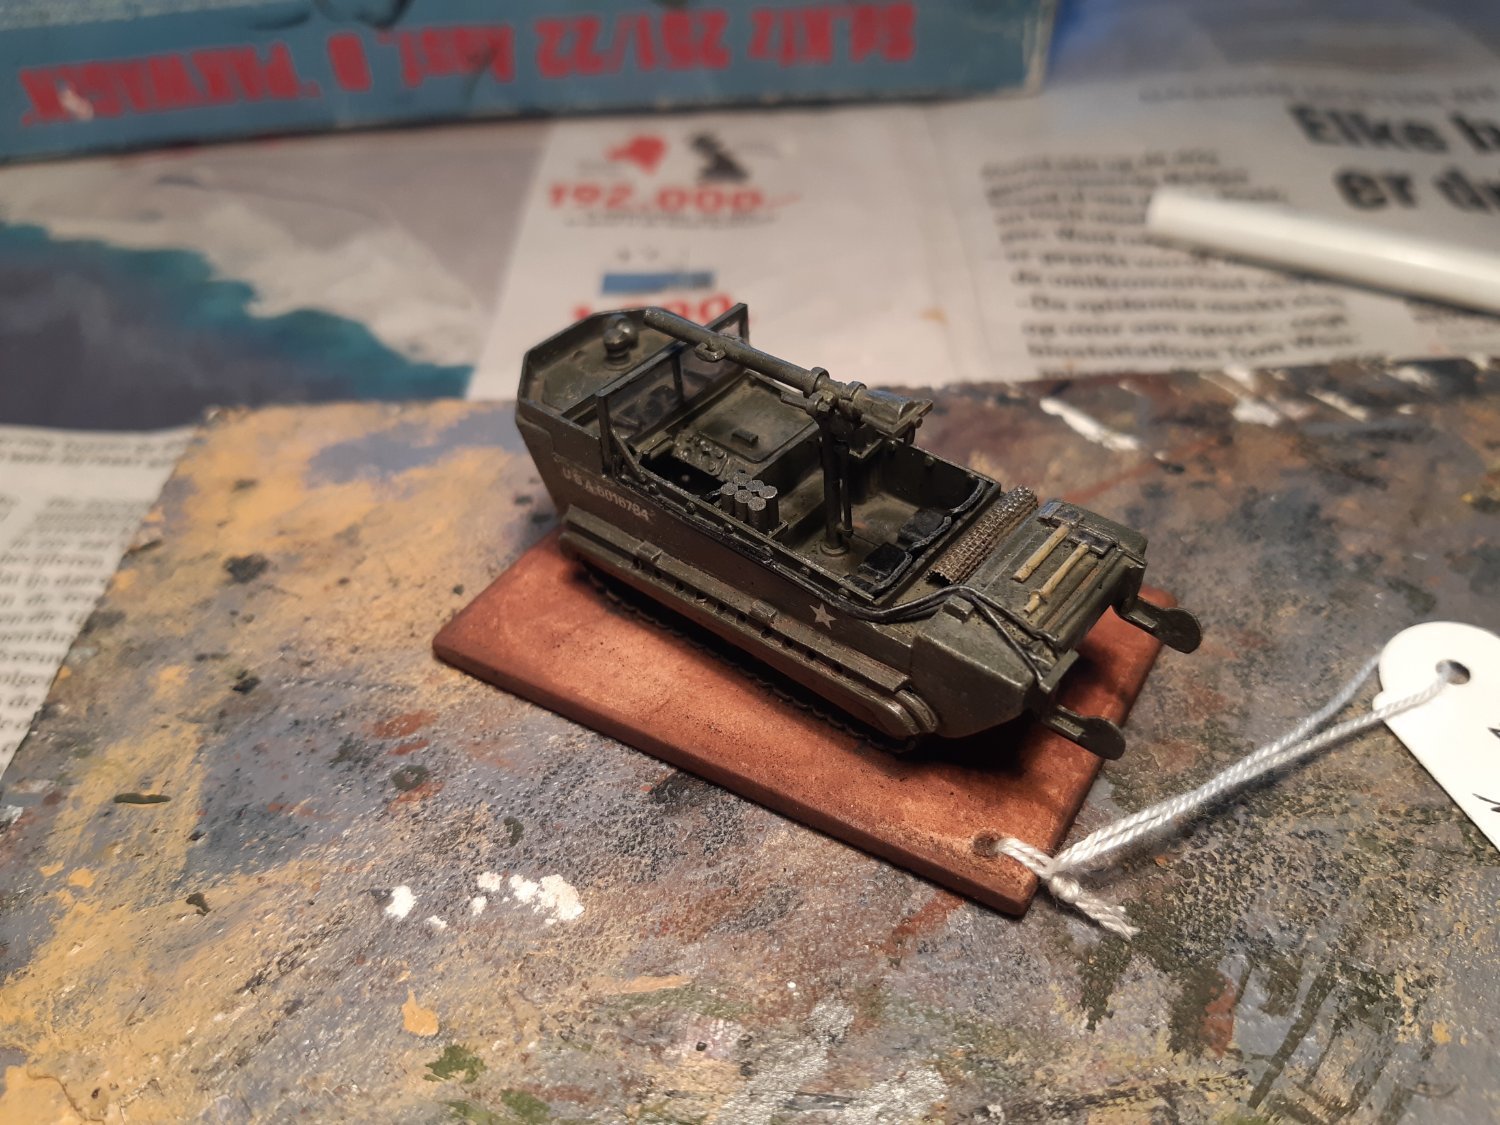
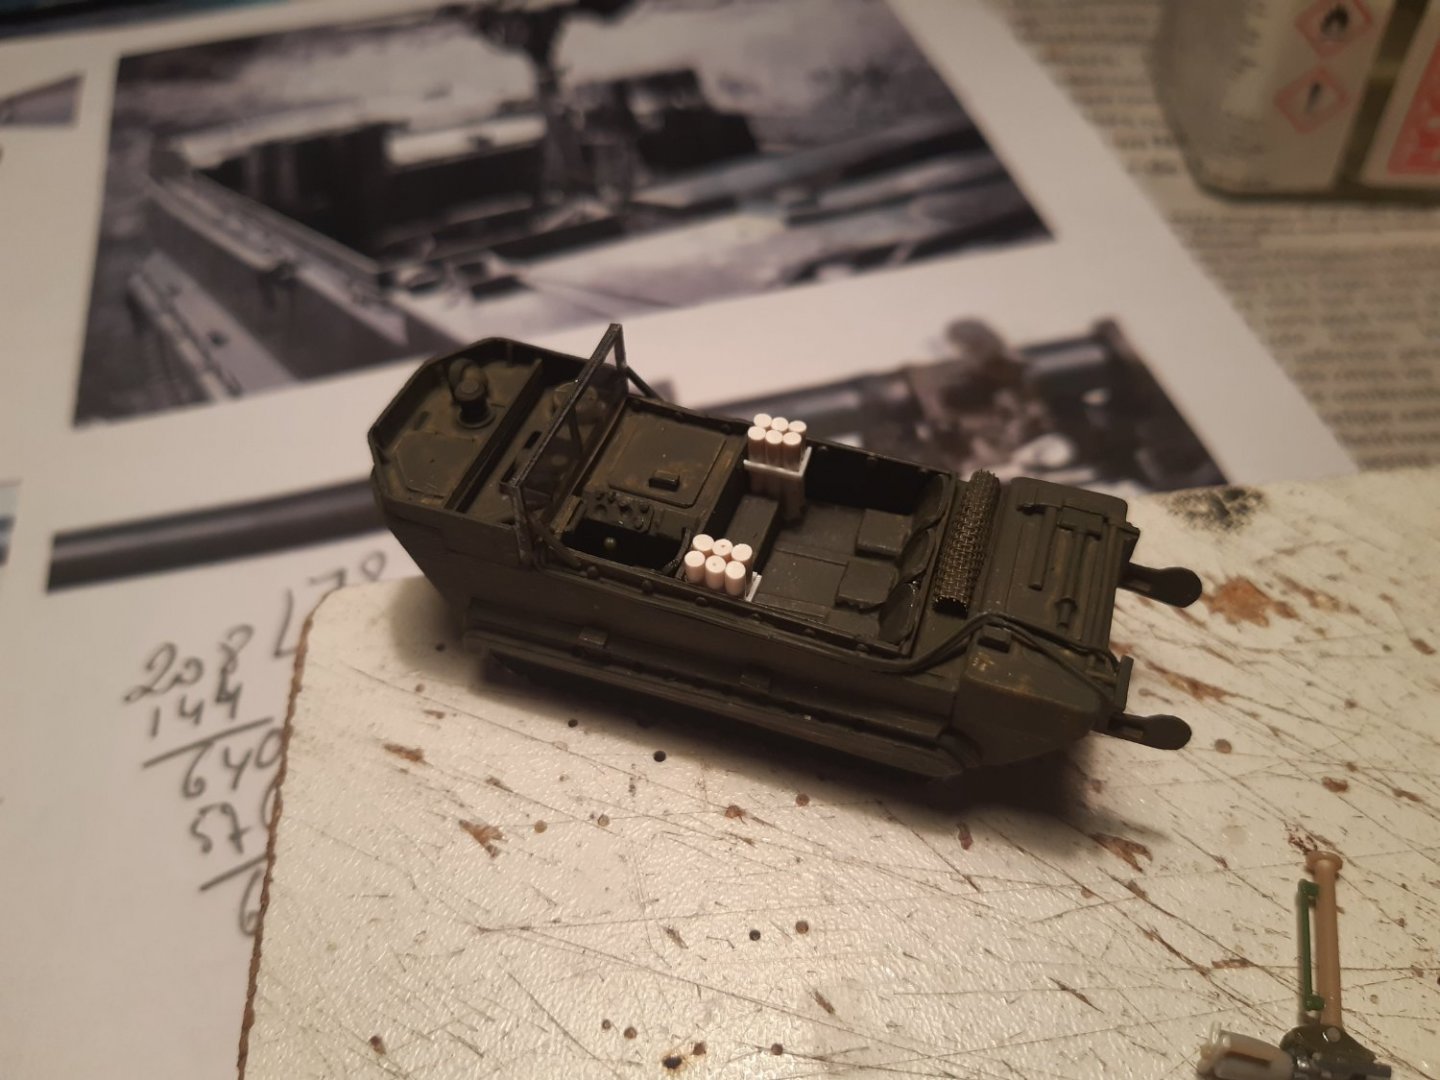
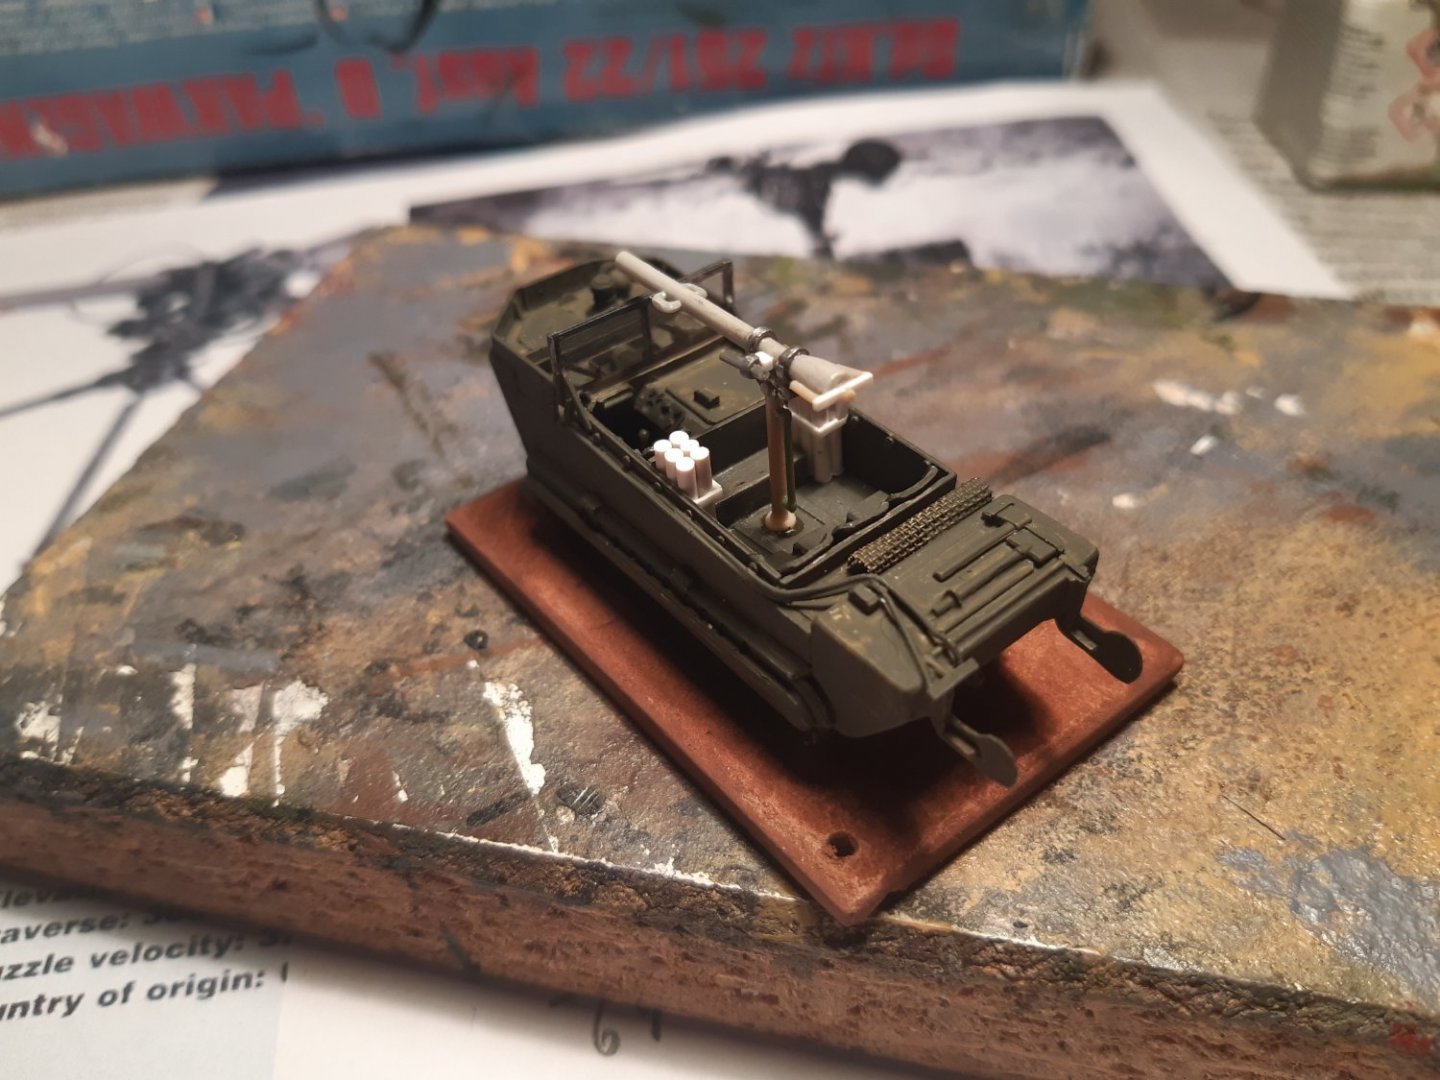
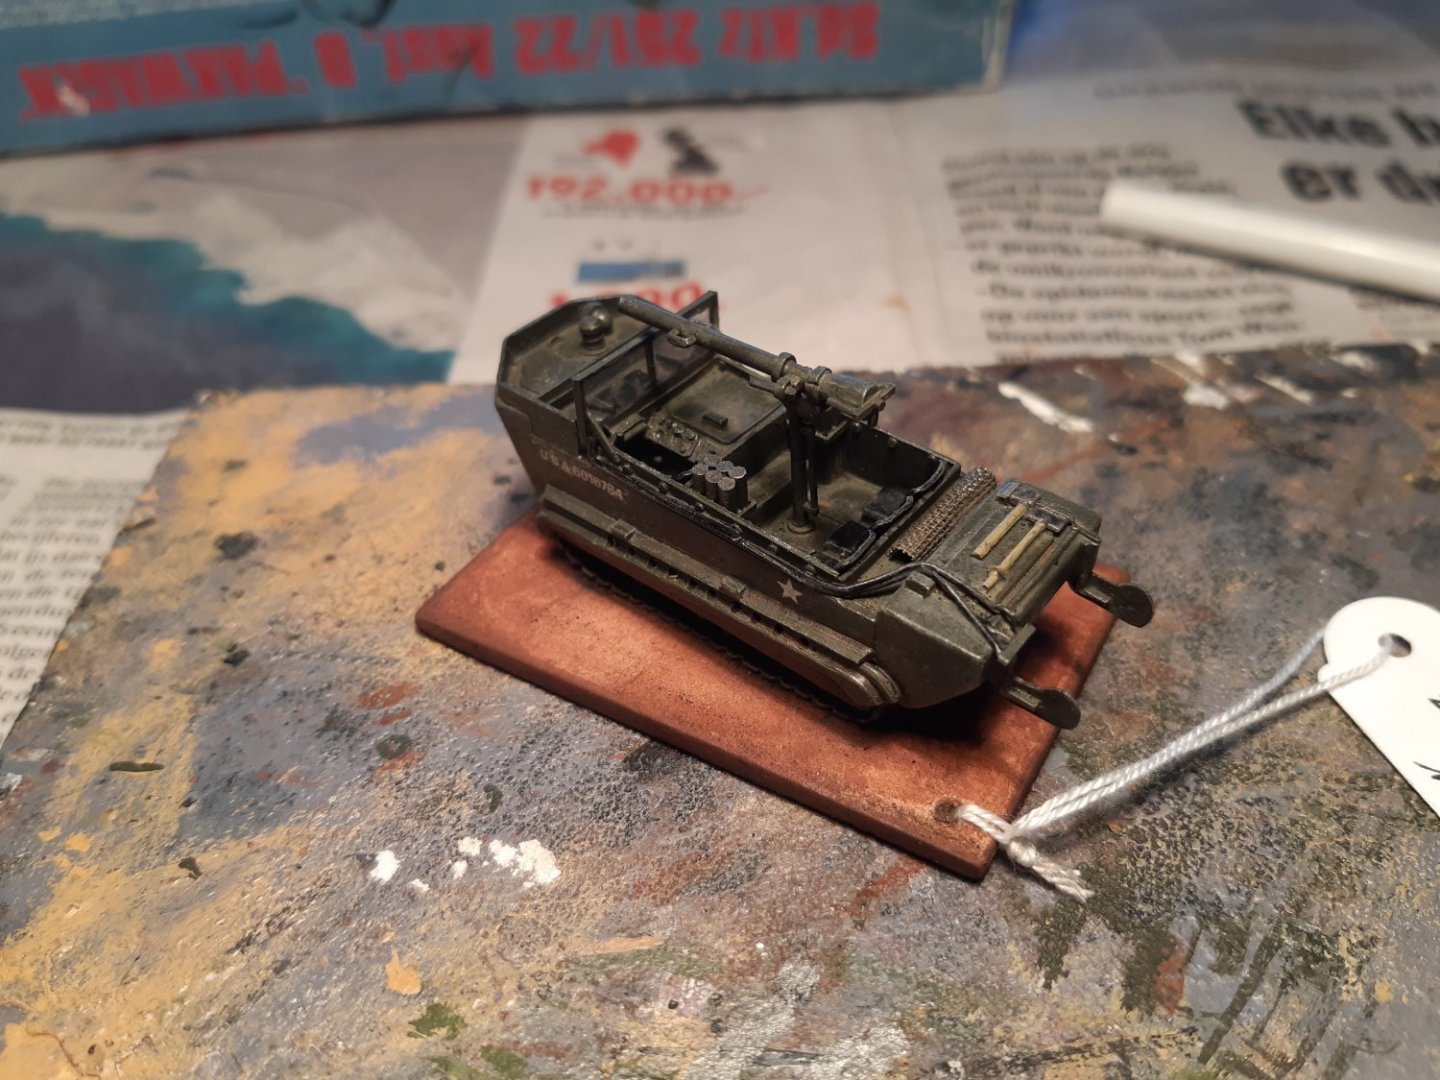
Next the recoiless 7.5cm M20 Made something that looks like a M20 Ammo "racks" Ready for painting Finnished 4 done and the cable layer is under construction. The finish line is in sight

- 50 replies
-
- 13
-
-
Finnish T26 tank by Baker - FINISHED - Mirage - 1/72 - PLASTIC
Baker replied to Baker's topic in Non-ship/categorised builds
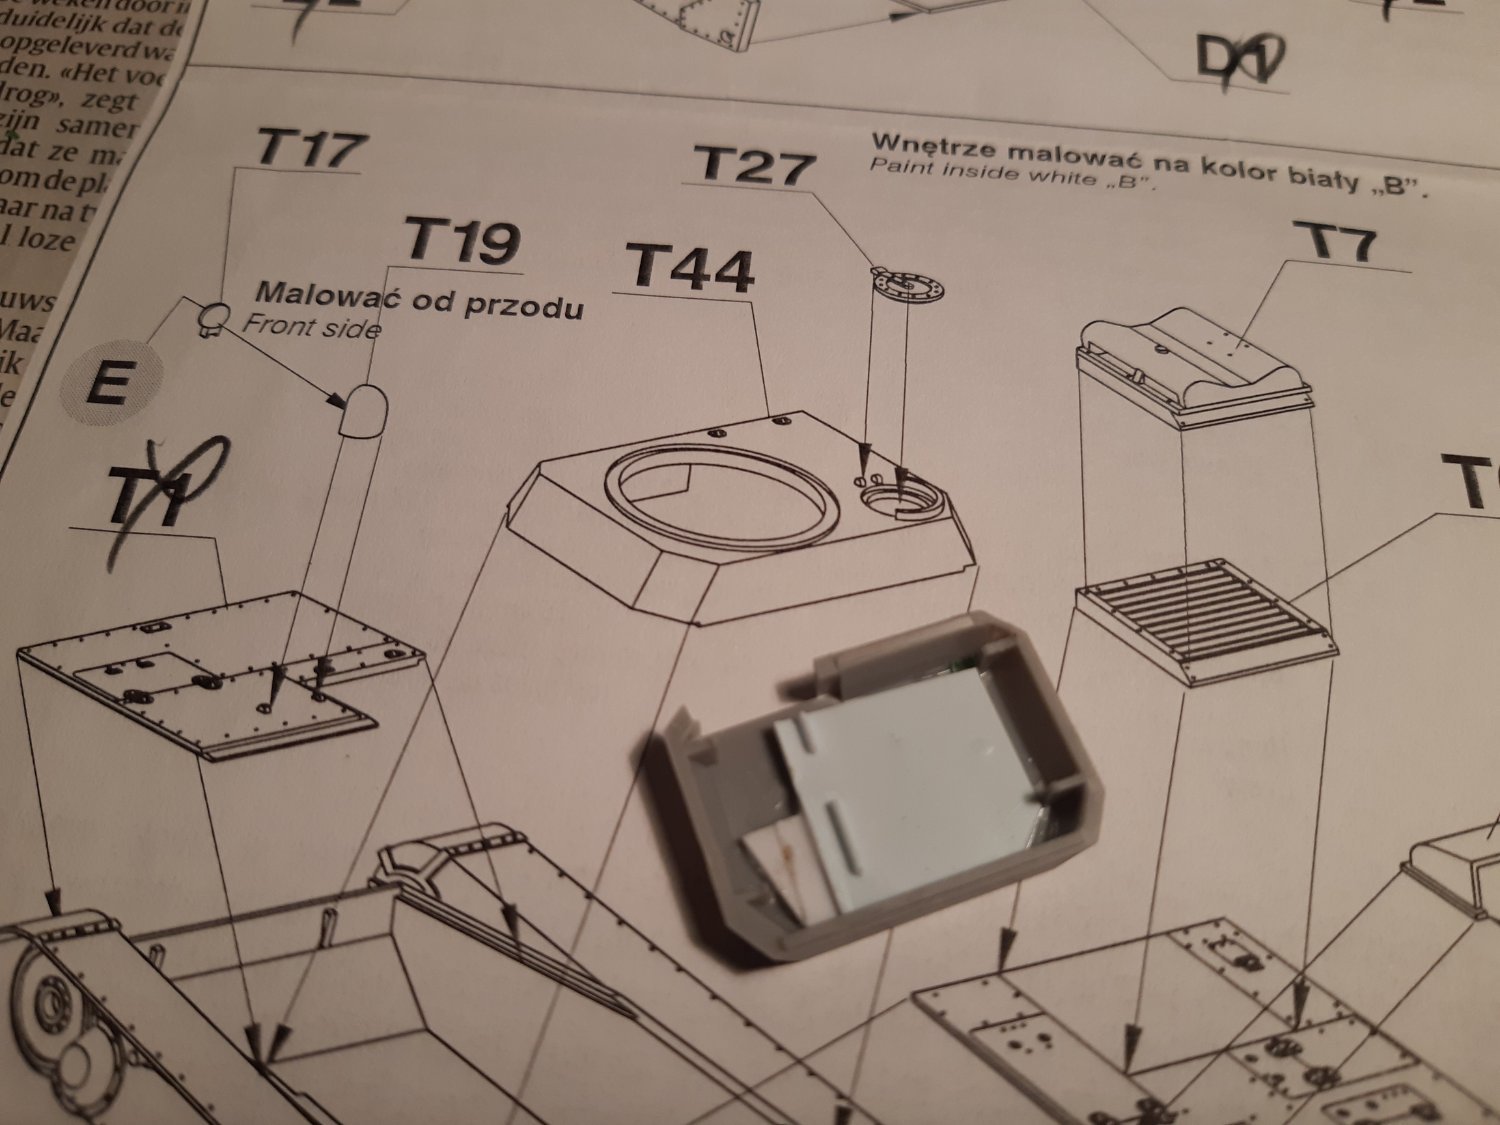
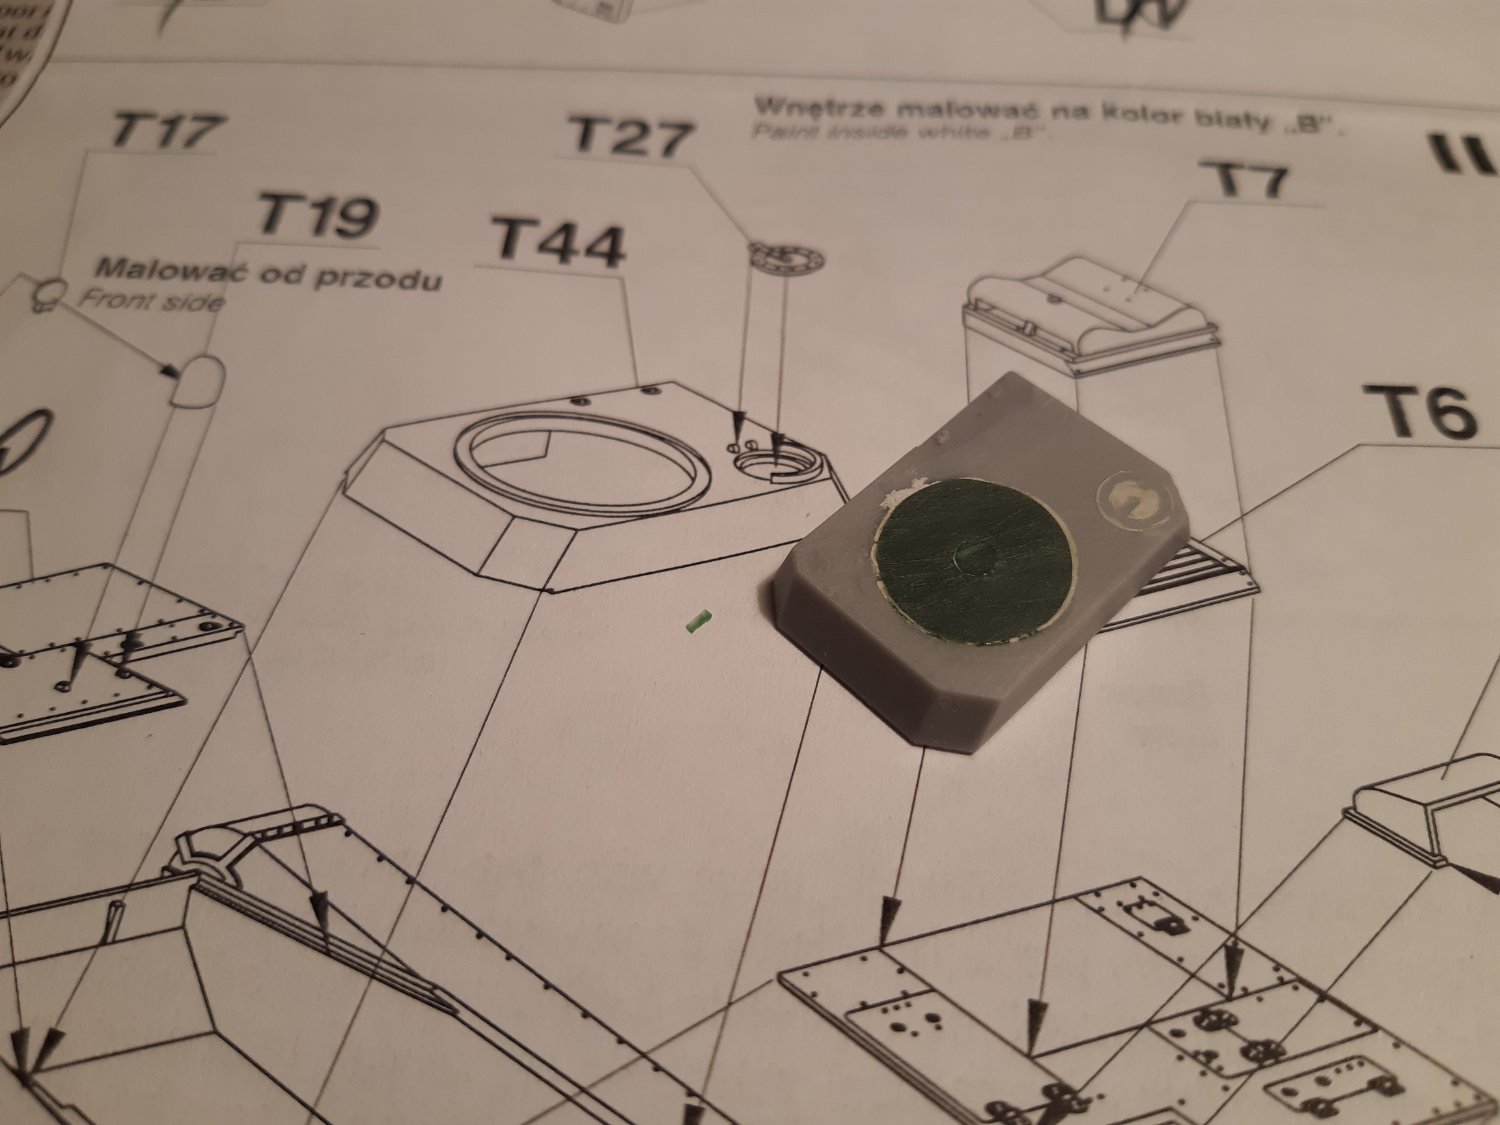
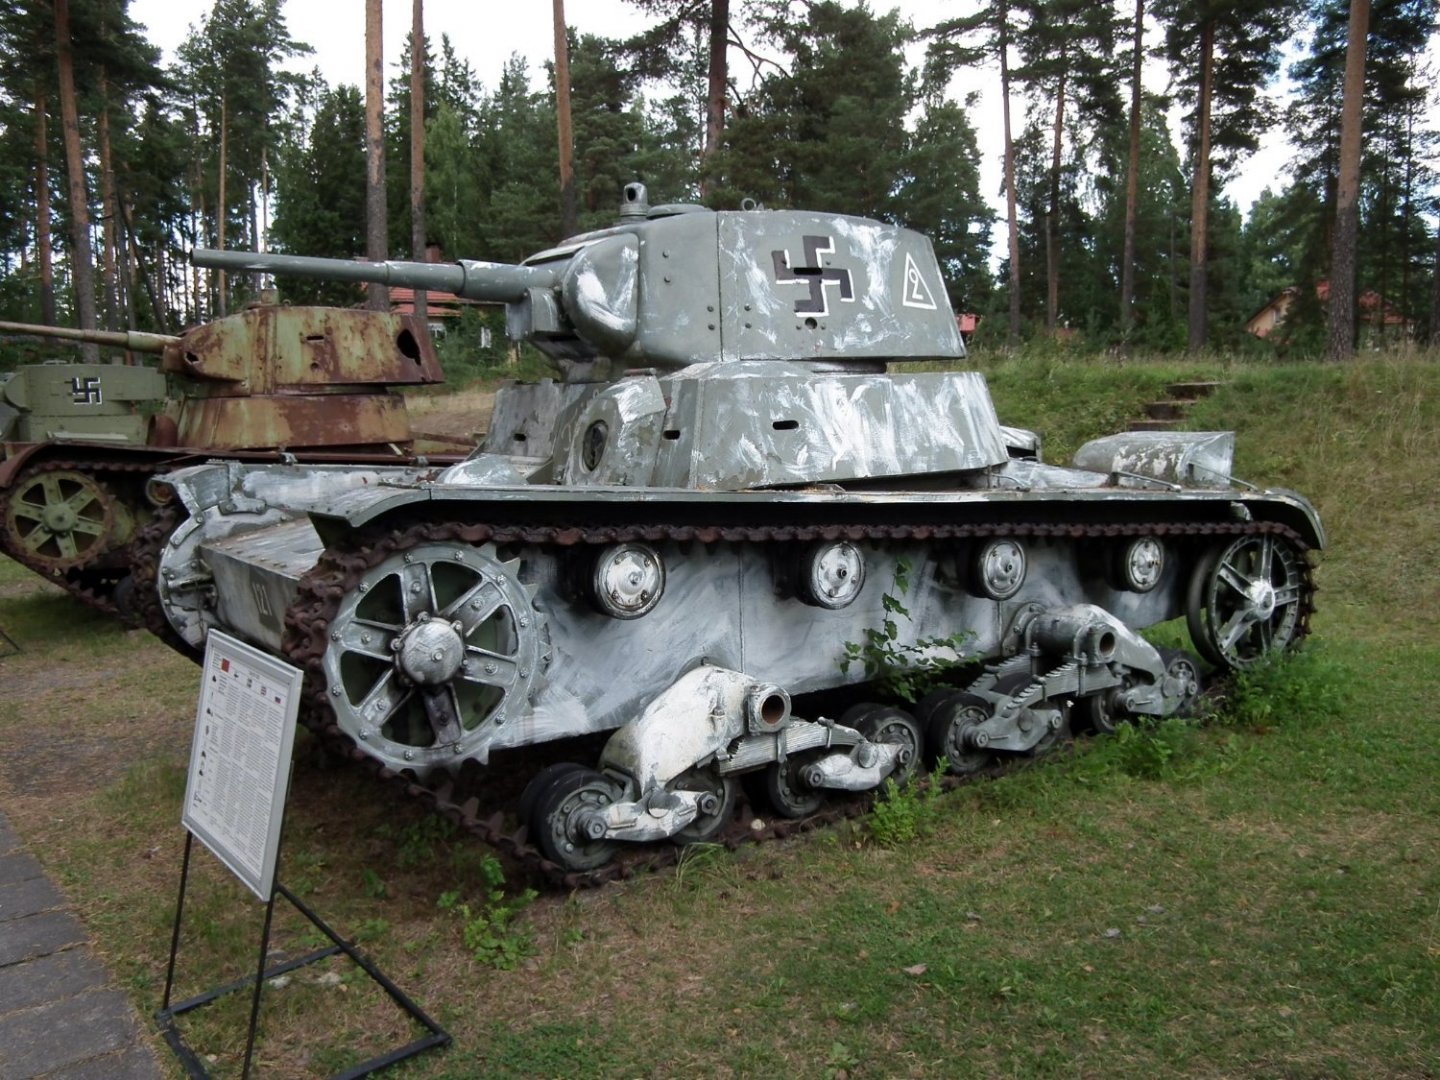
Most tanks are not made for tall people. But on the T26 the 3 crew members each had their hatch for access. And quite a bit of space compared to some other tank designs. This Finnish version had 4 crew members (an extra member for the flame trower) and this 4th member did not have its own hatch. So in case of emergency ... not so good for him. -
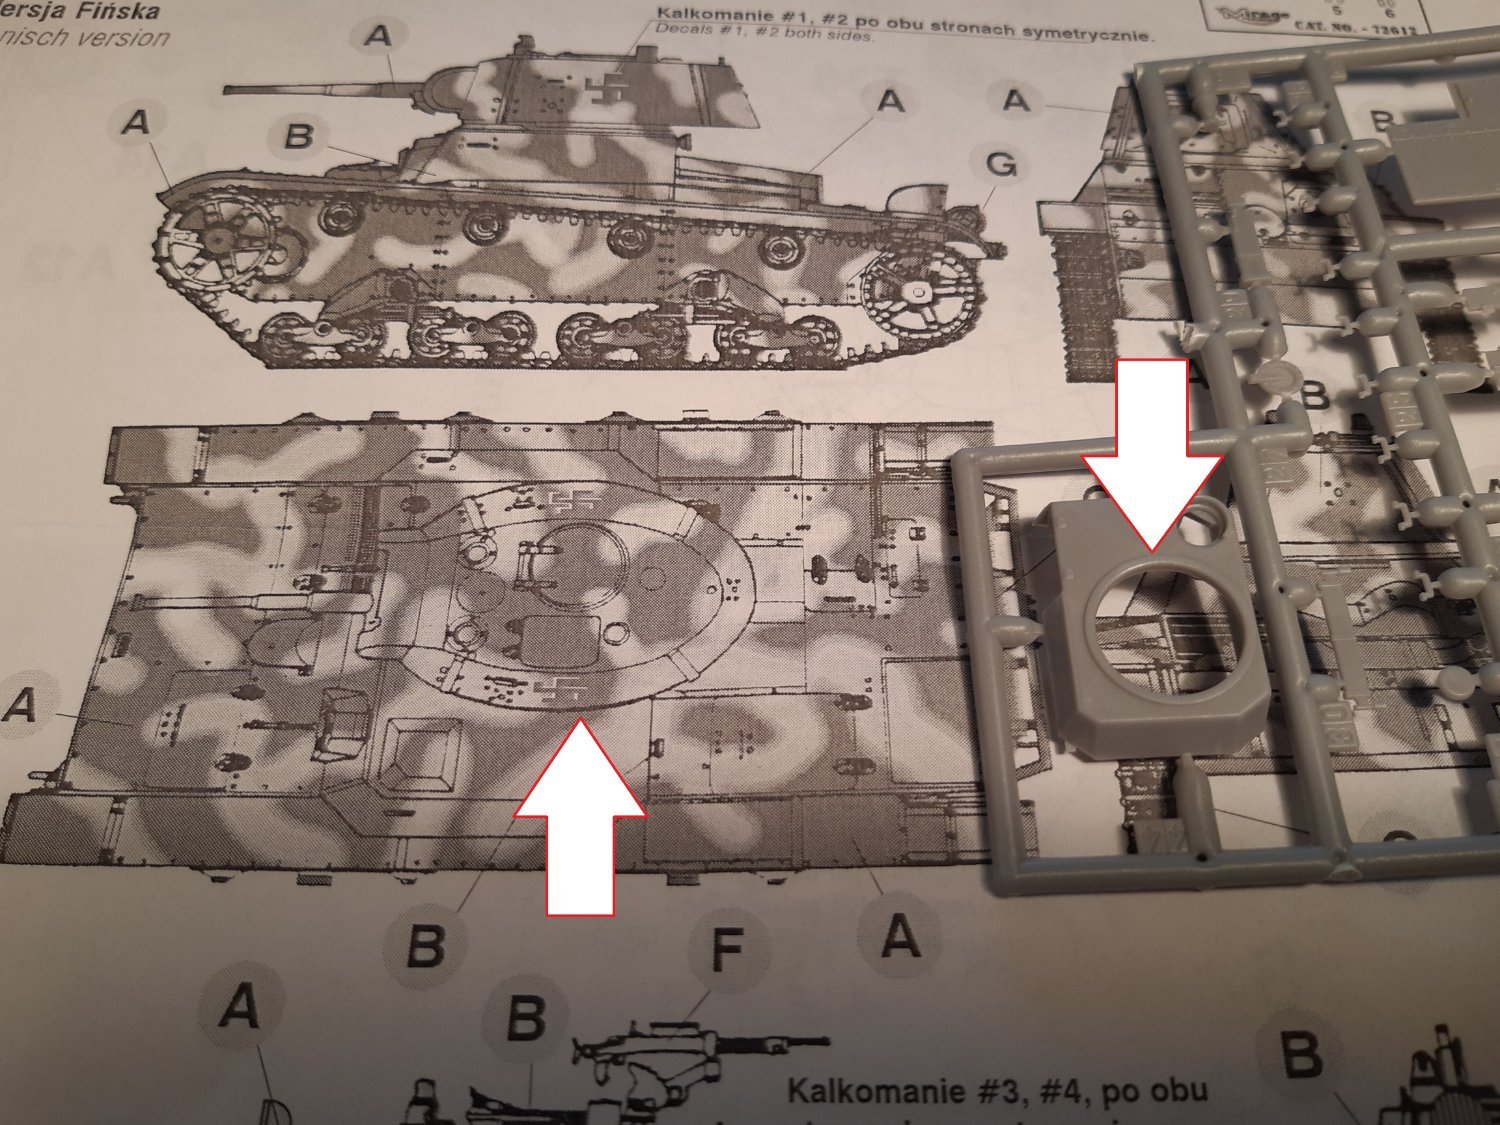
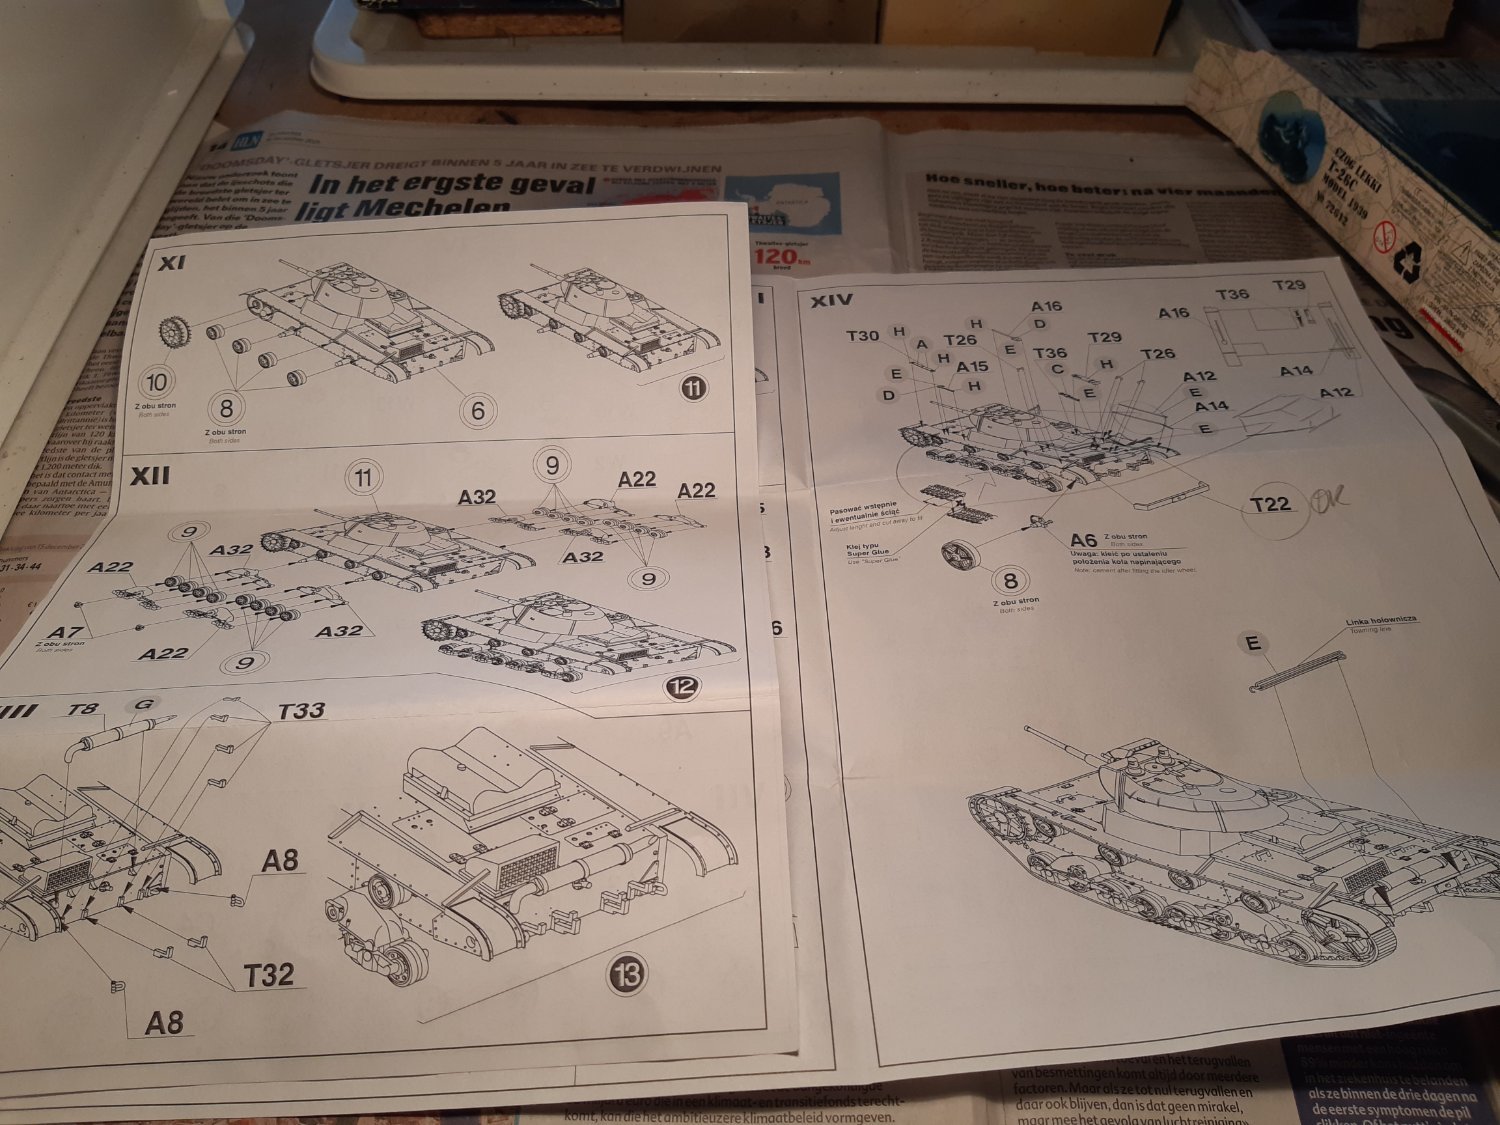
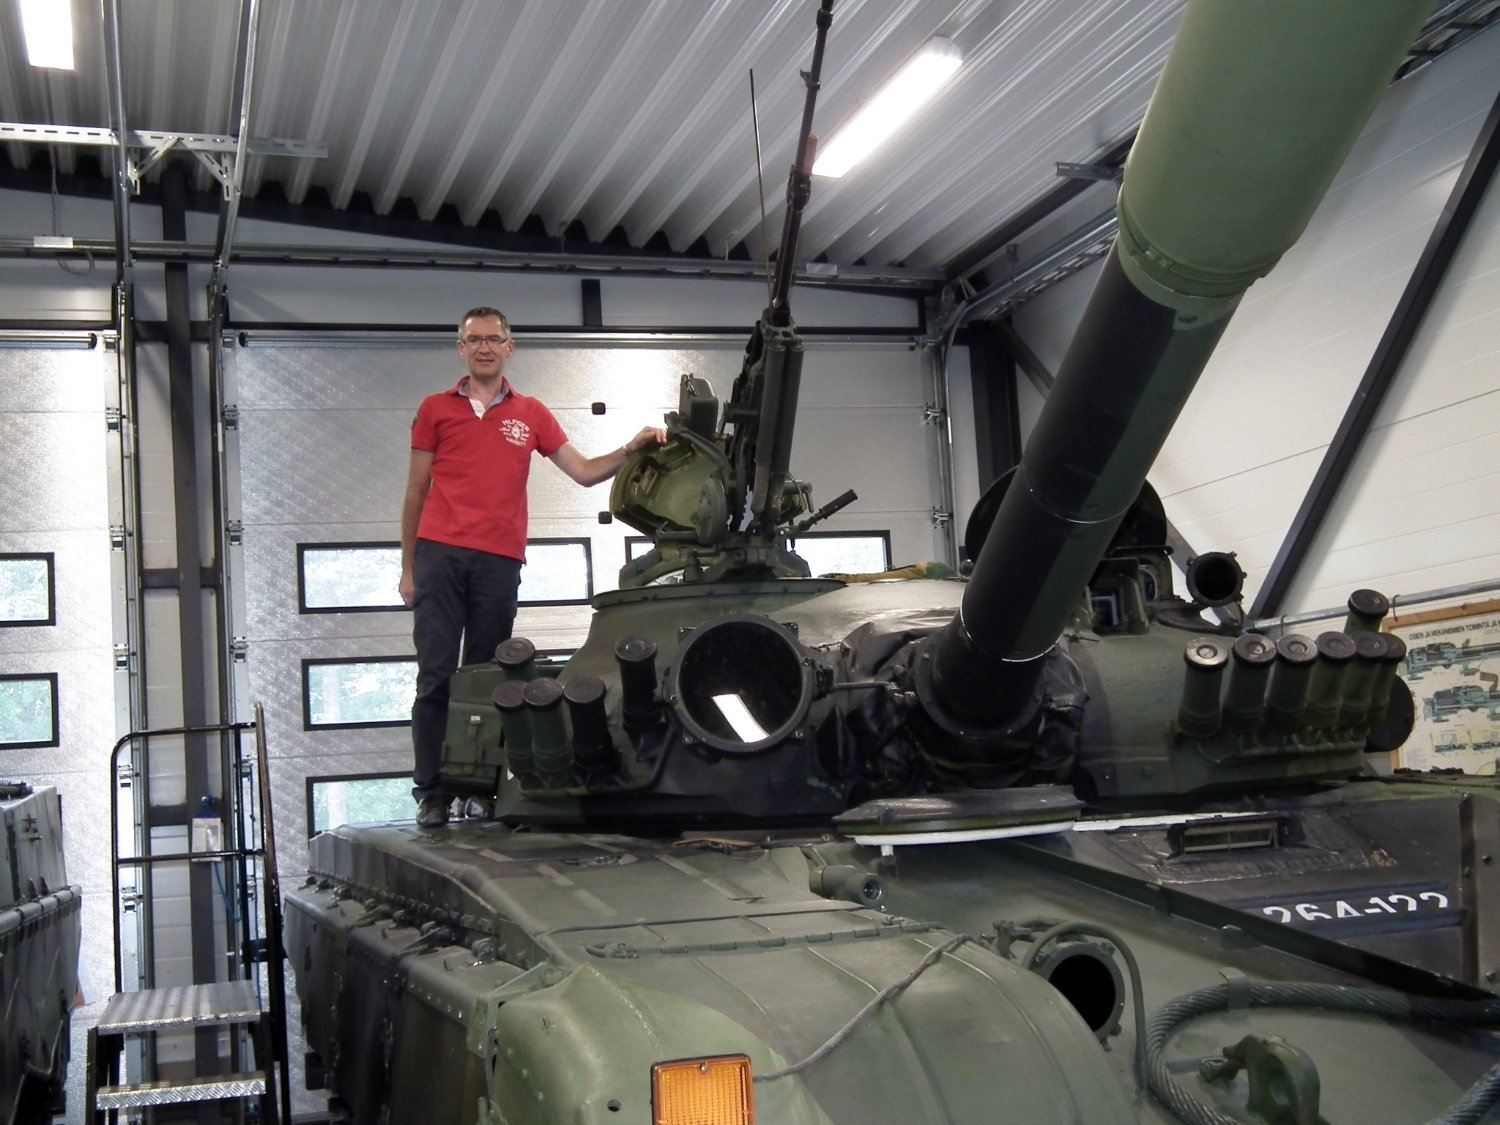
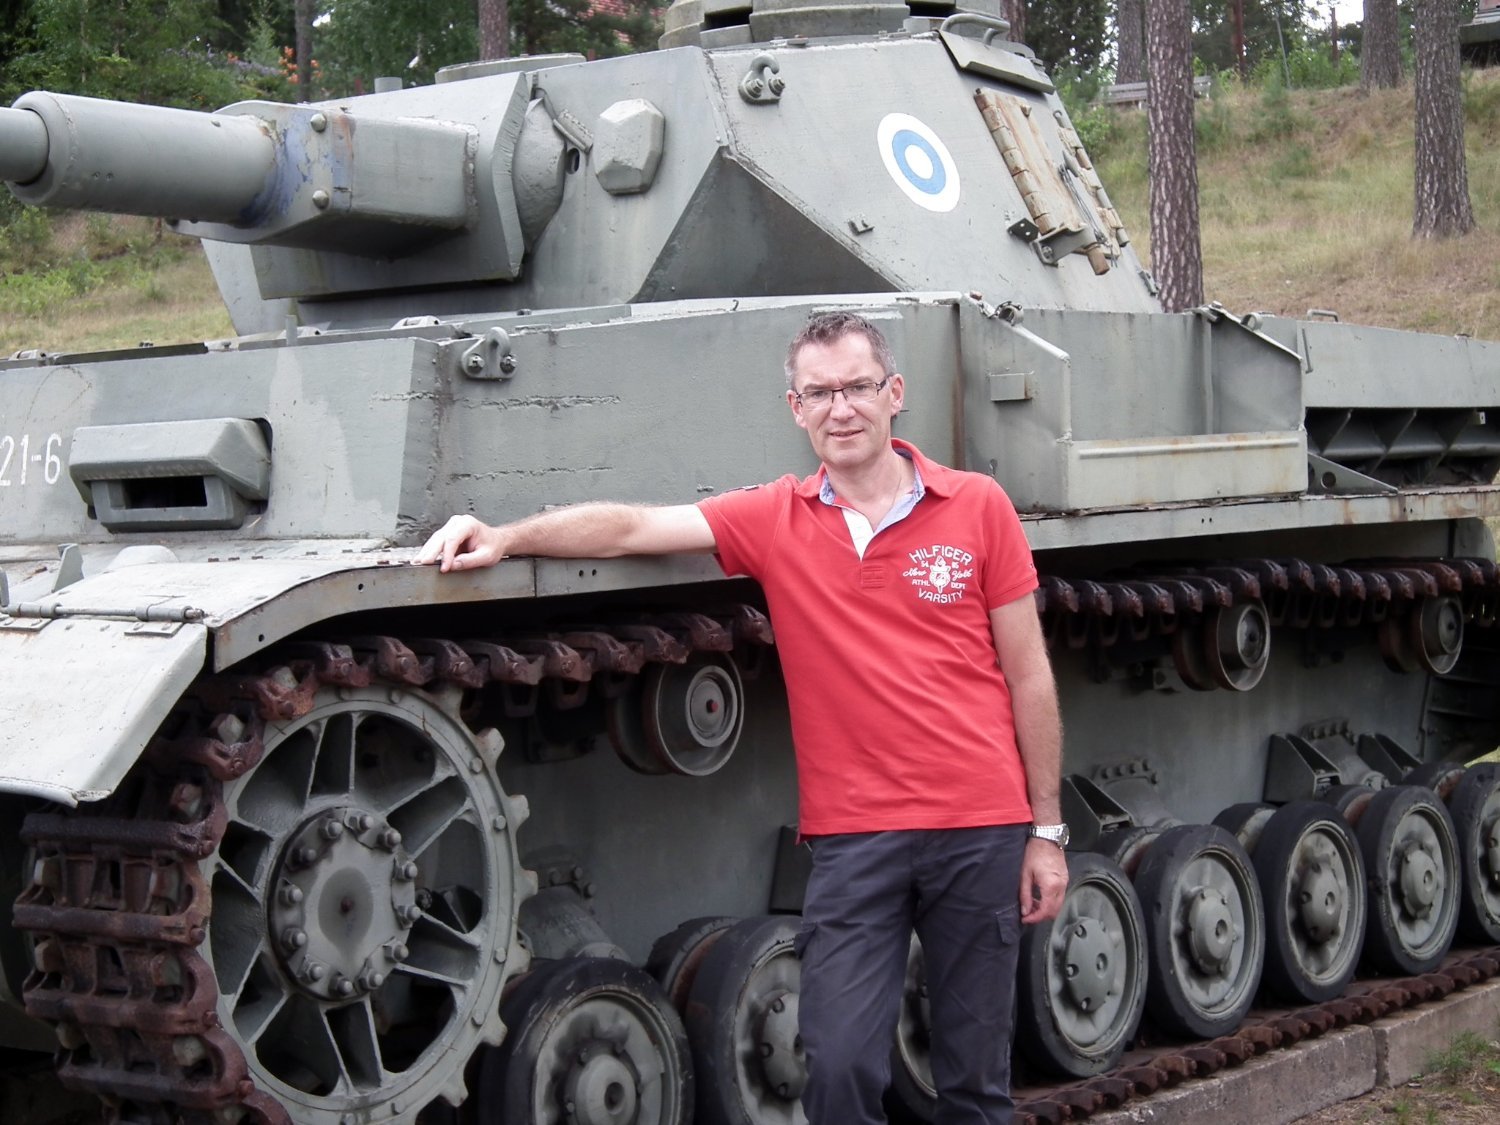
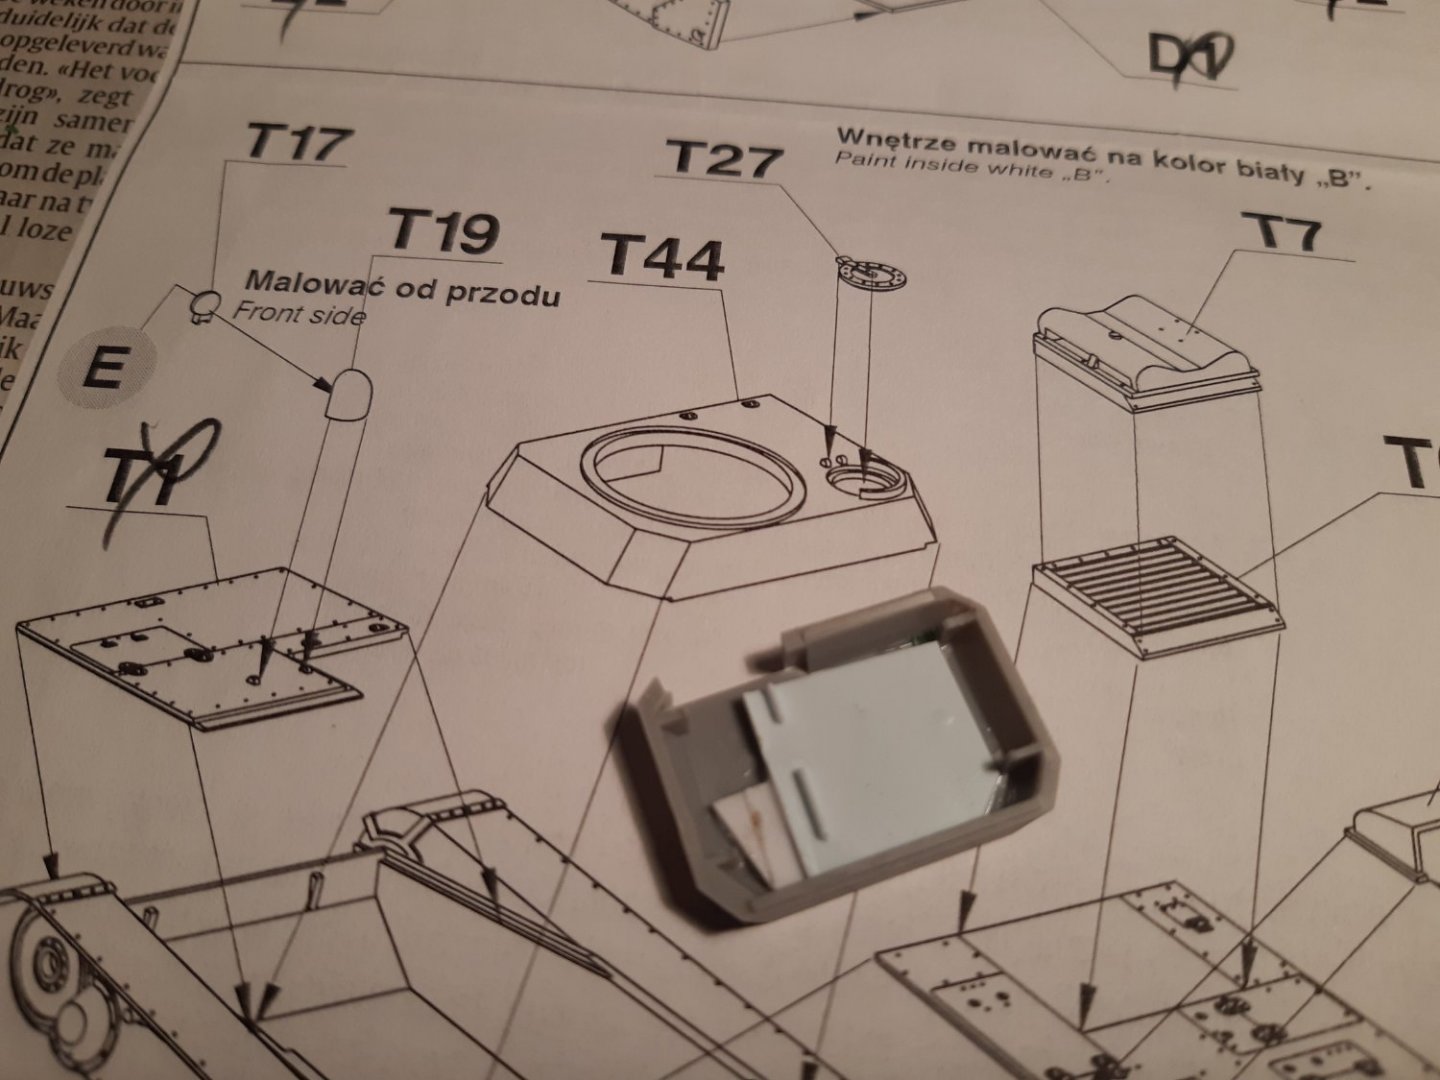
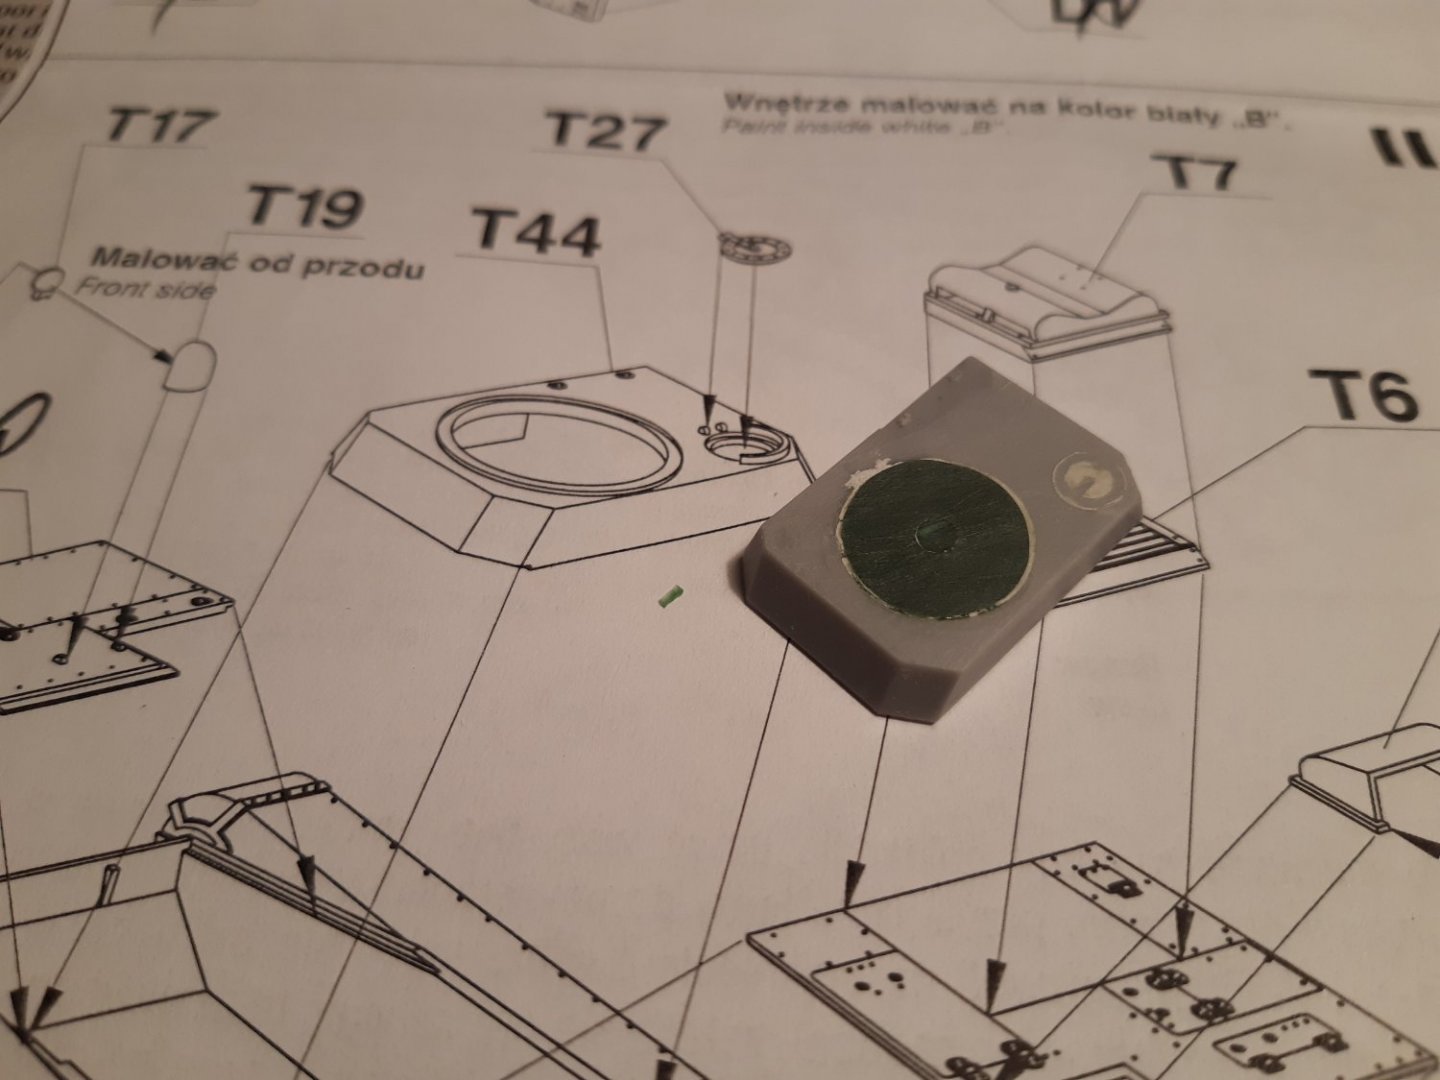
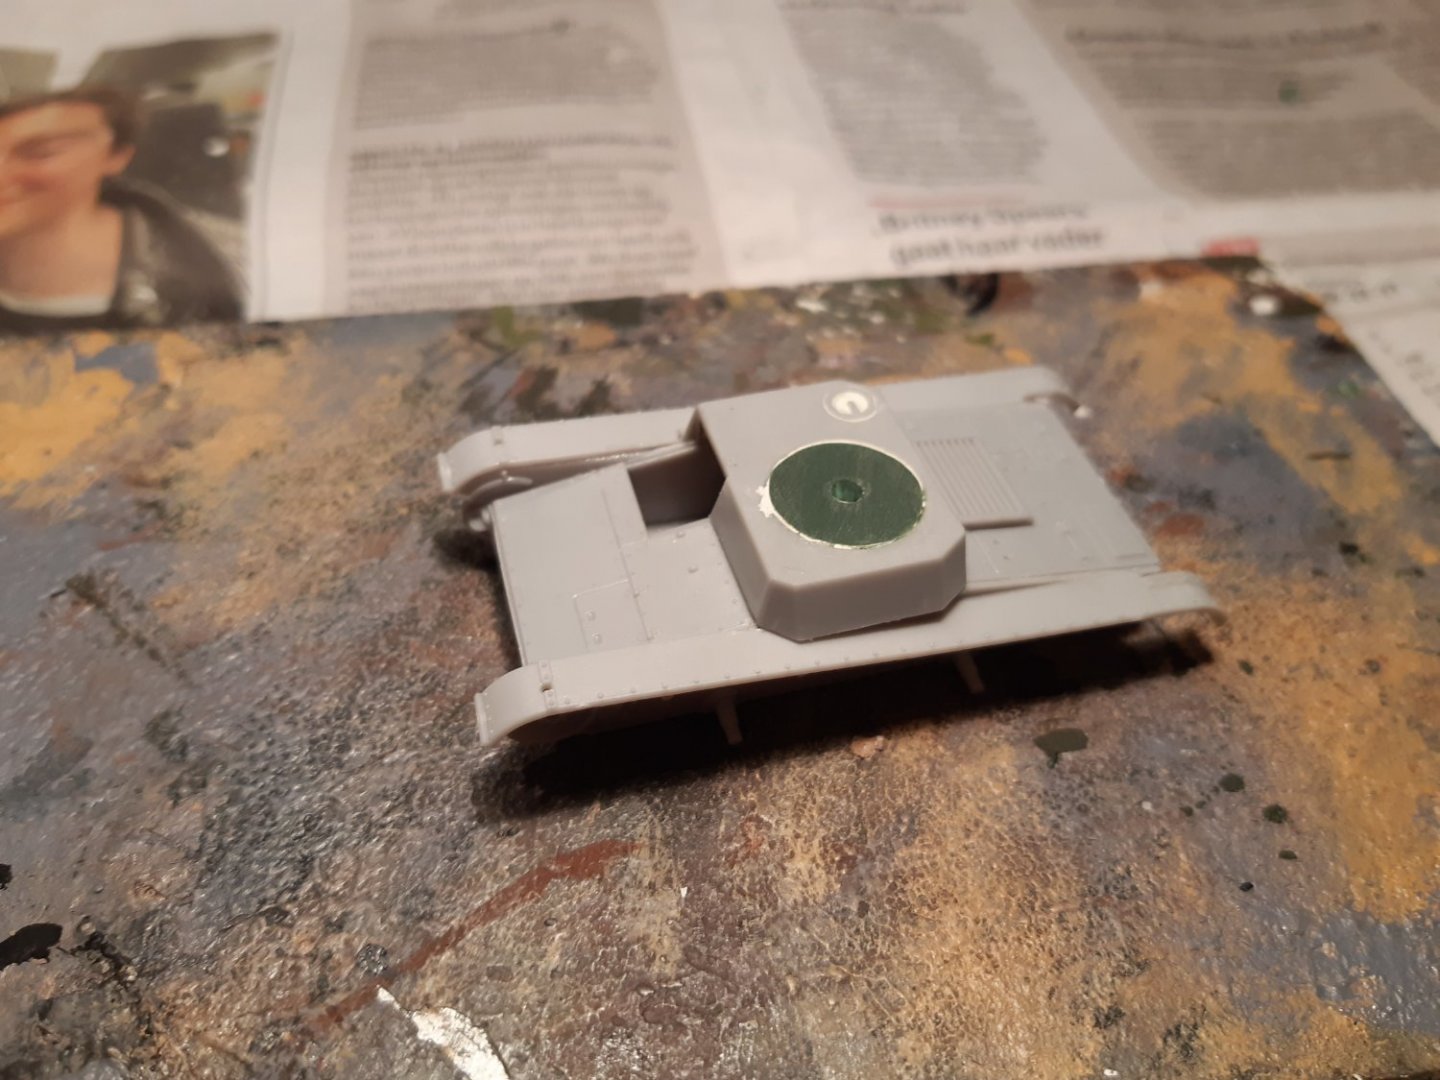
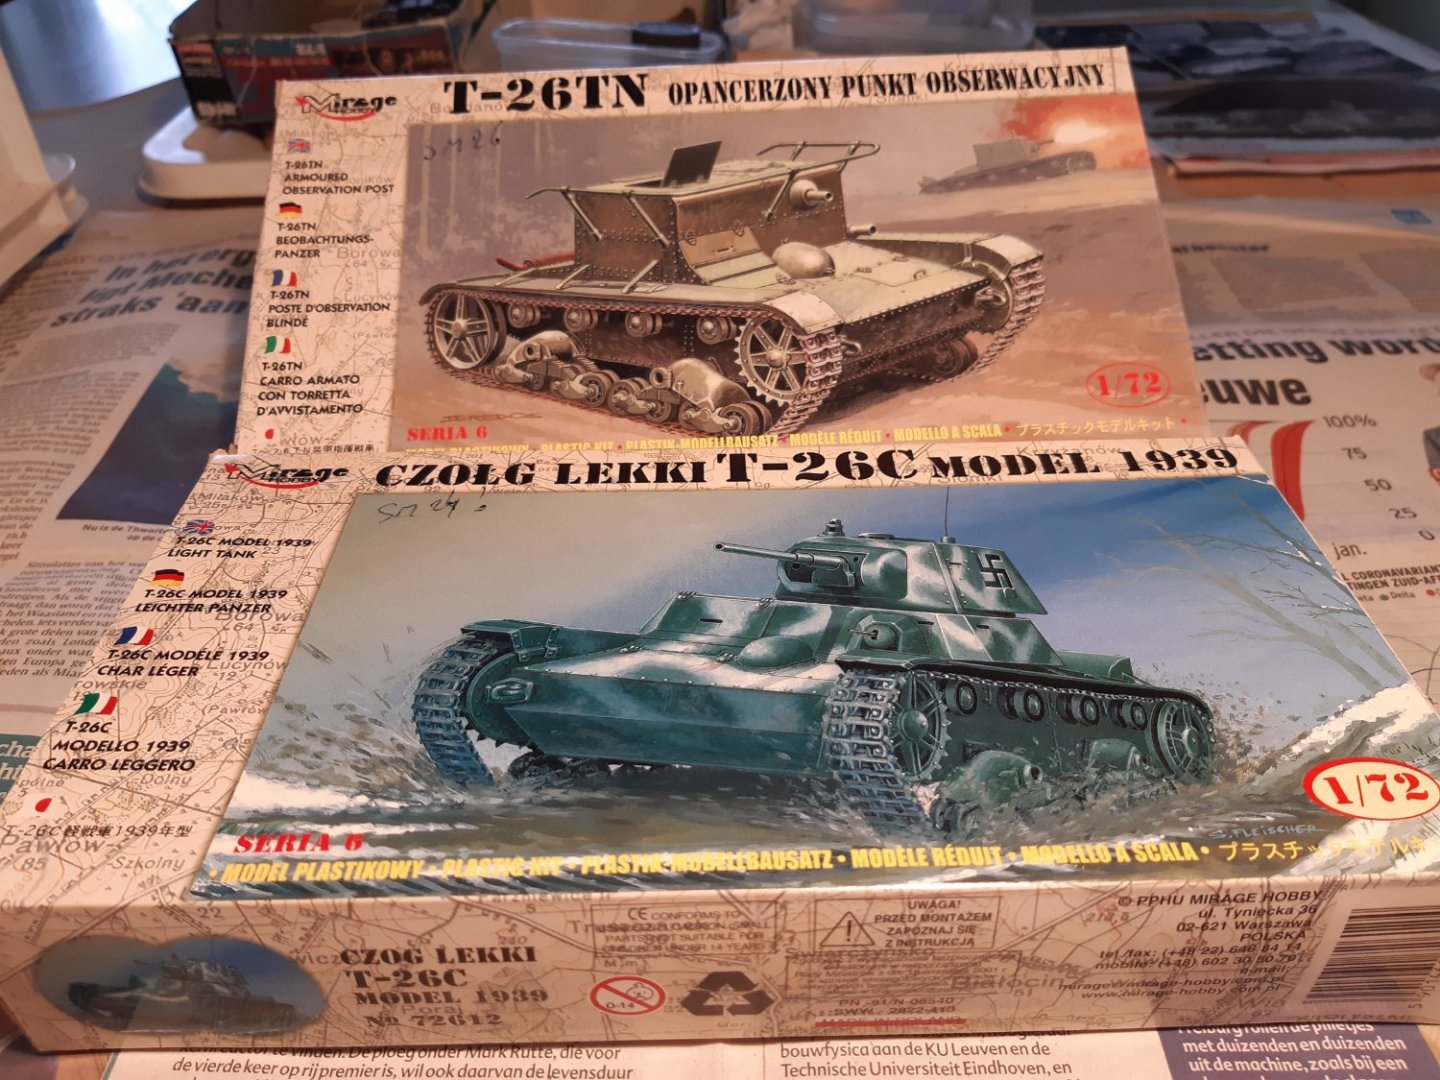
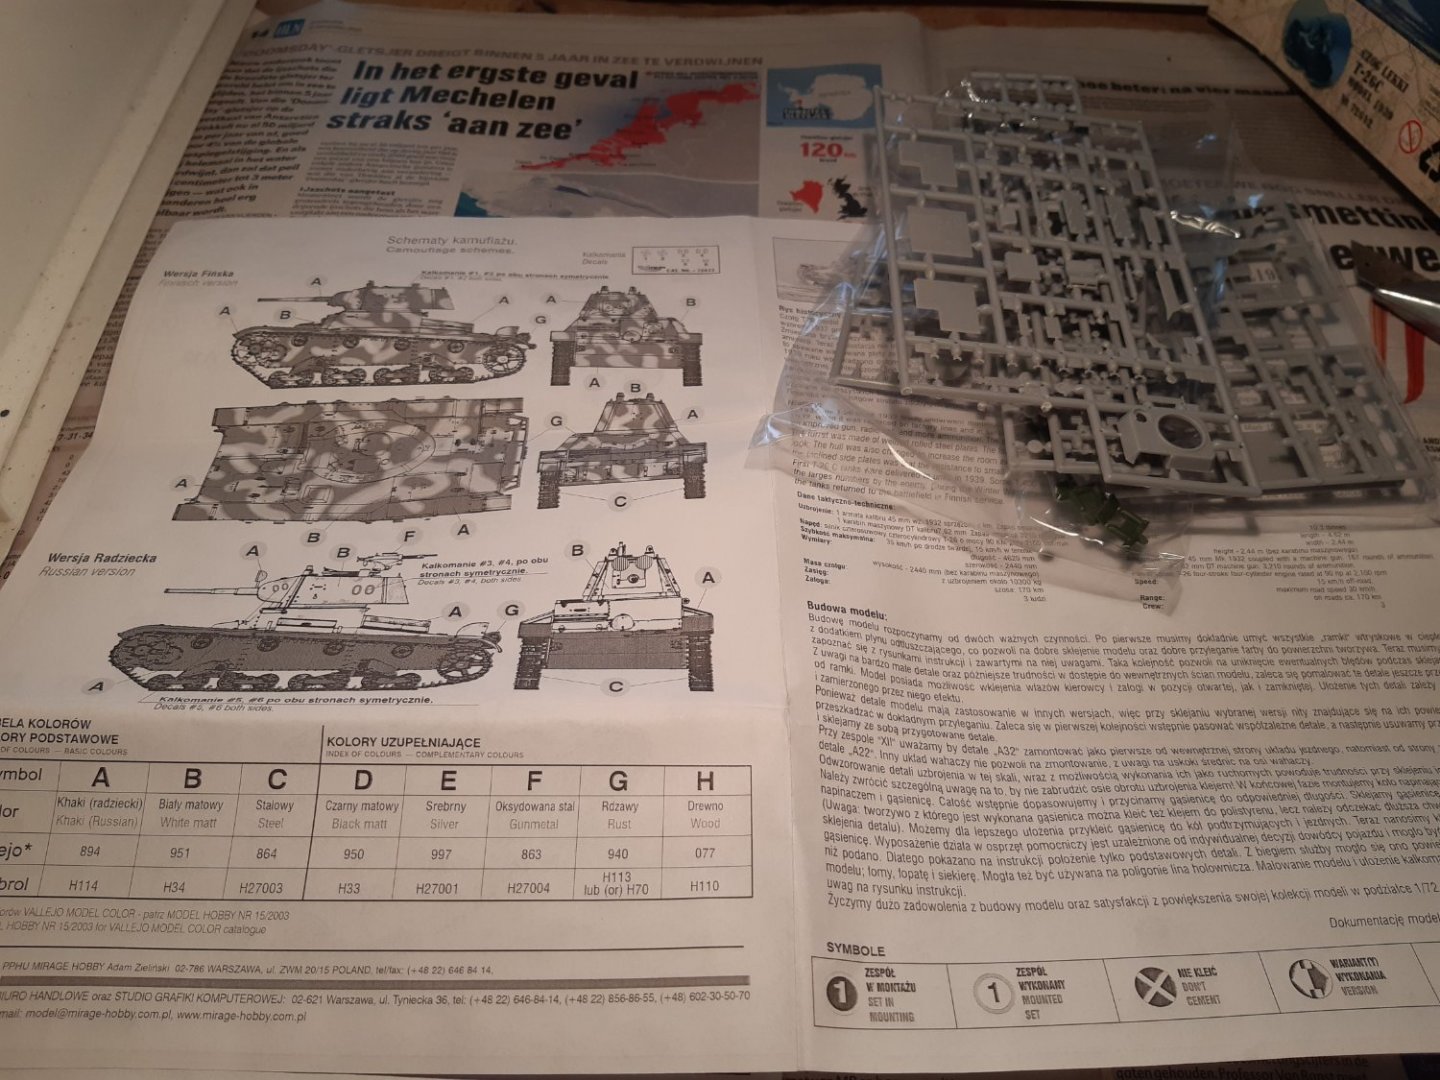
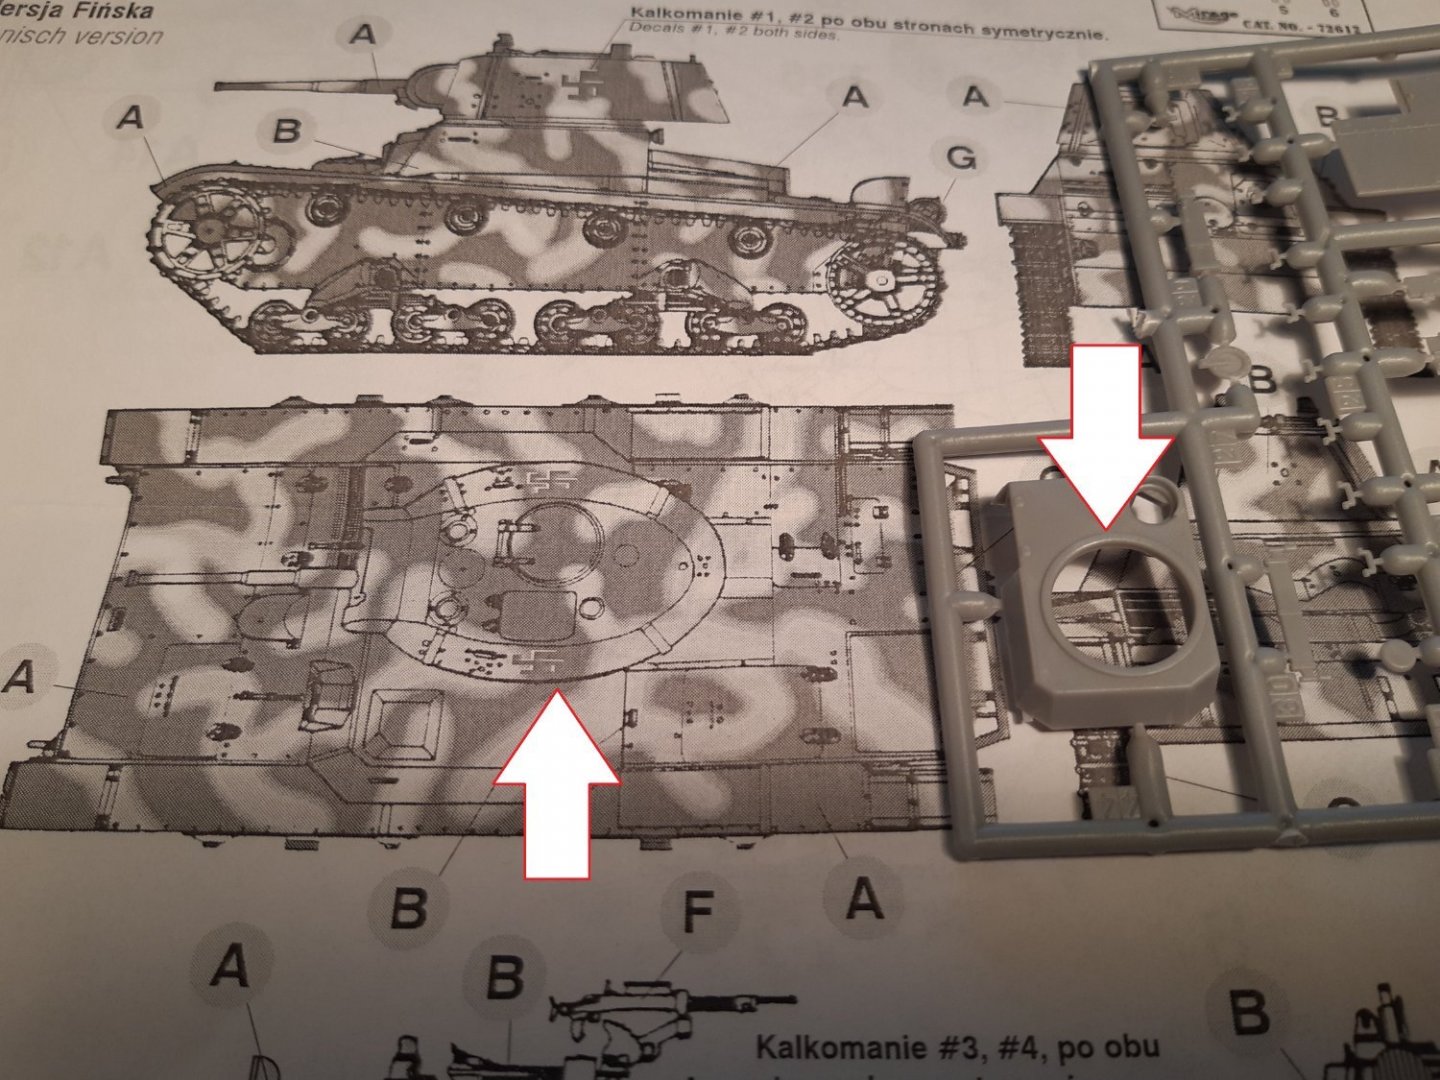
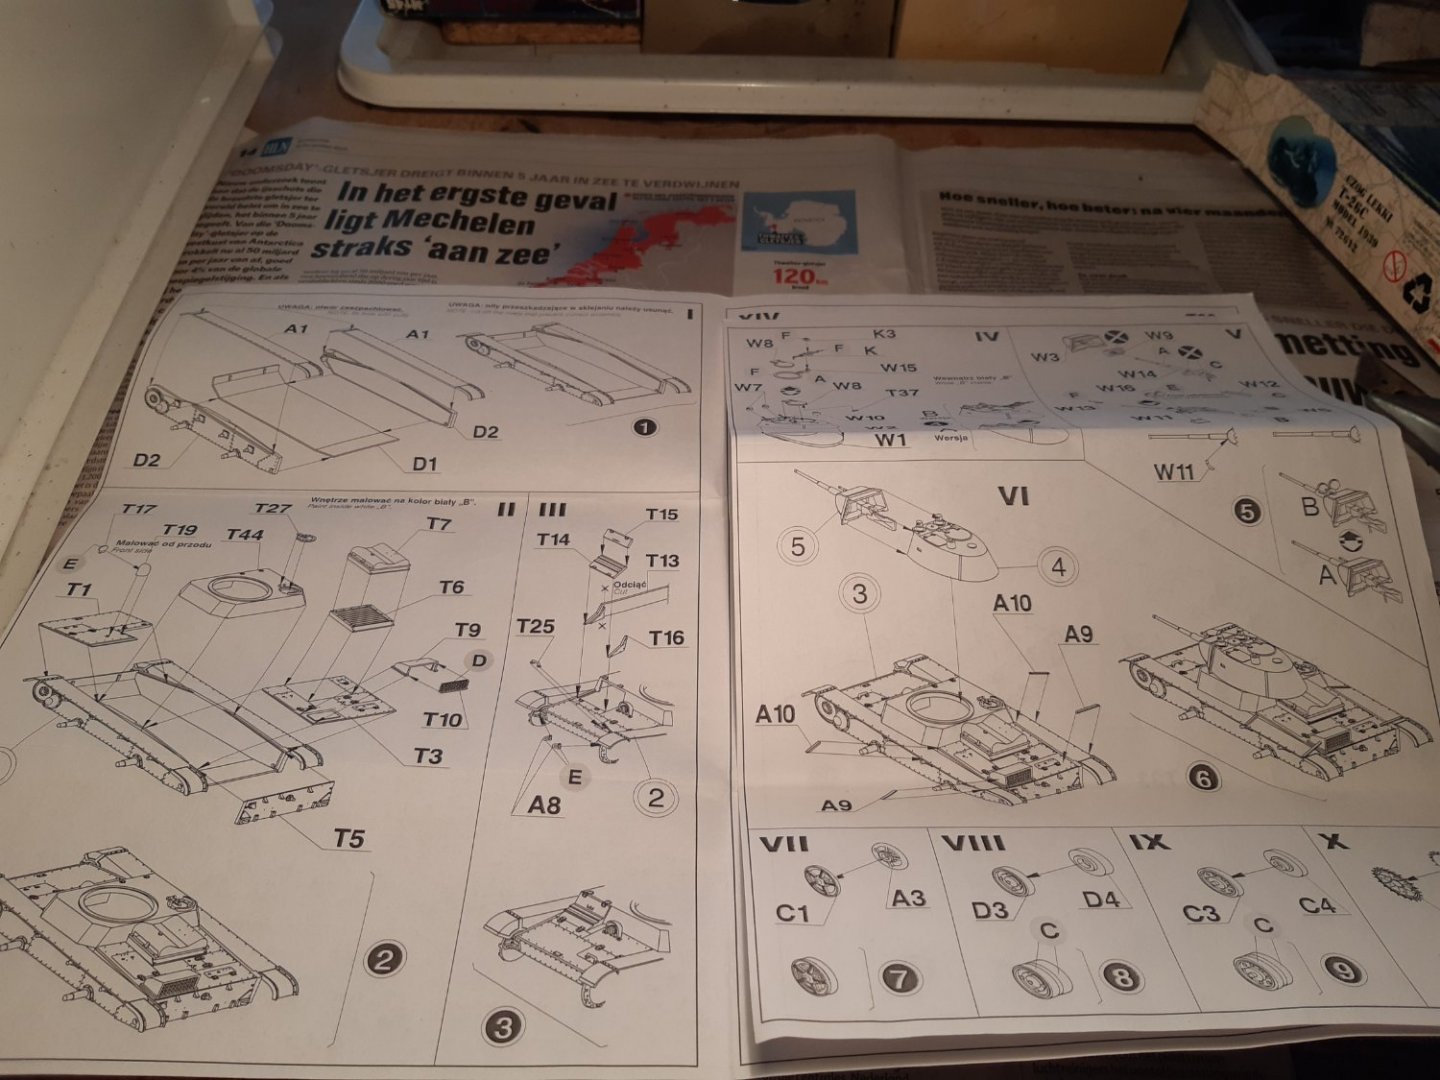
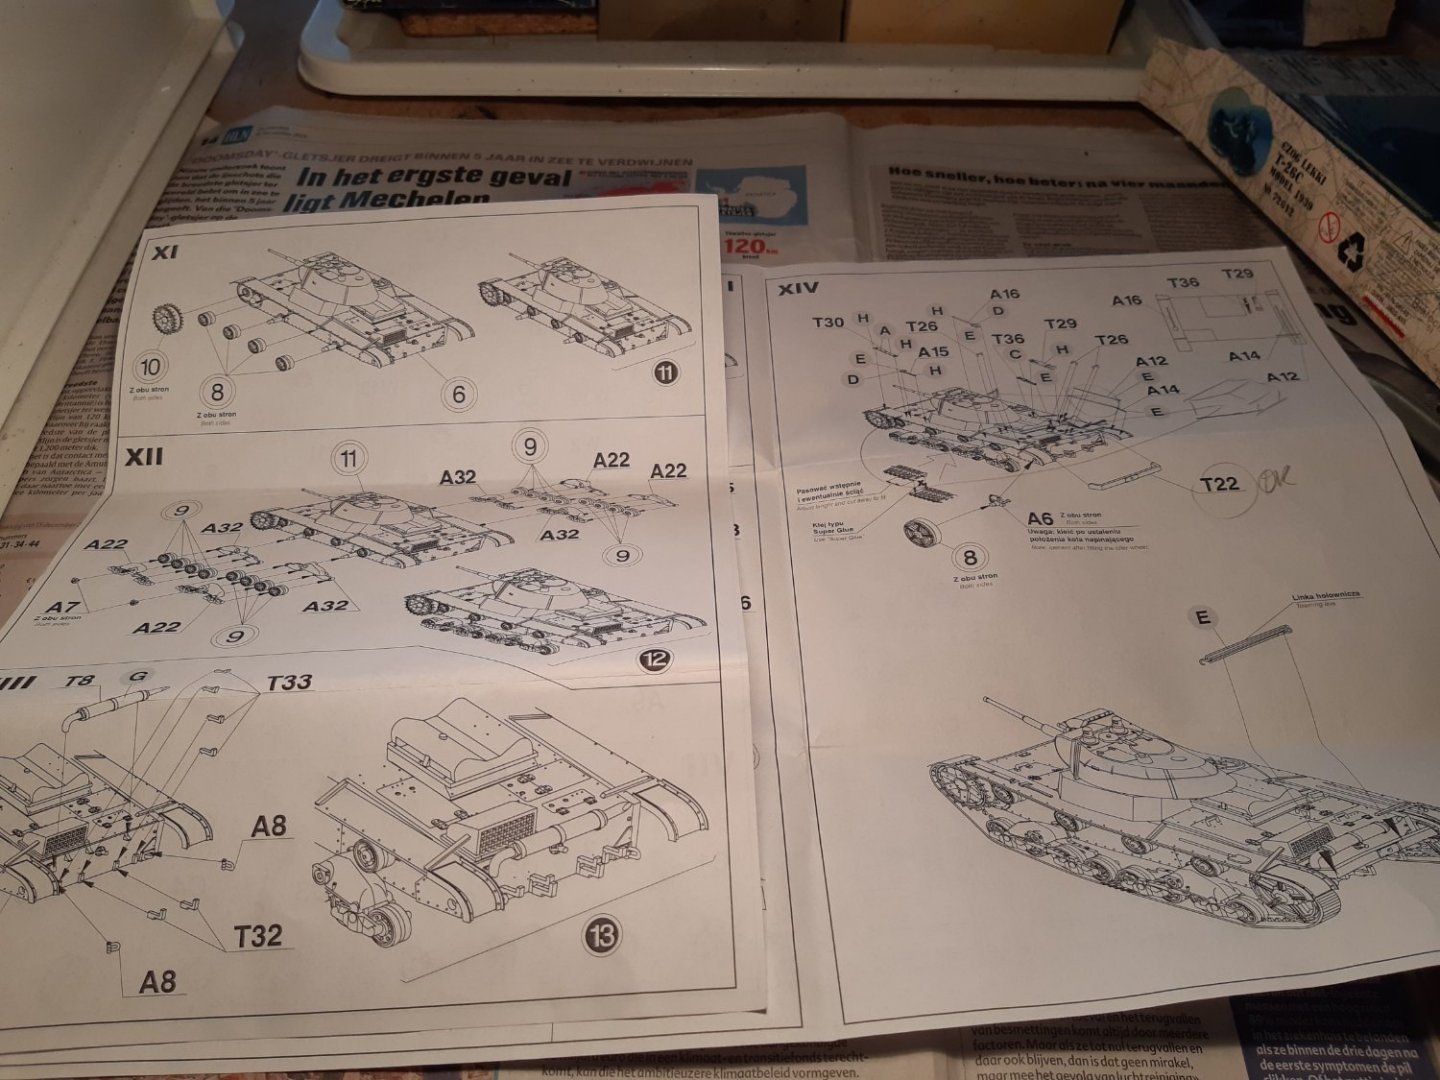
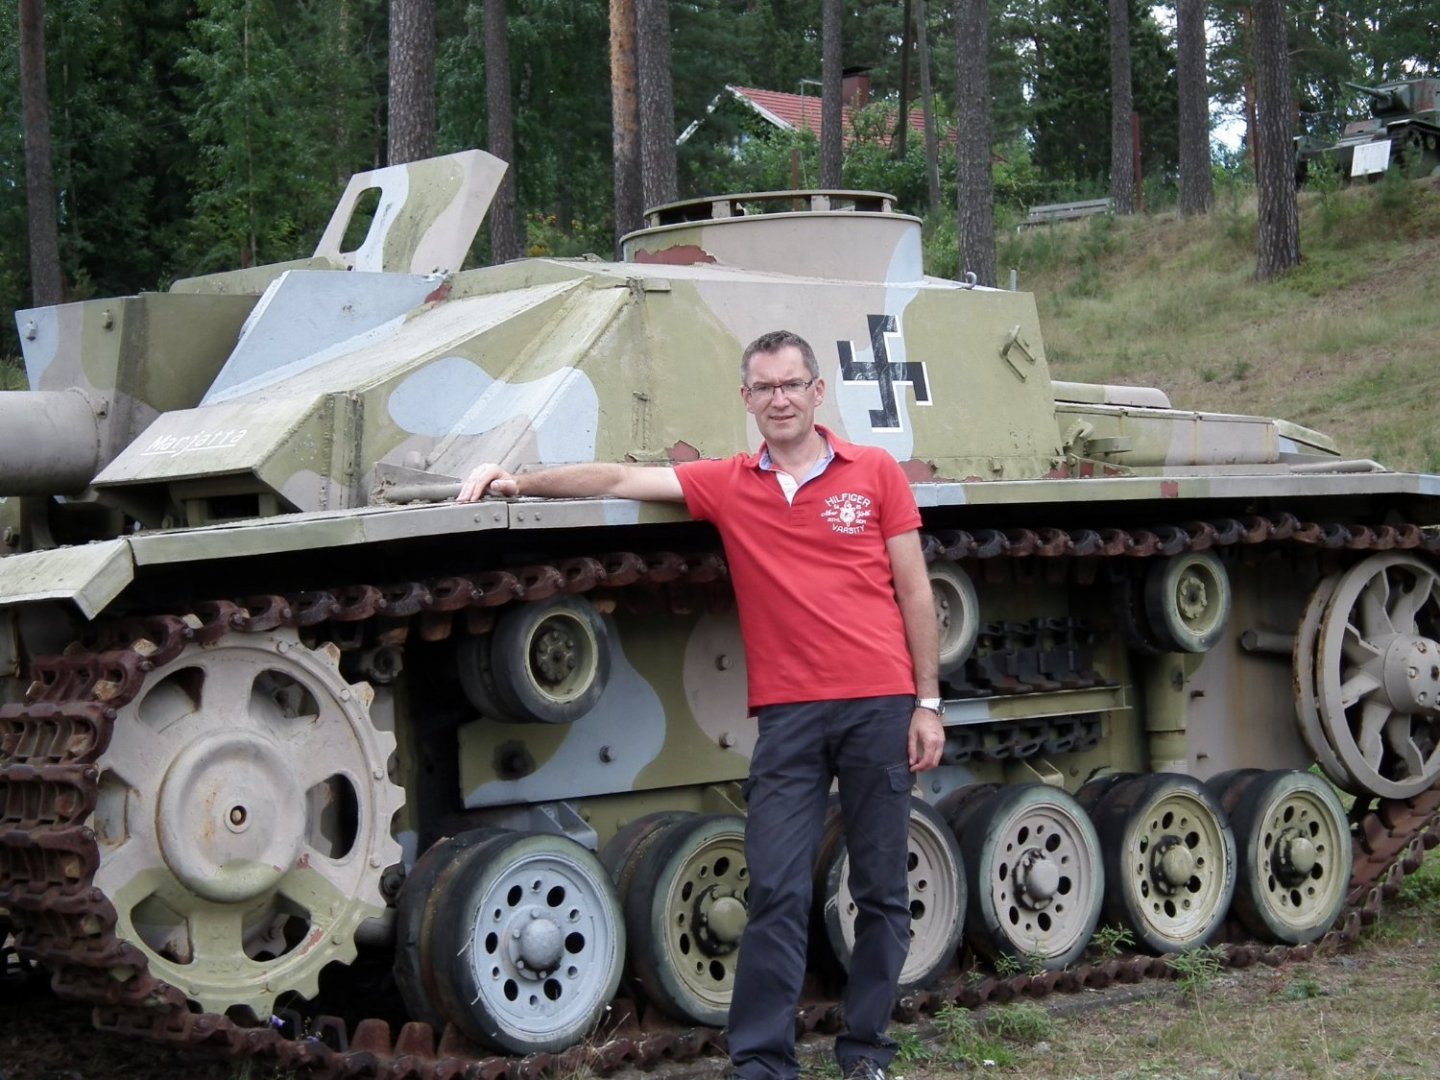
Next build is a Russian T26 converted in Finland. This kit has been in my possession for a long time. The idea was to merge this build with the T26 observation tank (top of the picture).. But the build is too different, that's why they come in 2 build logs. The kit and the plan. The basic error with this model is that the turret is on the wrong side of the hull (Not Mirage's habit, usually their kits are flawless) This is also why the build of this kit has always been delayed for so long. And I once had the chance to see this tank during a visit to the Parola tank museum in Finland Where I also was the proud owner of a Stug III (for a short time 😉) a Panzer IV And even a T72 Ps, I was 7 years younger then... And If you have the opportunity to go to Finland. Definitely go to Parola (it's worth the effort) Build is started, pictures in next post.


- 21 replies
-
- 11
-
-
Very nicely done 👍
-
M29 Weasel family 1/72 (scratch) by Backer Finished
Baker replied to Baker's topic in Non-ship/categorised builds
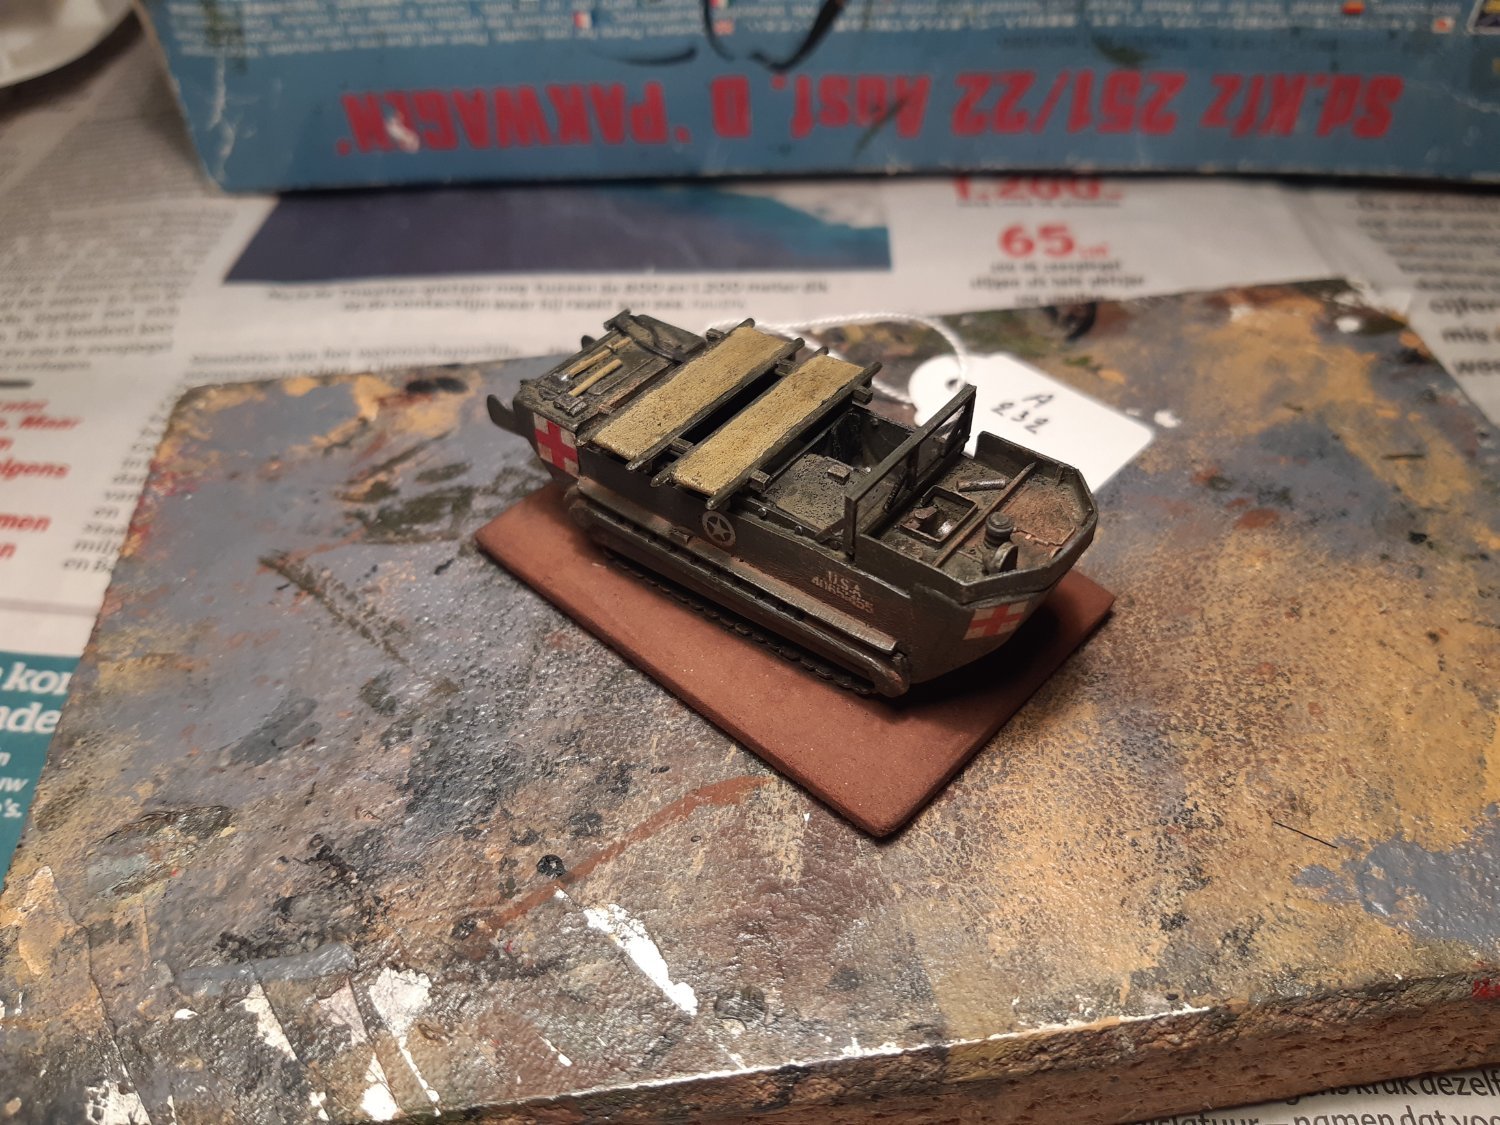
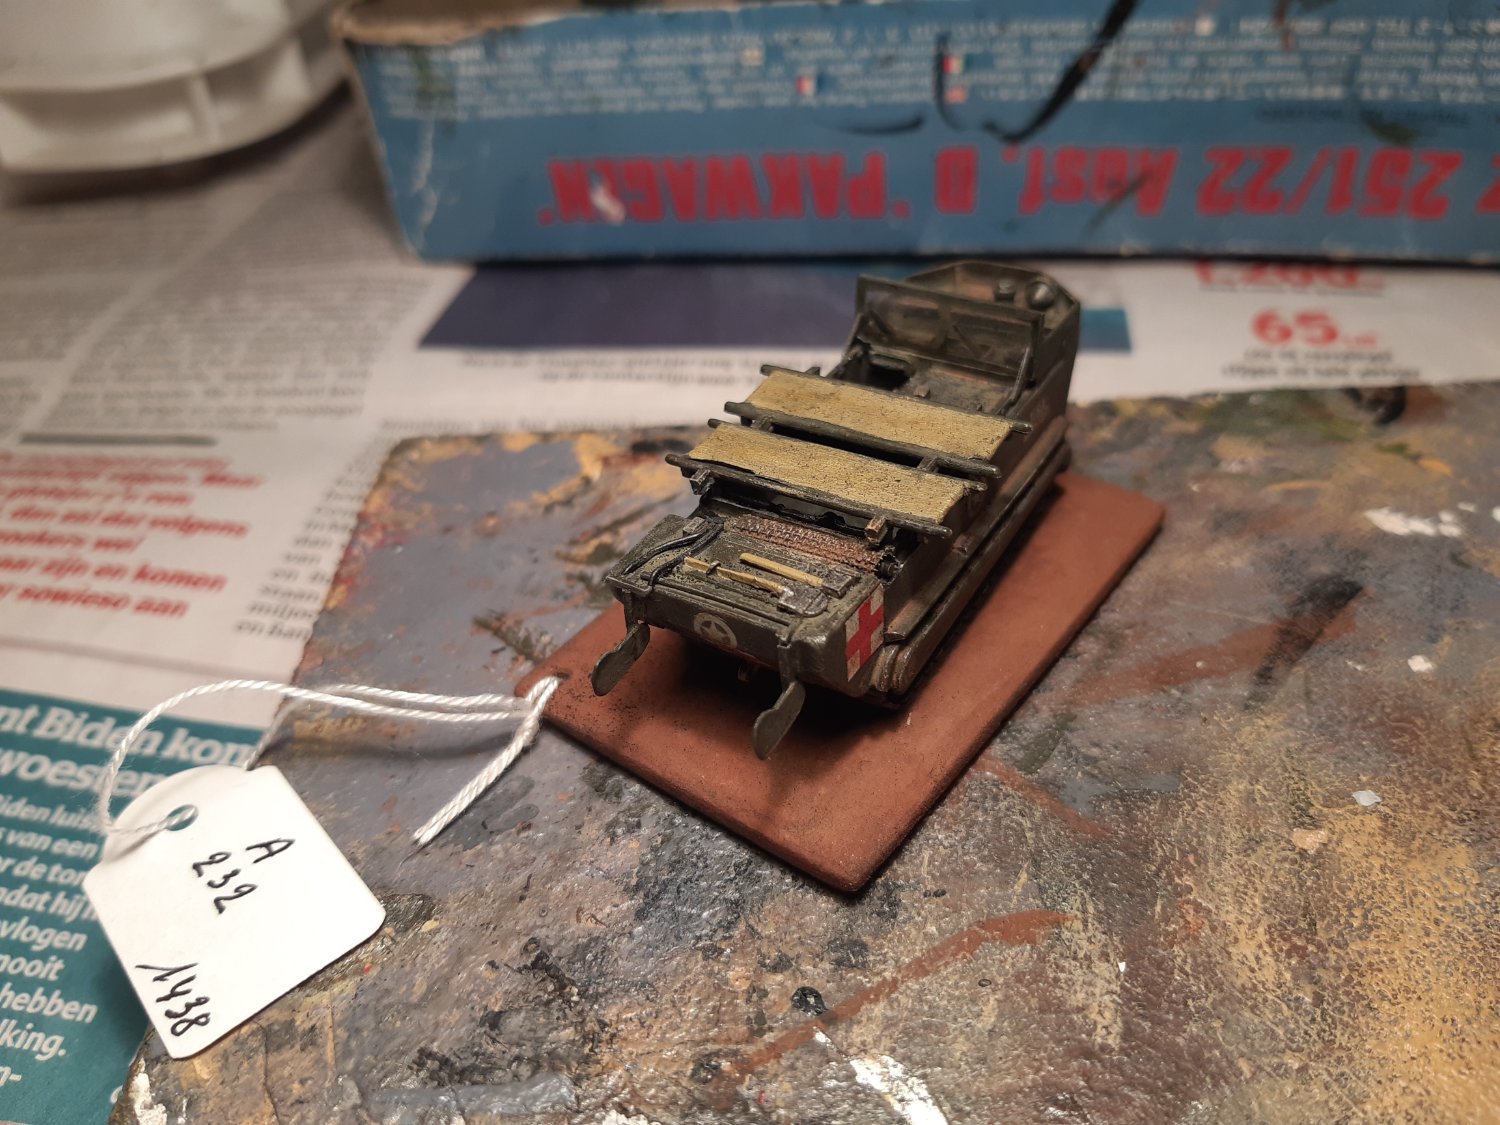
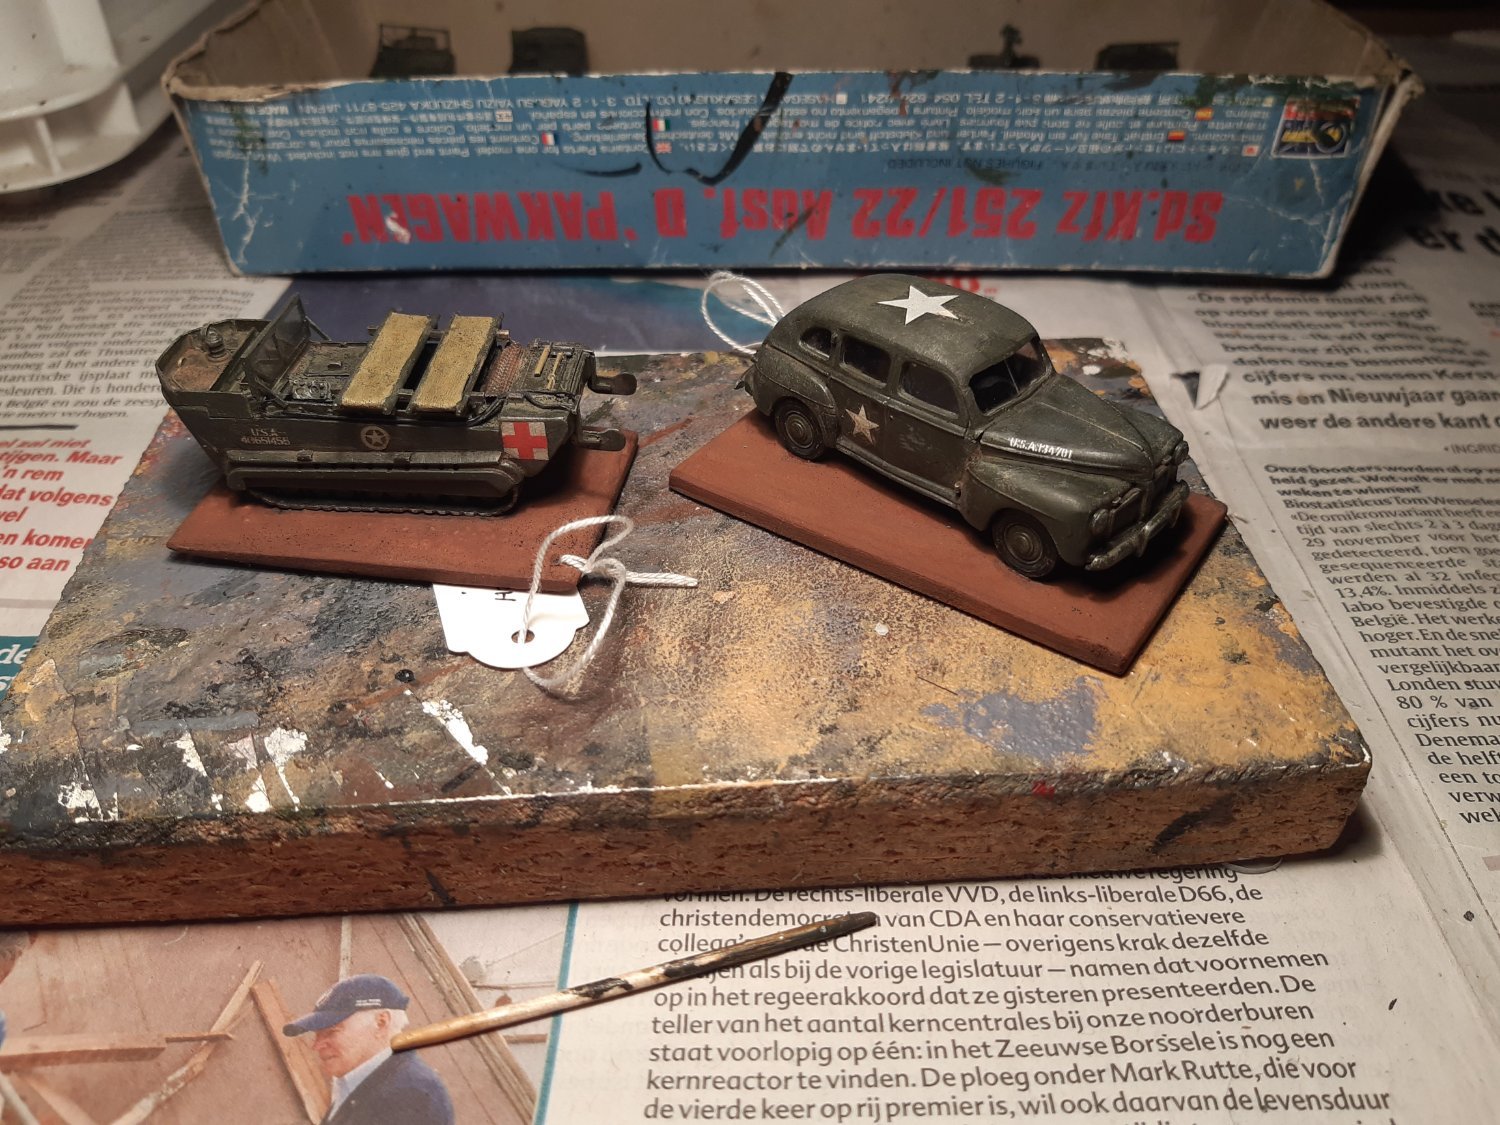
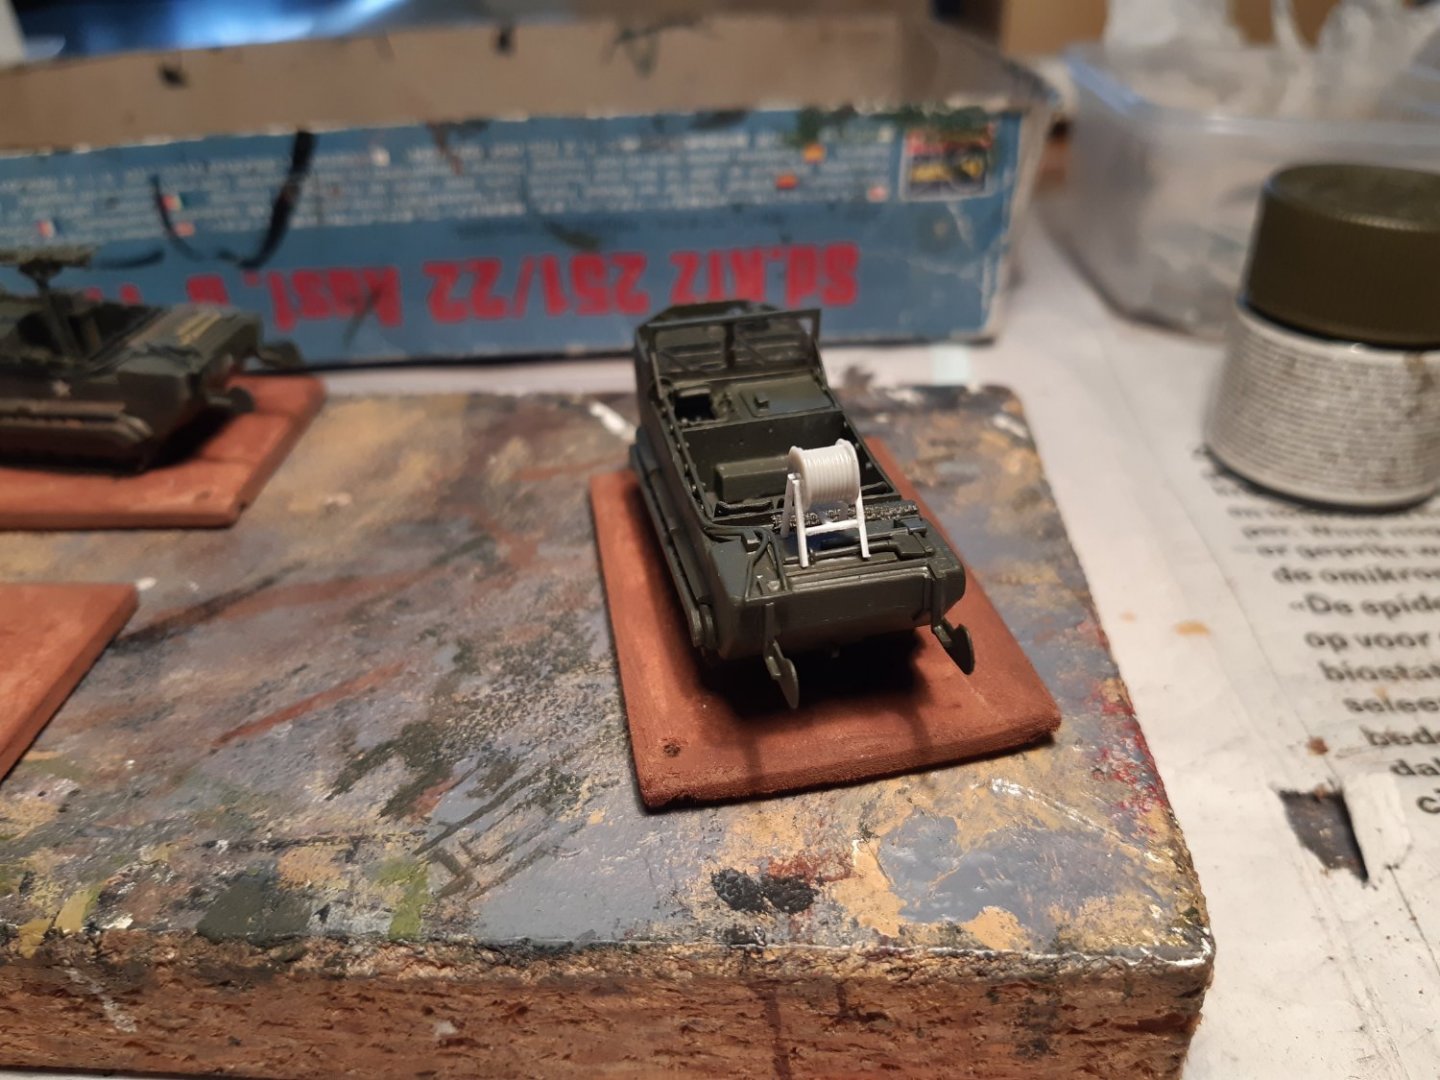
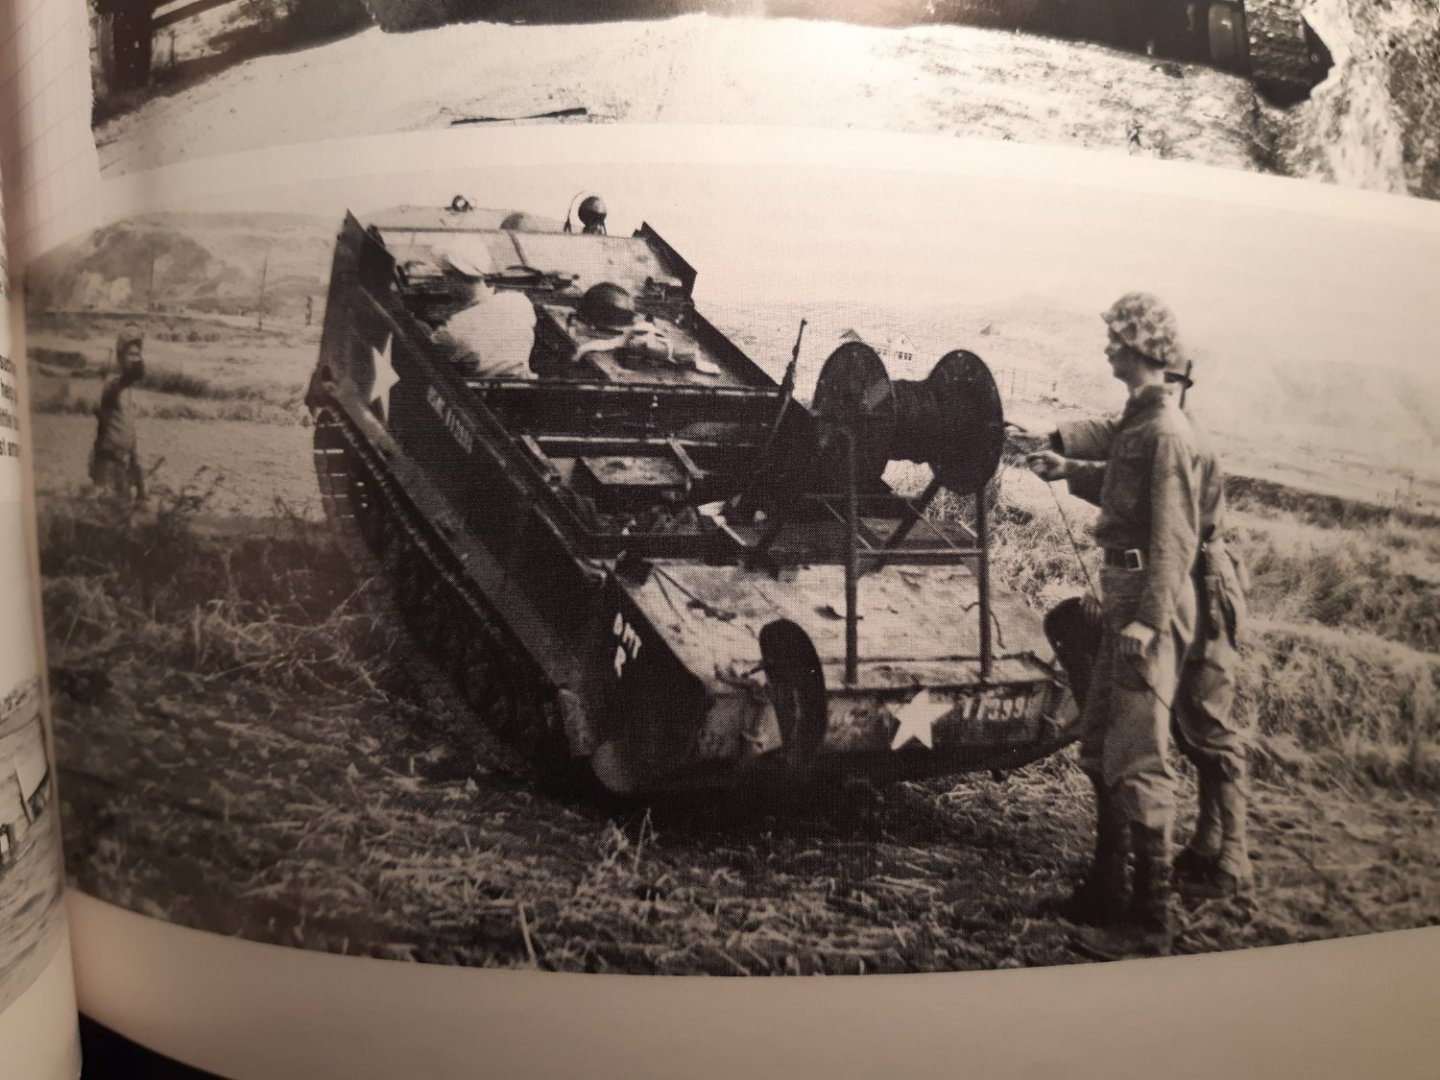
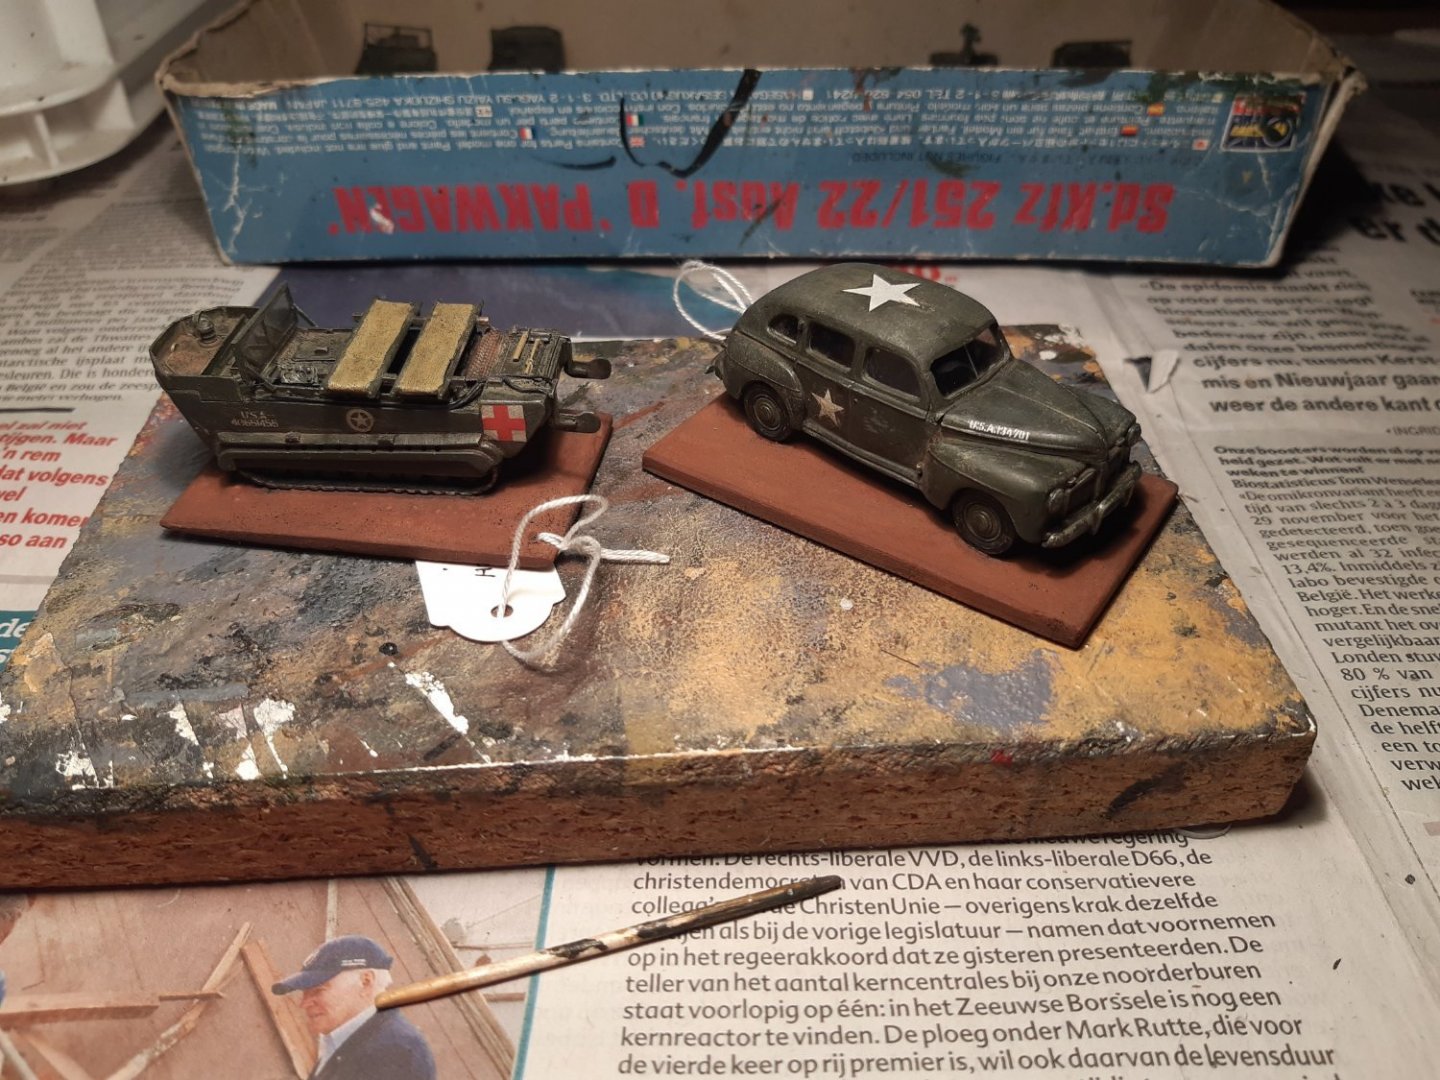
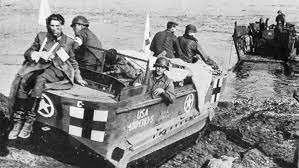
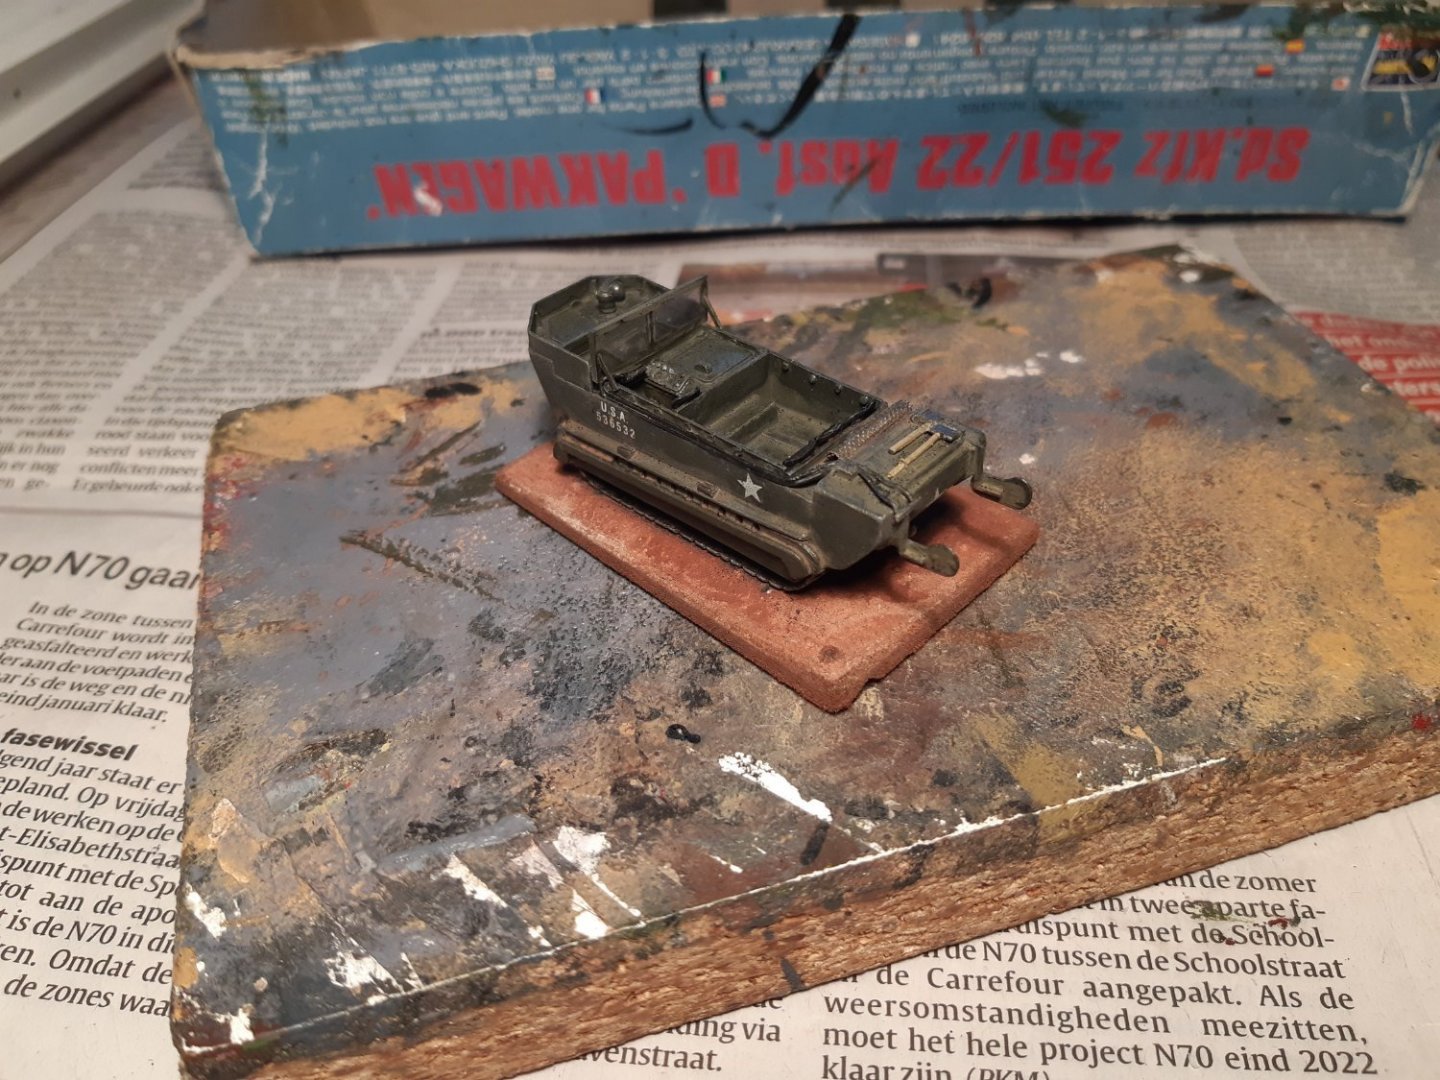
Thanks for comments ( and likes) much appreciated 👍. Next is the ambulance. I don't think there was a standard version of this. Most seem to be field conversions and no 2 look alike. So a use a photo as an example, with some free style additions. Base vehicle with 2 stretchers Painted and ready And a Ford Fordor de luxe 1942 Thanks for folowing


- 50 replies
-
- 10
-
-
A newly started Aeropiccola build log. Interested?
-
Golden Hind by Rock_From_Korea - 1:48
Baker replied to Rock_From_Korea's topic in - Build logs for subjects built 1501 - 1750
Nice start. All this work without a table saw 👍 -
M29 Weasel family 1/72 (scratch) by Backer Finished
Baker replied to Baker's topic in Non-ship/categorised builds
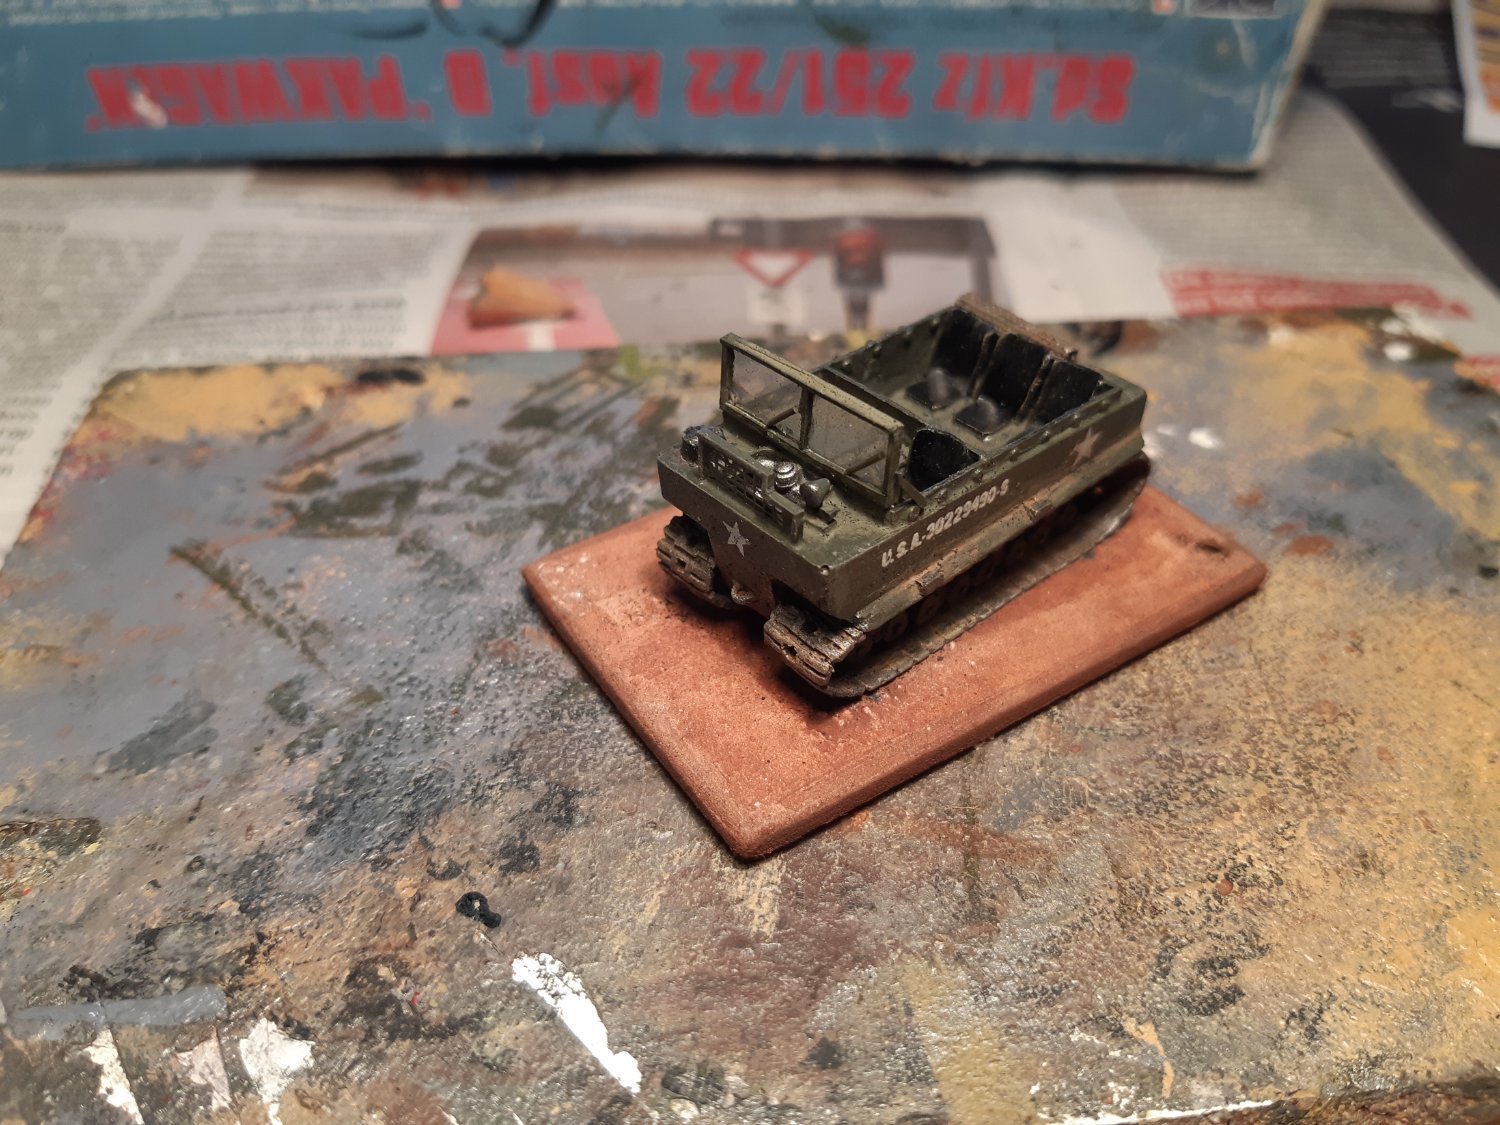
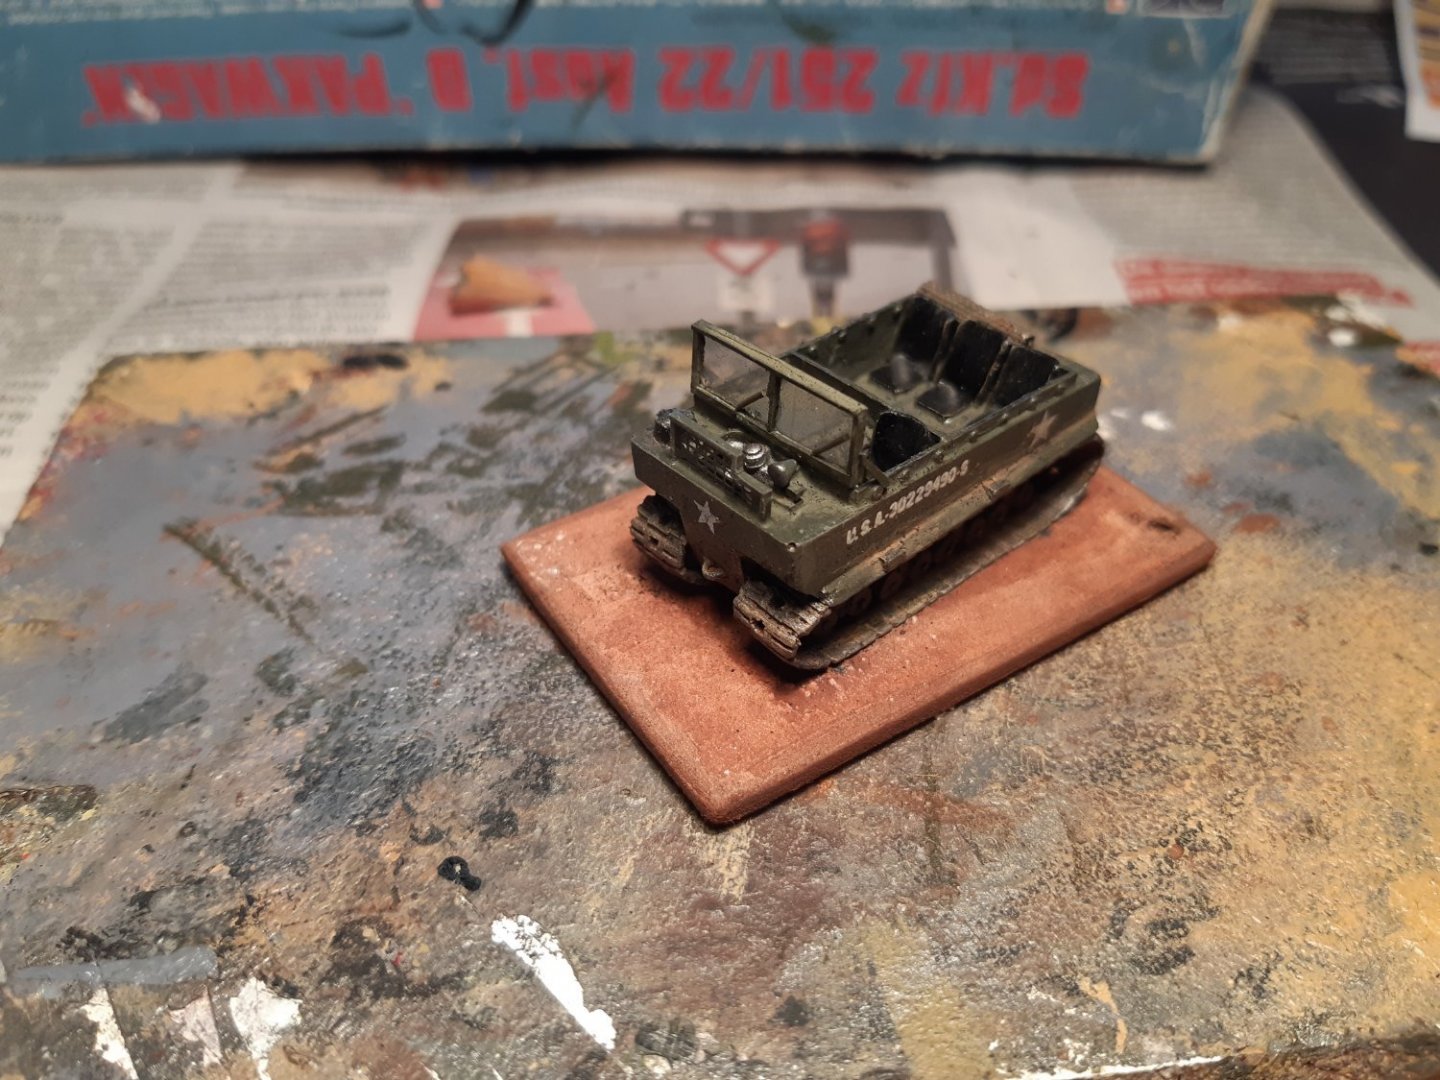
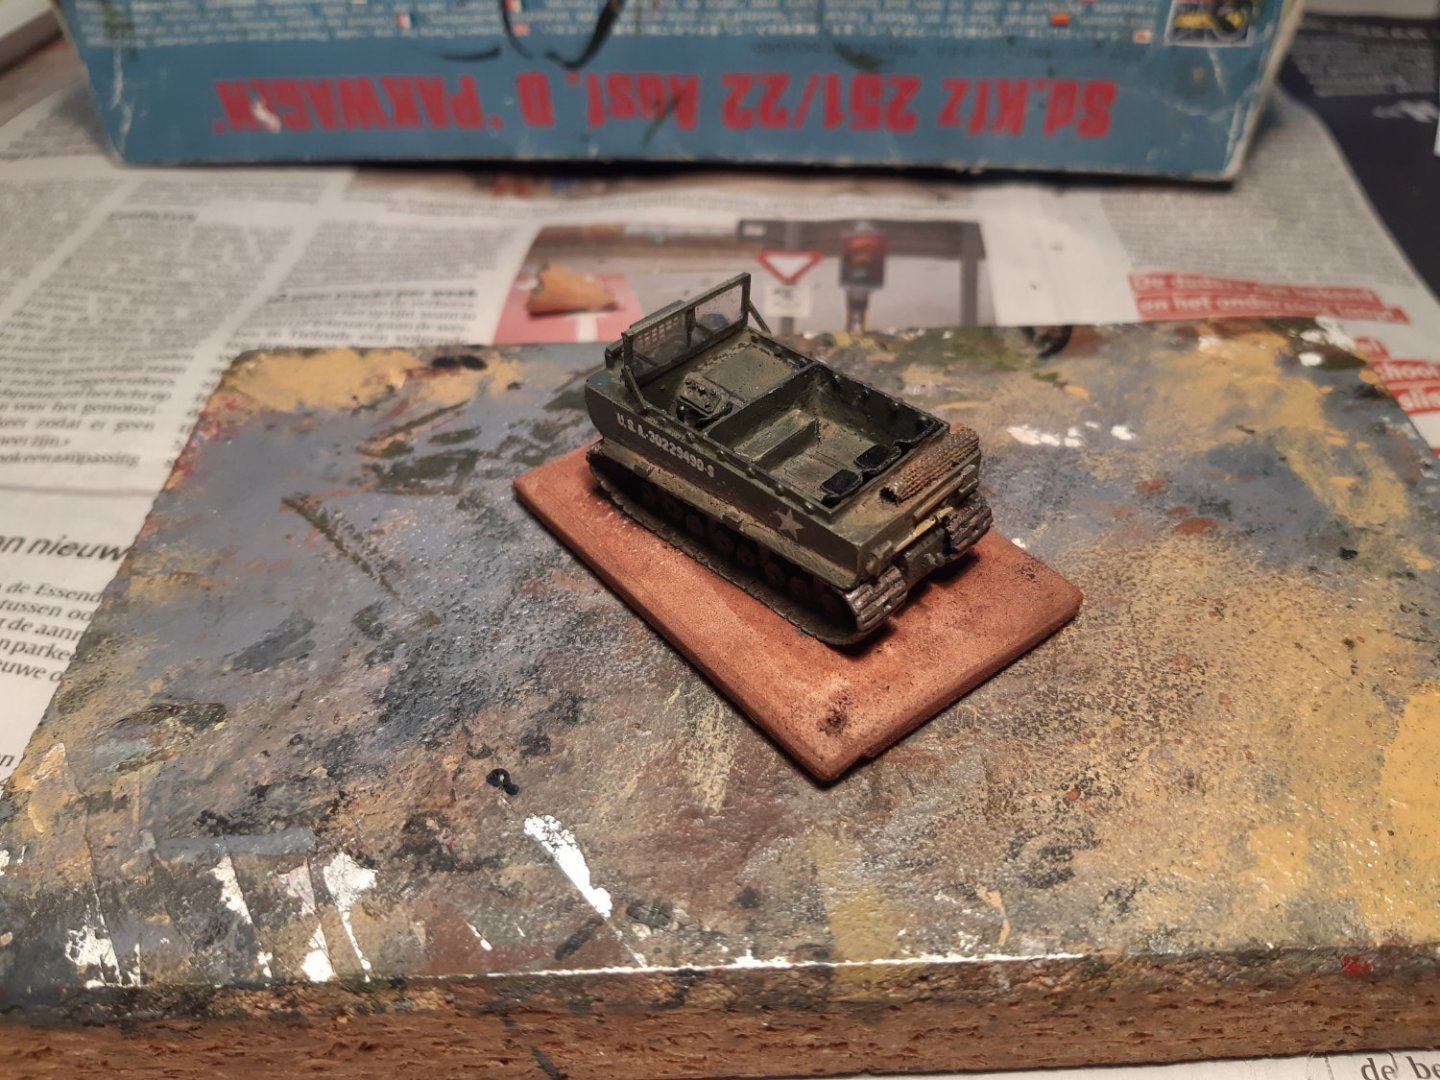
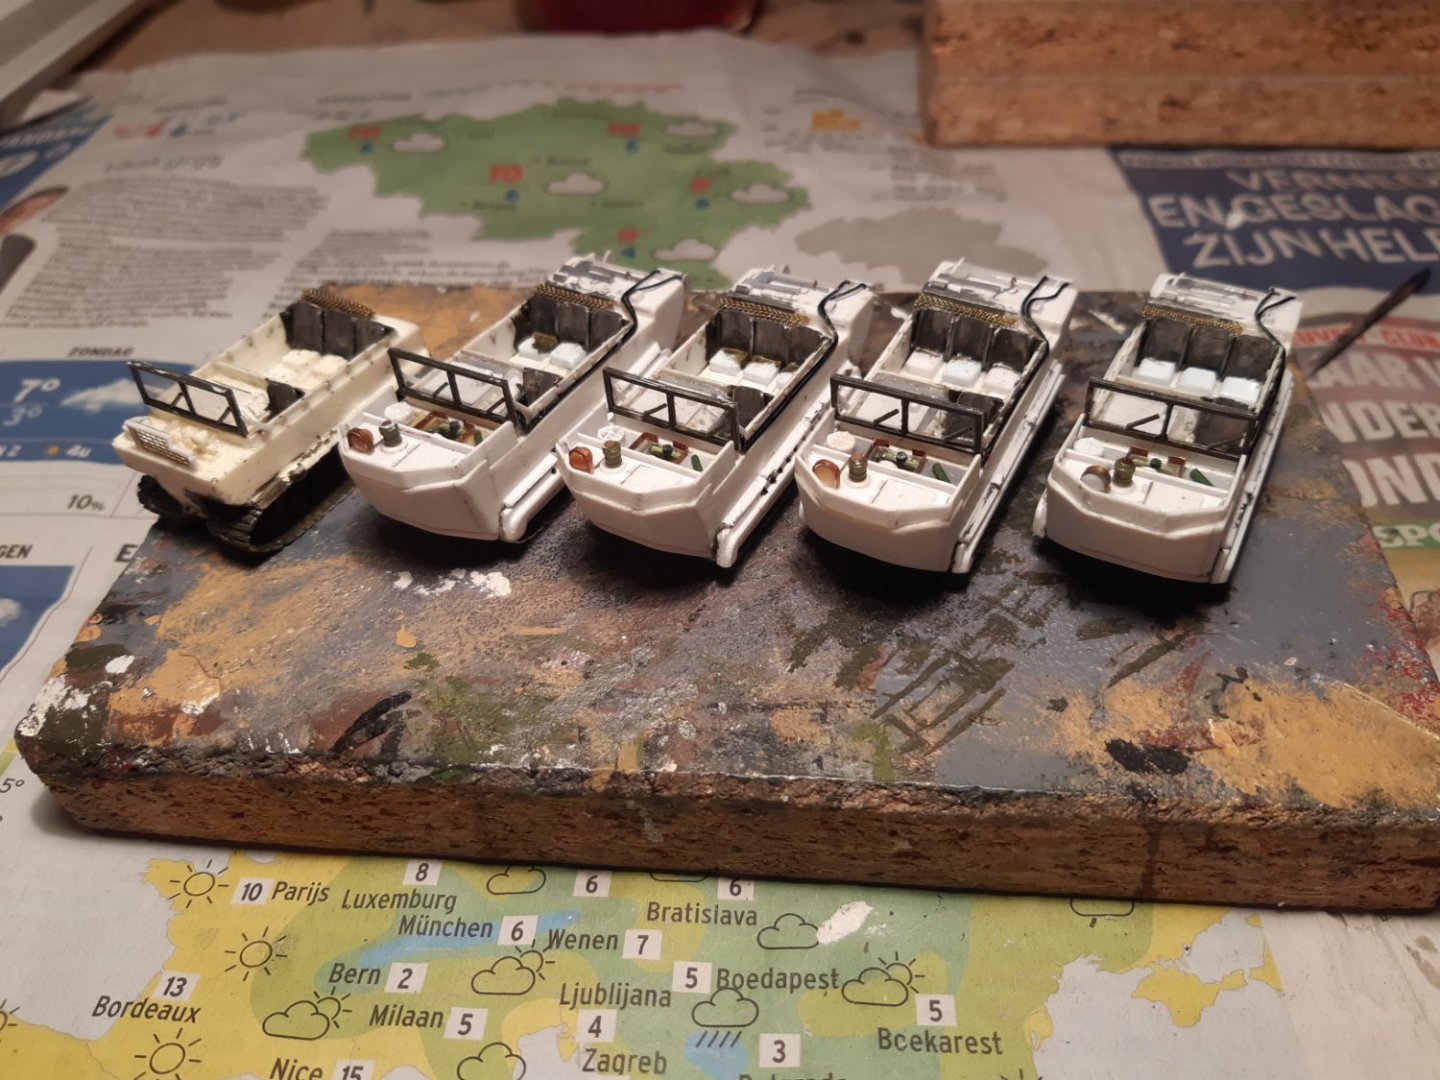
Thank you. Big moment. The first 2 Weasels are ready. Painting and weathering are done with my usual methods. The M29 The M29c The next one will be the ambulance.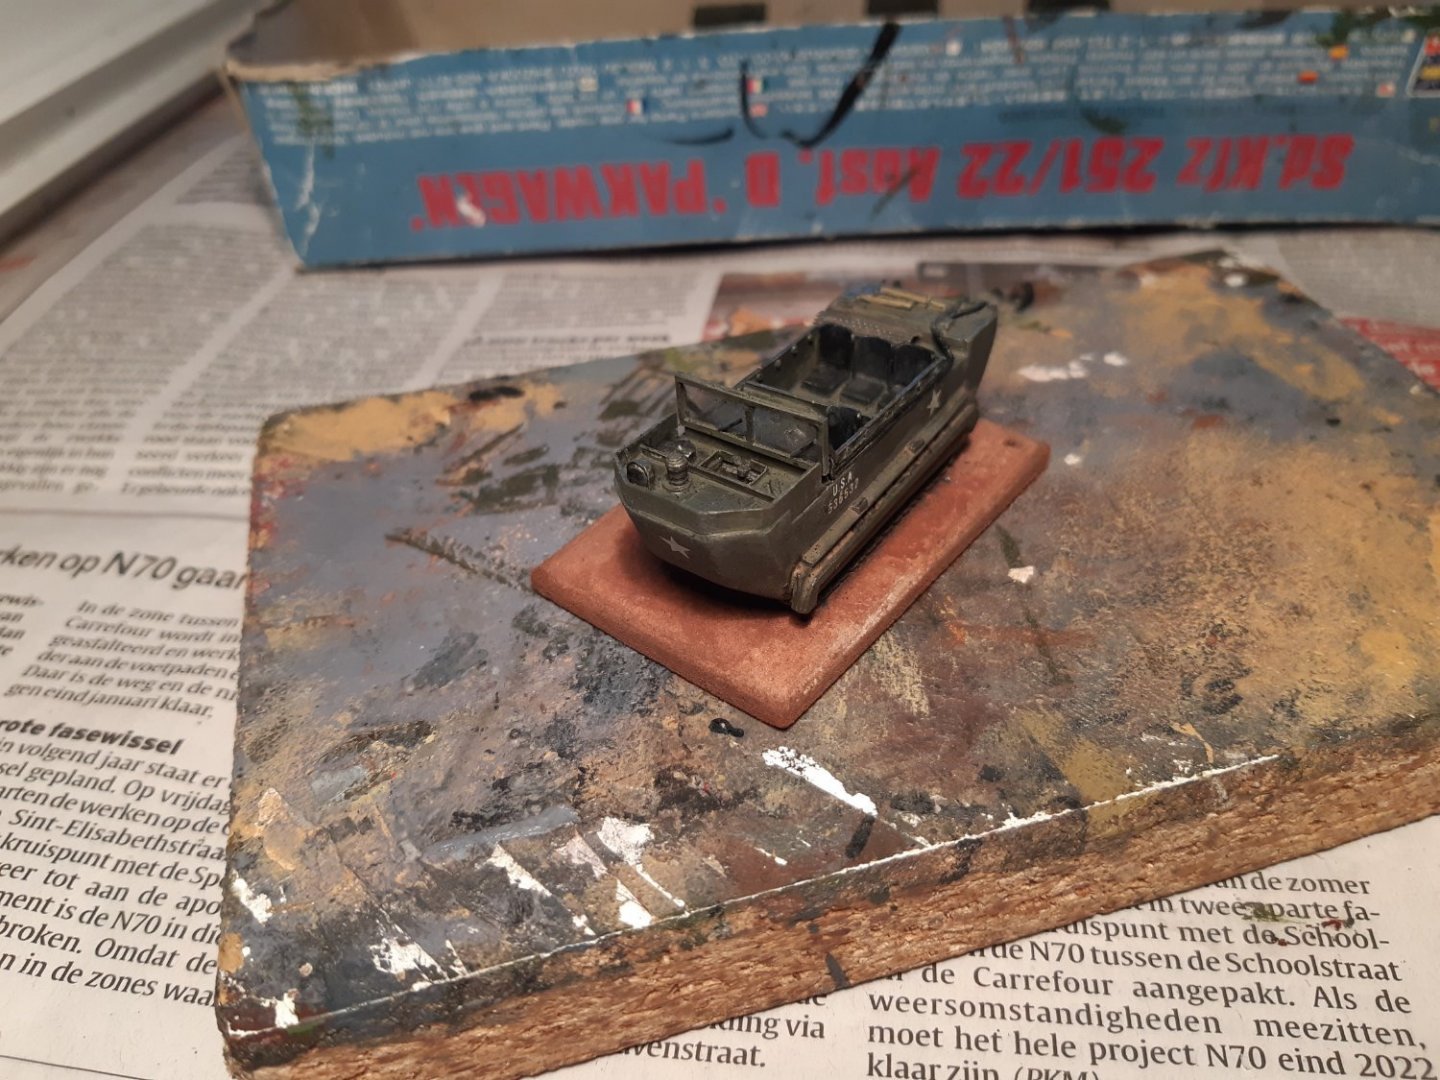
- 50 replies
-
- 10
-
-
Hello, and welcome to MSW
-
Welkom vanuit België
-
M29 Weasel family 1/72 (scratch) by Backer Finished
Baker replied to Baker's topic in Non-ship/categorised builds
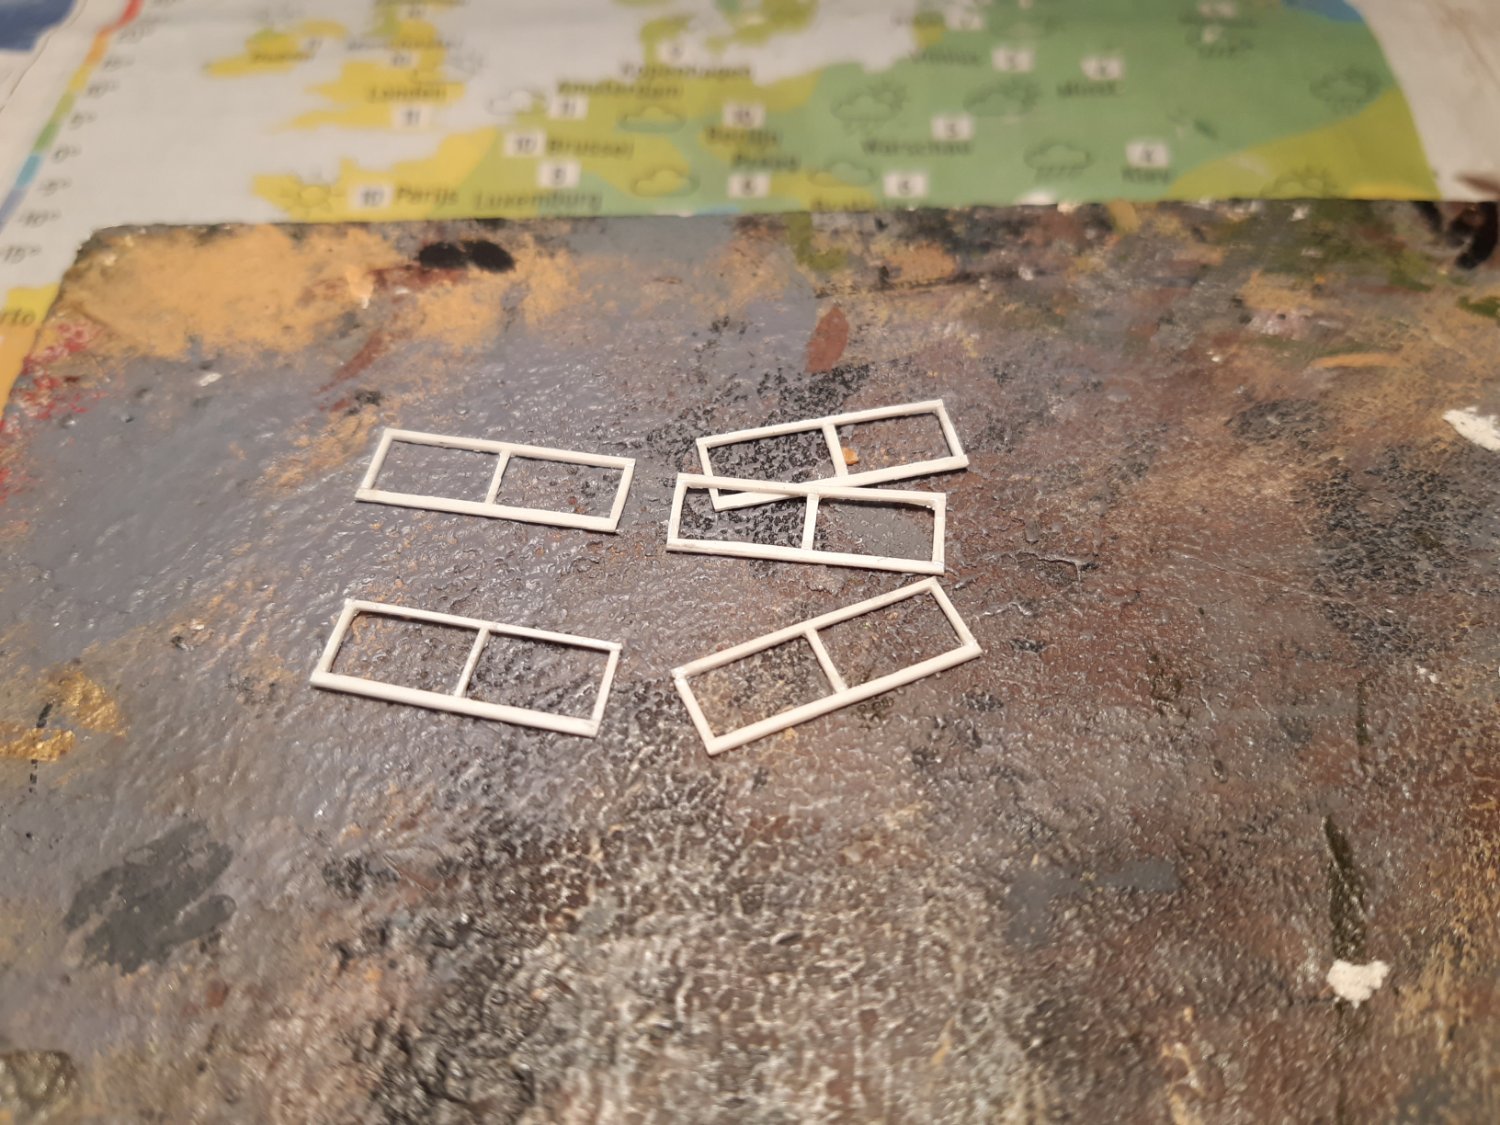
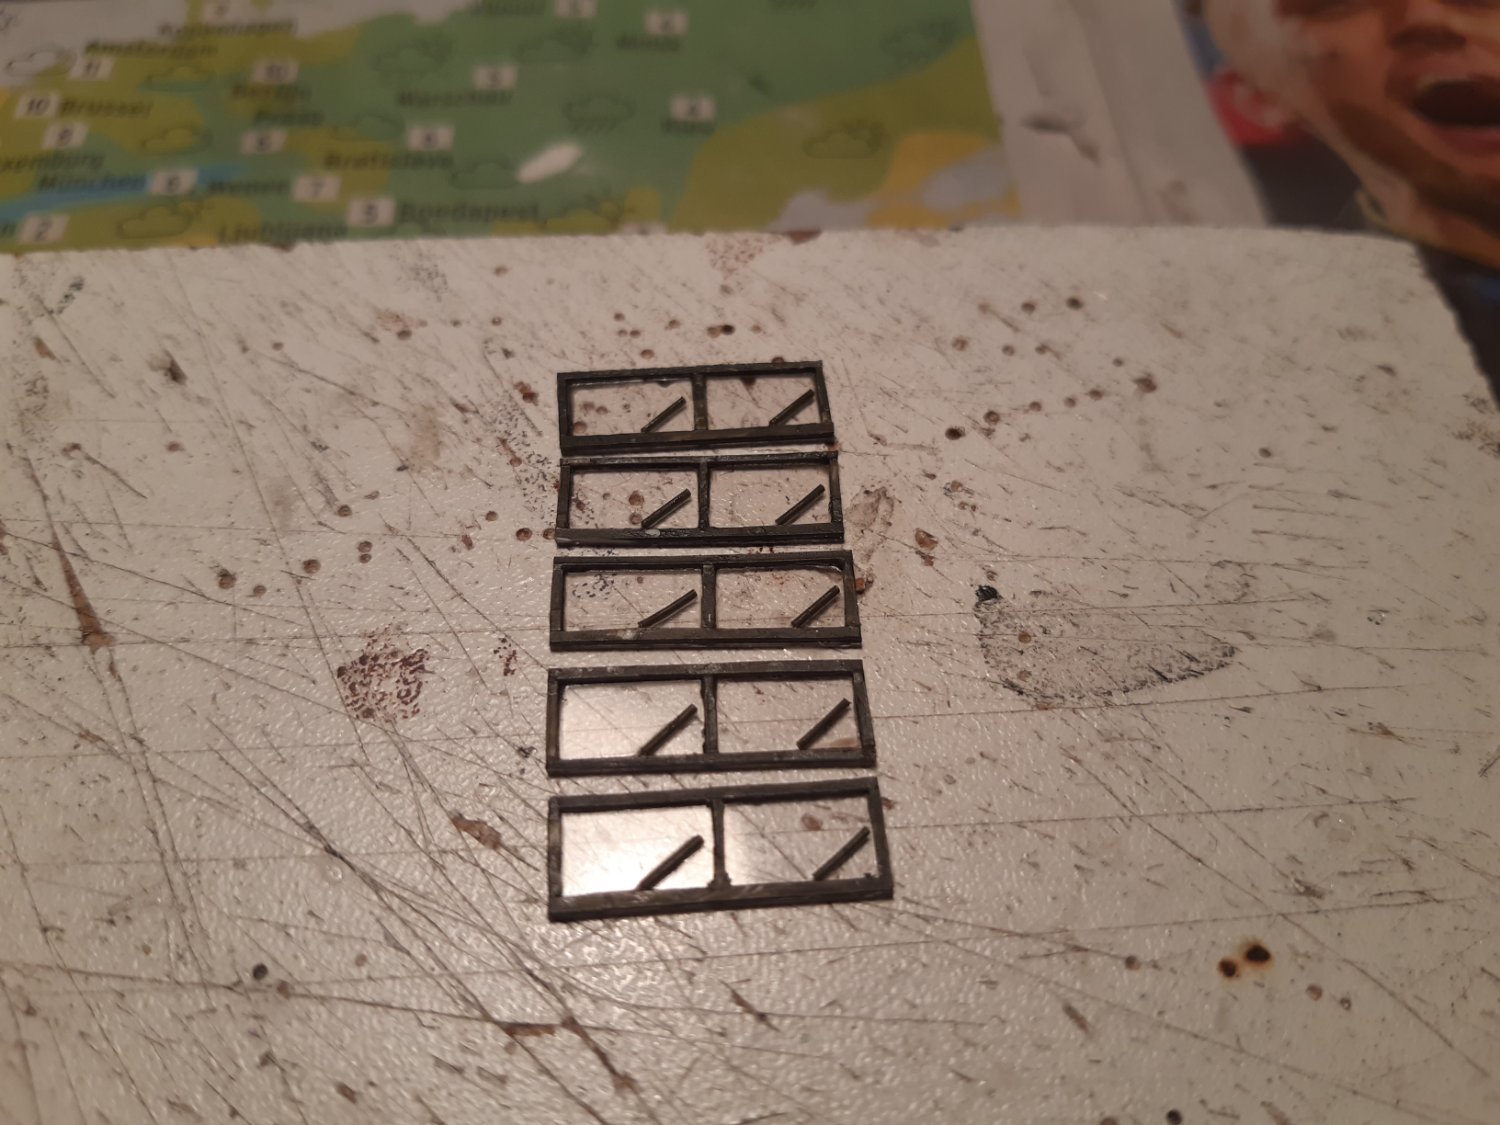
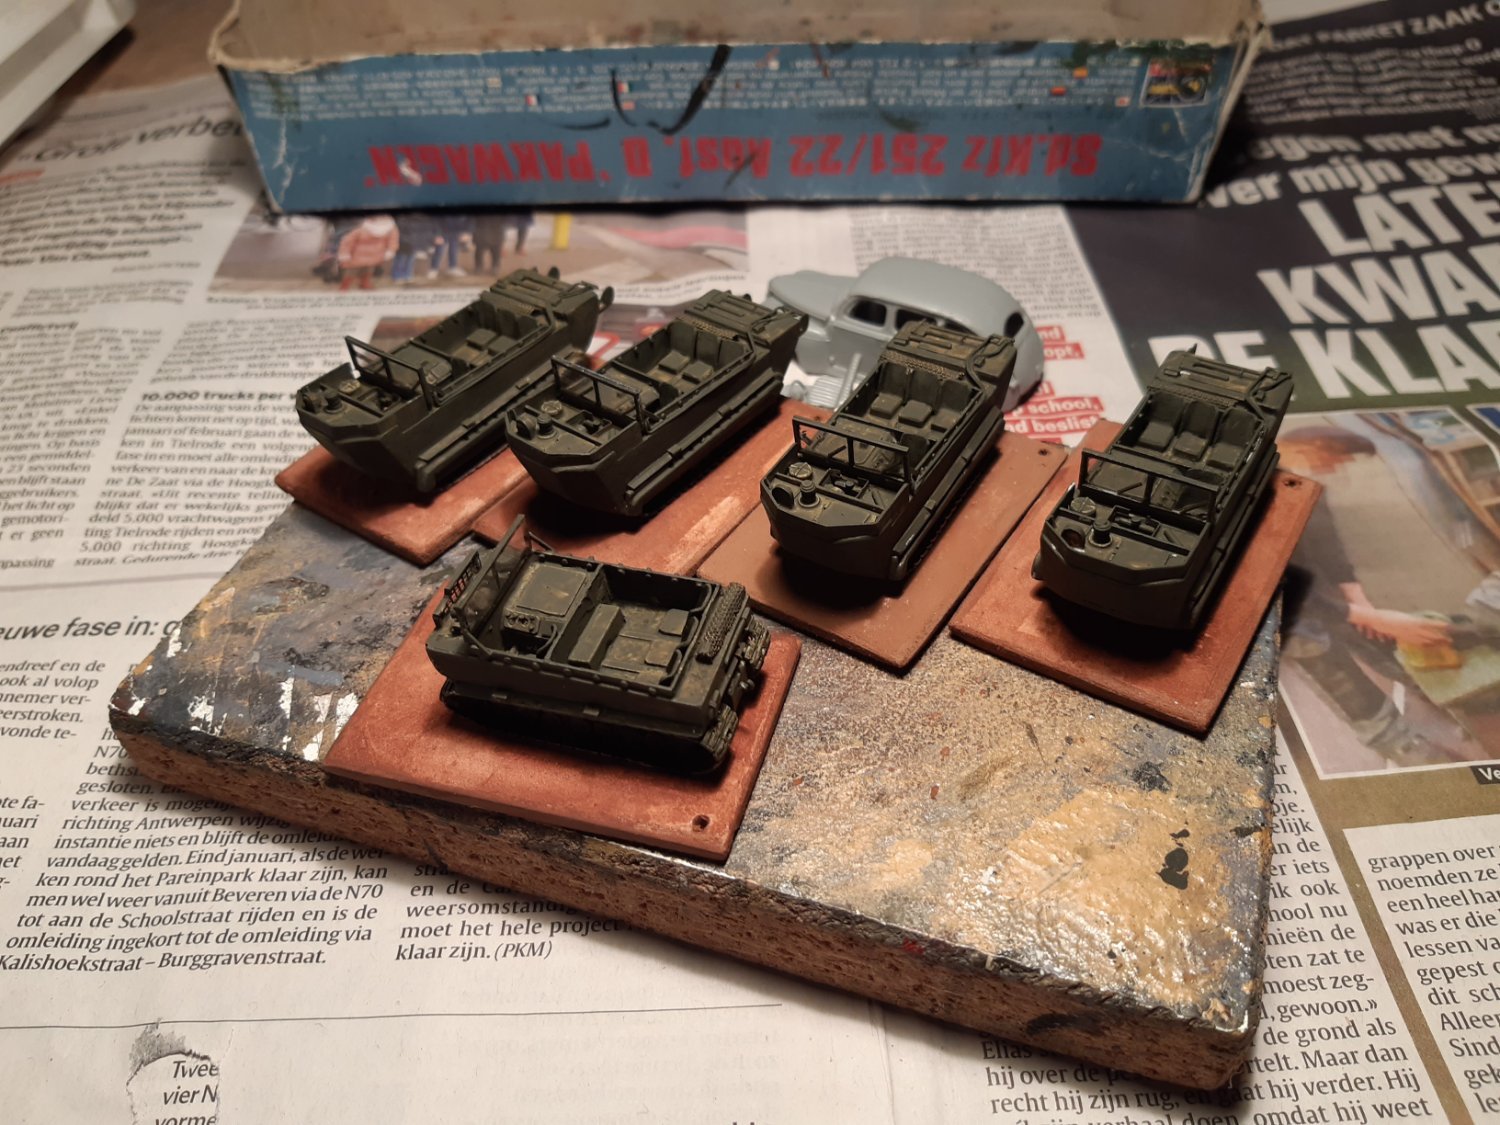
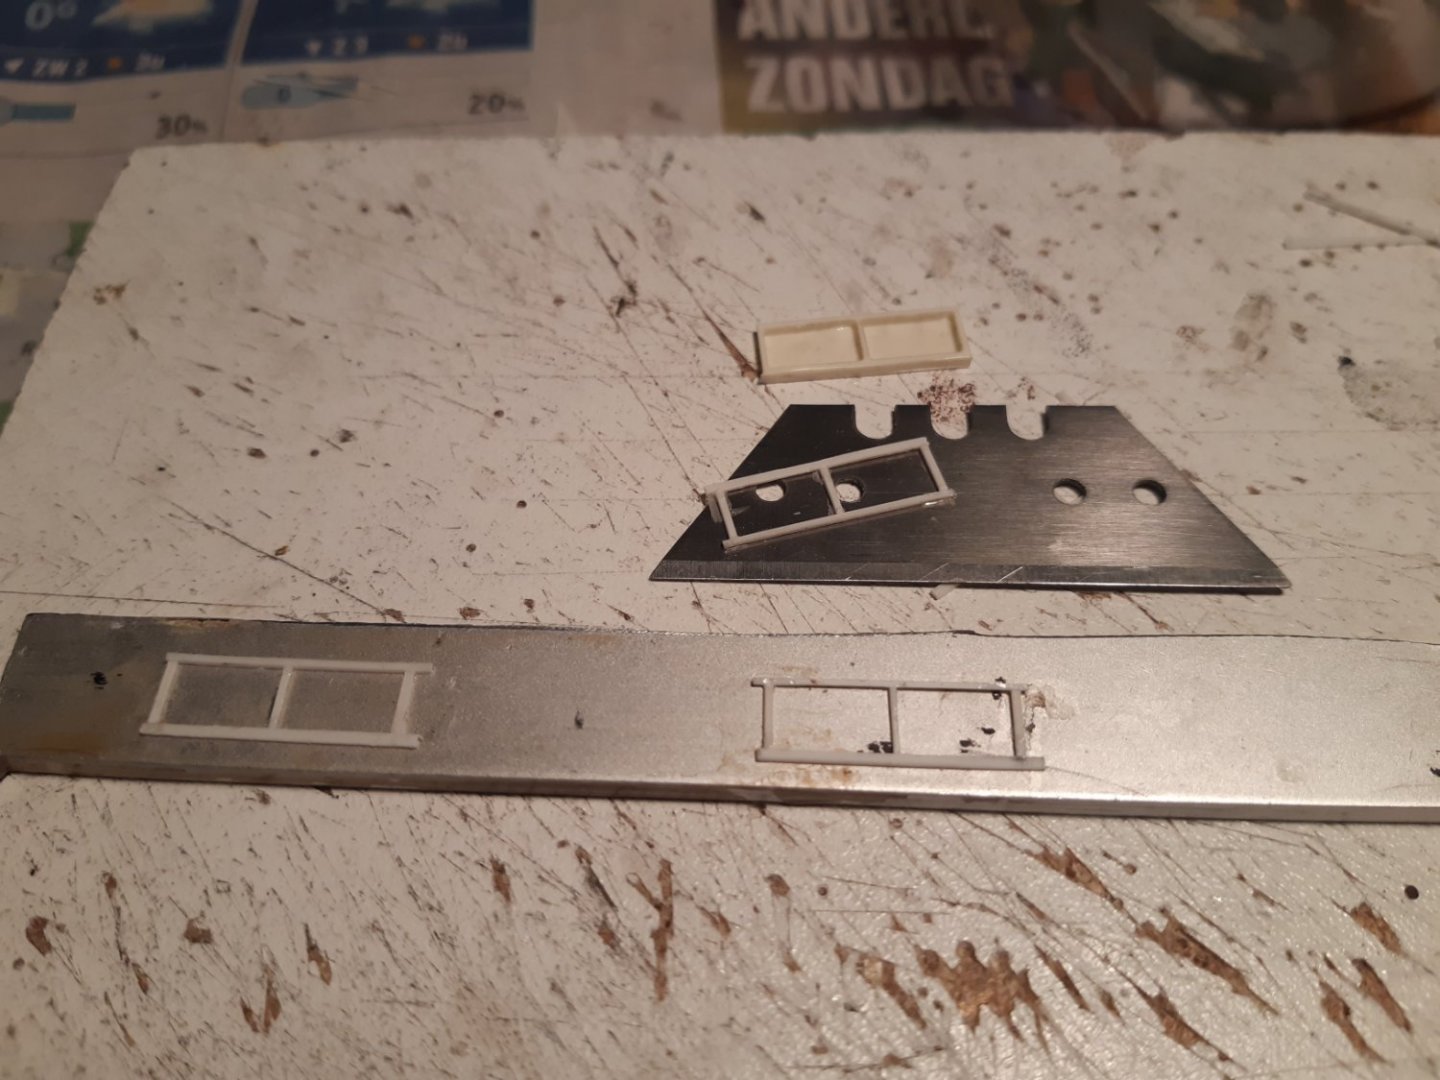
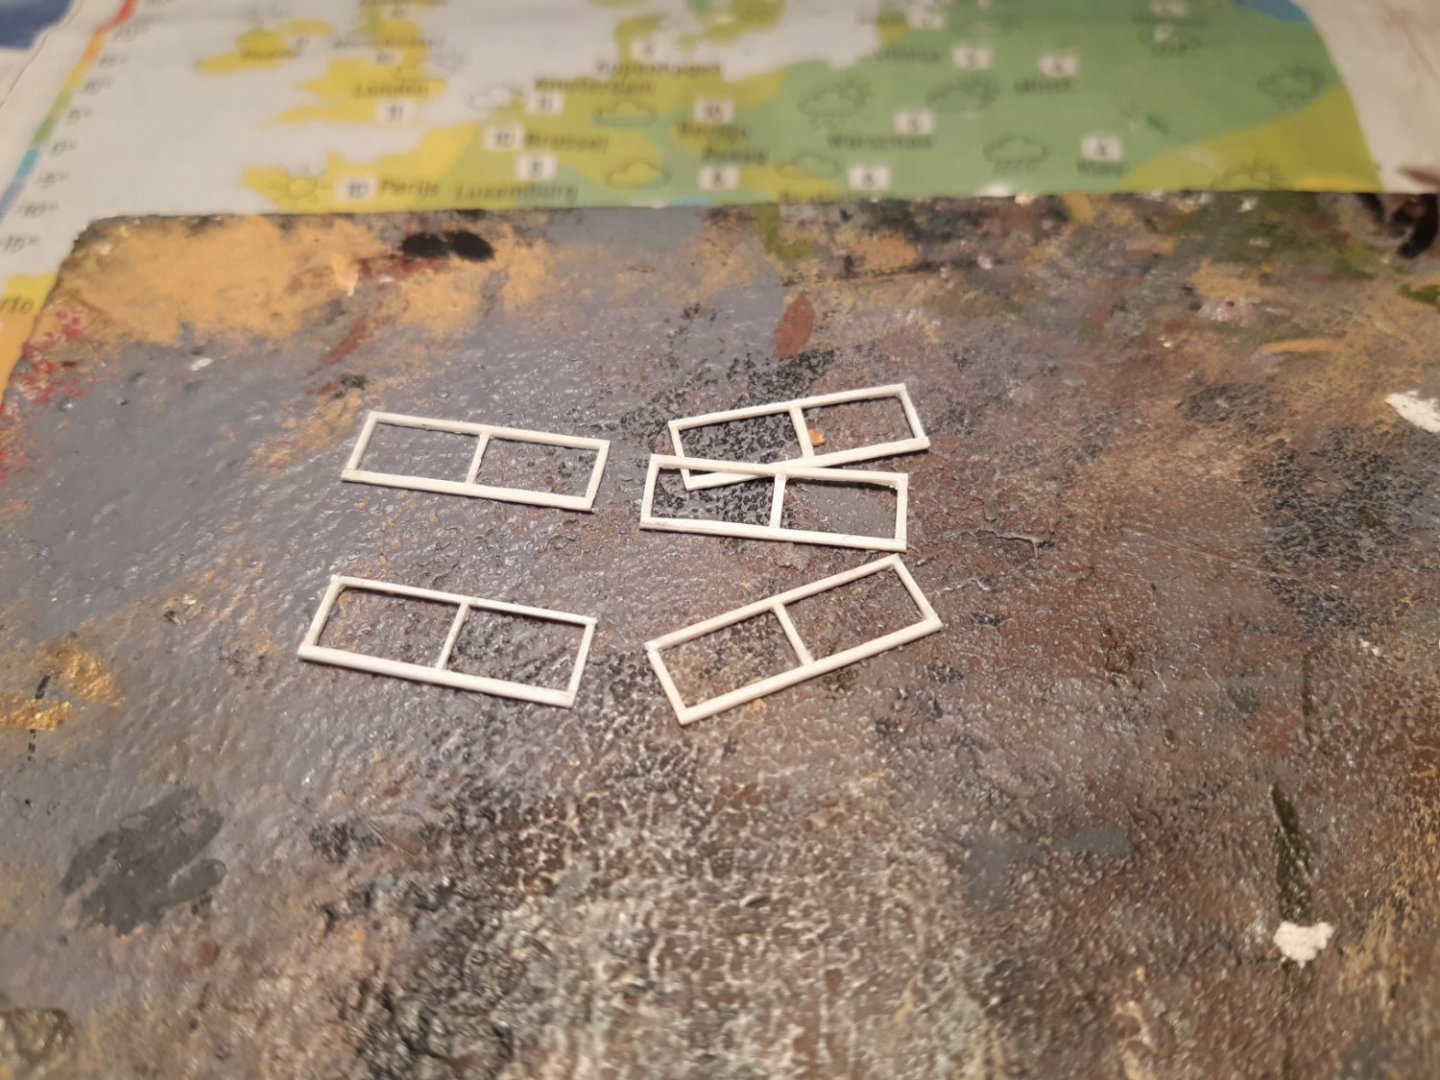
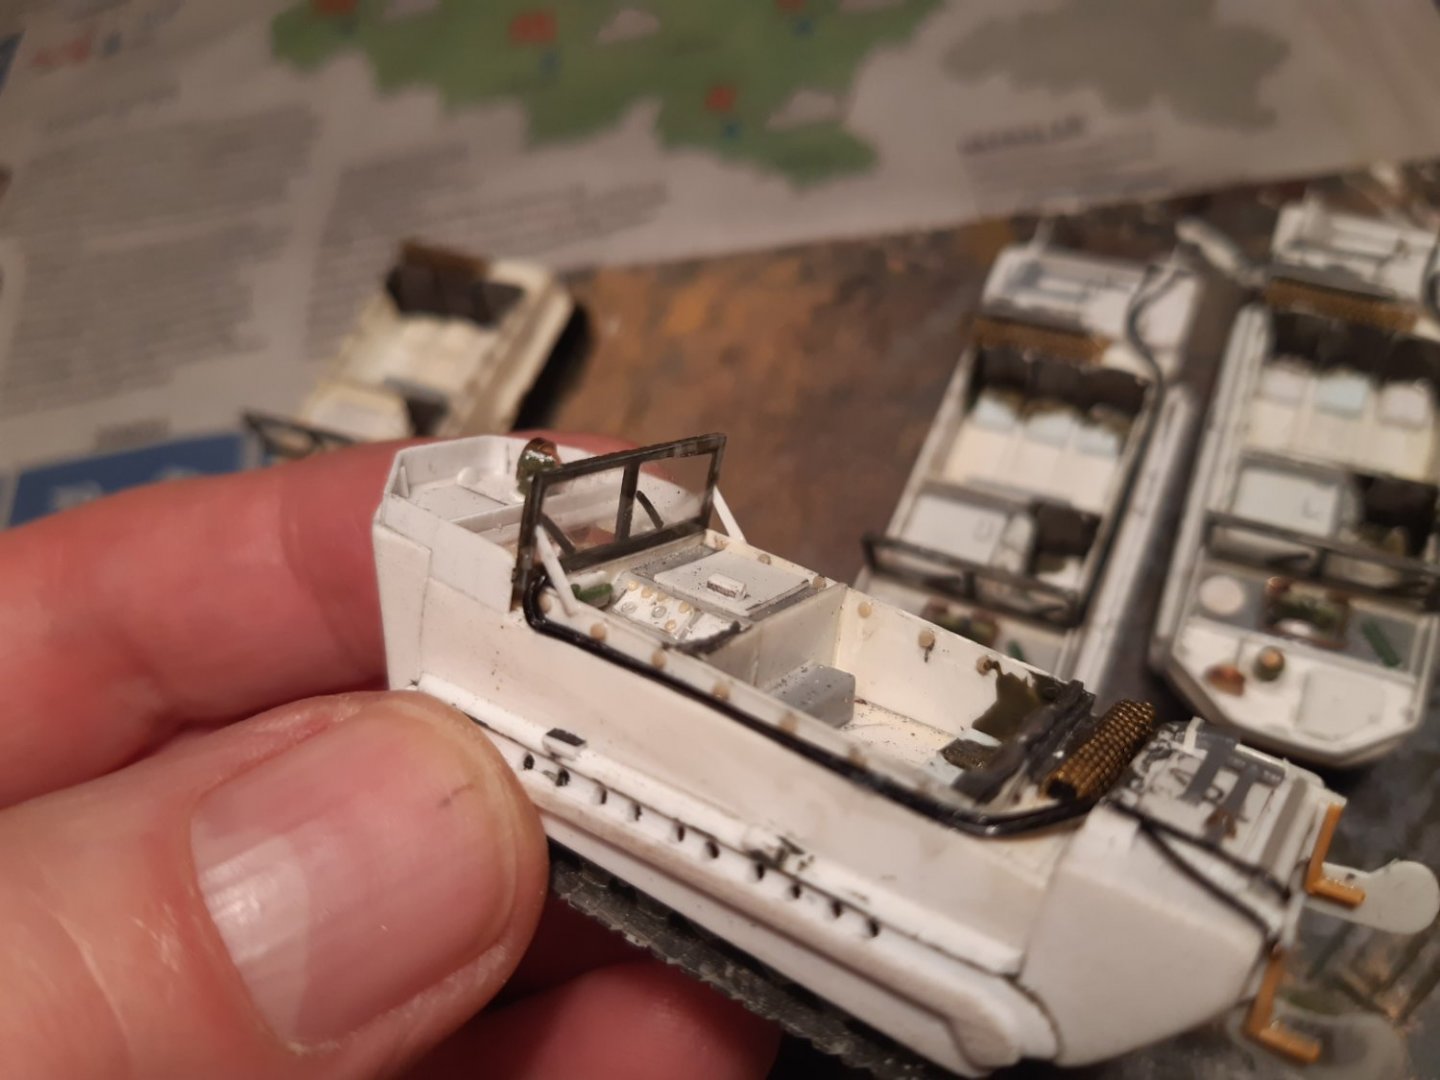
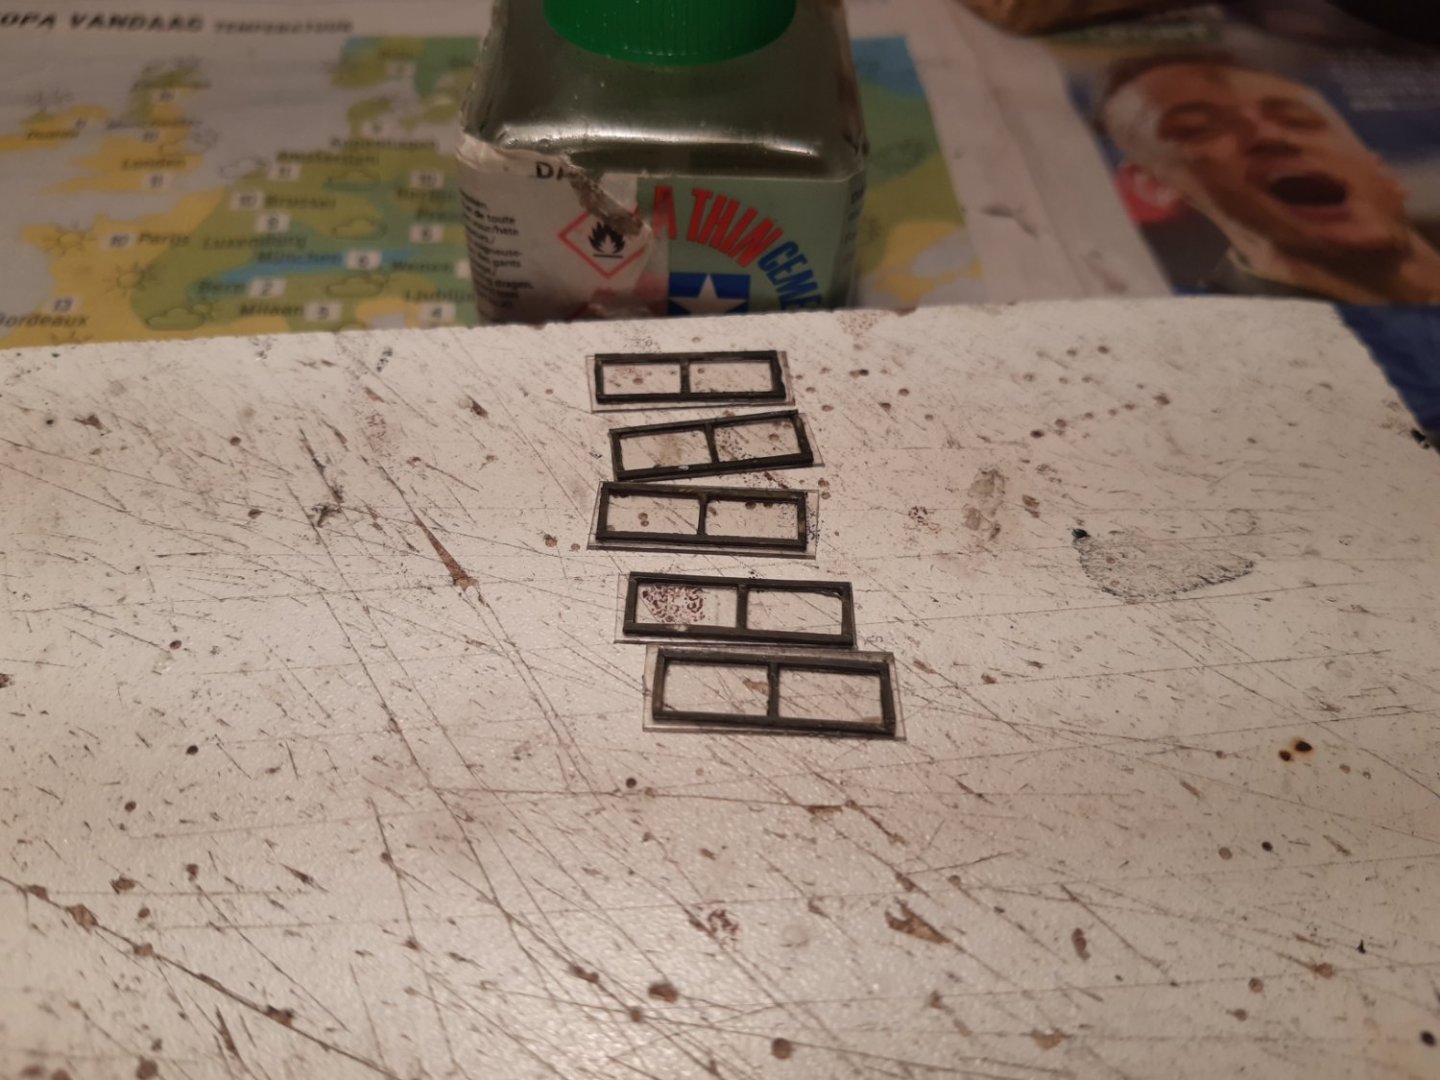
Windows. I use the resin window as "mold" First I cut plastic strips and a piece of aluminum is the base on which the strips are glued together. The glued plastic does not stick to the aluminum cut loose 5 windows I first paint them green and then glue on clear plastic sheet. I cut away excess clear plastic and ad windshield wipers in place 5 weasels, washed with soap and water And with a base layer of paint From now on, this build can't go wrong anymore Thanks for following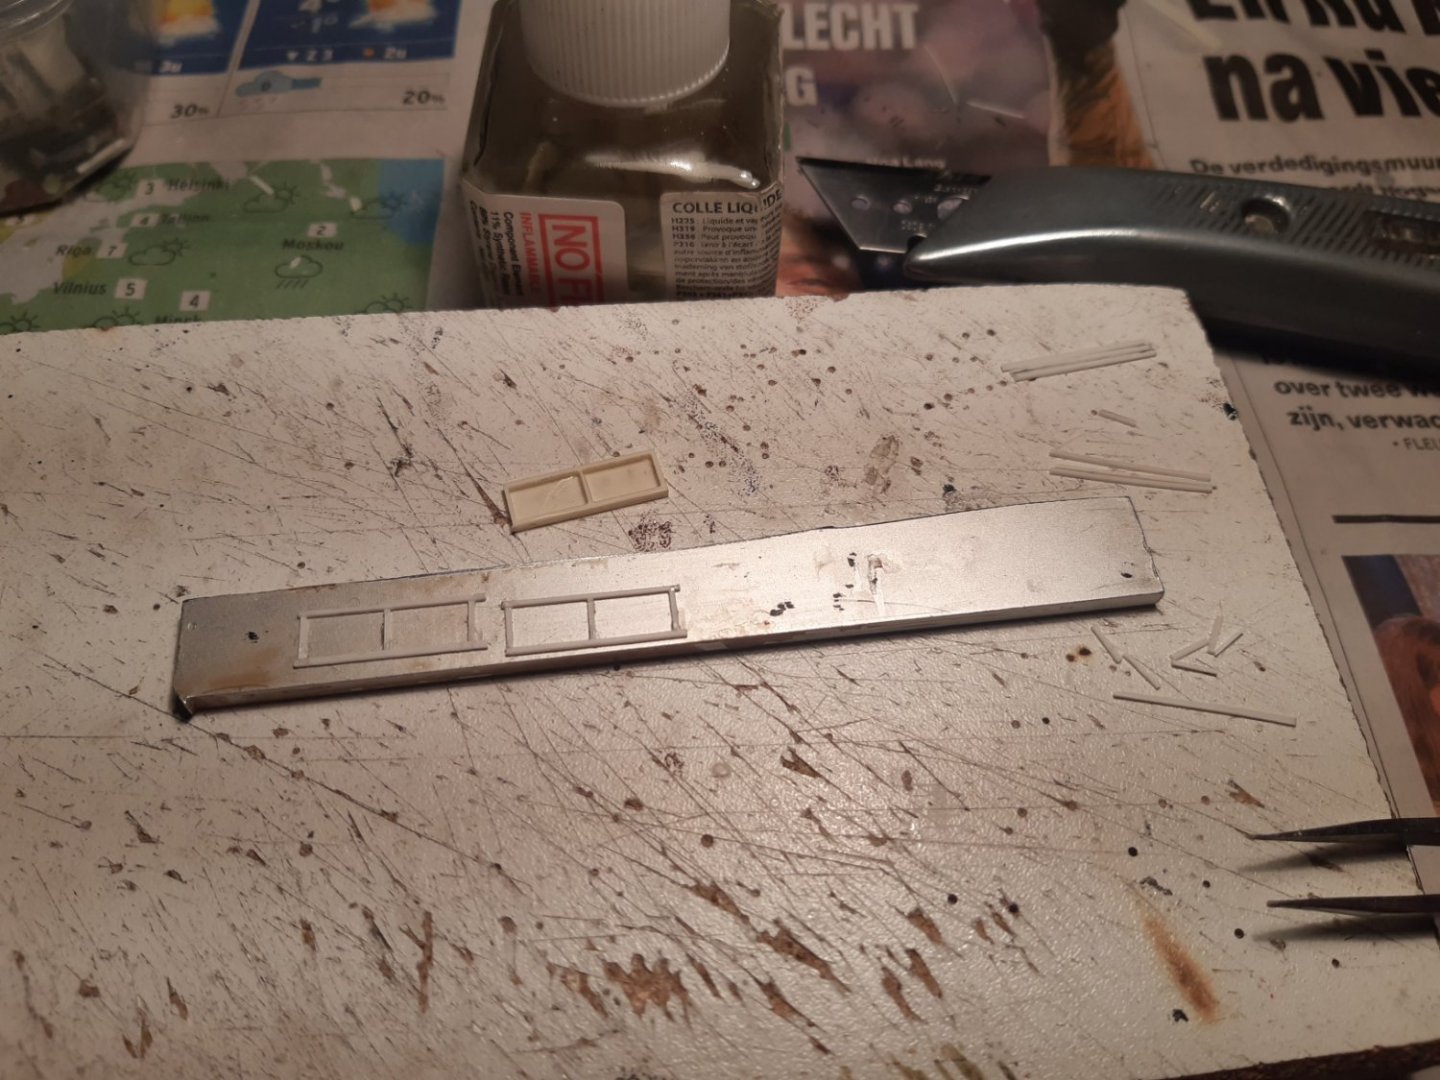


- 50 replies
-
- 11
-
-

-
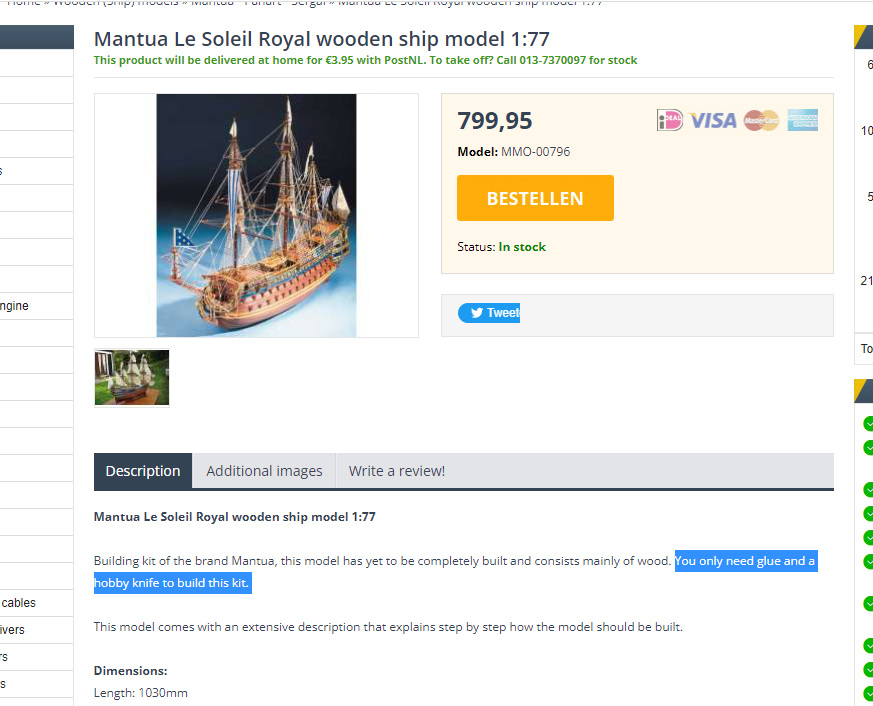
When I saw this ad I was a bit shocked Found on a Dutch website (translated to English) Building the Soleil Royal of Mantua should be easy. All you need is glue and a hobby knife ... To all beginners: this is really not true
-
Great start!
-
Nice start, In case you didn't find them yourself. Some links on the forum about planking. https://thenrg.org/resources/Documents/articles/PlankBending.pdf https://modelshipworld.com/forum/98-planking-downloads-and-tutorials-and-videos/
- 18 replies
-
- 3
-
-
- marie jeanne
- Billing Boats
- (and 1 more)
-
Difficult subject. In my opinion, Yes With these drawings you could build a (heavily) armed merchantman. The stern gallery and the poop deck should not be present. But, Since no one can really prove what the Golden Hind really looked like, you can also use these drawings for this purpose. But (again) that's my opinion.
-
Congratulations Rodolfo. It was a pleasure to follow the build of this beautiful model