HOLIDAY DONATION DRIVE - SUPPORT MSW - DO YOUR PART TO KEEP THIS GREAT FORUM GOING! (Only 24 donations so far out of 49,000 members - C'mon guys!)
×


petervisser
-
Posts
574 -
Joined
-
Last visited
Content Type
Profiles
Forums
Gallery
Events
Everything posted by petervisser
-
 Hi Glen, You have a great looking model so far. I used muslin cloth for the sails on my E'toile, which seemed to me to be a satisfactory weight. It's tough to get a good substitute for canvas at this scale. Muslin cloth is used by seamstresses for pattern templates and is readily available at fabric shops. It has a similar colour to canvas as well. I use it on all my models with sails and it looks and feels ok. As for another topsail schooner, Billing also produces the Lilla Dan which is still in production I believe. The lines are not as fine as E'toile, but still, it's a nice model. Brigs are a nice substitute to topsail schooners if you're still looking... Happy modelling! Peter
- 101 replies
-
- 1
-

-
- L Toile
- Billing Boats
- (and 1 more)
-
Greetings from the Pacific Northwest
petervisser replied to ErRains's topic in New member Introductions
Hiya Eric and welcome to the site. Sounds like you have a good perspective on what you want to achieve and a healthy respect for this intricate hobby. If I can offer one piece of advice, chose a model that appeals to your eye the most. One you could stare at for a good long while when it's complete. Oh, and take your time. I guess that's two pieces of advice... Anyhow, you're off on the right foot, having found this site. I wish you many happy hours of building! Peter -
Aloha g, I have built a newer version zeeschouw which Billing produced. There is a build log here on the site. It may not be the same model, but chances are the assembly of the model is similar. Check it out if you like. https://modelshipworld.com/index.php?/gallery/album/722-zeeschouw-by-petervisser/ Cheers, Peter
-
Hi Steve, Another awesome little project on the go I see. I think it's great that you're resurrecting an old kit that was unappreciated at some point, only to be brought to back to life and given the care and attention it deserves. It's a great little kit and you're going above and beyond in making it a stunner. It will look good and anyone's mantle! Happy building! Peter
-
Looks like model heaven in your shop Keith. Model trains, model planes and of course your beautiful Victory. Living the dream my friend... Peter
-
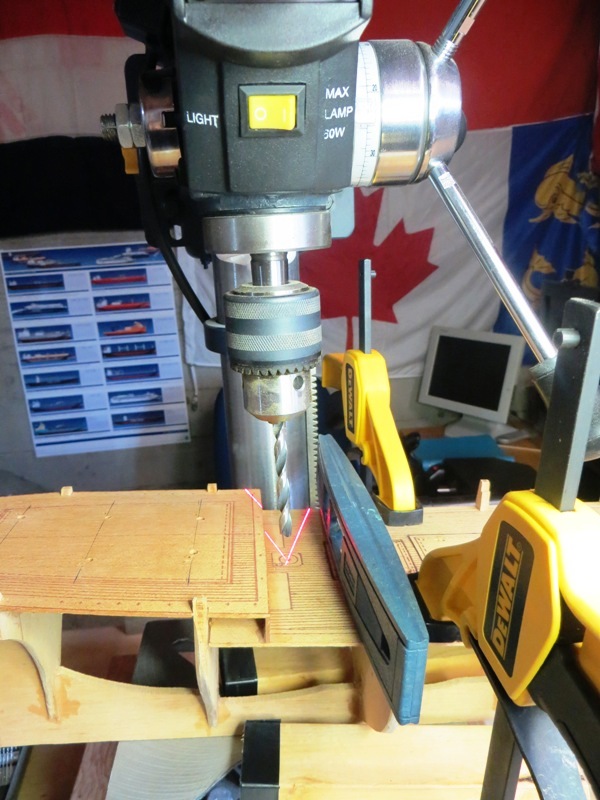
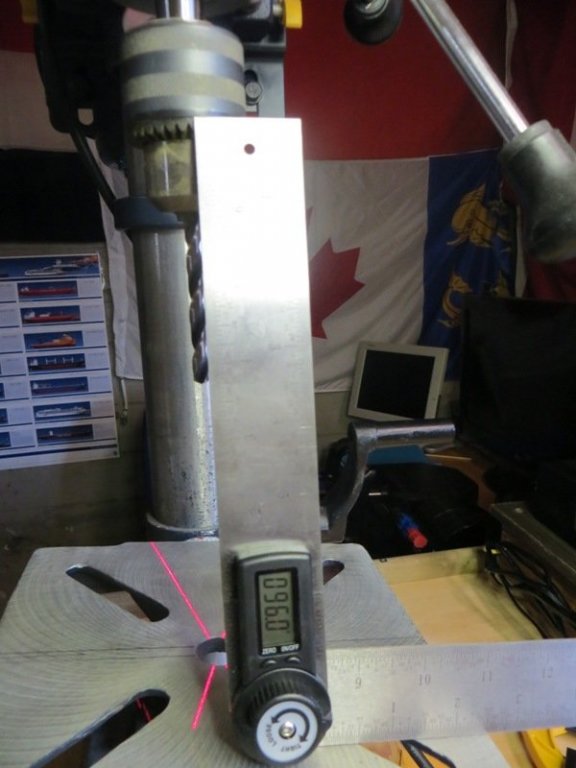
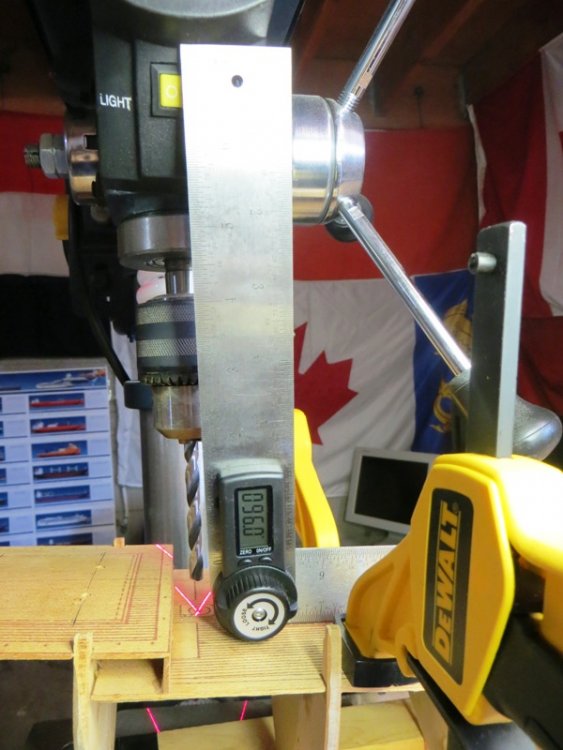
That might have been me... By trial and error, I tried setting up my drill press so as to drill the holes in the deck to accept the masts. I should point out that the masts on my model are not stepped to the keel as a proper ship. There are simply small blocks of wood glued to the underside of the deck. A Billing design that works and they were installed when I acquired this second hand model. In a nut shell, I set up the table of the drill press at the correct angle which was taken from Nepean's book concerning the Cutty Sark. I used a digital adjustable square to do so which I picked up at the hardware store for about $35. Then I gingerly clamped the model to the table and positioned it using the laser guide. Then I crossed my fingers, turned on the drill and, you guessed it, drilled. Here are some pic's of the process. It turned our fairly well, although foremast hole did not go to plan. Hence the toothpick for you eagle eyed observers...

-
Hi Steve, Great windlass! And the rest of the deck furniture is looking mighty fine too. I worked from John McKay's book as well and it was a great resource as there was no real internet yet when I built the Bounty. It is possible to write him and order large scale drawings at a reasonable price. I ordered a number of drawings to help me with the rigging. The drawings in the book are a tad small to work from. It won't be long before you get to that stage at the rate you're going! Happy building! Peter
- 291 replies
-
- 3
-
-
- bounty
- billing boats
- (and 1 more)
-
Handsome looking tourists Steve. The one gal going down the companionway looks like a go-er! Peter
- 291 replies
-
- 3
-
-
- bounty
- billing boats
- (and 1 more)
-
Wow, what a great looking model Scott. I think I just might put this on my "to do" list. Talk about a "full figured girl"! Peter
-
Hi Gil, It's good to see you back modelling. Boats that is.... I did a small sailing yacht myself after the Unicorn, and it was the "funnest" build I ever did. It's refreshing to do a simple kit after a major build and the experience is equally rewarding. Have fun with your Dragon, and I'll follow along. Cheers, Peter
- 60 replies
-
- 2
-
-
- dragon class
- billing boats
- (and 2 more)
-
Hi Steve, You're making a middle aged guy like me feel old when you refer to the 1984 film Mutiny on the Bounty, as old and original. The actual original film was made in 1935, and starred Charles Laughton and Clarke Gable. The second film Mutiny on the Bounty was made in 1962, and starred Trevor Howard and Marlon Brando. The last film Mutiny on the Bounty was made in 1984. Heck of a story though. Peter
- 291 replies
-
- 4
-
-
- bounty
- billing boats
- (and 1 more)
-
Hi Steve, Nice job on the cannons, even though they're wood... Peter
- 291 replies
-
- 2
-
-
- bounty
- billing boats
- (and 1 more)
-
Hi Steve, I'm not a slave to scale, but the bits and pieces have to look the part. The guns the Bounty carried were 4 pounders. More for "bark" than for "bite" really. The shot they fired were about the size of a tennis ball. That said, the Caldercraft cannon look a tad large to my eyes. Especially when you show one of them positioned at one of the gun ports. I vote for the Billing guns, since you're asking. As for the plastic bits, I'm not adverse to that either. A coat of suitably coloured paint hides the material from the squeamish... The Billing gun barrels are also more pleasing, to my eyes anyway. Peter
- 291 replies
-
- 1
-
-
- bounty
- billing boats
- (and 1 more)
-
Hi Popeye, I bought this model from Kip (Sawdust) a few years ago for $200. I know it sounds like alot, but he also threw in Longridge's book and a set of Campbell drawings. He purchased the kit which was in the very early stages of construction from a former neighbour for two bottles of wine. Hey, wait a minute, maybe I did pay too much! But not really. When I think of the many many happy hours I will spend putting this kit together means that the money was well spent. And it keeps me off the streets... Peter
- 207 replies
-
- 1
-
-
- billing boats
- cutty sark
- (and 1 more)
-
Hi Popeye, Thanks for the likes and the comment. Yes, I've been following your Thermopylae and don't envy the scale you have to work with. As you know, I have built a few Billing kits and they tend to be 1:50 scale. It's a scale I'm comfortable with and the fittings are easier to see and work with. Anyway your build is looking mighty fine all the same! Peter
- 207 replies
-
- 2
-
-
- billing boats
- cutty sark
- (and 1 more)
-
Great flag locker Steve. I went the same route on my own Bounty. Funny that Billing does not include this feature in the kit. Oh well, nice save! I remember using the cannons as supplied by the kit, as I didn't know any better, and they did turn out ok, with some paint and rigging. I went with buff coloured carriages, again because I didn't know any better... Anyhoo, hope you're satisfied with the replacements. I've been following your build from the wings and reliving my own time taking on this kit. Thanks for all the photos. Peter
- 291 replies
-
- 2
-
-
- bounty
- billing boats
- (and 1 more)
-
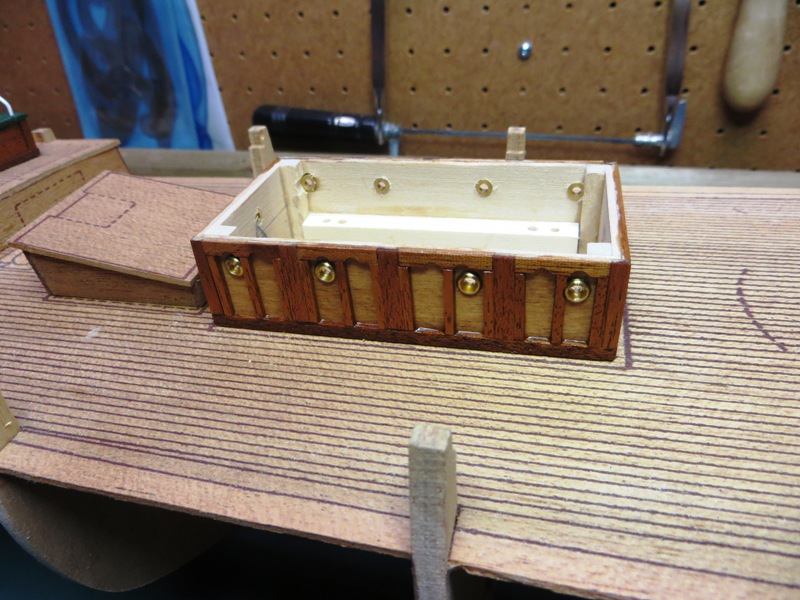
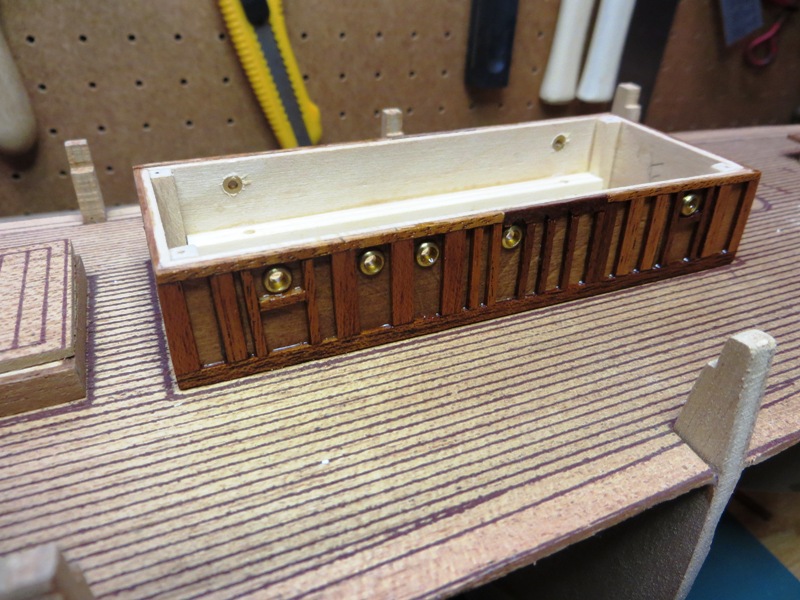
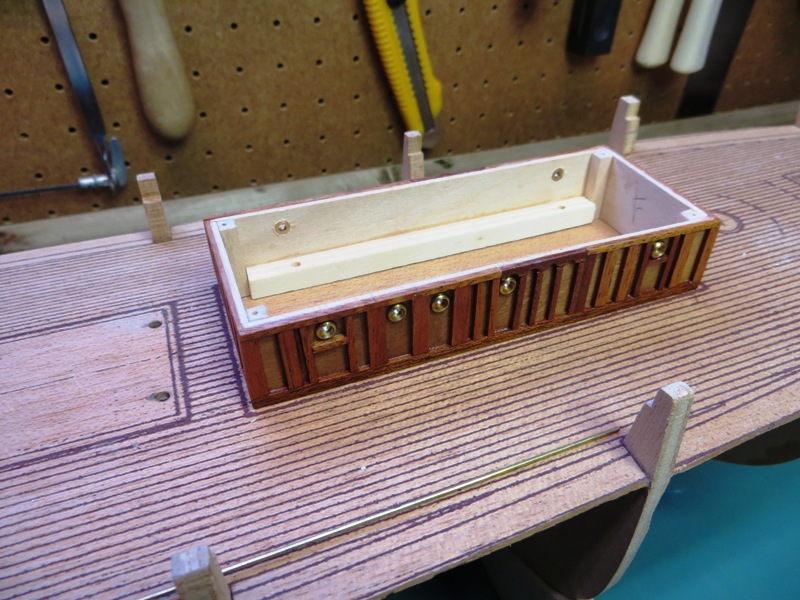
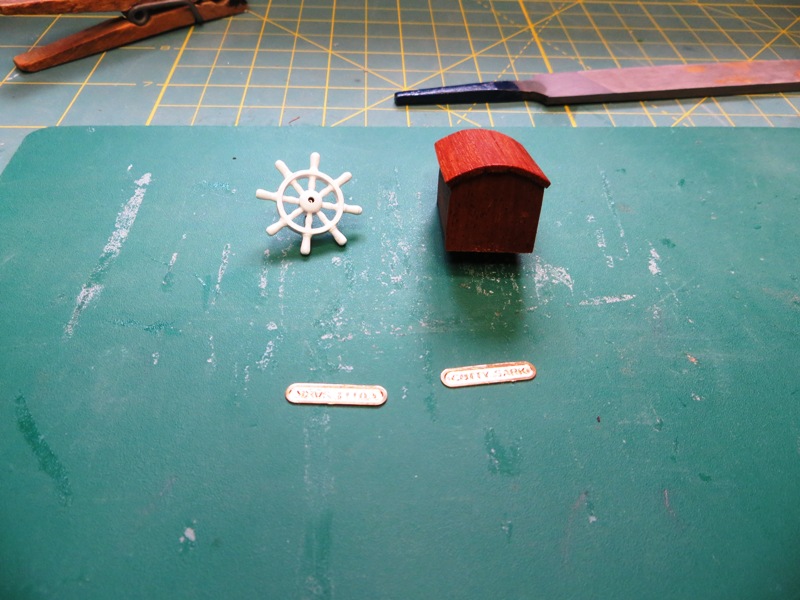
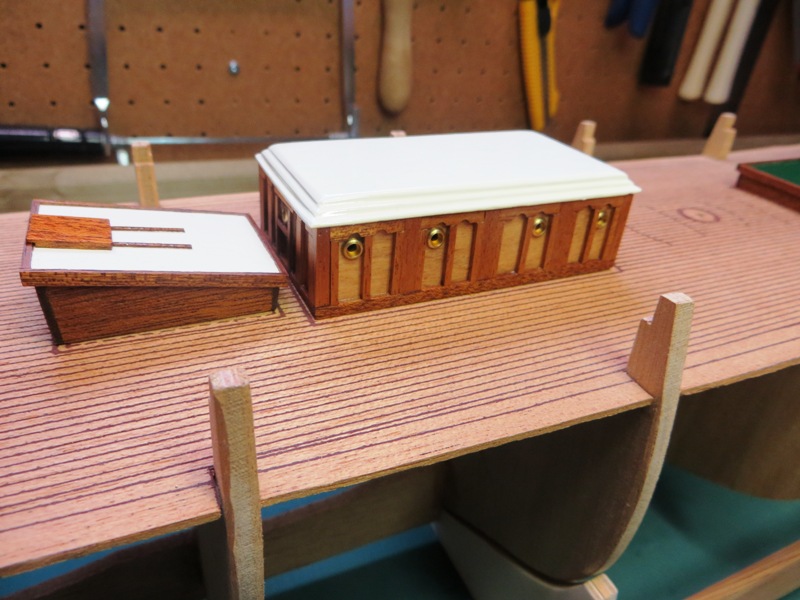
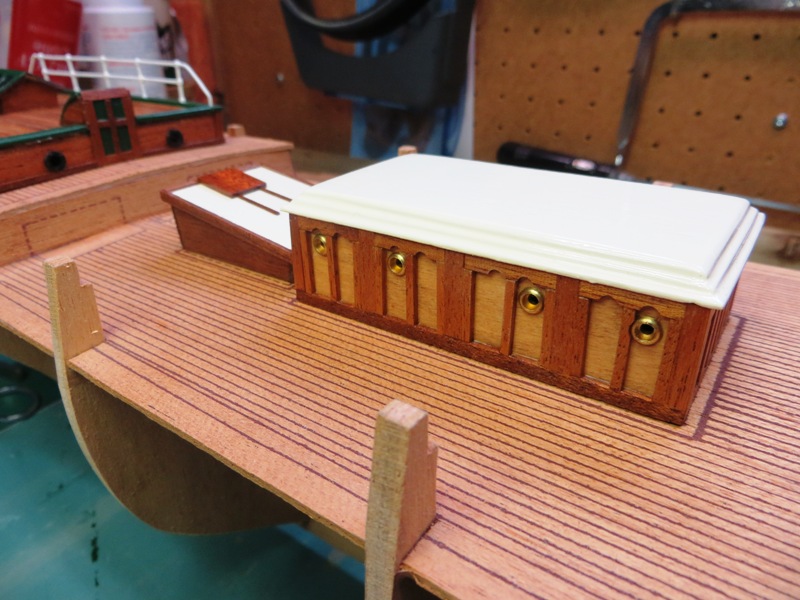
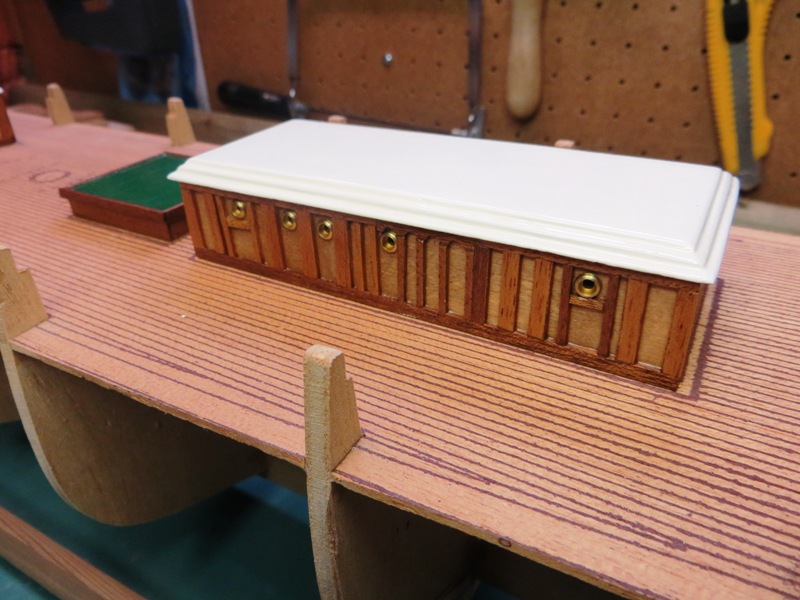
Just a quick update with the steering gear box finished. I purchased a photo etch sheet produced by Mantua for the decoration sets on the bow and stern. It also included the name plates that are afixed to the sides of the box, which make for a nice addition.
- 207 replies
-
- 4
-
-
- billing boats
- cutty sark
- (and 1 more)
-
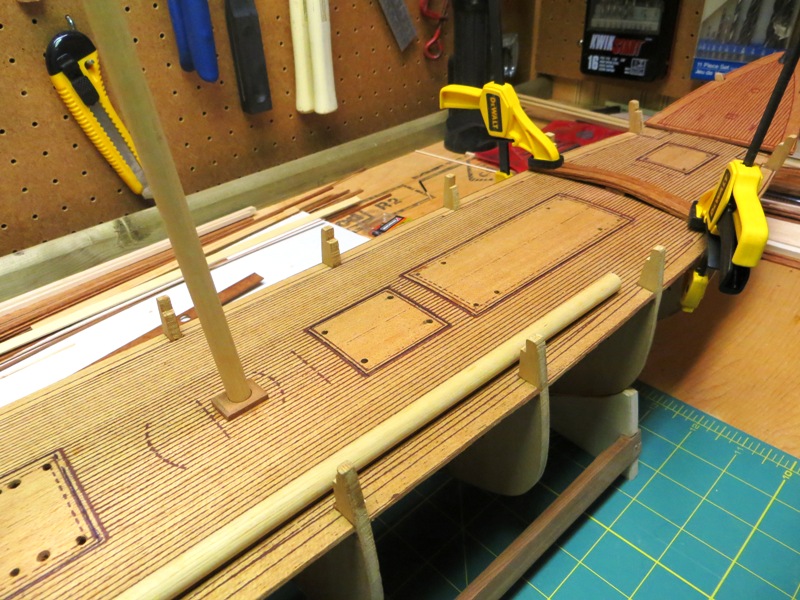
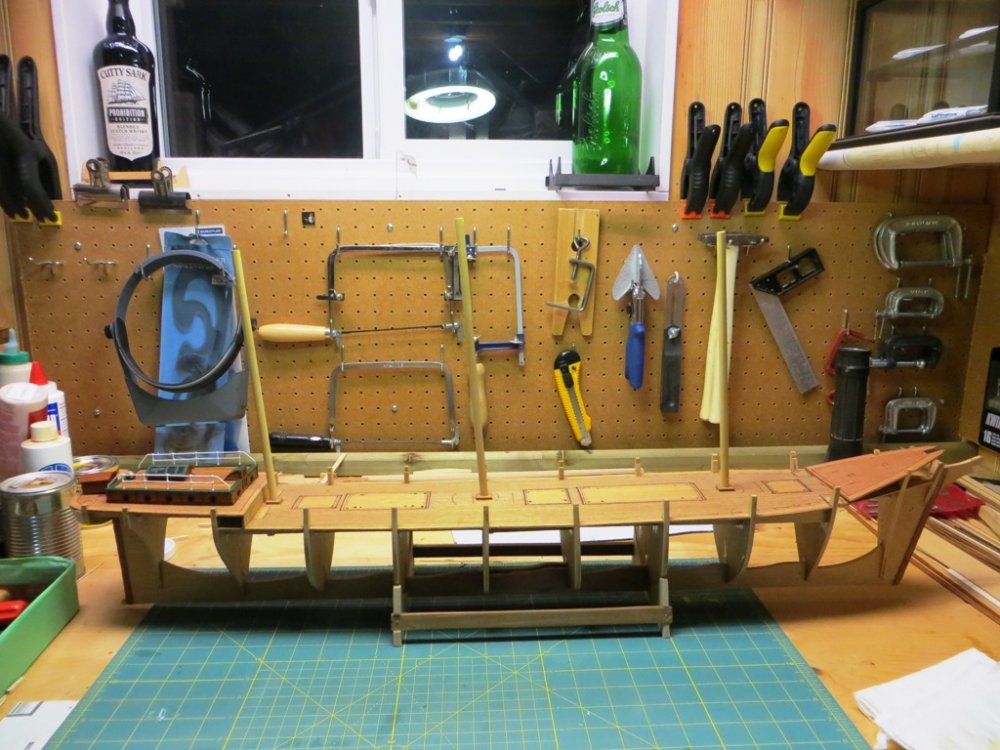
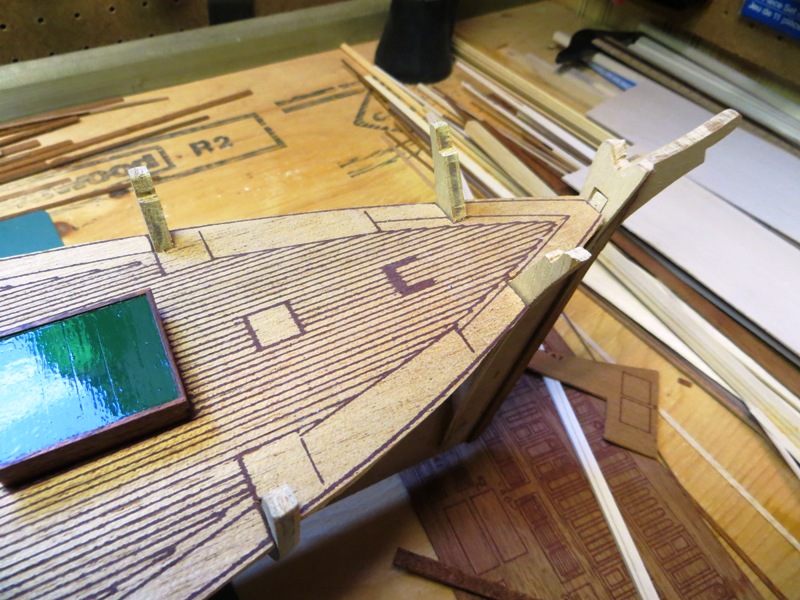
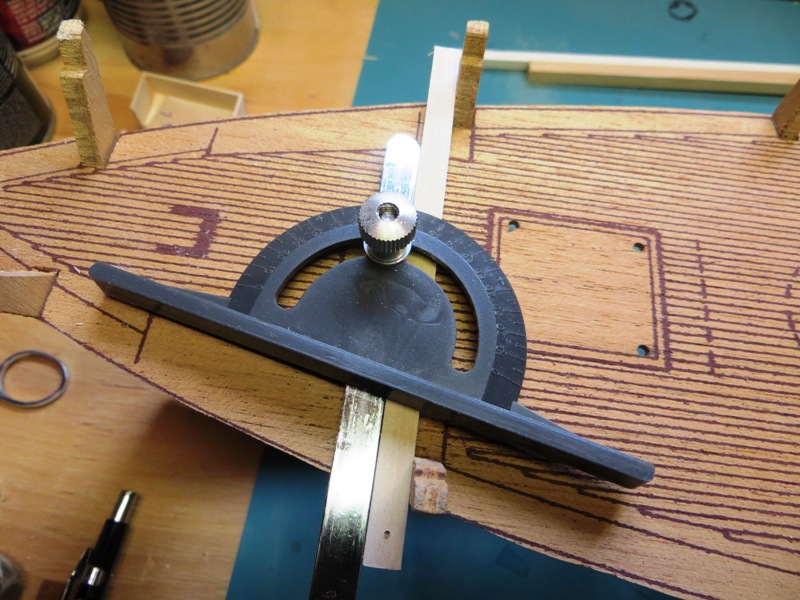
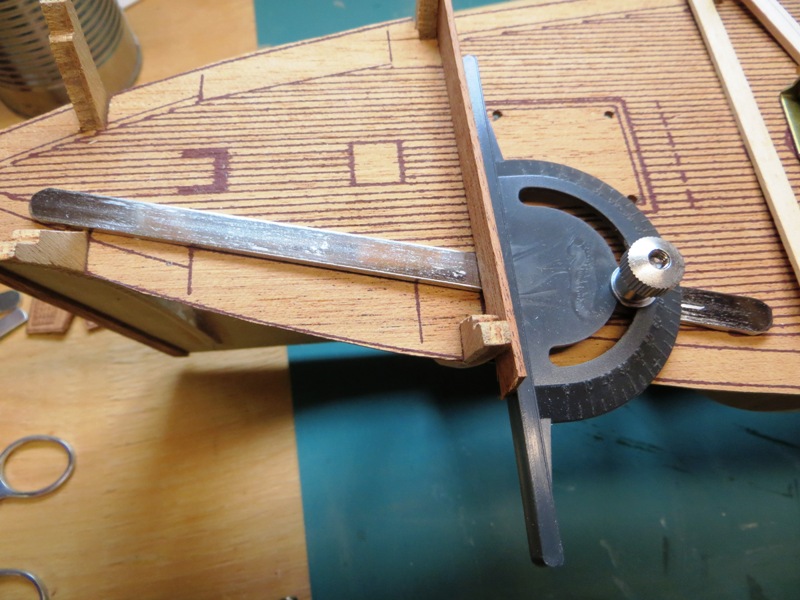
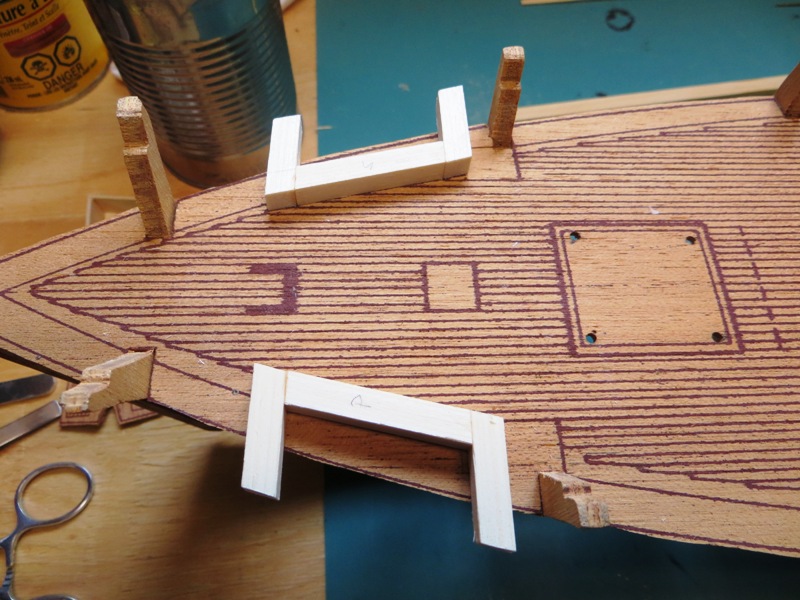
As mentioned earlier, I have decided to get as much prep work done while there is no deck or hull planking. This makes everything easier to access. So the next operation was to step the masts. This was a bit of a nail biter, because everything had to be gotten right the first time. I am happy to say that it did for the mizzen and main mast. However things went sideways with the foremast because there wasn't enough clearance under the drill bit when the model was positioned on the drill press table. Hence the collars at the base of the masts to hide the "whoops" around the base of the foremast. I managed to clamp the model on the drill press and adjust the model transversely and adjust the drill press table longitudinally to allow for the rake. I found the rakes for the masts in Longridge's book "The Cutty Sark" and used a digital protractor I purchased from Lee Valley. With everything in place and securely clamped I simply had to turn on the drill. As mentioned this worked for the main and mizzen masts. The foremast did not work so well, and I have to confess there was some foul language used. At any rate, the mast collars on the deck hid any messy hole drilling and all is well in my little world. Here are some pics of the progress...

- 207 replies
-
- 3
-
-
- billing boats
- cutty sark
- (and 1 more)
-
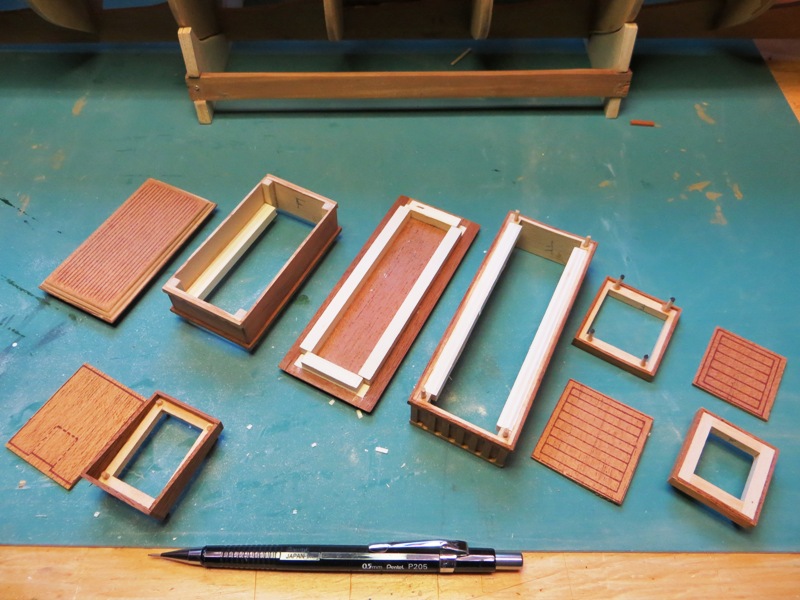
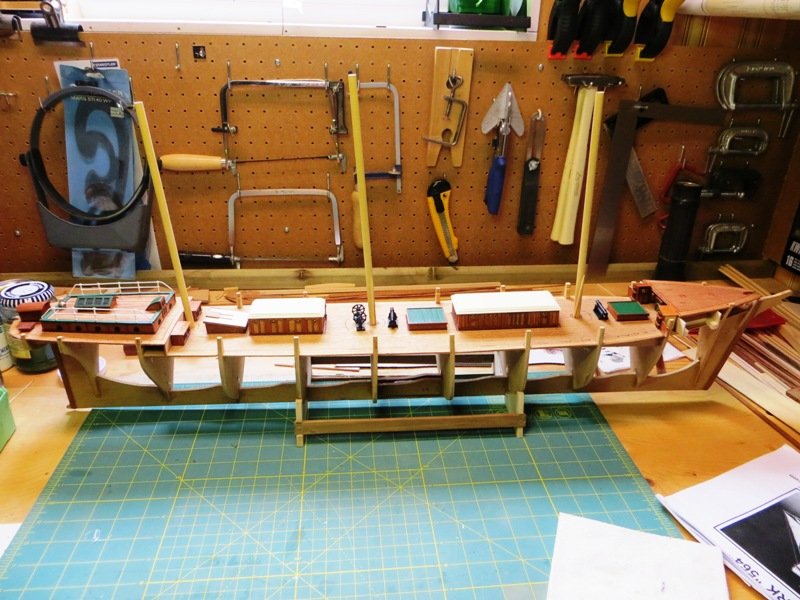
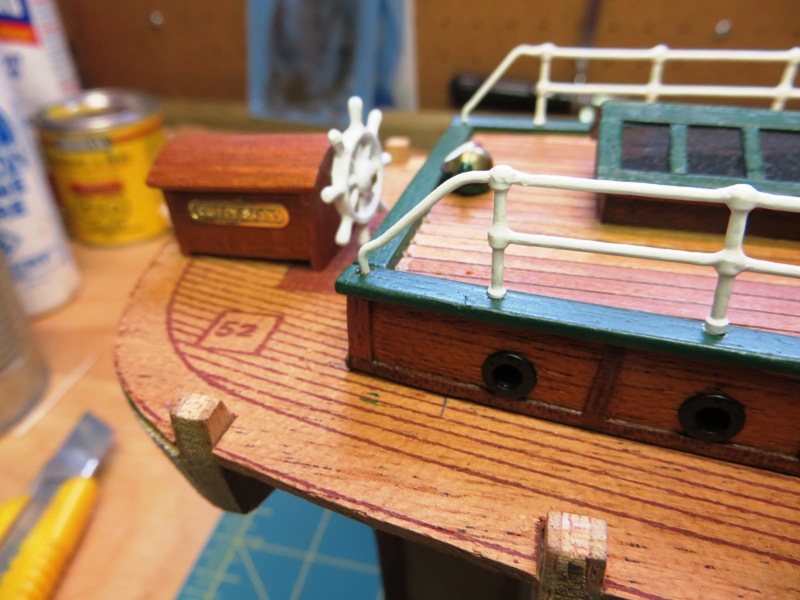
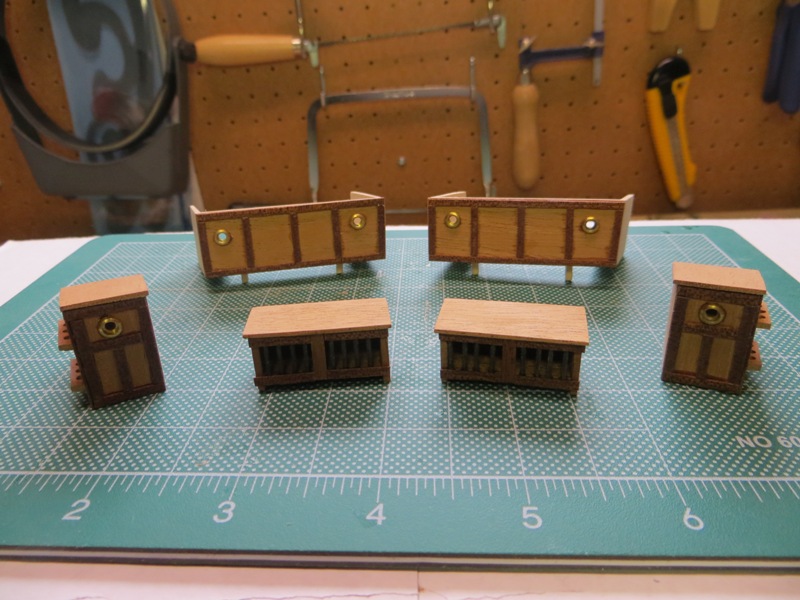
Here is the collection of deck furniture that wa assembled this week. I have yet to put some varathane on everything. I am waiting to finish the companionway before I do that. The pig sty and paint locker aren't that detailed. Because they are hidden under the fo'csle deck, I didn't spend alot of time detailing them. Peter
- 207 replies
-
- 3
-
-
- billing boats
- cutty sark
- (and 1 more)
-
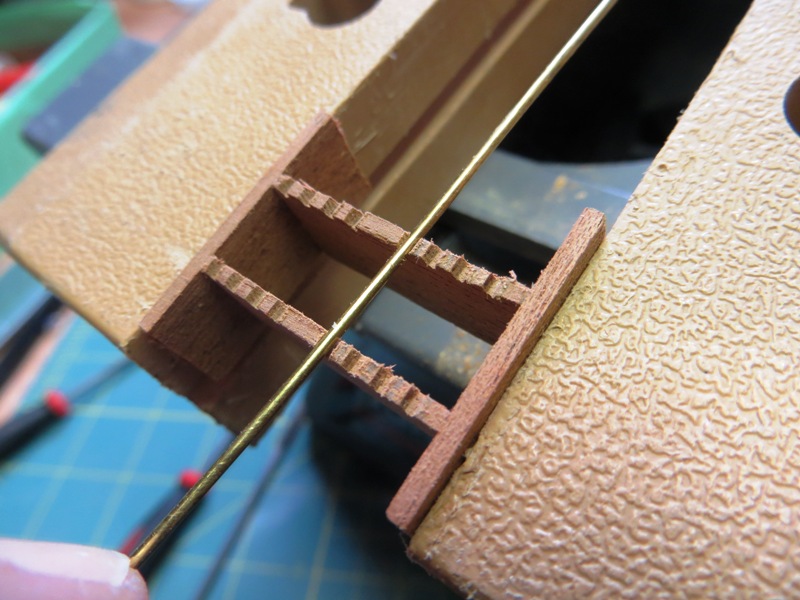
I never would have guessed when I started this hobby that I would ever have to build chicken coops for a model I was constructing. But hey, this hobby takes us down many roads and the birds have to go somewhere I guess... The Billing kit does include these little sub-assemblies, but again they are printed on an ancient sheet of mahogany and so I had to go with Plan B in assembling them. Here's how I did it... They were actually fun to build and turned out ok. I can't wait to see them installed on the model. Peter

- 207 replies
-
- 2
-
-
- billing boats
- cutty sark
- (and 1 more)
-
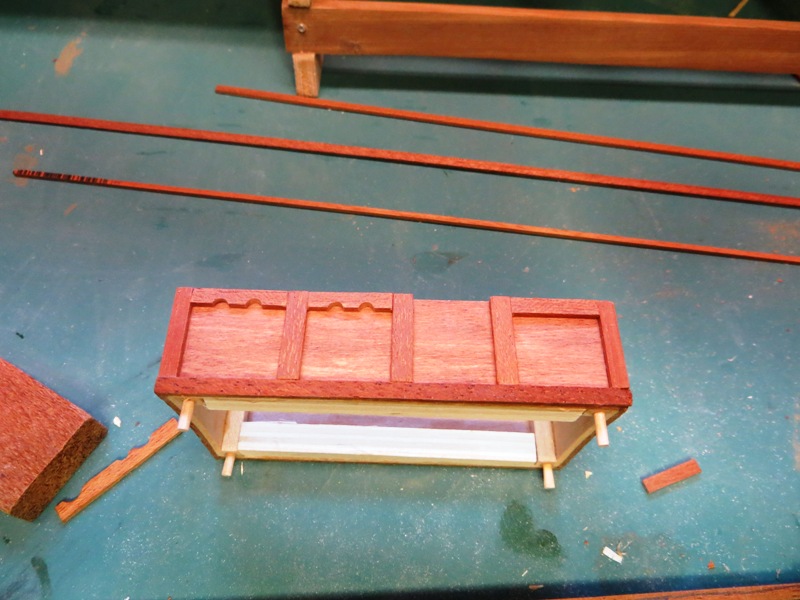
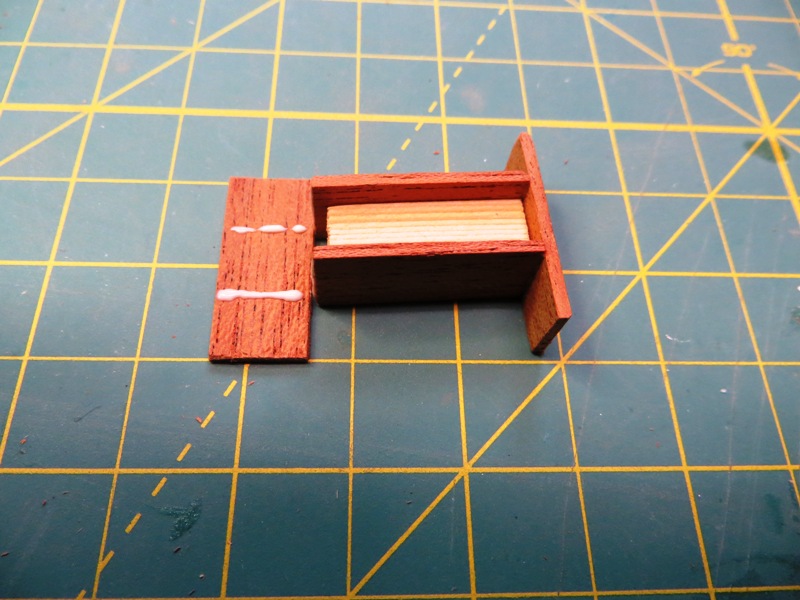
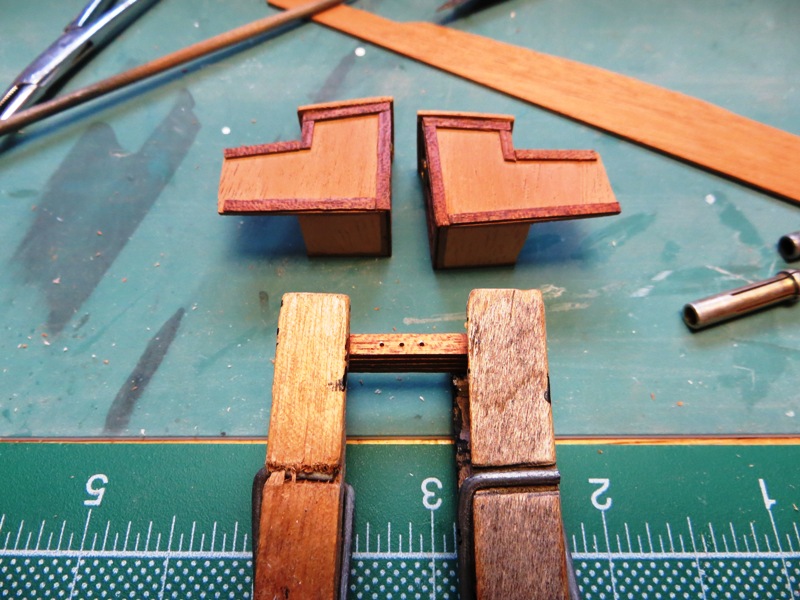
The heads which attach to the sty and paint locker were then constructed. Billing supply small plugs that can then be faced with a suitable veneer. I have lots of scrap wood for that. Again, they are built slightly oversize on the outboard side for later trimage...


- 207 replies
-
- 2
-
-
- billing boats
- cutty sark
- (and 1 more)
-
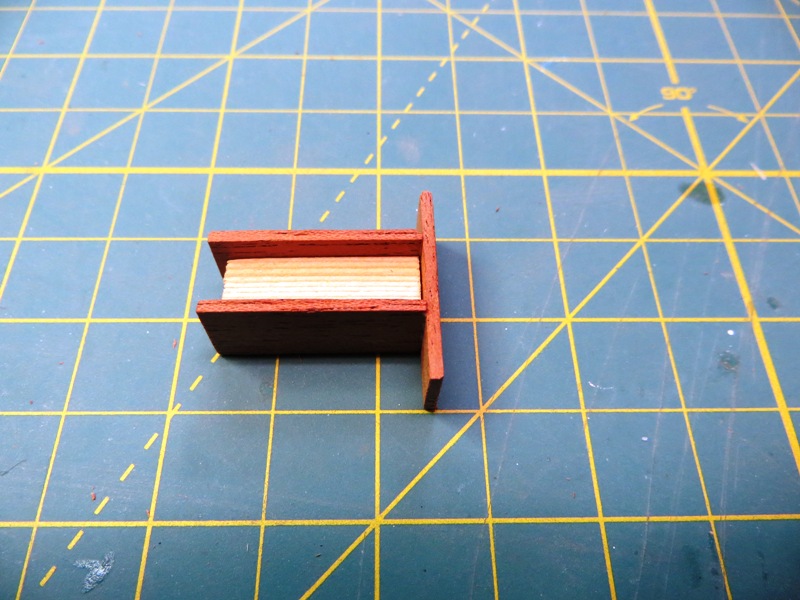
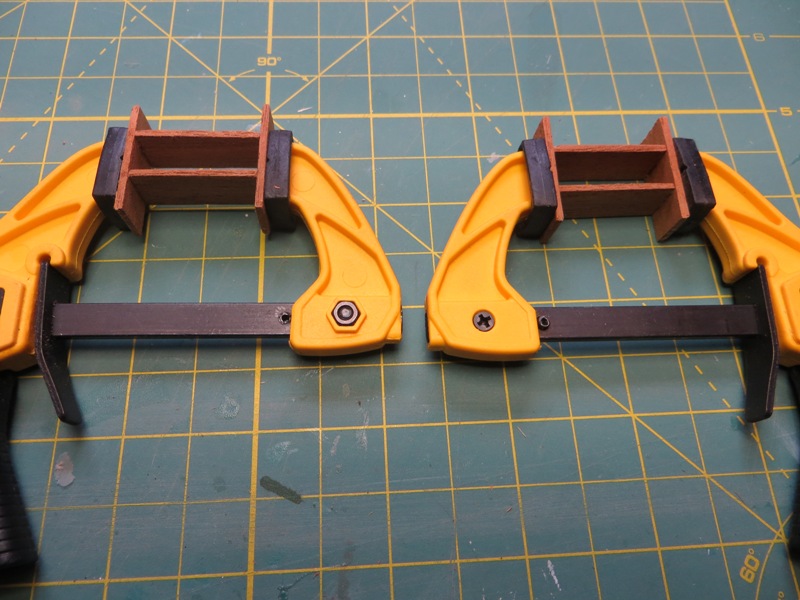
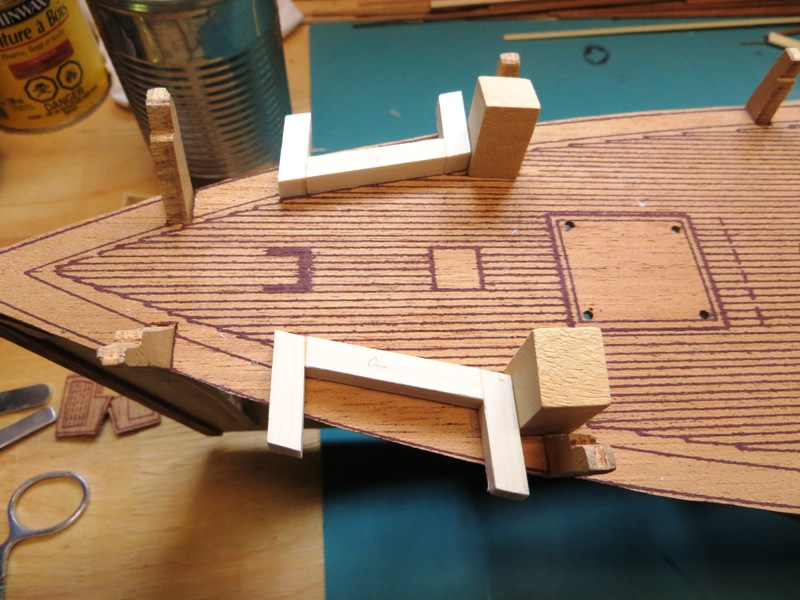
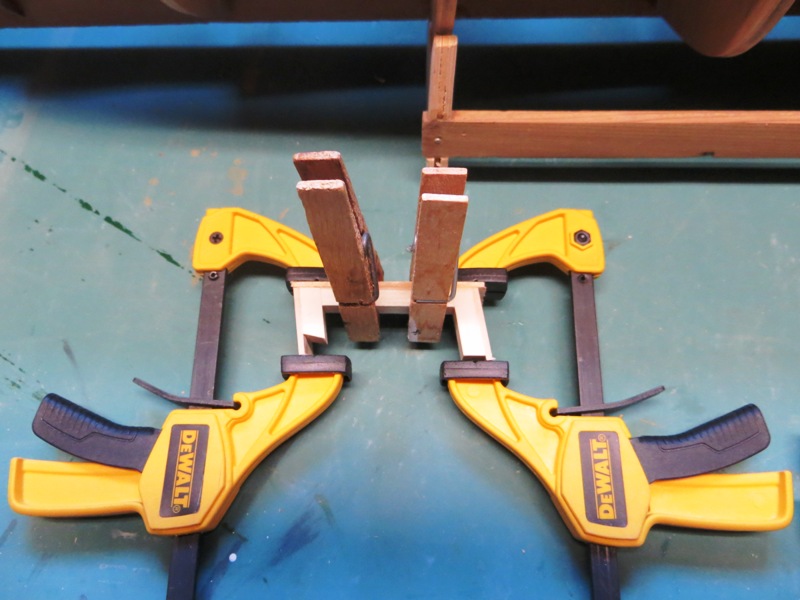
Thanks guys for the encouraging comments. They have not gone unnoticed. Work resumed in the ole dockyard this past week. It was spent building more components of the deck furniture in the forecastle area of the ship. I noticed that although the old kit included the paint locker and pig sty under the fo'csle deck, the modern instructions don't include them. Oh well, I thought I would build them anyway. there were some interesting angles and I built them somewhat oversize on the outboard sides, so they could be trimmed just before the hull planking is installed. Here then are some progress pictures... I measured the angles for the various sides first which could then be transferred directly to the little table saw I have. The square stock would then be used as a suitable backing for the bulkheads faces.
- 207 replies
-
- 1
-
-
- billing boats
- cutty sark
- (and 1 more)
-
Hi Glen, and welcome to MSW. I was excited to see your post because I built this model some time ago and have not seen it since. You are very lucky to have acquired such a unique kit. Mine was built pre-MSW and pre-internet, truth be told, so I built it much as Mr. Billing intended it. It is to this day, my favourite model that I have built. The lines of the hull and sail plan are a thing of beauty. The kit and instructions are pretty straightforward so you shouldn't have any issues. As you mentioned, the original wood may have to be replaced. My kit contained obechi wood and some mahogany strips, so my kit was an '80's version that I built when it was new. I shall follow along on your build log and re-live my time building this kit. I wish you all the best and many hours of enjoyment. Cheers, Peter p.s. Thanks for posting the photos of the actual ship.
- 101 replies
-
- 1
-
-
- L Toile
- Billing Boats
- (and 1 more)
-
And here are the finished products of just some of the deck furniture. The model building will now have a short hiatus while I go back to work... Happy modelling! Peter

- 207 replies
-
- 4
-
-
- billing boats
- cutty sark
- (and 1 more)