RGL
-
Posts
5,539 -
Joined
-
Last visited
Content Type
Profiles
Forums
Gallery
Events
Everything posted by RGL
-
 You apply it on top of your base colour, when dry, you paint over it, then when the top coat is dry, you put water on it then rub and the top coat chips off. The problem with a hull as large as a battleship is there is a very large surface area.
- 405 replies
-
- 6
-

-
- tamiya
- king george v
- (and 2 more)
-
Strait to first grade! Looks like a really nice build.
- 34 replies
-
- 3
-
-
- kearsarge
- first build
- (and 1 more)
-
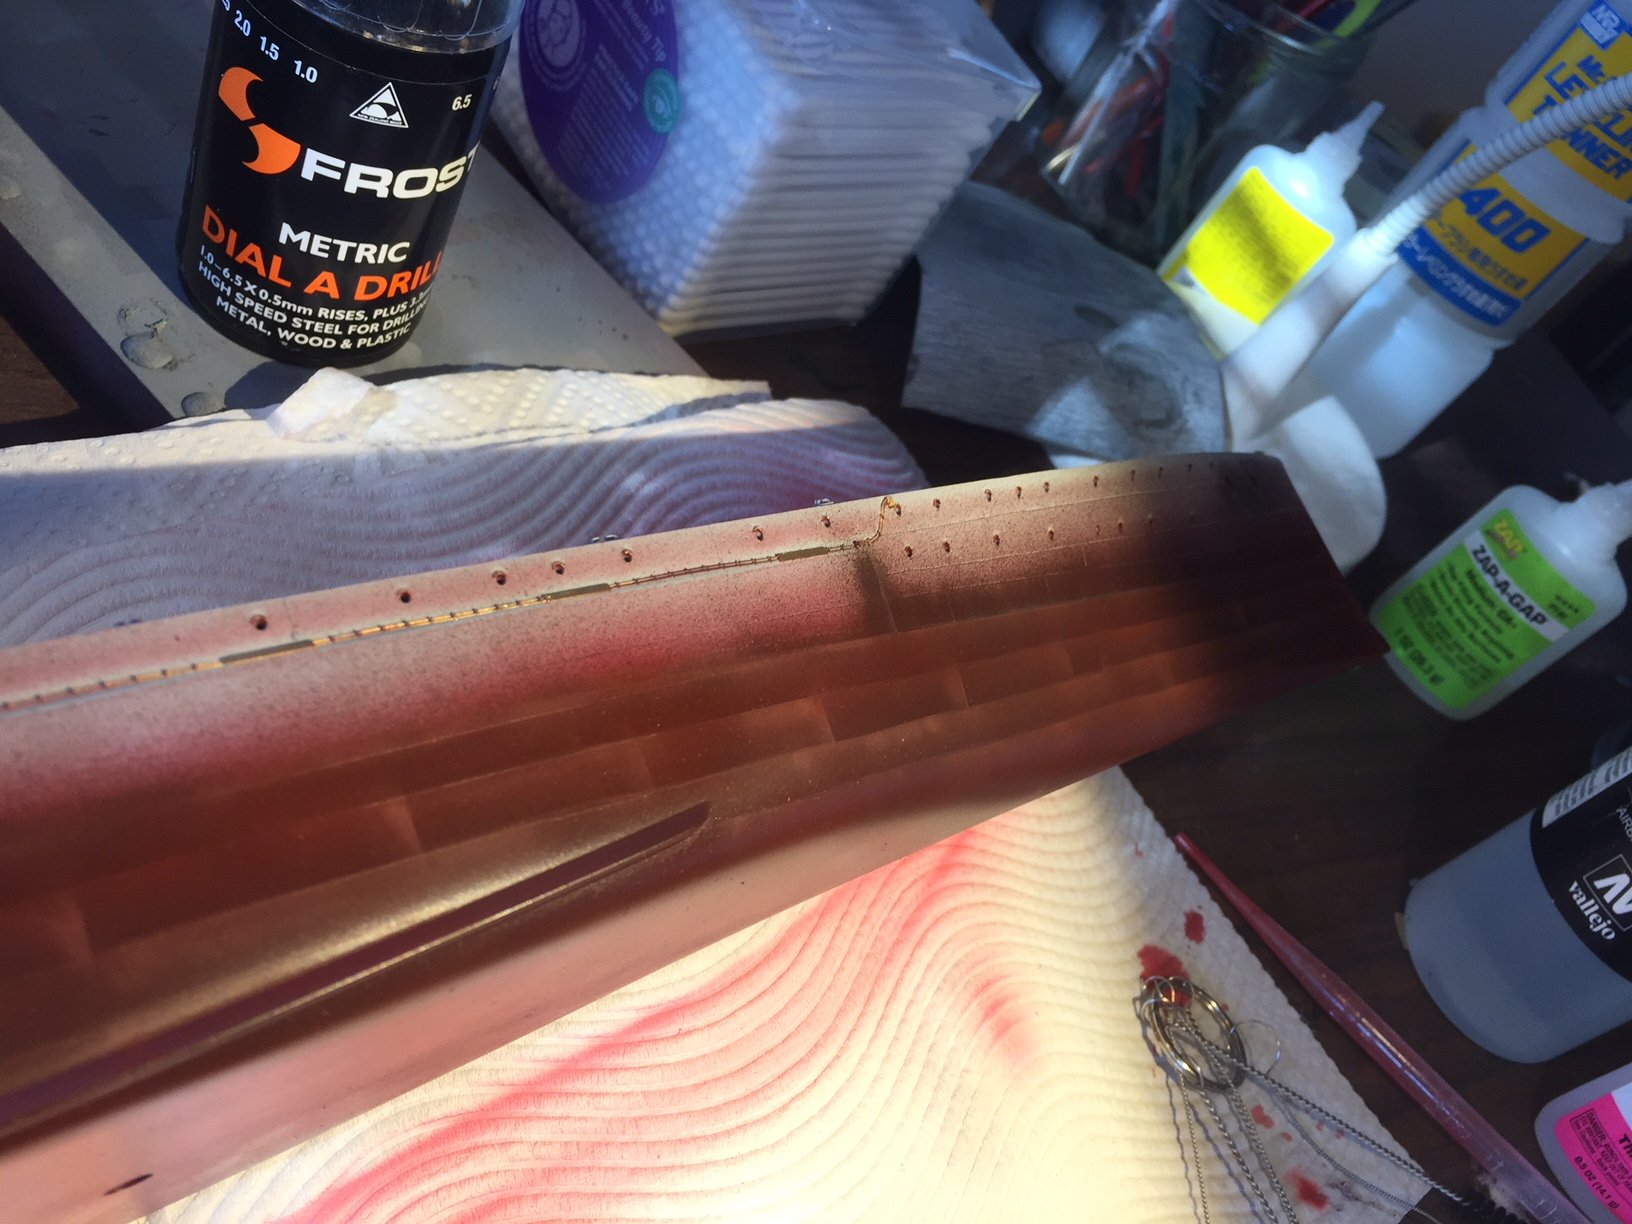
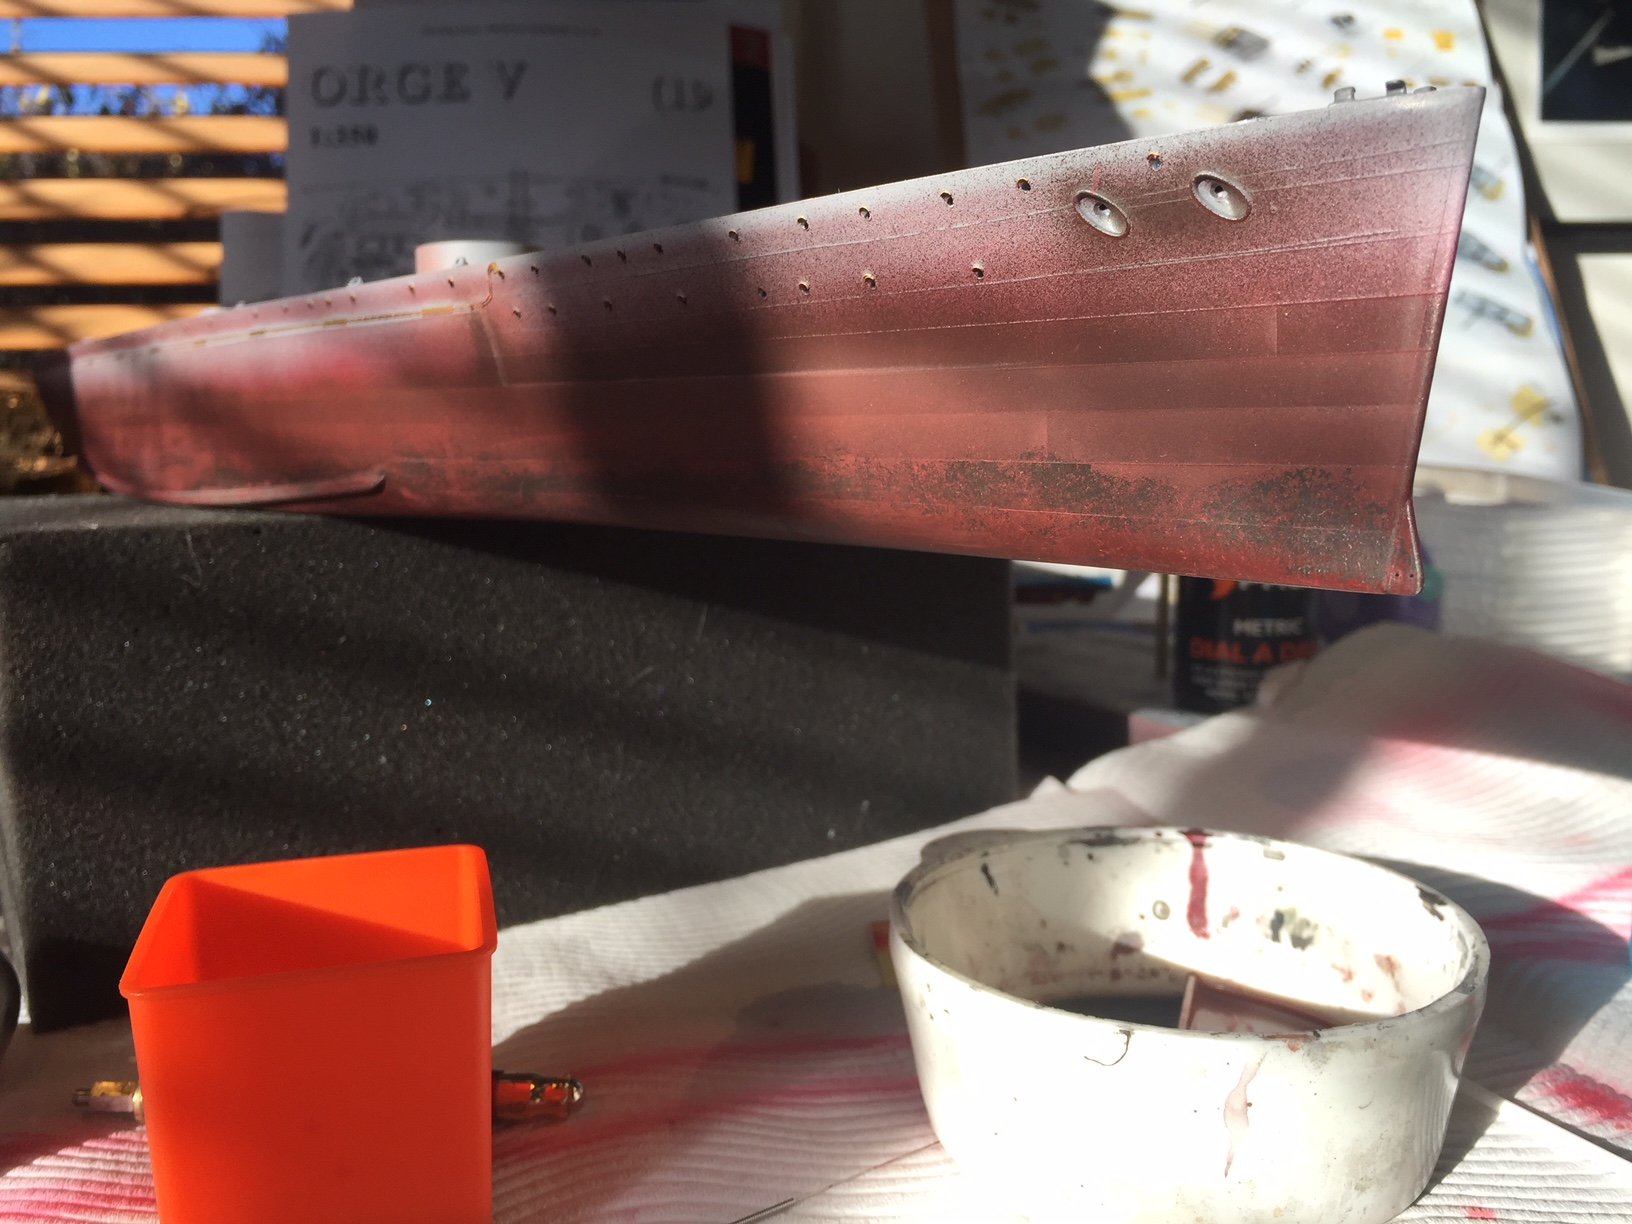
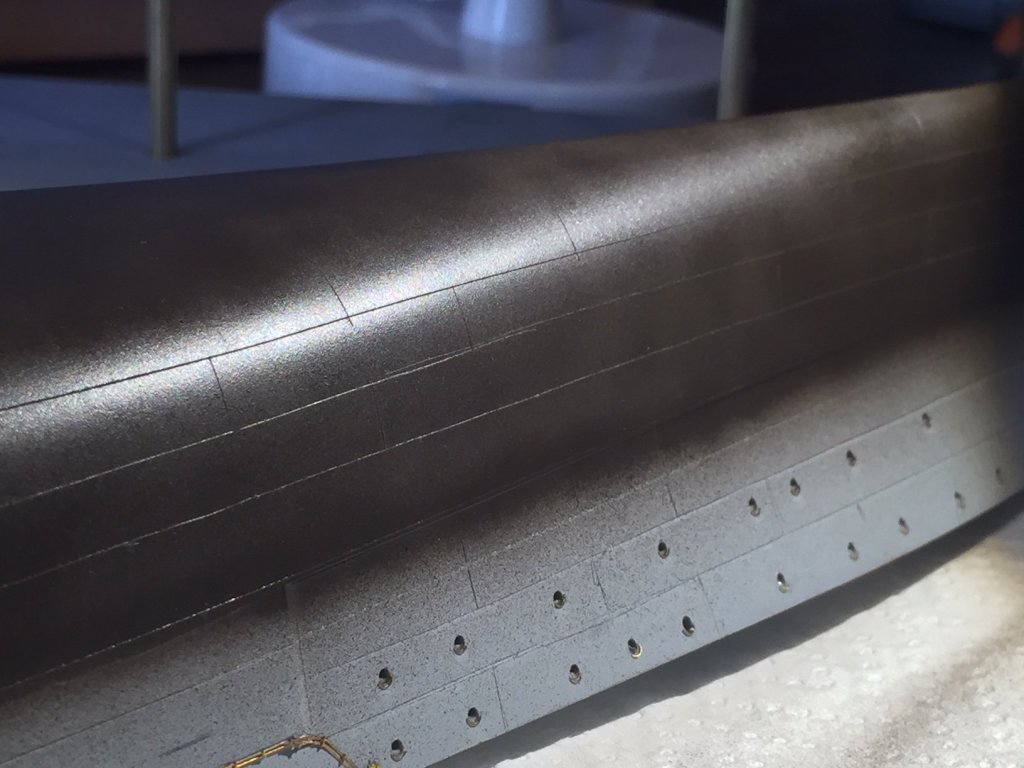
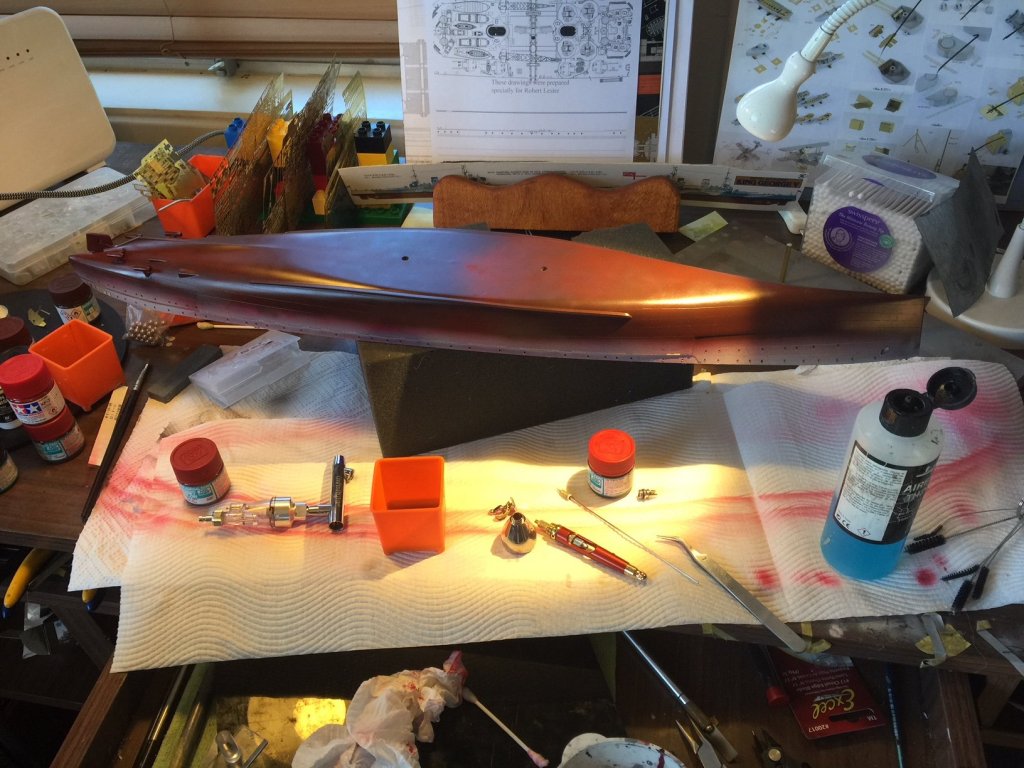
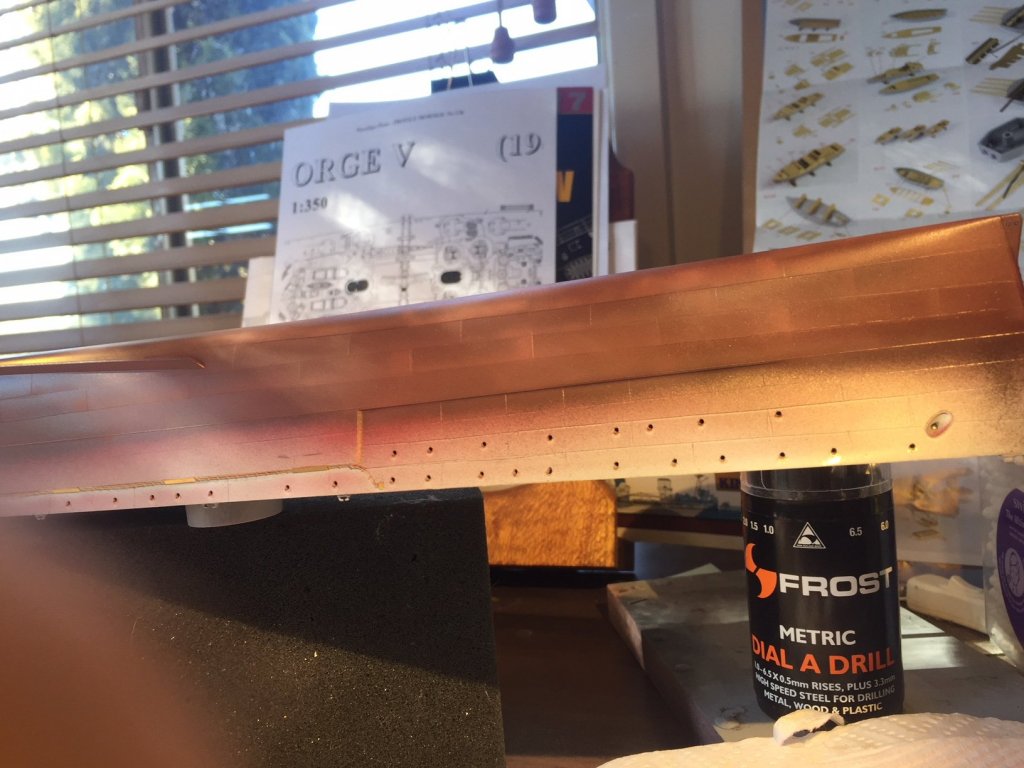
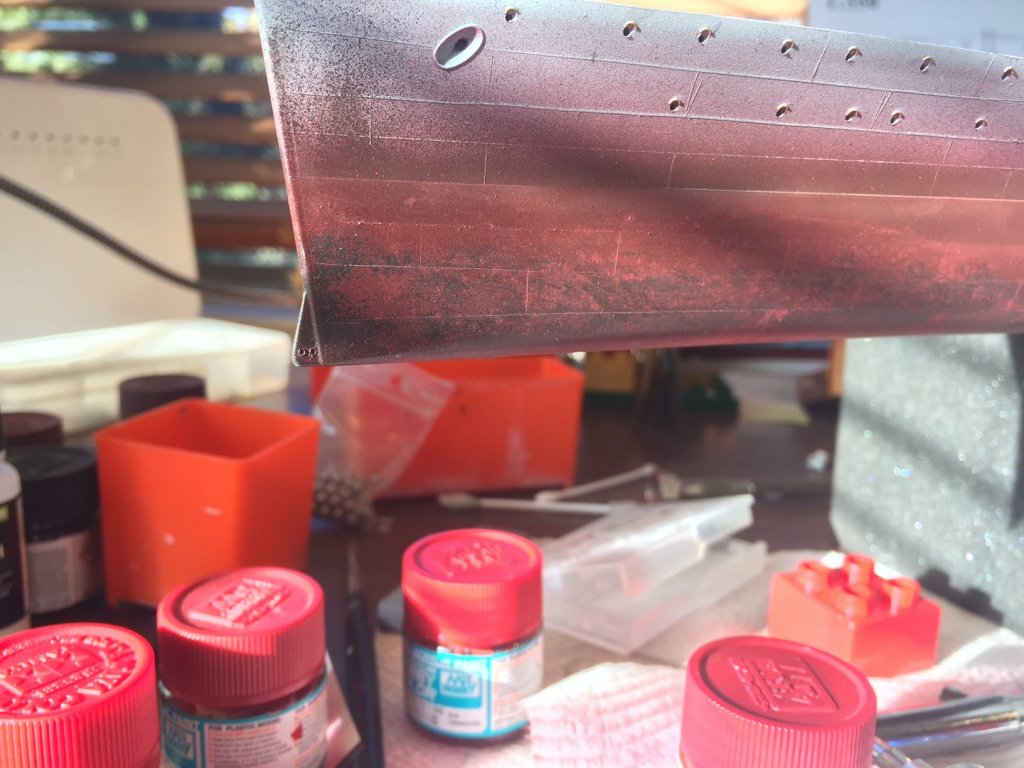
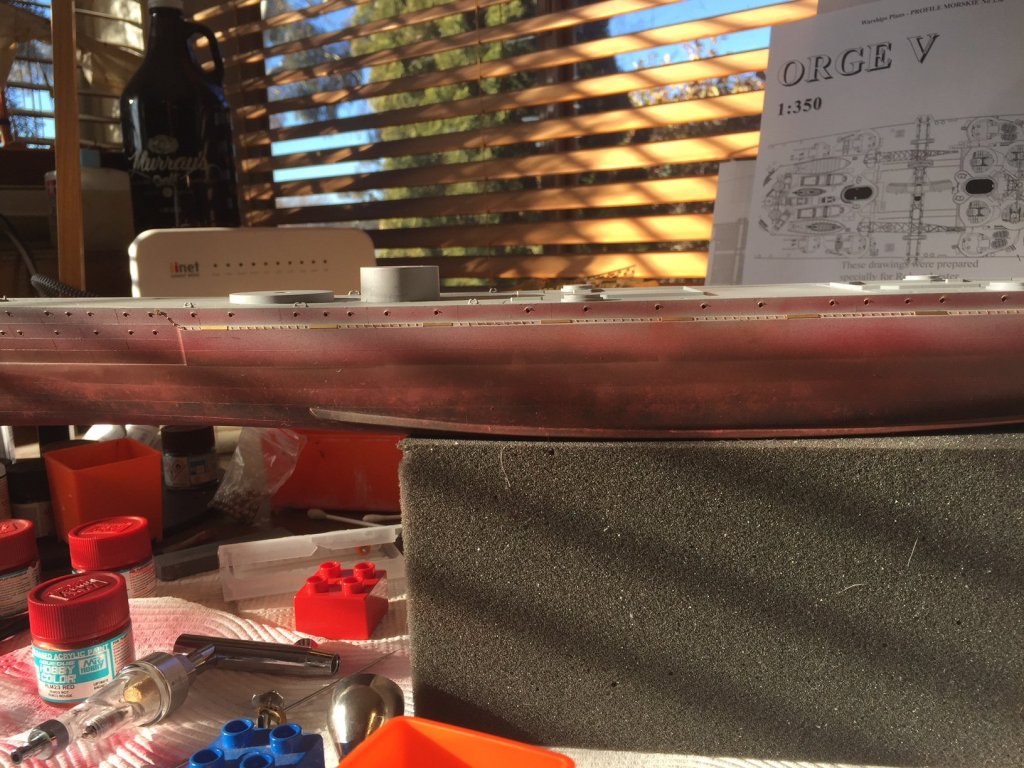
I got the airbrush out. After the rattle can primer, a good coat or Black/Brown and then a couple of satin coats. You can see the hull plates where they have been etched in. I then gave the lower hull 2 coats of chipping fluid, then a few shades of red to bring out the panels. I then removed most of that work with the chipping fluid using an old toothbrush. So tomorrow I can start to grunge her. As it was in 1943 before her last war refit, she was in the Mediterranean so I reckon she'd be pretty grubby below the water line. The band that been rubbed back to bare metal will be covered in grunge and the boot strap and upper hull colours will make this pretty un noticable anyways.


- 405 replies
-
- 11
-
-
- tamiya
- king george v
- (and 2 more)
-
Yep, I bend 1 side in my pe bender, flip it 180, and then use a scalpel point to ‘pop’ the steps, then bend it up, squaring it up with pliers gently afterwards.
-
As usual you’re the master! I agree with the paint as it depends on the time of day/ sunlight/shade as to how a grey looks grey.
-
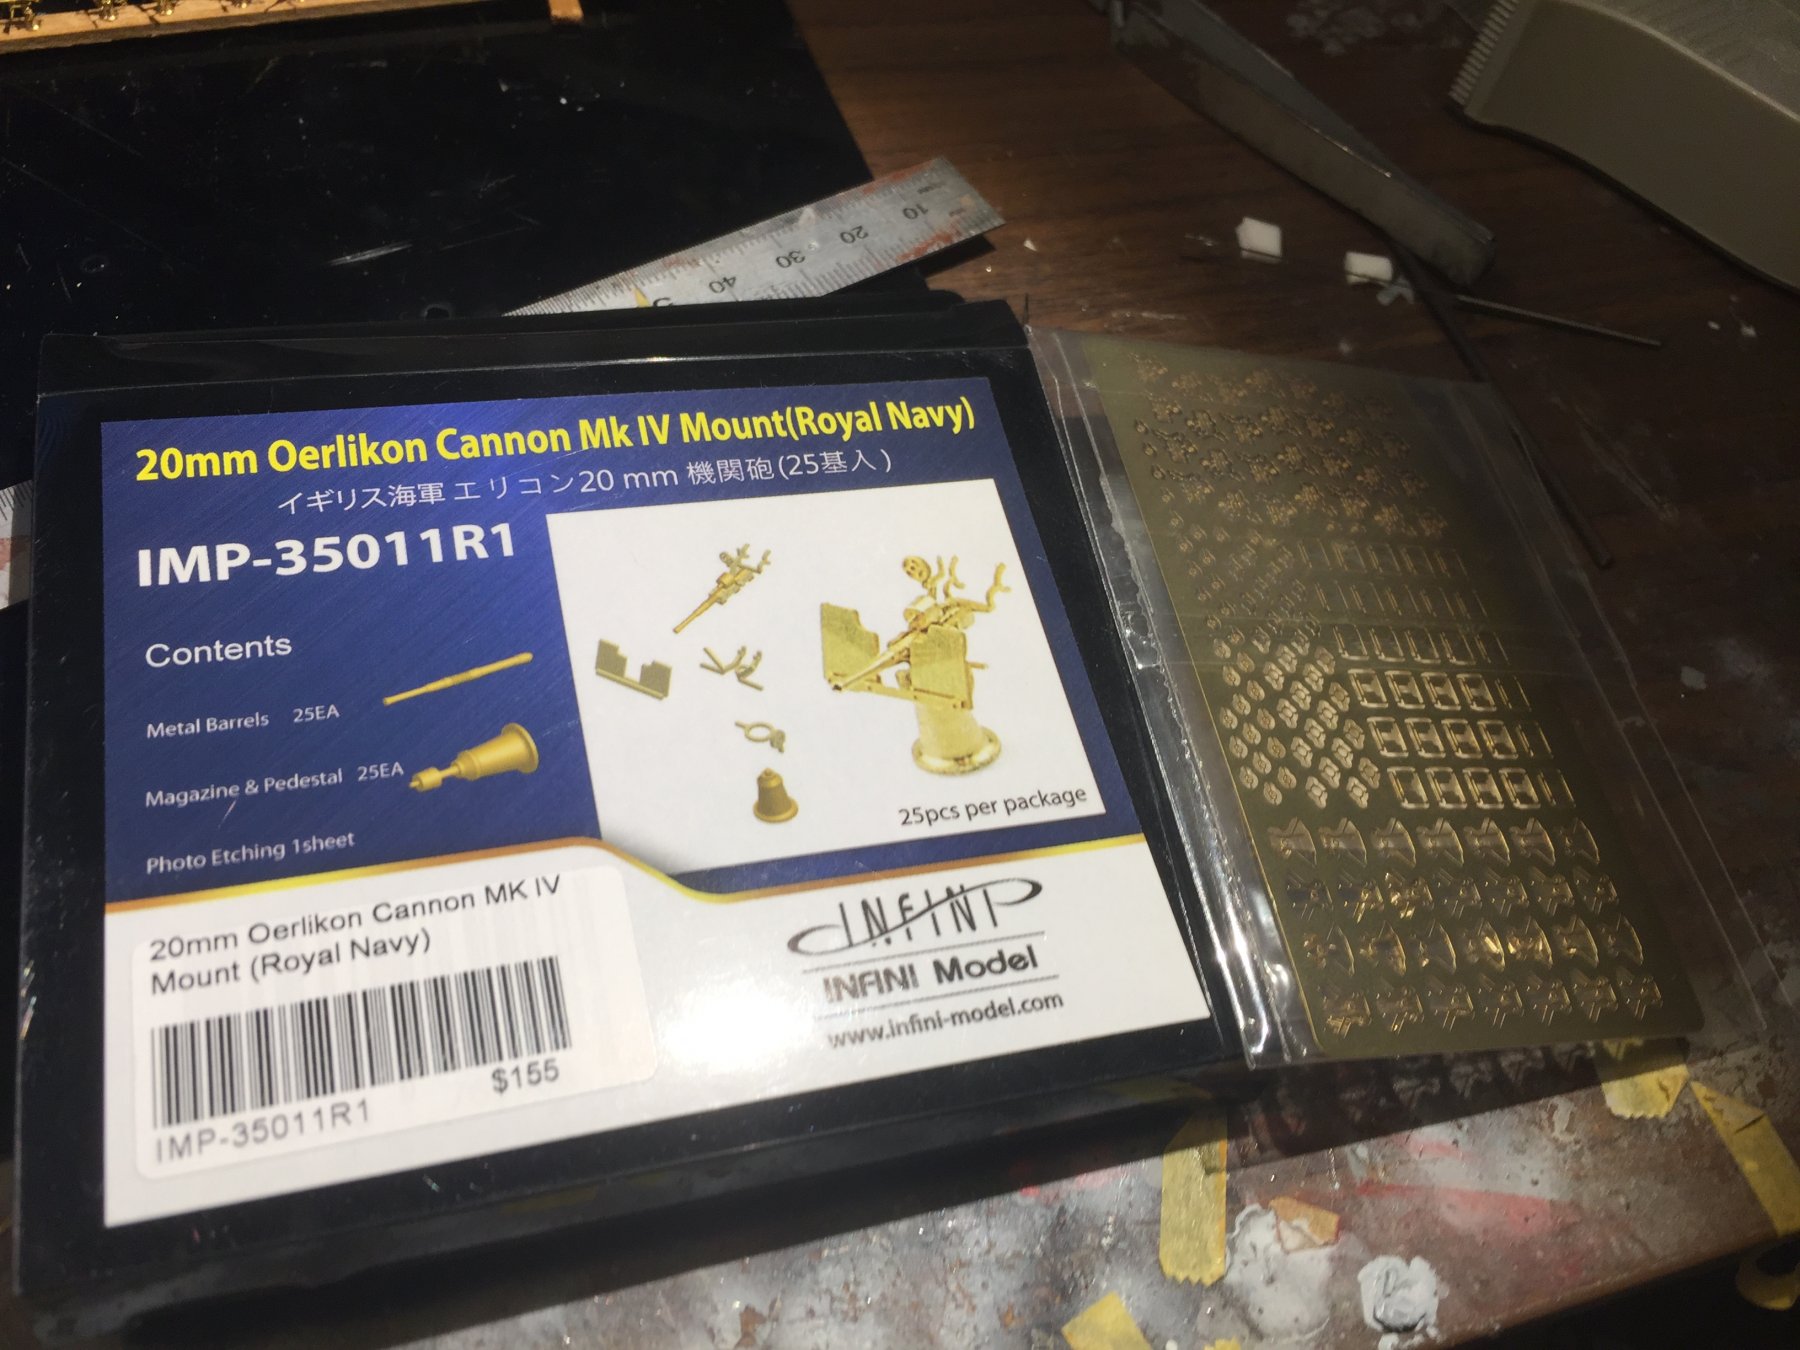
The cat tolerates me. I found they fit, the Infini set was a magnitude harder still
- 405 replies
-
- 6
-
-
- tamiya
- king george v
- (and 2 more)
-
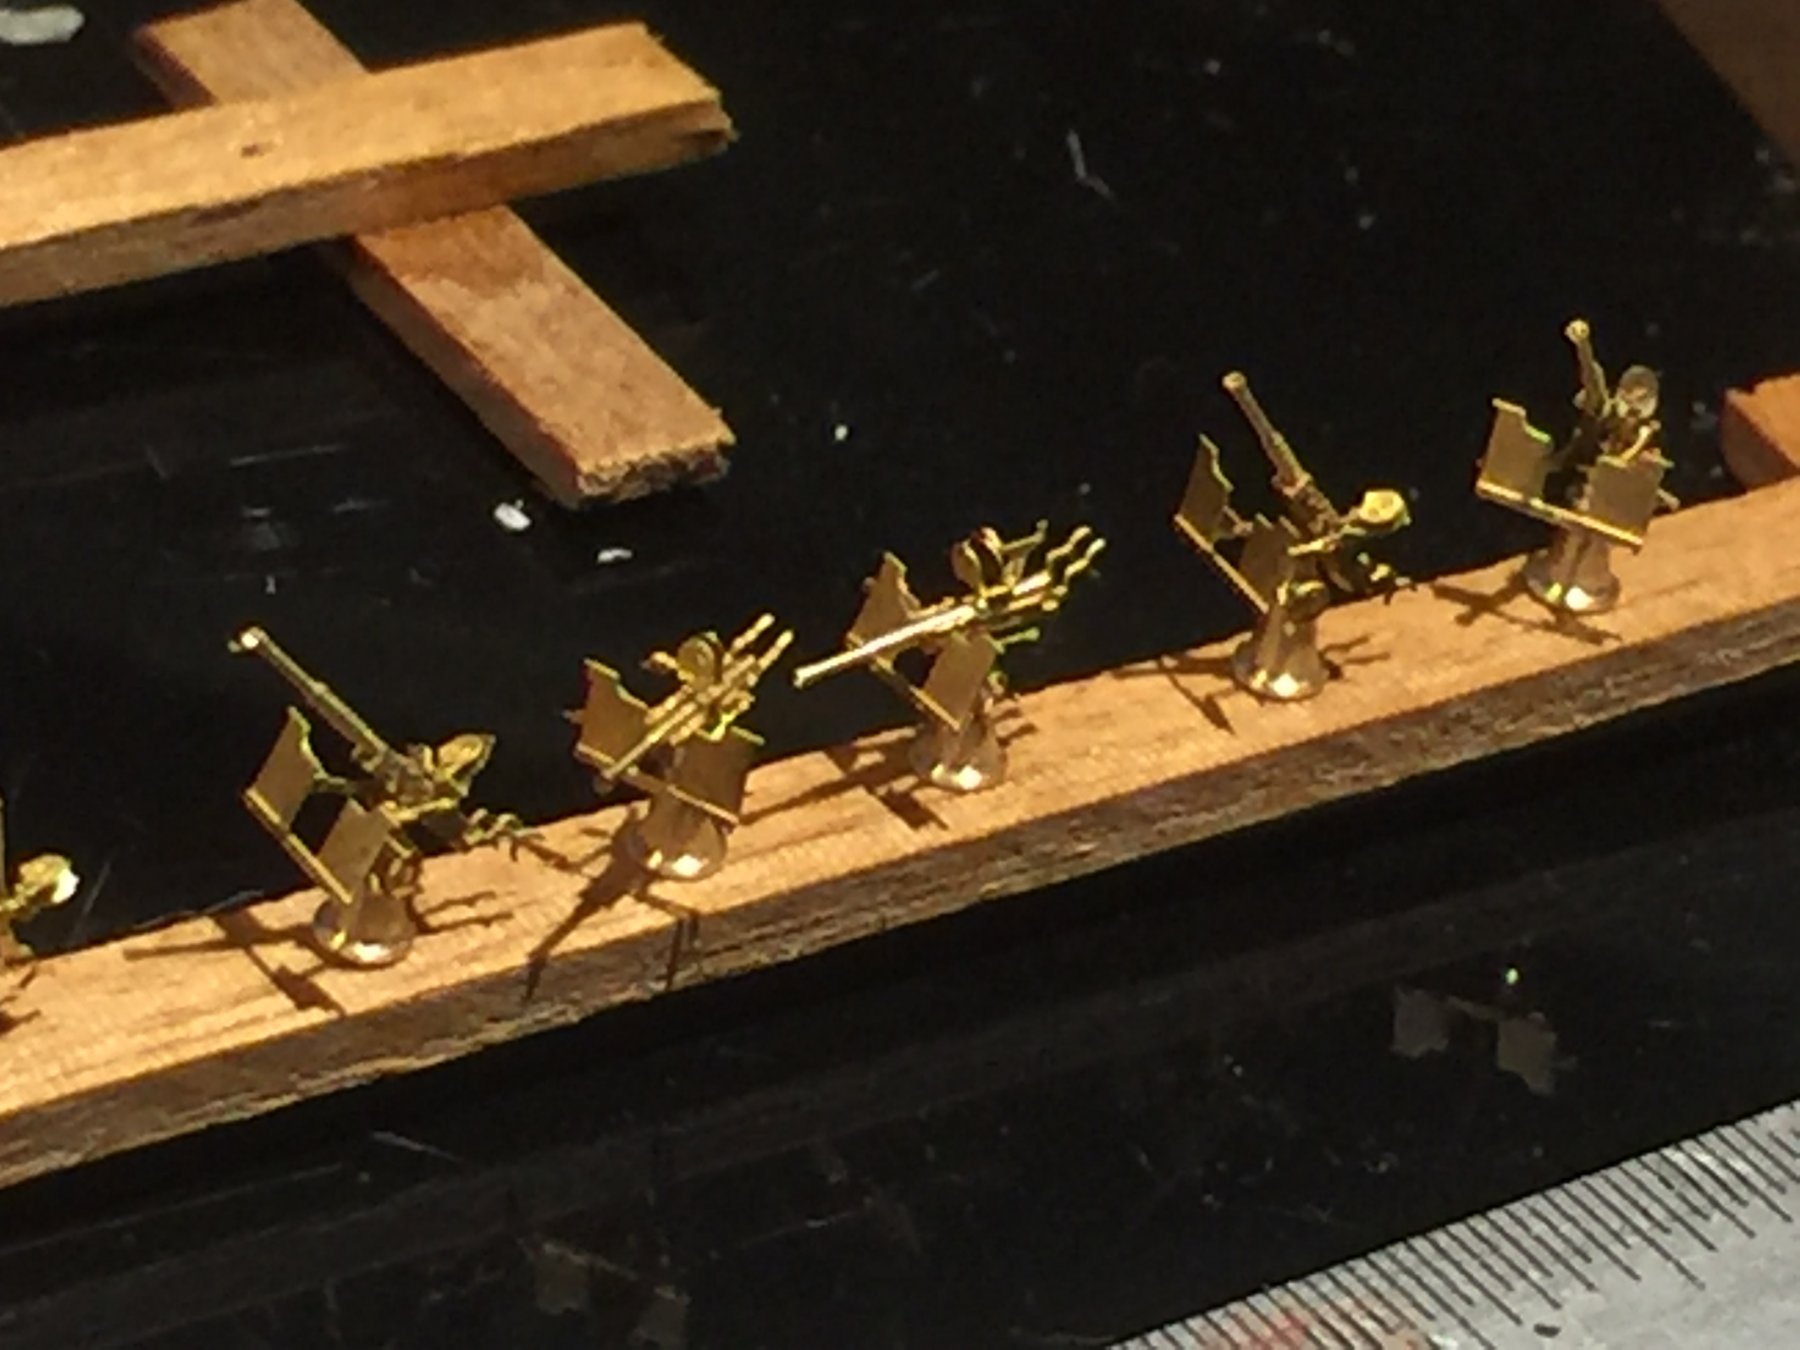
Finished now anyways, 35 (1 spare) done up. That’s the last of the guns thank goodness. Time to revisit the hull I think.

- 405 replies
-
- 14
-
-
- tamiya
- king george v
- (and 2 more)
-
I generally spend a lot of time researching my next build during my current build. I think I’ve got most photos of the Seydlitz now.
- 1,090 replies
-
- 7
-
-
- showcase models
- vendetta
- (and 2 more)
-
They’re not that bad really. Considering you can hardly see them they look nice
- 405 replies
-
- 7
-
-
- tamiya
- king george v
- (and 2 more)
-
They are not as hard as the IJN stuff. It’s just the quantity. I’d hate to rig the Cannons on HMS Victory correctly.
- 405 replies
-
- 7
-
-
- tamiya
- king george v
- (and 2 more)
-
You know you are supposed to do comparison shots to show how small your current build is? The big boys are that much easier to build.
-
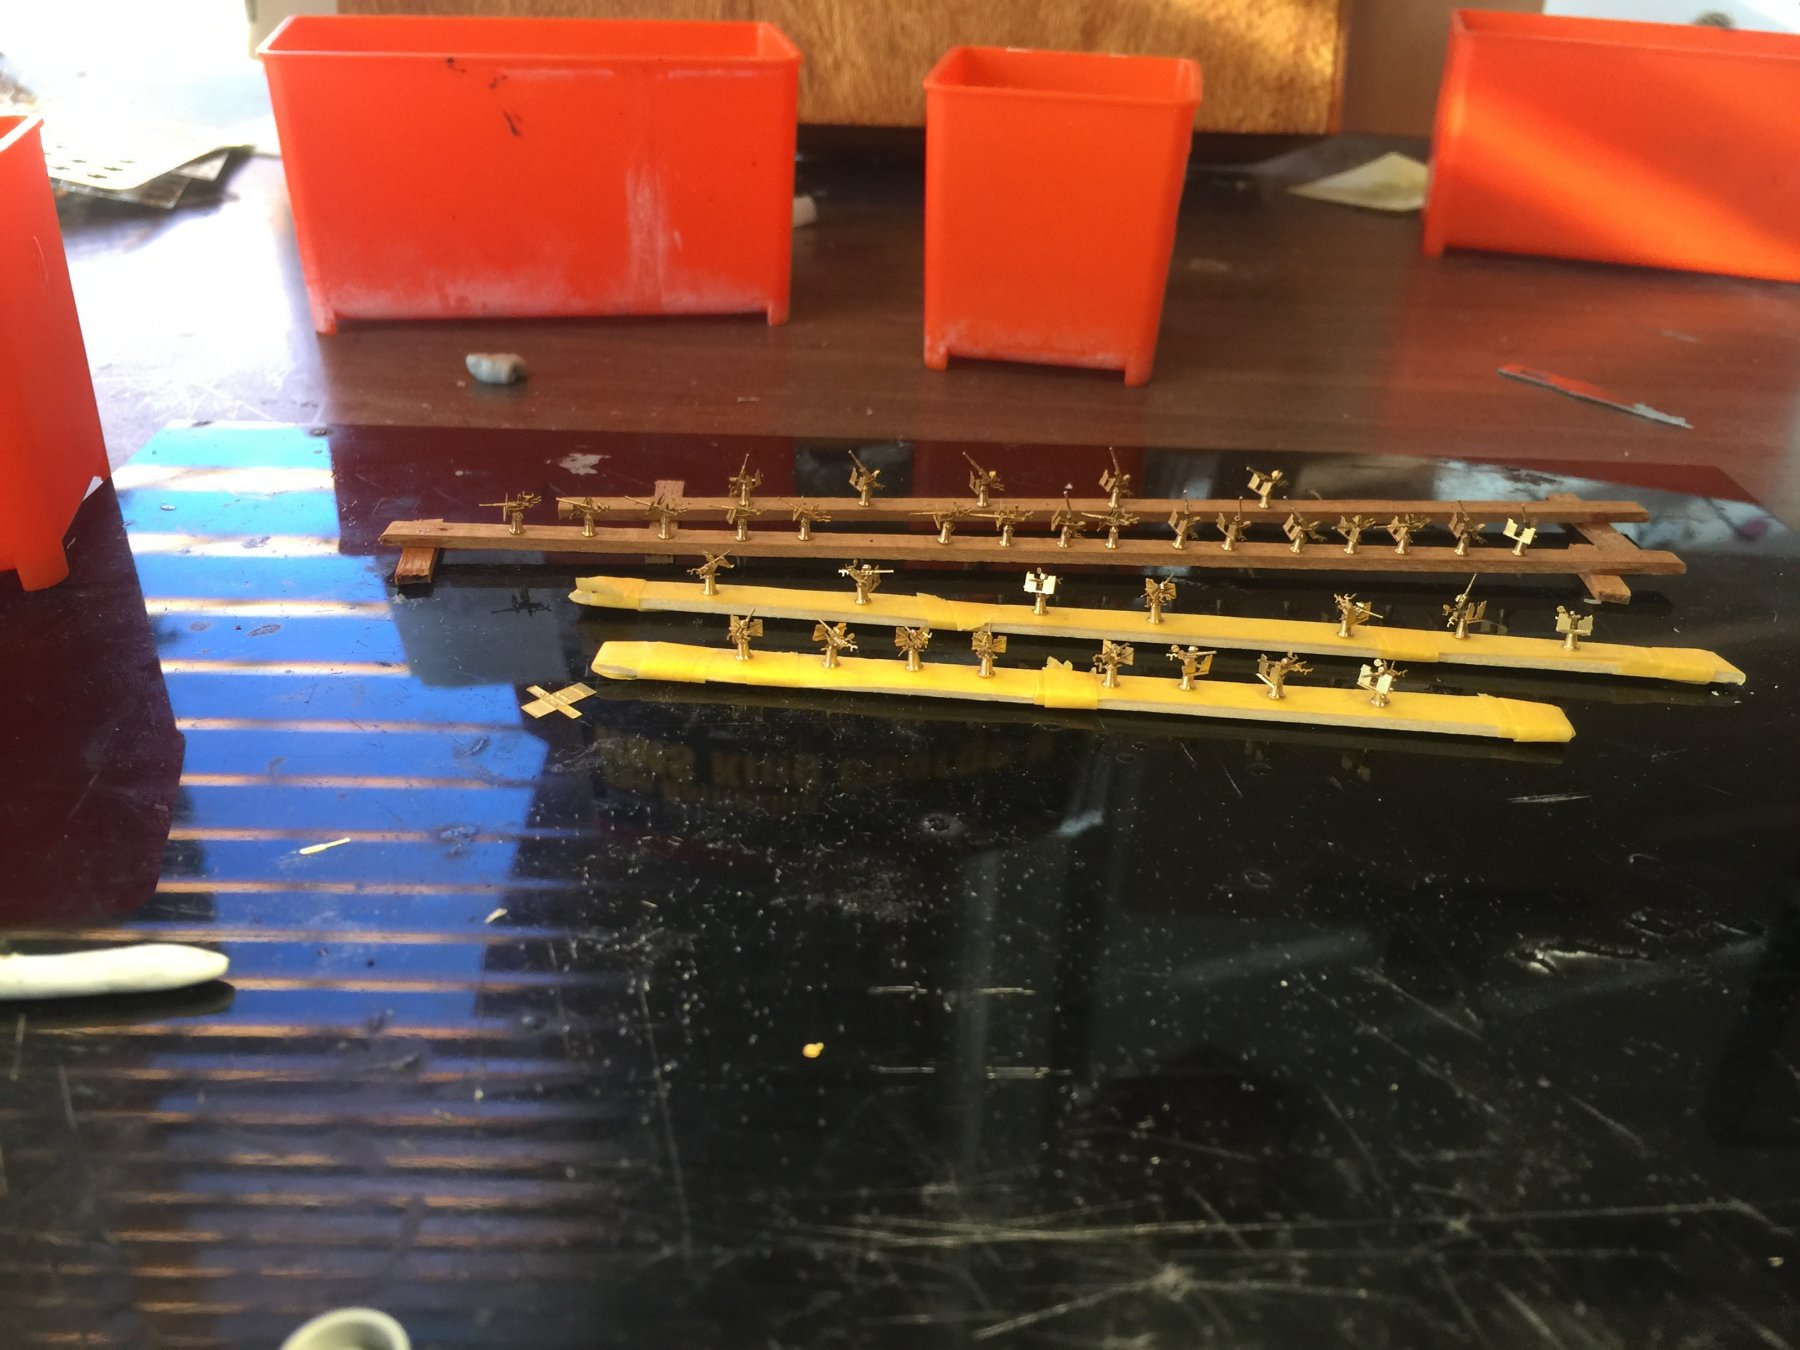
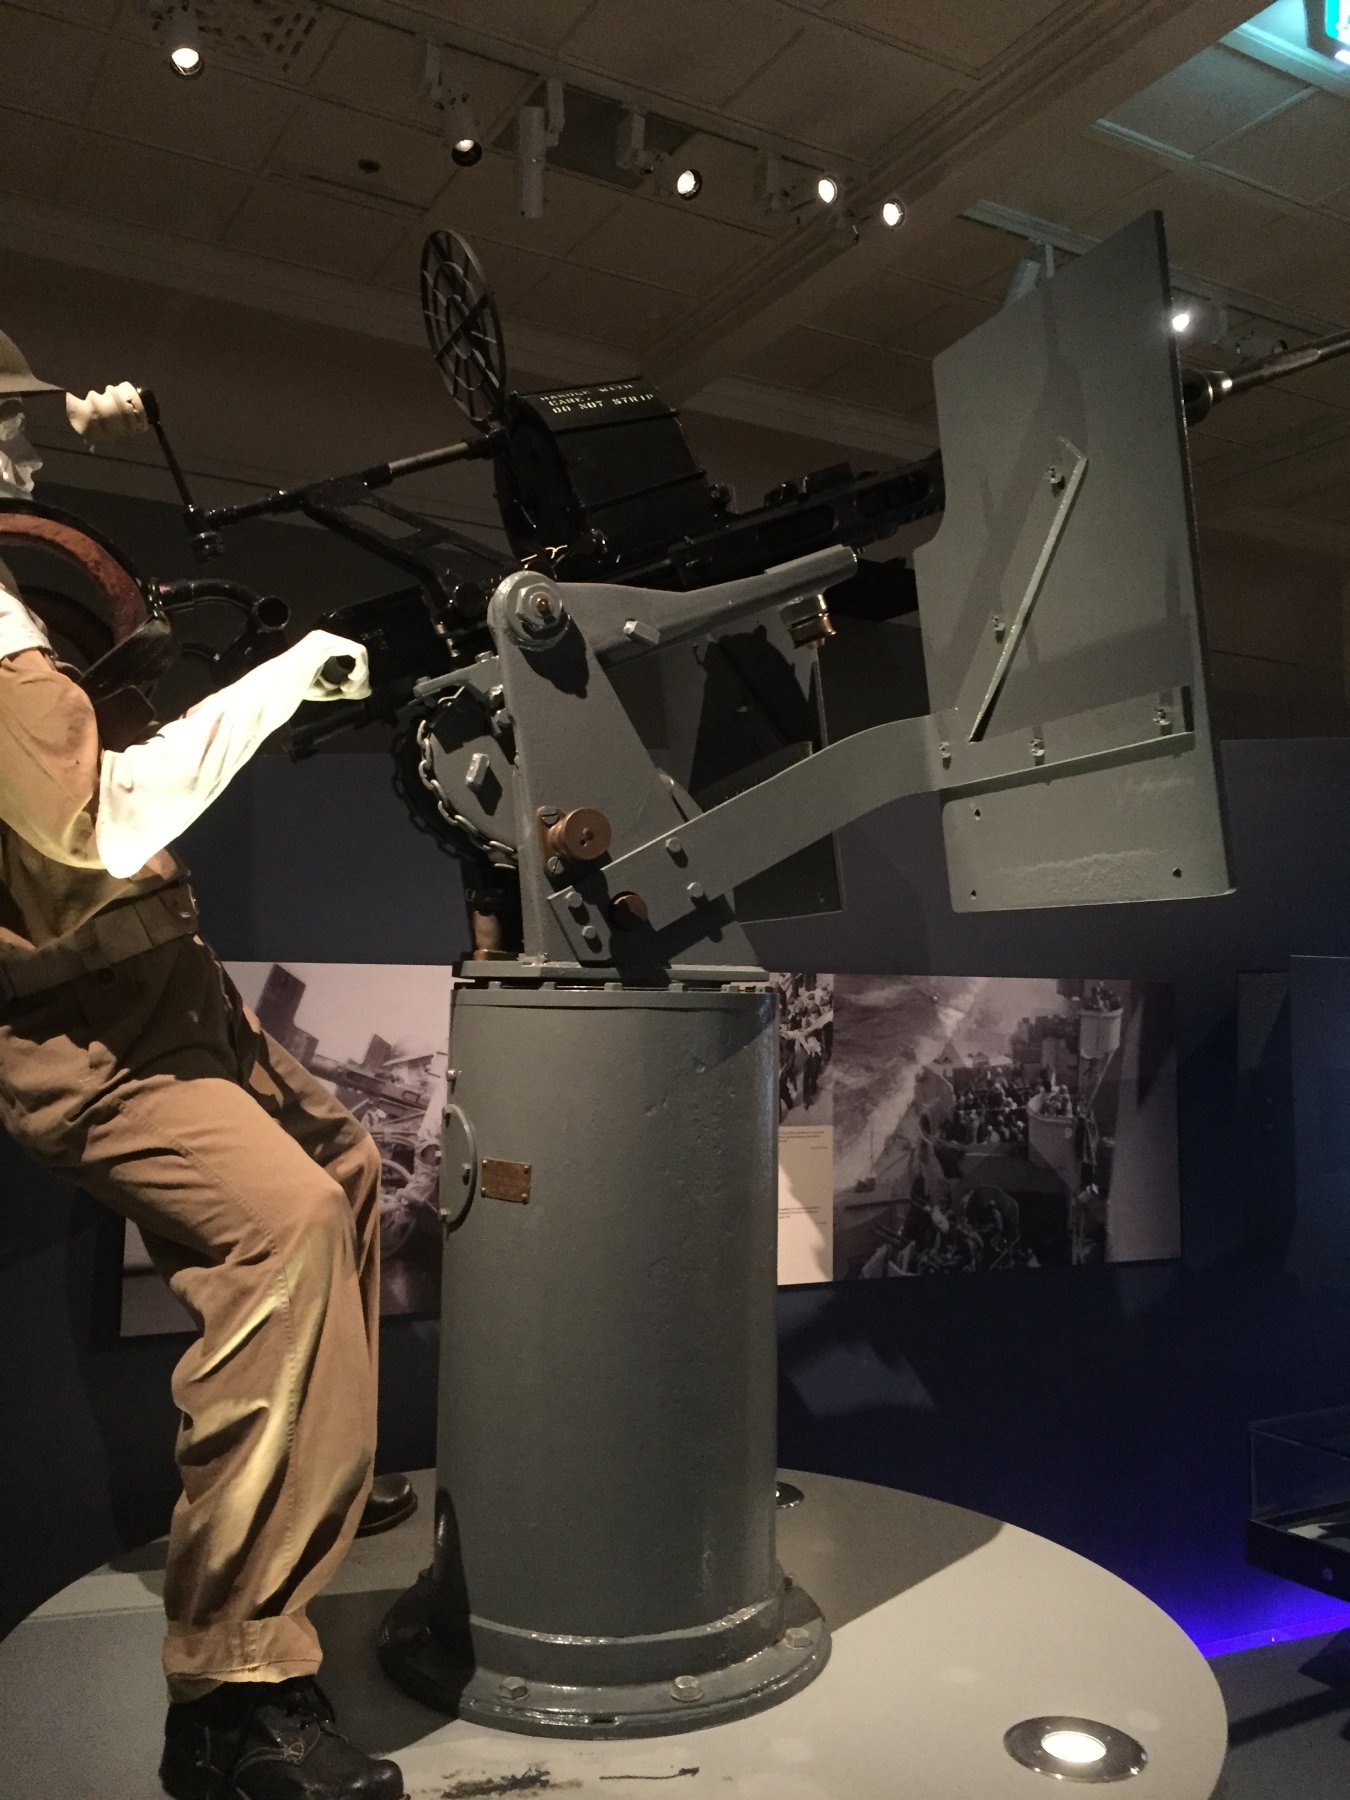
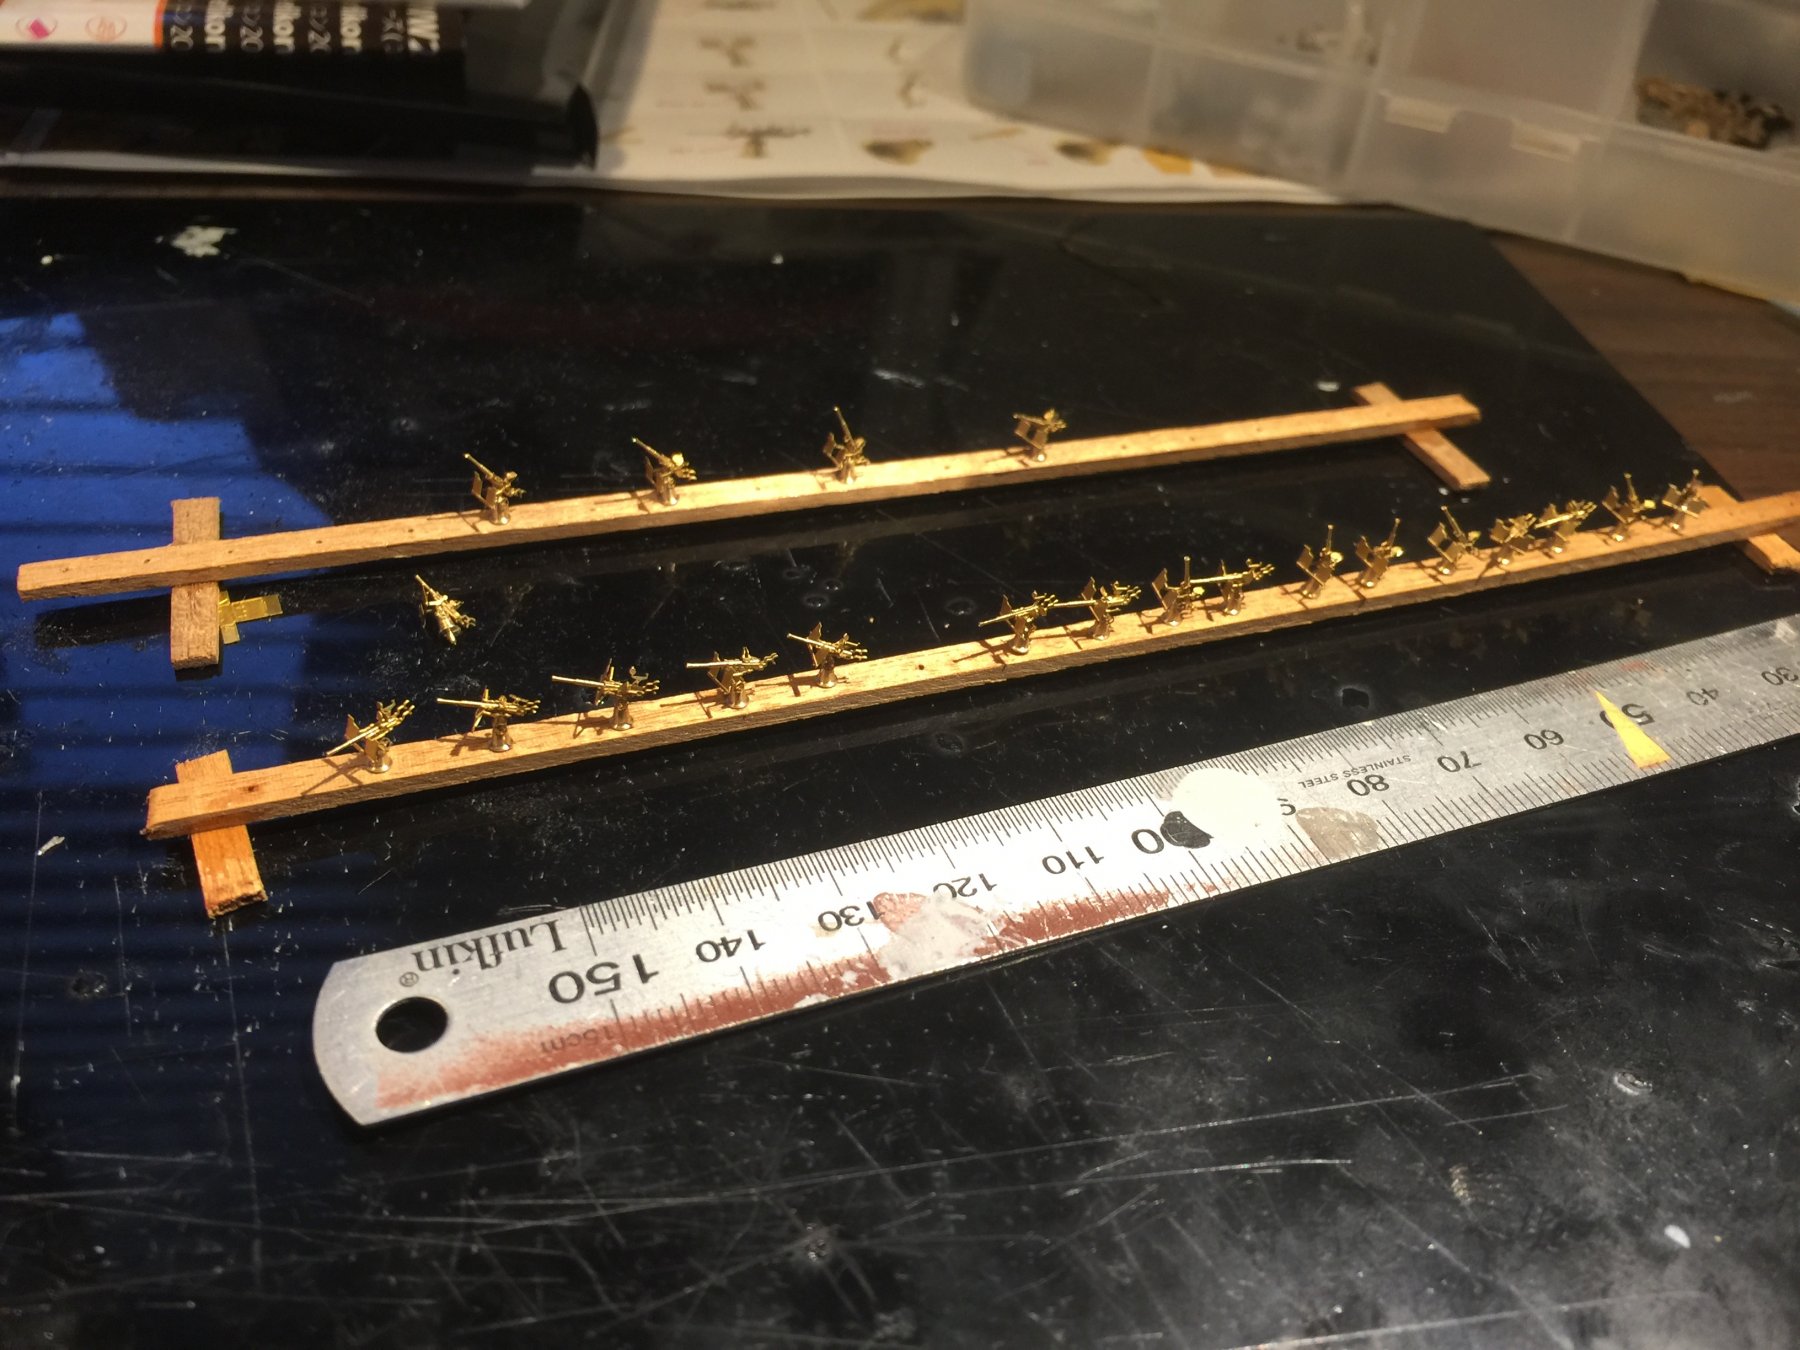
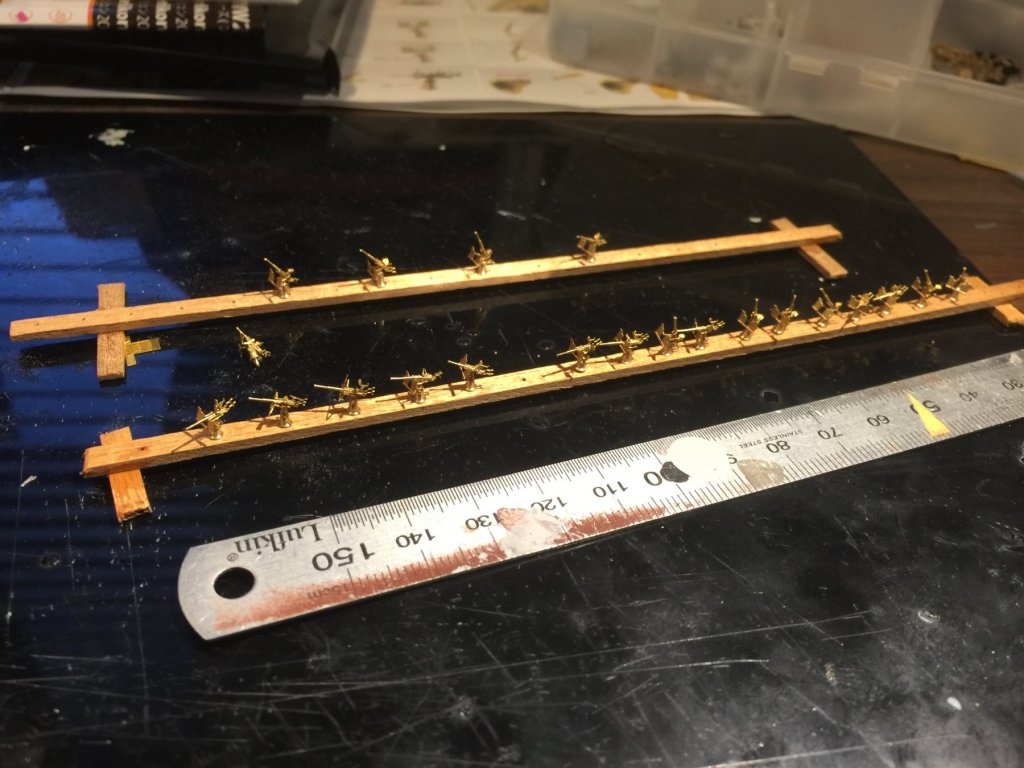
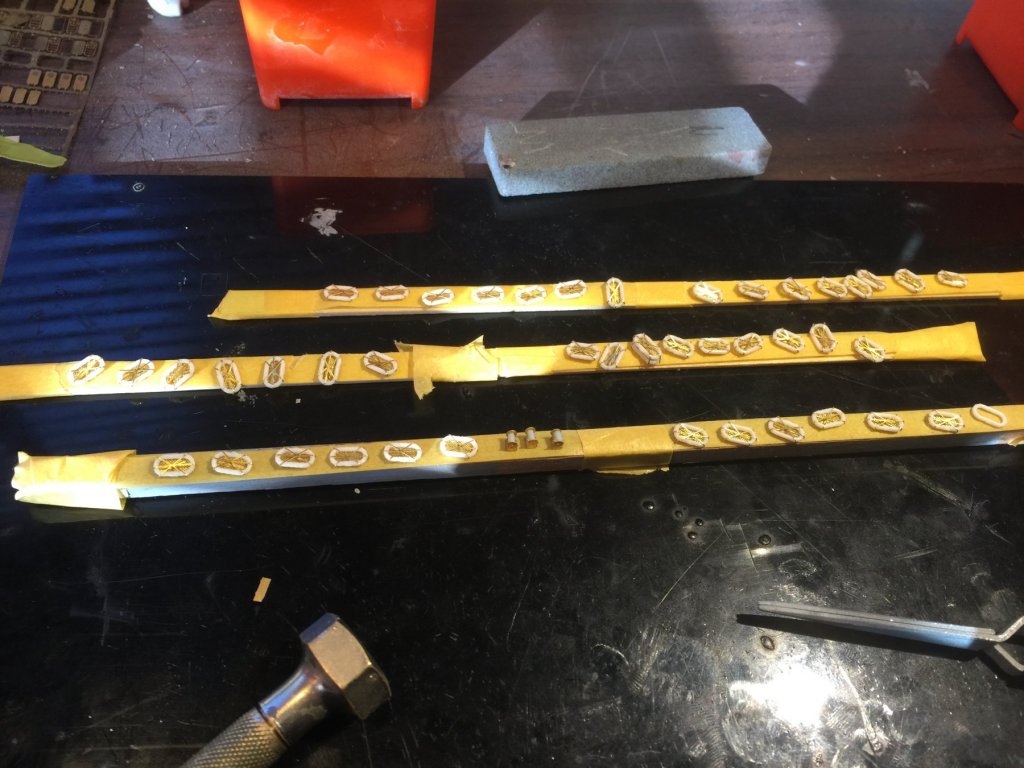
The 1943 configuration requires 34 x 20mm single AA guns. Pontos gives you enough plus spares for the ‘41 configuration (21 guns), so the extra Infini set of guns is required to make up the balance. You can see the kit product and why one destroys one’e Eyes to replace it. Ill hopefully have them done tommorow


- 405 replies
-
- 14
-
-
- tamiya
- king george v
- (and 2 more)
-
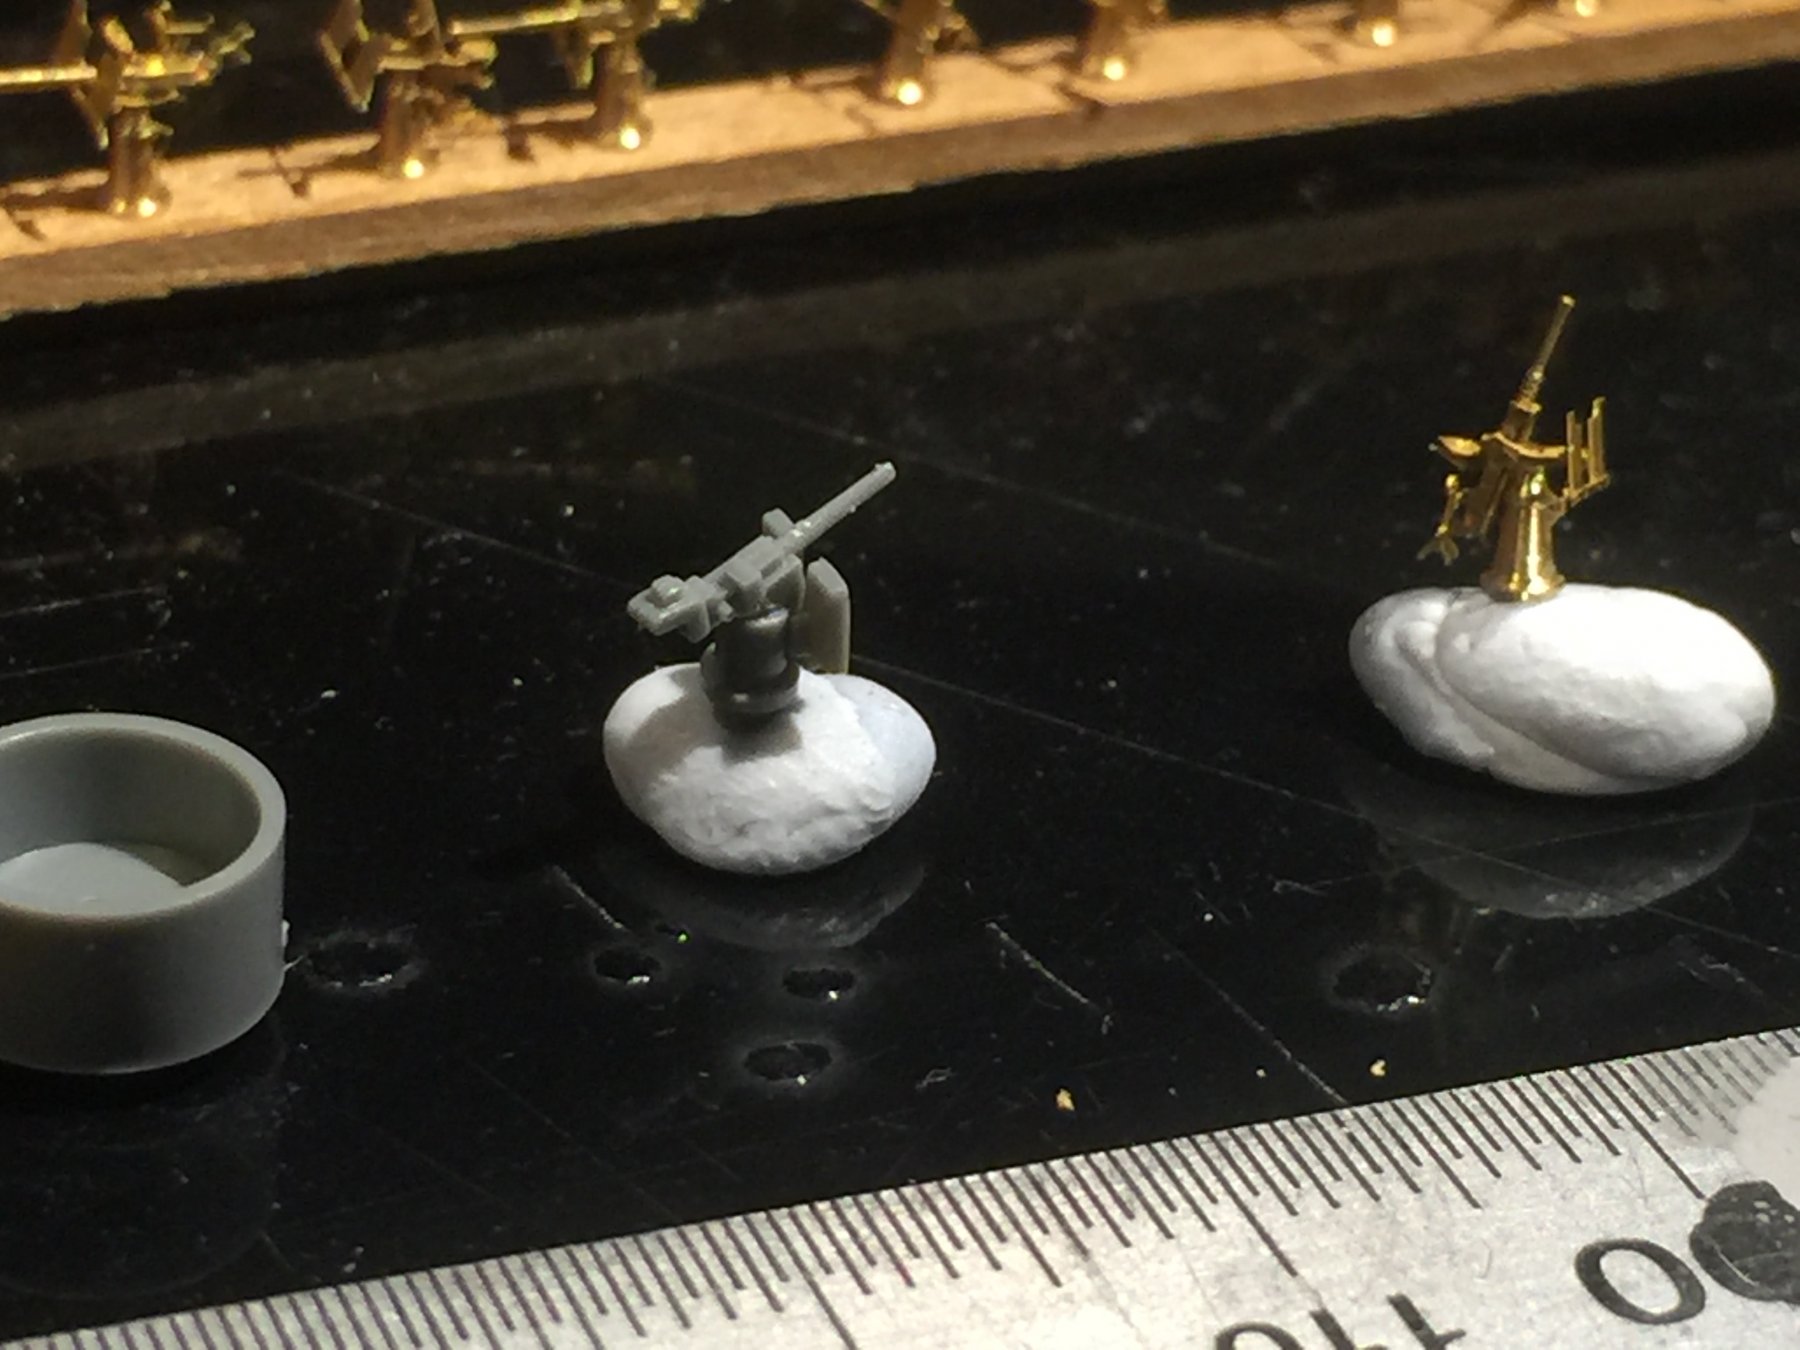
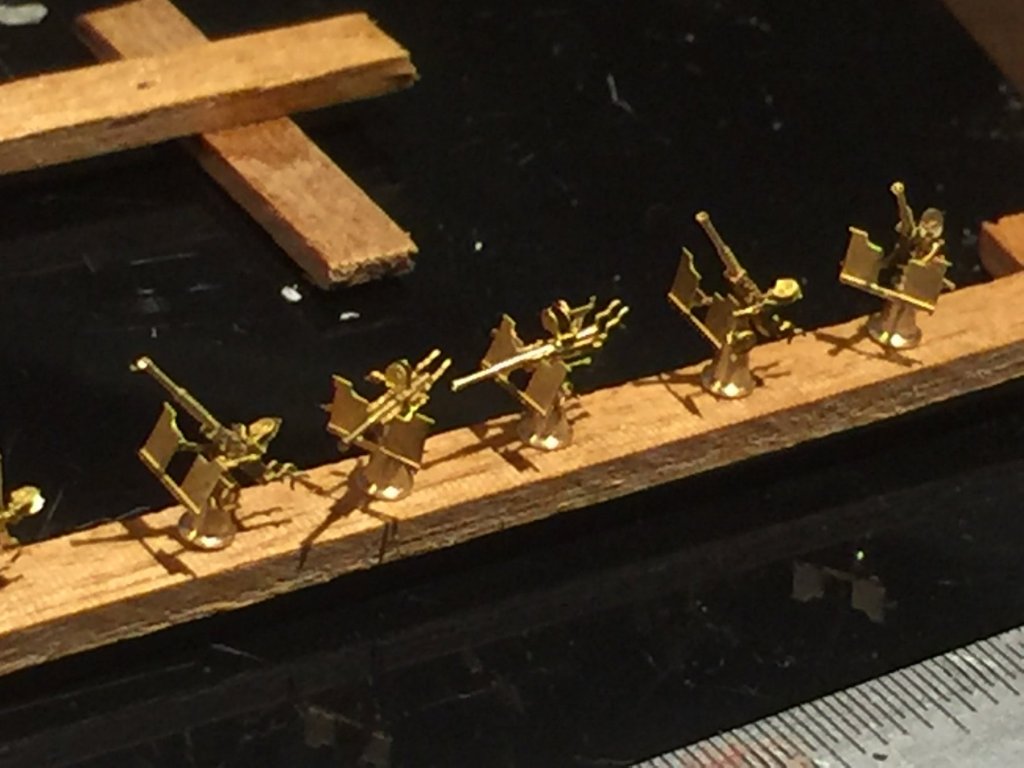
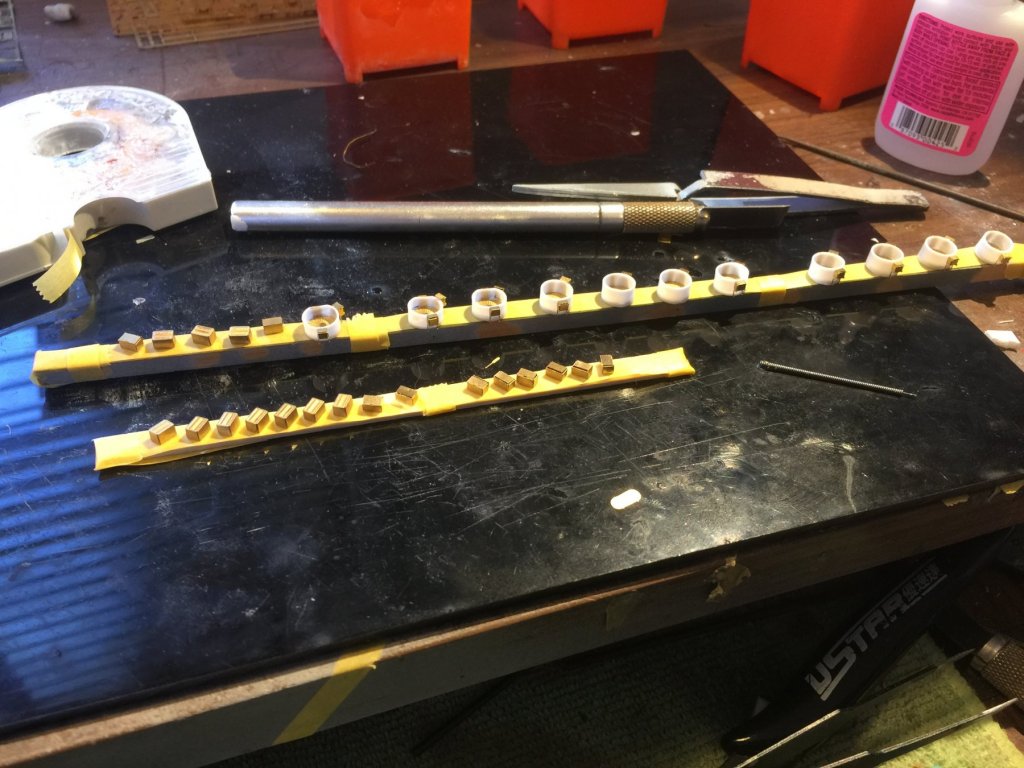
So, the 20mm gun tubs done up. The Pontos brass inserts were too big and required filing. A few ammo boxes as well.
- 405 replies
-
- 11
-
-
- tamiya
- king george v
- (and 2 more)
-
I just use a piece of post it note, it’s small enough to rotate in the hand whilst edging so it does not get too soggy. Cheap and you gets lots of them,
- 292 replies
-
- 5
-
-
- g class destroyer
- trumpeter
- (and 4 more)
-
Never seen this before, interesting technique. Would not use skin, that’s why I use acetone on all large pieces of PE now to help the primer stick, acrylics just won’t stick.
- 292 replies
-
- 4
-
-
- g class destroyer
- trumpeter
- (and 4 more)
-
That’s 3 packets of them! No way, considering I have to now do about 40 single 20mms as well.
- 405 replies
-
- 7
-
-
- tamiya
- king george v
- (and 2 more)
-
If it’s out by .5mm it’s all over. Does not matter, just wanted a bit of flexibility for what I have planned for the completed model. Anyways, I calculate it will suck up this many Carley Floats.
- 405 replies
-
- 11
-
-
- tamiya
- king george v
- (and 2 more)
-
Nice deep red! Be careful using normal masking take as it will lift at the edges or be very ragged. The Tamiya tape really is the goods for it.
- 292 replies
-
- 6
-
-
- g class destroyer
- trumpeter
- (and 4 more)