RGL
-
Posts
5,555 -
Joined
-
Last visited
Content Type
Profiles
Forums
Gallery
Events
Everything posted by RGL
-
 Now from someones personal blog, private images of a destroyer oiling from KGV in 1943 (colour pattern is correct, and the cable till appears to be running along top of the armor belt. Damn decisions decisions
-008a-OilingKGV.jpg.5b6441192931a0c585bda04867193434.jpg)
-008d-OilingKGV.jpg.5d12317a182252431992634e5db7146a.jpg)
- 405 replies
-
- 7
-

-
- tamiya
- king george v
- (and 2 more)
-
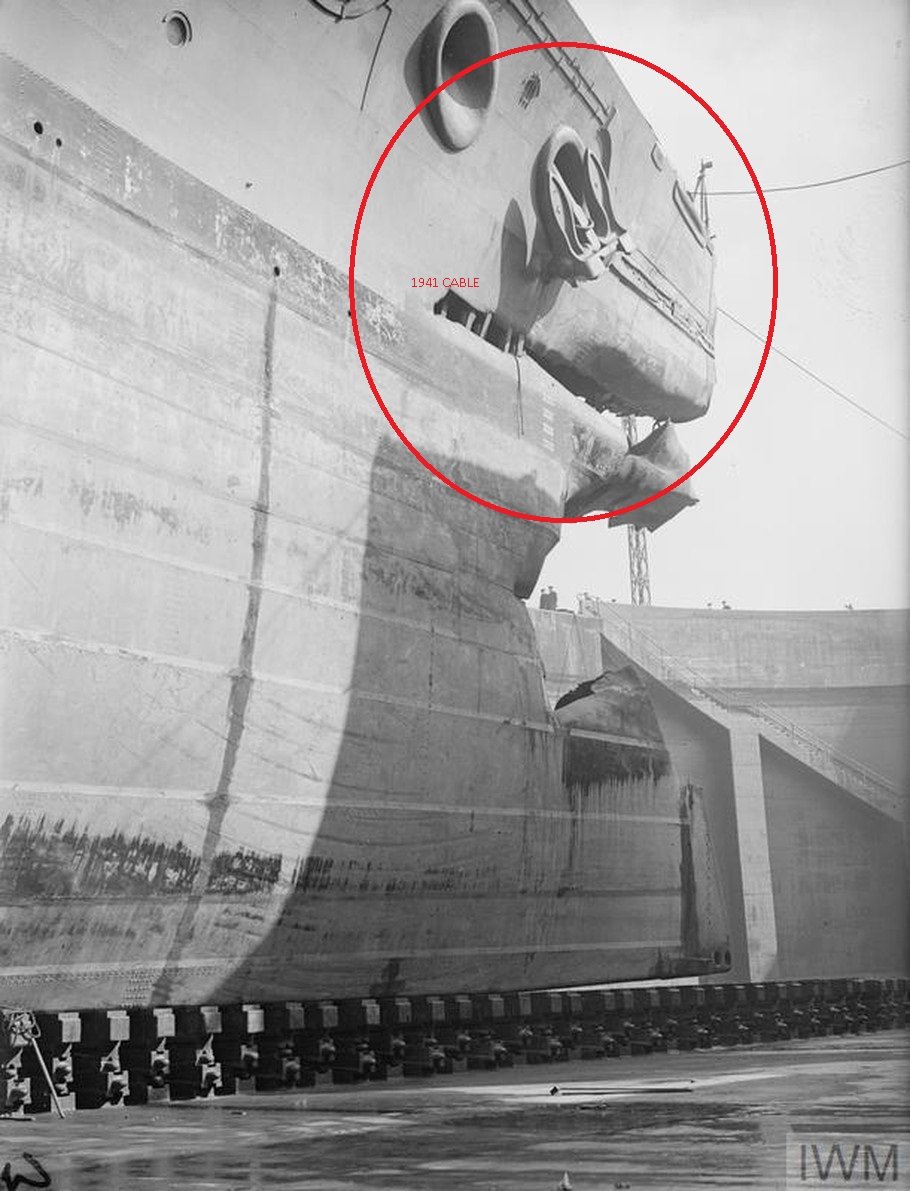
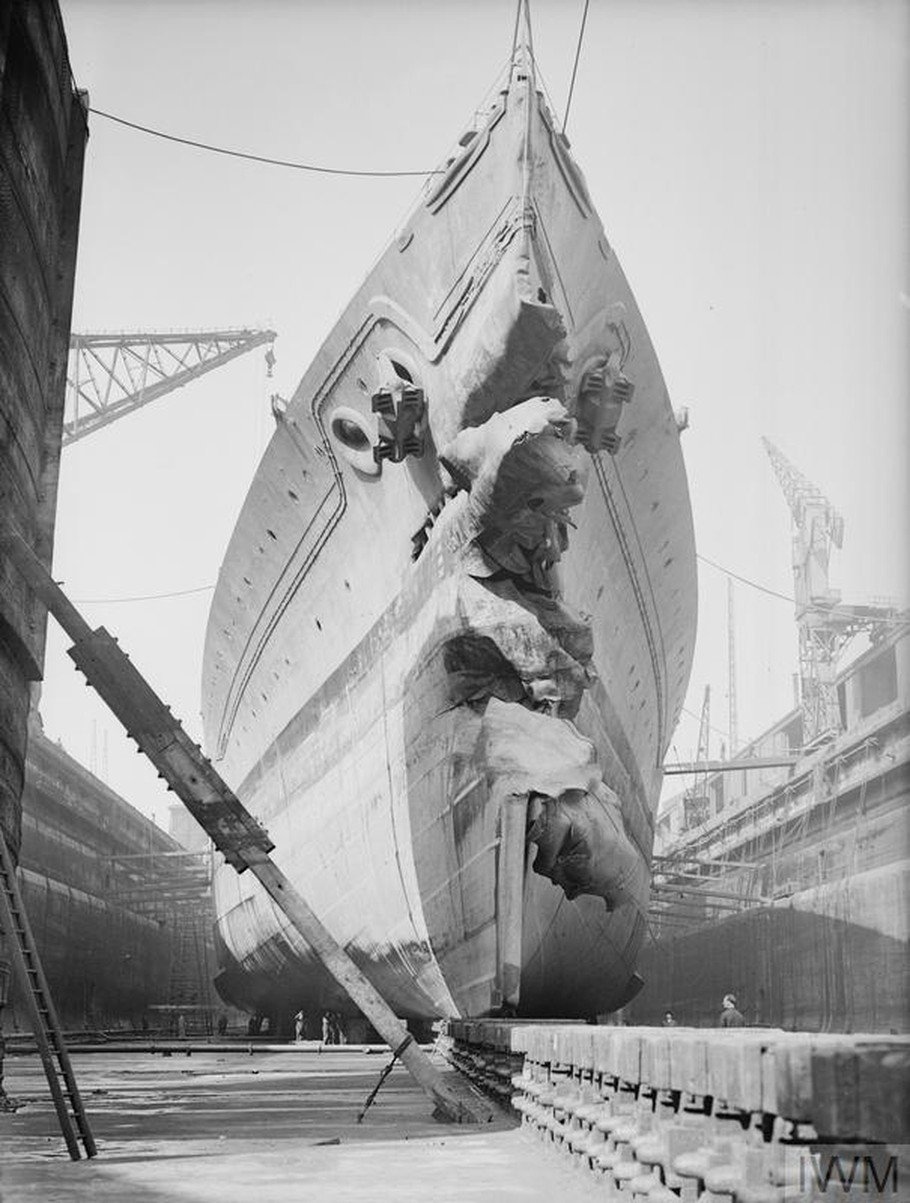
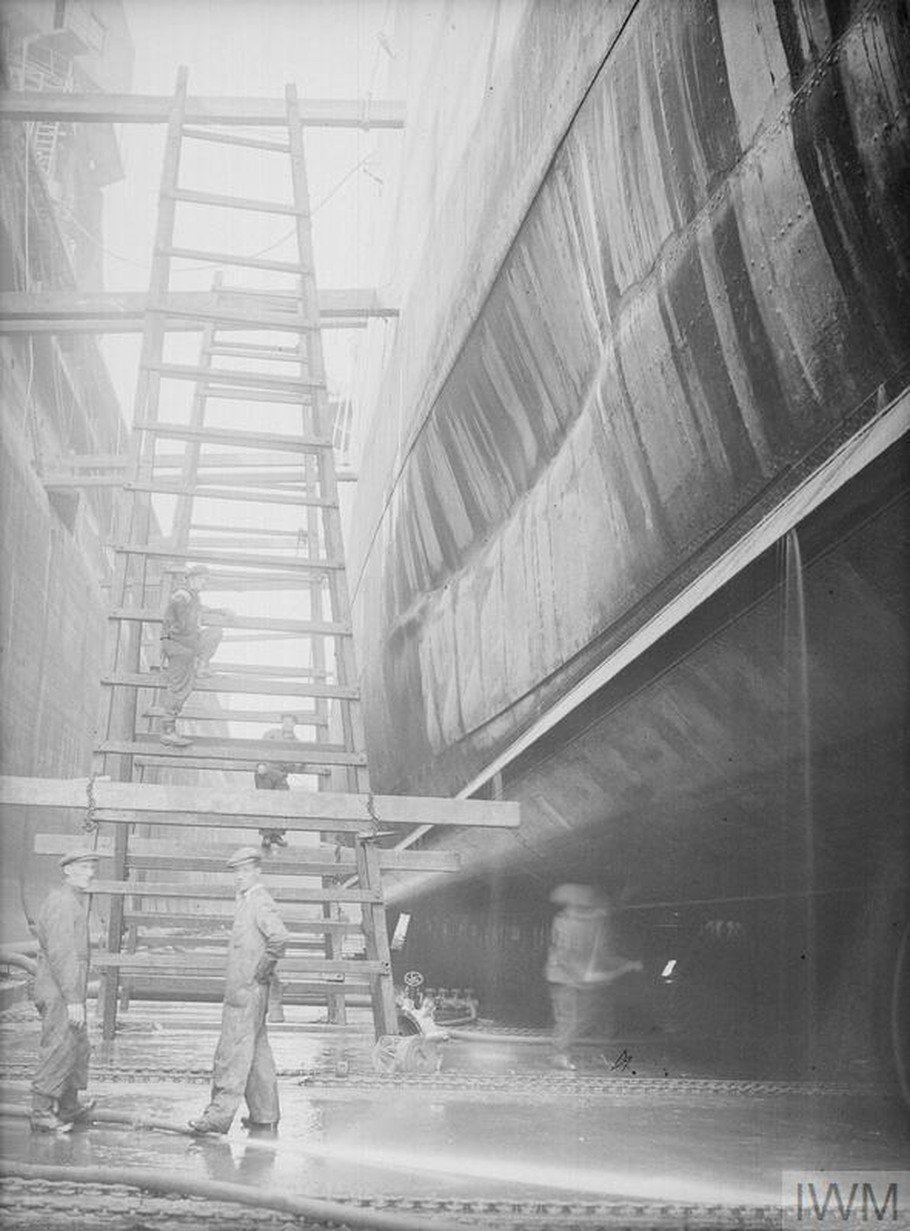
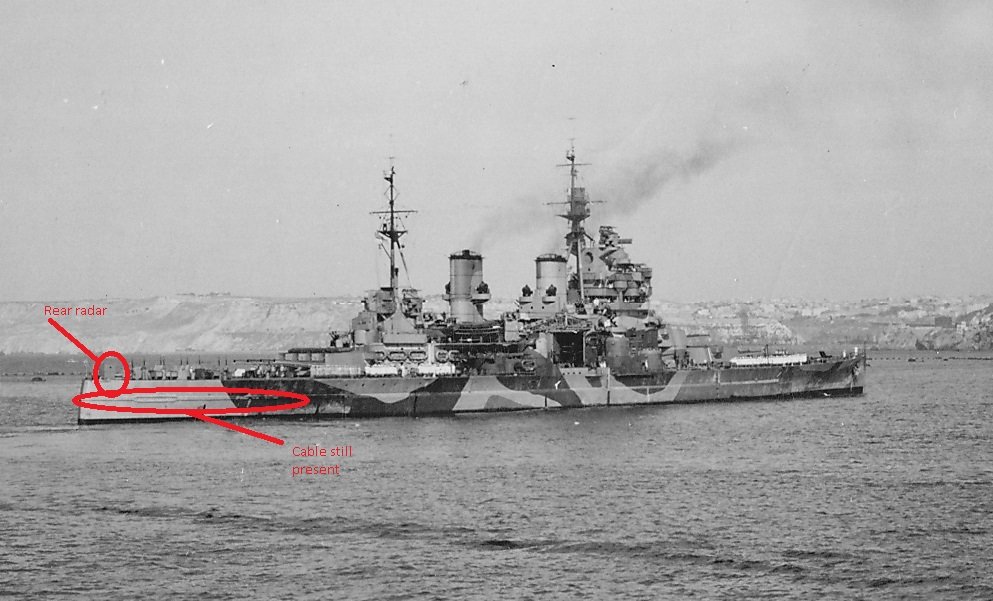
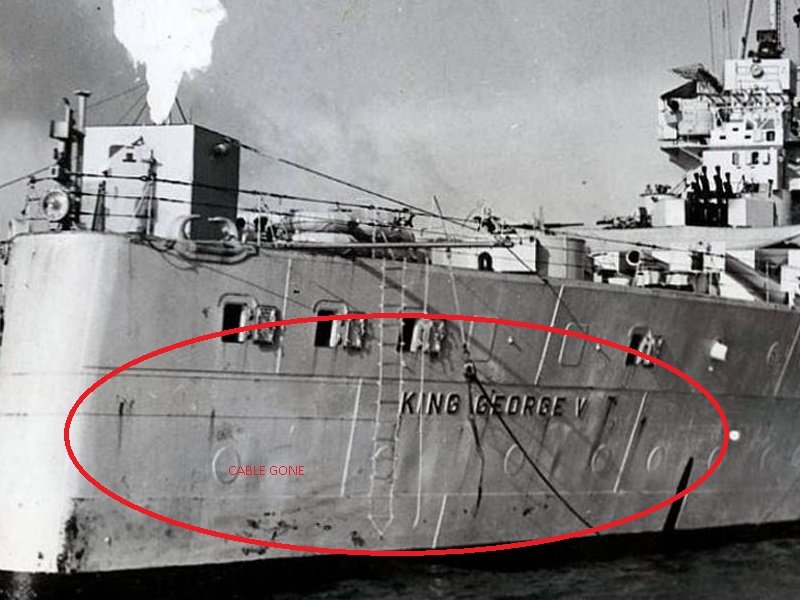
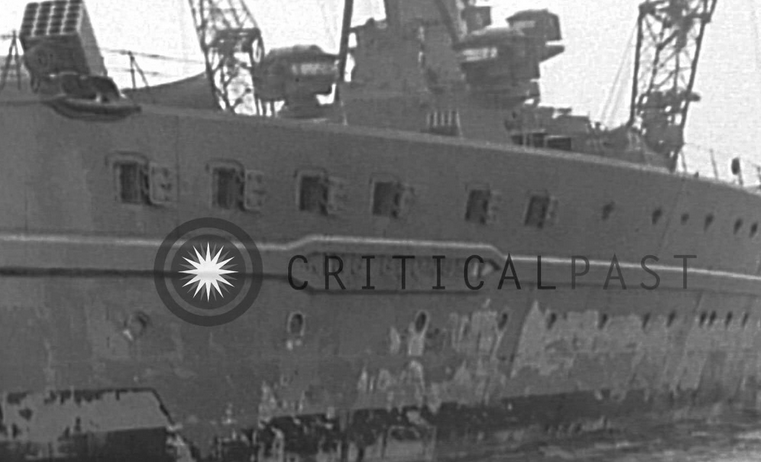
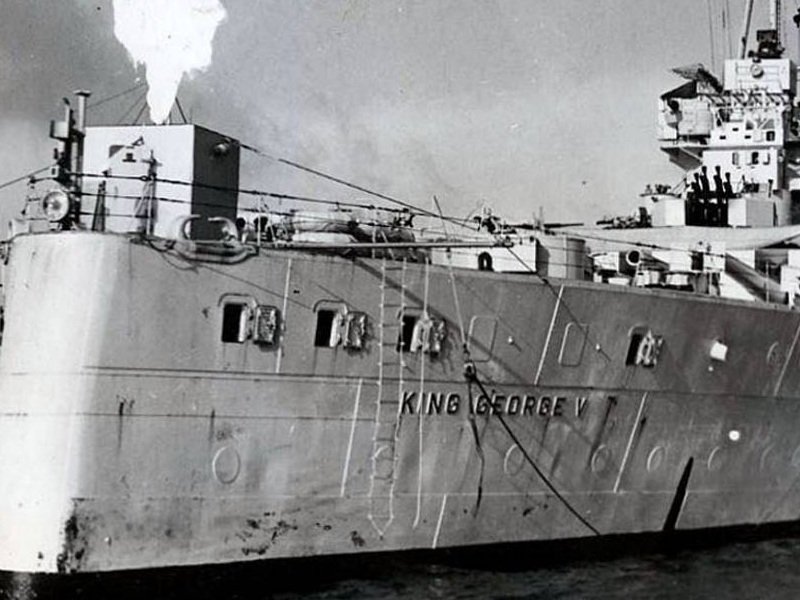
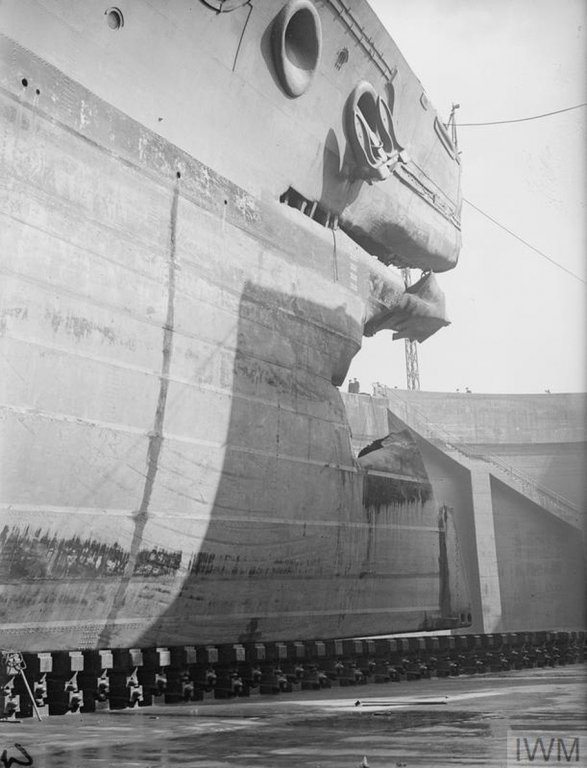
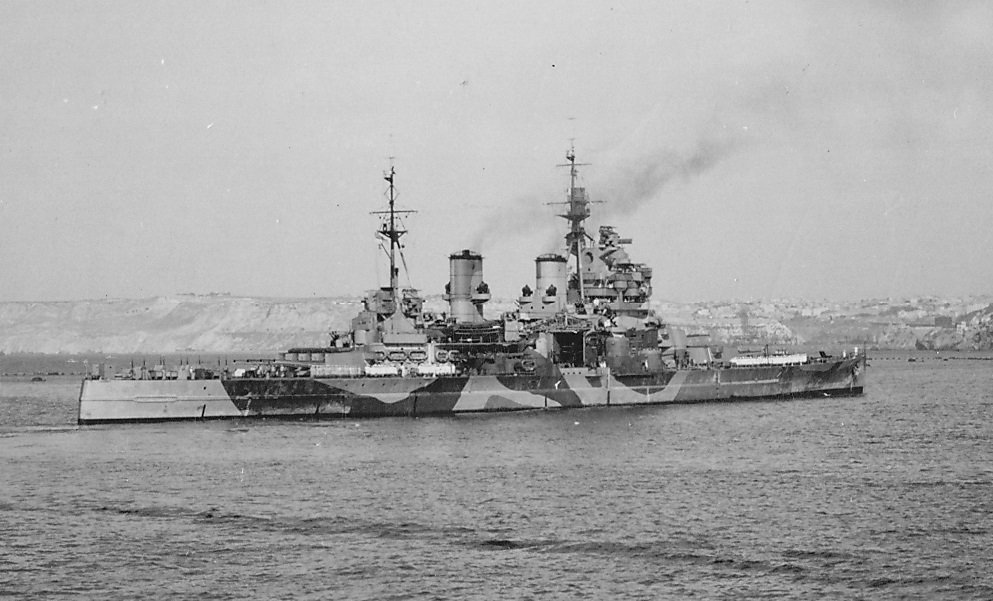
The four photos show her in 41 in drydock after her ramming of a destroyer and a still from a video after he returned from the USA (paintwork falling off) The cable is at the front and rear. . The this photo from her during the invasion of Sicily in 1943 shows the rear of the cable present, notice the nameplate is framed by it. There does not appear to be cable at the bow. You can see the 1945 shot of her stern with no cable and some portholes closed over.

- 405 replies
-
- 6
-
-
- tamiya
- king george v
- (and 2 more)
-
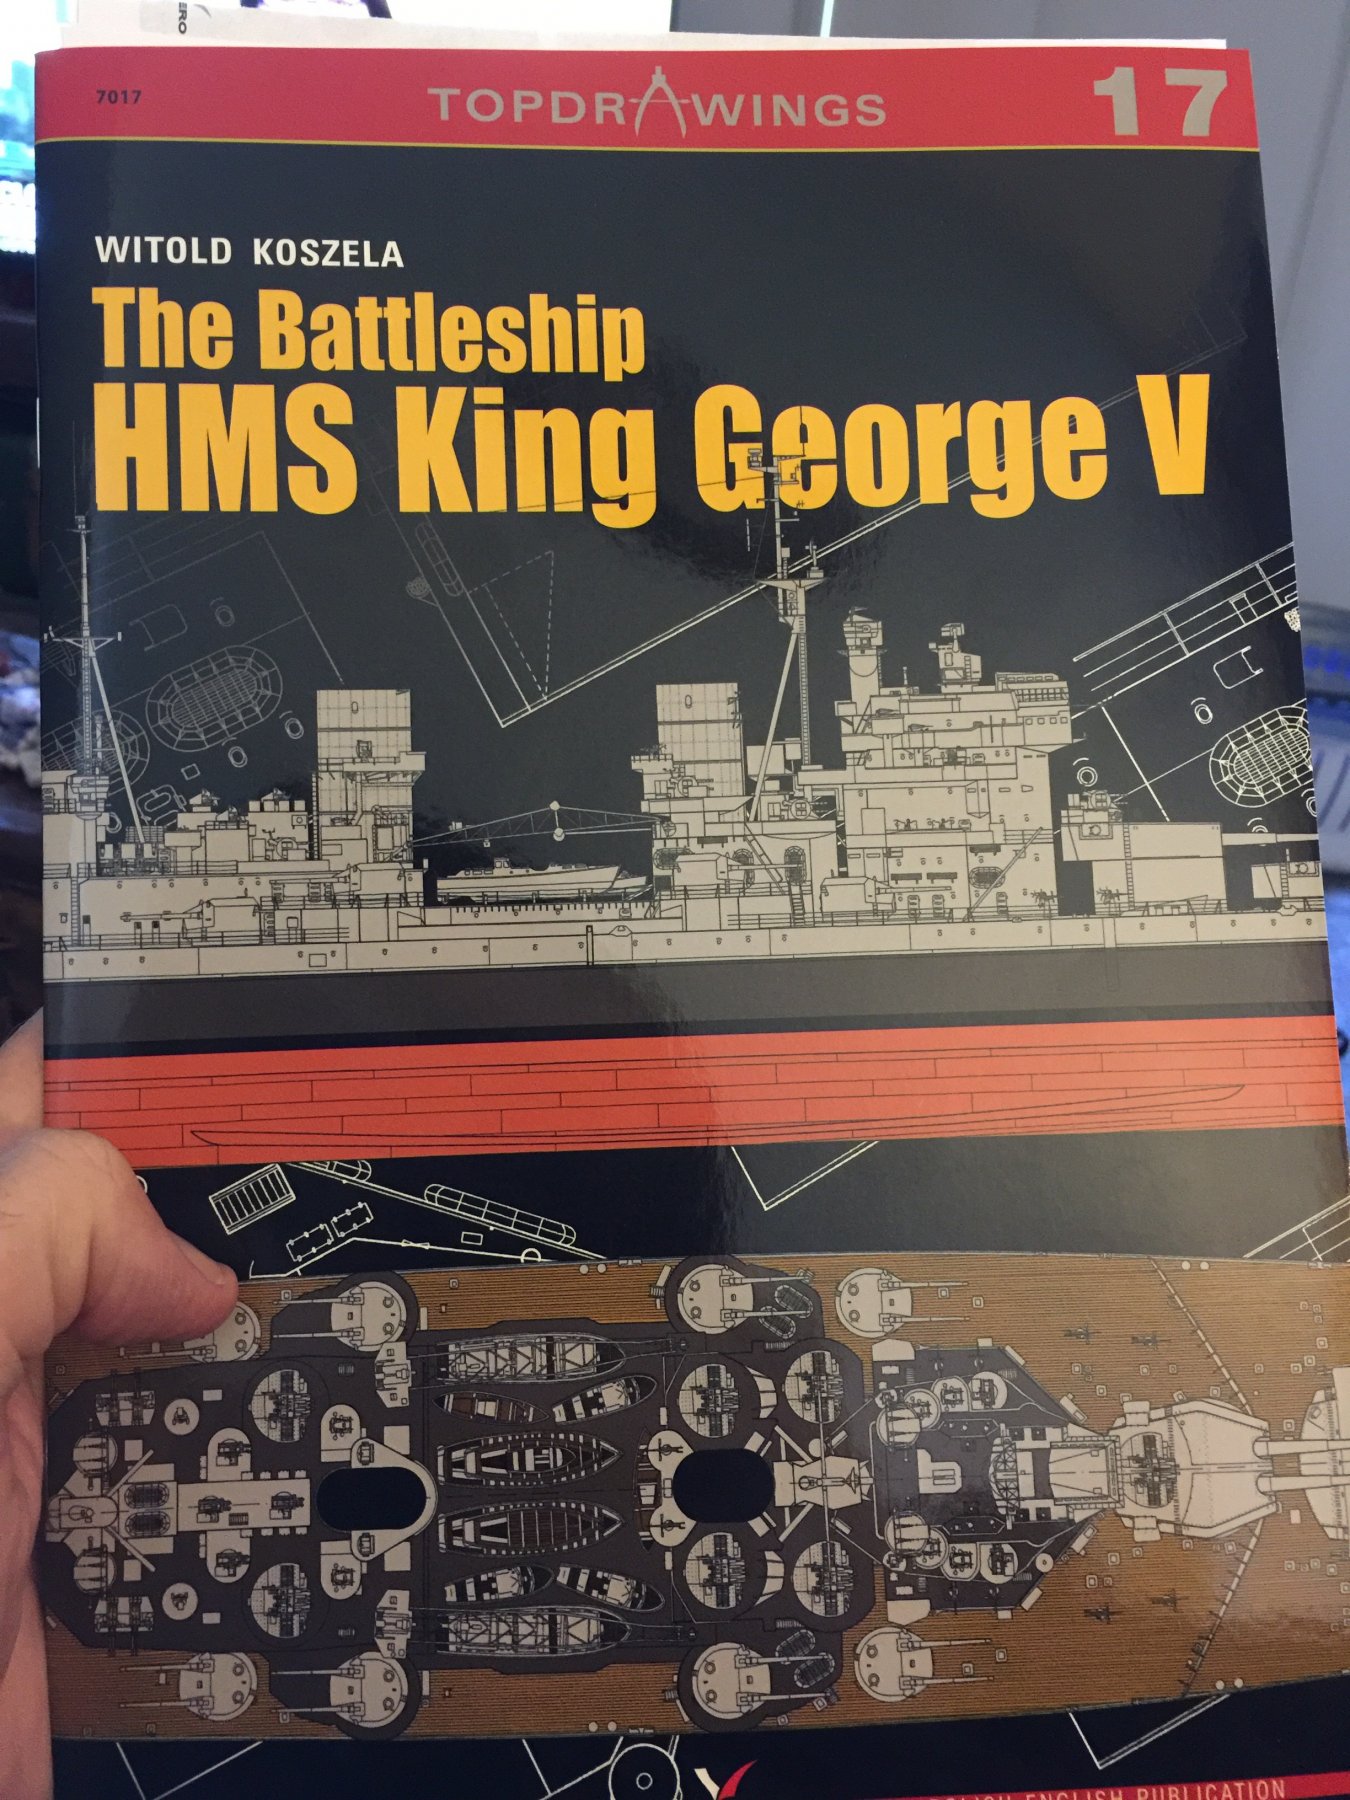
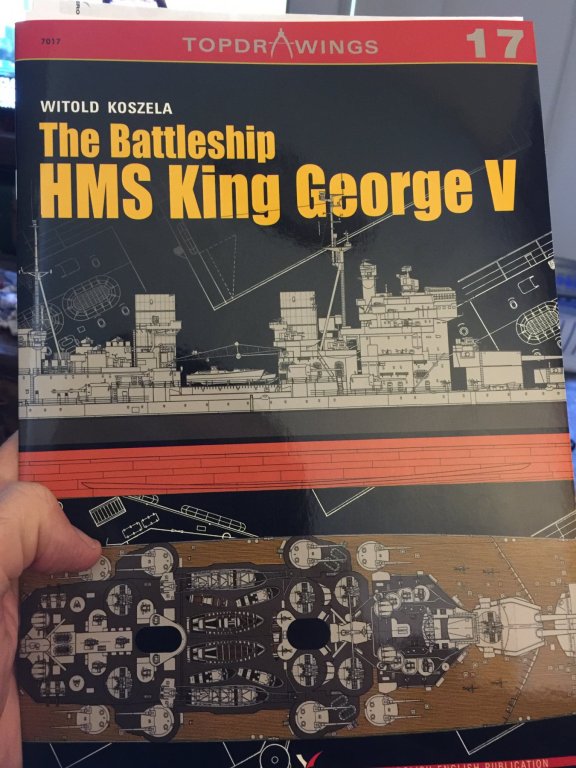
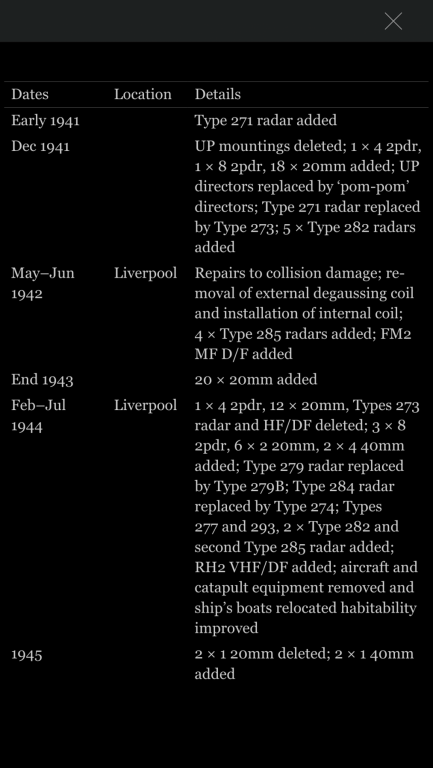
I don’t think they were covered until the 1944 refit and when she was sent to the South Pacific given the insanity of the Japanese pilots. In 1943 she still had them uncovered and had an extra 18 twenty mil guns. If I did the 1945 version I would probably get the set I used to cover the Yamato portholes. It also appears the rear section of her degaussing cable were still present but the front section removed. I just recieved this, which covers her entire career but for some reason ignores the removal of the degaussing cable completely. So, the photos don’t lie.
- 405 replies
-
- 6
-
-
- tamiya
- king george v
- (and 2 more)
-
Just sit in front of the TV with a pin vise and drill away, it’s mindless work but has to be done
- 405 replies
-
- 6
-
-
- tamiya
- king george v
- (and 2 more)
-
Only ever use a hand drill, dremel gets the bit too hot and the plastic melts and/ or makes the hole too big.
- 405 replies
-
- 5
-
-
- tamiya
- king george v
- (and 2 more)
-
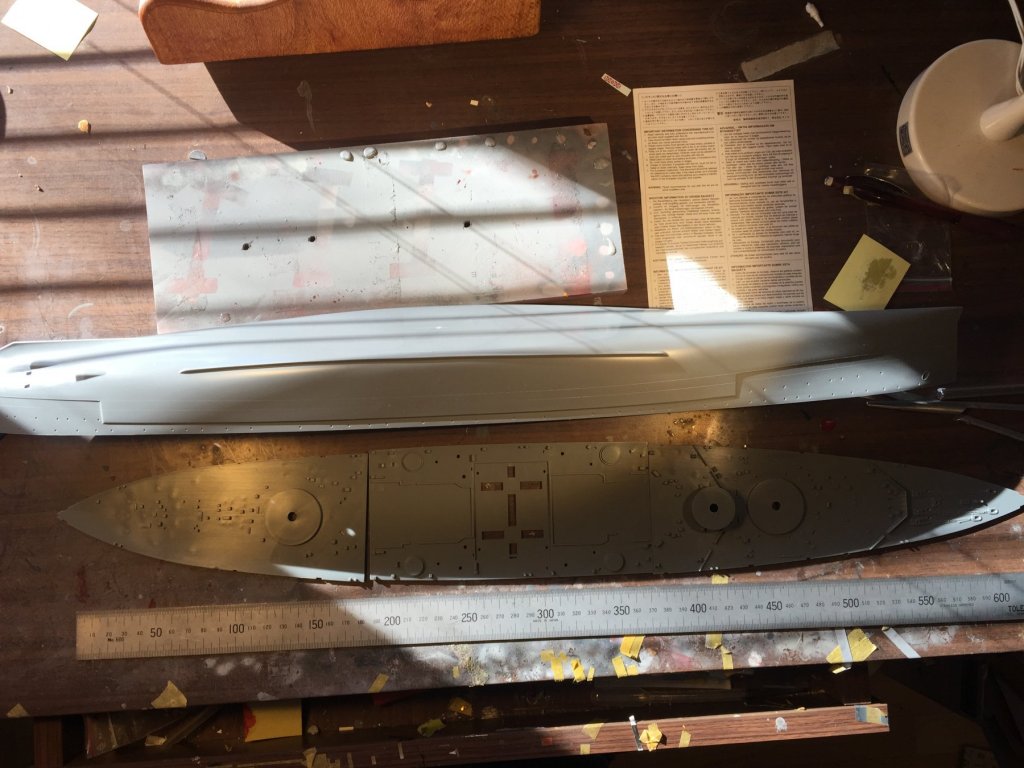
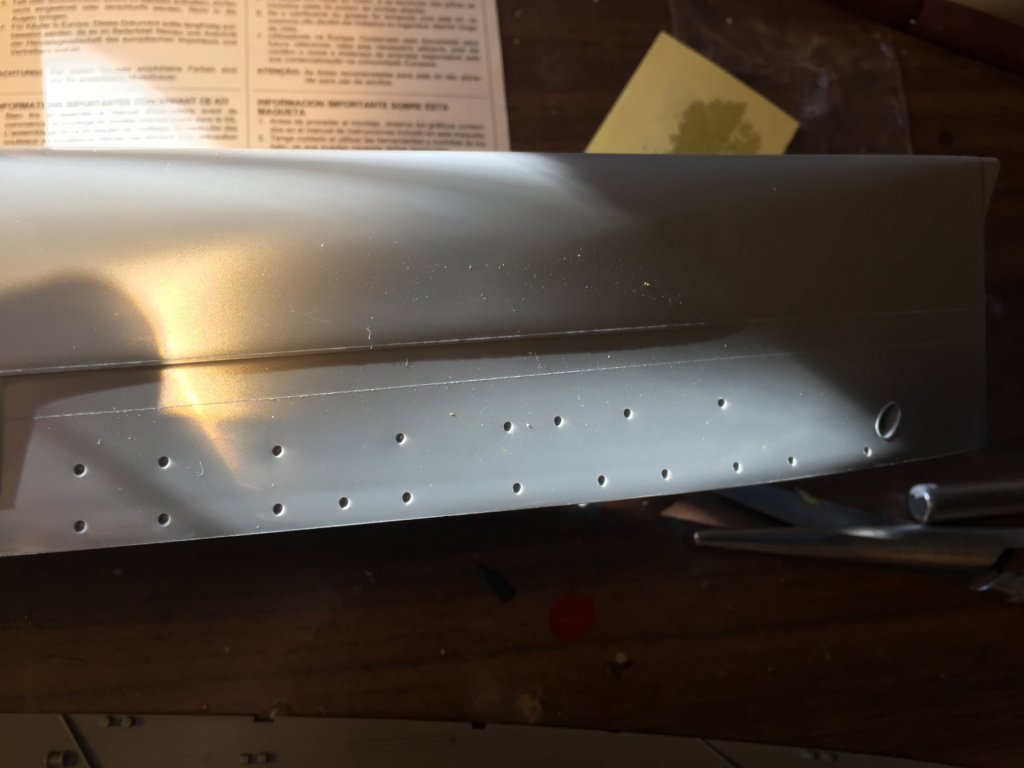
The base hull. All the detail will have to come off the decks so I will have a clean slate. Portholes will need to be drilled out, ringols added, two holes in the bottom for the brass stands, add the decks so they’re nice and flush, drill several hundred holes for railing stanchions.
- 405 replies
-
- 9
-
-
- tamiya
- king george v
- (and 2 more)
-
Very tidy work Cog, one of the hardest things to do and this thing is tiny. Well done.
- 1,090 replies
-
- 8
-
-
- showcase models
- vendetta
- (and 2 more)
-
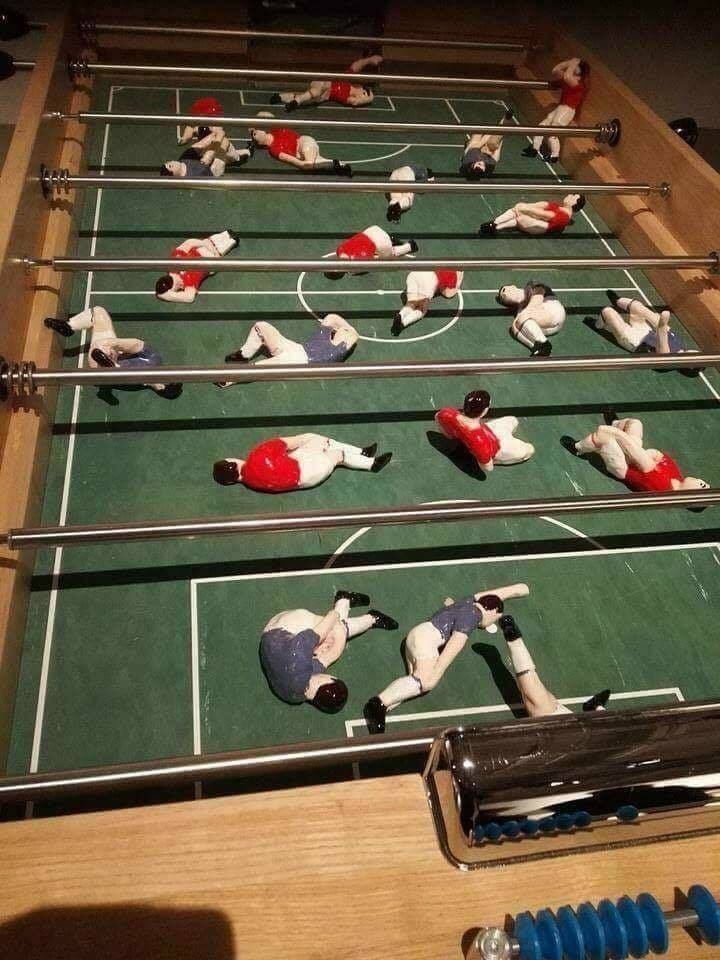
Um, Aussies have always called them Yanks even though they had a significant impact on us keeping English as our first language in the 1940’s. listening to cog squeal reminds me a bit of a soccer player squealing and falling to the ground crying when they are tapped on the shoulder. Having a contact sport job helps.

- 1,090 replies
-
- 9
-
-
- showcase models
- vendetta
- (and 2 more)
-
Spend some time looking at Hobby Easy or BNA (easier to navigate), probably 70% is directed at IJN aftermarket but there is so many extras out there. The 3d printing world is also amazing but for those of us at the top end of the world the shipping is waaaaaaaay out of proportion (must be a EU thingy). Unfortunately GMM was British then bought out by the yanks and whilst they were pretty much to start of PE they have not made a new product since the turn of the century
- 1,090 replies
-
- 6
-
-
- showcase models
- vendetta
- (and 2 more)
-
You’ll probably find this hard to believe but I have a fair bit of PE left over now which I keep in a plastic sleeve folder and sticky take the frets to a piece of paper. Strangely enough the modern DDG was the least satisfying build as everything was done and no imagination was needed and the tolerances were unforgiving.
- 1,090 replies
-
- 8
-
-
- showcase models
- vendetta
- (and 2 more)
-
The next build is months away gents so plenty of time to join. Dont be afraid of PE, and don’t be afraid to use small strips of wood or styrene to make backing plates. There are often gaps and this fixes the gaps.
- 1,090 replies
-
- 8
-
-
- showcase models
- vendetta
- (and 2 more)
-
I saw this recently, is there enough paint to do a battleship? Do they airbrush well?
- 405 replies
-
- 6
-
-
- tamiya
- king george v
- (and 2 more)
-
Eduard is rubbish I don’t really know about Tom’s as it’s hard to get in Oz and very expensive Gold Medal Models is also very very expensive for what you get and about 10 years out of date compared to what s coming out of Korea Flyhawk is nice and good value Pontos is top shelf as is Infini Models (SangYun Park did a lot of their stuff before he defected) Alliance Model Works is a US company and very reasonable with nice stuff BigBlueBoy has some DDG stuff MK1 is good there is so much stuff out of Asia now it leaves the older companies in the dust. the two sites I look at are BNA model world in Oz and Hobby Easy in Hong Kong
- 1,090 replies
-
- 8
-
-
- showcase models
- vendetta
- (and 2 more)
-
No AOTS for it. The book I’ve ordered has fold outs which will help
- 405 replies
-
- 8
-
-
- tamiya
- king george v
- (and 2 more)
-
I’m awaiting the Top Down reference book, but as far as my research goes, it appears to have happened after the ‘44 refit. As I said before, there is so much poor information out there one needs to be careful. The IWM photos are all referenced by the photographer so I trust them more more than some bloke on google. The kit hull is lazily done by Tamiya but it is old. I intend to overspray the who whole hull before I draw up the hull plates then layer them to give depth.
- 405 replies
-
- 7
-
-
- tamiya
- king george v
- (and 2 more)
-
Rubber straps really hurt, but one did learn manners and that ones opinion is not the only one
- 1,090 replies
-
- 8
-
-
- showcase models
- vendetta
- (and 2 more)
-
Nun’s, nasty things that used rulers, then Brothers, canes and straps.
- 1,090 replies
-
- 8
-
-
- showcase models
- vendetta
- (and 2 more)
-
The hull is smooth as a baby's bum BUT does etch in a boot strap. Your can see from the photos of when KGV was in drydock in 1941 after a parking incident there is a considerable amount of hull detail missing. The Degausing cable was removed in later '41. It appears from the 1943 photo it was only the bow section. The stern also has these pesky square hatches (photo is from '45 when some portholes were covered over). The deck will need to be completely wiped clean and flush. As such by the time get this one done, Cog will be out of excuses to do the next joint build. Roger Chesneau's book on the KGV class includes the fit out history. As such the hull needs a LOT of work before any PE comes out of the box.


- 405 replies
-
- 11
-
-
- tamiya
- king george v
- (and 2 more)
-
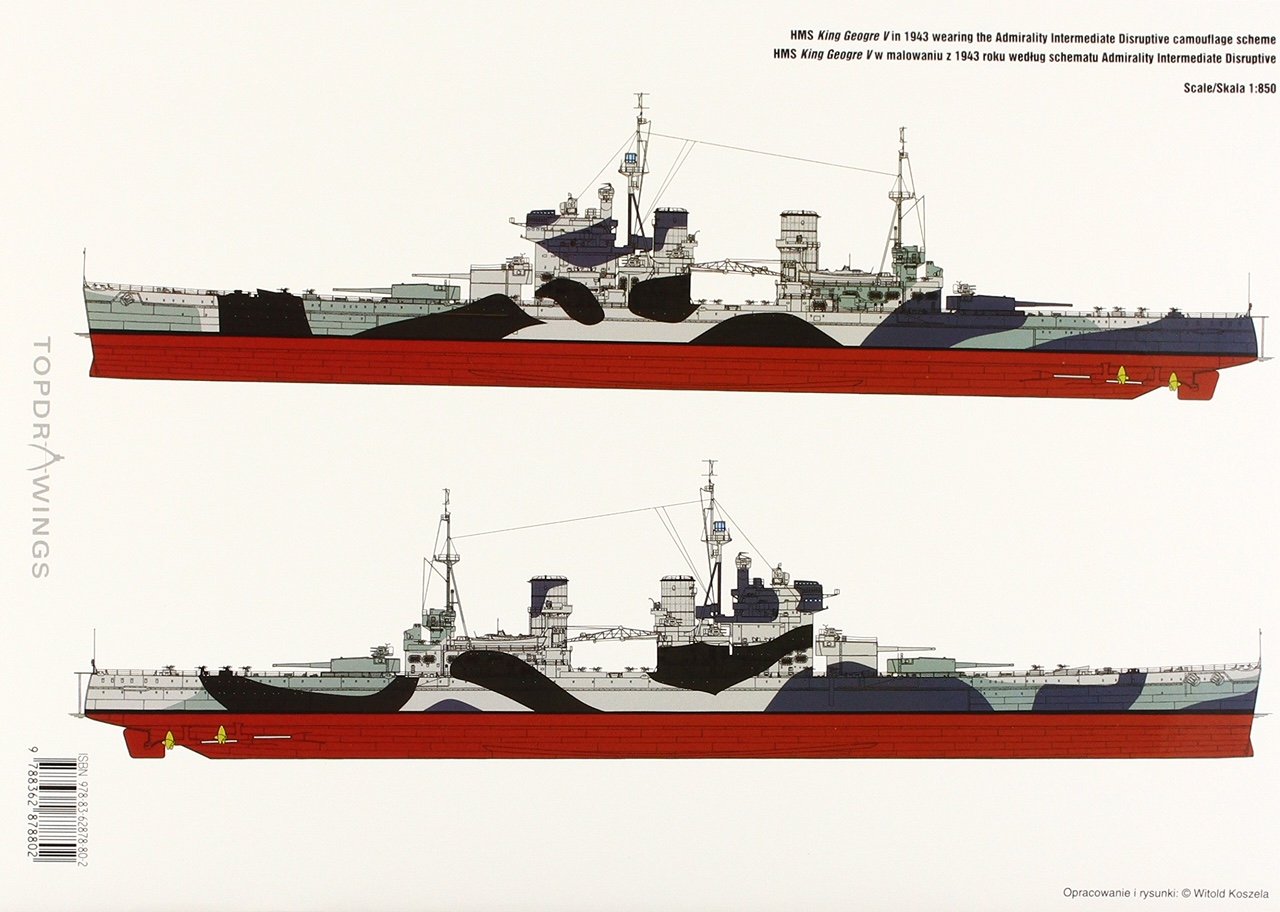
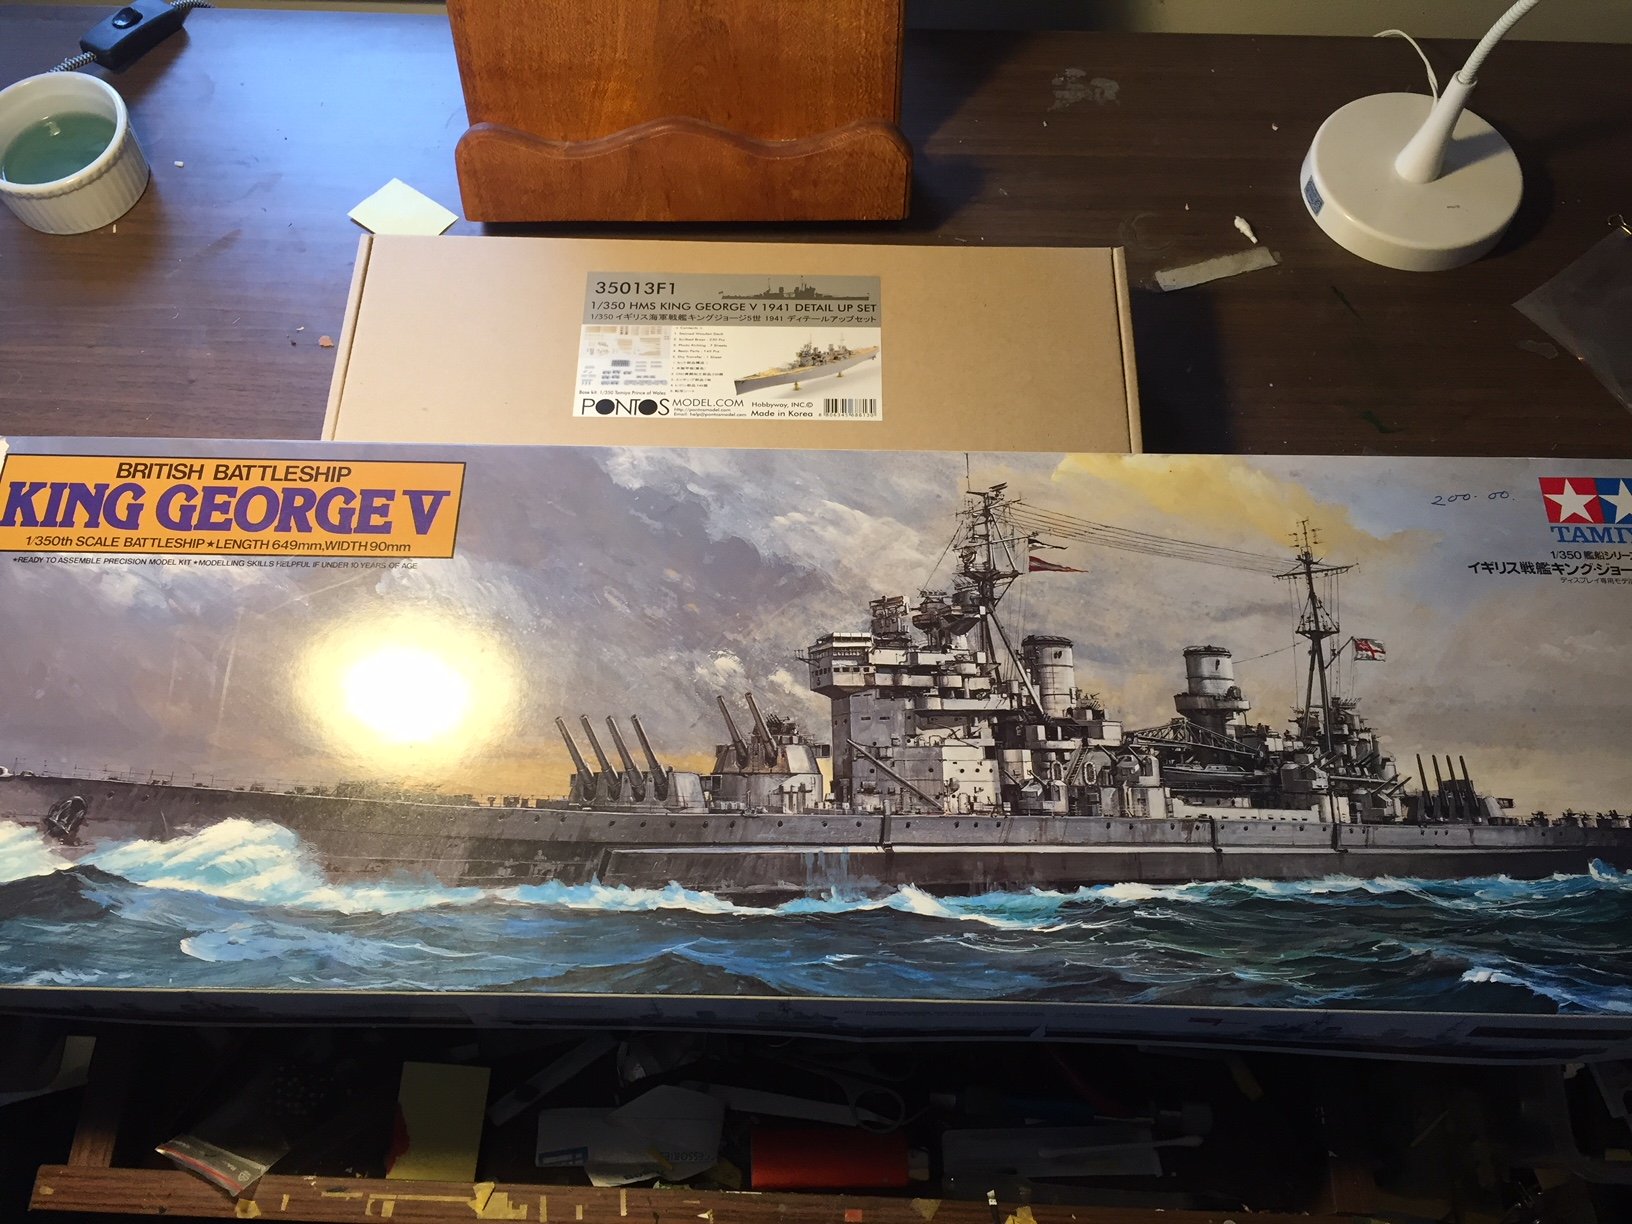
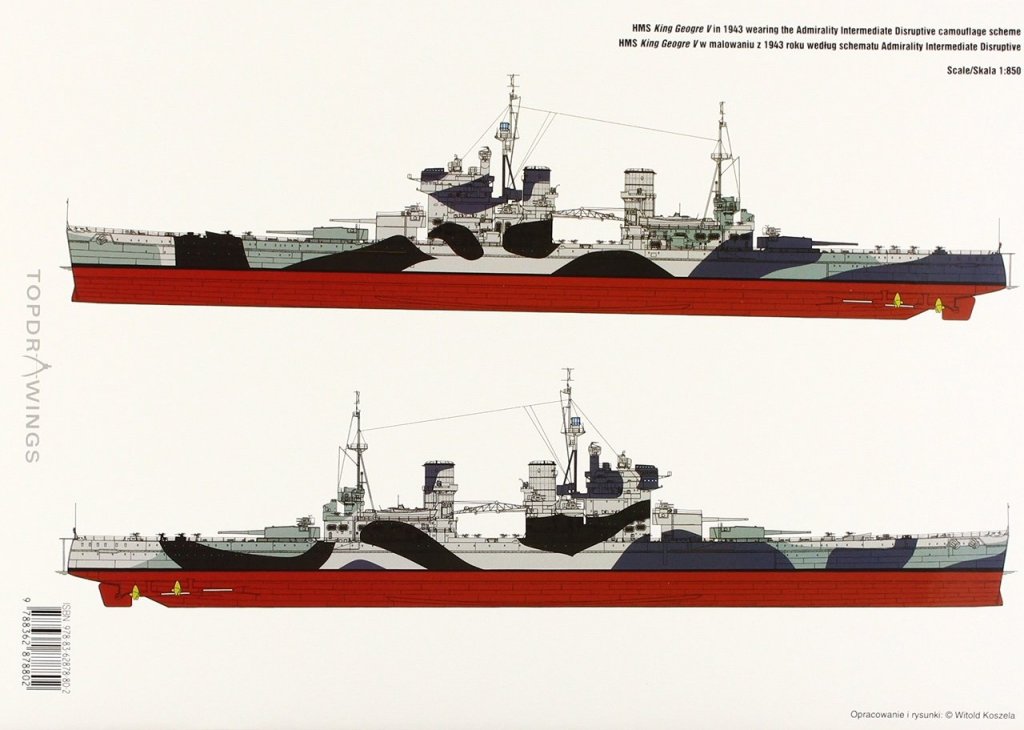
So I found a King George V on a local buy and sell site, came with a wooden deck and metal barrels at a good price. I know it's been done, Mr Rabbit and Kpnuts, and there are basically three iterations of HMS King George's Career, when she fought the Bismarck in '41, the '43 fit out then the '44 fit out. I want to do the '43 fit out as it hardly ever been done, the references are very obscure and I get to do camouflage and not strait grey. The Tamiya Kit is set for the 1945 fit out, having removed the aircraft and placed the ships boats amidships, but the Aftermarket Pontos is retrofitted for 1941. The thing is, the Pontos set gives you the ability to have an aircraft deck but the kit gives you no aircraft. Thus one has to buy a Walrus. The Tamiya kit has the stern square hatches omitted which need to be after - after market as Pontos ignored this gem. I got the new Infini Models RN Doors (he bloke who is Infini models designed this set when he worked for Pontos) as they are just magnificent. I also got some individual RN stanchions as I'm over one piece railings are I like to torture myself. I've ordered new Carley Floats (i'll have to scratch build the Flota nets) and an extra set of 20mm guns as there should be 38 of them all up. The Chap I bought the kit from had a Artwox deck which is suitable but the Pontos one is fairly clean which means I can add whatever configuration I want. I've spent a few weeks researching tis and the internet is just full of people who just do not check their references, as about 70% of the photos pro porting to be KGV are usually a sister ship. The Imperial War Museum has lovely photos which are correctly labeled and allow me to feel comfortable in my 1943 configuration. Welcome to build number 10 in 1/350.

- 405 replies
-
- 12
-
-
- tamiya
- king george v
- (and 2 more)
-
Your favourite being.......? no rush C, stock up. I have another battleship to build yet, just awaiting some reference stuff. That gives us us time to gang up on Cog.
- 1,090 replies
-
- 6
-
-
- showcase models
- vendetta
- (and 2 more)
-
Yes Canute, and Cog gets to pick on you too. It’s becuse he’s so tall. He can reach up the rafters to steal food from onlookers.
- 1,090 replies
-
- 6
-
-
- showcase models
- vendetta
- (and 2 more)