Check out our new MSW Sponsor Innocraftsman
×


RGL
-
Posts
5,504 -
Joined
-
Last visited
Content Type
Profiles
Forums
Gallery
Events
Everything posted by RGL
-
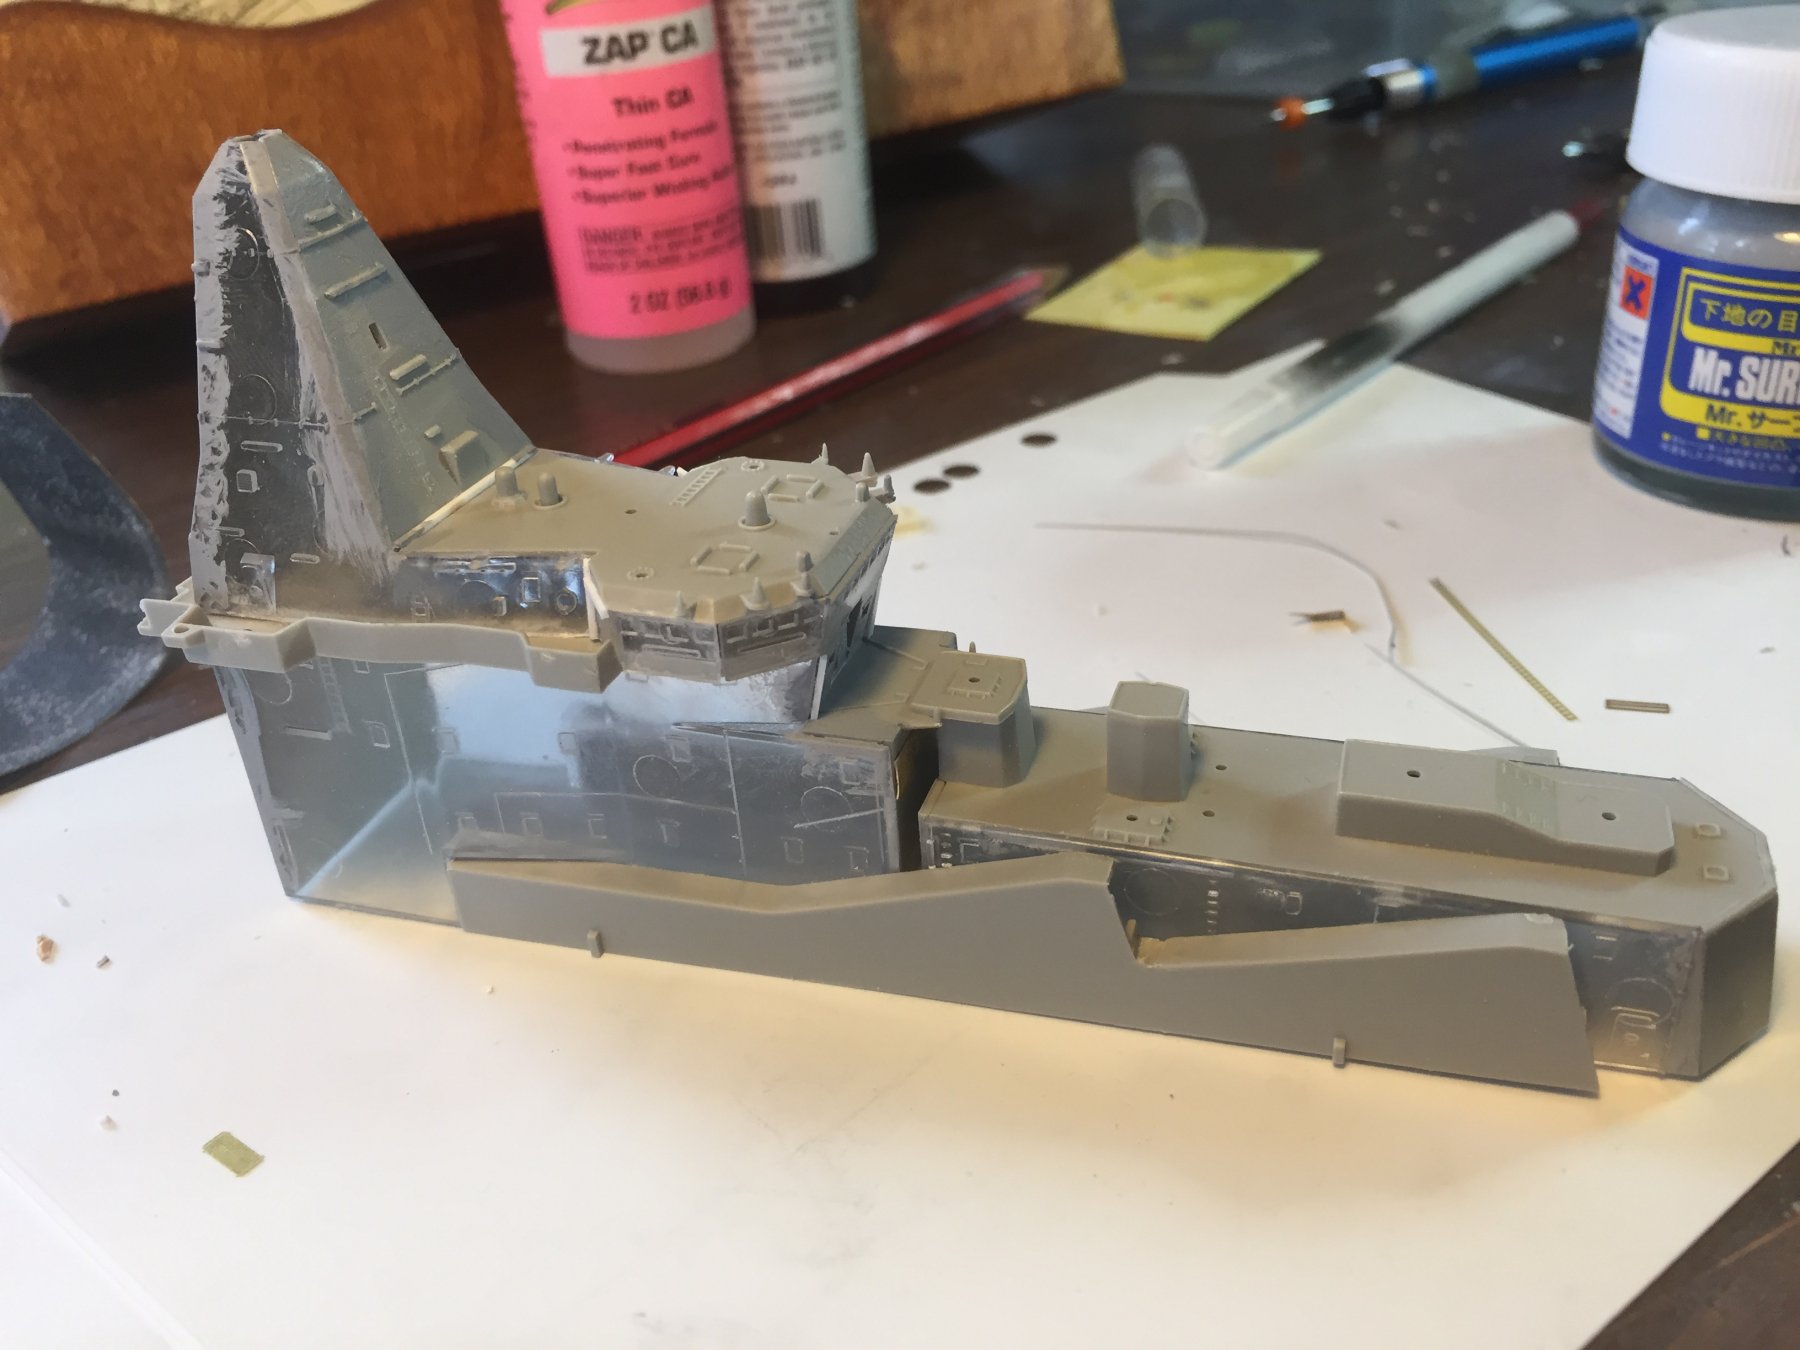
 The last main superstructure, this clear stuff is such a pain, you cannot see gaps, so after I glued it I used some Mr Surfacer on the edges to see where the gaps where. I sanded in the small box es and used some plastic strip on the big ones. There is a LOT of small details to add to this. I found some speakers in 1/350 (coming from France) and have ordered some Accupuncture needles to uses as the multiple whip aerials. Apart from the GMM set there are a lot of cables and handholds to add all over. Dry fit;

- 180 replies
-
- 12
-

-
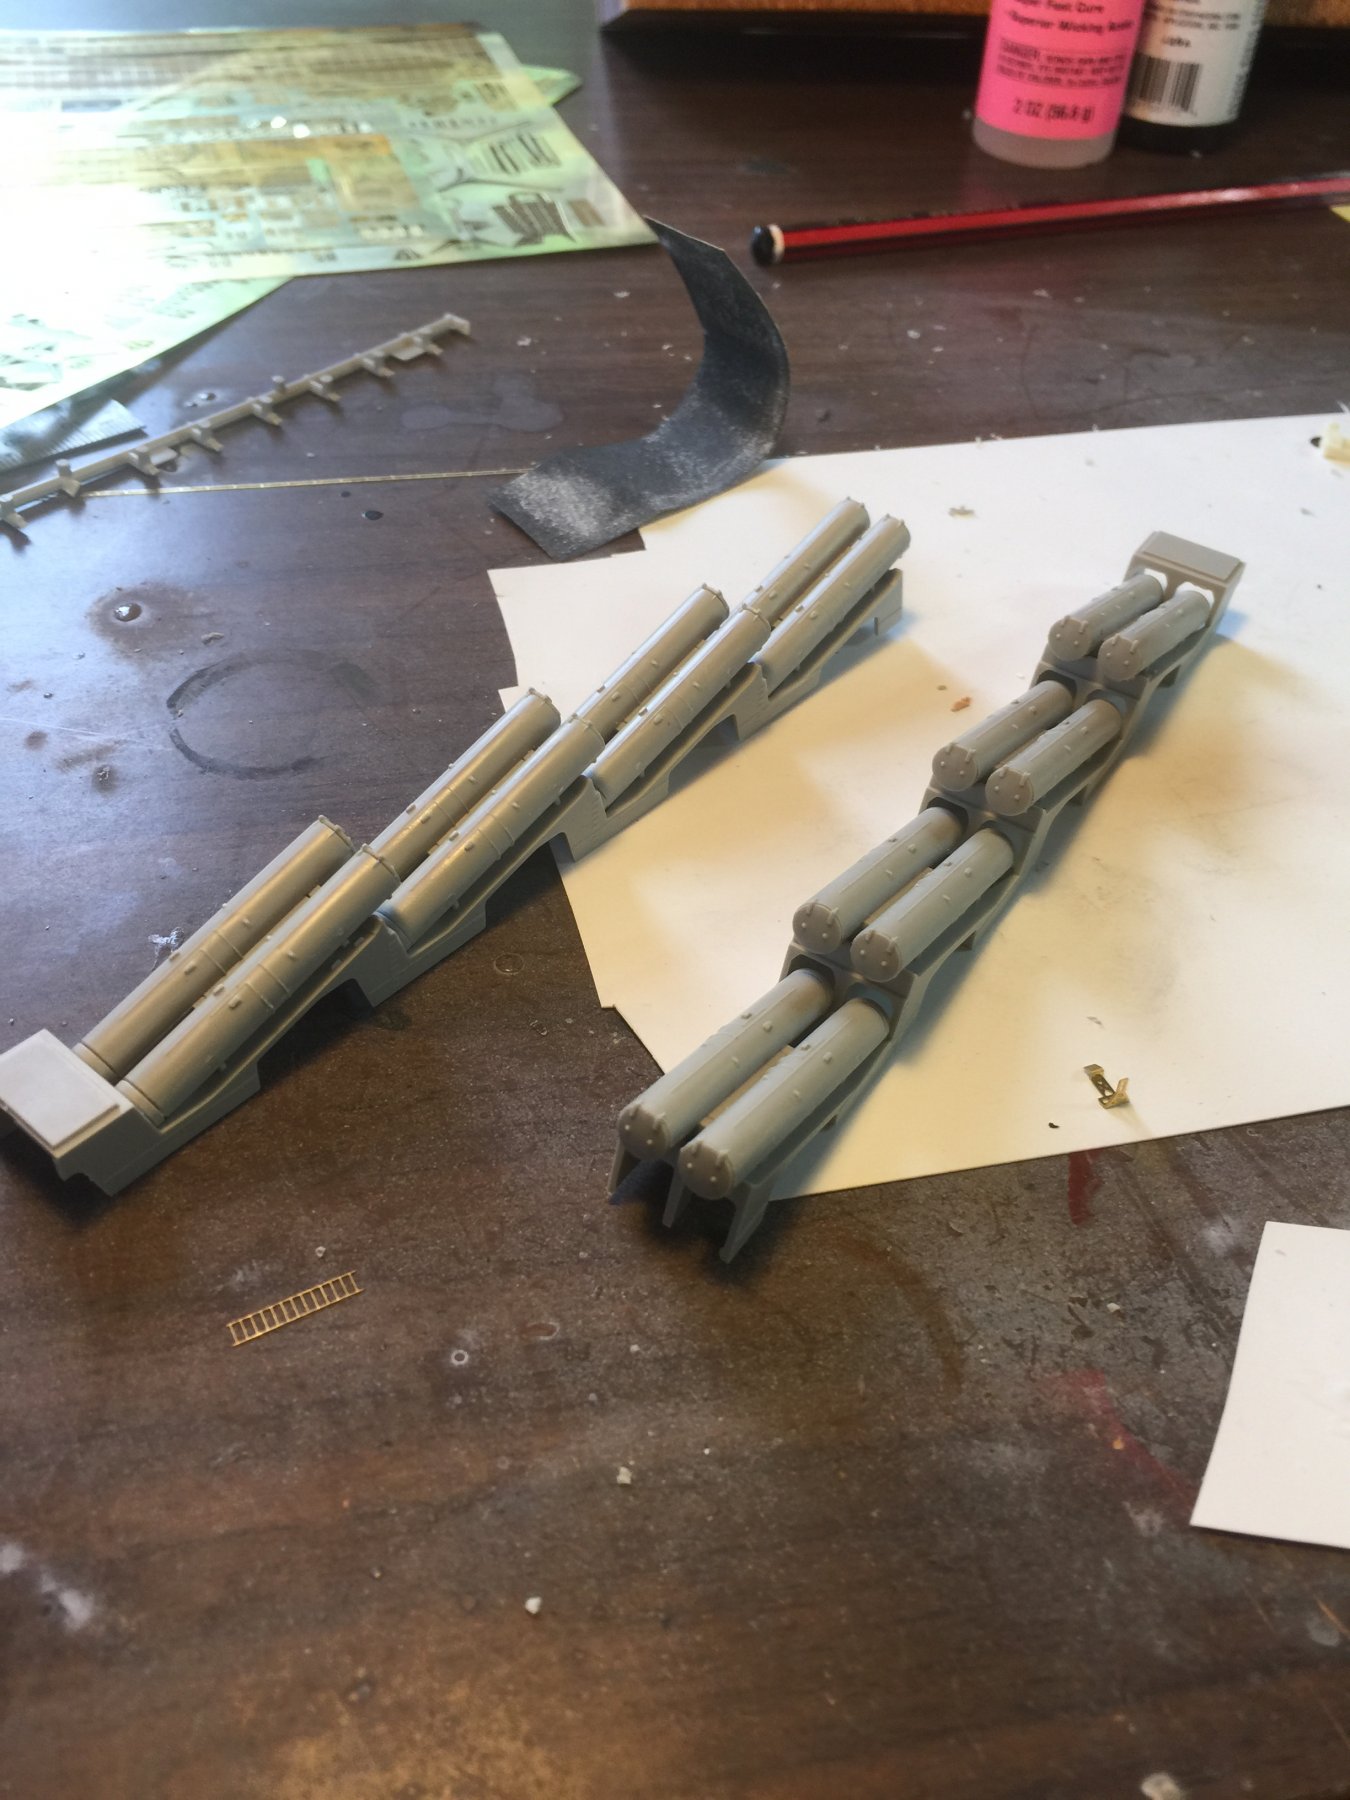
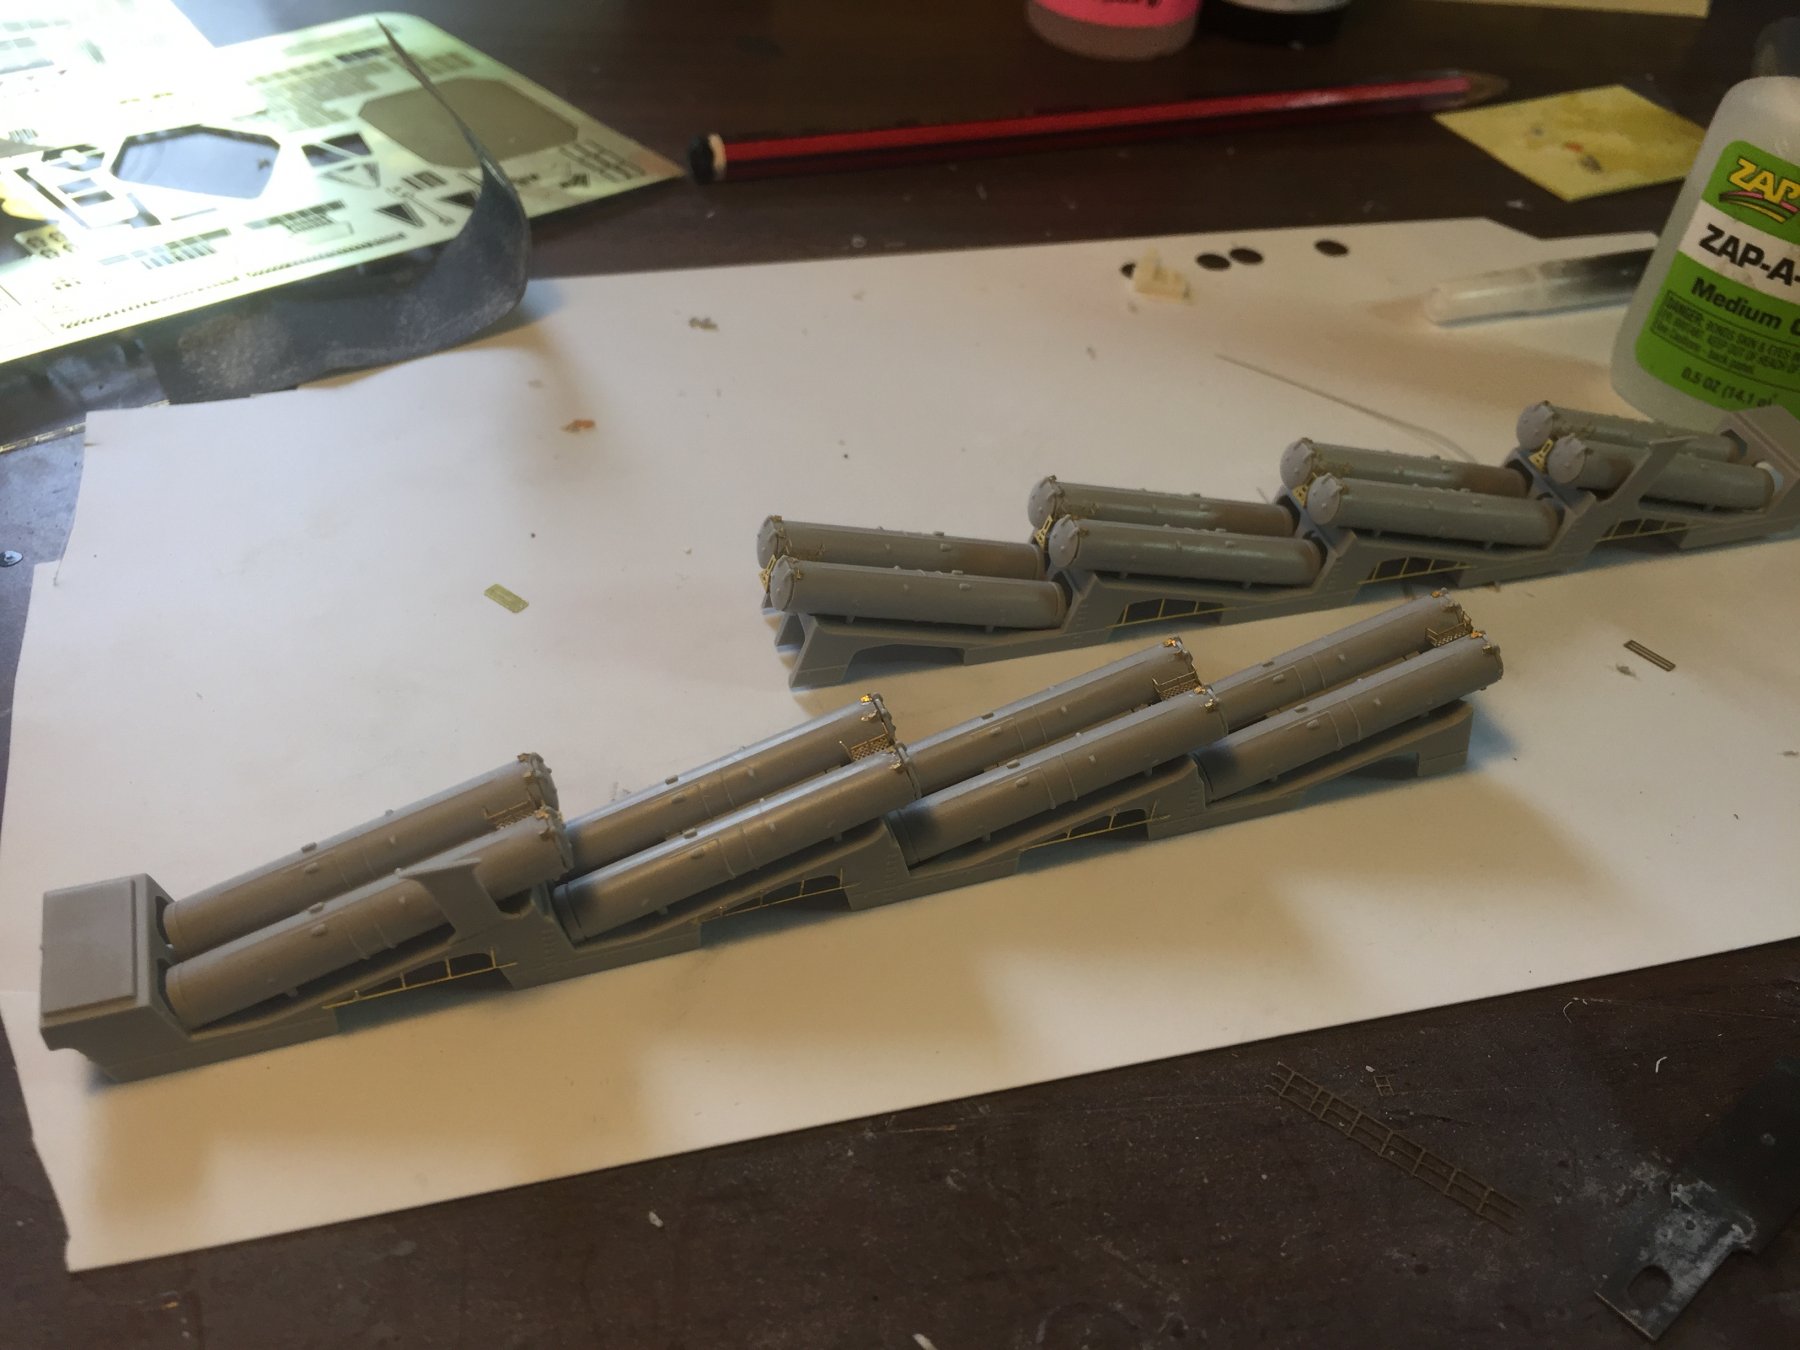
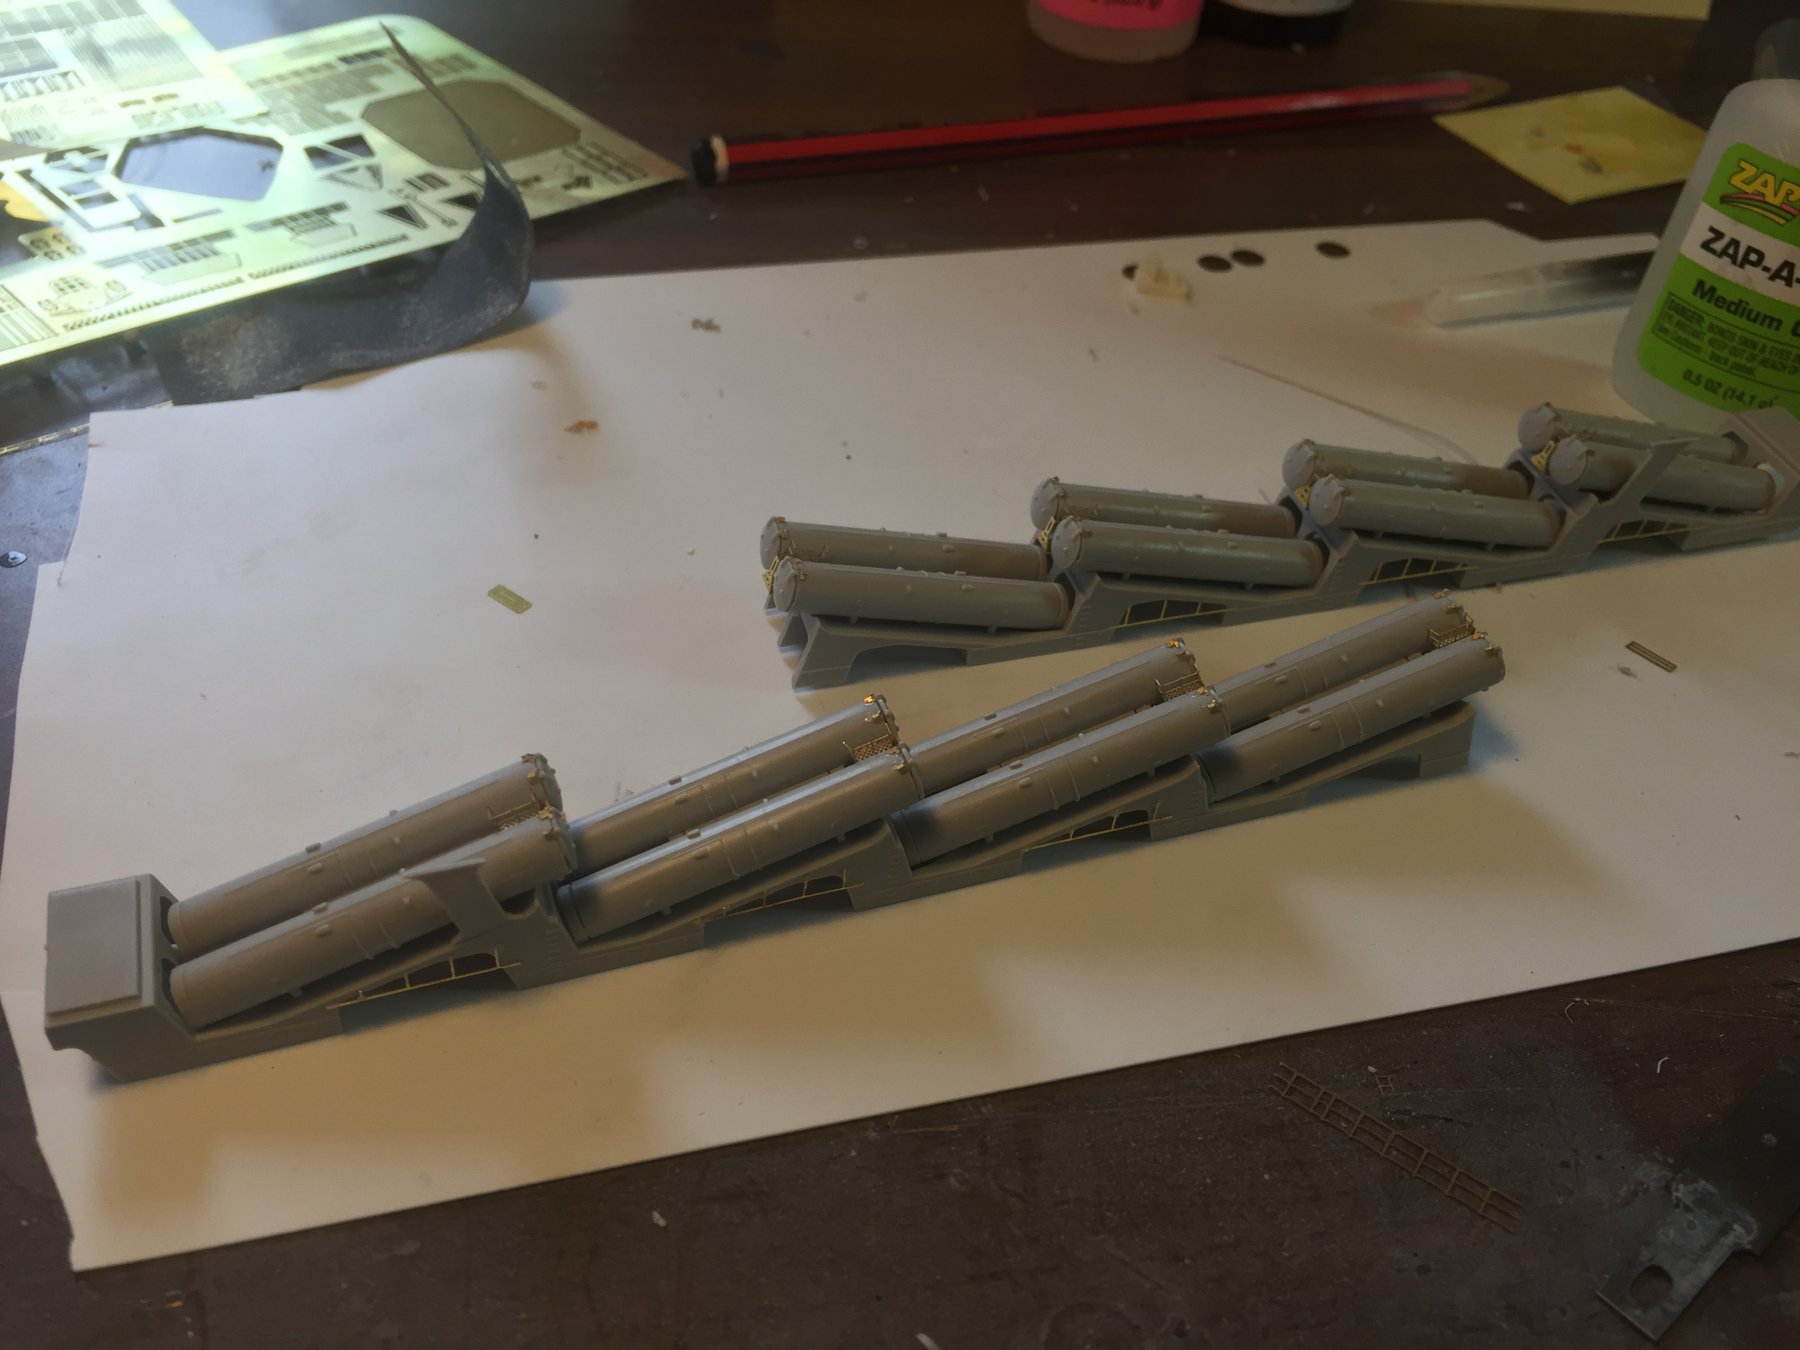
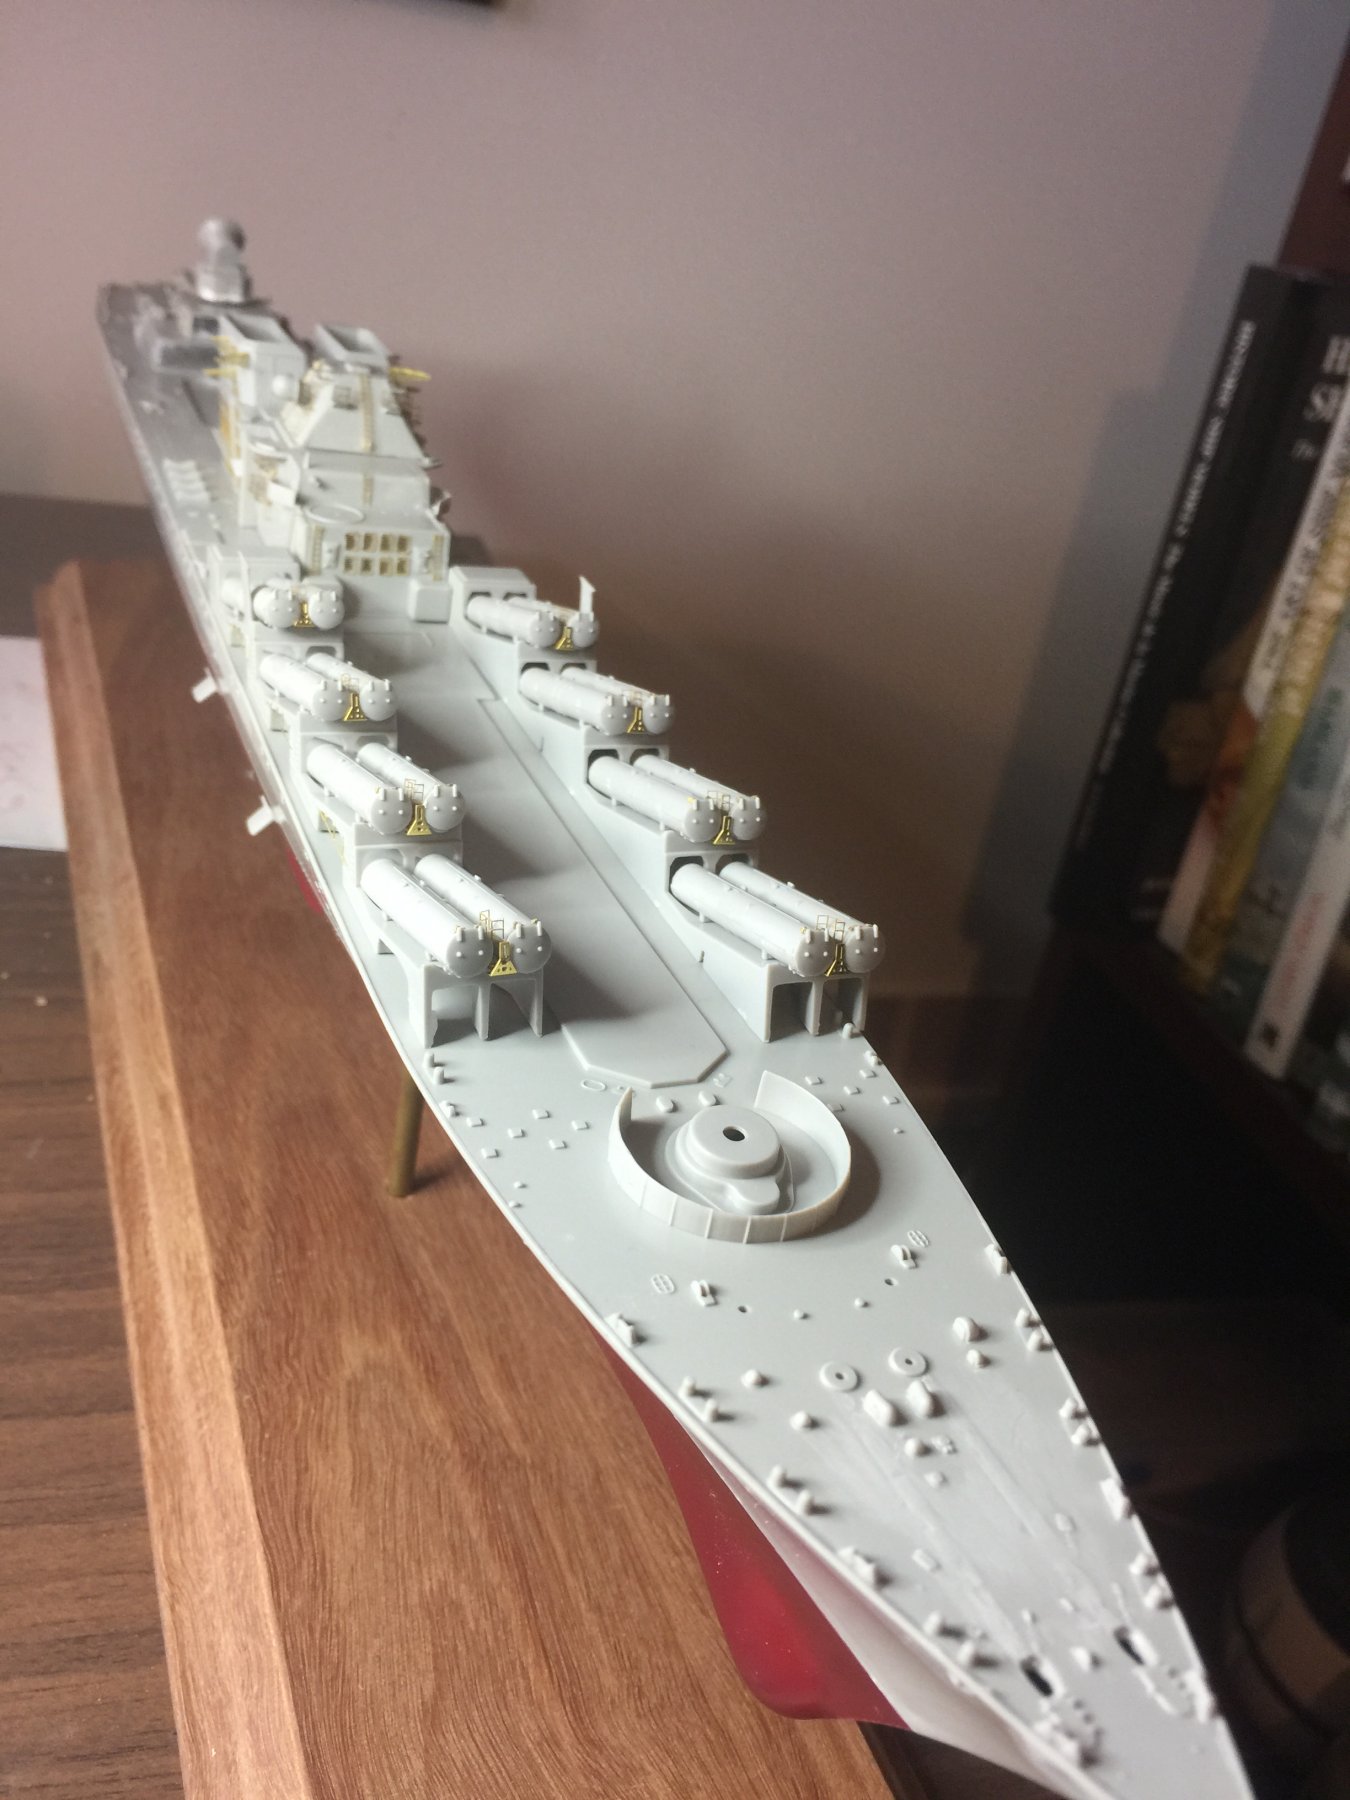
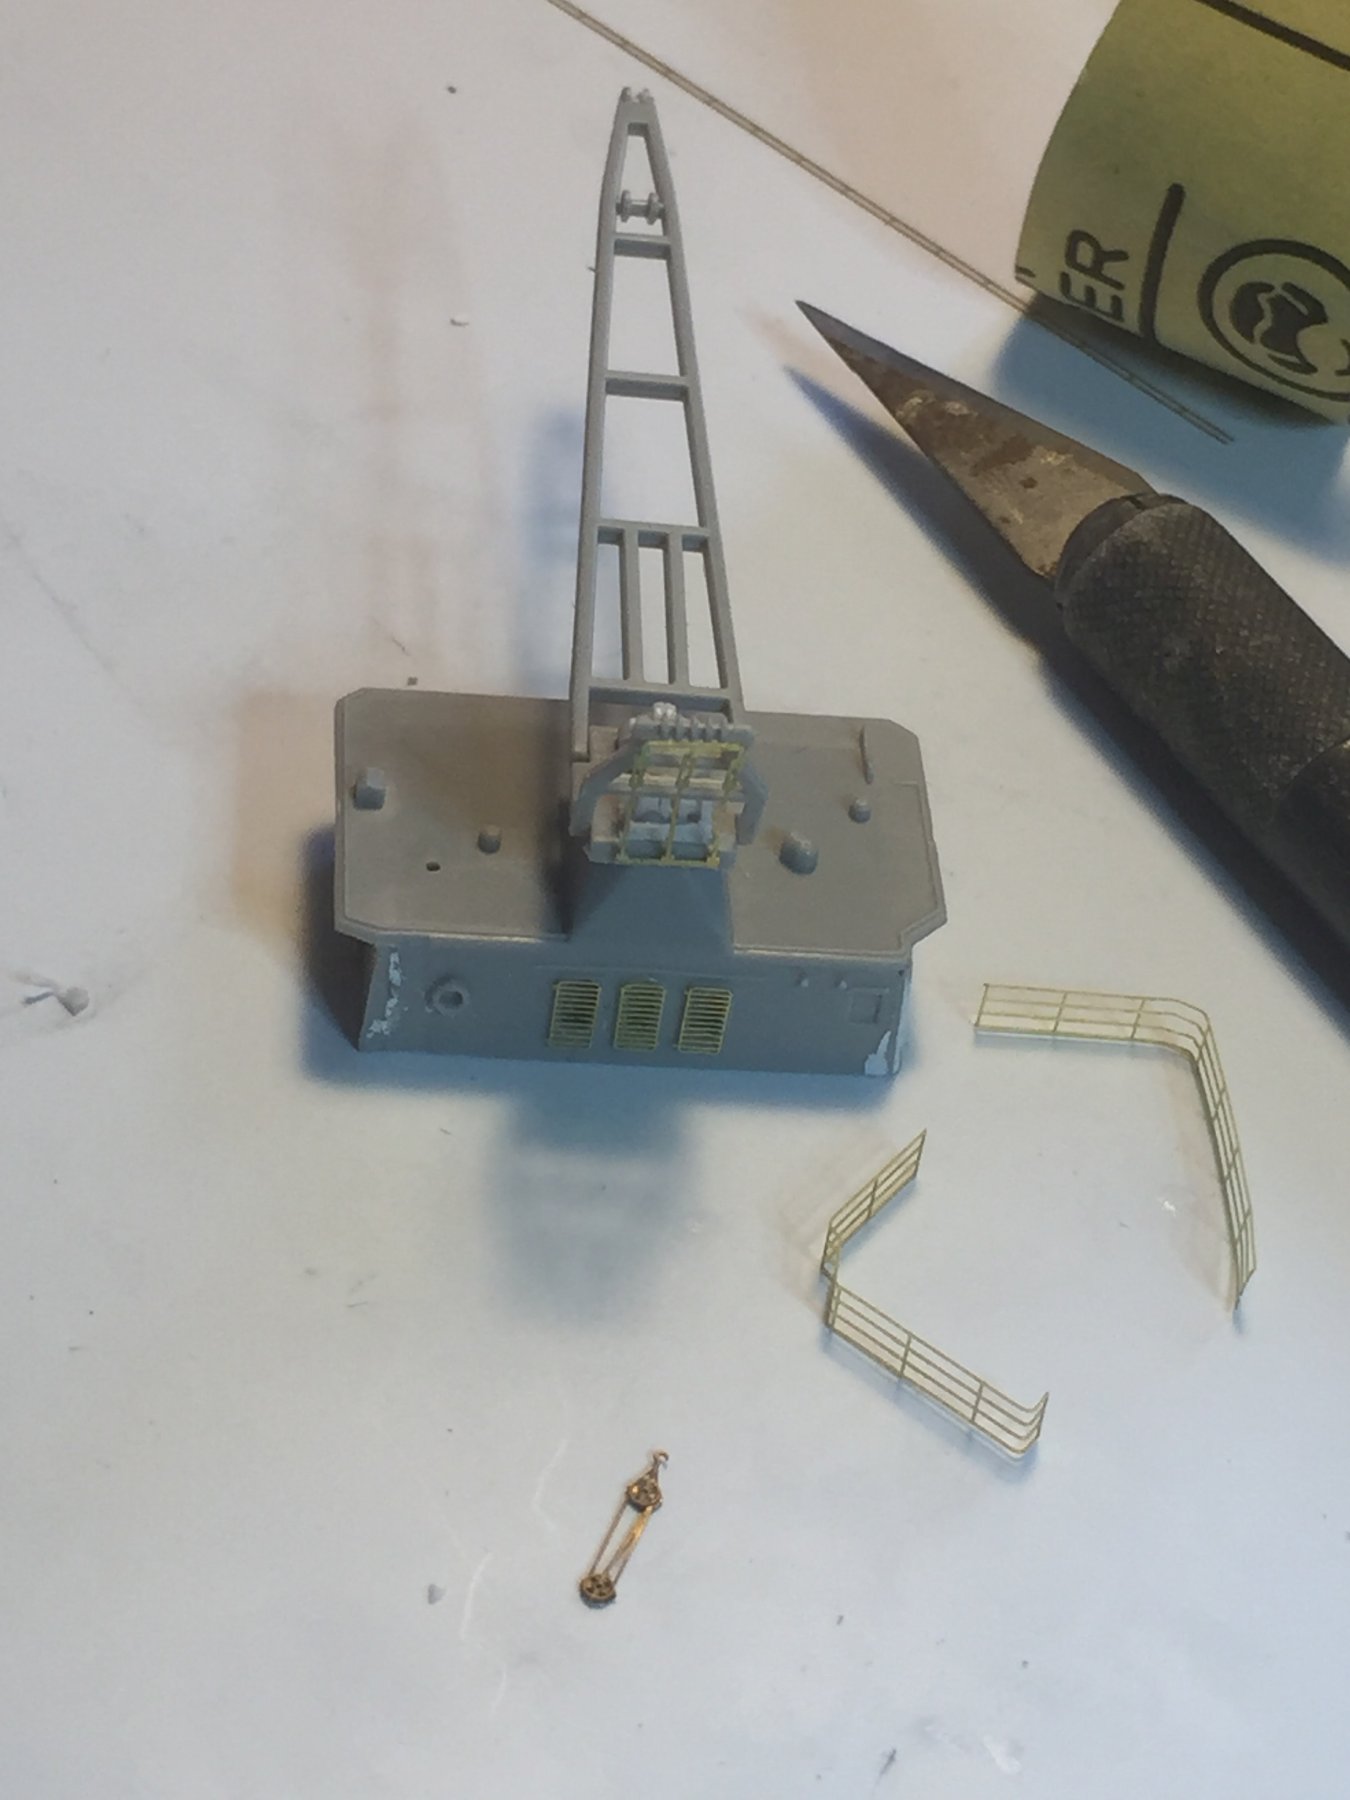
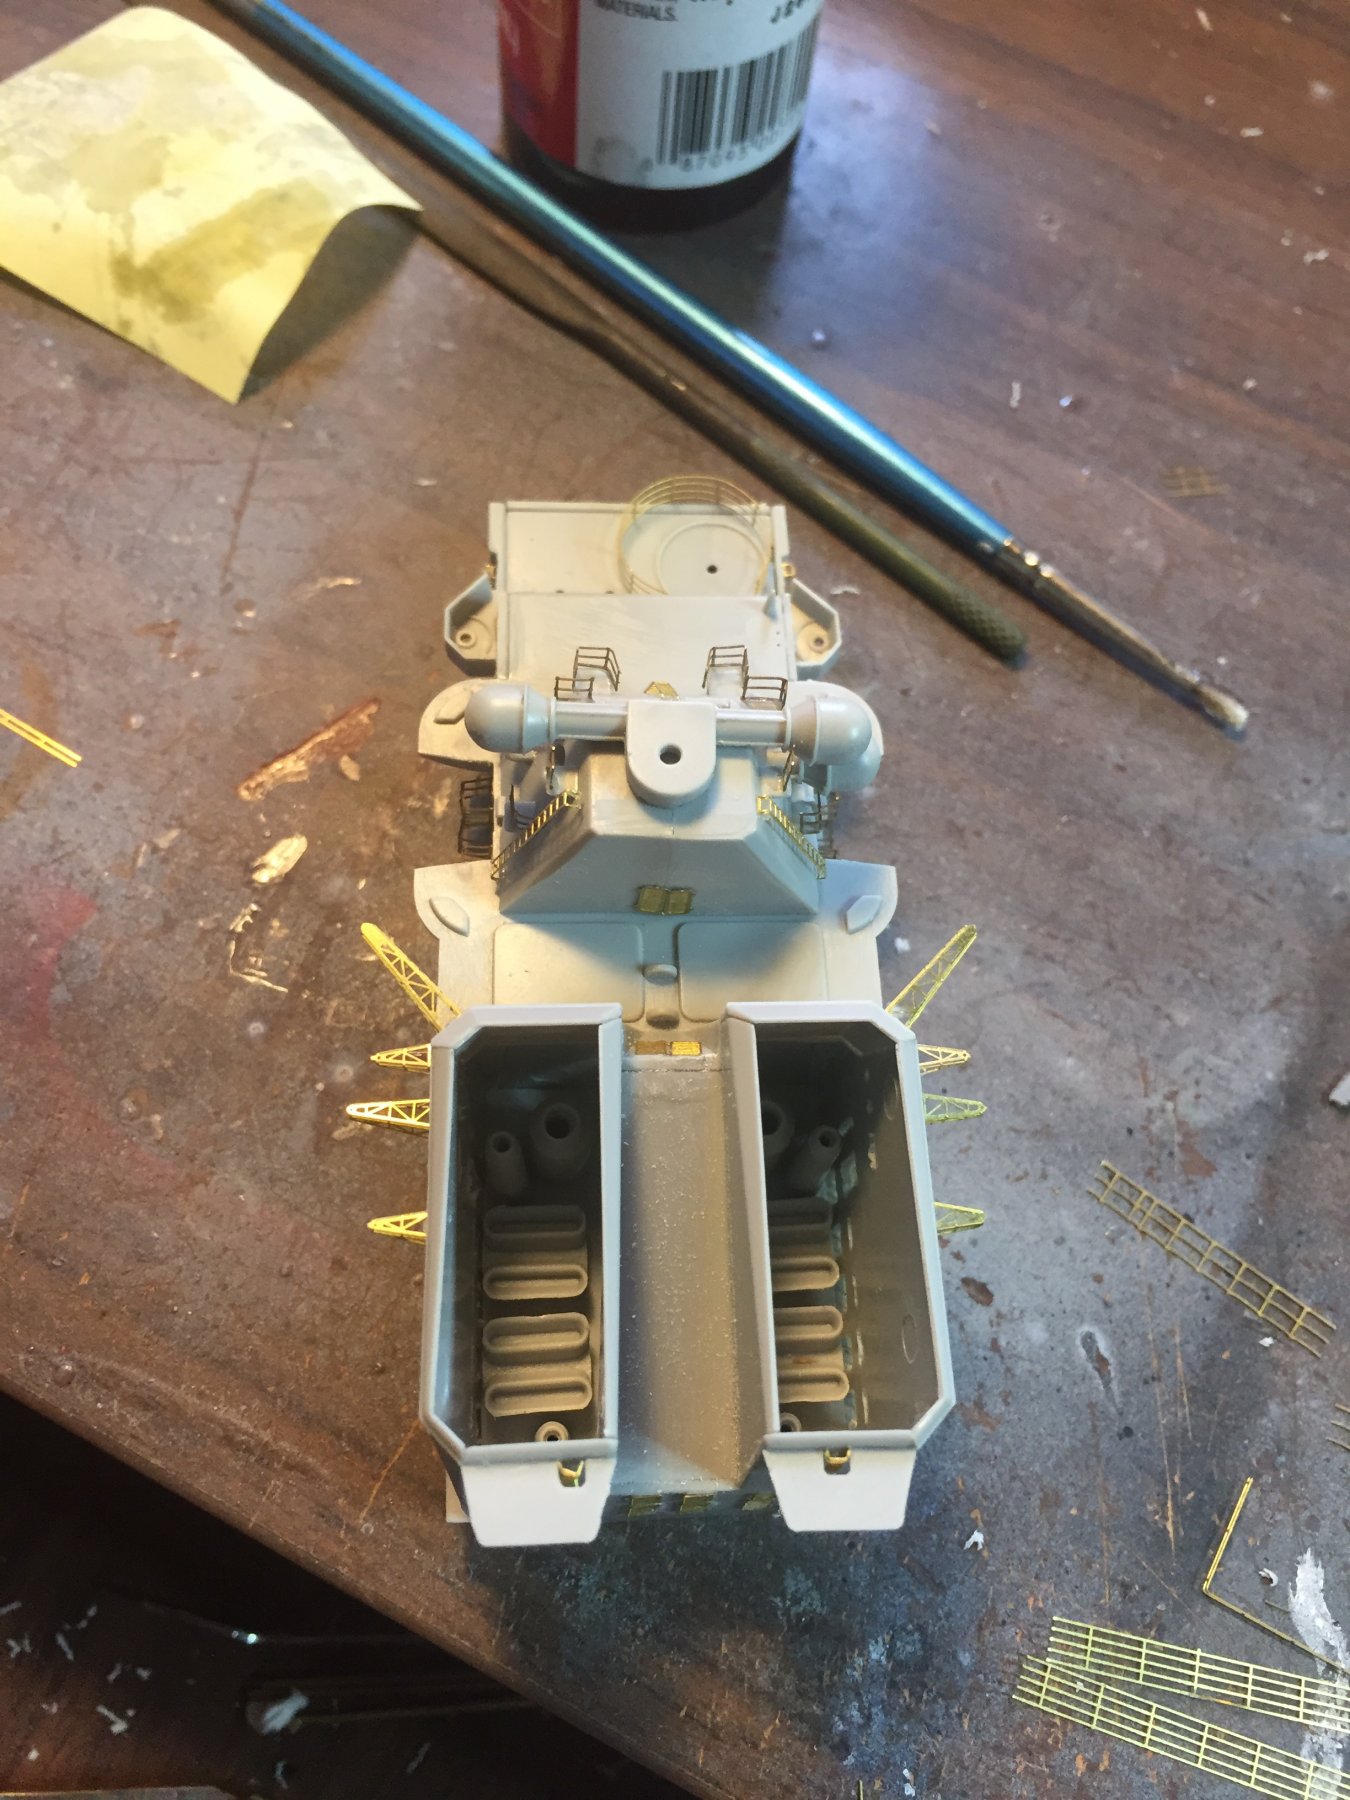
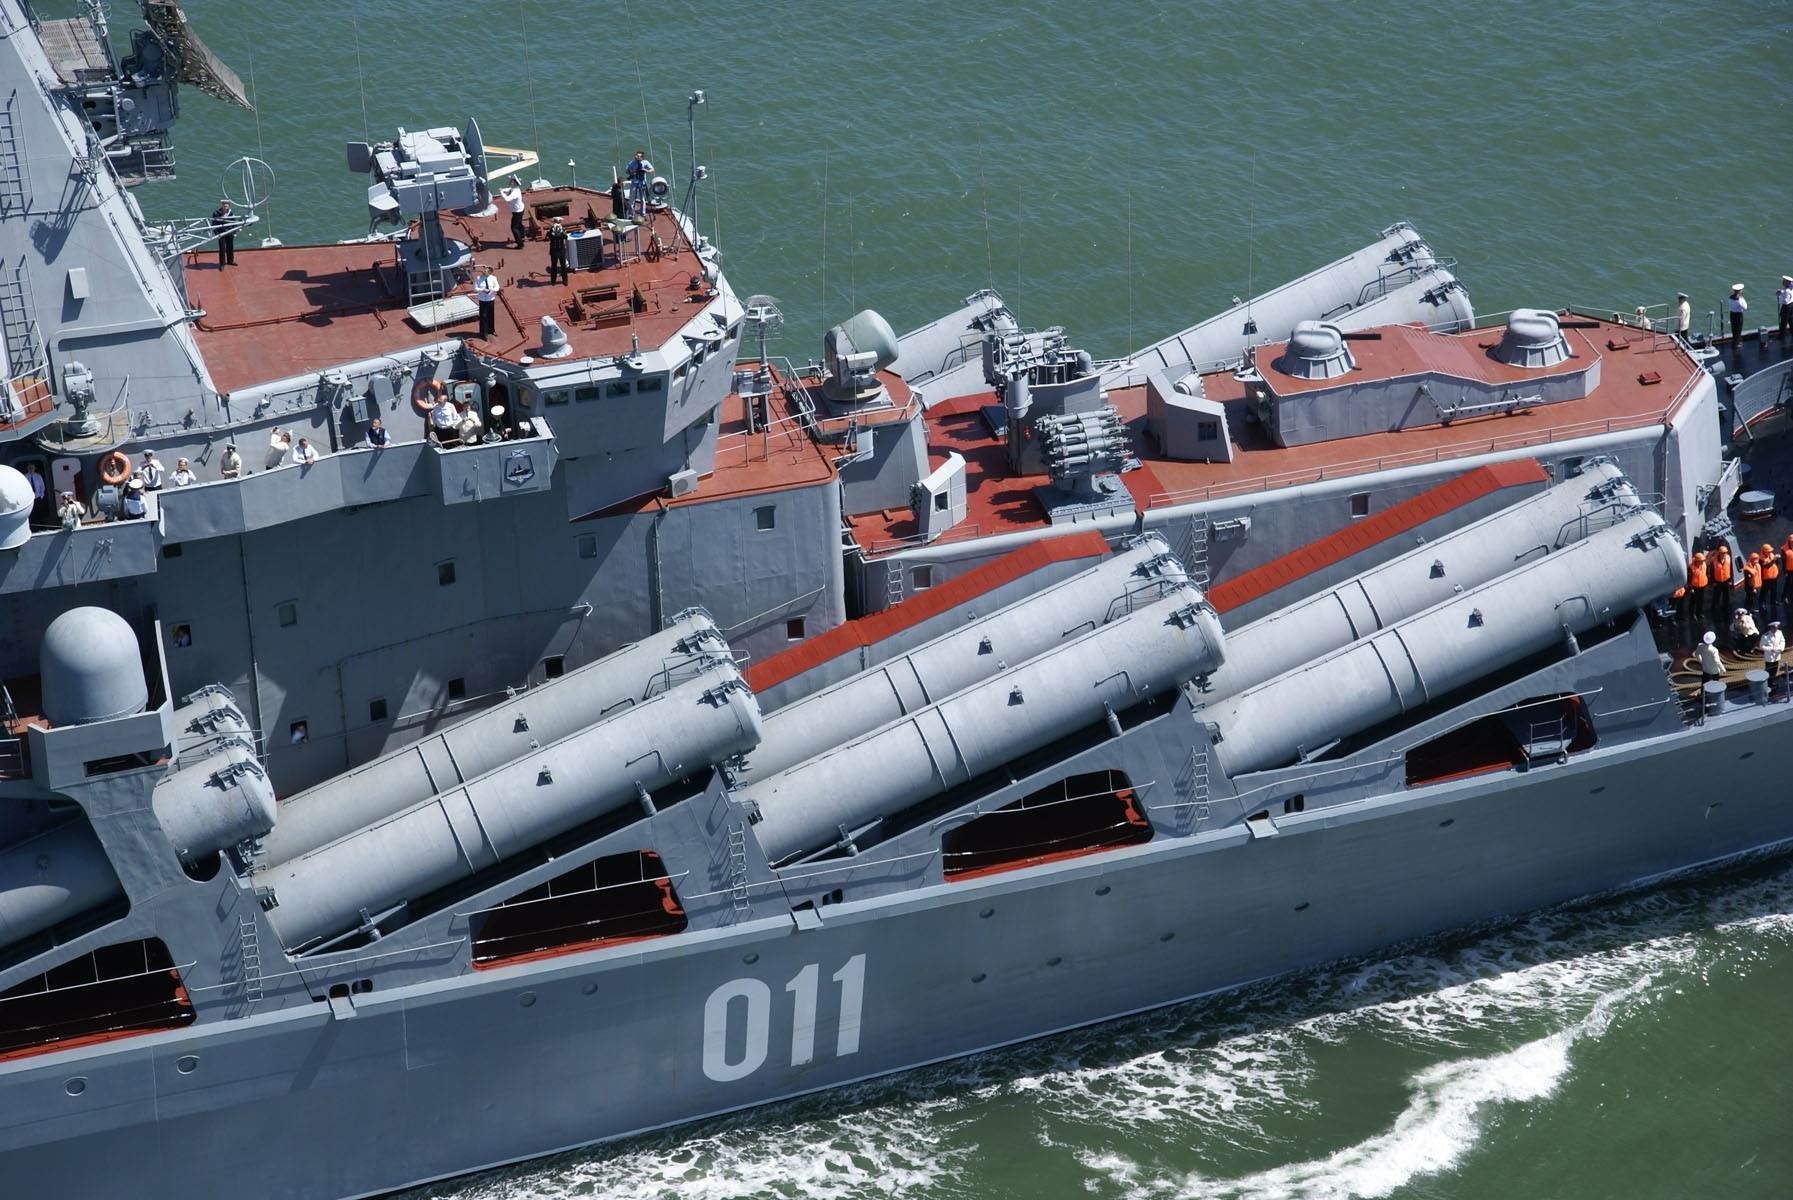
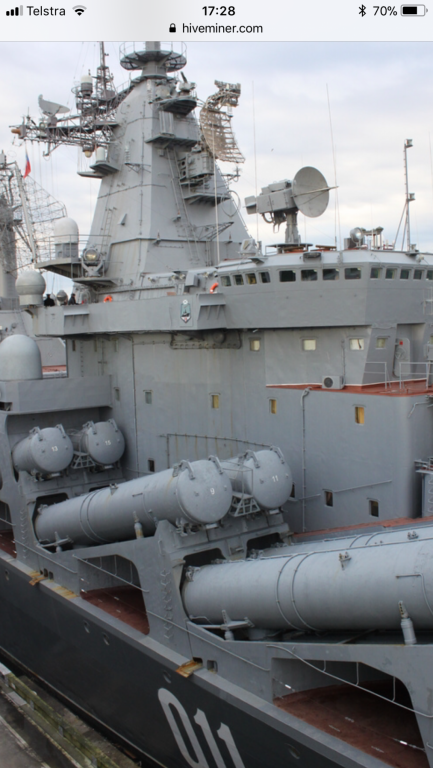
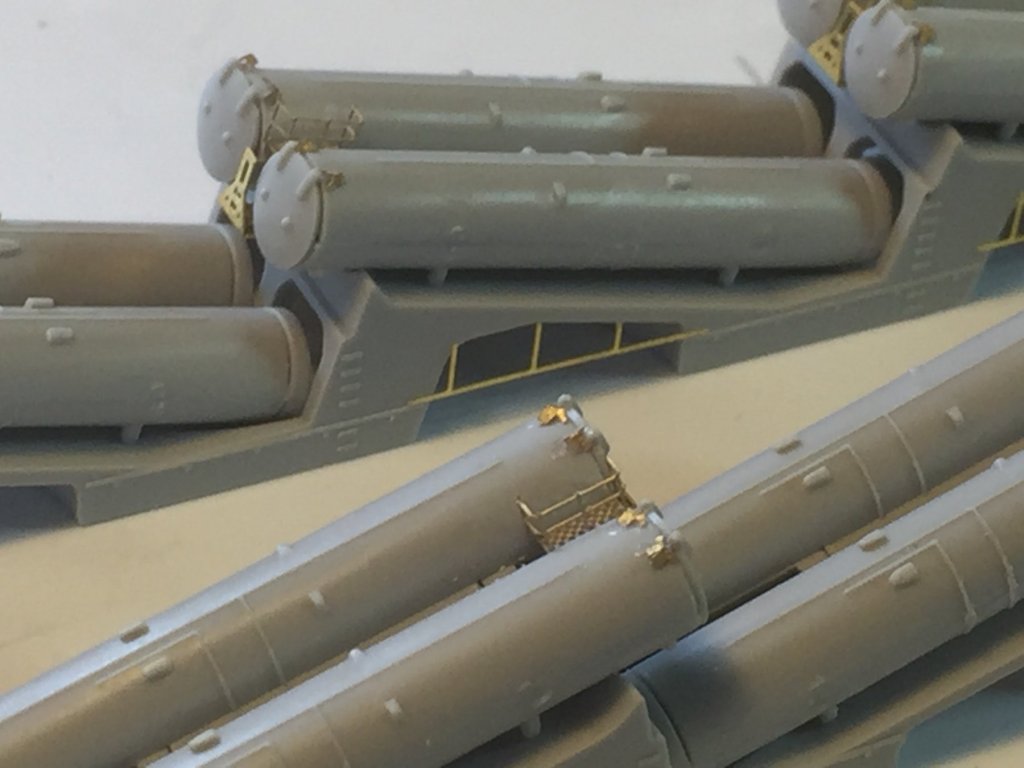
The SS-N-12 launchers. The kit provides a little bit of PE that sirlts at this he front which is supposed to be a platform. I used these and added some platforms and railings from the Ise spares. There are also exhaust railings on the side and some offcuts of brass thingys to make up some hinges which are fairly non existent


- 180 replies
-
- 13
-
-
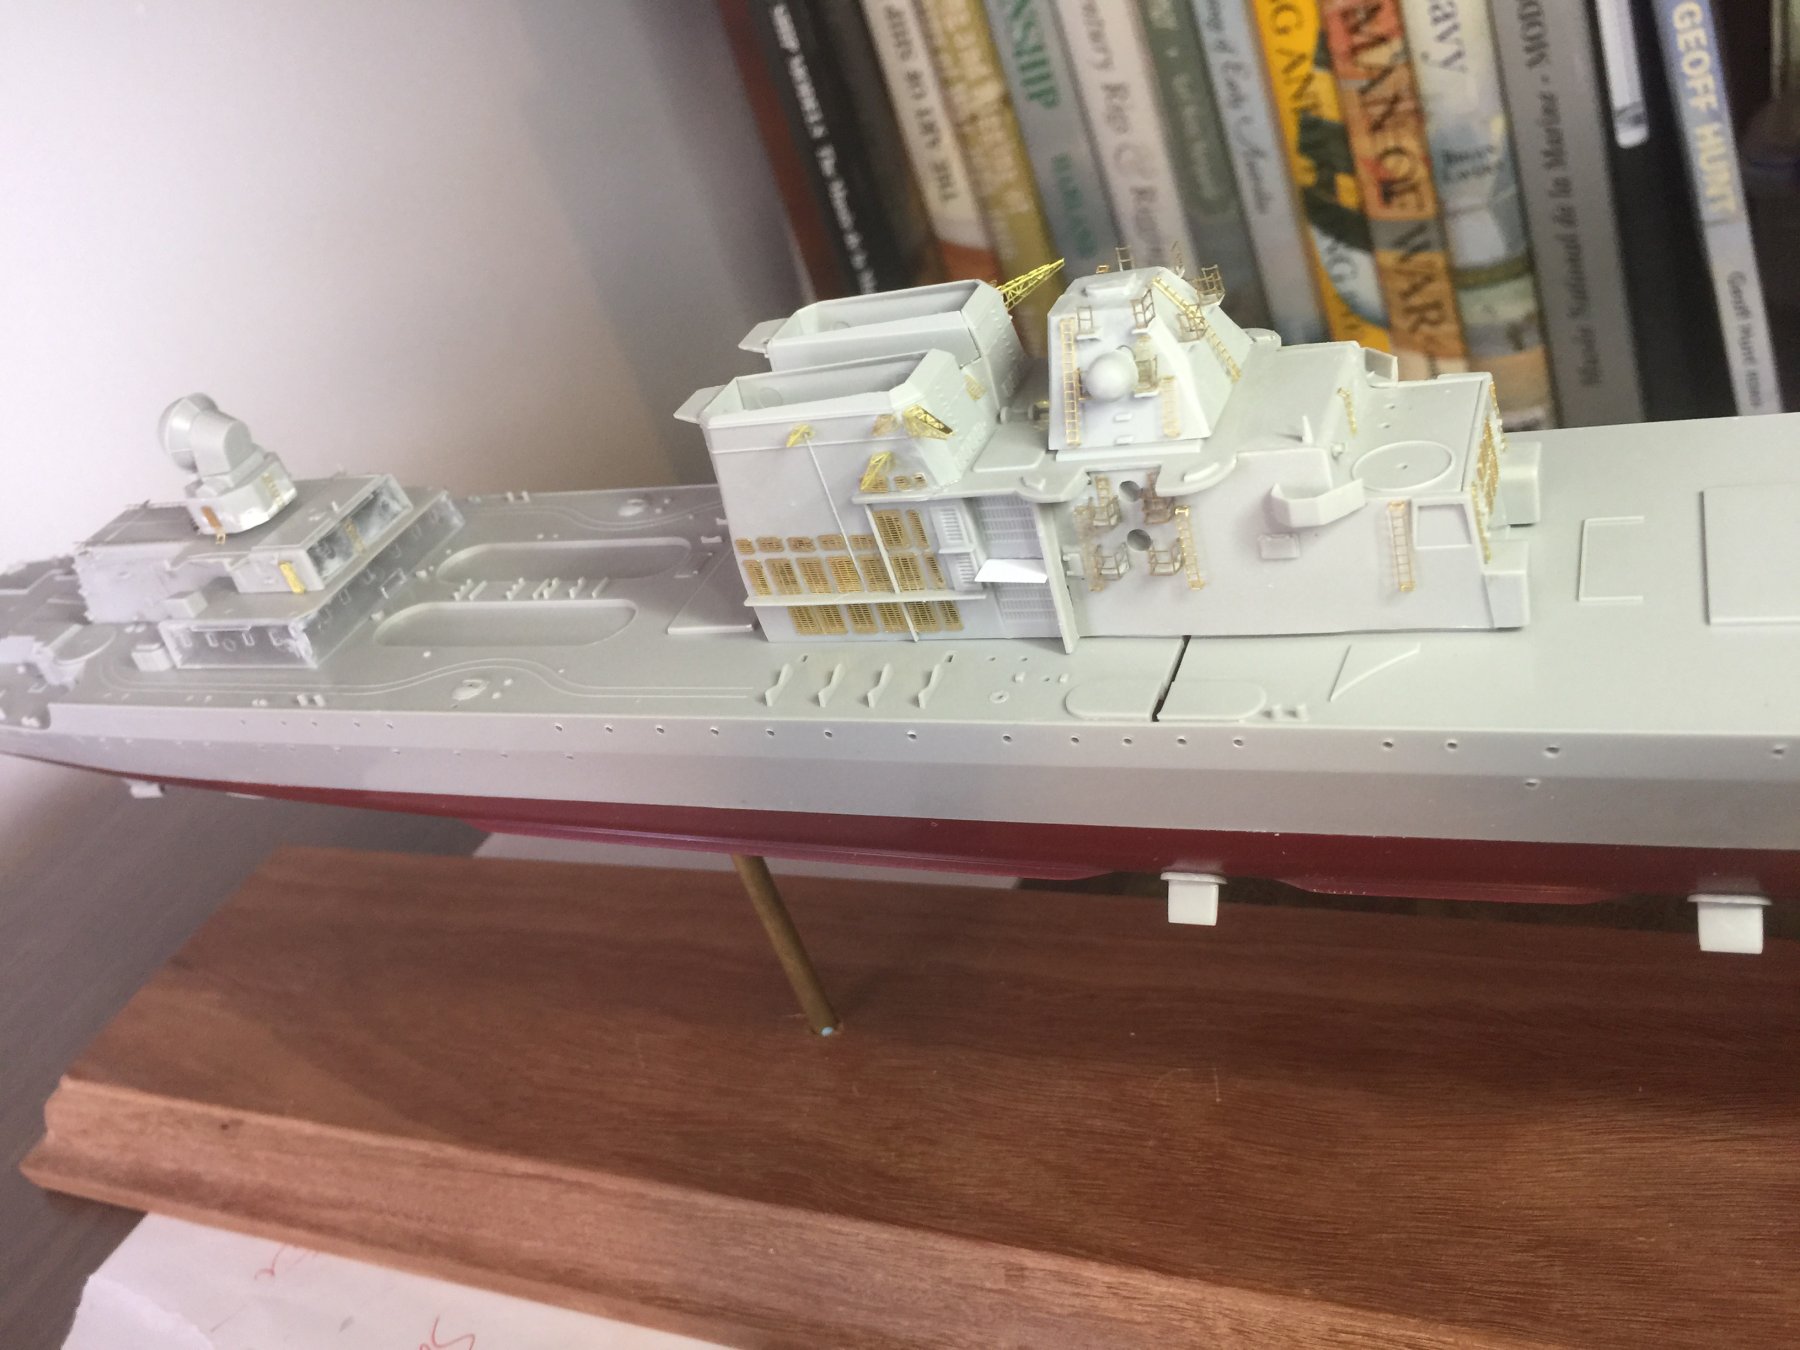
A quick dry fit over the massive gap in the deck. The quick fix will be to file the inside of the superstructure so it drops on flush. Then the two outside platforms that hold CIWS guns will cover the rest of it.

- 180 replies
-
- 13
-
-
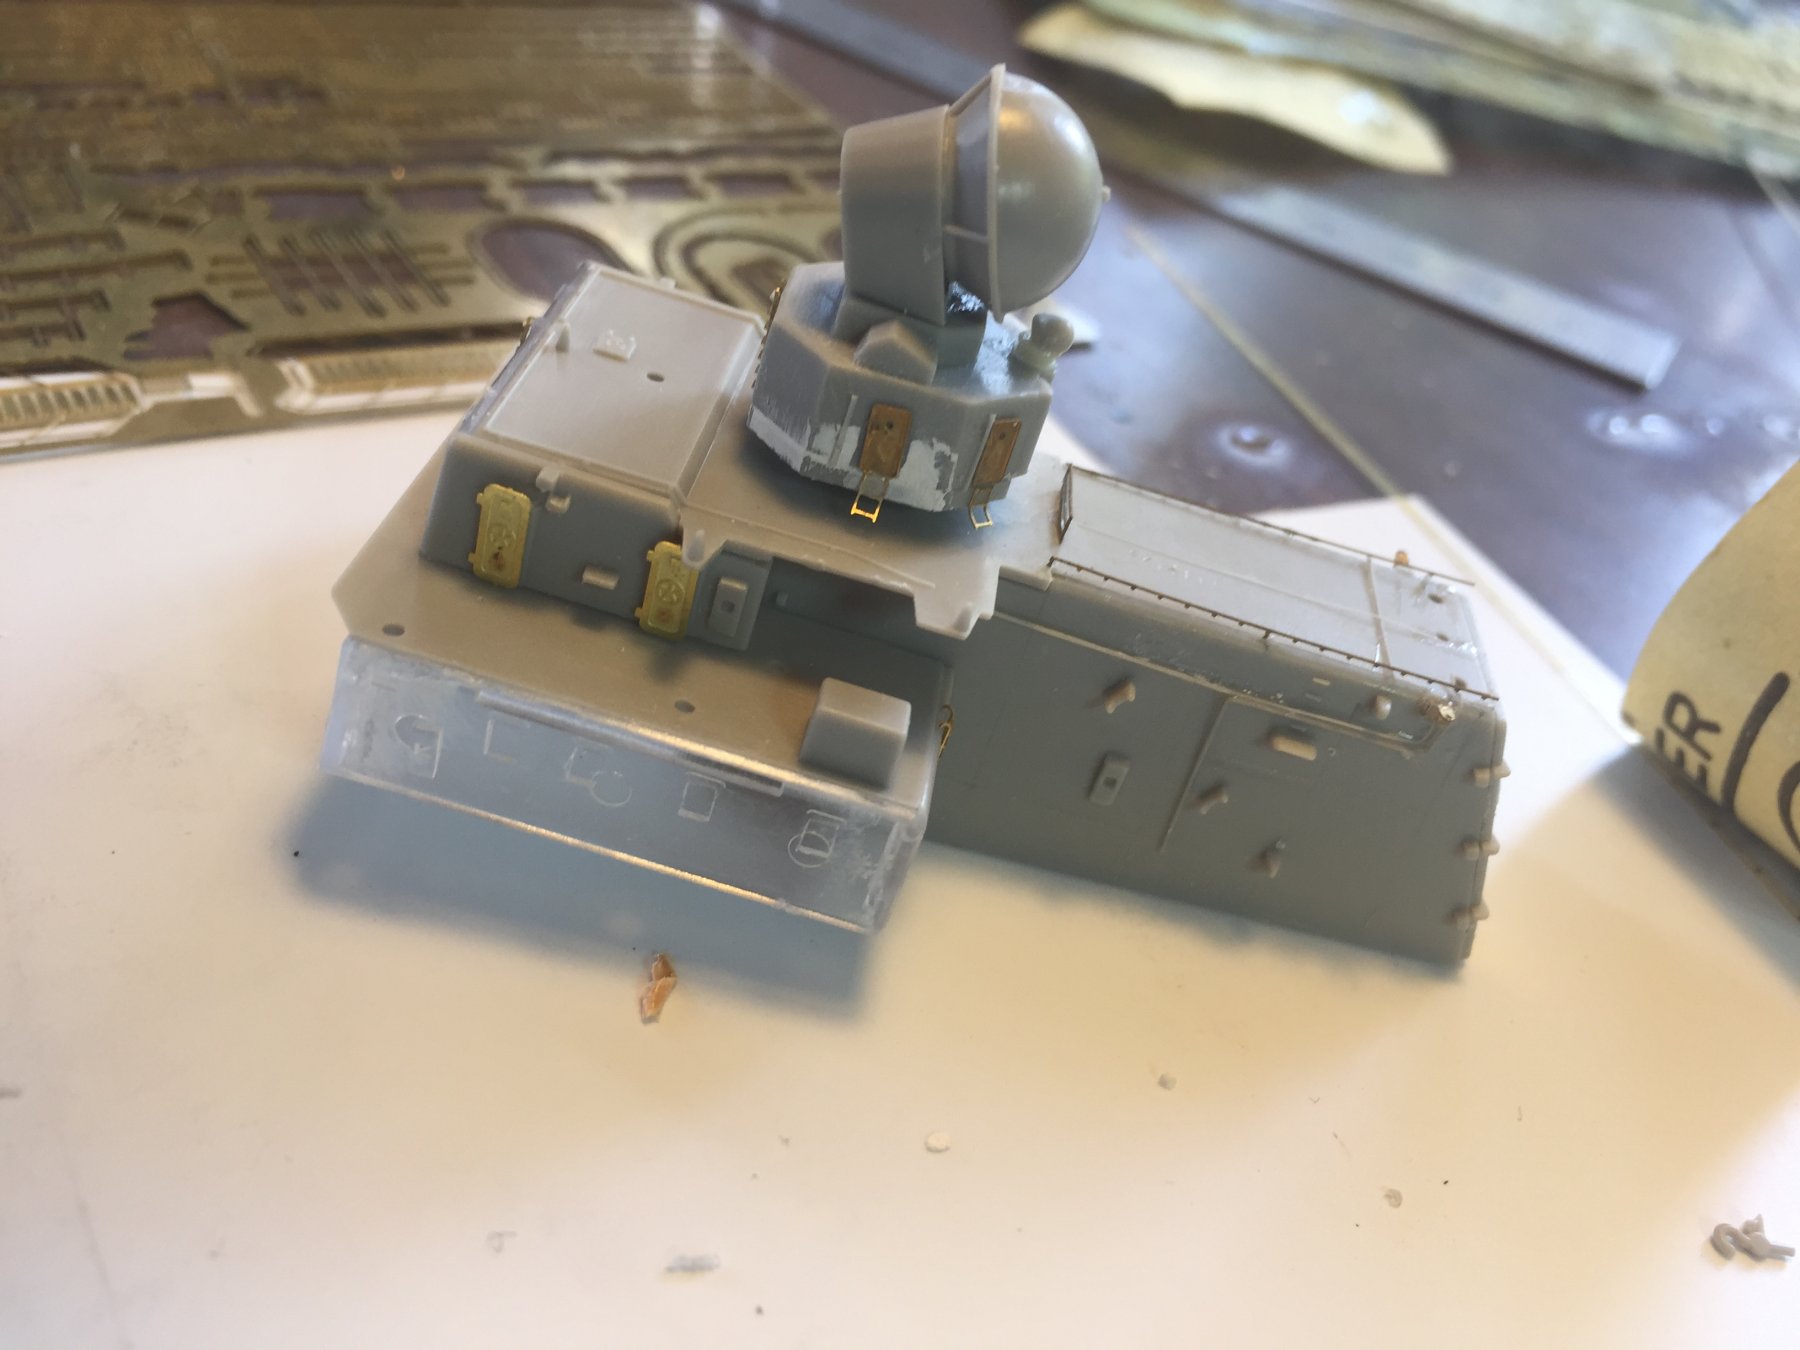
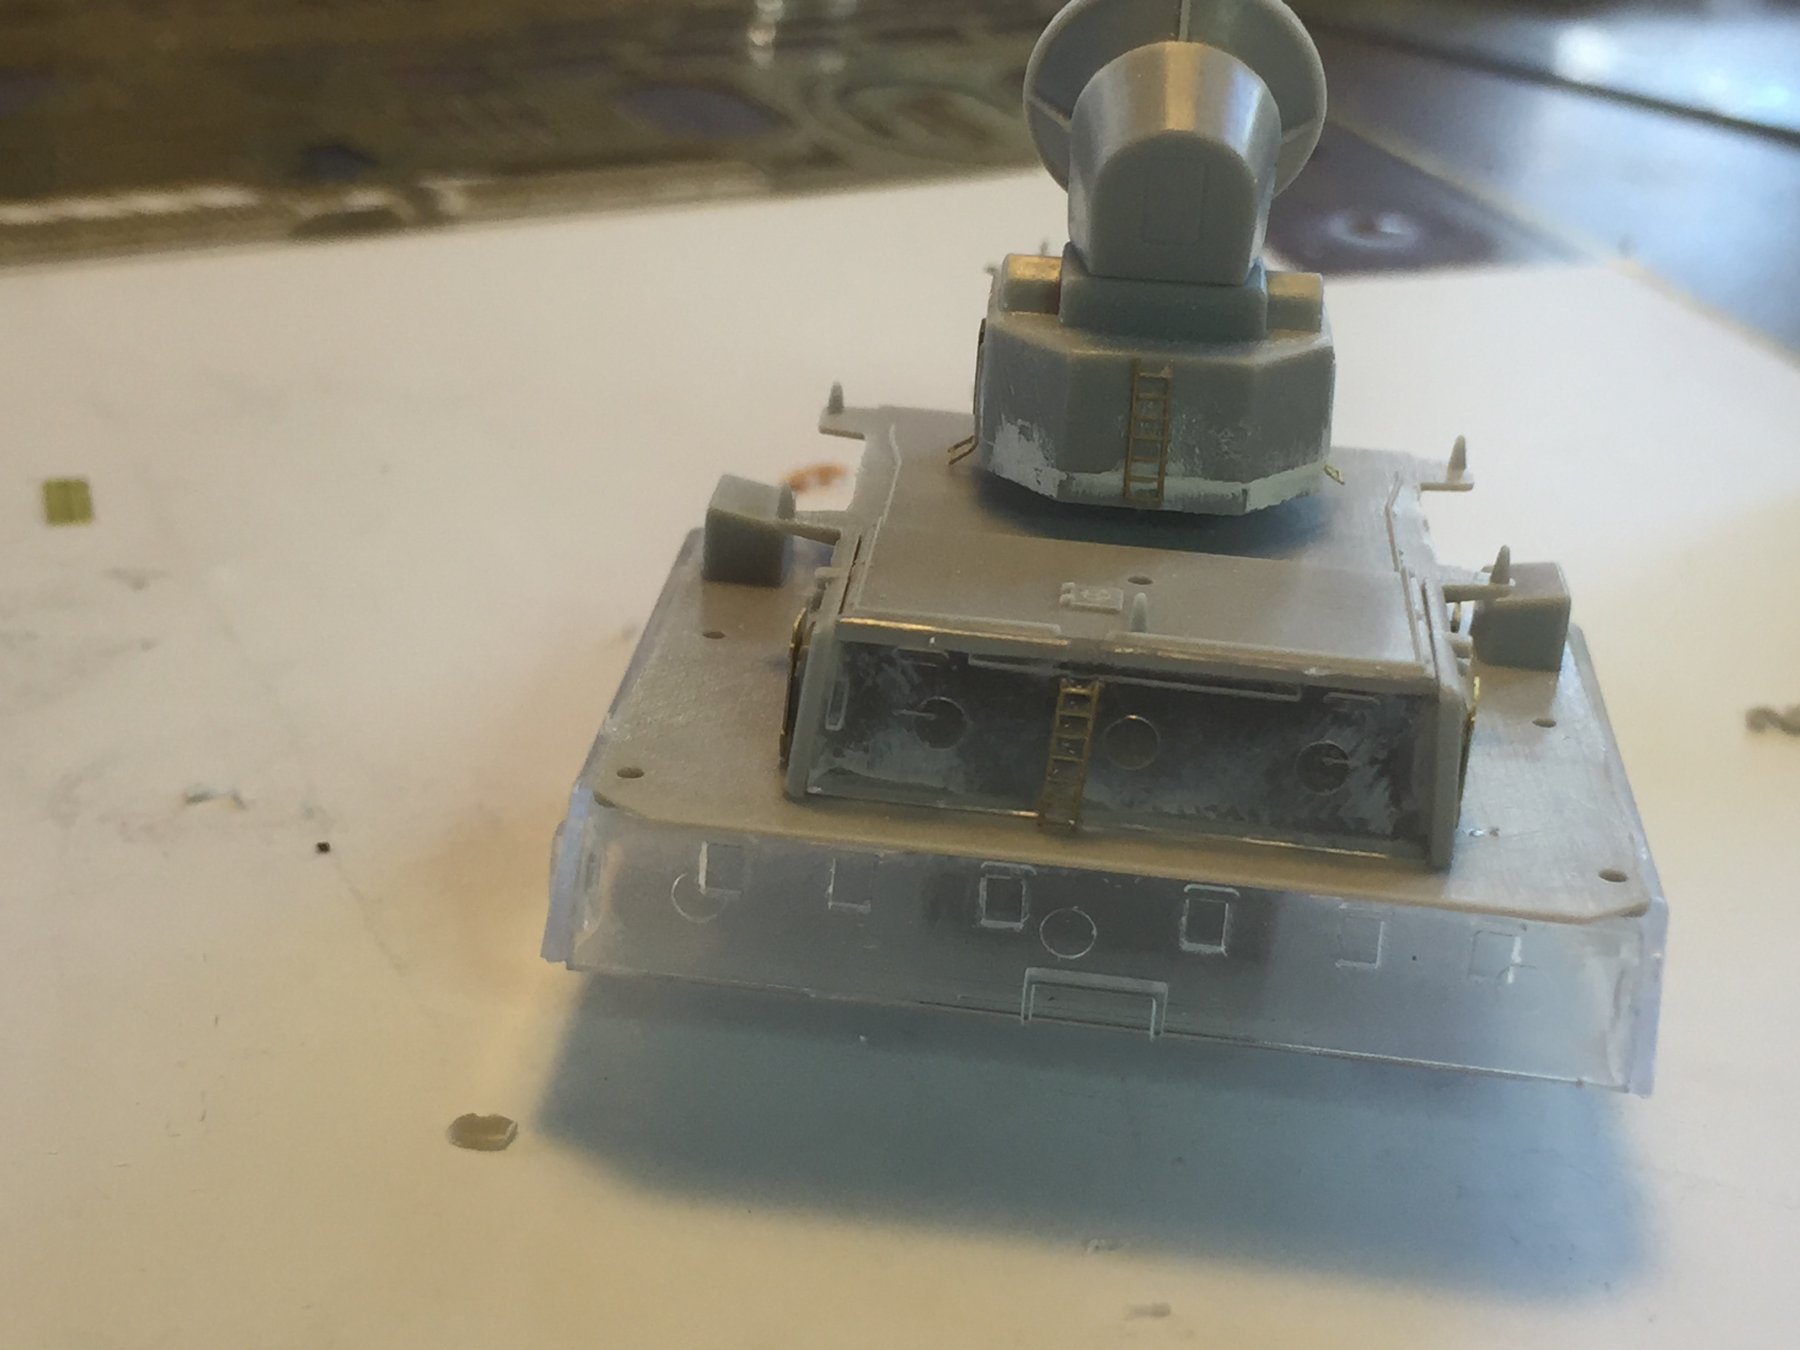
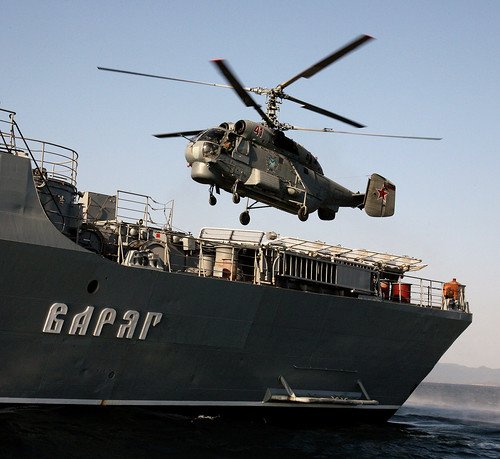
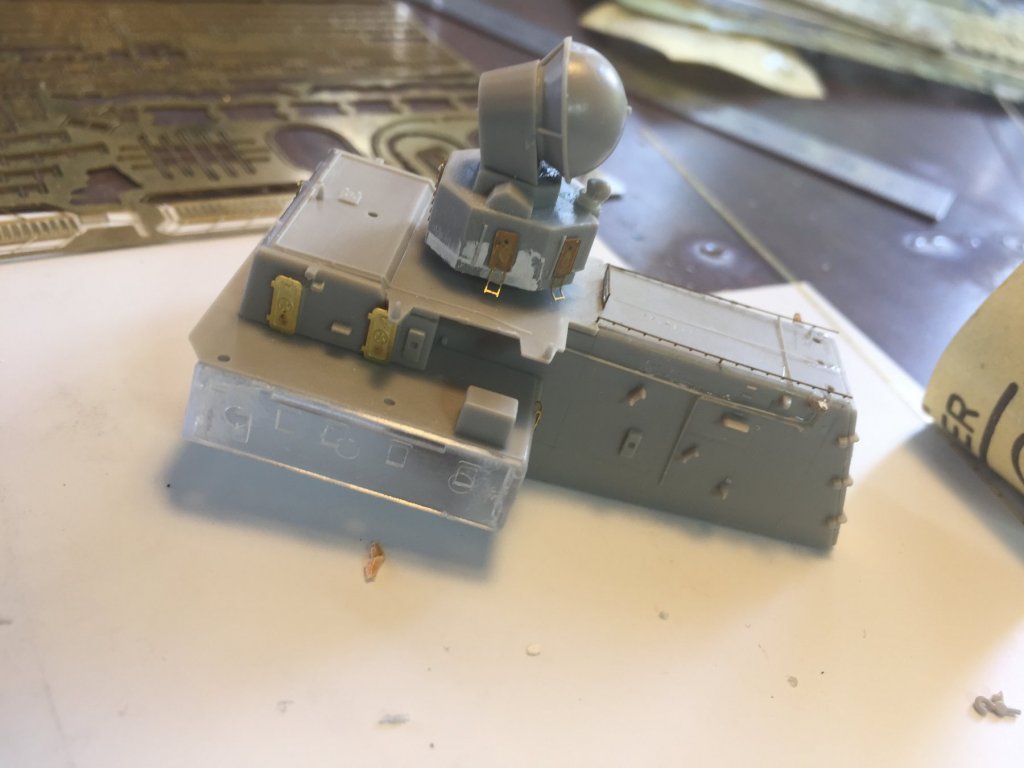
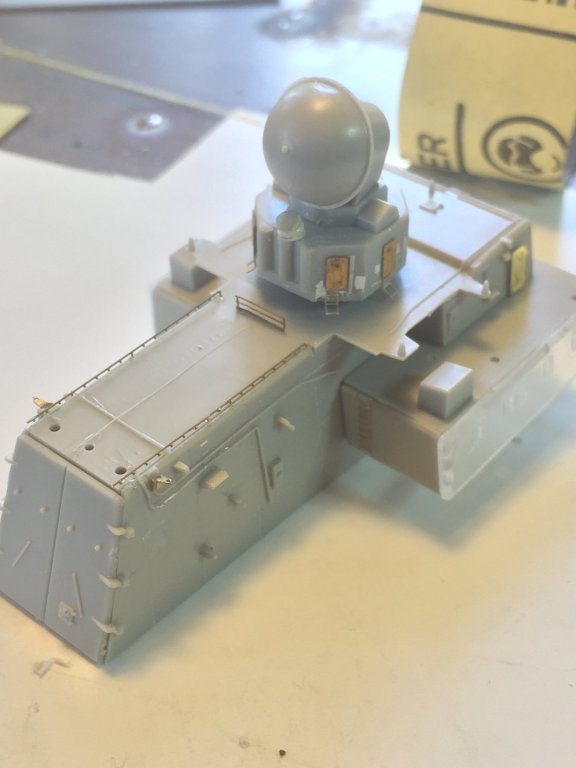
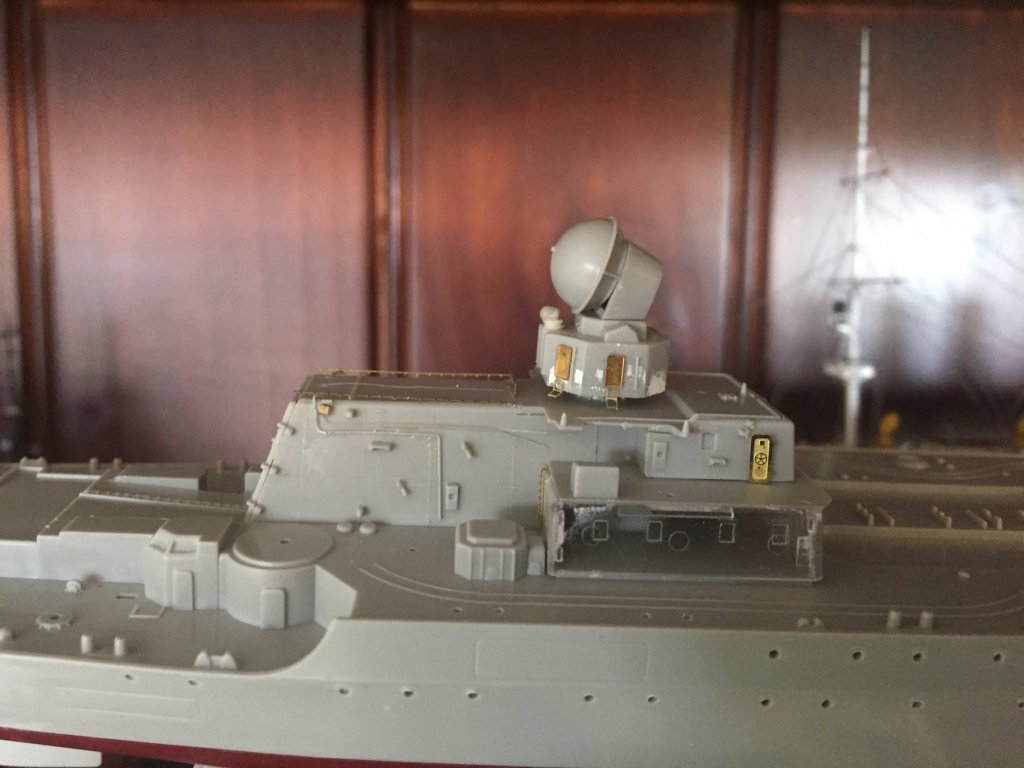
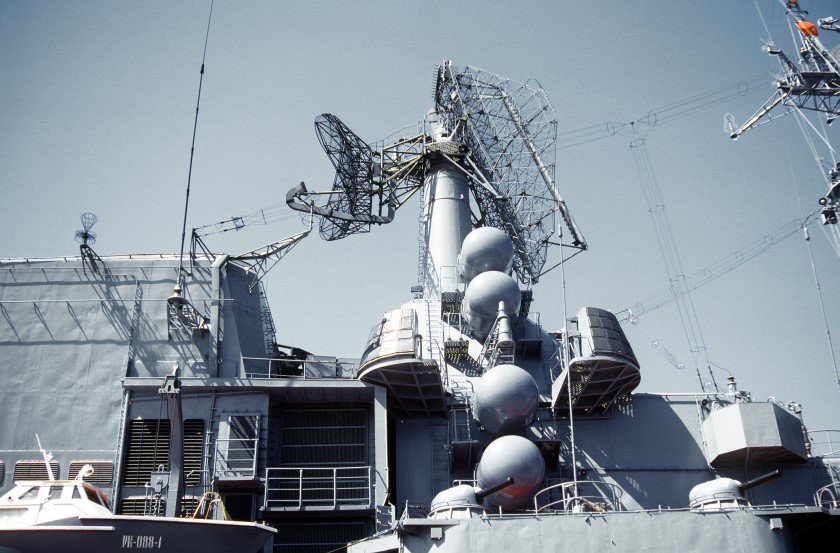
The garage for the helicopter. I’ve added a few cables than run to the ECm and spotlights out of stretched spruce. There was a molded ladder on top which I’ll replace later. Lots more detail to add to the piece yet but after painting. Someone flew a drone over her in HK earlier this year and posted it on U tube so there is a HD reference which also confirms from the still photos that the Top Done fire controller is very very wrong, requiring some filing and a bit of scratch building and added some doors from spares. It also includes some clear pieces which I have seen from other forums are universally hated. Off to the front of the bus next. Question; does anyone have any clue how to make 1/350 speakers/Pa’s?

- 180 replies
-
- 12
-
-
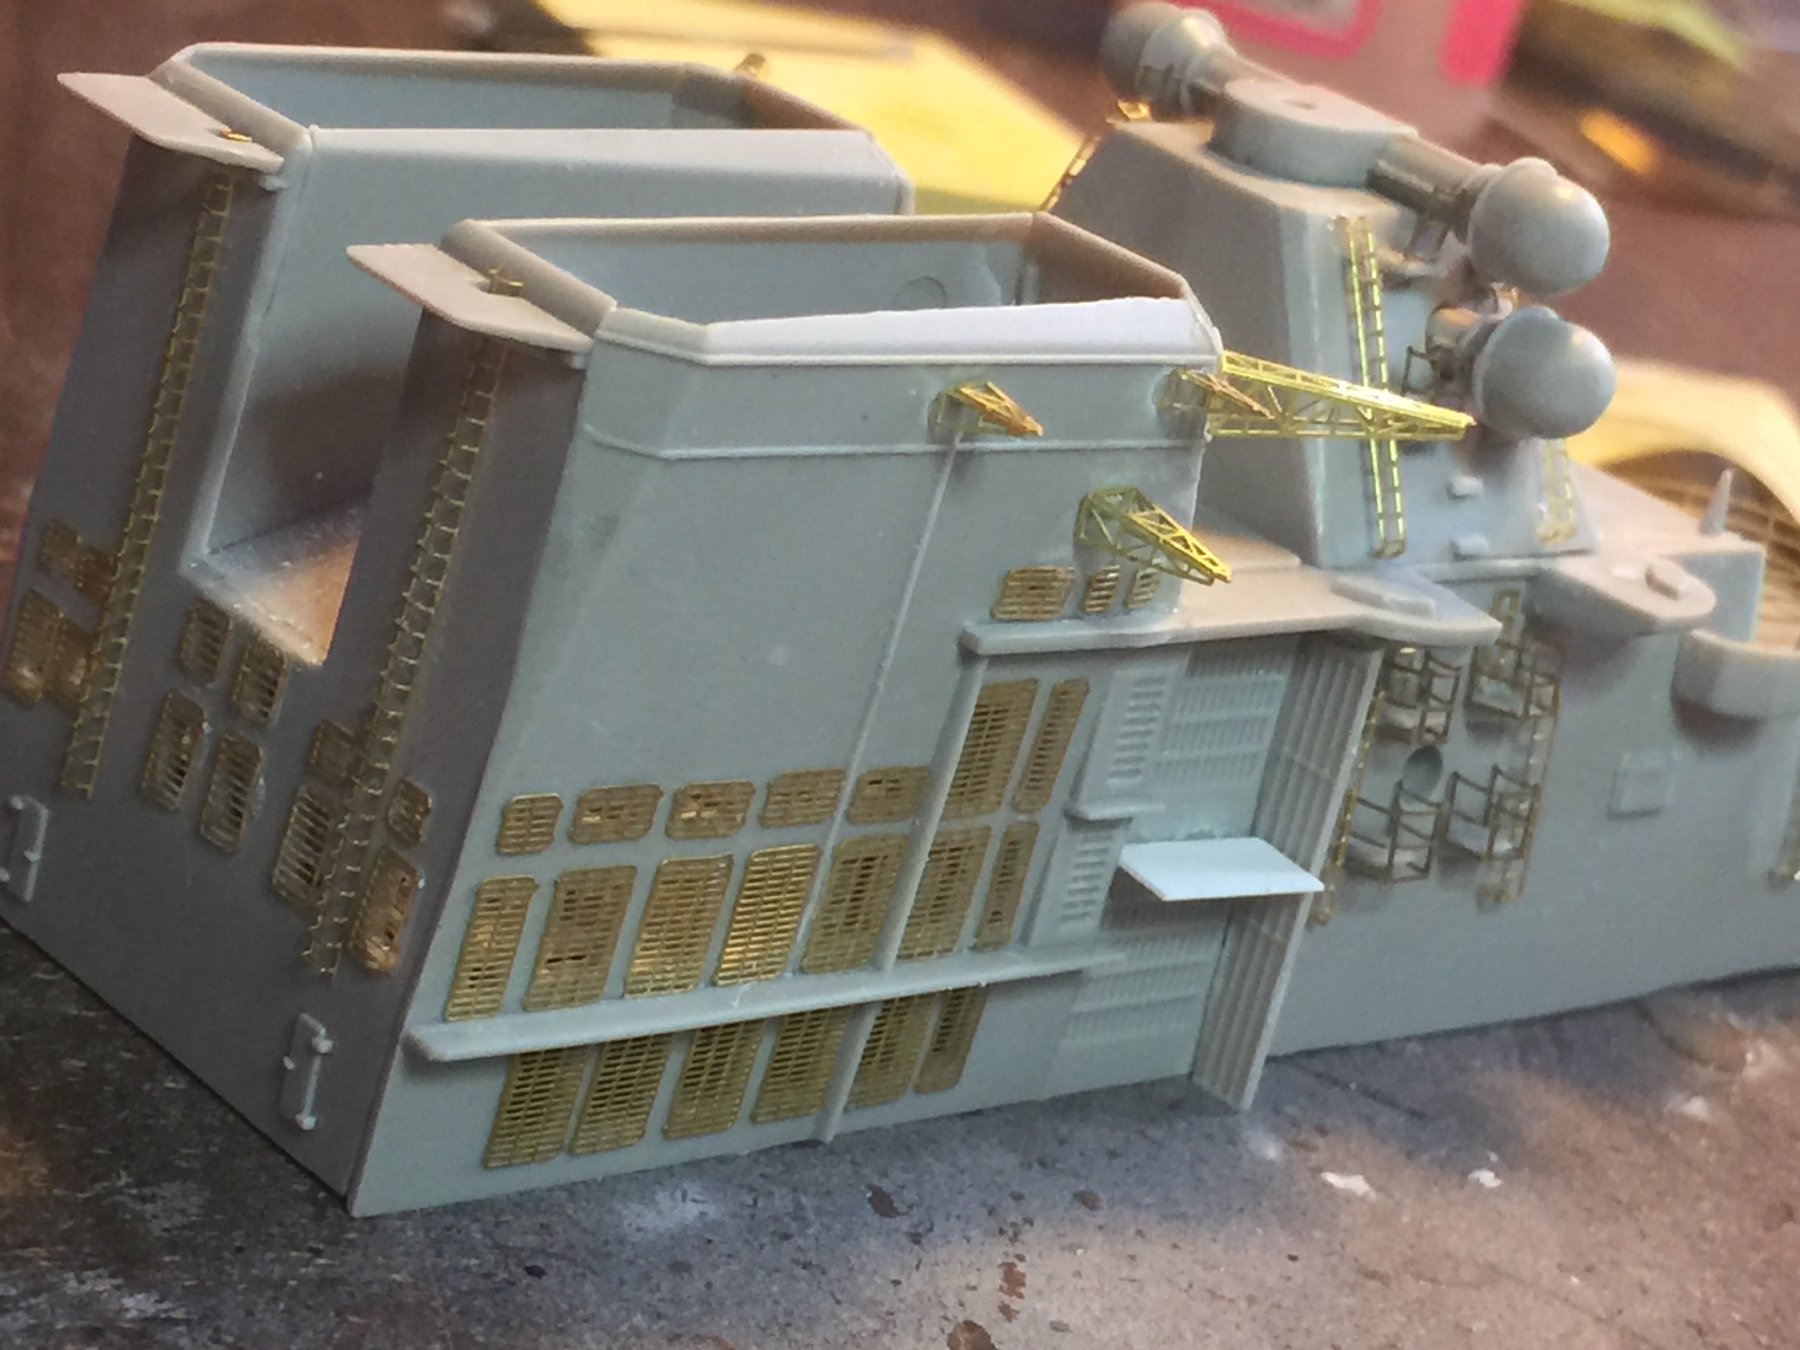
Cdw don’t hold back! There are a few more ‘recent’ ships I have my eye on. The crane section done, I added winches and backstays but will rig it once painted.

-
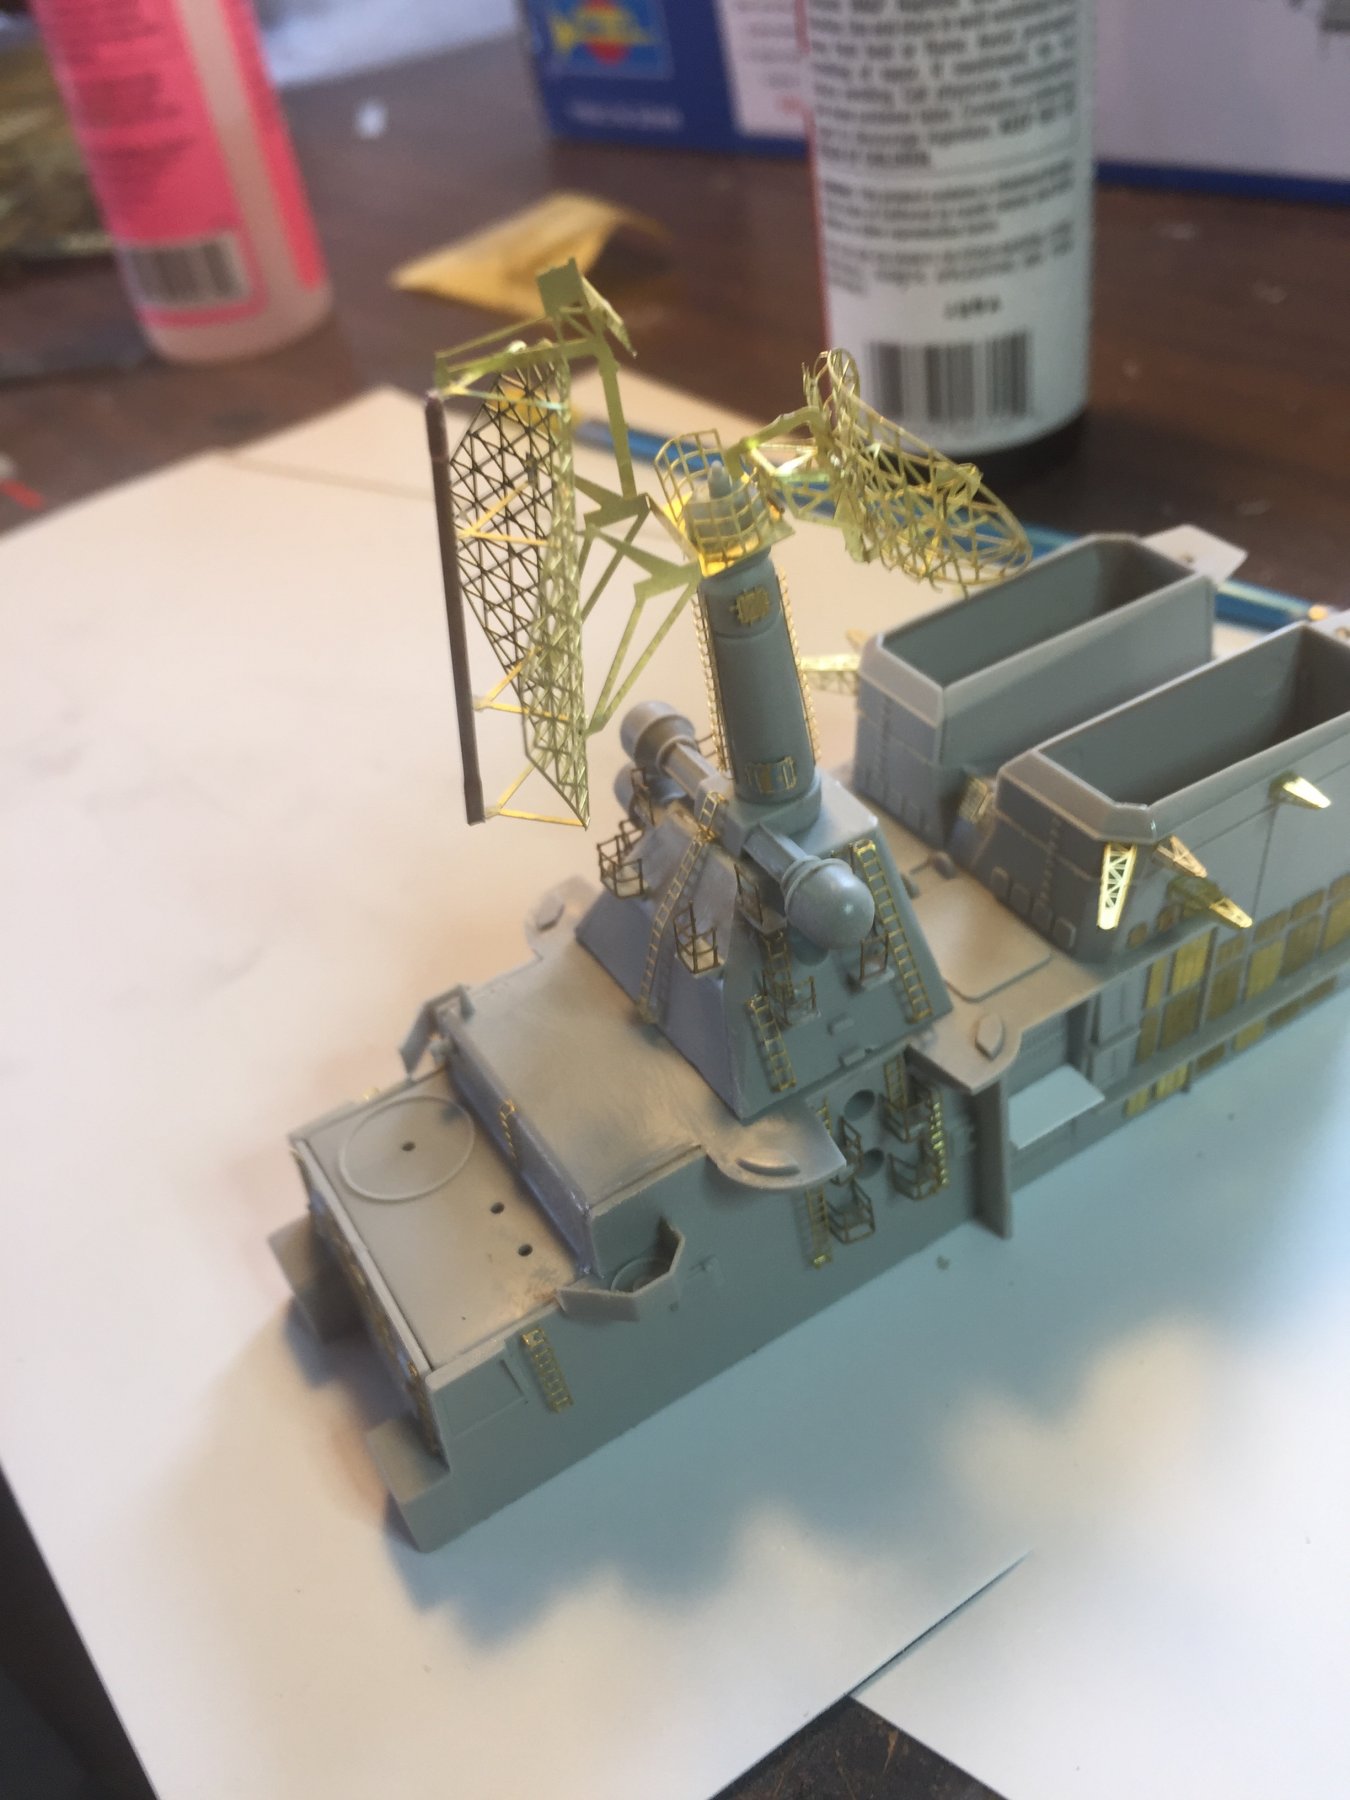
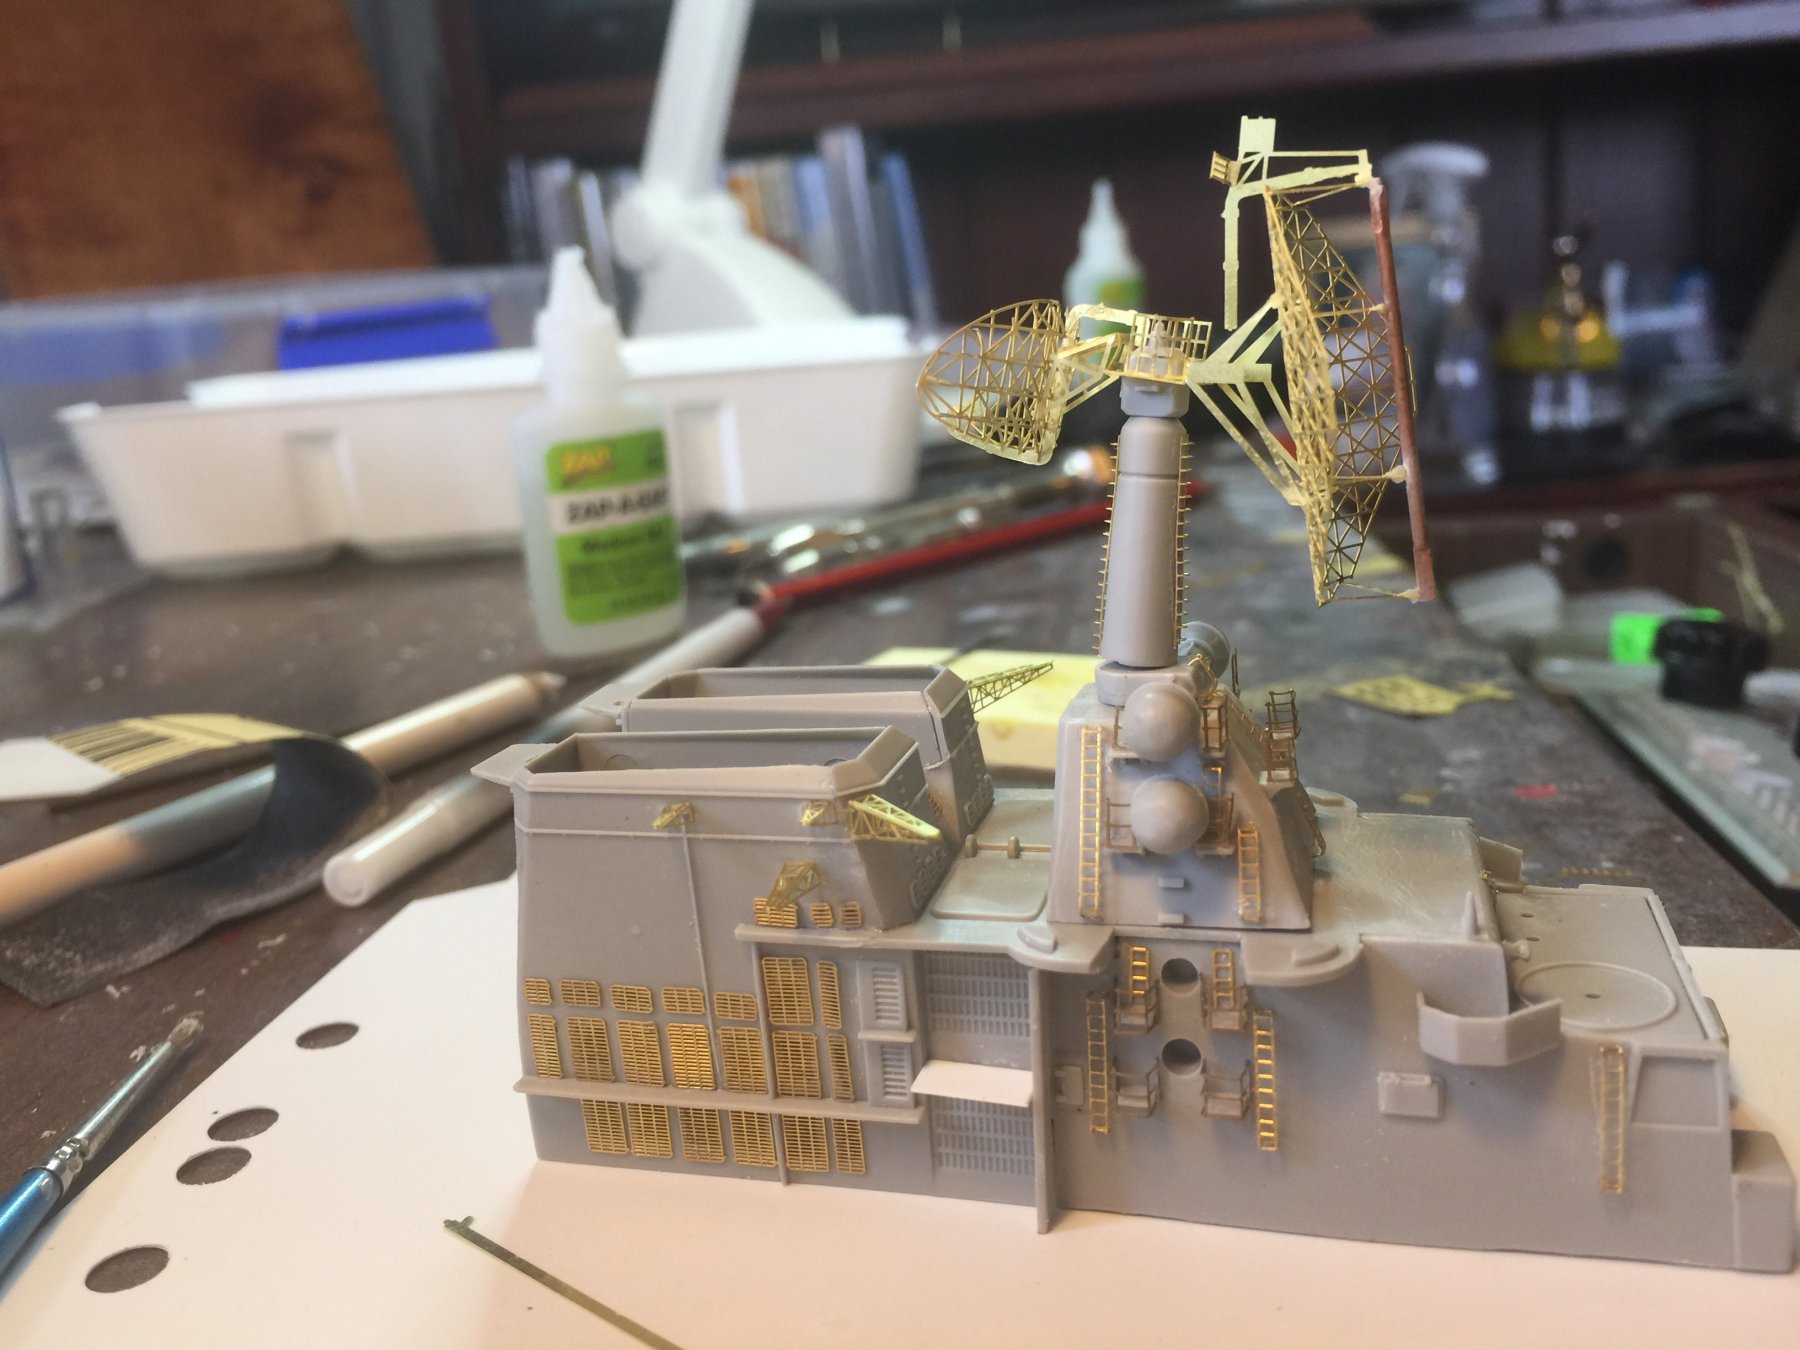
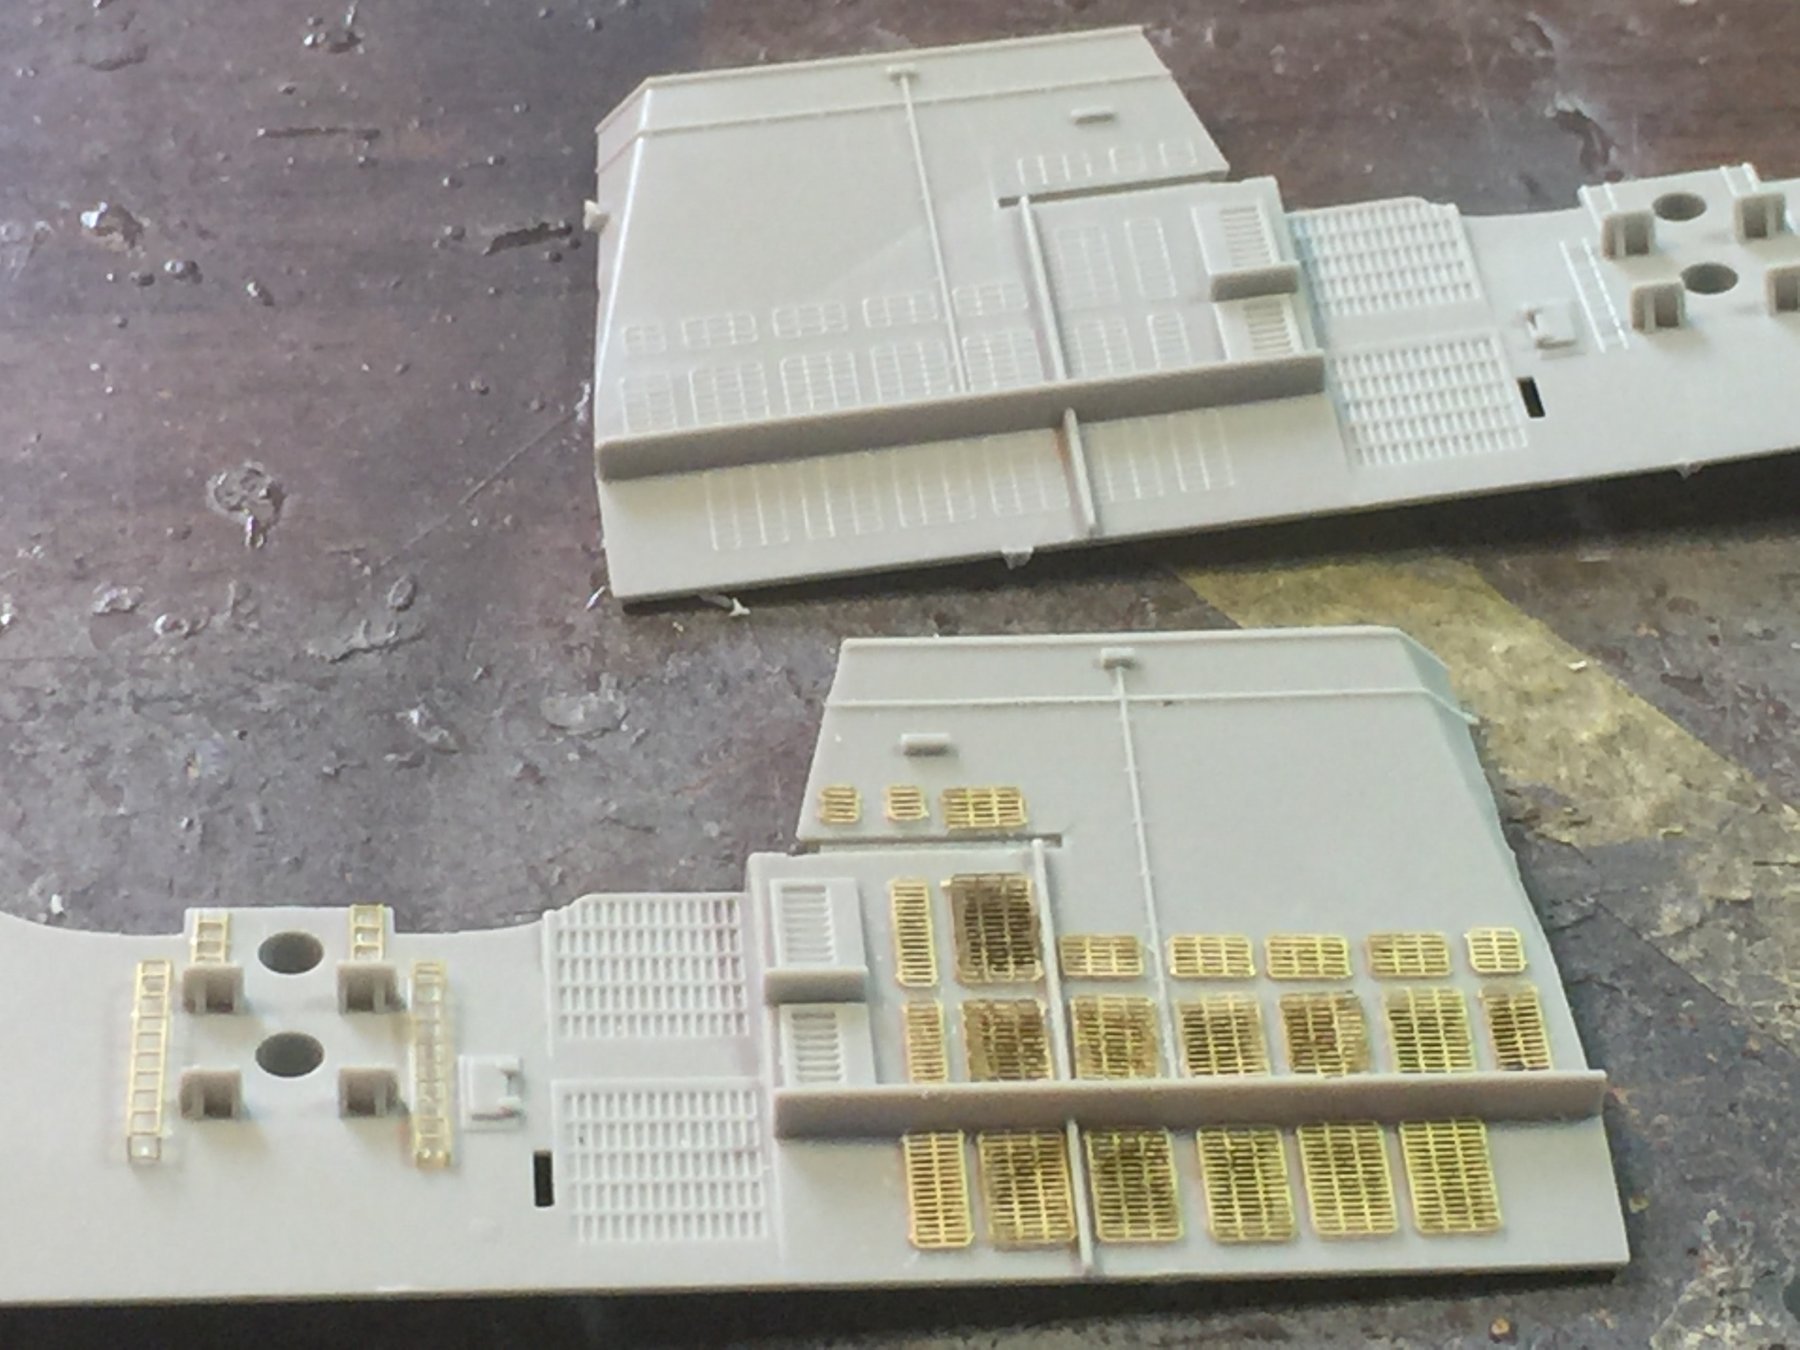
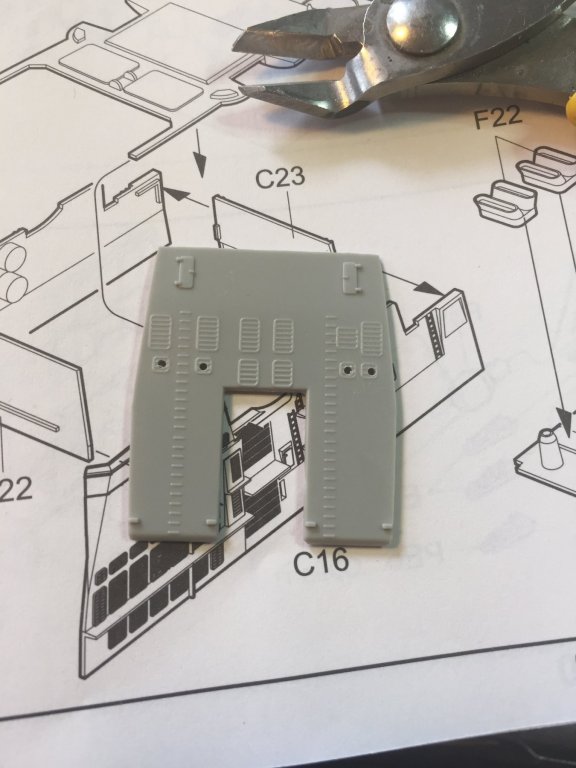
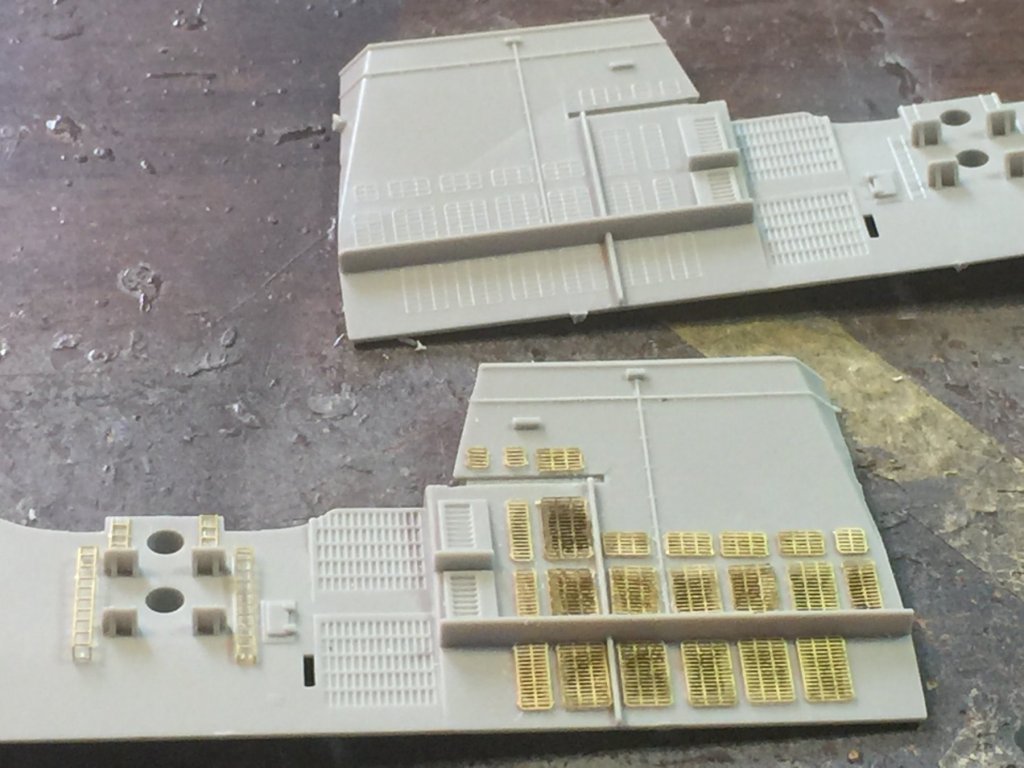
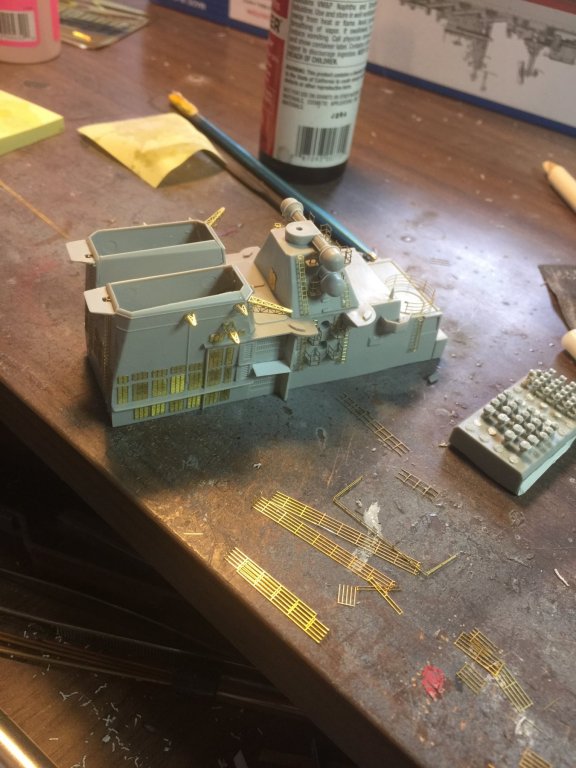
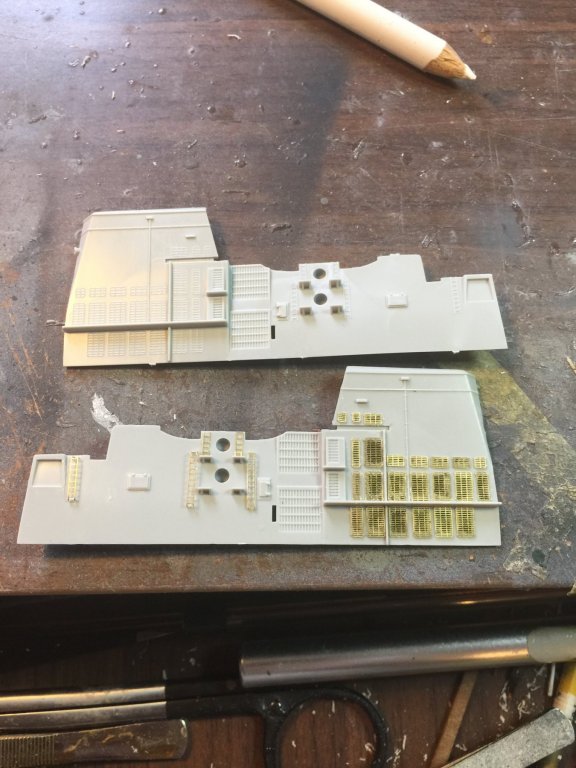
Well I haven’t posted for a while as I’ve been slowly working on the funnel section which will be one of the 3 main superstructures. Like a wooden ship, I’m trying to plan ahead as much as possible but unlike a tall ship, I have to preplan what gets painted in situ or painted off ship then placed on after. The Gold Medal Models PE is dated, expensive compared to what comes out of Asia and presumes a LOT of knowledge with PE. That being said it’s lovely and no one else makes it for this kit. The plastic Trumpeter pieces are nice enough but just not Tamiya standard for accuracy and fit. After the last 5 days of nightshift I have researched all I could for what extra needs to be done and there is a lot of small not in the kit or explained by GMM. It’s going to be a bastard to paint. Anyways, I drilled out all the vents and placed the covers provided by GMM, small railings and ladders that will go into vet the radar thingys. This has been a surprisingly large amount of work with still a lot to go. Railings everywhere and belaying points for cage antanne and big gaps to be filled.


- 180 replies
-
- 14
-
-
I’ve taken to placing a pin head of glue then using a Zapper fluid on a lot of my PE work noemw as it really causes it to set instantly and hard as a rock. Stops having to make a mess with lots of glue.
-
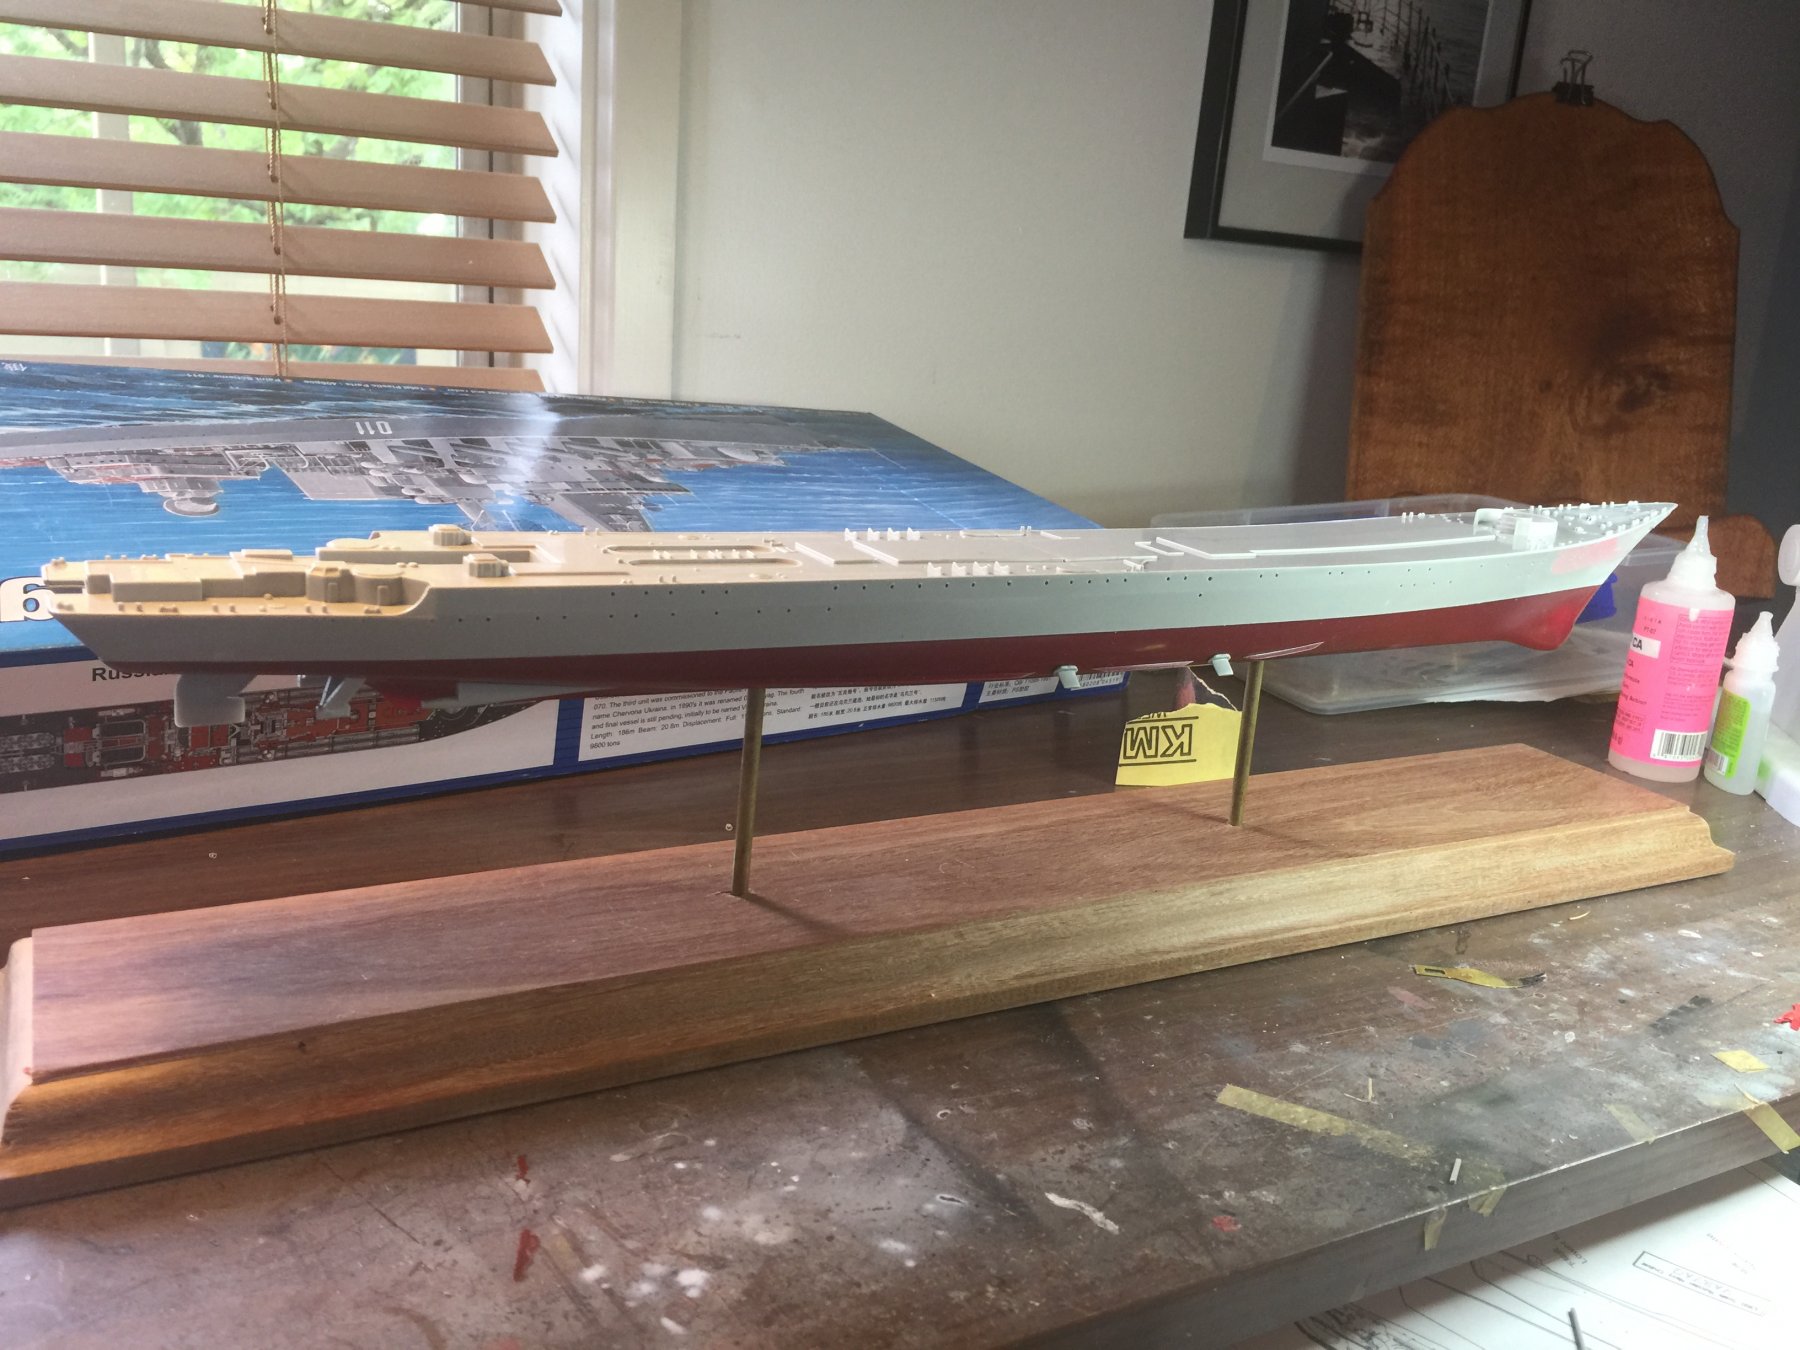
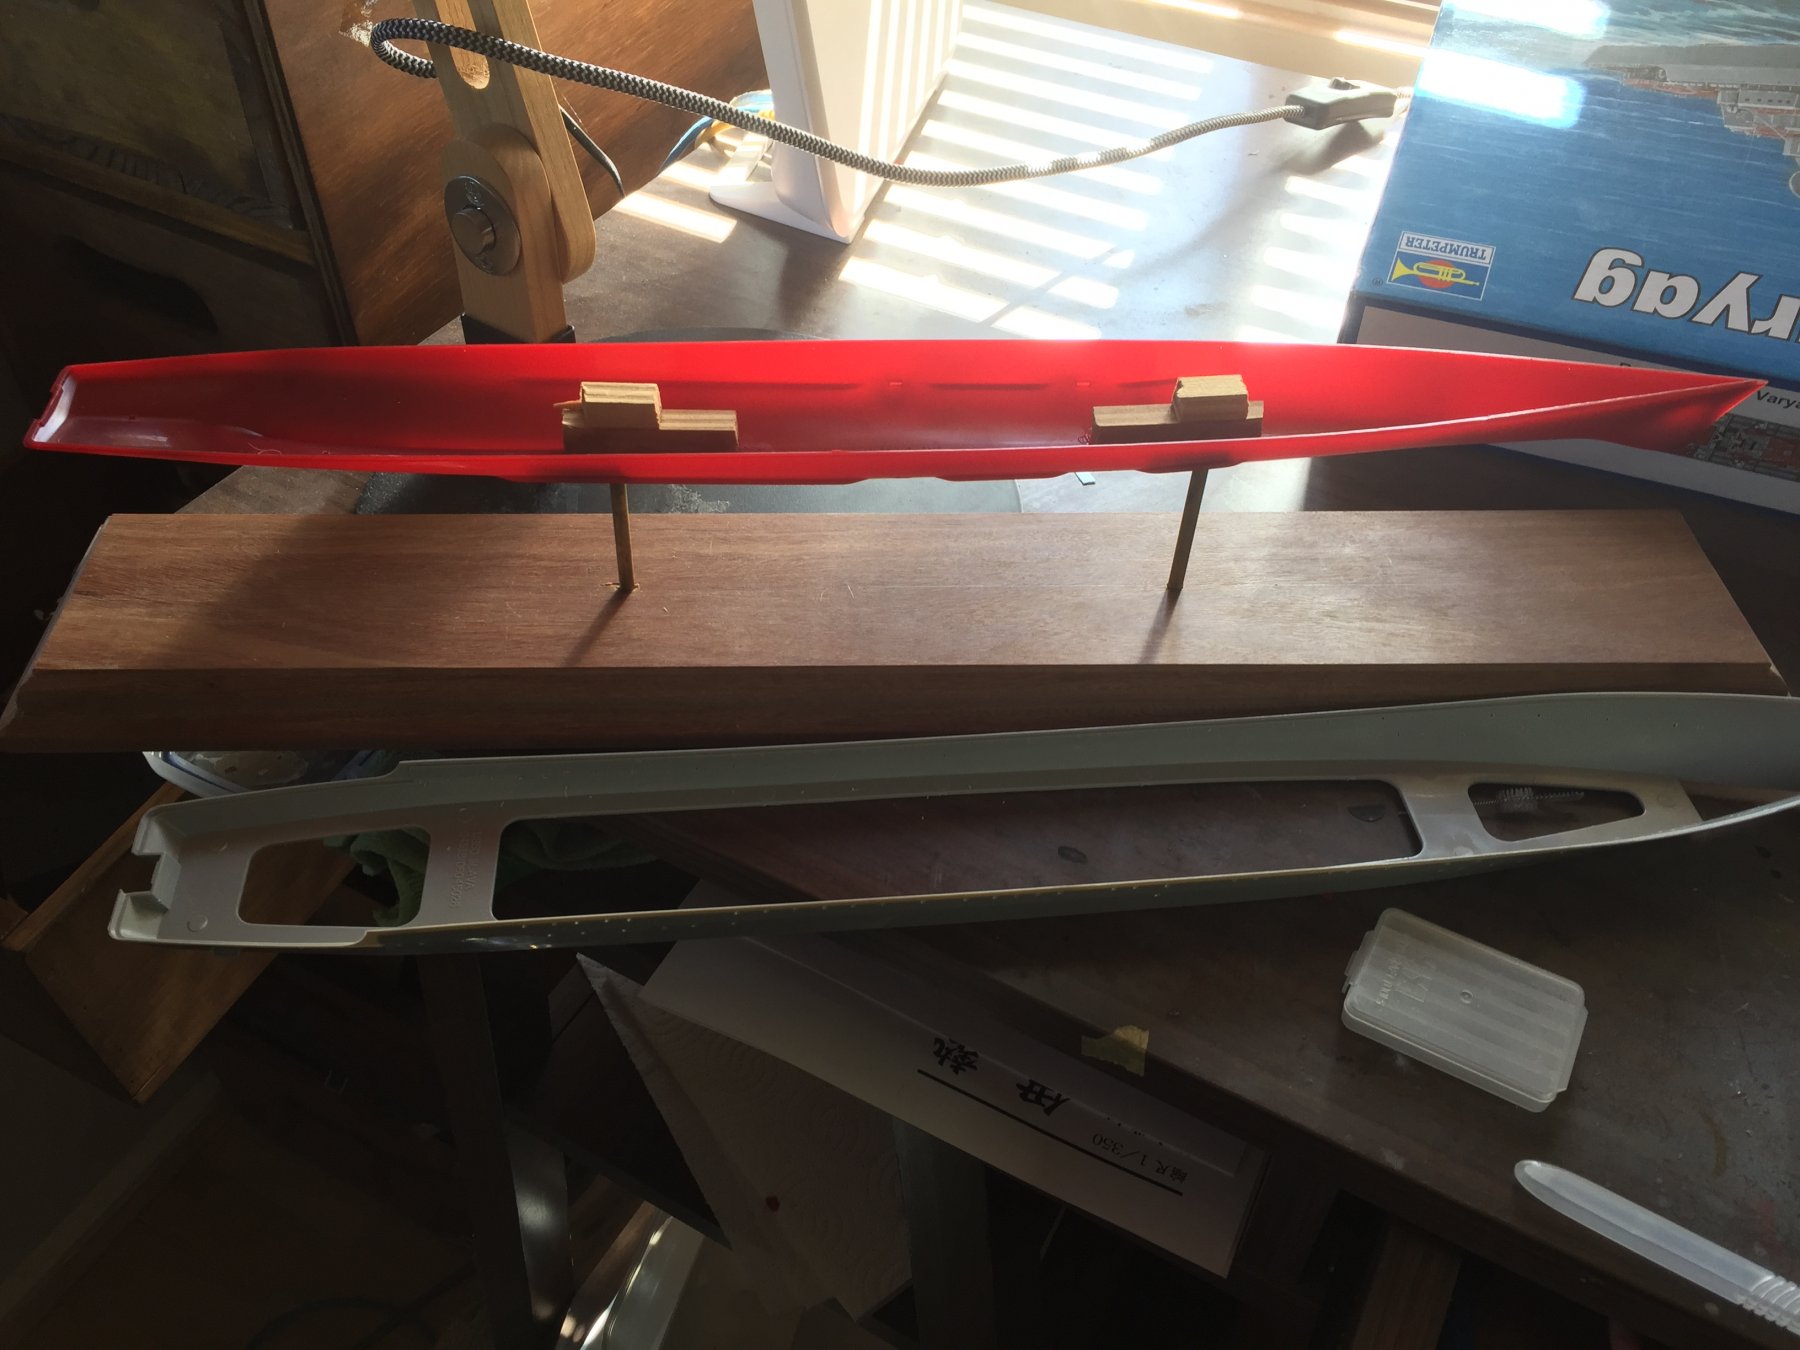
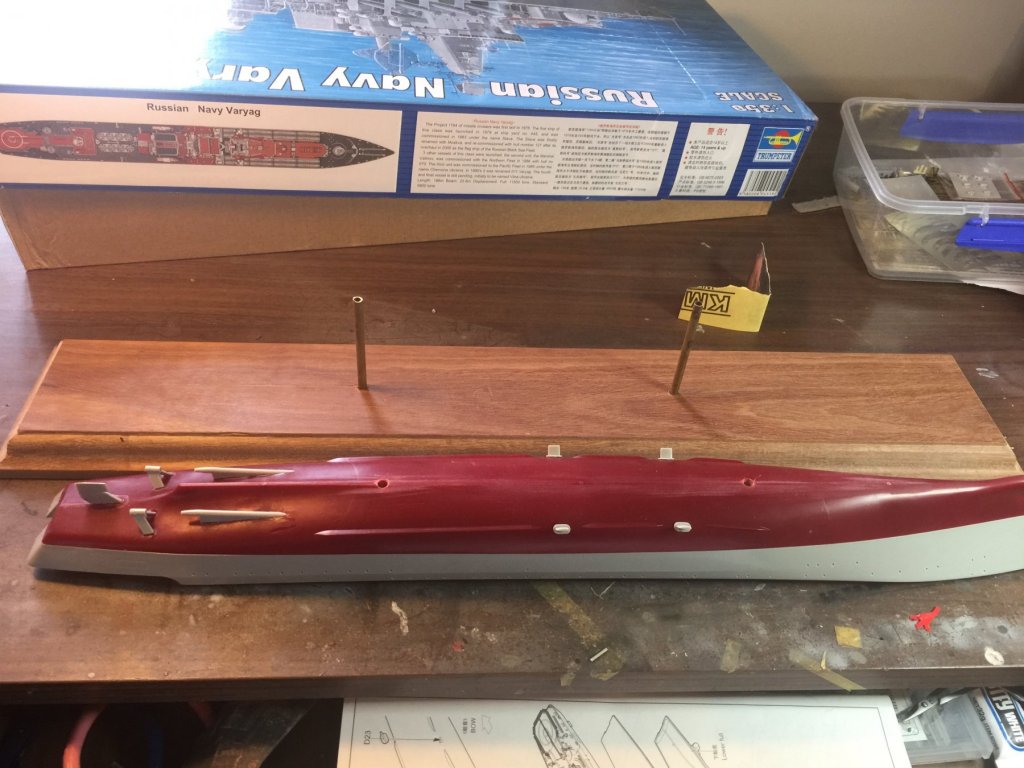
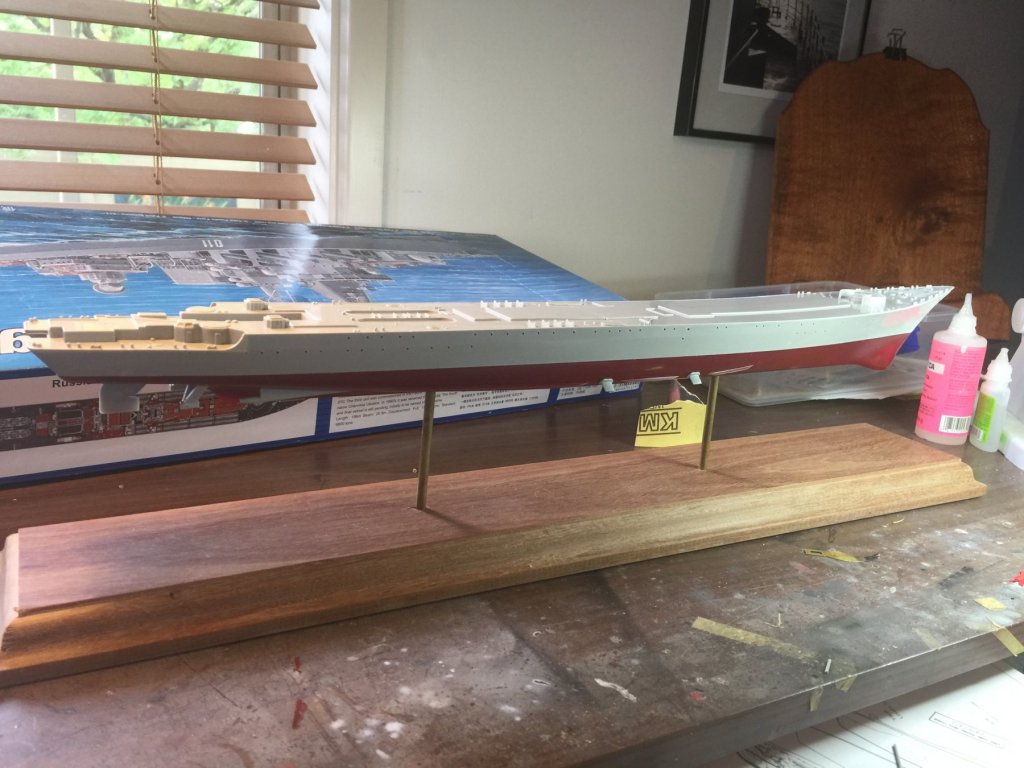
Main hull joined up and rudder/ shafts and stabilisers added. As you can see there is a massive gap in the deck, it has to be amidships or the gap at the bow or stern would just be messy to fix. It won’t matter or be visible when the deck housings go on.i have also filed off the molded anchor chain (really, is this the 1960’s?). I intend to give her multiple layers of primer (after a quick sponge bath with metho to clean her) to I can scribe in hull plates.

- 180 replies
-
- 11
-
-
The chap who made is is perhaps one of the best in the world, I’m yet to find any tutorials on his work.
- 46 replies
-
- 5
-
-
- o16
- pacific crossroads
- (and 2 more)
-
the is utube footage of it this year in Hong Kong looking fairly spiffy but where is the fun in that?
-
There will be weathering and some modulation of colour otherwise it will be very boring.
-
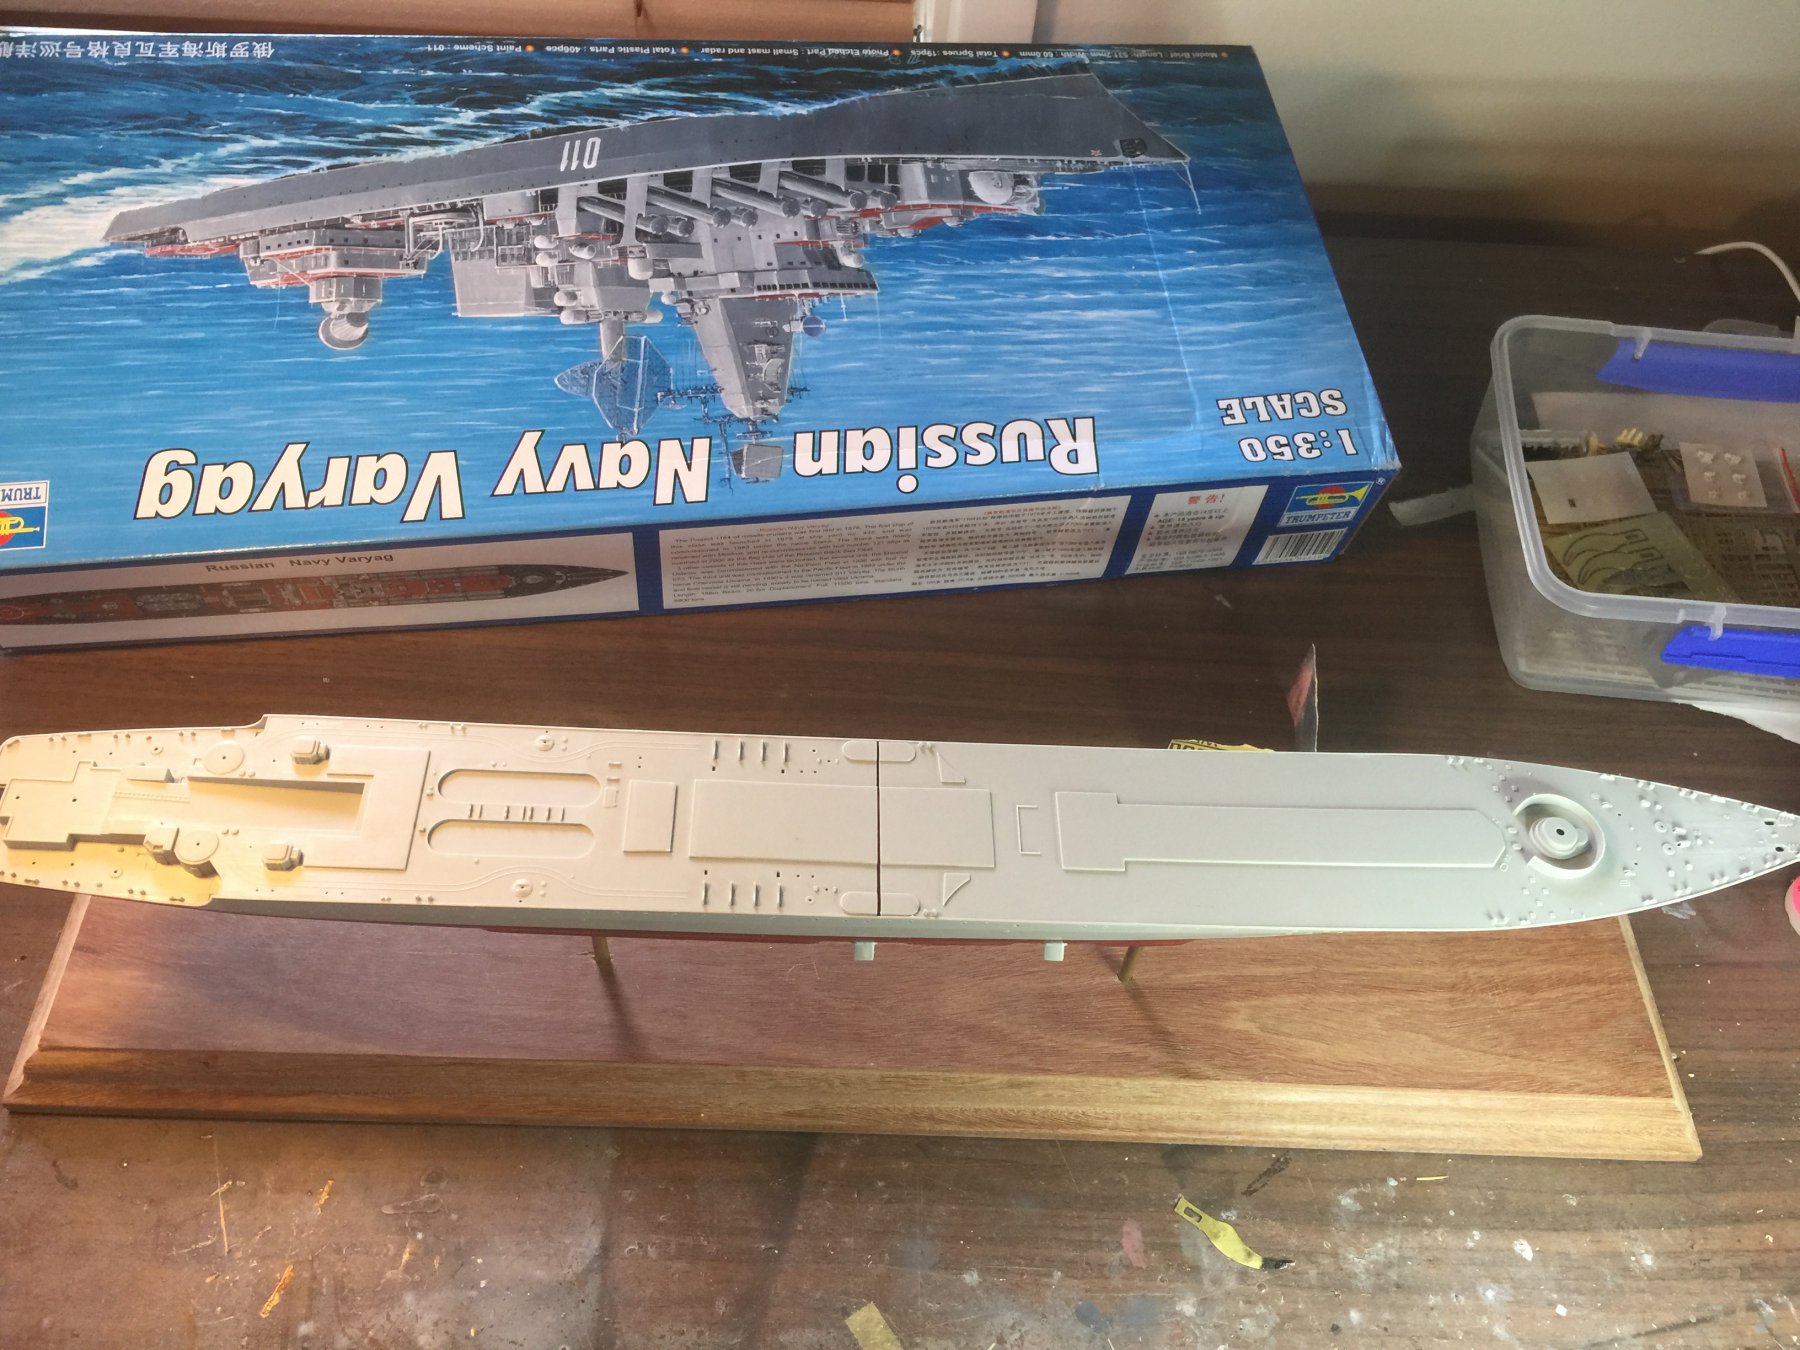
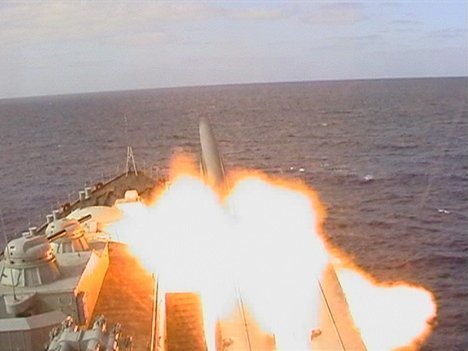
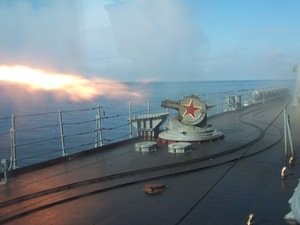
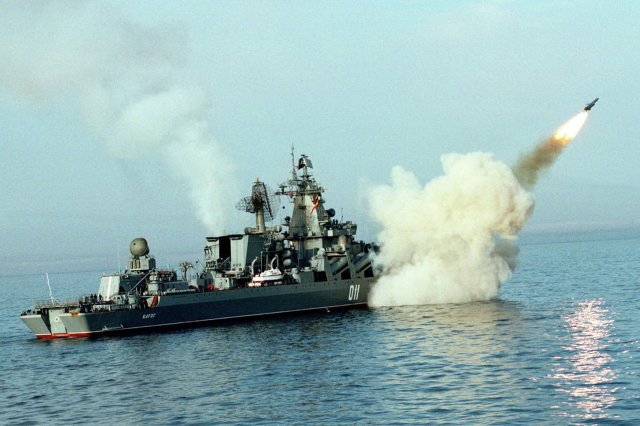
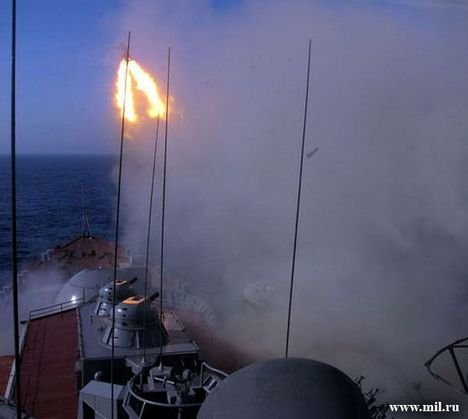
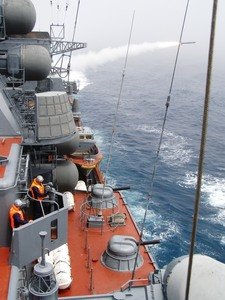
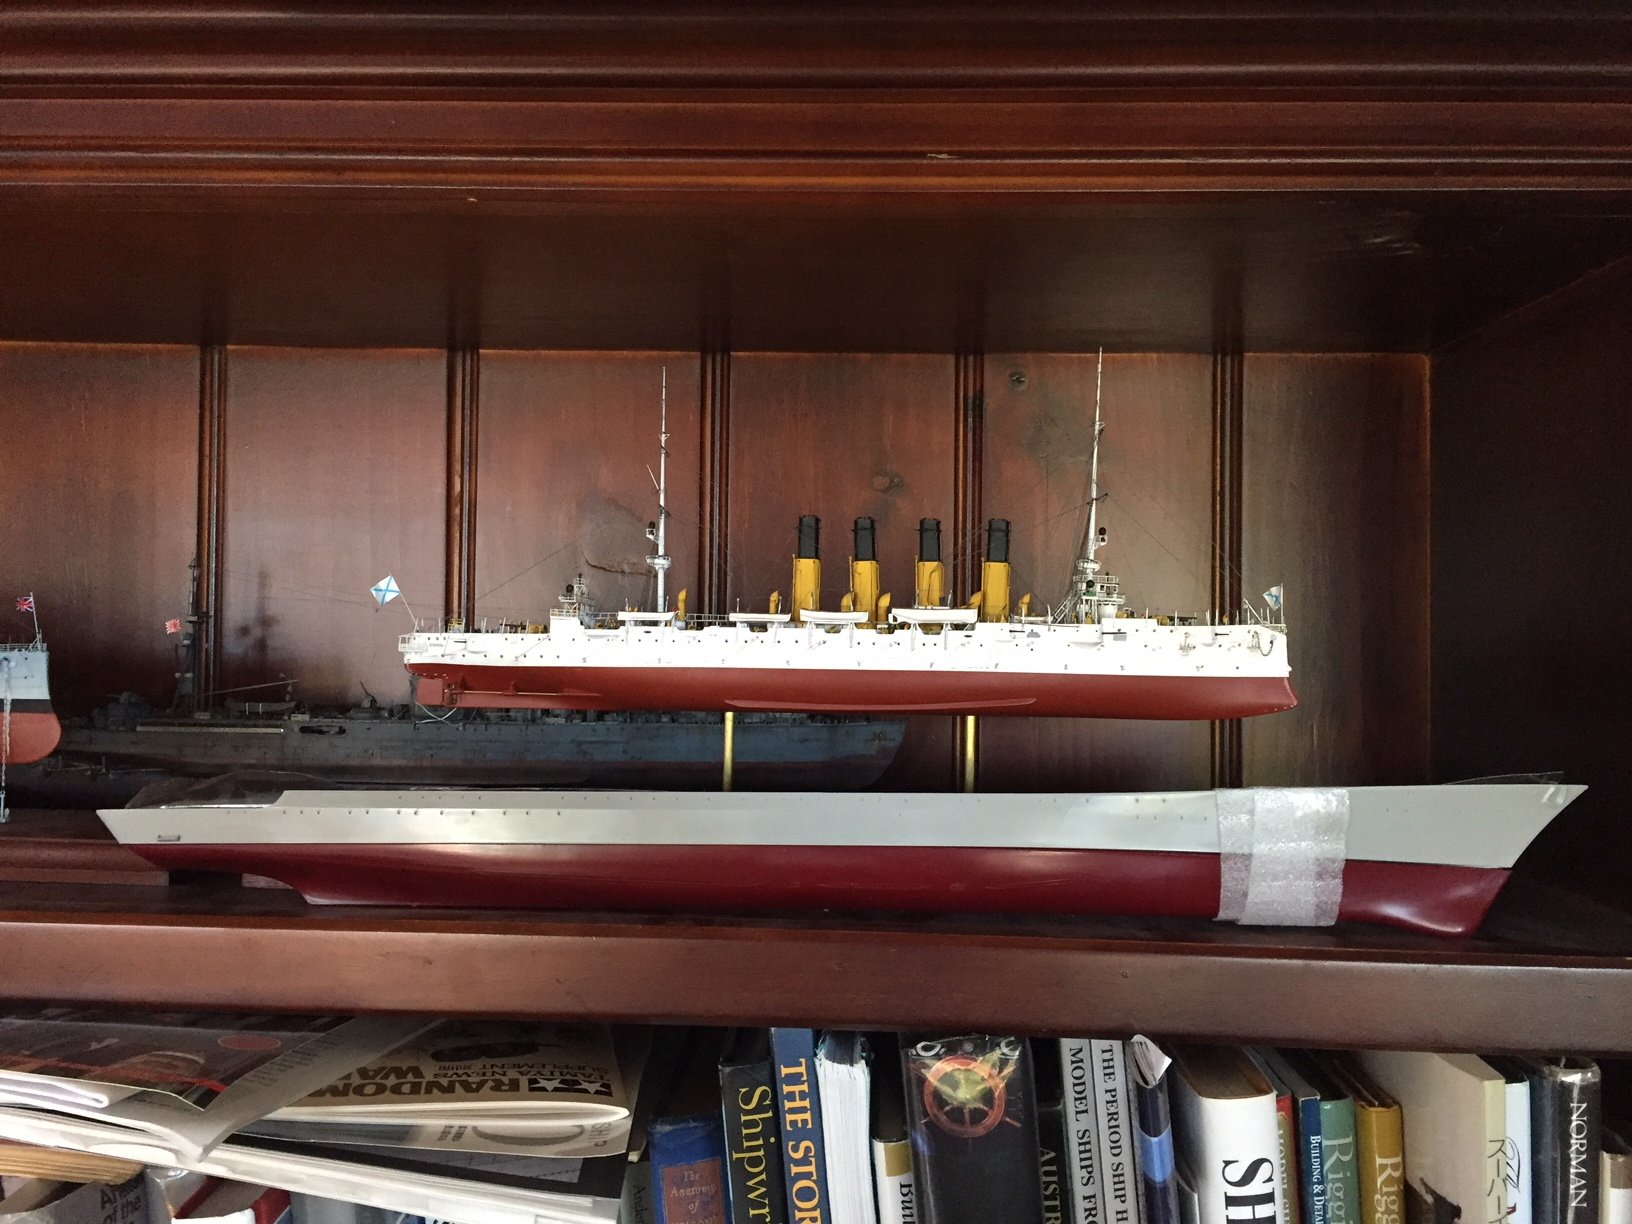
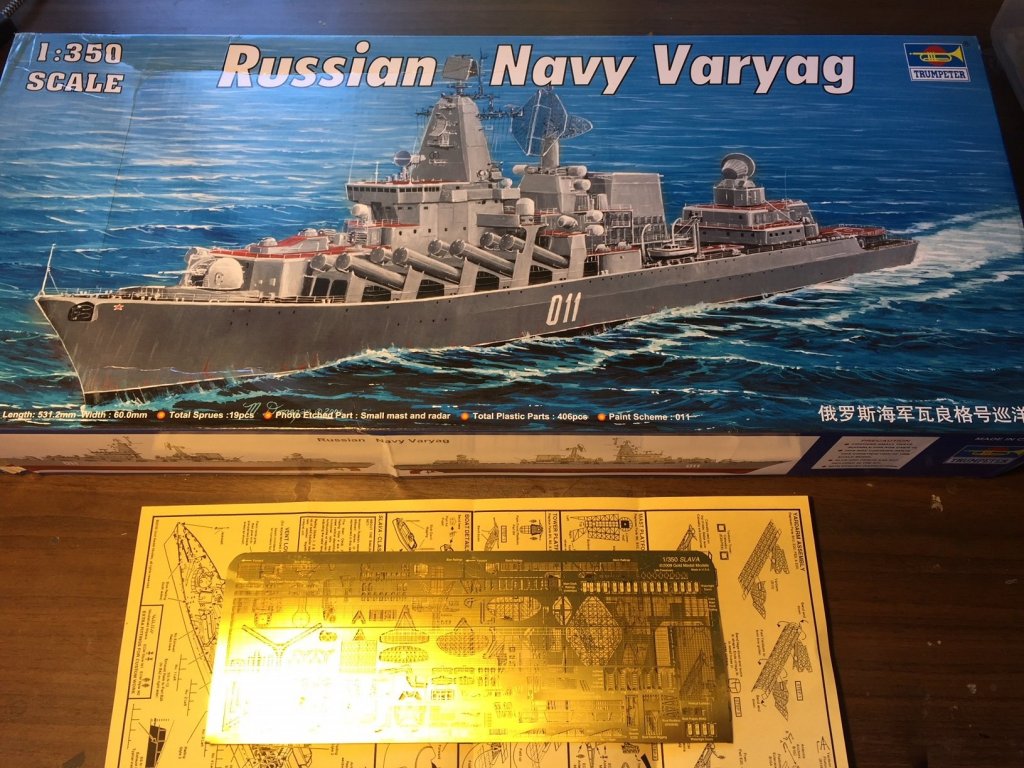
Moving forward in the later 20th century, my next build, the Soviet (now Russian Navy) Varyag. I found this on ebay along with a cruiser and a Chinese set of PE for the Varyag for a hell of a lot cheaper than anywhere in OZ. You can see from the 1904 version, she got a bit bigger and I think was primarily an aircraft carrier killer. There are a LOT of photos online for her him and his brothers (Russian ships are boys apparently), and I have as usual ordered up some more extras. The Gold Medal Models PE is just lovely and incredibly detailed. The hull is very smooth and I will be doing a fair bit of work to etch in some panel lines, scuppers, dents, all to aid in weathering it.
- 180 replies
-
- 13
-
-
Man, I could never bring myself to solder, so much PE, so much work! Ive decided the quick set binding fluid for Ca is now my friend. Its a massive build.
-
and I am looking forward to you value adding to the build log. I have ordered aftermarket from from around the globe and purchased my next kit for a steal off eBay, it actually included a Chinese pirated copy of the PE and a second Chinese build. All for under the RRP of the kit. In keeping with the principles of this site I have re ordered the PE from the company that produced it. I need to to tidy up all the pe I have acquired as it is all 1900-1945, and now we progress to the time when I started walking this earth. When it all comes together I’ll start a new log.
-
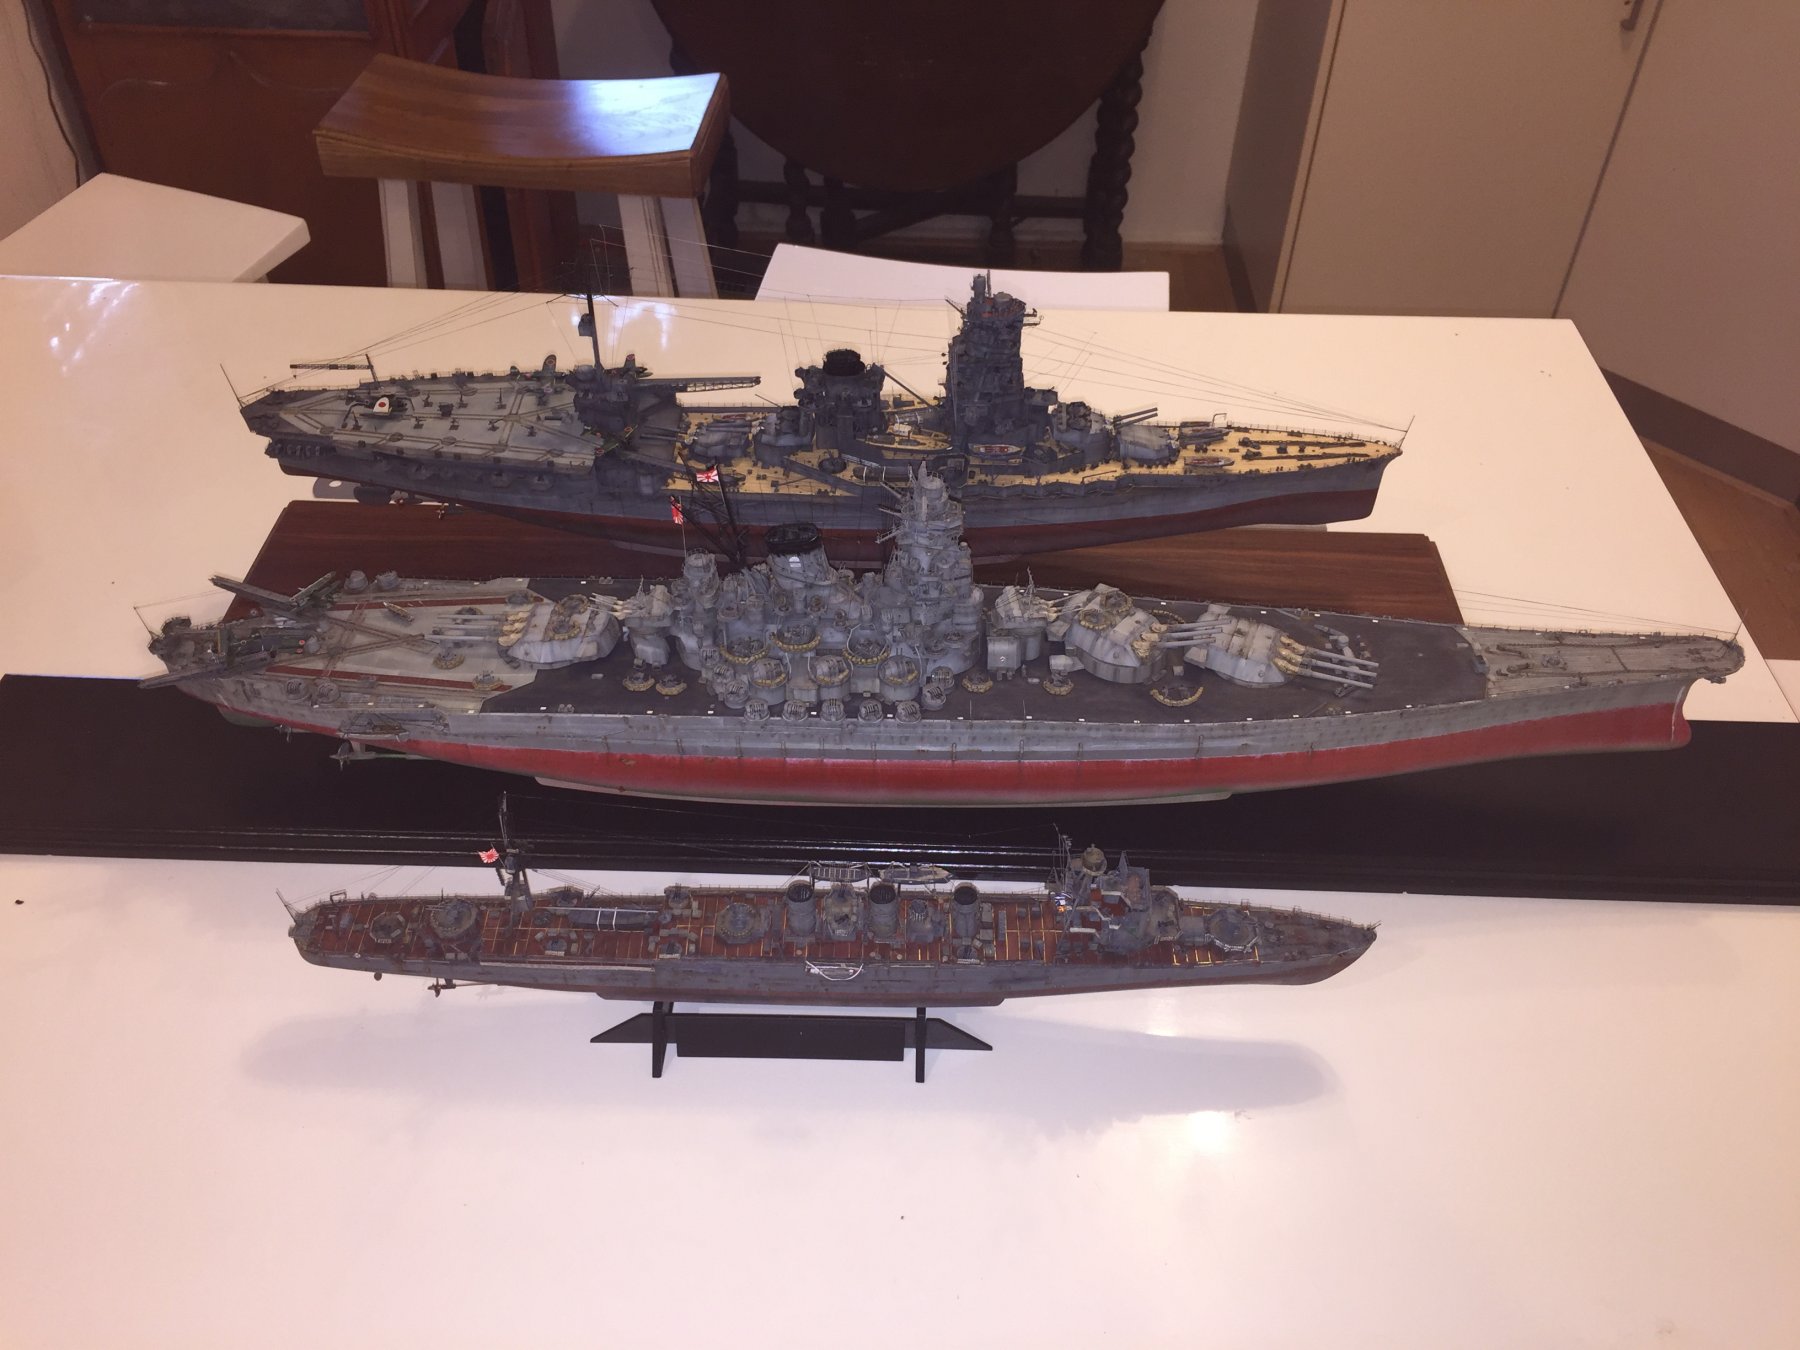
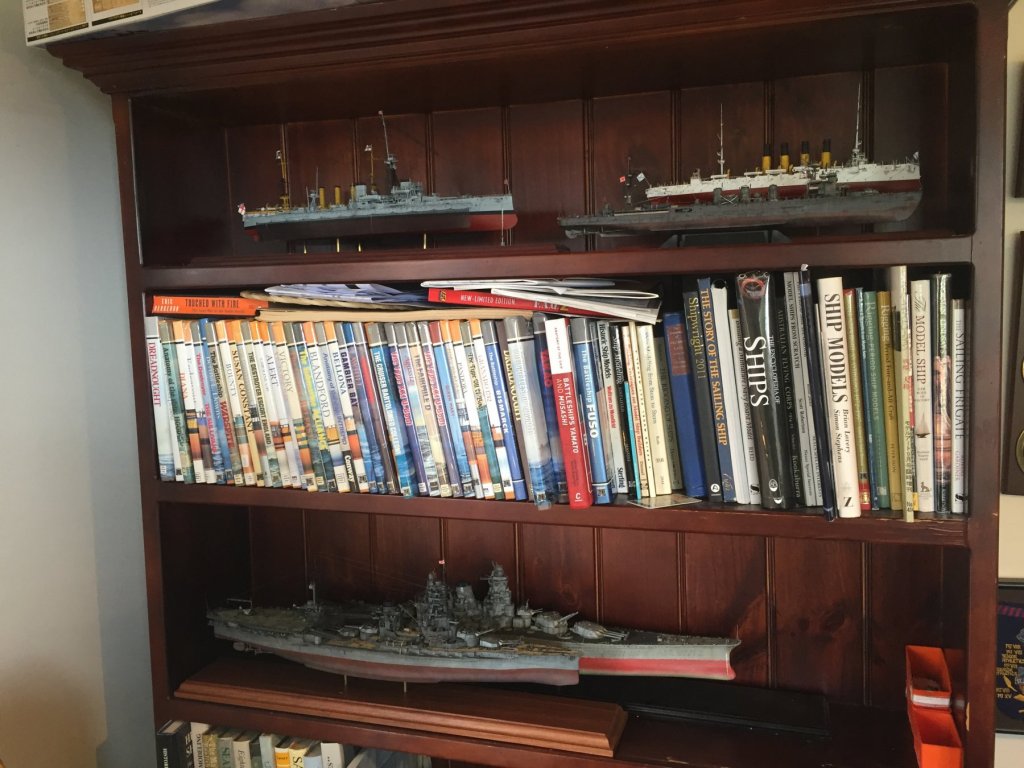
And here ends my IJN phase. I really don’t want to build another for quite a while as it just starts to repeat itself. Hope you enjoyed this one, I’m going forward to the Cold War next. Off to the digital graveyard.
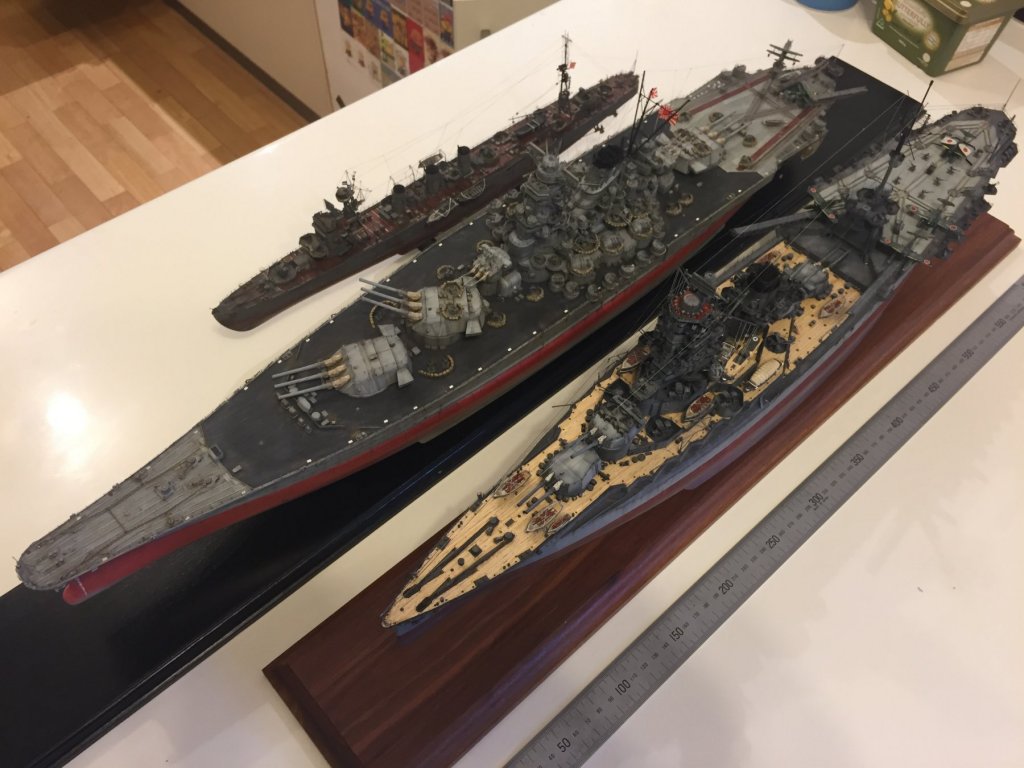
- 224 replies
-
- 22
-
-
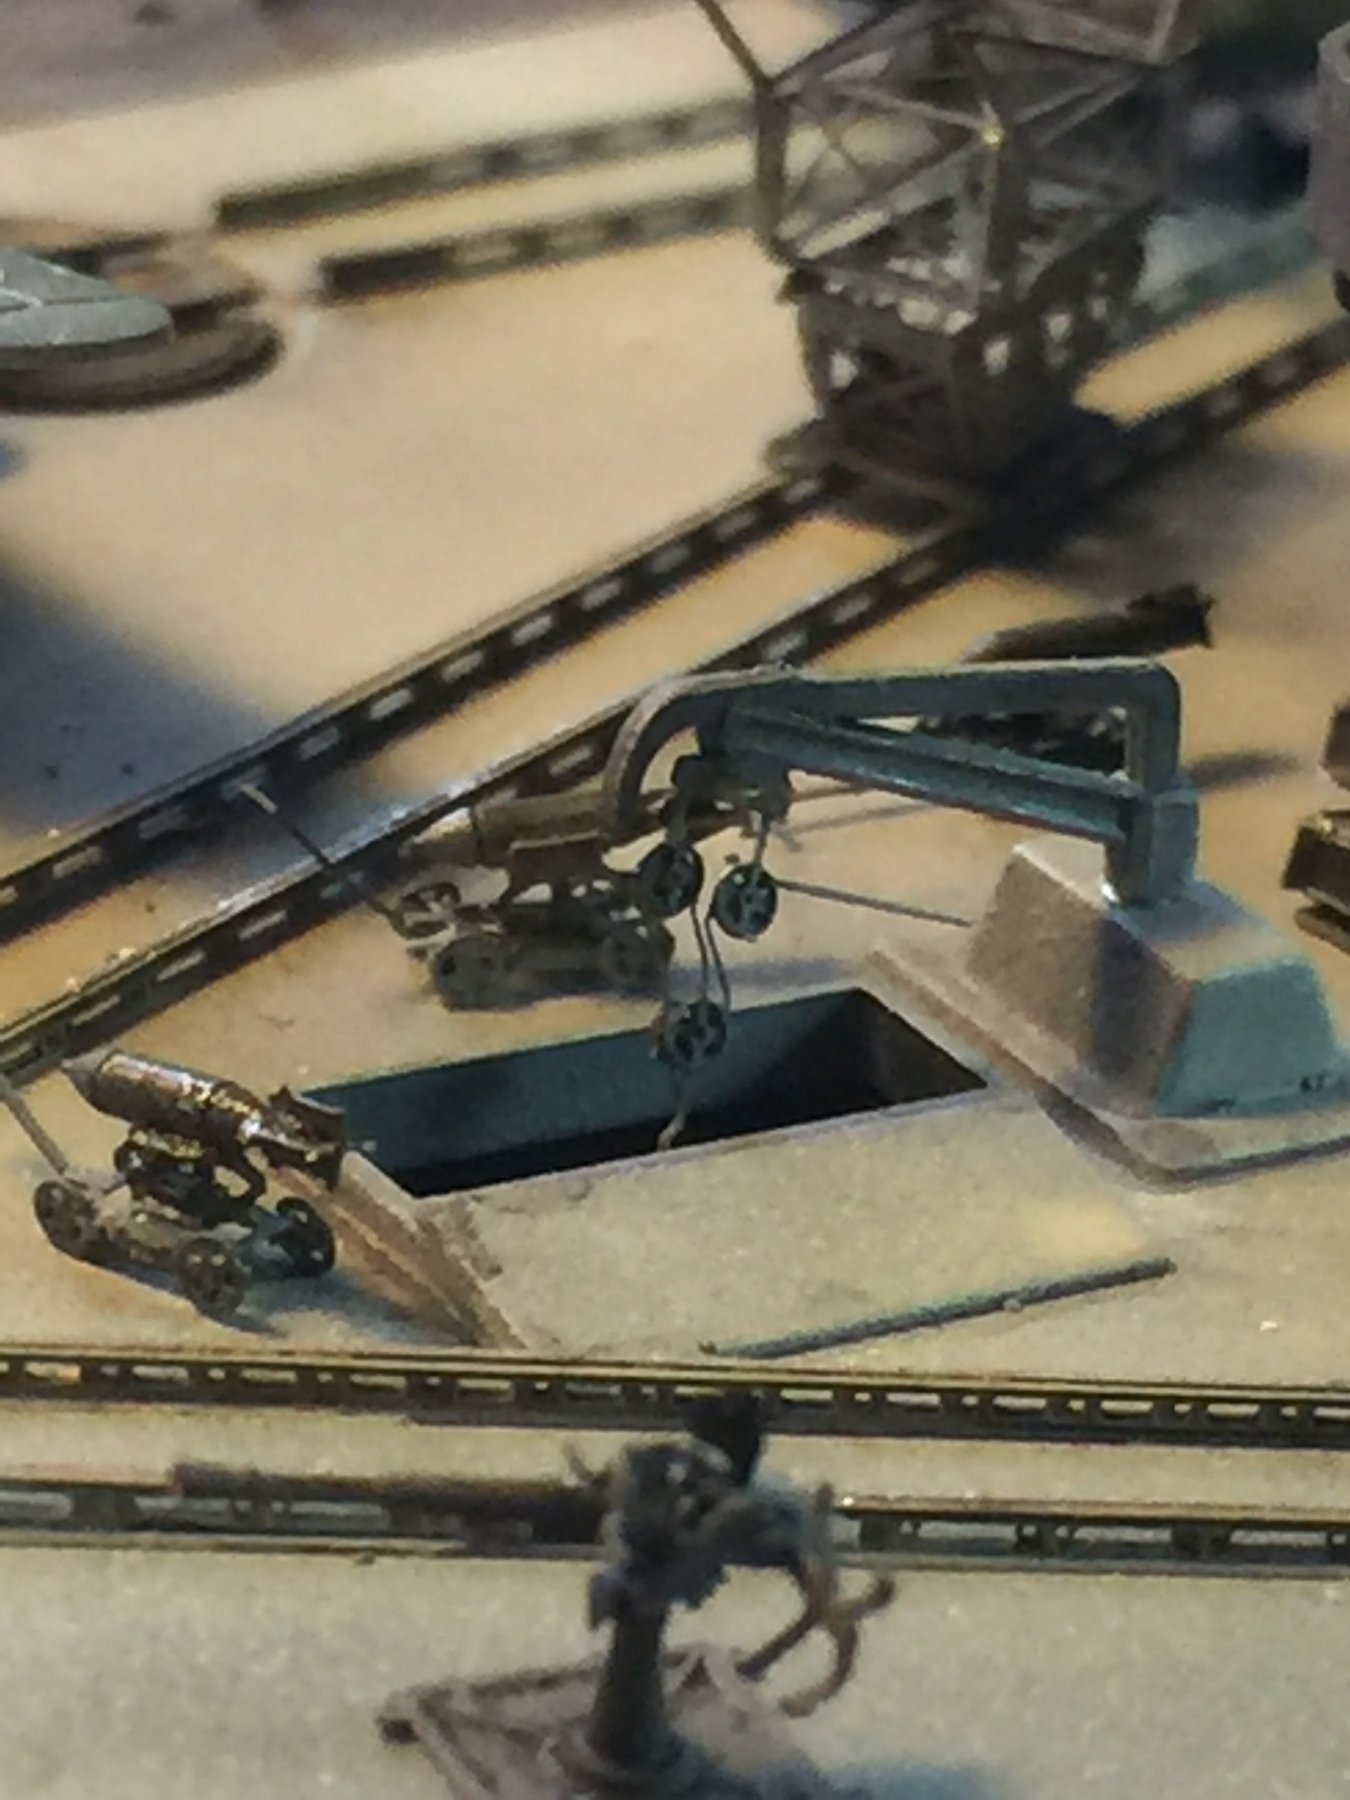
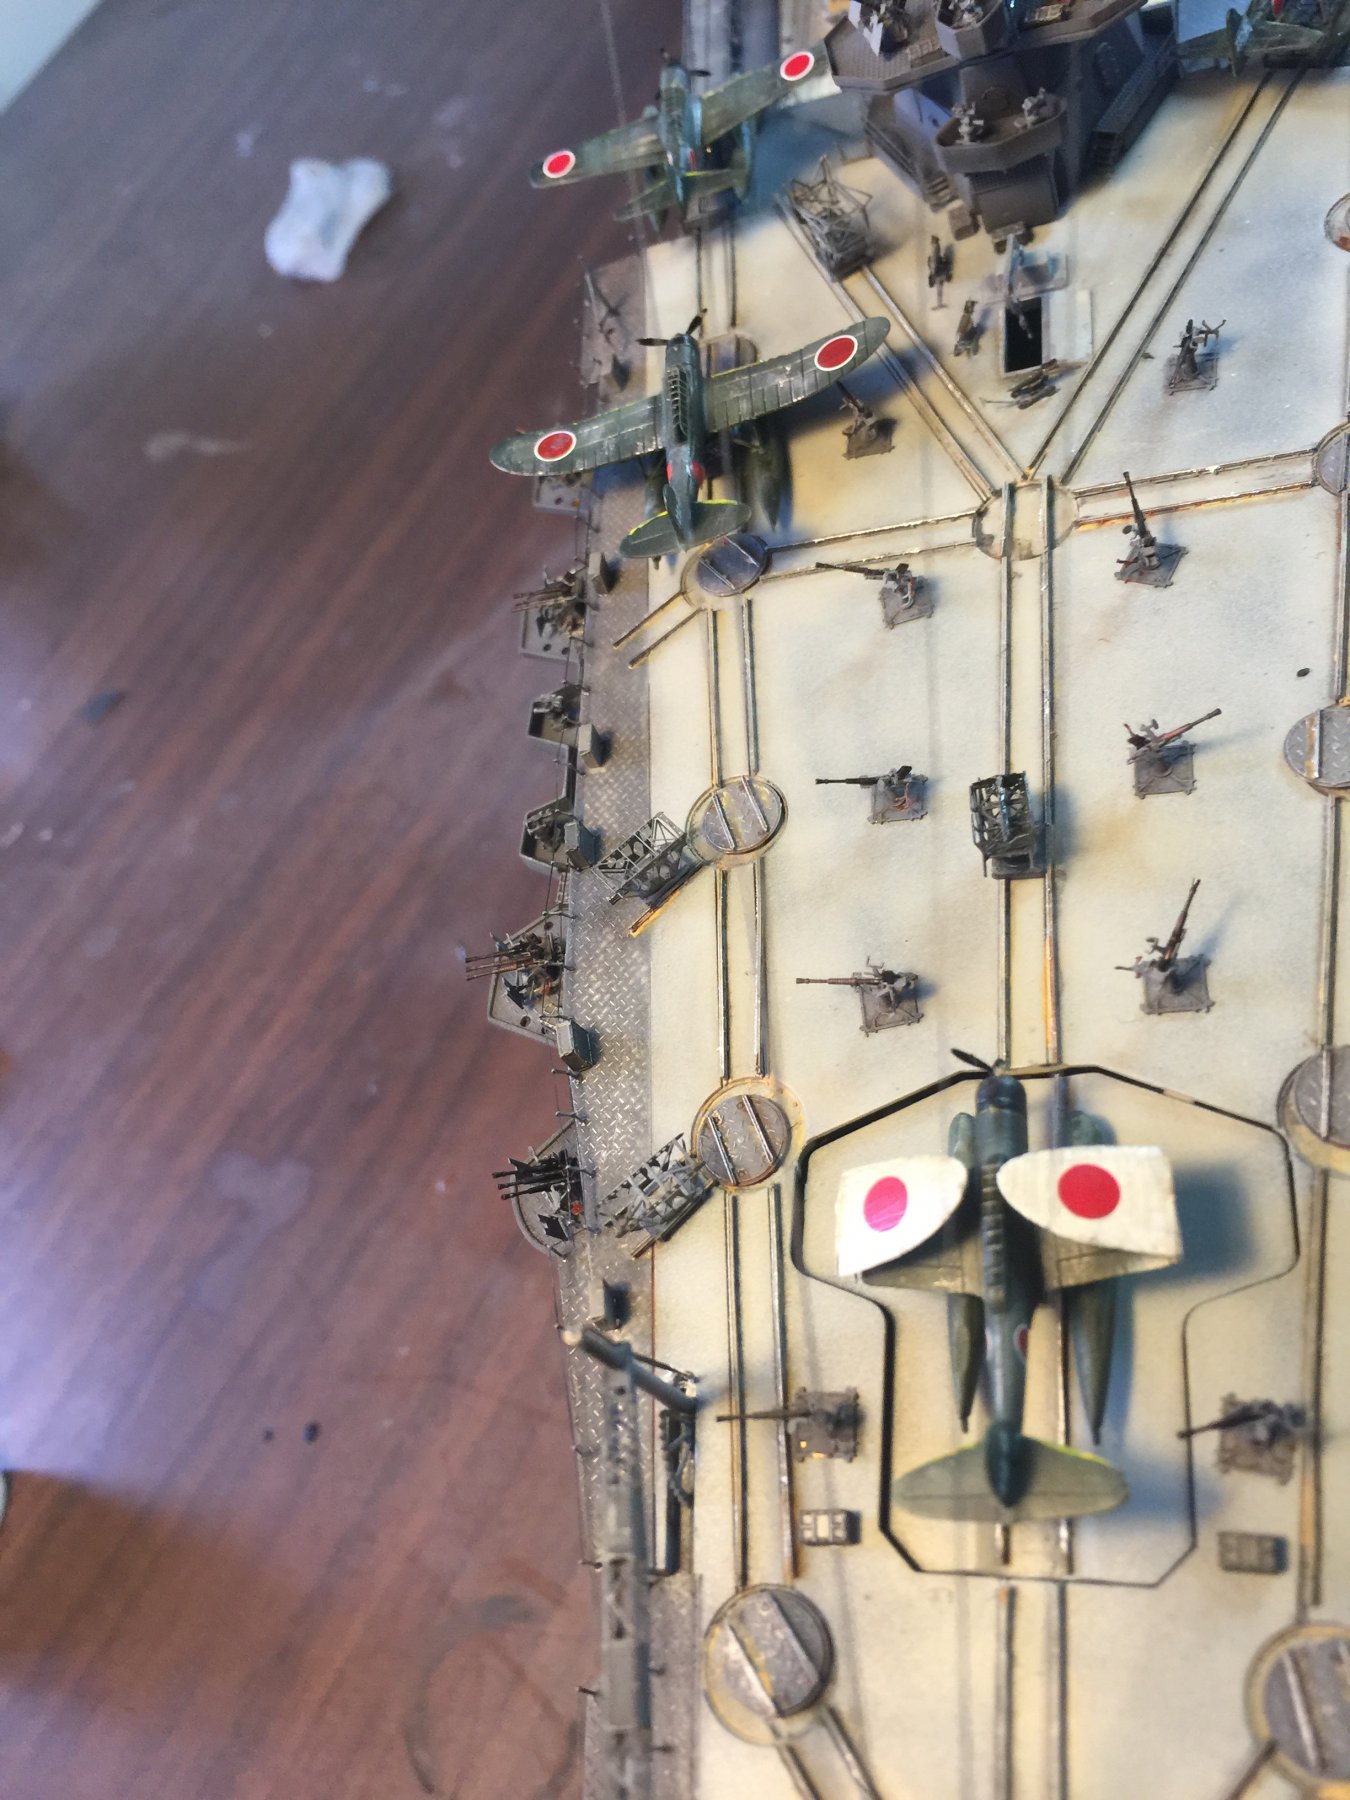
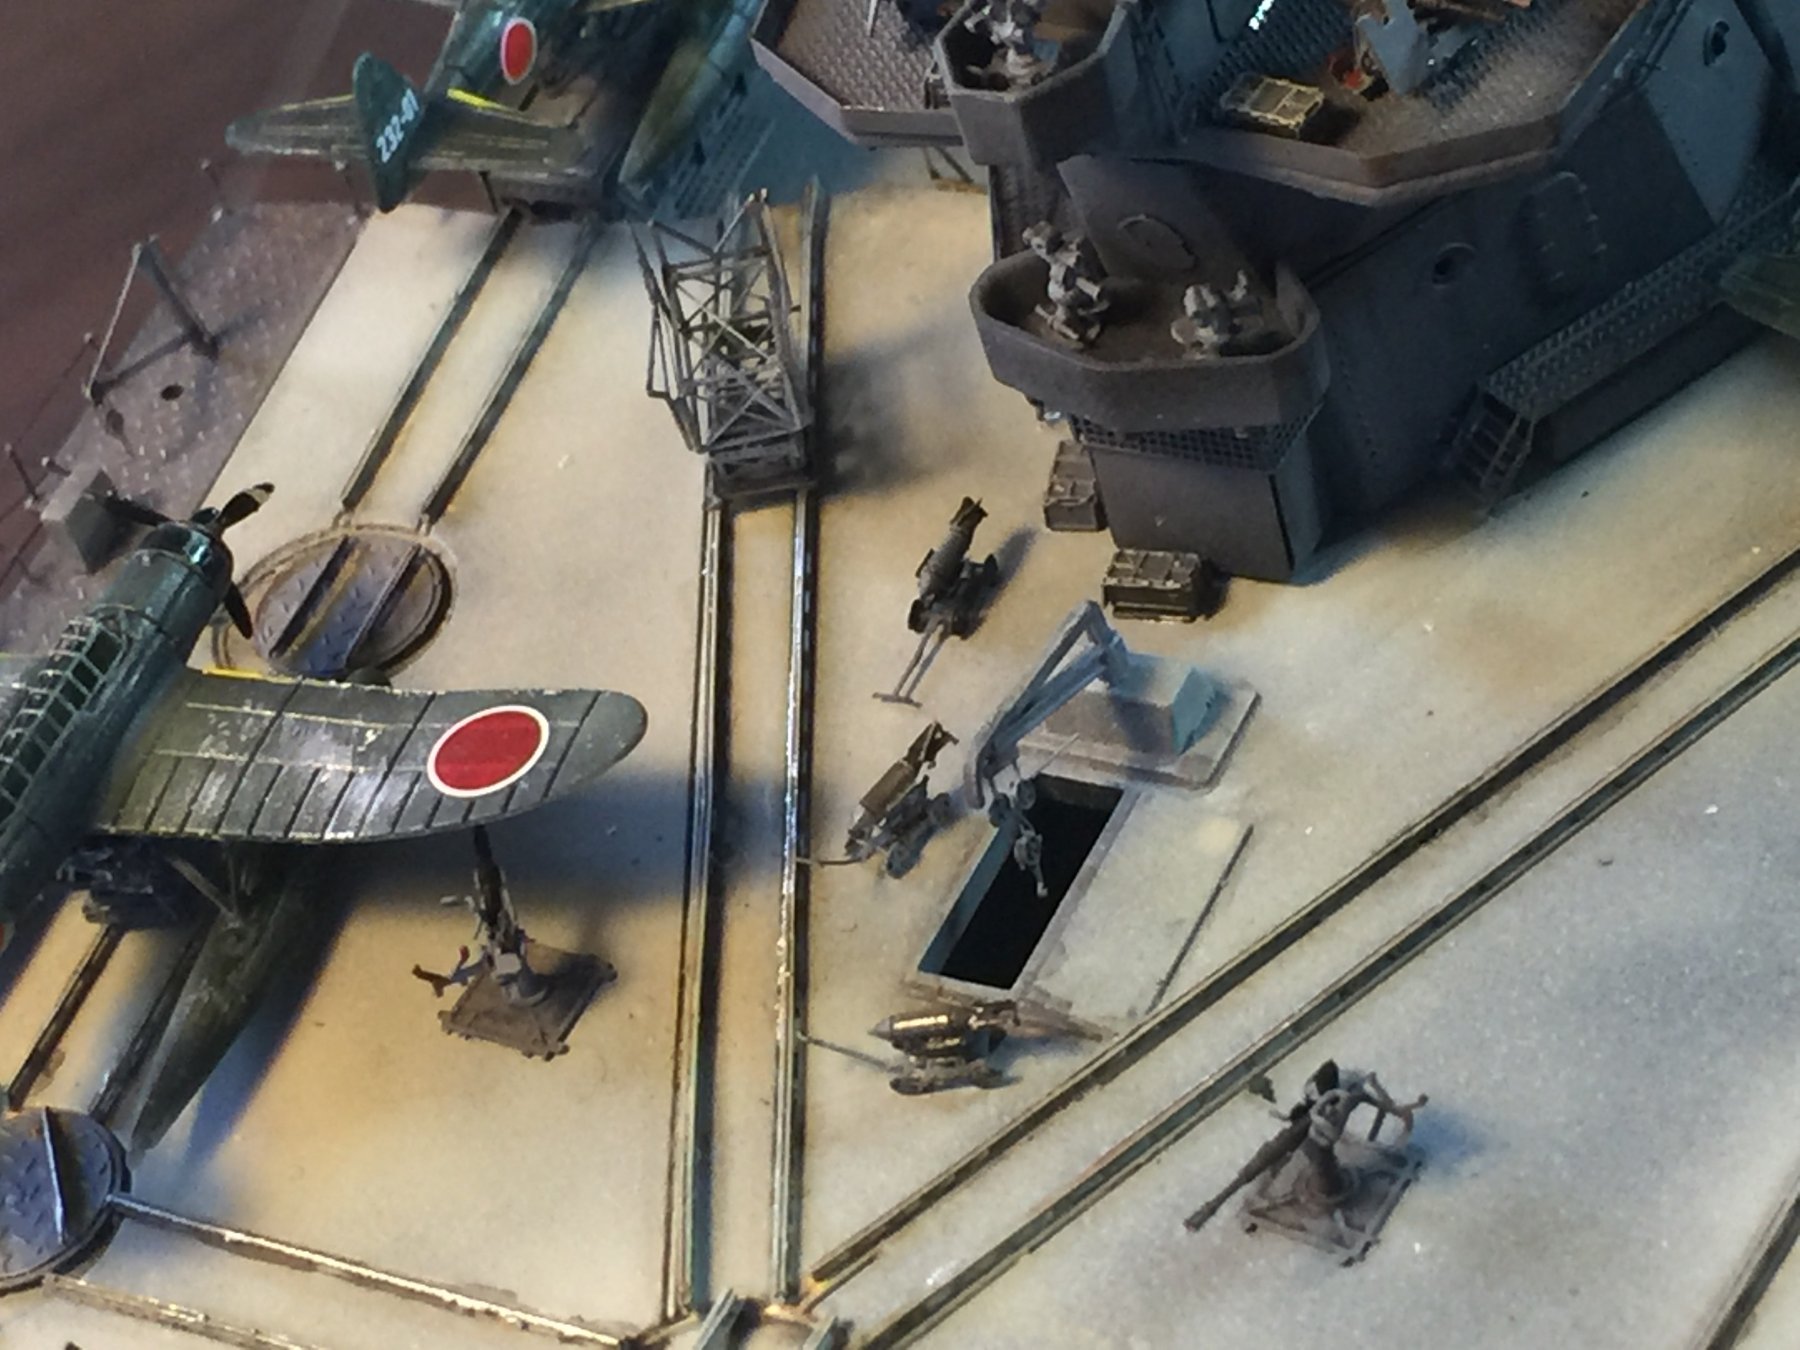
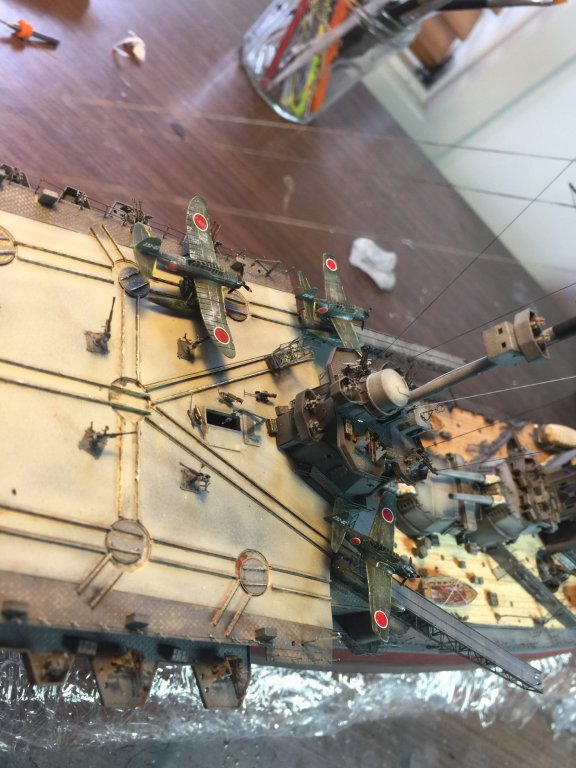
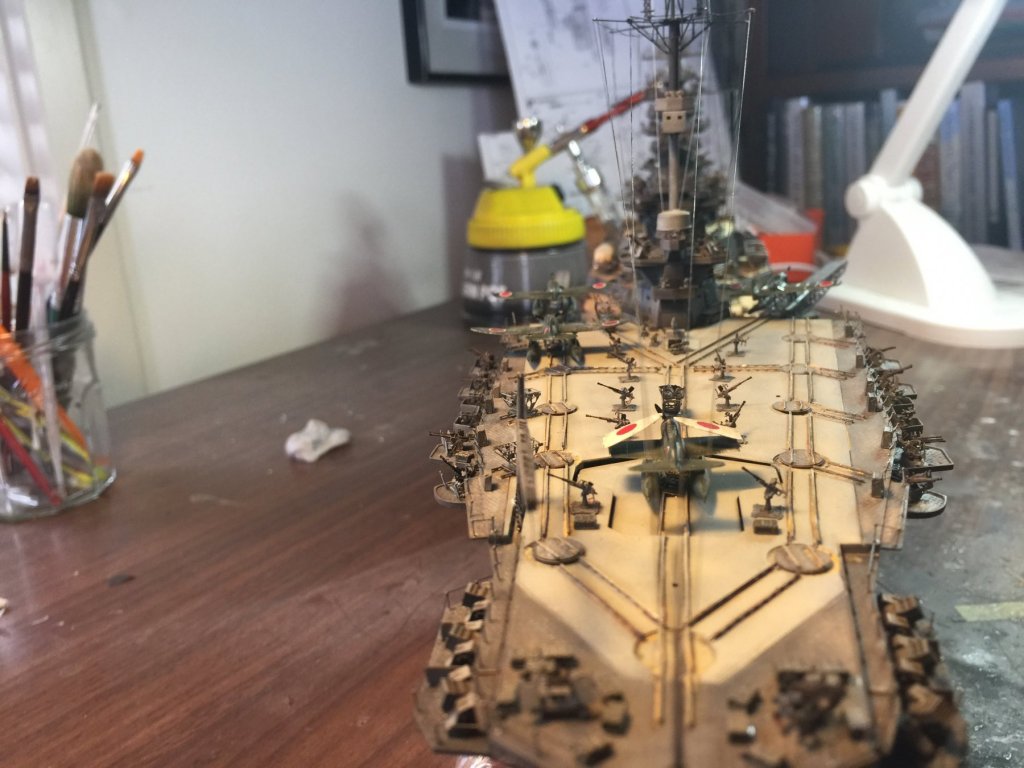
Essentially I’m crap at aircraft. There is a bomb hoist where I have added some little bombs on trolleys and left a few trolleys for aircraft lying around.


- 224 replies
-
- 17
-
-
You could try a heavy black wash for the helicopter windows.
- 133 replies
-
- 3
-
-
- jeanne d arc
- heller
- (and 2 more)
-
Cog, according to the internet, if you don’t grow up by 50 you do’nt have to, 2 years to fight it.