-
Posts
5,529 -
Joined
-
Last visited
Content Type
Profiles
Forums
Gallery
Events
Everything posted by RGL
-
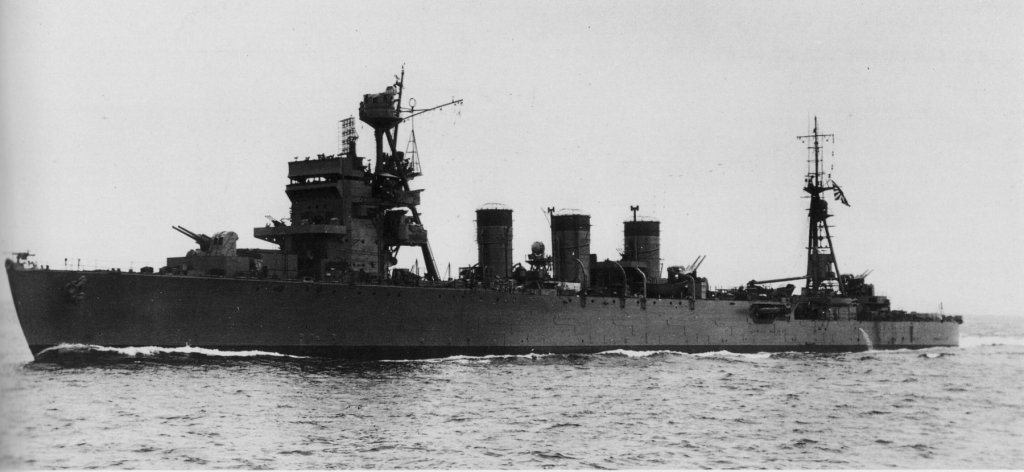
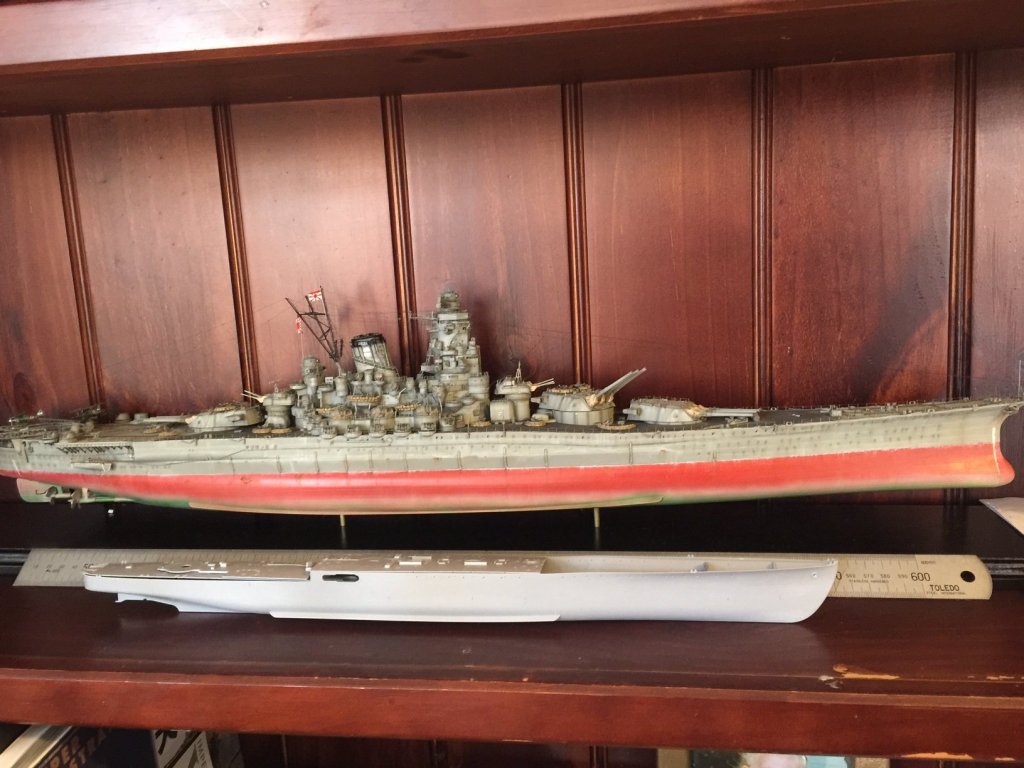
If you zoom in on the second photo, you can see strange rectangular panels on the hull, which have been suggested as strengthening strikes but I'm not convinced. There are also what appear to be longitudinal scuppers beneath them and little bulbous scuppers just above the waterline. I used offcut PE for the 'strokes' as it is easier to work with and very thin, evergreen strips for scupper pipes and half sanded vents in resin for the waterline scuppers. There is is another layer of primer to go yet before pre shading so it won't be so stark. The hull panel lines were easily cut into the multiple layers of primer. The hull ladder rungs to go.
-
After much masking and multiple coats of rattle can primer, I have replicated the hull plates, which I'm actually quite happy with. They are about .1mm higher than each other which should be correct for scale. Most kits have scribed or raised seams which is just not accurate. Now I can scribe the individual plates and add the scuppers and the mysterious bits on the side of the hull before another overall coat of primer. With pre shading to delineate them all I'm hoping it will come up ok in the end before it gets messed up with heavy weathering.
-
There are three gun mounts for the high altitude AA guns, the forward mount is the trickiest as the PE is out by about .5mm. The rear mounts are fairly simple and get sandbags. Did they have them? Who knows, I reckon they'd have wanted as much protection as they could by 1945.
-
Whilst awaiting the next layer of primer on the hull to finish, I think this is the radio room and the 60cm spotlight on top with sisal protection
-
This piece is now pretty much complete, having added the sisal ropes. There are a heap of ammo boxes to go on top with the guns which will hide the gaps.
-
I have started the primer coats on the hull, I'll try and use masking tape to delineate between the hull armour, so there will be multiple coats. In in the interim I have started up the PE deck assemblies. This Flyhawk set is very nice, but a bit of work to do yet to fill gaps and smother with sisal splinter shields. This is a central ventilation room which will seat 2 triple type 96 25mm AA guns (same pain as the Yamato to build).
-
That's a nice piece of work, I know your pain!
- 151 replies
-
- duke of york
- tamiya
-
(and 2 more)
Tagged with:
-
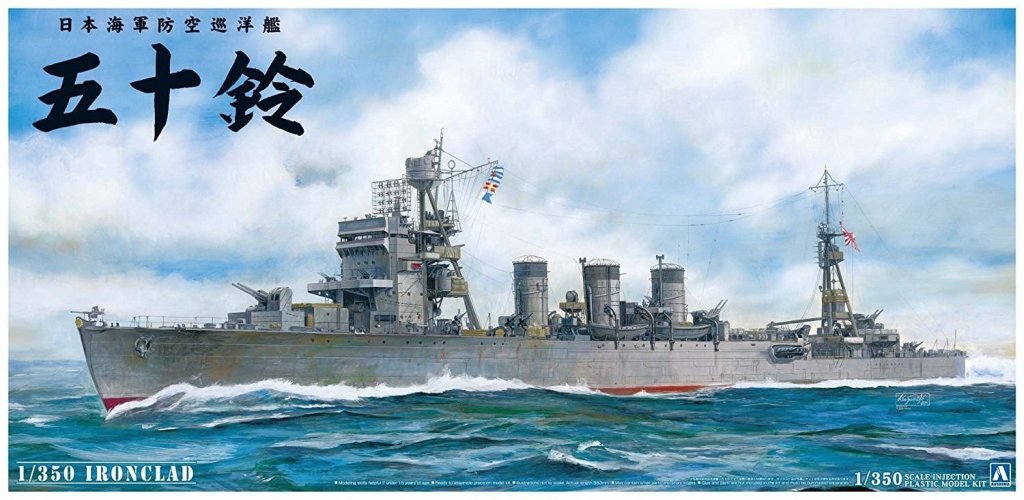
Pretty much destroyed most of the detail popeye, slowly removing and sanding everything back, a couple of indentations to fill where the pumps and cable reels are supposed to go as they are utterly inaccurate. The rear deck area; I replaced the doors (hatches), added proper cable reels, and some support gussets. The Flyhawk set adds an extension to the top deck to make it like the kit is supposed to be. I won't glue this down yet as I will have to paint it beforehand. I picked up some rattle can primers yesterday so I can start building up the hull plates, once I can do that up I can add the multitude of side panels that are displayed on the box art and original photo (if anyone knows what they are I'd love to know, open and zoom in on the b/w photo), plus a LOT of scuppers at the waterline.
-
It's good to see a few other plastic modellers here now! Moving on, I have finally stripped the decks, the top deck comes in three sections which will have substantial gaps between them which will need a fair bit of work. The quad torpedo launchers are supposed to be put in beforehand but it will make painting a continuous deck problematic so I cut the bottom off the so they can be slid in later as the interior will not be visible. I have also also added the ringols to the portholes and added the manual aiming Port (right hand side near the large opening), which is visible on the photo and in other references for the IJN but not made up in the kit. My quandry now is, do I add the deck? The hull is going to need plating added and numerous other details and the deck will be linoleum (brownish), requiring a lot of masking to separate the two colours.
-
I won't bore you with her history as Dr Google can do that, needless to say she was converted into an AA light cruiser. Yes, I may have invested in a bit more aftermarket stuff but I have a lot left over from Yamato.
-
You can see there is a lot of molded detail, all the stuff on the hull is wrong and the entire deck detail has to go. so far I have stripped the deck completely and sanded the hull back, individual stanchion holes have been drilled as well. I will have to replace all the deck equipment with something not looking like a plastic blob, make up hull plates, paint and weather it as to it's last day of staying afloat, rusty and beaten, with sandbags, etc and new guns. Nearly every model I have seen on the net does not match the final photo of her, and as hard as you may find this to believe, I think people may have made things up!
-
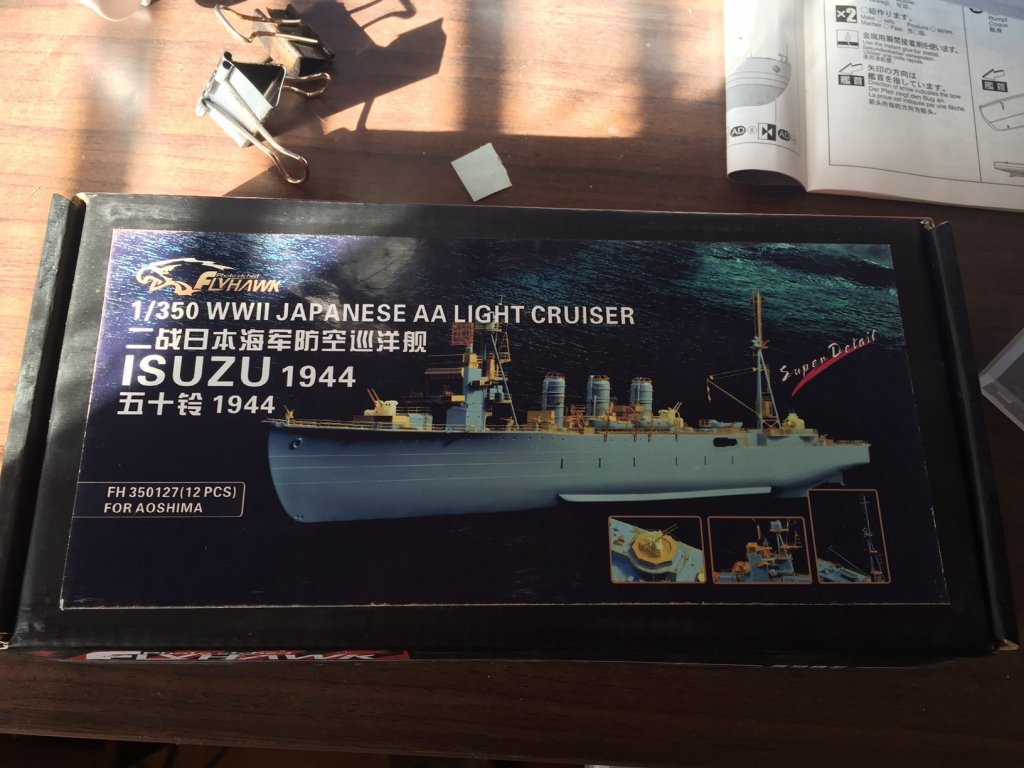
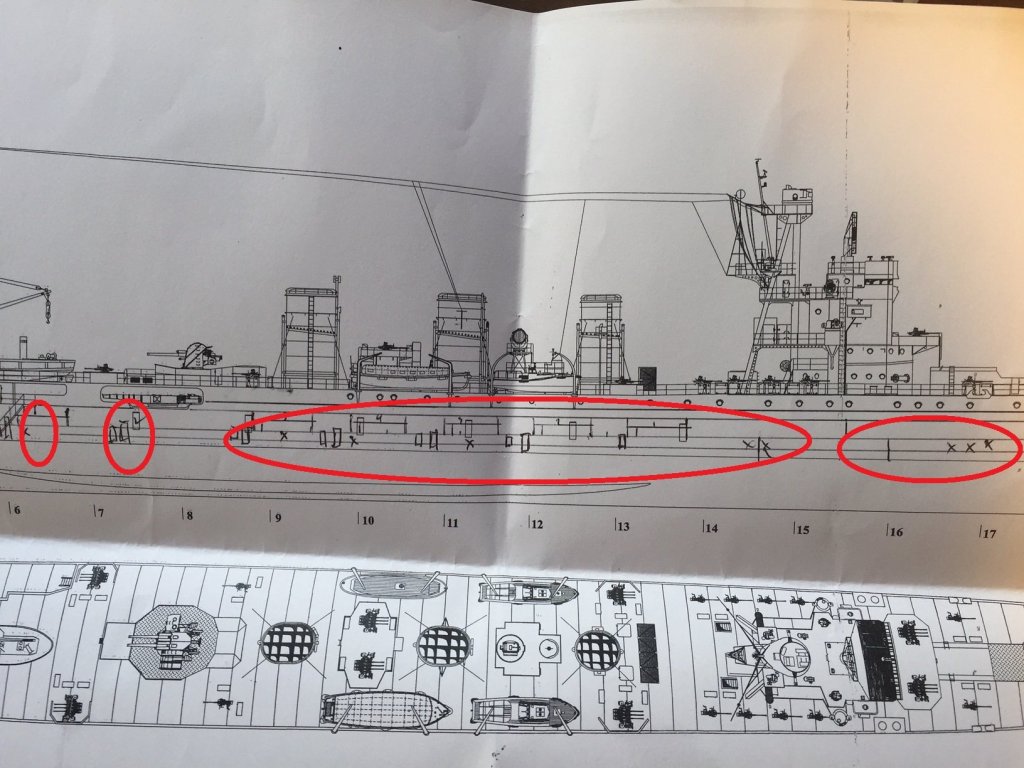
My next project is the IJN Isuzu in 1/350 from Aoshima. Date of sinking, 6 April 1945, the same as the Yamato. This is a very very bland kit, the box art is based on one photo taken in 1944 after it's last refit, unfortunately Aoshima didn't bother with any of the details on the hull, and there is so little reference materiel available (That I can find in English or any other language) that I have to go off what I can find online. I got the flyhawk upgrade set and will replace nearly everything on the kit bar the hull and decks. I could not face a long project, as the Yamato was pretty much out of the box, this is going to be a kit bash. I purchased the Profile Morskie plans which are great for gun placements and details of the structures but no deck details. As you can see I have done up some planning for the hull plates. Its been a slow start as I've been trying to get my head around hull construction. You can see her compared to Yamato, no where near as complex.
-
Sorry, I'm back, been to the netball. You could try diluted acrylic paint. I think as these decks are a bit like pre chewed chicken they really don't have a grain per se, and as they are holystoned anyway, there is no grain to see. I was pretty happy using a pastel powder on my black deck and you could really develop that technique with different shades which should in theory work very well, but leave it to last.
- 151 replies
-
- duke of york
- tamiya
-
(and 2 more)
Tagged with:
-
If you are using a stick down deck, the stain will not work (I tried), as they are really waxy for some reason. I suggest either paint it or use the AK wash for wooden decks as it will bring up the planking and will be heavier at the edges. I was going to stain my Yamato deck black using a commercial black stain which worked on real wood but it failed on offcuts. The stick down decks are so thin you can't sand them back.
- 151 replies
-
- duke of york
- tamiya
-
(and 2 more)
Tagged with:
-
Looks good mate, good choice with the railings
- 44 replies
-
- schnellboot s-100
- revell
-
(and 2 more)
Tagged with:
-
We all get stale mate, that's why we walk away for a while. Big elephants one bite at a time.
-
Mate, there is nothing harder than serving a rope then stropping a block, seriously this stuff is far easier. Never think any of us has anything over any of us. It's all a matter of degrees. I'd have to re learn how to plank a ship.
-
No mate, something simple but complex, I can't face the equivalent of the HMS Victory yet
About us
Modelshipworld - Advancing Ship Modeling through Research
SSL Secured
Your security is important for us so this Website is SSL-Secured
NRG Mailing Address
Nautical Research Guild
237 South Lincoln Street
Westmont IL, 60559-1917
Model Ship World ® and the MSW logo are Registered Trademarks, and belong to the Nautical Research Guild (United States Patent and Trademark Office: No. 6,929,264 & No. 6,929,274, registered Dec. 20, 2022)
Helpful Links
About the NRG
If you enjoy building ship models that are historically accurate as well as beautiful, then The Nautical Research Guild (NRG) is just right for you.
The Guild is a non-profit educational organization whose mission is to “Advance Ship Modeling Through Research”. We provide support to our members in their efforts to raise the quality of their model ships.
The Nautical Research Guild has published our world-renowned quarterly magazine, The Nautical Research Journal, since 1955. The pages of the Journal are full of articles by accomplished ship modelers who show you how they create those exquisite details on their models, and by maritime historians who show you the correct details to build. The Journal is available in both print and digital editions. Go to the NRG web site (www.thenrg.org) to download a complimentary digital copy of the Journal. The NRG also publishes plan sets, books and compilations of back issues of the Journal and the former Ships in Scale and Model Ship Builder magazines.


