RGL
-
Posts
5,564 -
Joined
-
Last visited
Content Type
Profiles
Forums
Gallery
Events
Everything posted by RGL
-
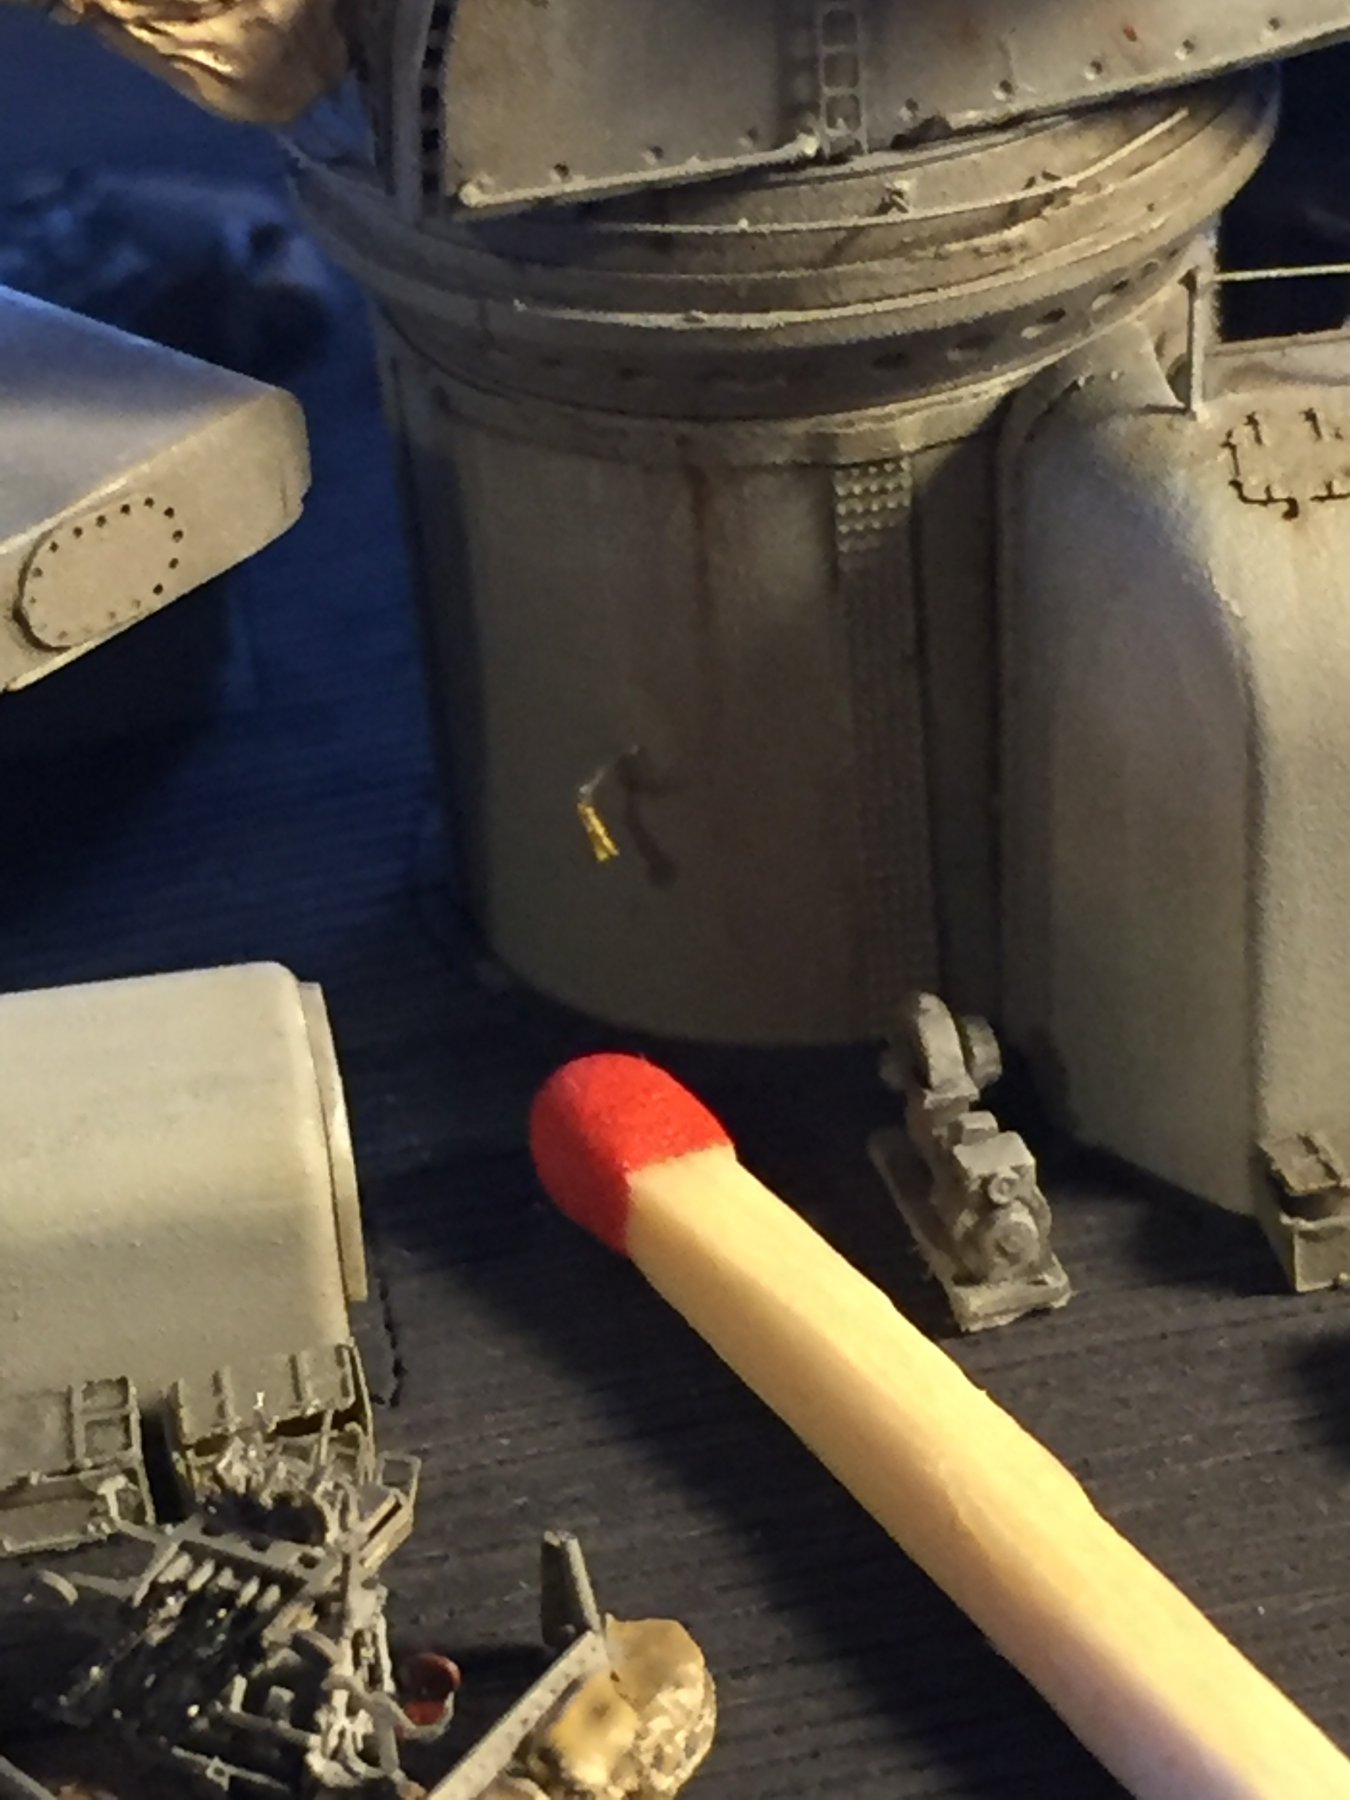
 Sorry if it's a bit gimmicky, but the Yamato actually had a ships bell in the location, managed to get it right first time
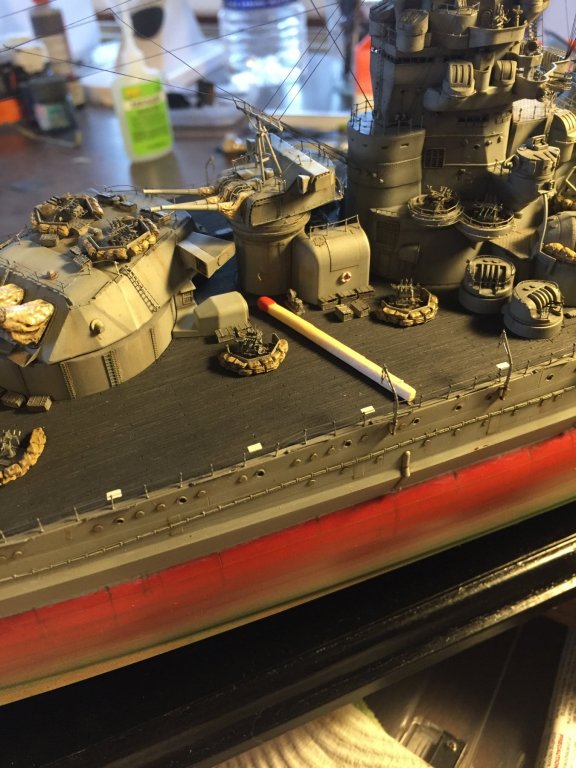

- 743 replies
-
- 19
-

-
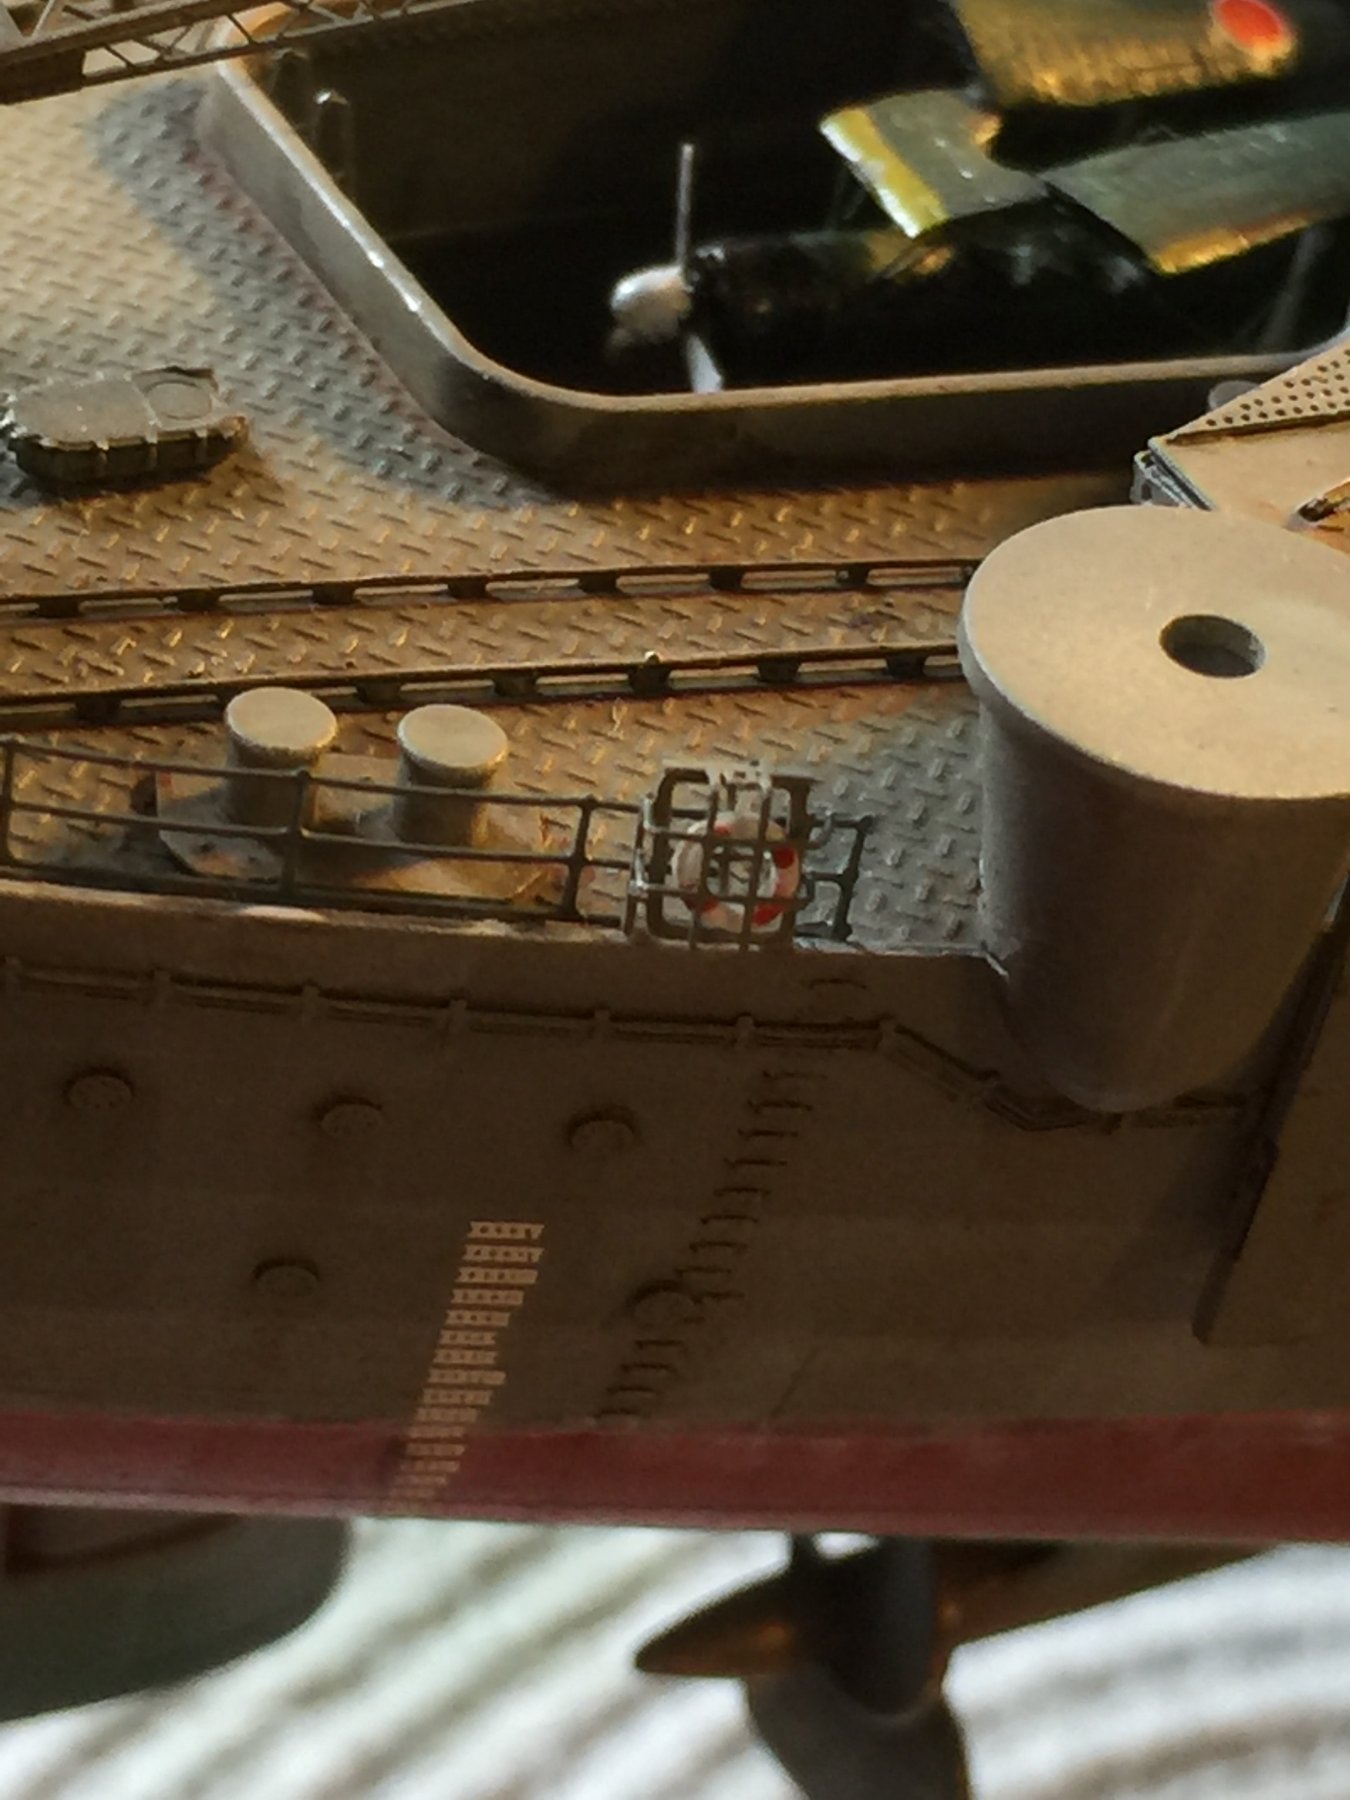
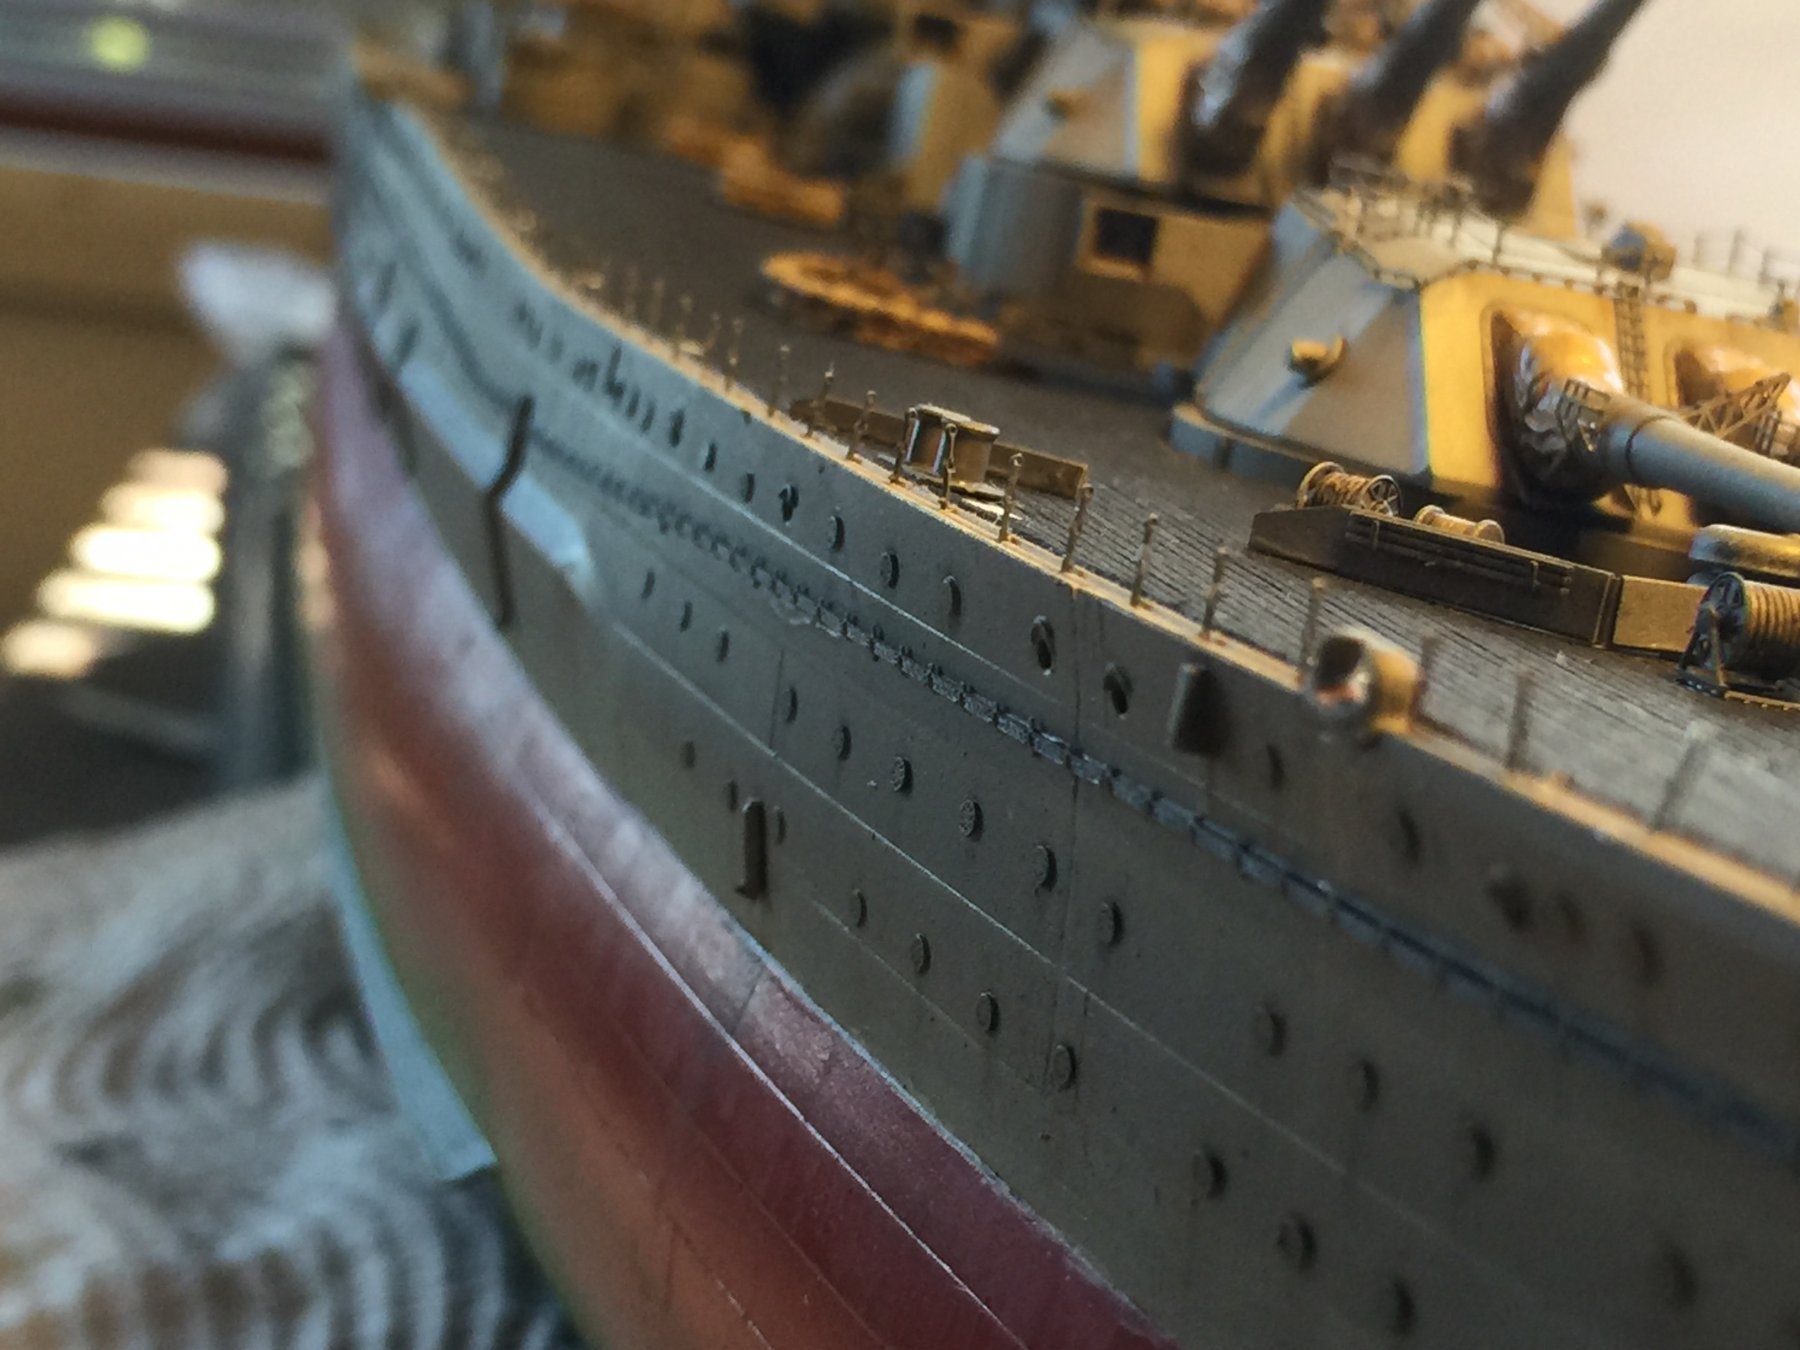
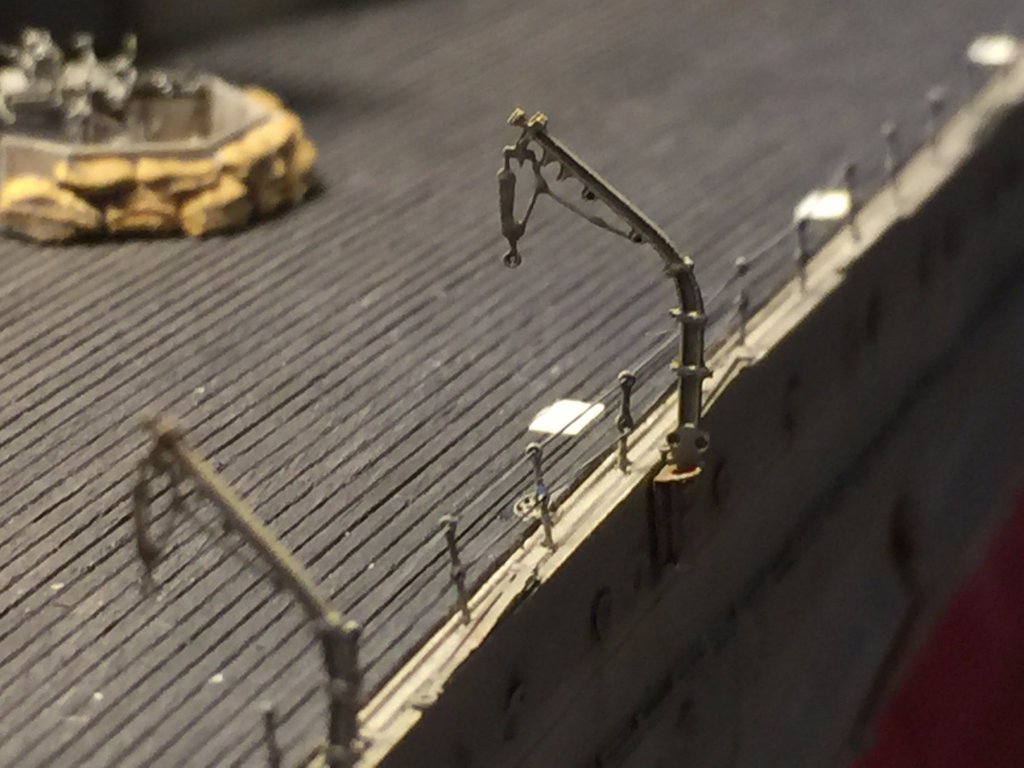
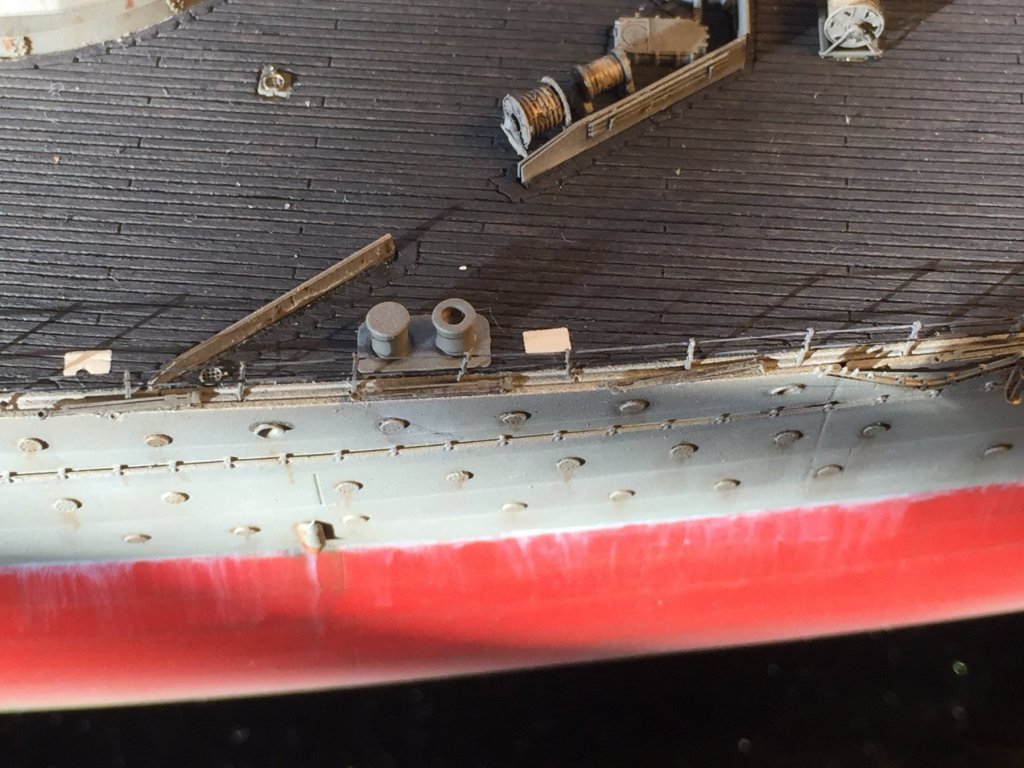
Awning stanchions, Davits and life rings added. Getting there. It's an awful lot of work for something you can hardly see. I also added the paravane rollers and the stowed boat booms.

- 743 replies
-
- 19
-
-
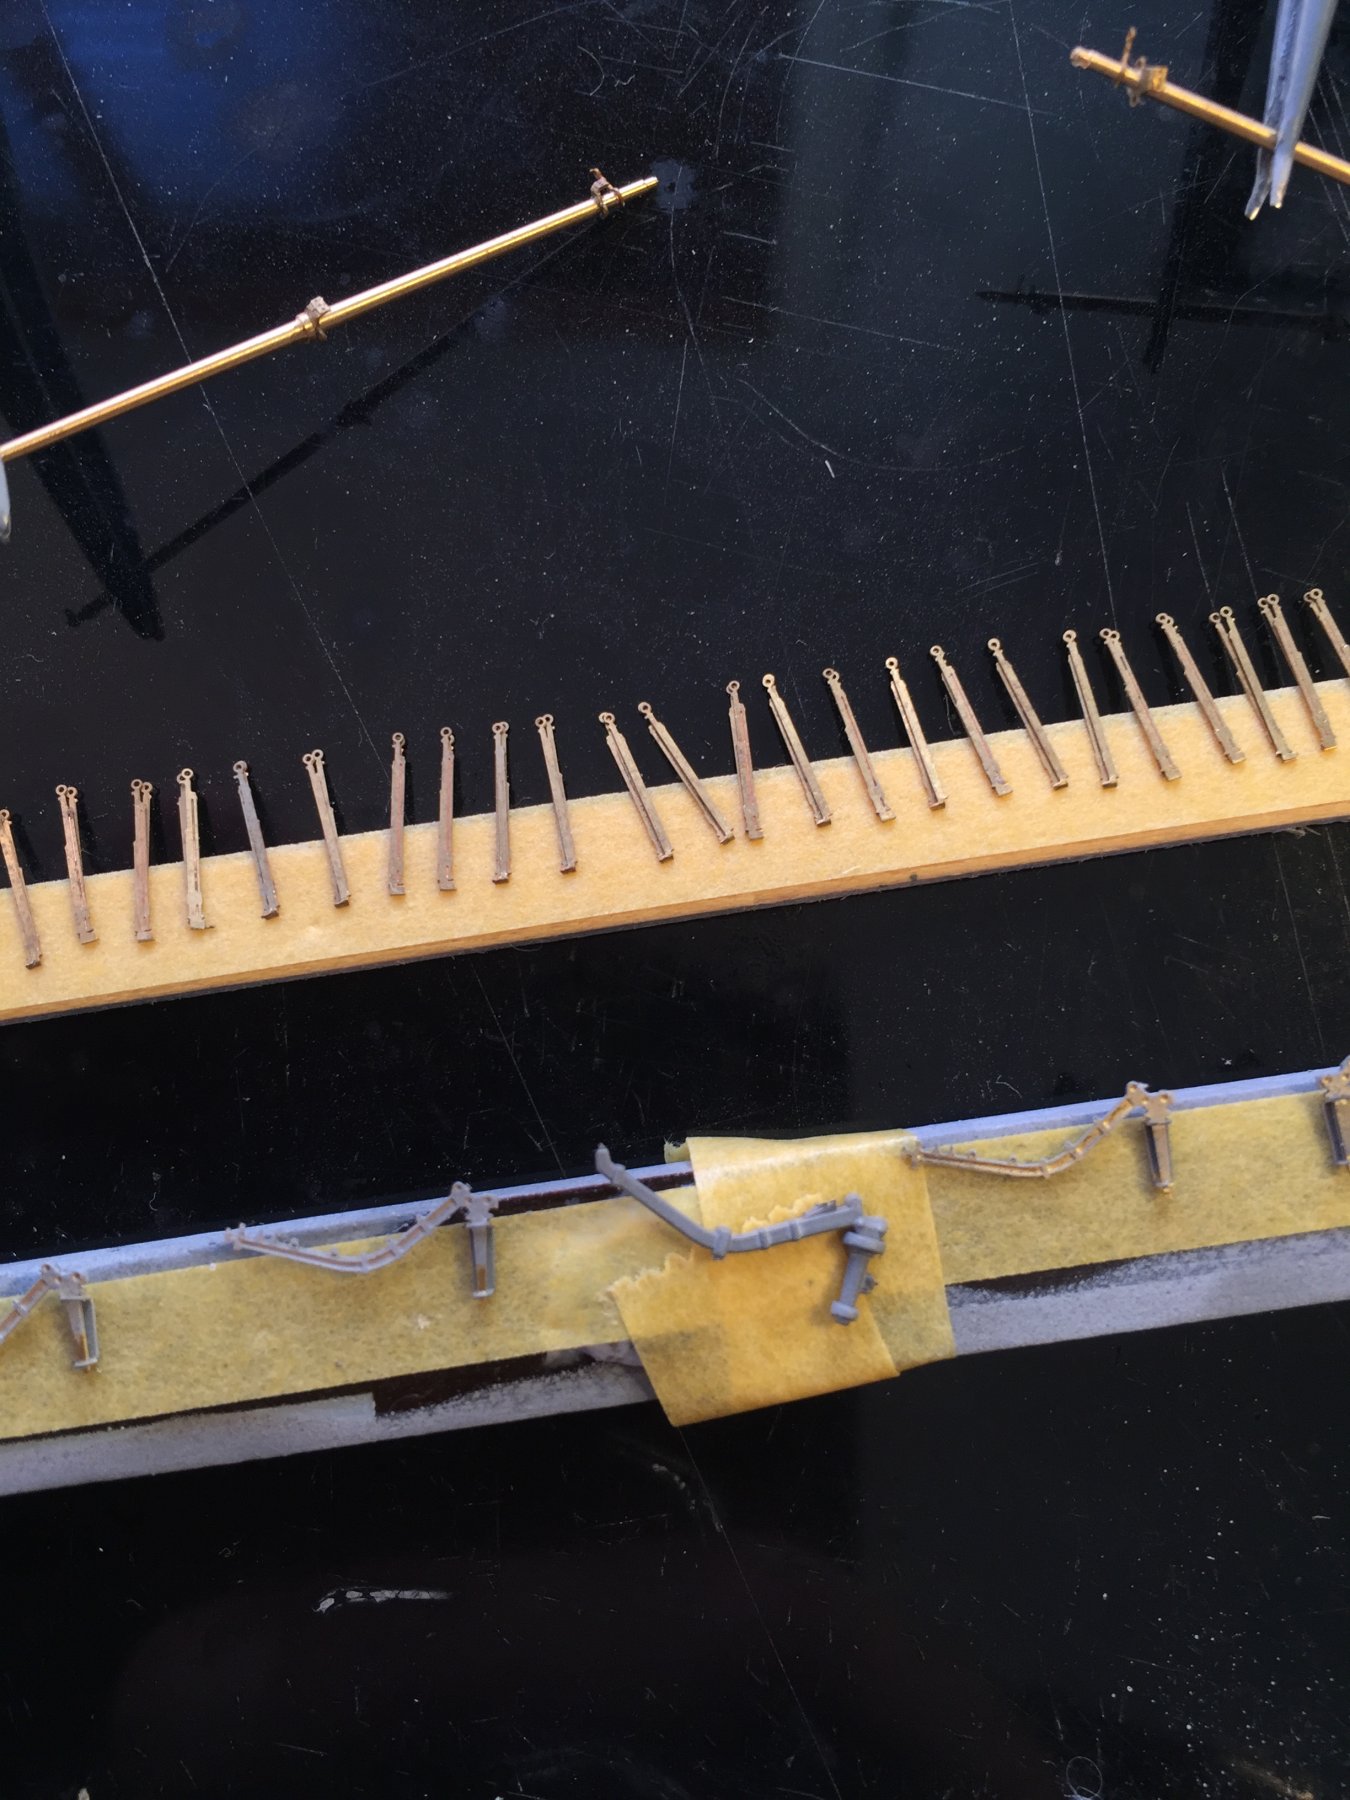
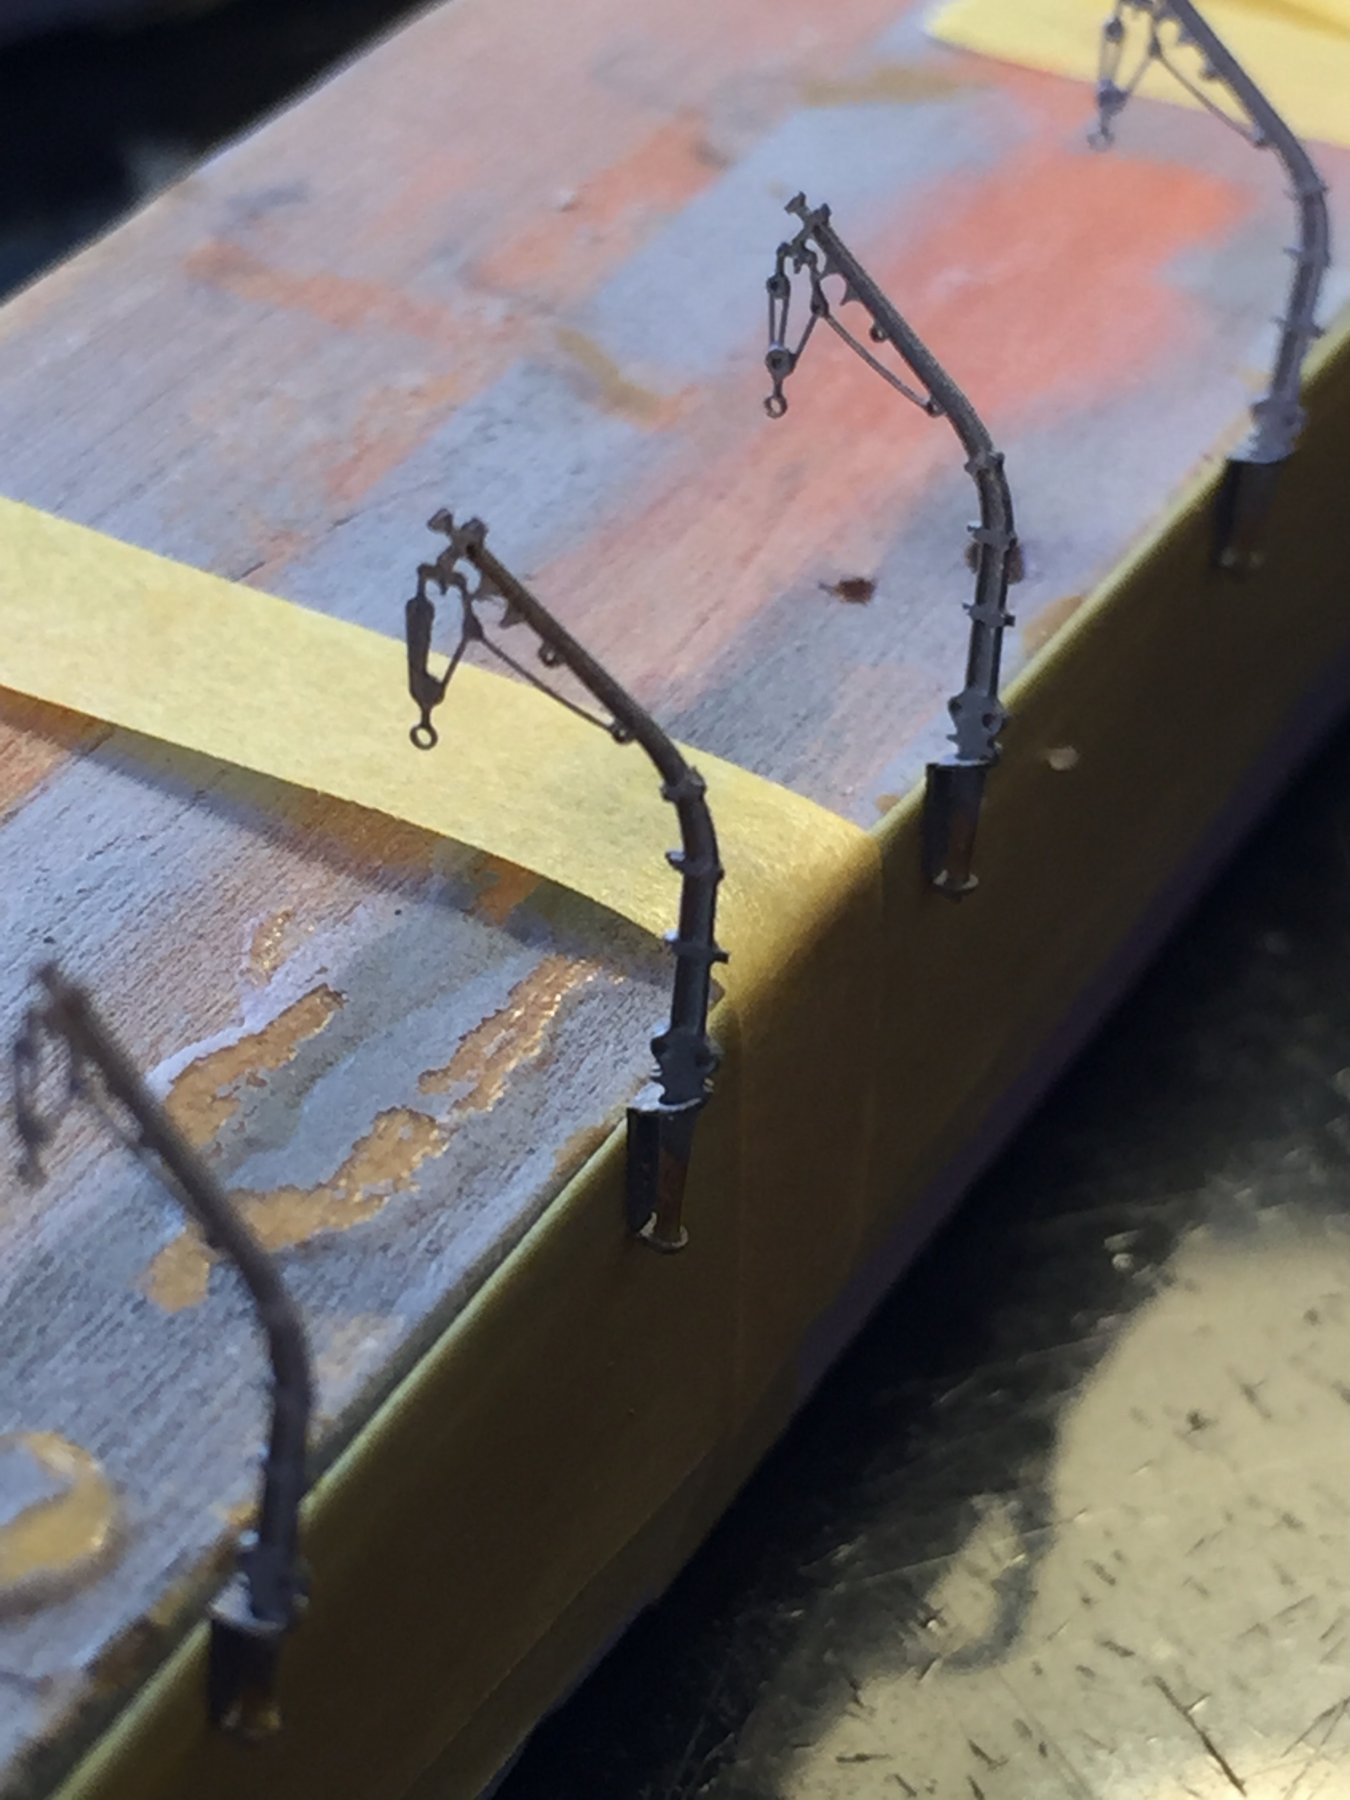
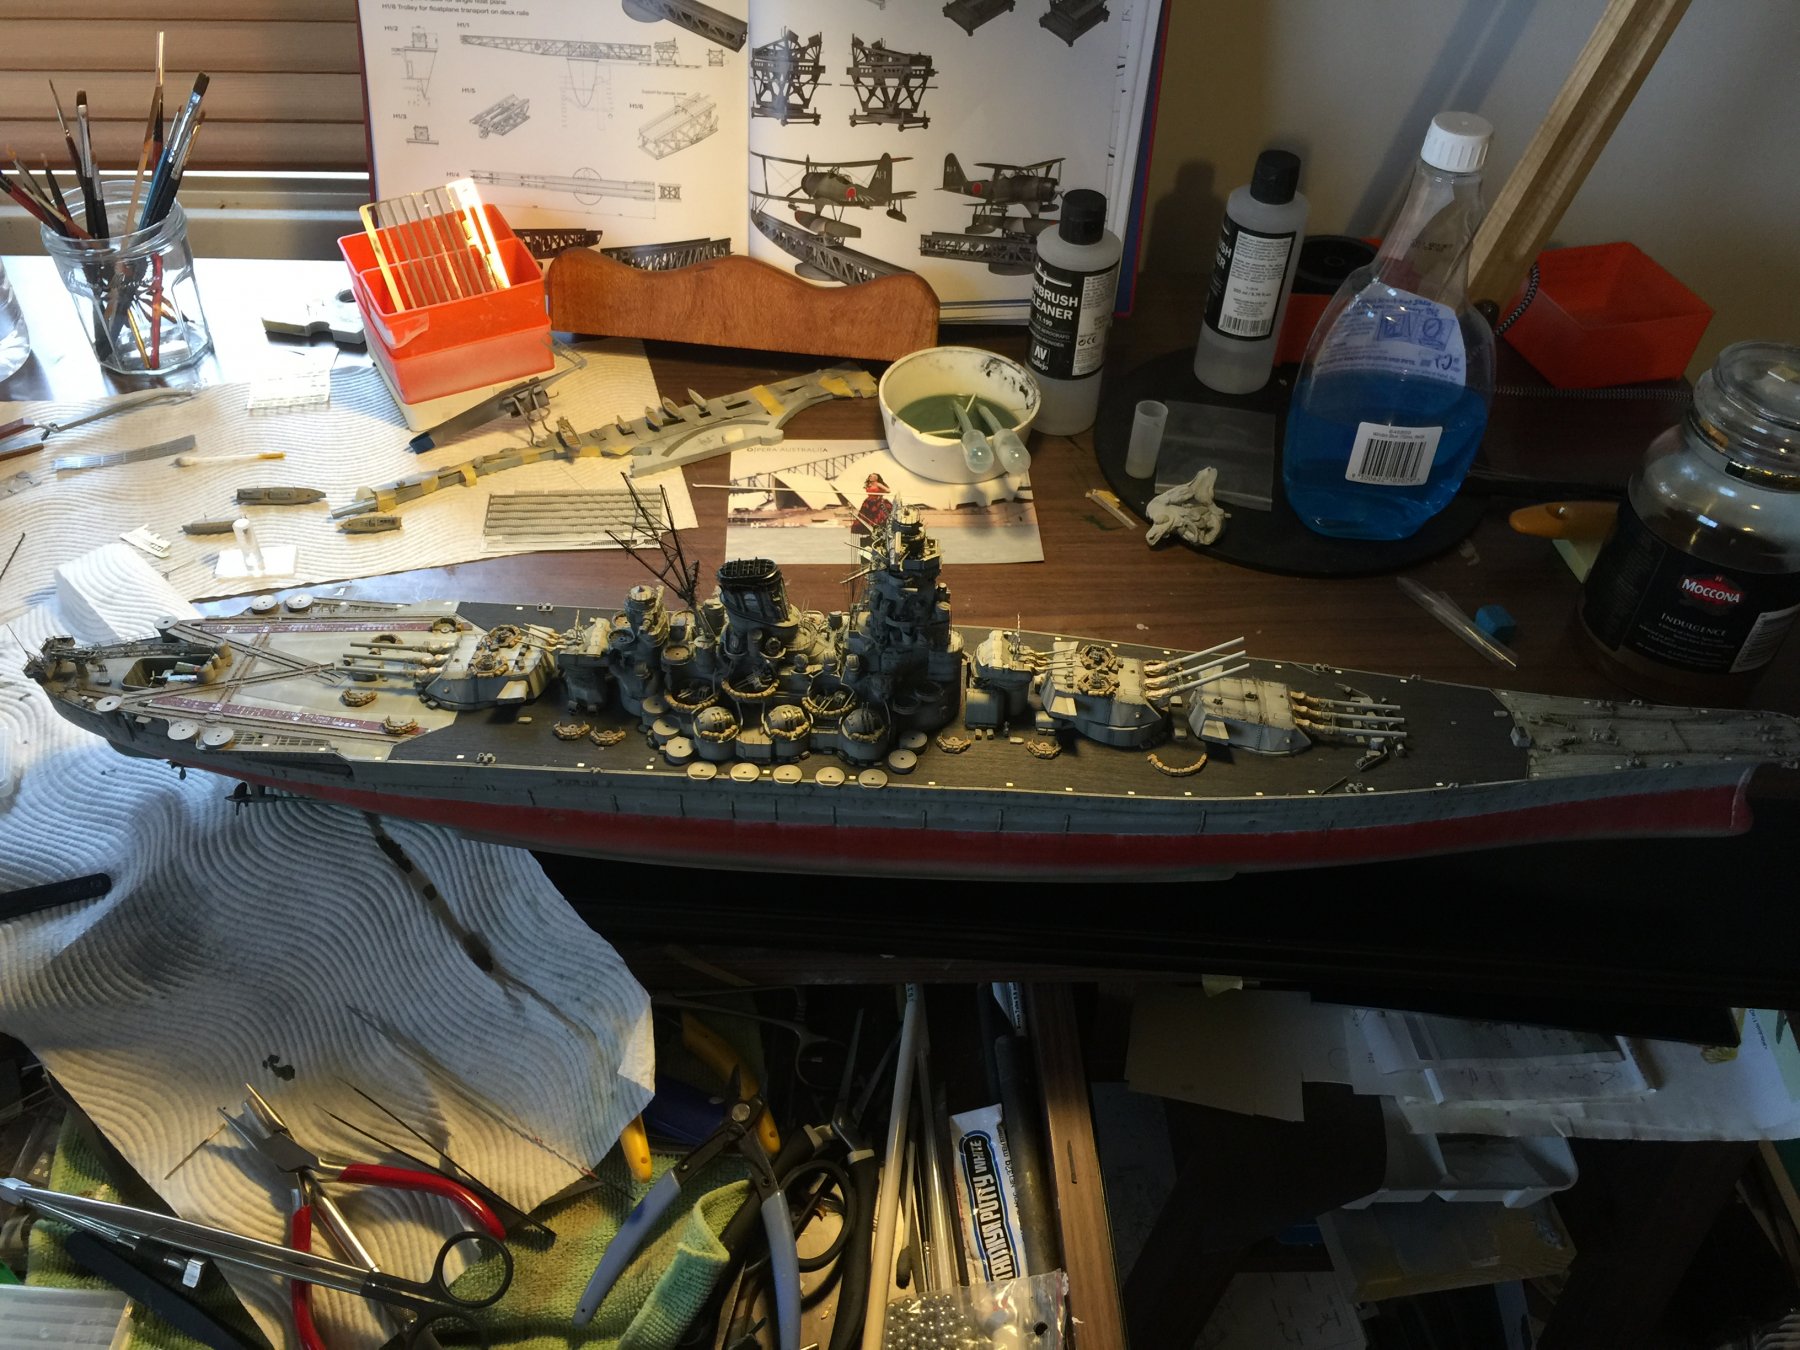
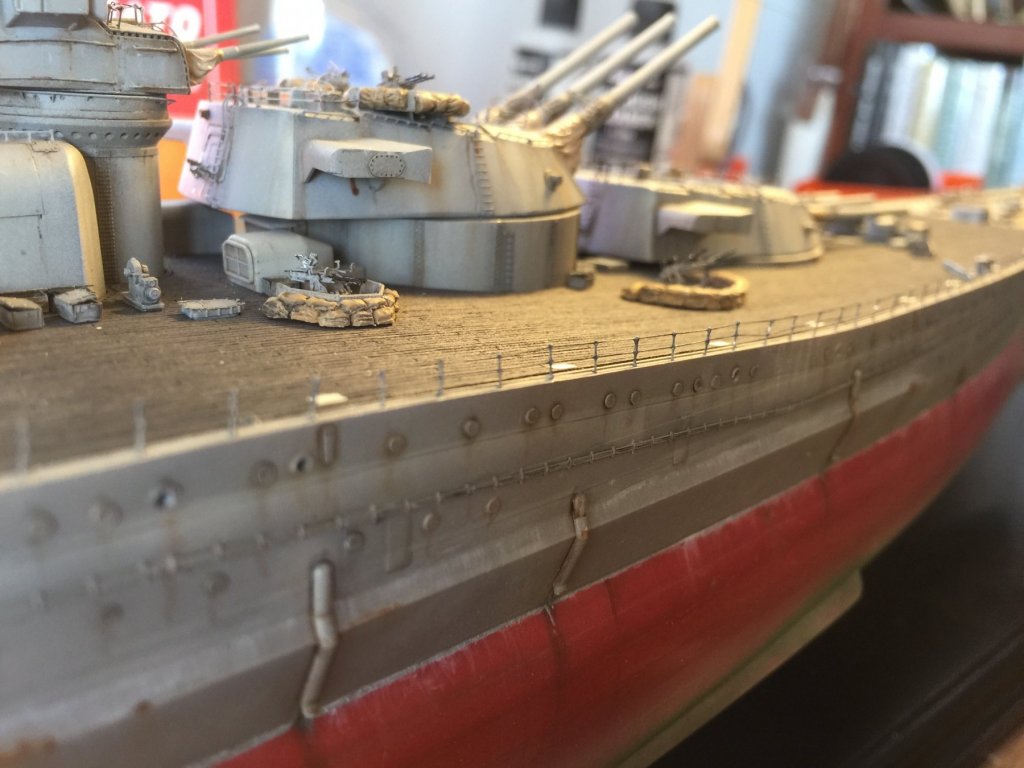
Next, there are 64 awning stanchions that run along the side of the ship, Pontos provides them in an open or stowed position, given she's not at anchor I used the stowed version which only requires one 180 degree fold on all 64. The issue will be placing them as they sit flush on the gunnels outboard of the rails which gives me about 1mm to work with. If it is too hard or creates too much mess I will omit them (it's never going in a competition), also there is the davits, you can see the Tamiya kit provided blob so I used a discontinued Flyhawk Davit set for the Yamato. There is also two boat boat booms which Pontos give you the option of rigged and slung with ladders which I won't use as it's just asking for trouble as they would extend past the baseboard. There are two lifering ring holders which go on the stern. Finally Pontos provided life rings which will just require red stripes. Ill get around to painting/weathering and adding them this week.

- 743 replies
-
- 10
-
-
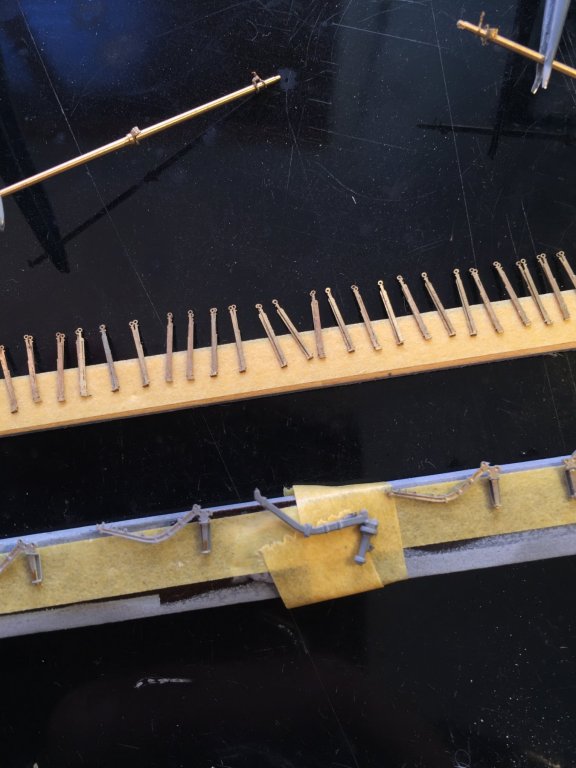
After days of back cramps the railings are done. I still prefer the individual Tamiya stanchions over the one piece etch railings as I feel it just looks a little more real. Next is the boat boat booms and awning stanchions (all stowed), then the davits. Getting there.

- 743 replies
-
- 20
-
-
Yes, it becomes a bit of a nest at times. The window in front has wonderful morning sun so I'm loathe to put anything in front of it
-
Popeye, yes and no, putting the thread though the holes is a bit like putting a marshmallow into a coin slot, but the brass wire is an utter nightmare. Sometimes you just have to wind it around. As it's elastic it's not that hard.
-
Thanks Pat, I intend to leave quite a few off! I see you've found WiFi! 110 individual stanchions Starboard side, 110 to do Port side then thread the railings, this will be the most painful part of the build after the triple25mm's.

- 743 replies
-
- 11
-
-
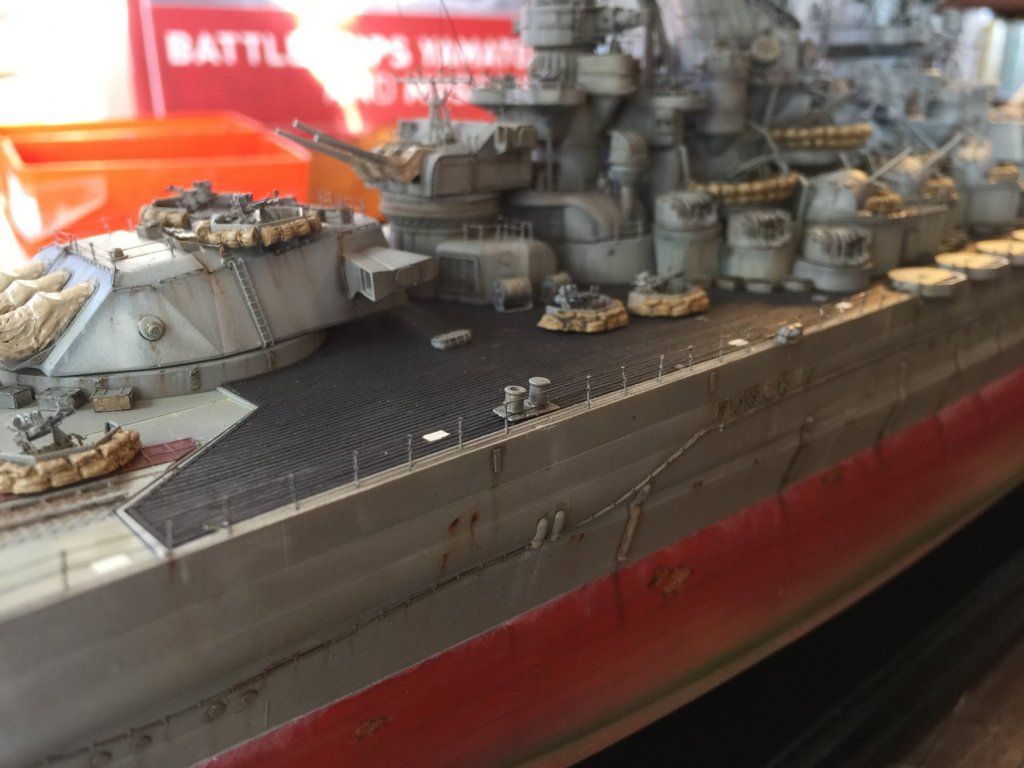
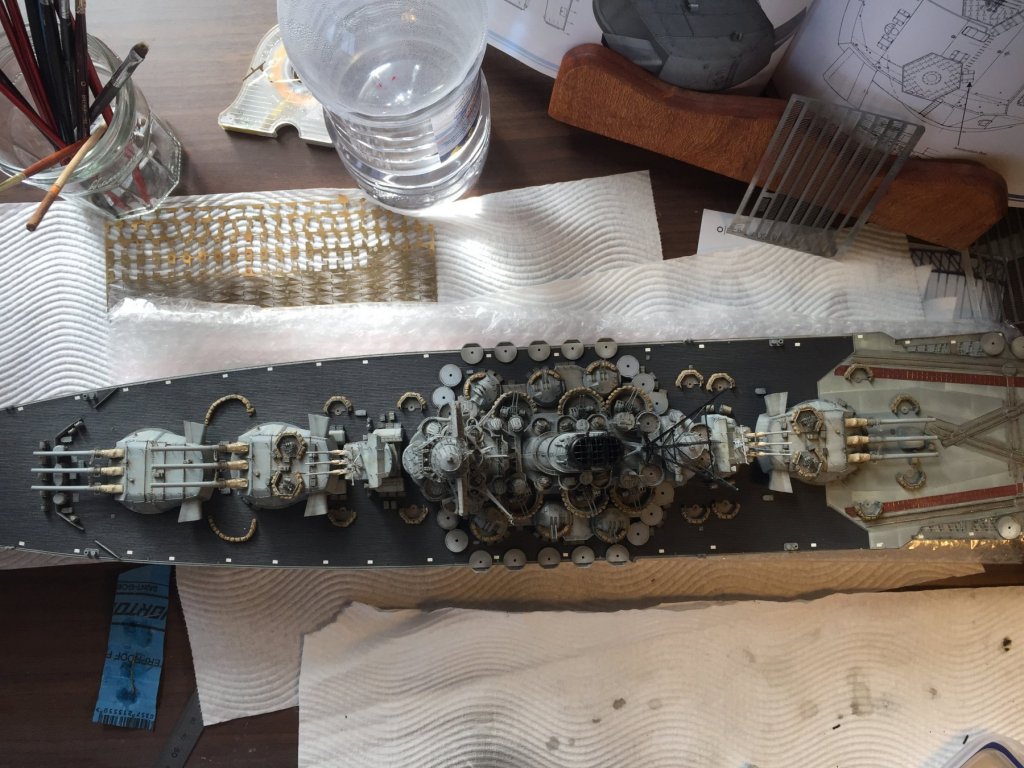
I have now added all the open mount 25mm triple guns and the closed ones that won't be affected by the railings on the sides. Getting there.


- 743 replies
-
- 15
-
-
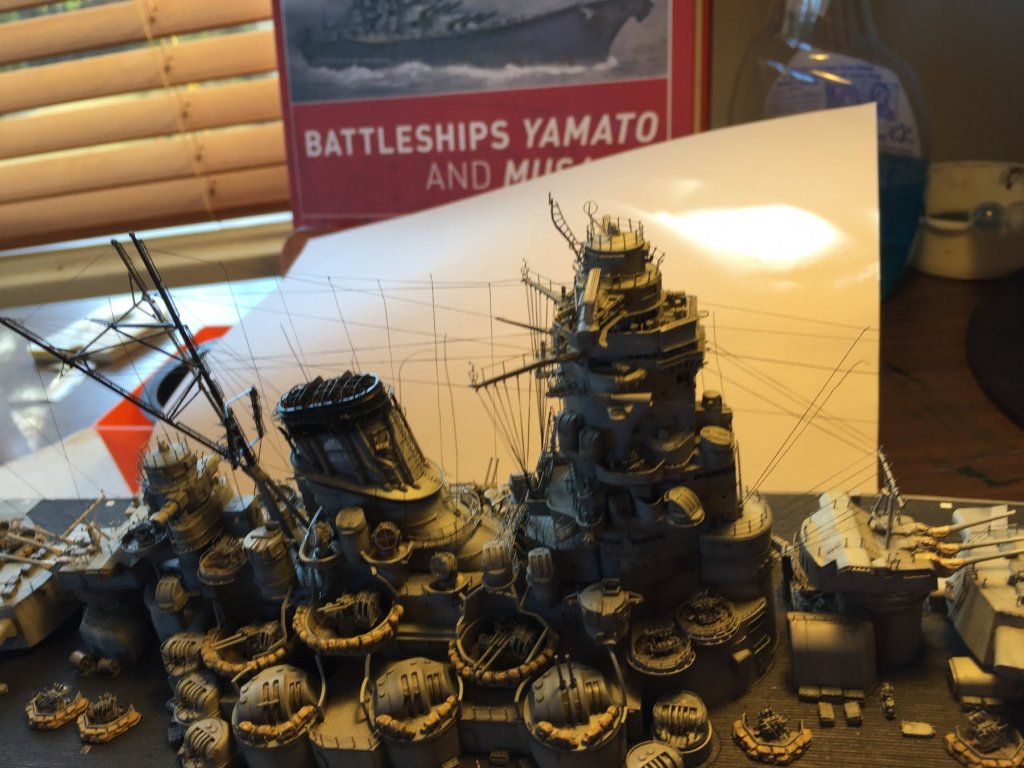
I have done up the rigging but I am awaiting some Krystal clear to make up the insulation balls before I tidy it up, as the rigging is black it's really hard to see. It is incredibly hard to figure out the rigging plan as it's so convoluted I have tried to keep it simple.
- 743 replies
-
- 10
-
-
Mate, put three in there! I was going to slug one from the crane but I think it would be over capitalising unless it was in a diorama
-
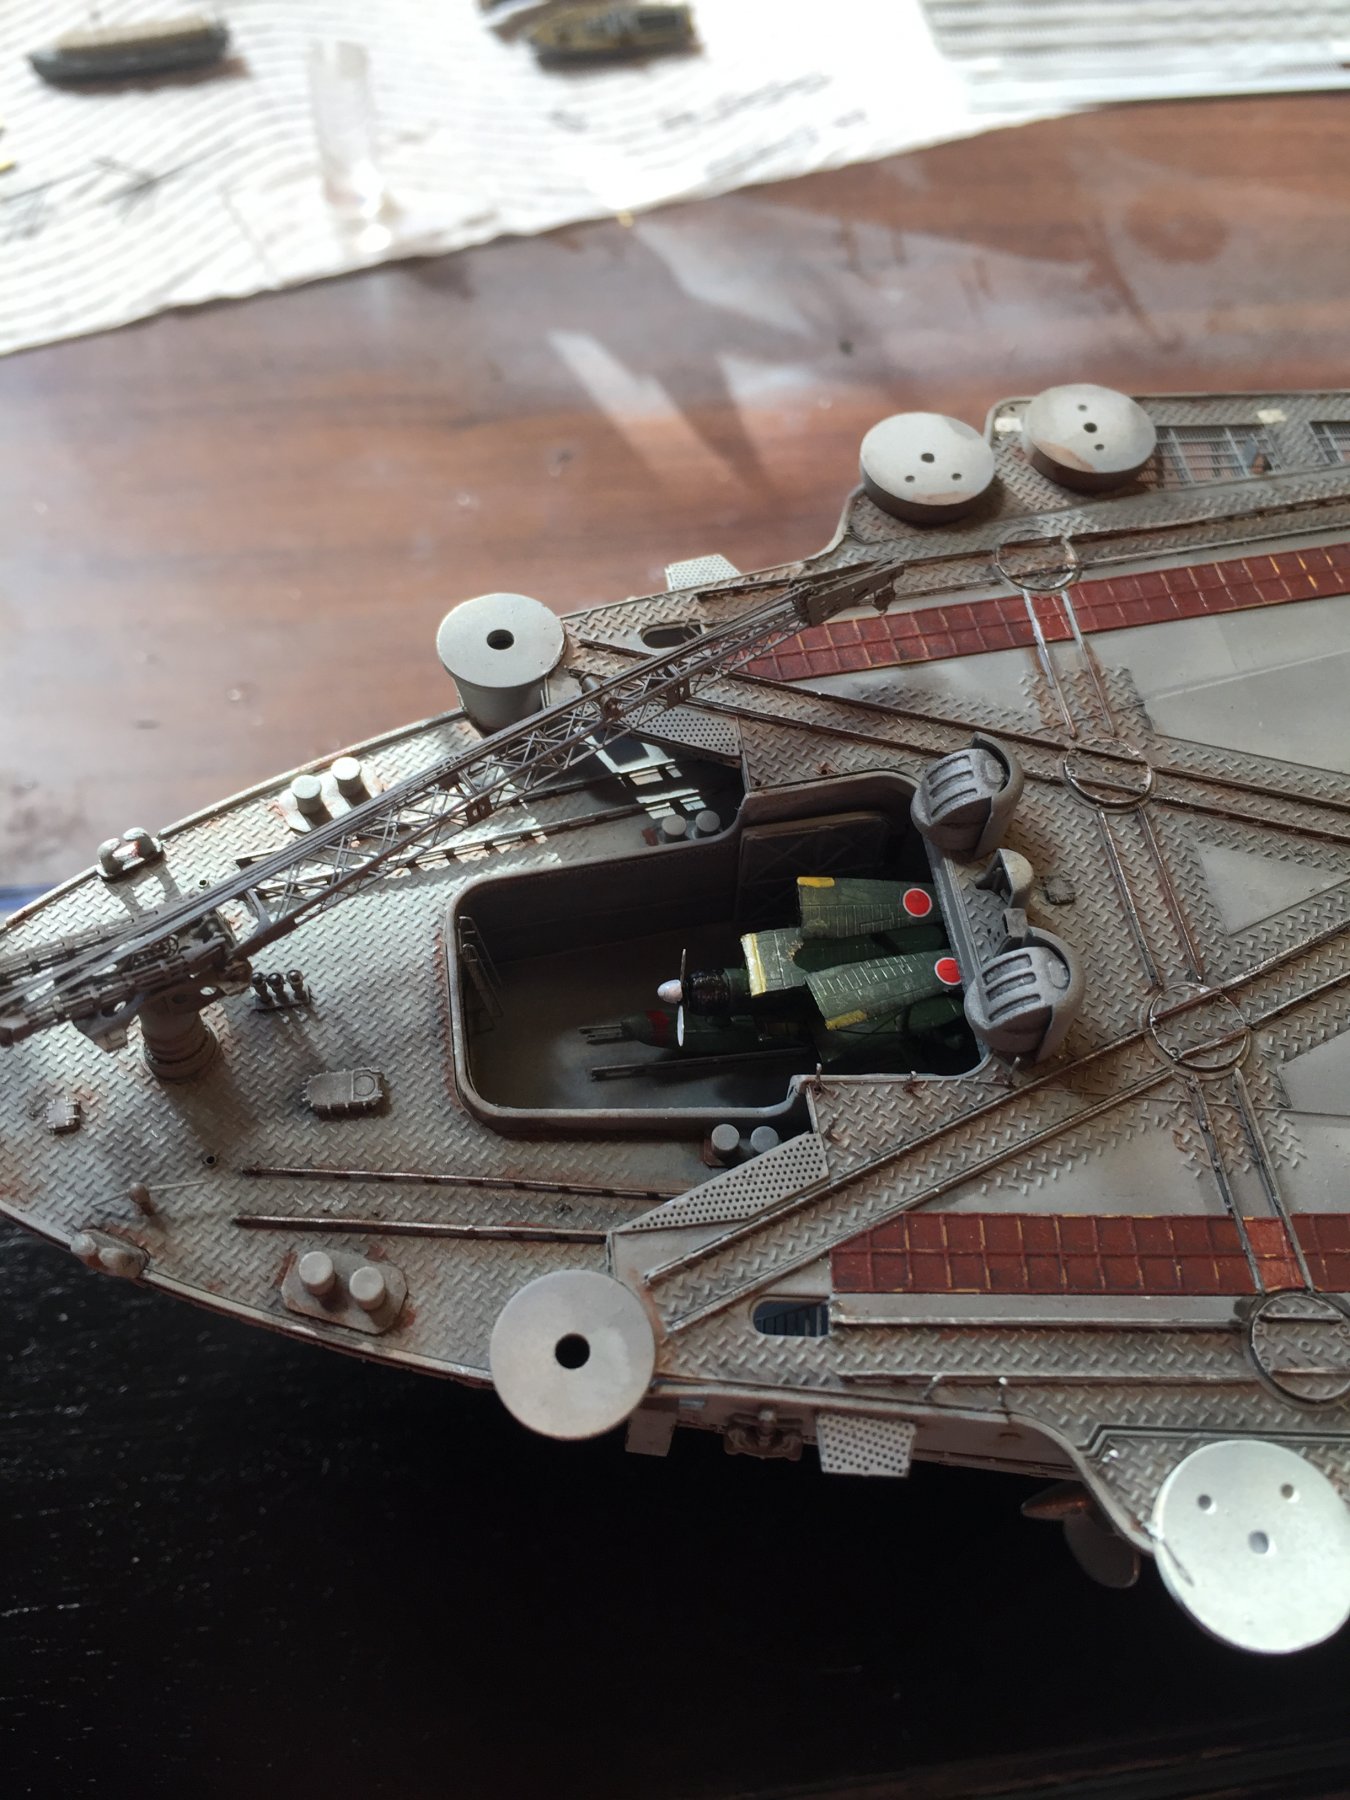
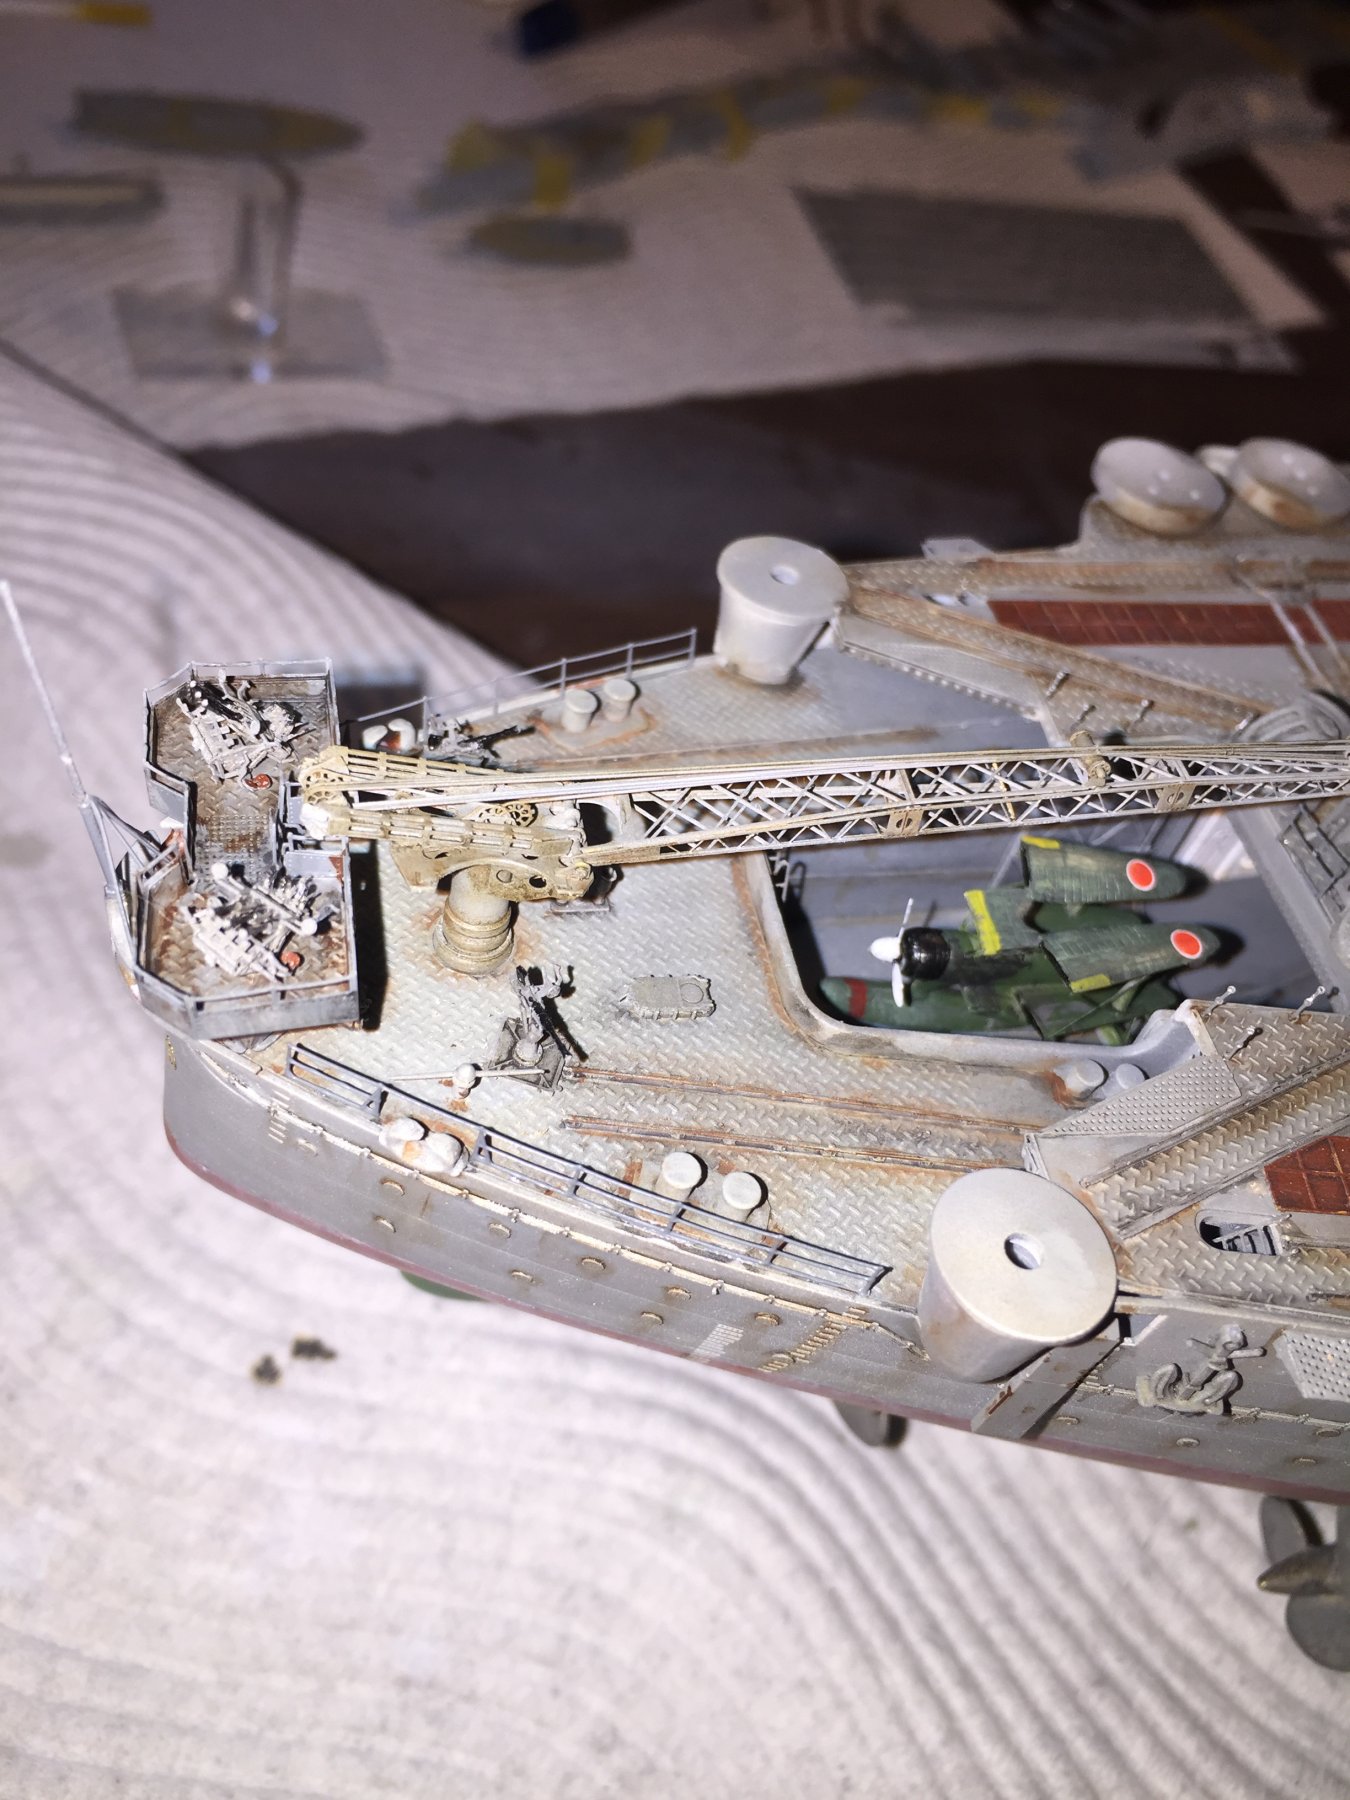
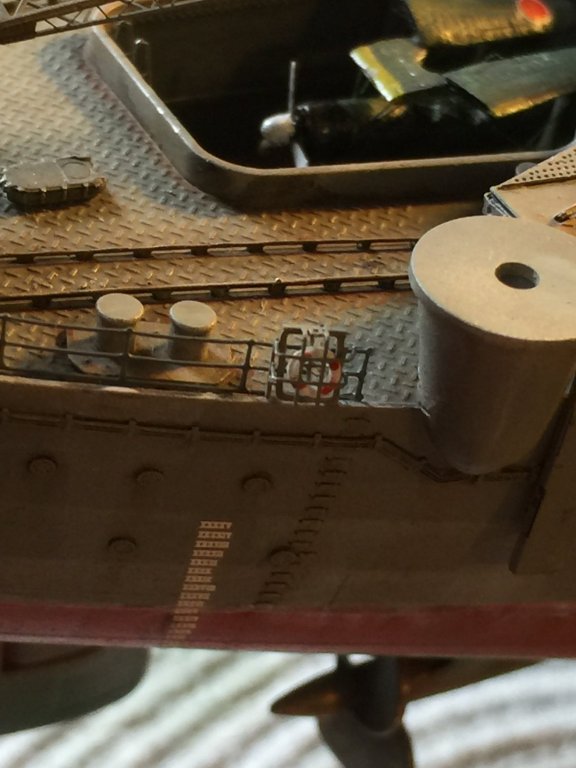
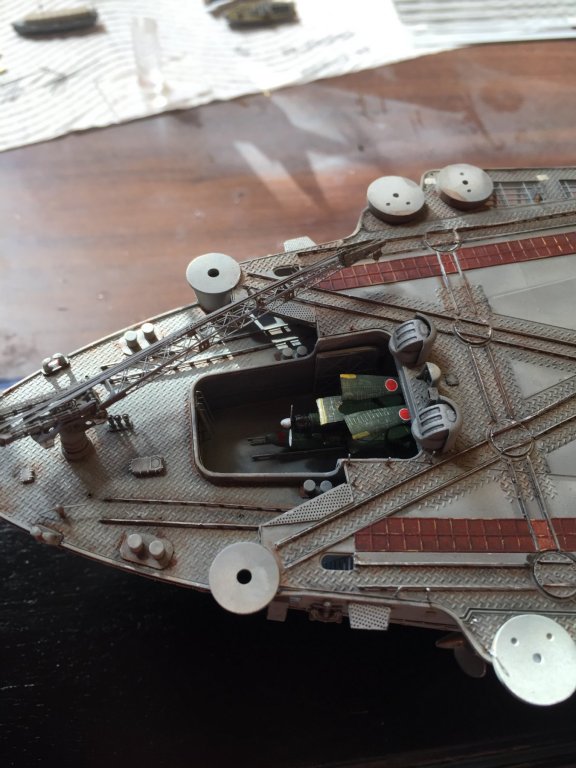
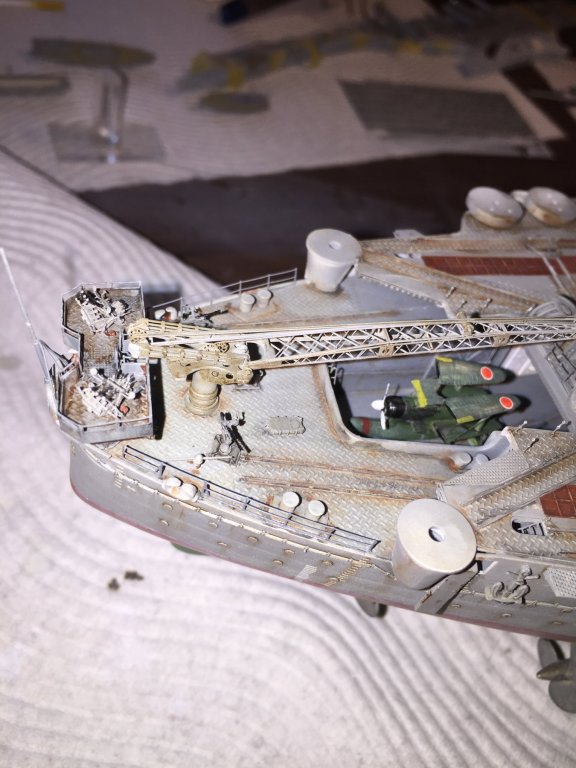
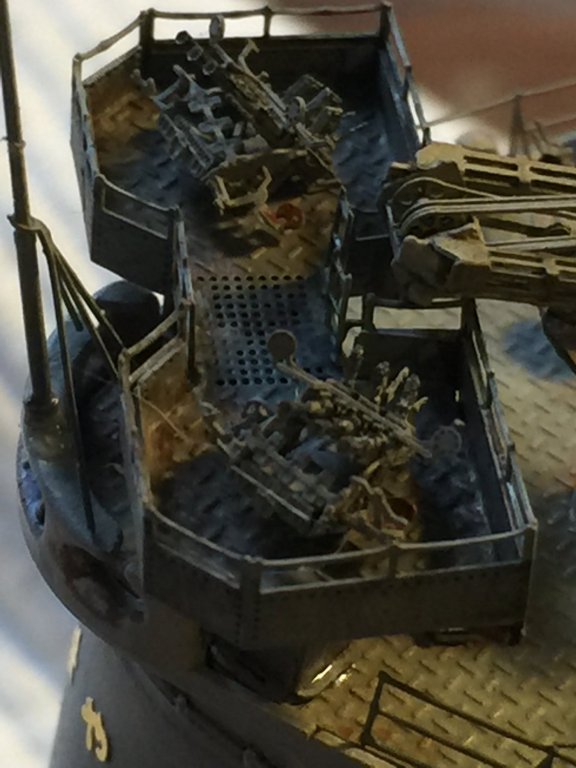
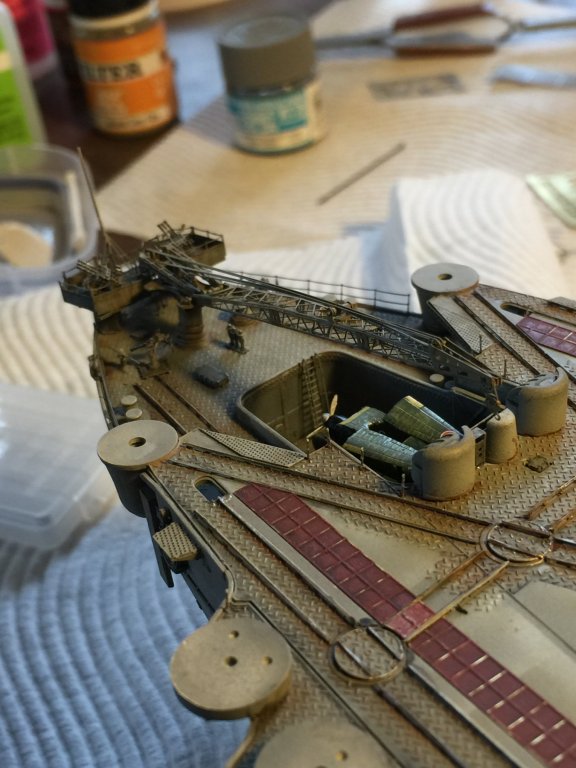
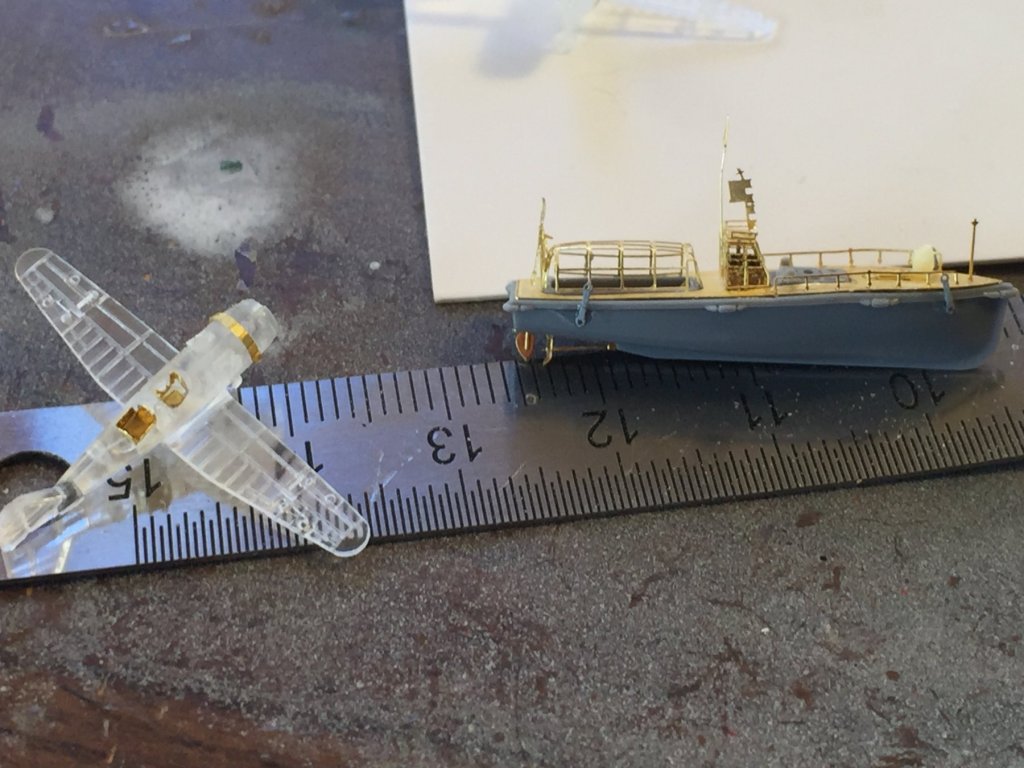
I'll have to get some of that Decal stuff! i used the Tamiya floatplanes for the hangar, or should I say I used 2 as I had to cut the wings off both, and a little bit of weathering but as it's in a hole it's not that obvious. The Ensign staff is added, along with the platform for the twin triple 25mm (which fell apart once and had to be re built), 2 single 25mm's at the end of the boat rails (I'll add them last just before I add the catapults), dropped in the crane, added rear rails (there are still life preservers to be added) and single stanchions around the MG range finders. In the overall scale of things this area his area is fairly small. Now, I can start rigging the beast.
- 743 replies
-
- 19
-
-
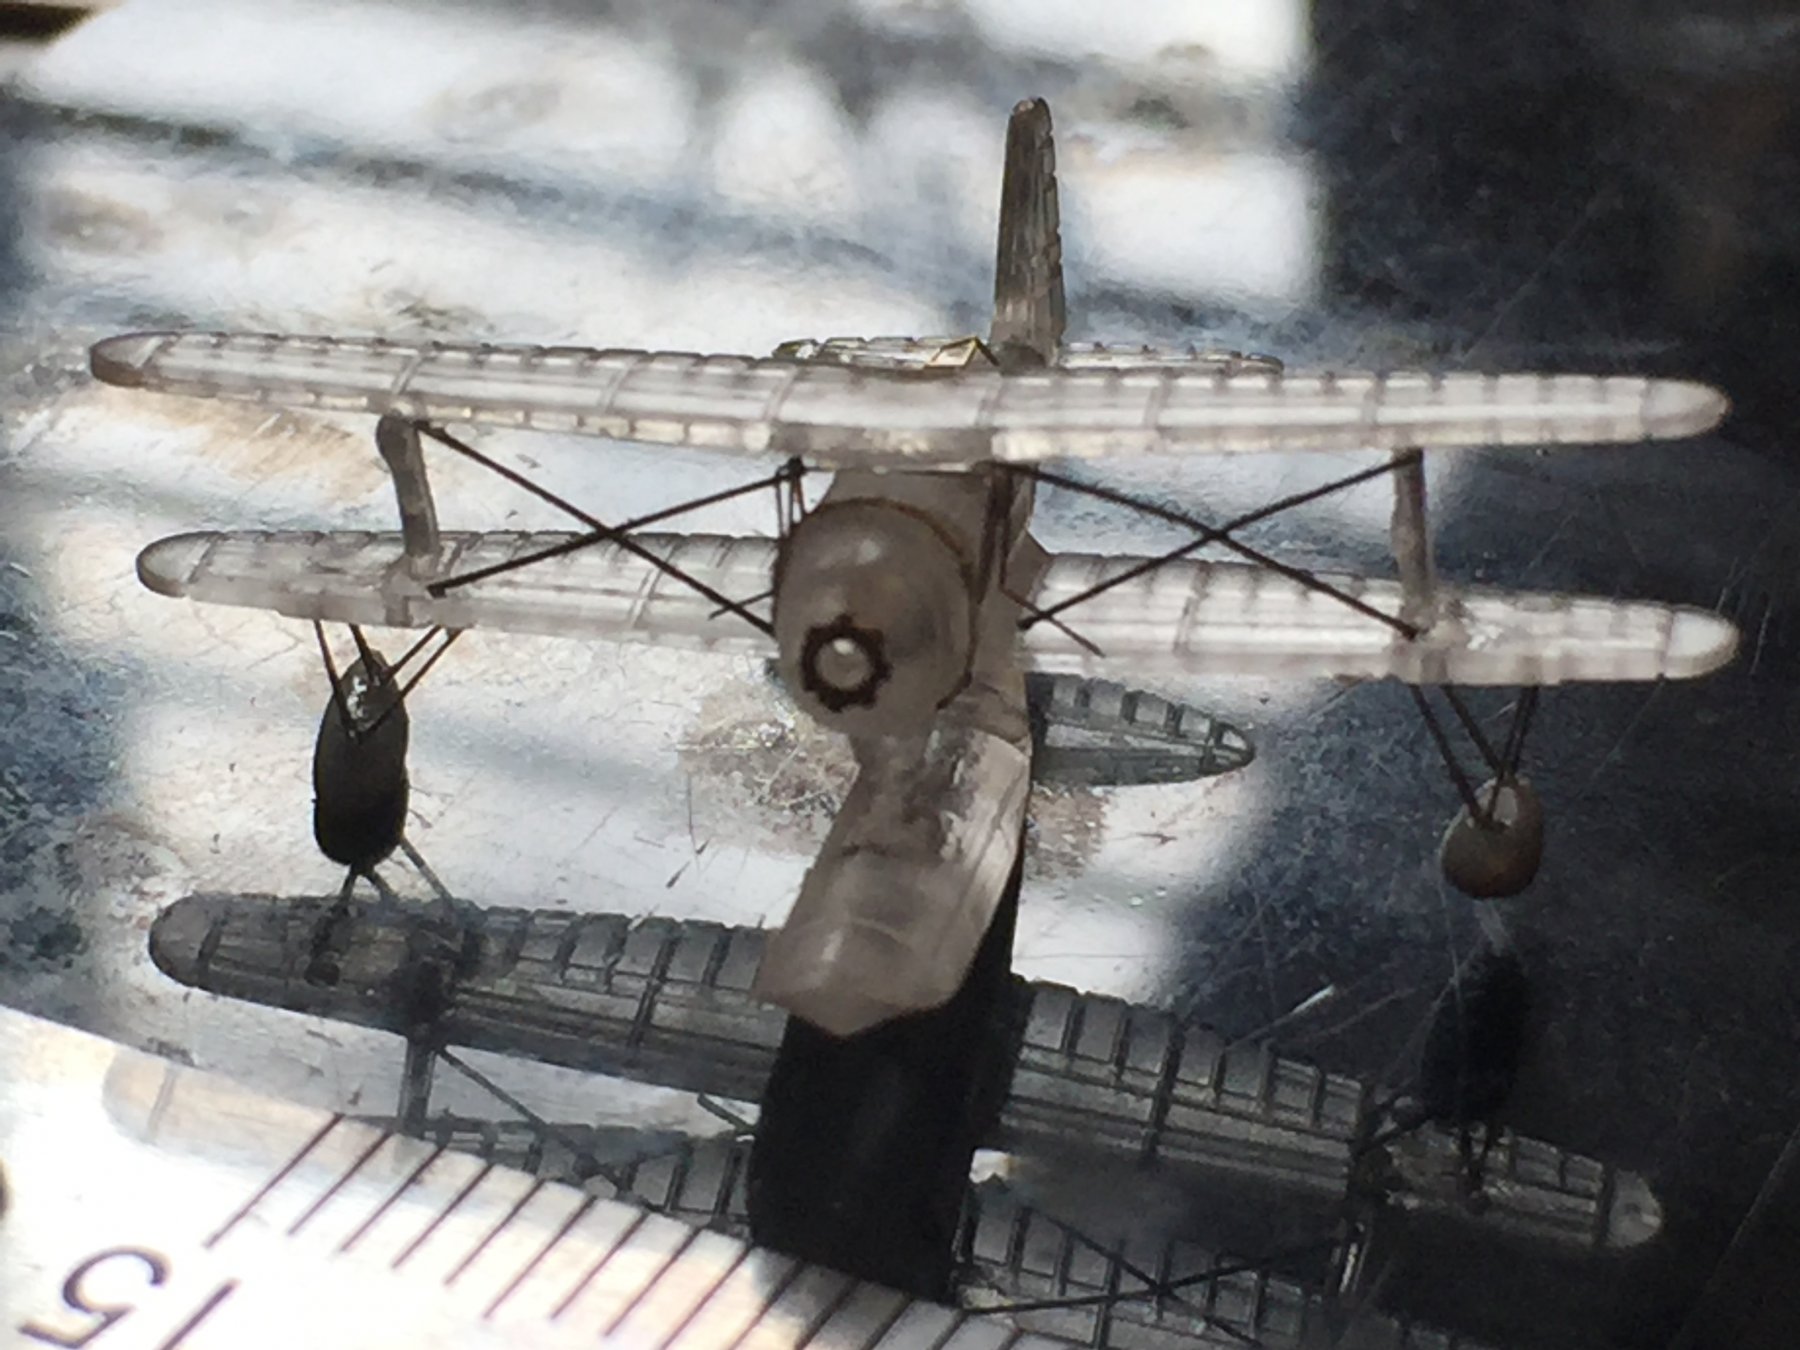
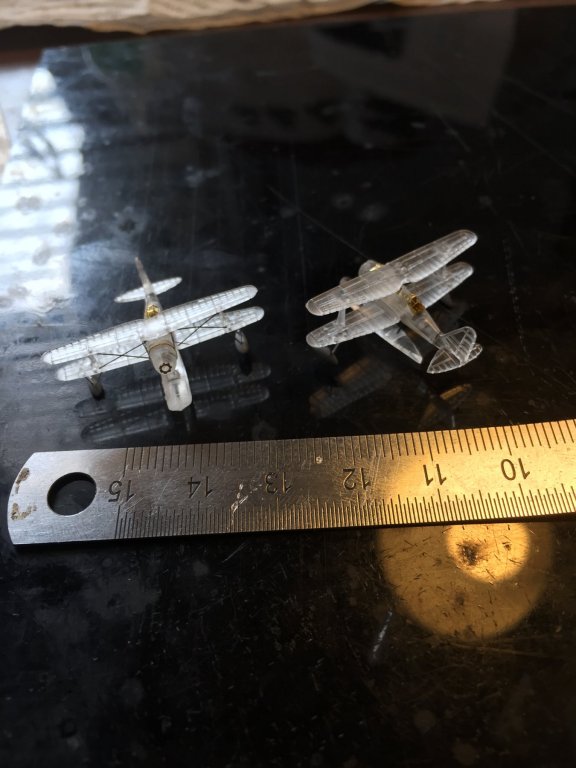
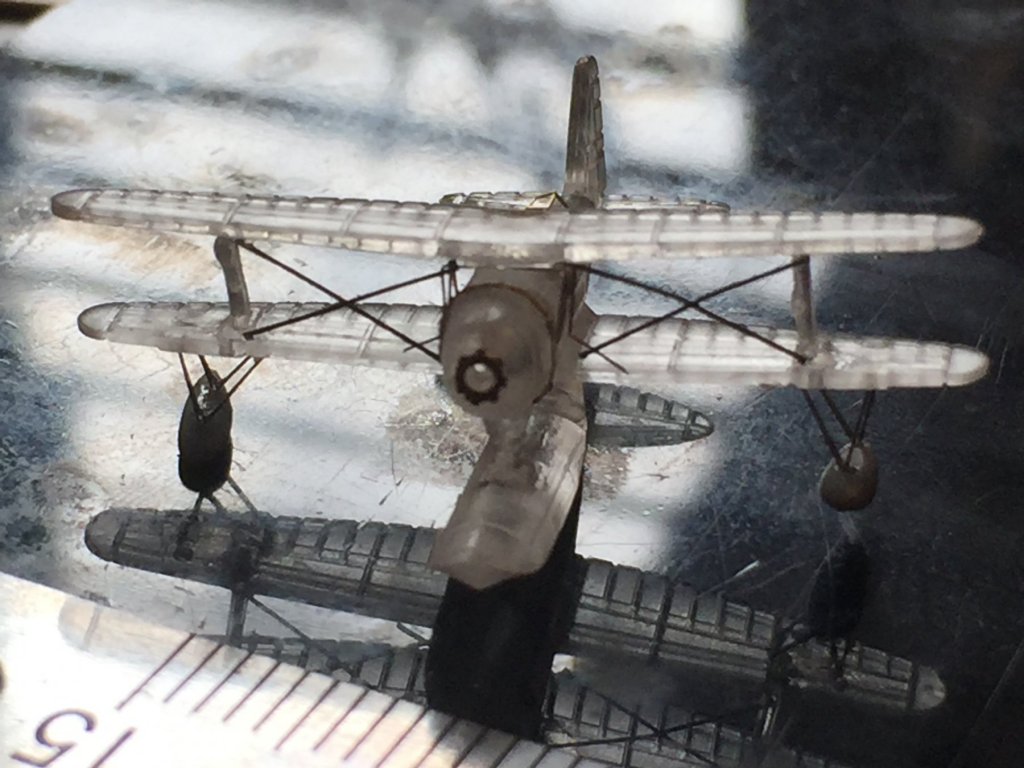
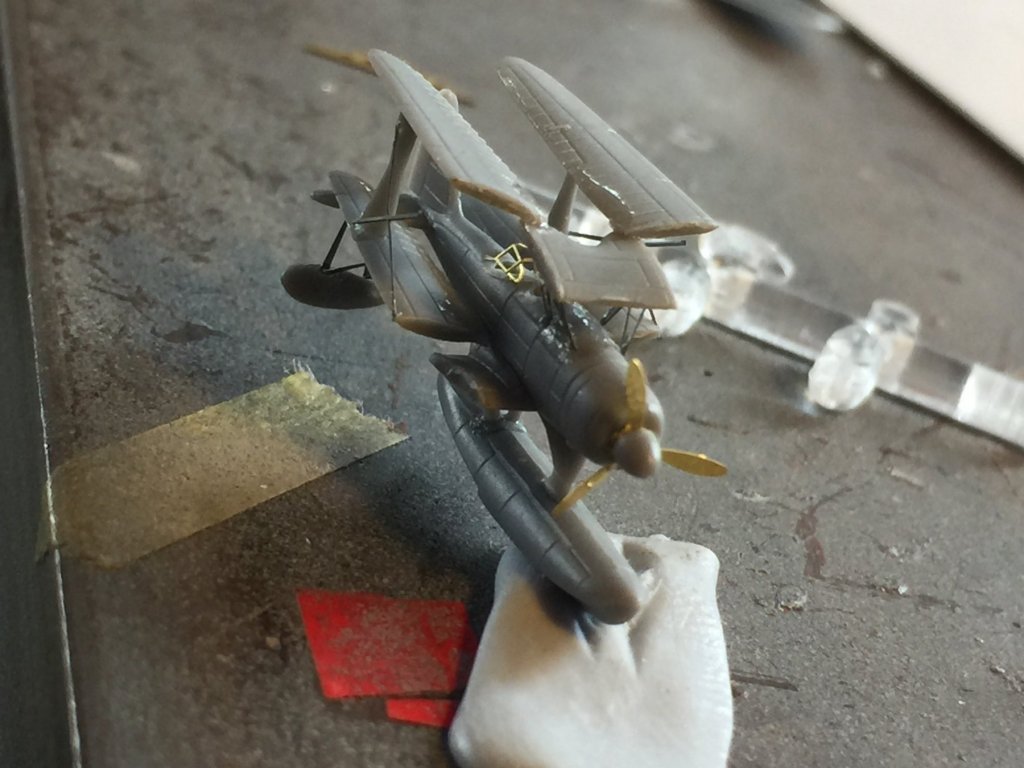
I can see why this was discontinued as it is really horrible to use. Just tiny. Also, I bashed up one with folded wings from the Tamiya kit, this will sit in the hanger bay so the errors won't be so visible.

- 743 replies
-
- 16
-
-
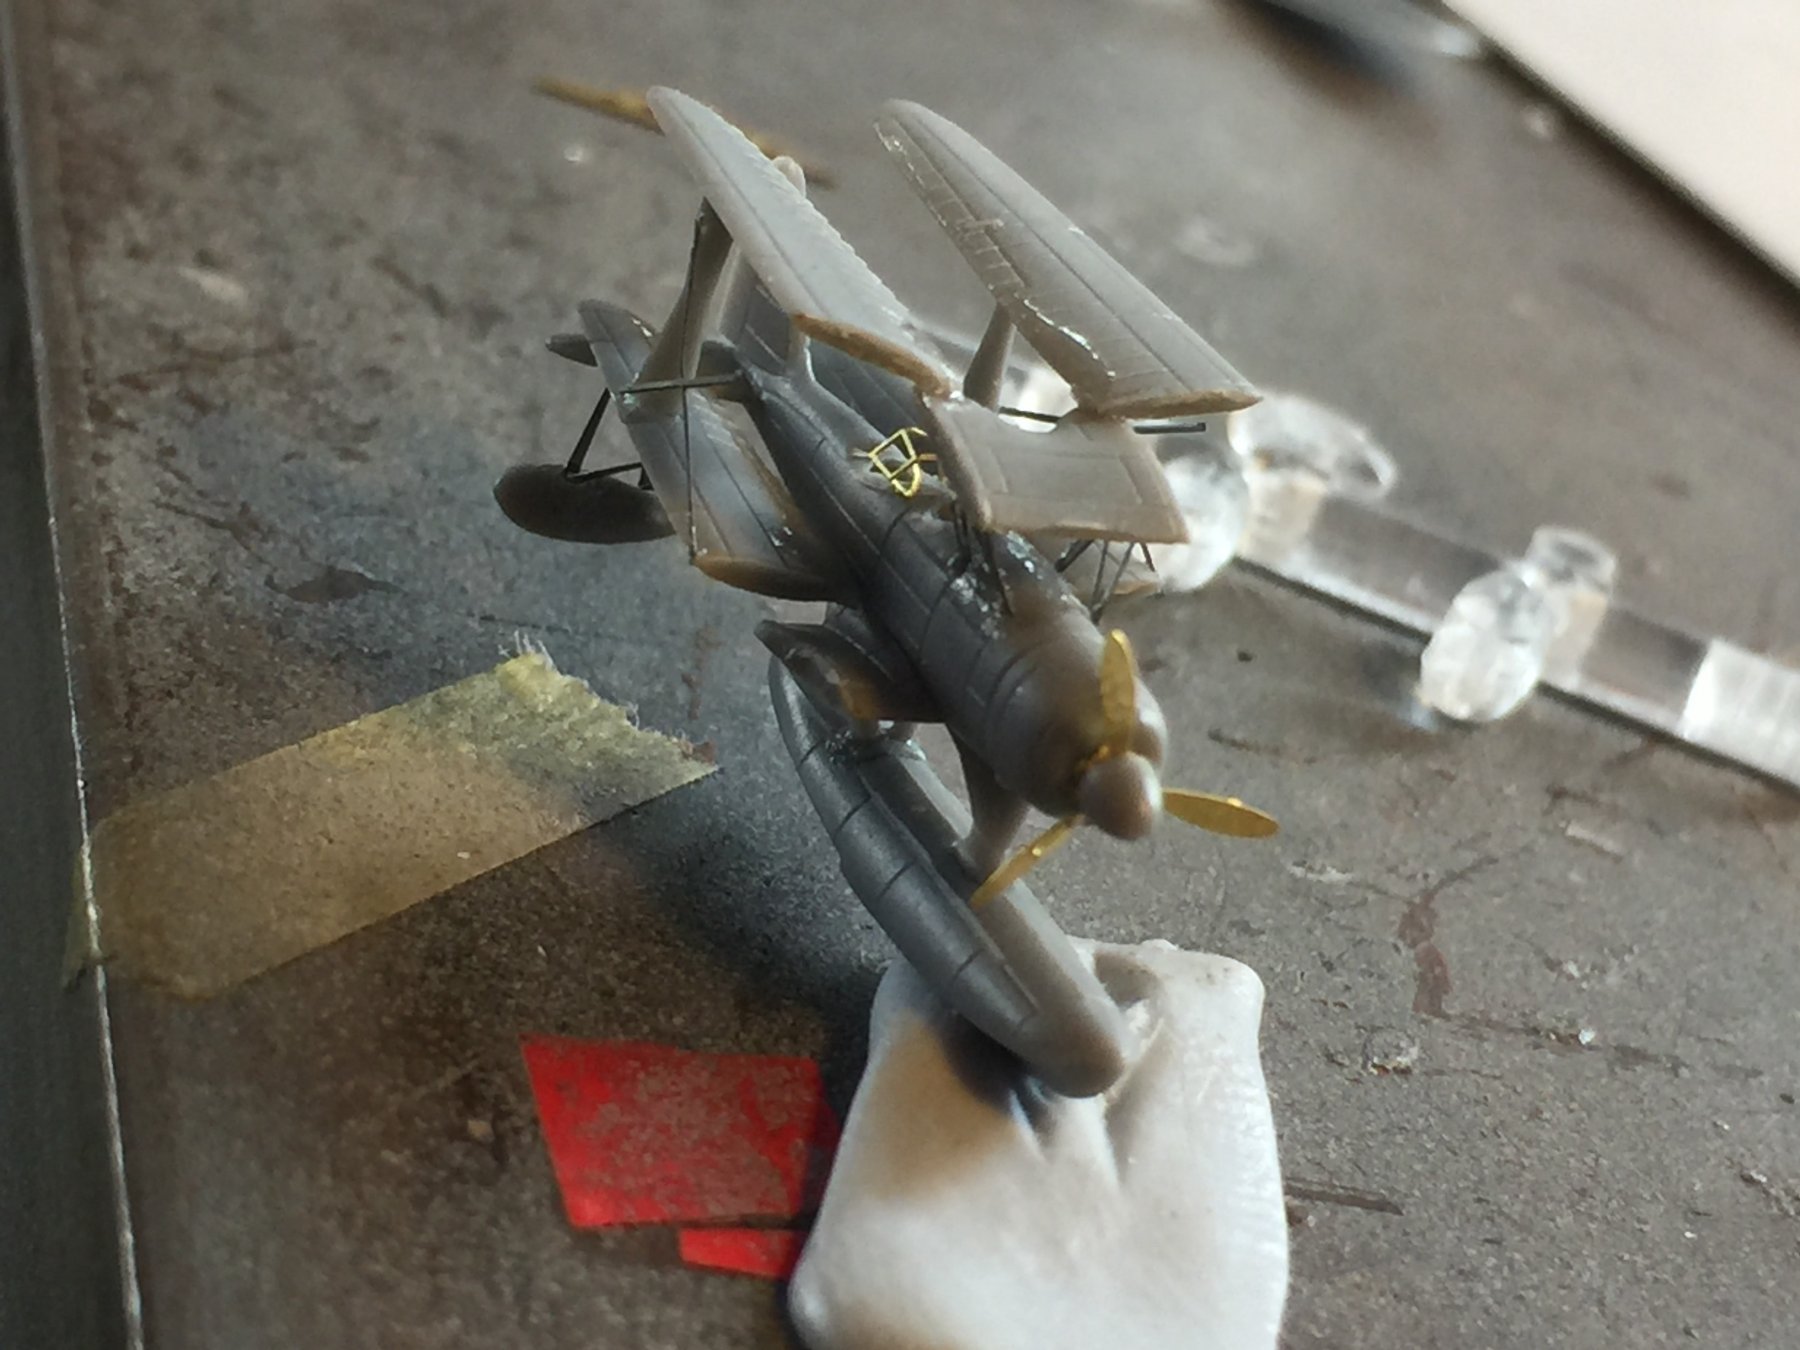
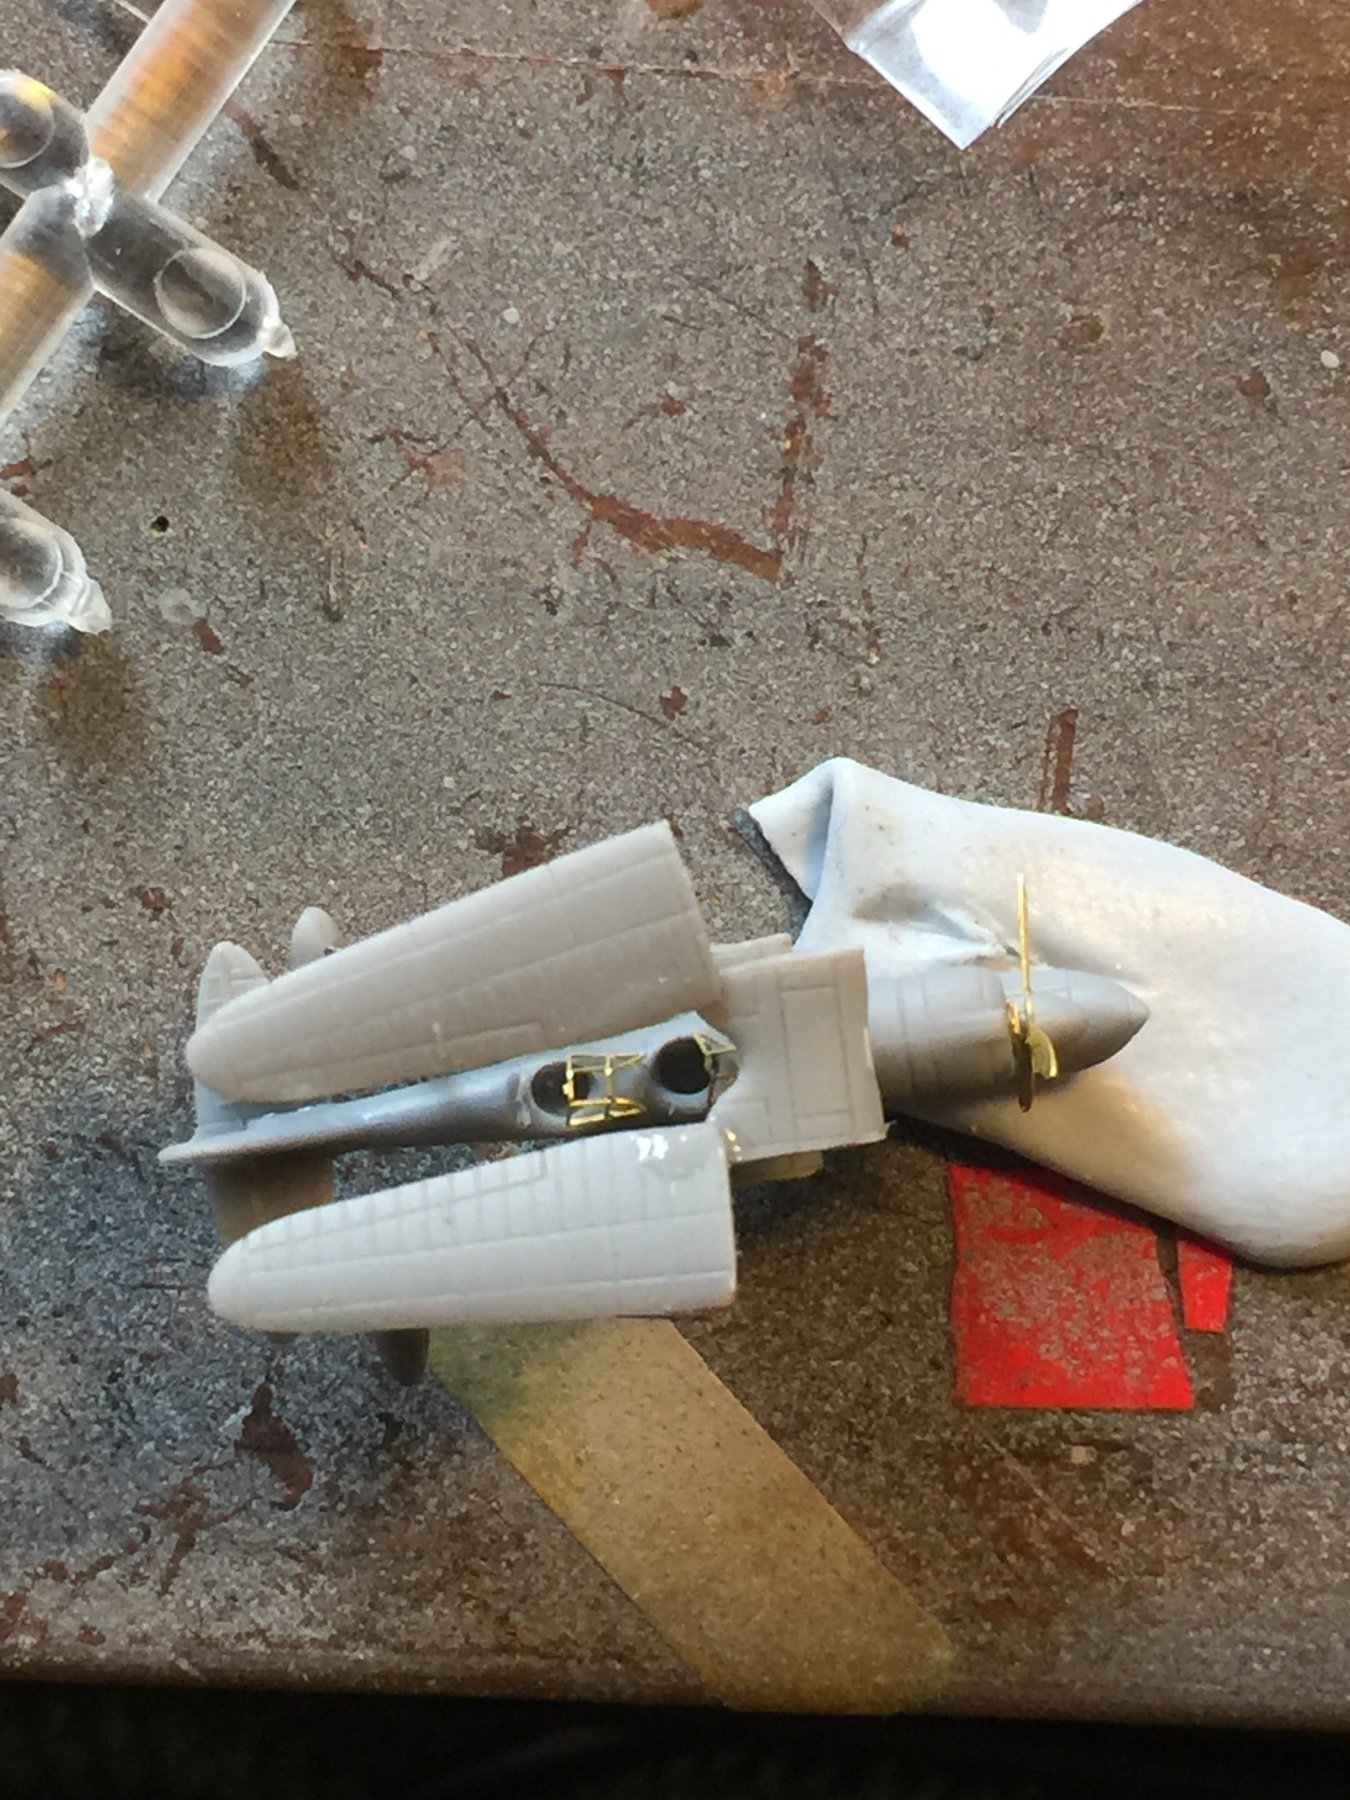
It's from a discontinued Fujimi seaplane set which is hard(ish) to find. As they are hard clear plastic they are very brittle and horrible to work with and the only set that you can add the rainbow models cockpit sets without major surgery. Tamiya give you 2 sets of each aircraft as well which are quite nice as well as the two sets from the practice kit which are fairly basic. The new AOTS says Yamato only carried the Mitsubishi Pete and not the monoplane but I may yet cheat and do one up. I should have enough to do up 2 with their wings folded (Dr Google has very little information on this) and have them in the hangar well and a couple on the catapults. I know now that they got rid of them all for the last mission but.... painting and weathering them them will be a challenge and I have to do some research on this stuff people use to stick decals down. Pontos have nothing in reference or addition addition to the ships launches.
-
How's this? You can see I'm trying to put cockpits into floatplanes at the moment. Time for a break and a beer.
- 743 replies
-
- 11
-
-
I had seen this but it is waaaaaay too big for this scale. North Star make it to scale which I used on my Dreadnought but it's a pain to make and still looks 2D to my eye. All the manufacturers are seeming to make 1/200 these days so it may work for that but I would quickly run out of room parking them in my study.
-
So true, at this scale you can get them as Etch but they don't look quite right so I had to make do.
-
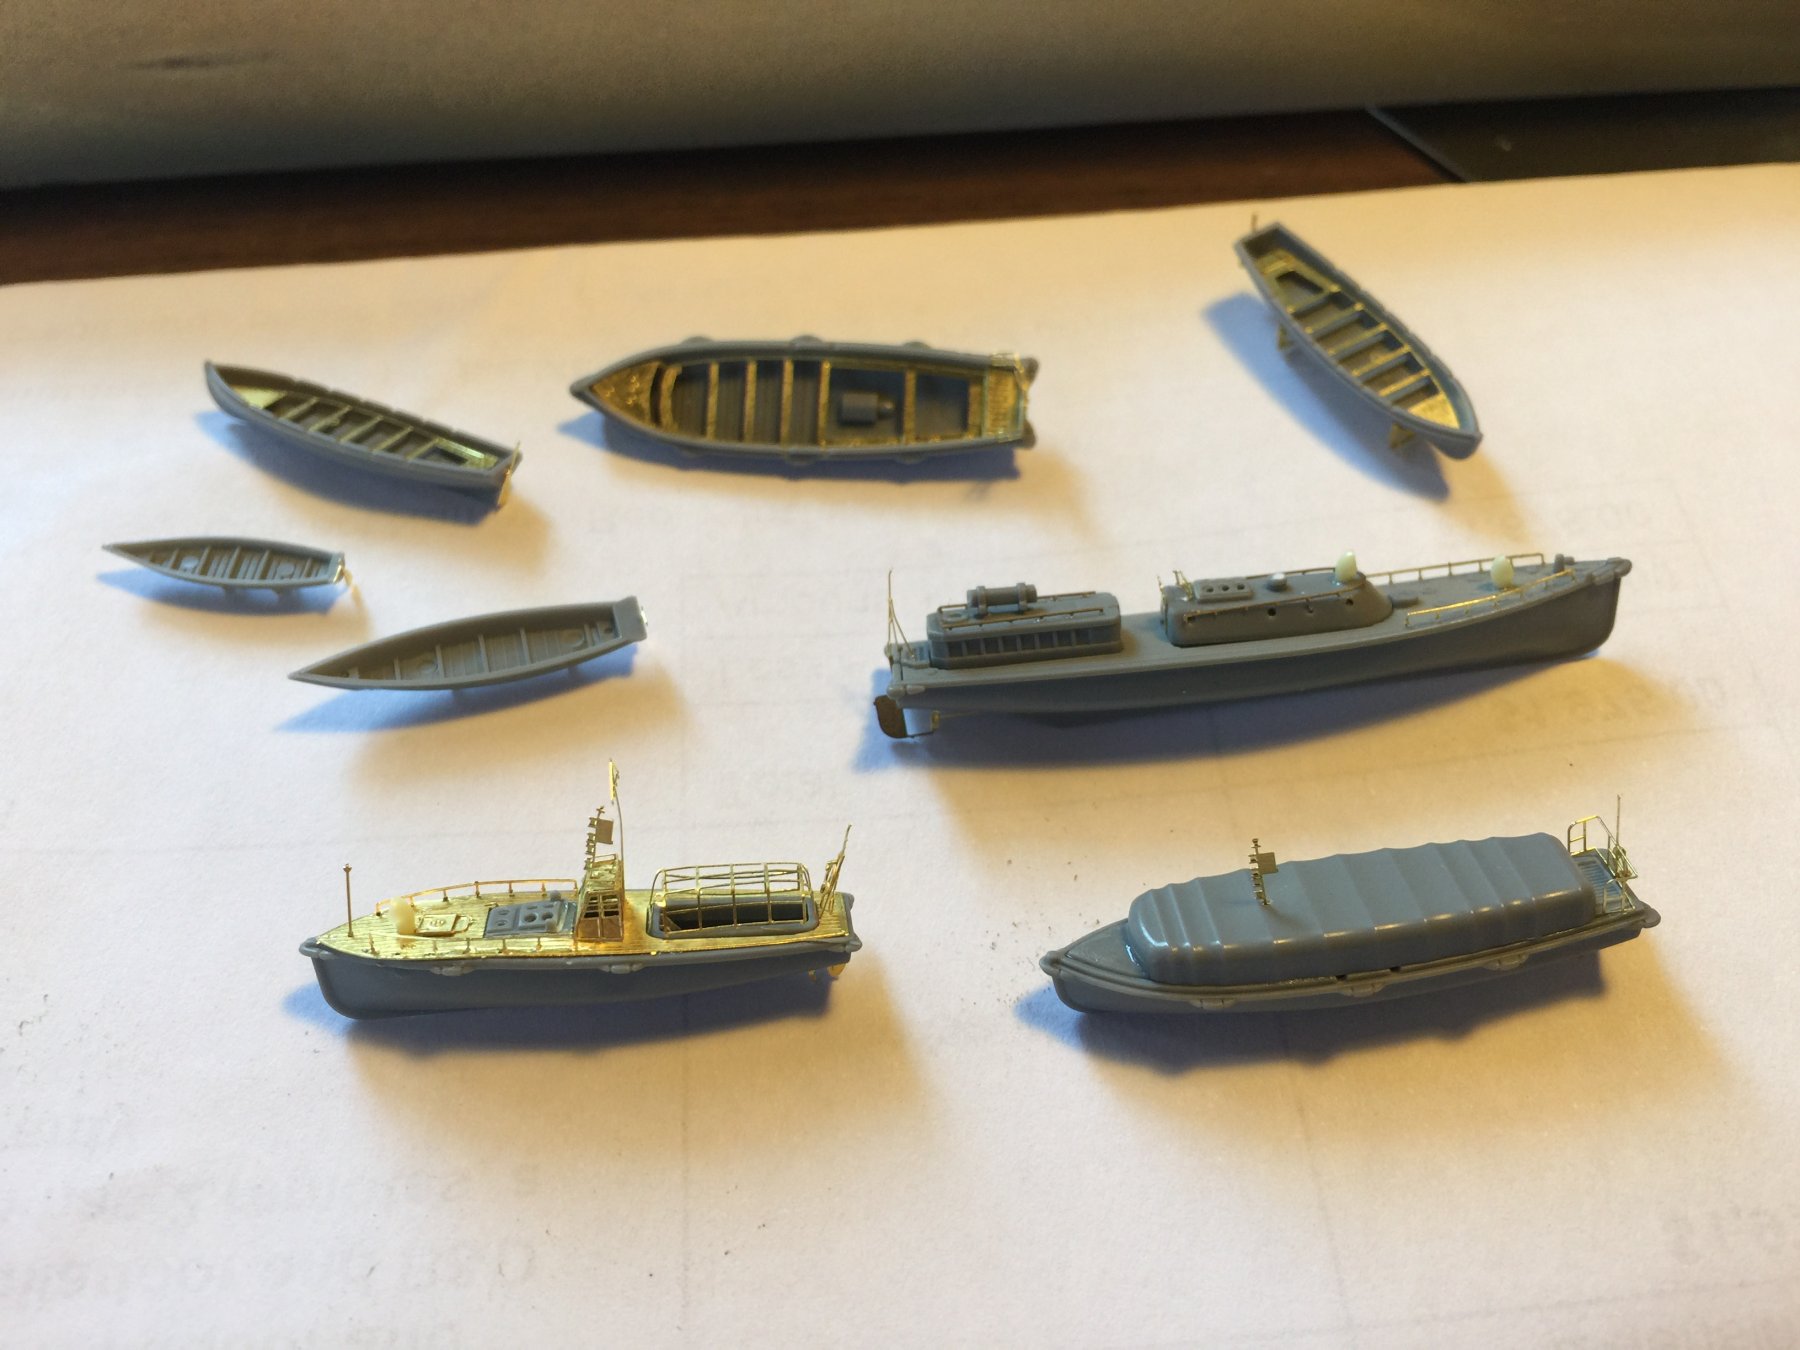
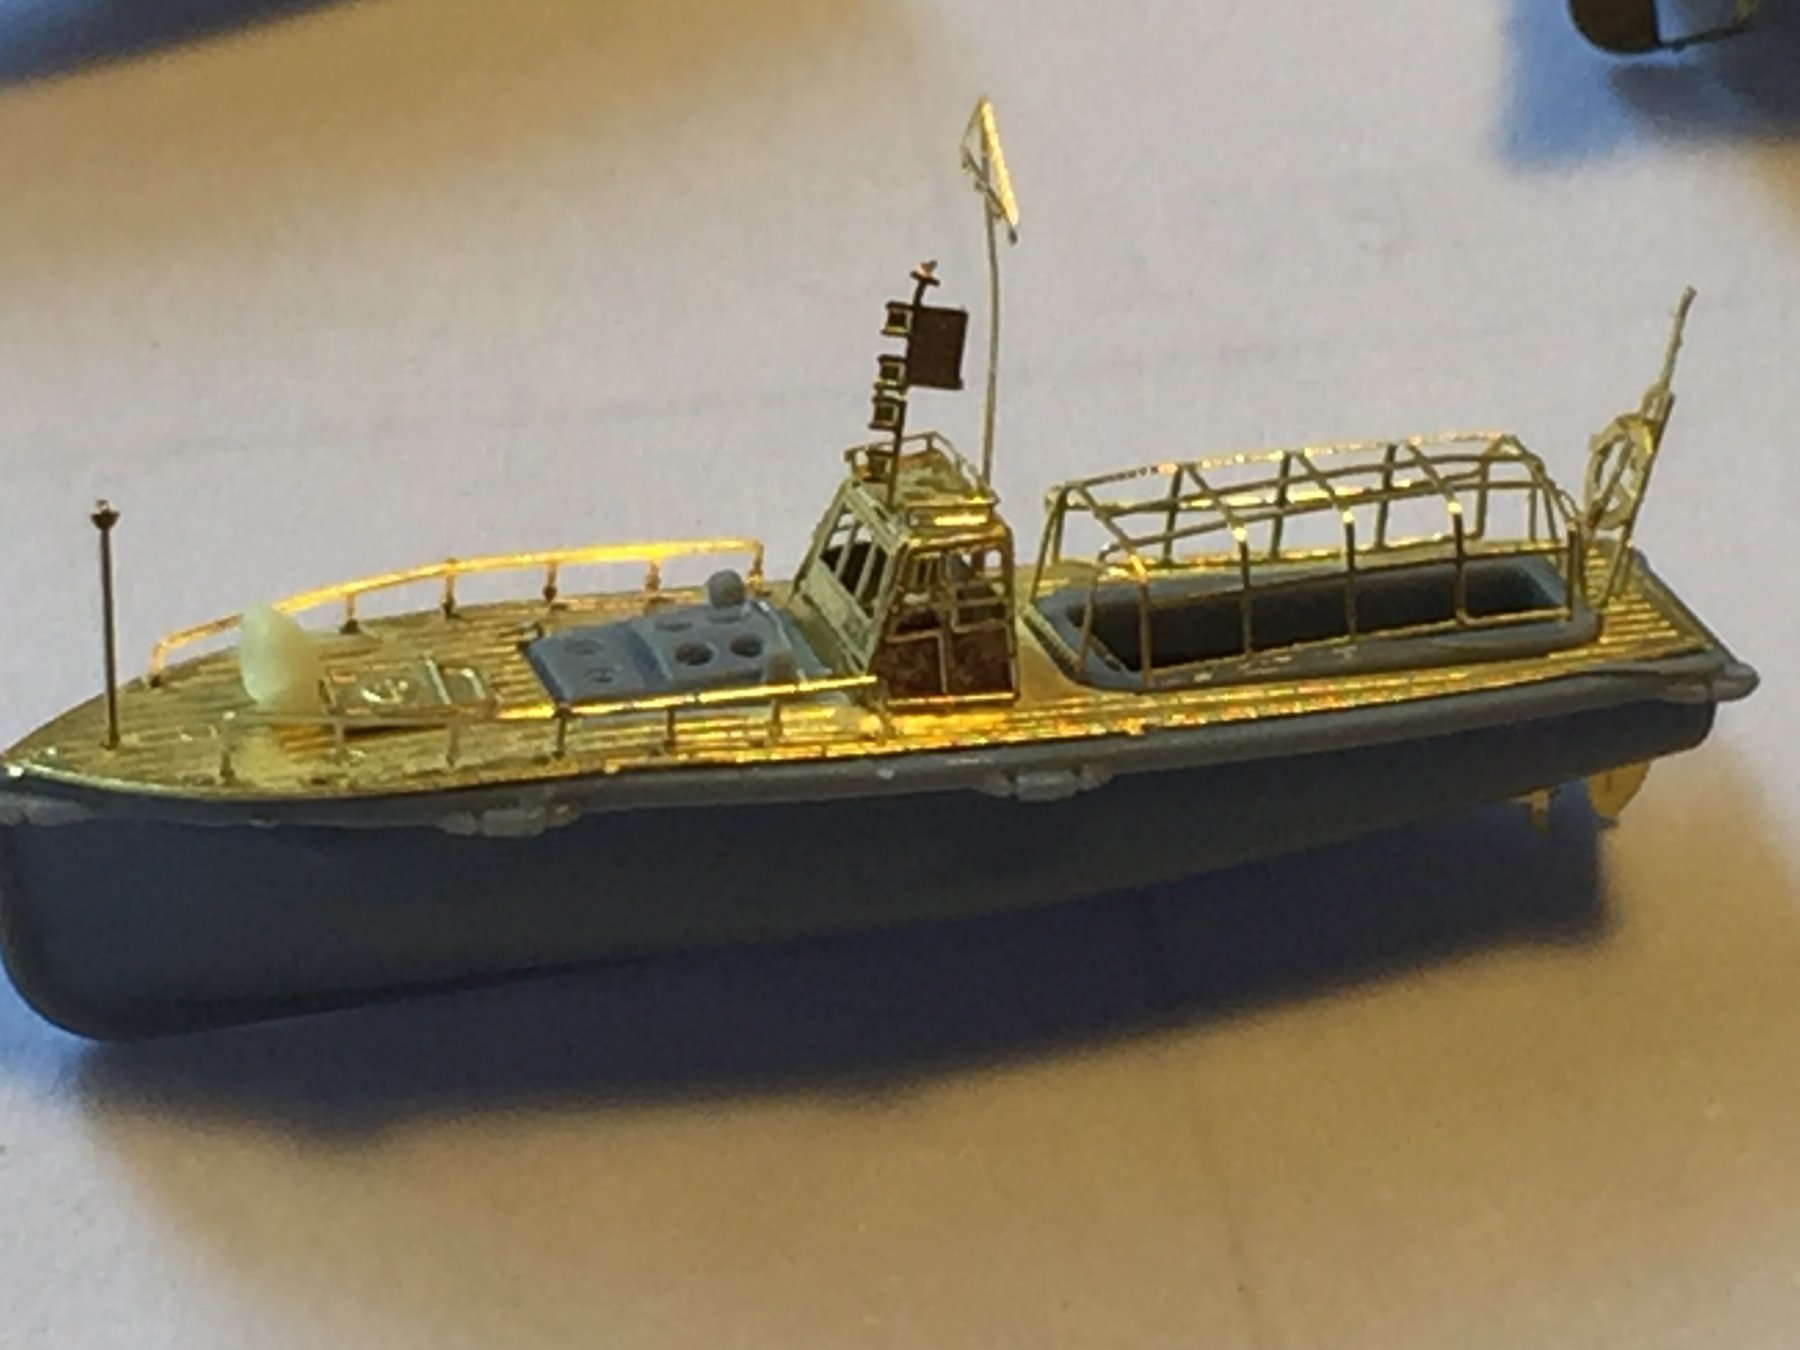
Thanks mate, I'm thinking of how to make improvements for my next build. The plan is to beat the hell out of the next build. Working on the ships boats now, the scales seem to be all wrong.
-
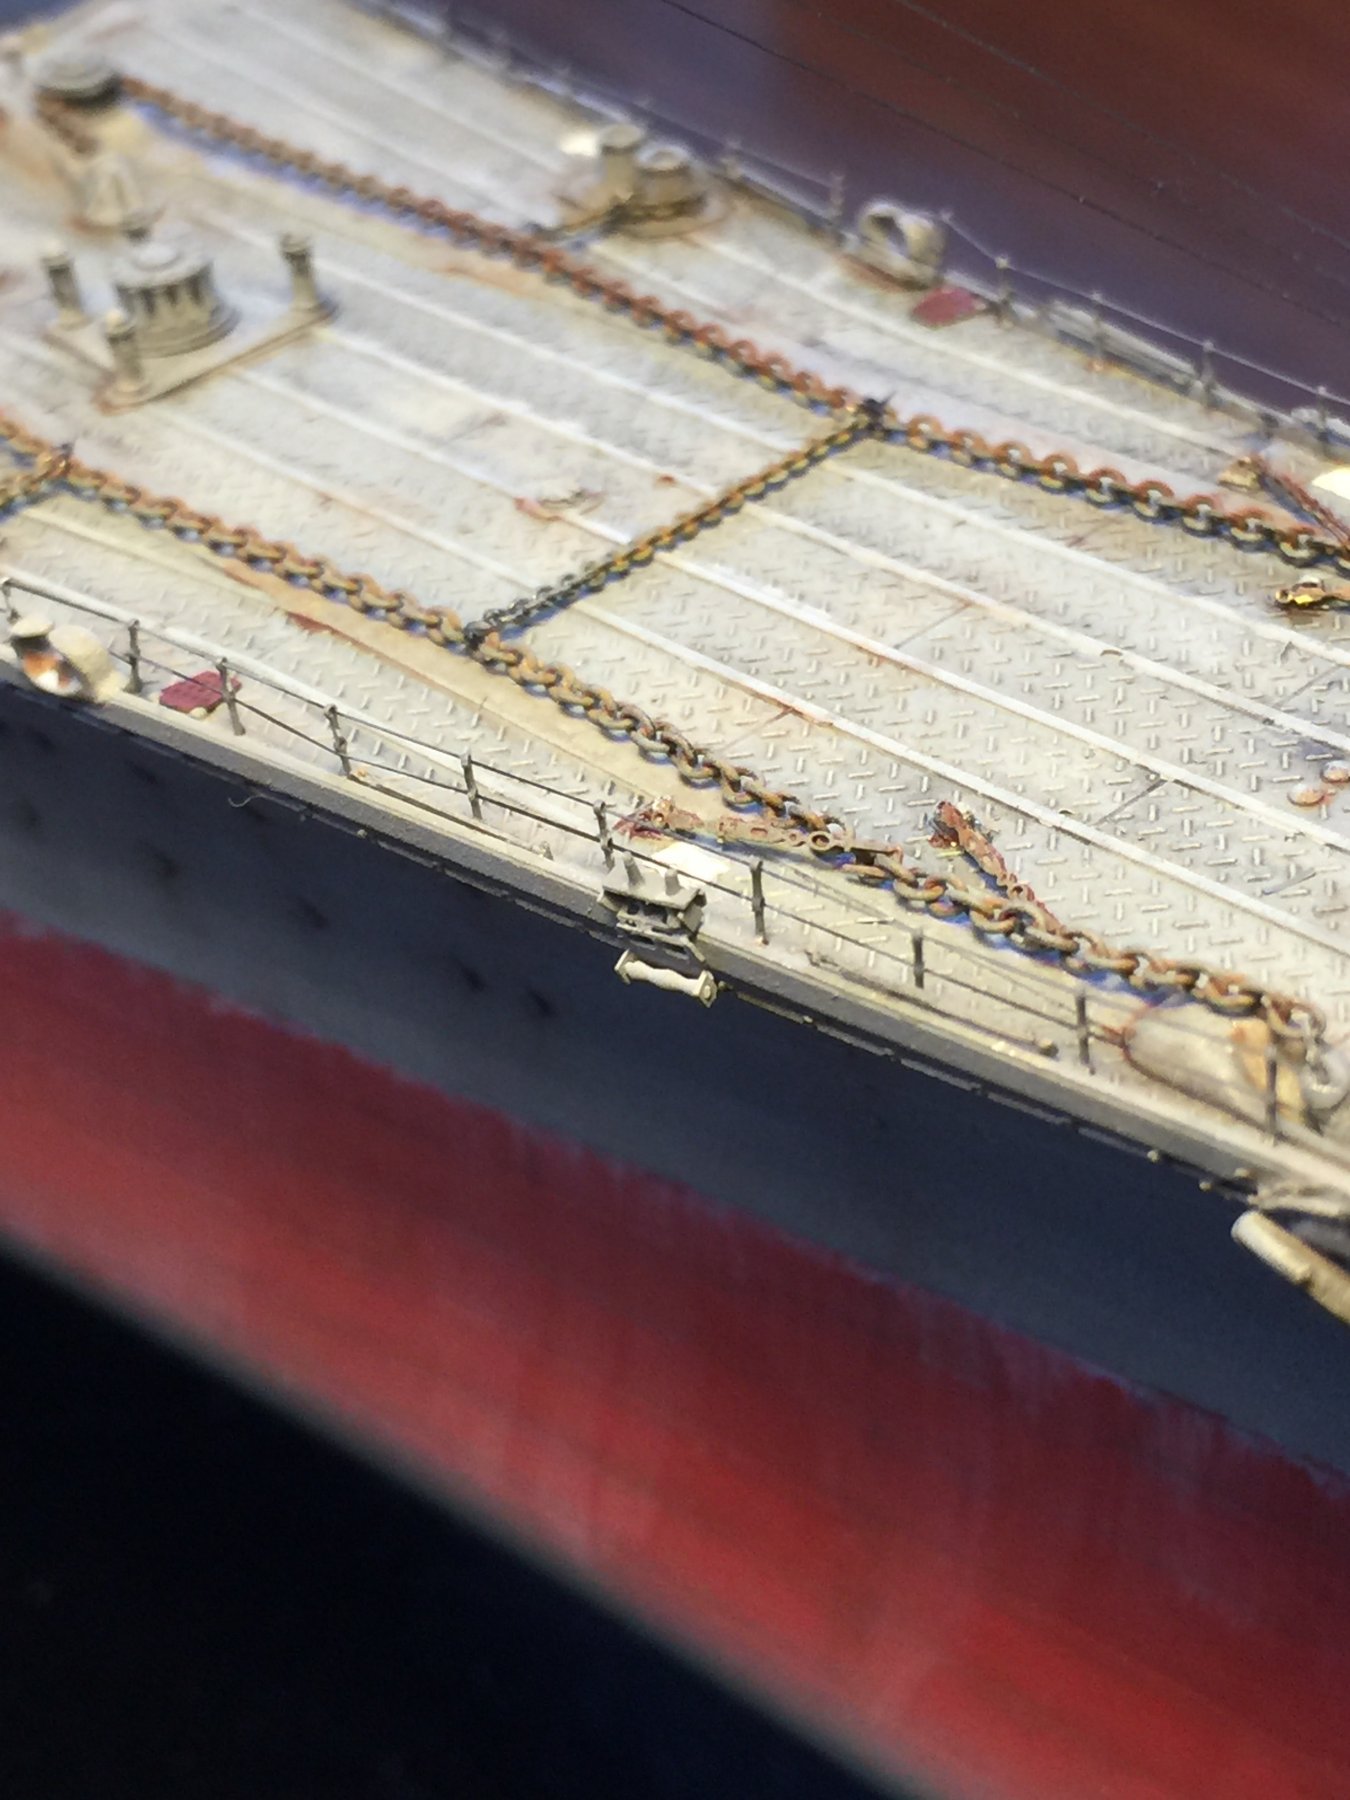
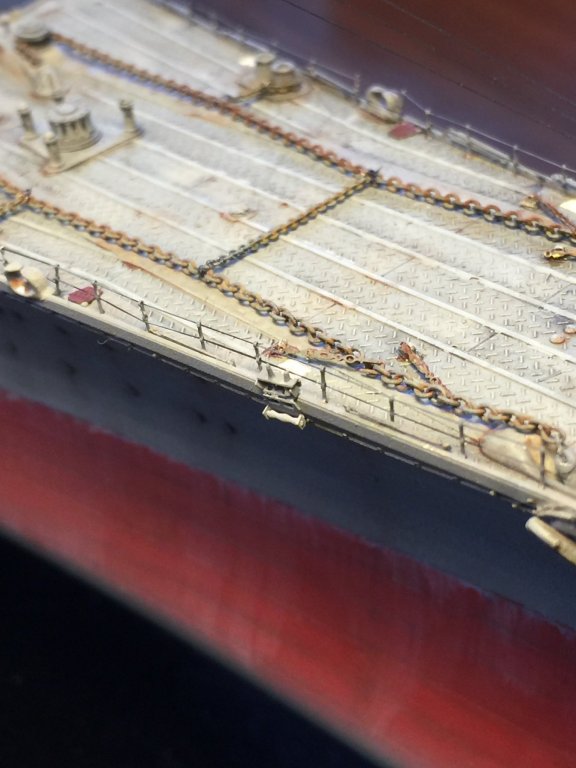
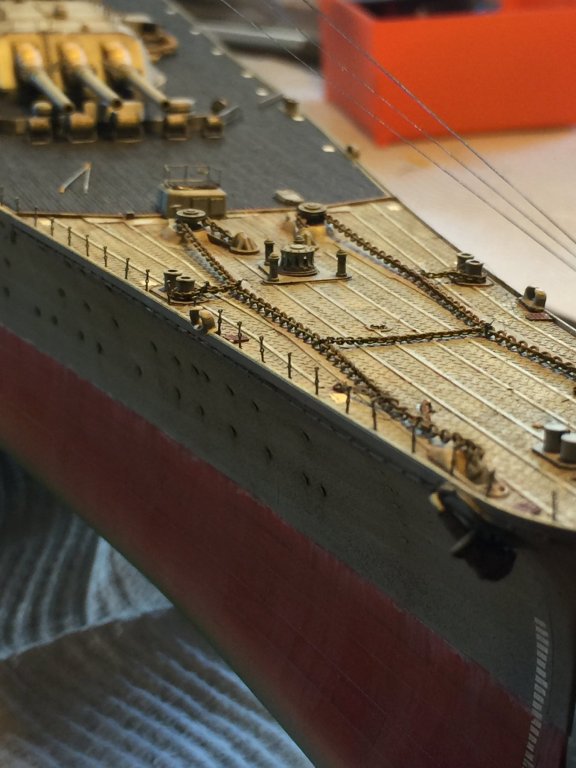
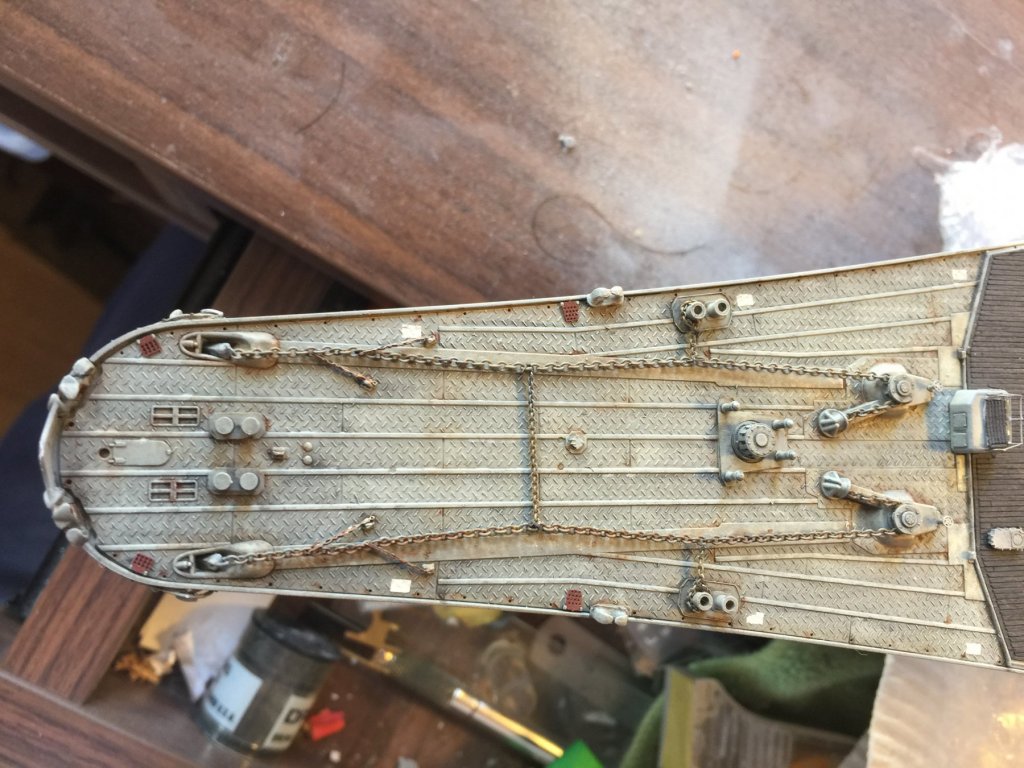
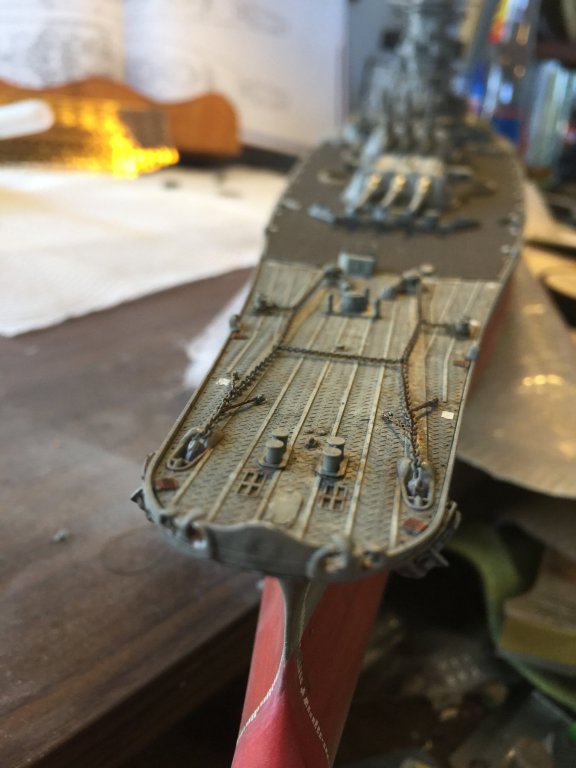
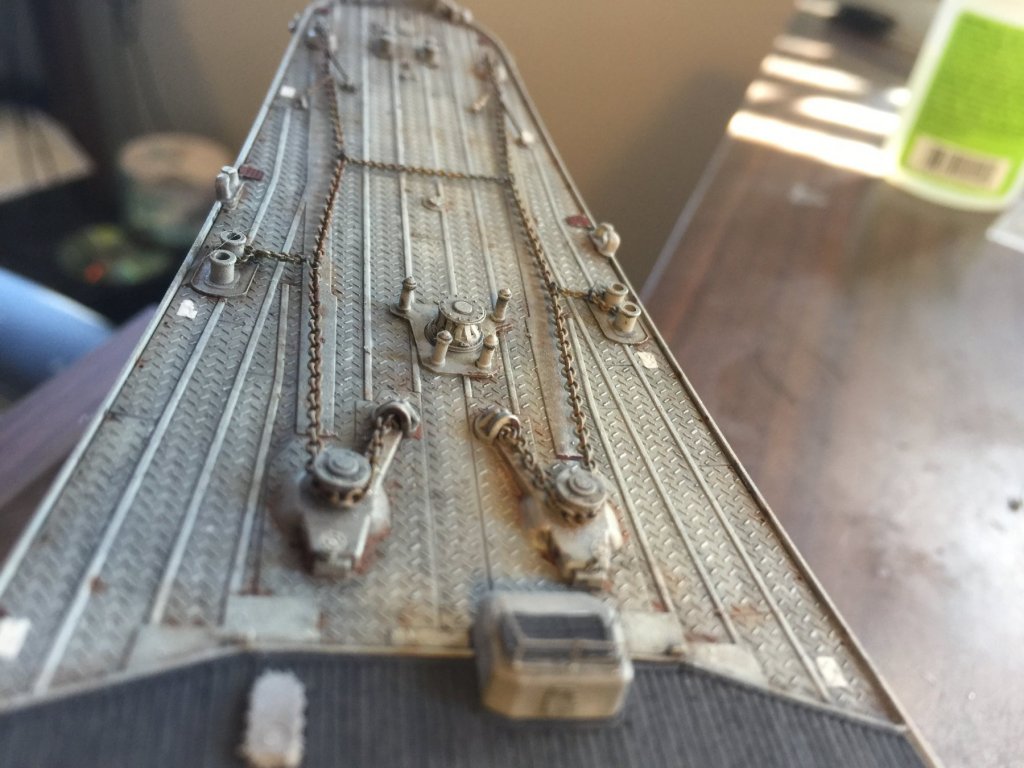
And back to the front of the bus; the ships chains and anchors. I painted the chains grey (from the shiny cheap looking black metal), then ran 2 different rust washes over them, and using two different chain sizes secured them with ezline. The Pontos kit provides 4 chain stoppers and brake handles as well. I think they came out OK.

- 743 replies
-
- 20
-
-
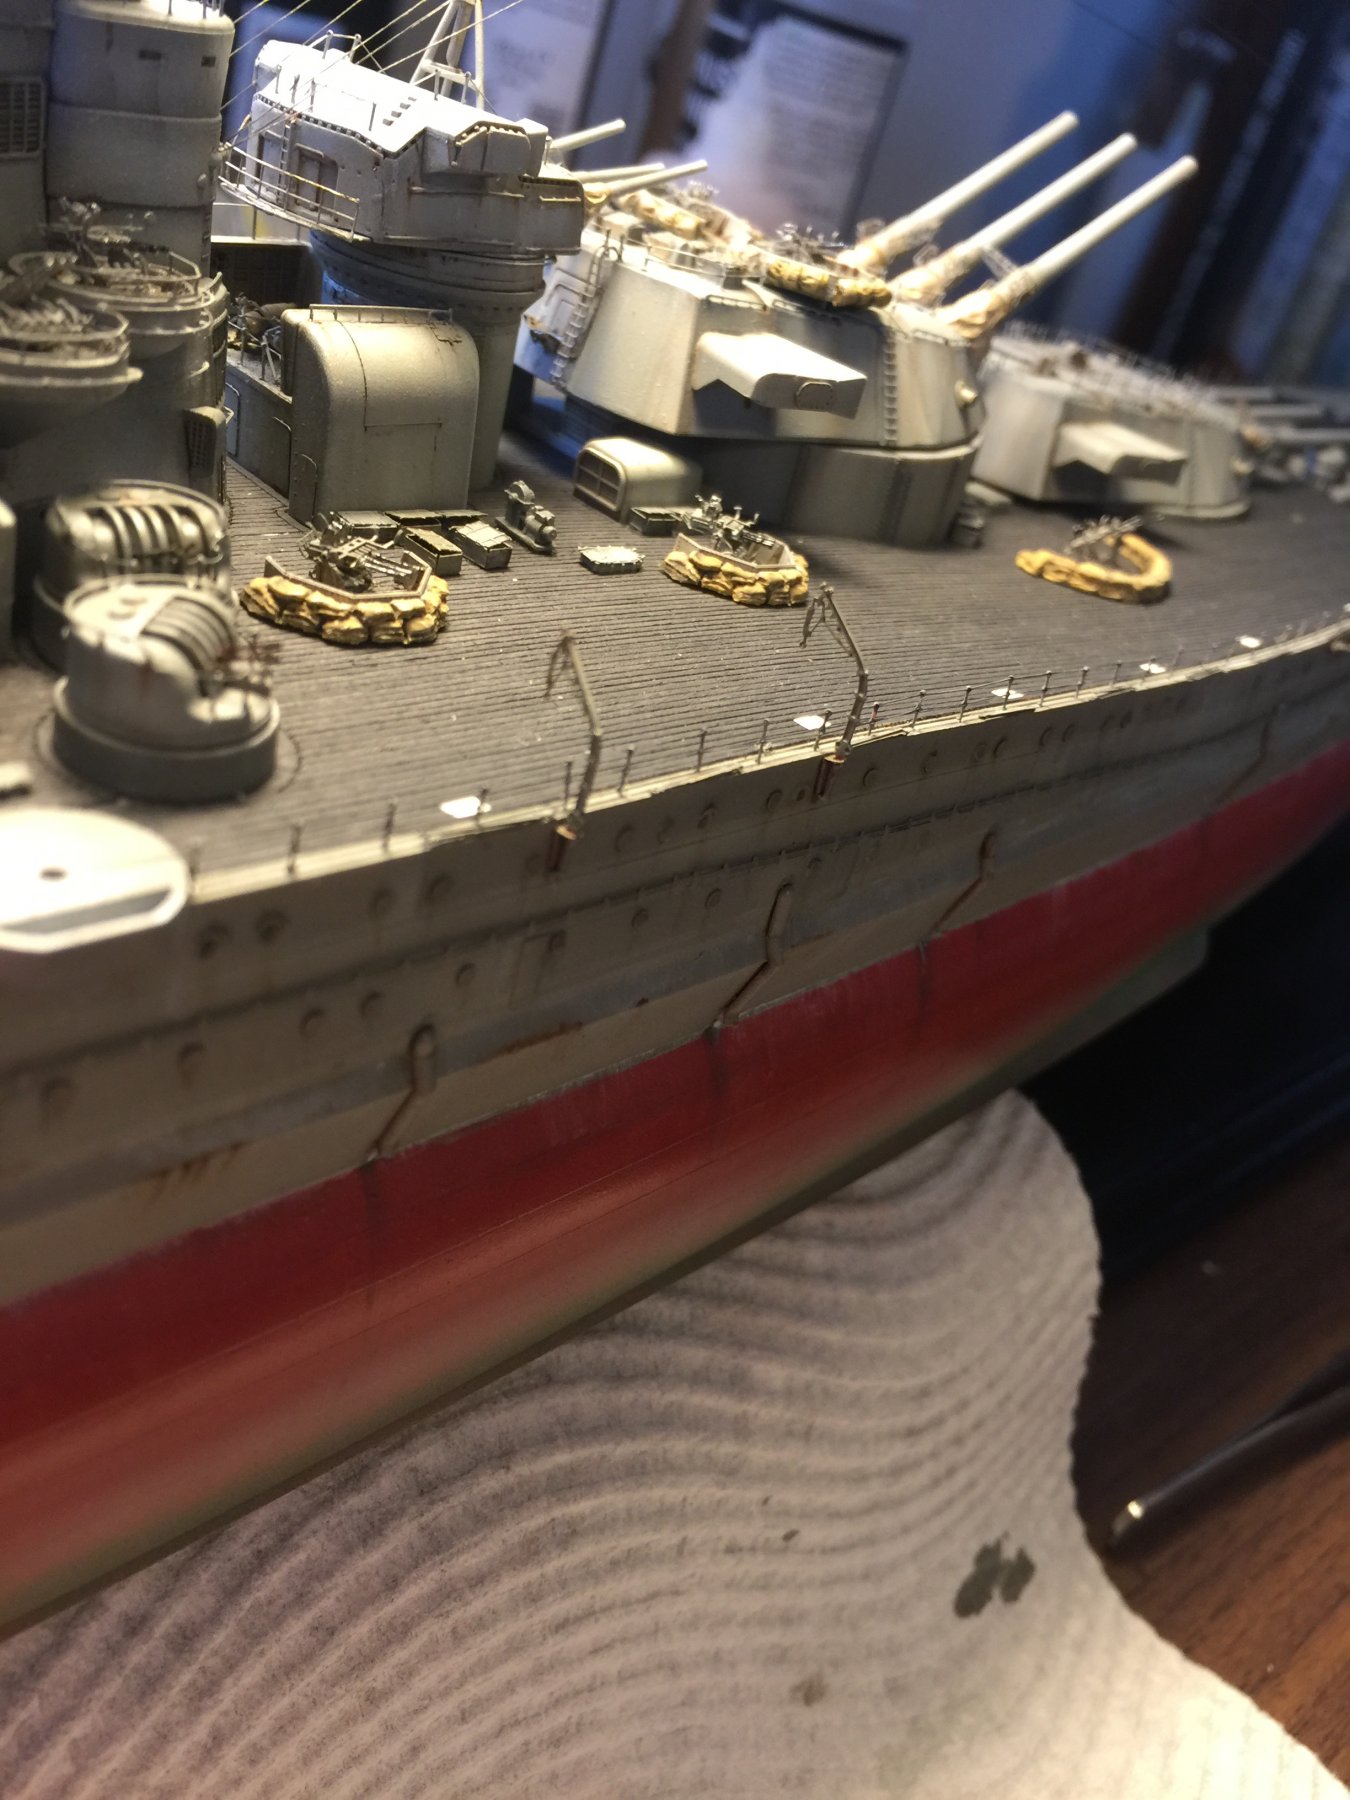
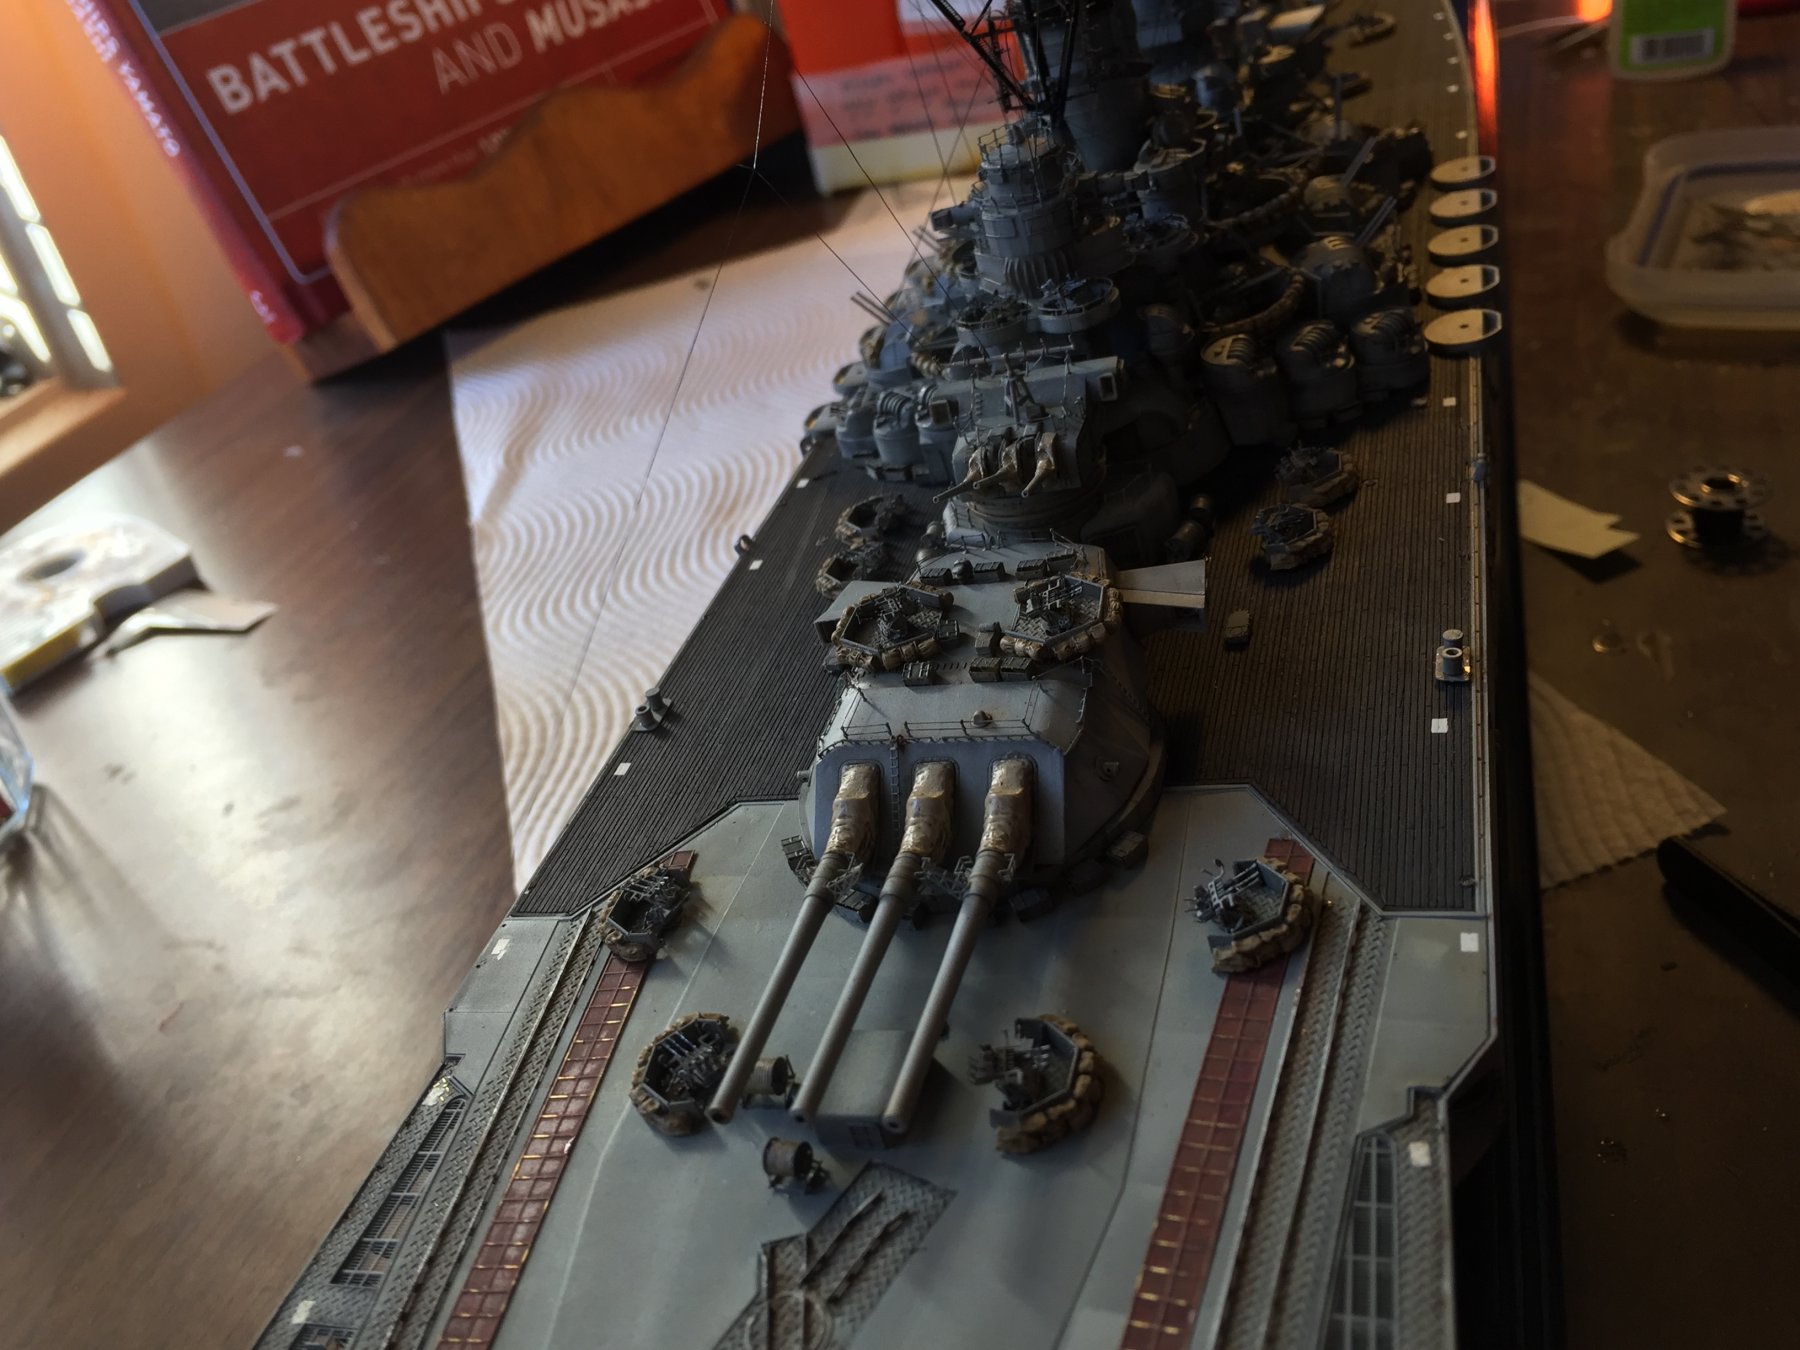
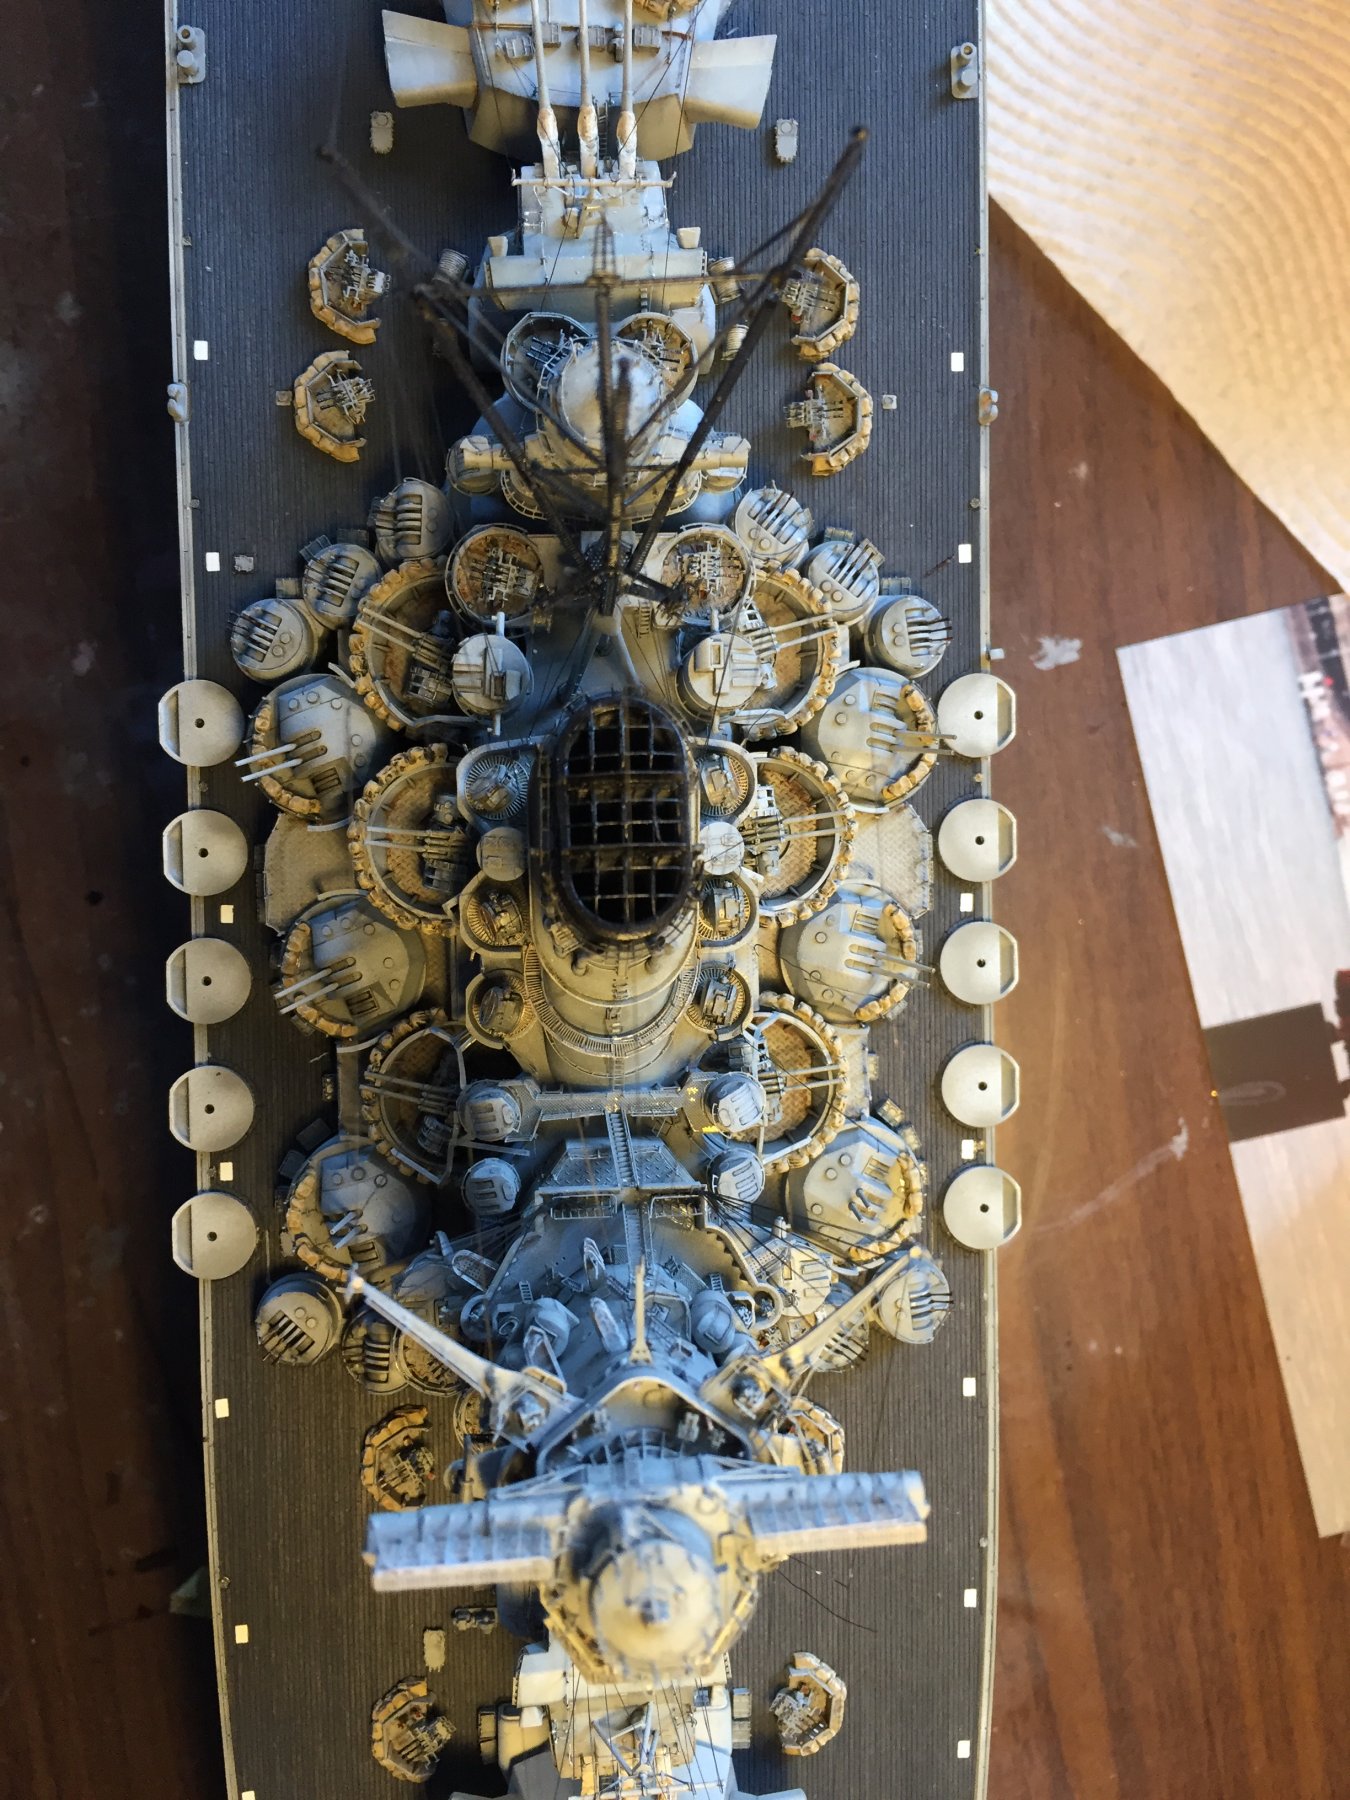
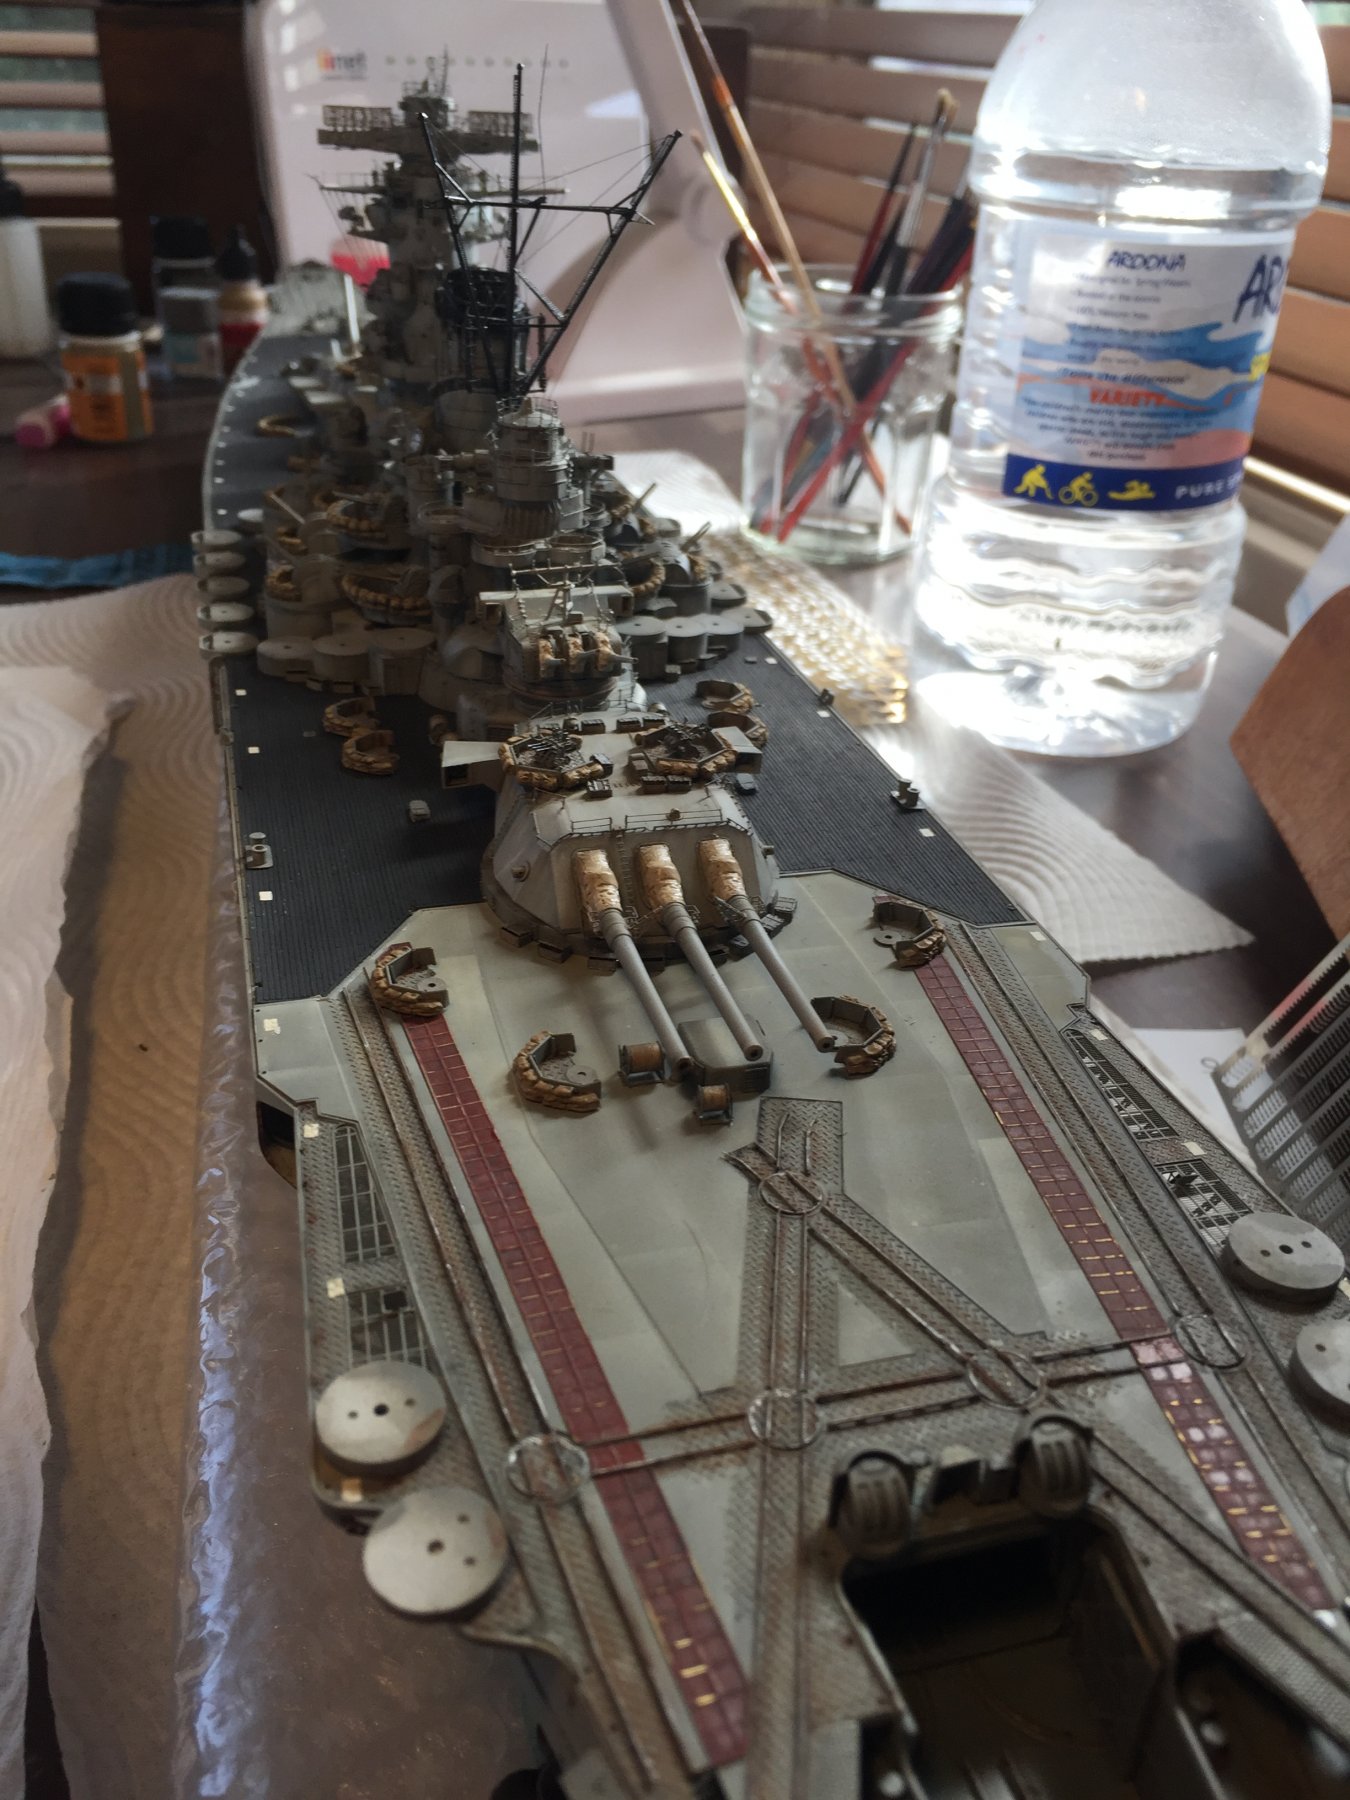
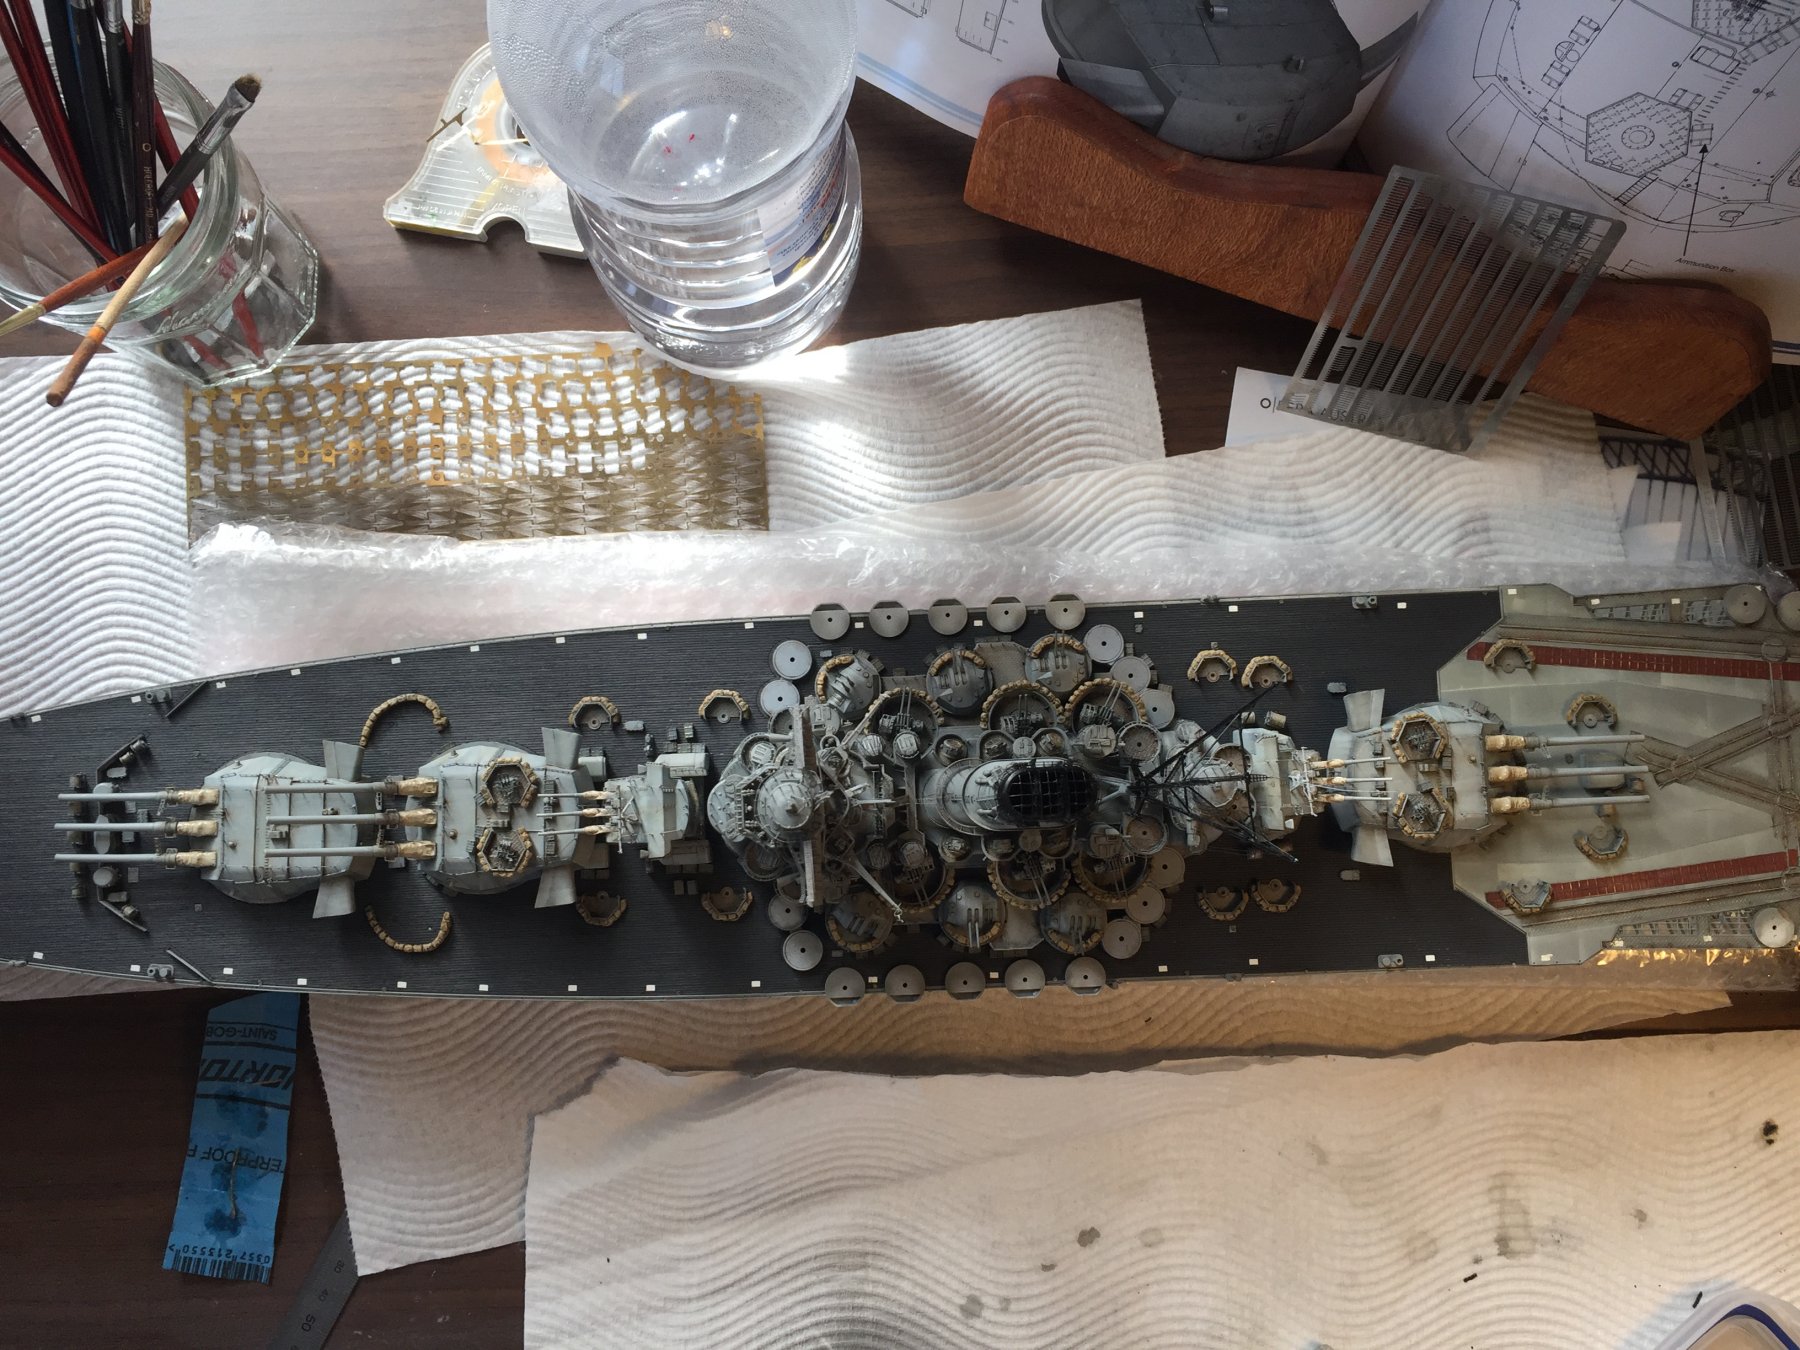
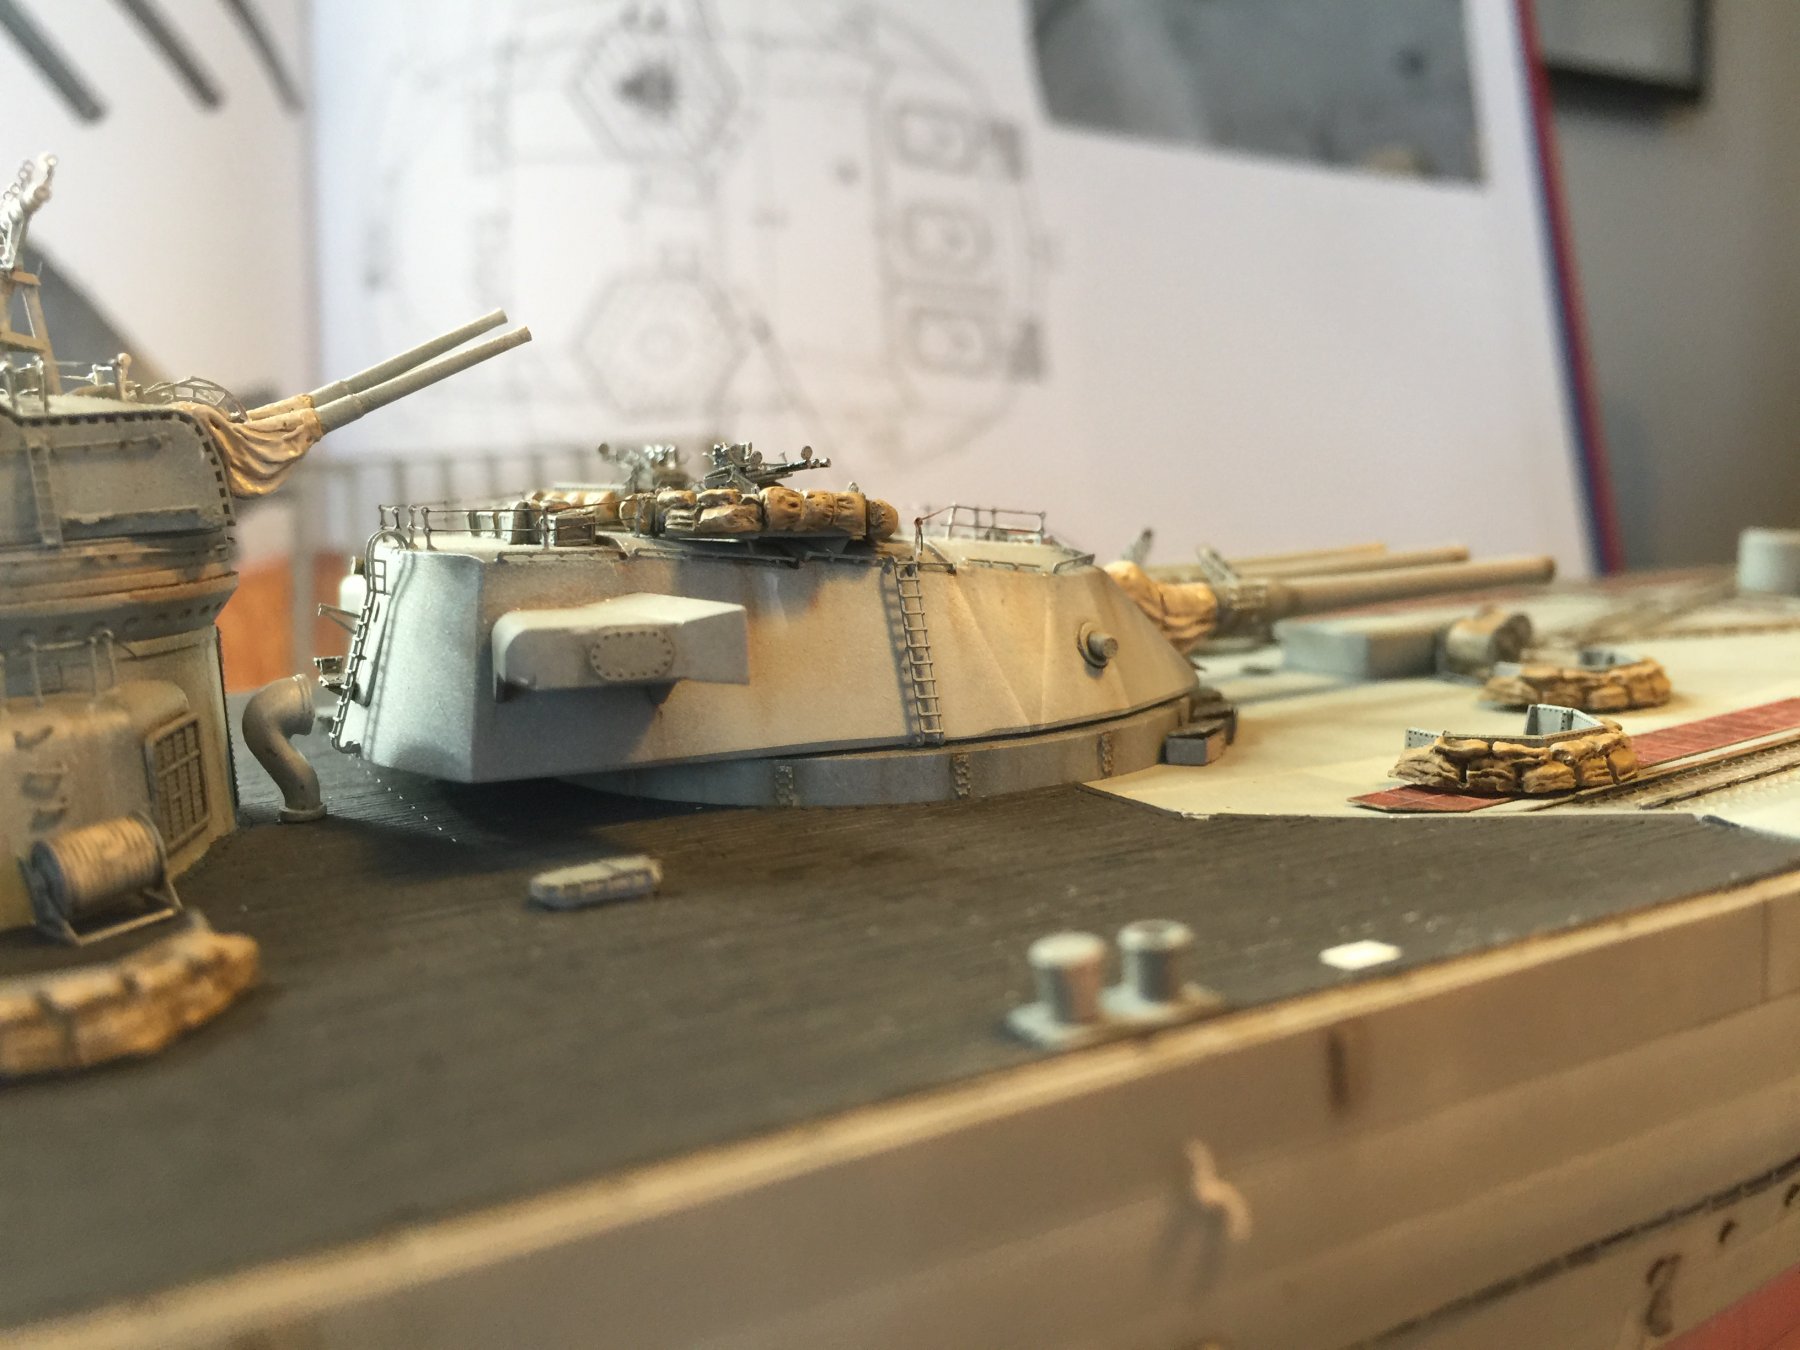
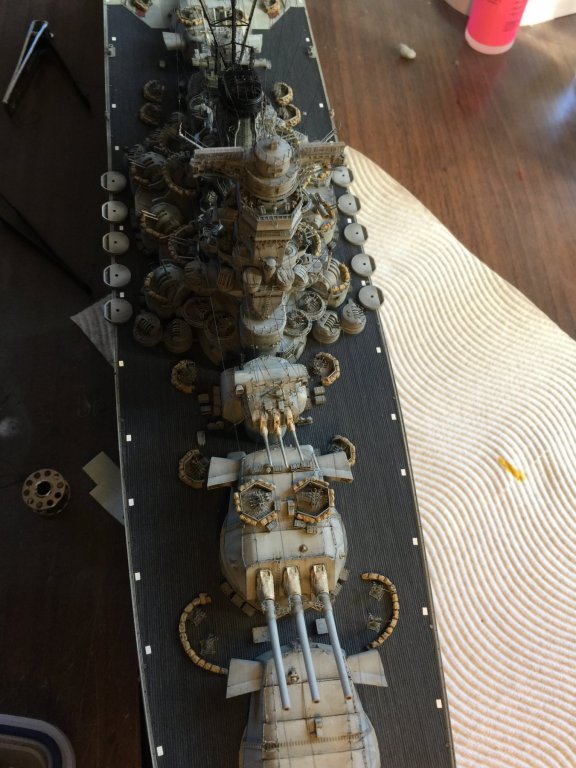
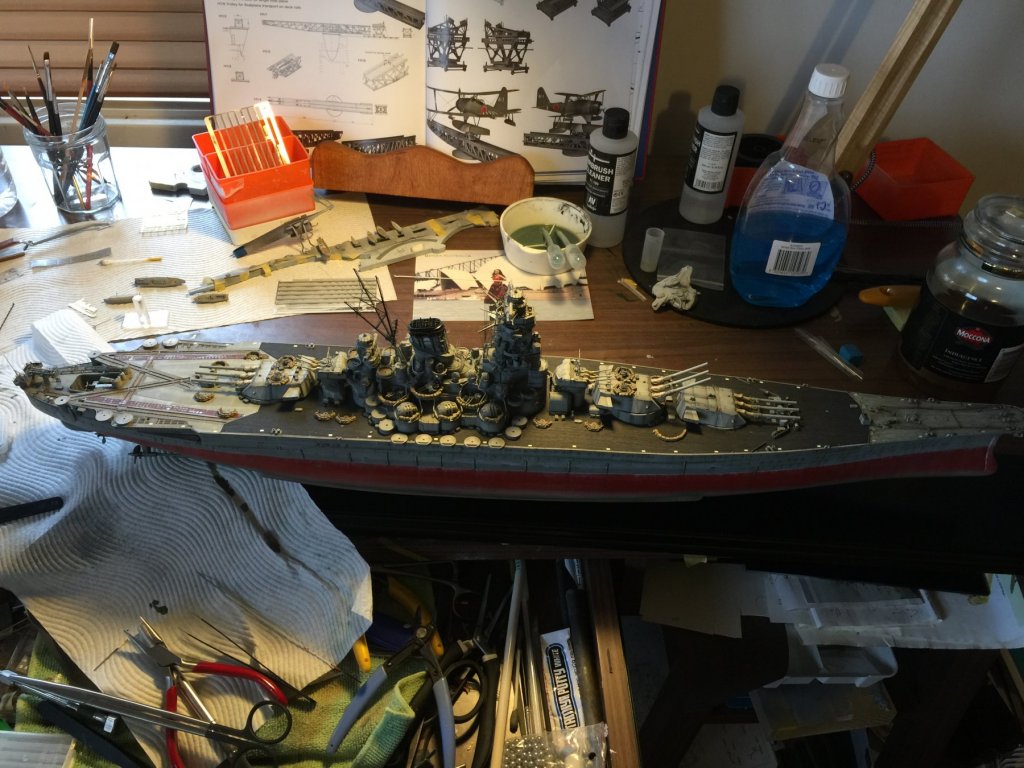
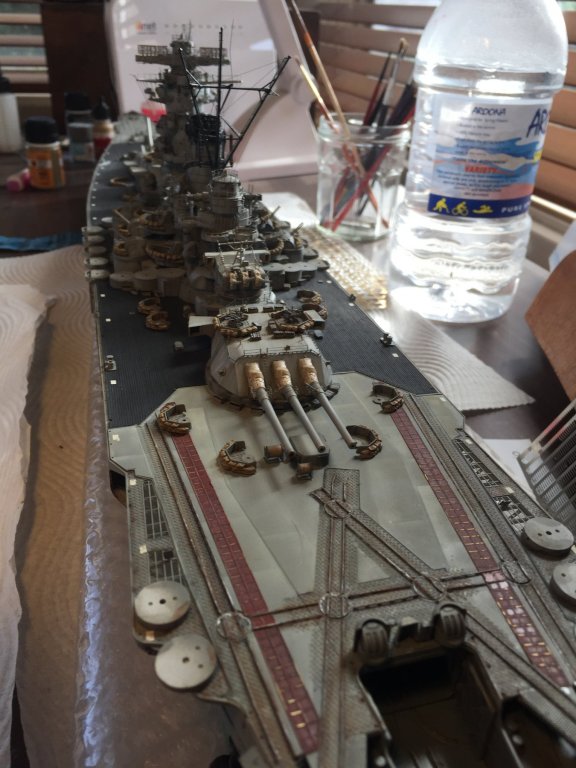
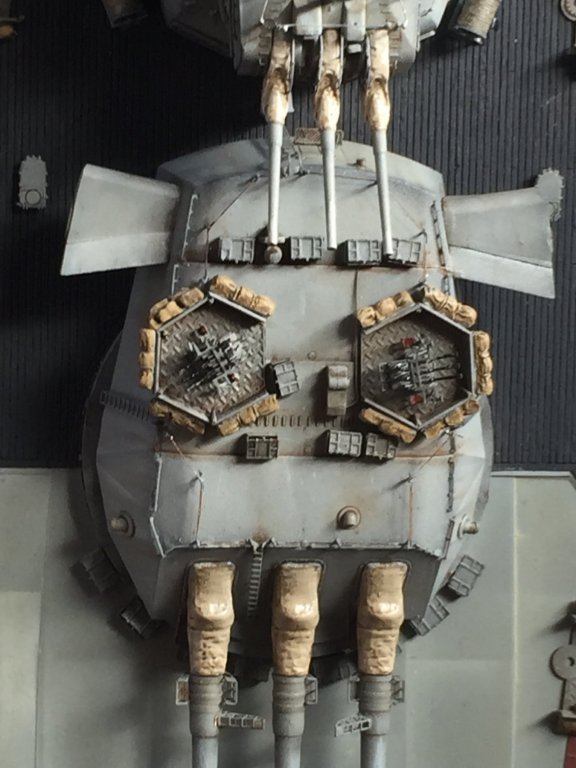
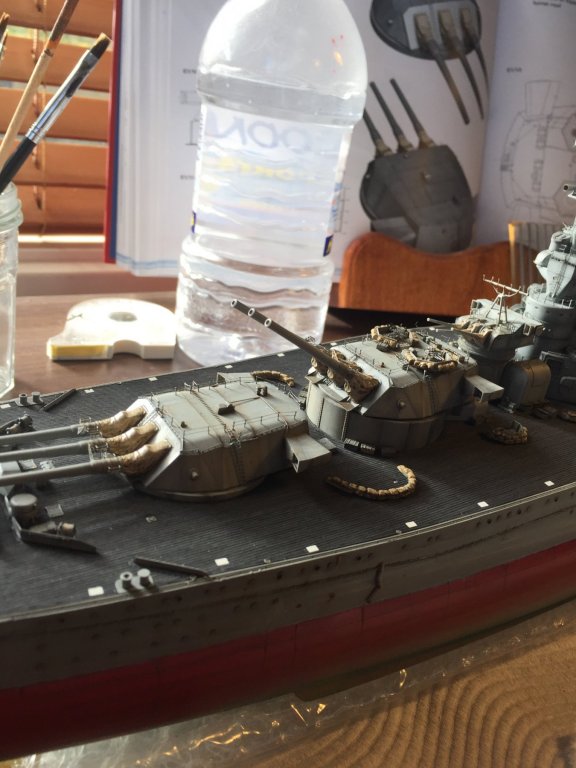
After 3 hours of repairs, the big guns are done. Ammo boxes added and the AA guns, finally looks like a battle ship. As the 25mm's are so fragile I will leave the rest of them to last, but I really don't want to tempt fate by removing the big guns again.

- 743 replies
-
- 24
-