RGL
-
Posts
5,555 -
Joined
-
Last visited
Content Type
Profiles
Forums
Gallery
Events
Everything posted by RGL
-
 Paul, I have been using this set during the build (and on previous builds too). Cog, I think a jigsaw would take less back strain, 5 folds each after cutting them off the fret. They're going to each need a few tiny drops of glue.
 -
Yes, I have been looking at that as Infini models has a nice upgrade, the bloke was the primary engineer for Pontos and left, but I'm very tempted by an Isuzu was well as there are a lot of improvements to make on it. How's the back?
-
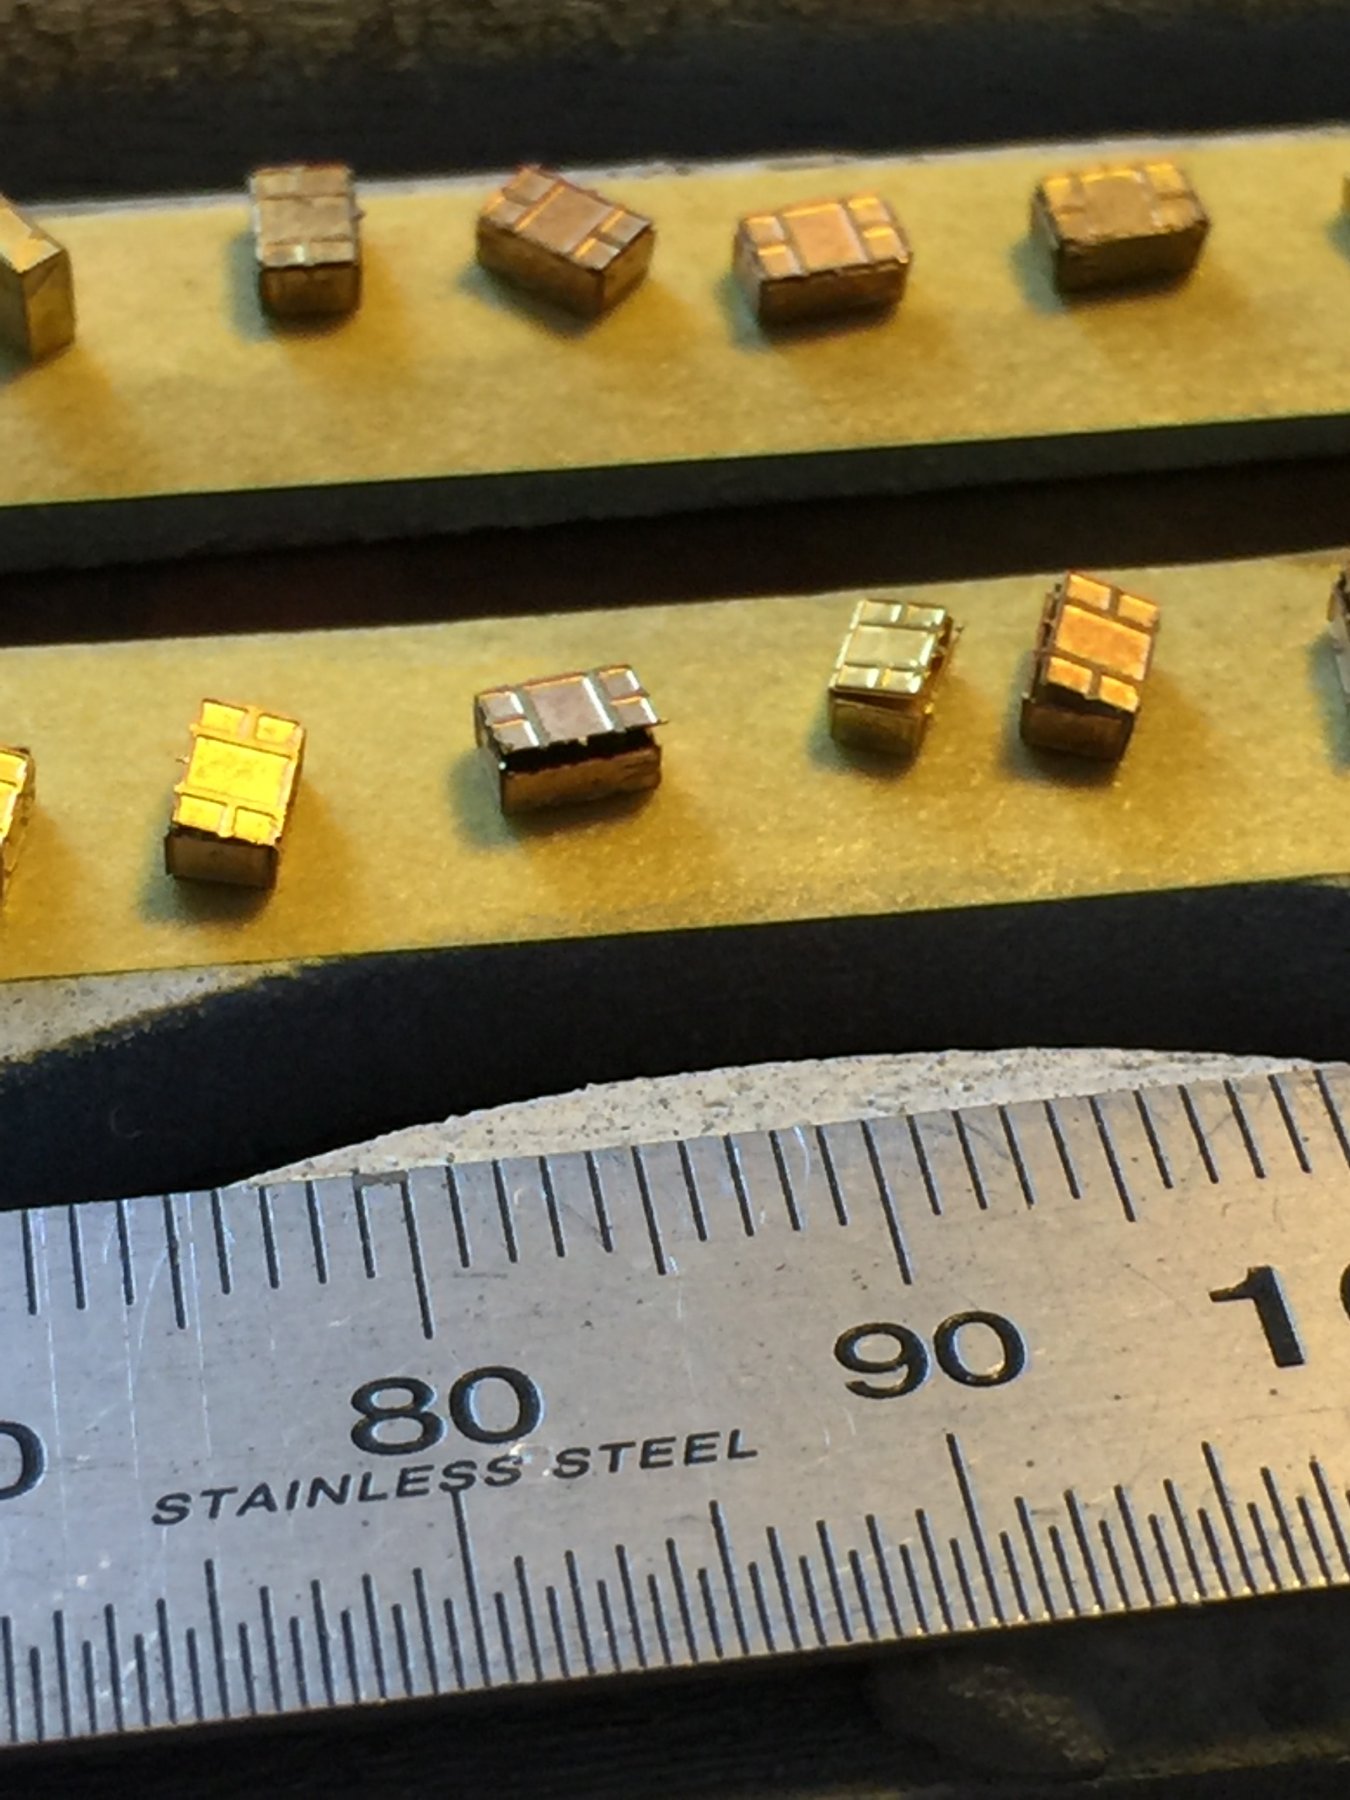
Well, I tried the run on decals, too hard so went with the Tamiya ones. I did drop the container will all the big guns in it today, took me an hour to find NEARLY all the bits that fell off, can't find 2 of the sandbags which I'll make from spares. Annoying but not the end of the world to fix. A few hours work. Im currently working on the deck fittings and dreading making up about 170 ammo boxes and placing individual stanchions for the entire ship, plus boats and aircraft. As to the weathering, Utube is your friend, and the excellent airbrush recommend by banyan. You just can't do this without one. I reckon 3 months to go. I really want to build something smaller next (in this scale) so I'm open to suggestions. I now have an inside job for at least 6 months and no coaching duties until October.
- 743 replies
-
- 10
-

-
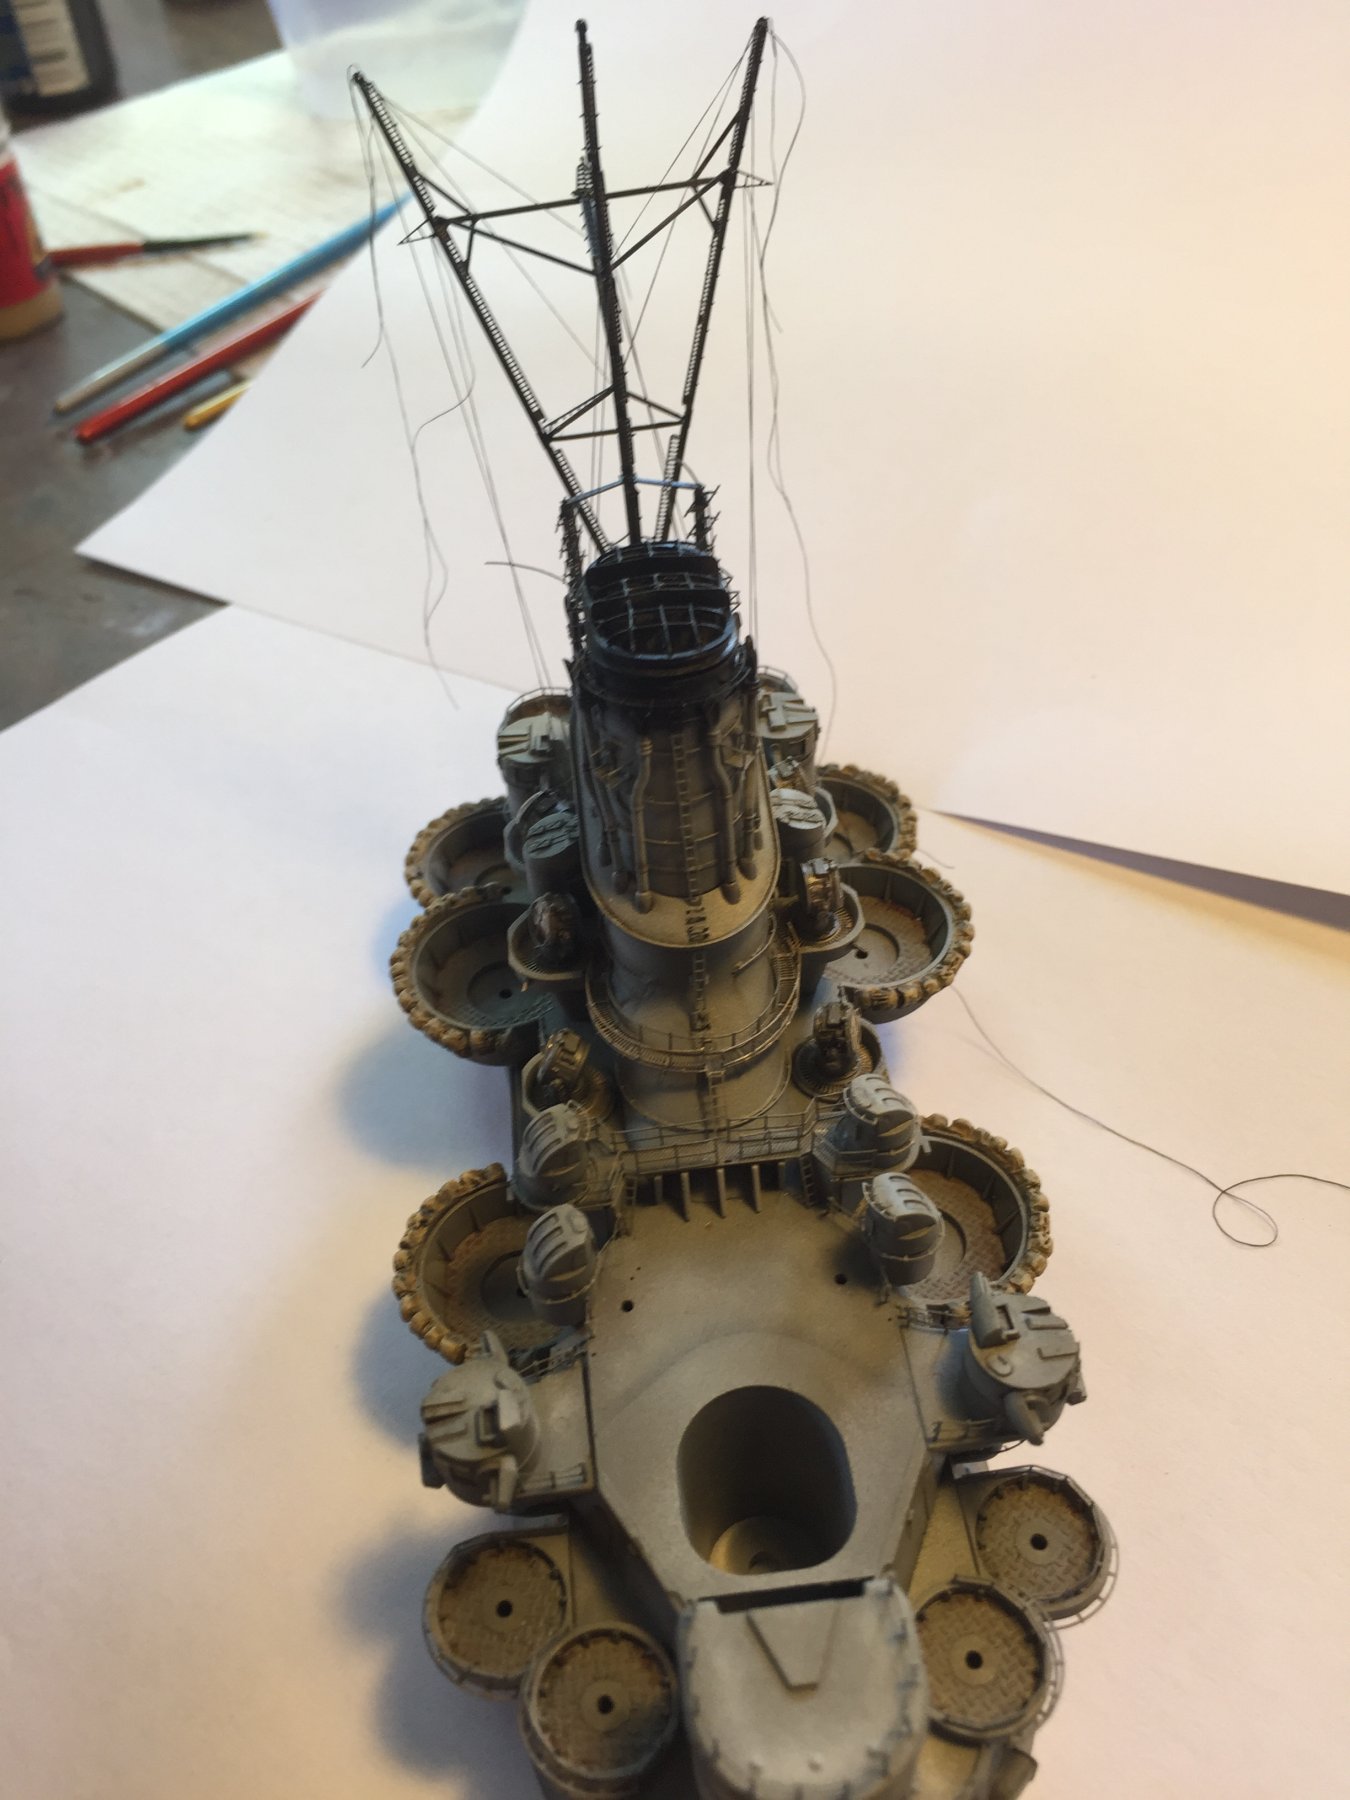
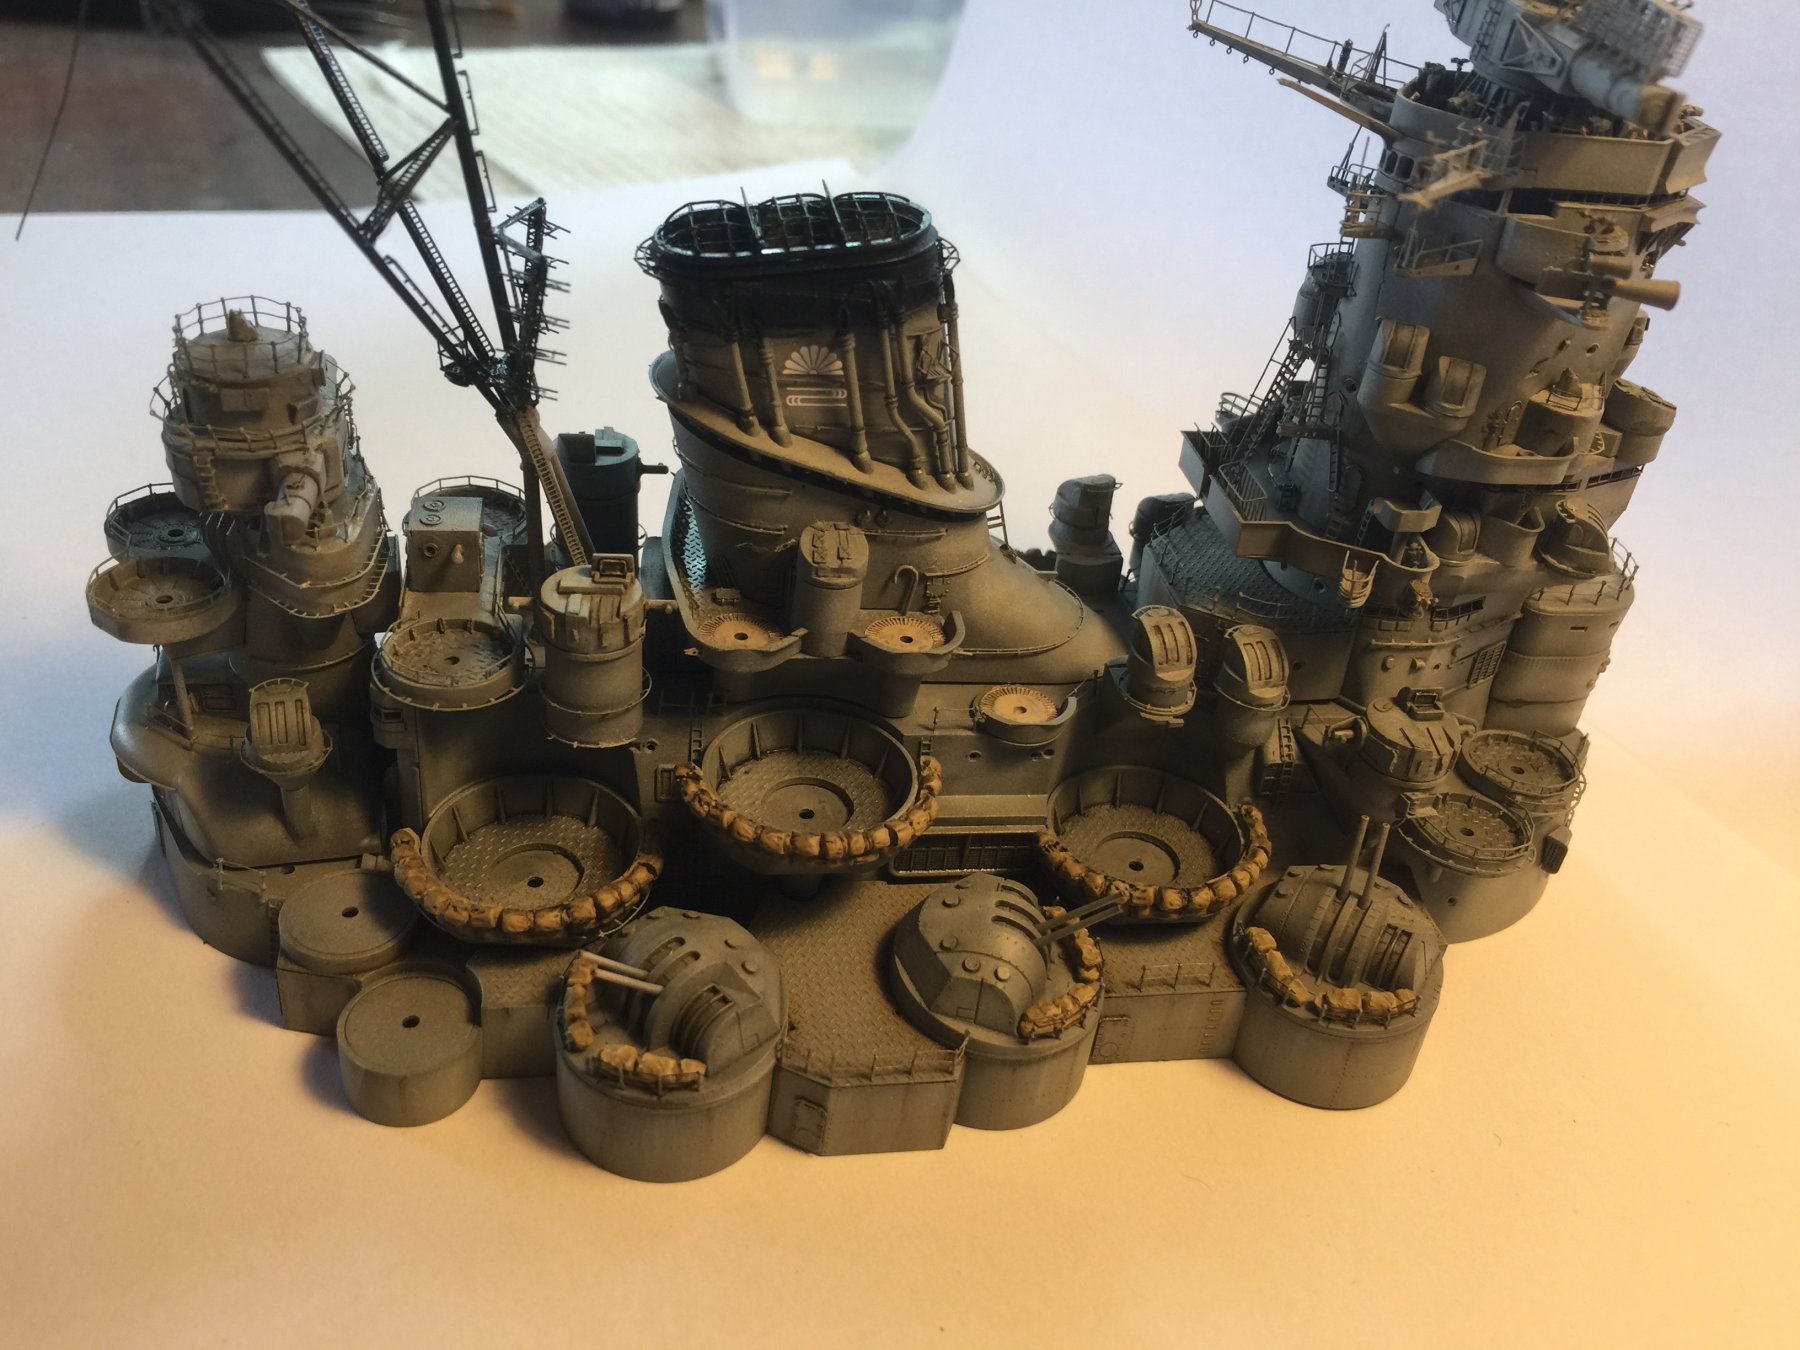
Thanks for the comments folks. I have now added the 150cm spotlights and the gantry which runs in front of the funnel. I have also commenced on the rigging whist I still have access to the funnel without the fore and aft towers. I've done as much weathering as I can for the moment.

- 743 replies
-
- 24
-
-
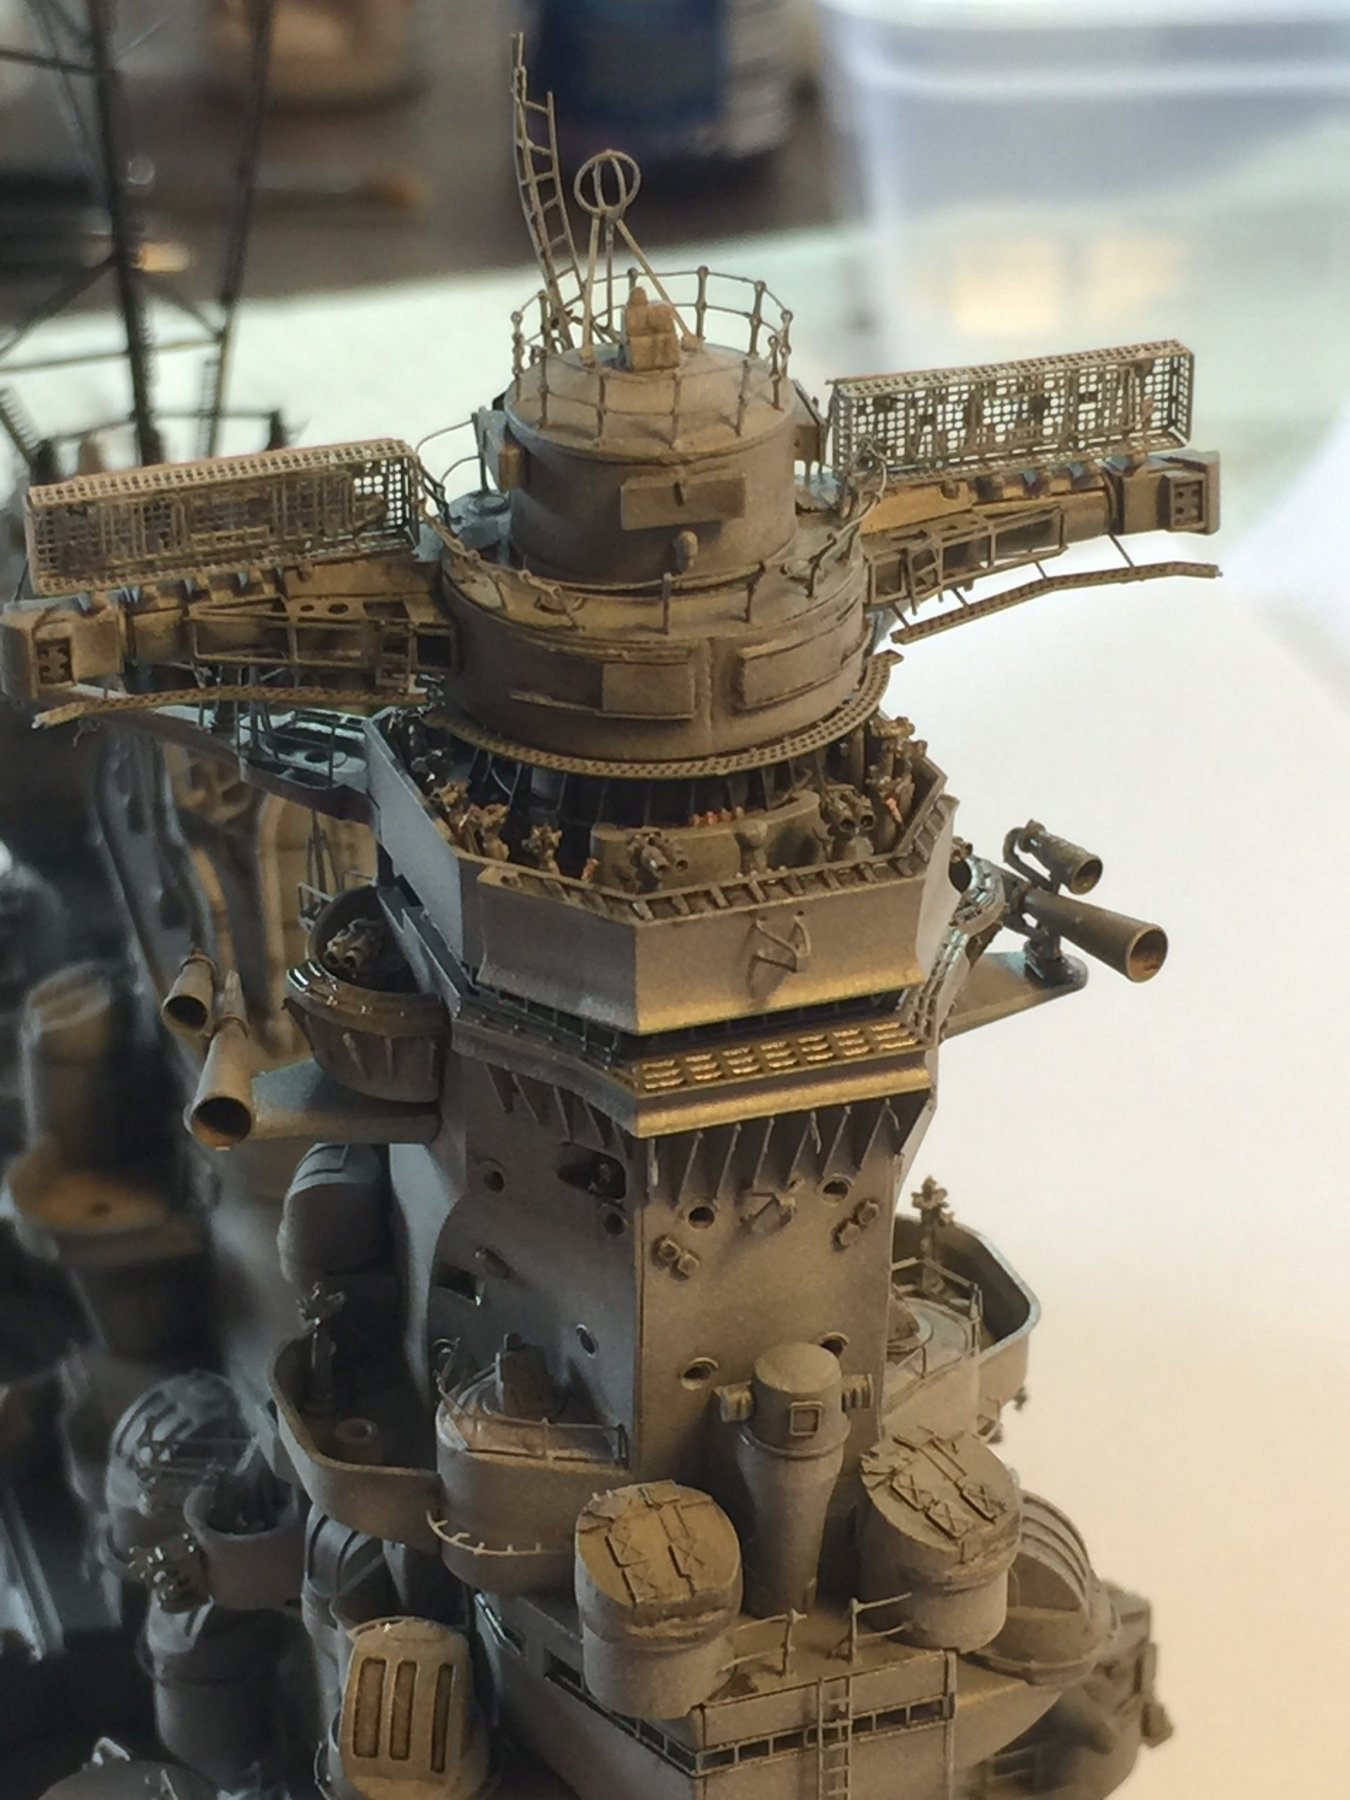
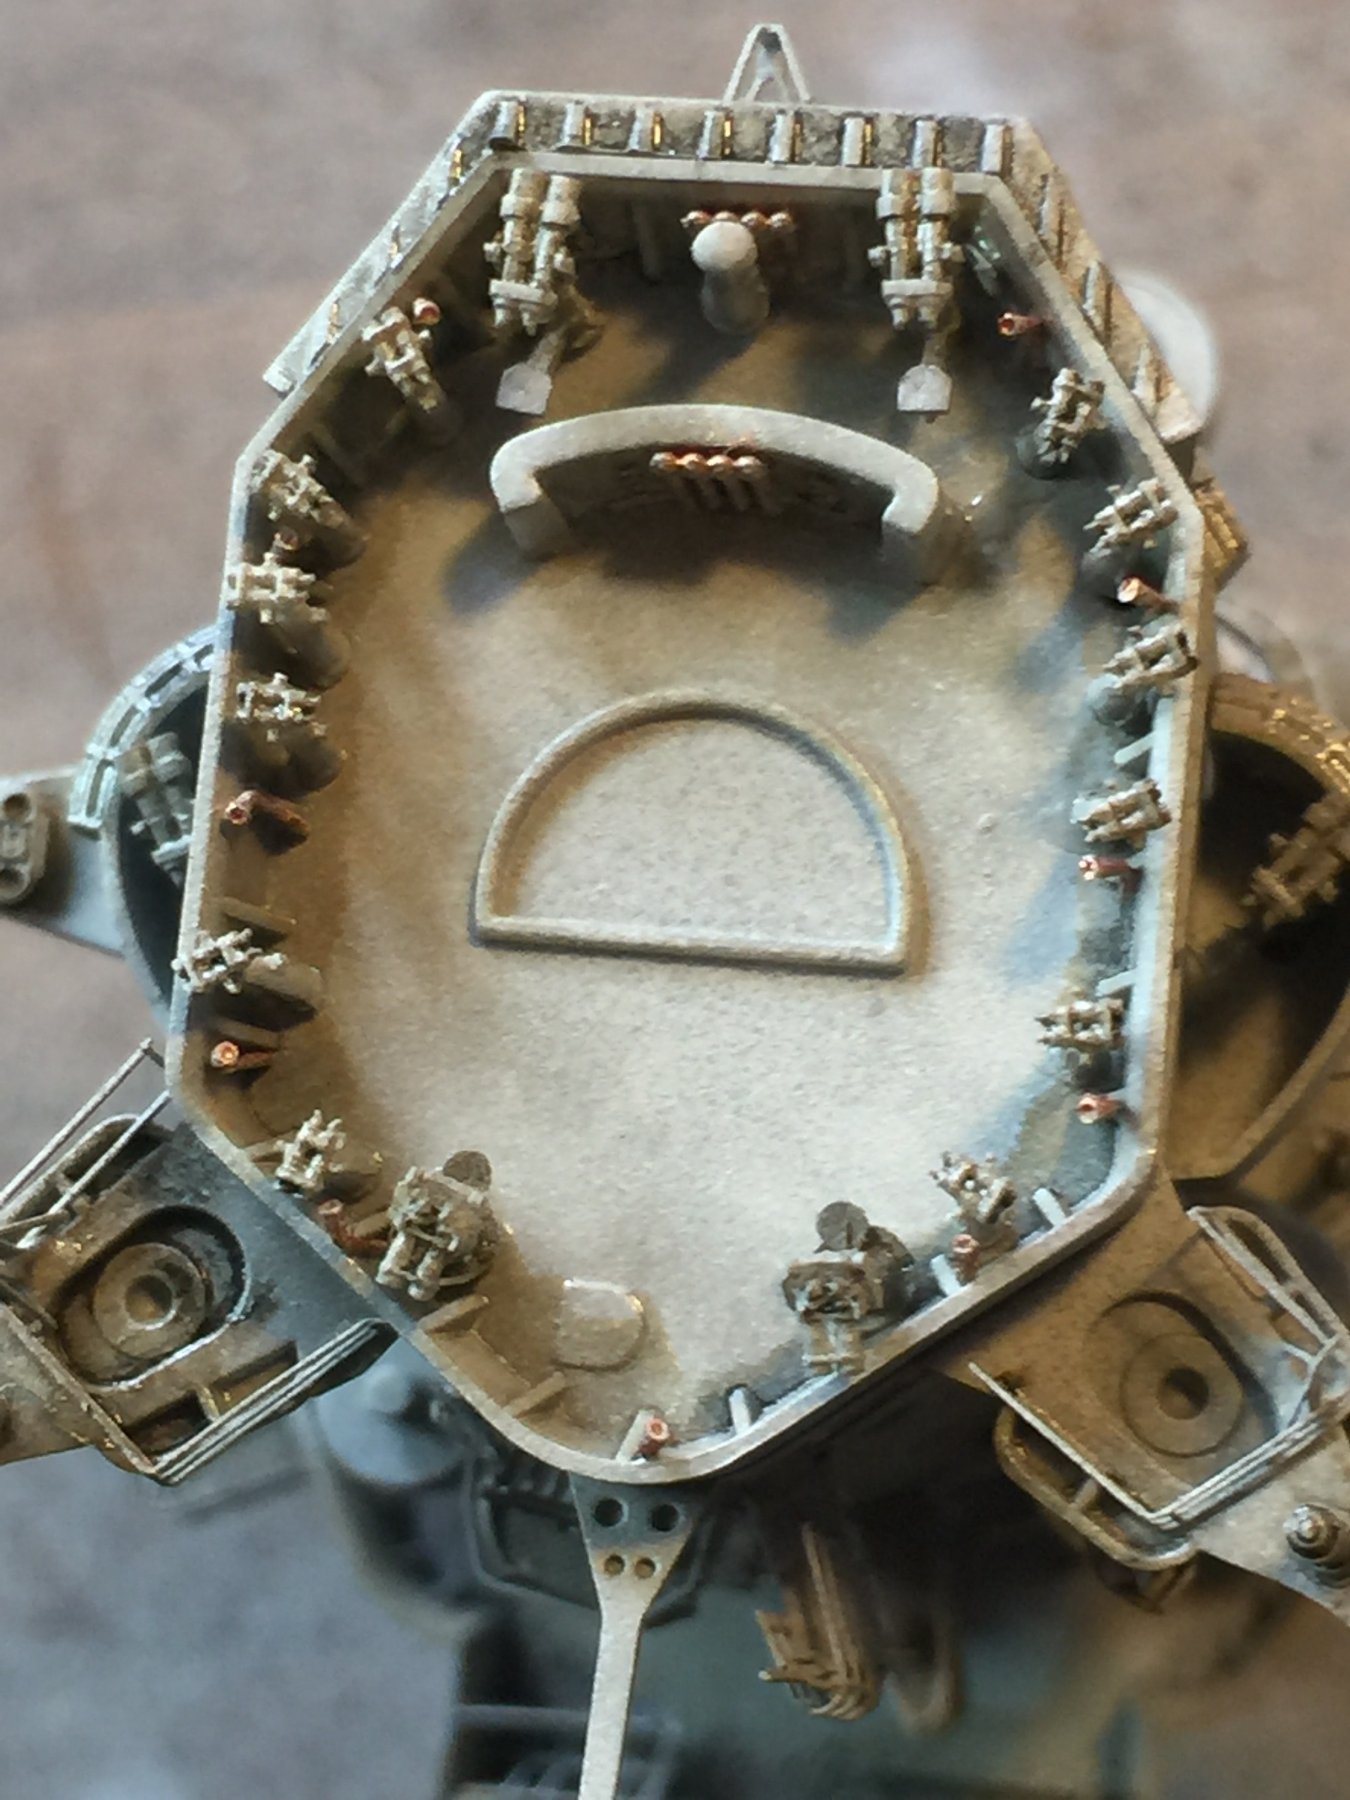
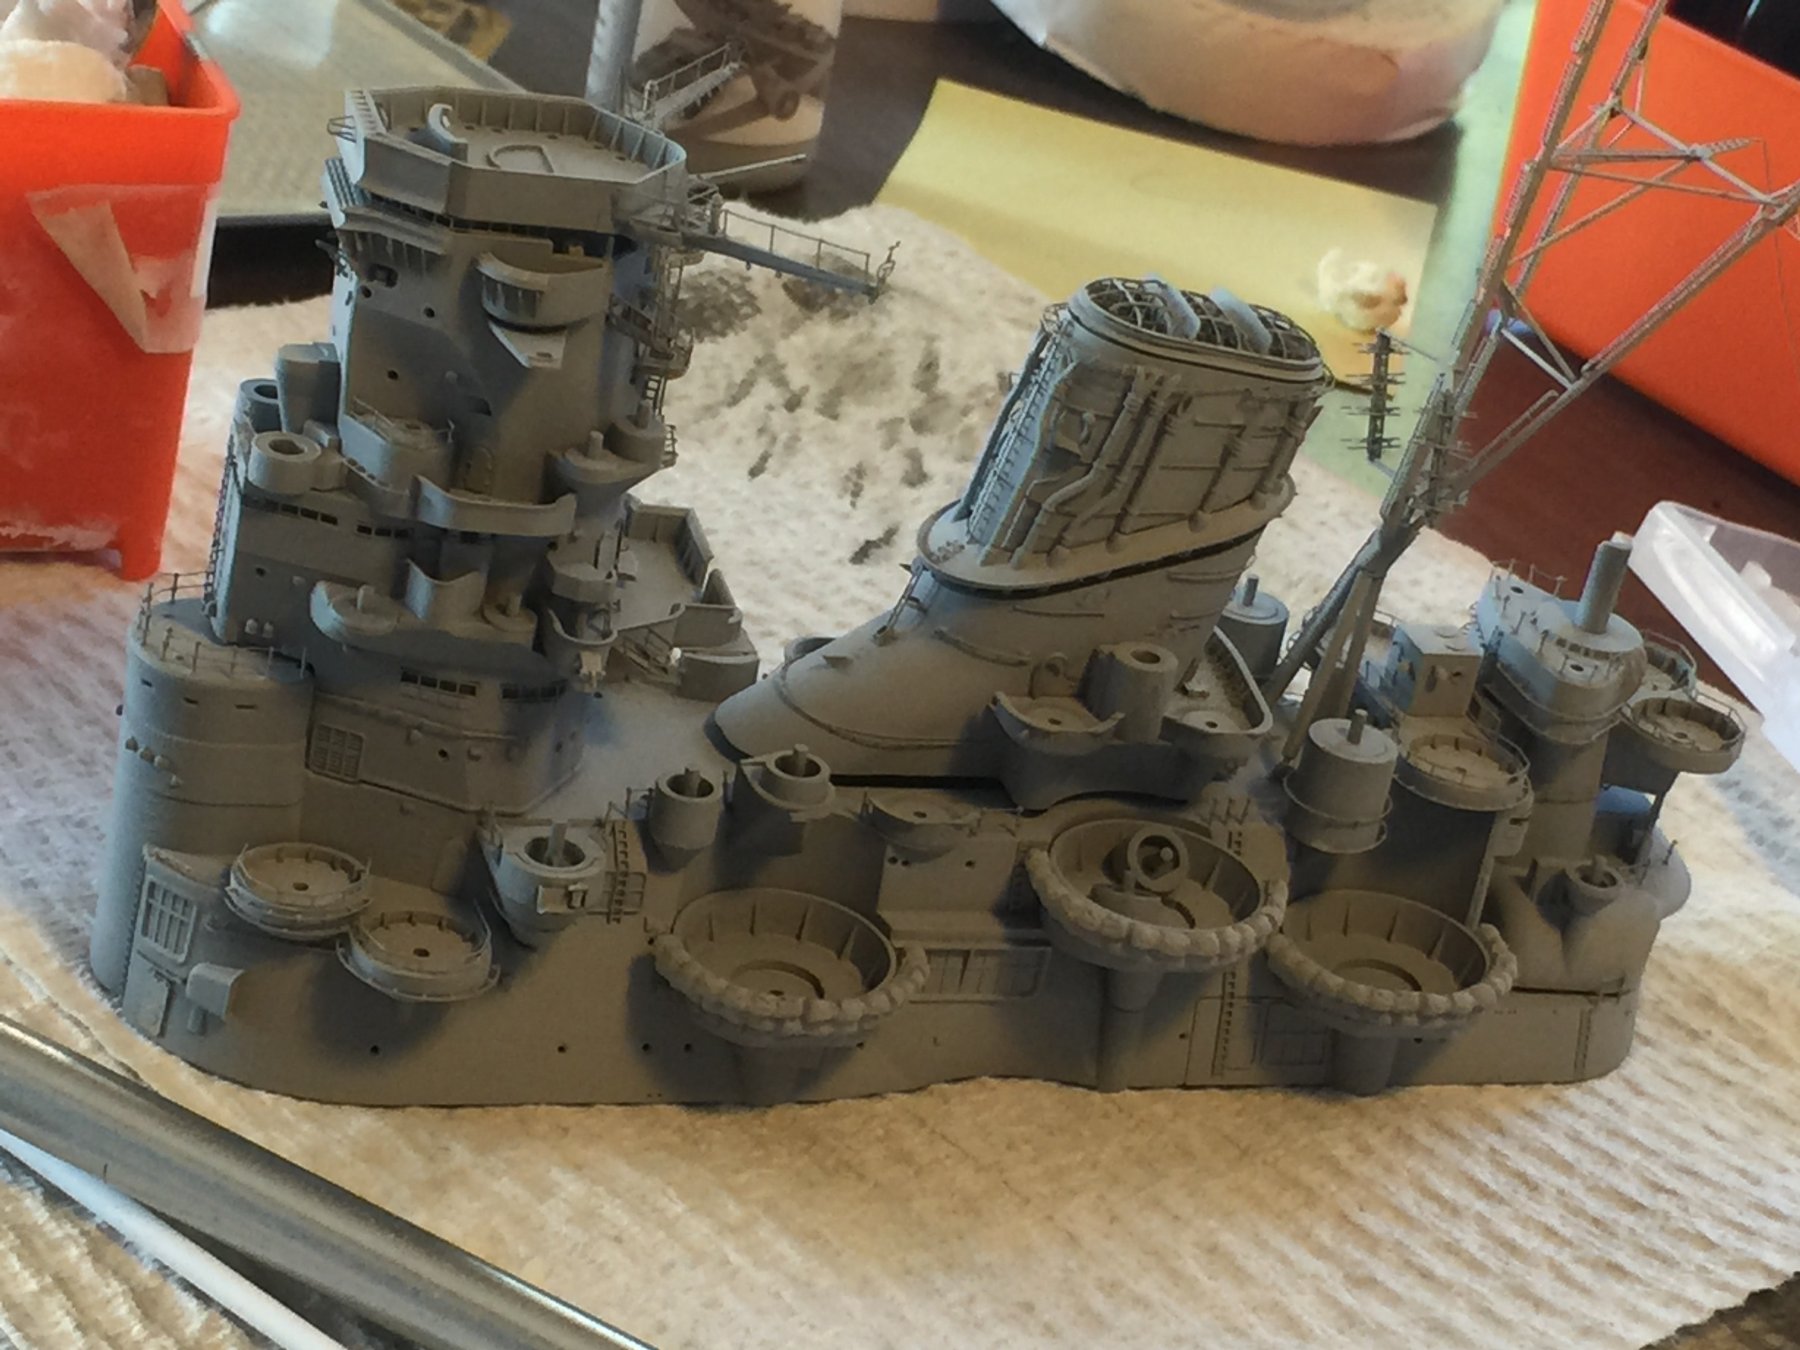
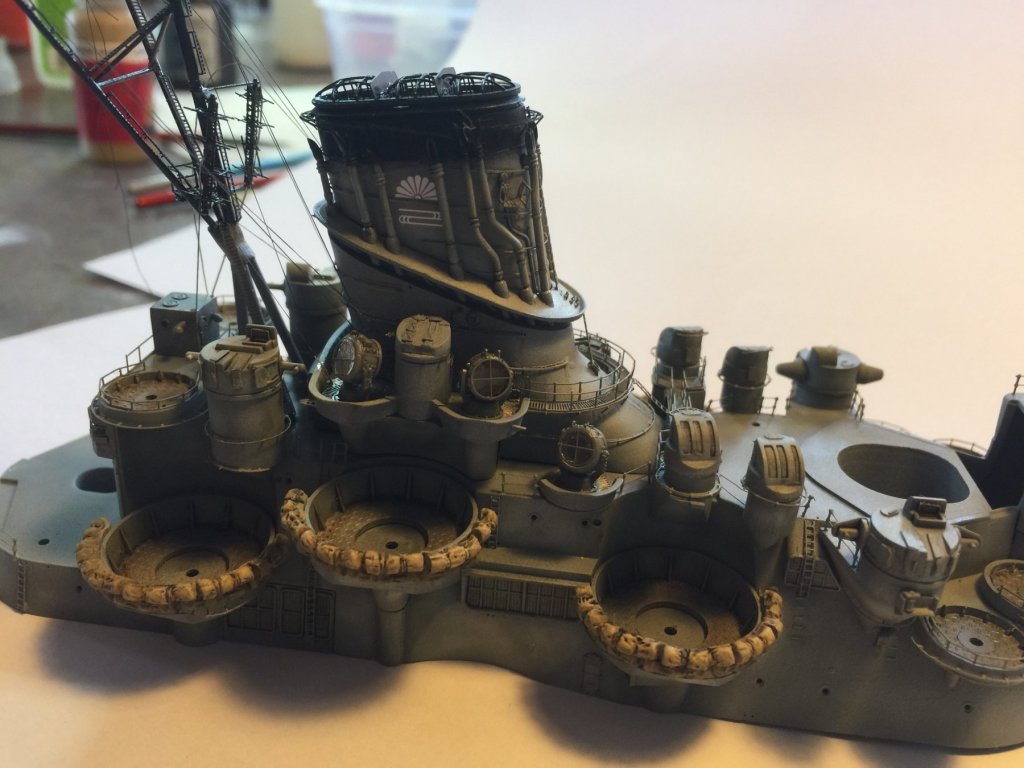
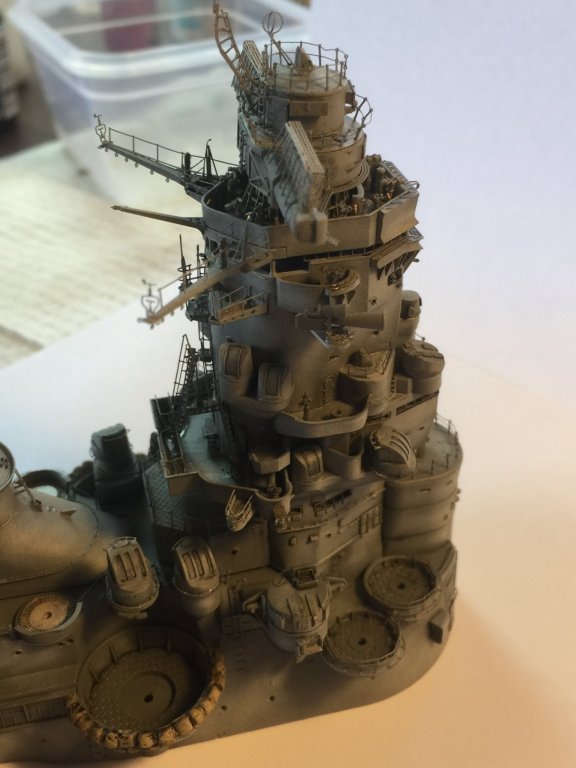
Now, all the fire control turrets are added and I have done a wash to bring out the details, as well as adding the radar. I am yet to weather it. All that is left is the search lights. I will not add the guns until I have done up the plethora of ammo boxes. I cannot even join the towers or tower until I screw the base of the tower to the deck, which I can't do until the deck arrives. Imagine my surprise when I discovered this afternoon that Tamiya has decided to use a dual combination of 1941/45 and leave6 search lights not 4!!! Anyway, the last photo shows how it will look with the sponsons attached. I'm happy with the results to date.


- 743 replies
-
- 28
-
-
Cog, nothing worse than a back injury, they keep coming back to visit you. I thought you'd been quiet. I have done the platform up behind the main tower up tower up some time ago when I did the sponsons, I'm trying to get my order of construction in my head right. All the references say there was a practice loader on it which I am yet to find in aftermarket. Looking forward to seeing you back in the saddle. greg
-
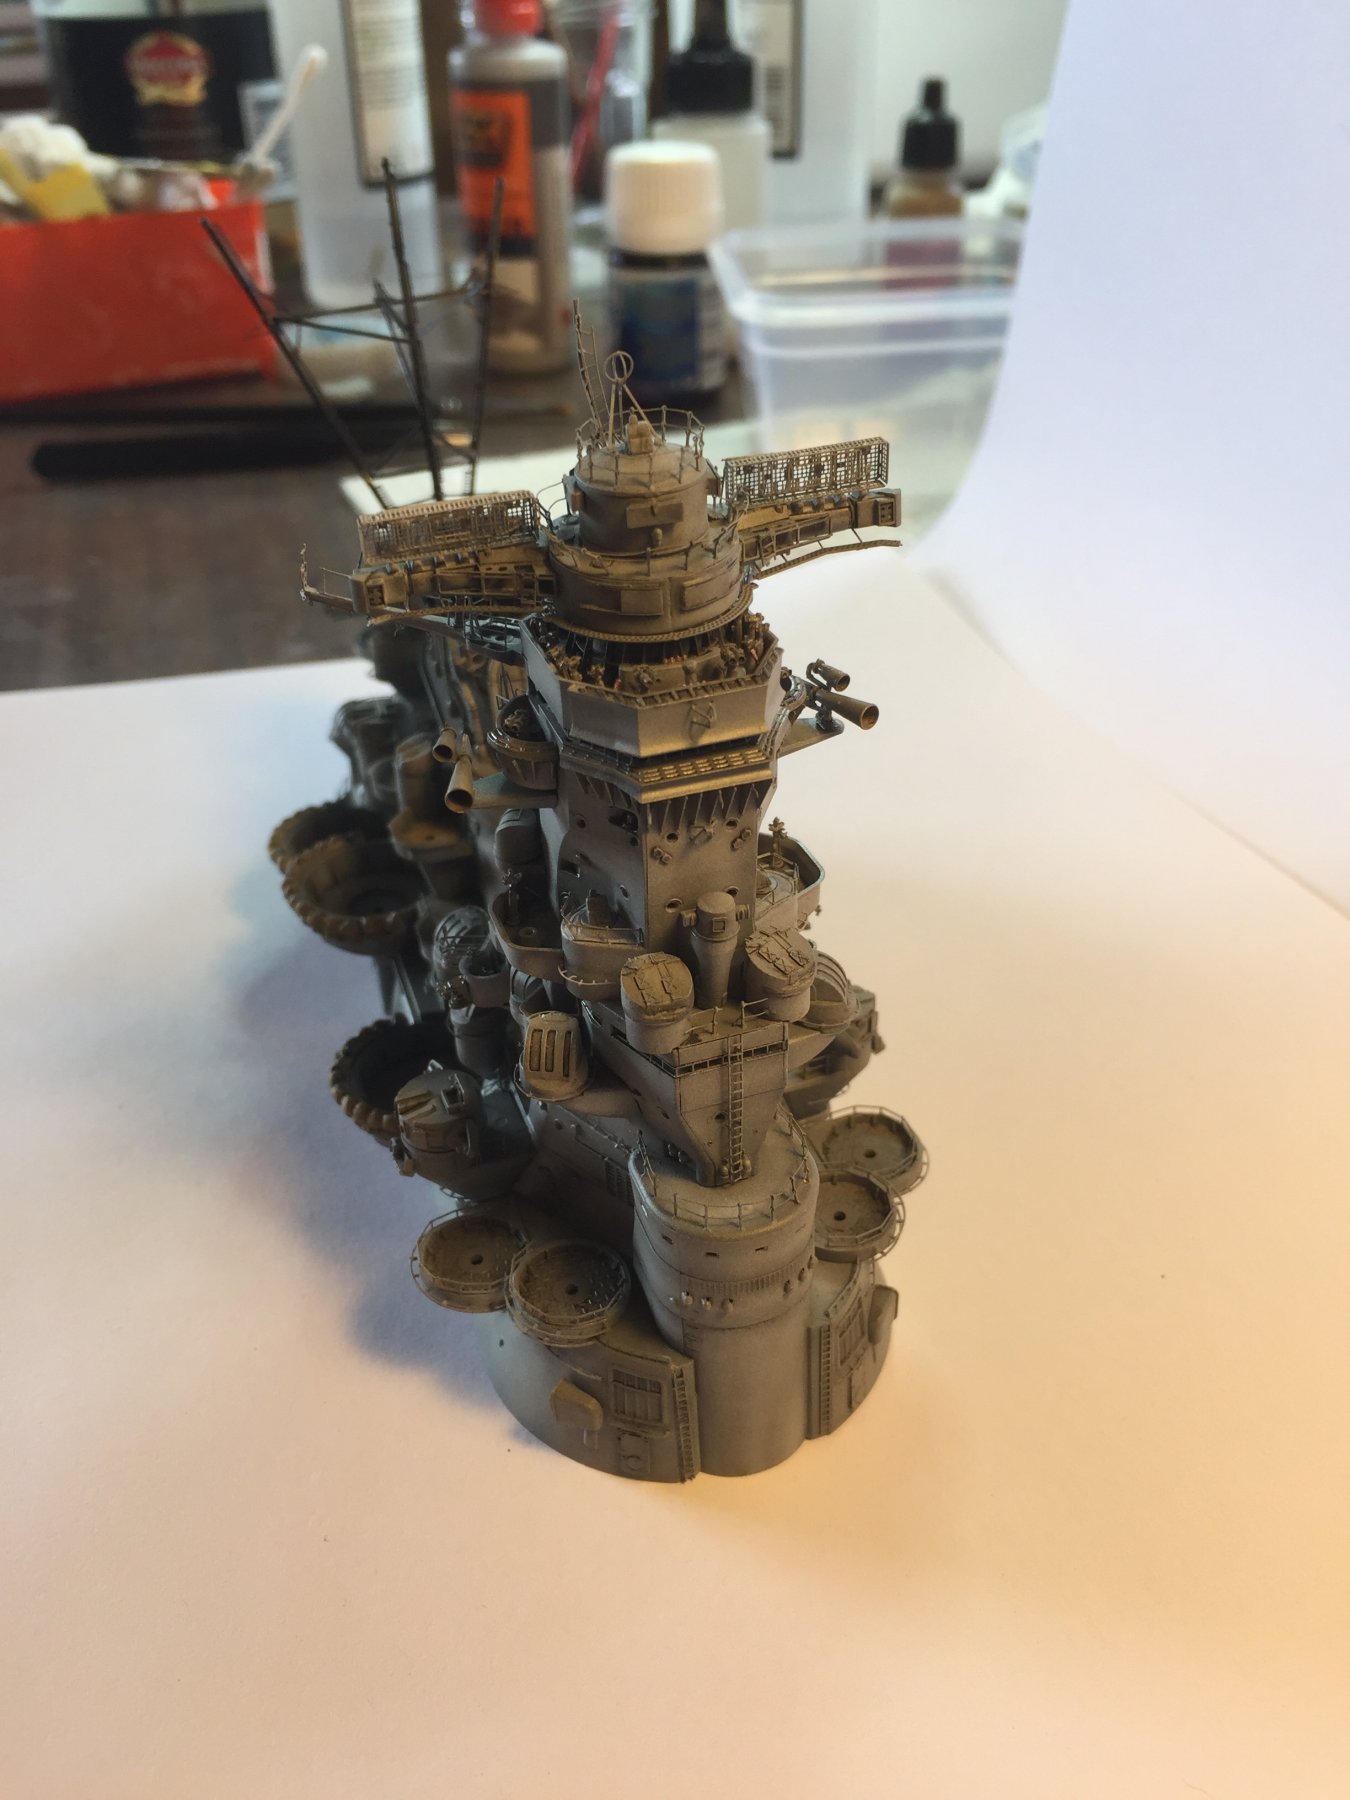
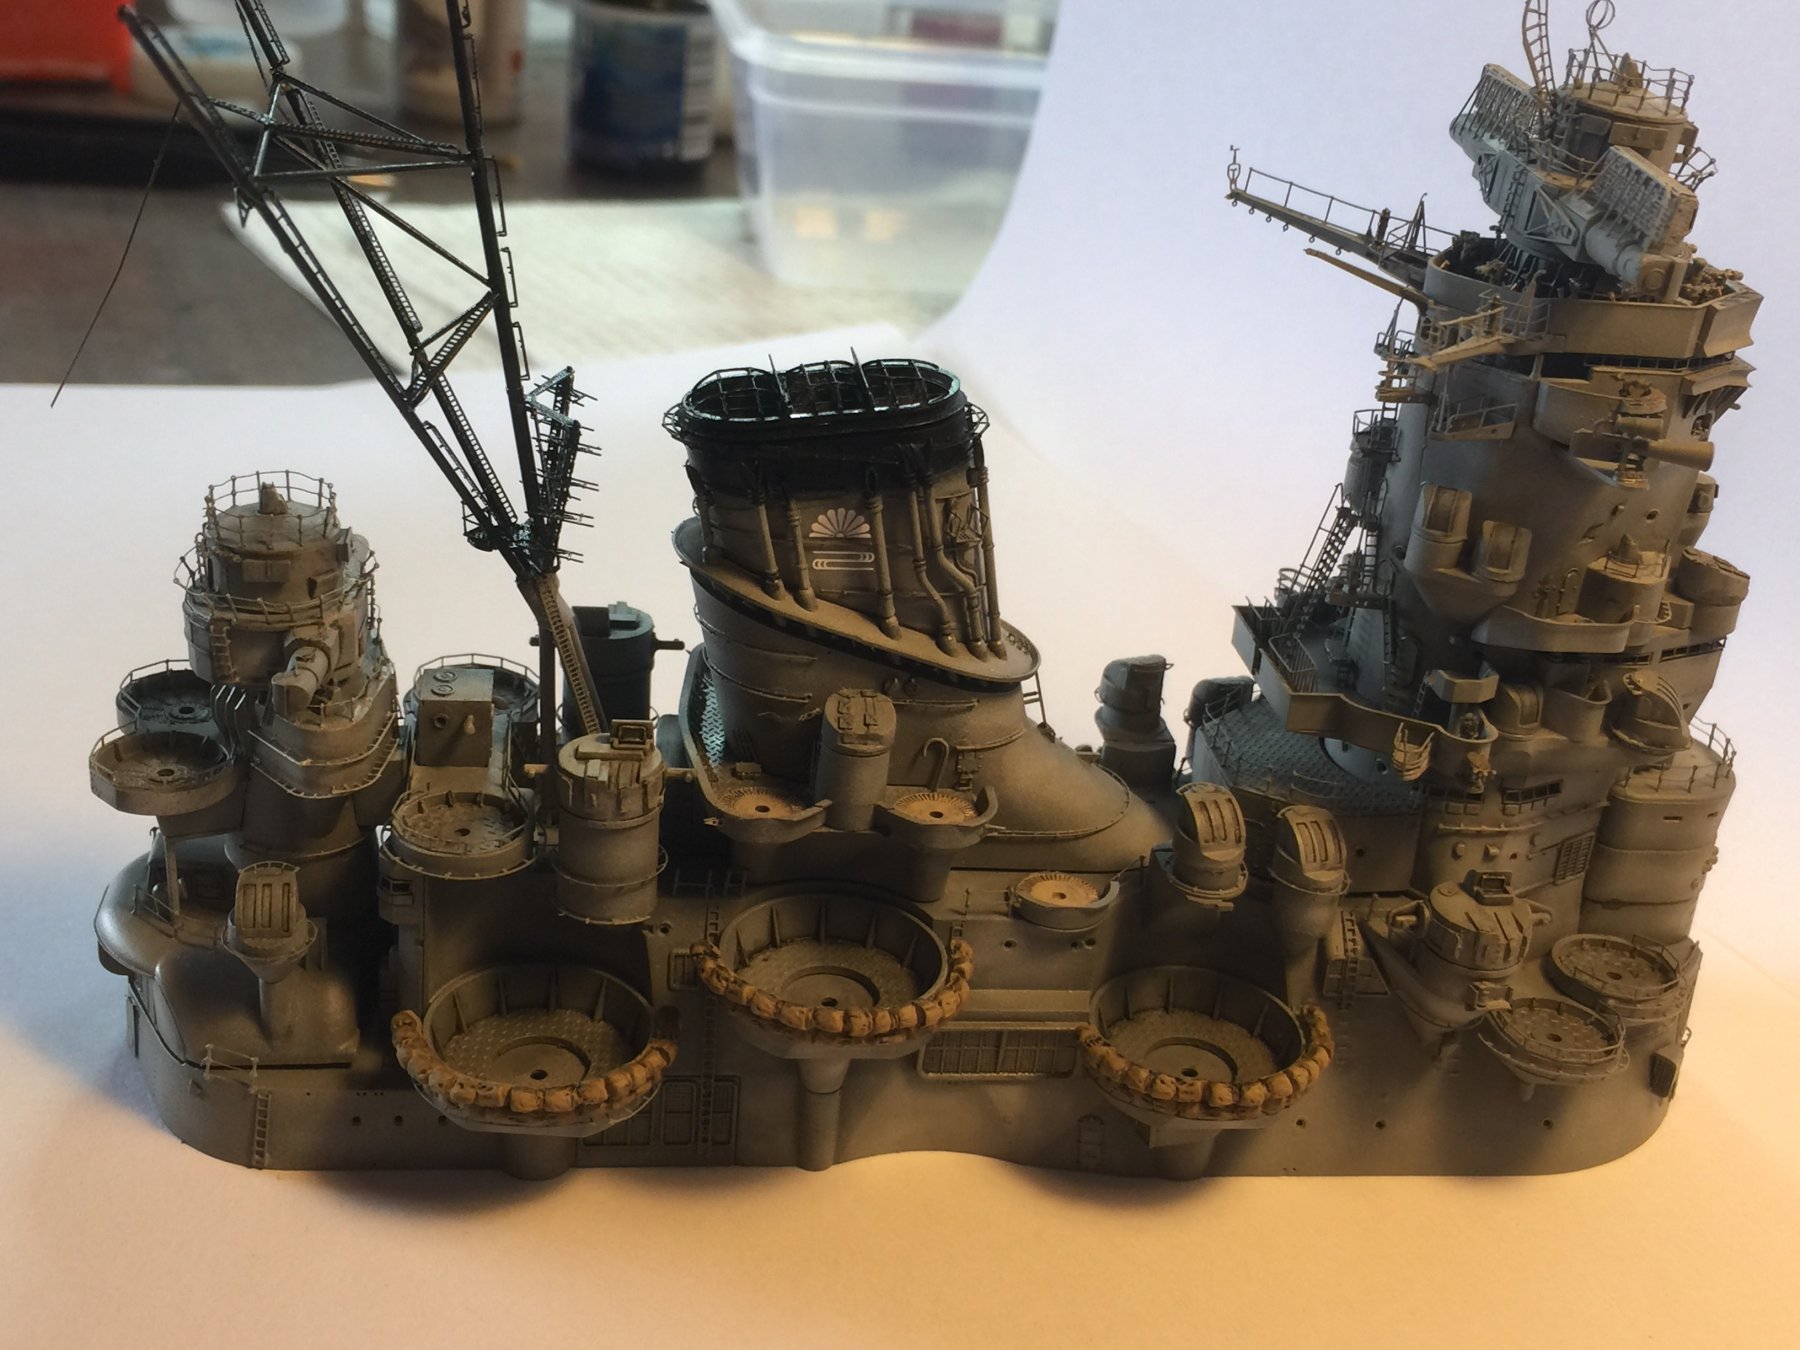
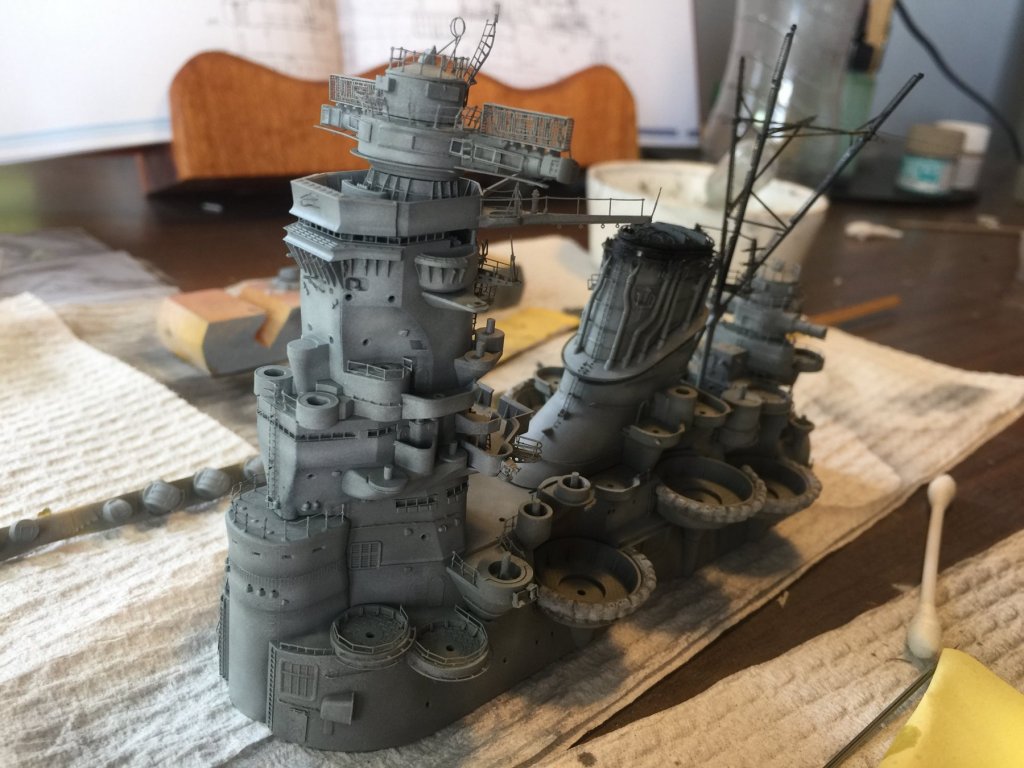
Grey coats added and a rest fit. I have to fix up the funnel top black ring, add a filter and washes, then paint the sandbags, weather it and rig it. More ladders and gantrys to go, then add the extras. This is a massive piece of work that is almost done.
- 743 replies
-
- 19
-
-
Probably why there are so many handrails all over the thing. Once this section is painted I can get a lot of rigging done amidships so I just have to plonk it on when the deck is added.
-
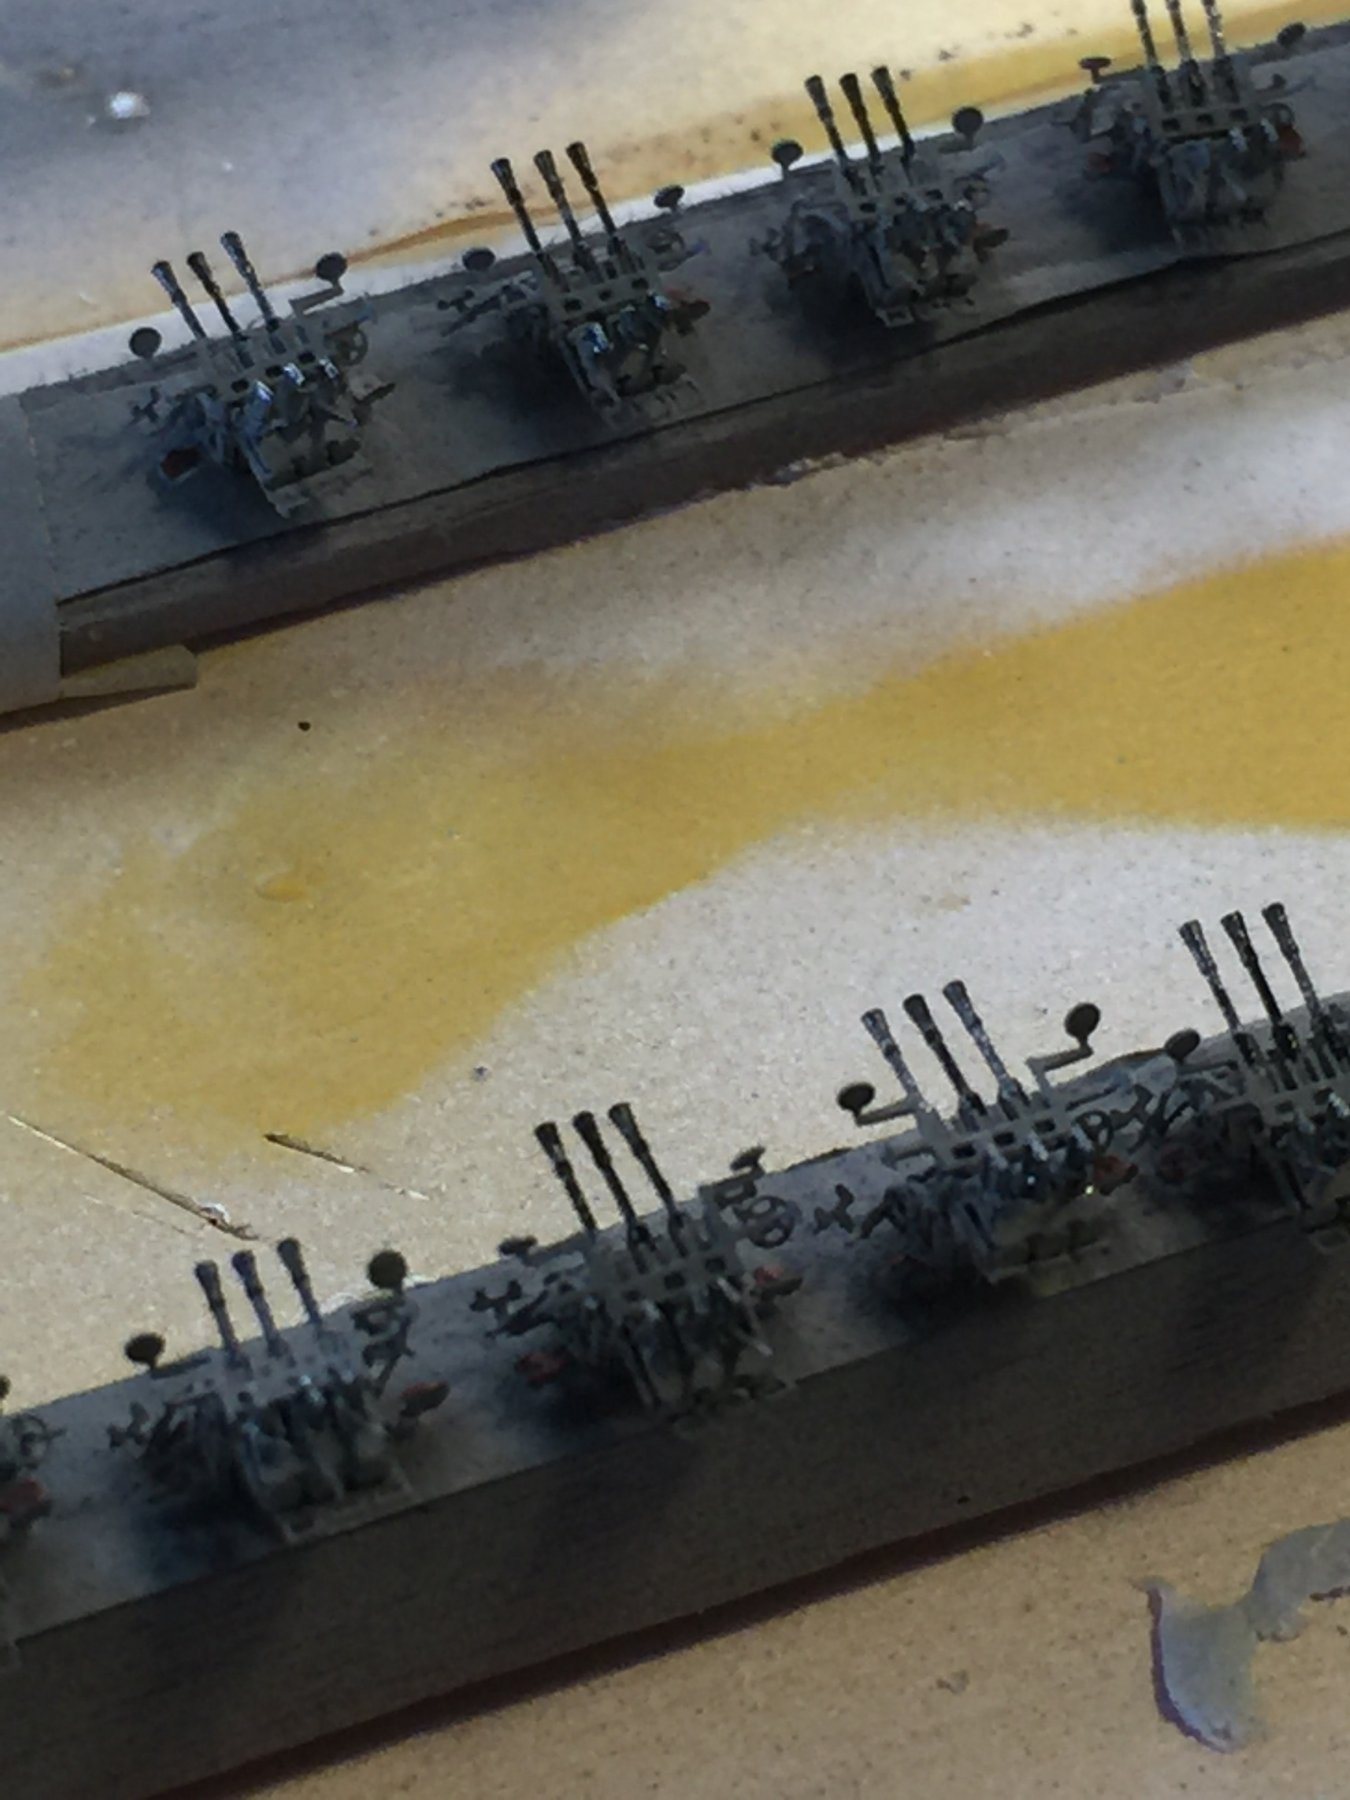
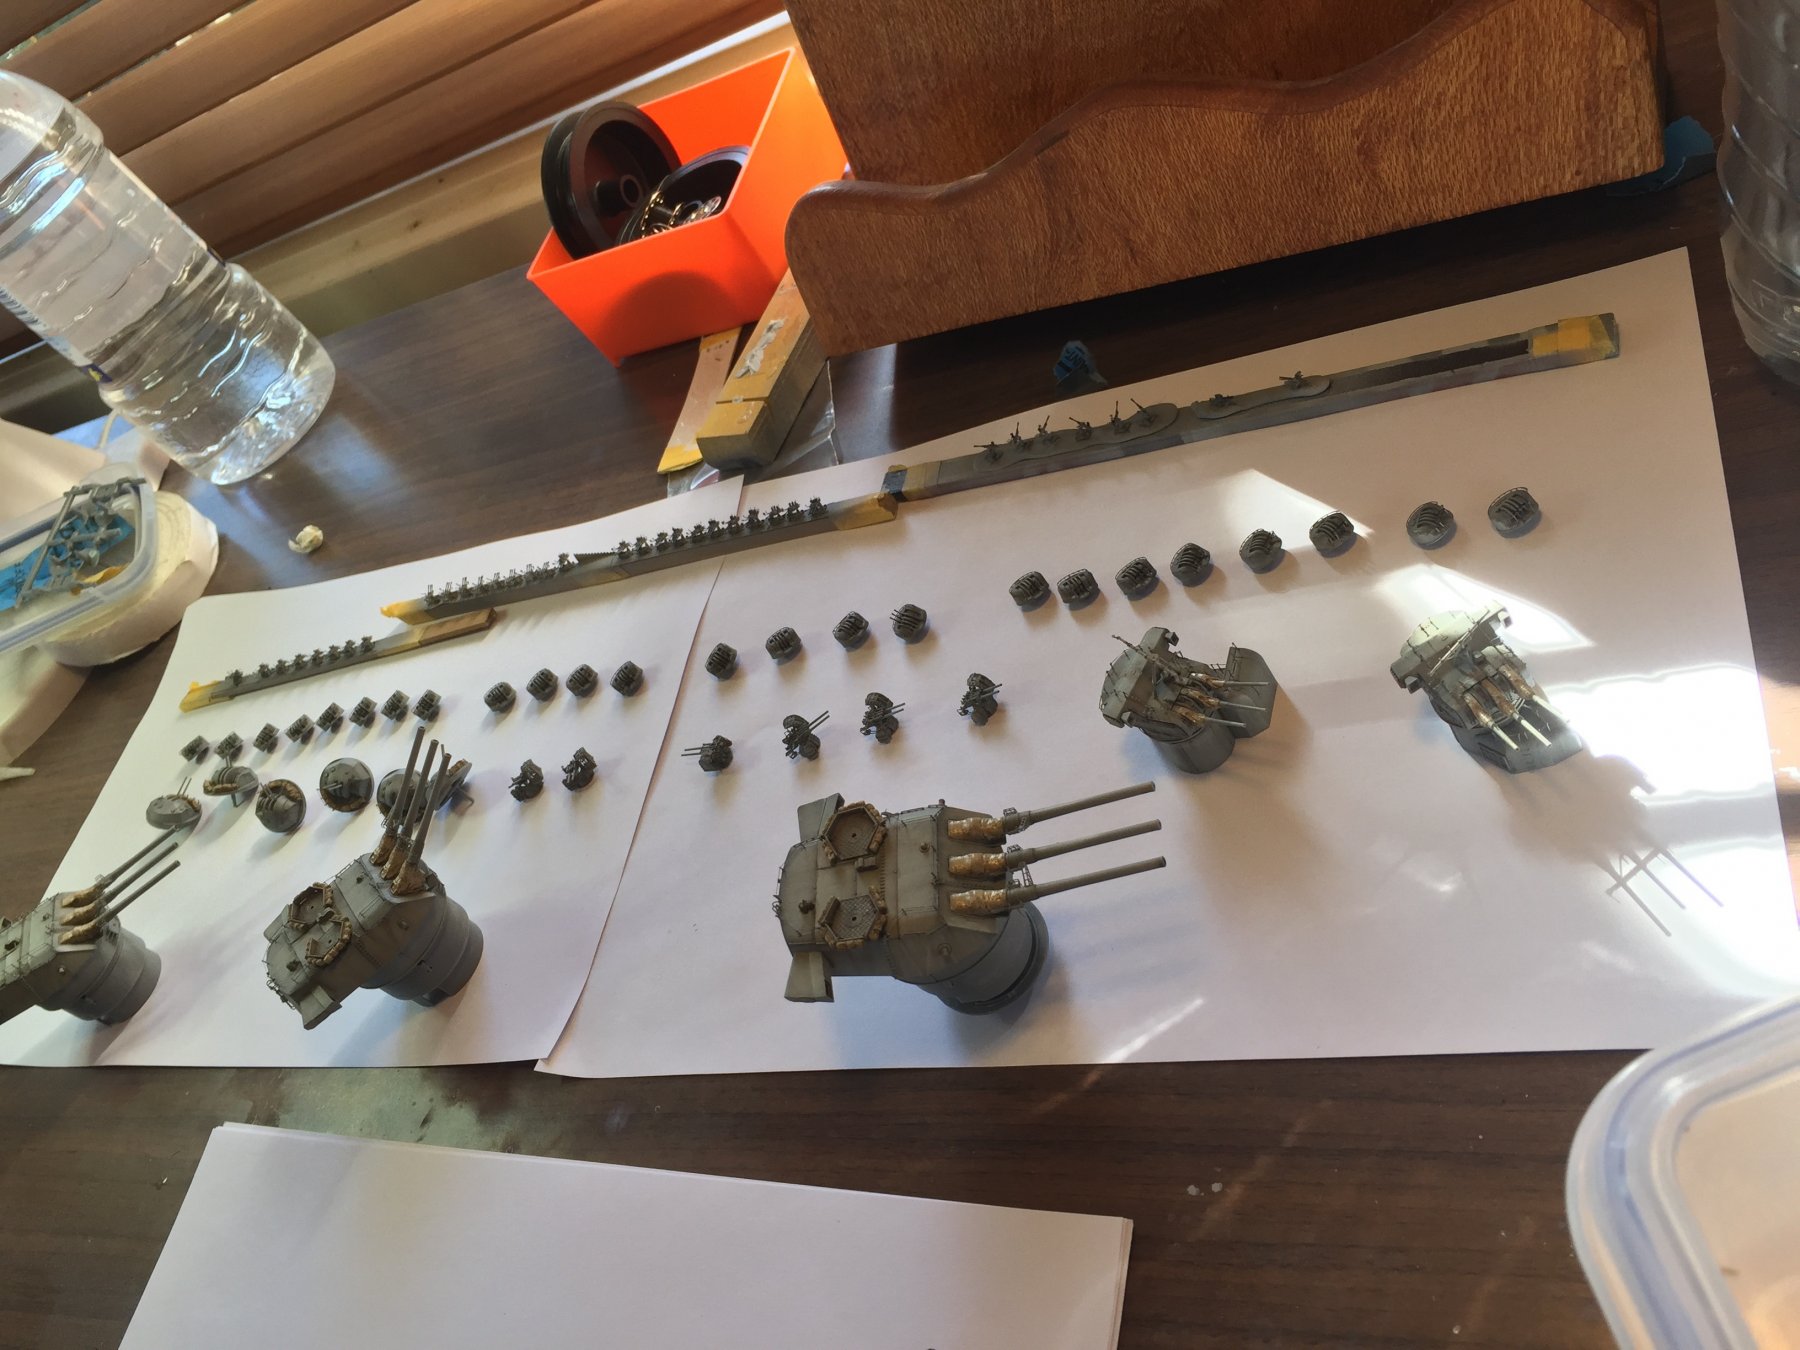
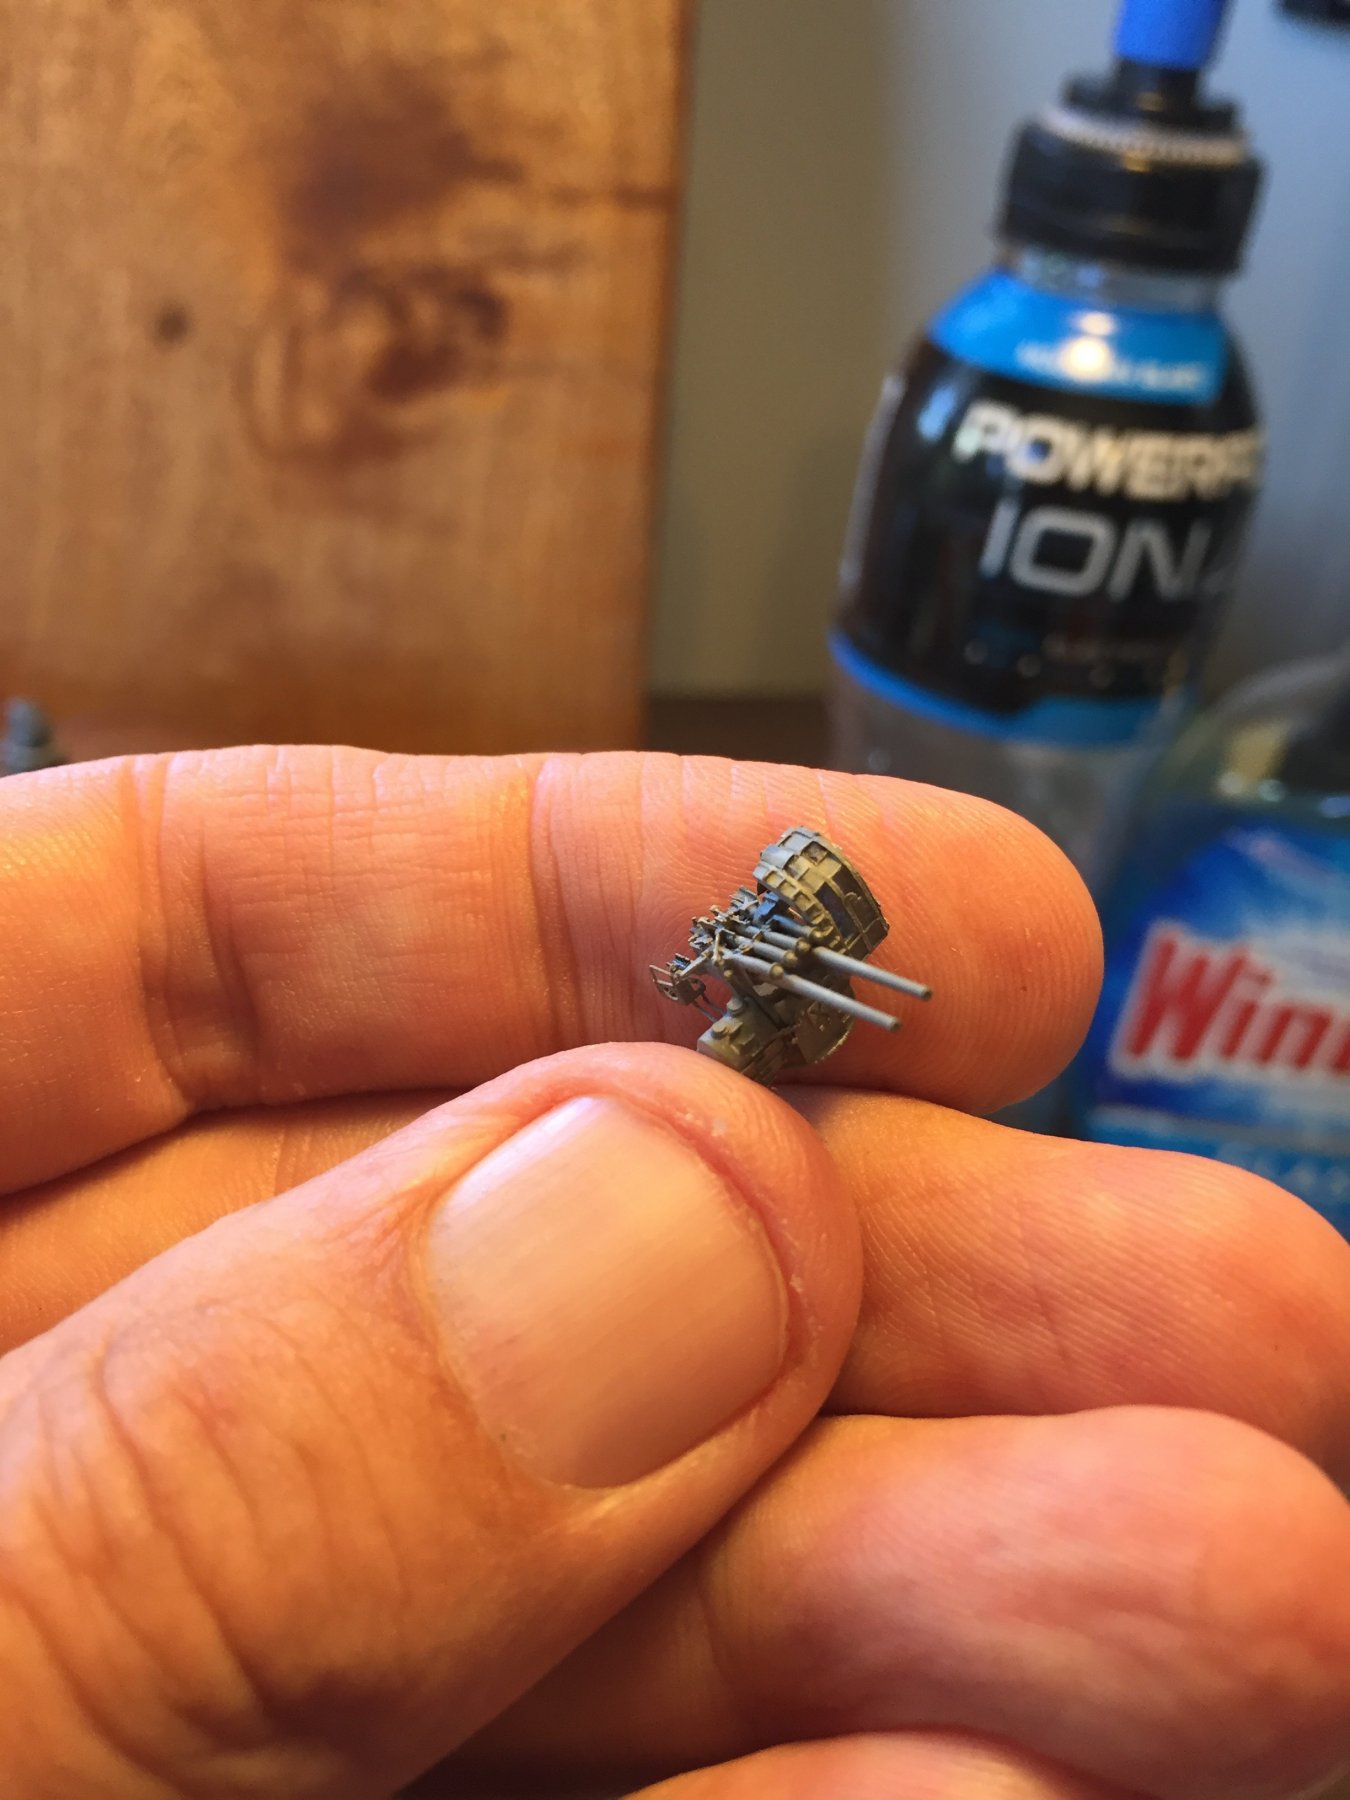
The 25mm open mounts painted, I may yet replace/redo the singles. Finally, all the Yamato's guns are finished. 75 plus!!


- 743 replies
-
- 19
-
-
The last gun turrets, 24 of them! I have added covers for the ventilators, replaced all the barrels, placed handrails and stanchions with ezyline as railings. From boring little blobs to half decent guns.

- 743 replies
-
- 15
-
-
Yes mate, I did a google search on something and my name turned up on about page 5. Not a good thing in my line of work.
-
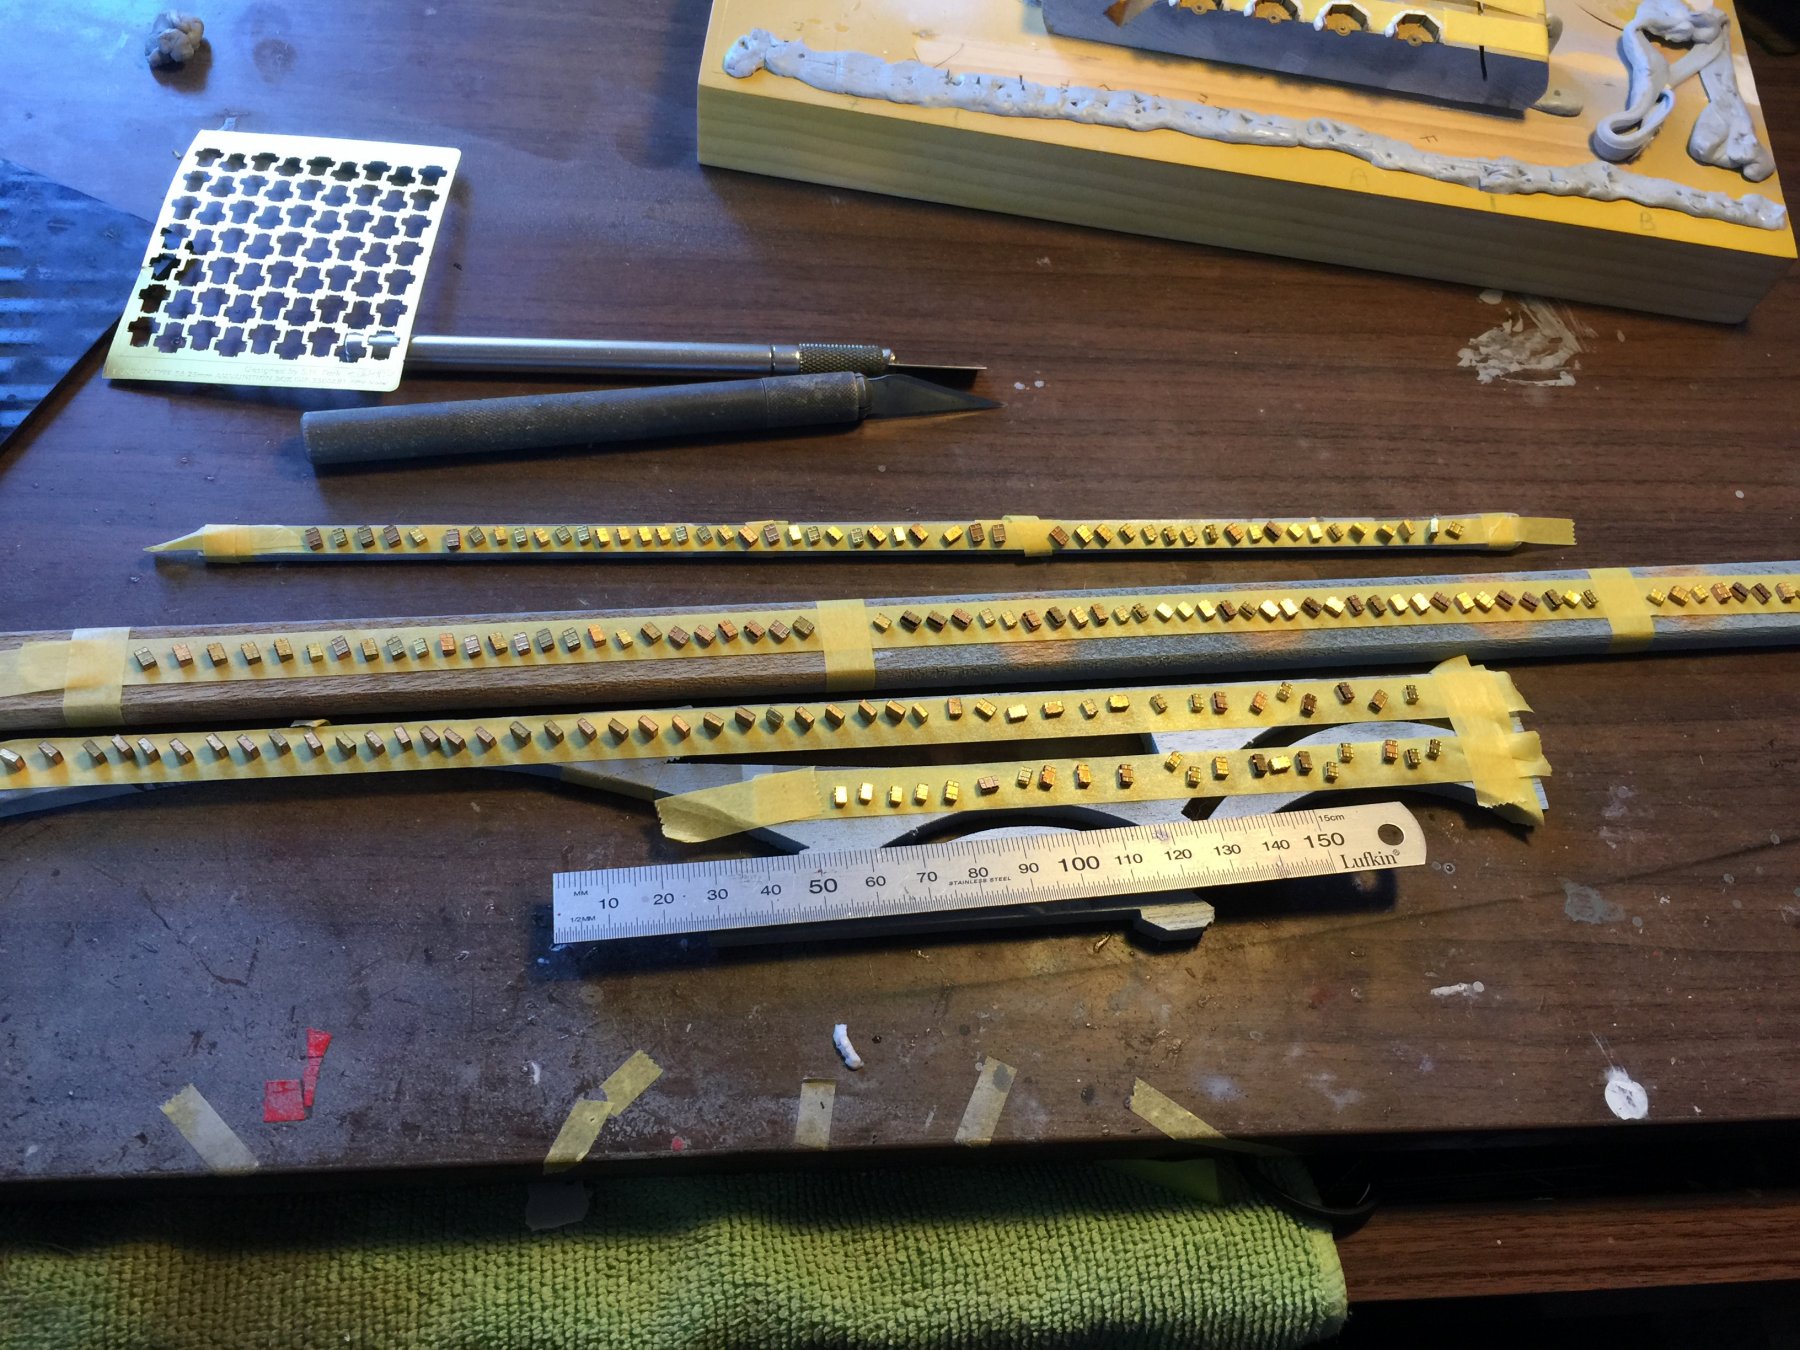
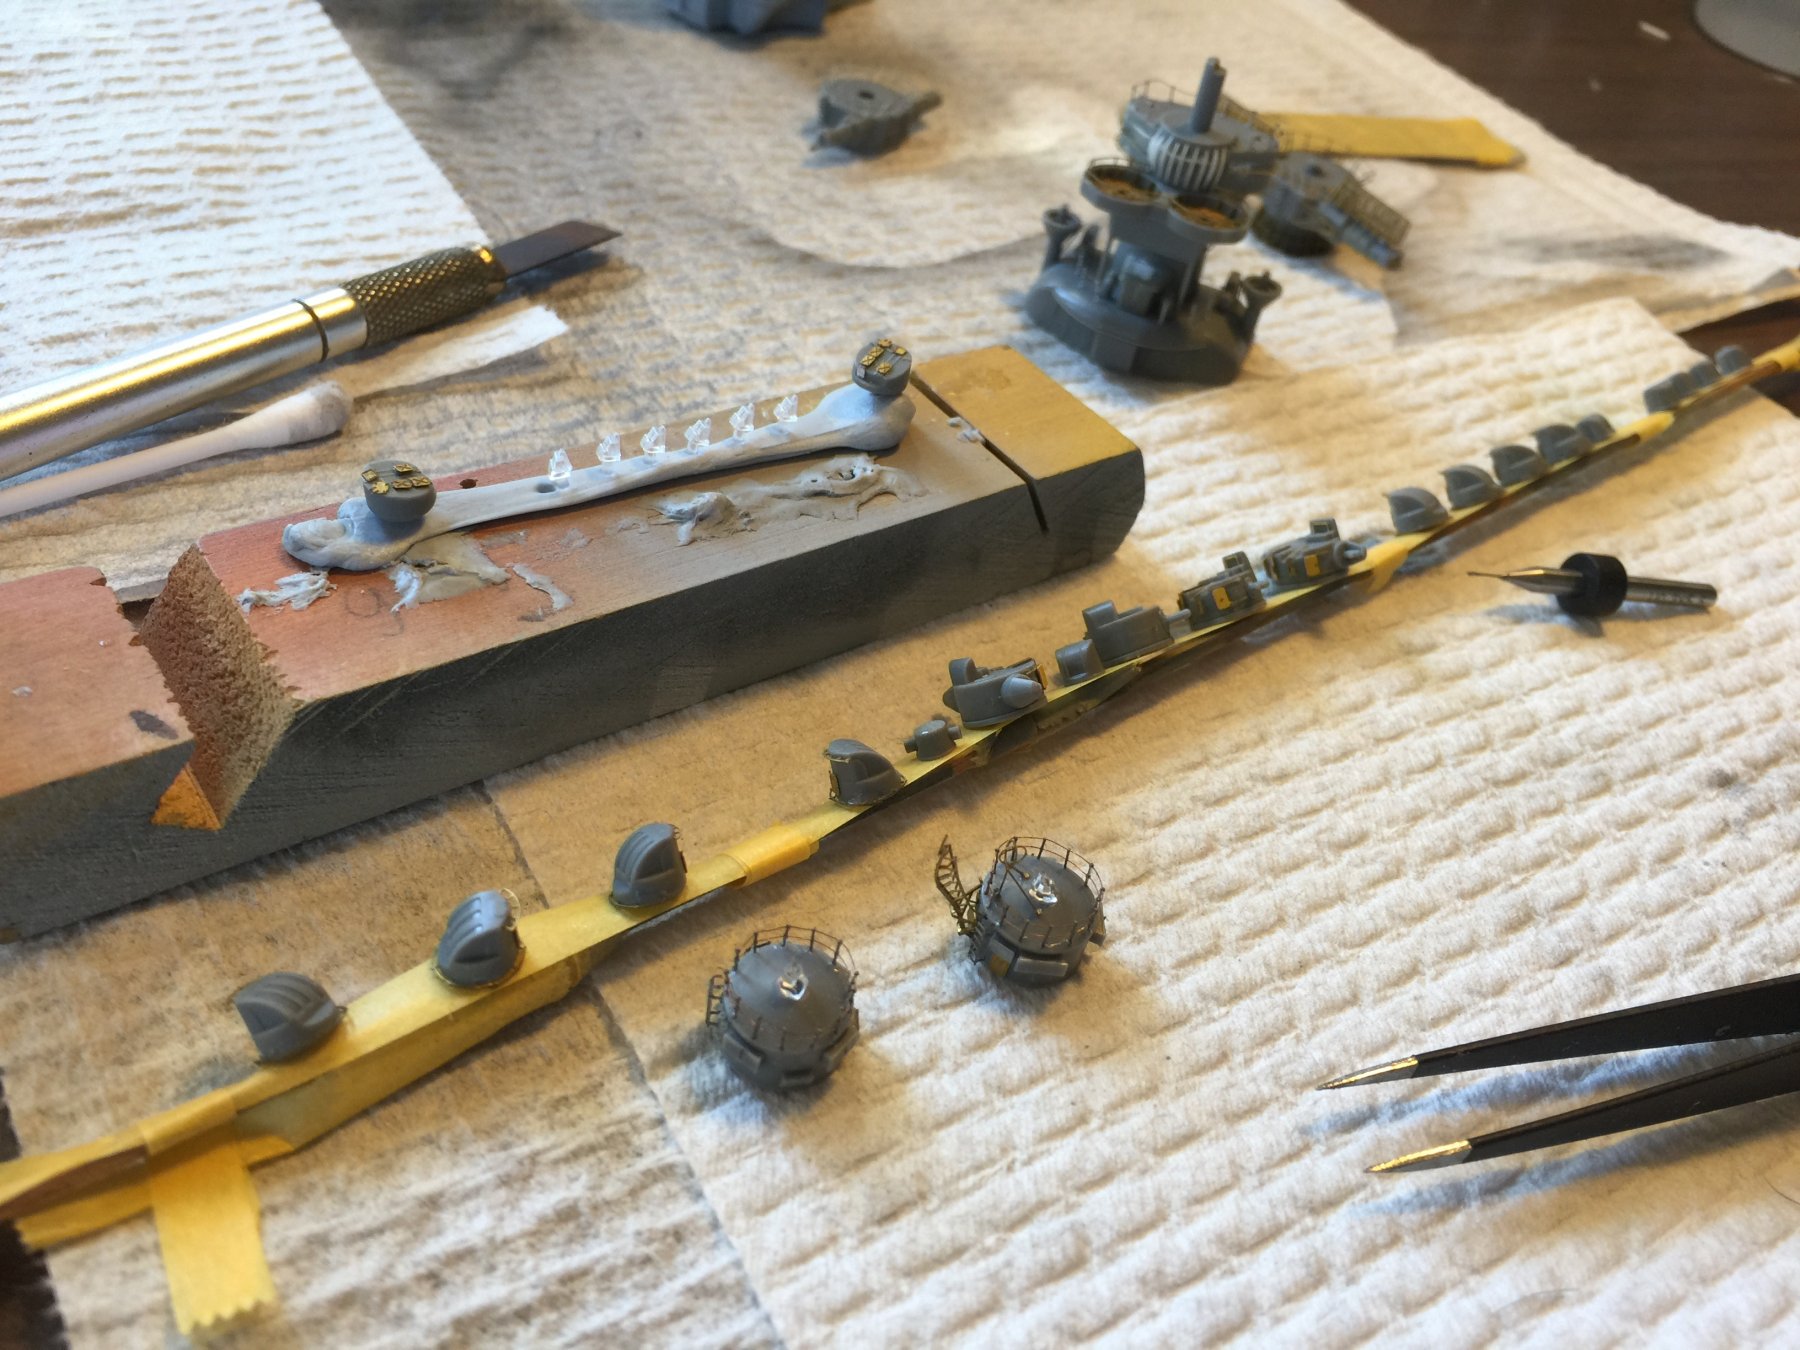
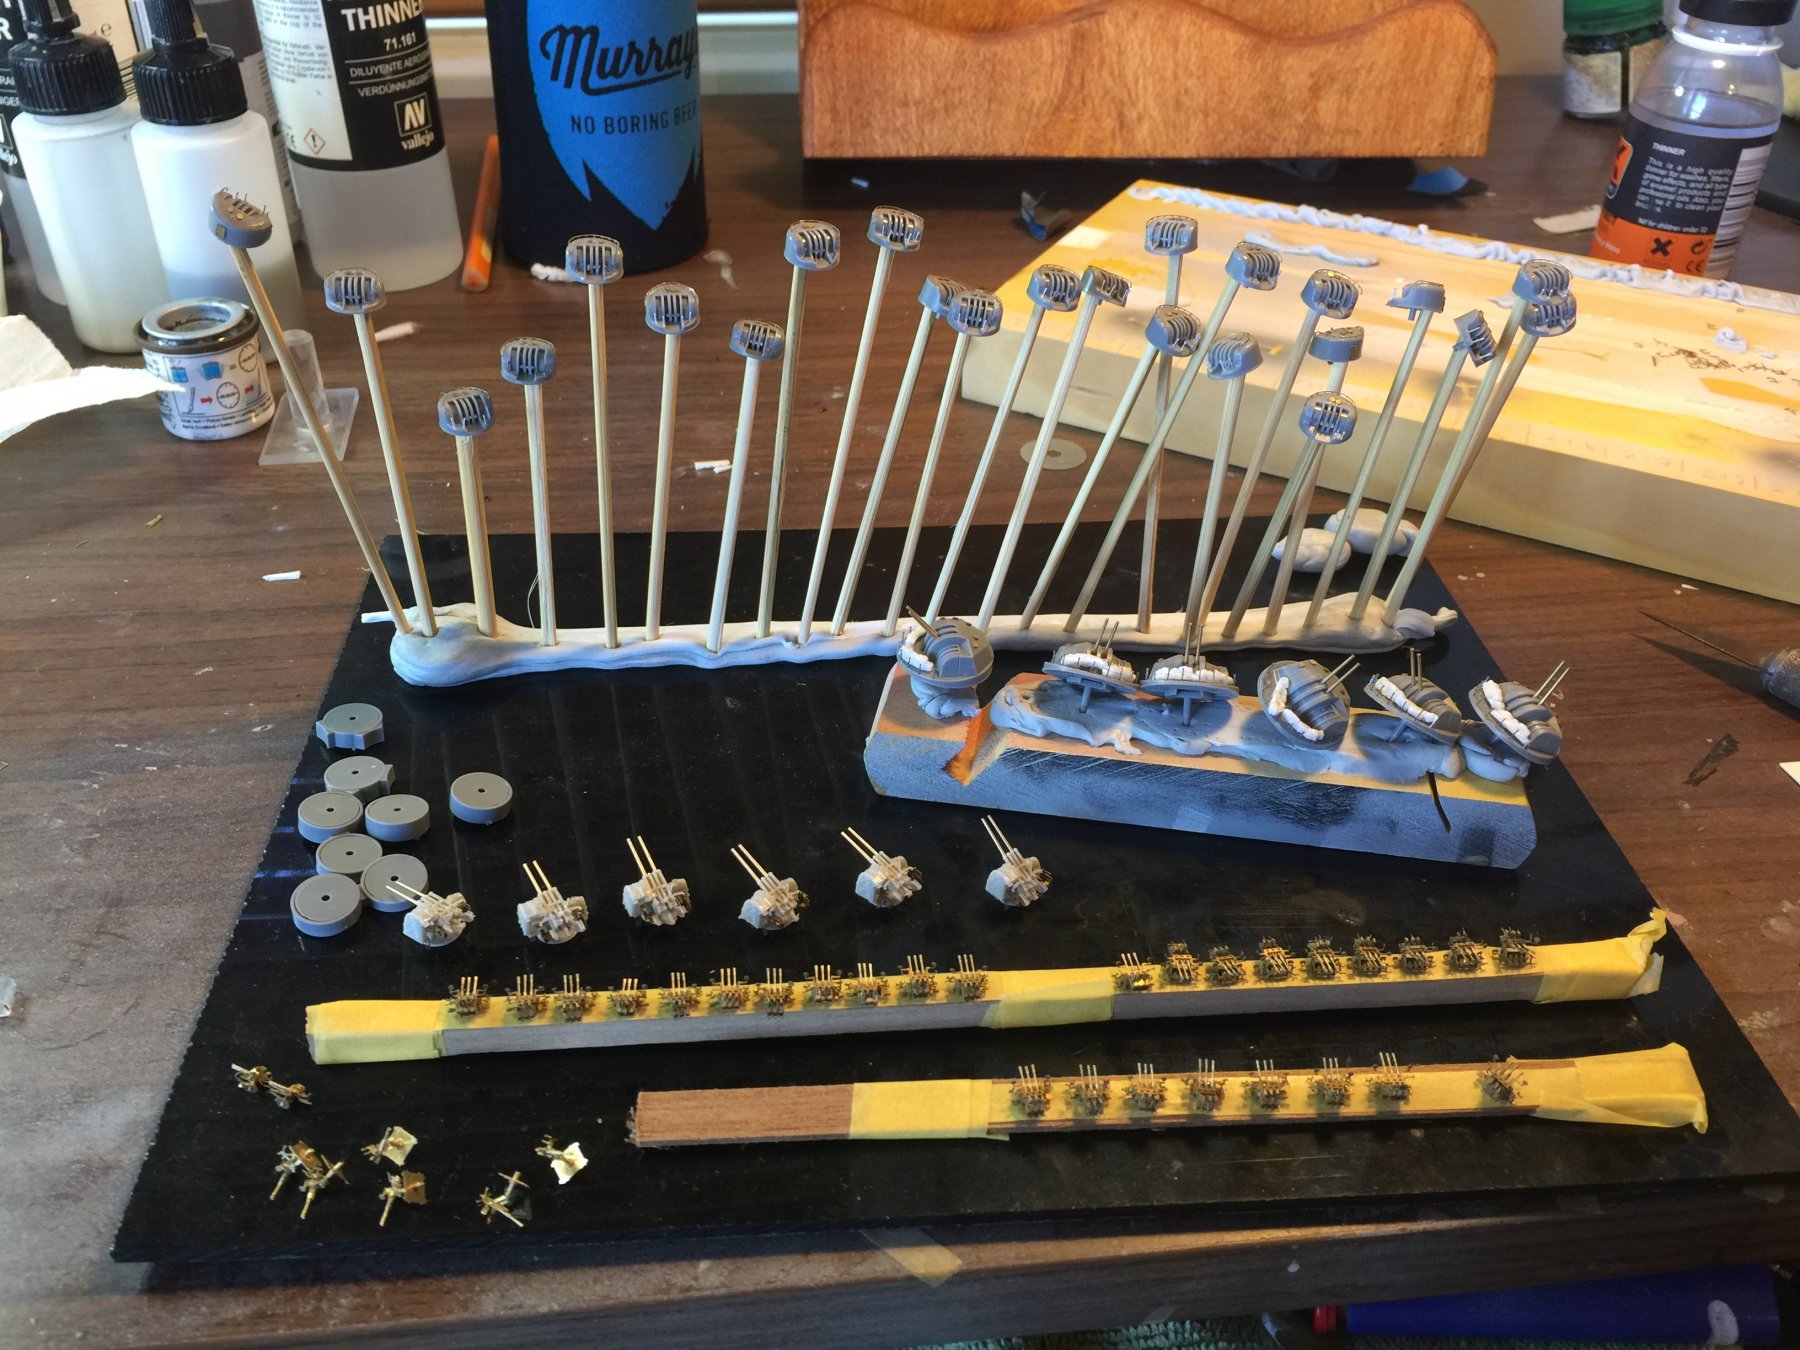
Thanks Mr Rabbit, I'm in the process now of threading 96 needles for the smaller turrets railings. I have used blackening solution to do most of the small 25mm's barrels, and I am considering my third re do of the single 25mm's. The triples will have to do. Im looking forward to not doing guns. I have ordered replacement davits for the side of the ship as the plastic ones look, well, plastic. The Pontos kit comes with a stained teak deck, and apparently it was black at the end which means I've had to order a black deck (which of course Pontos make separately). I never thought this this would be a 12 month build, but there is still so much to do!
-
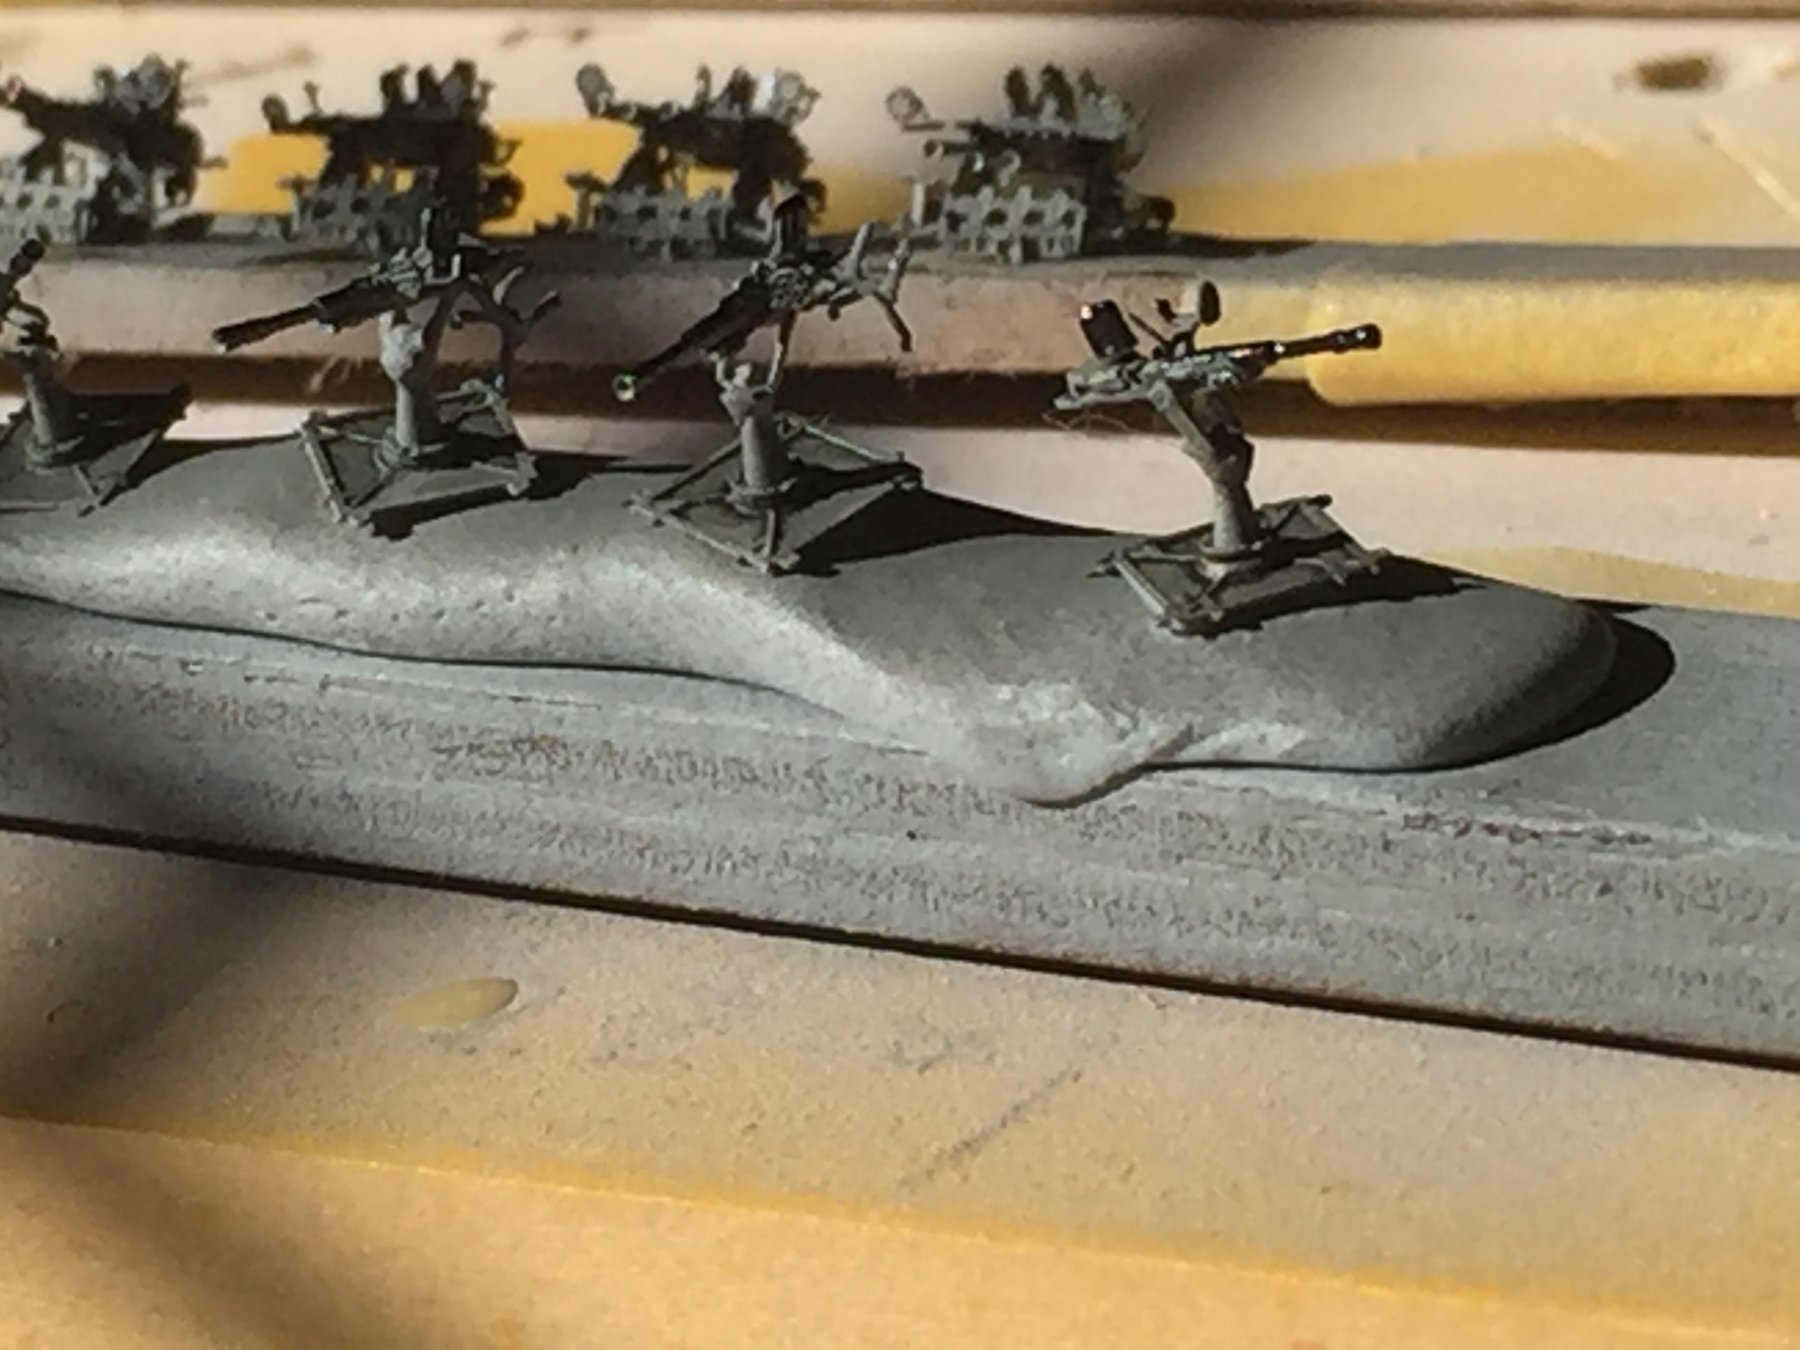
Finally finished something! The 12 AA guns. Now in a box and awaiting attachment at the end.


- 743 replies
-
- 15
-
-
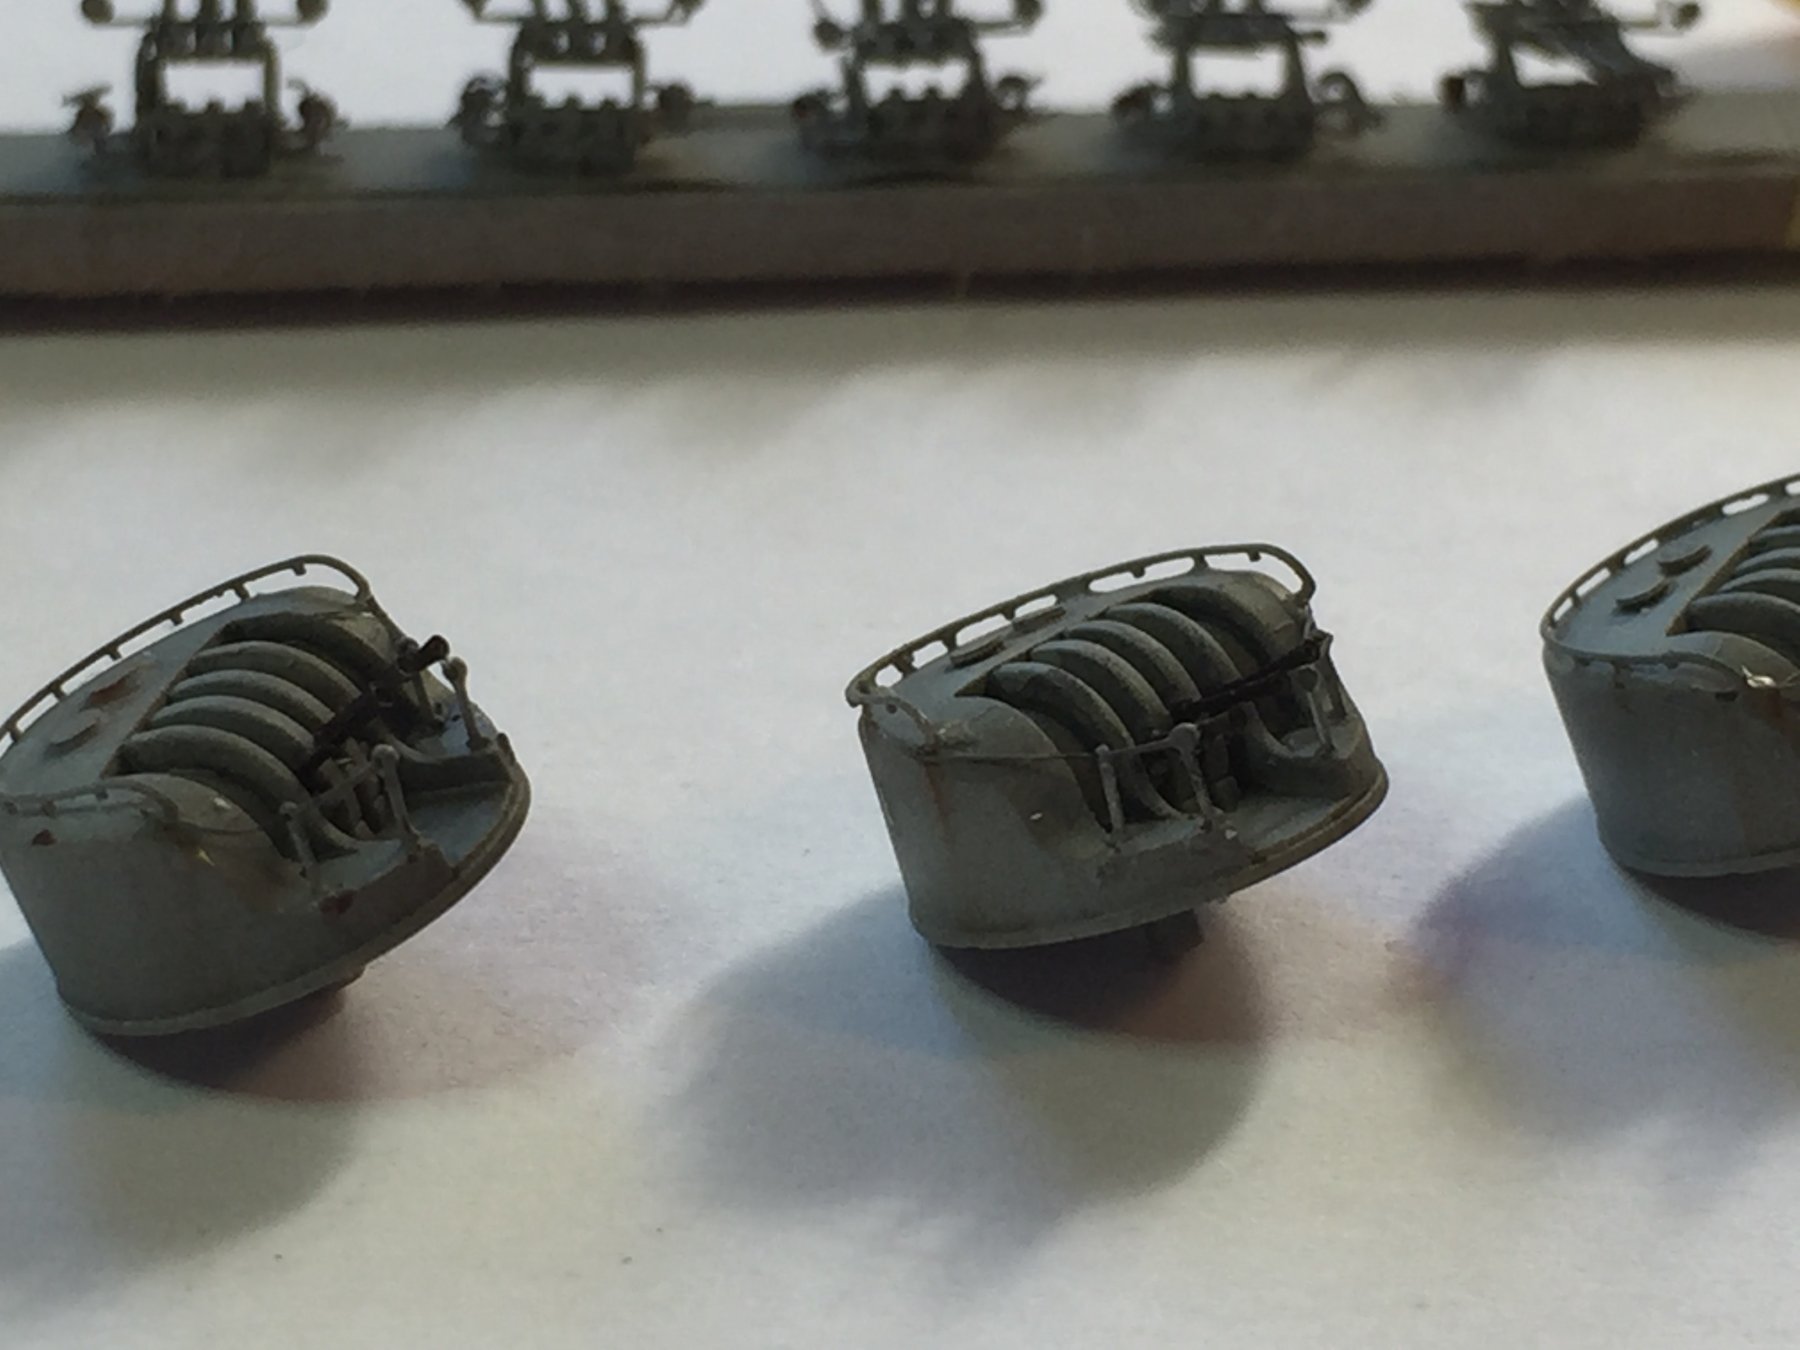
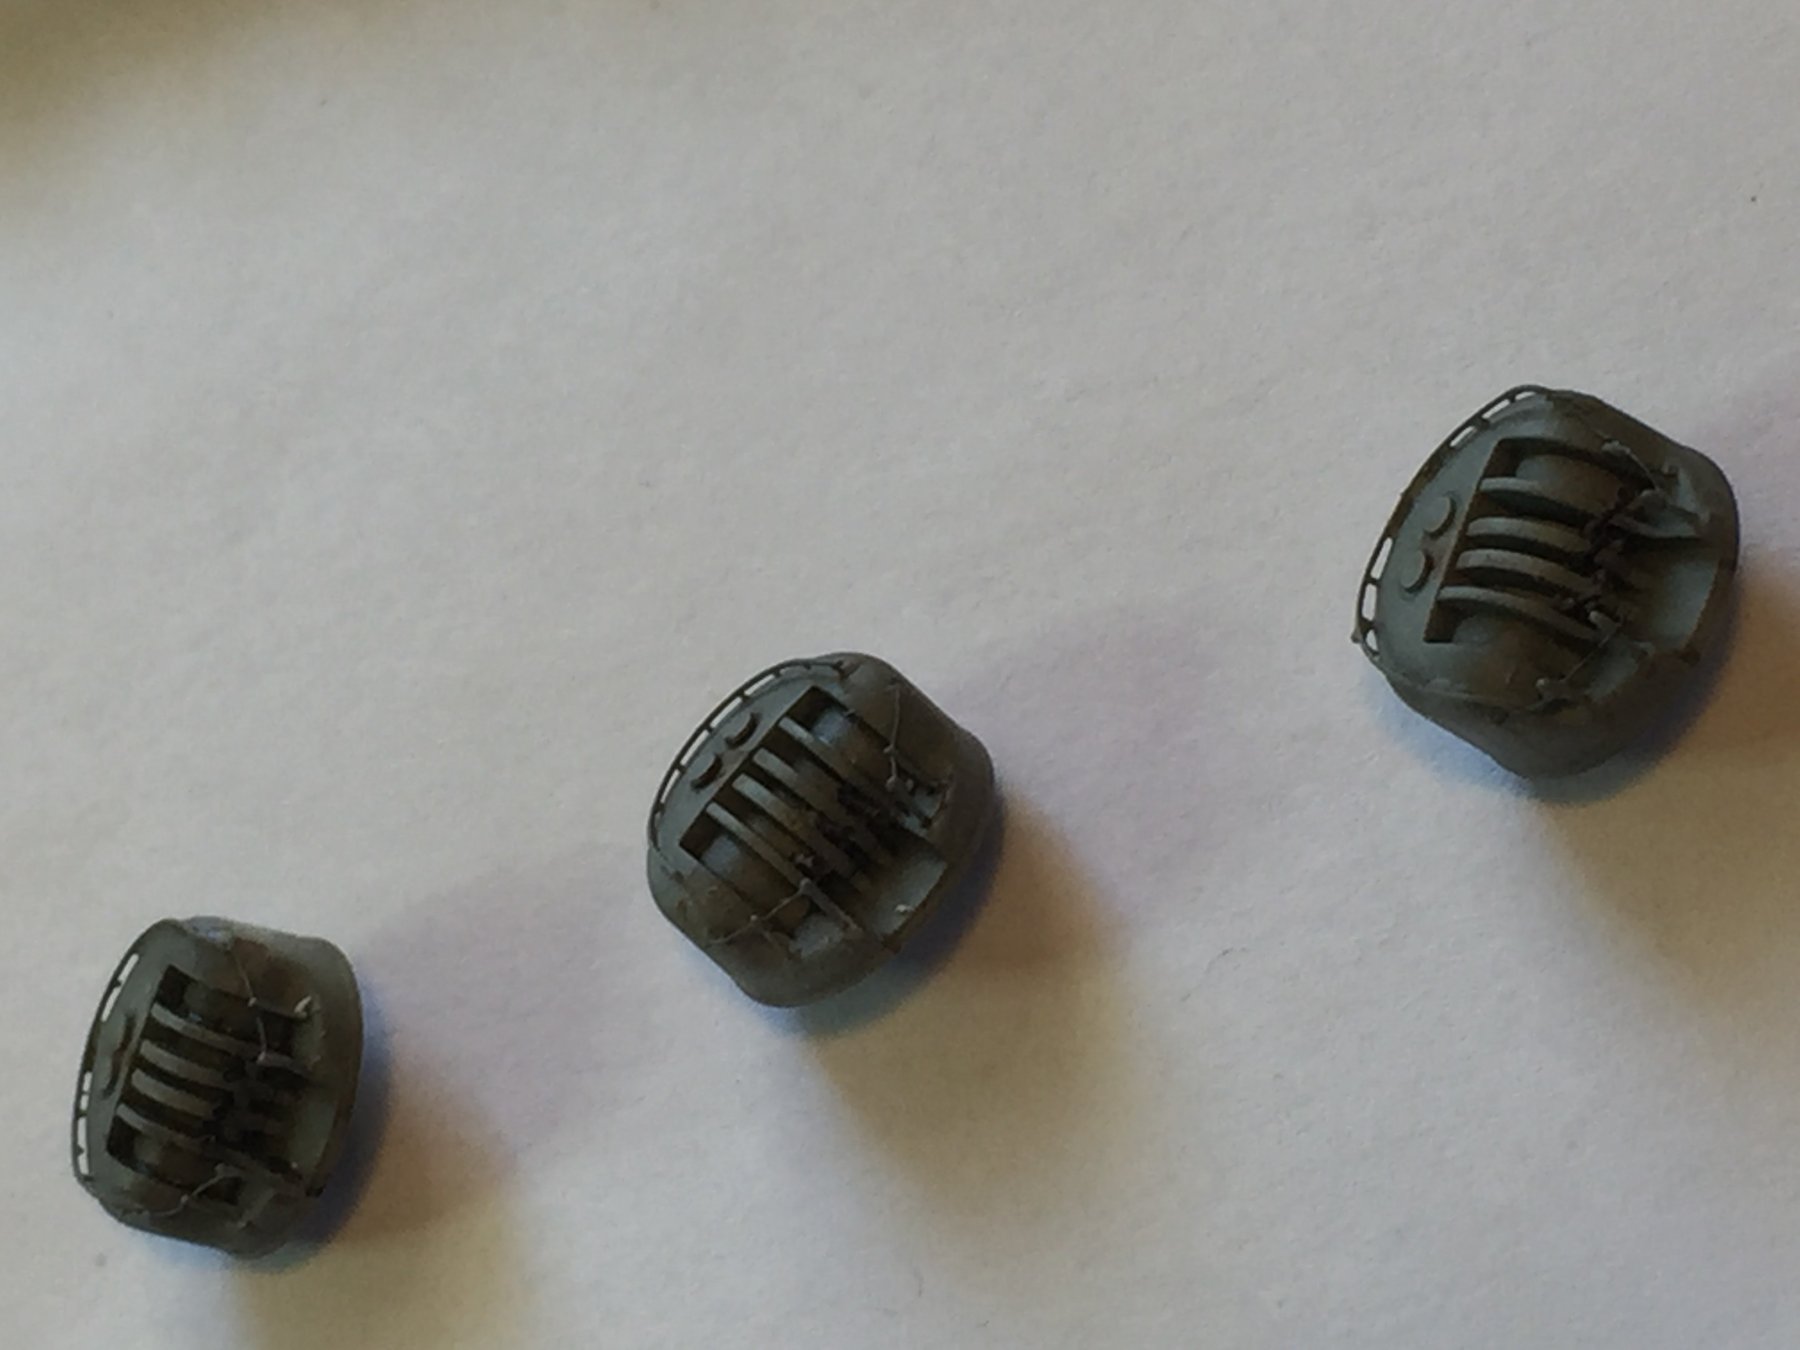
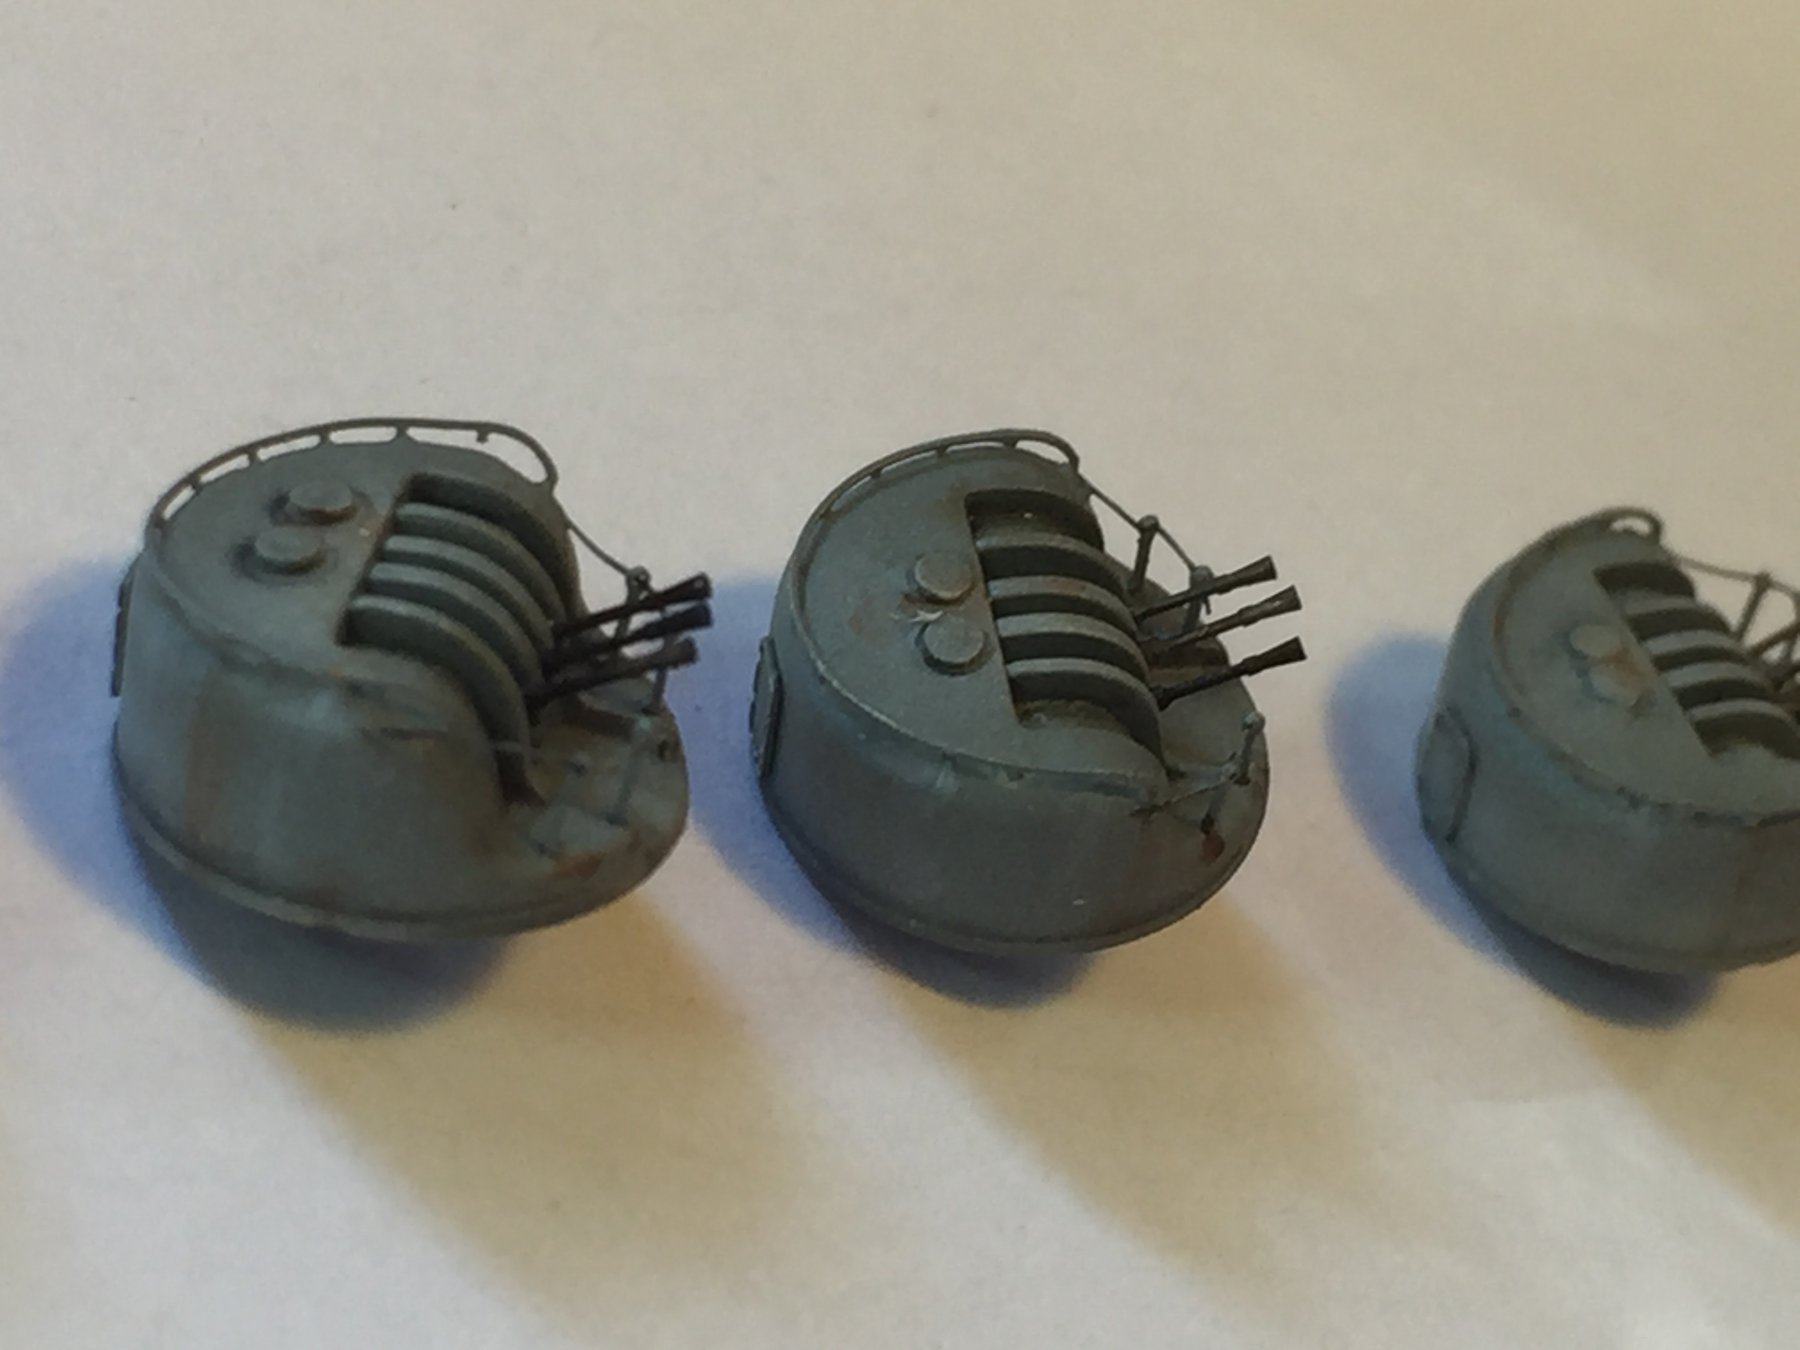
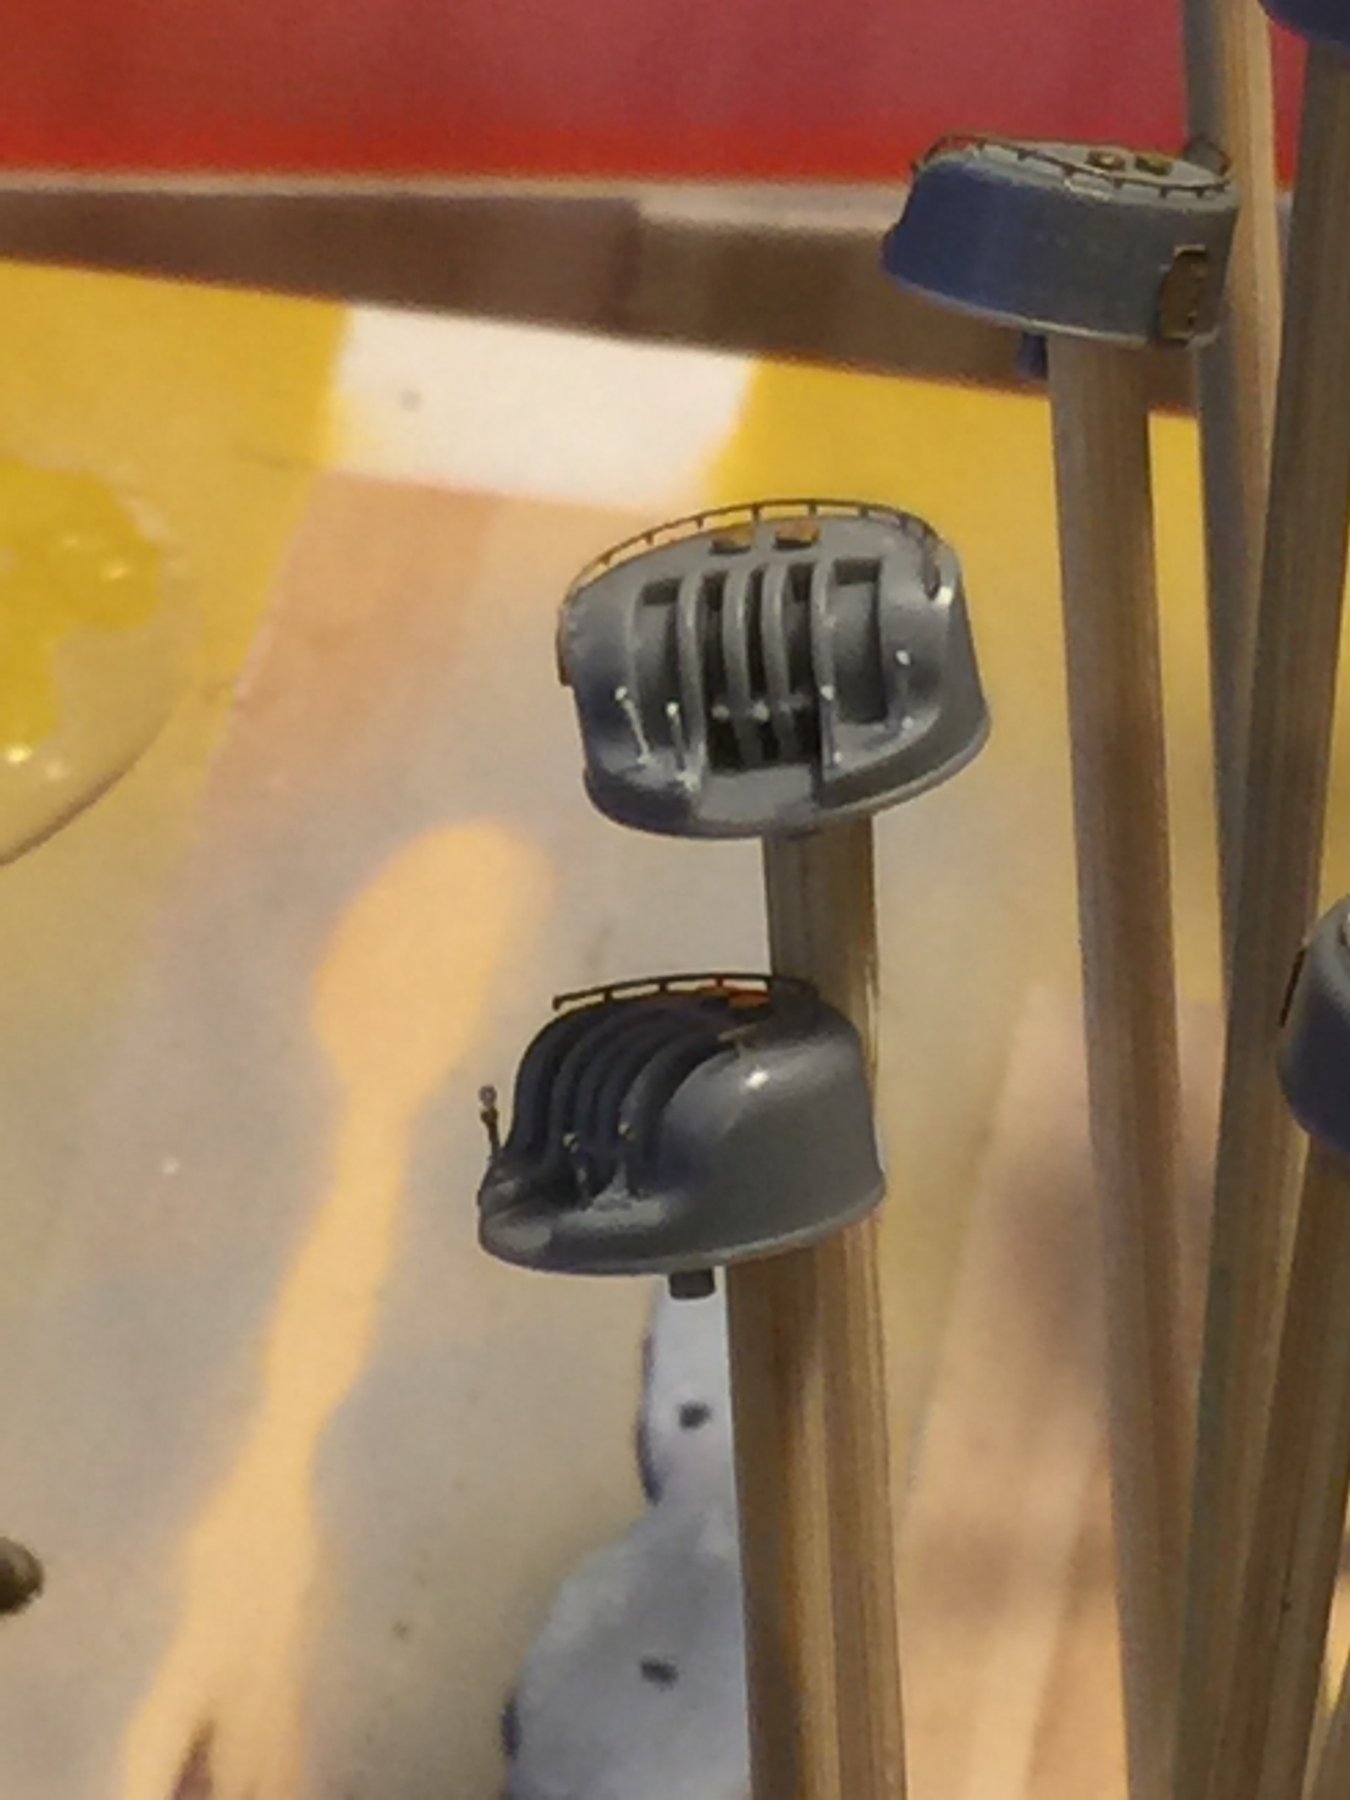
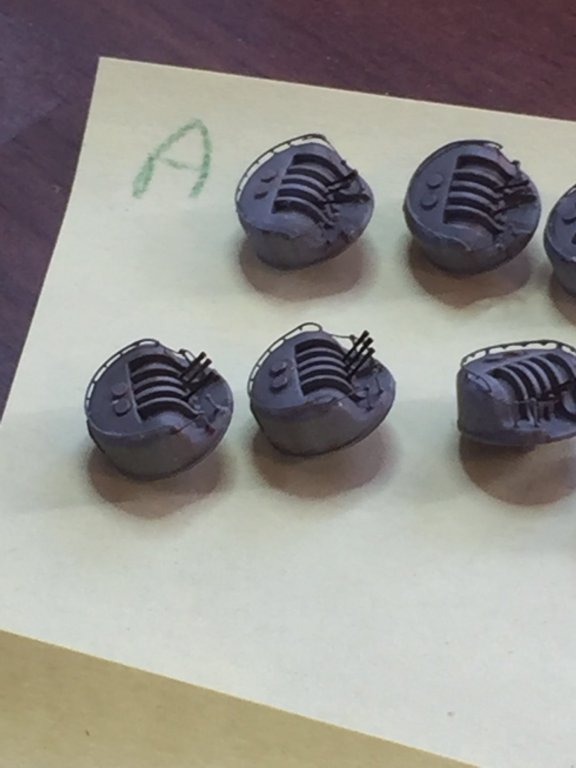
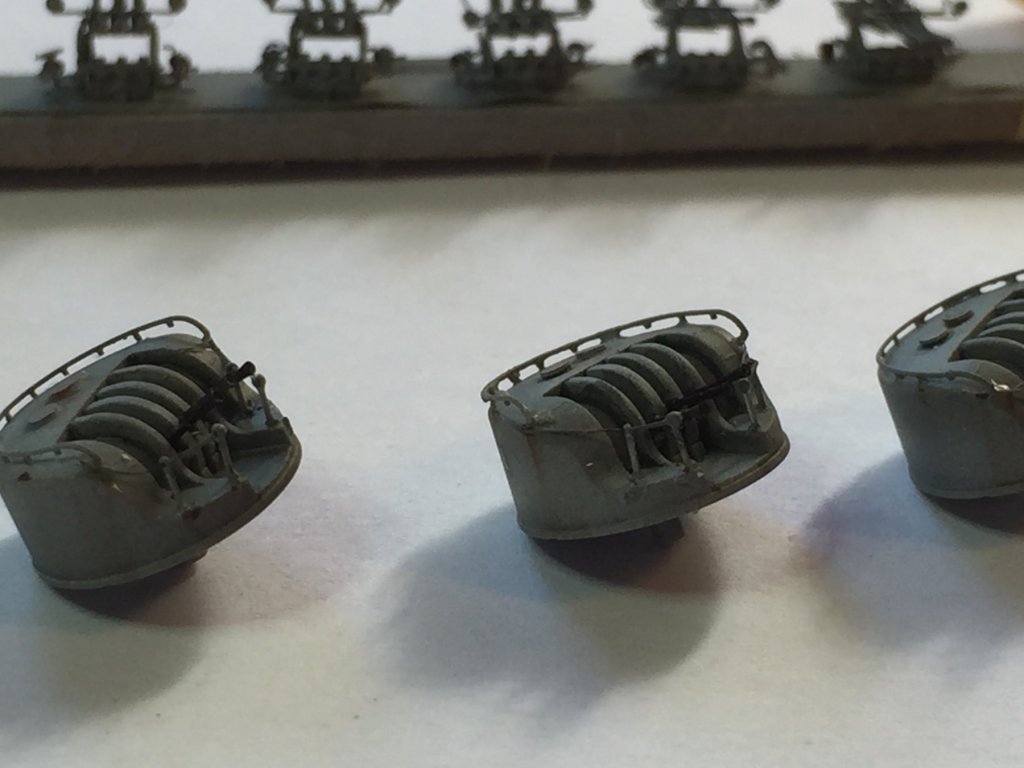
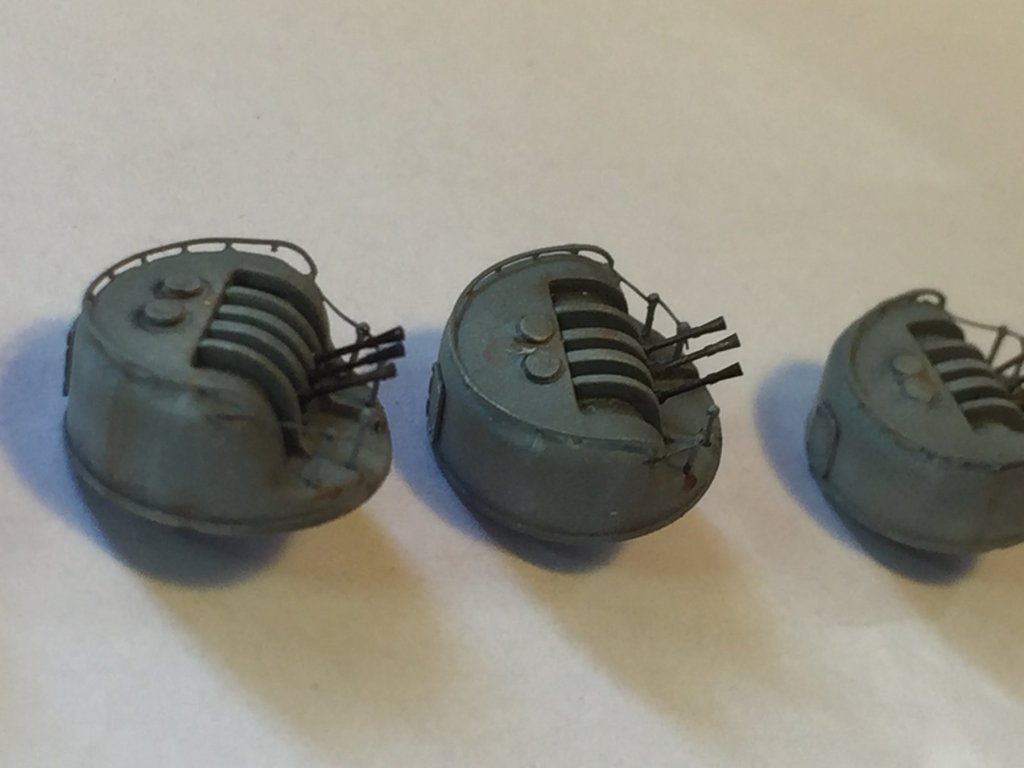
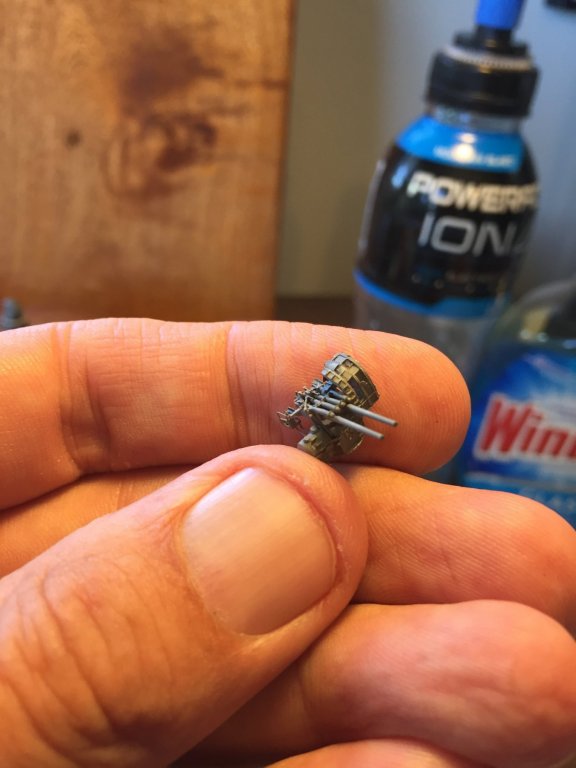
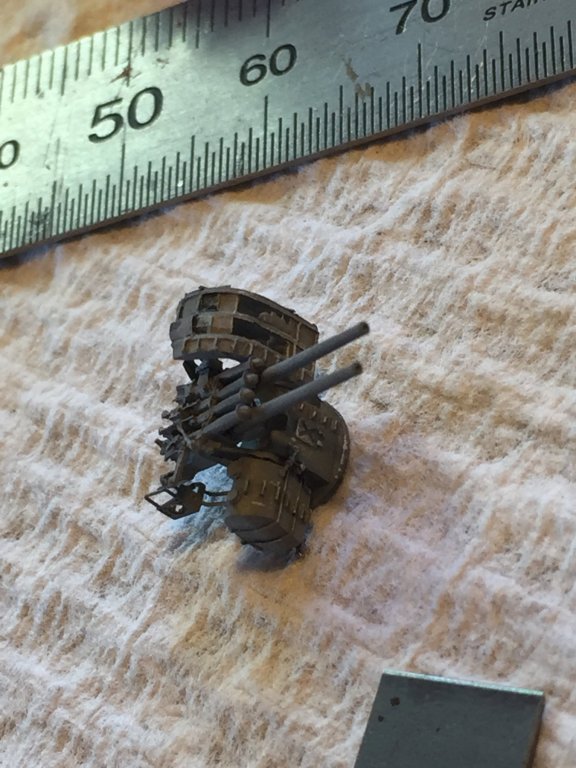
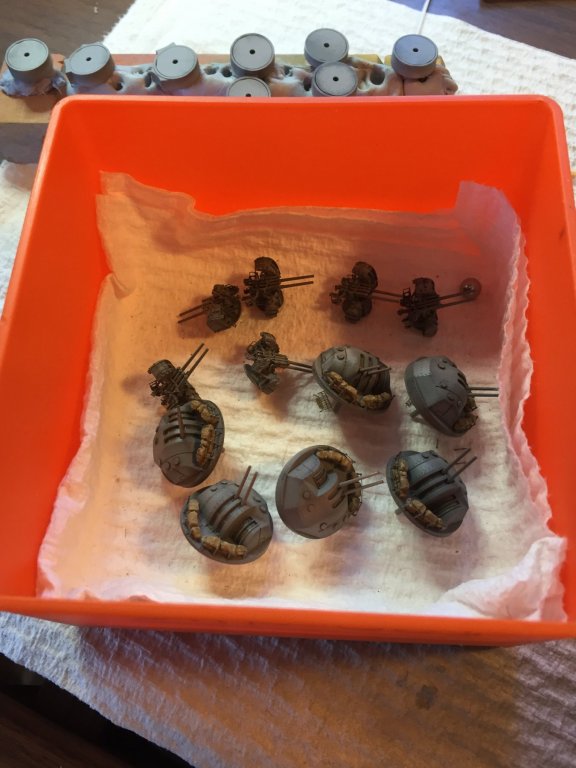
Painfully, the are 26 small triple machine gun turrets with very little detail. I tried the Pontos Rails and did not like them so replaced them with individual stanchions. The handrails are a nightmare to stick down. The barrels have not yet been added, which I plan to blacken then add after painting. Again I have added ventilator covers.
- 743 replies
-
- 15
-
-
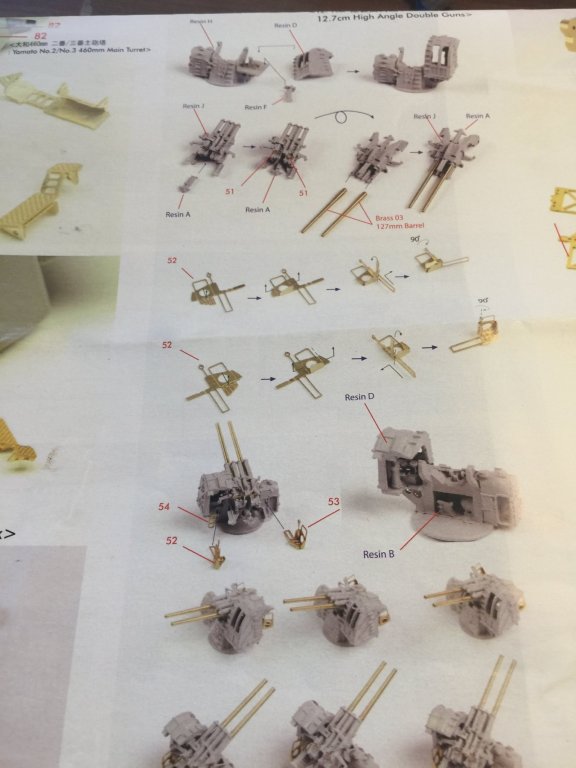
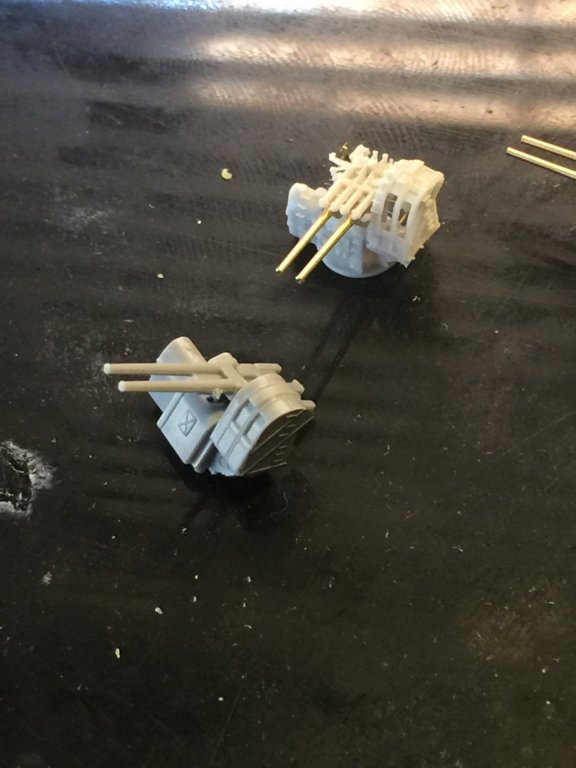
Next are the open 12.7cm guns. Imagine my surprise which I opened up the packet and found German guns! I e-mailed Pontos (no reply) then the hobby shop (BNA Model world) which replaced them for me. These are Veteran Models resin which are very nice. You can see the Tamiya offering in the foreground of the finished product.
- 743 replies
-
- 15
-
-
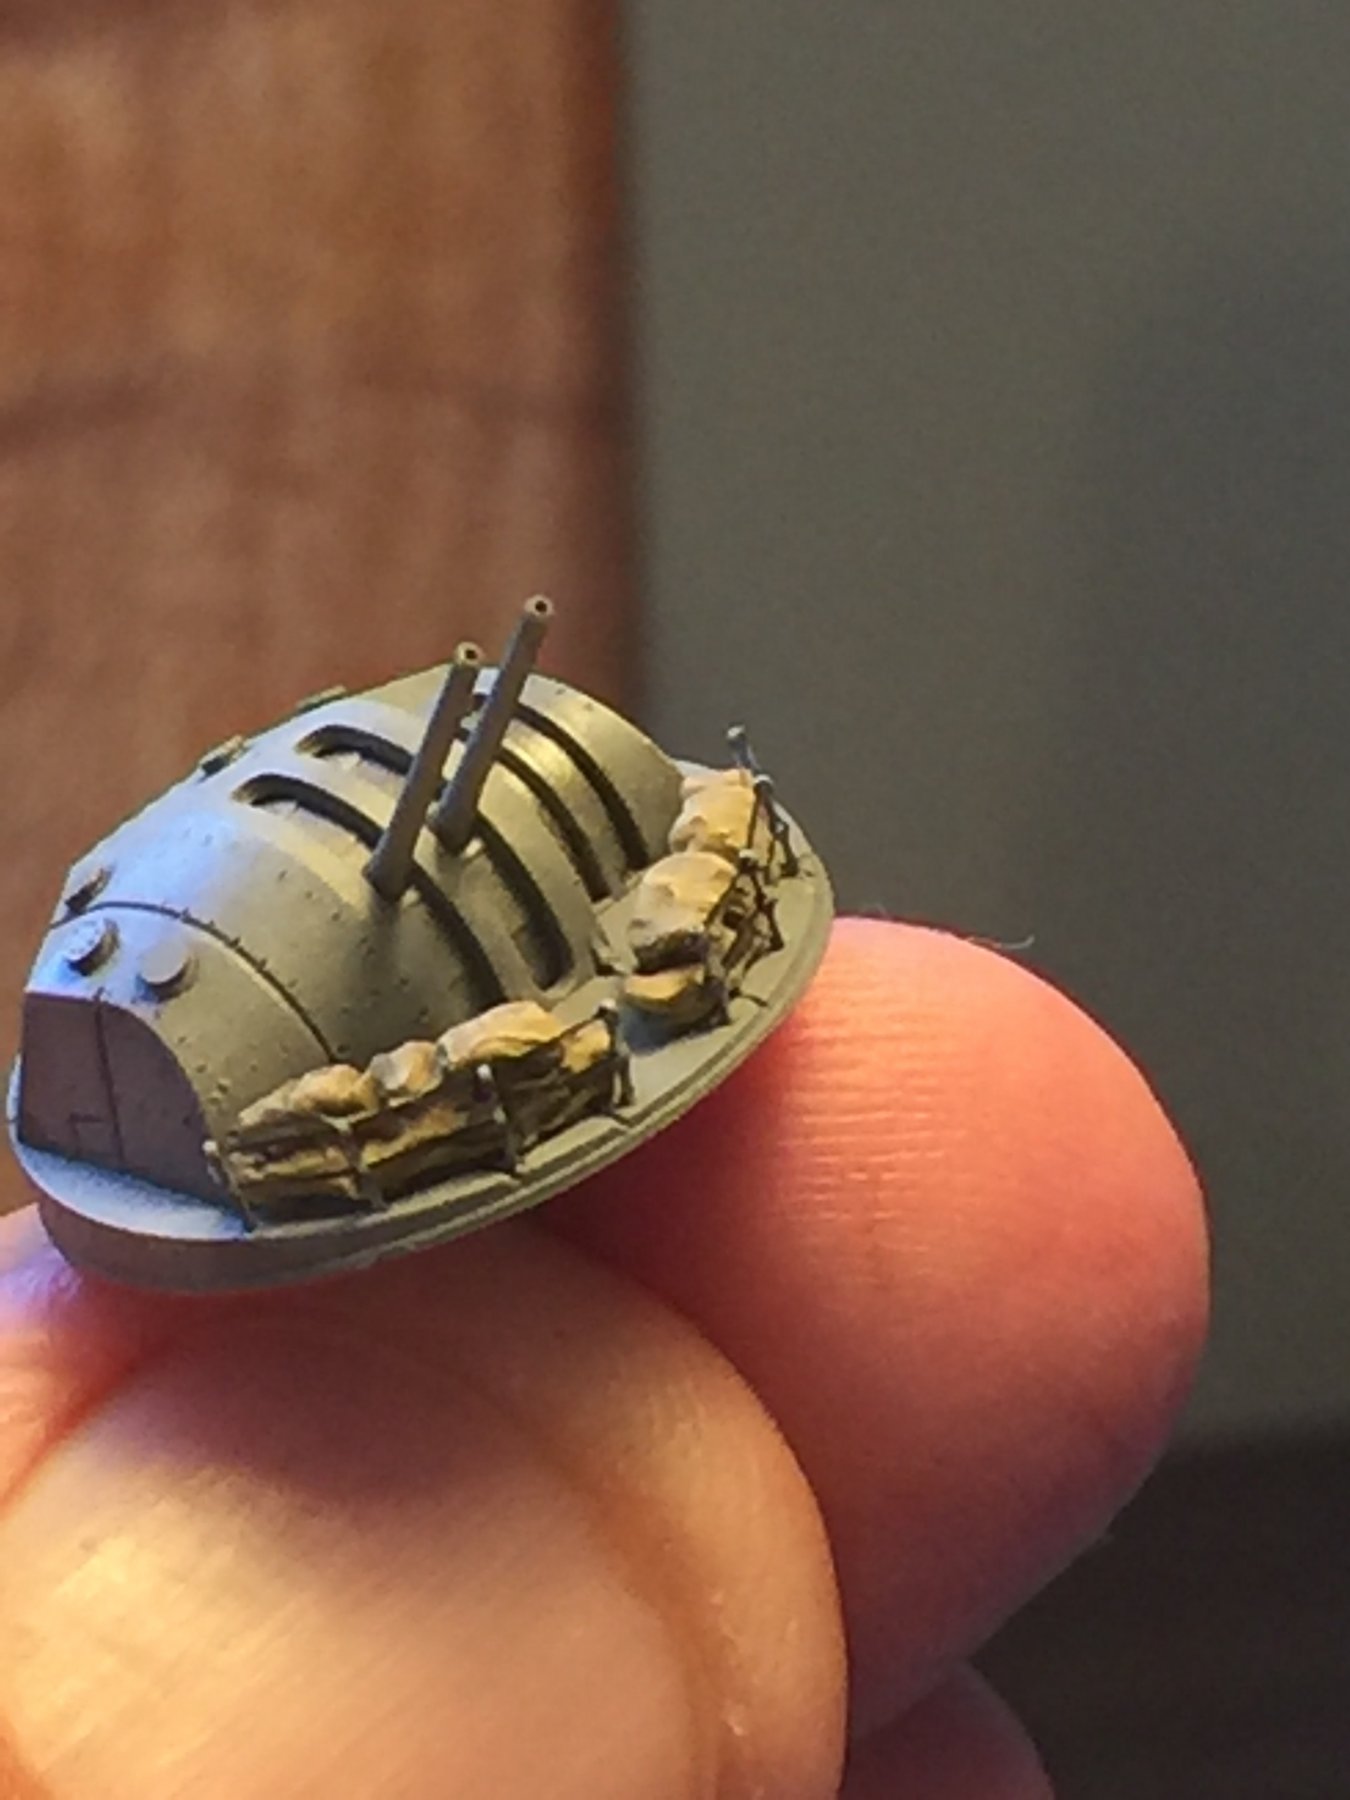
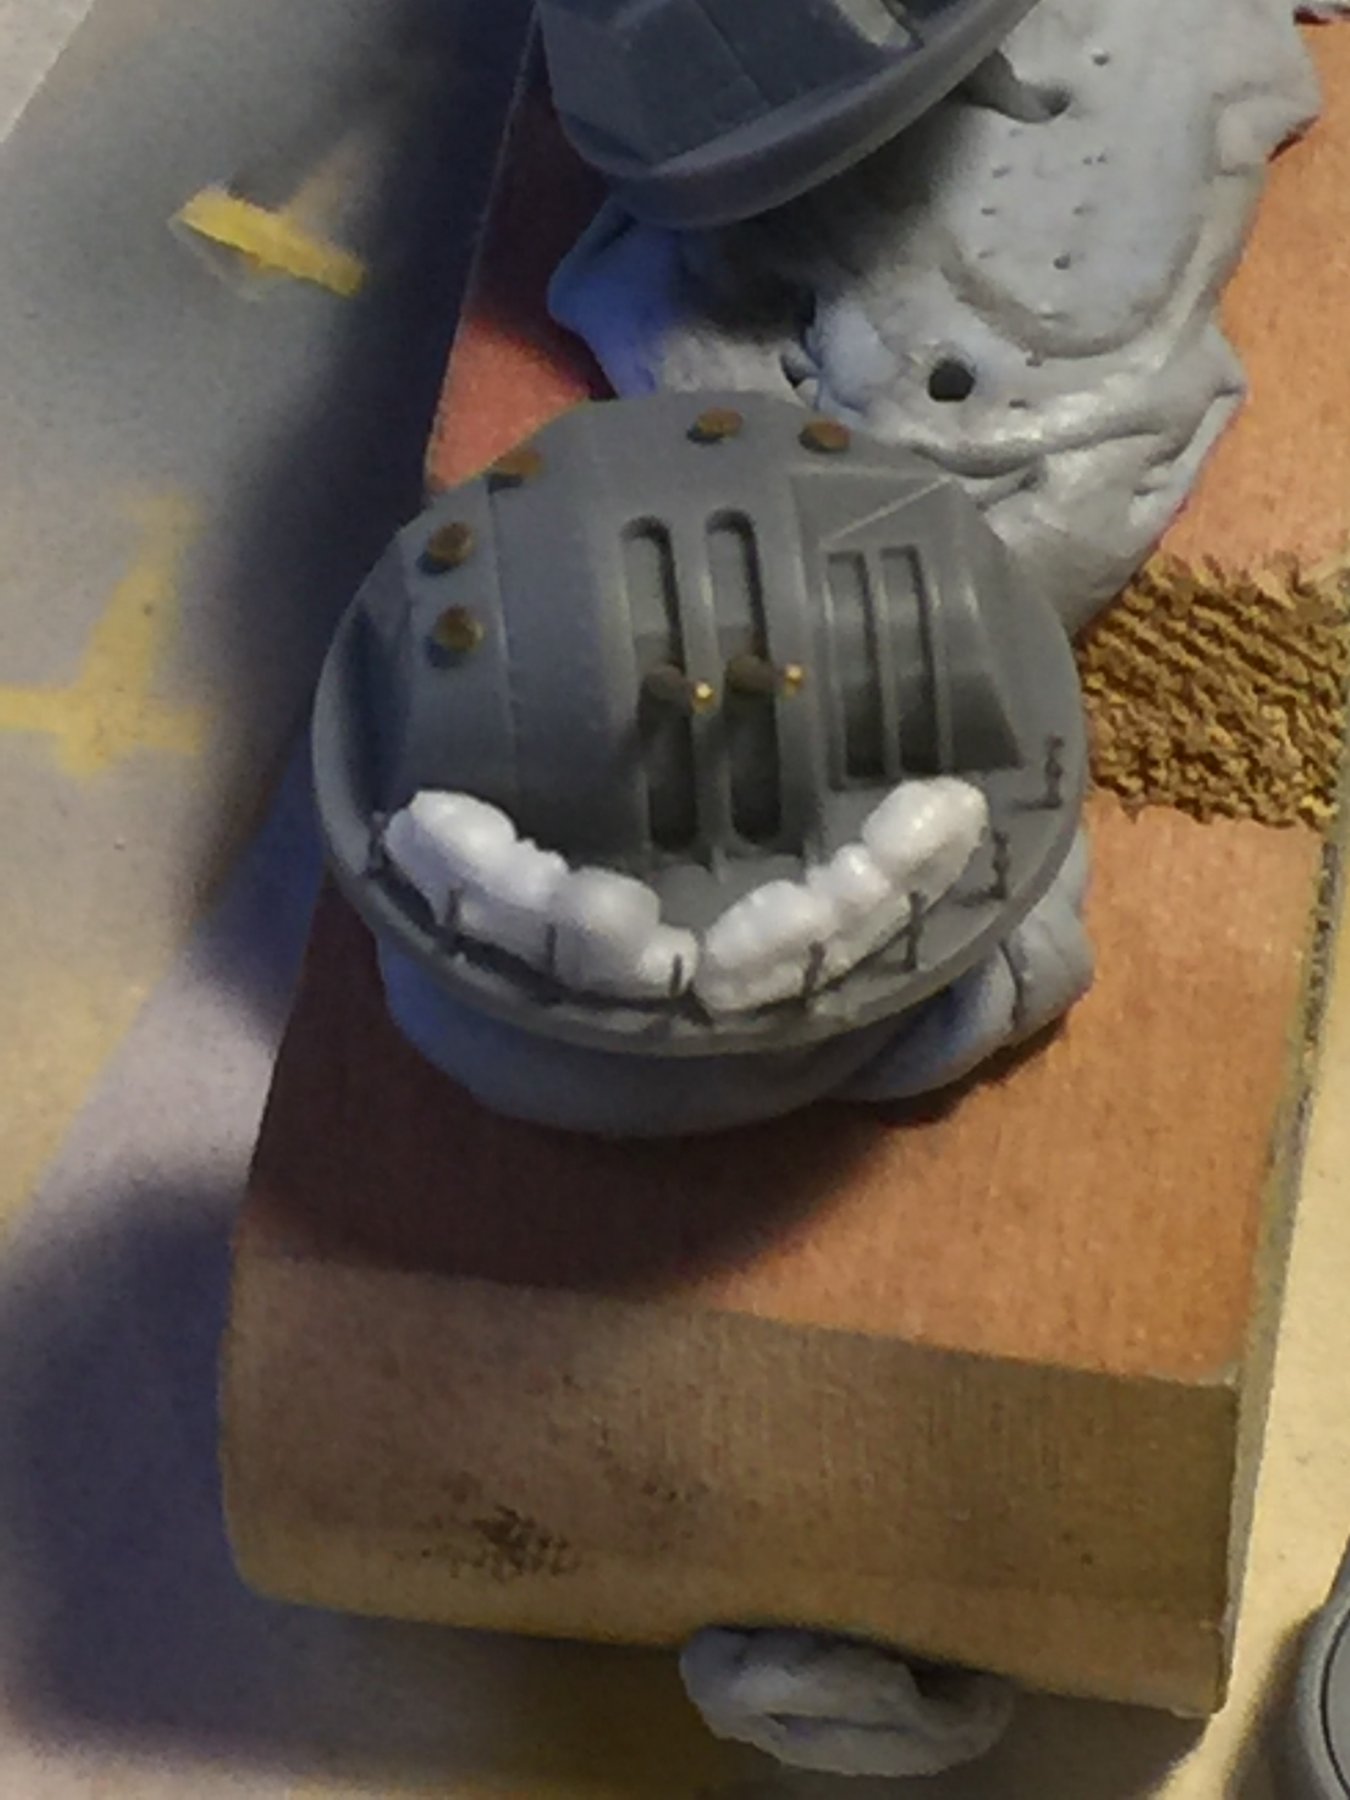
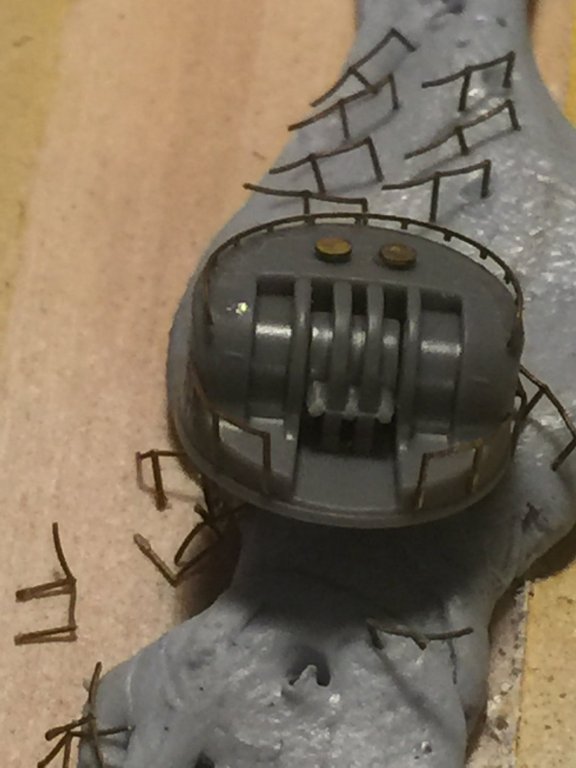
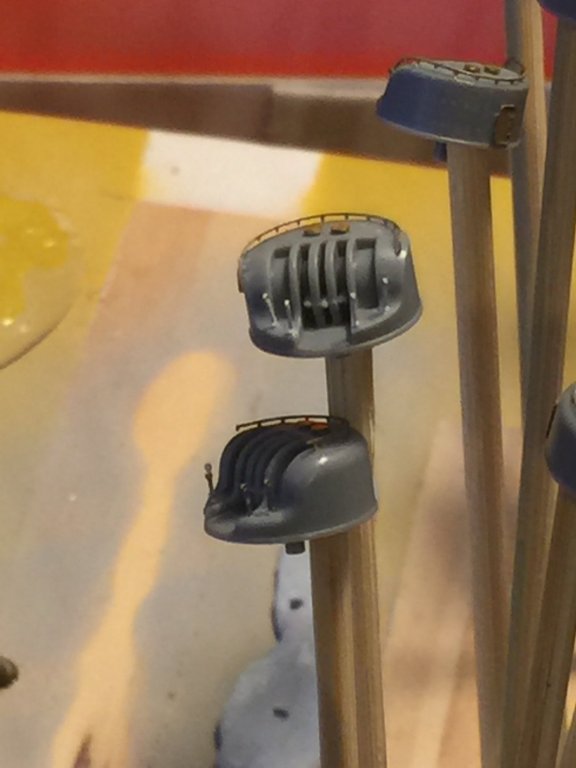
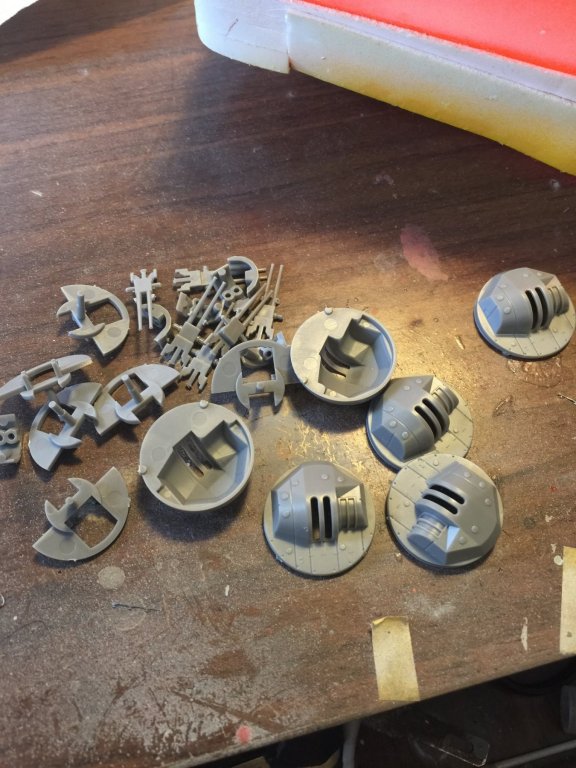
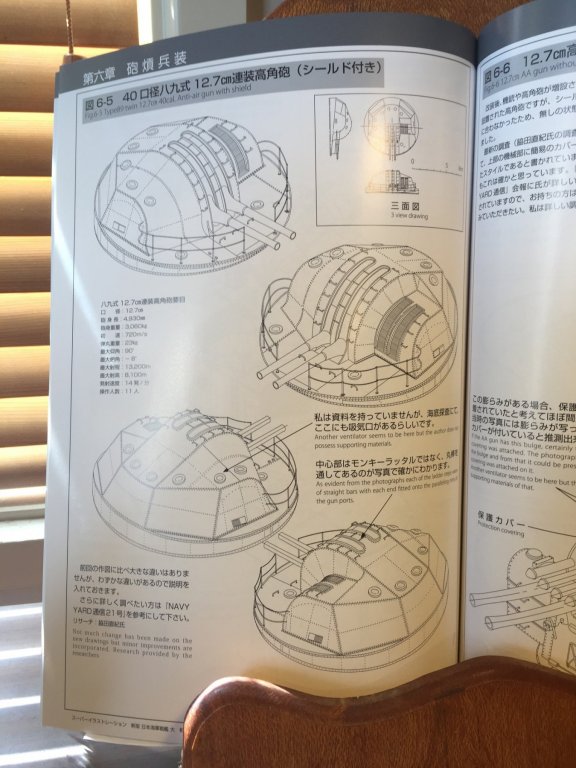
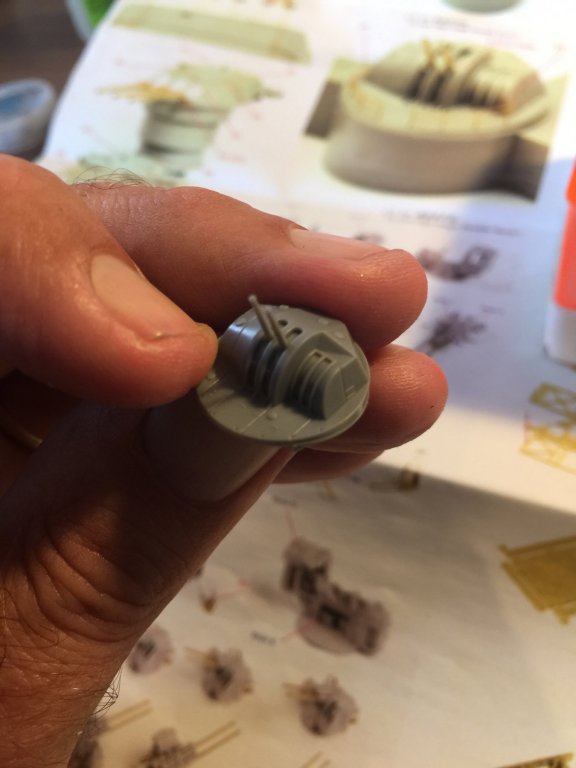
OK, moving on, the AA guns. Firstly the high angle turrets, you can see the base Tamiya offering (photo 3), Pontos provides the barrels and sandbags plus railings which I don't like. The ventilator covers and stanchions are replaced, but I cannot replicate the handholds, so be it.

- 743 replies
-
- 14
-