RGL
-
Posts
5,546 -
Joined
-
Last visited
Content Type
Profiles
Forums
Gallery
Events
Everything posted by RGL
-
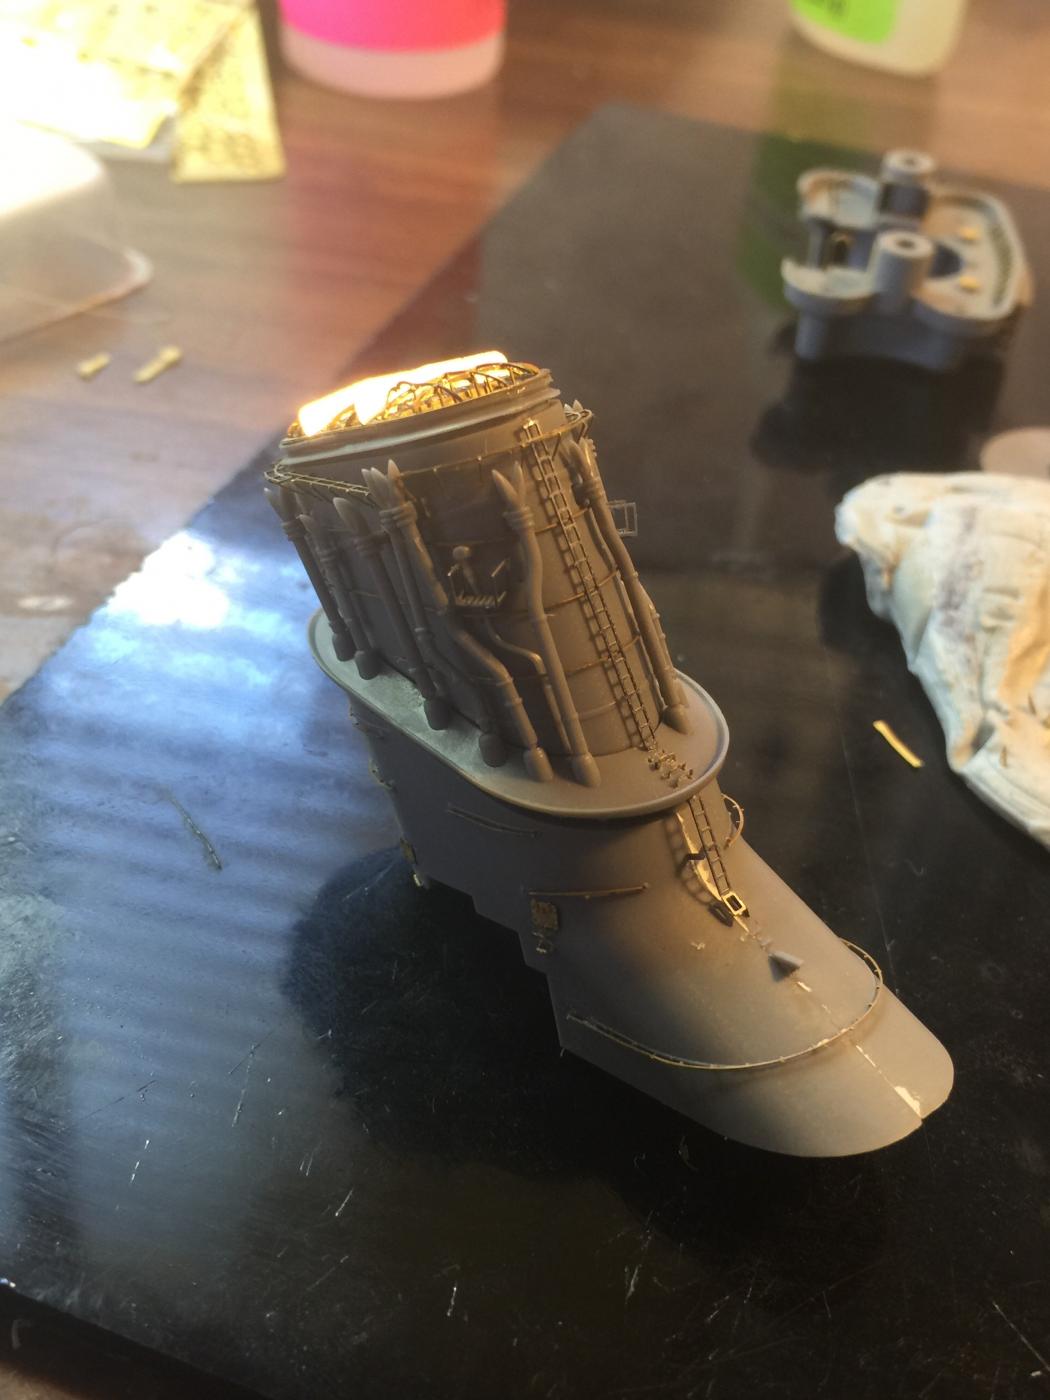
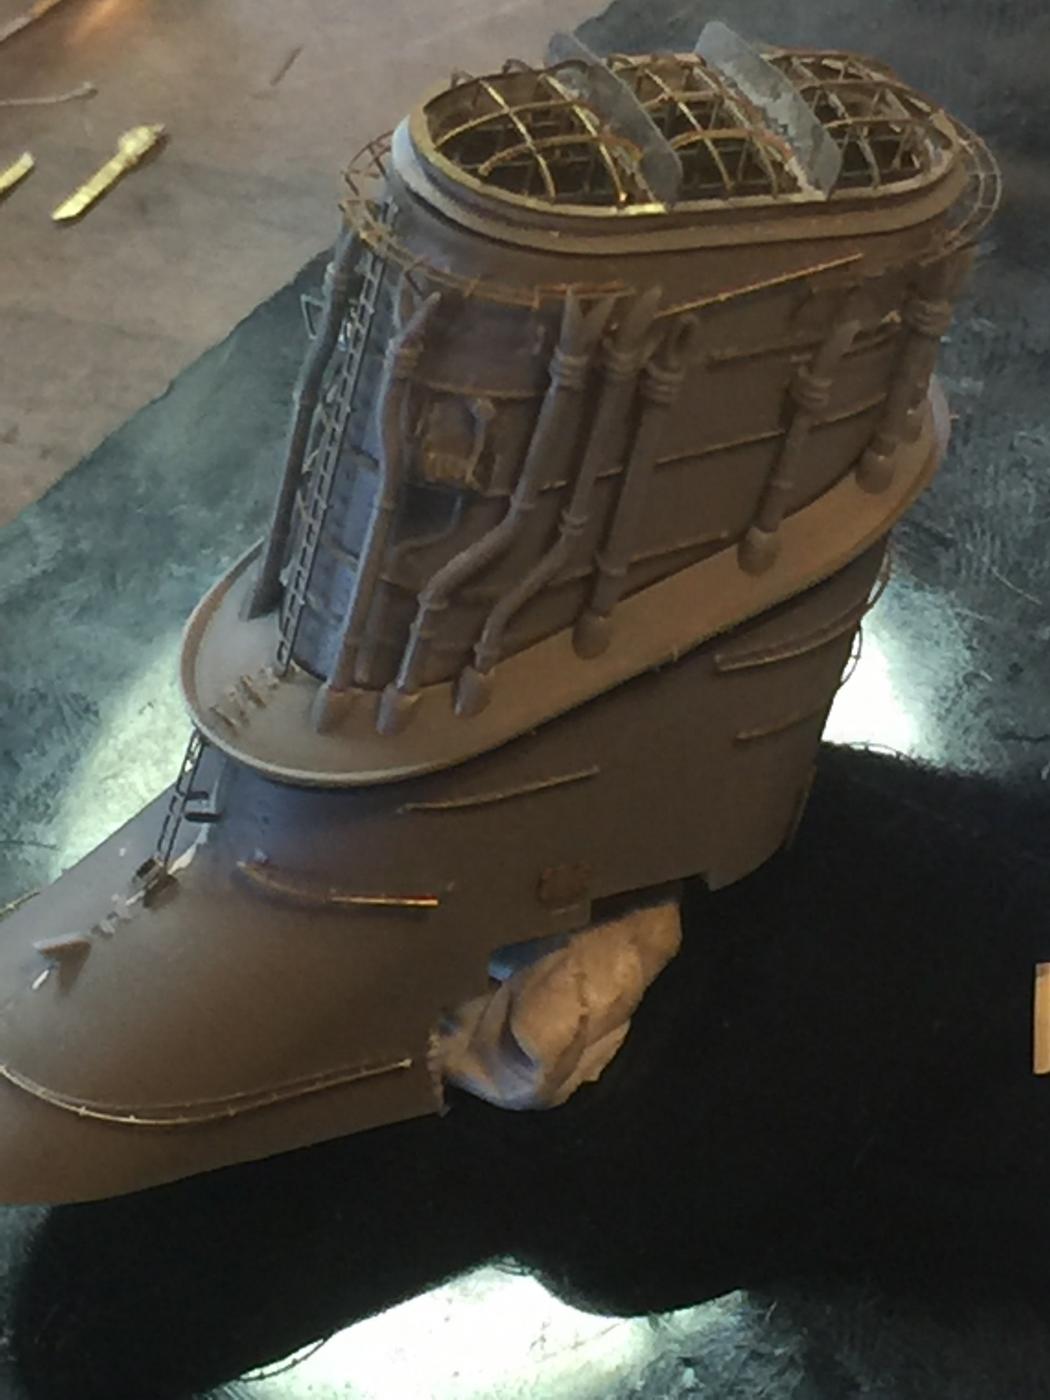
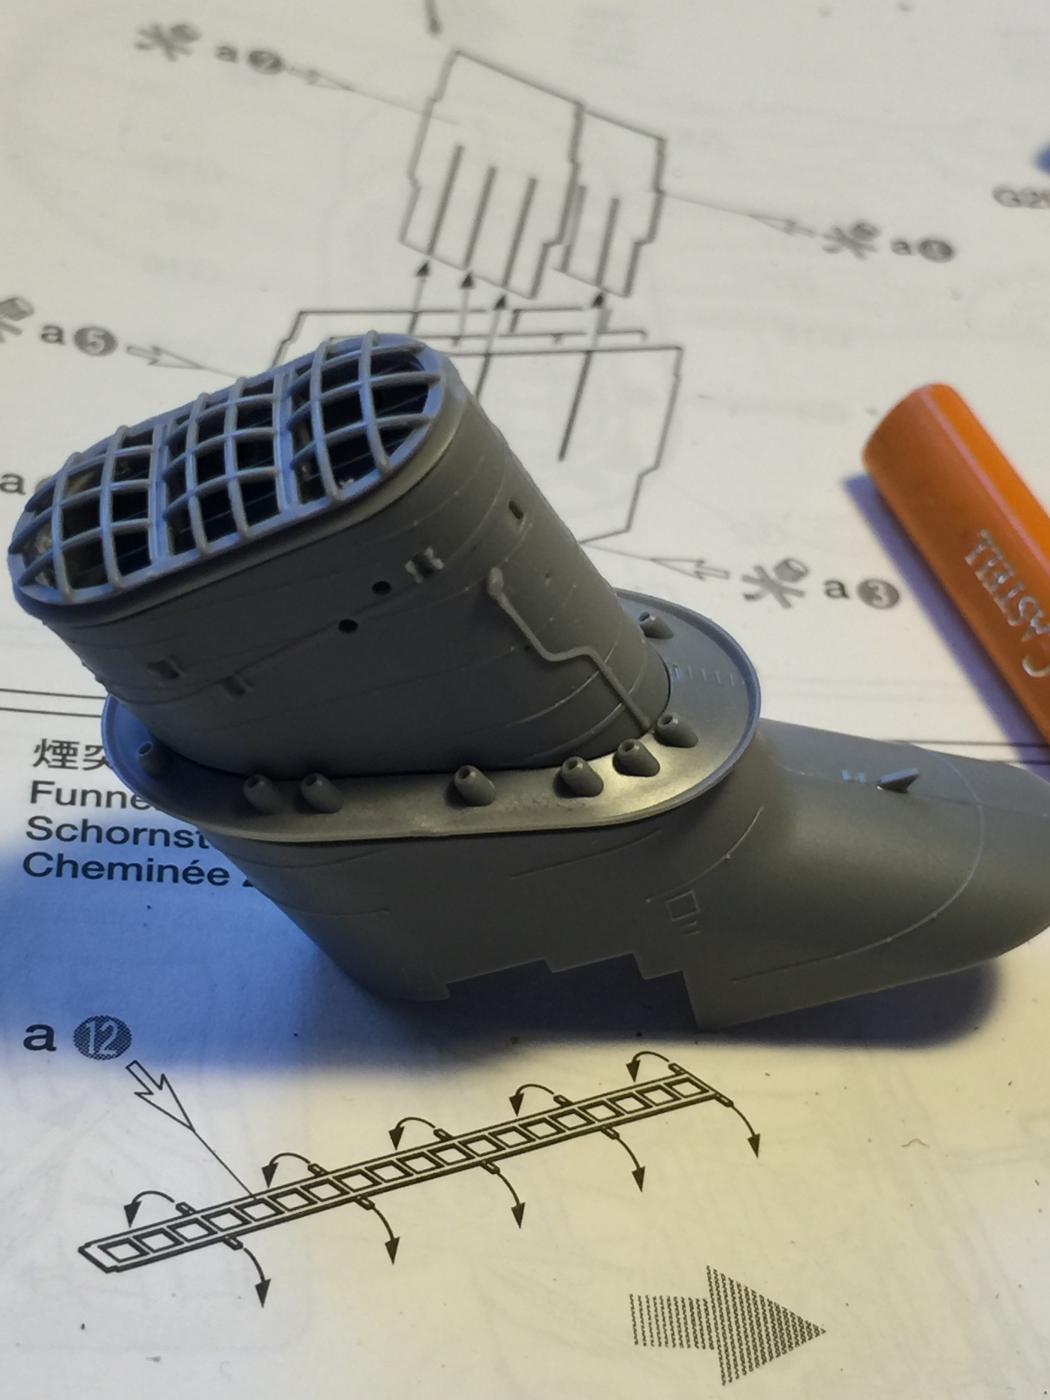
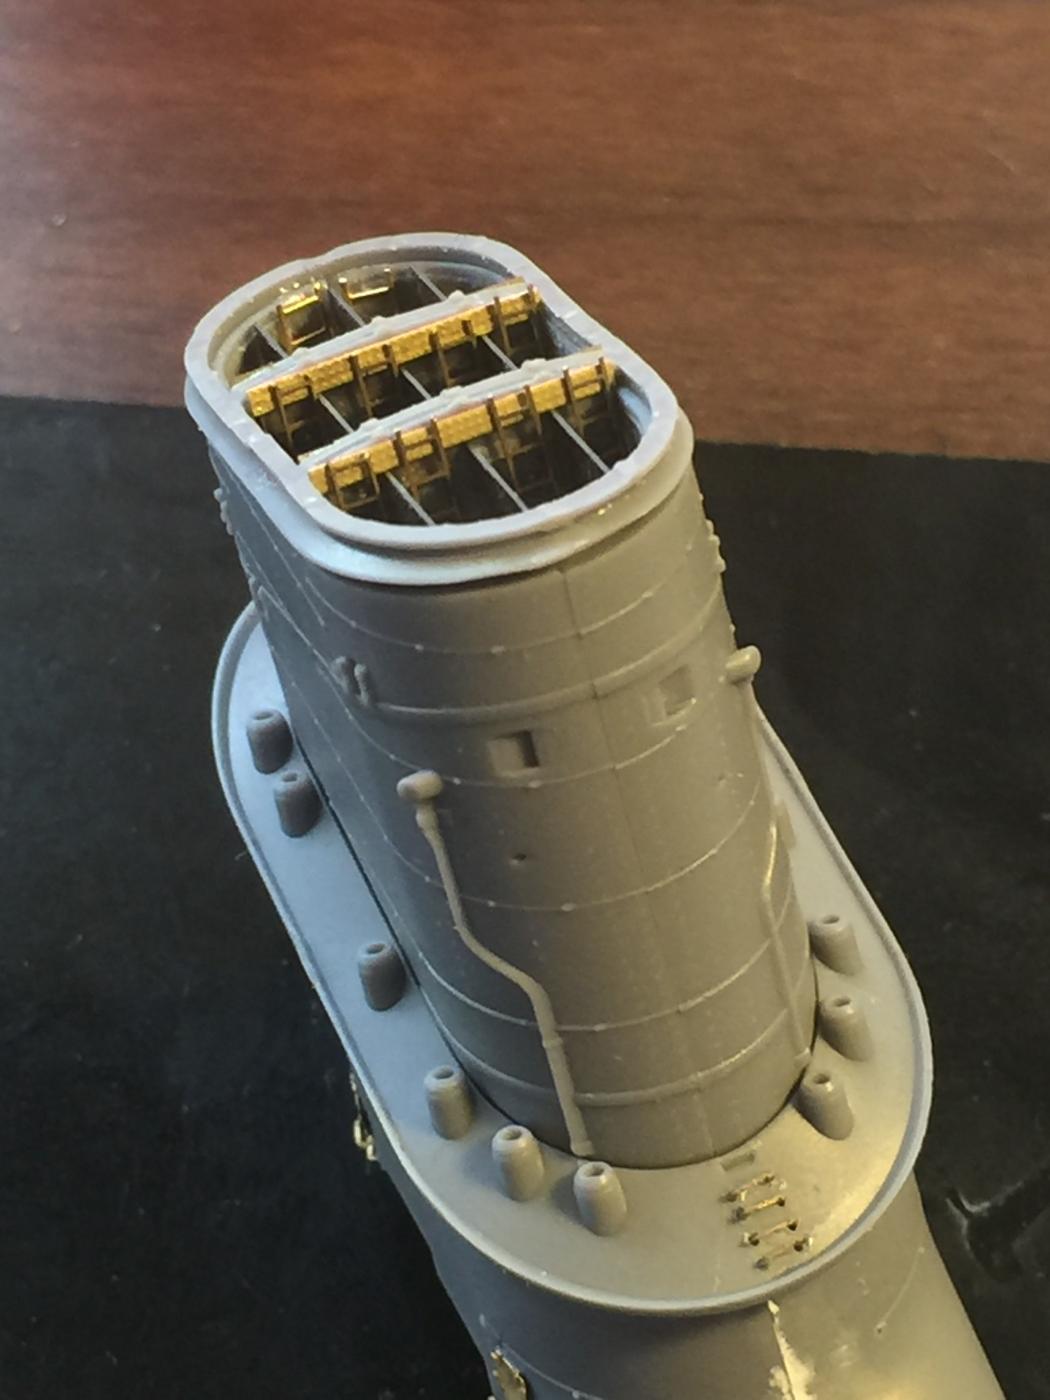
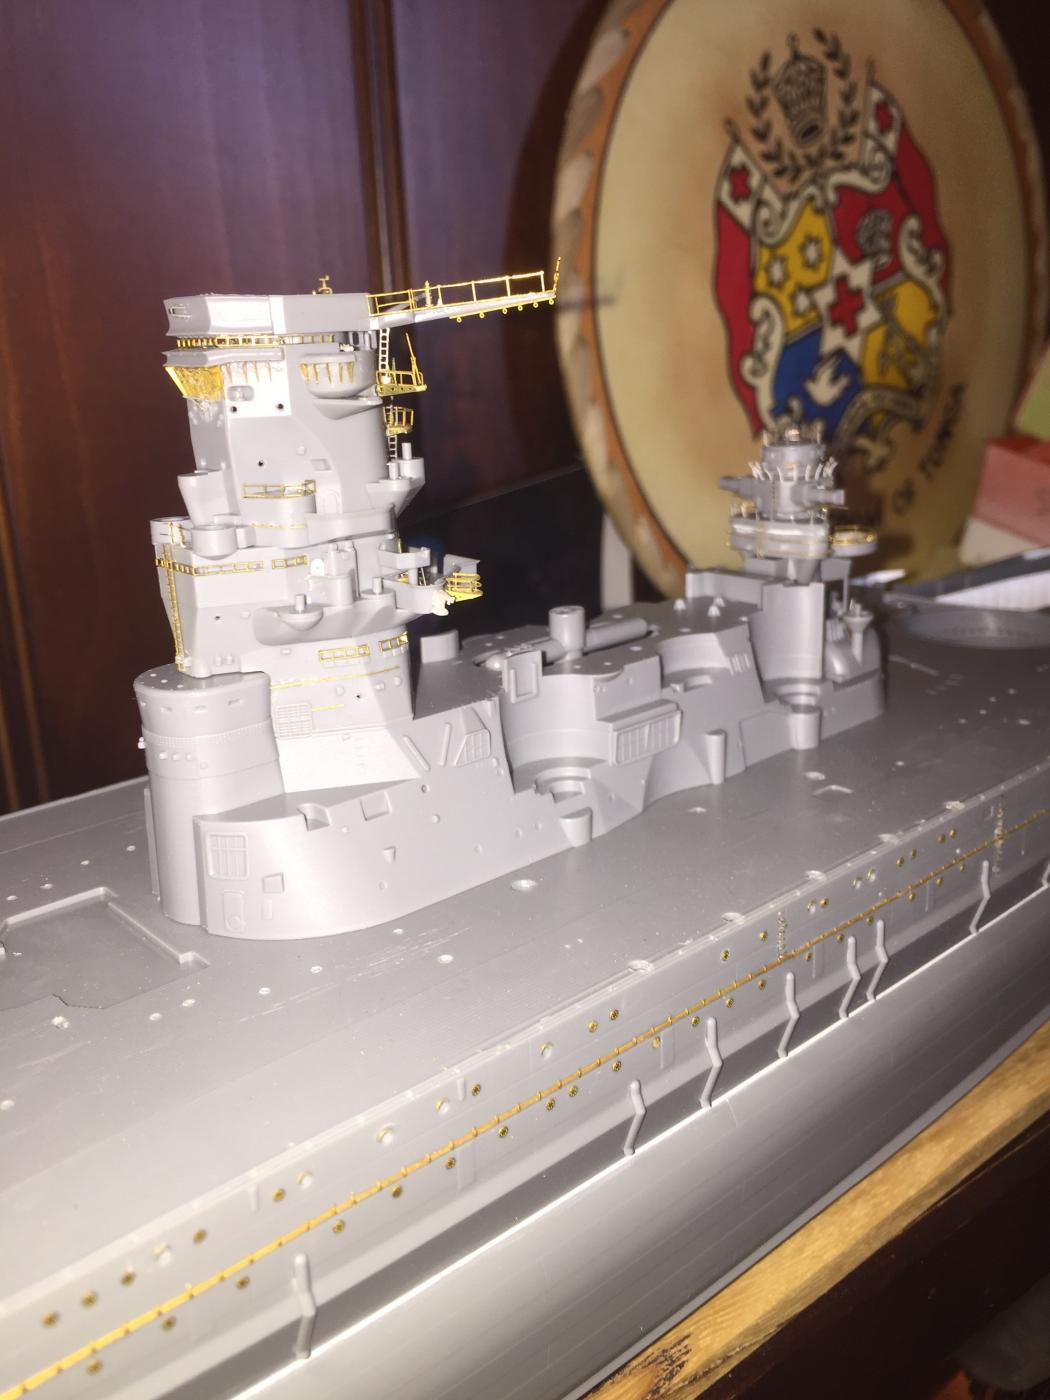
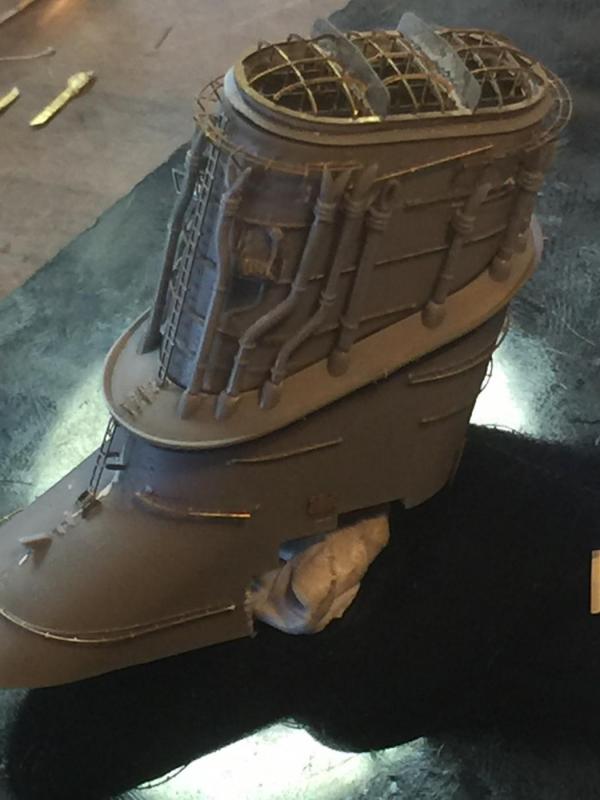
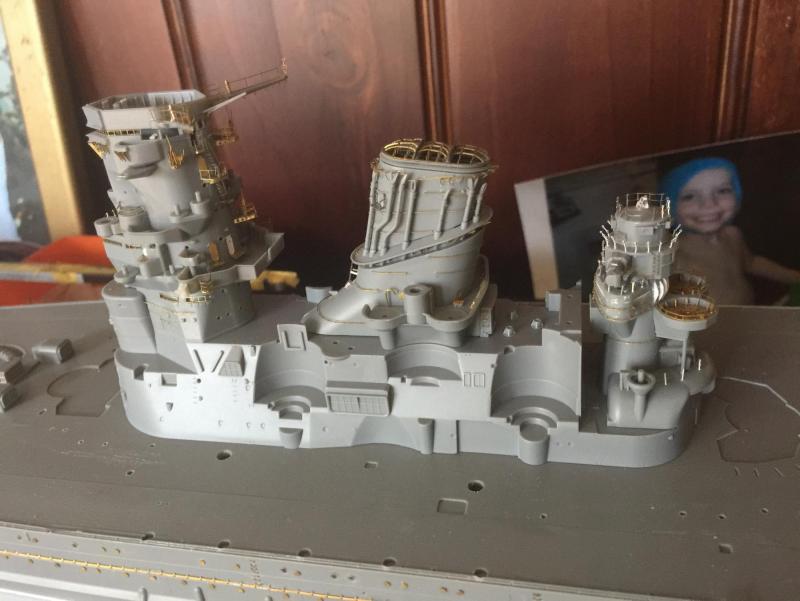
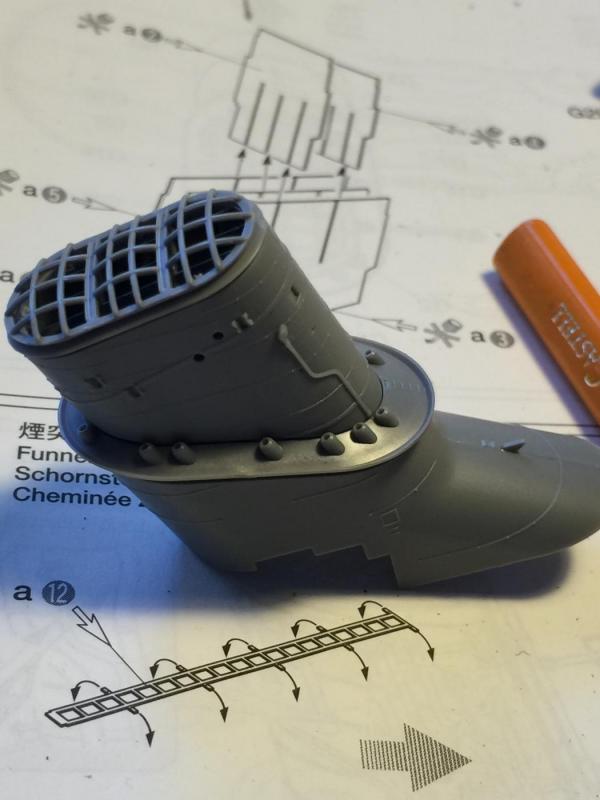
 The funnel is now pretty much complete. There is a gantry to go but I won't put it on till later as well as a ships whistle. The 150cm spotlight platform is next. The reference has support struts along the entire sides but the metal platform below is too wide so I'll leave good enough alone. The crew quarters whilst a nice addition will not sit flush so I used rivet strips to cover them which will be OK when painted. 8 extra sets of doors were added as well as a couple of hatches and pipes. and steps over the grill. Finally how she sits on the superstructure which will be next.


- 743 replies
-
- 19
-

-
It's pretty much follow the dots so far, the handrails are a punish and I'm still considering how much additional detail I need to add. As it sits at an angle, handling is very painful so it has to be top to bottom and trying to seat it in blue tack. This is the last main bit that seats on the centre island where it will really get very crowded. You've probably noticed I've done none of the control turrets or smaller guns which will be done last after the superstructure as it will be mass production. The more you do PE the better the muscle memory as a fine motor skill, and it becomes a VERY fine motor skill at this scale. Like a tall ship, when you move on from planking it's a whole new skill set, which ends with rigging.
-
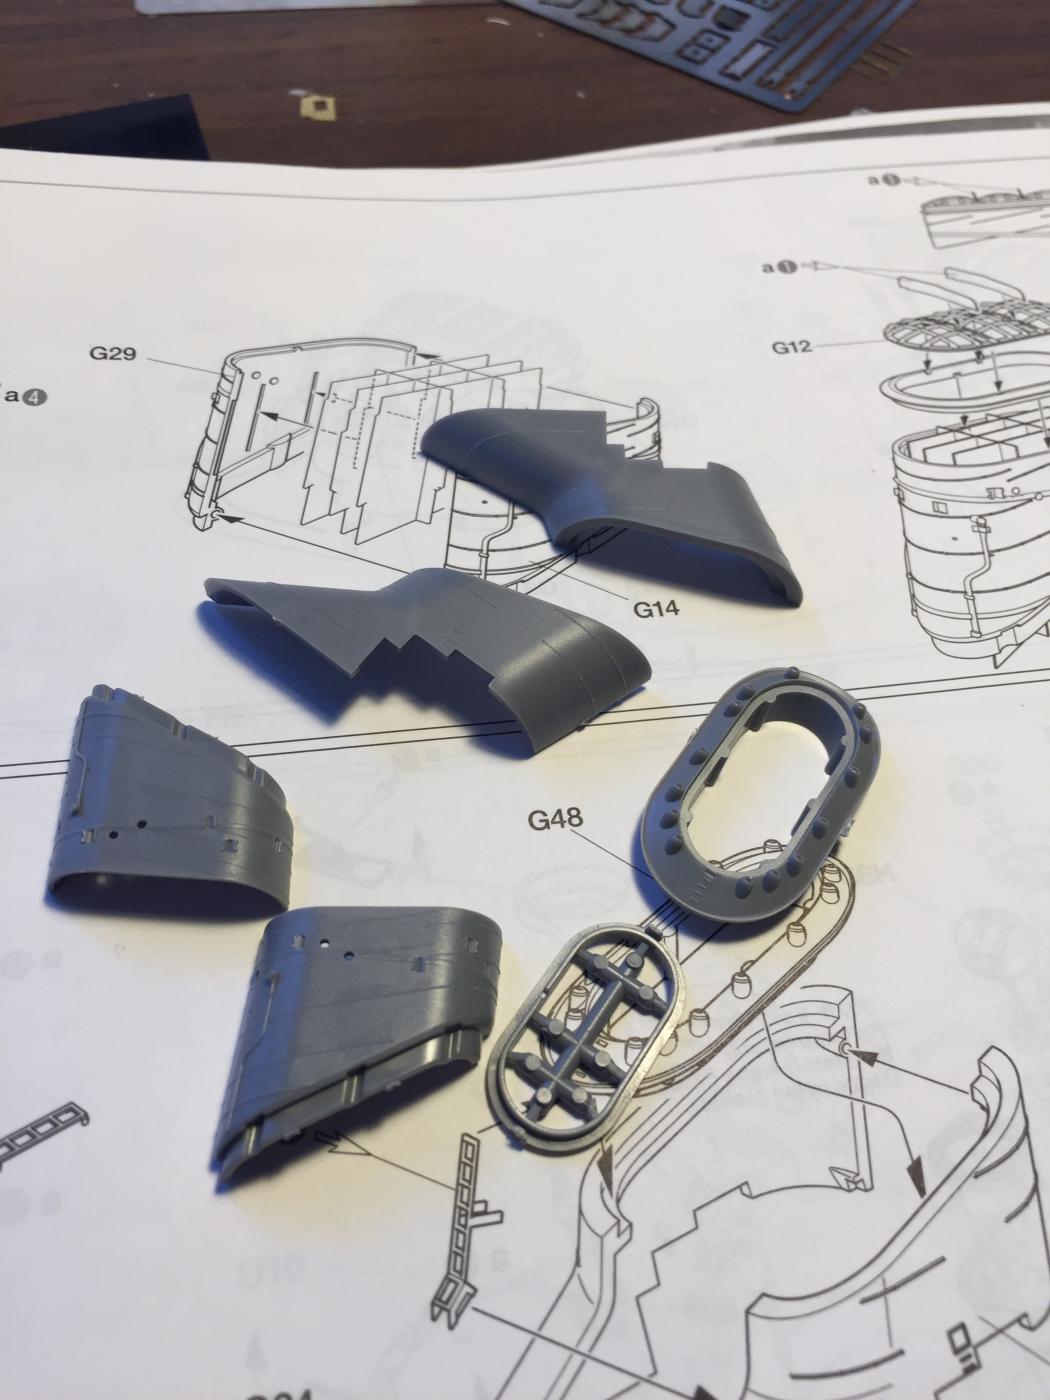
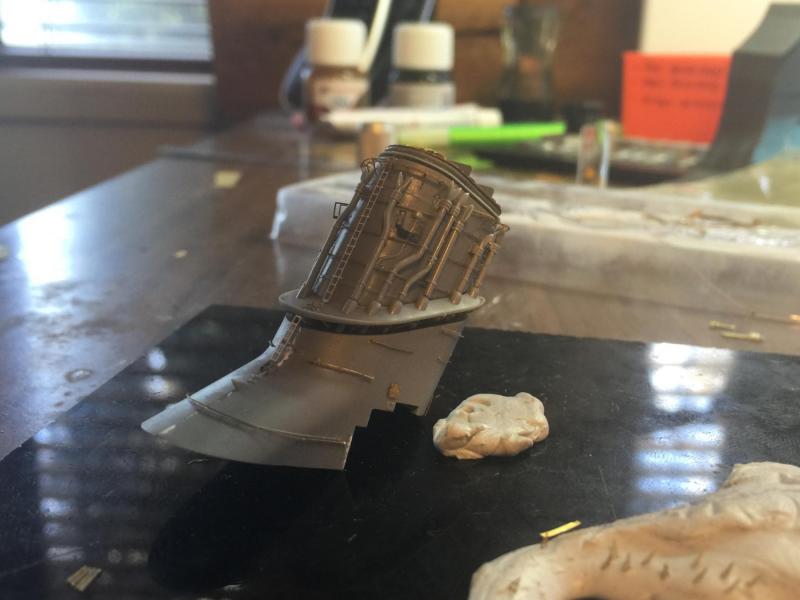
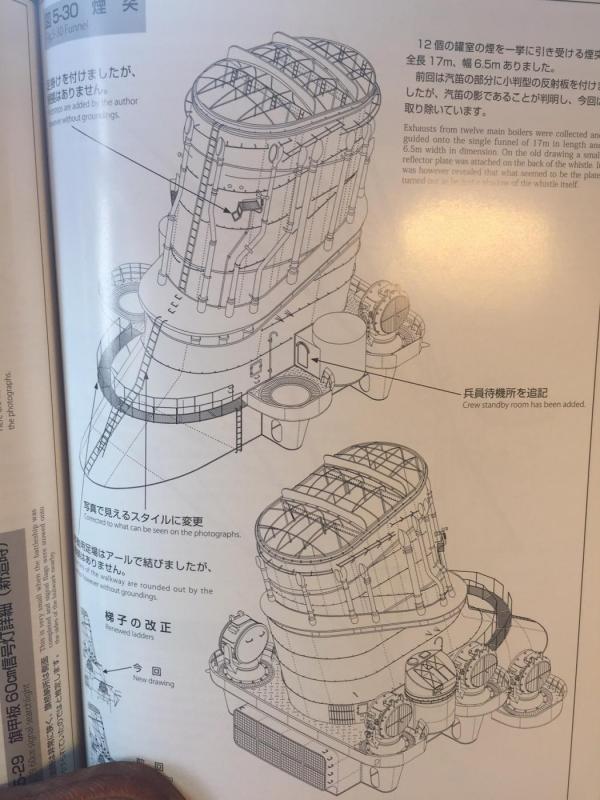
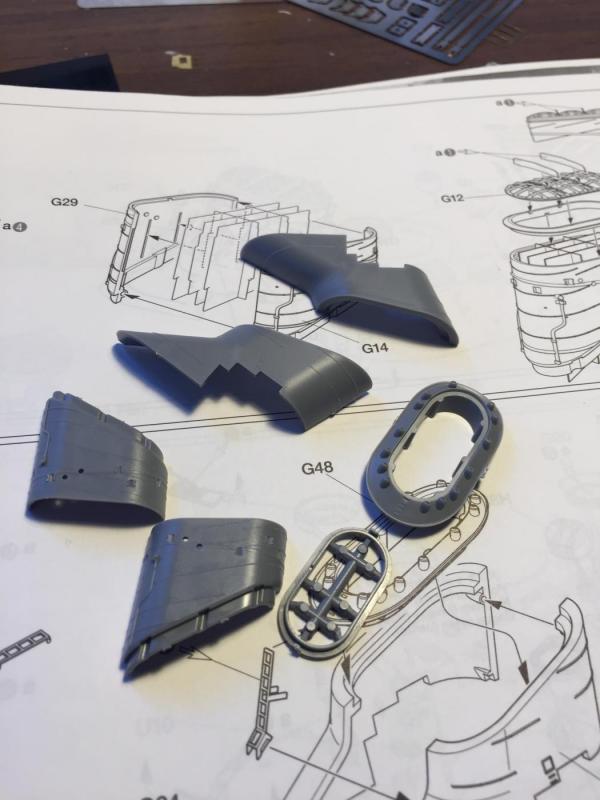
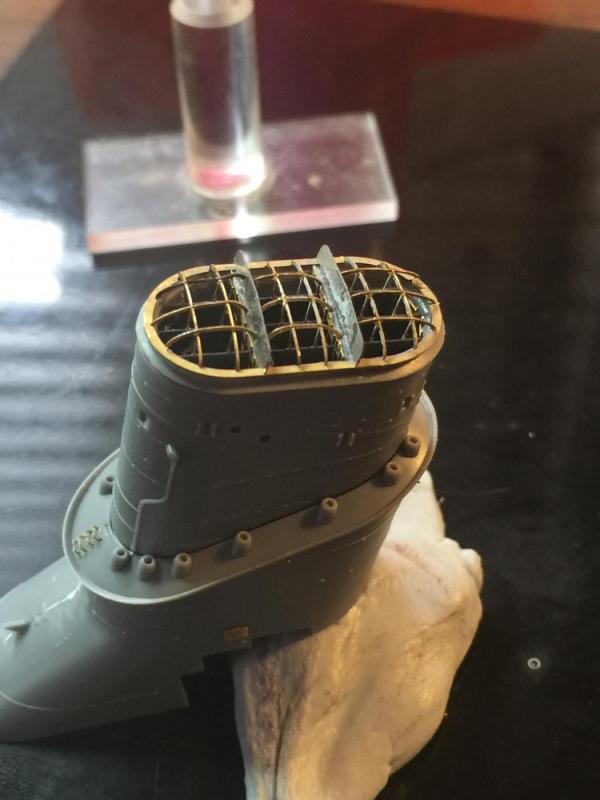
Moving on to the funnels, lots of details be be added here. Again, the base... Then the pre after market aftermarket, including hatches, steps and internal ladders plus support struts then the pontos funnel grille


- 743 replies
-
- 24
-
-
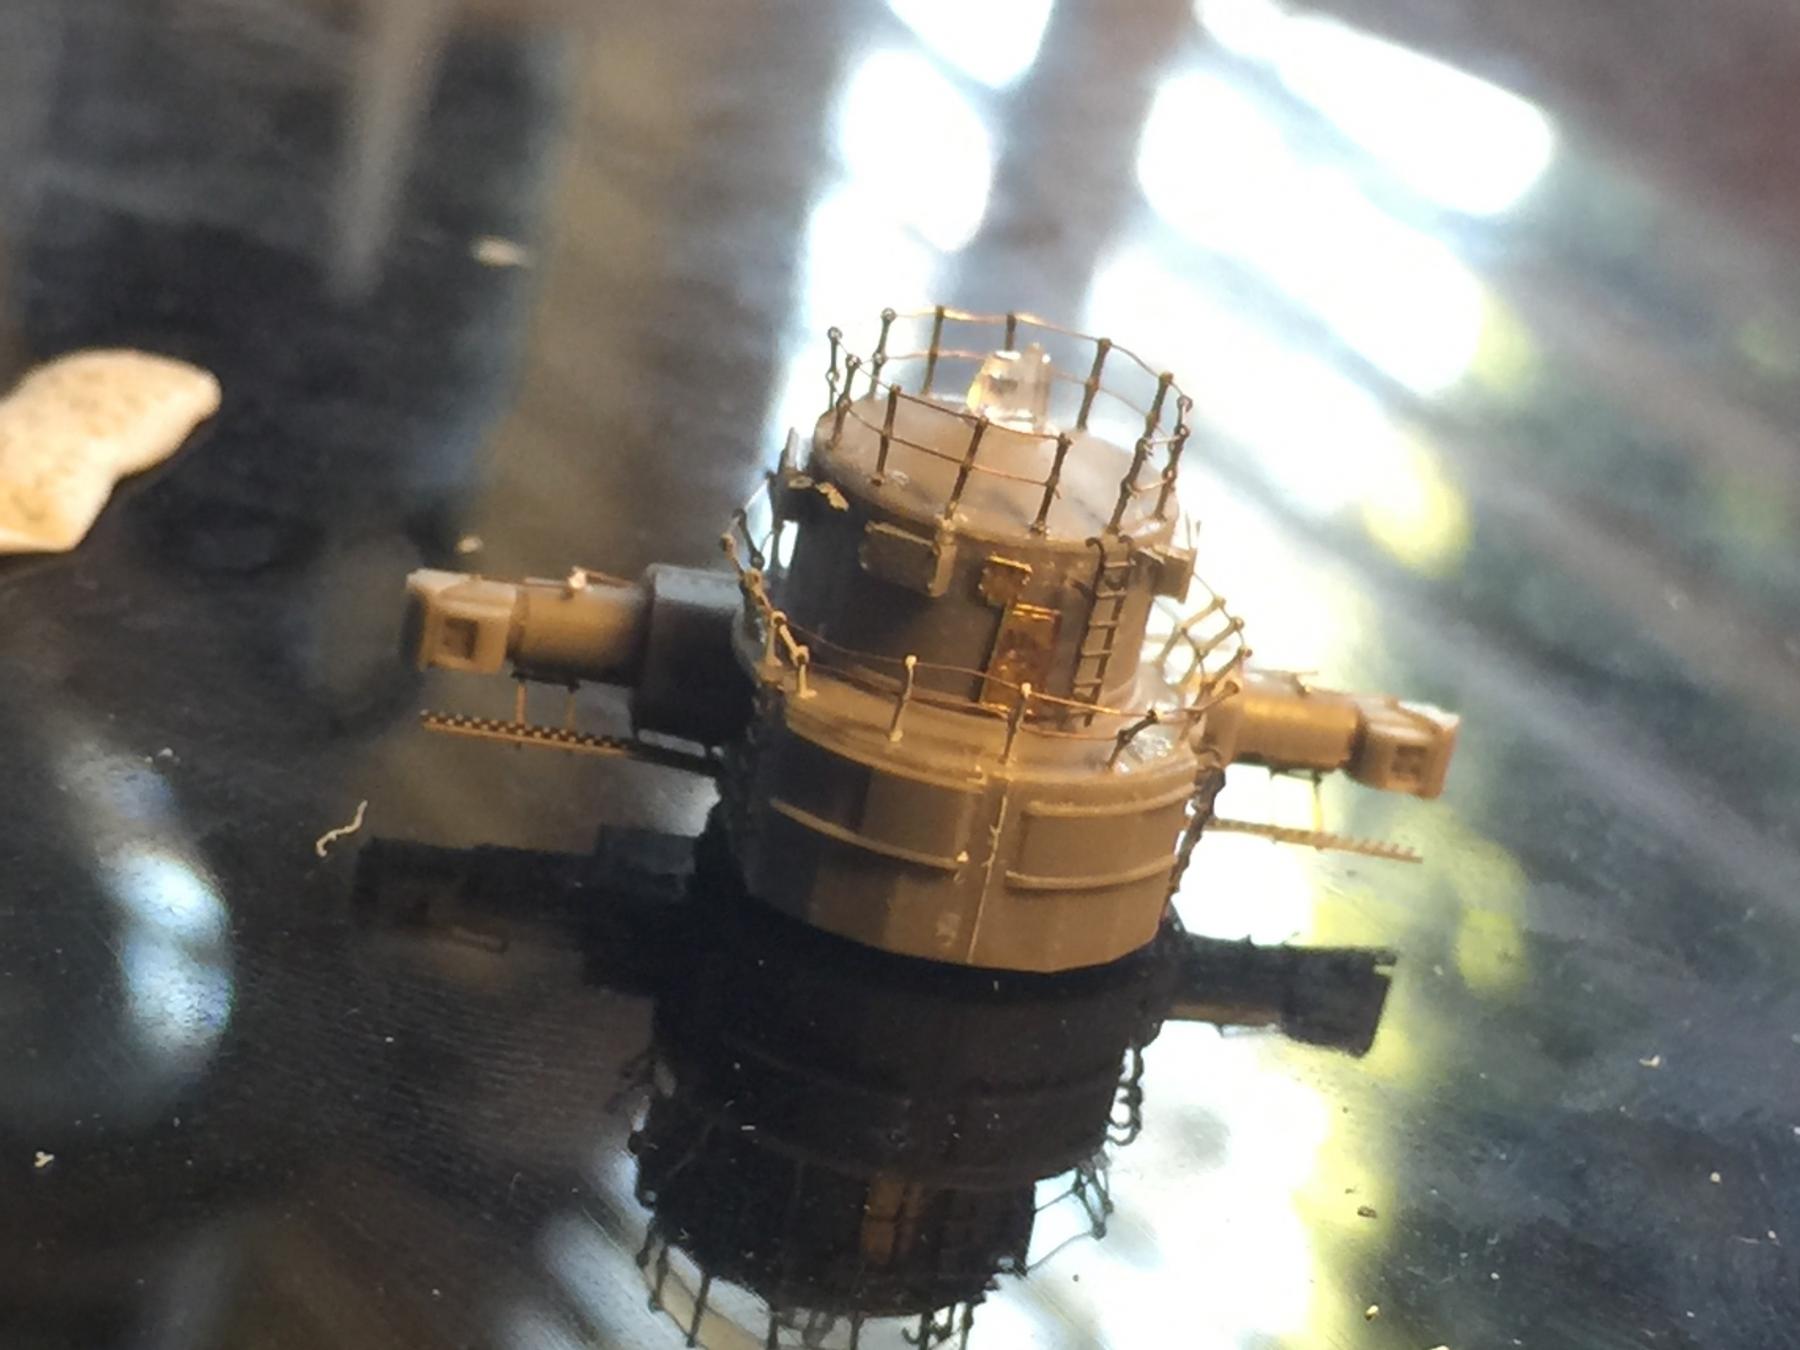
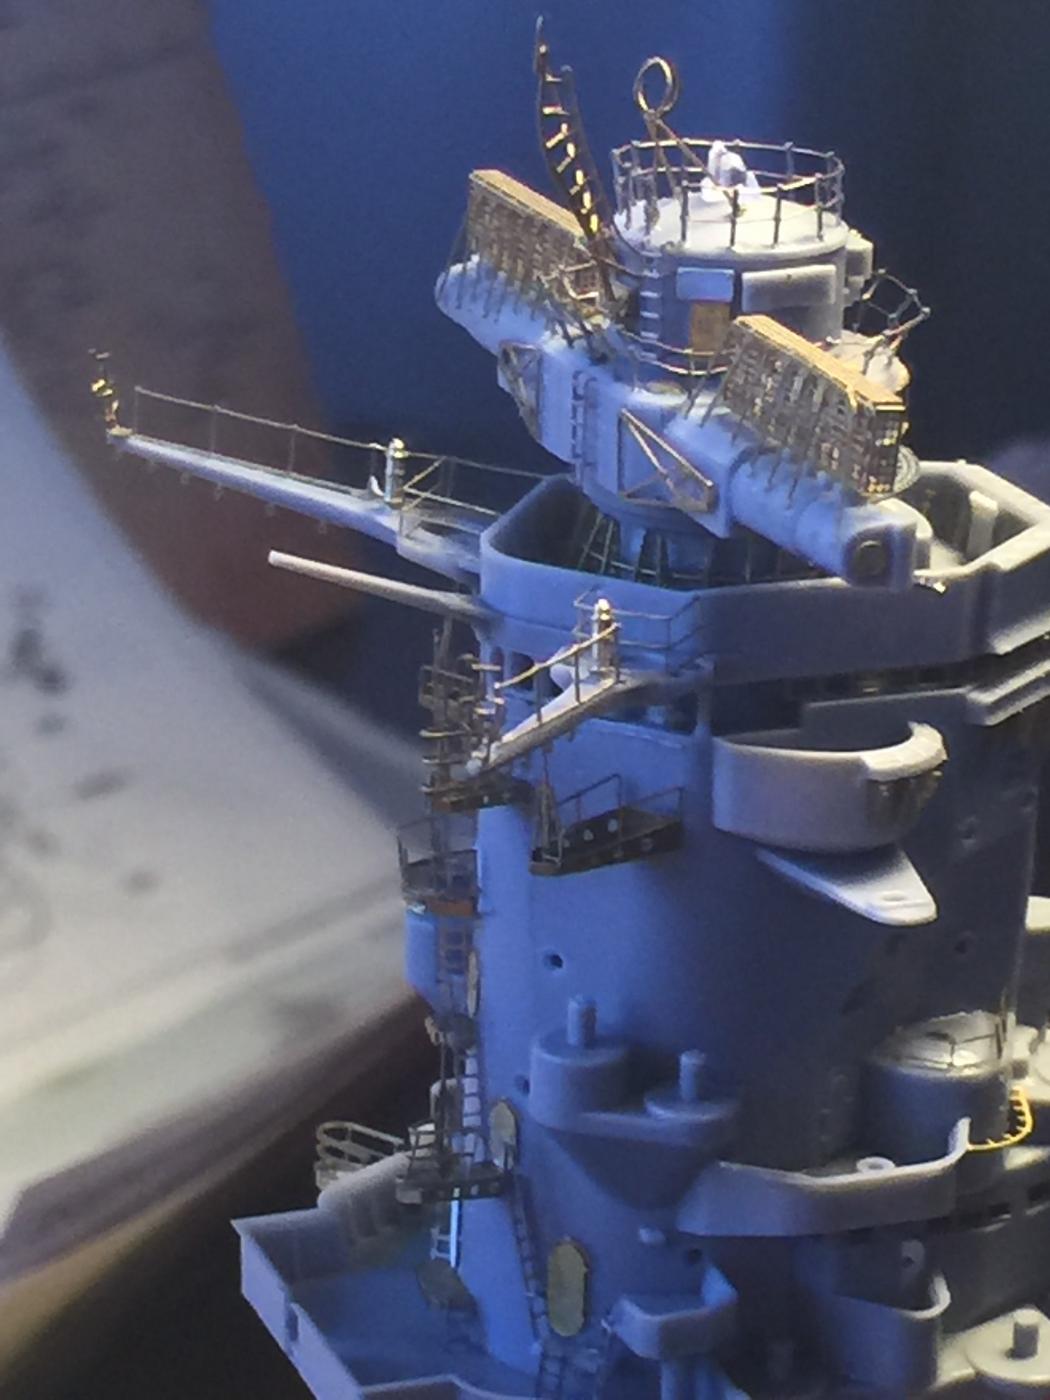
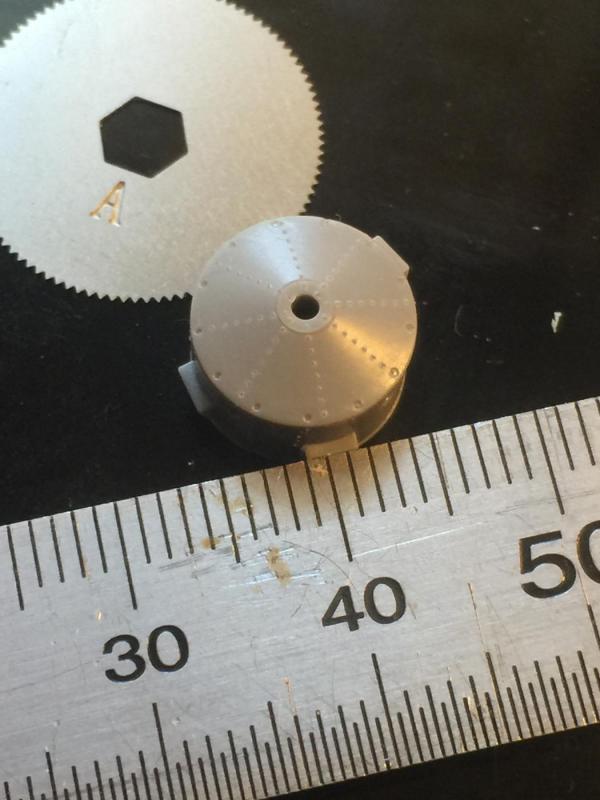
The aft control tower is similar to the front one, just a little smaller and the only real addition is the control arms that go the end covers. A simple fabrication. You can see the little fly wheel I have used to create rivet lines. The tower it sits on has gun controllers which I will add later, the sum total of the parts don't seem to add up to much, and I have added rivet lines throughout and I have added handrails, replaced the support struts in white card and extra rails on op that are not mentioned by tamiya. About a days work. Final shots of where she sits on the ship


- 743 replies
-
- 27
-
-
Pontos has a lot of assumptions, mainly that you are an expert on the ship that your are building and know what goes where and have extensive research materials at hand. Then they leave bits out that one would think would be naturally included. That being said their products are first class. I love this build and look forward to seeing you cover the deck in aircraft!
-
Sorry Banyan, I missed your question, I got them with the PE bender from some place online in Queensland but they would be very easy to fabricate
-
Banyan, the holder is from a rivet maker set, basically a tiny metal wheel with teeth that I am using to make rivet lines which you won't see until it is painted and washed. Amateur, I hope you're not put off from the scale Hof, where are your logs?
-
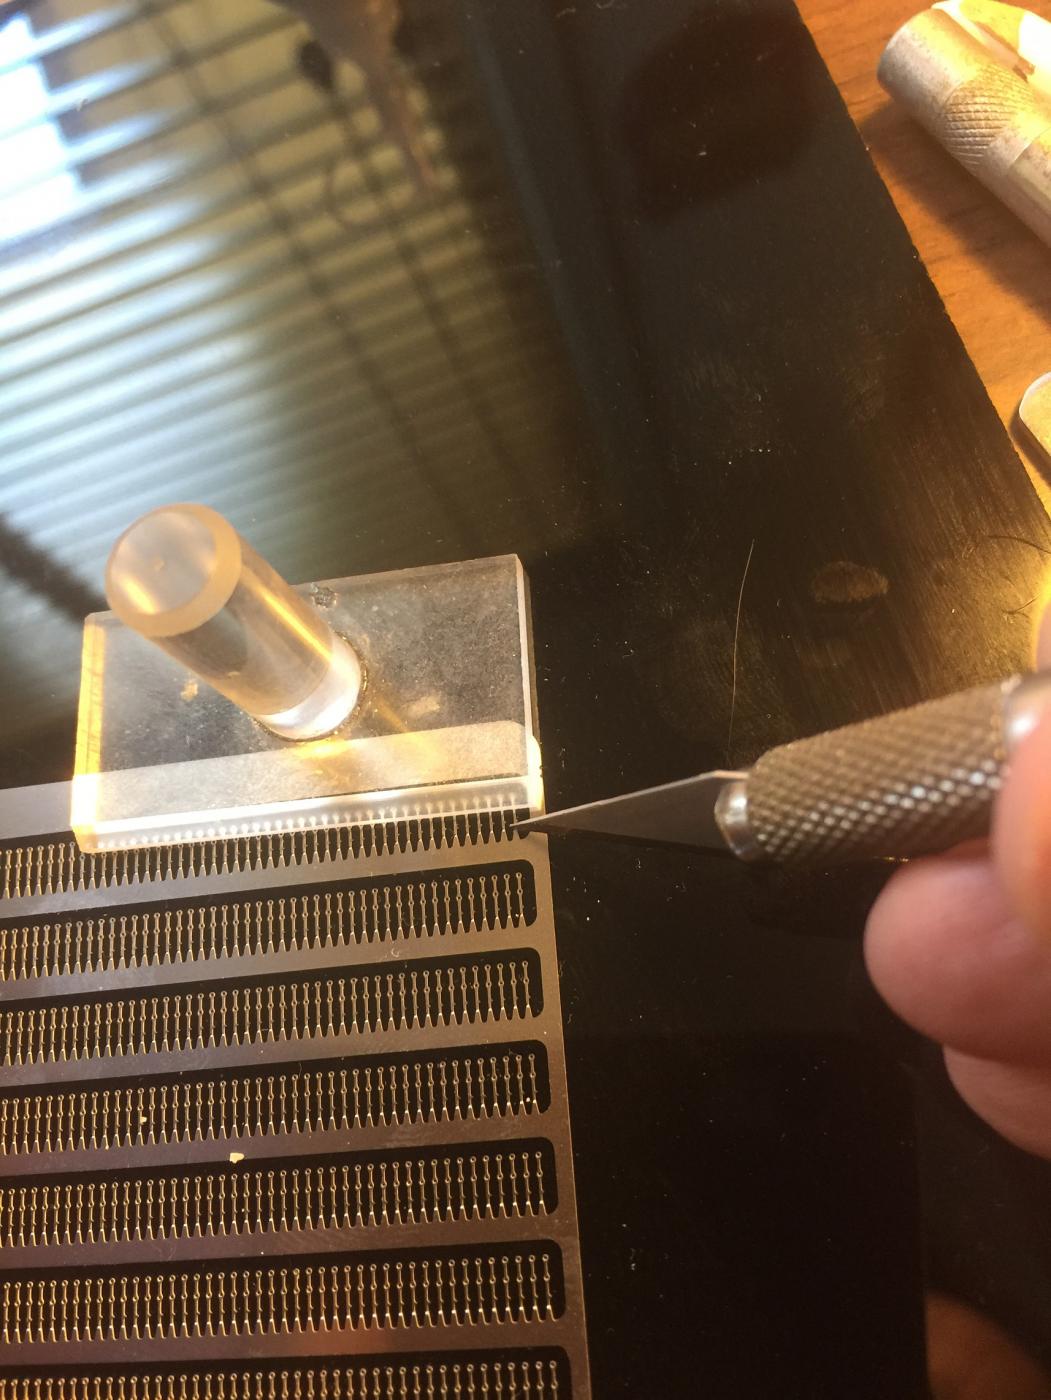
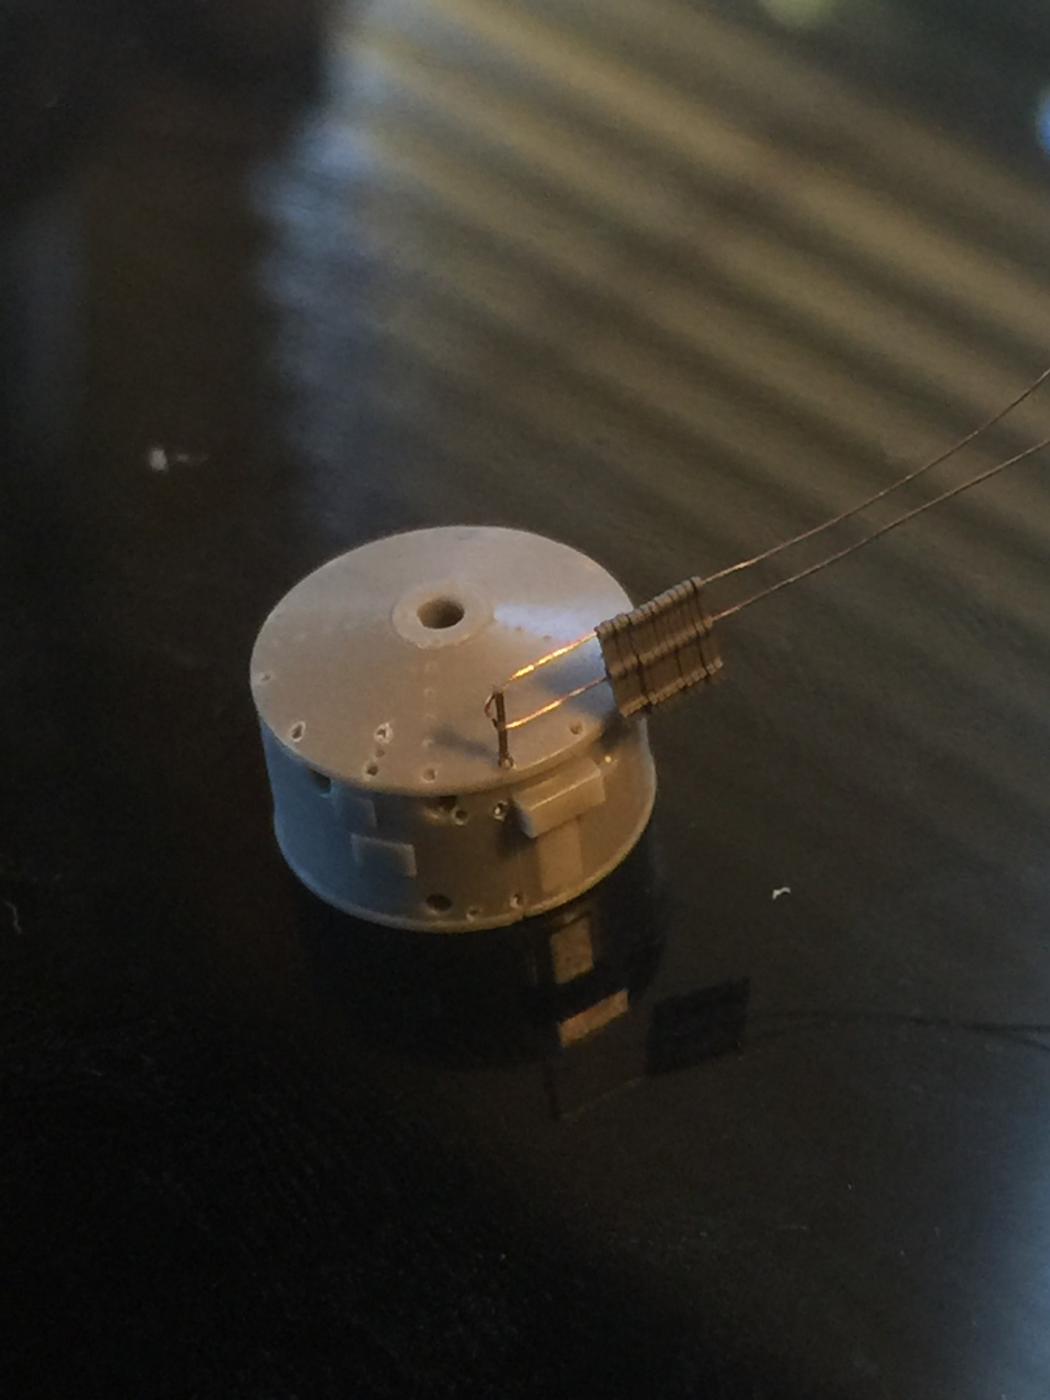
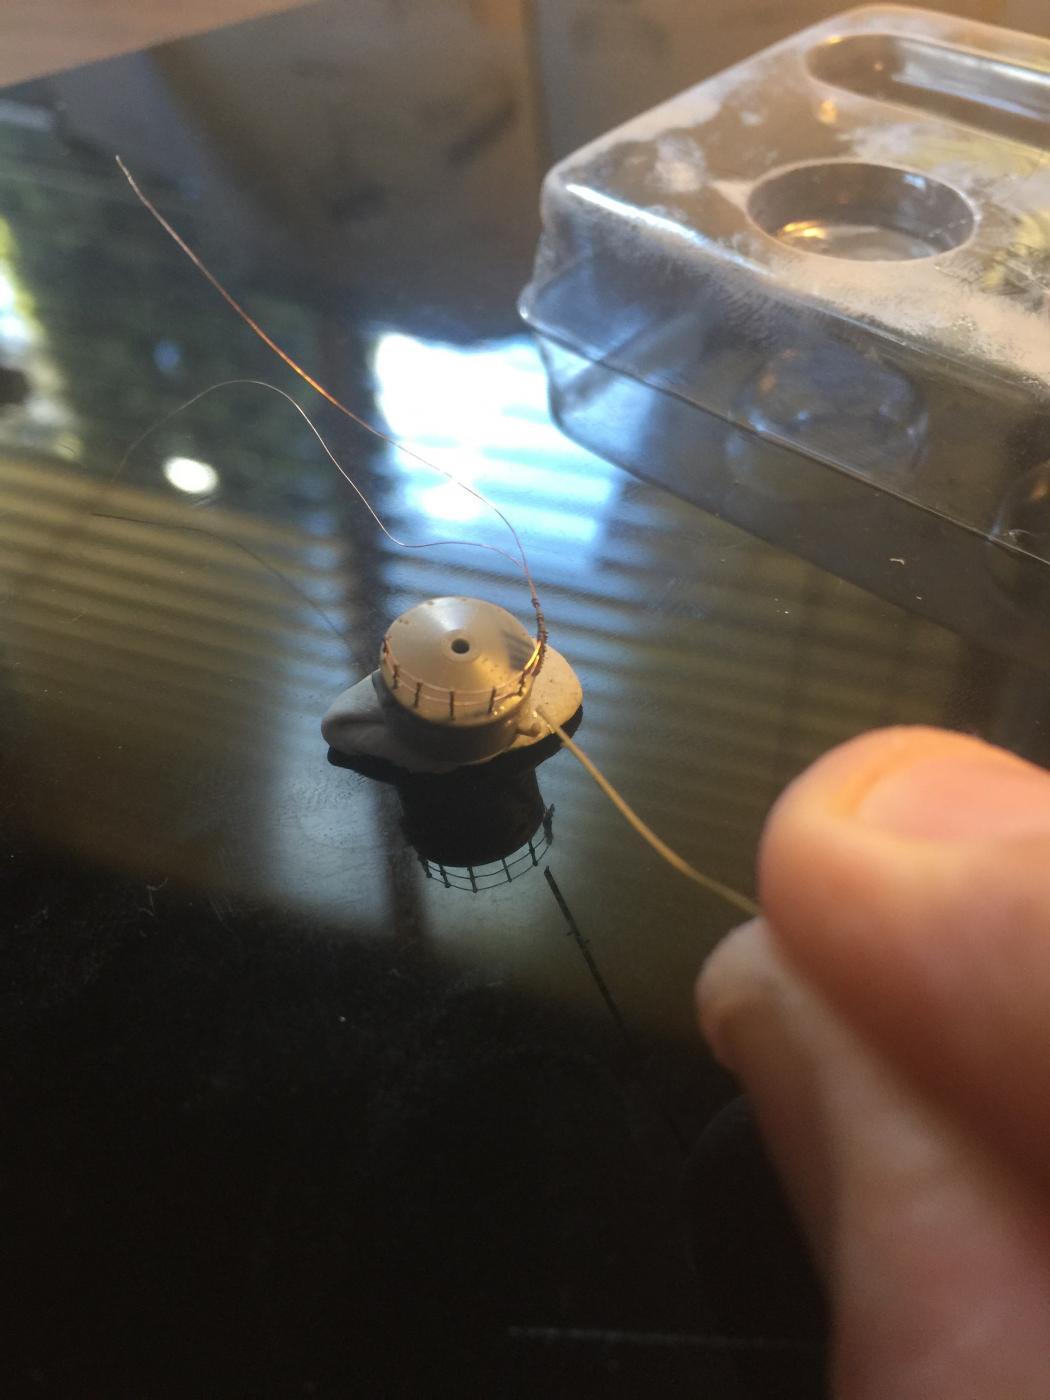
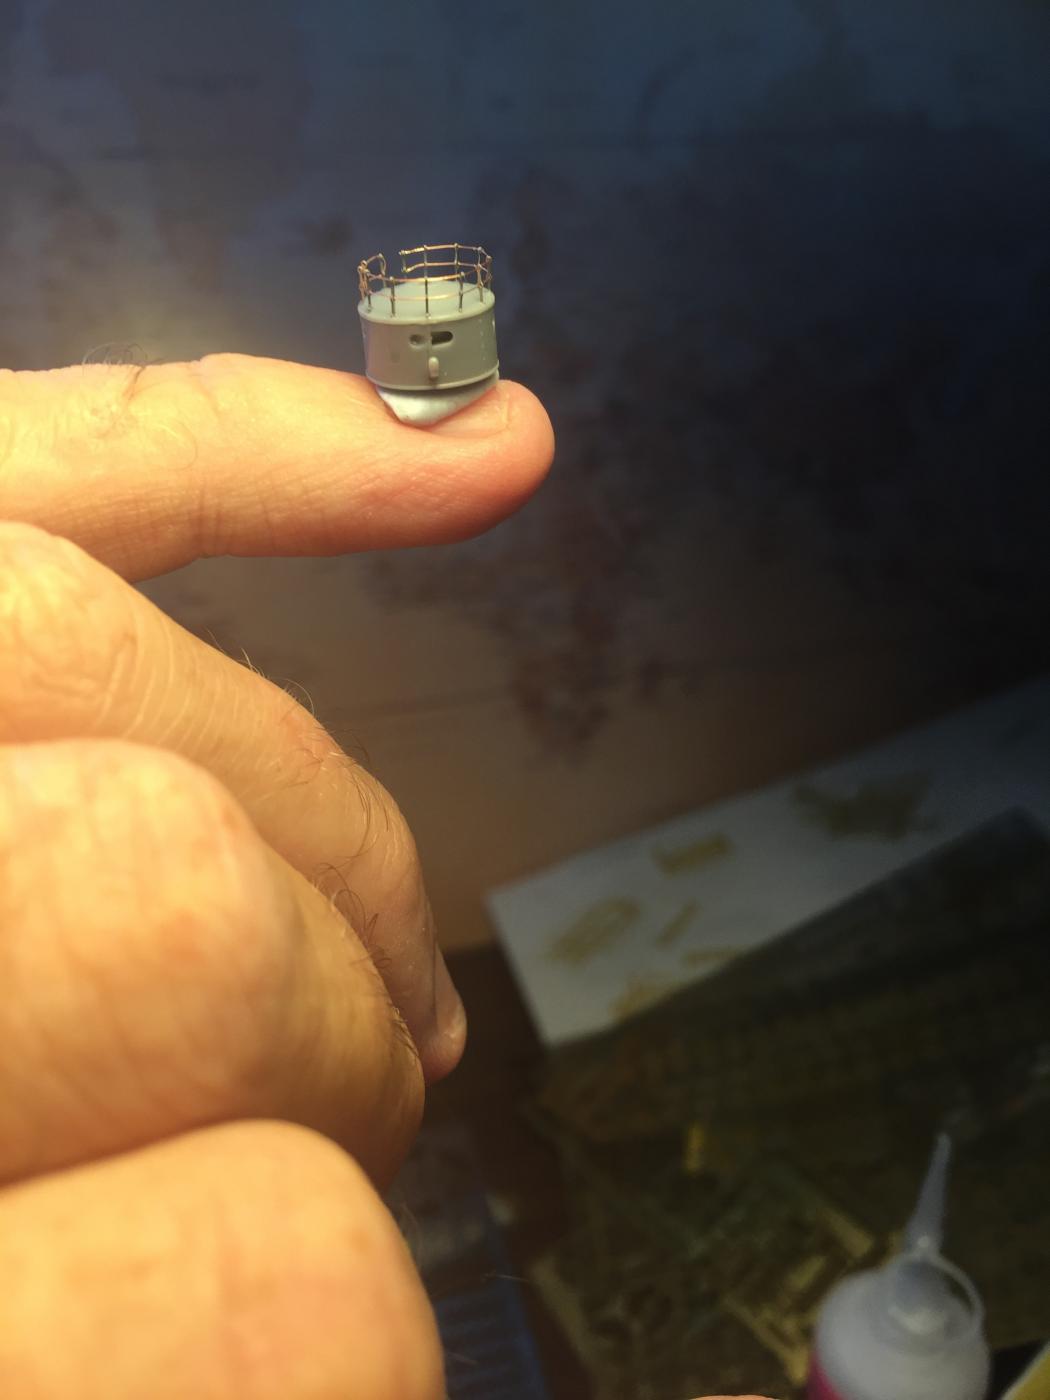
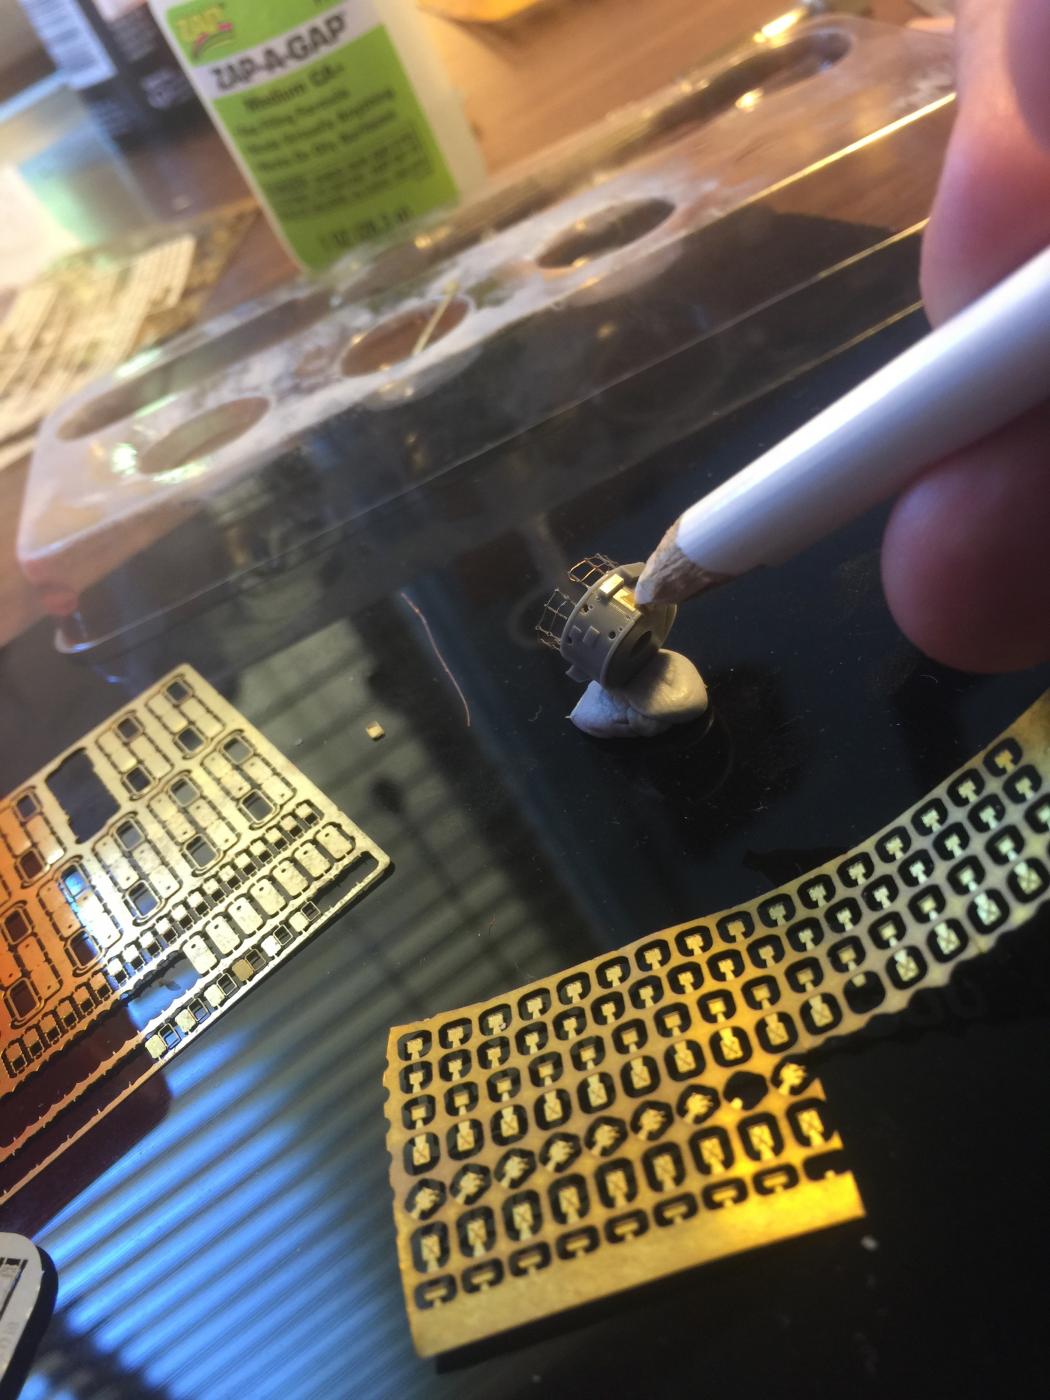
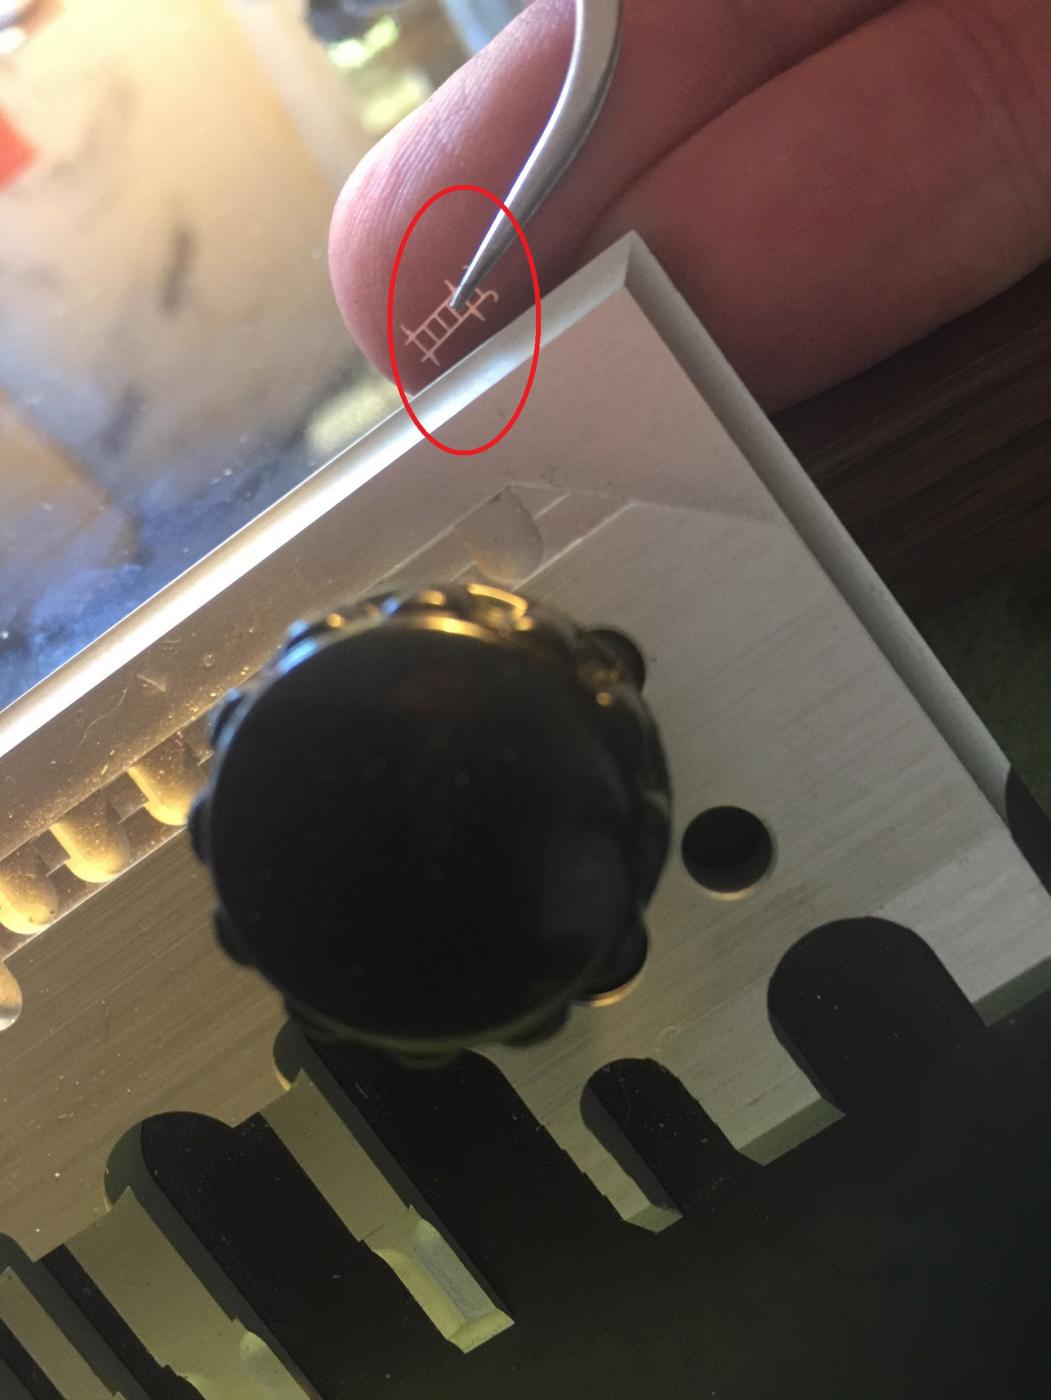
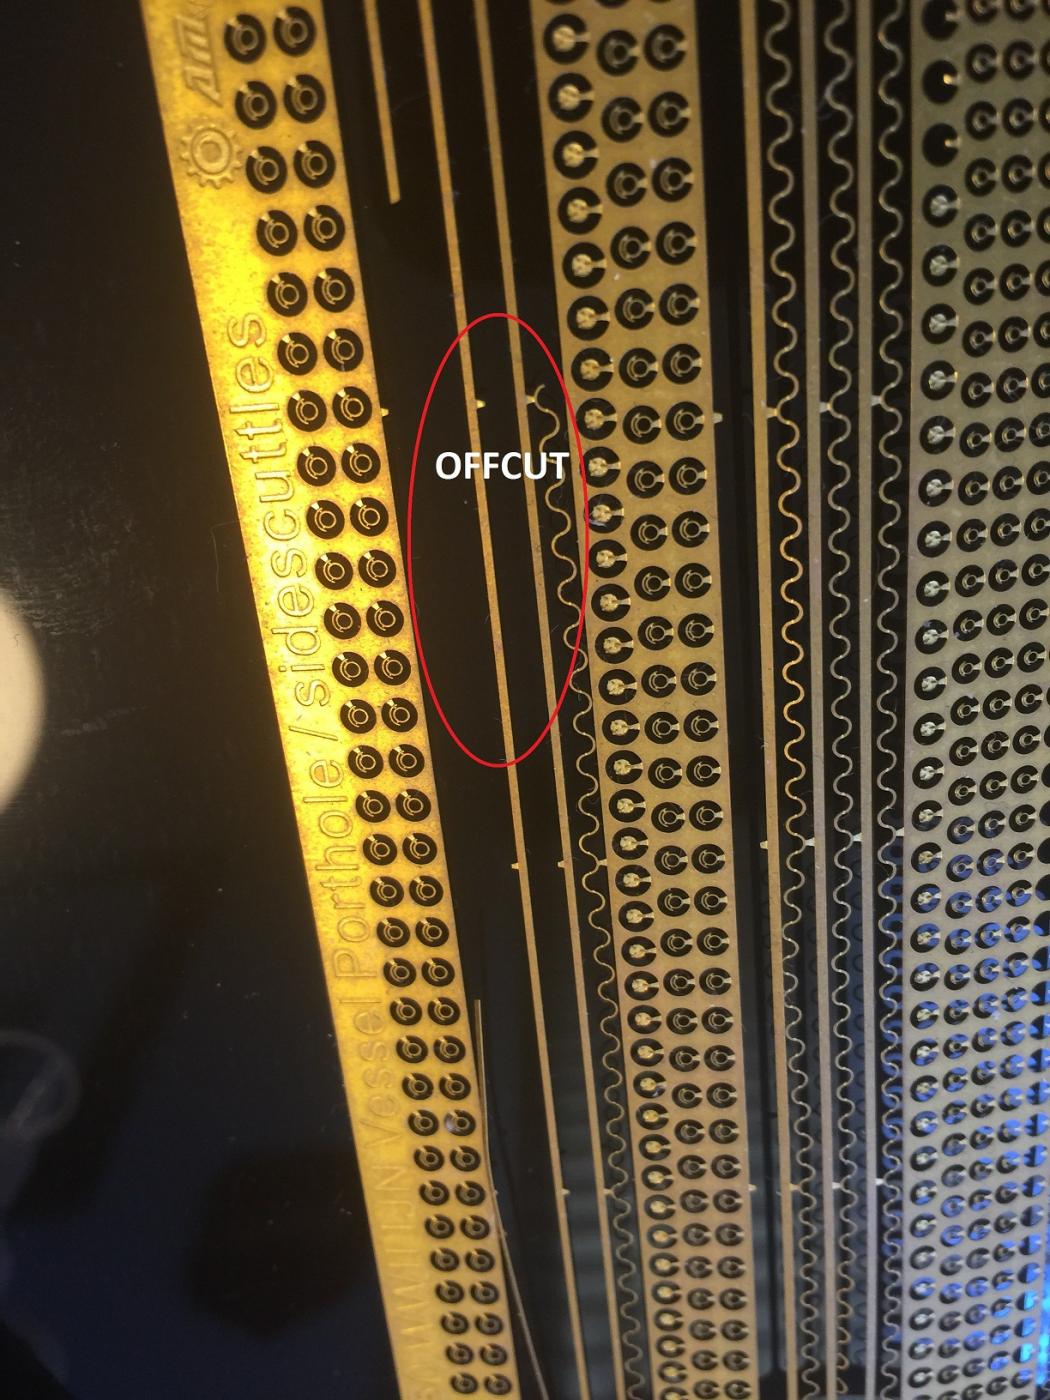
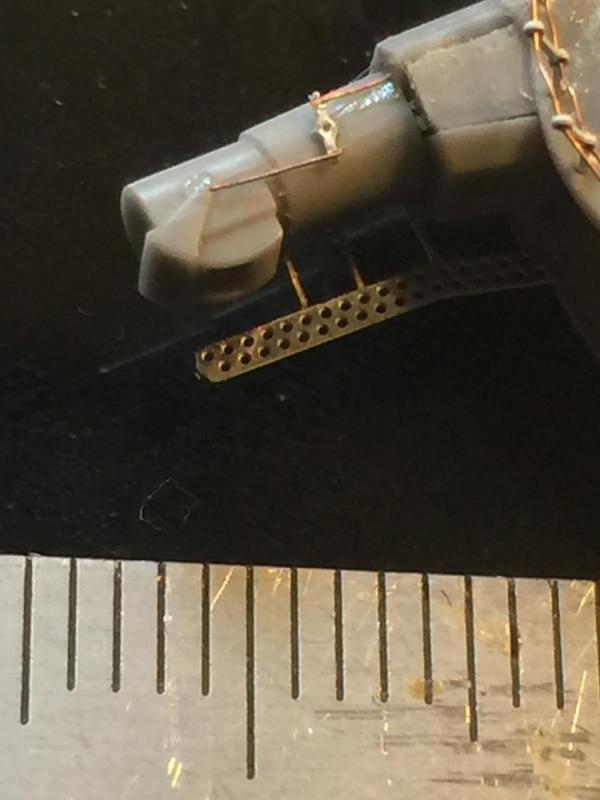
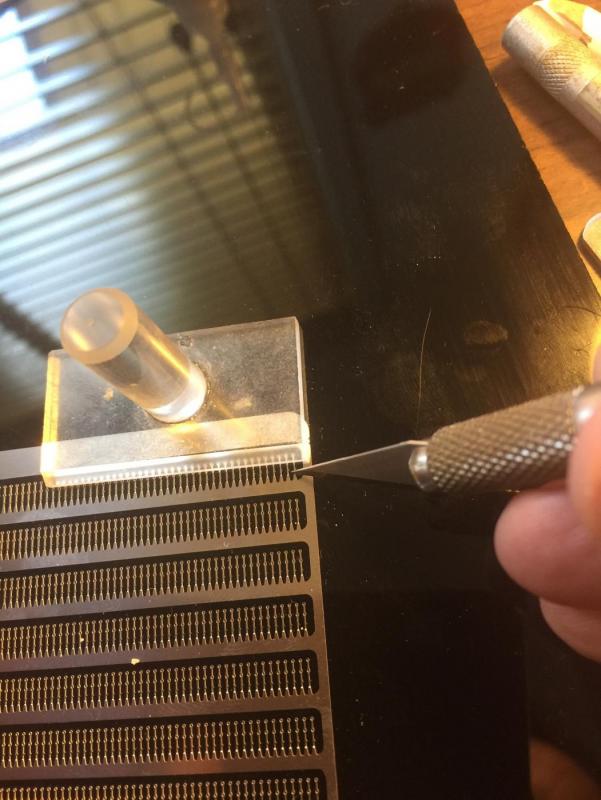
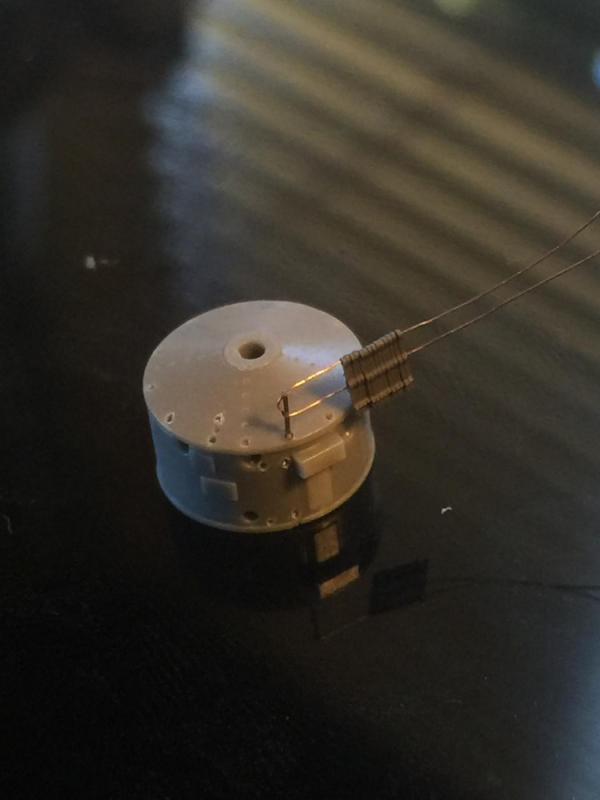
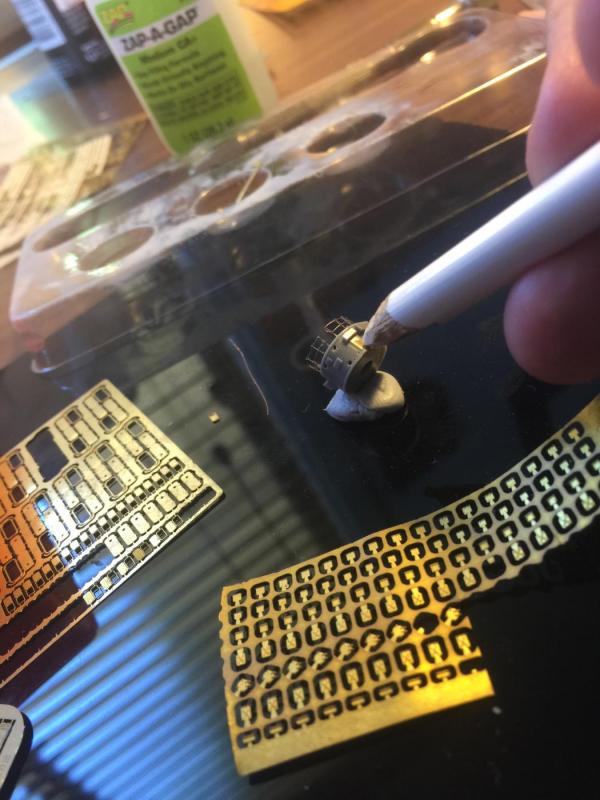
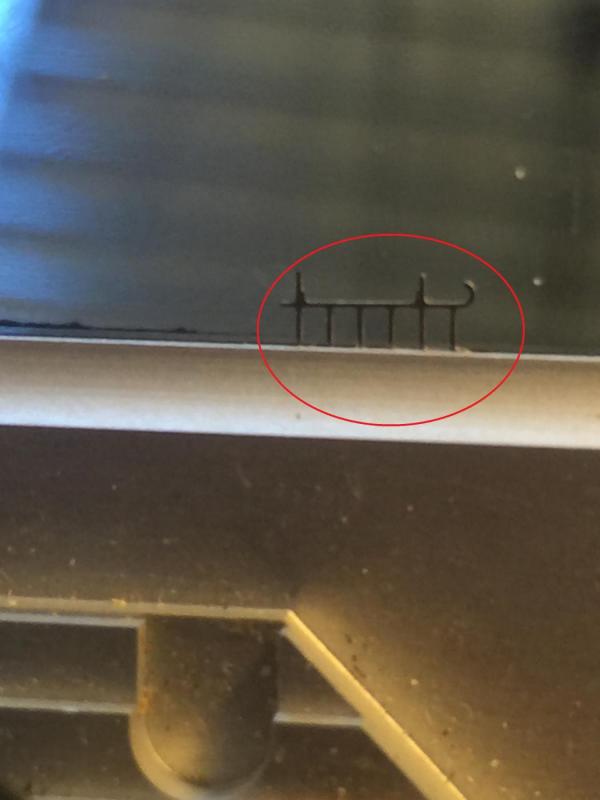
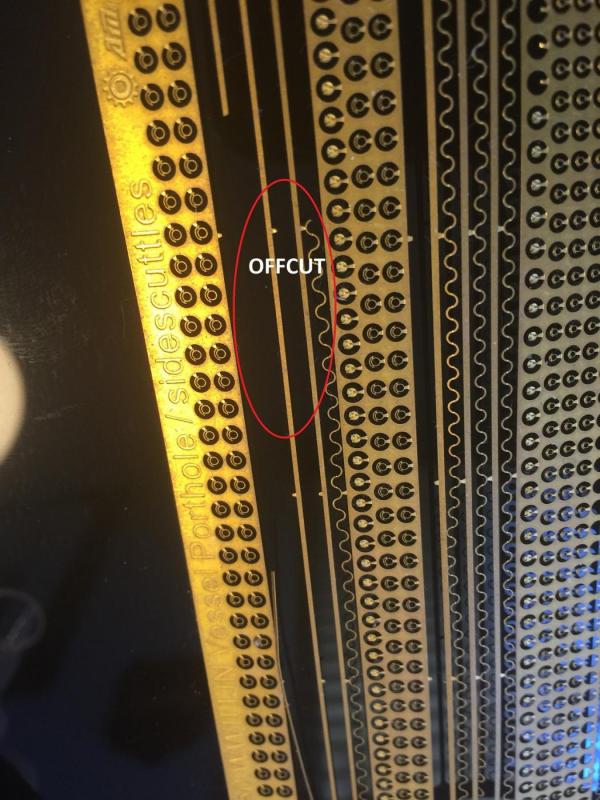
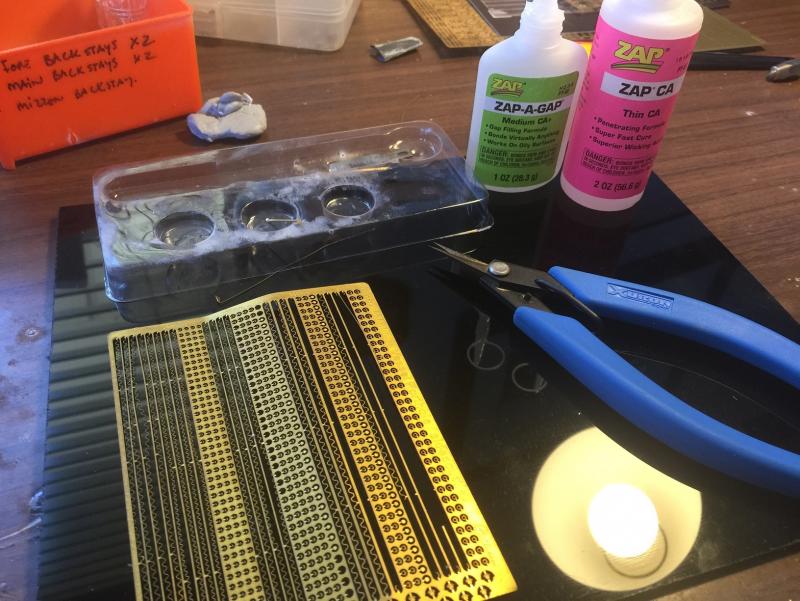
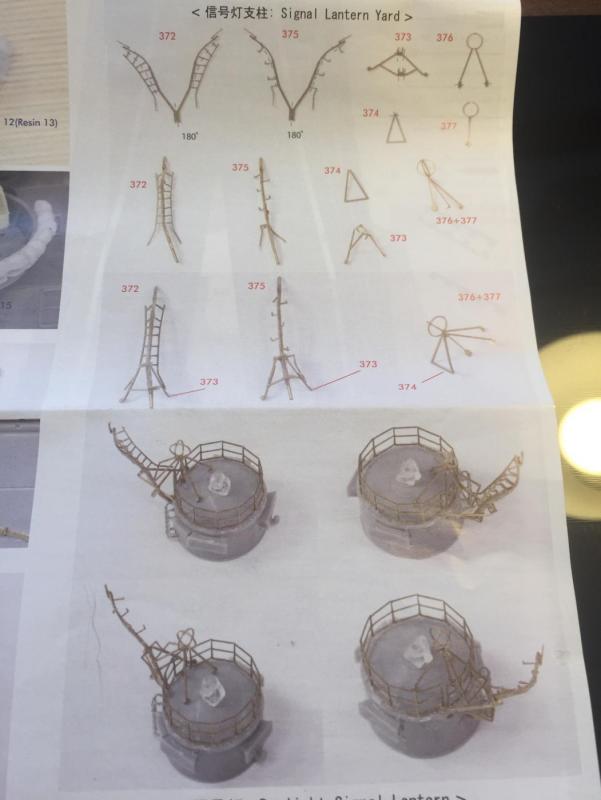
So, the build, firstly drilling out the .3mm holes in the top piece. You can see from the Pontos instructions they provide 1 piece of Pe but I prefer this. Then using the perspex holders, cut the individual stanchions off the fret. Tamiya does these in steel and whilst very sturdy, they are very hard on blades. Because they will be curved, I add all the stanchions to the .3mm copper wire. The using the patented Ca applicator, add tiny drops of glue to the holes.... And there it in on my fingernail. Note I use bluetack to hold the pieces stable whilst working on them. They are my third hand. Then the small hatches which are used with spares (none in the kit or Pontos, applied with a grease pencil。 Next are the ladders which are Tamiya and steel, obviously to save on brass, but hard to cut. There are applied to the PE bender and folded on each side, using the blunt end of tweezers. They are then applied with a piece of bluetack on the end of a paint brush handle. Then the aerials from the fret, as I said, there is no reference from pontos to say there are two type, but I figured it out, the PE bending as very fragile but achieved in the PE bender and very soft hands. Hope it answers those questions. Greg


- 743 replies
-
- 24
-
-
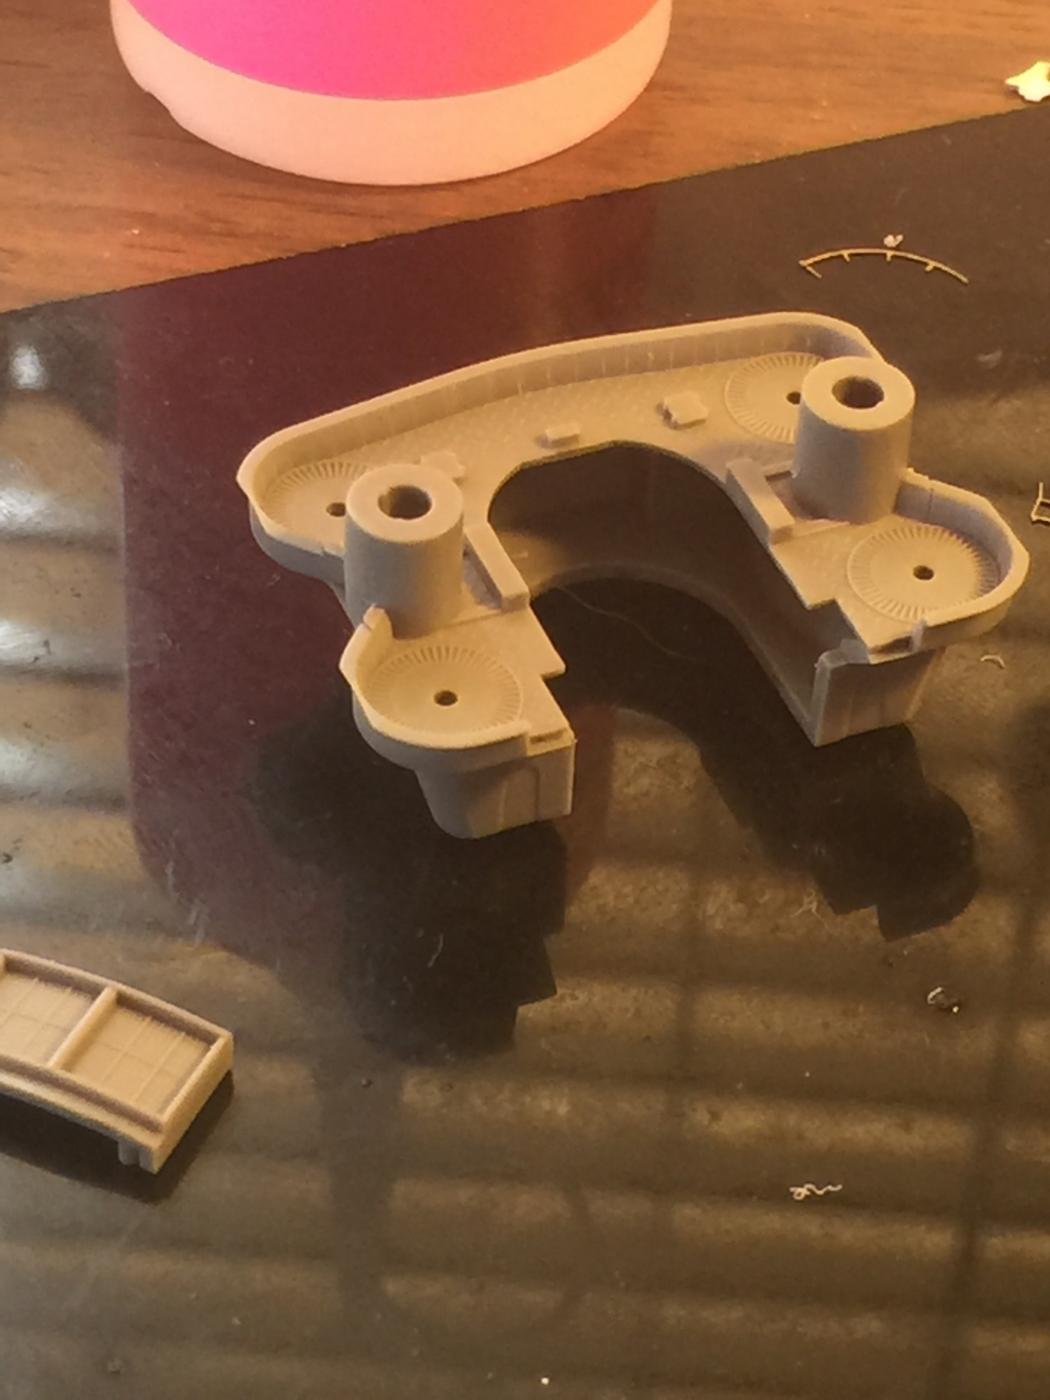
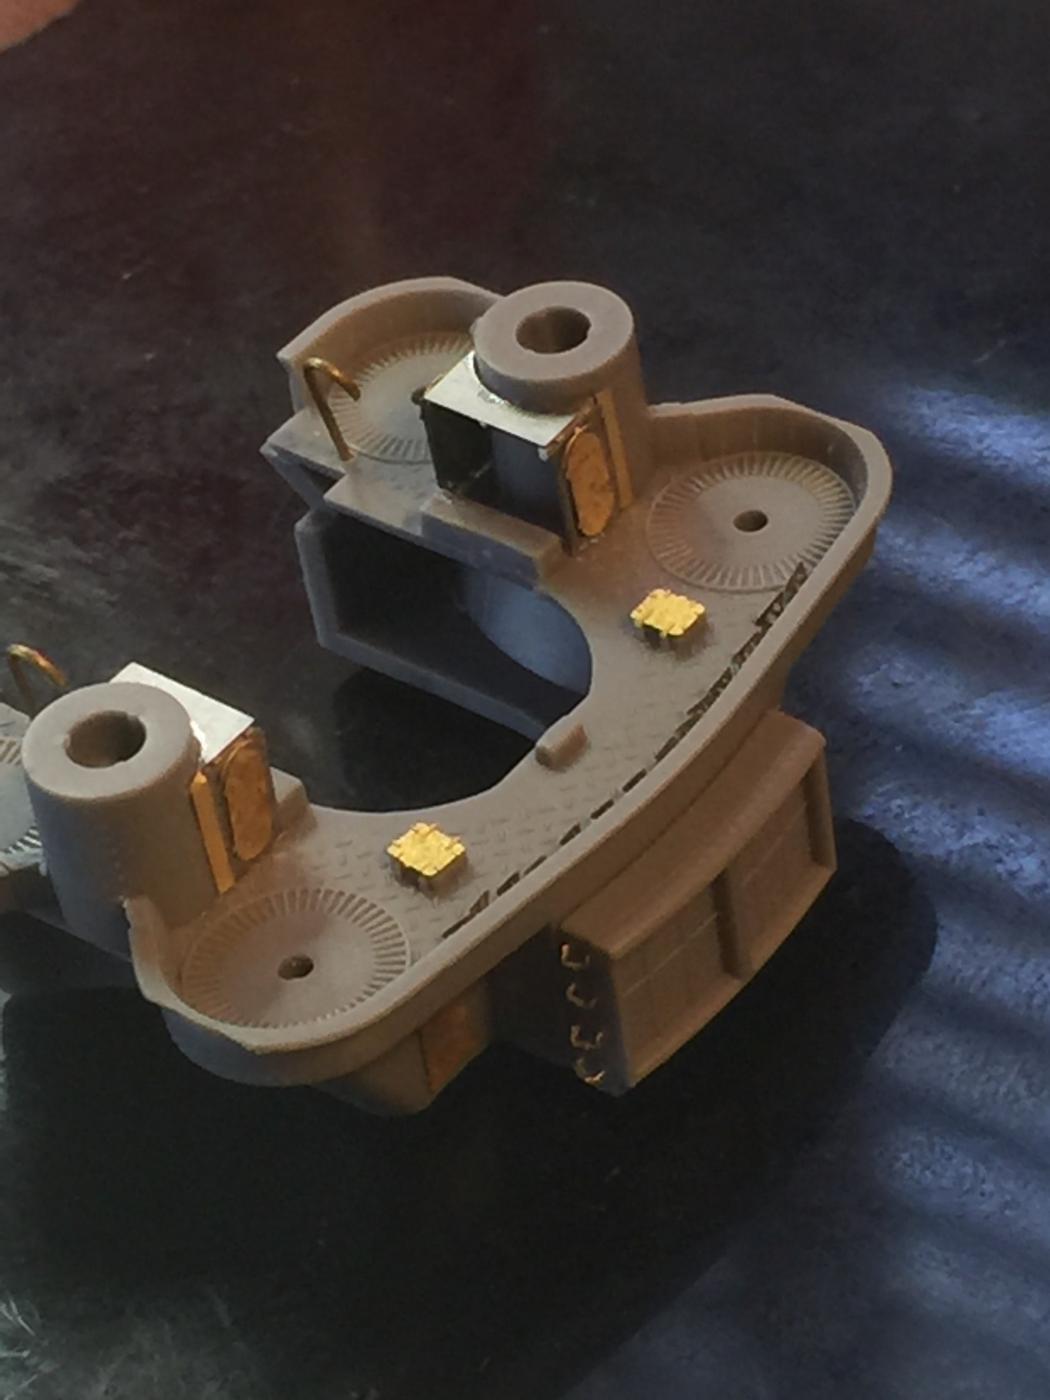
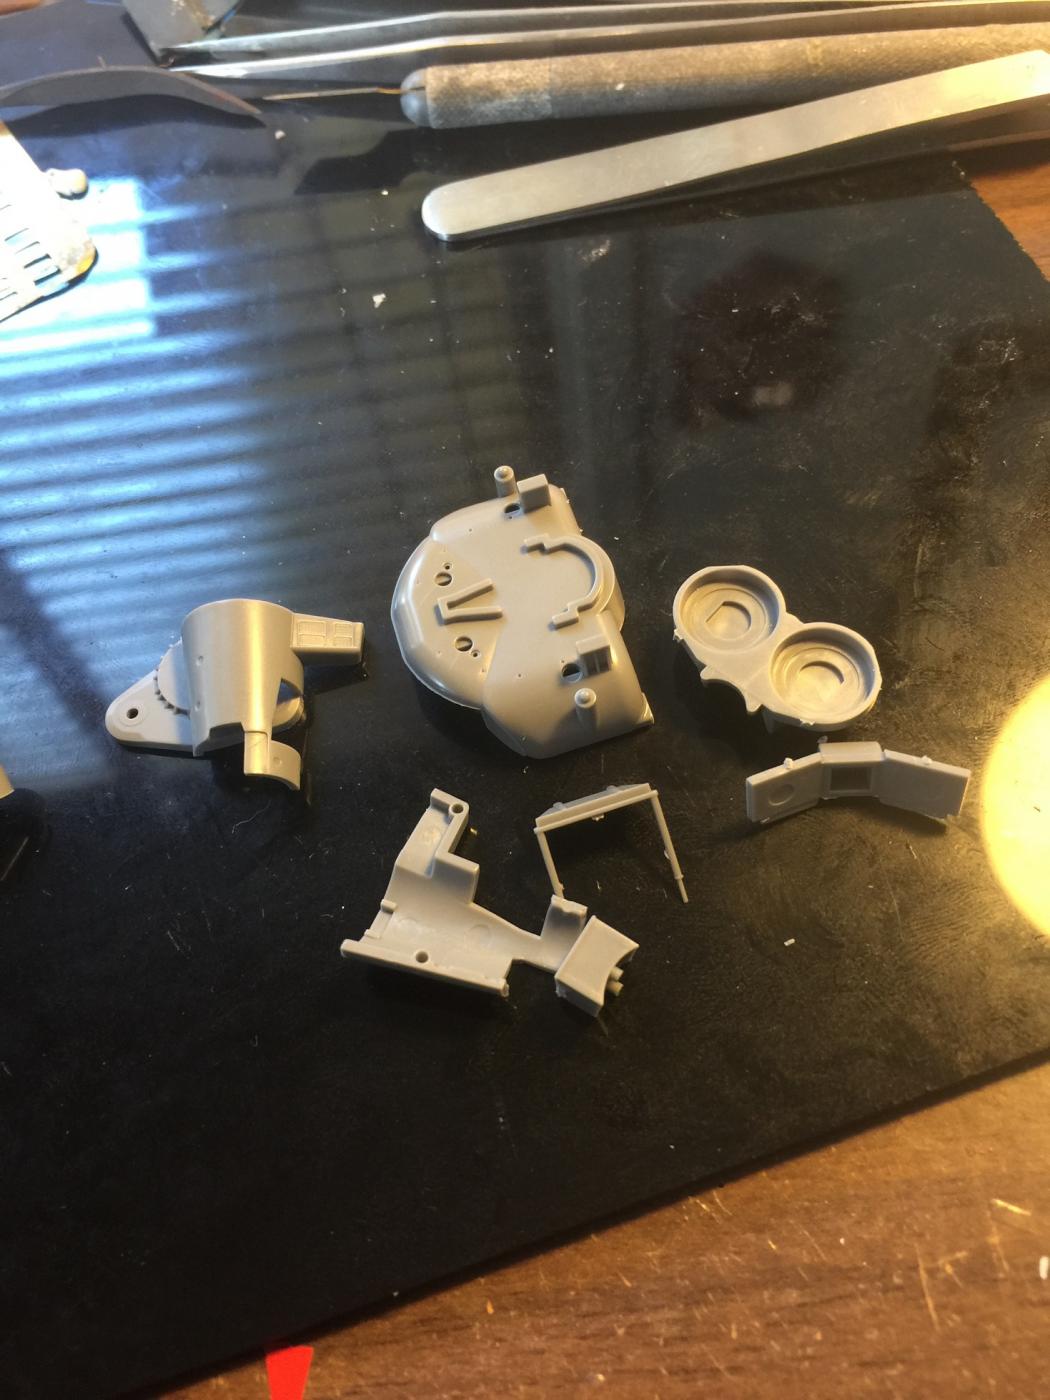
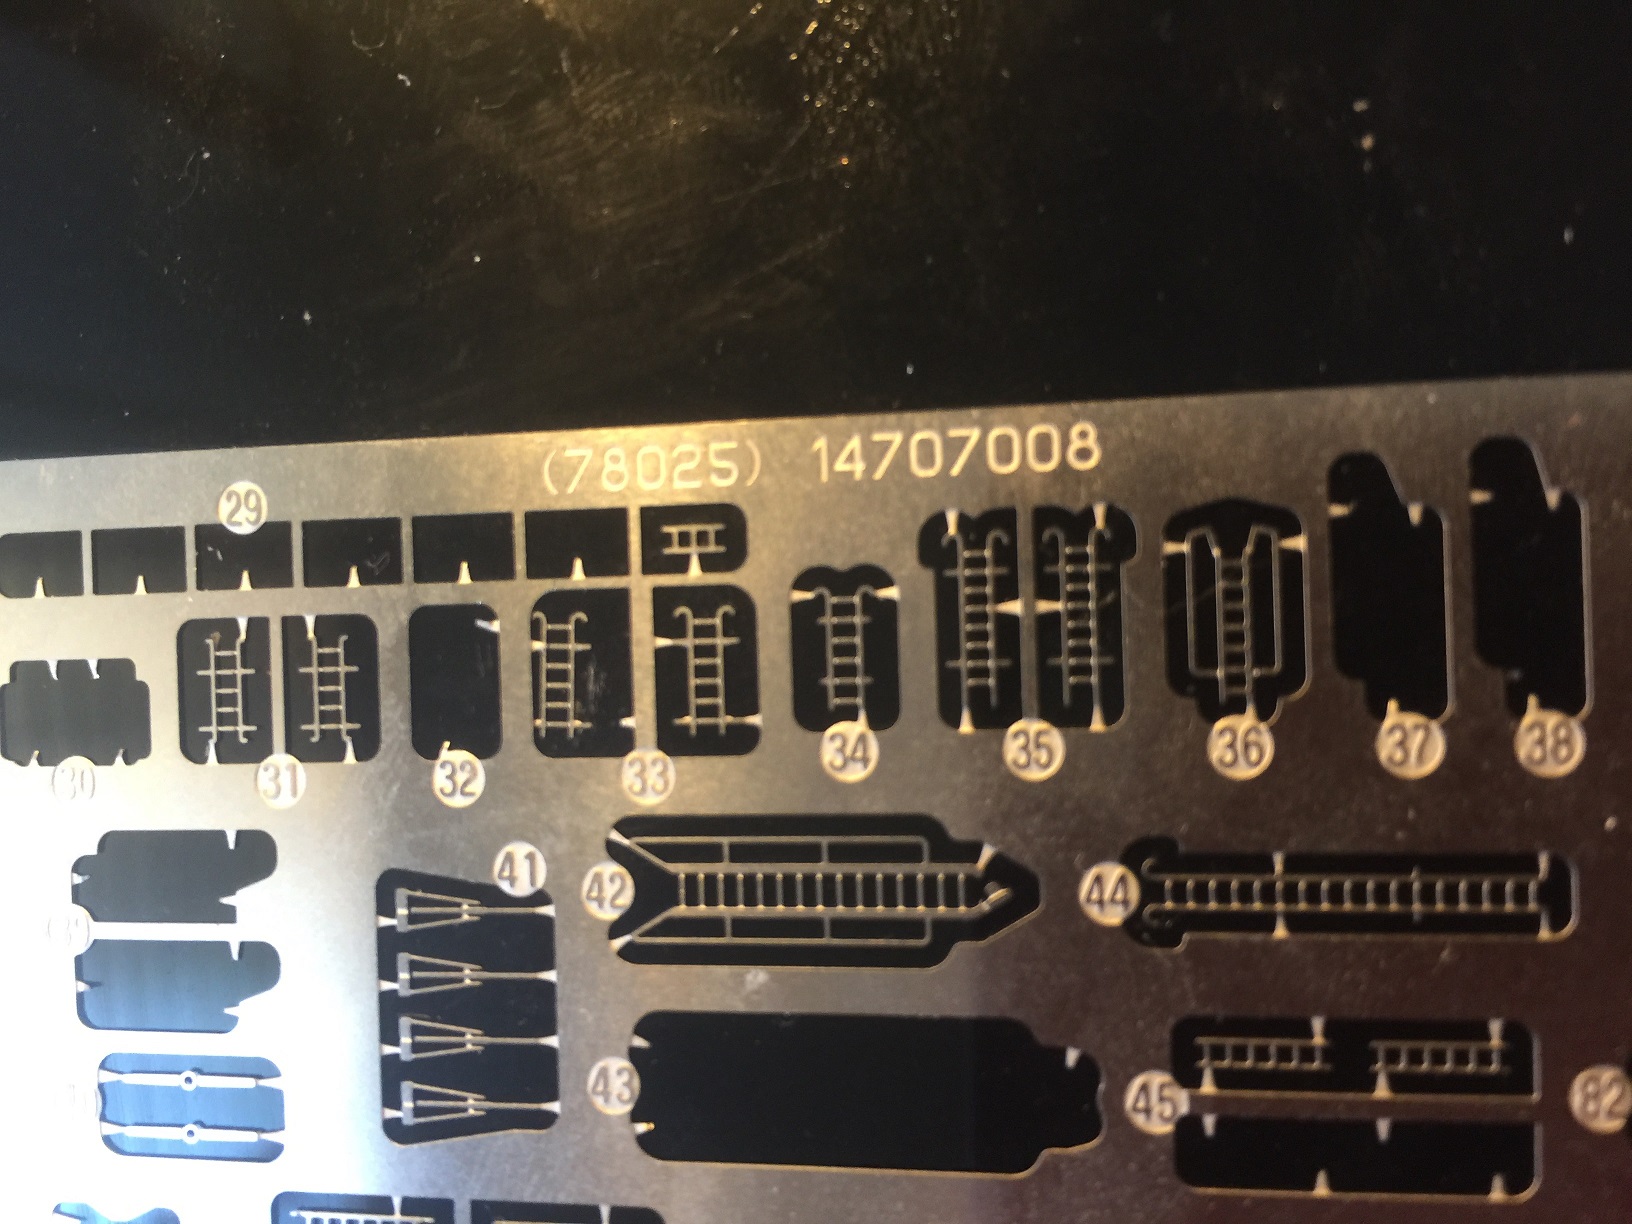
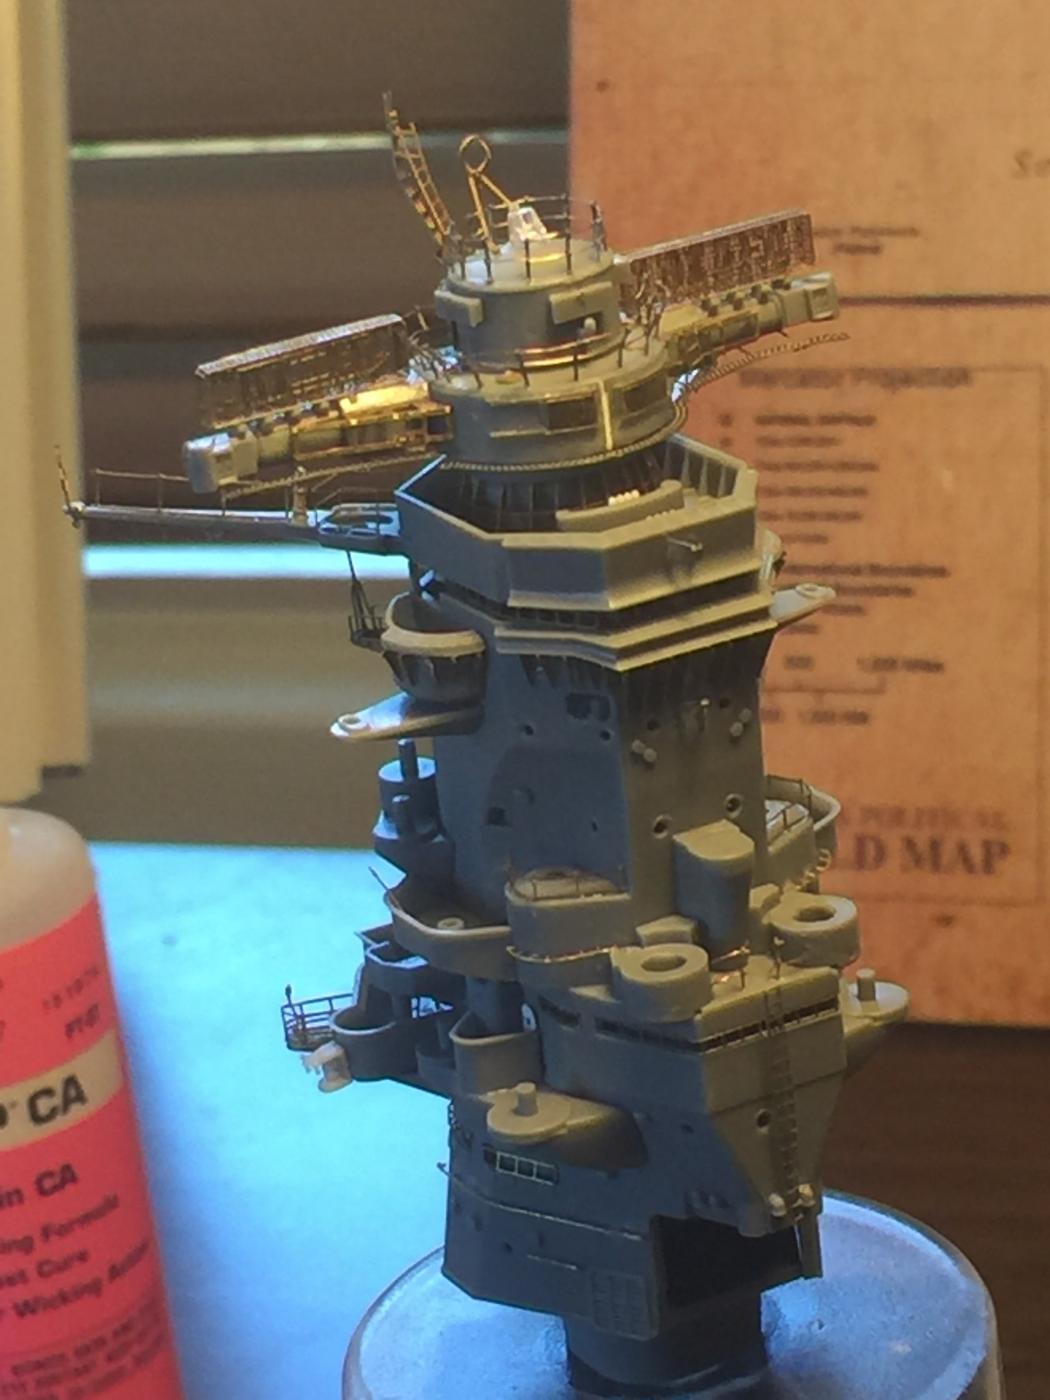
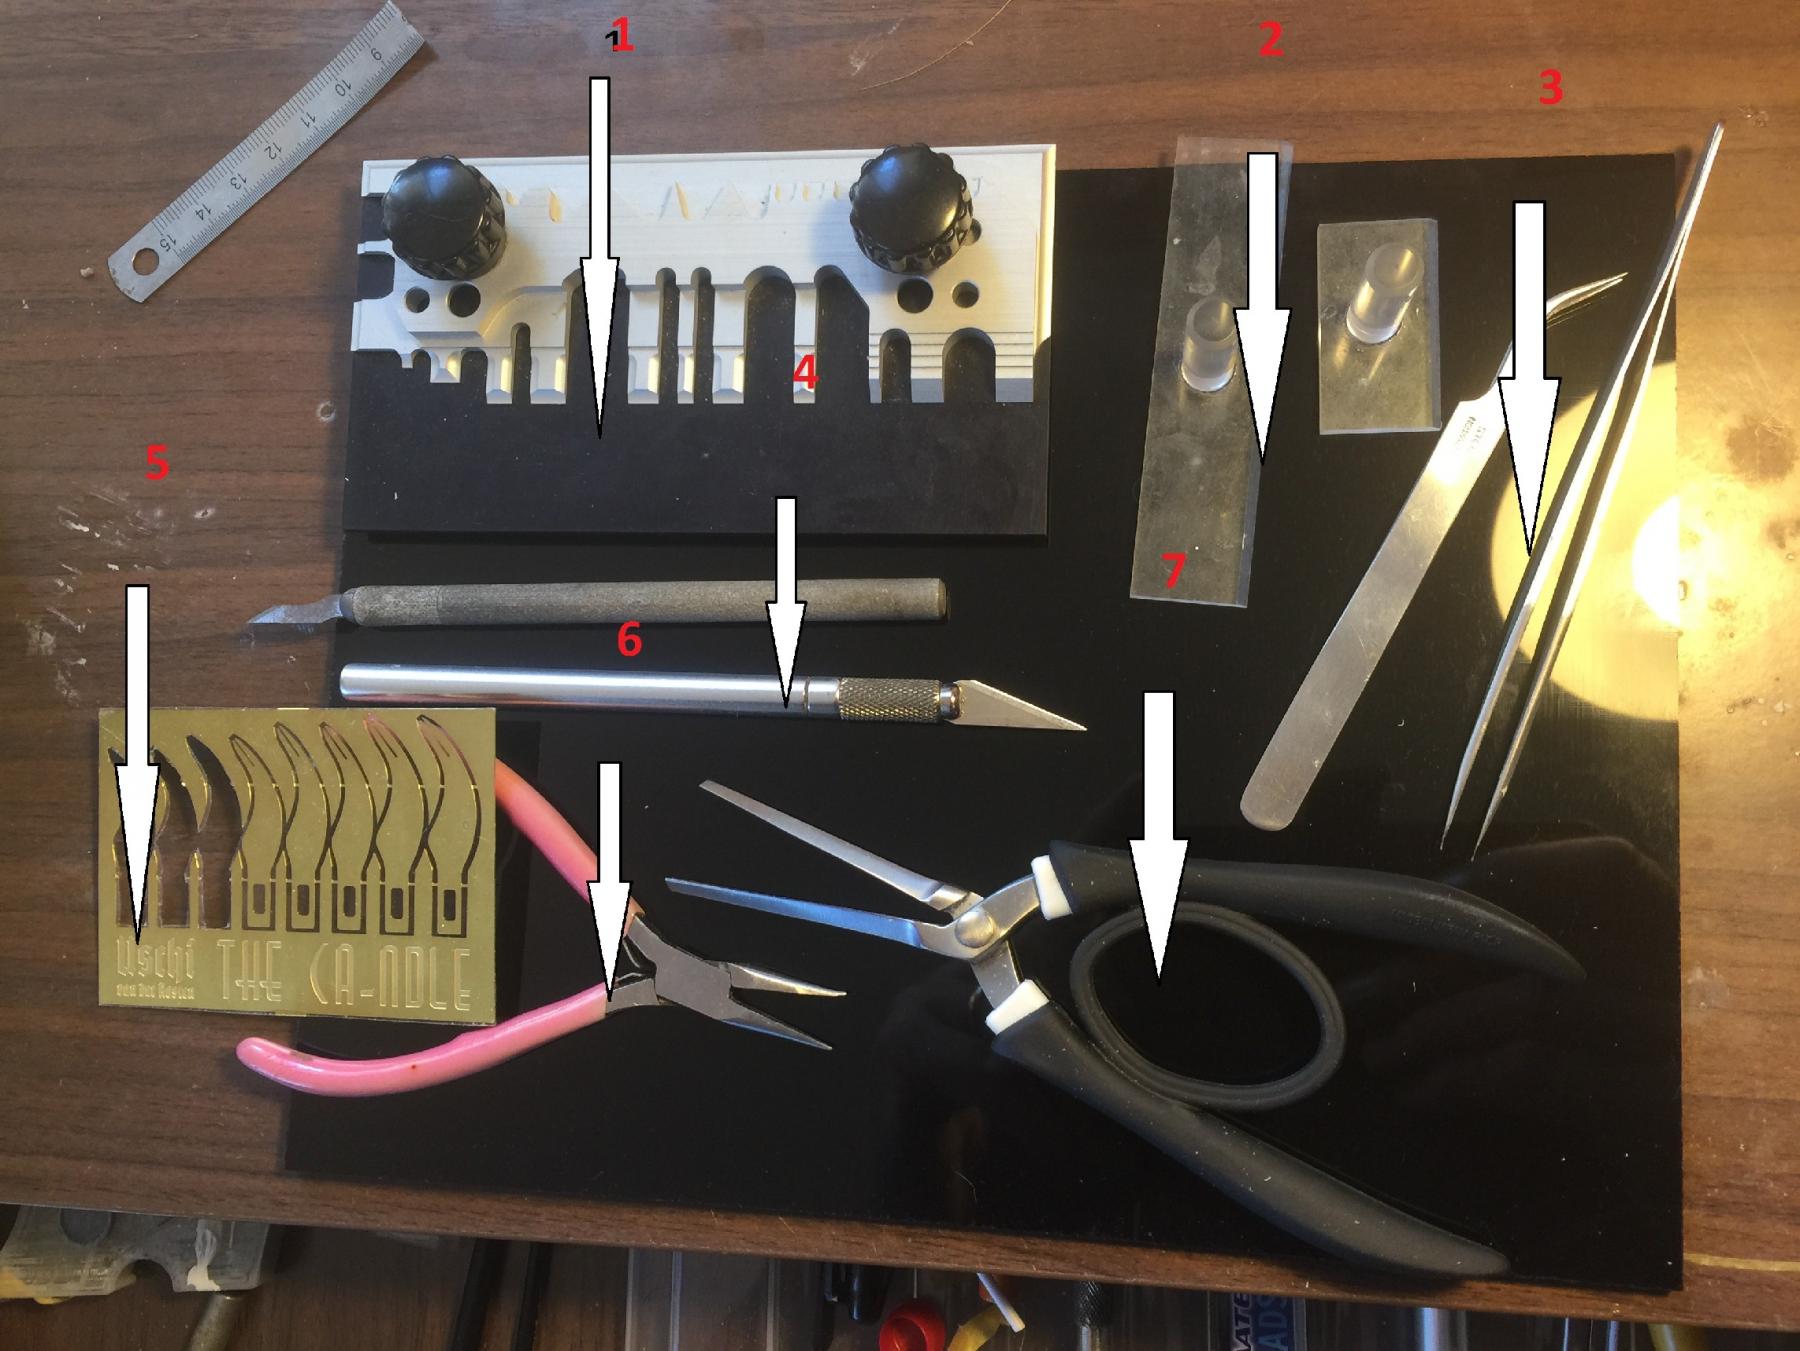
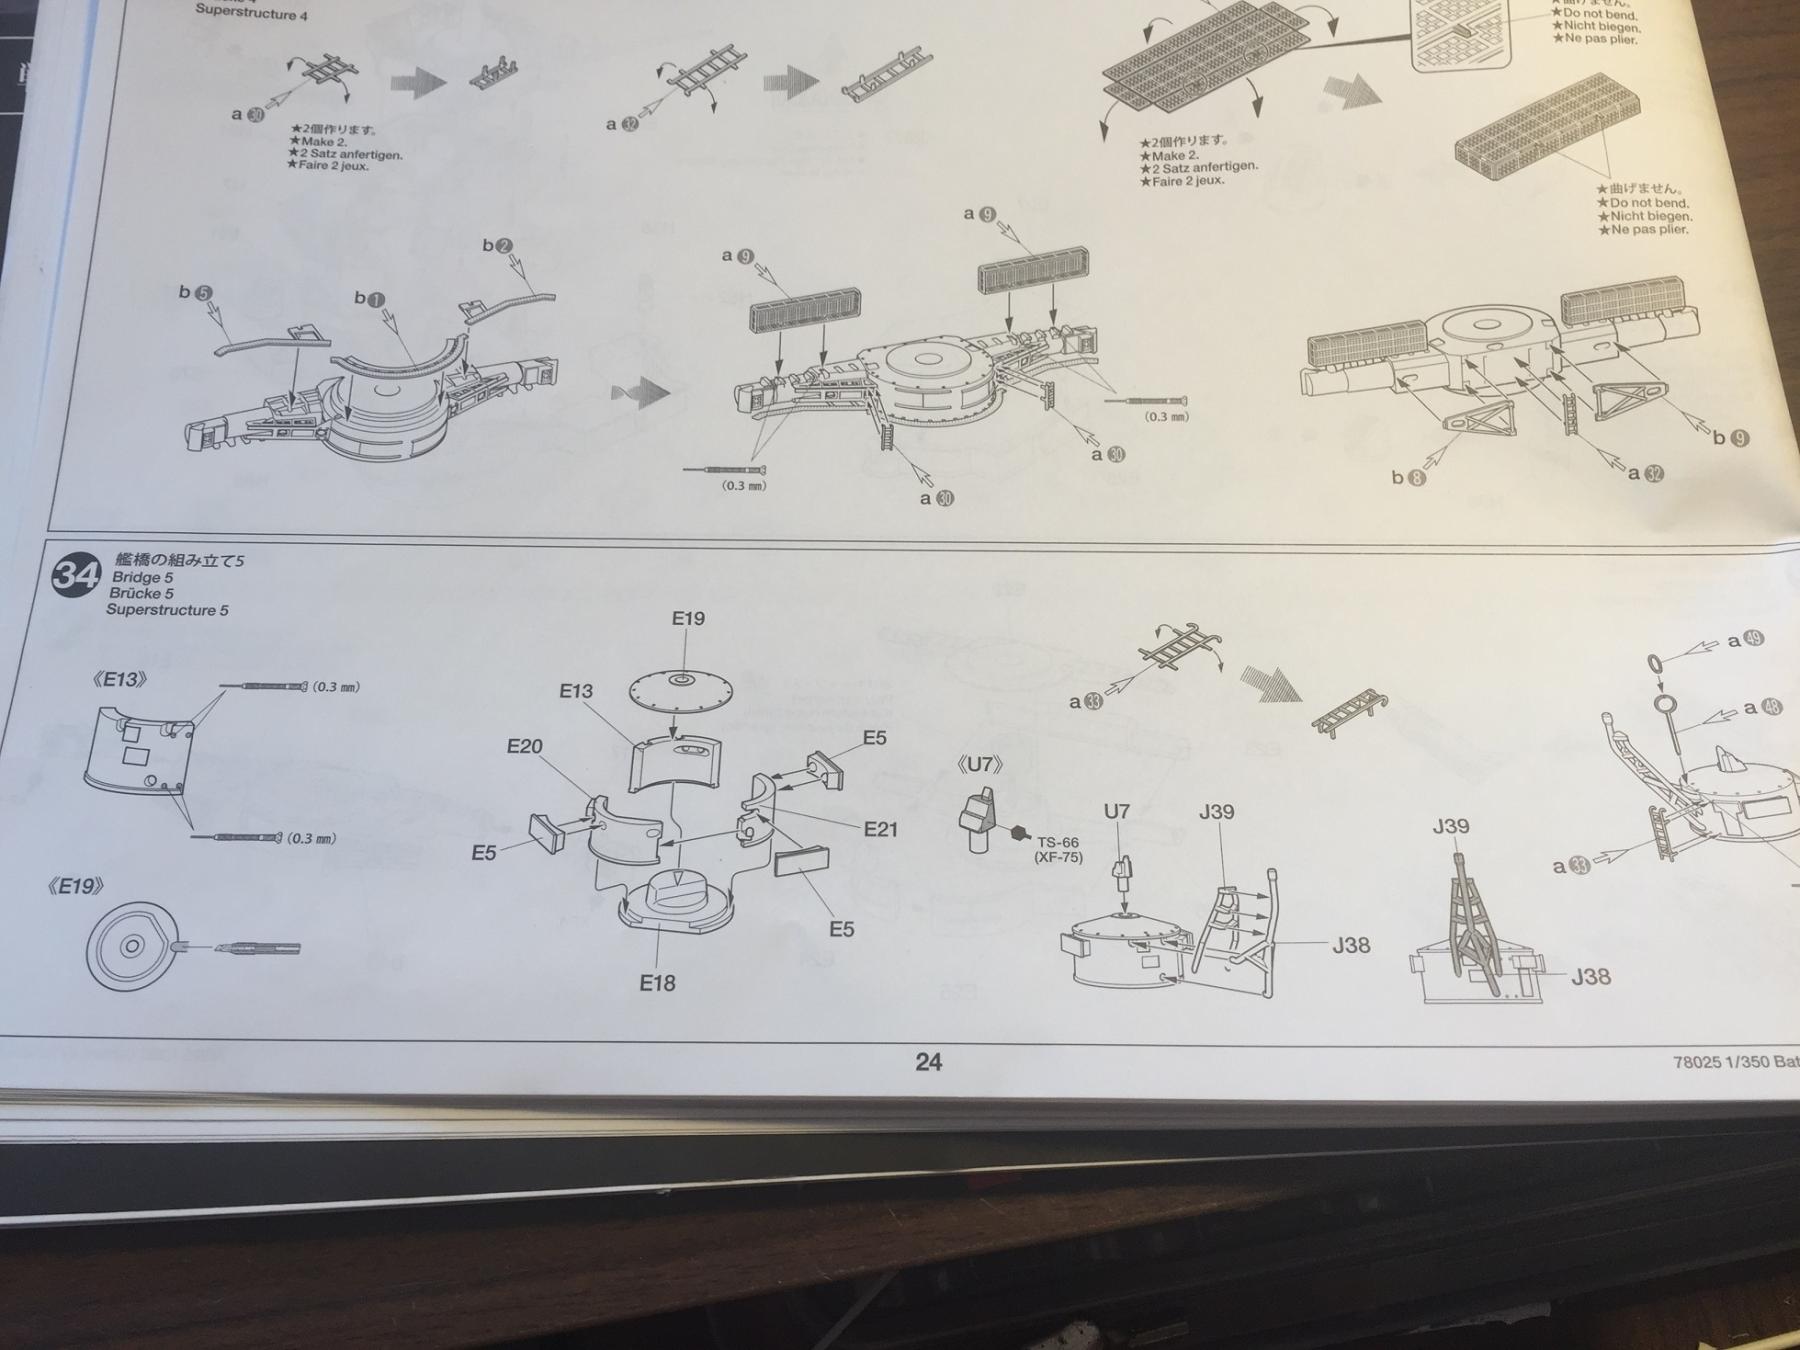
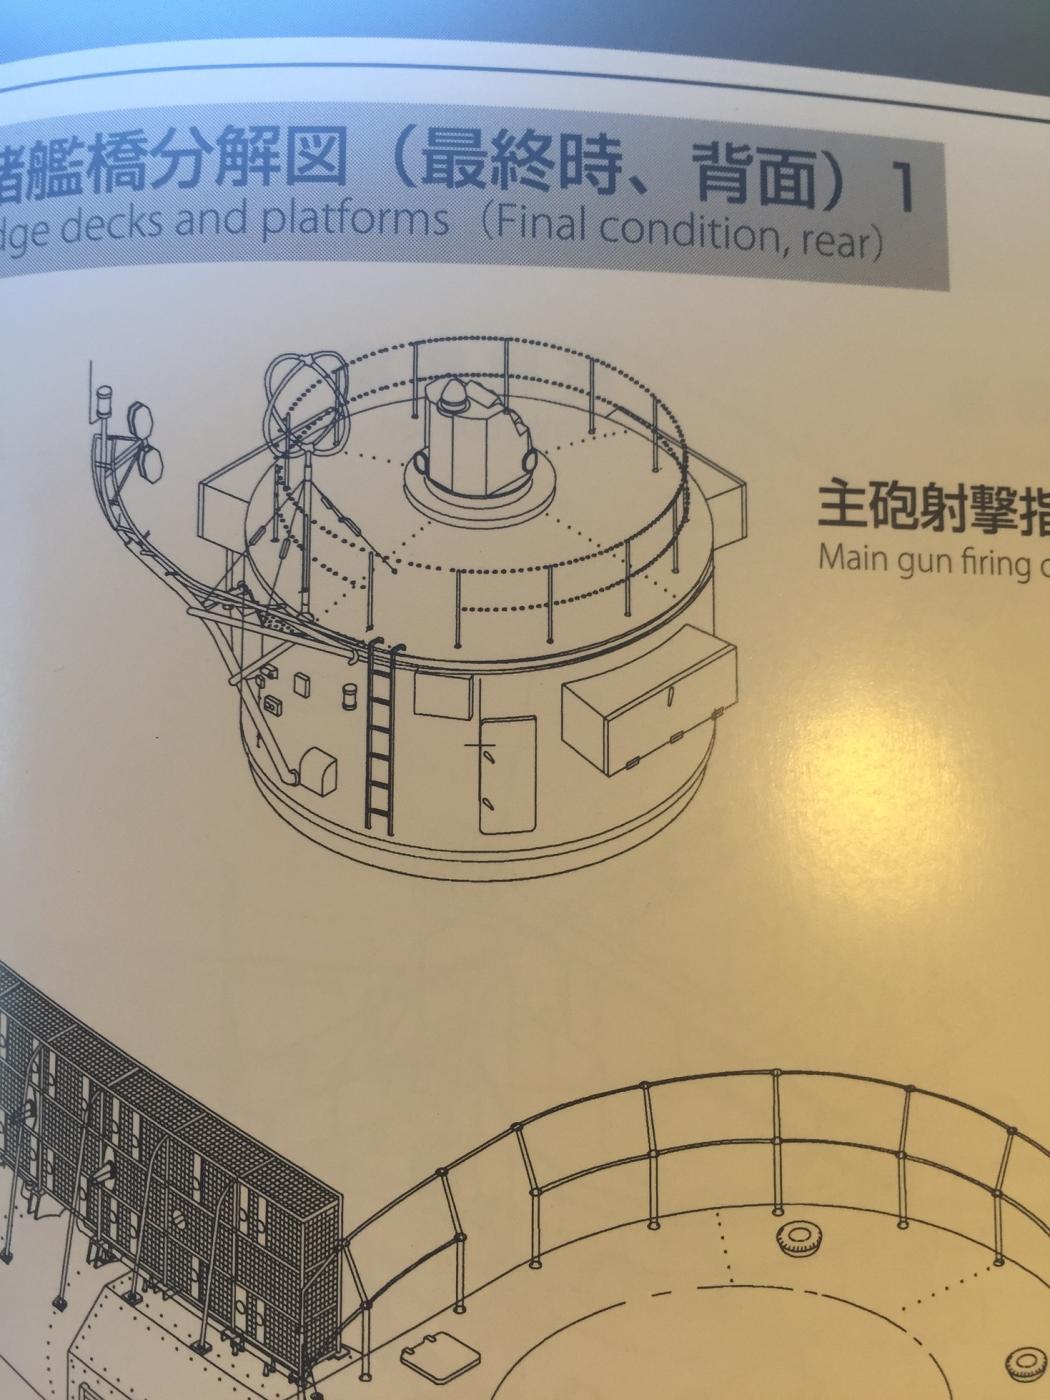
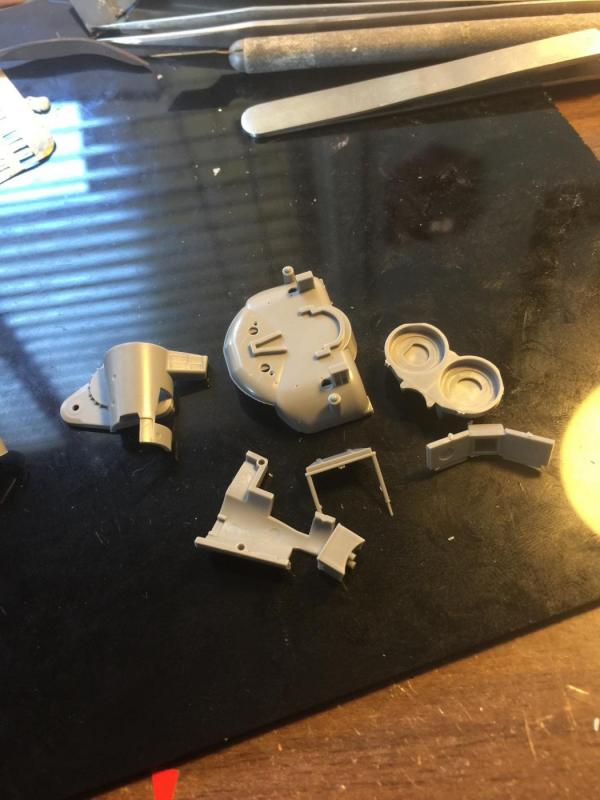
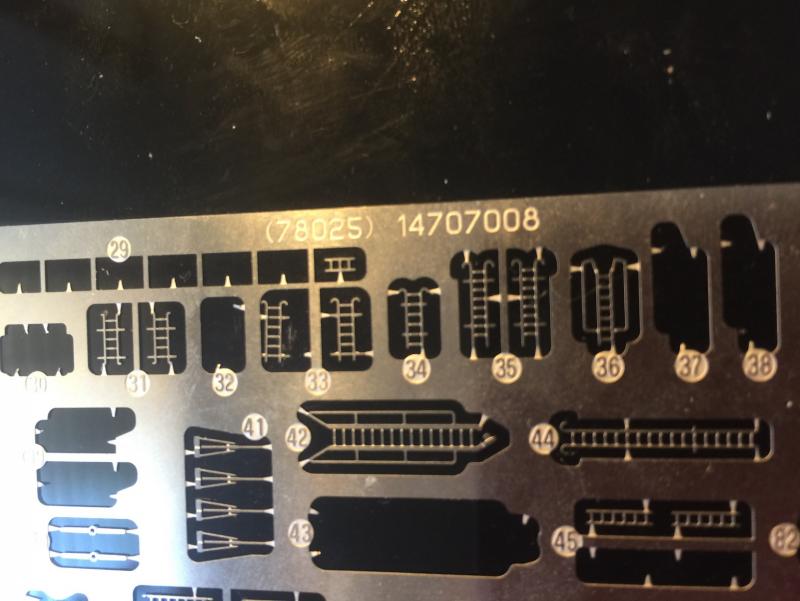
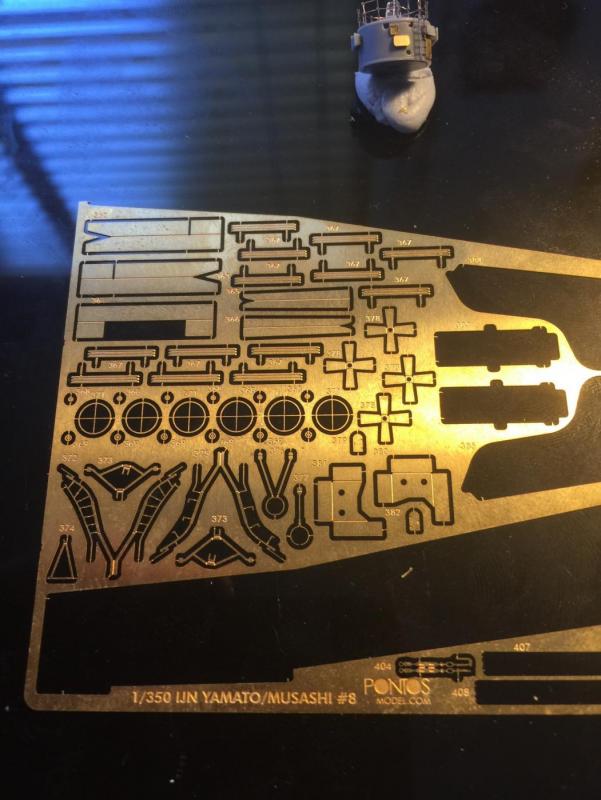
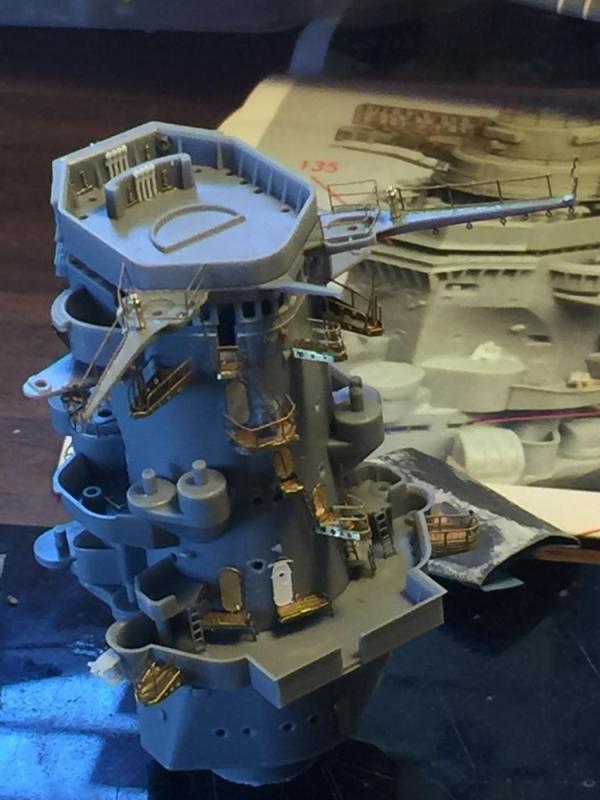
So after a few requests, I have broken down the next component, the main gun control tower. Firstly, the main tools I use: 1. A small shop photo etch bender 2. PE holders that keep the piece flat when cutting 3. Tweezers 4. Scalpels, (chisel ends work best for cutting) 5. Uschi applicators for large pieces and thin glue that go into the end of the scalpels 6.Beading flat pliers 7. Tamiya PE benders which I cannot master as they refuse to align properly. All on a black perspex cutting board. My PE applicators , offcuts of PE frets. Xuron metal cutters, thin and medium CA , any old piece of plastic that I can drop glue onto. Moving onto the piece itself, 34 is the Tamiya instructions, then the reference and then the Pontos detailed instructions. I discovered that of the four photos provided, that whilst there are two aerials, one is pre and one is post 1944 but they make no reference to this.


- 743 replies
-
- 13
-
-
Well done, that looked like hard work mate.
- 68 replies
-
- 2
-
-
- Arleigh Burke
- BlueJacket Shipcrafters
- (and 1 more)
-
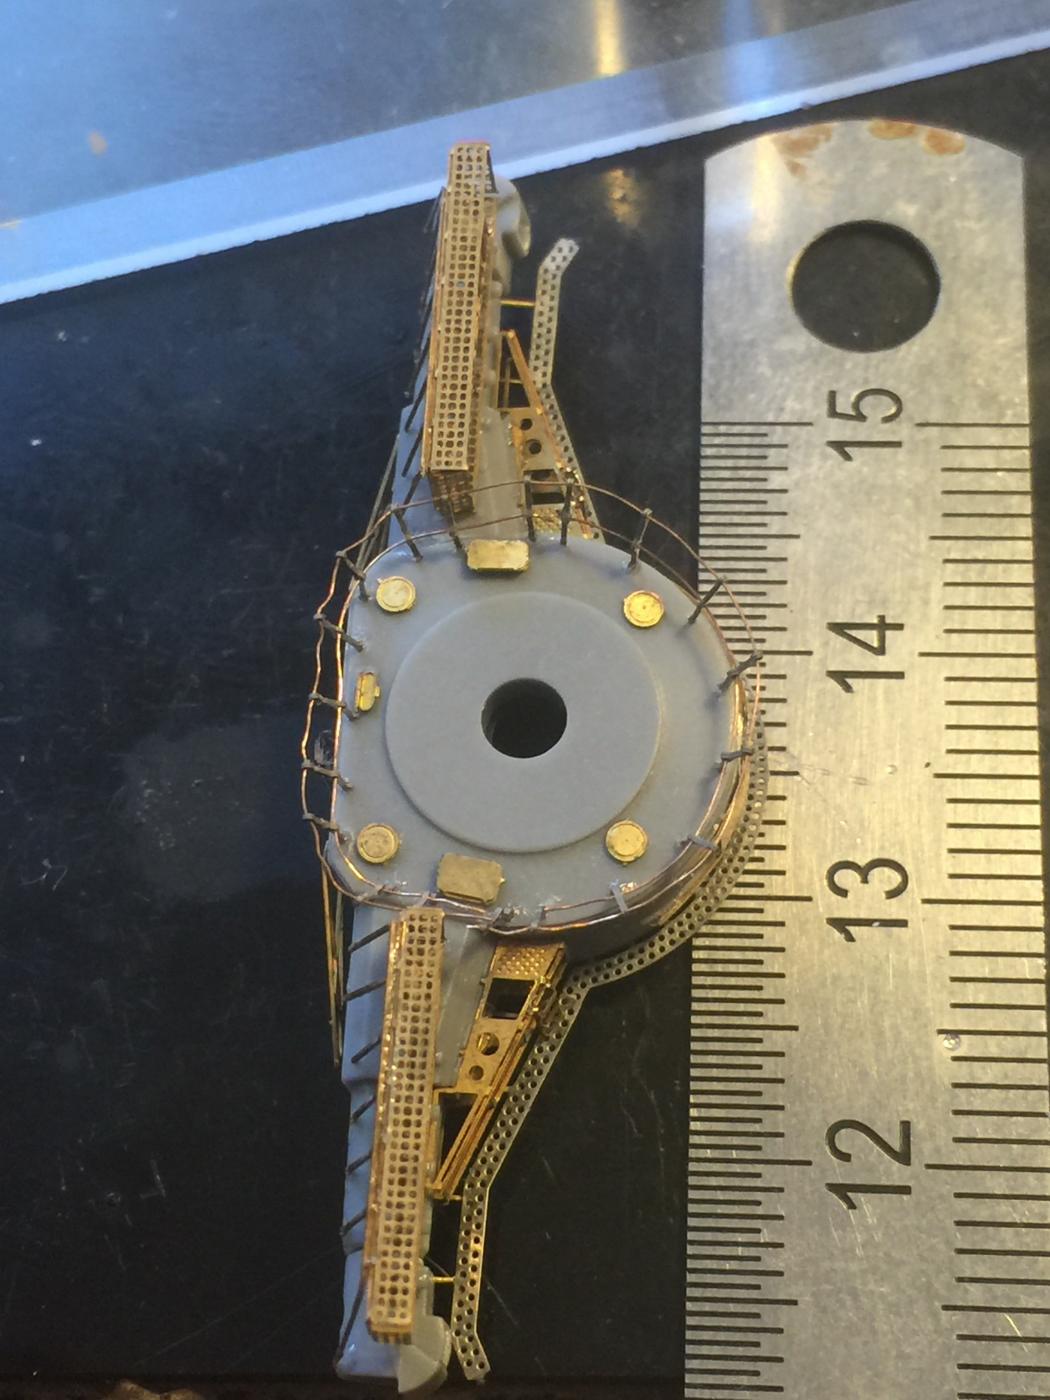
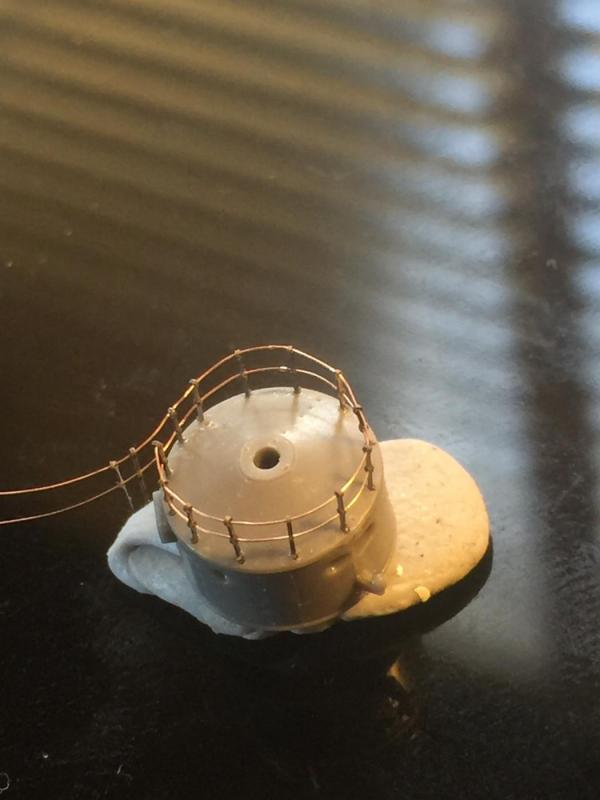
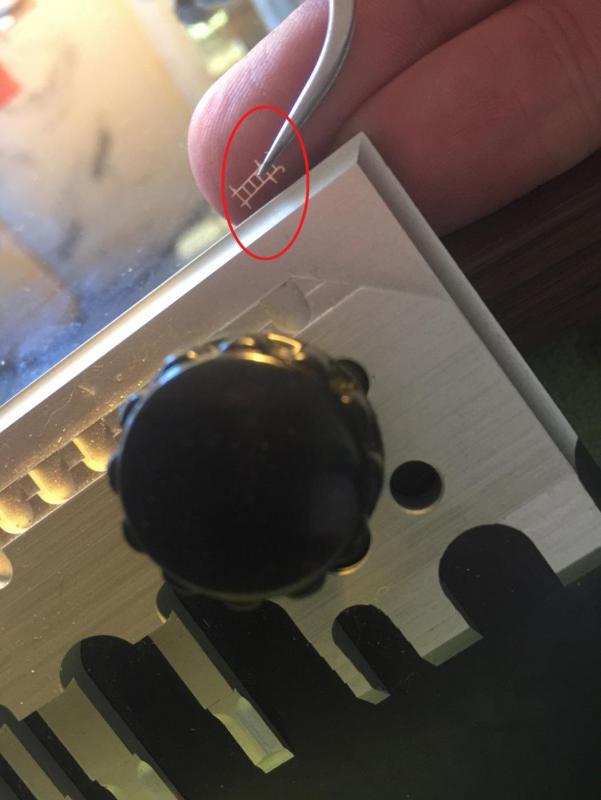
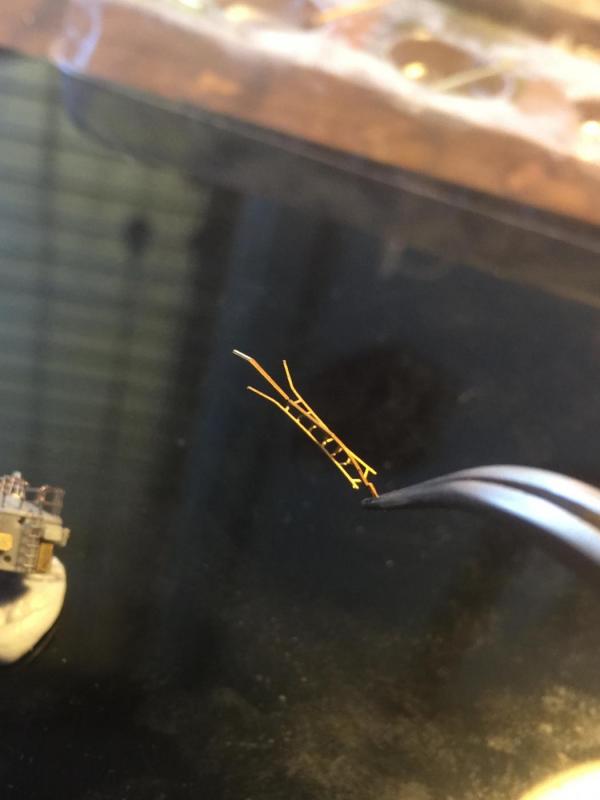
Banyan, yes, yes they were, the radius of the stanchions on top of this piece is even smaller, so I will add the wire to the stanchions first then curl them into shape, the tricky part with this one was there is a 20 degree Angle between the first and second hole. A .3mm drill bit (they come in packs of 10 as they break very easily) allows you to dip the stanchion in glue then and drop it in, then if required, use a tiny piece of offcut railing to add a tiny drop of glue to strengthen. When I did my other builds I used the same stanchions but used the elastic rigging but for this build I will use copper as I want them painted. I am going to ask the wife for an airbrush for Christmas and I'll go with your recommendation of the H&S.
-
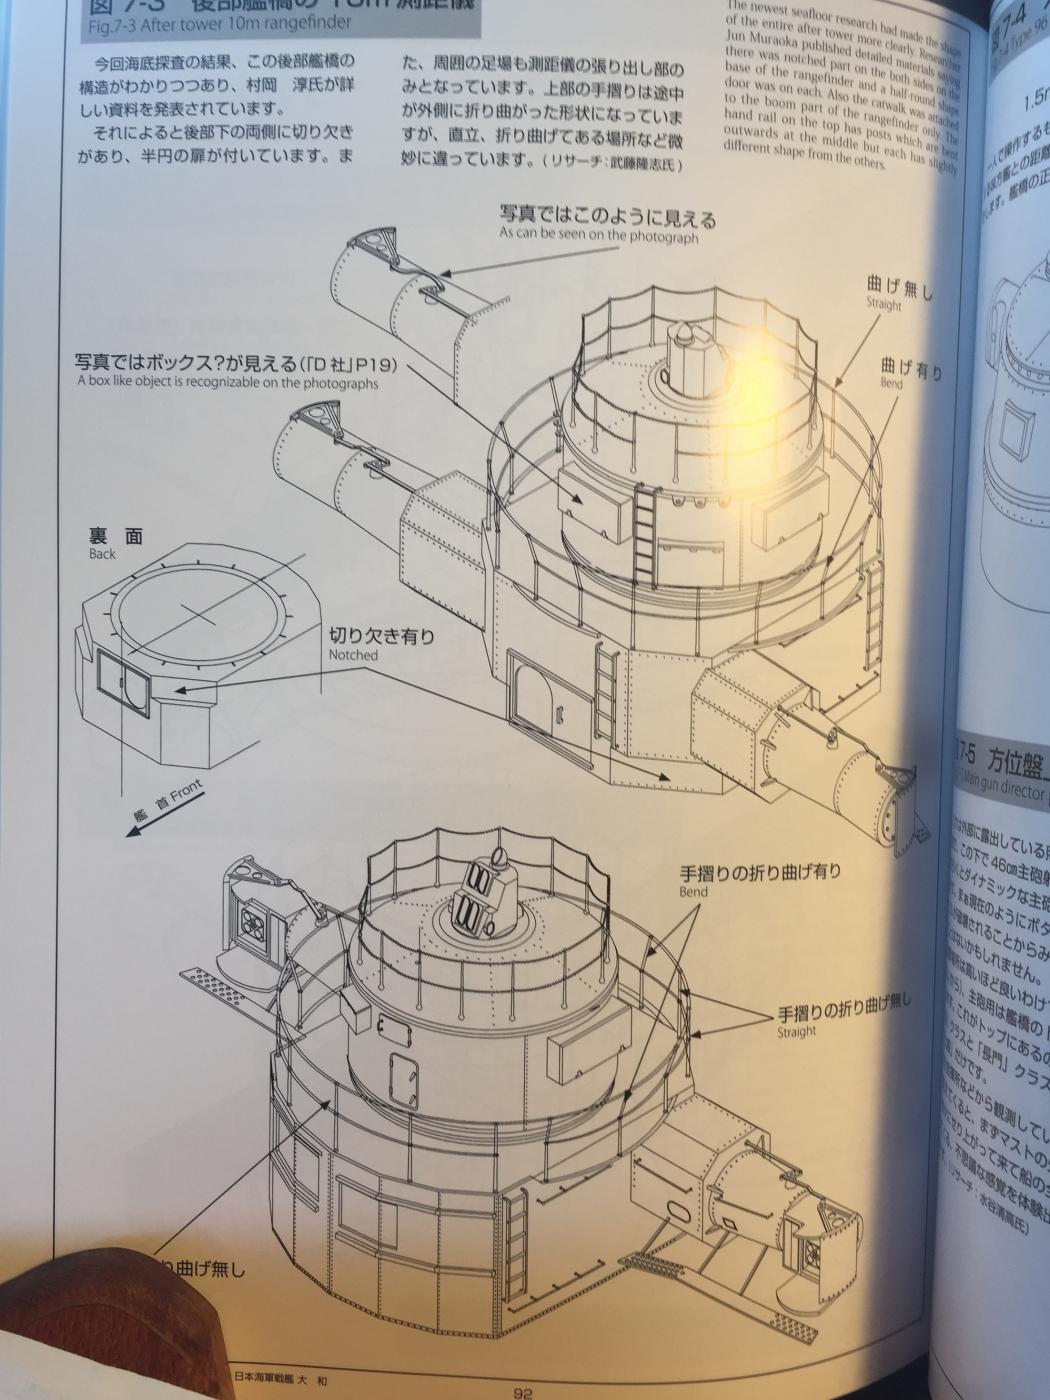
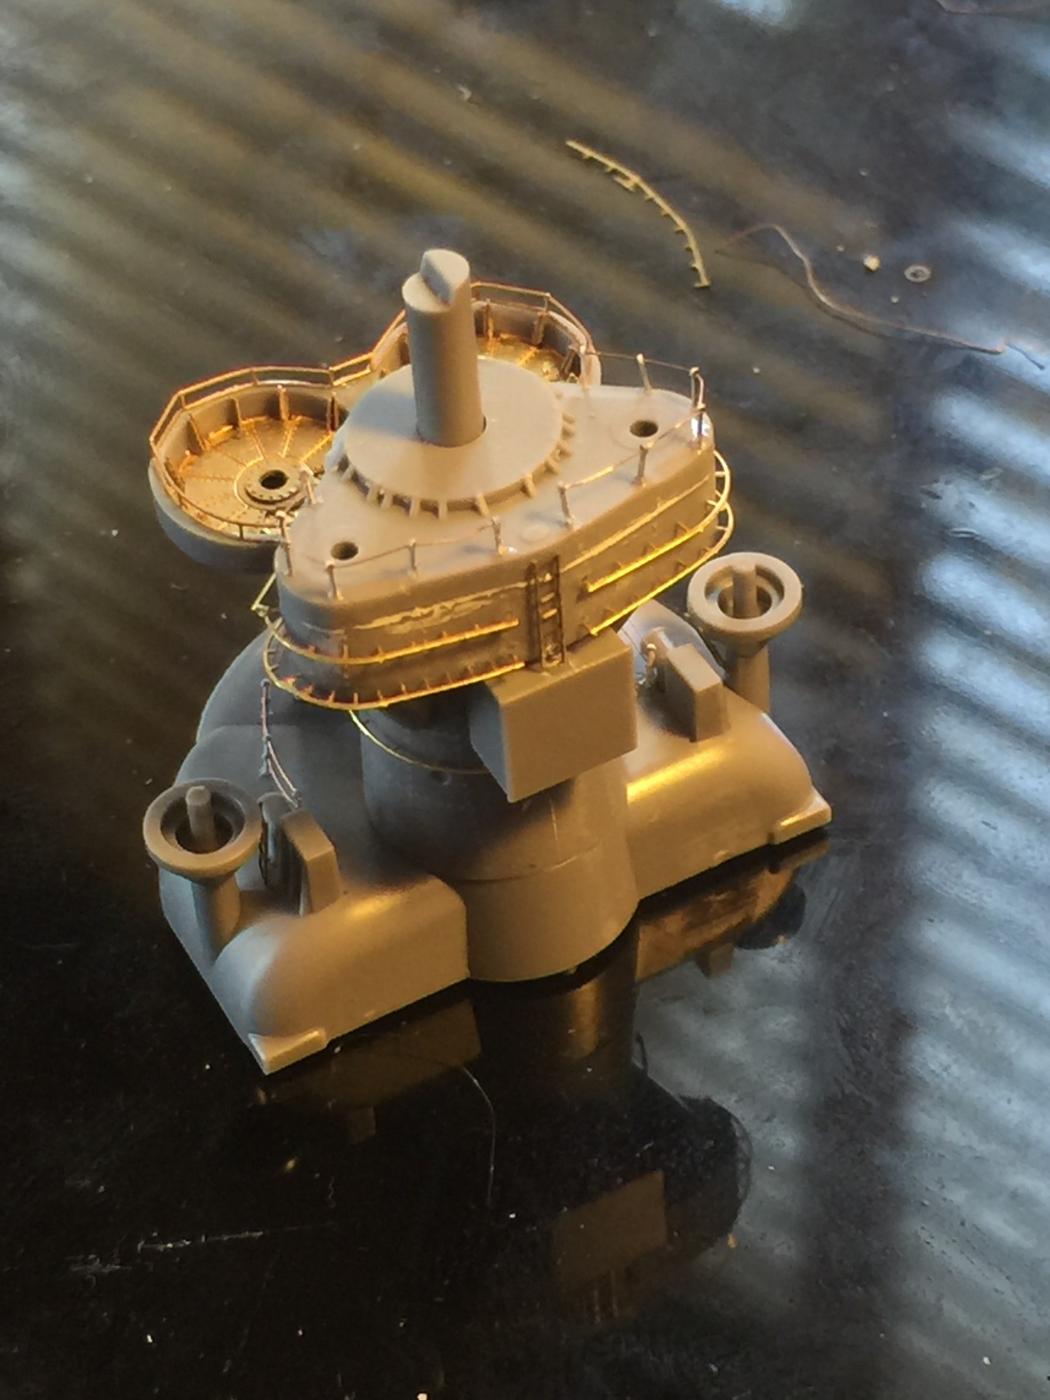
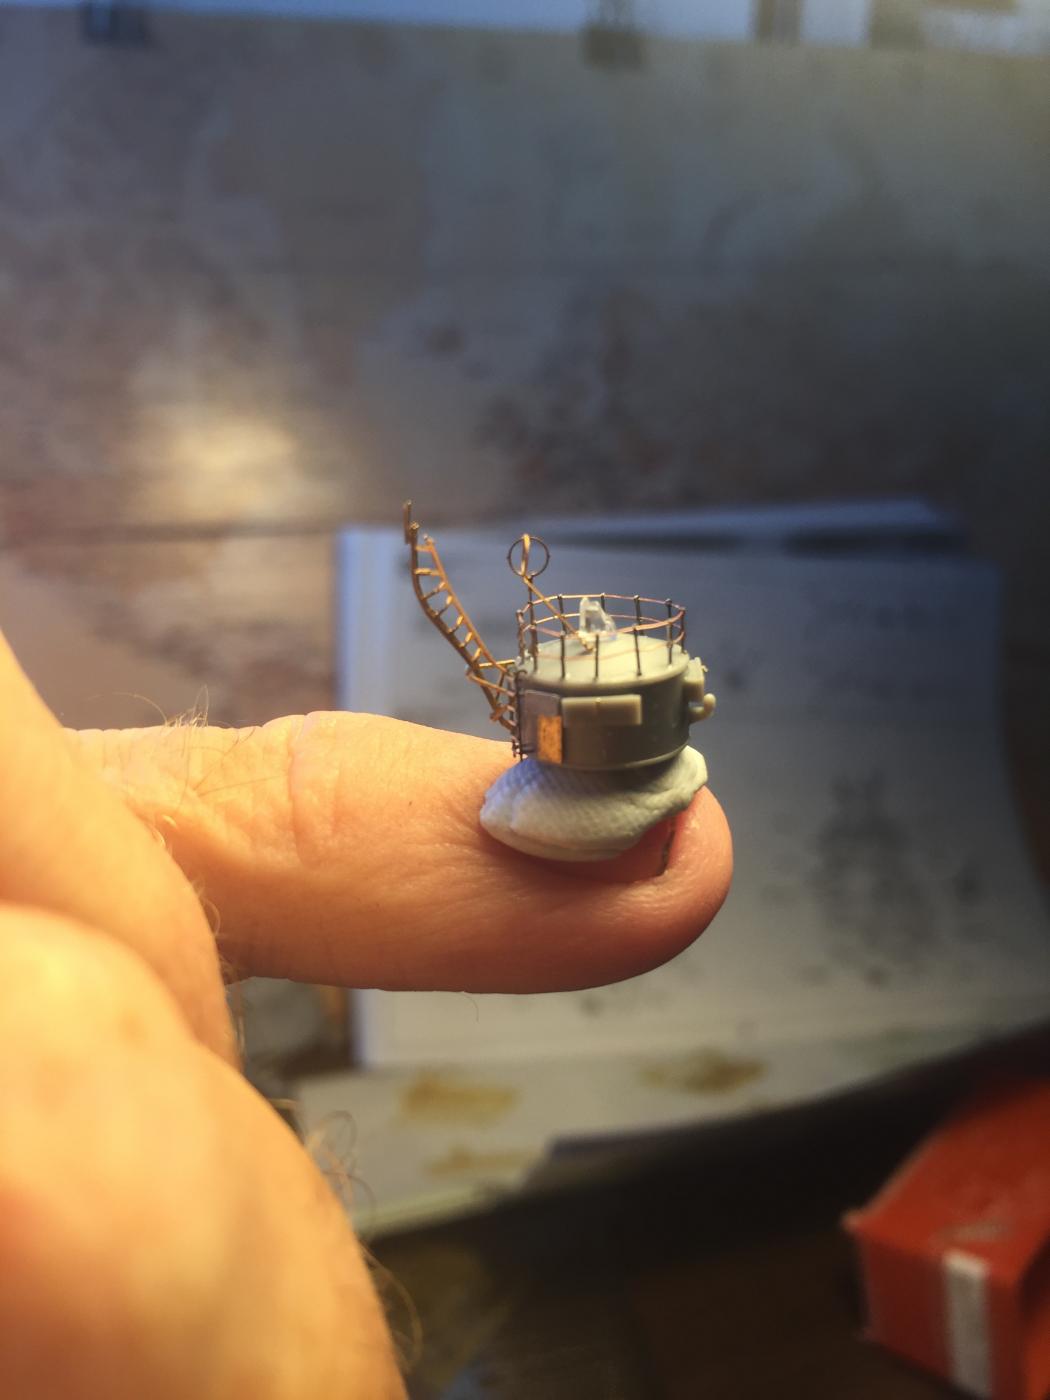
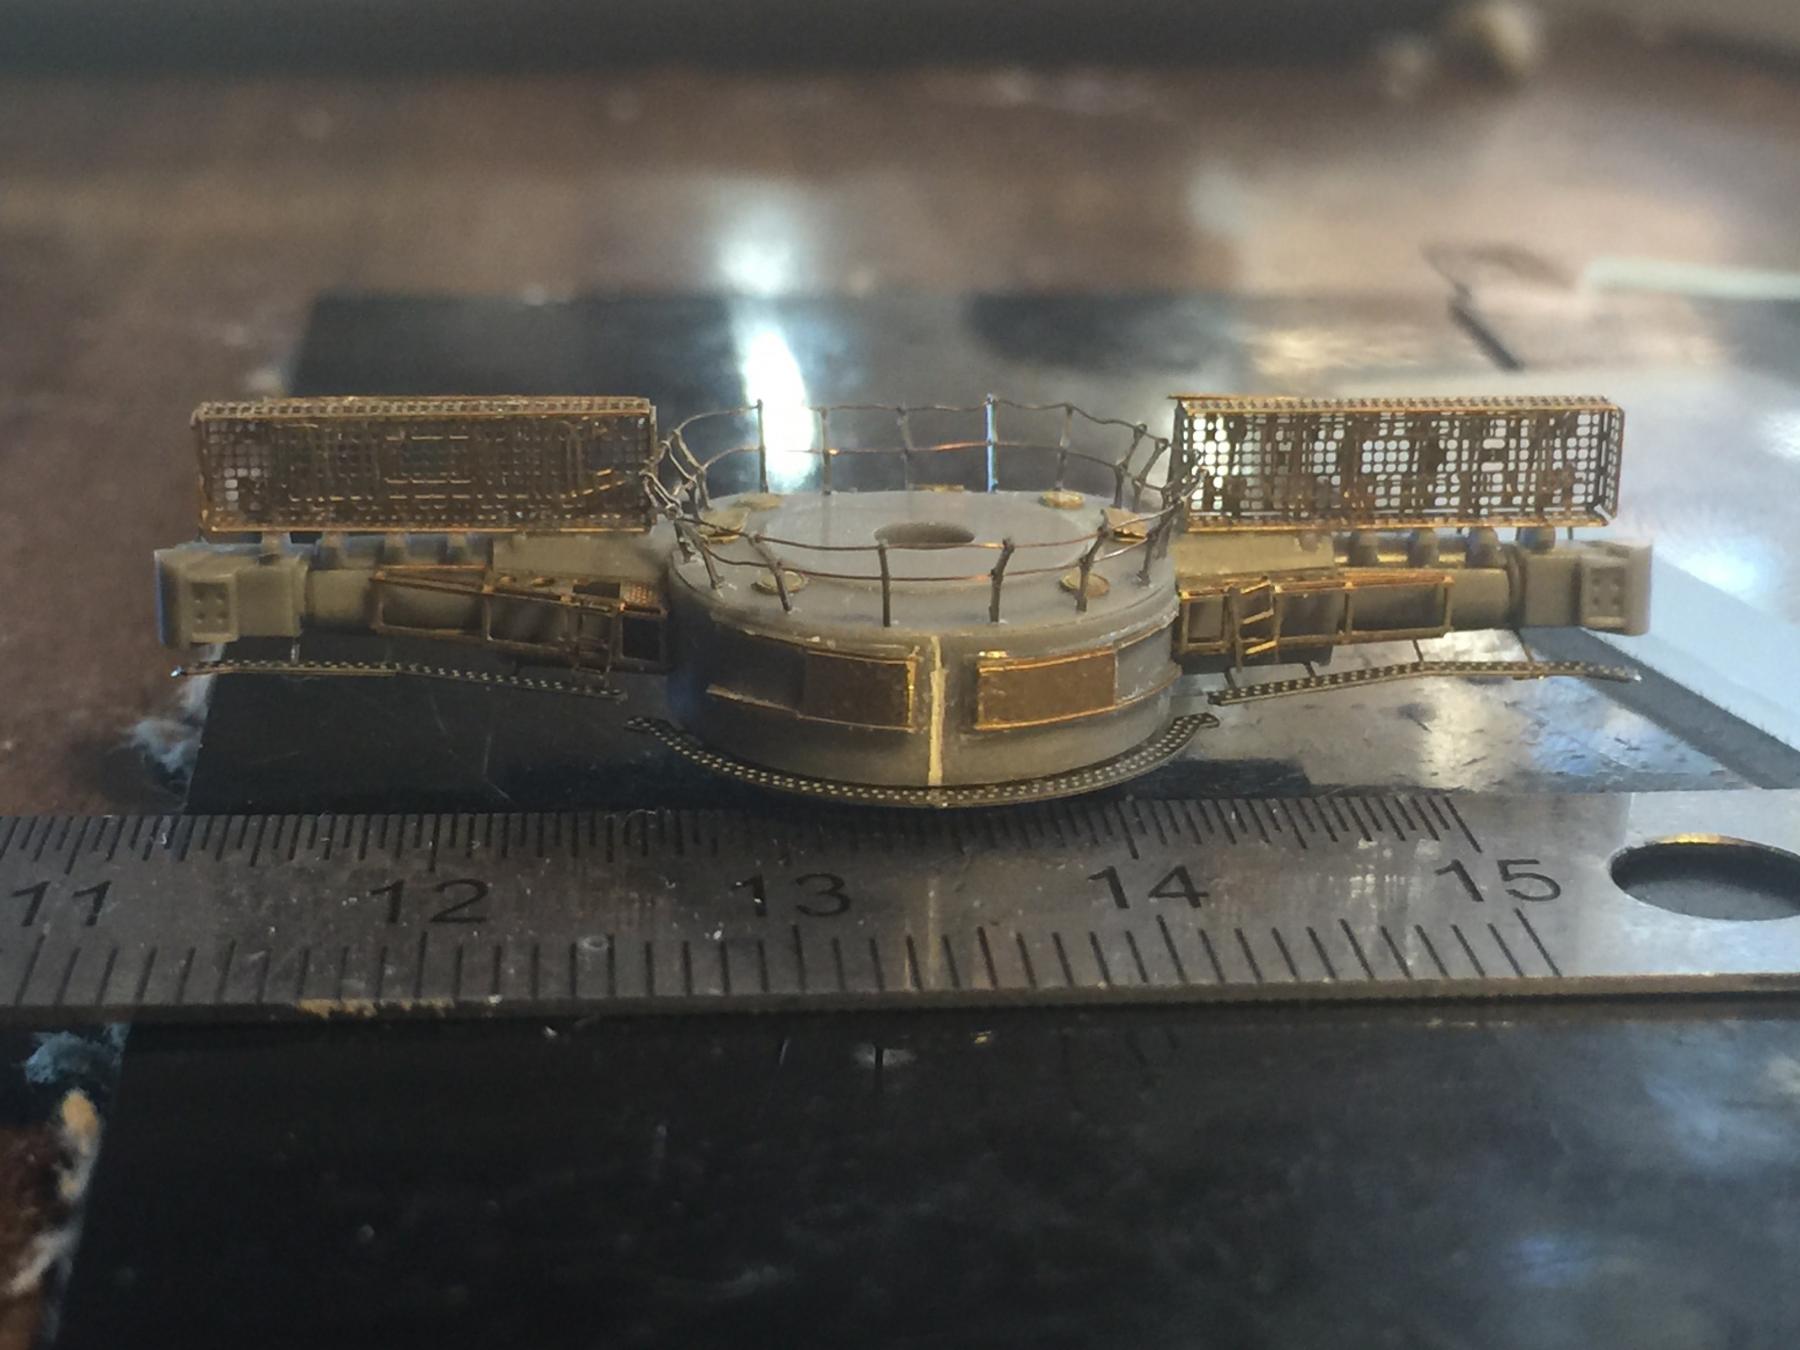
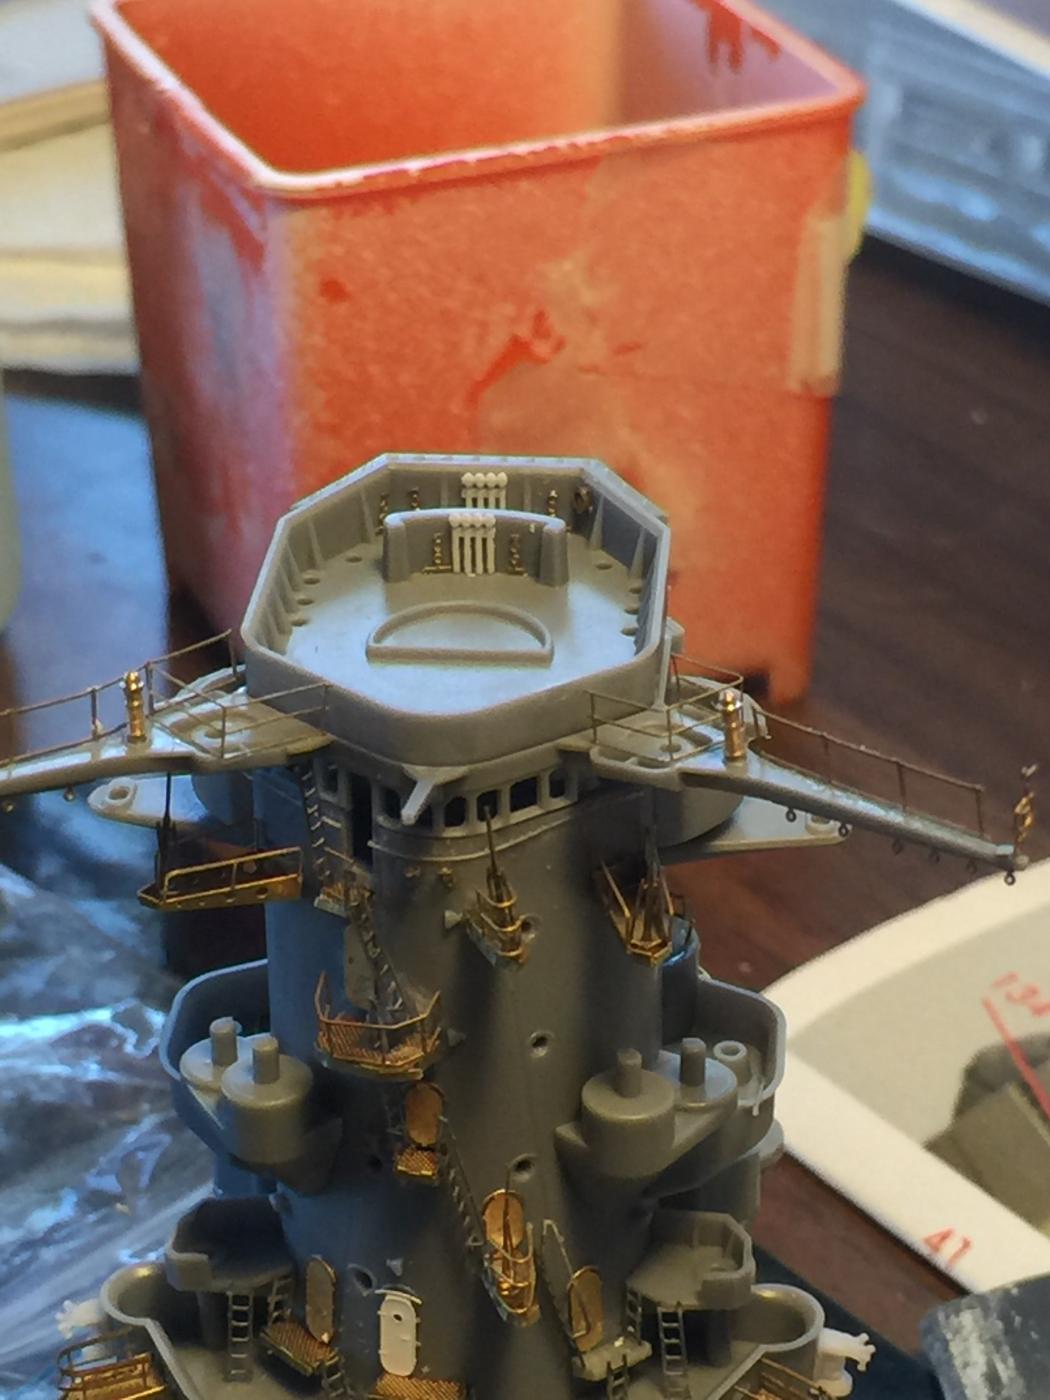
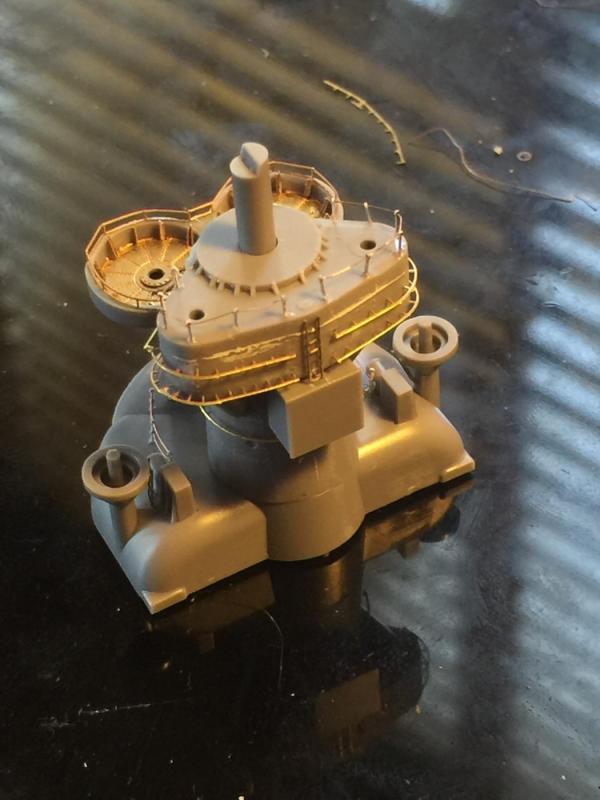
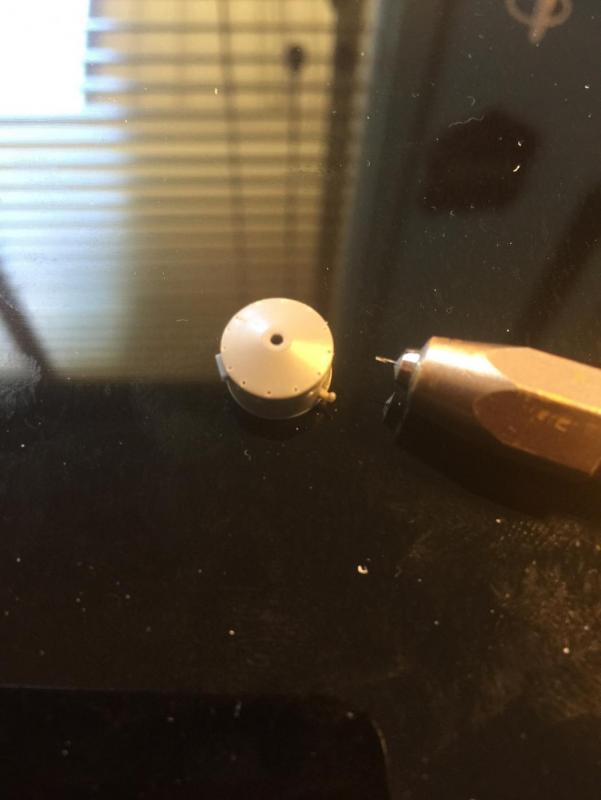
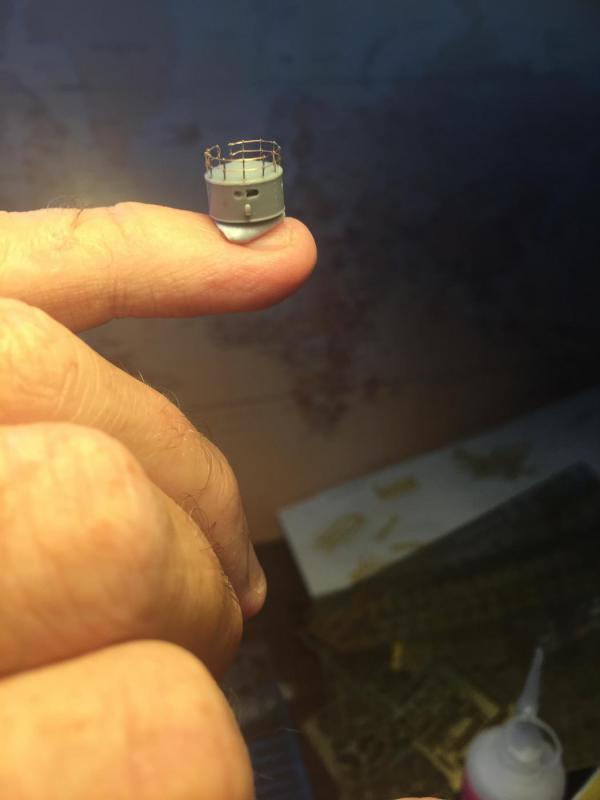
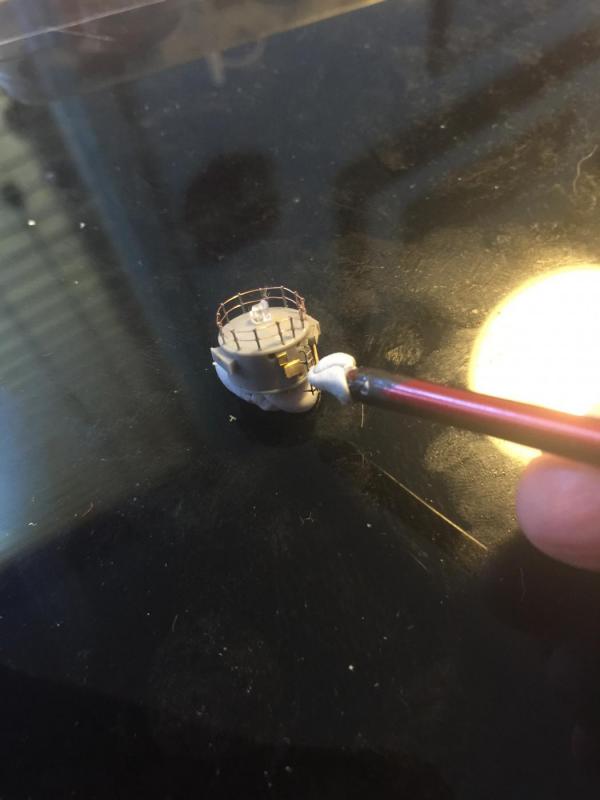
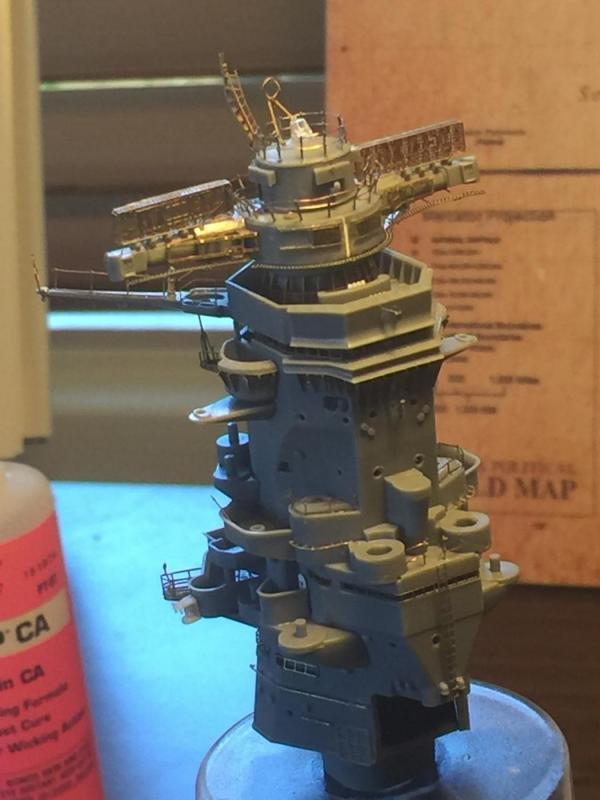
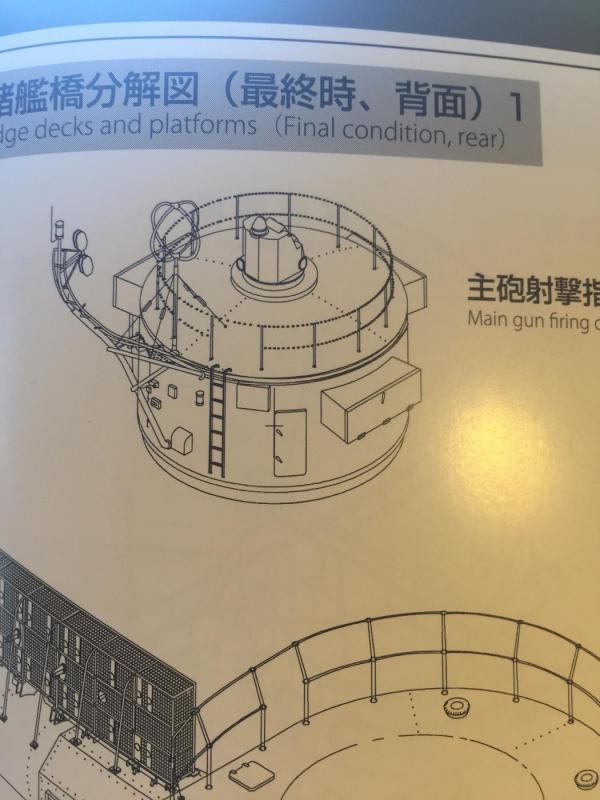
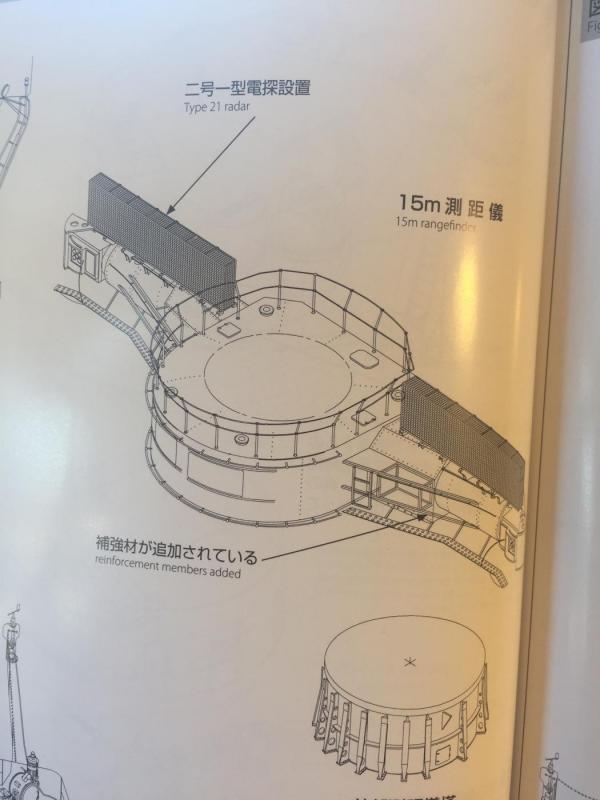
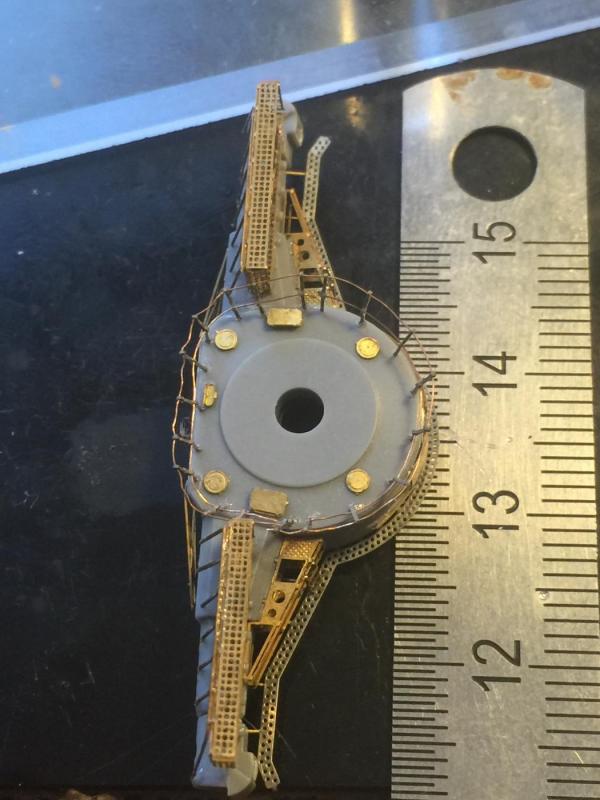
Before I do a breakdown on my next piece, I have spent several days working on the Main tower bridge rangefinder. Without going into the kit instructions, the reference has it looking like this; The Pontos instructions give you this the front hatches are added but not in the instructions and the metal walkways are included in the kit, as is a handrail which looks no where as natural as the rails I added. So, building it up and adding some extras, such as individual stanchions and a few extra hatches it comes up quite nicely. The main gun control tower goes on top of this and I will do a little tutorial if you wish?


- 743 replies
-
- 20
-
-
OK, when I do the next assembly I will break it down in a photo essay if you would like. It generally takes about 6 hours a piece so a video is out of the question, plus I don't want to go public. Banyan knows why!
-
Depends on the piece; I use Thin sometimes but it dries incredibly quickly so if the angle is off you have to scrape the piece off. I find the thin does not adhere as well as the medium. Vossy is right that medium gives you some seconds grace and bonds better. I use off cuts from frets cut to a point, or pins which have to be burnt repeatedly to stop build up. The advantage of using off cuts is you can snip it back again and again for a fresh nib or the width you want. I generally pour a drop onto a piece of plastic and dip it in then on. Does that answer or would a pictorial help?
-
It's all piece work, don't cut it off until you're ready to use it, get a PE bender and the best tweezers you can buy and a set of flat beading pliers. Finish one piece completely, store it, until you have all the assemblies ready, then paint them, then throw it together. That way adding the bits you miss is easier, and easier to repair off kit than on kit, making ire you know where your rigging points are beforehand so you can add belaying points. Much like a tall ship it is very hard to reach in to add something once it's all together.
-
Thanks folks, the level of detail is pretty good, but there is still a lot missing much to my frustration. If it was wood I could scratch build it. One piece went somewhere, no idea, my 11year old eventually asked me (after a solid hour on the computer near my workstation) if I found it? No! A 2 minute scratch build solved it (you'd struggle to see it on this piece but it's there). There will come a day when then metal ships come completely in metal, the Flyhawk brand has a AUD $250 upgrade which I would love to have as well but only one fret of 9 that I would require. You would think for the price it would just have everything. Rant over, the 6 square metres of mulch on my front lawn will not move itself. Thanks for the likes!
-
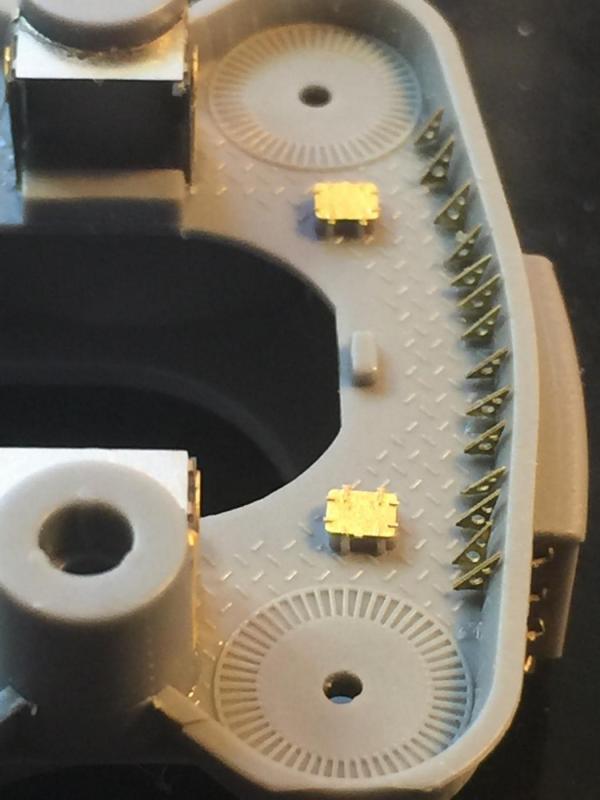
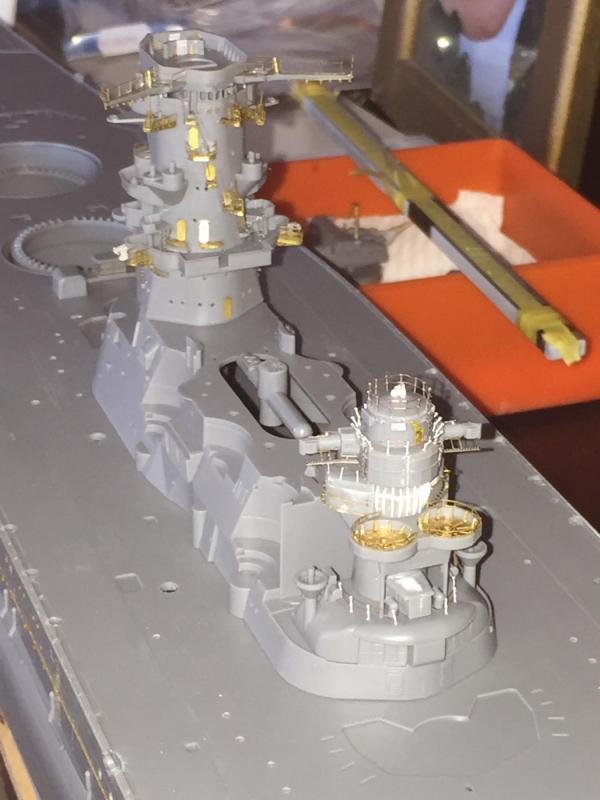
It's just a massive task keeping track of it all. I have taken to buying Tupperware containers to separate the built components. It's been 4 days work on this tiny piece alone, adding to the add ons such as hand rails, and this is just the structure without all the turrets yet alone detailing those was well.
-
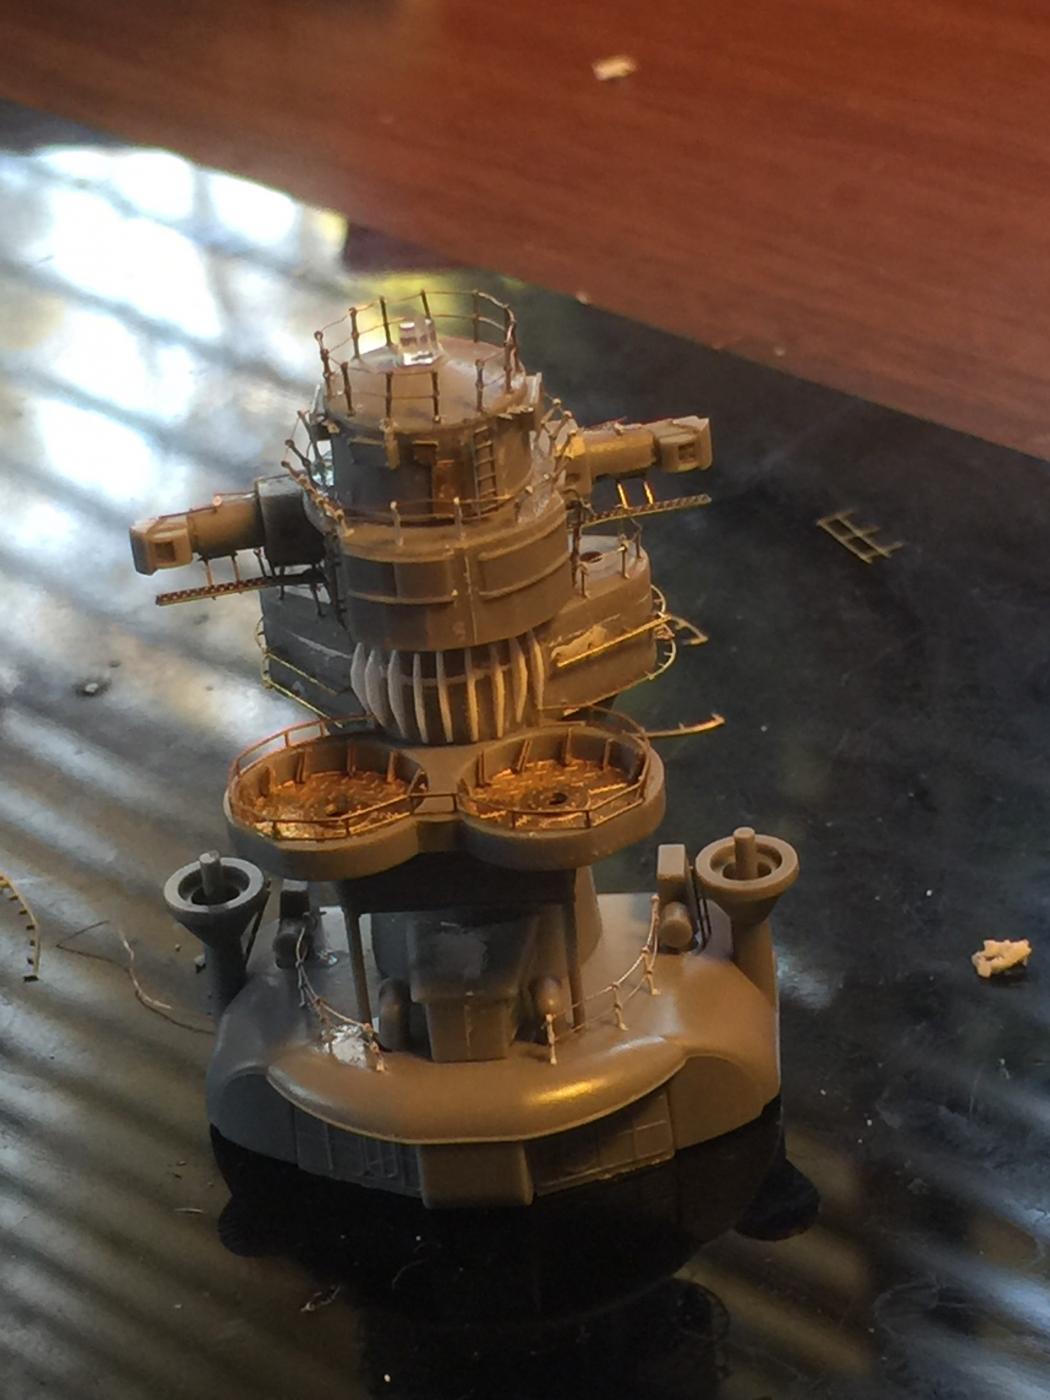
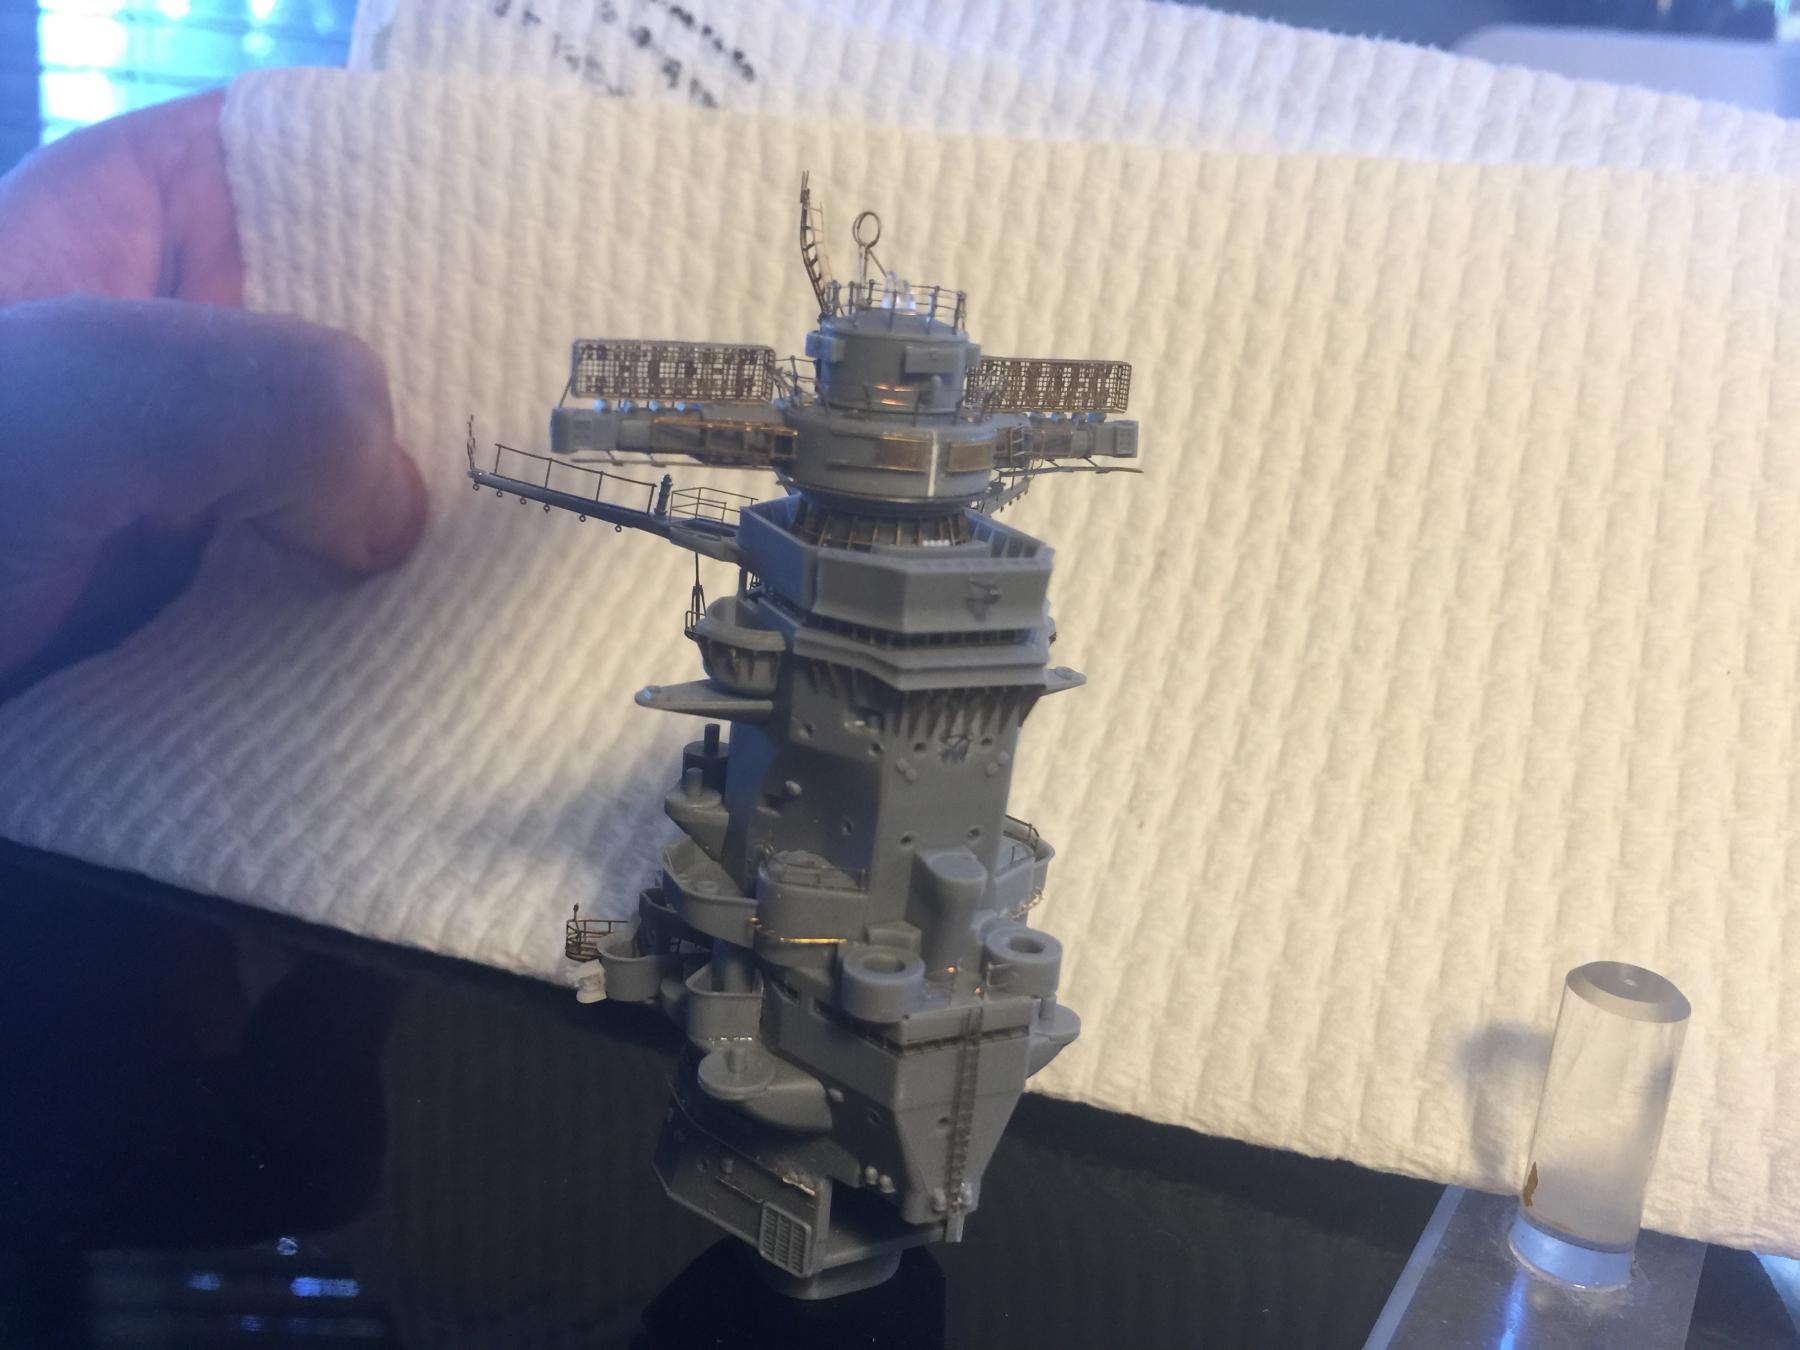
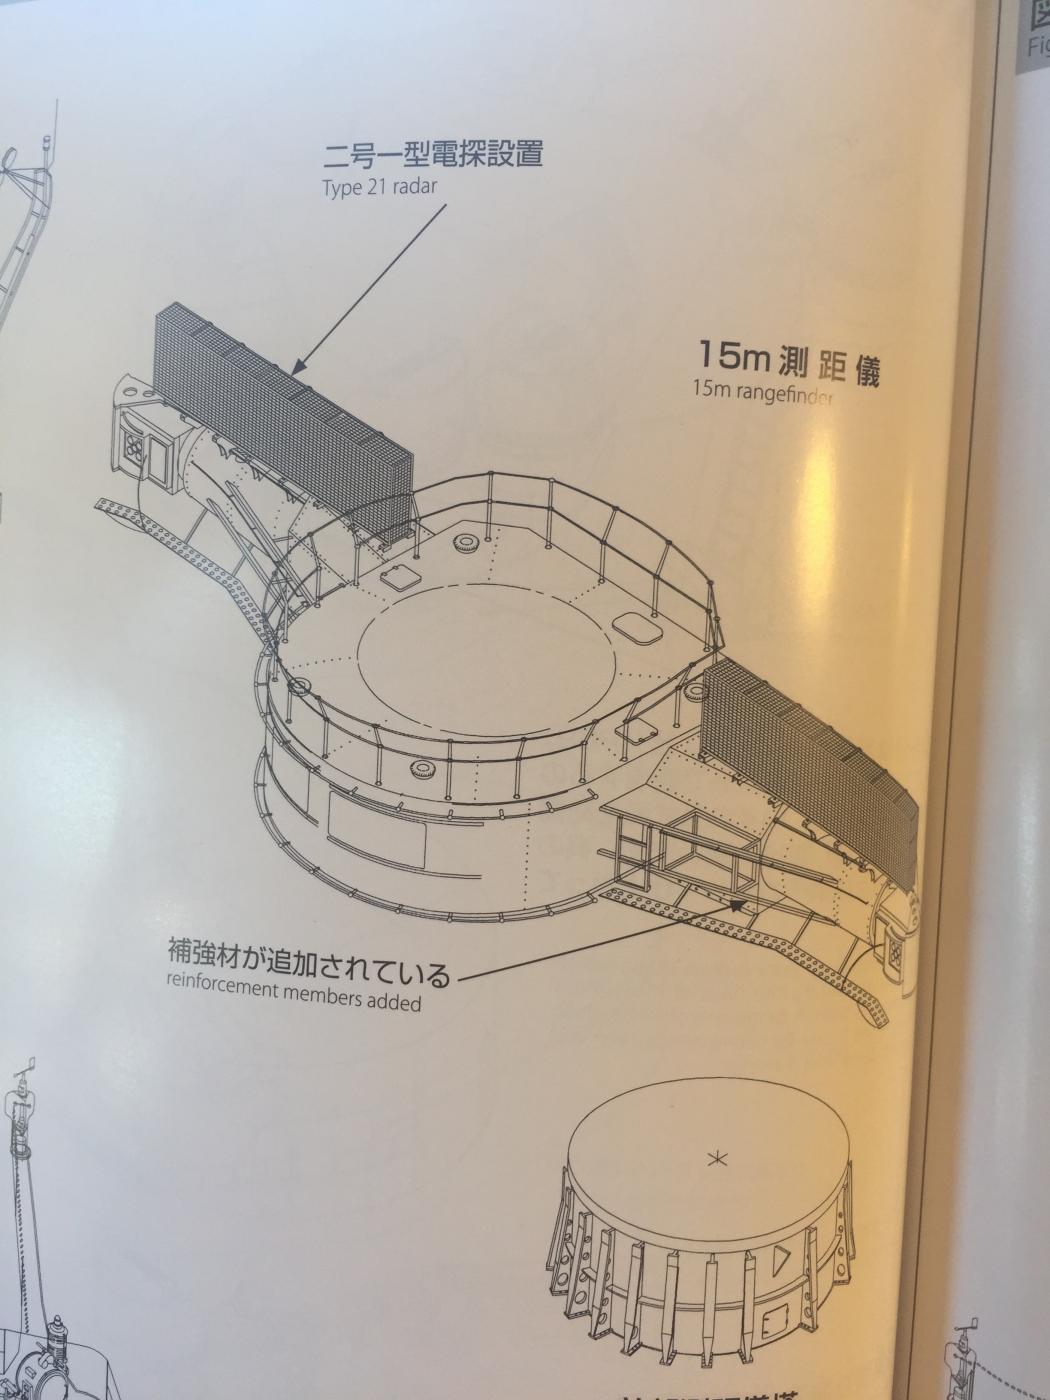
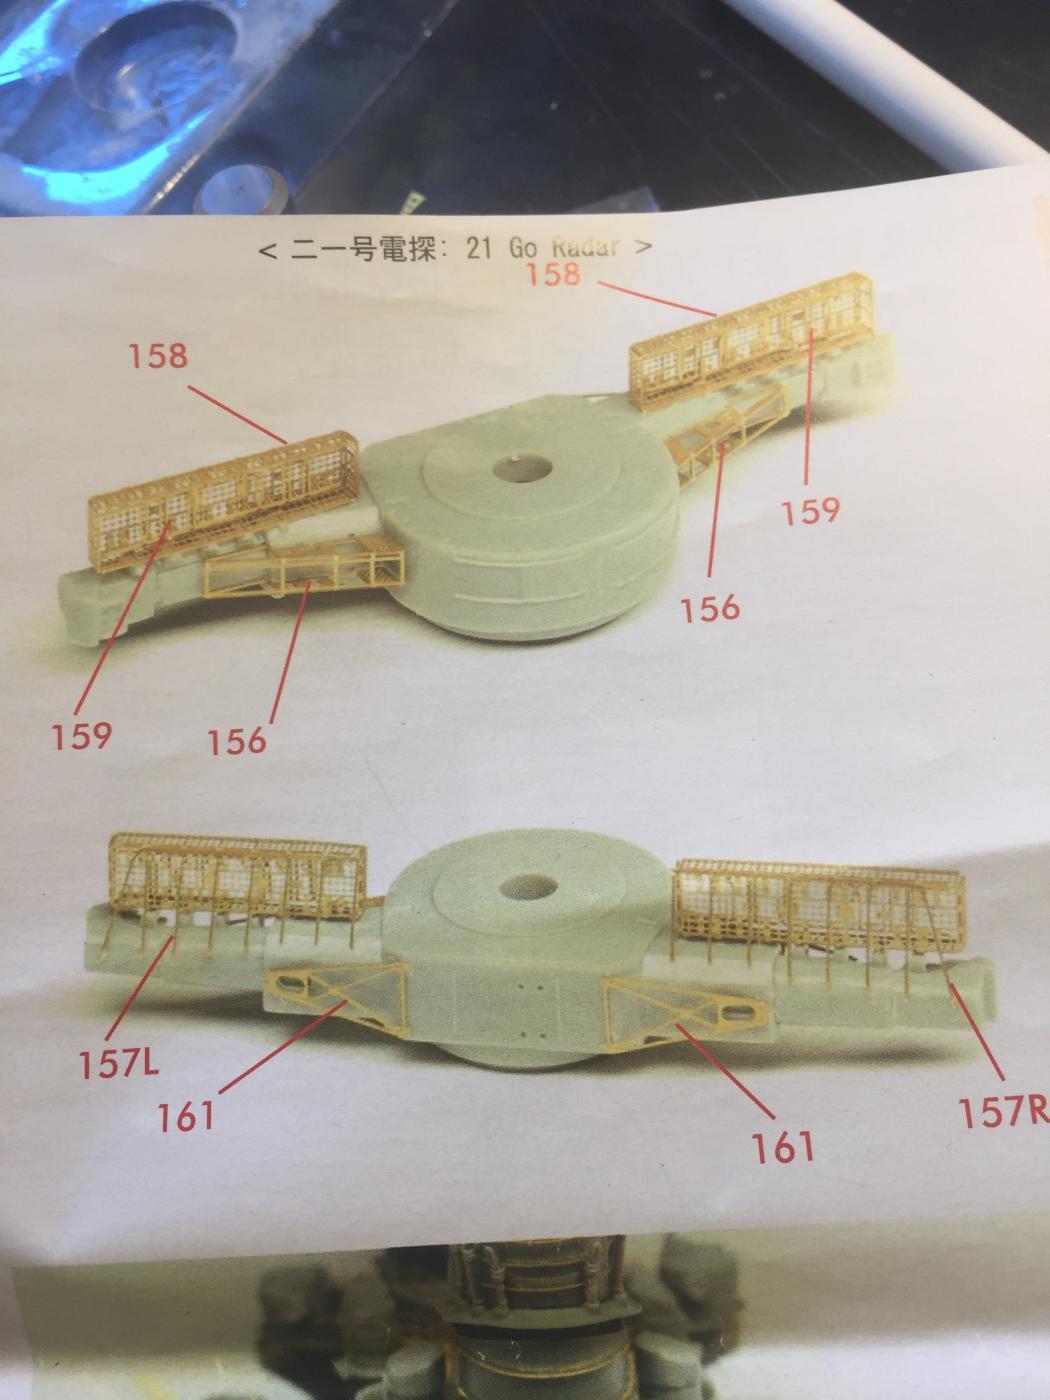
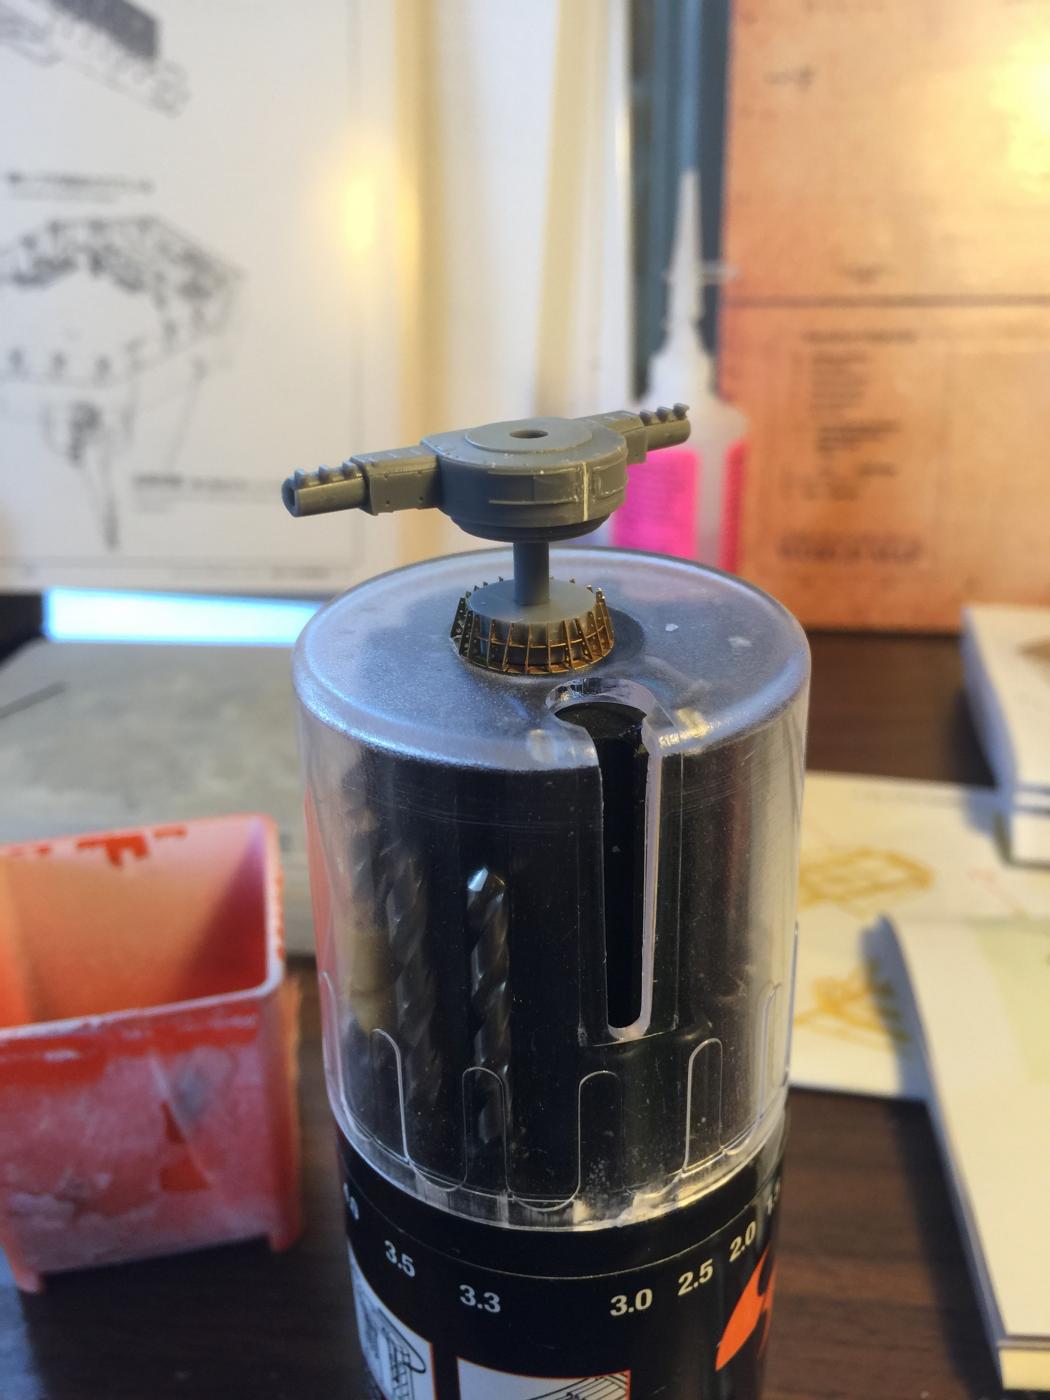
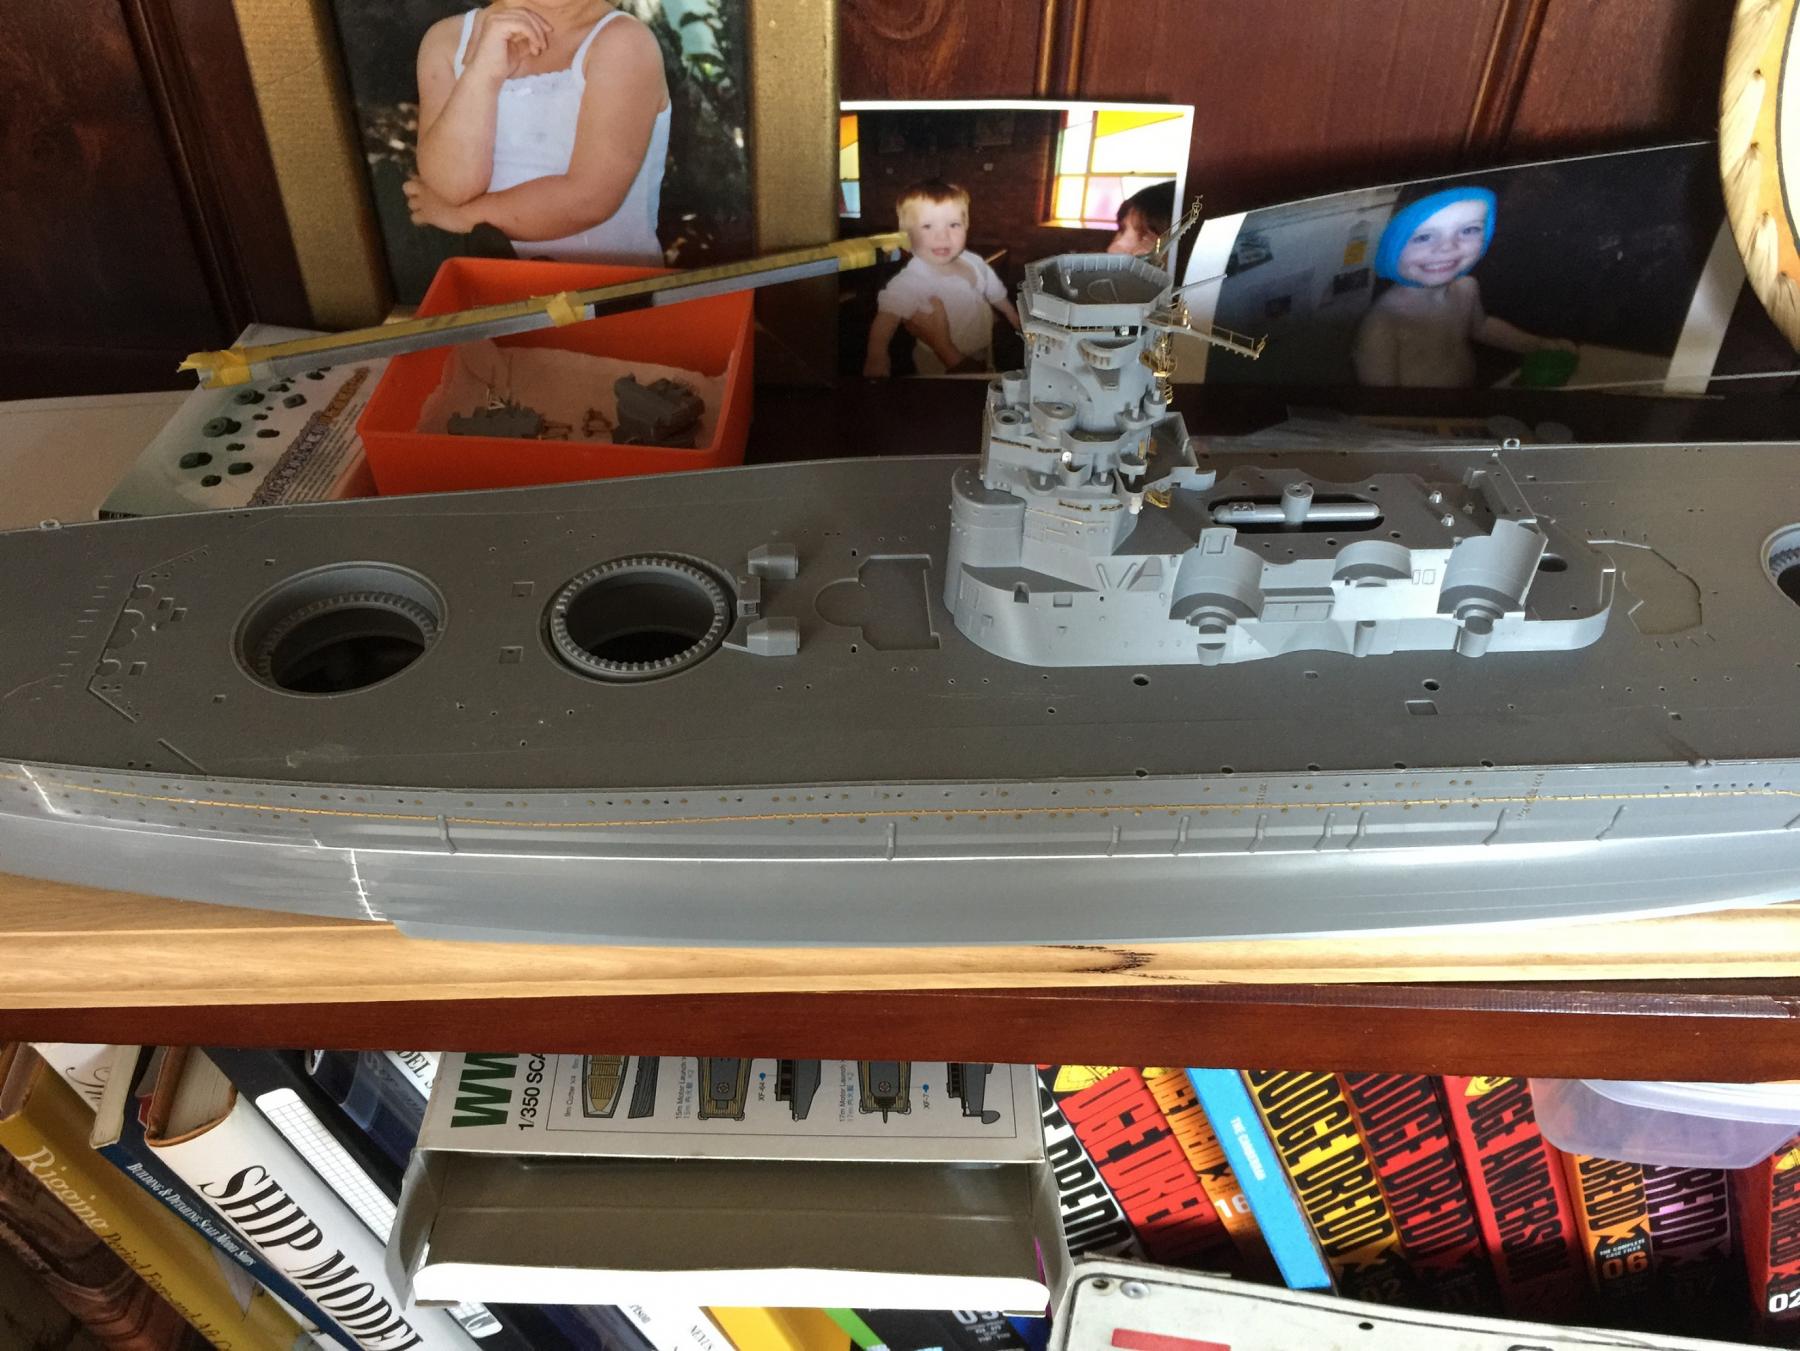
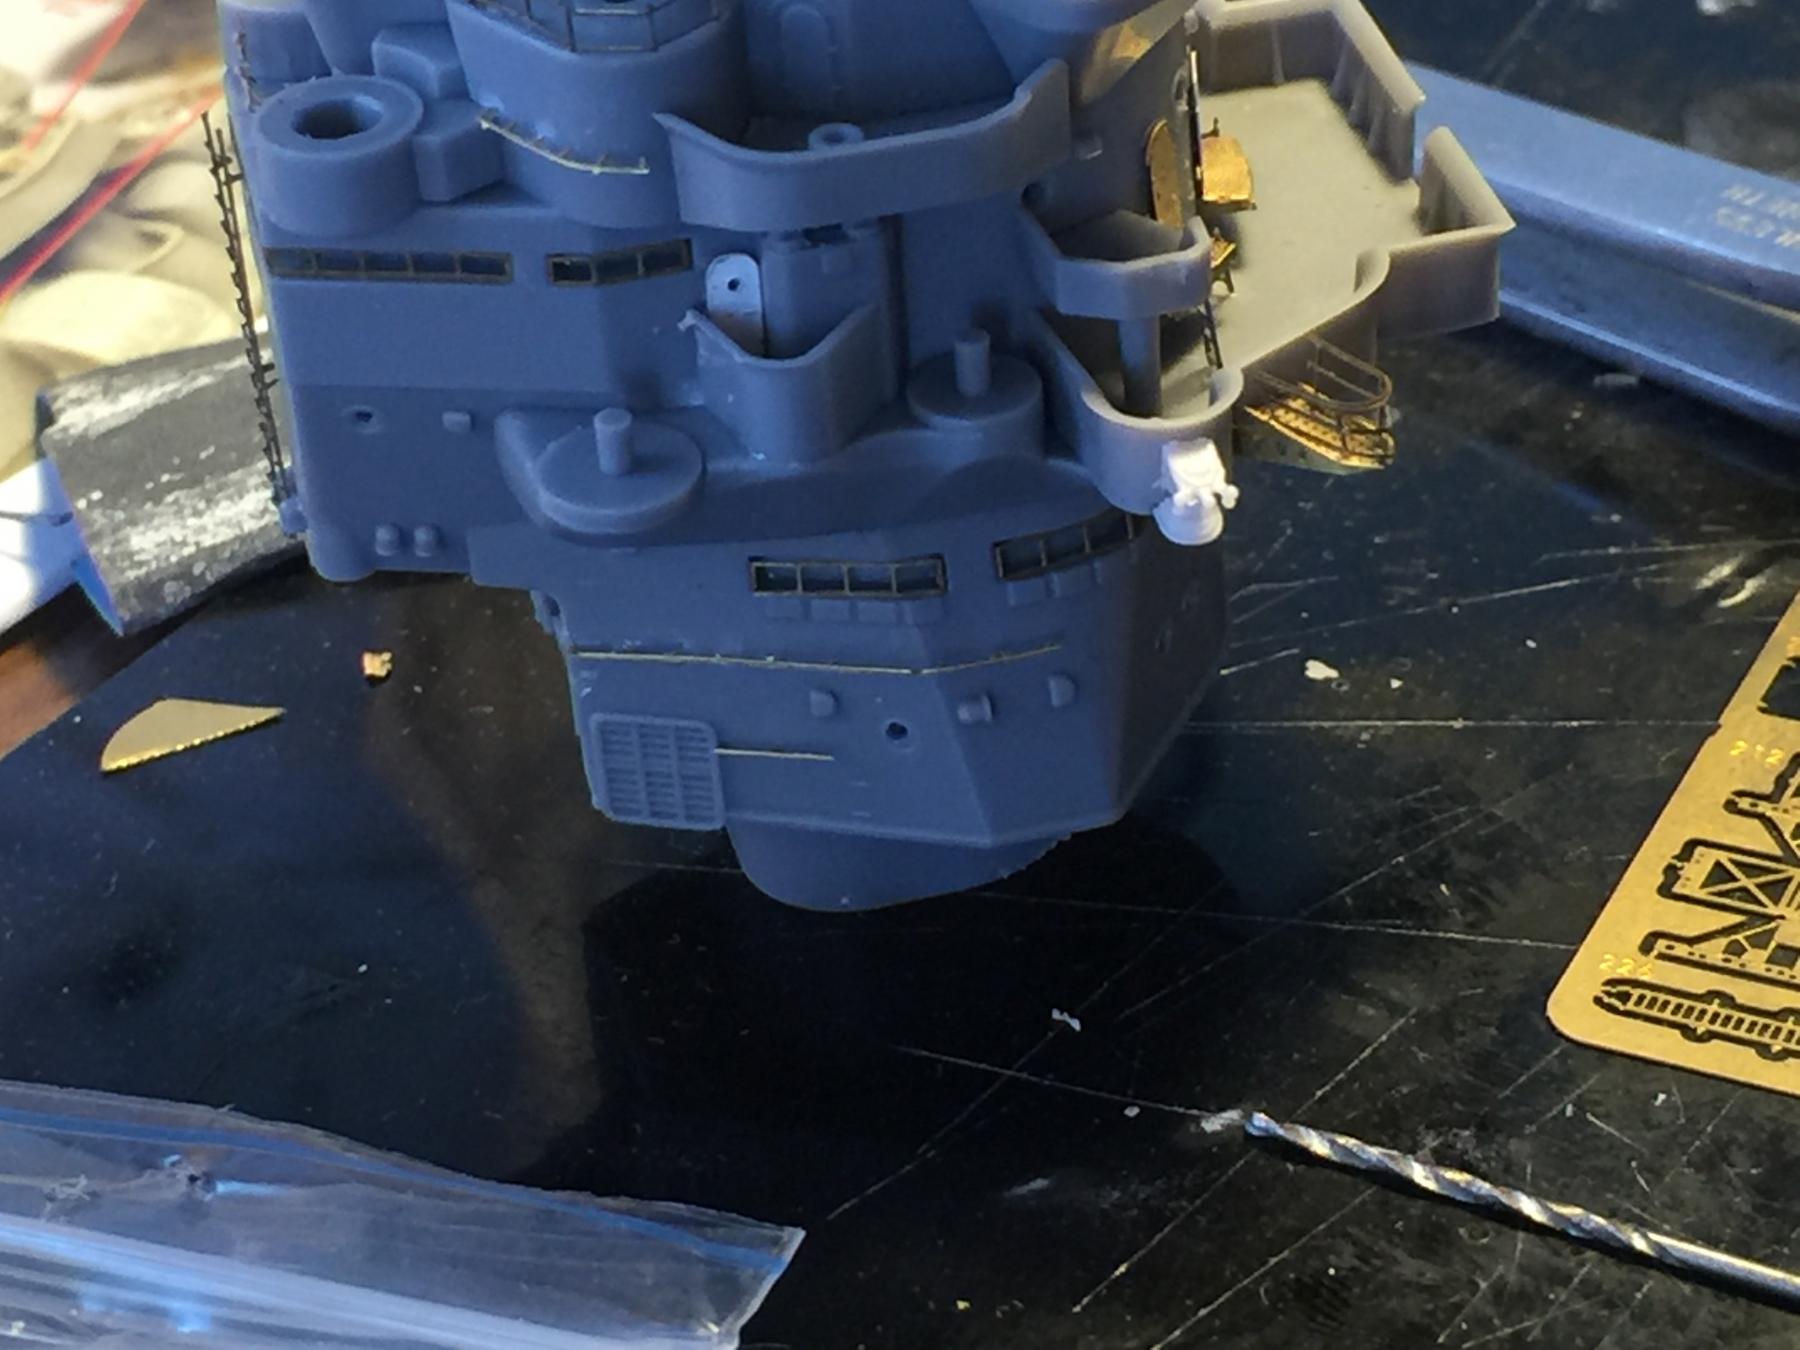
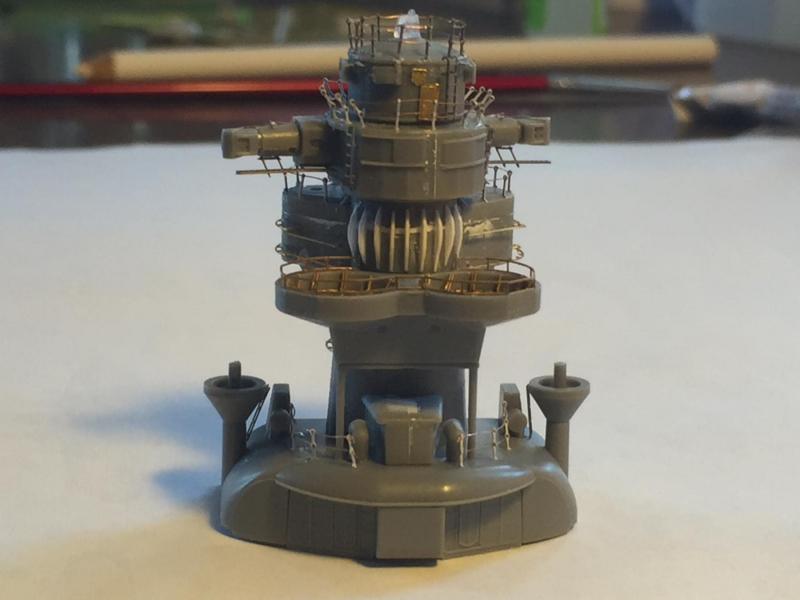
Continuing on, I have added some handrails along the superstructure mentioned in the reference stuff. Then the air defence bridge has been added, adding some voice pipes and dials. Finally to put it in perspective, it is parked on the ship whilst I do the radars.


- 743 replies
-
- 27
-