RGL
-
Posts
5,554 -
Joined
-
Last visited
Content Type
Profiles
Forums
Gallery
Events
Everything posted by RGL
-
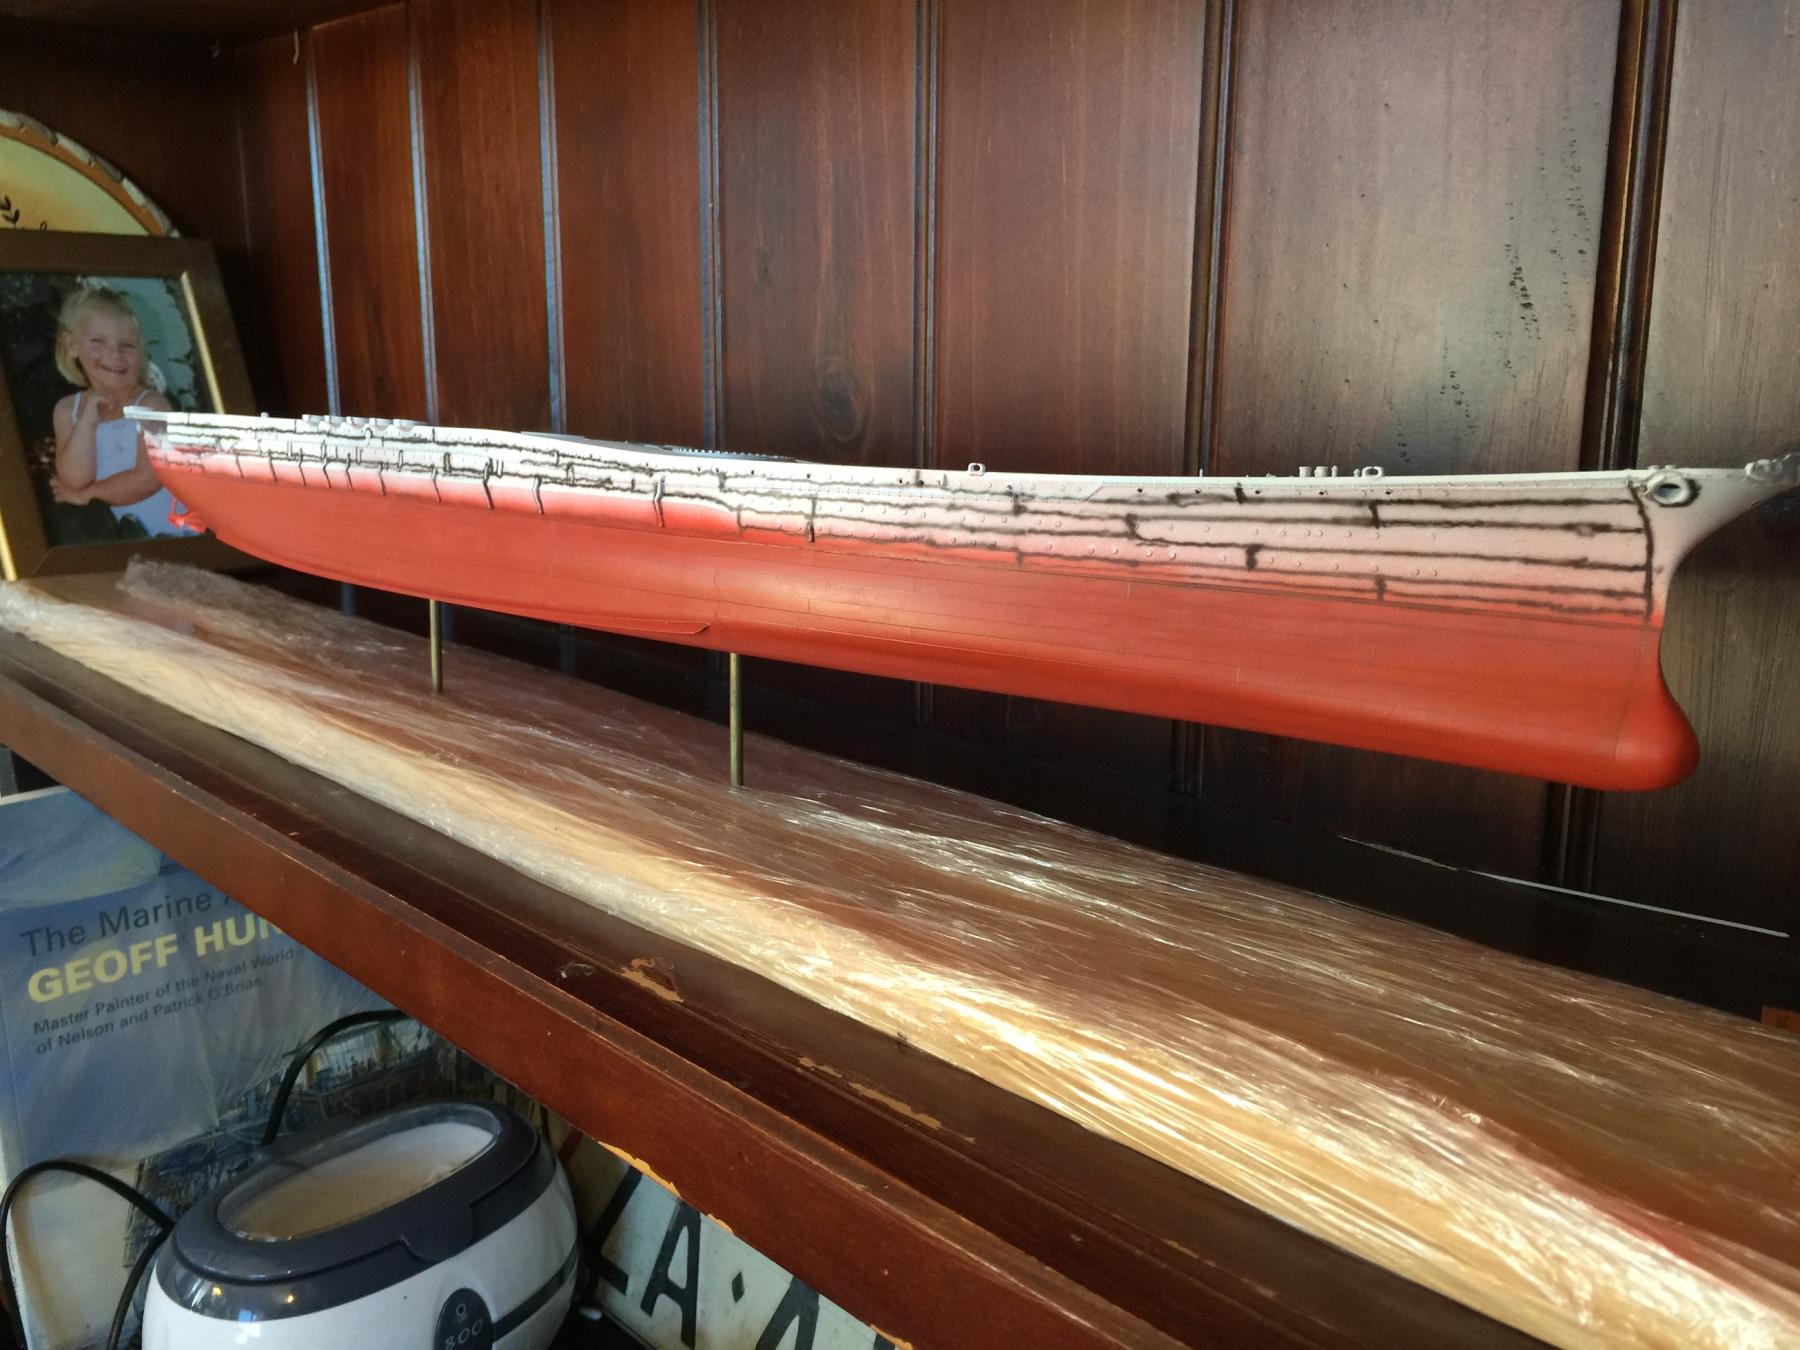
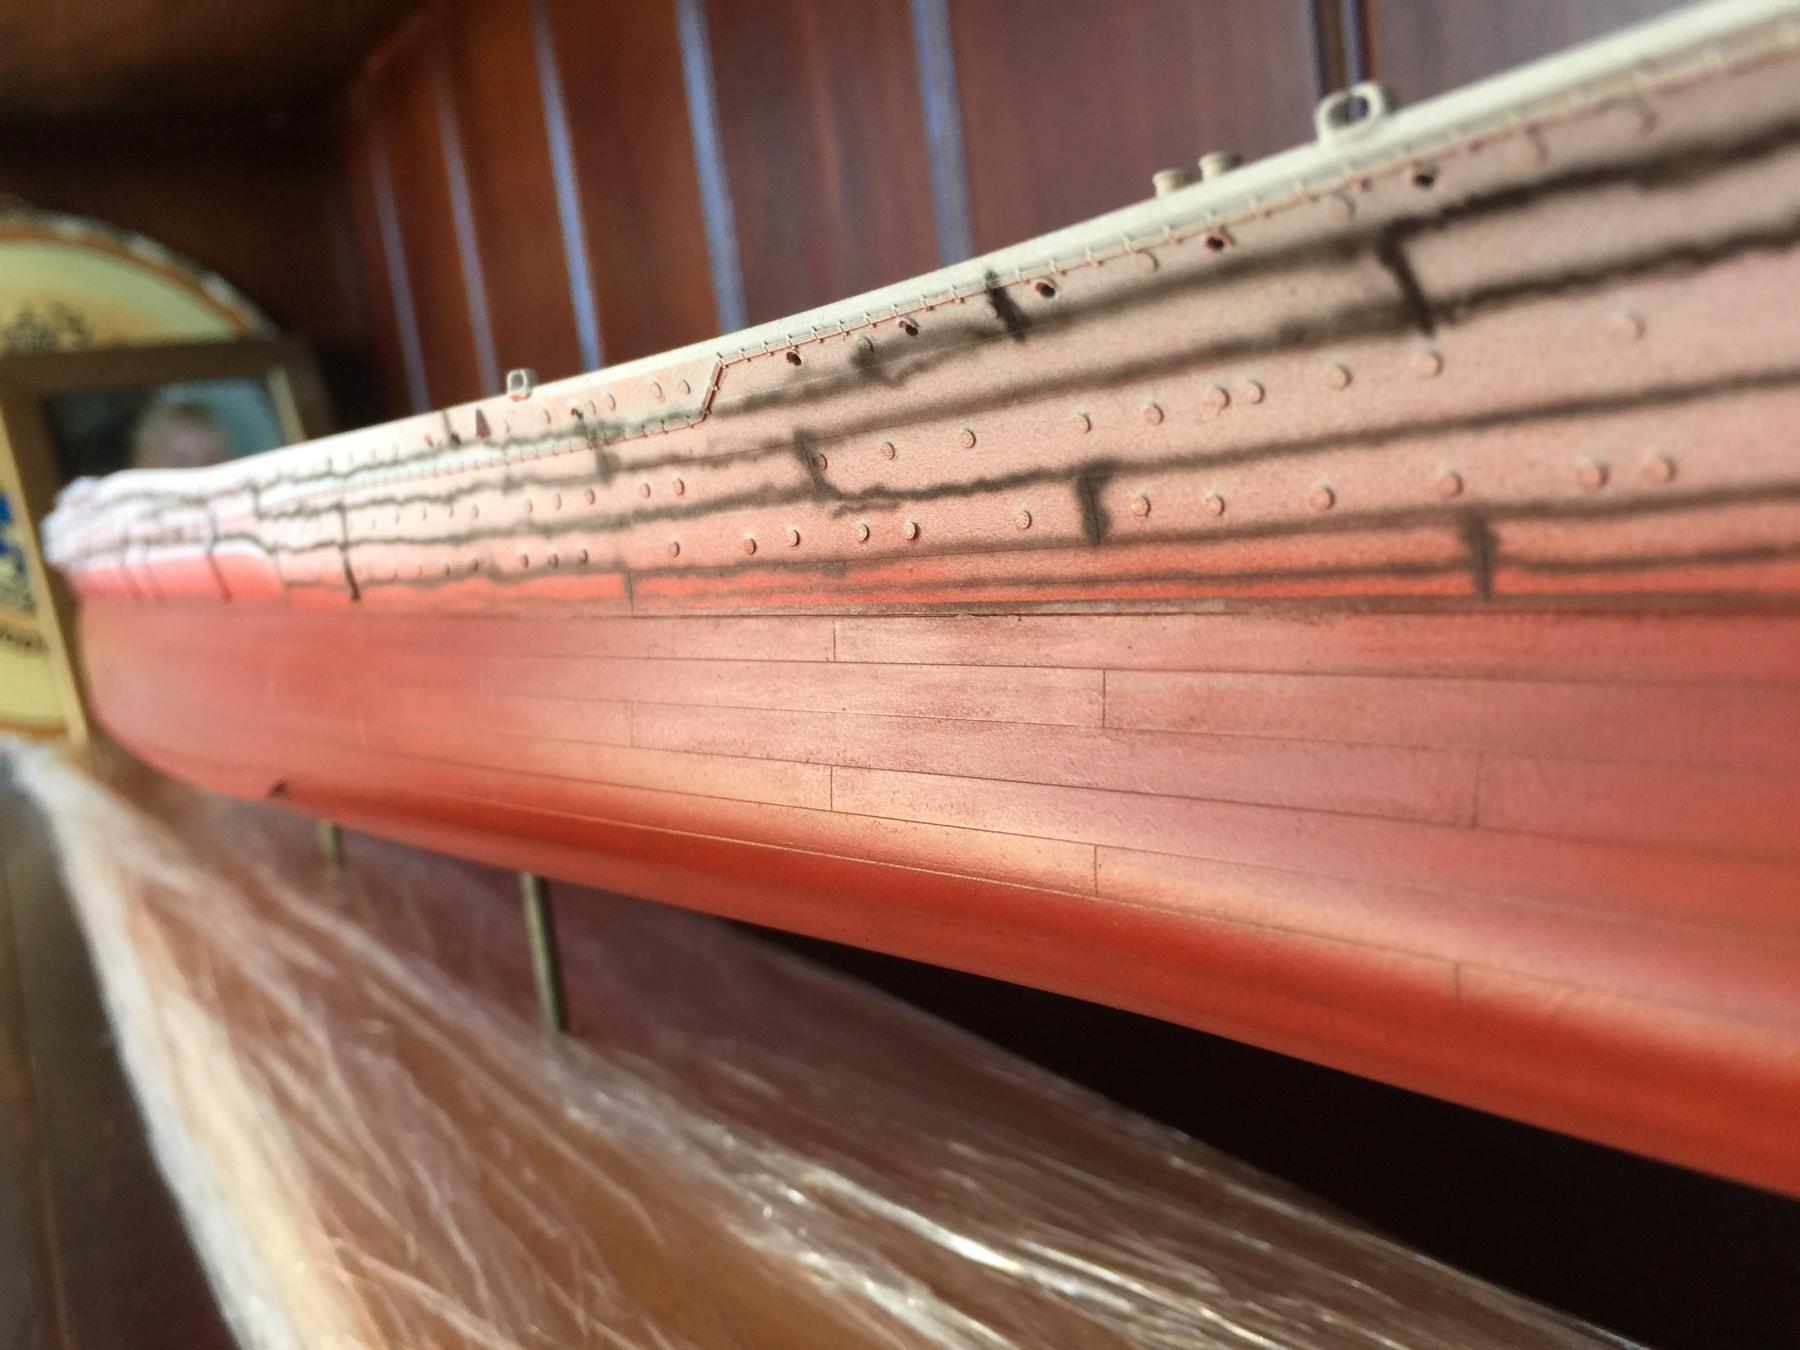
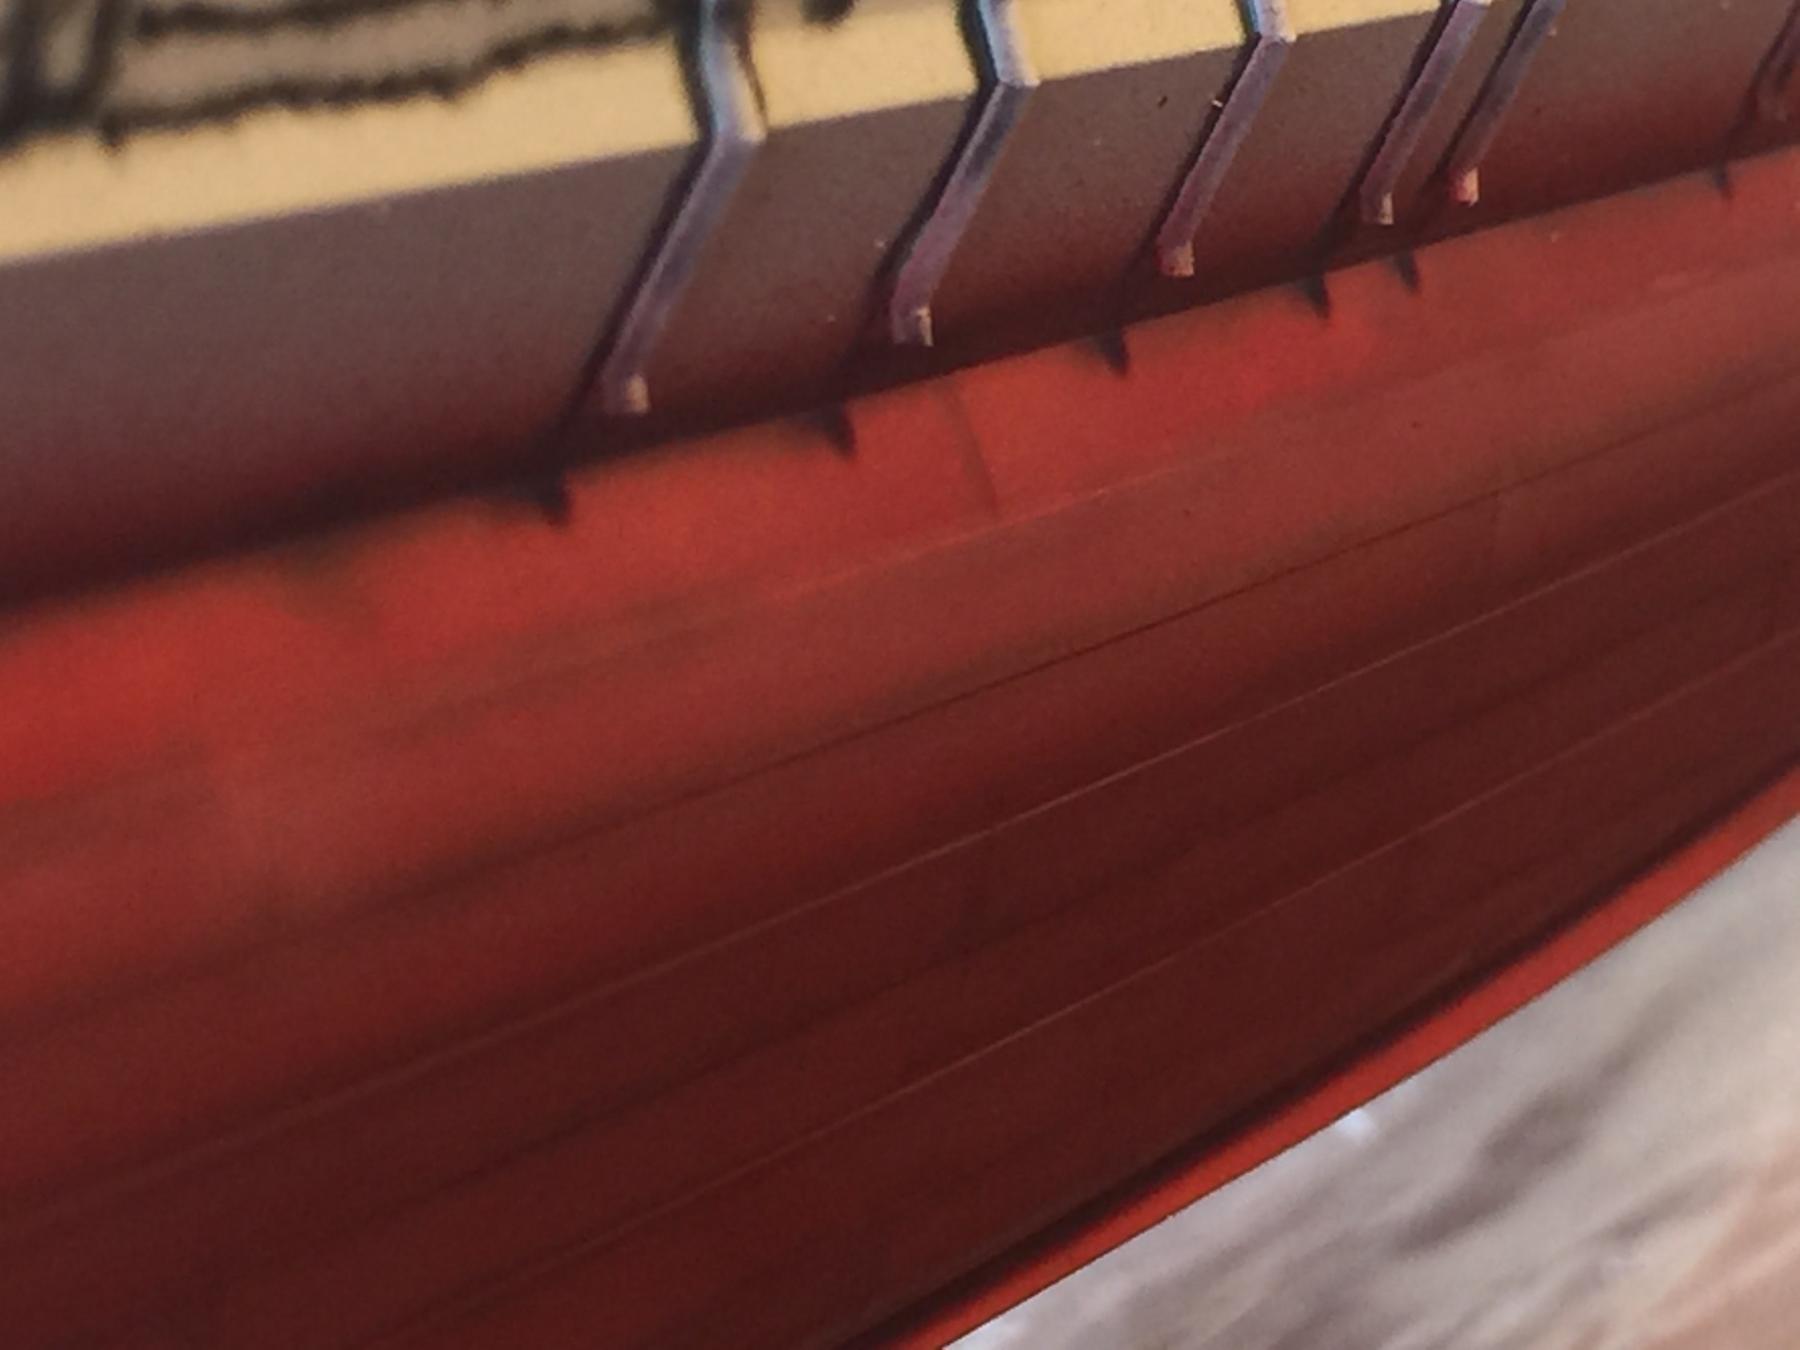
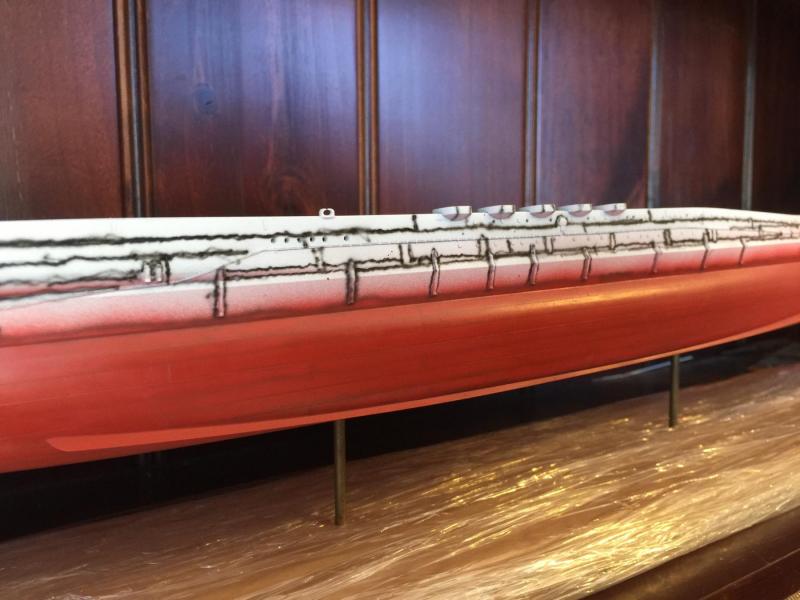
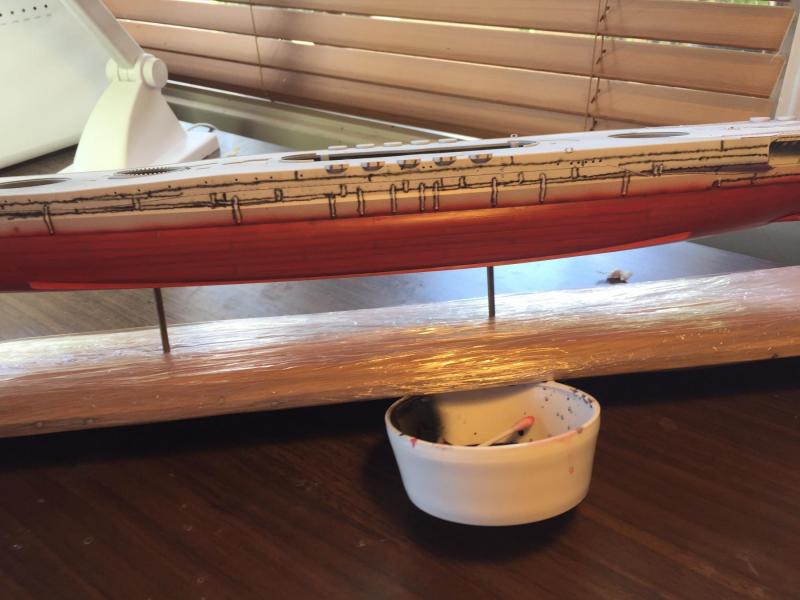
 This morning I oversprayed the hull with a 60% diluted Raw Sienna colour to mute the preshading lines and darken the hull, which really makes the whole effect much more subtle. The ship is not in dock for a week to dry whilst I start priming other things such as the guns.
- 743 replies
-
- 11
-

-
Good, I was supposed to go to a regatta is Sydney where it was 44 but it got cancelled so I have a few days of quality desk time. It only got to 40 degrees here. The airbrush work is improving and I'm a lot more comfortable for the practice with it.
-
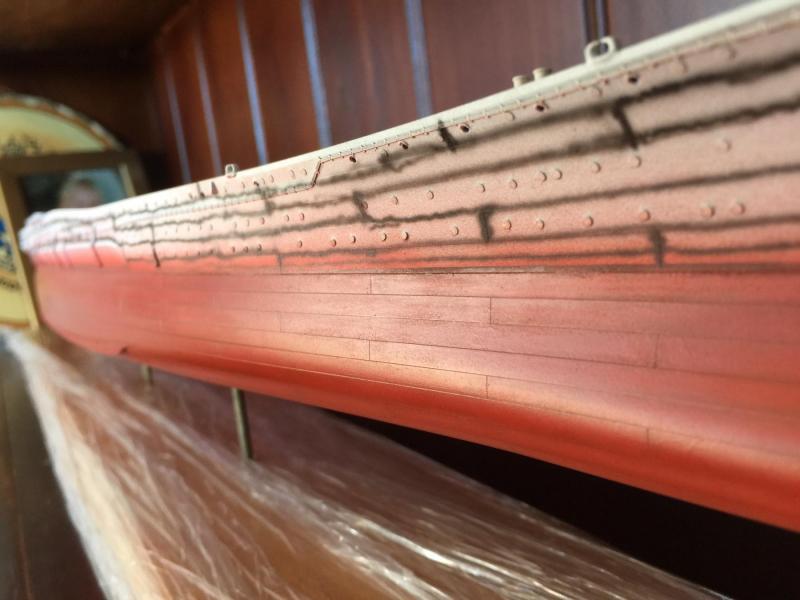
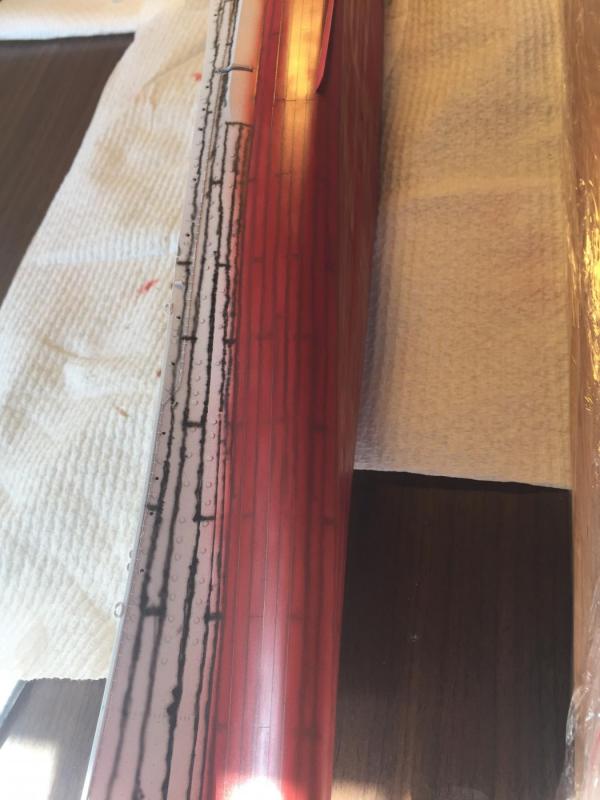
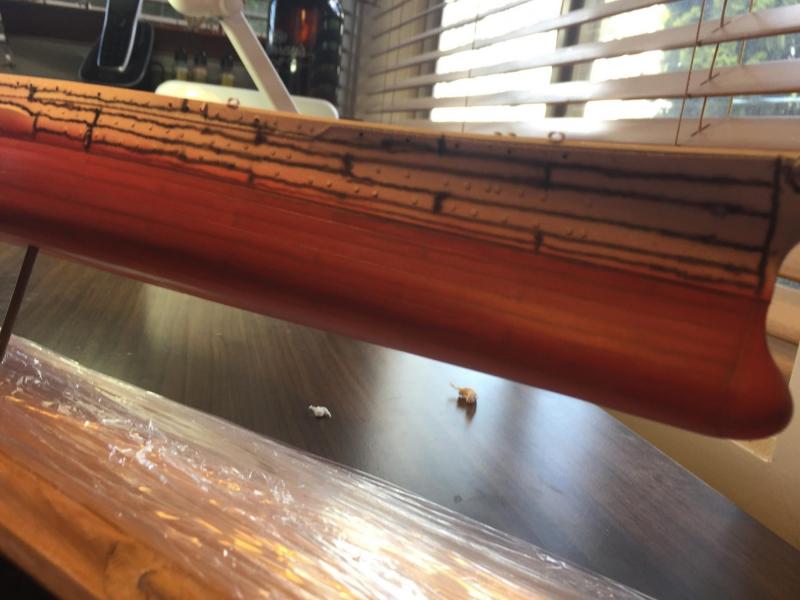
Ok, now I've painted all the squares, i filled in all the spaces with red, then oversprayed the hull with more red. That's the thing with red, it's soo translucent, Then I highlighted all the panels with a lighter red, toning down the back preshading. It actually looks a lot better in real life as the iphone camera does notcut it.. I intend to do a filter over the top then some very light dry brushing to really highlight the panels. I did not do the ribbed version as I previously explained it does not make sense. Then I can move upwards to do the upper hull after I leave it for a week to dry to I can mask it safely. Then the weathering....
- 743 replies
-
- 14
-
-
No mate, I could only build the one type of each ship! You monster would mean I'd need a bigger study and I only moved house 2 years ago. Having the wooden base makes you a purist!
-
One is enough.
-
This is going to take up a LOT of space
-
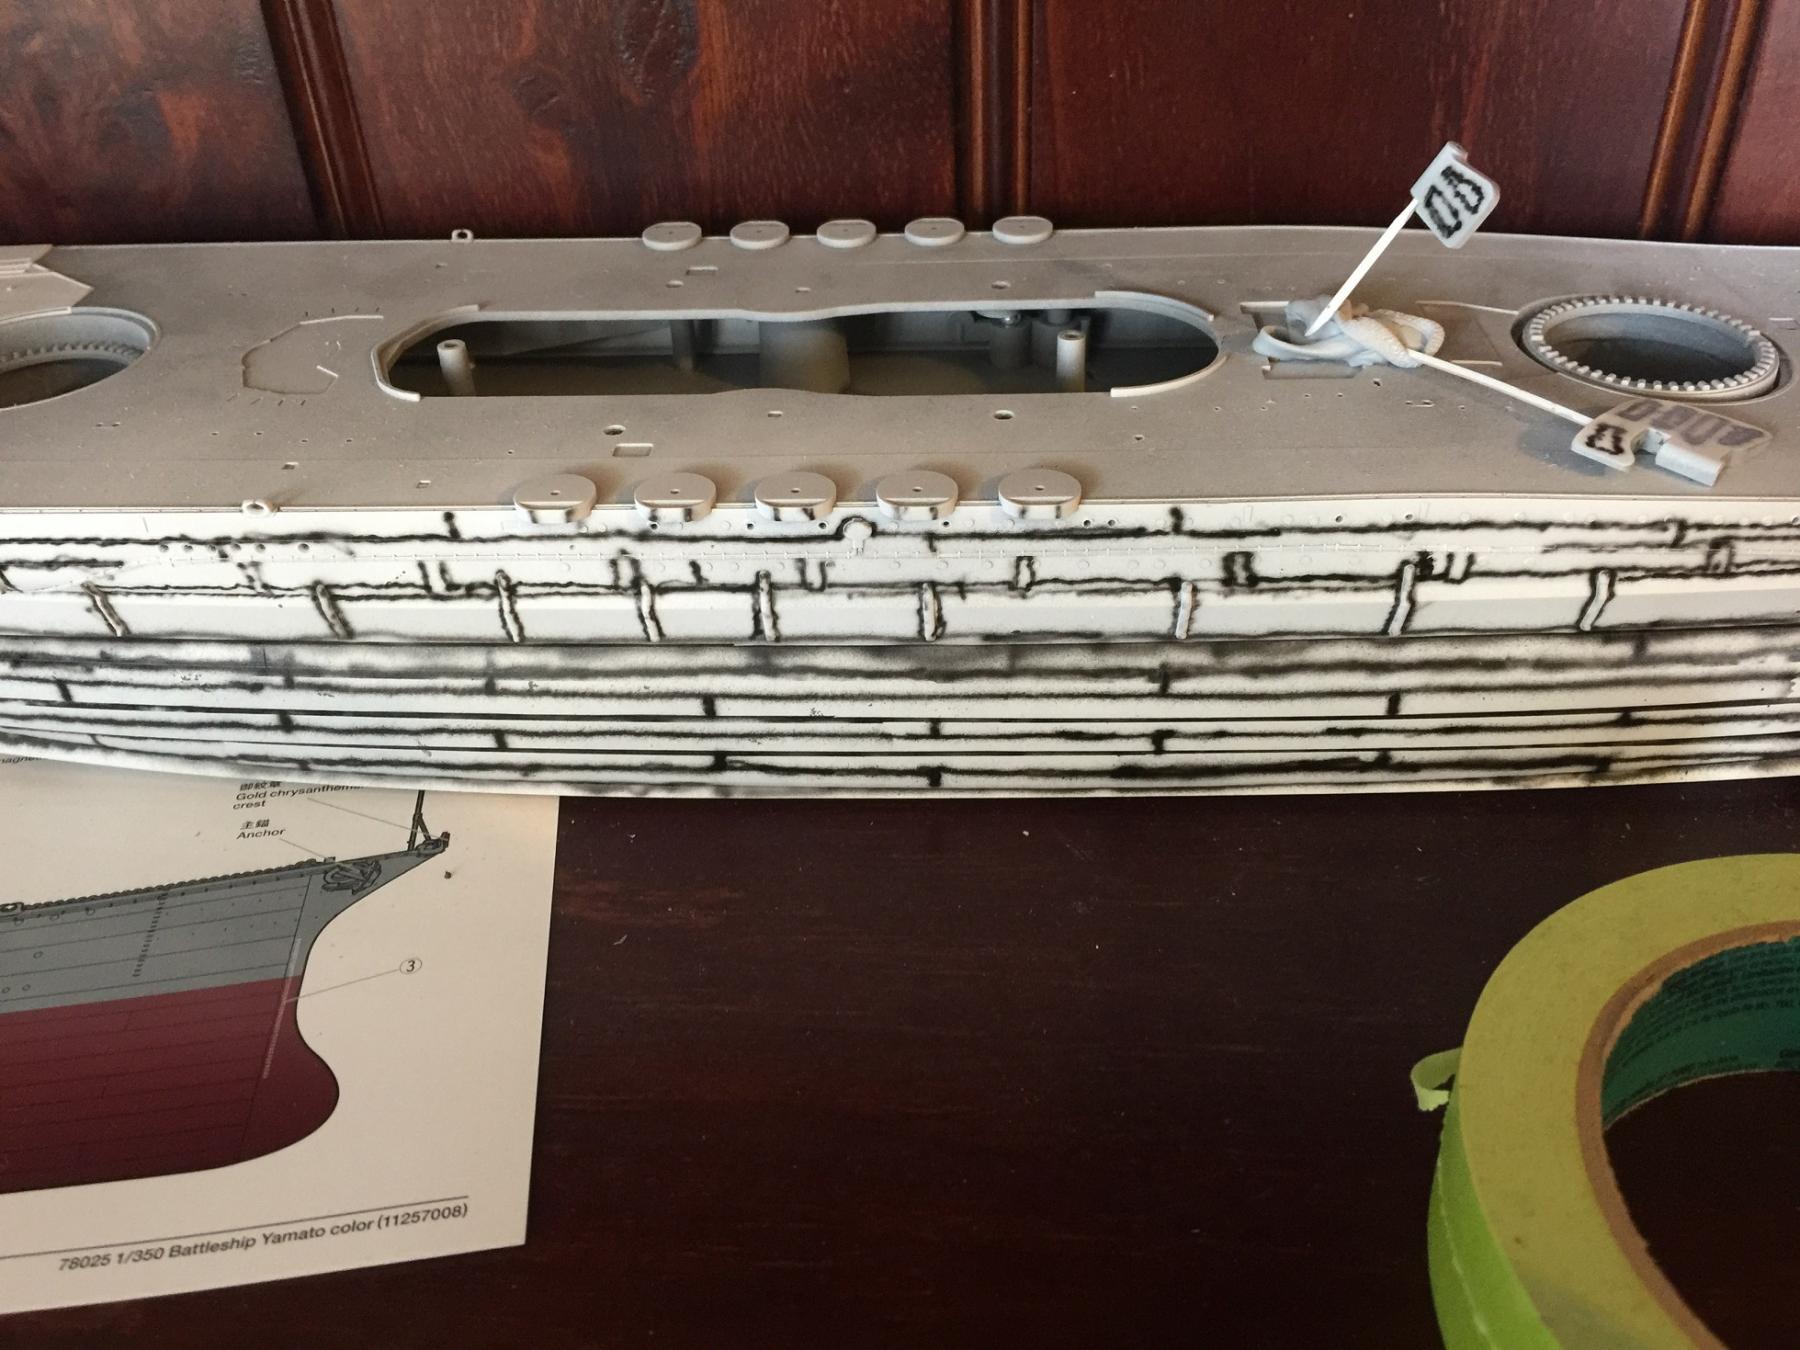
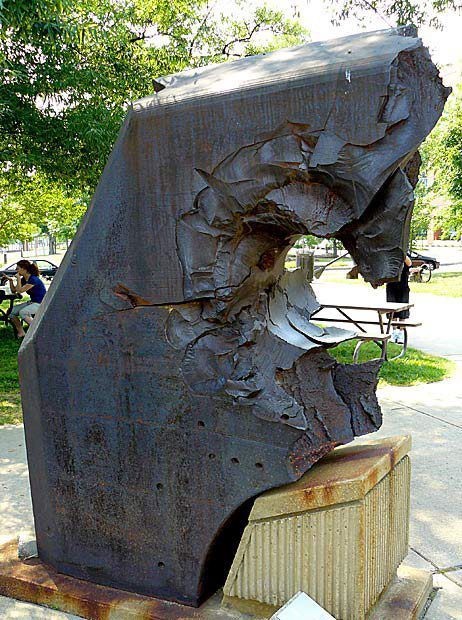
It is a shell hit, it's obviously the same thickness but not the real thing I suppose. The particular piece of armor tested was the 26-inch frontal armor for one of the Shinano’s 18-inch turrets located in the Kure naval yards after ww2. The Shinano was never made but it was the same class. The U.S. Navy shot it point blank with a 16-inch shell. The resulting impact penetrated and ripped the armor apart. While this showed that a 16-inch shell could penetrate the Yamato’s armor, it’s unlikely that it would have done so at distance. This piece of armor tested by the navy is now on display at the Washington Navy yard. Reference http://www.byronhartshorn.com/
-
You can never have enough PE! I just don't want to spend $250 for about 20 pieces. Ok, it's PE envy. A lot of the PE was designed for the old tool which will not translate to the new. I can see Cog might be an Aussie given his sense of humour.
- 383 replies
-
- 10
-
-
I don't like the one piece railings for some reason. Tamiya designed it for after market and the wire does not bend well but it works with ezline with the stanchions. That way you don't have a rail on the deck and it does not pull if you hit it. I will have to test how it takes paint, but I used it in my Emden and Varyag and liked the effect. Have a look, it comes out OK. We forget as photos are very forgiving with a crap camera. I used the Tamiya rattle can for the bulk of the hull and will use Ak from here on in, it's just for ease, but you do have to sand it back as the rattle can picks ups anything floating in the air and presses it into the ship. It sticks to brass and plastic really well. I have found that gluing brass to brass with a paint barrier does not work well, so I have a lot of work to do with rigging points to do yet for the ships arials. The airbrush is a dream as the paint goes to about 1mm coverage and coffee does not help at all, given the size of the hull there is no such thing as a 50cm strait line. I'm looking forward to progressing with the build but a week of dayshift, coaching and a trip to Sydney next weekend for a regatta will slow me down
-
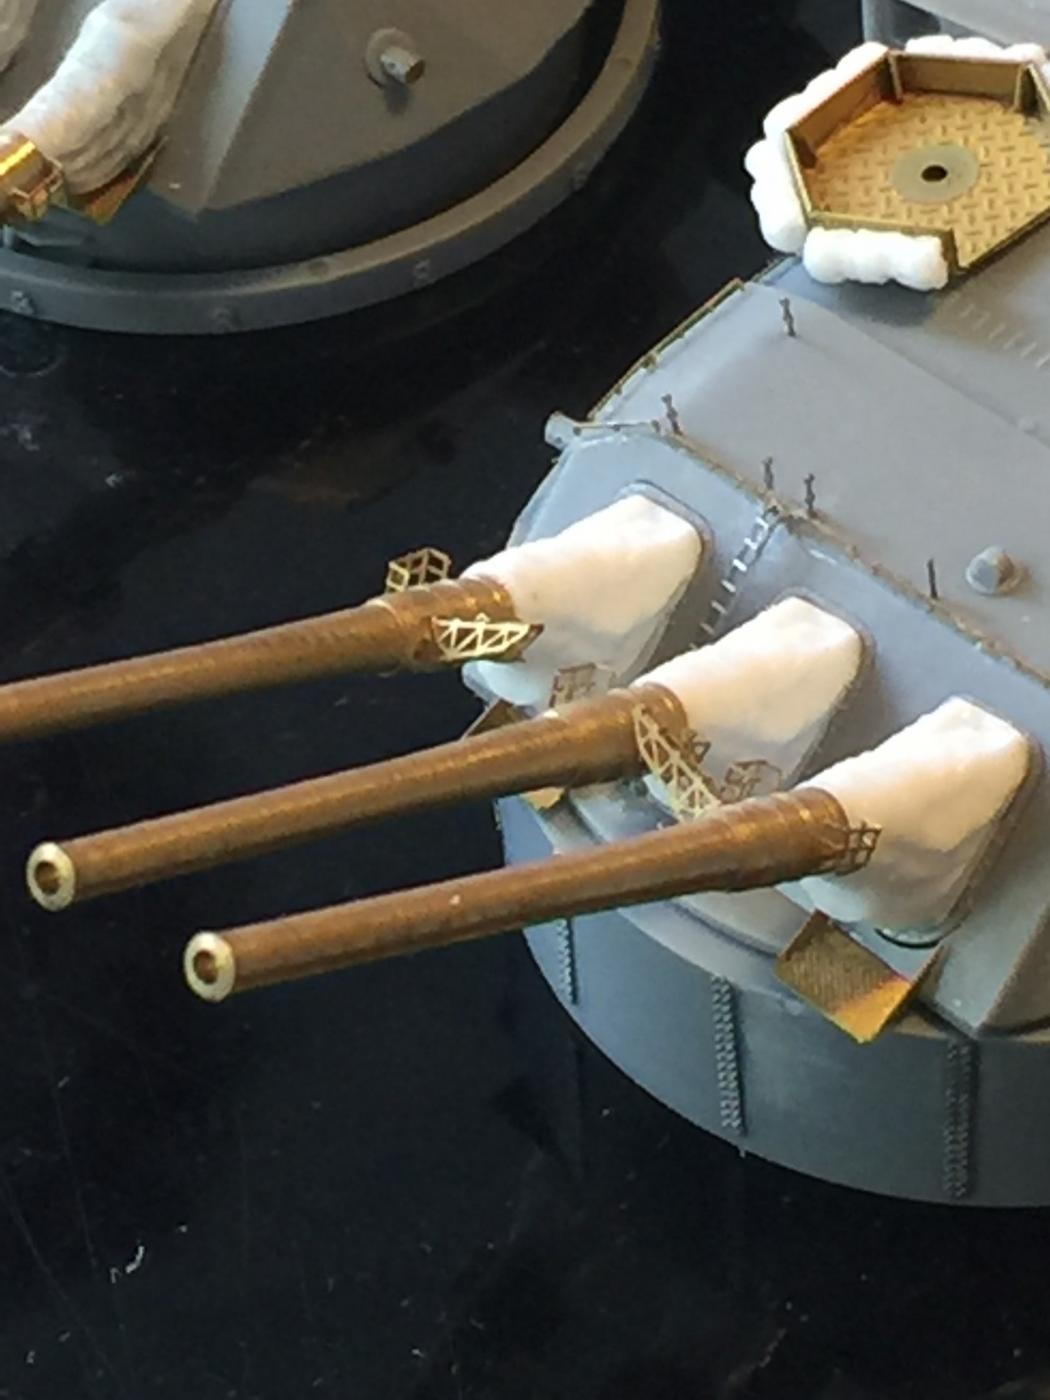
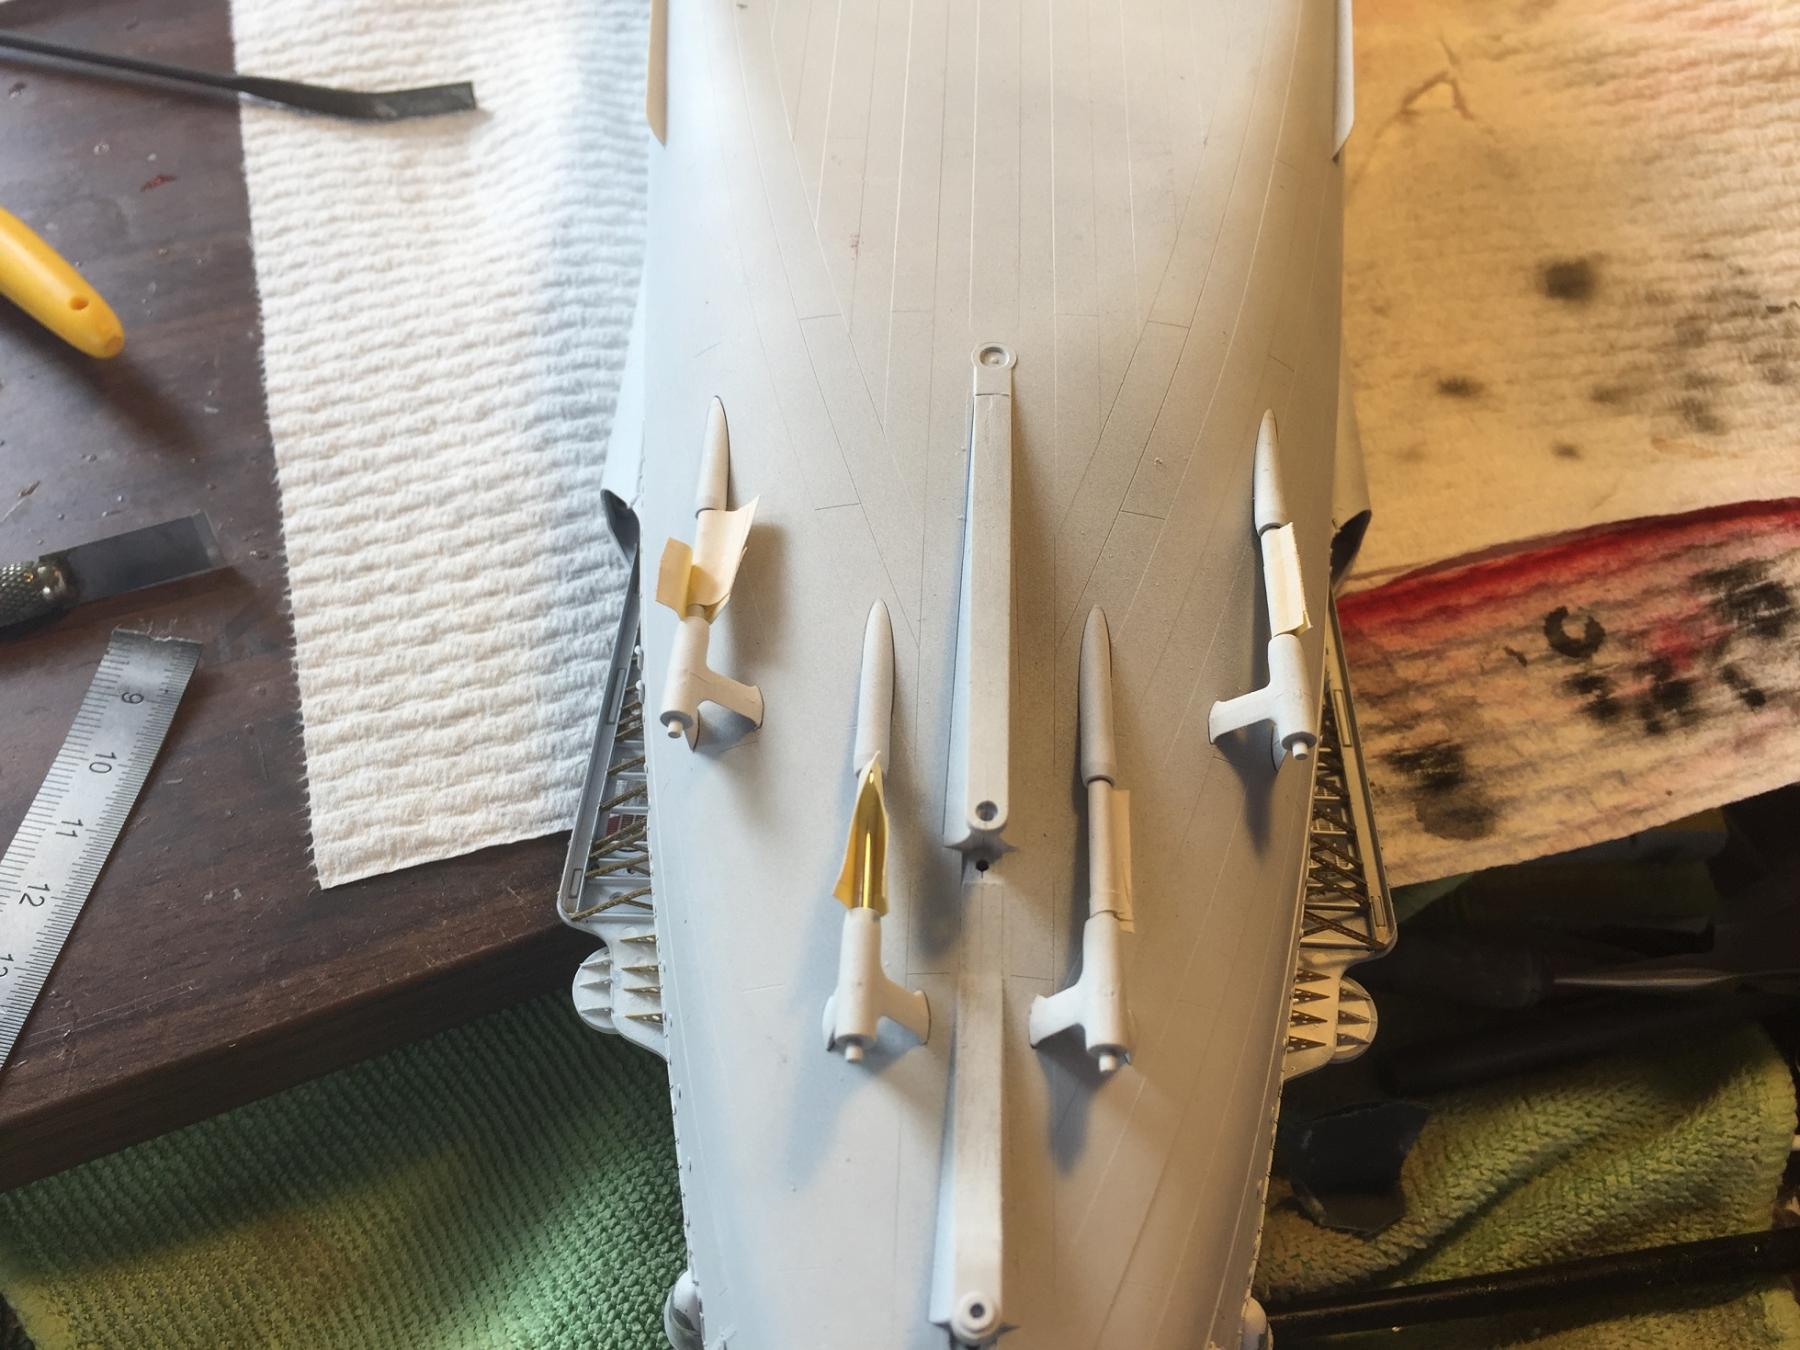
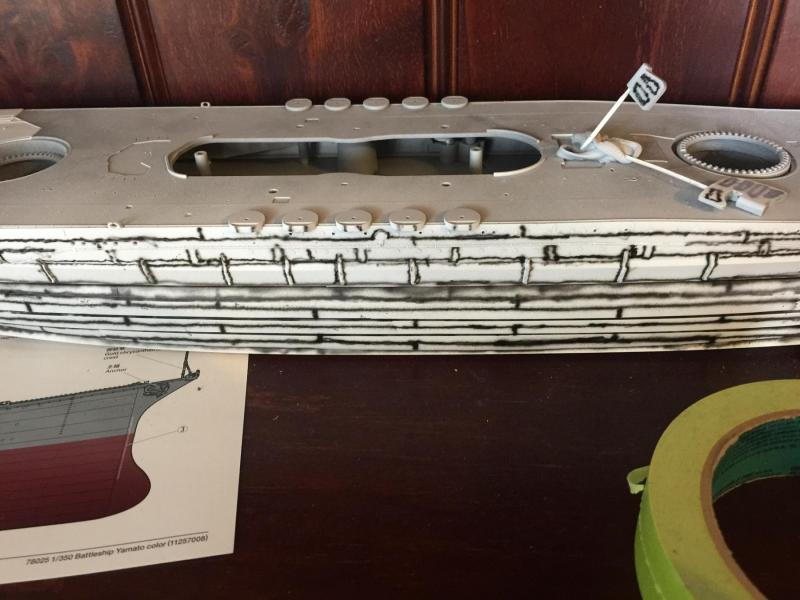
So, as much as I want to show the ribs, it does not make sense. The armor bands were so thick it would not be visible. This shot is Yamato armour from the US navy. So, getting the hang of this airbrush thingy, and preshading the panel lines. I want to leave the paint to set before masking so I finished the main guns, including the instrument platforms on the barrels and individual stanchions. I was going to use wire but it just bends and crimps hopelessly so I will use ezline.

- 743 replies
-
- 16
-
-
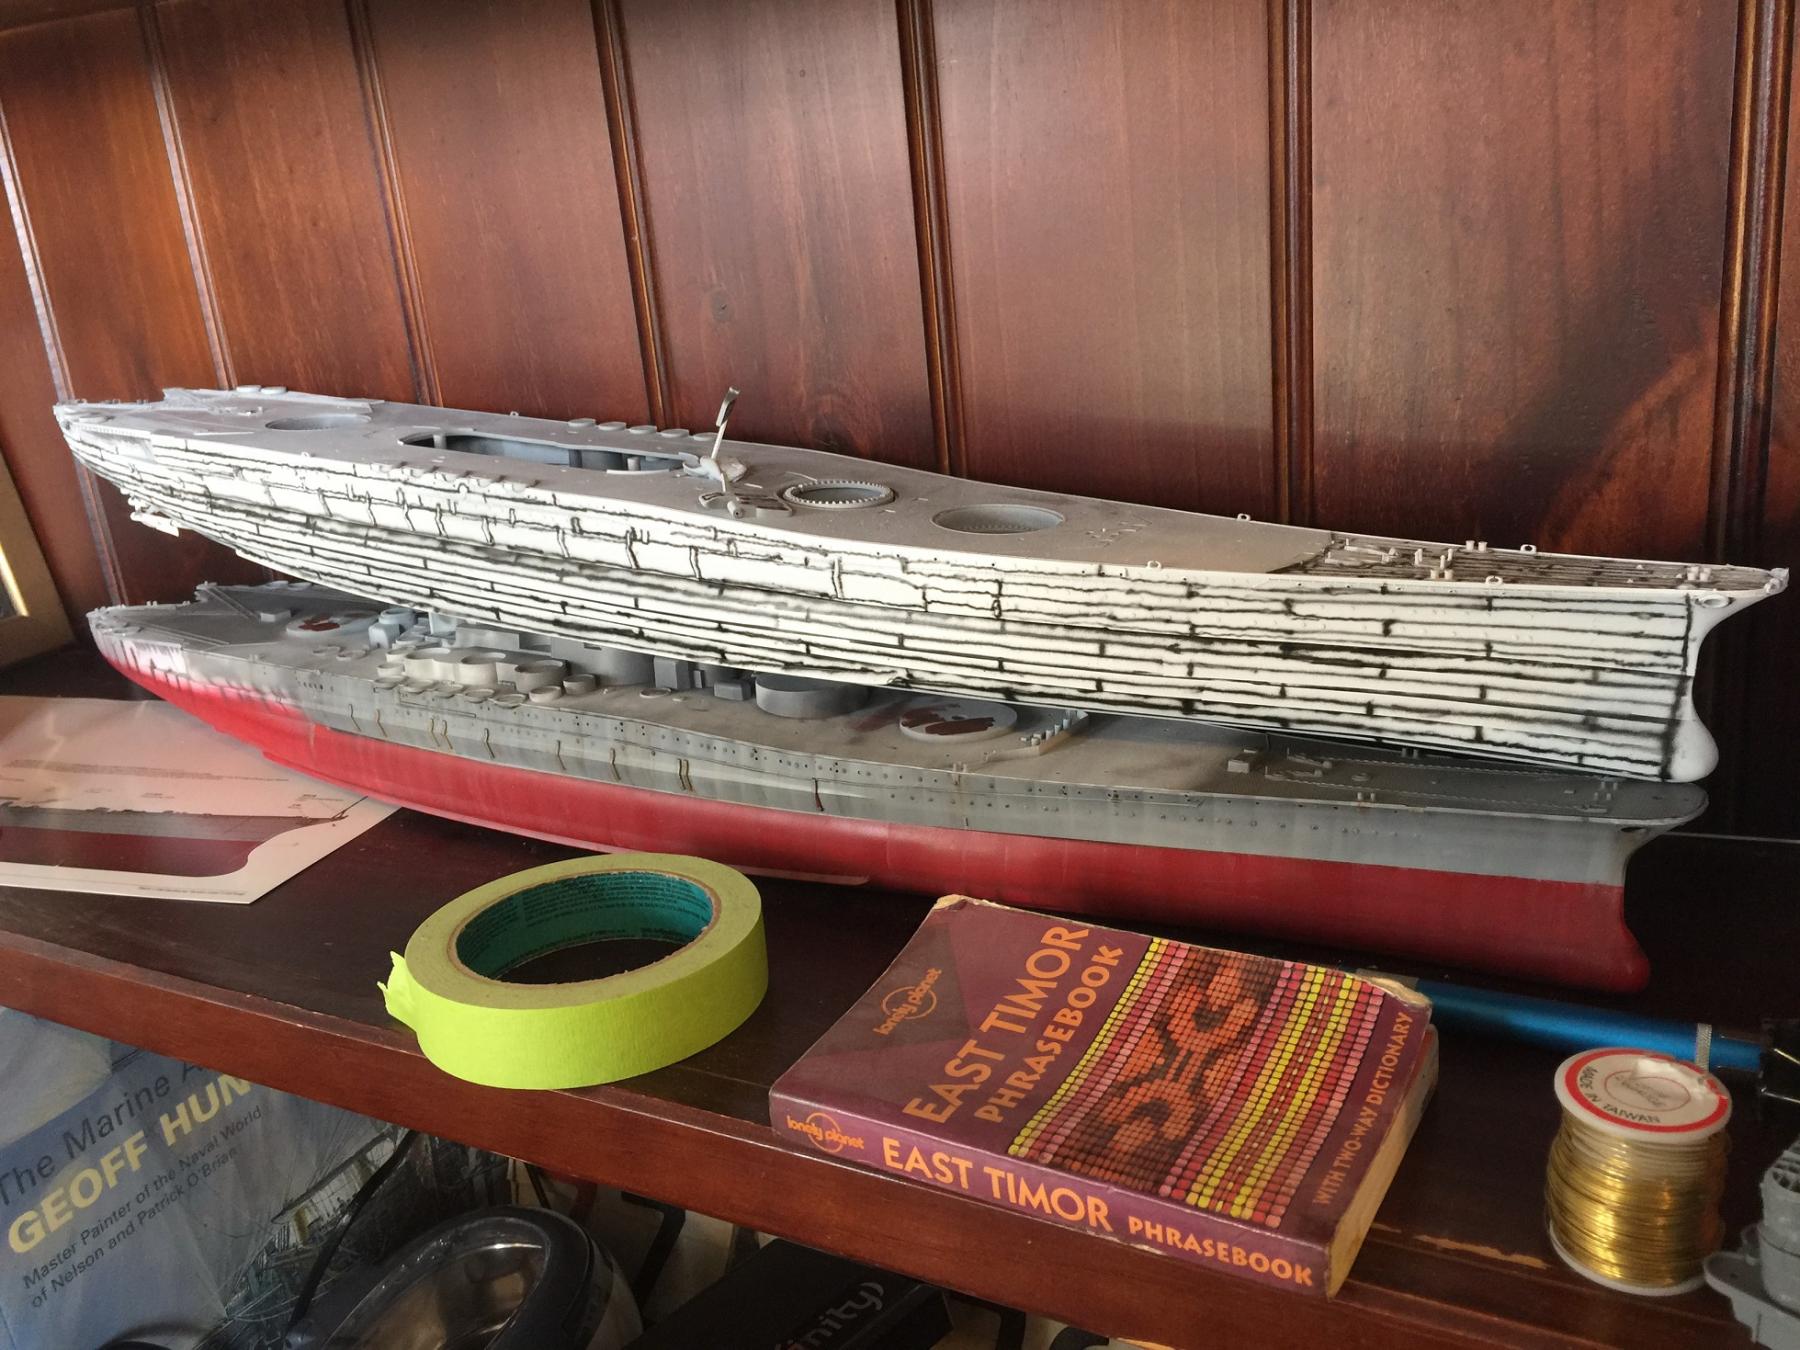
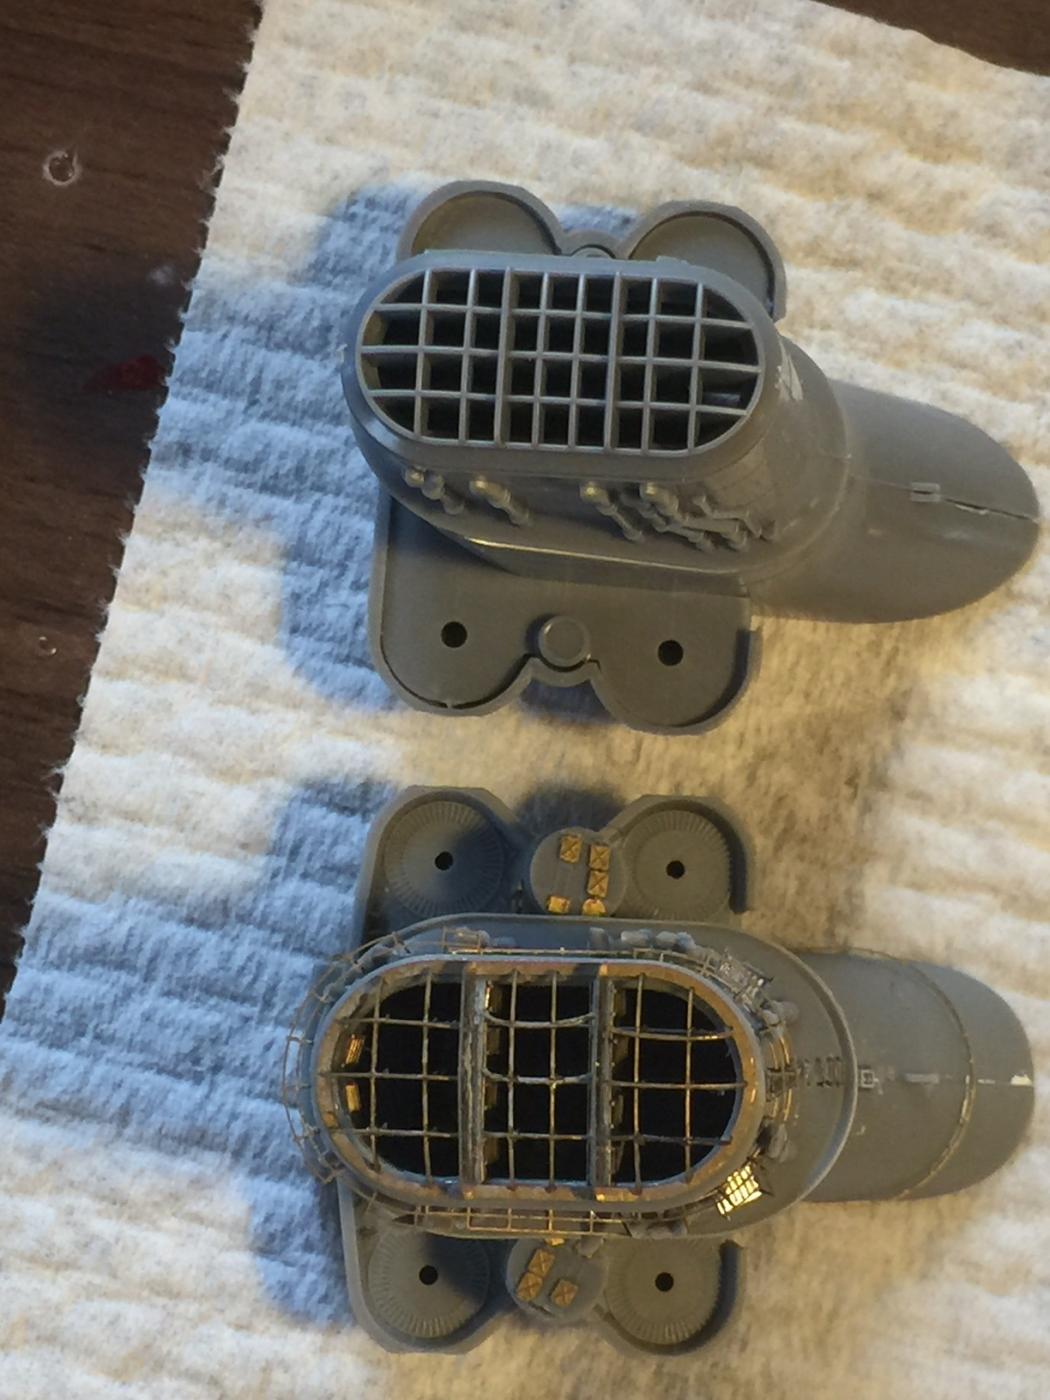
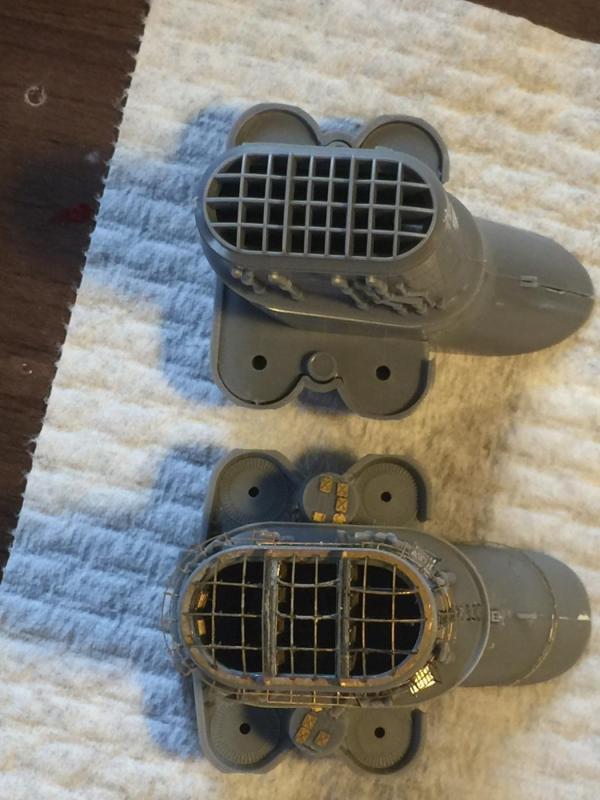
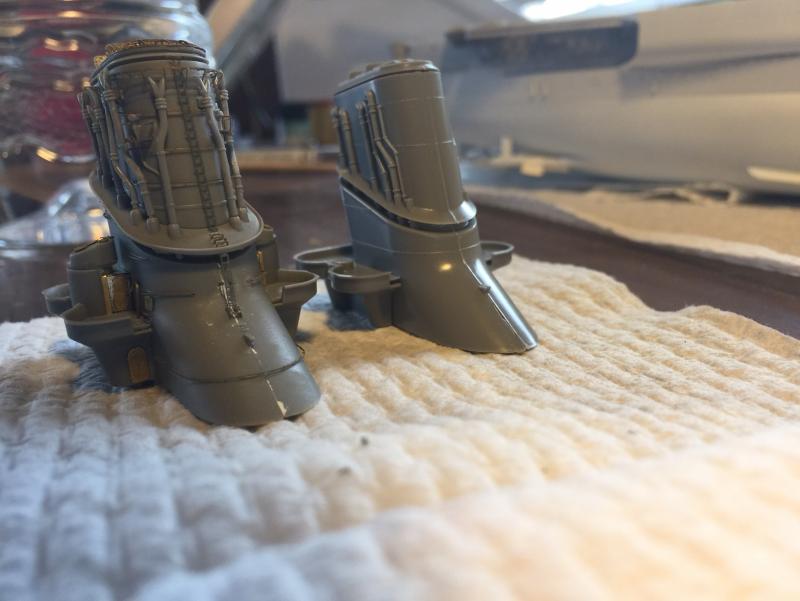
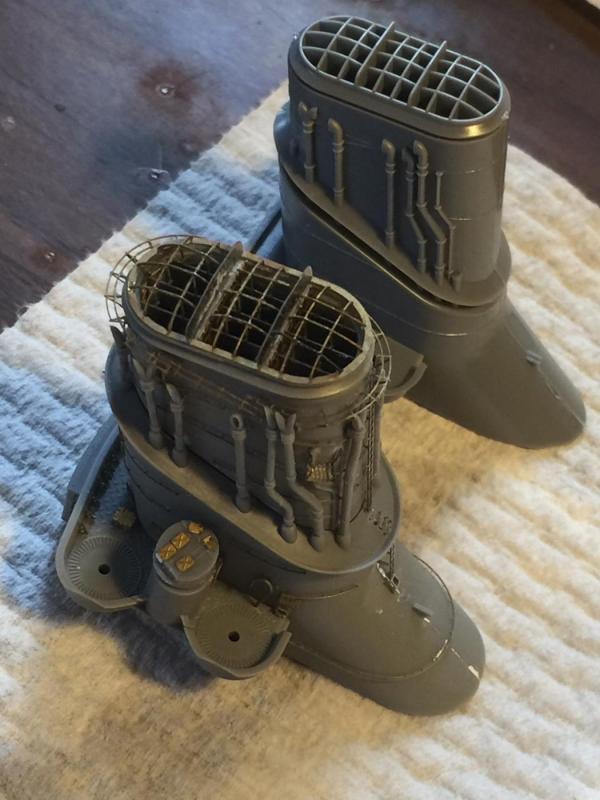
Cog, I have put the funnel from the old tool to compare with the new. As you can see the new is a bit taller and wider. The New tool comes with internal baffles in PE, I just had to add ladders. I don't know if Mushasi was much different tho.
- 383 replies
-
- 12
-
-
The Pontos is made for the new tool. I agree that Flyhawk has some nice additions tho.
-
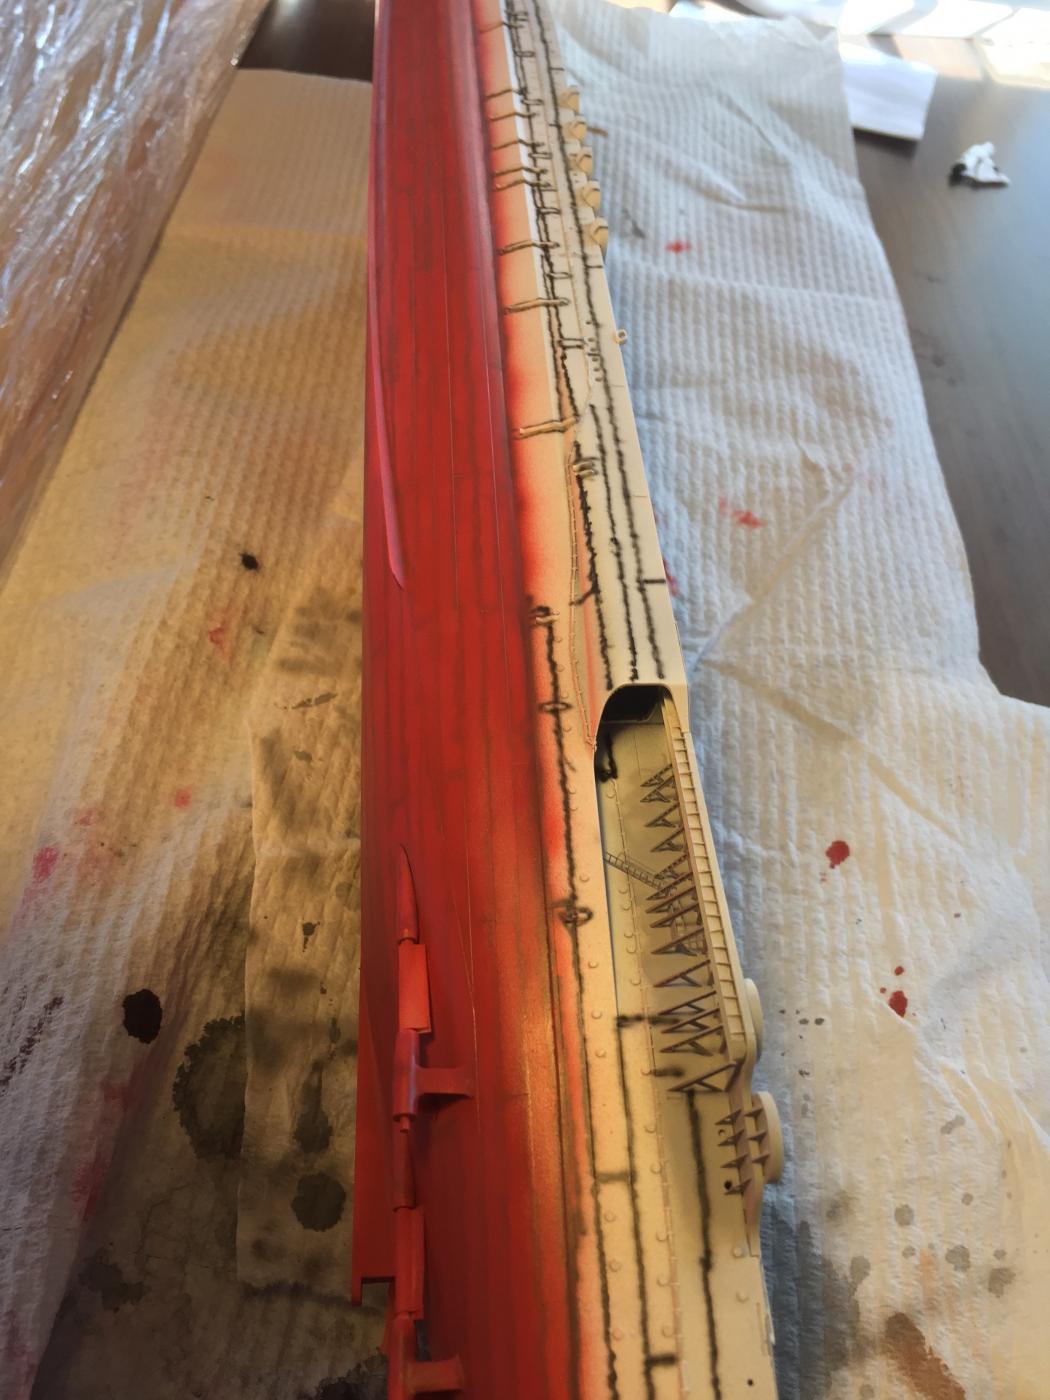
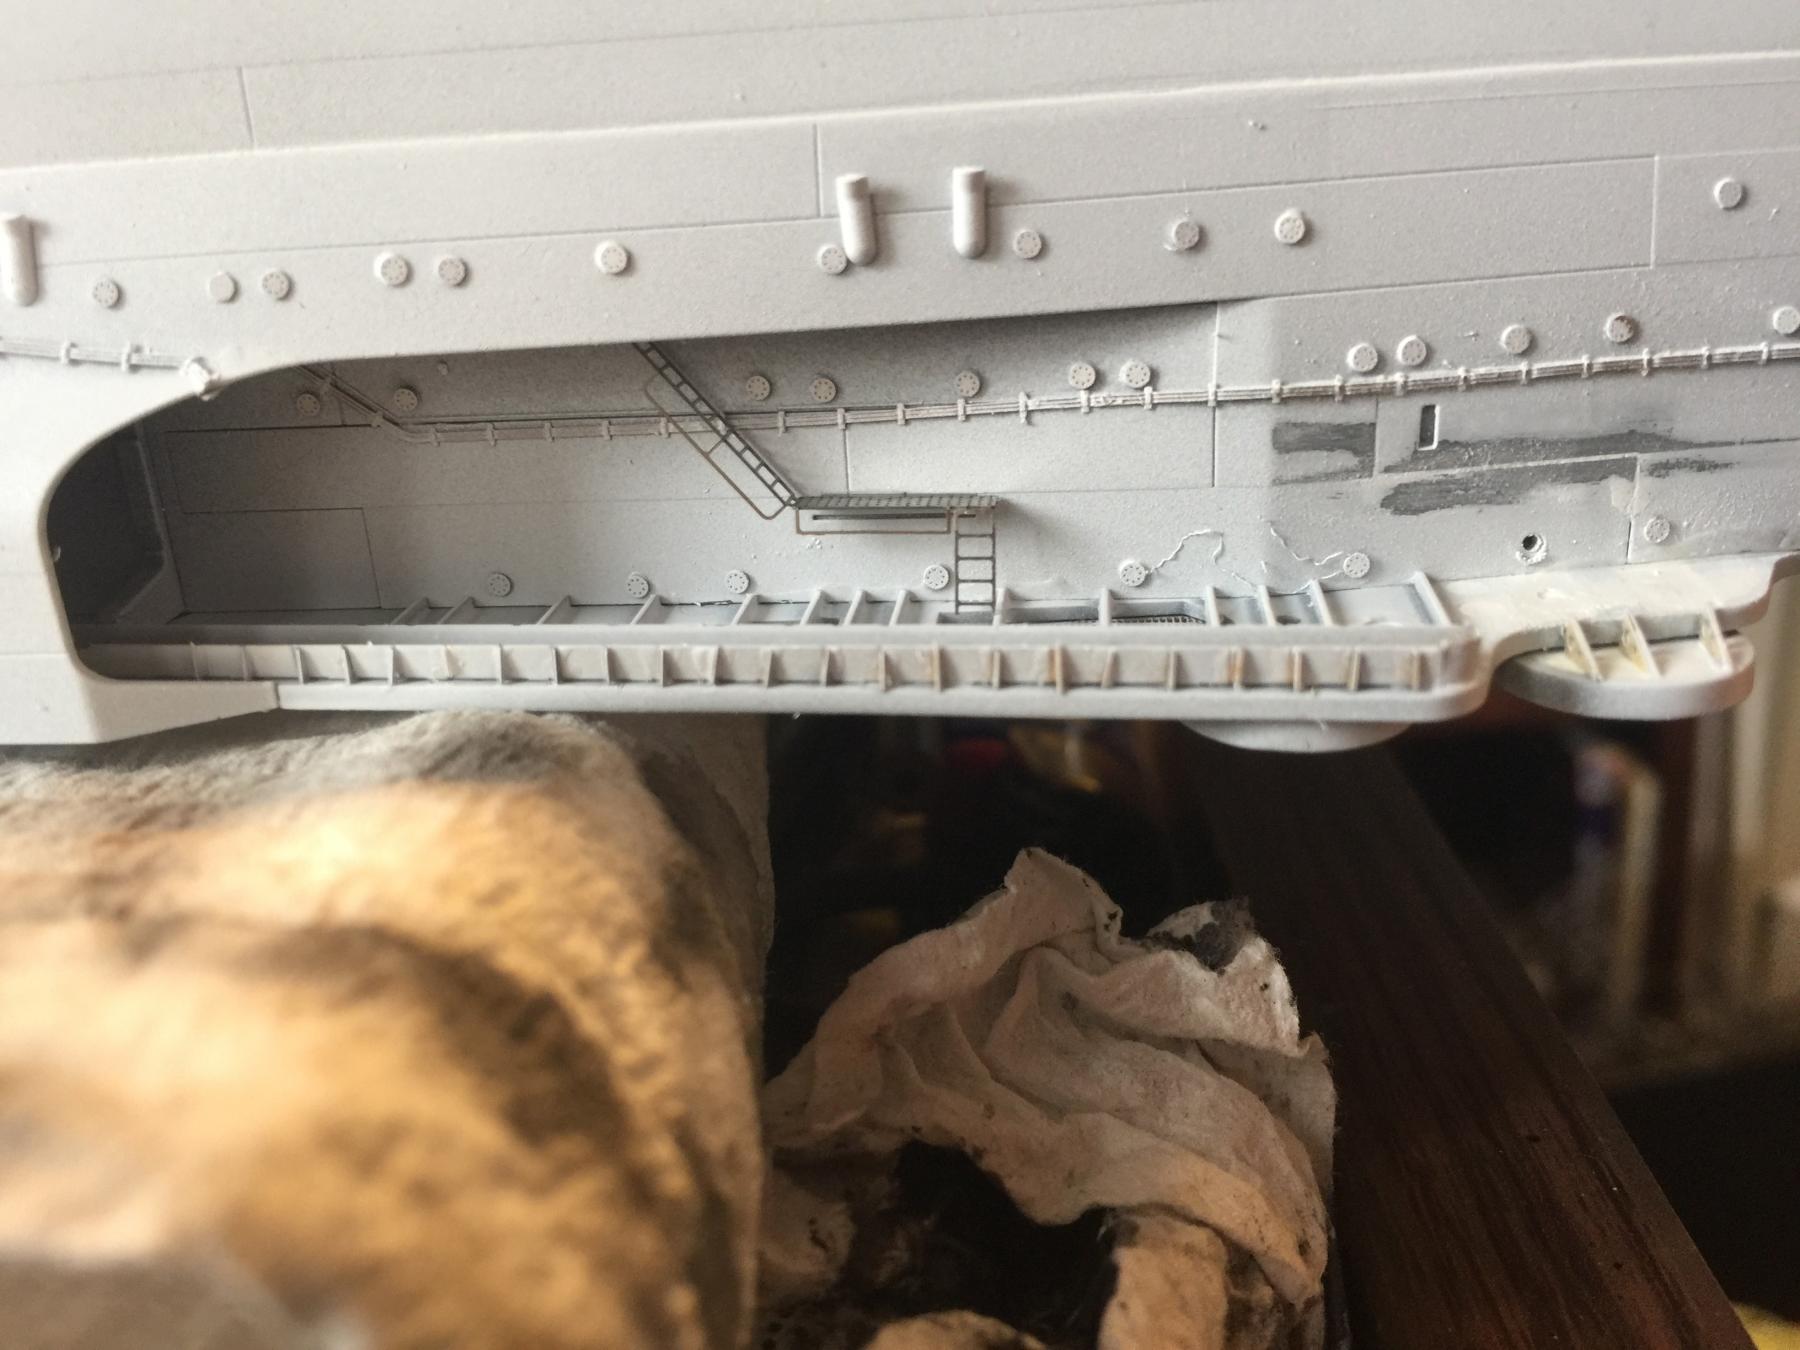
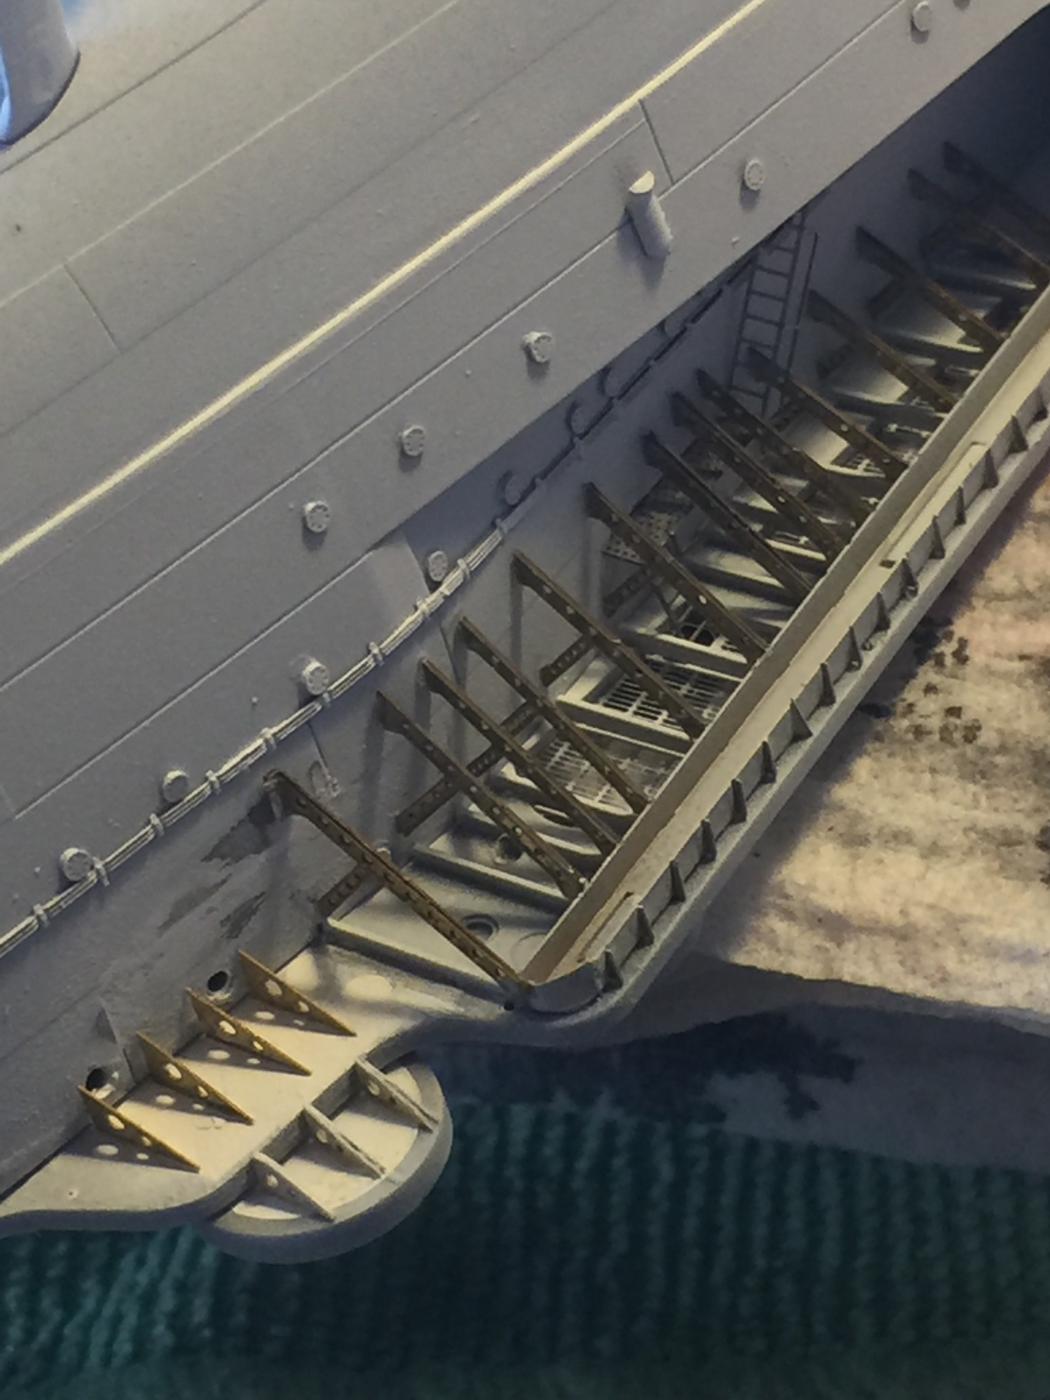
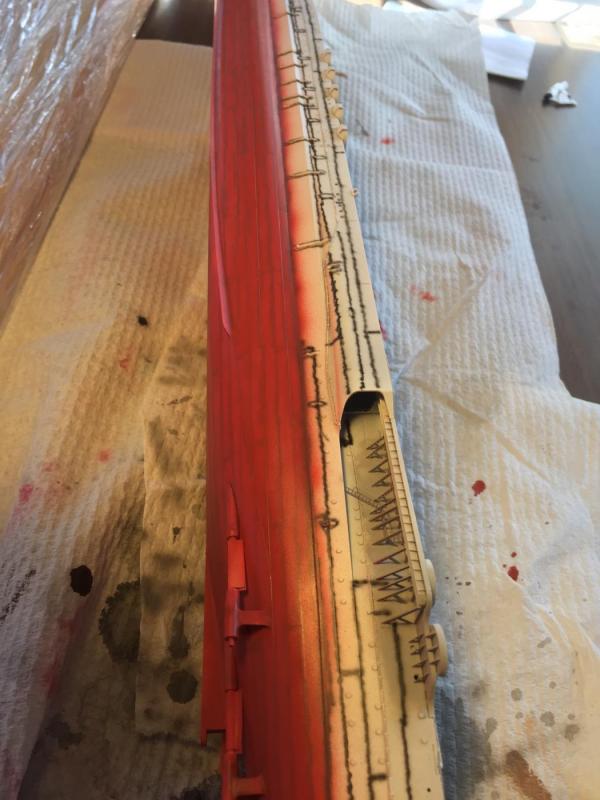
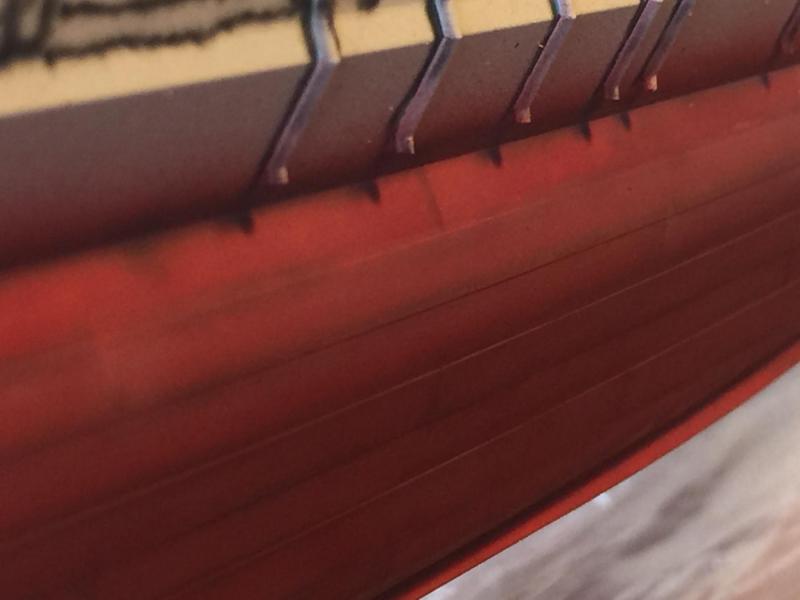
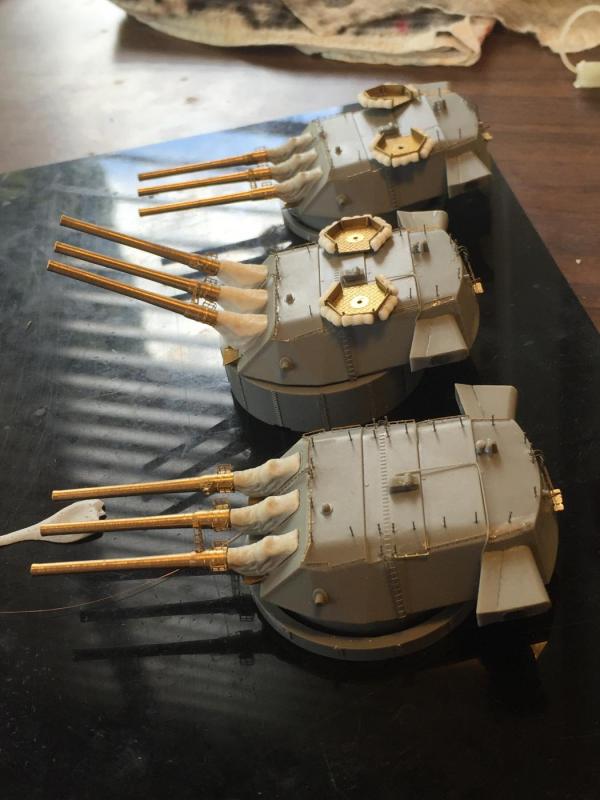
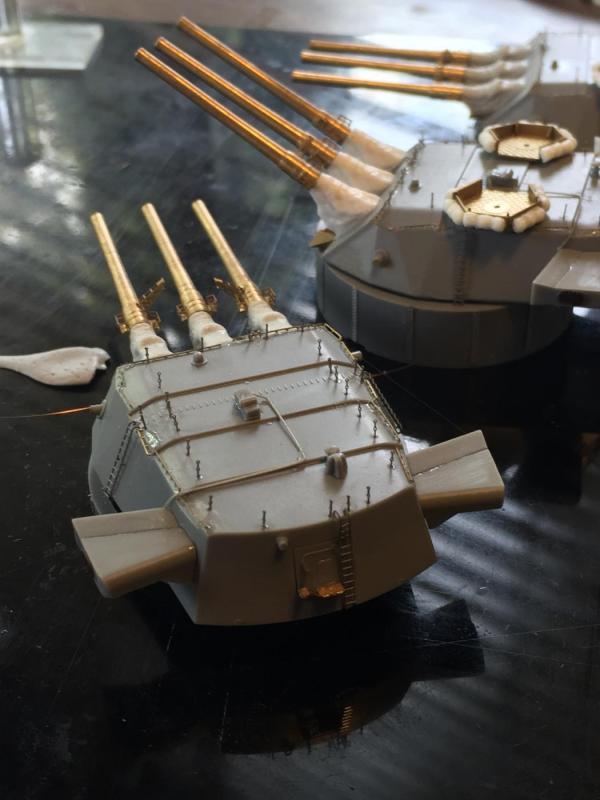
A few hours of cutting and bending, the support struts for the rear deck. For some reason Pontos does not replace the ladders, maybe they did but there is no reference. The struts in the kit come in one piece, but this is really nice and they fit perfectly. I have added the 4 aftermarket support struts to go under the triple 25mms from the hull as Tamiya do provide some but they are not perforated. From these close ups you can see the hull lines and the deadyeyes that go over the portholes that are nicely detailed.
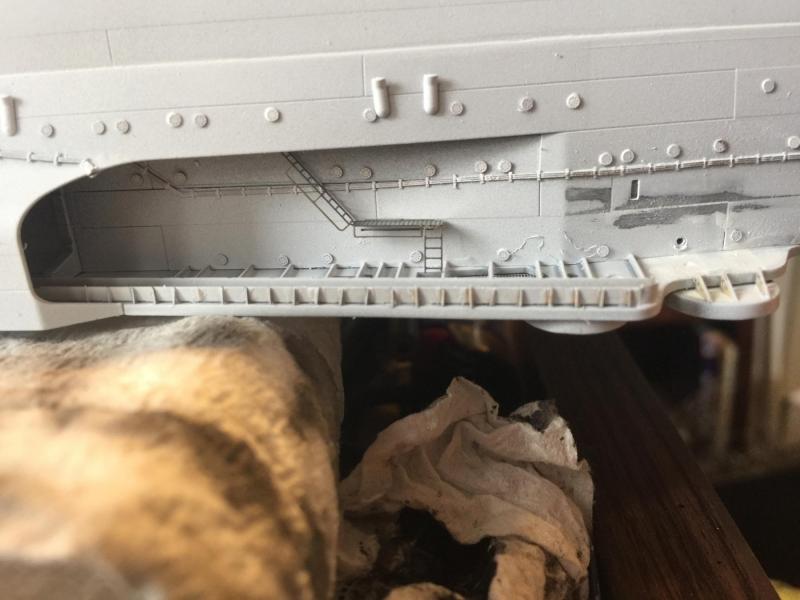

- 743 replies
-
- 20
-
-
True, but with so little reference material it's hard to know, so I'll stick to subtle.
-
I don't know, I'll take a photo when I do the black pre shading, but you could probably tell from the chap on the other forum or AOTS. I have pre ordered the new version of AOTS from Amazon UK which comes out in March and ships in about 4 days to OZ (unlike 6 weeks plus from the US). If I can have the hull sorted by then I can do alterations to anything above. I imagine the hull would have been very weathered by 1945 but it's like being a little bit pregnant, you are either fully blown or just showing.
-
I've seen both and attempted it on my Dreadnought. The new tool does have nice horizontal plating.
-
I have seen models where people have done rivets along the hull but they are so out of scale they would have caused enormous drag. Given how thick the armour belts are I would be surprised if they were visible but I like the effect and it will be very subtle. There really are no publically available shots of the ship in detail given the secrecy of the project, I have some leeway. I will use Dr Google and try and find some photos of IJN ships.
-
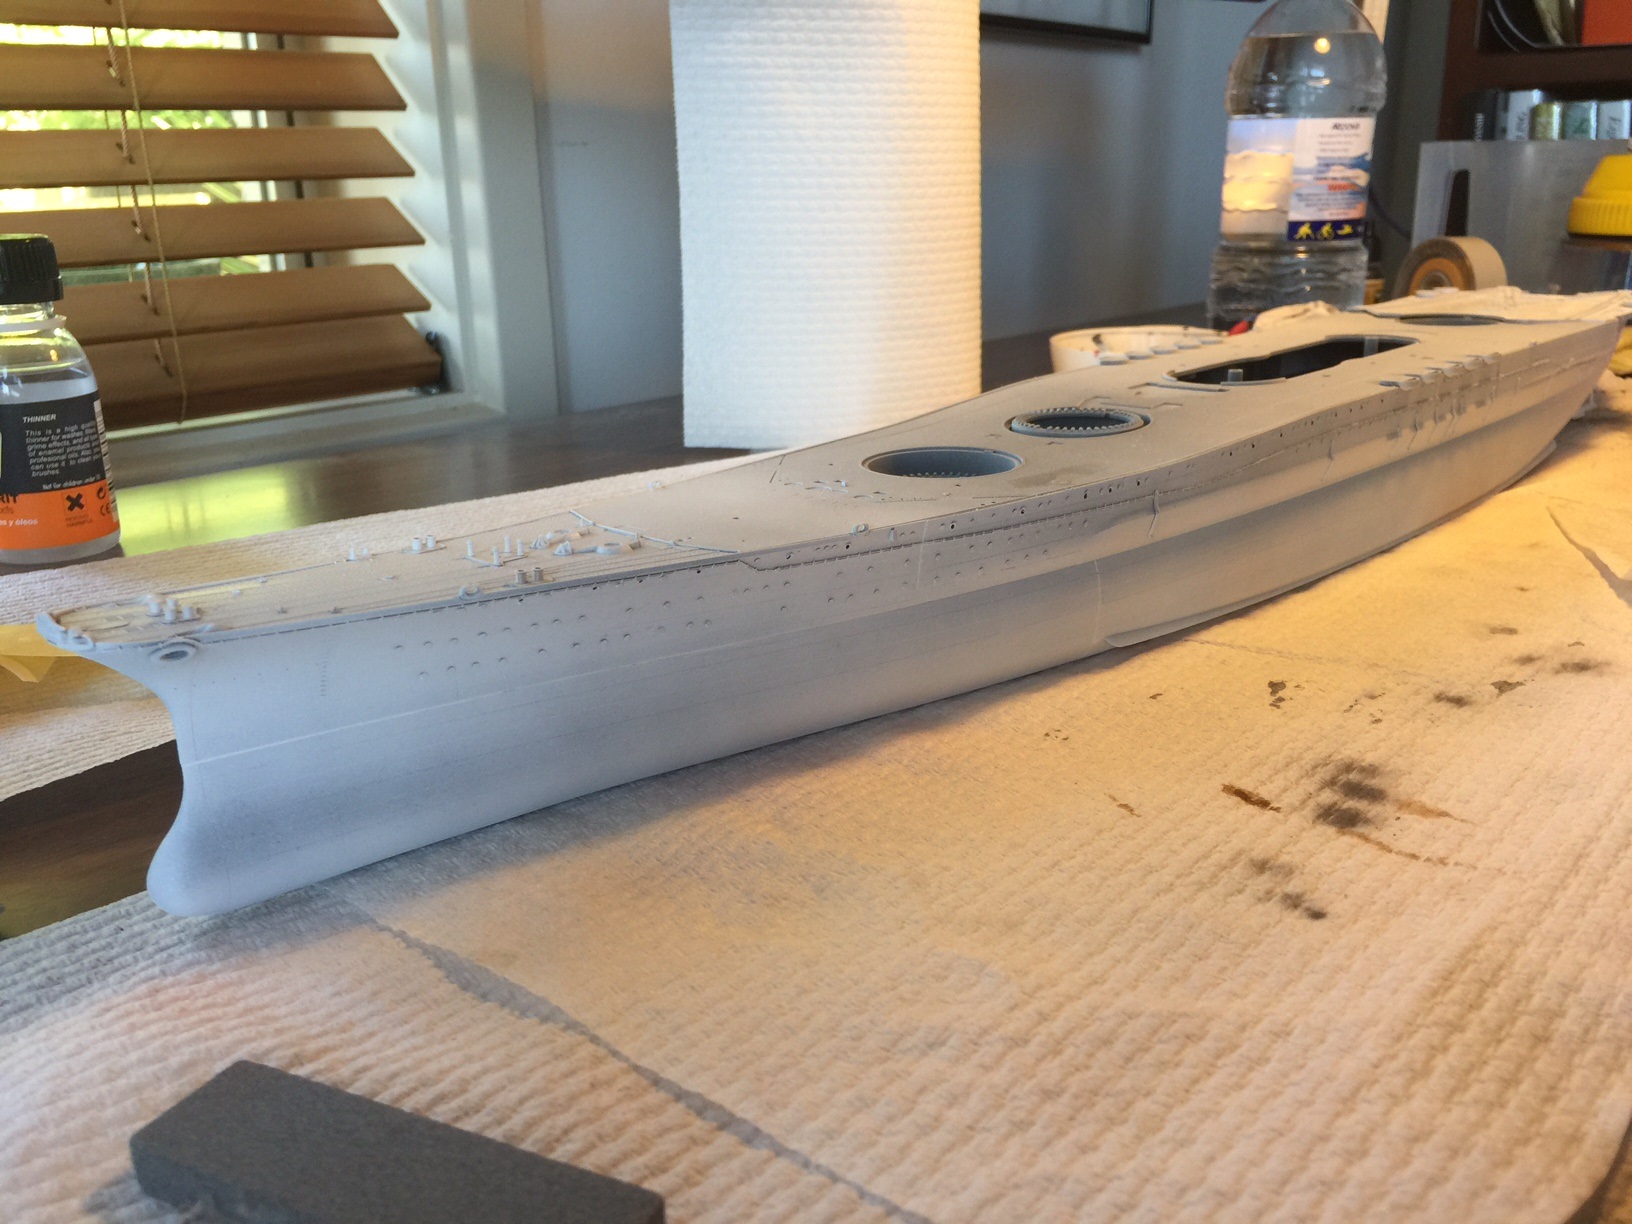
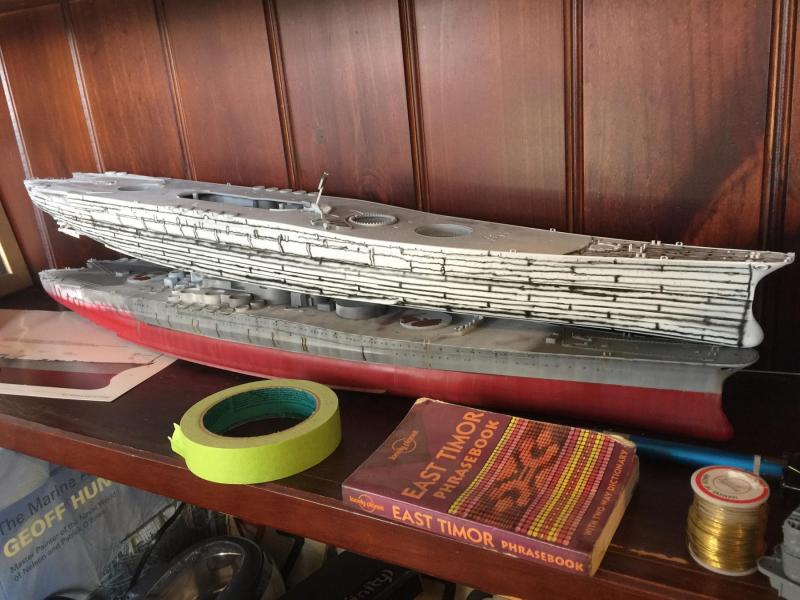
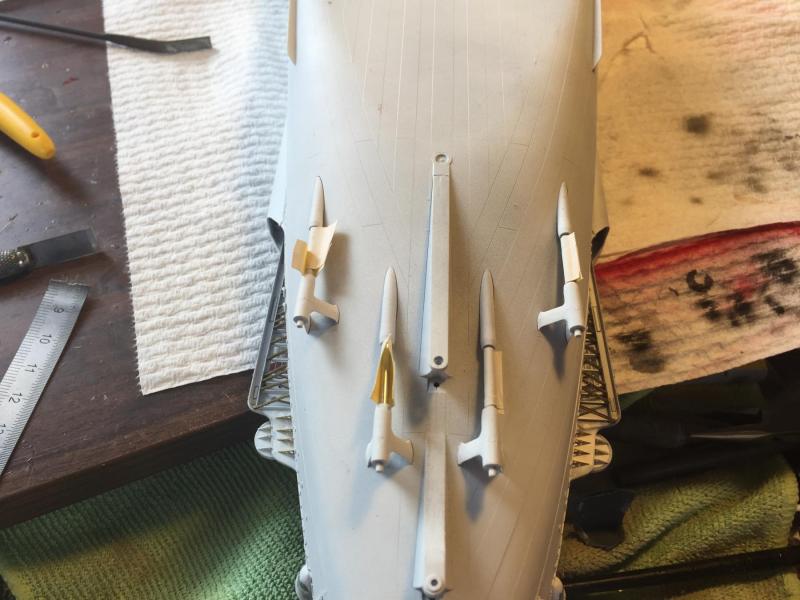
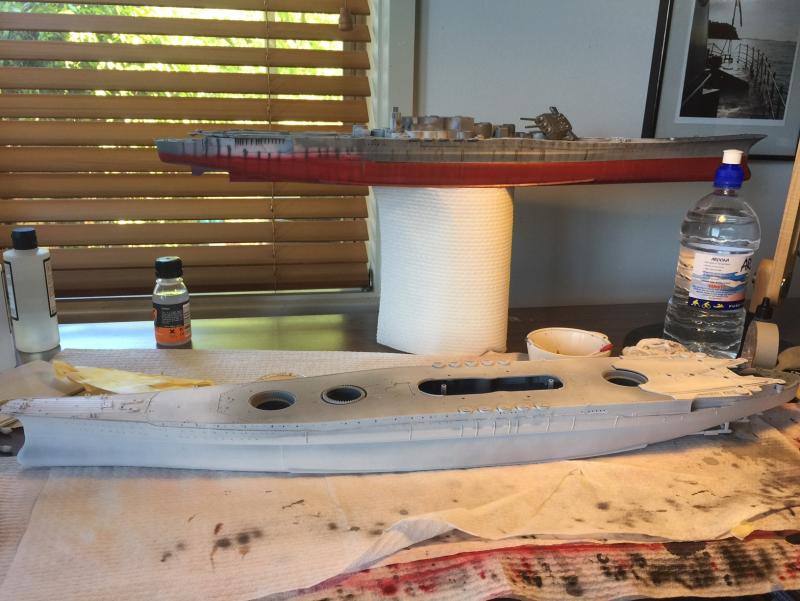
Ok,back to the kit. Using the Tamiya rattle can I have done the primer coat on the hull. All the gaps will be done with the airbrush as I have saved a lot of time. After working on the old tool hull I forgot how detailed the new kit is to date. Before I go any further though, I have to attached the rear flight deck, which, for some reason has warped in the heat. One that is done I will have to add the support struts under the rear wings and a few ladders before I can start painting again. After a month of work, I'm back tomorrow and the kids are back at school so that will slow things down again. You can see the old kit in the background, I've been playing around with weathering on it, but given the vast amount of detail on the new kit, I thought it time to take the plunge if I ever want to finish this monster.

- 743 replies
-
- 15
-