RGL
-
Posts
5,564 -
Joined
-
Last visited
Content Type
Profiles
Forums
Gallery
Events
Everything posted by RGL
-
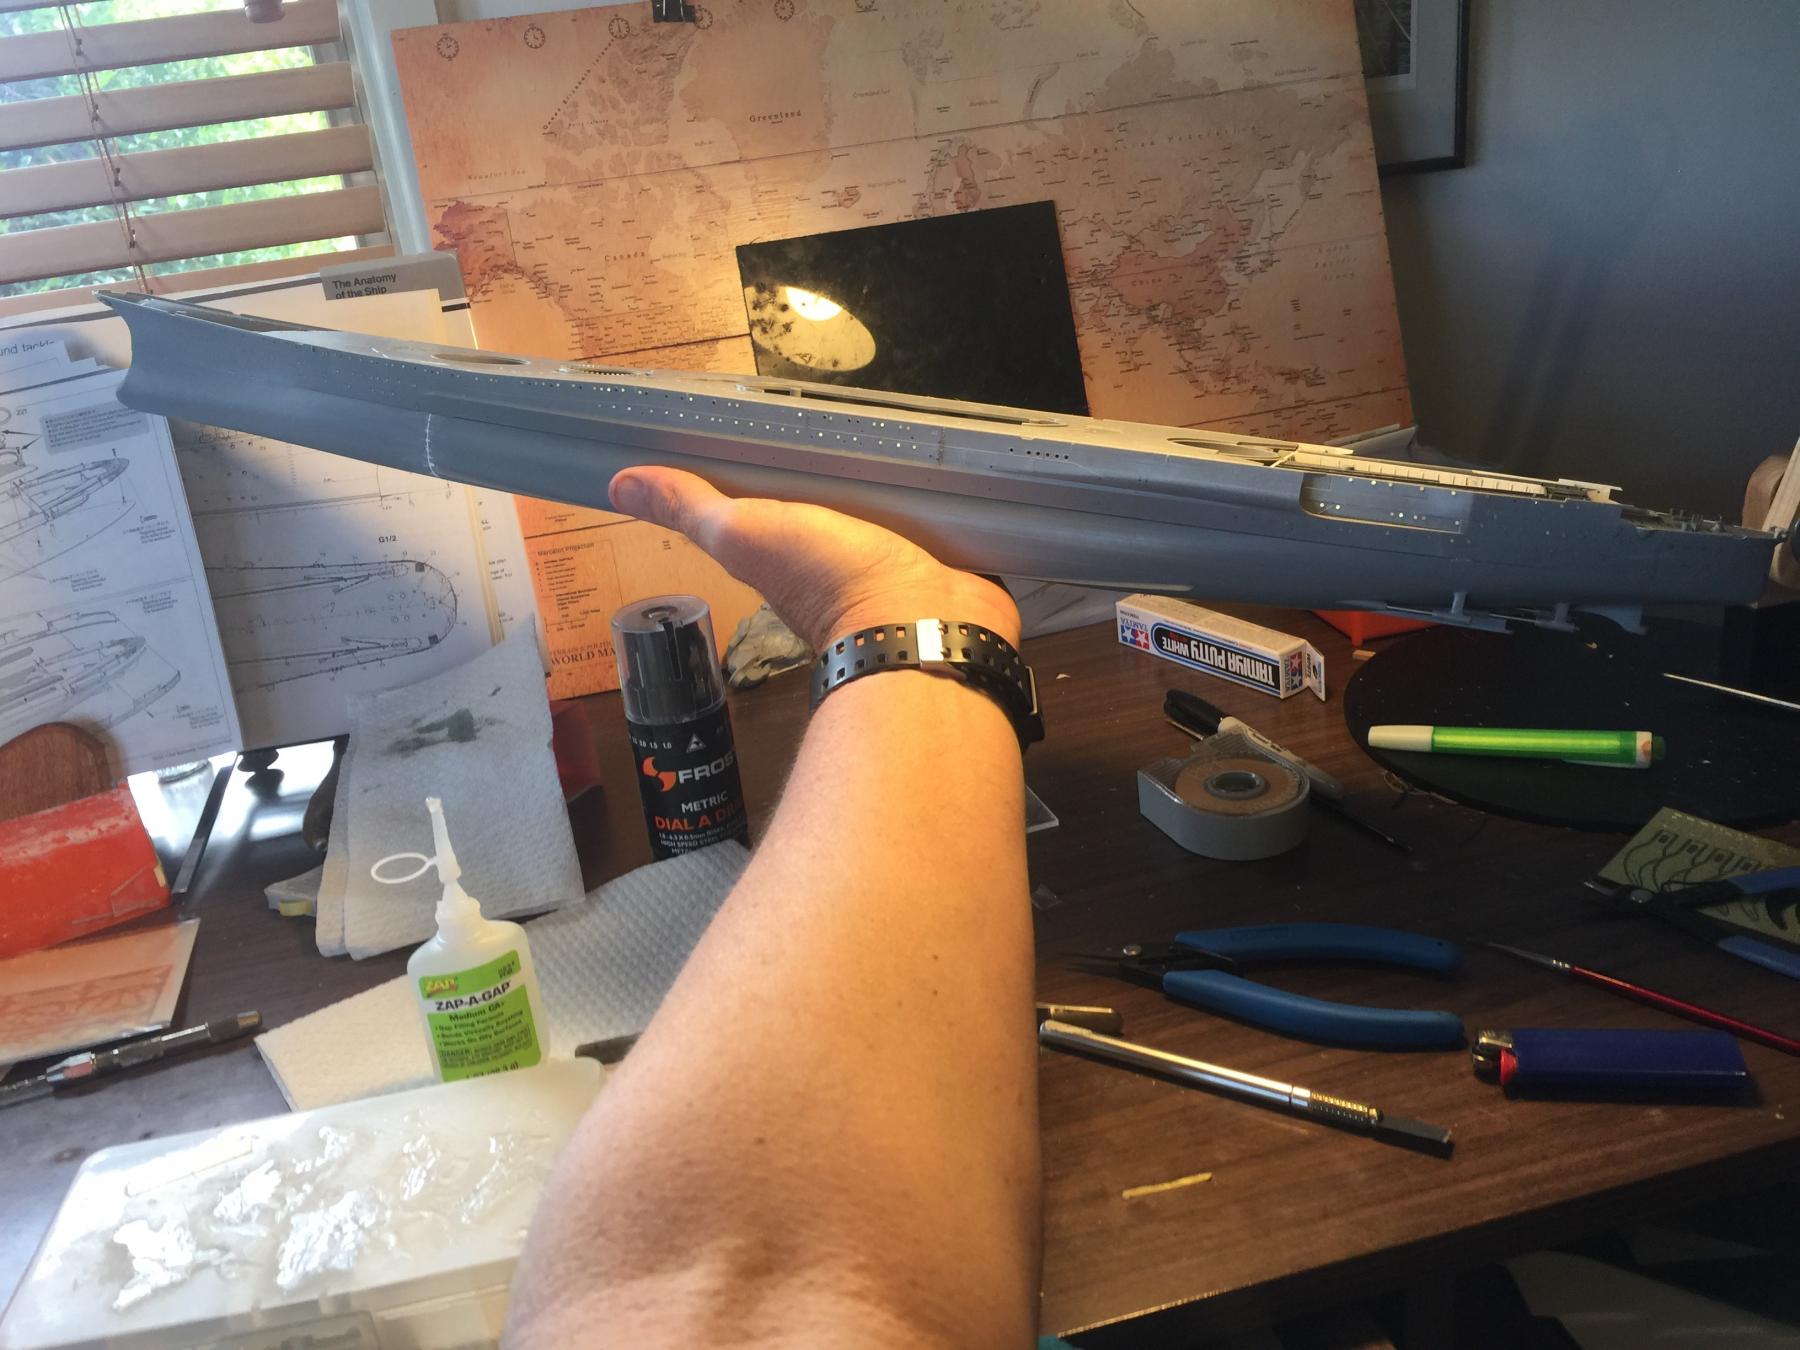
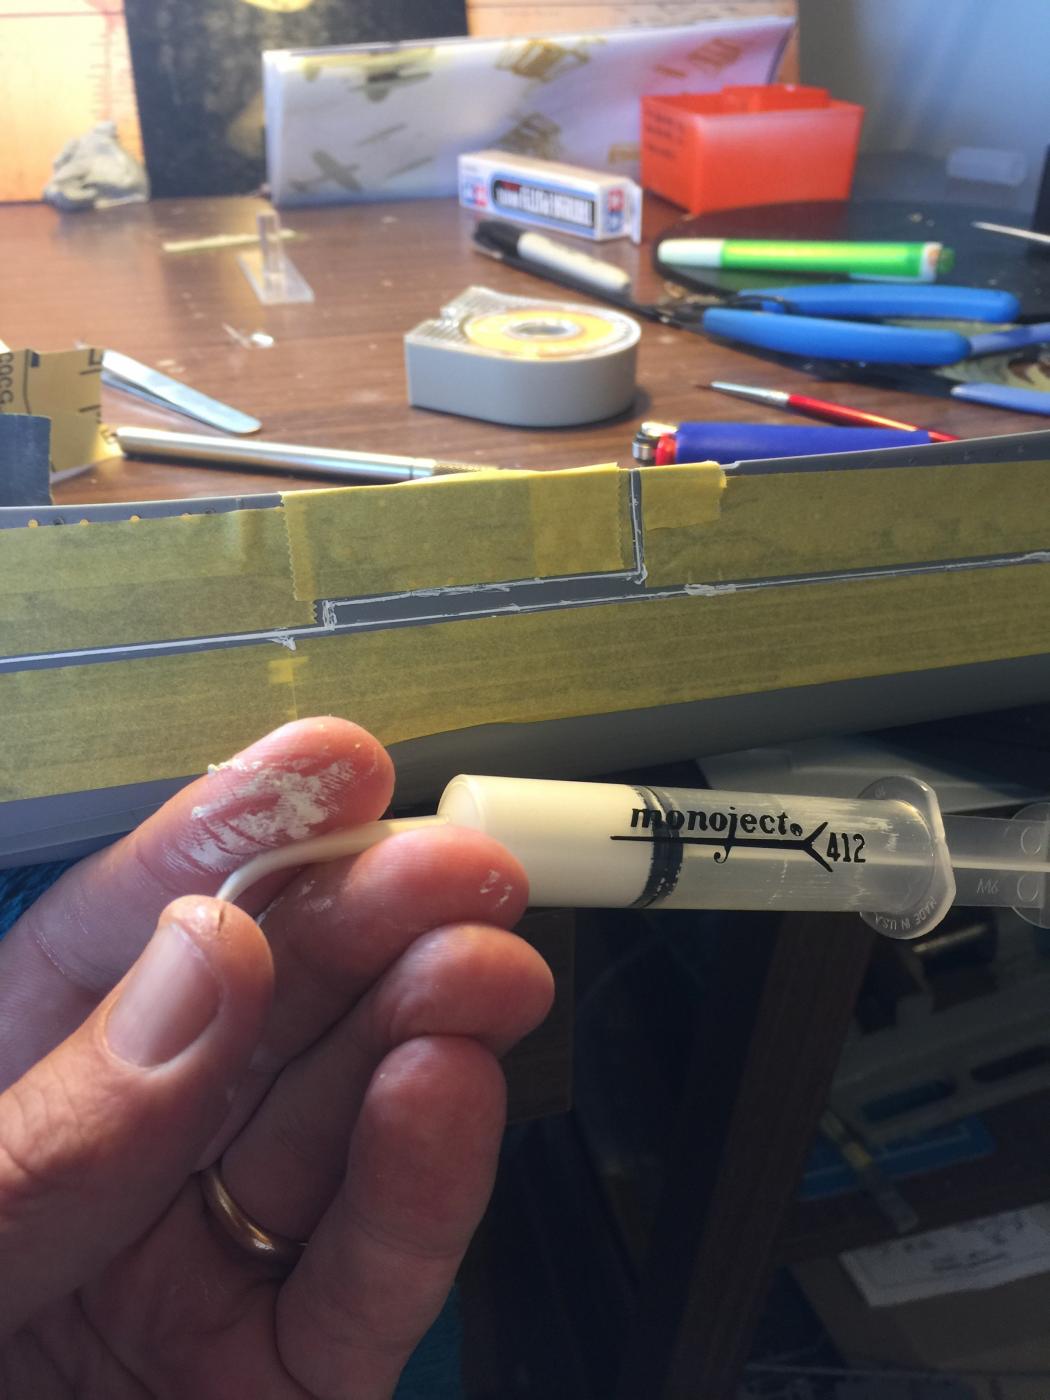
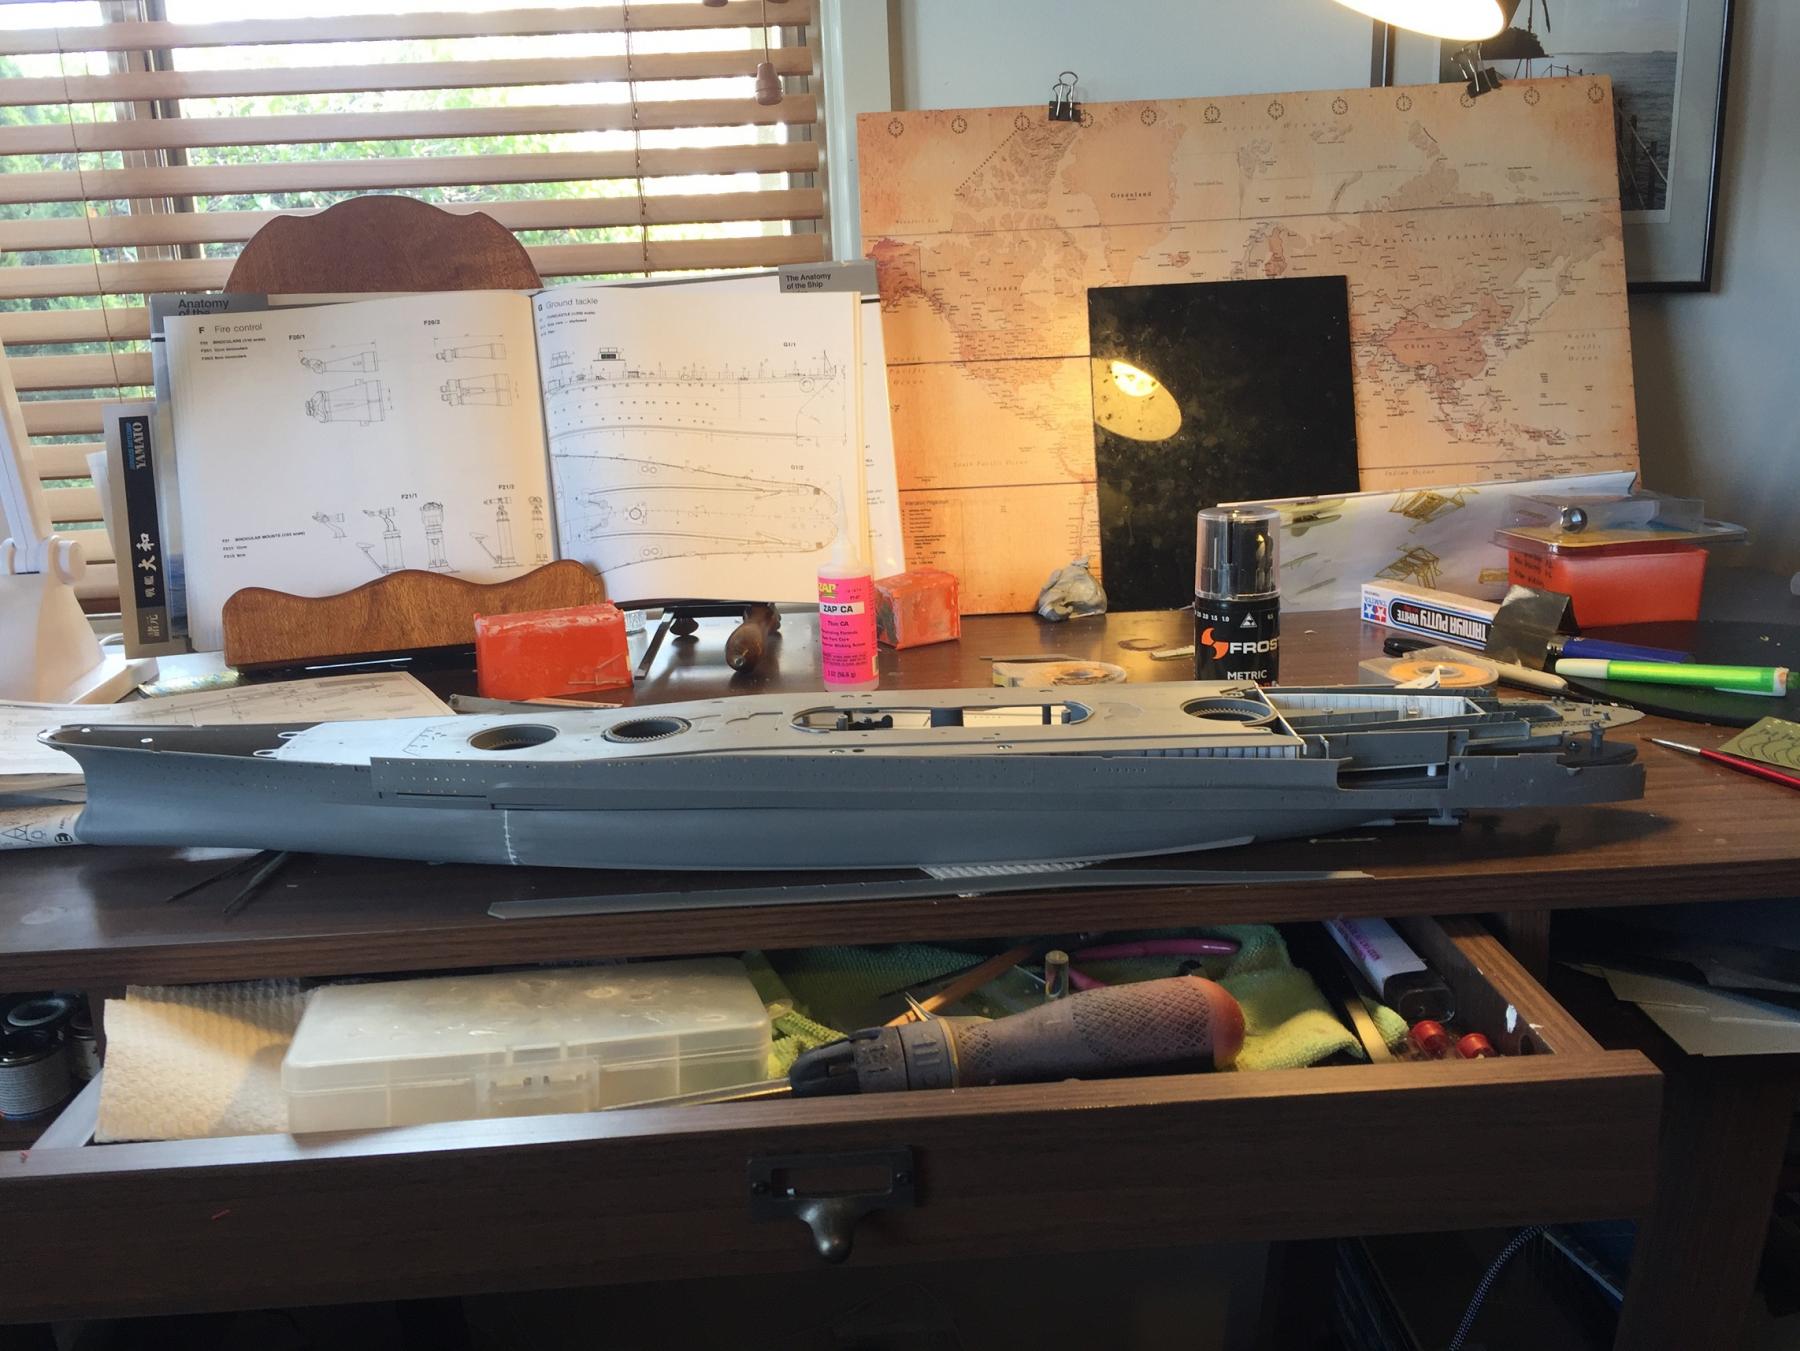
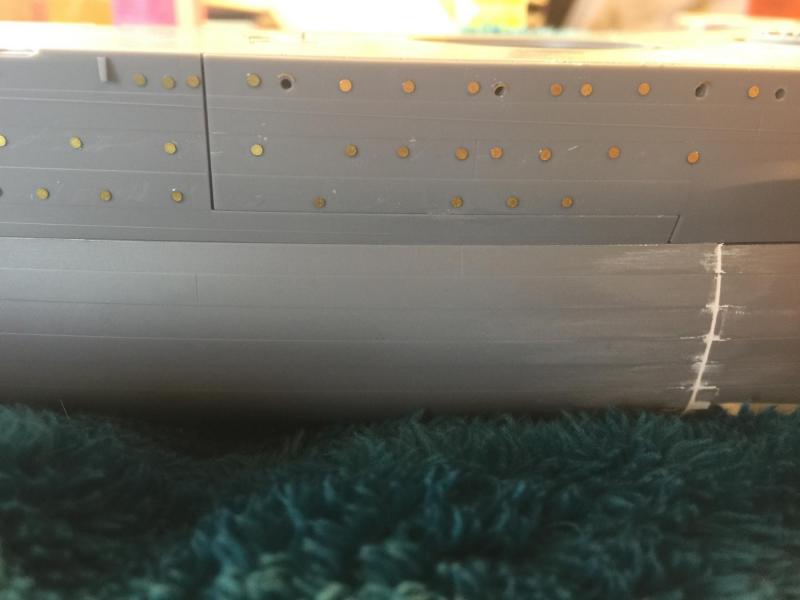
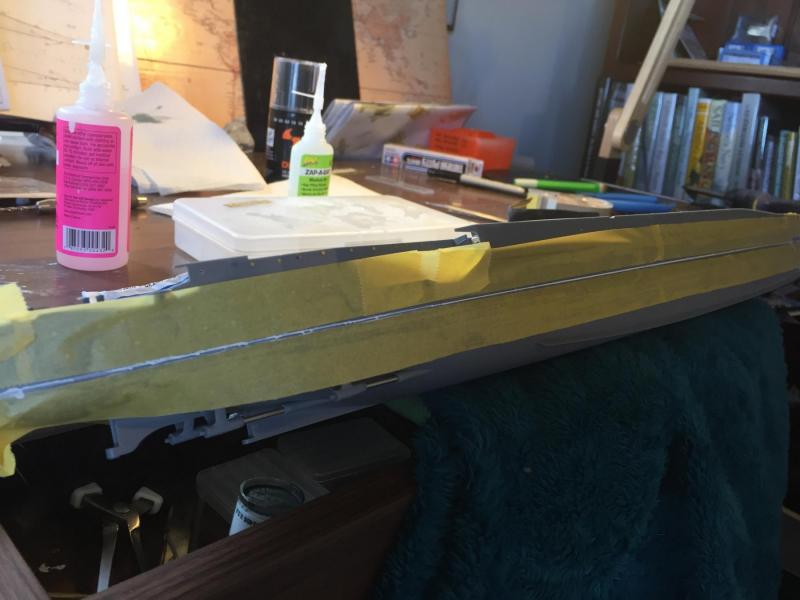
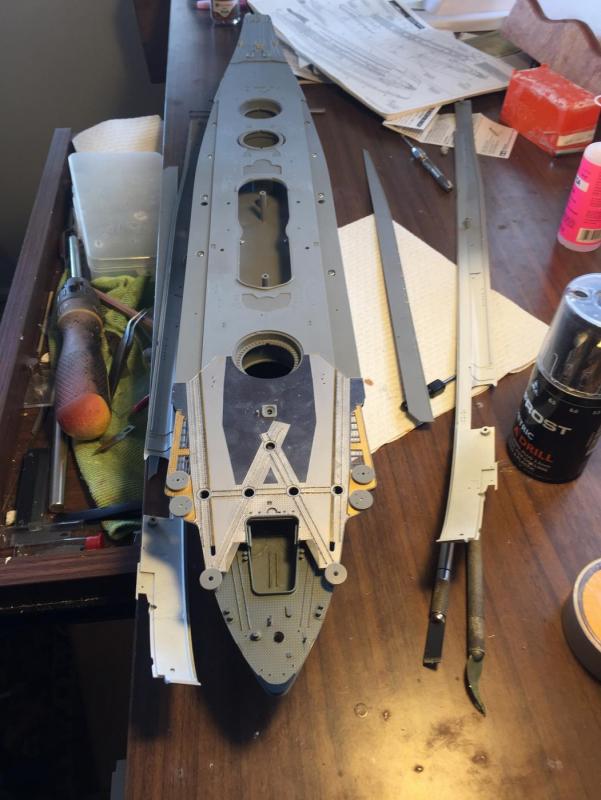
 Finally some days off! The hull is now joined up, but I have no idea what Tamiya were thinking making the upper hull in 5 pieces as the gaps are huge. Given the size of the ship, it needs a LOT of glue, and it requires a fair bit of spot glueing with off cuts of PE to slide into the gaps. The centre deck area (I'm sure the ex mariners will have a name for it), comes in three pieces which join up to the hull nicely with some thin PE. In a moment of inspiration I found a syringe which I filled with Tamiya putty and ran along the gaps which will hopefully avoid a lot of sanding to avoid loss of molded seams. This is backed up by the prodigious use of masking tape Quite a few of the dead lights have fallen off due to this handling but can easily be replaced. Once all the seams are fixed up I can add all the drain pipes on the side, drill out the stanchion holes and fix up everything I can before even thinking about adding the forecastle and rear flight deck.
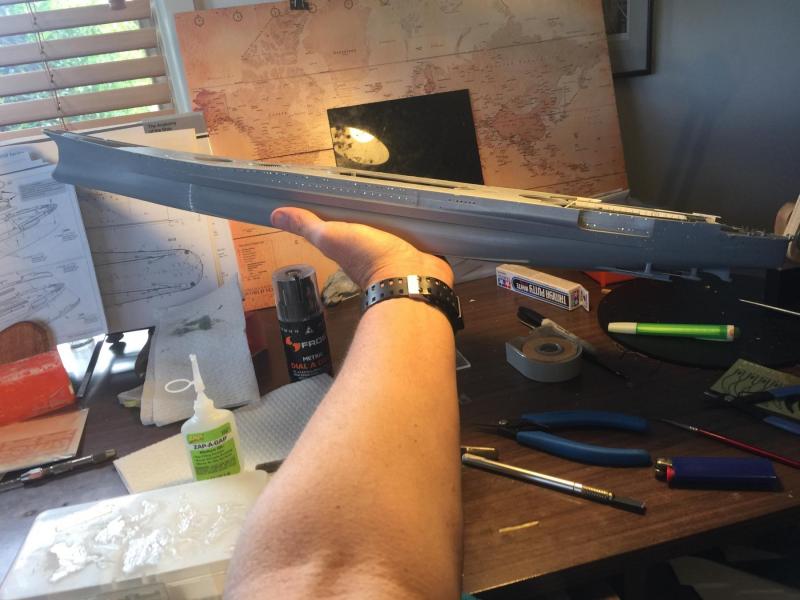


- 743 replies
-
- 21
-

-
Slog, North Star is now producing these in 1/200 with resin and brass but you're all over this, amazing work.
- 244 replies
-
- 4
-
-
- borodino
- dom bumagi
- (and 1 more)
-
Thanks for the feedback gents, the intend to get the hull joined up, fill the gaps, and the use a Tamiya rattle can to prime, as their fine primer is excellent. Once that is bedded down I can start on the guns and superstructures, the numerous (I mean hundreds) of smaller guns, , and have everything ready to go for proper painting and weathering, the ships boats, aircraft etc, so my log will continue in that vein until it's time to buy and learn. Big build and large investment means being careful in what I do. BTW, Mr Taylor, challenge is set for you to try one!!!!
-
There is a build I'mfollowing on another forum that's quite good as it points out the bits that the instructions don't tell you about and is nicely weathered. When I get an airbrush there is a wealth of info on it, I know how to but there is so much good stuff out there now on the internet that did not exist back in the day that it's a whole new world. I think the secret is to be subtle. I imagine the hull will be battered and dirty but the Japanese were and are so fastidious the areas that were accessible would be as clean as possible or their seniors would have flogged them. I keep telling myself stop rushing.
-
Nah, I'll use anything, I used Humbrol for the weathering but this is a whole new world for me. The Tamiya Putty sands very nicely but goes off very quickly. This is the New Tool (post 2011), but I have the old tool for practice and they are exactly the same size. The only camera I own is my phone so if I had a good 54mm lense it would look better. My job sent me on a professional photography course last century and it's all about light (this was before digital), and I mainly then took photos of people who didn't know I was there.
-
Too early to tell, once I get the hull togeather and the gaps filled I'll feel a bit more confident. It is a very big kit. Keith, belated answer is no as there will be aircraft / boats in the road anyway
-
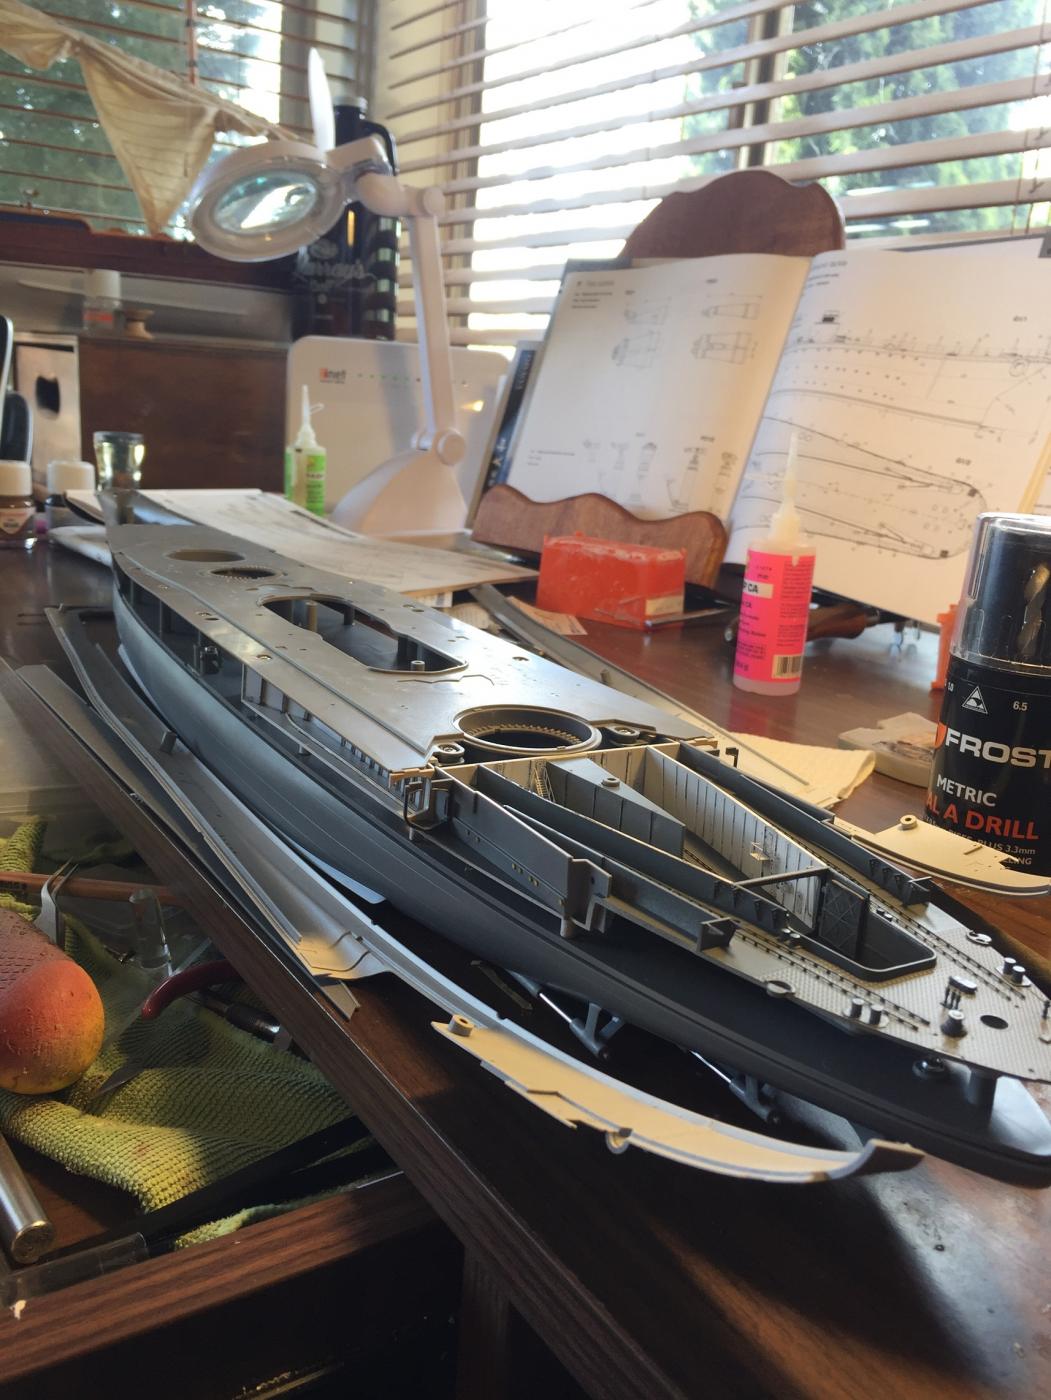
Now to start screwing the beast together. It is massive. The bow, hangars and main deck is down. I will get to the sides and forecastle later later next week then do the filling and sanding. The Rear aircraft deck will go on much much later.


- 743 replies
-
- 29
-
-
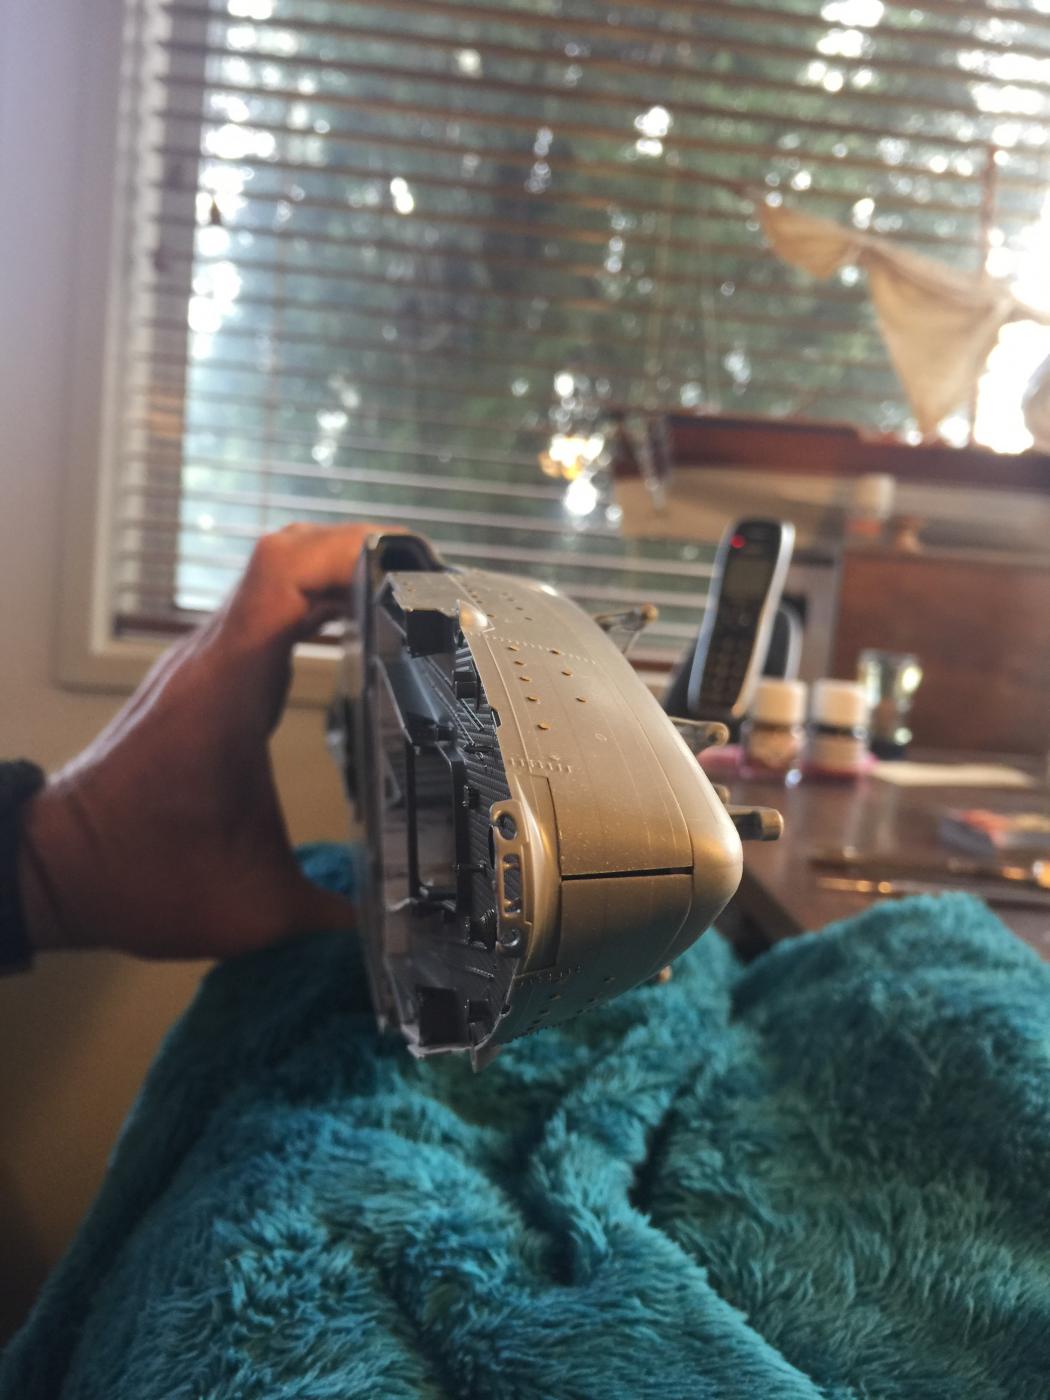
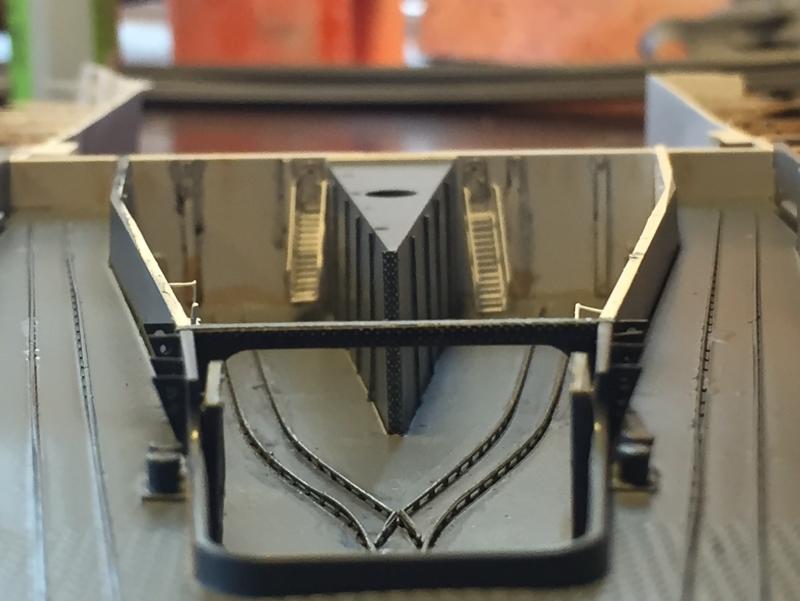
I have now finished the interior hangars. A little bit of weathering, rust, grease and drybrushing. Realistically not much will be visible.


- 743 replies
-
- 24
-
-
You suddenly will hit that point and go, bugger, I'm finished, what now!
- 517 replies
-
- 2
-
-
- Endeavour
- Artesania Latina
- (and 1 more)
-
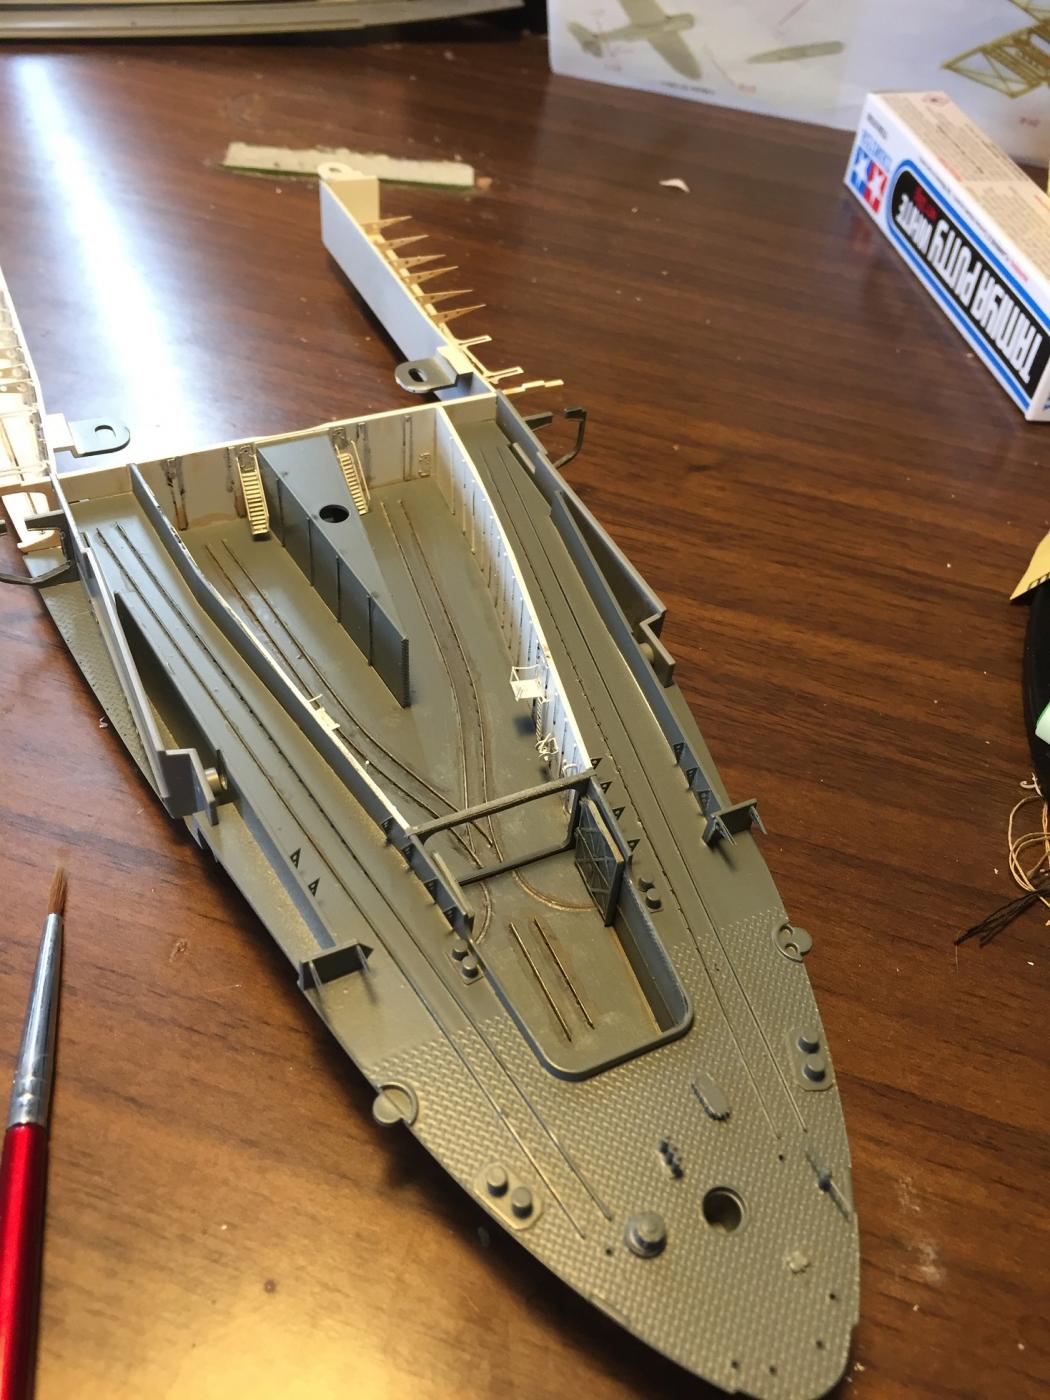
I'm at the stage where I really want to start putting the hull together, but I have to paint the interior boat and aircraft hangers first. I have given the 'inside bits' their first primer an base coats. I will weather the interior bits by hand and wait till later until I do the IJN grey bits. That way I can put the sides one and the deck. You can see in the foreground some perforated steel beams which are required on the rear aircraft deck, which is finally complete (2 weeks from the Ukraine to Oz is pretty good. I intend to give the base coat 12 hours to dry nice and hard before I do any work on it then I can put the hull together.

- 743 replies
-
- 16
-
-
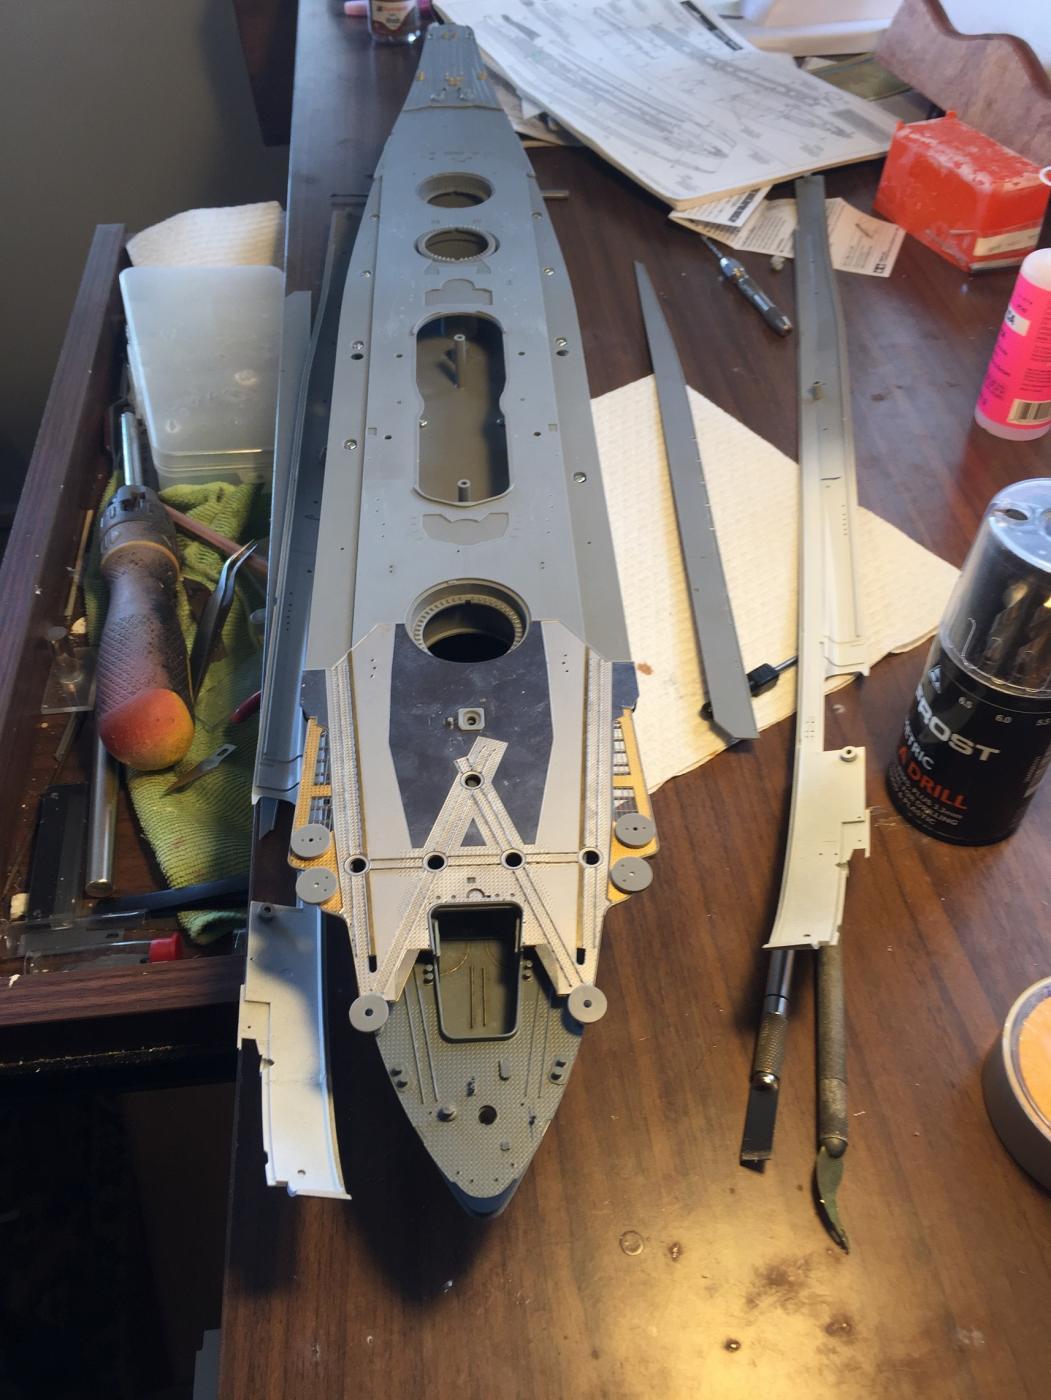
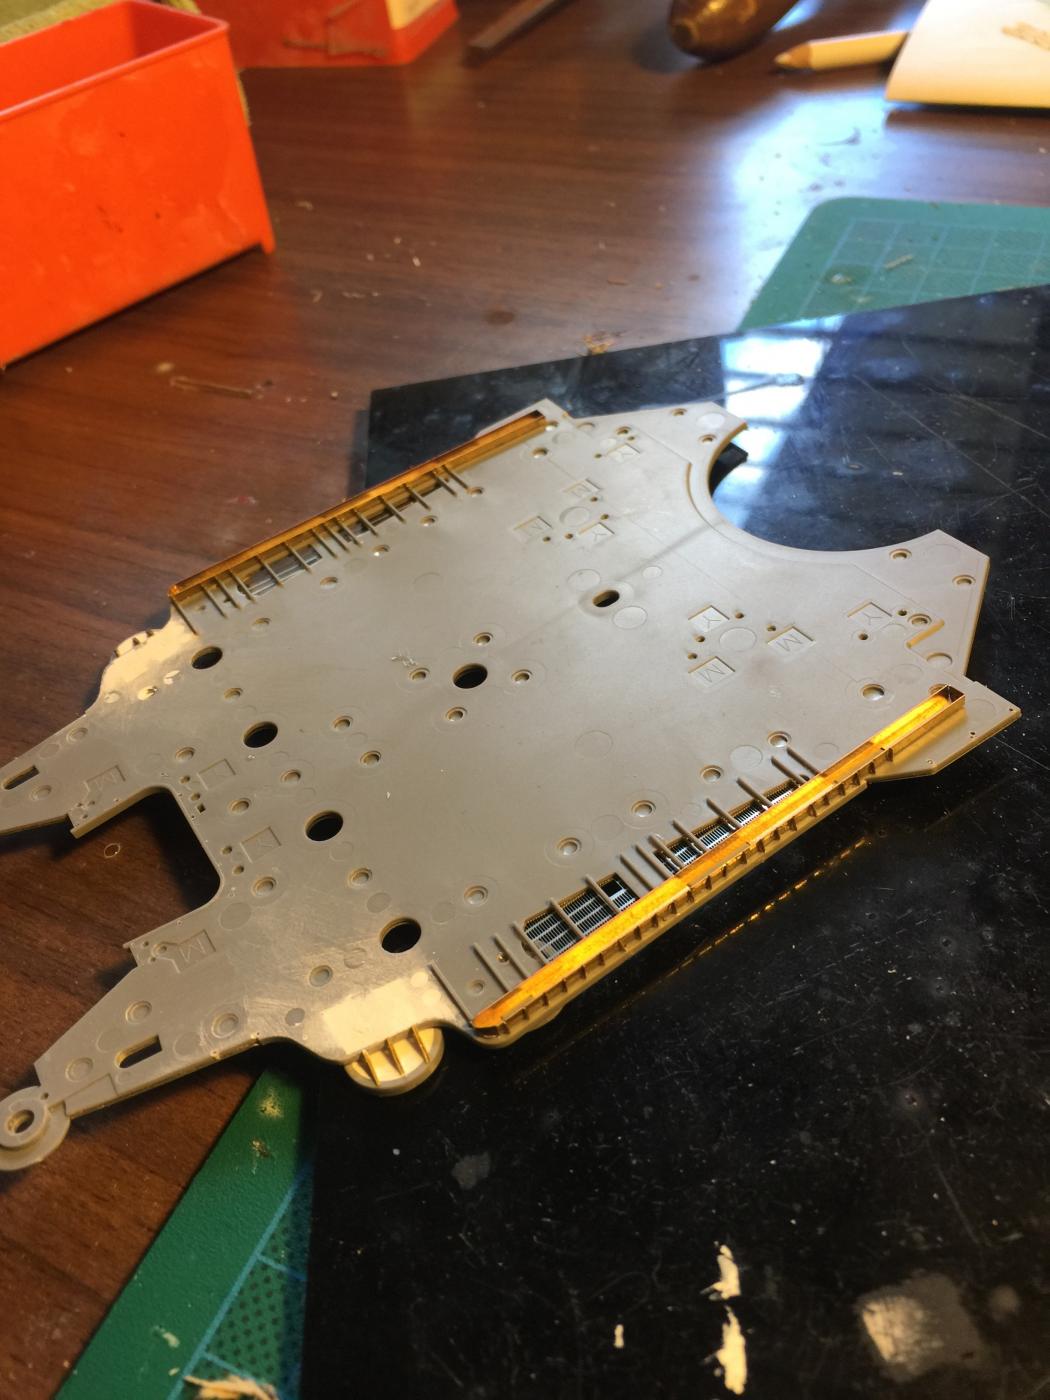
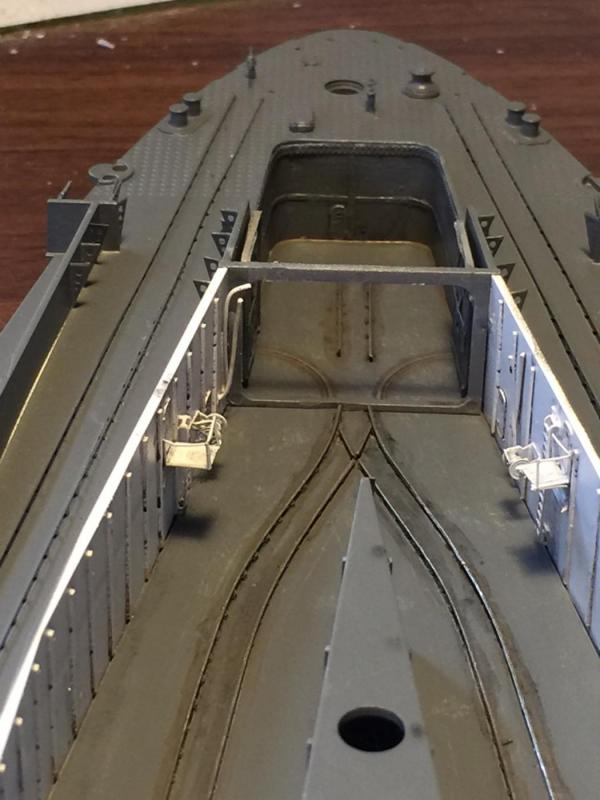
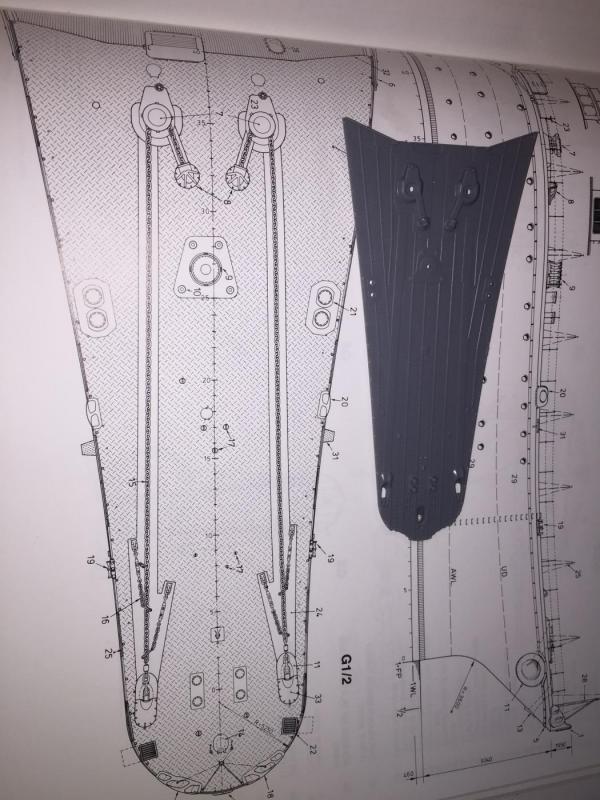
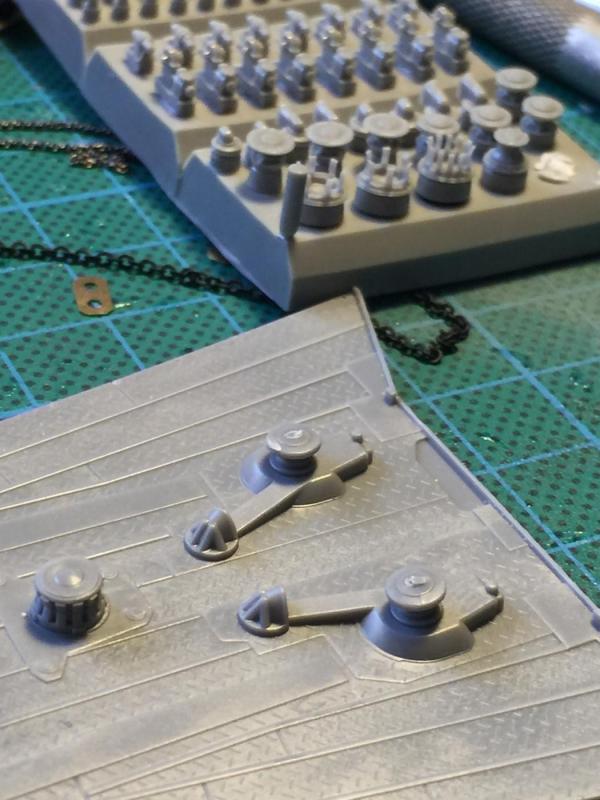
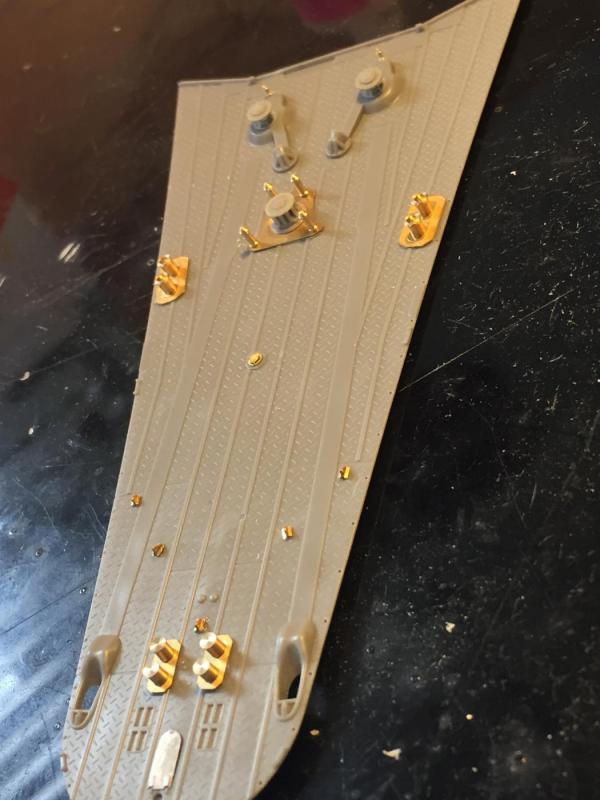
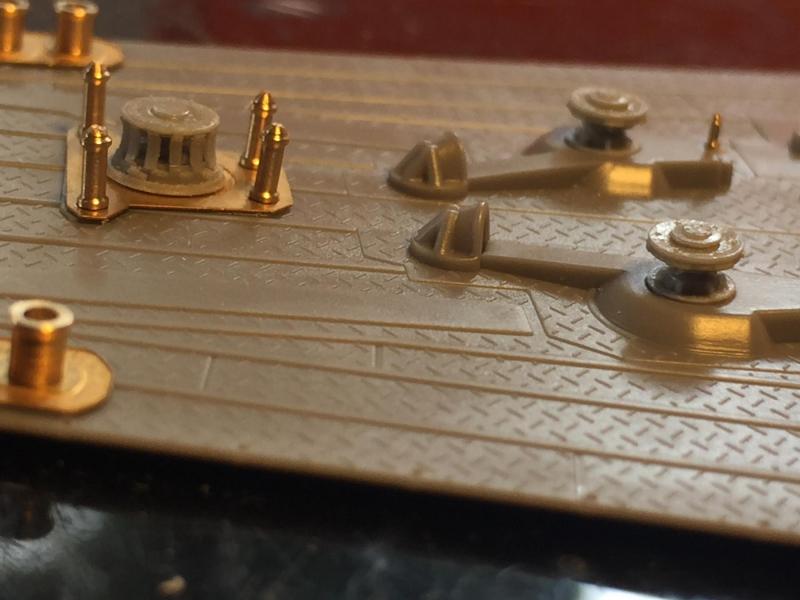
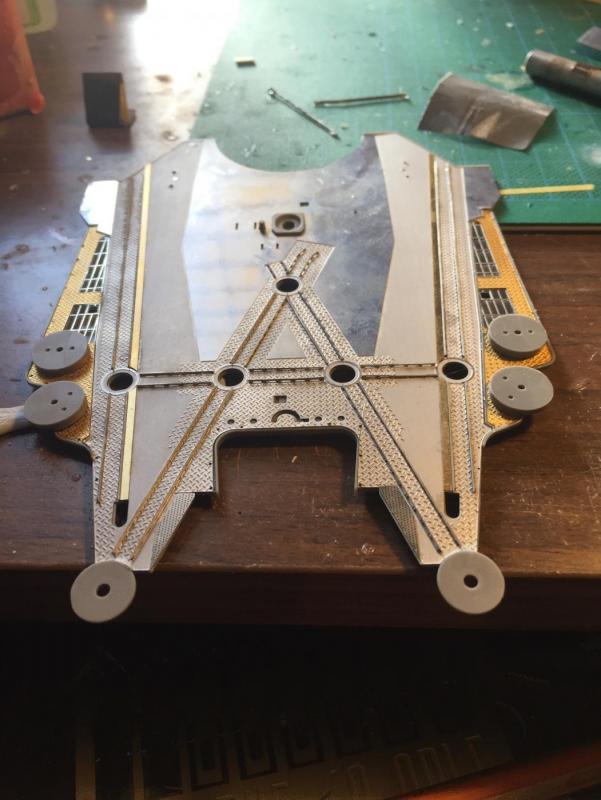
Moving along, I have done everything t the deck I can do before painting. There are marked places for the stanchions but I cannot drill them until I do up the hull. The Forecastle is a very nice mold. As you can see from the AOTS there is not really much to be done here. The Tamiya capstan and cable holder are fairly bland; and I have replaced them with the Chrysanthemum set which is just lovely. The front hawser hole is provided by Tamiya but the other brass is all Pontos. Now it's in its' box until painting time. What next?

- 743 replies
-
- 25
-
-

-
Most, if not all their stuff is in 1/700, for the sake of my eyesight in latter years, I will avoid. I do like this Essex though!
-
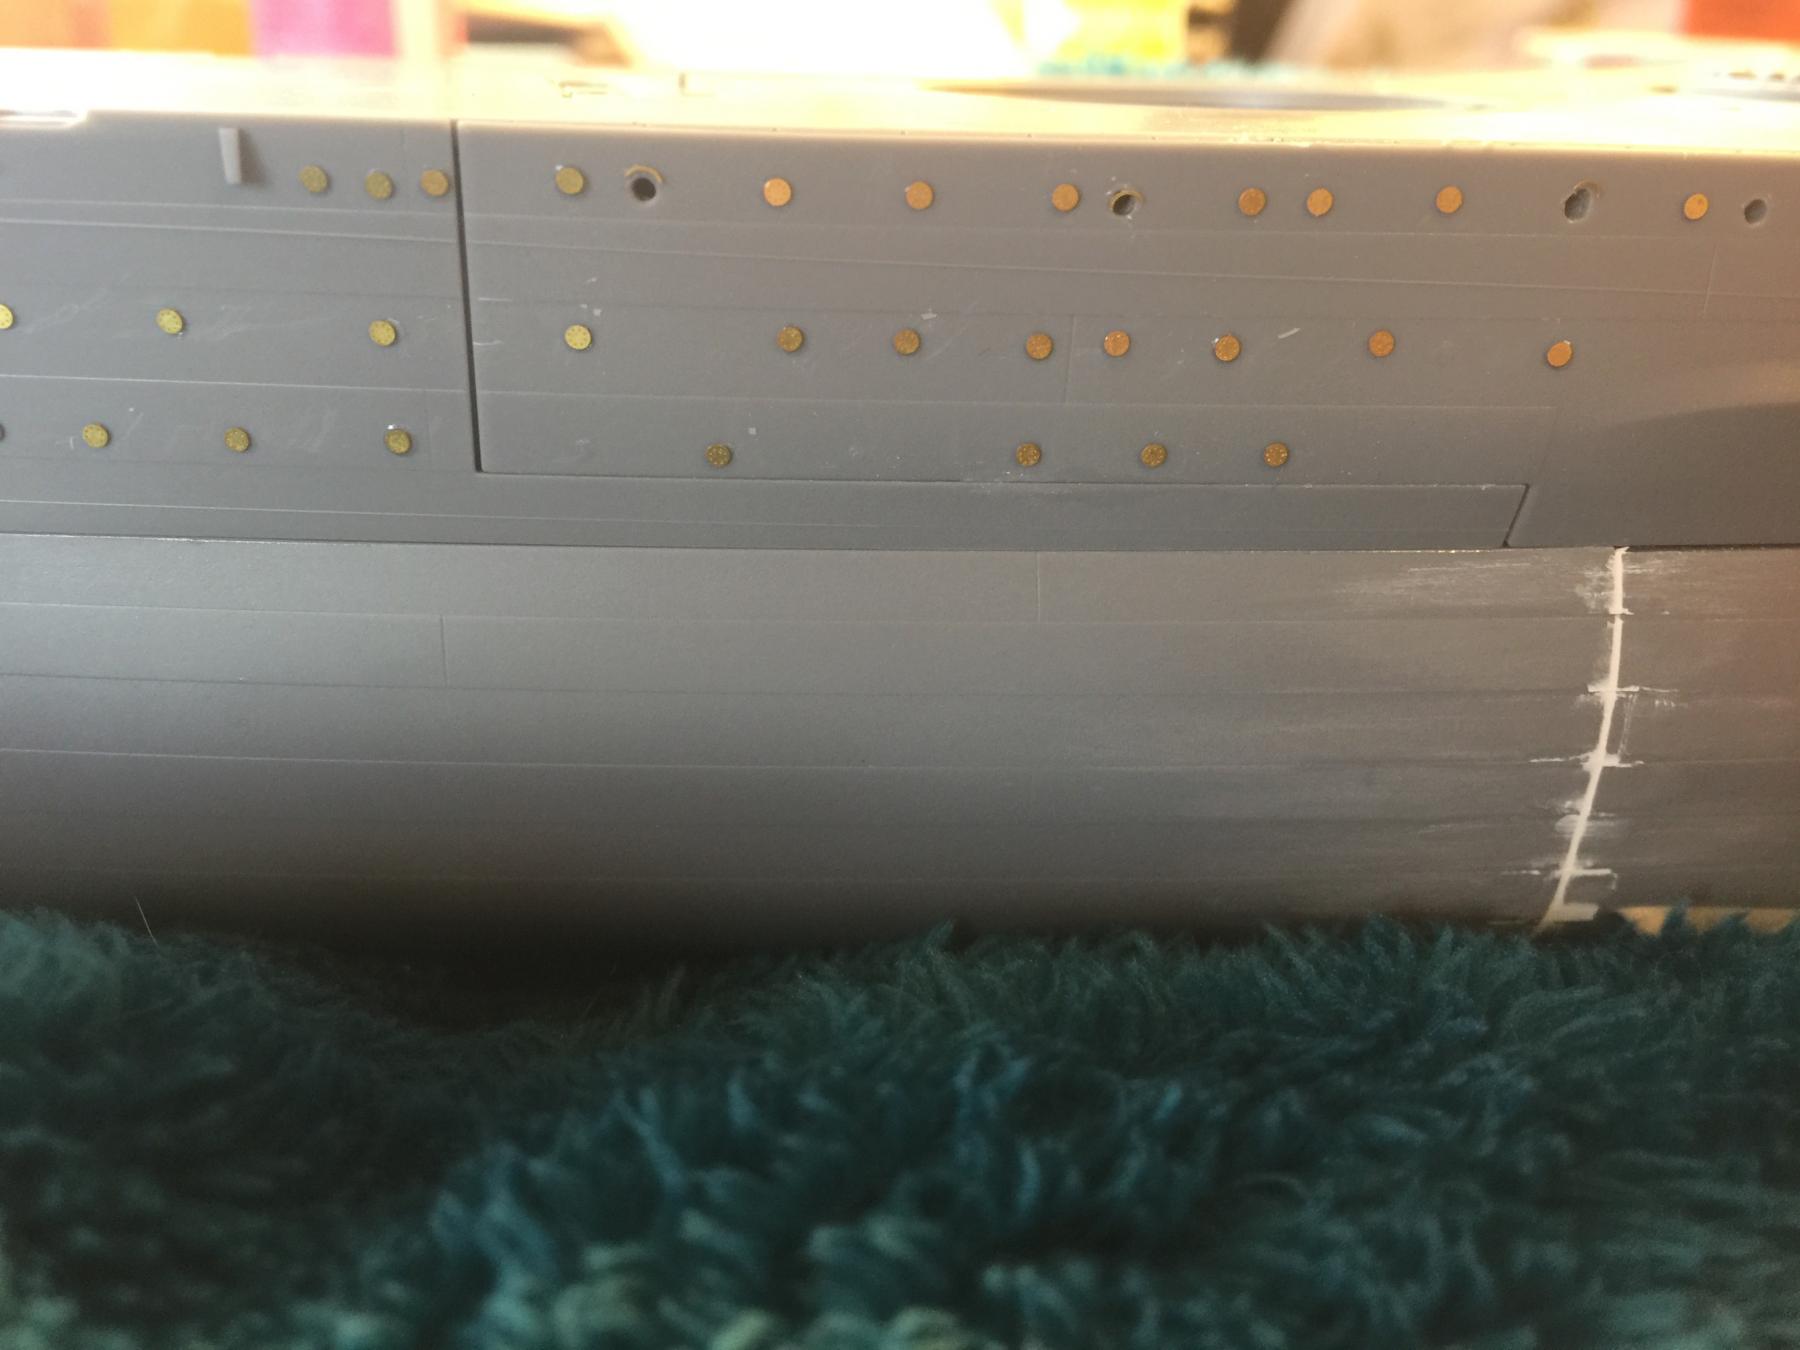
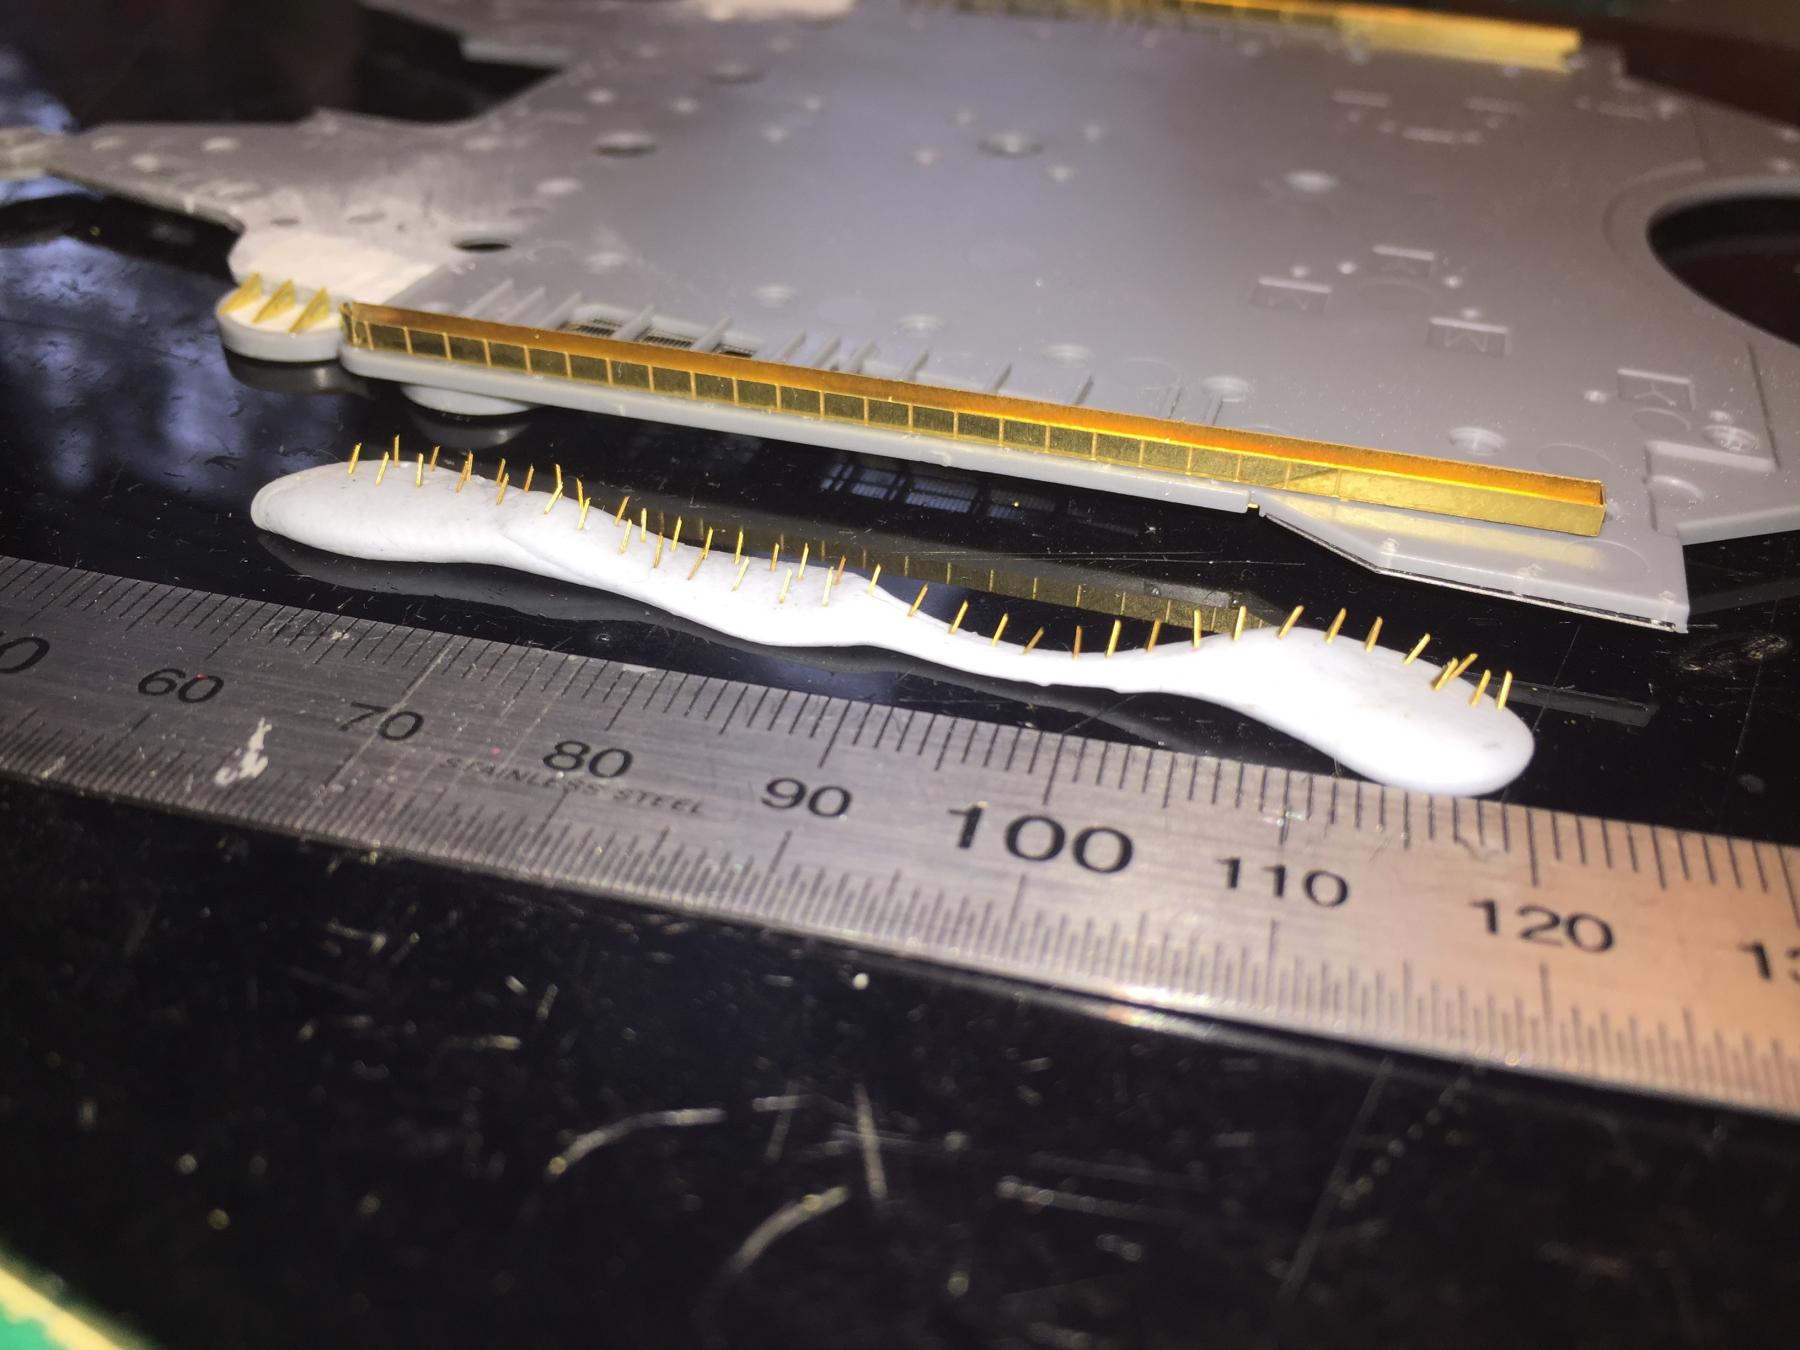
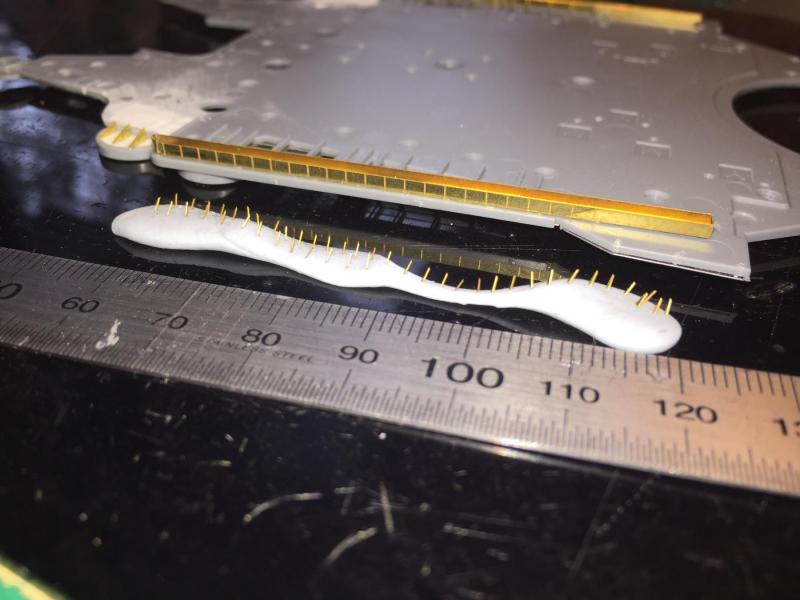
Little update, the crane runners for the ships launches. The main metal pieces are 1 piece of PE, but the struts are each about 2mm x 1mm x 0.3mm. In order to place them as they are tiny triangles, it's a matter of placing them facing the right way in some blu-tack and running some CA in the grooves then using the tweezers to place them. Once placed, run some thin CA to seat them permanently, and watch some fall off, and repeat. There are 24 on each side and the kit provides 50, and I only lost 4 so a few tiny offcuts of old PE did the trick. There is very very little reference as to how it works so a bit of scratch building/imaginative interpretation as to how I will sling the launches much much later in the build. I am awaiting some perforated beams to place on some edges and this piece will be finished for all intensive purposes. I am now moving on to the deck, drilling and prepping areas that will be replaced by the Pontos parts plus a couple of hundred stanchion holes.

- 743 replies
-
- 22
-
-
Not at all, I had no idea that's what they were called. That's how we learn. I don't think many people would get the other reference!
-
Banyan, I know what you mean and have edited it! I have to type all the time at work and after 27 plus years of it I'm still crap at it. Night shift is interfering with the build at the moment. I posted mid sleep, sponson supports, I've learnt something new!
-
That's nice work, I'm tempted to do an aircraft carrier next, I love the metalwork on them, but I'm hoping something from WW1 comes out.
-
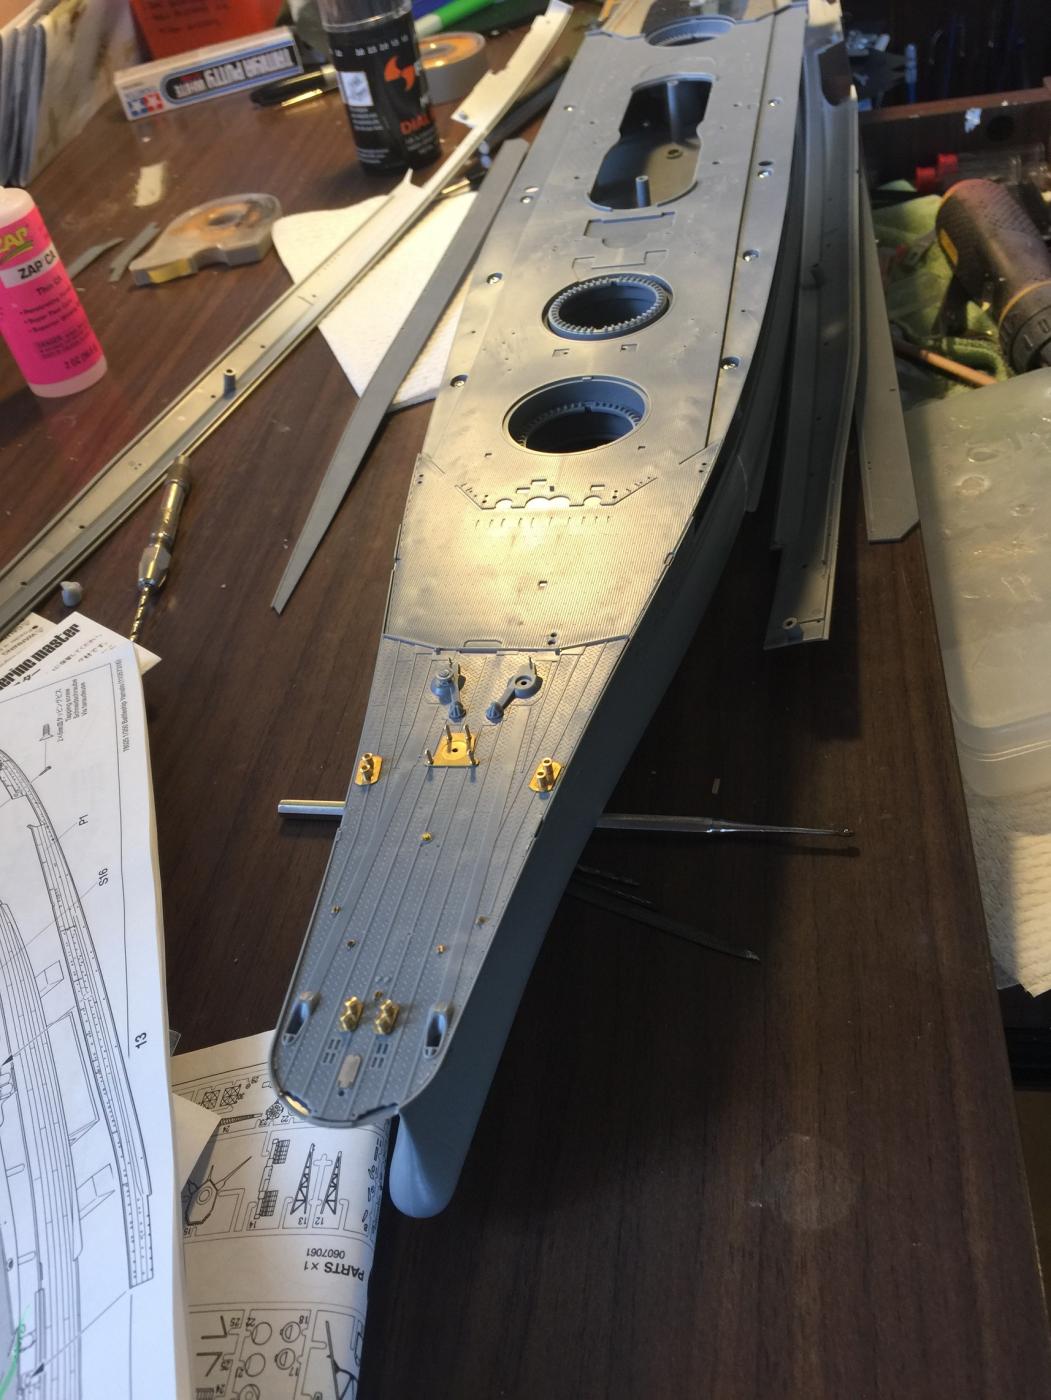
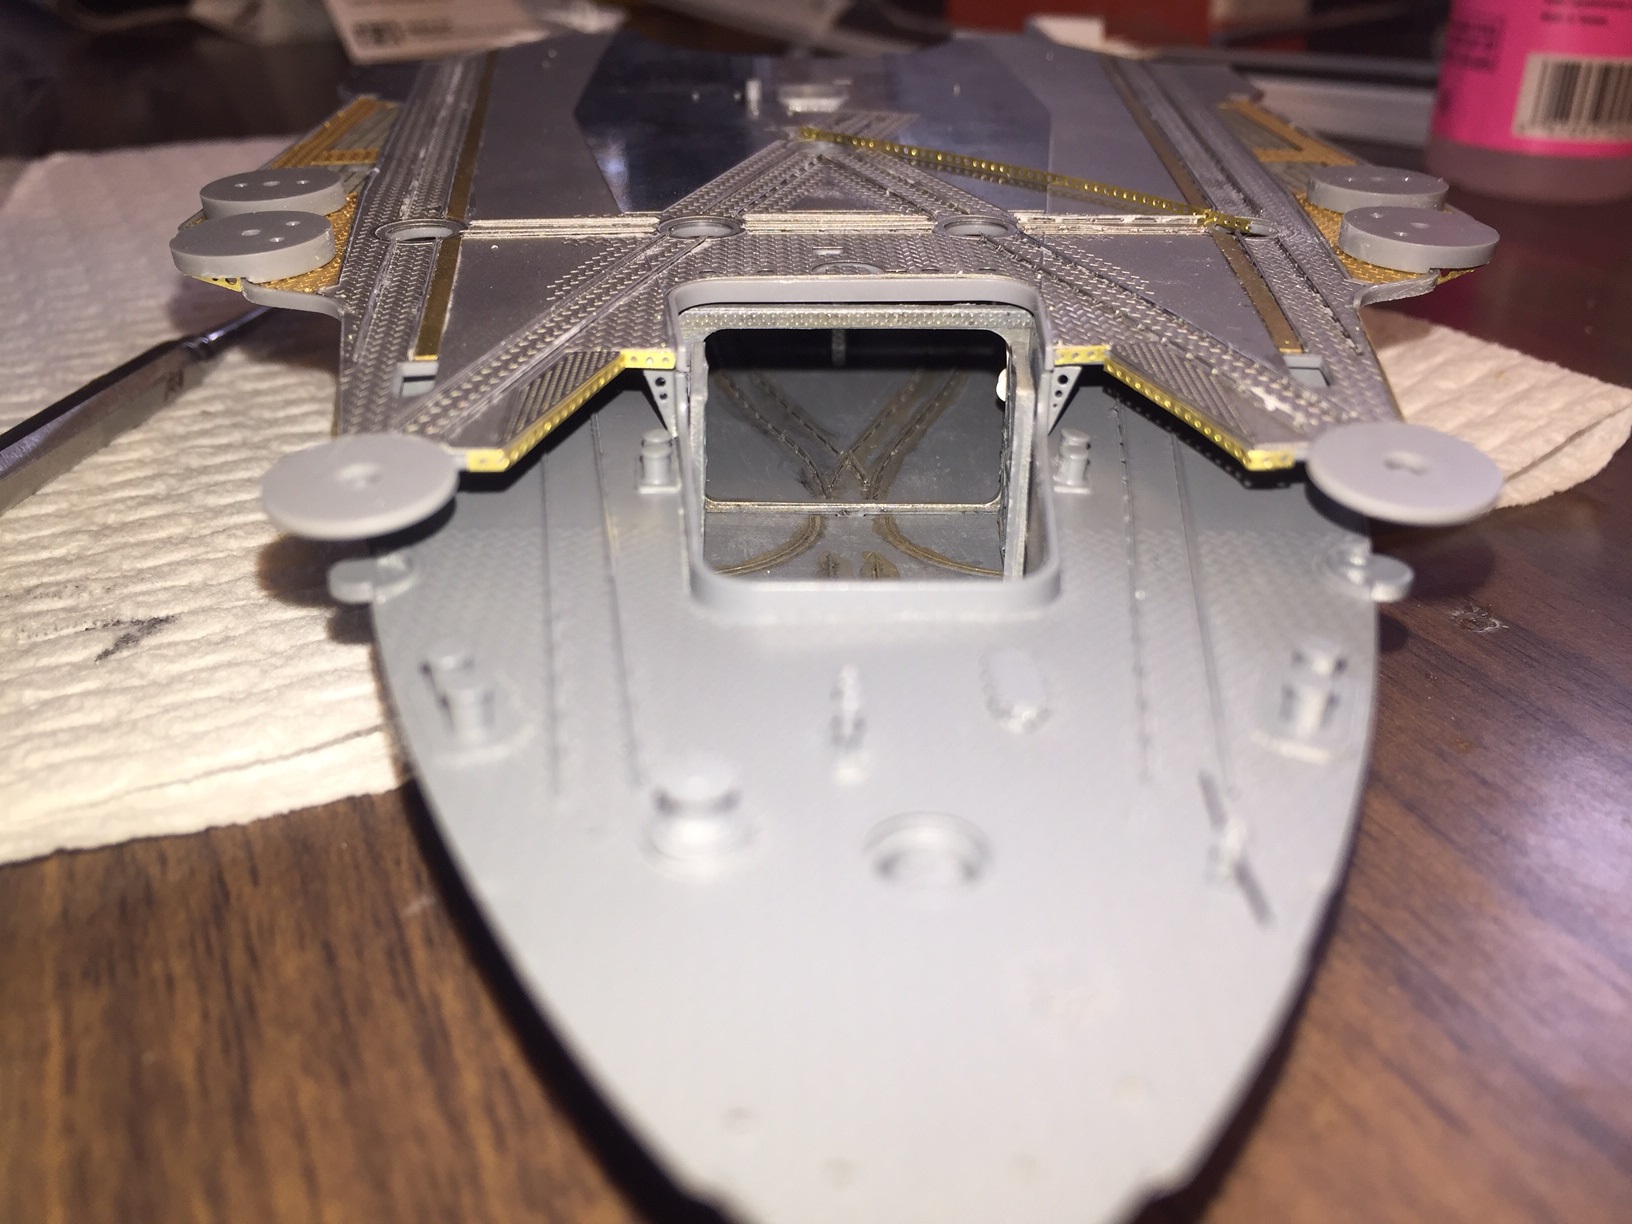
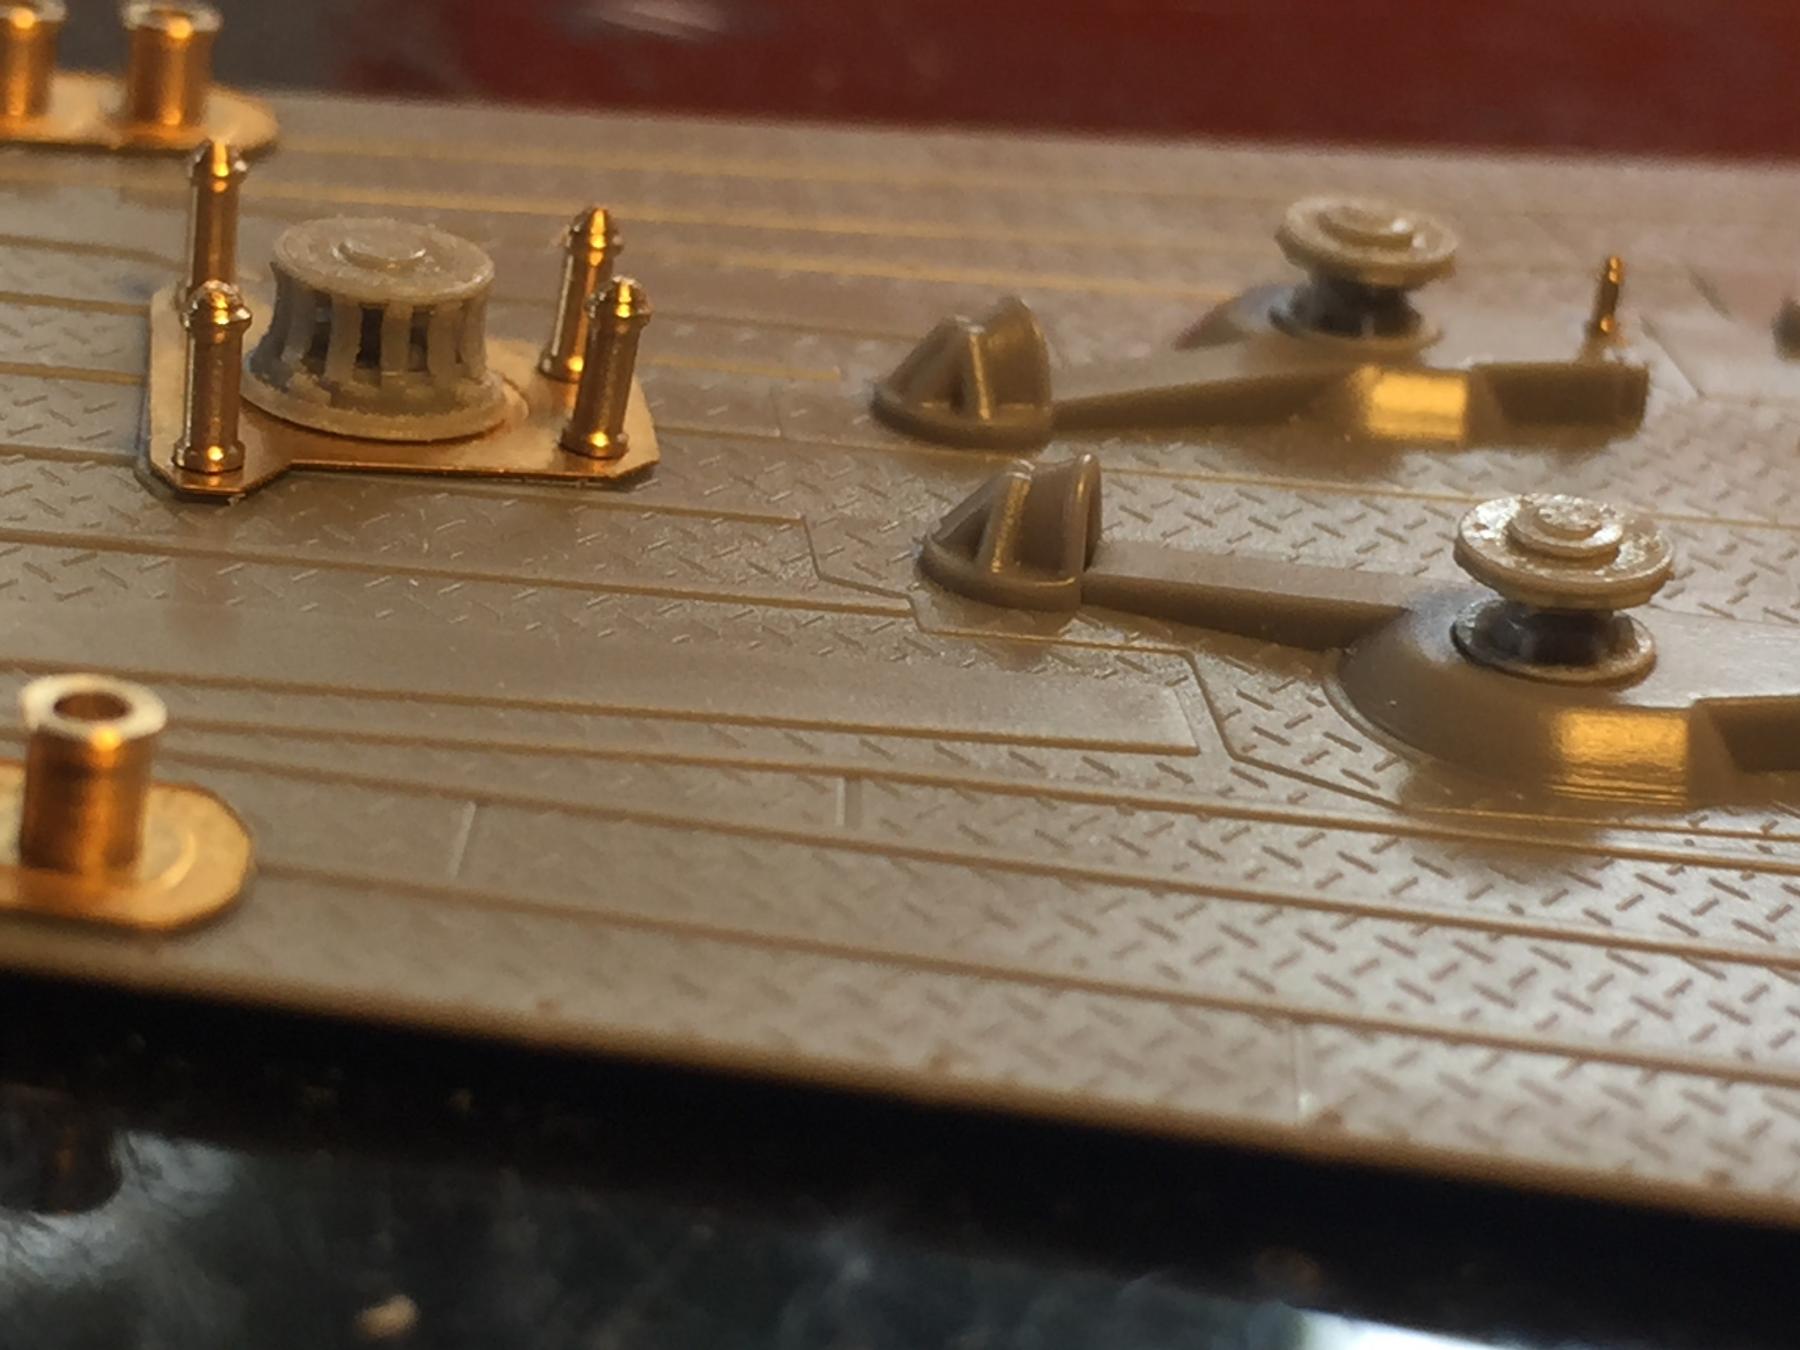
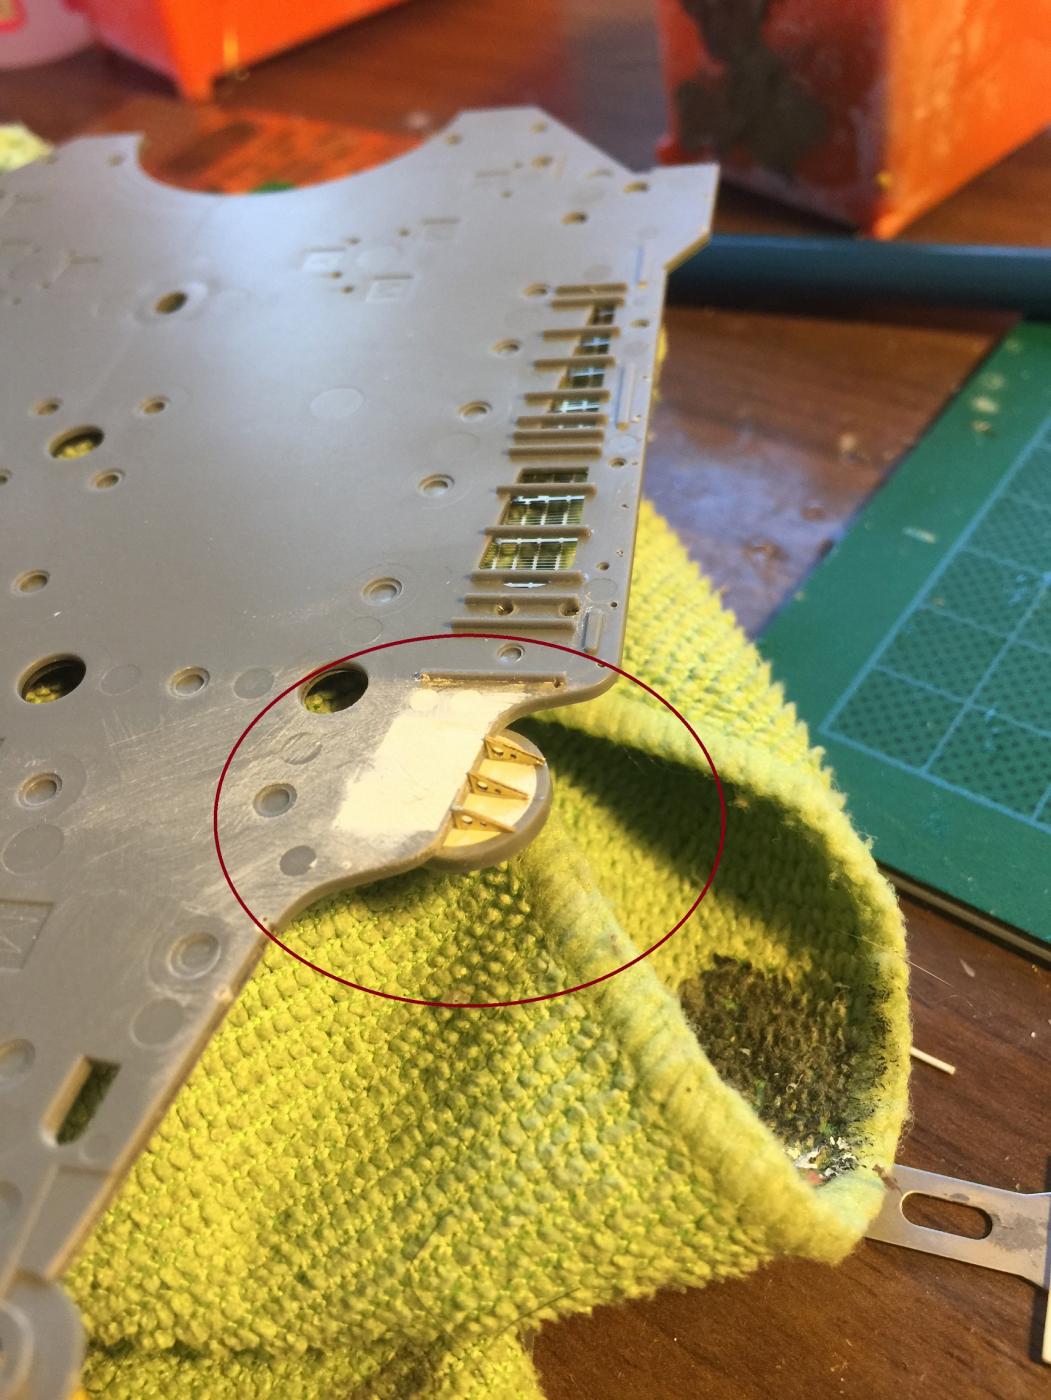
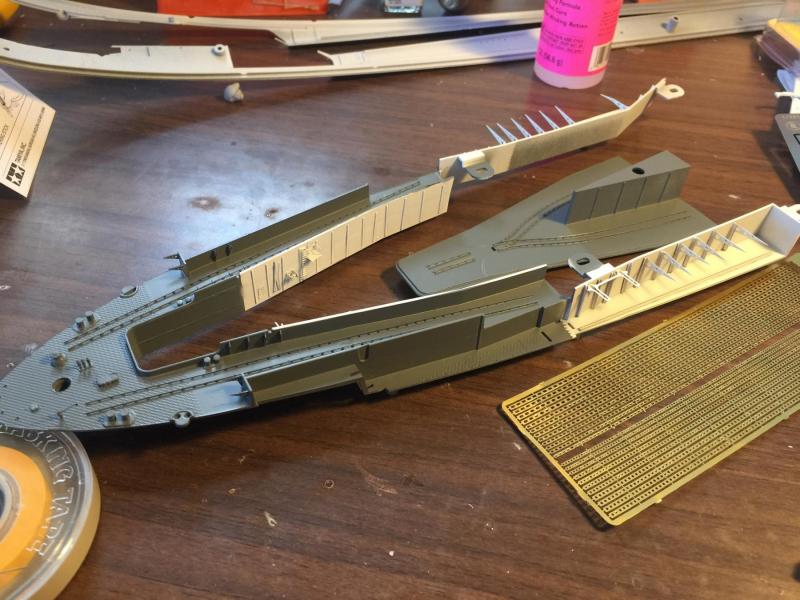
Having read the instructions again, I need to add the Type 96 25mm AA gun mounts to the rear flight deck. A little more drilling and as the aft ones overhand the deck, a little bit of filling with card and putty. I have circled the areas that needed work, and after smoothing it out, added some support stanchions. When I affix it to the hull I will place three more behind each of these but I need them to sit flush on the hull and I will wait for that. Next will be the railings/runners for the launches.


- 743 replies
-
- 21
-
-
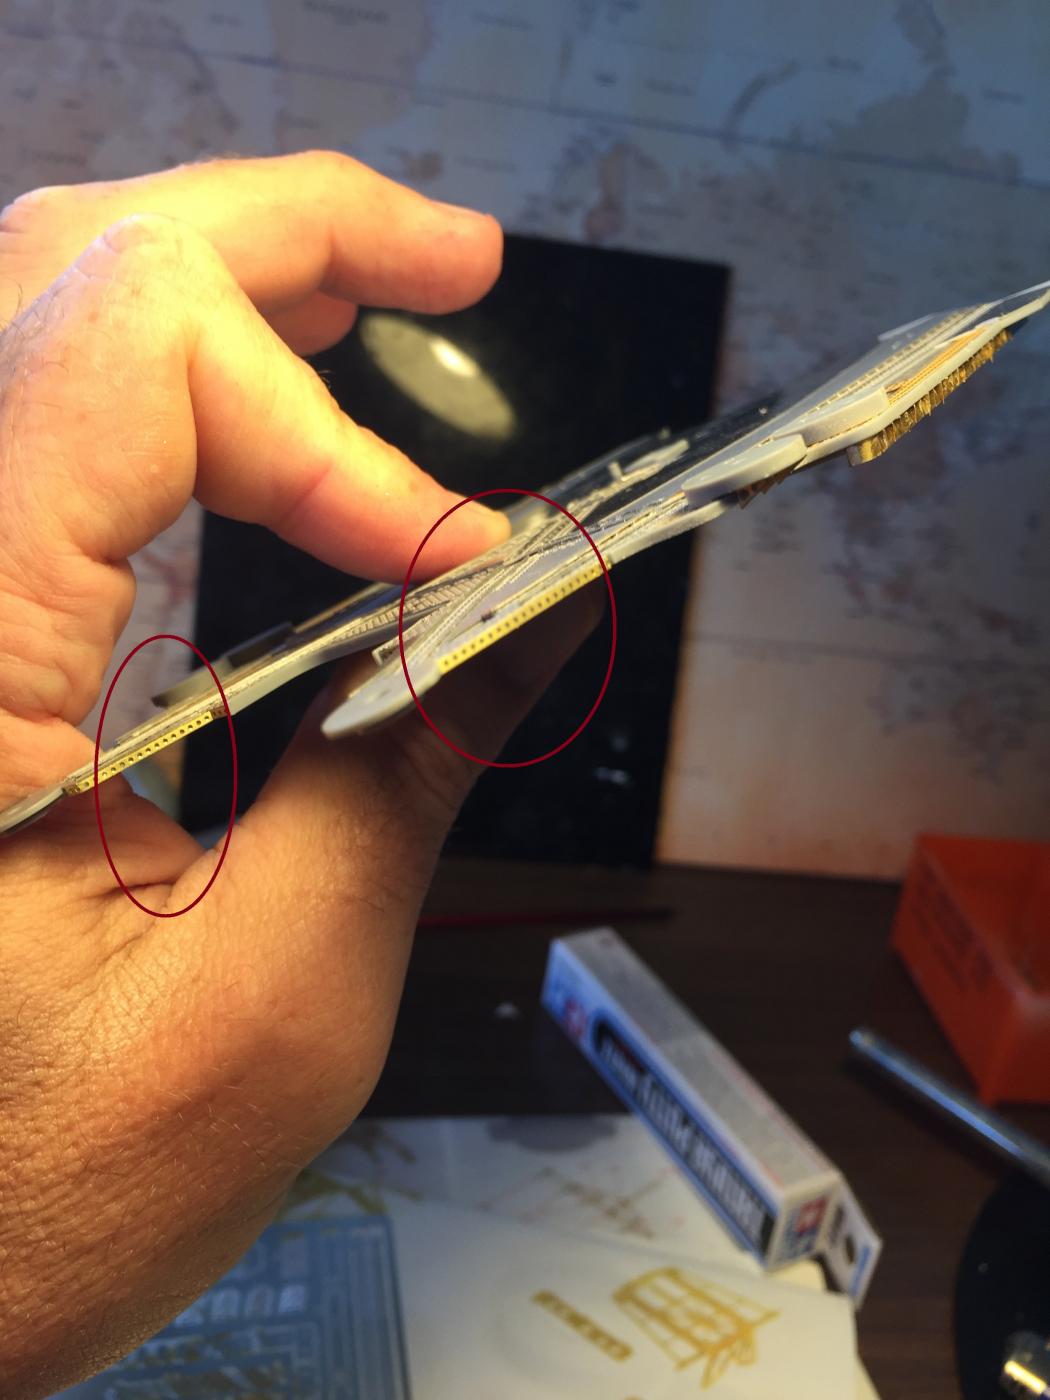
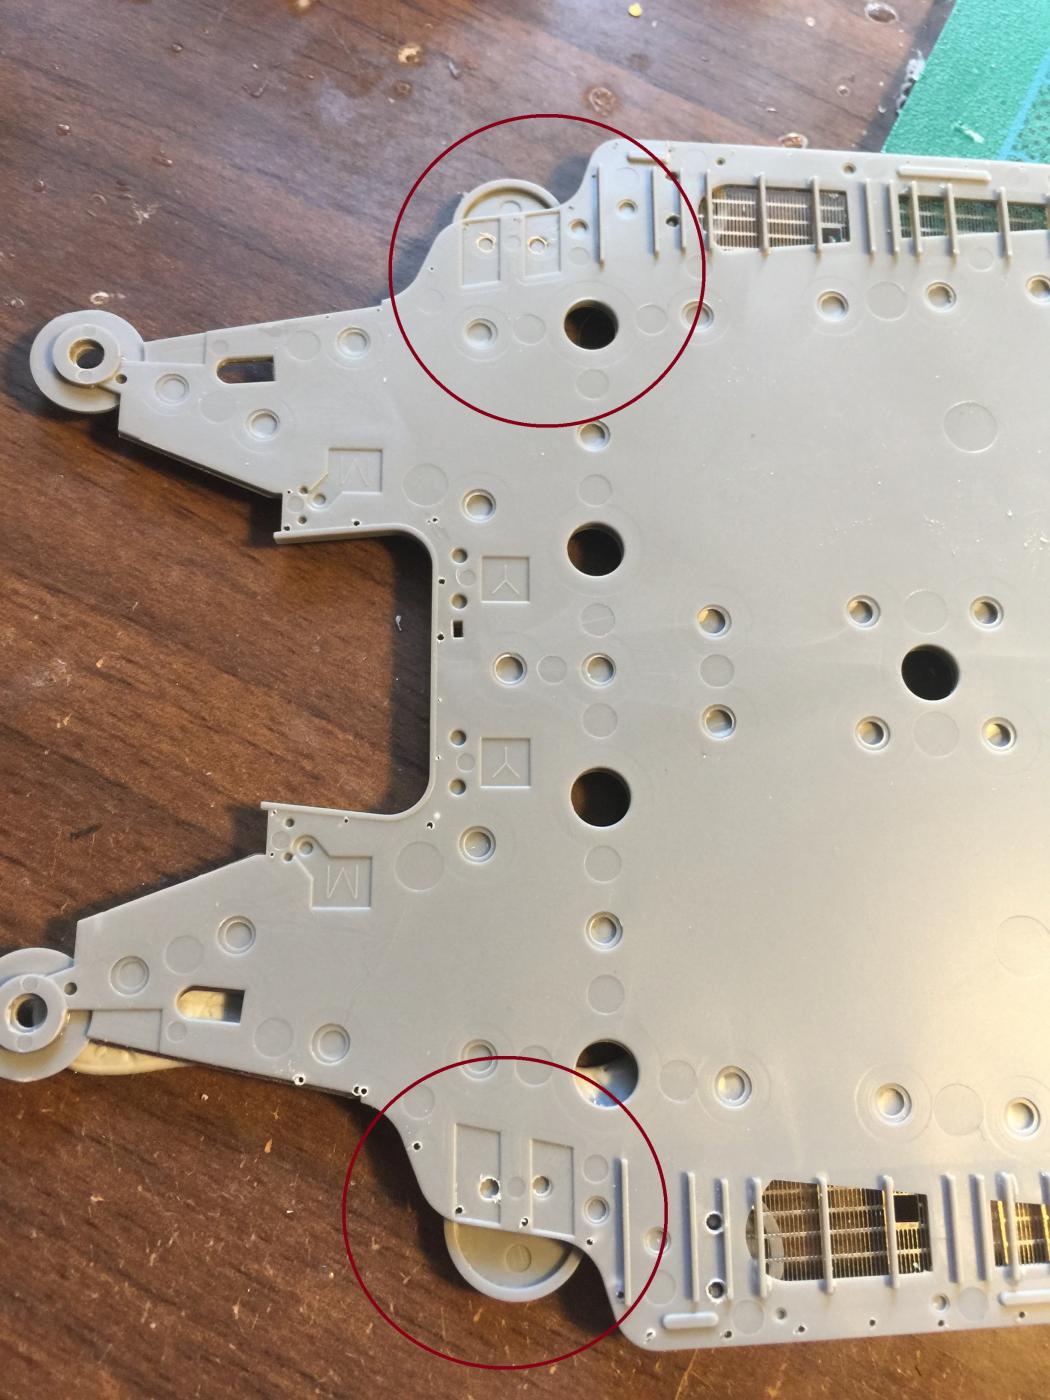
Not frustrating just part of the build really, I discovered more holes I am supposed to drill out too for the rear gun mounts (the PE instructions are so complex I really really really need to keep reading the kit instructions in conjunction), that also require support struts underneath. I am still waiting on some perforated beams that will go on the stern of this piece, which in total will probably represent about 3% of the entire build. The volume of work is enormous before I even consider purchasing an airbrush and learning how to use it, then learning how to use it properly and teaching myself proper weathering techniques with it. My previous 3 kits have been an excellent primer for this one as a lesson in patience.
-
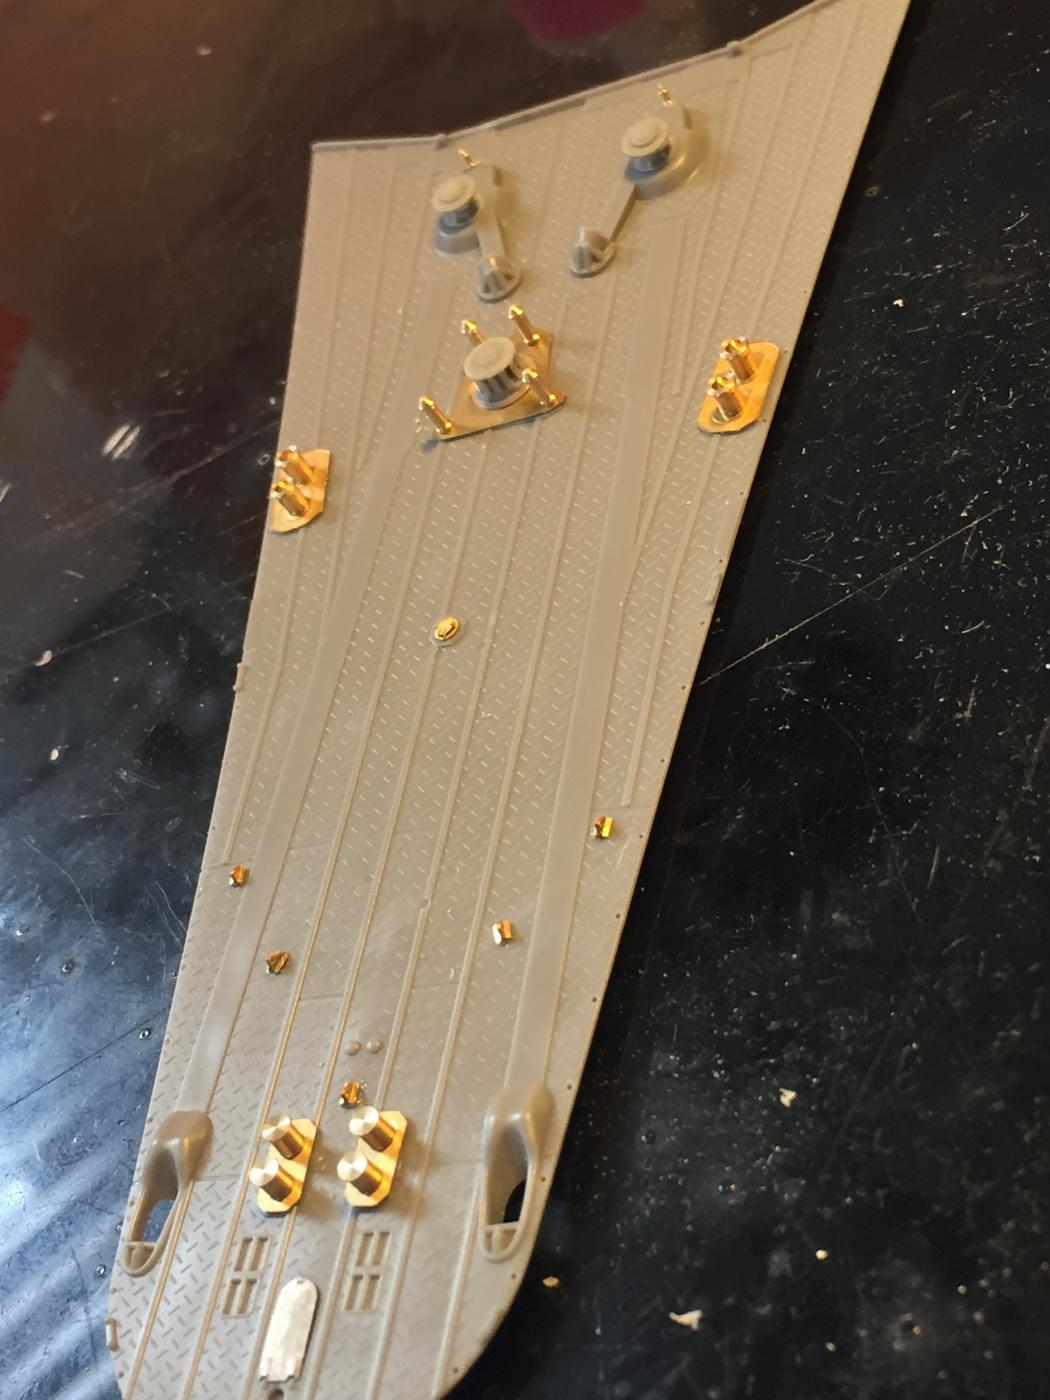
Pontos include them but never mention them in their instructions for some reason. There are a lot of assumptions, it would be nice if they were a little more linear in their instructions and not expect everyone to be a master modeller, but I expect it overcomes the language barrier. Their stuff is top shelf but they leave out some rudimentary things at times but it is generally better than anything else on the market. I think their primary engineer/designer left and started up his own company called Infinity which will probably even end up better.