RGL
-
Posts
5,550 -
Joined
-
Last visited
Content Type
Profiles
Forums
Gallery
Events
Everything posted by RGL
-
 Thanks Steve, It's close, I used their guns on the Varyag, I'm going to try and man up and scratch build them!
 -
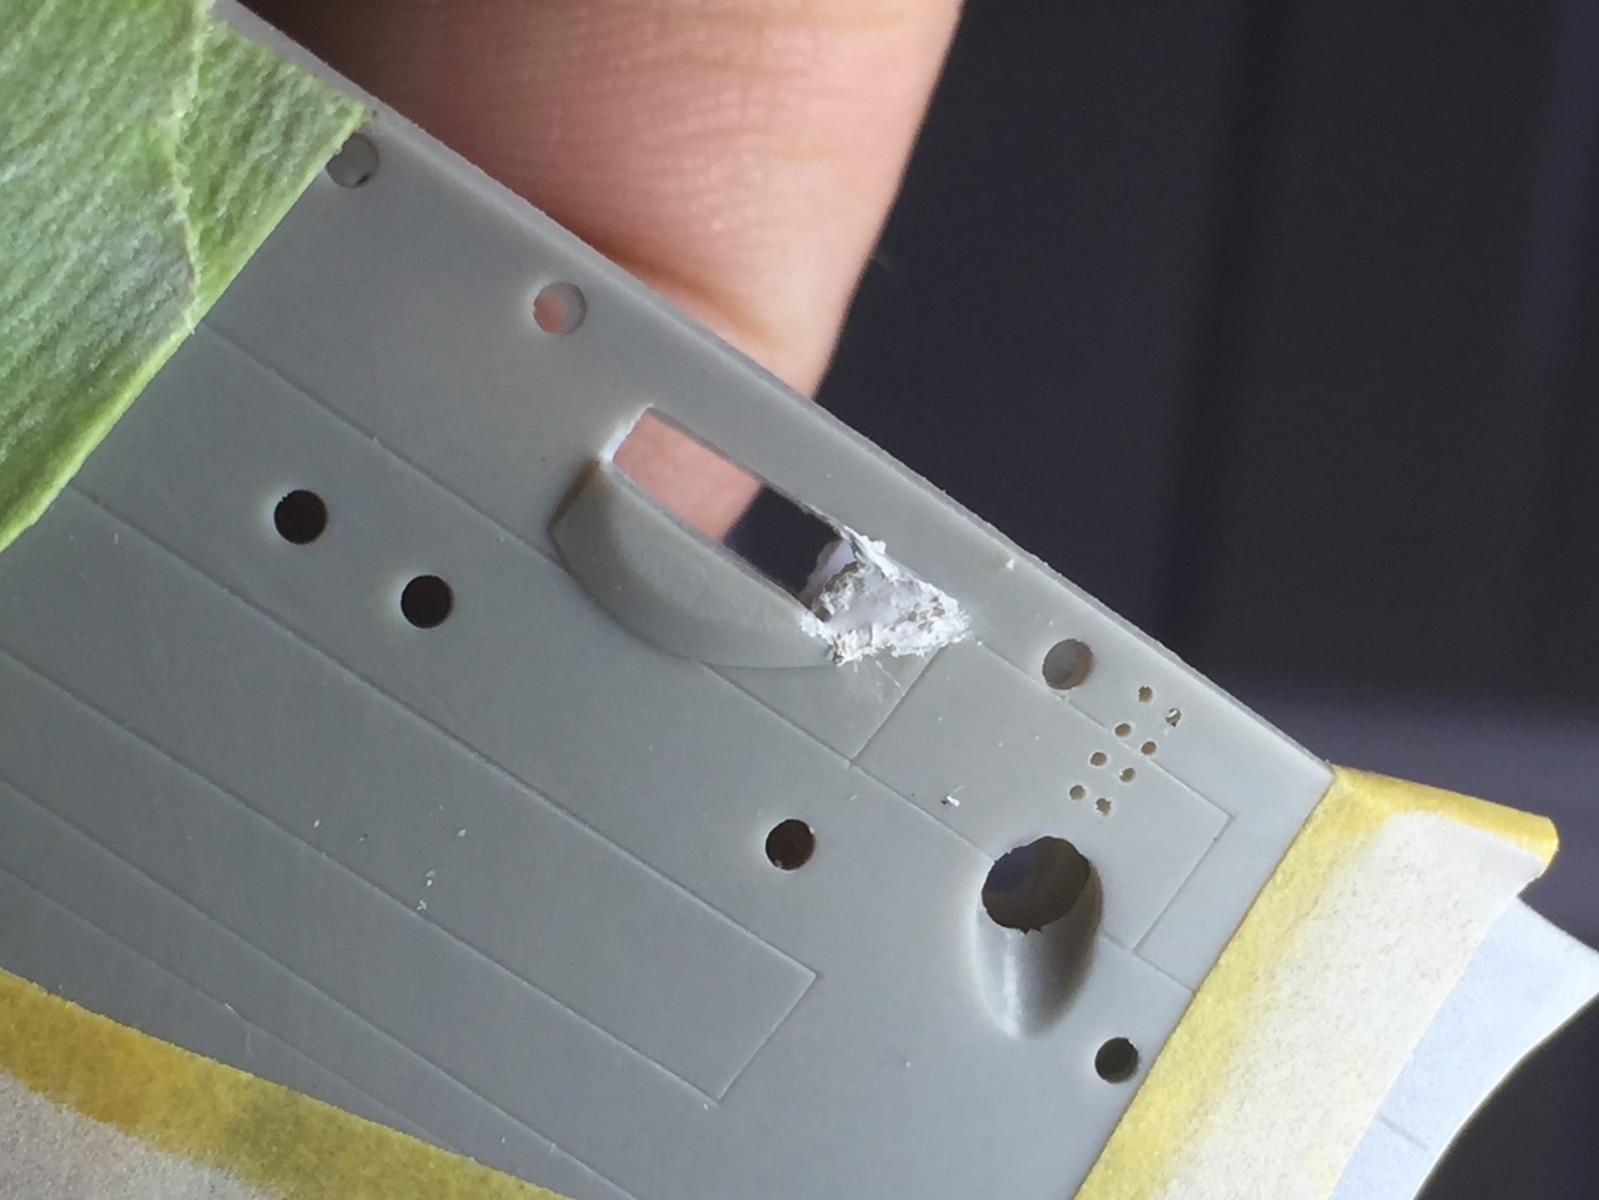
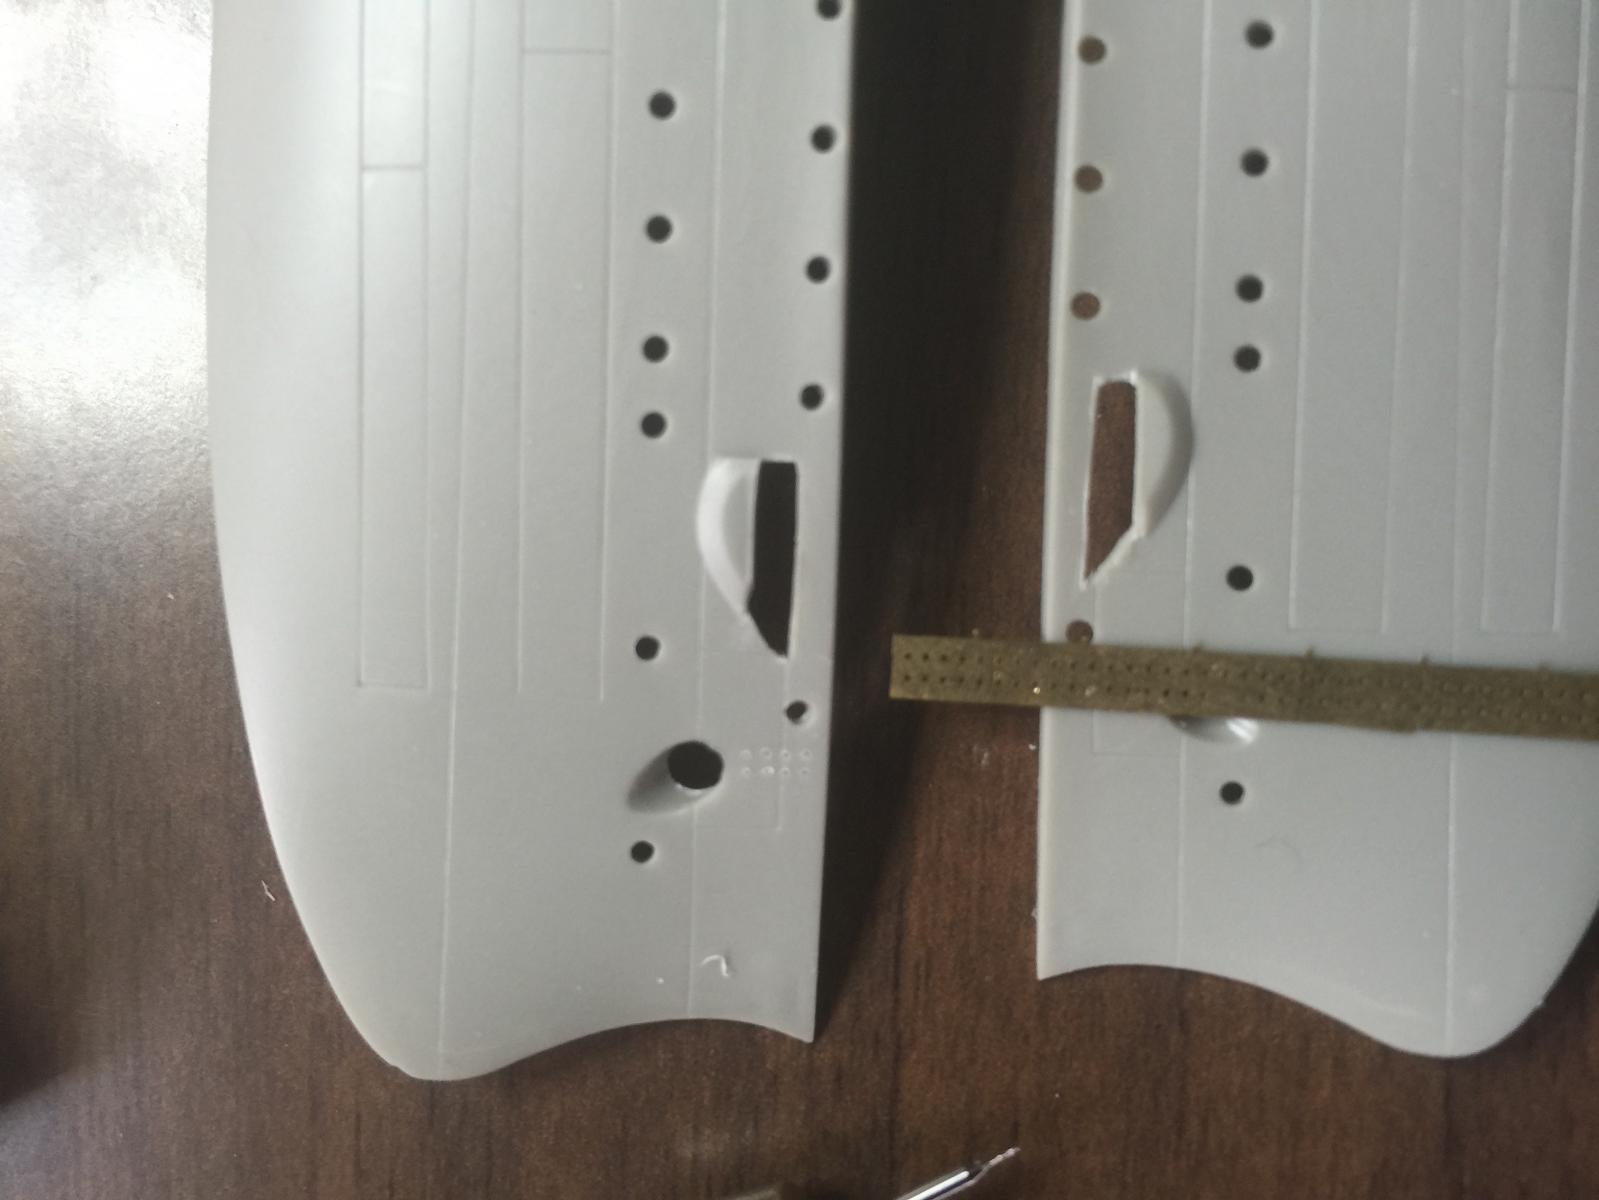
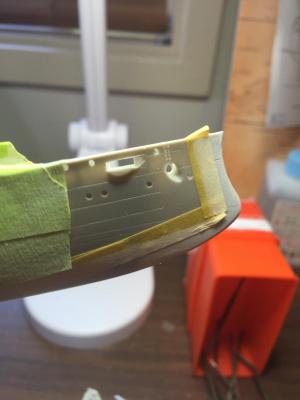
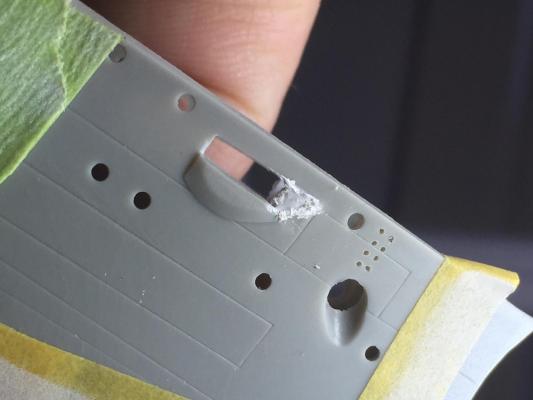
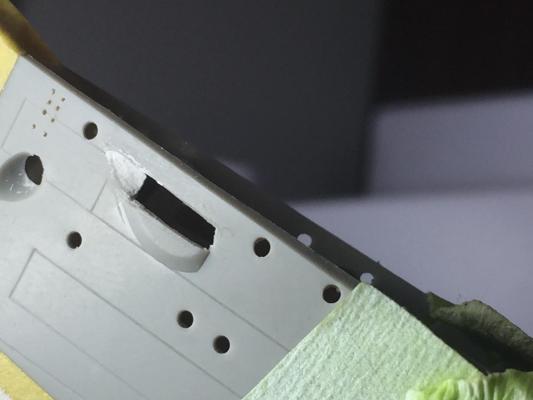
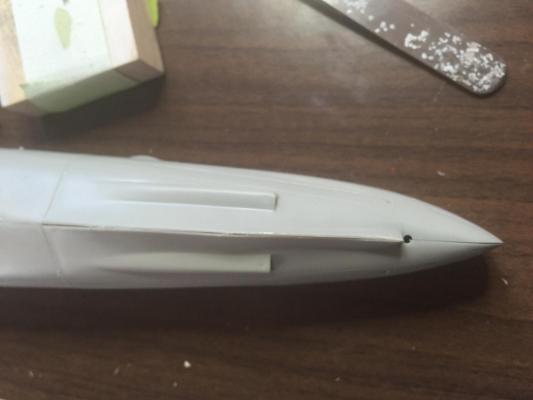
next are the Bow chaser gun openings. The kit has this silly little representation on a barrel. It took me a fair while to just figure out to put a bit of car behind the triangle at the front and create the angle into the hull with putty. That way the barrel can sit flush within the lines of he ship. Bit of tidy up to do and it will be fine, as there will also be the hatches folded down.
- 236 replies
-
- 10
-

-
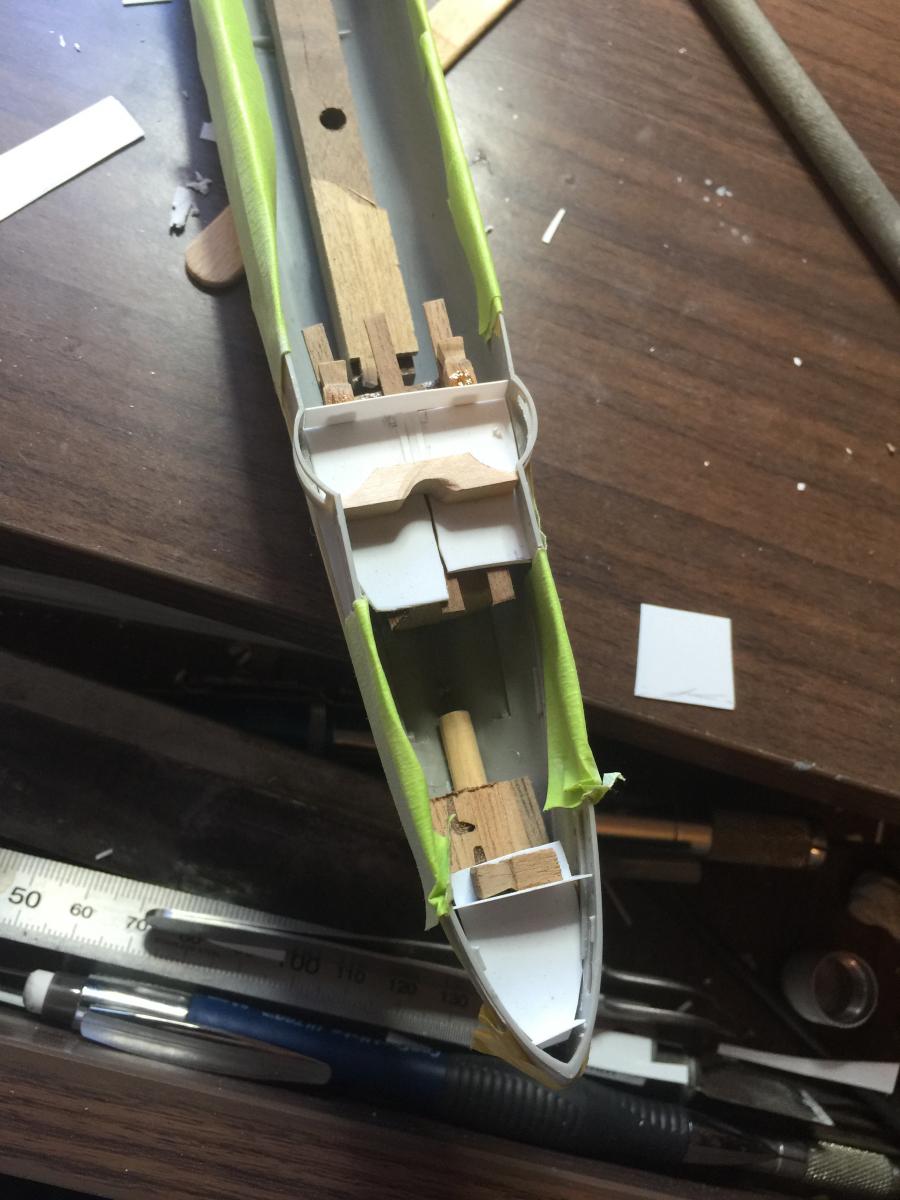
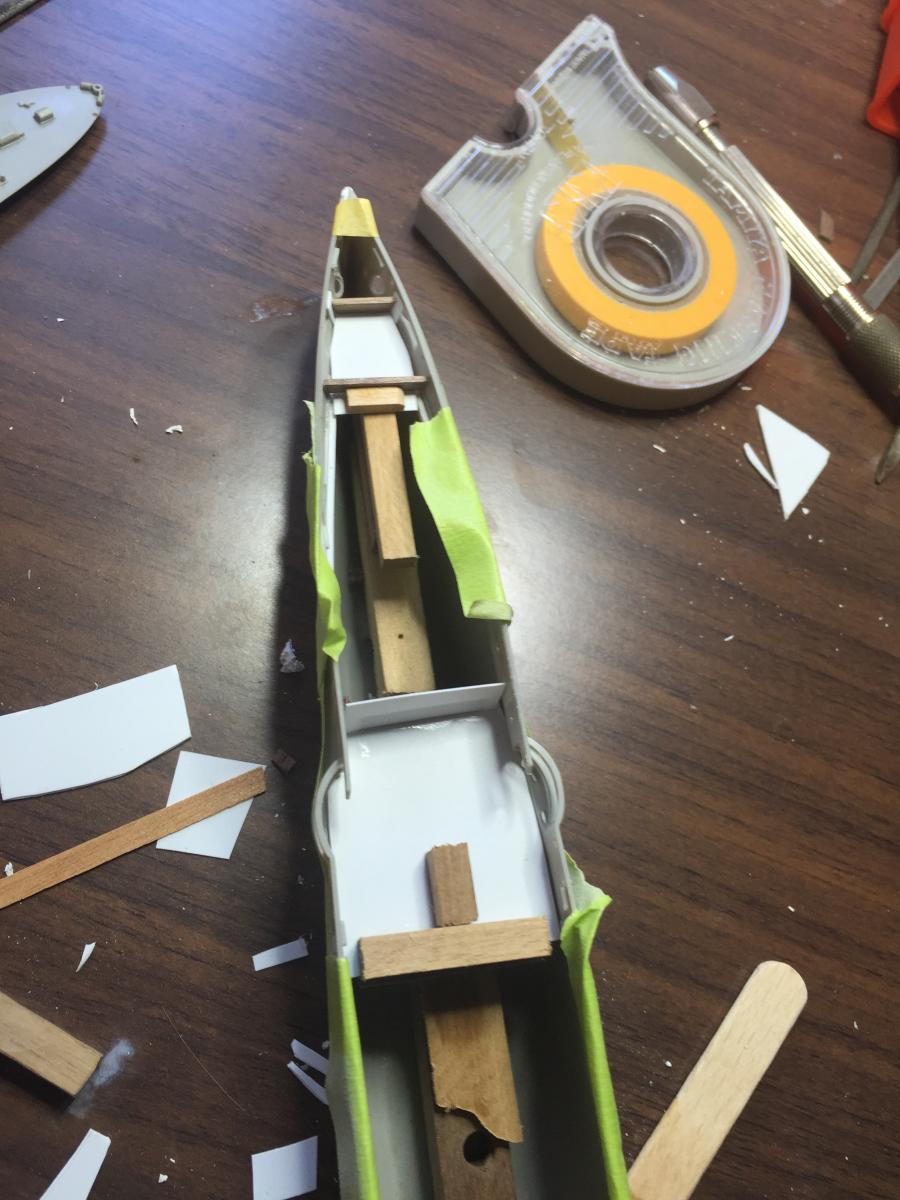
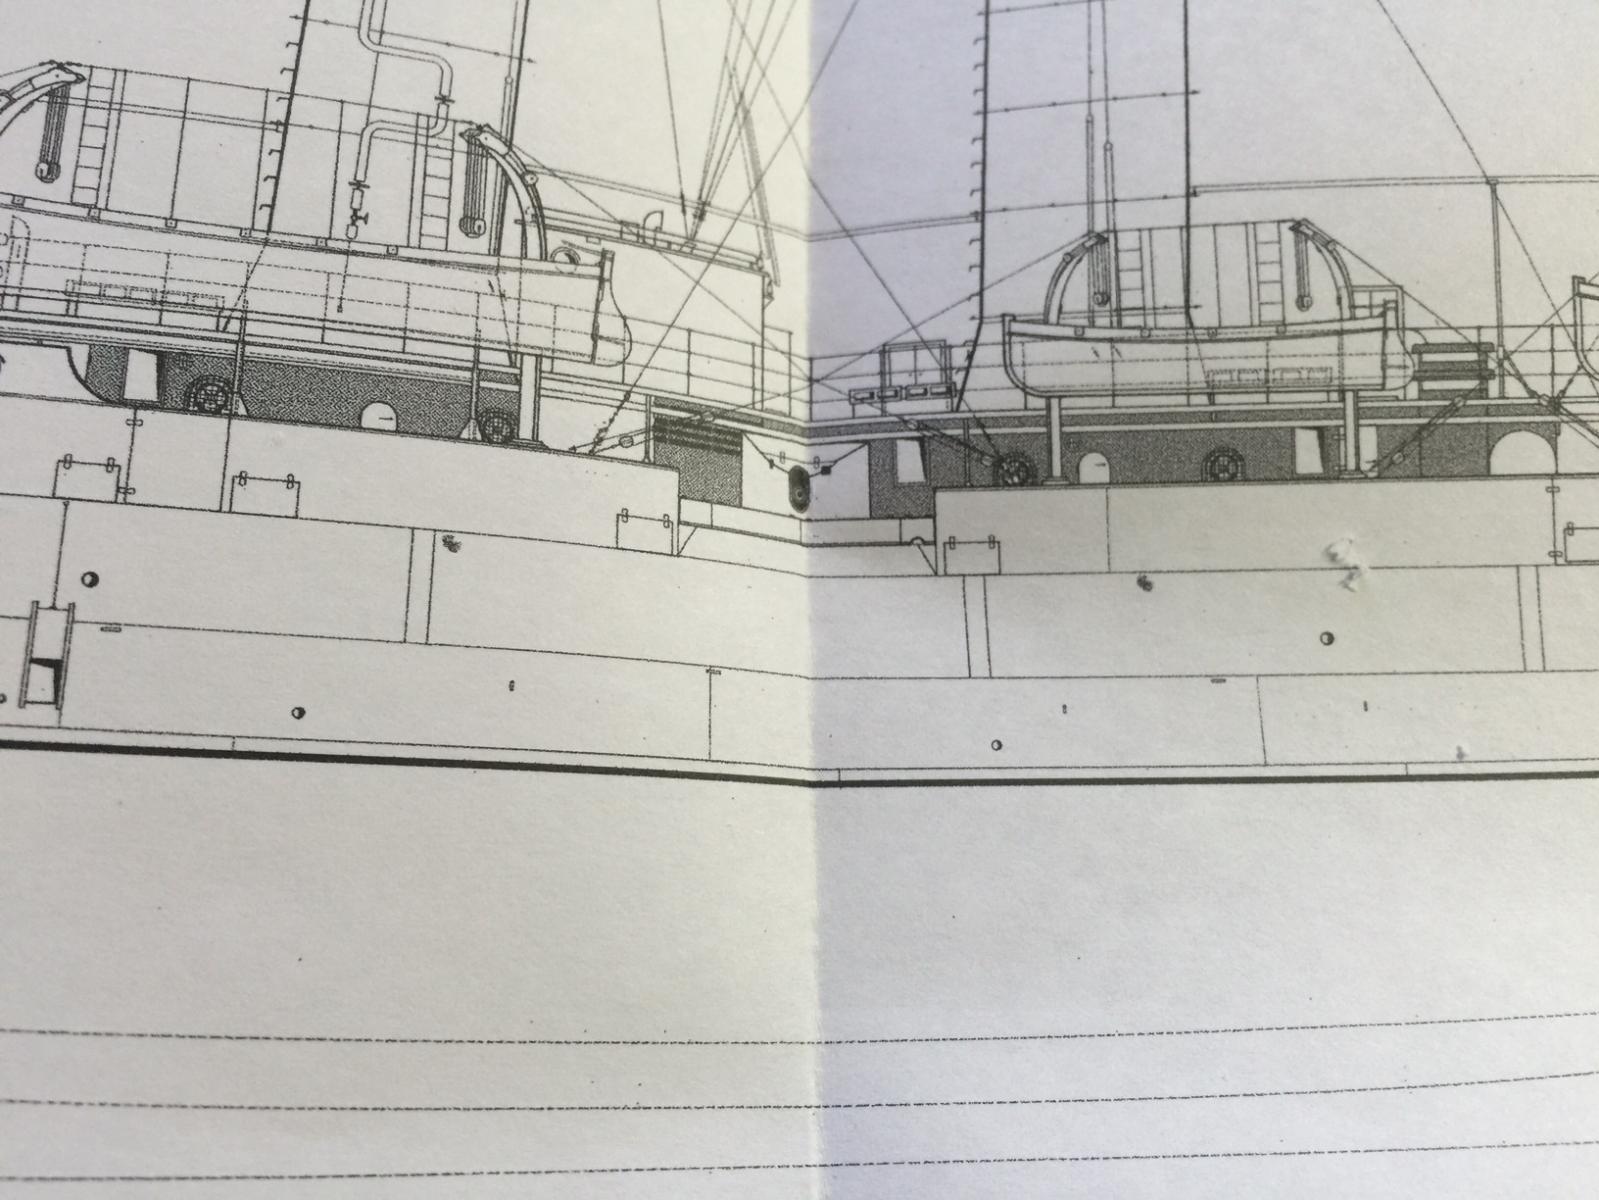
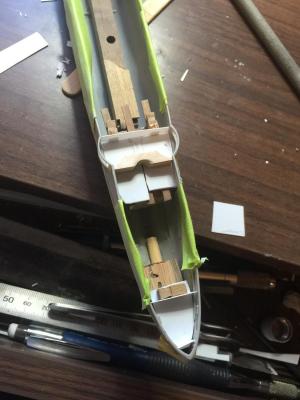
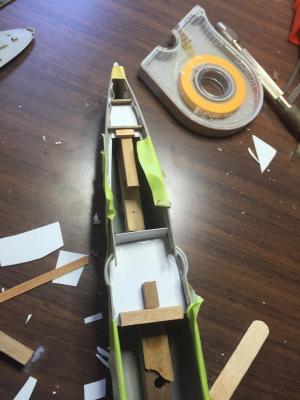
Continuing on with the inside of the hull, I know it looks messy but it's very sturdy and it will be invisible forever. The plans show how there is a remarkable lack of compartmentalization which means I will have to add a fair bit of detail to the inside behind the guns.
-
I think they'll suit, but that's months away anyway, and a fair bit of scratch building anyway. A 20 minute drive to Australian War Memorial to look at the original helps.
-
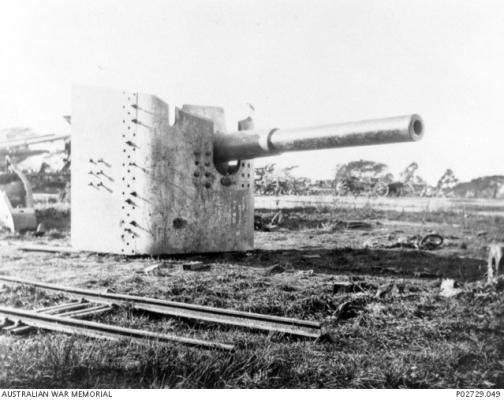
The genre is somewhat limited in aftermarket, I will have to order the 4in guns from the Belfast to replicate the 105mm guns.
-
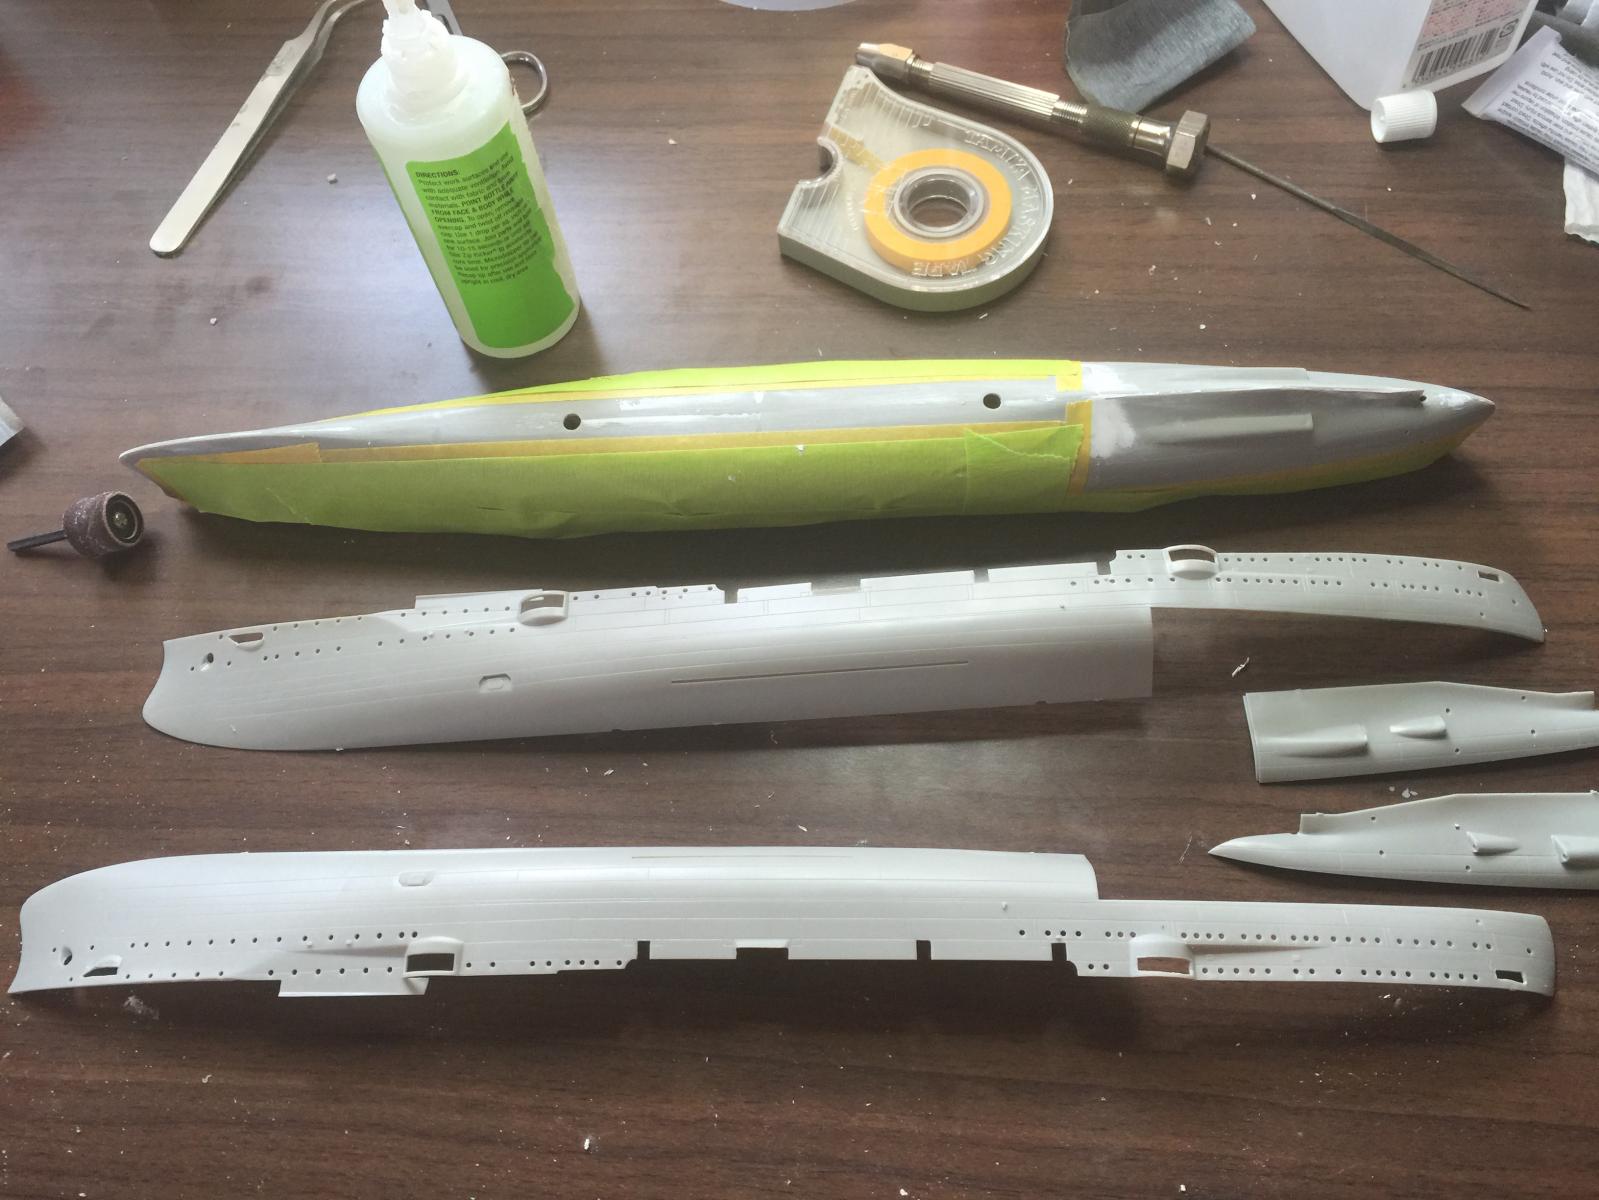
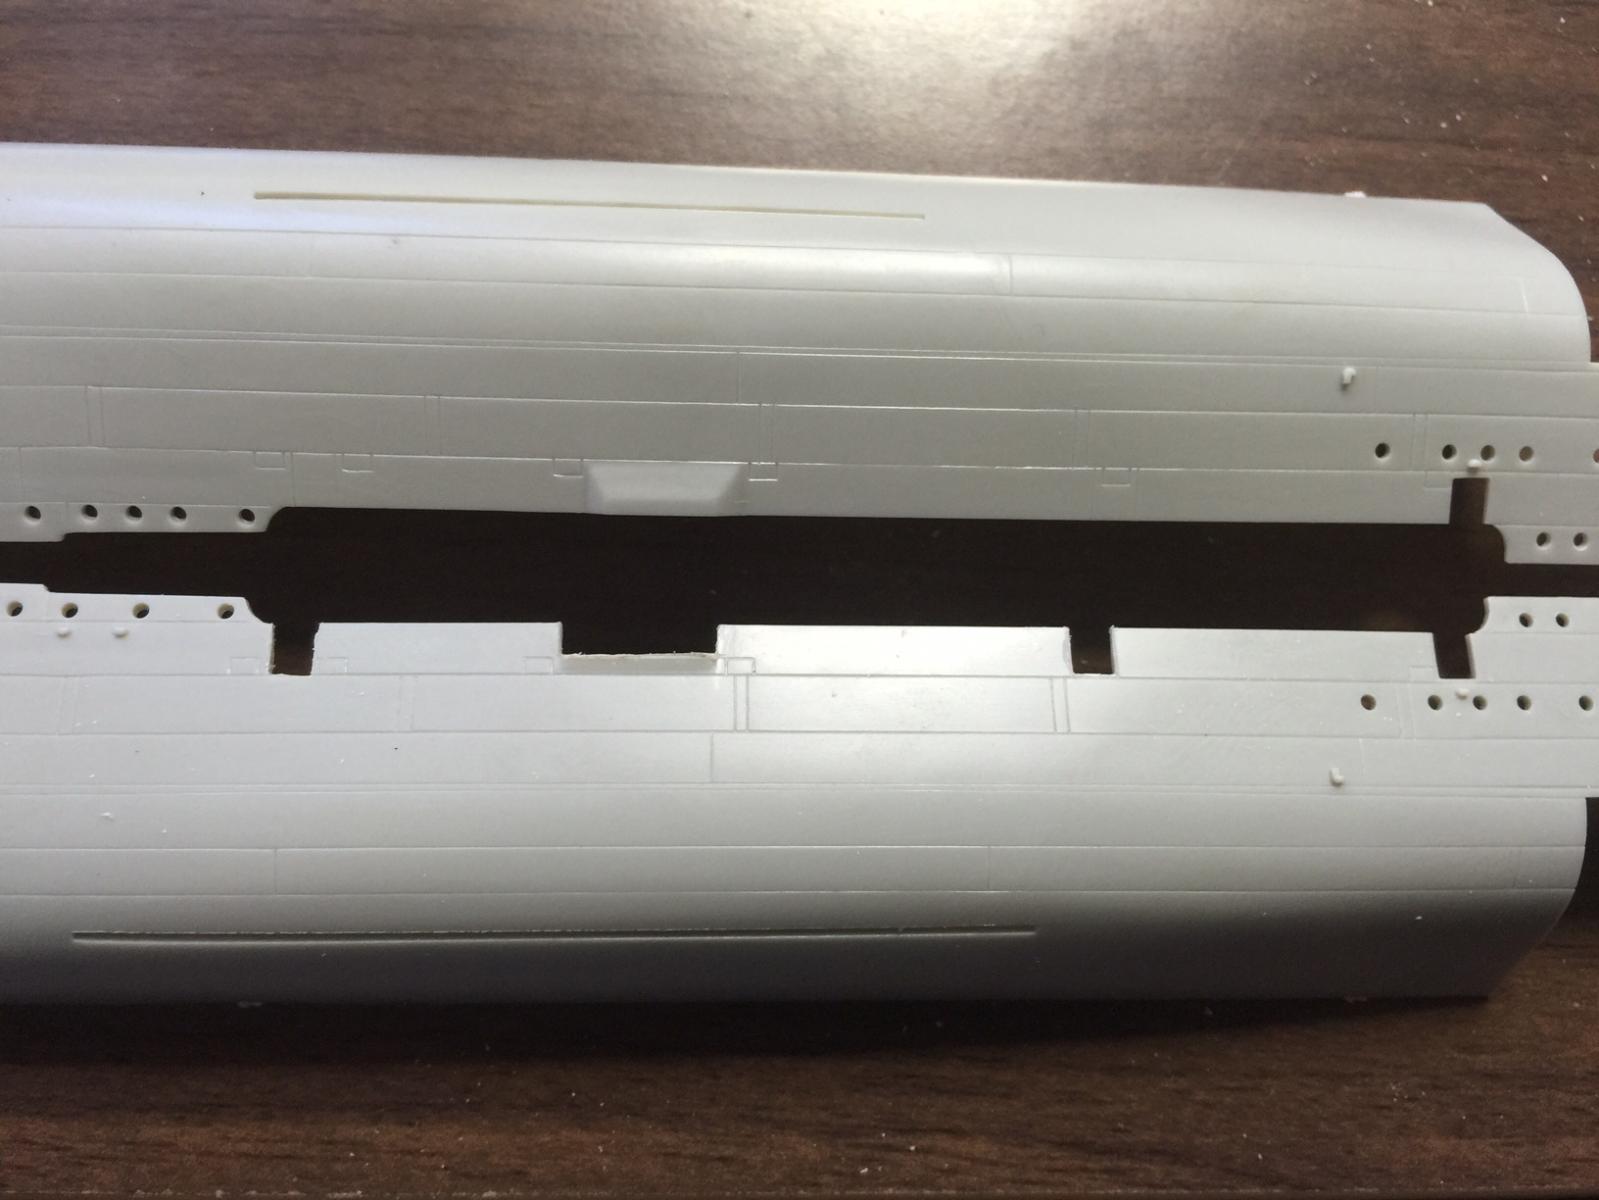
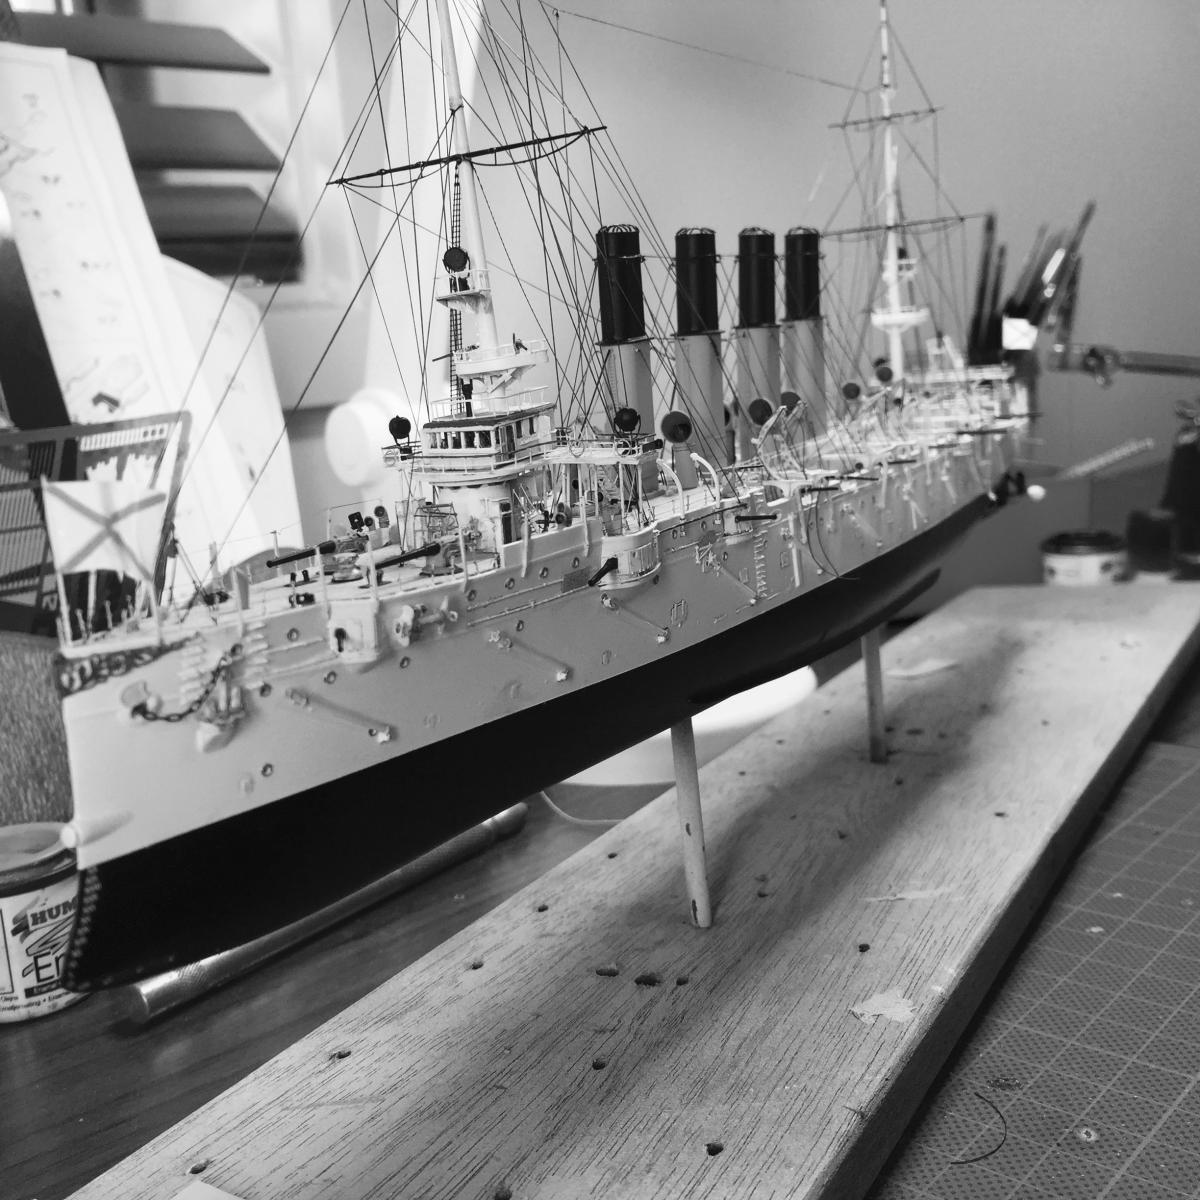
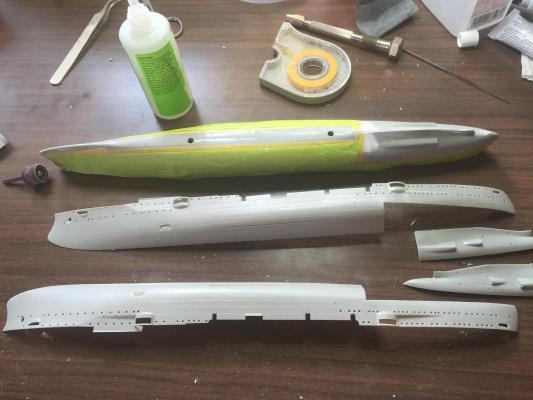
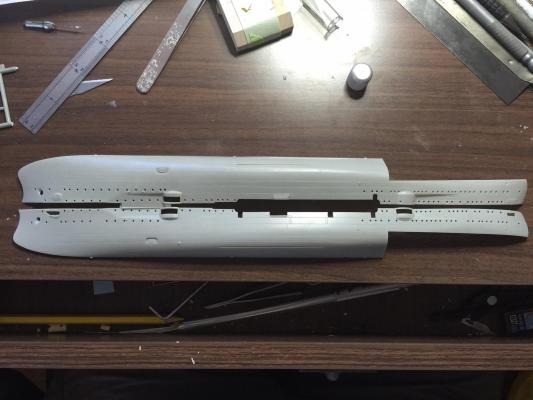
Joining up the hull is somewhat of a nightmare. As the hull homes in 4 pieces, as Revell have made one hul for both then some small pieces for the shafts between the Emden and Dresden kits. They do not line up. At all. I would feel somewhat less than adequate if every other build I had found on the internet did not have the same problem. Its seriously out of kilter. I have braced the interior of the hull with offcut pieces of wood, so as the hull is not so laterally flexible and the joins won't break, as well as allowing for the two brass rods which i will use as stands as well as a painting brace. It also allows me to have a stable internal platform for the under deck guns which I will construct compartments for in styrene.I have run them along the centreline as these compartments will not be attached to the side of the hull because they would just snap off when I have to apply the deck. As the plastic is so soft, sanding marks up the hull very easily. I masked up the joins so I could have attempt one at the putty then a quick light coat of primer to see my sins then attempt 2.

-
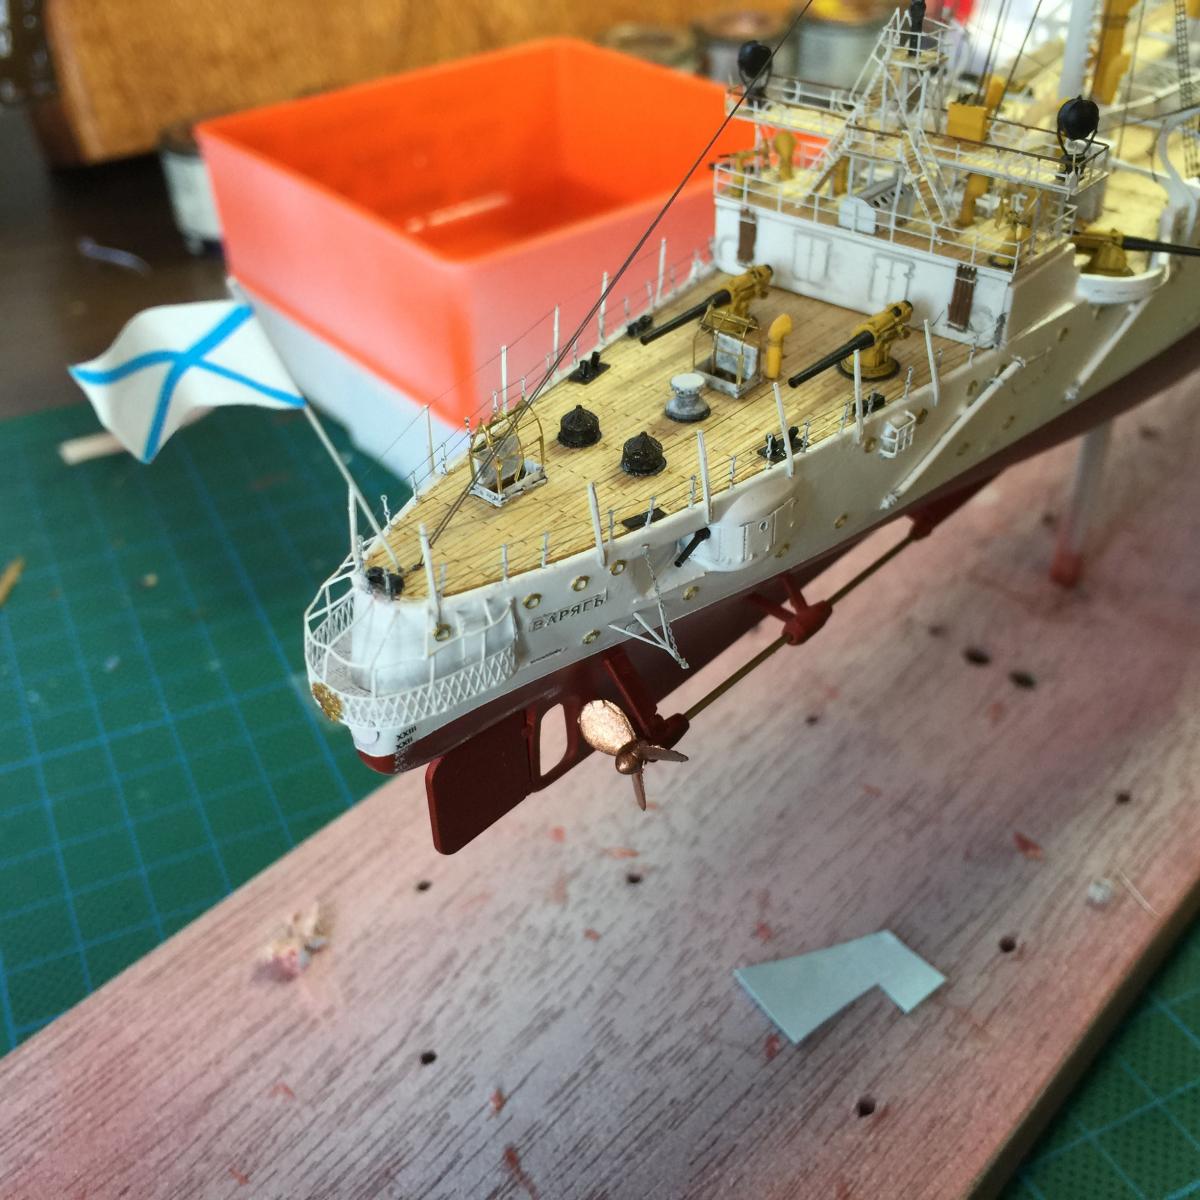
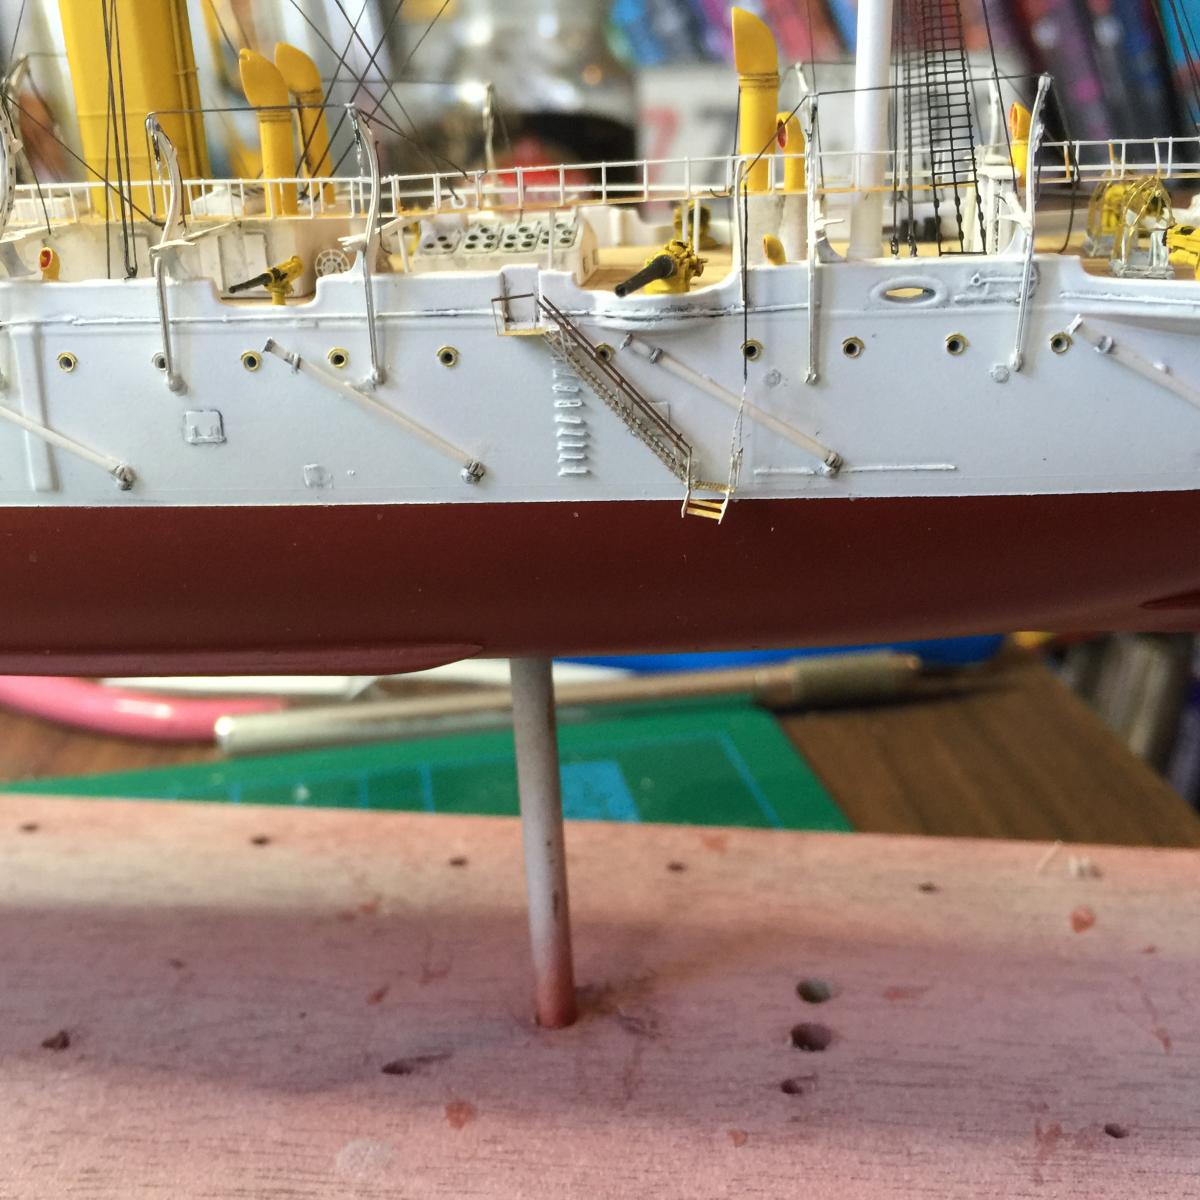
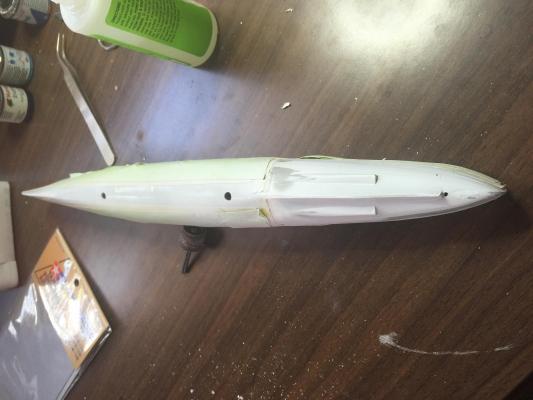
I have drilled some .02mm holes for the steps on the side of the hull before joining the hull. I will have to make up some anchor points for the prop guard, later. The hull itself is fairly self explanatory. The North Star steps have a little template to make sure everything lines up. There is no reference to the steps in the Revell plans.

-
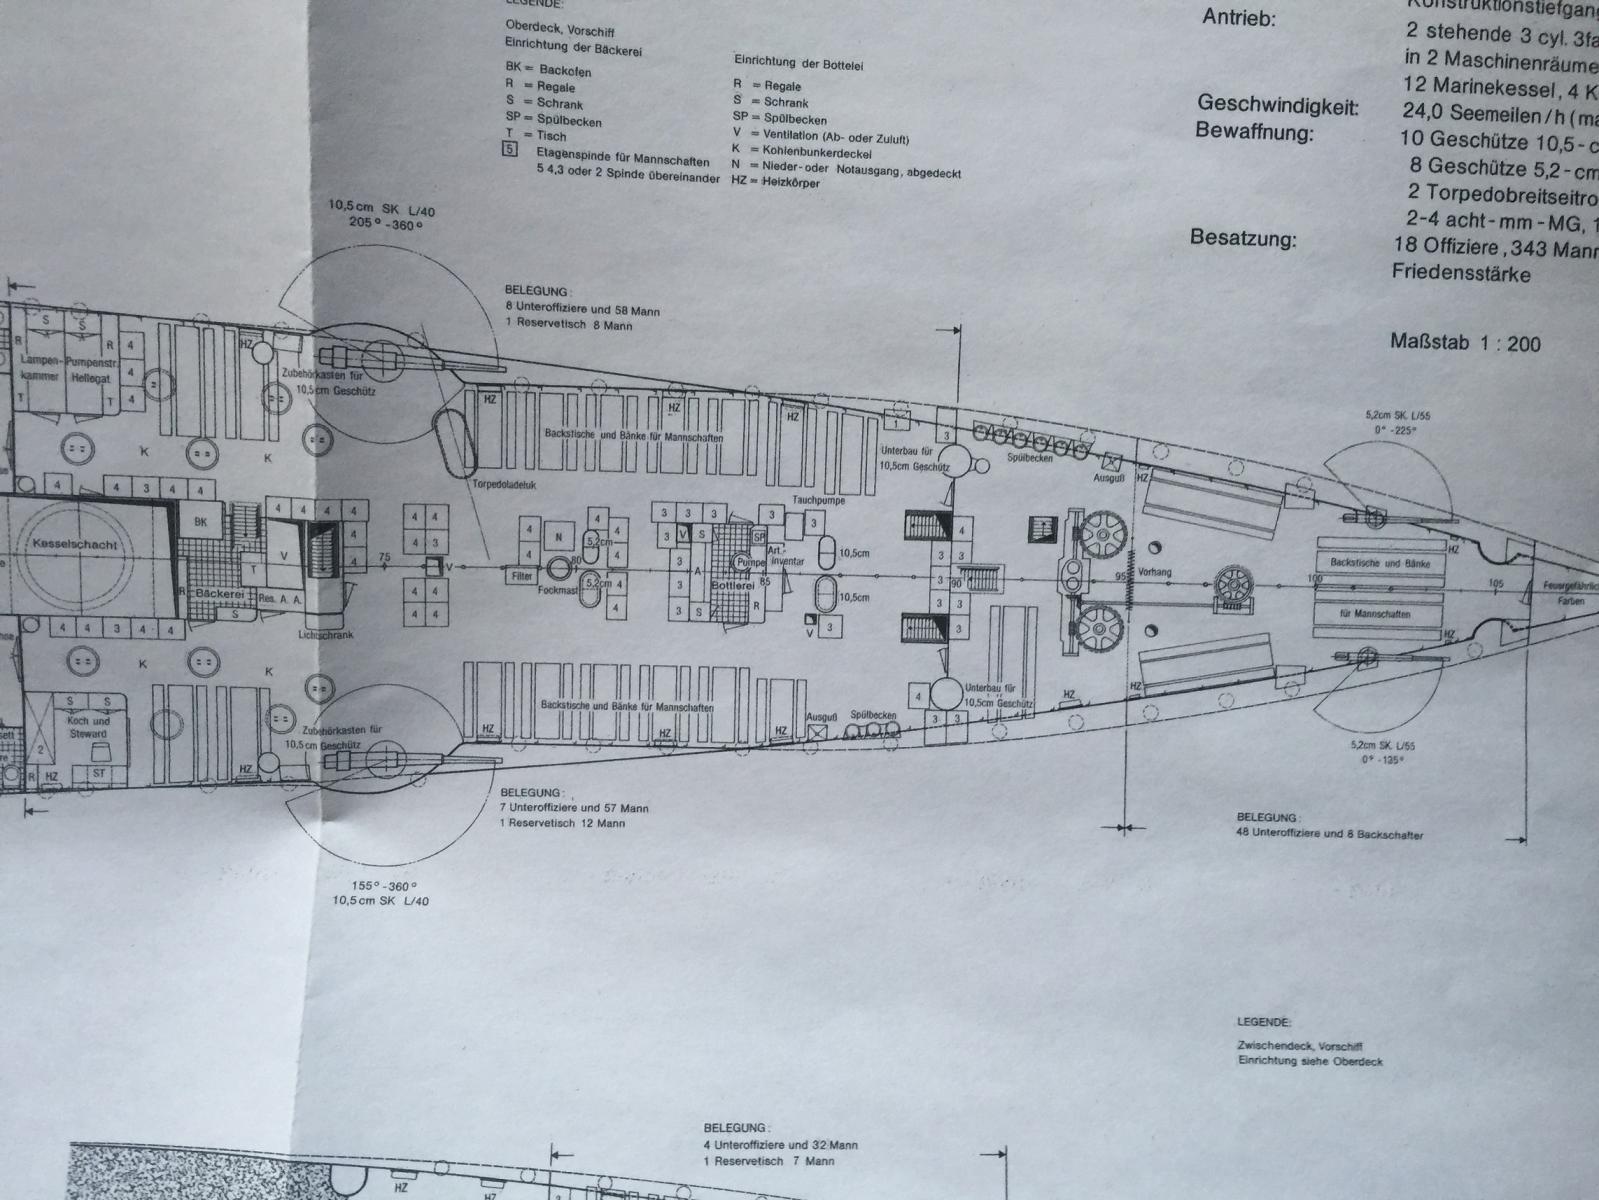
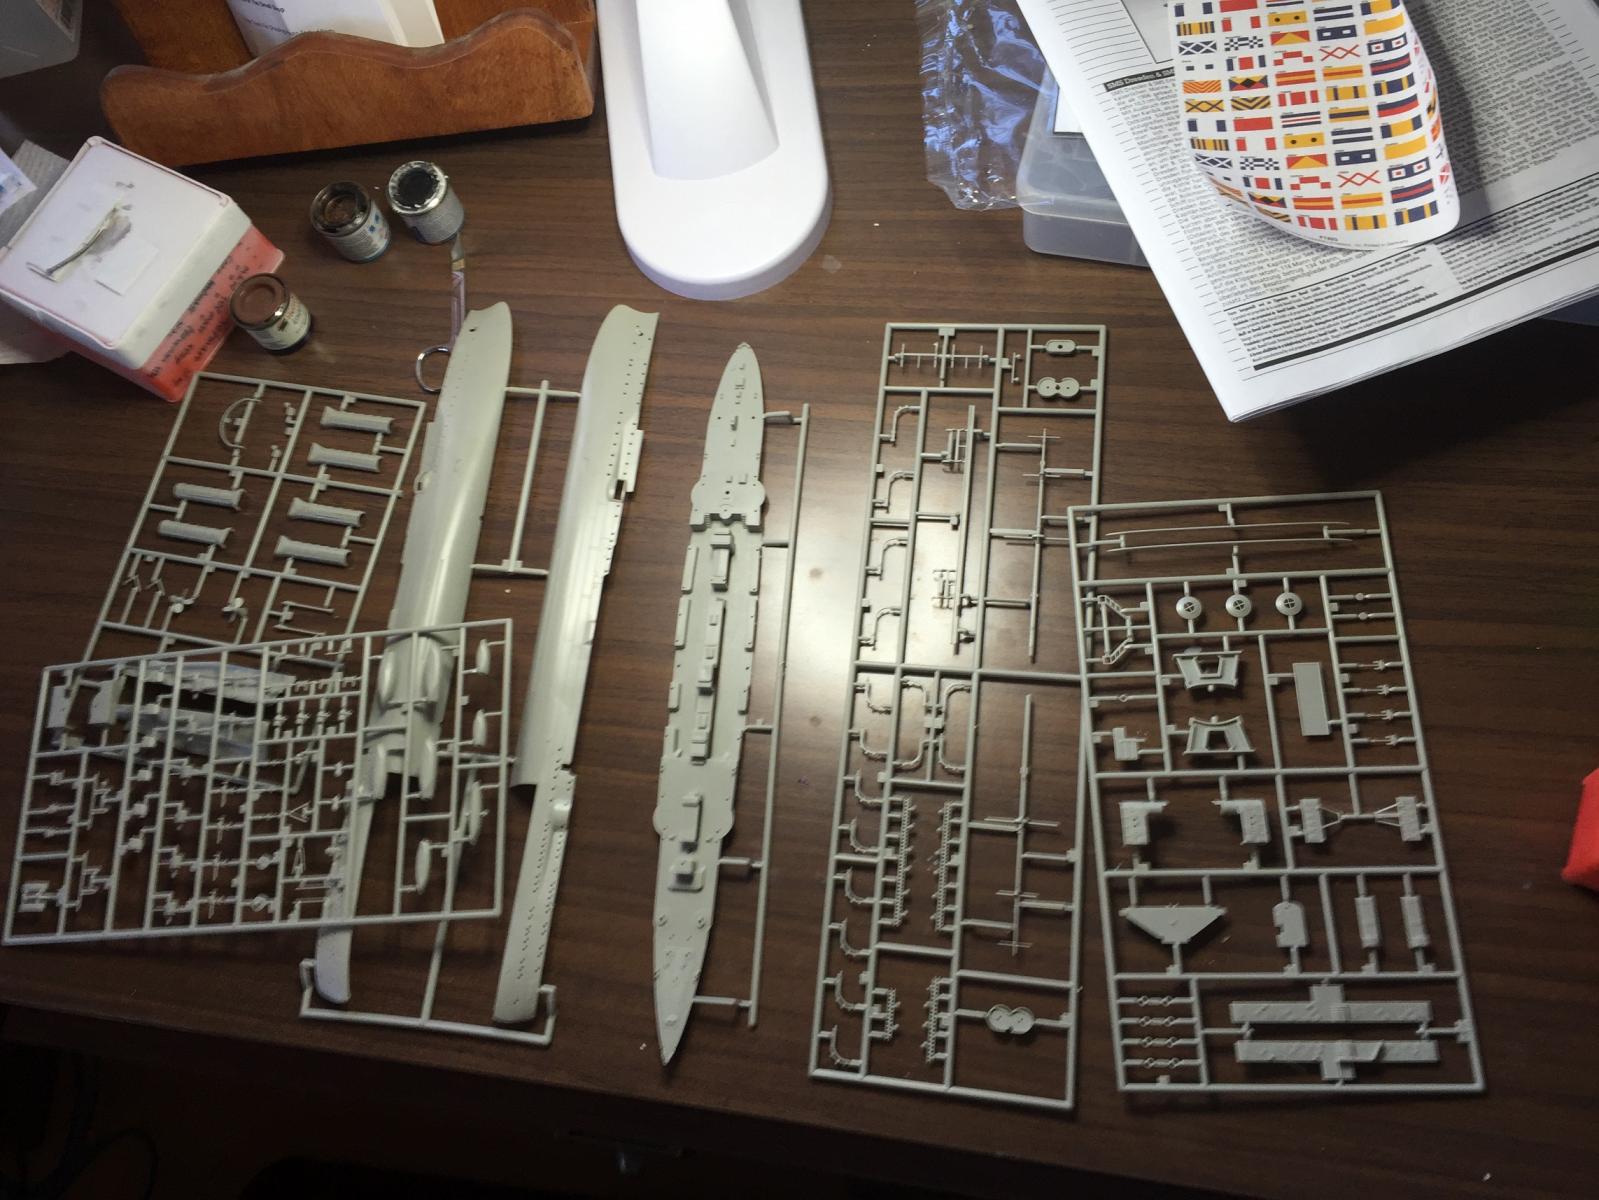
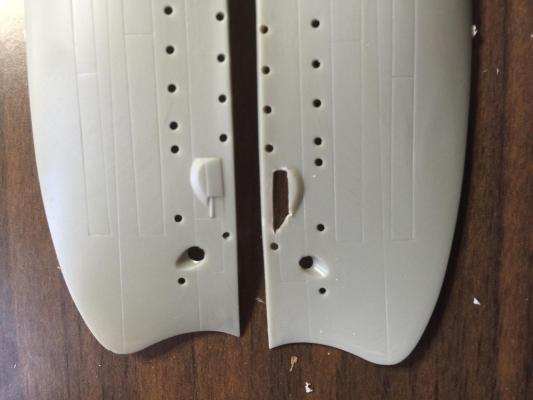
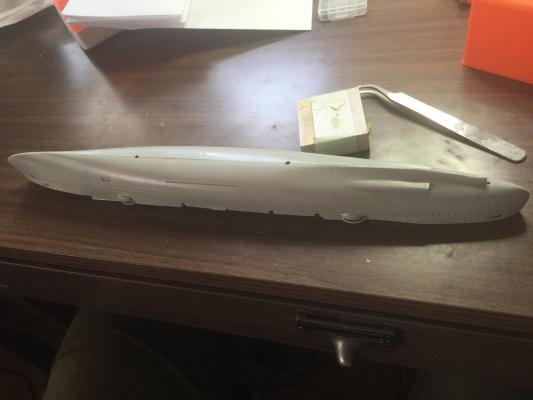
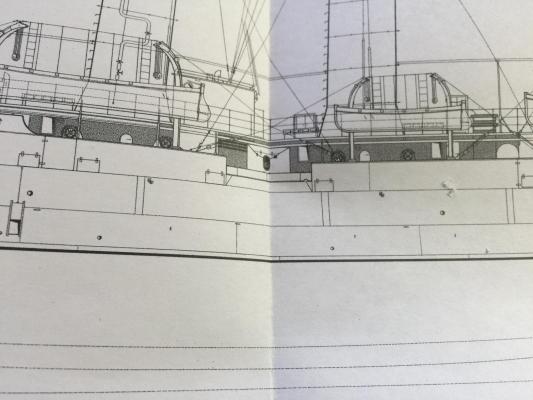
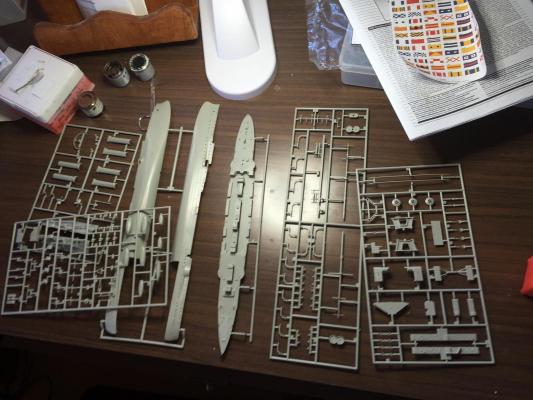
And it starts. there is an imprint of the hull of 1995, so a 20 year old mold. The plastic is very soft so cuts well but does not sand well. I have cut out all the first deck holes for the 10.5cm and 5cm guns as well as the little doors amidships. The upper deck 10.5cm gun amidship is show on the draughts as requires the hull to be reduced. The bow and stern guns have this ridiculous fake barrel attached to the hull which I have cut off and will place the guns internally.


-
There are some spectacular ones in 1/100 but nearly every 1/350 is straight from the box. Challenge set as I intend on learning from my mistakes in the Varyag. None of the fantastic builds by our contributors on this forum are open to the Internet (which I like) as we have some true artists here. In the plastic realm, Dafi is a master.
-
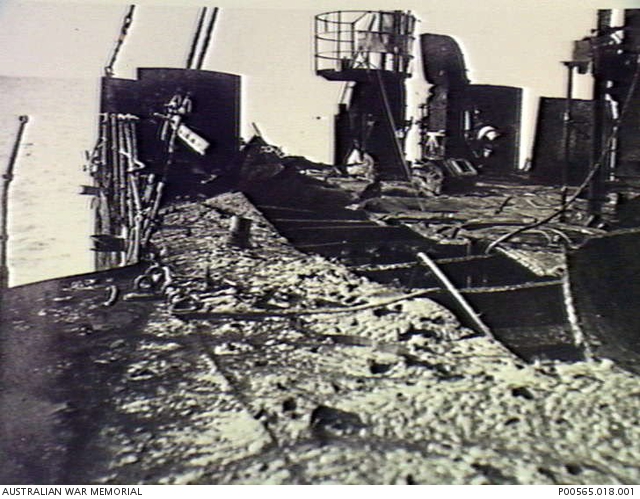
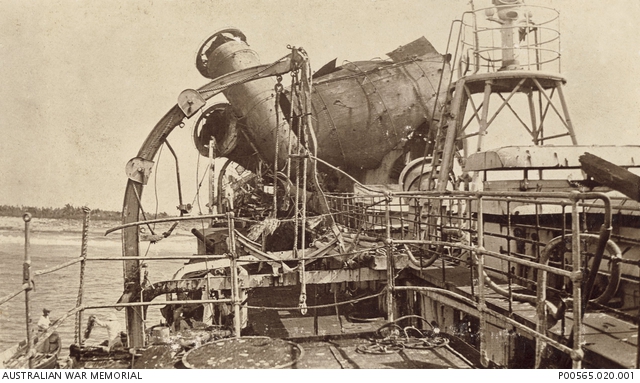
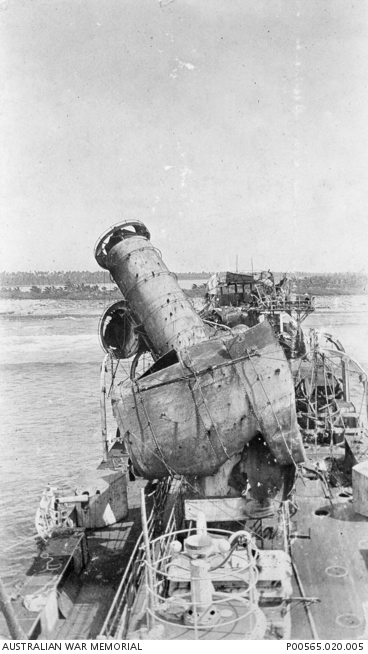
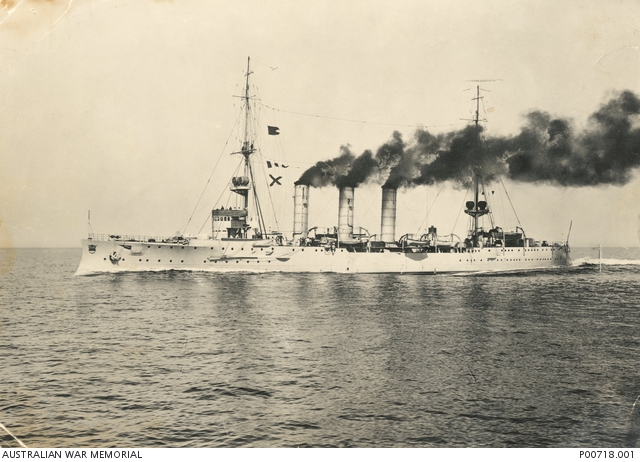
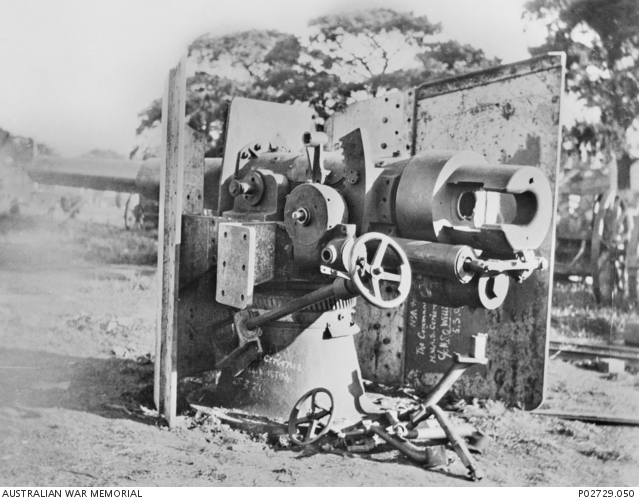
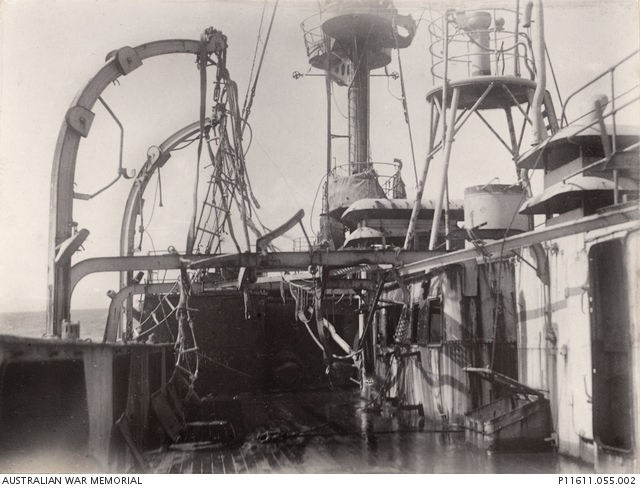
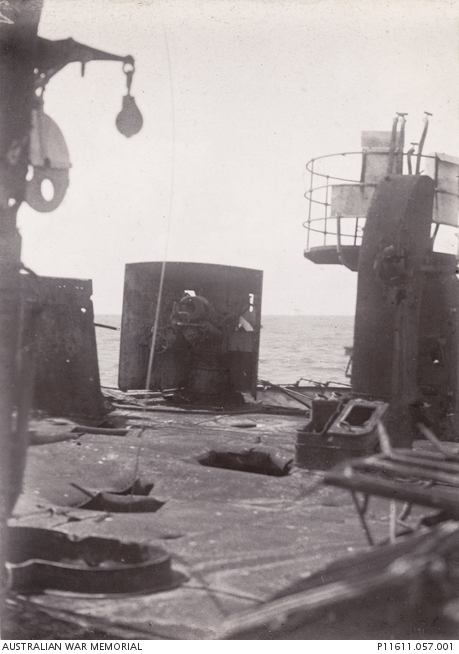
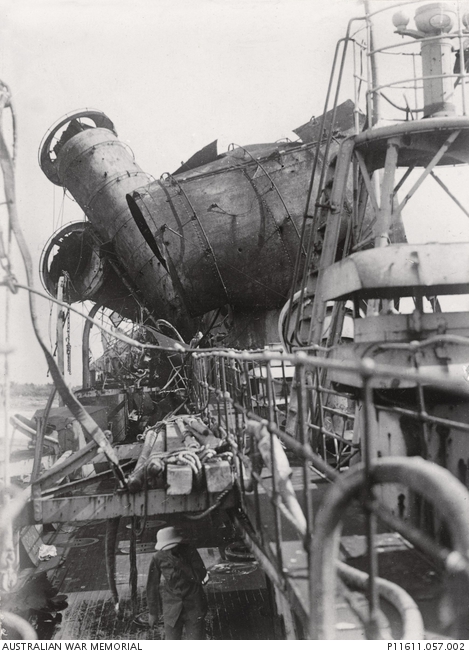
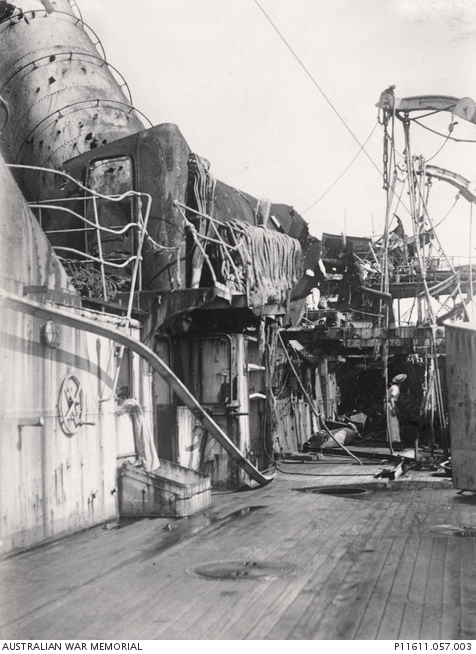
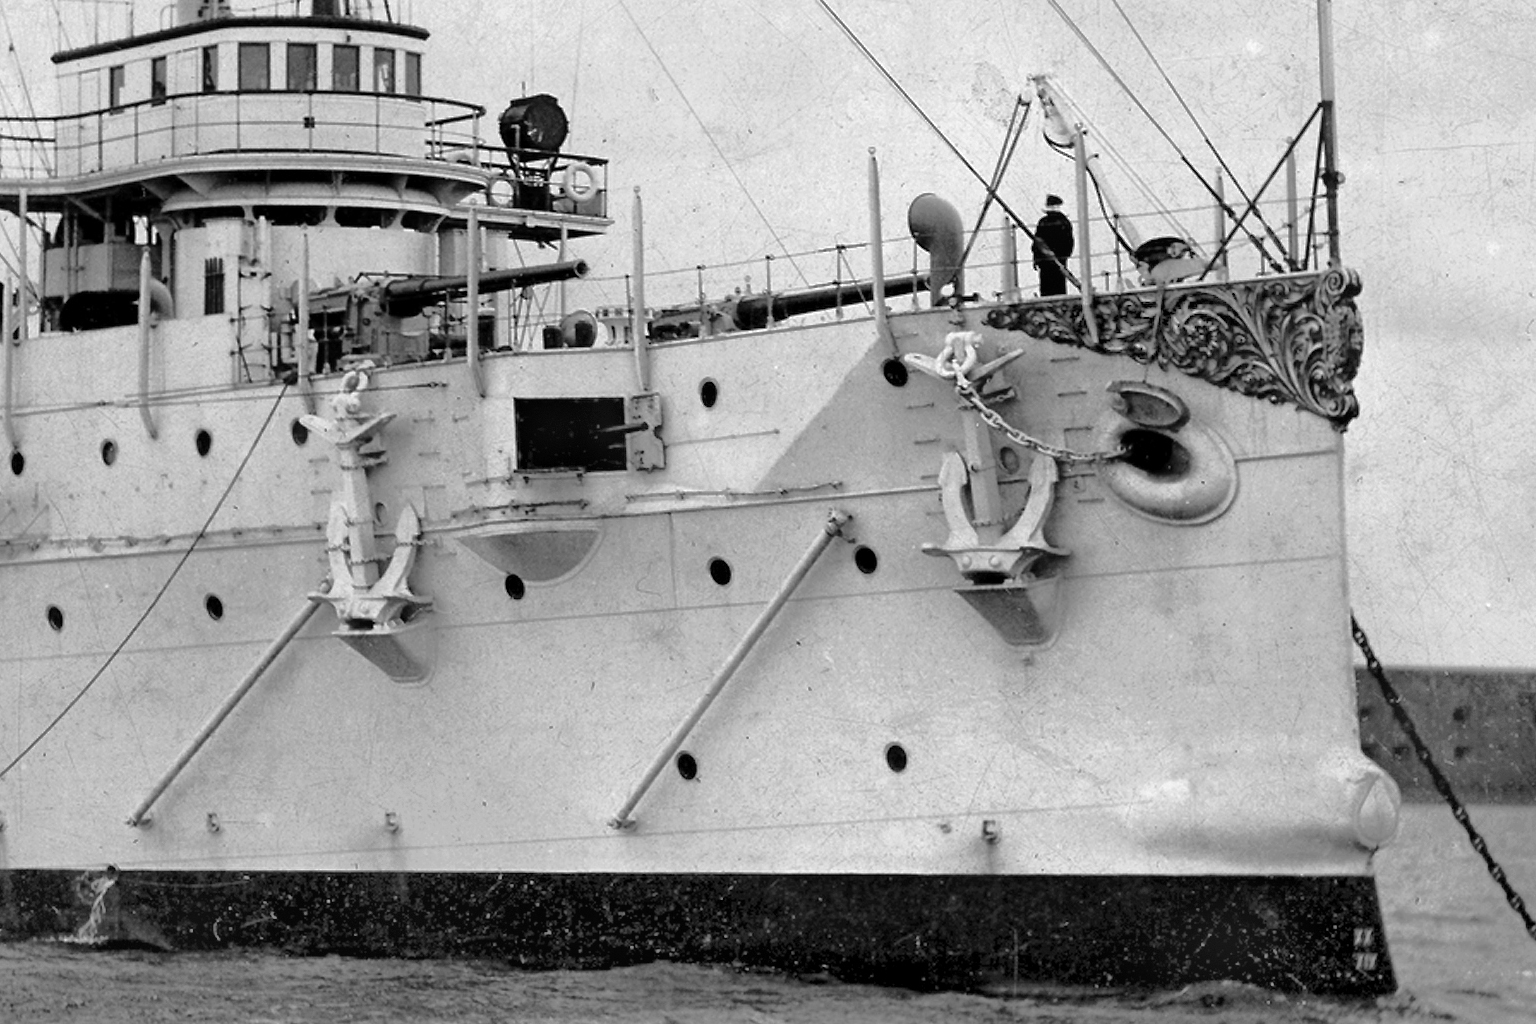
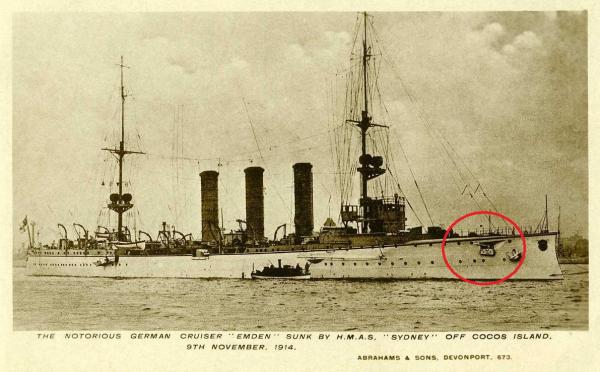
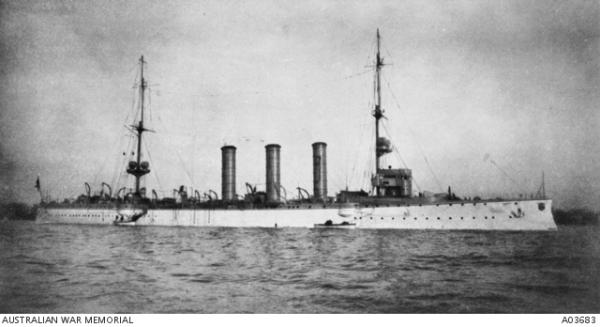
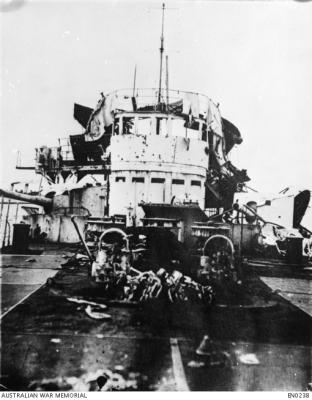
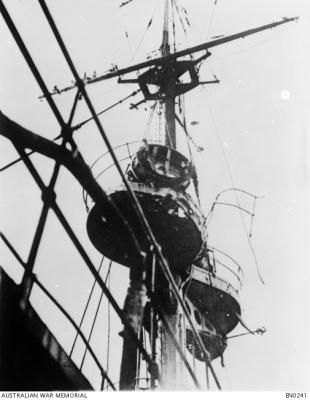
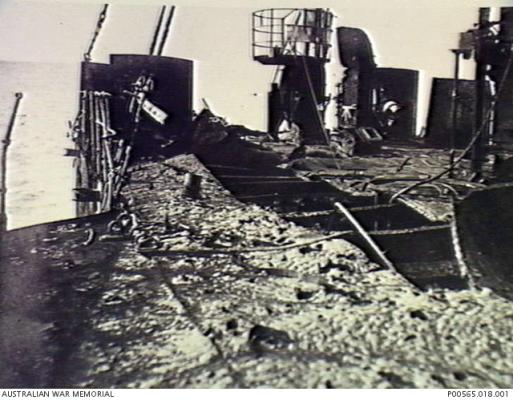
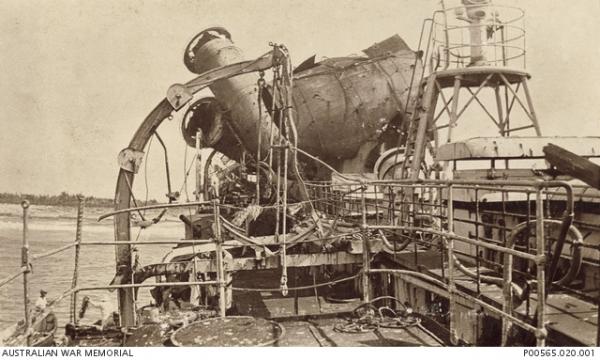
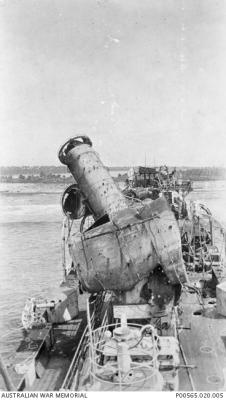
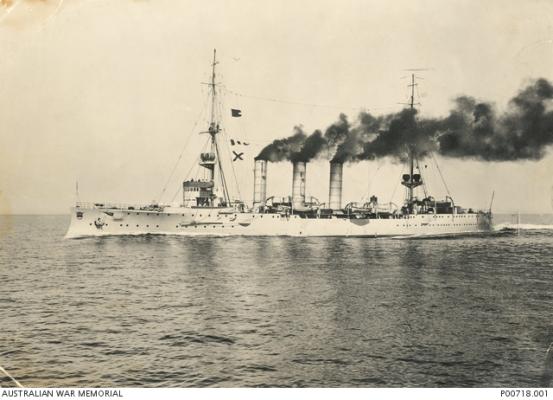
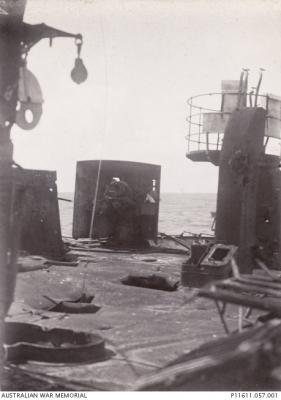
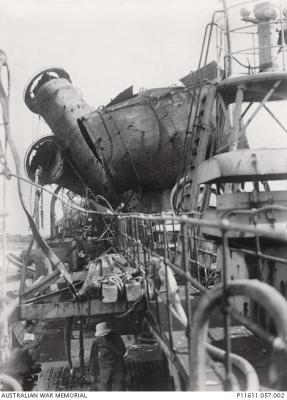
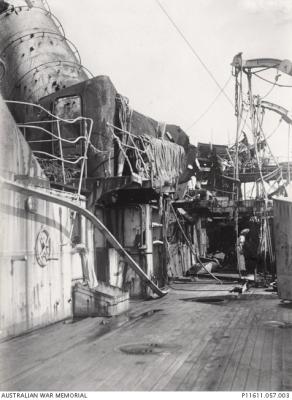
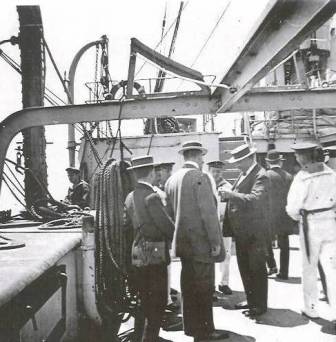
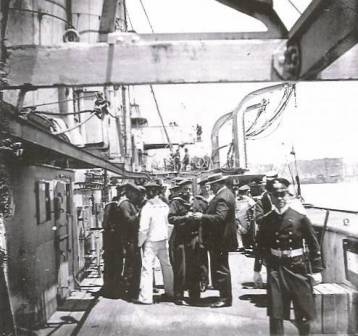
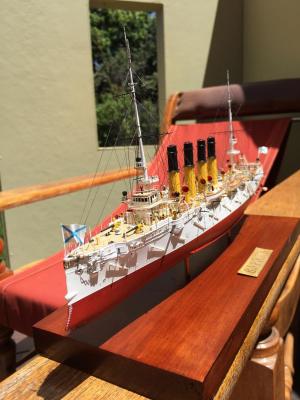
Now some of the original Photos, many are from the Australian War Memorial where they have one of the 10.5cm guns on display.


- 236 replies
-
- 10
-
-
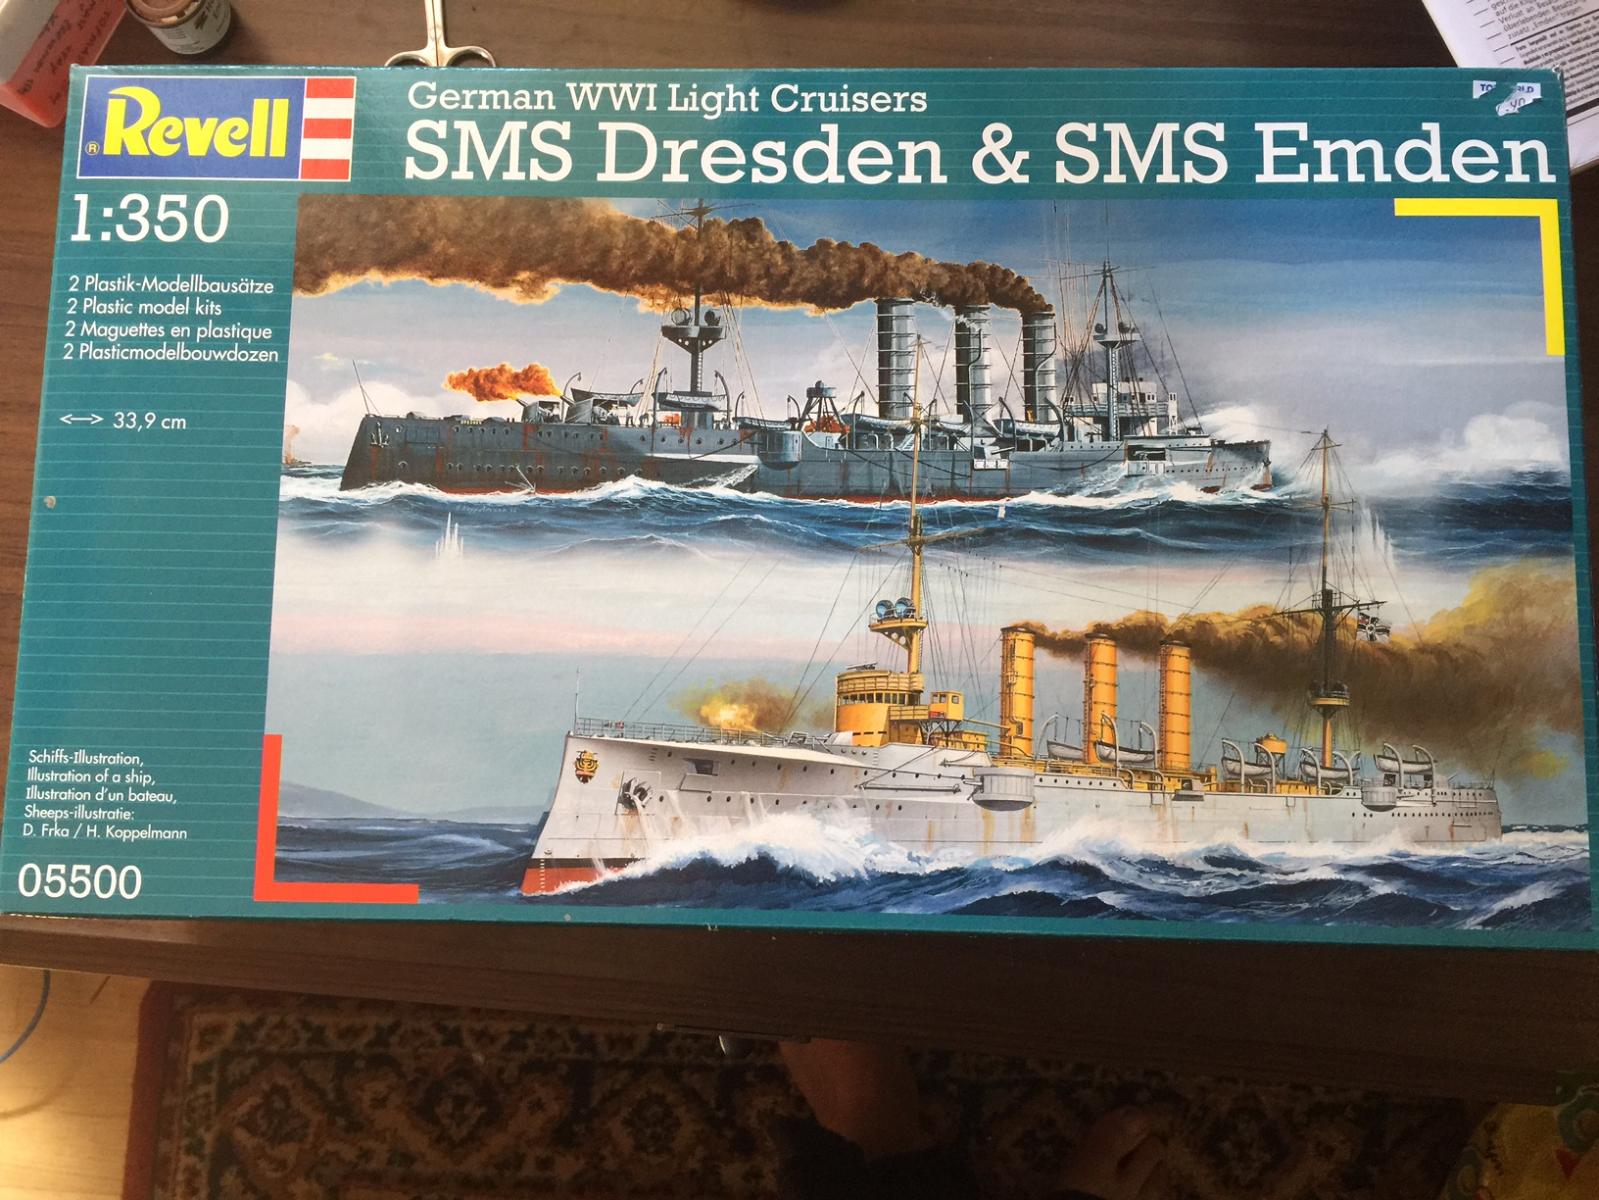
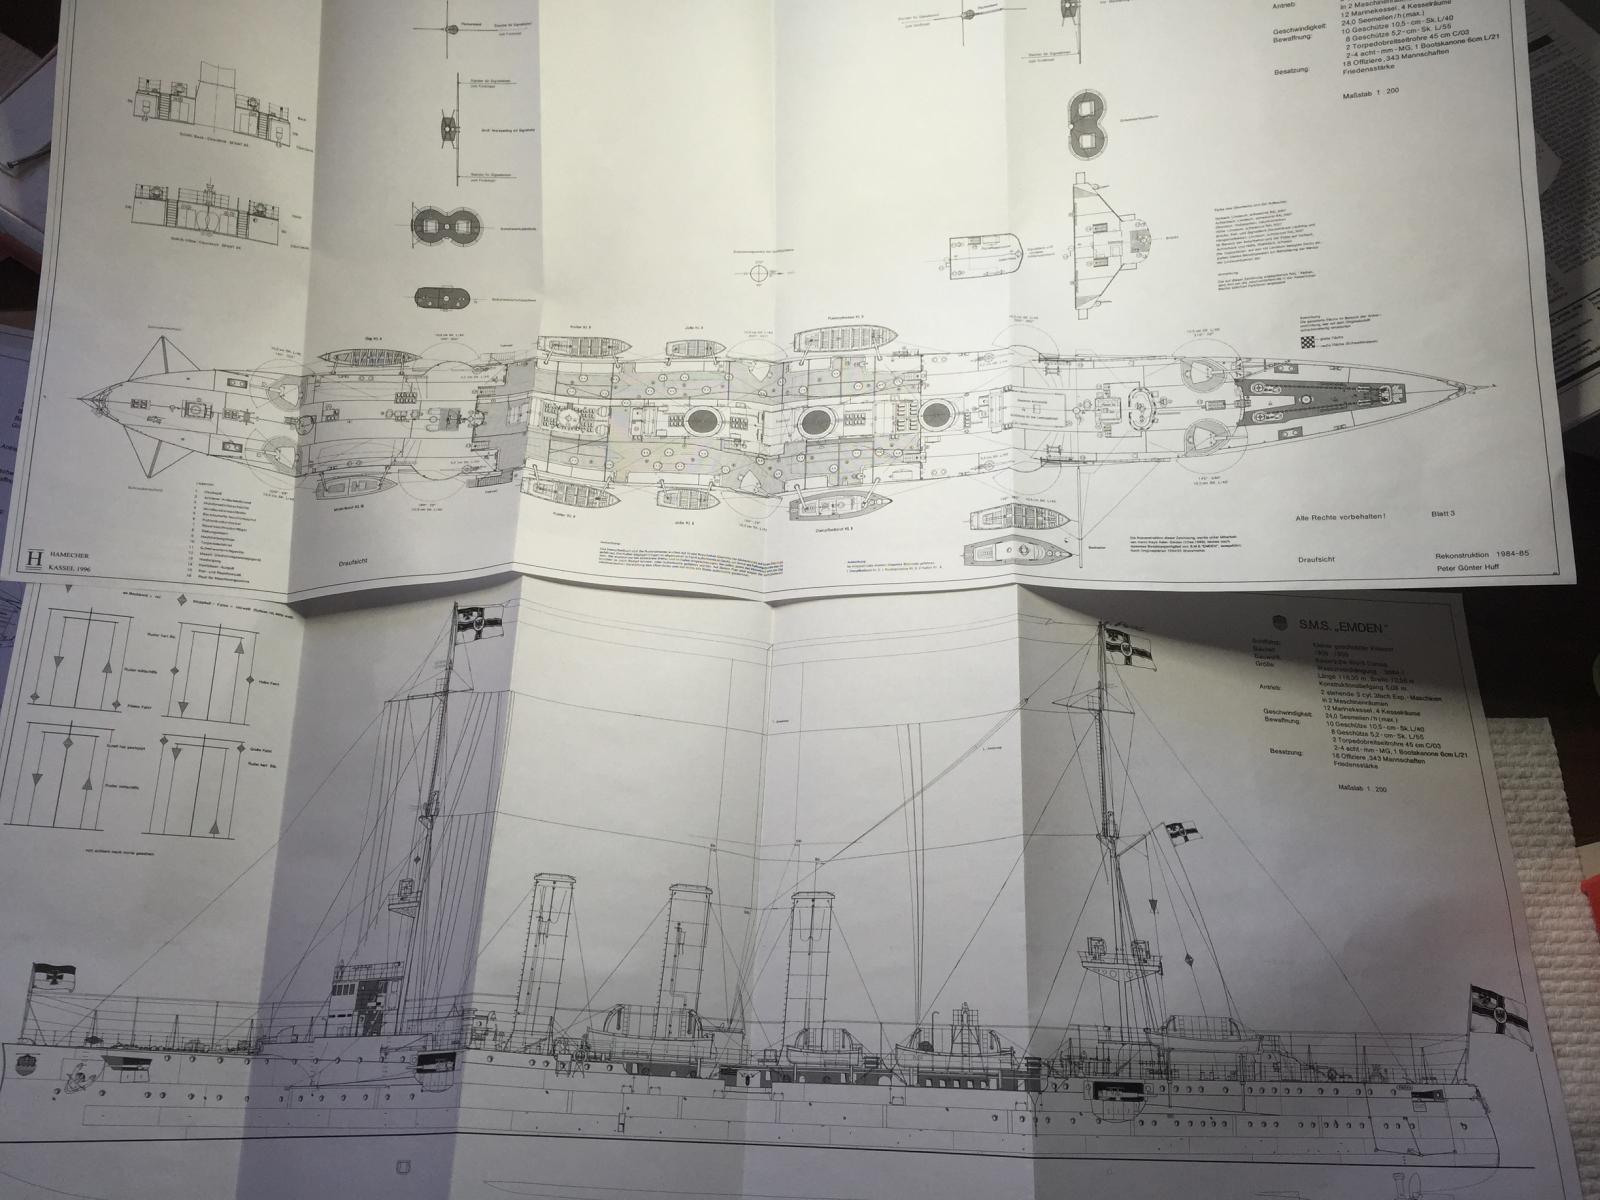
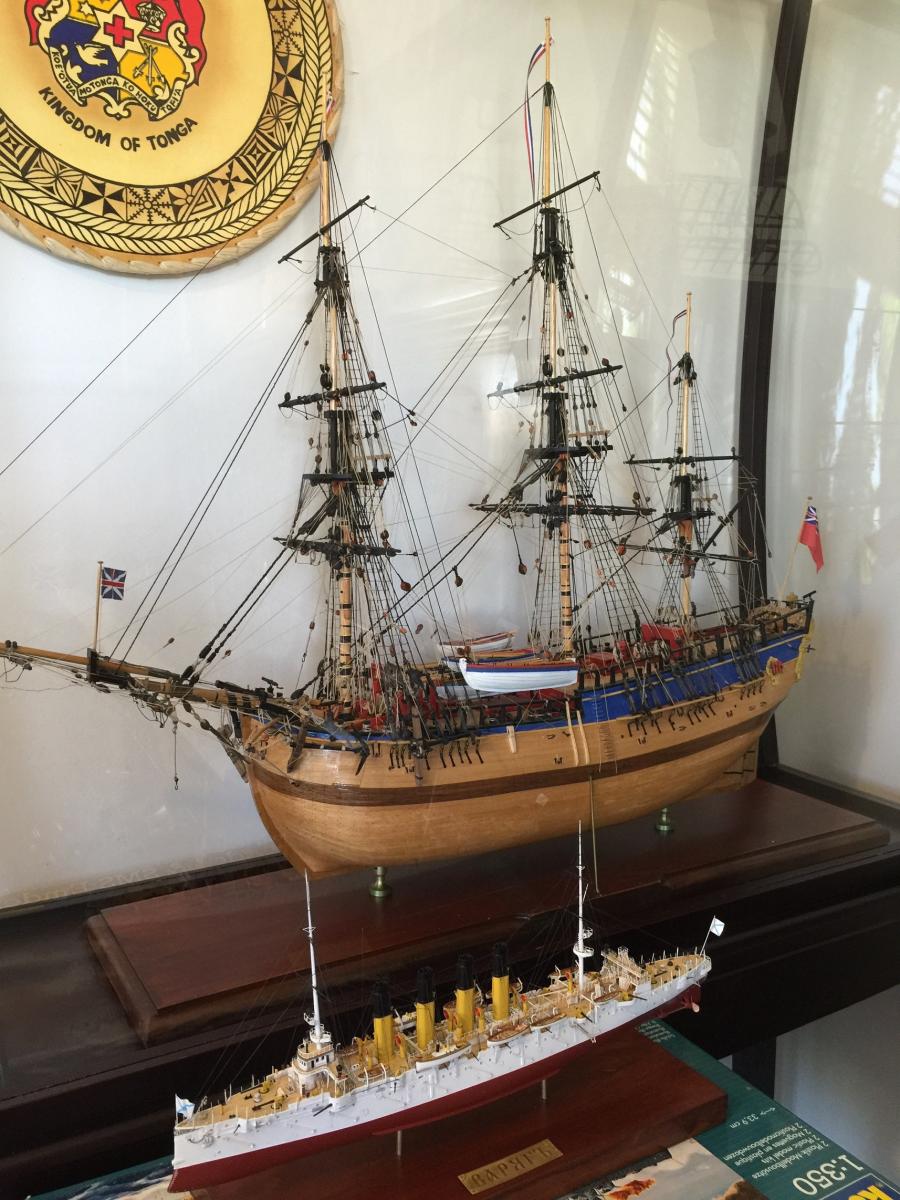
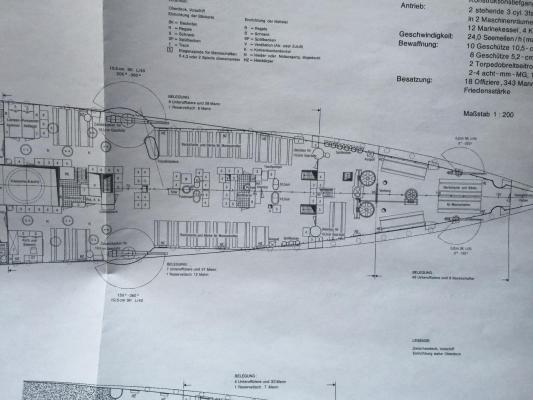
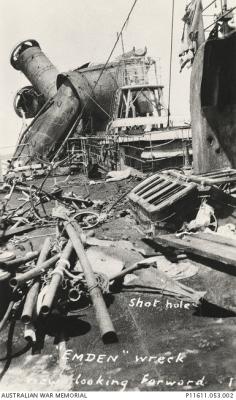
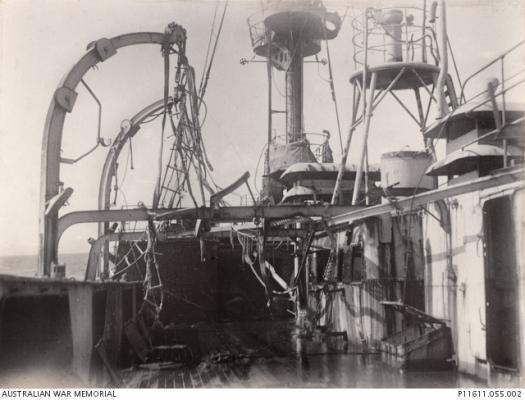
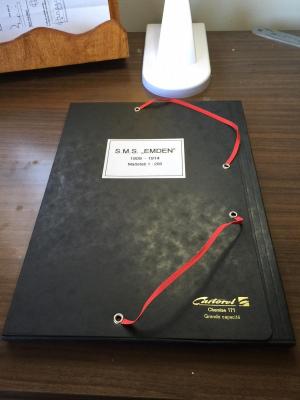
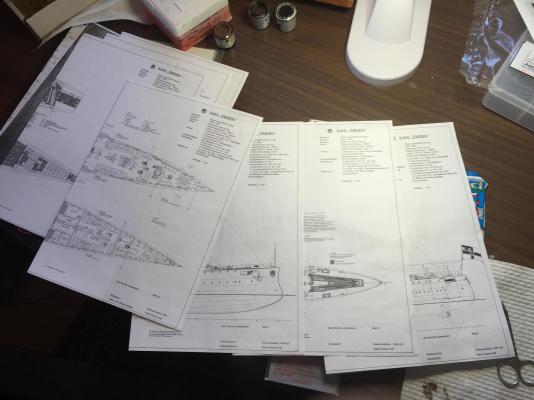
My third build will be the SMS Emden. It has a history for us Aussies I suppose. I won't go into the history as there is the whole of the internet for that. Revell brought out a twin kit recently which will be good if I stuff up something, as I don't intend on building both it and the Dresden. There are a lot of open source builds on the net for this kit, most of which seem to be strait out of the box. I managed to purchase the last set of draughts in 1/200 on the internet for Peter Huff's 1995 publication. I had a look at the Kagero book and yet again, their research leaves a bit to be desired, as the even the photos don't match. The kit will need a LOT of bashing. Thus more internet shopping for bits and pieces. Heaps of work, but that's the joy of it. I got the Eduard Emden photo etch set for a start. A lot of the sprues look like they have been put in an oven as they just look blurry with very little detail. There will be very little of the original kit used but the hull is nice. I'm thinking six or more months, given my Varyag has a lot more detail but also a lot more commercially available extras. This era is not well represented for after market.


- 236 replies
-
- 10
-
-
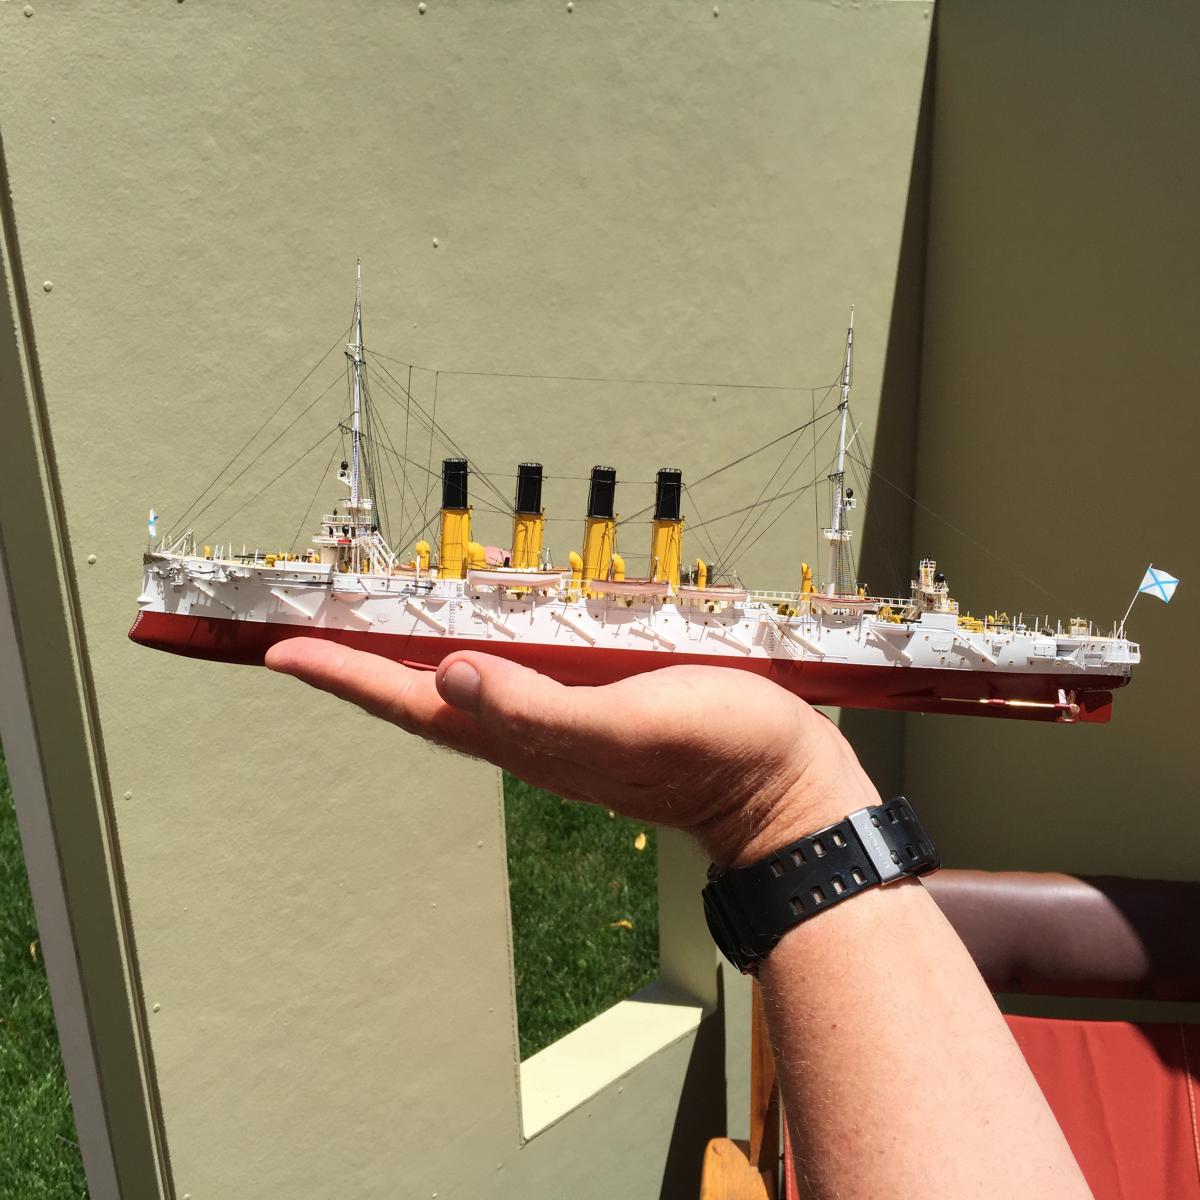
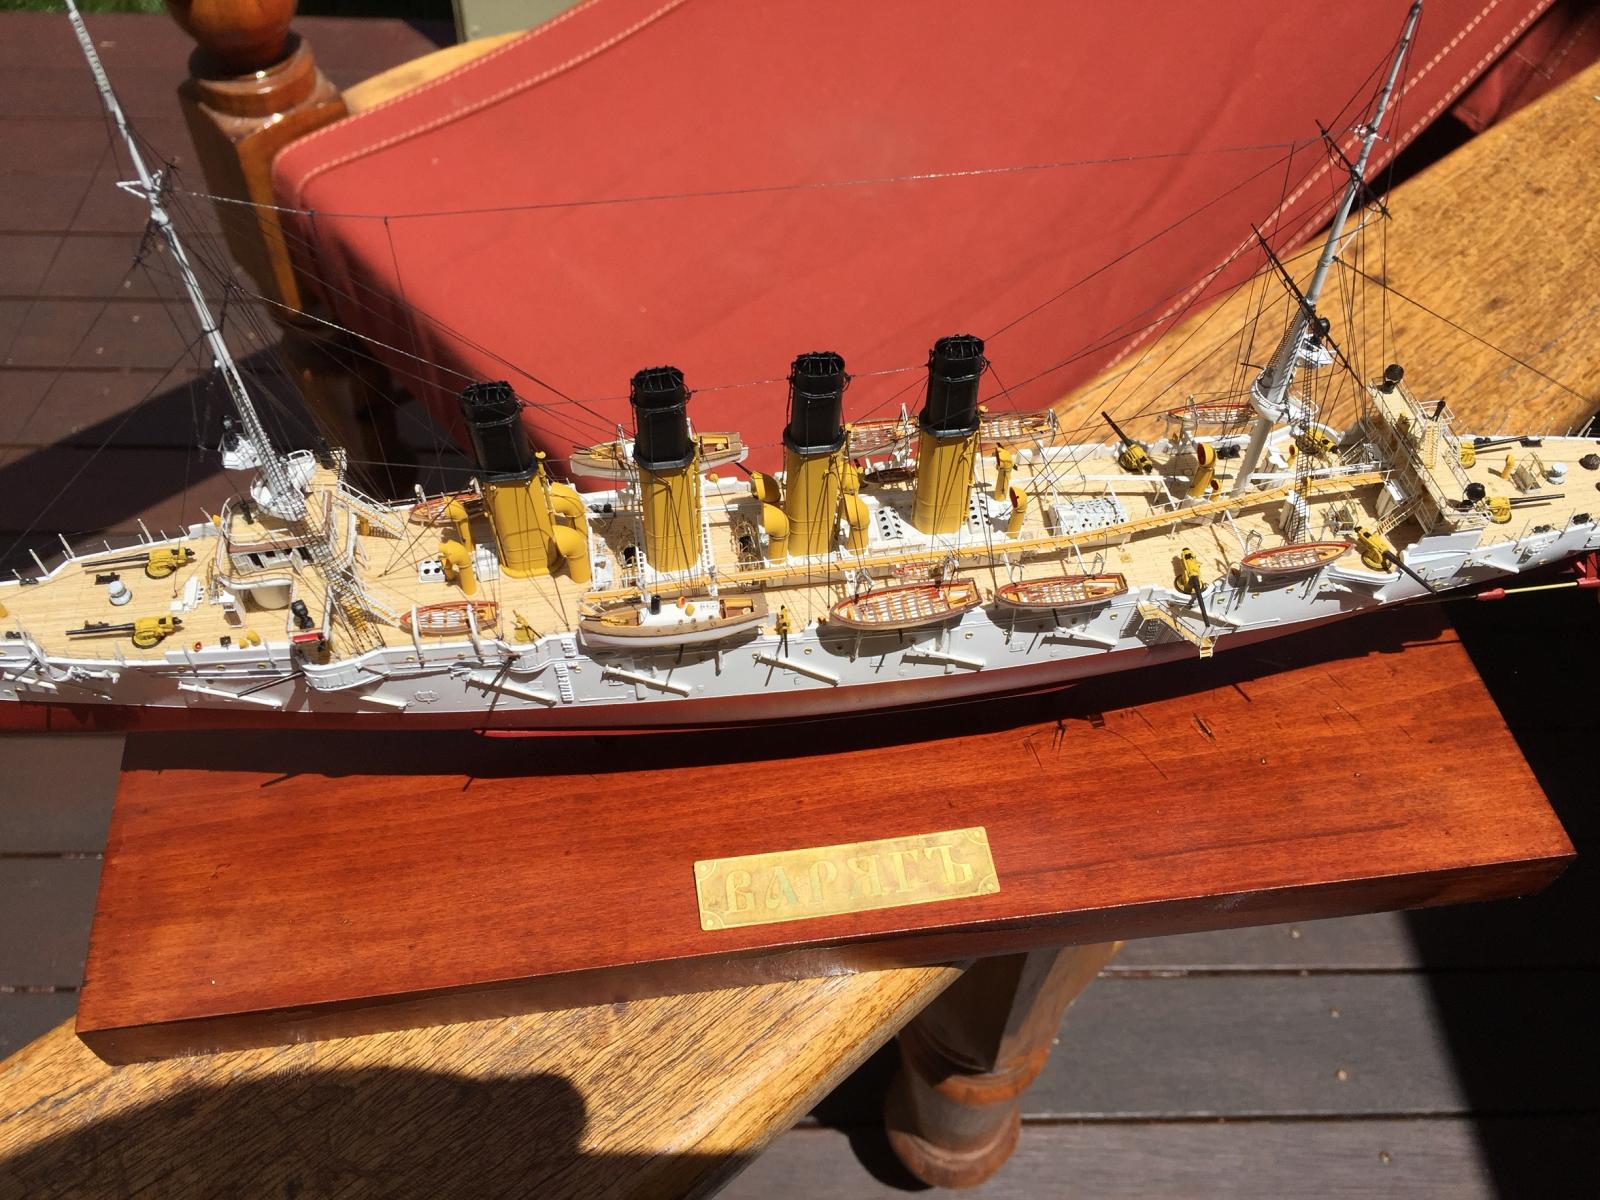
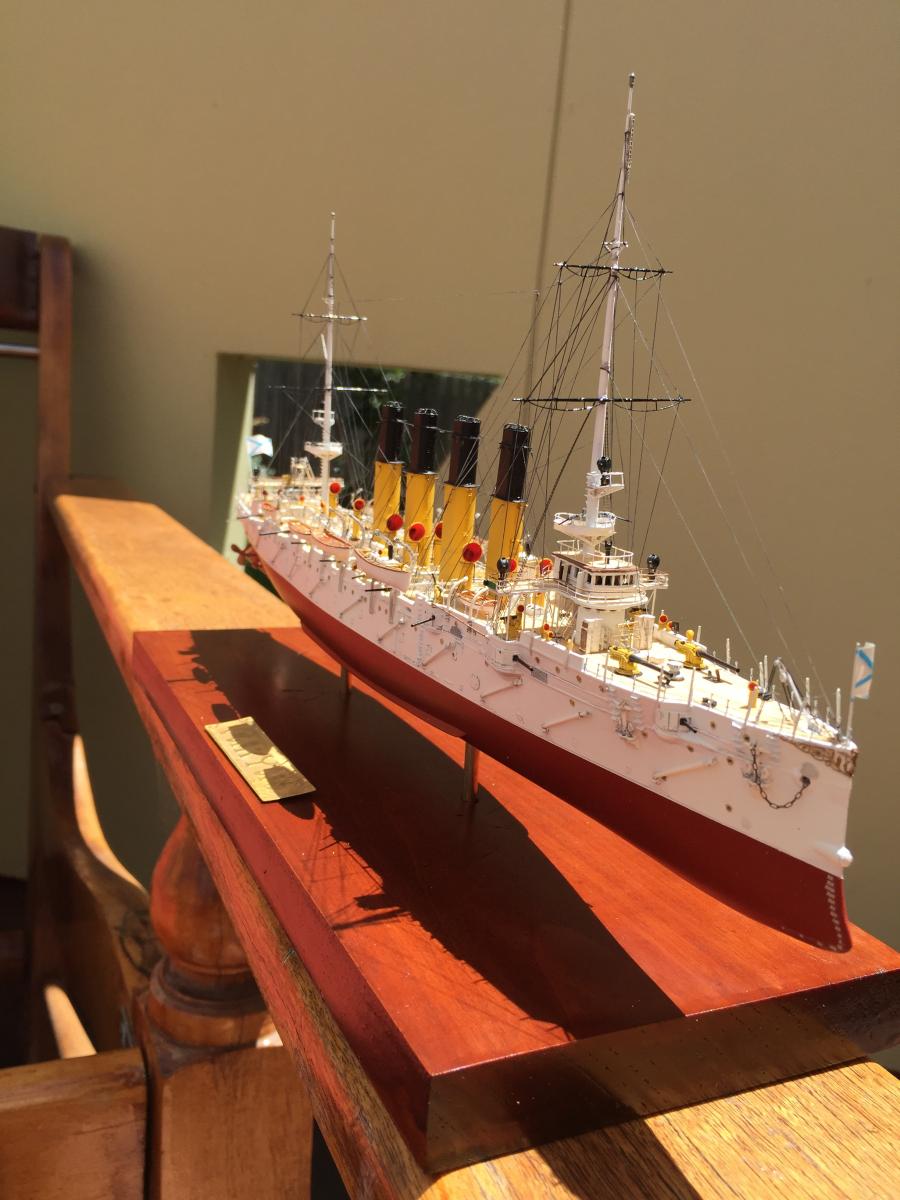
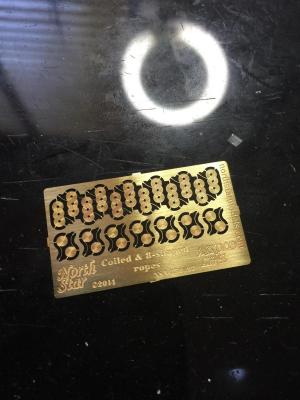
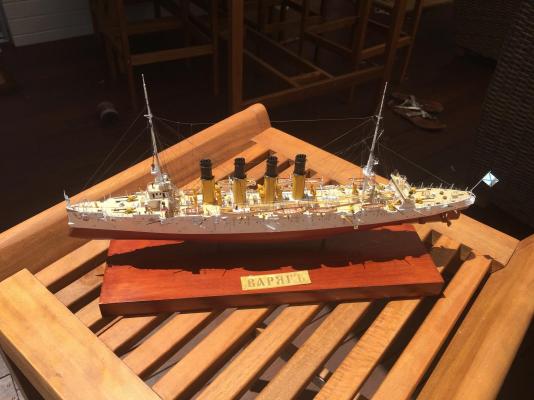
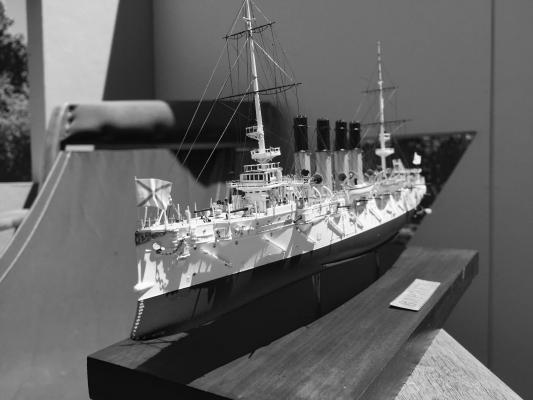
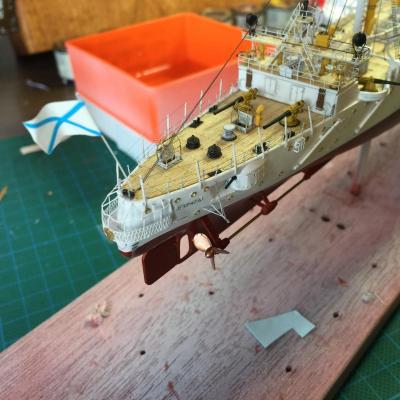
Last post on this build. I finally received the rope coils from North Start Models in the Ukraine. I only used them for the braces on the davits, but they are a nice bit of kit for that final bit of icing on the cake.

- 174 replies
-
- 12
-
-
Rename them in numerical order
-
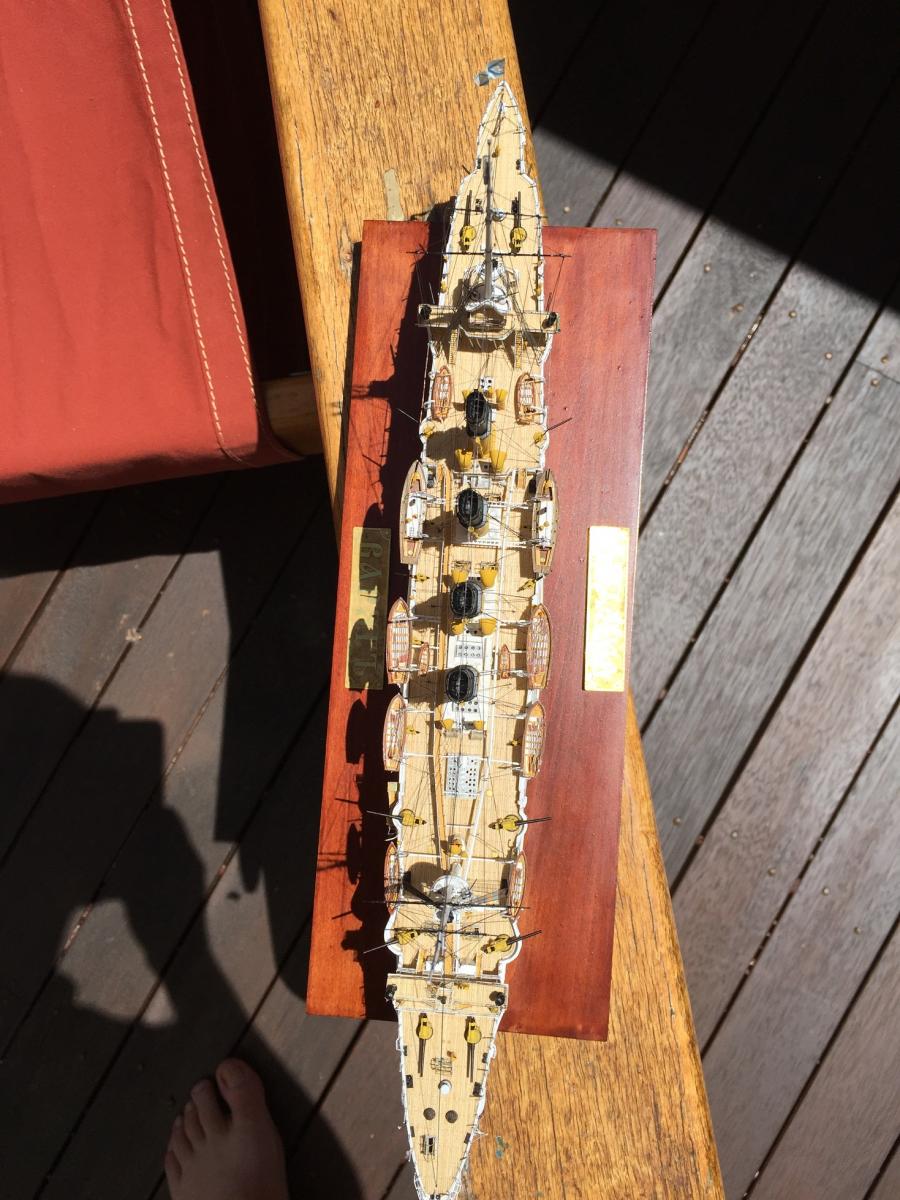
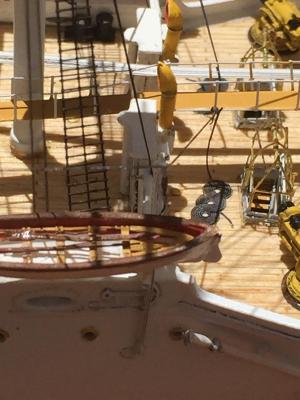
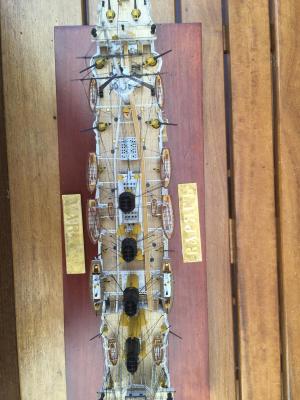
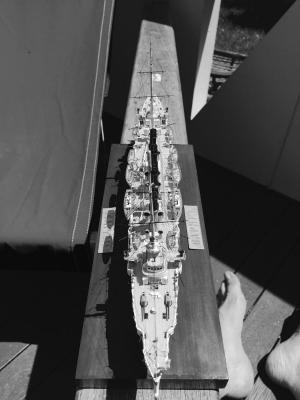
OK, third last post for this build: I affixed the ships boats, I got to the stage where I had to draw a line, the kit does not include cradles (which it really should) and fabricating them at this scale is quite hard and I think I'd probably just make a mess of it. I have made a temporary base where I'll park the old girl for a while, I only have to add the rope coils when they arrive. It's a really nice and very different kit, the Artwox resin is nice, but it is missing many deck fittings and I think the creators went of the Kagareo book a little too much for accuracy when the plans are available. I would like to see some of the resin made available commercially, such as the ships boats and the fairleads. No sea steps, just the original Zvesda bumps on the hull, no mast ladders, no stand for the model at all. The guns have all been replaced, the kit ones are just too inaccurate. The masts are wrong, the instructions are atrocious, some of thr alignments are not explained and you don't find out till way too late, and some oif the details left on teh fret I'm still scratching my head over. Whilst I'm a mutt at the photo etch thing, the frets are too thin. I think it they were as thick as the Eduard ones it would be a step ahead,as the detail is very nice.


- 174 replies
-
- 14
-
-
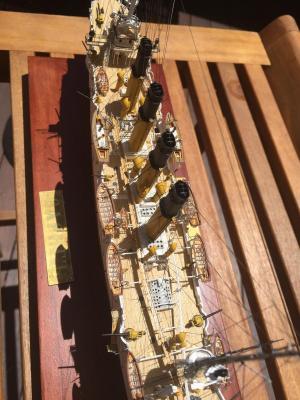
Thank you for the likes and comments, I don't think I'll ever show her or my Endevour though, the shipping to the states would be a killer.
-
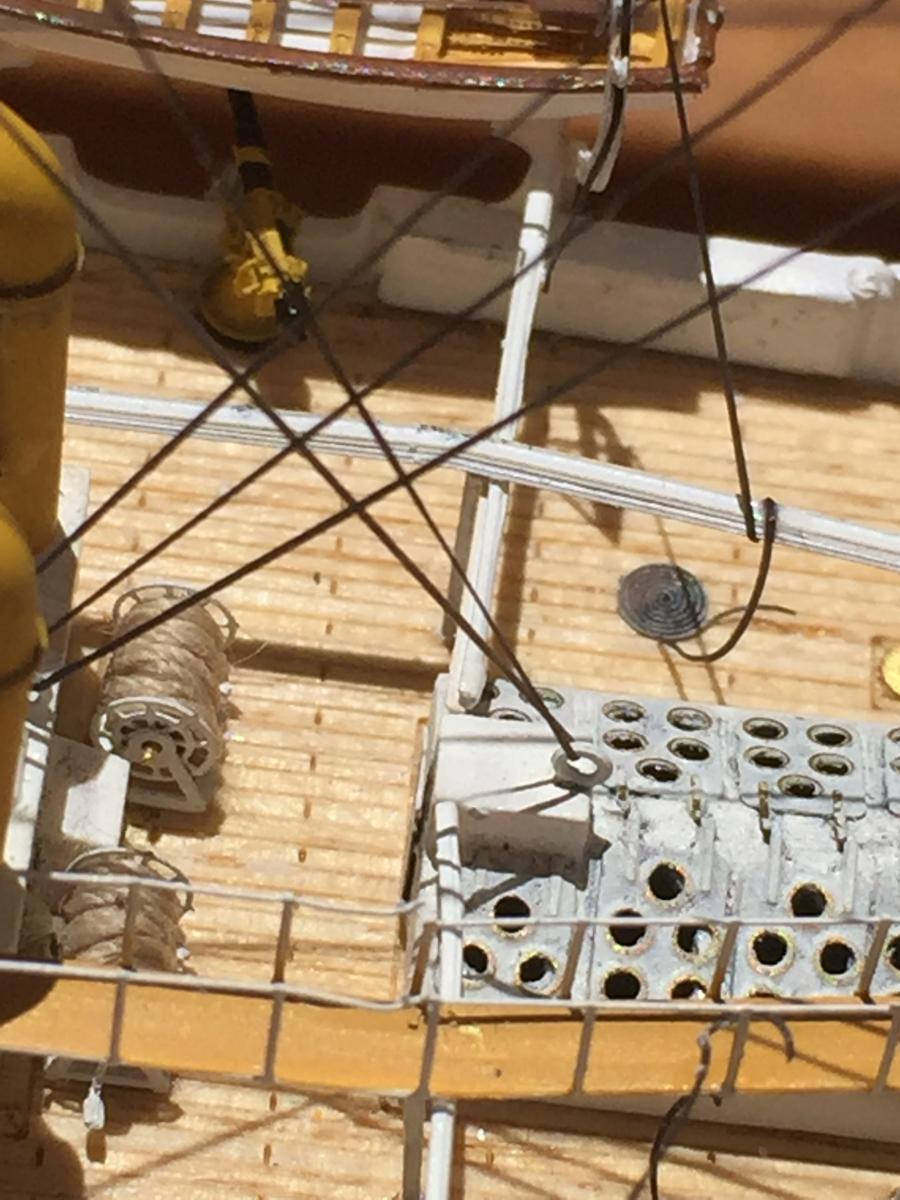
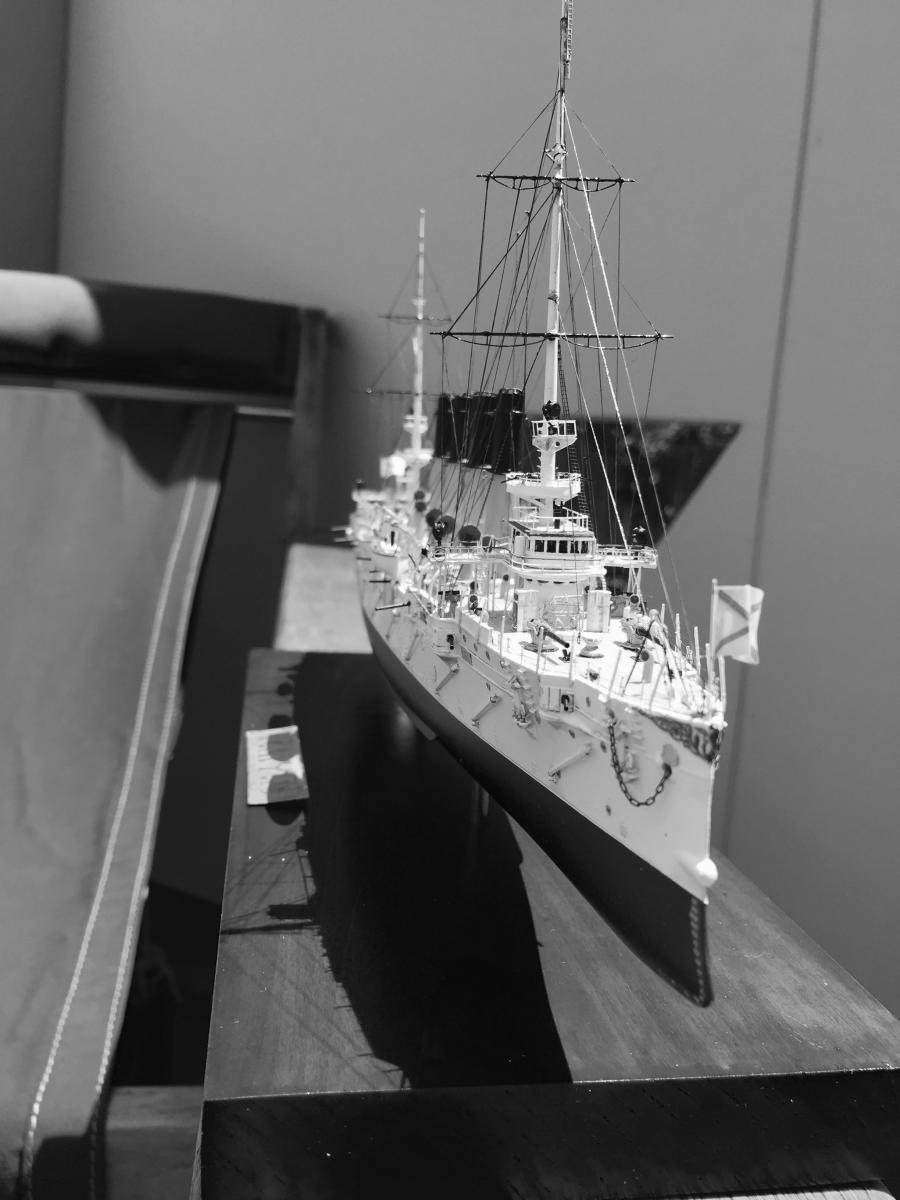
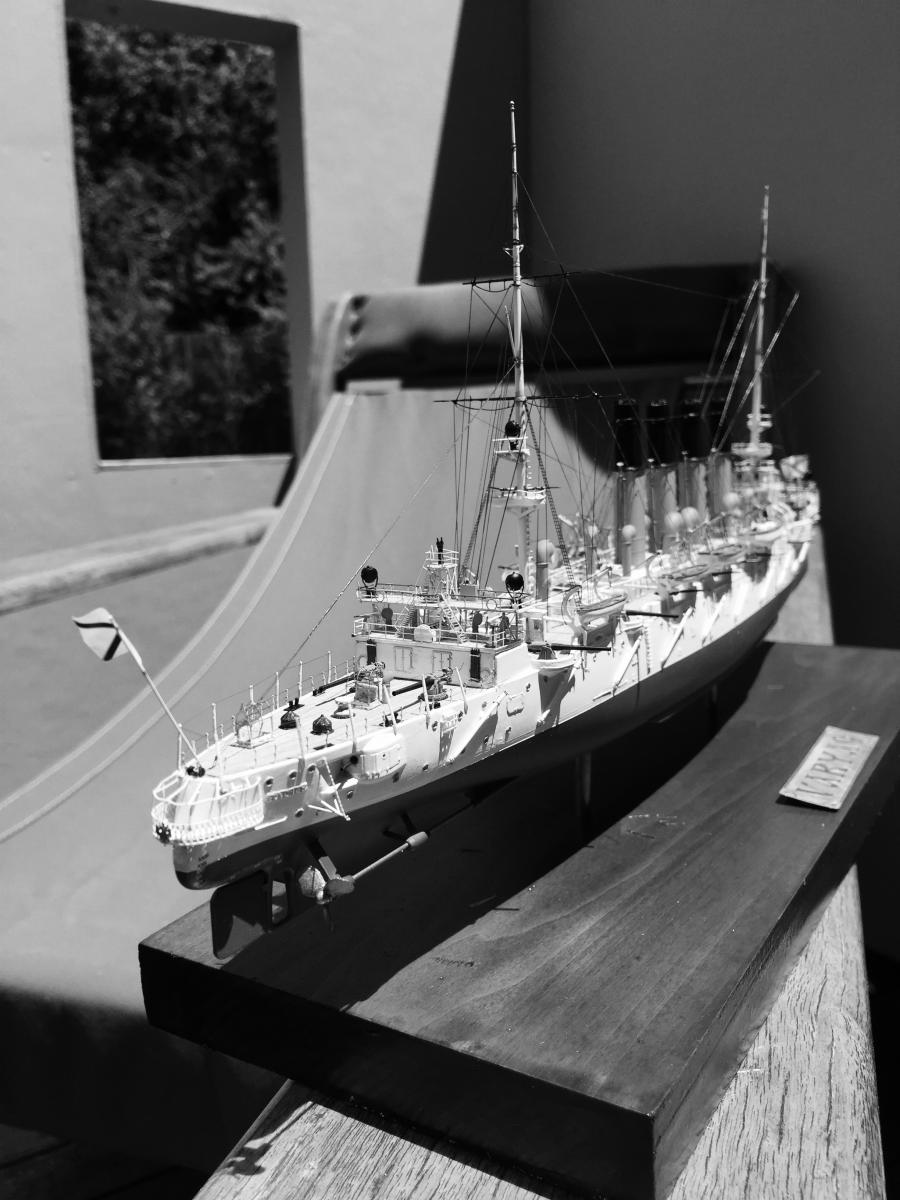
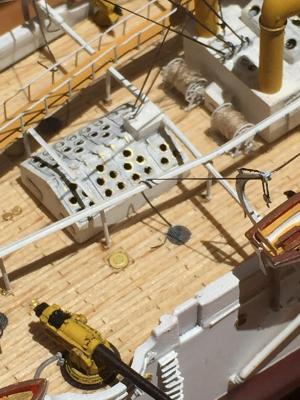
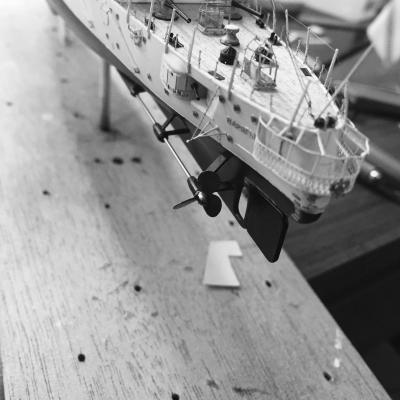
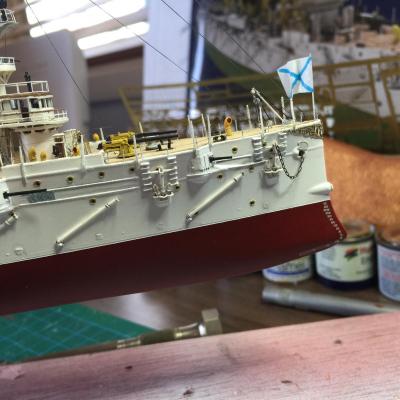
Getting there, the anchors are attached, I just needed some micro chain to secure them, there is no reference to it in the instructions. All the guns are now attached as are the flagstaffs and one set of stairs. I just have to attach the lifeboats and fabricate some braces for them, and I am awaiting some photo etch rope coils from the Ukraine. I added the shafts and screws, and propeller guards which are by no way known referenced in the kit!


- 174 replies
-
- 12
-
-
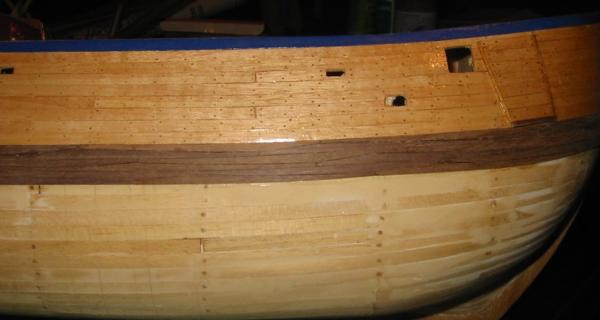
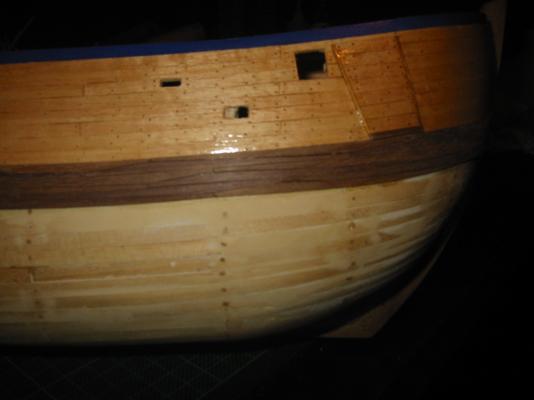
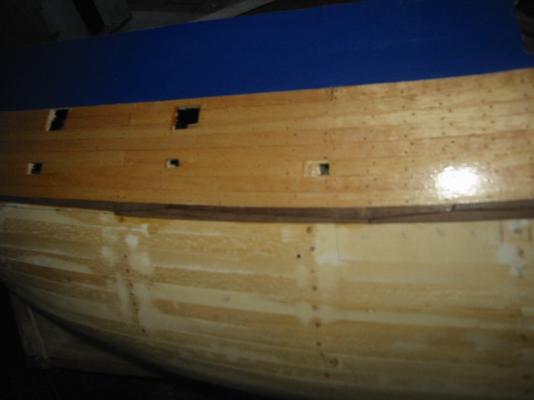
If you can be bothered, sand the Wales flat, then use some1mm hardwood. Just do it piece by piece, cutting each one to exactly the same size, bending where required to follow the hull. Drill your treenails in after putting a layer of varnish so they don't split. You need to do 3 planking lines. Any gaps use a dark filler. I know Janos doesn't use treenails just a dark filler. It's a Couple of days work. Not the best shots but you can get the idea.
-
I attempted it on mine, it's not that hard, just a lot of work. A lof the photos went with MSW v1 but I have back ups, but use a good hardwood.