
HOLIDAY DONATION DRIVE - SUPPORT MSW - DO YOUR PART TO KEEP THIS GREAT FORUM GOING! (Only 13 donations so far - C'mon guys!)
×


Steve 12345
-
Posts
438 -
Joined
-
Last visited
Content Type
Profiles
Forums
Gallery
Events
Everything posted by Steve 12345
-
 thanks brian it does look like that from the photos regarding the engine bay im thinking I may not build the engine as im gonna have the ship in a case when completed and its not like I would remove it from case just to show engine I am really enjoying this build and with the amount of parts I will have left over due to scratch building all the hardwood parts I might scratch build a whole new ship the painted version and display both together there is a mare in the gallery from another member that painted one side and stained the other which I thought looked really cool
 -
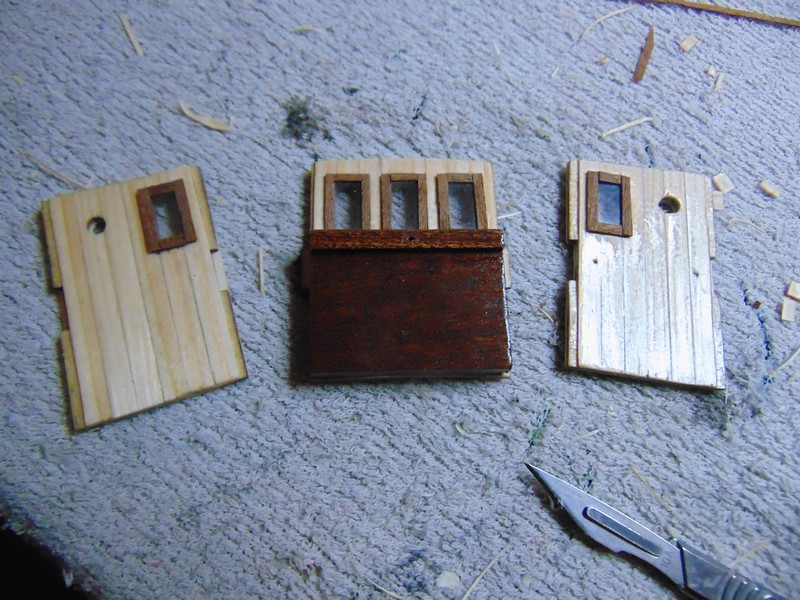
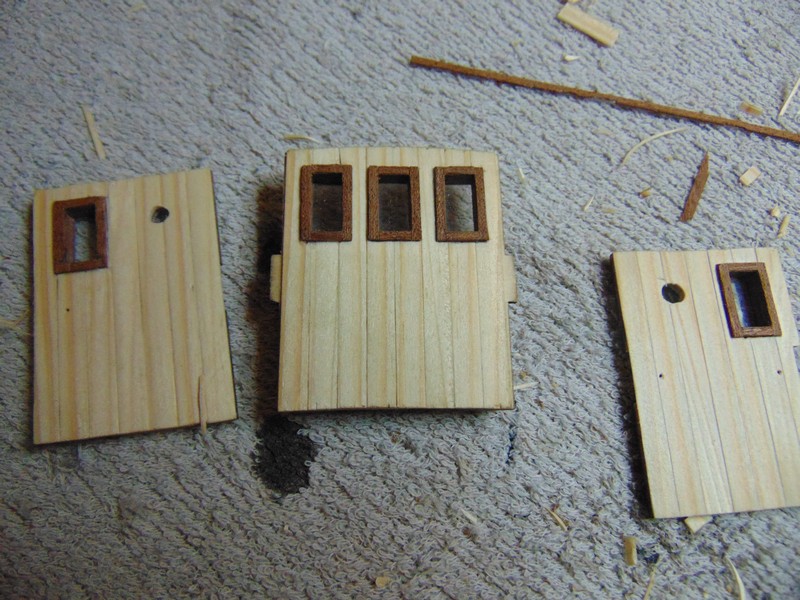
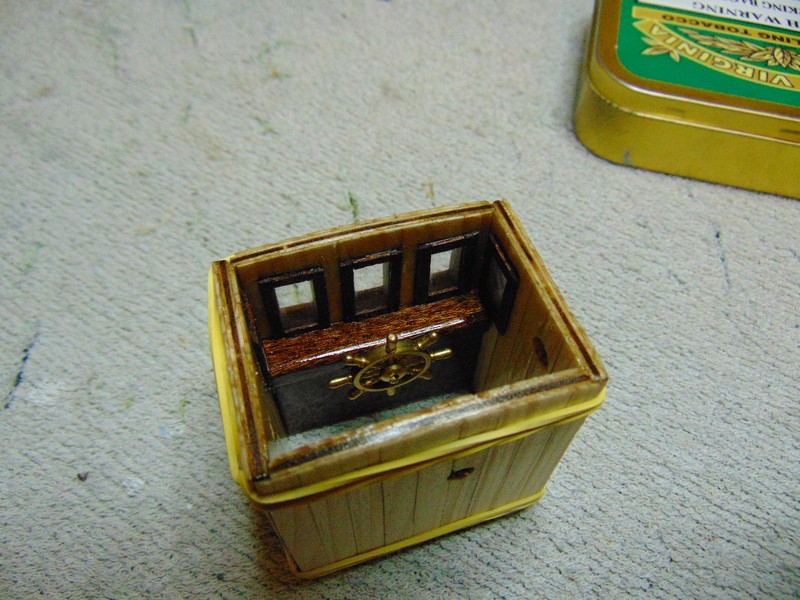
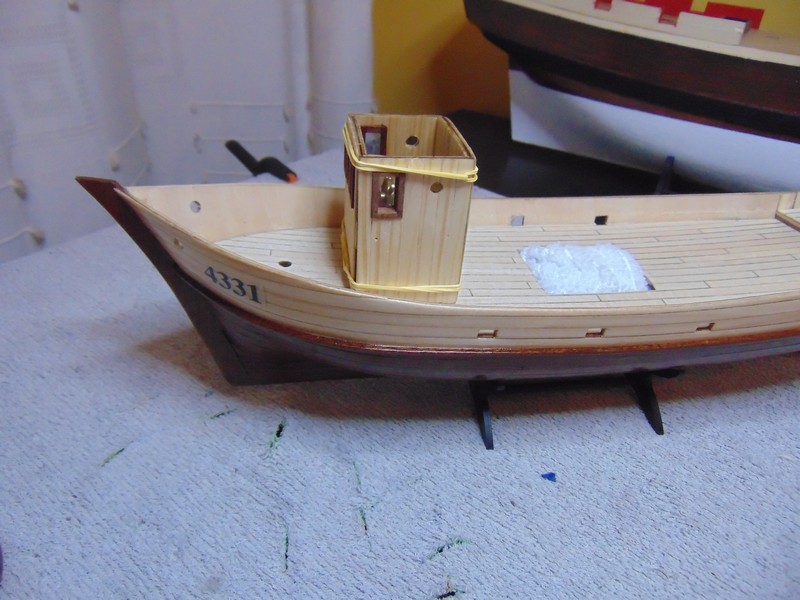
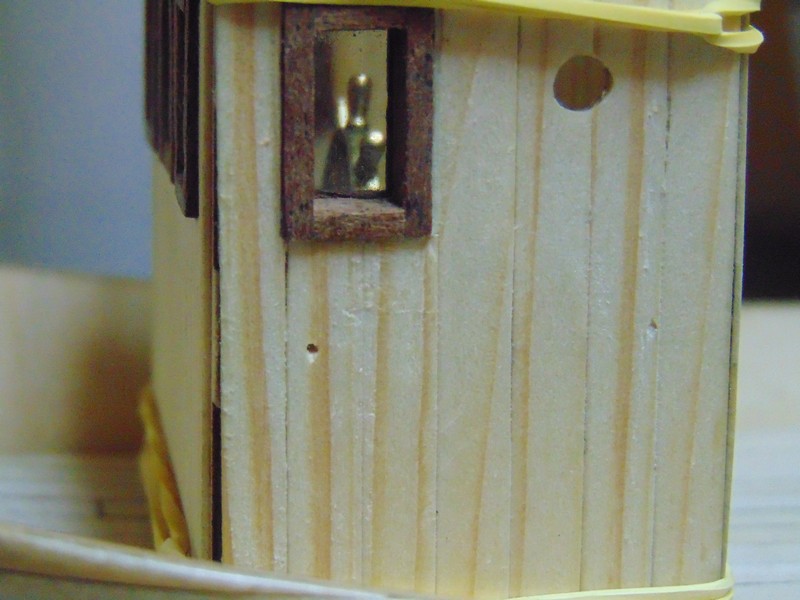
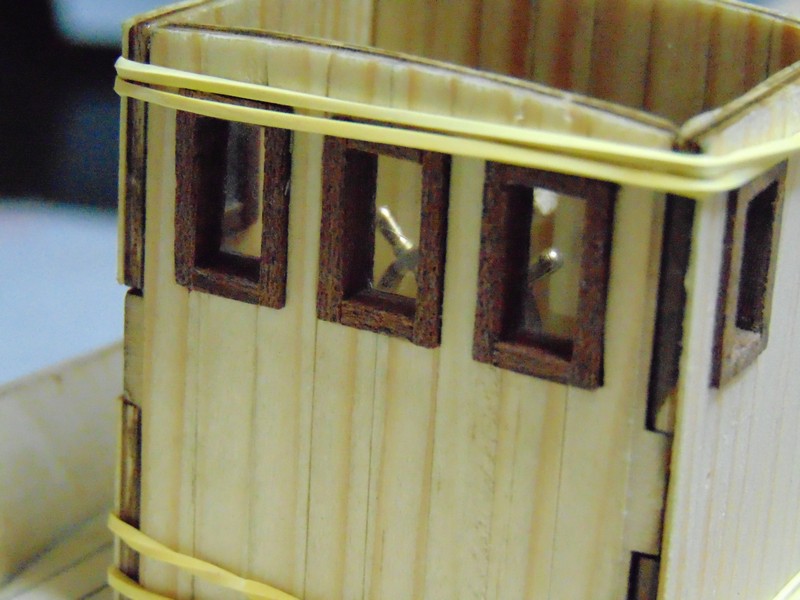
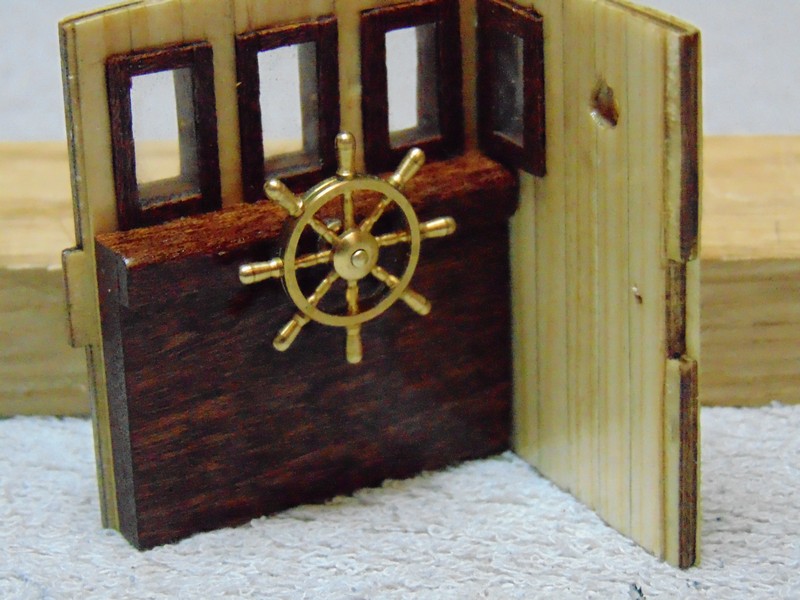
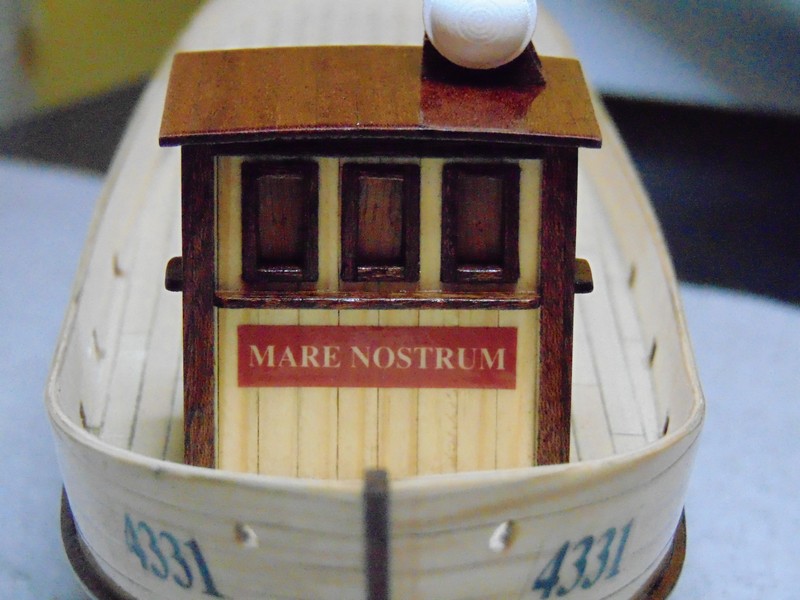
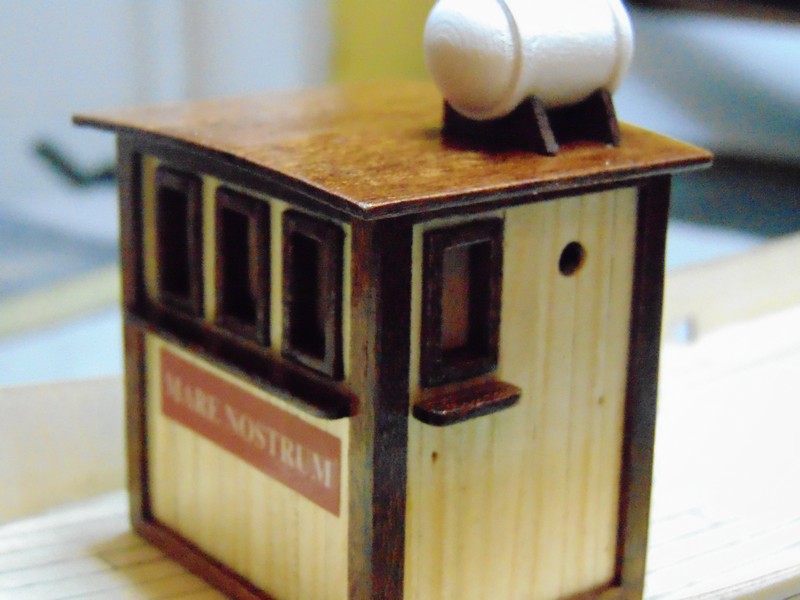
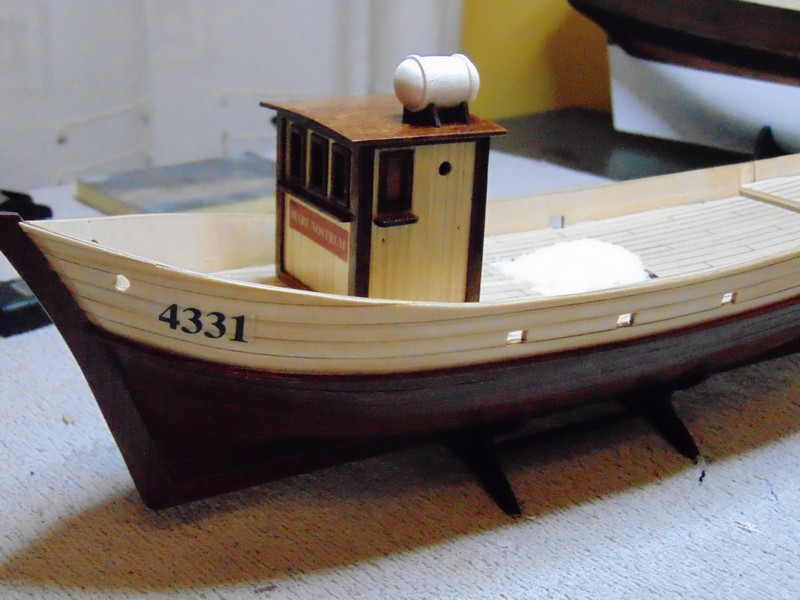
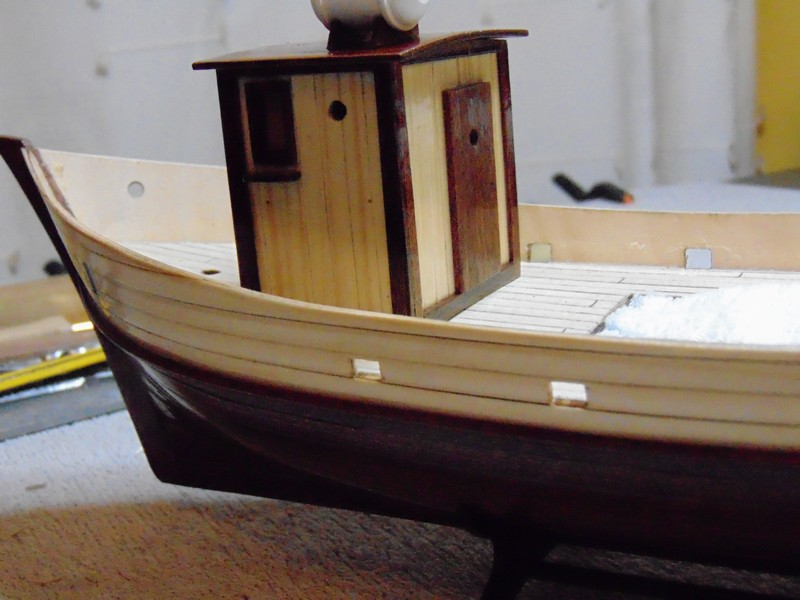
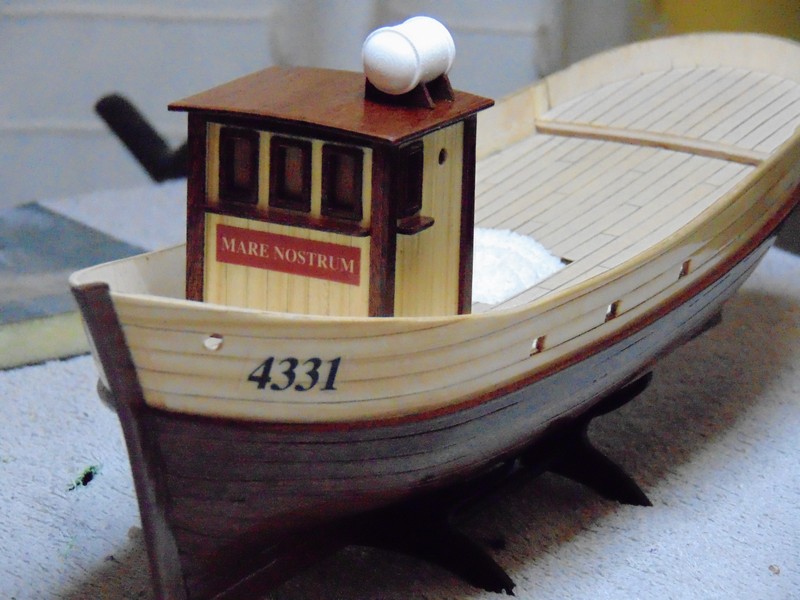
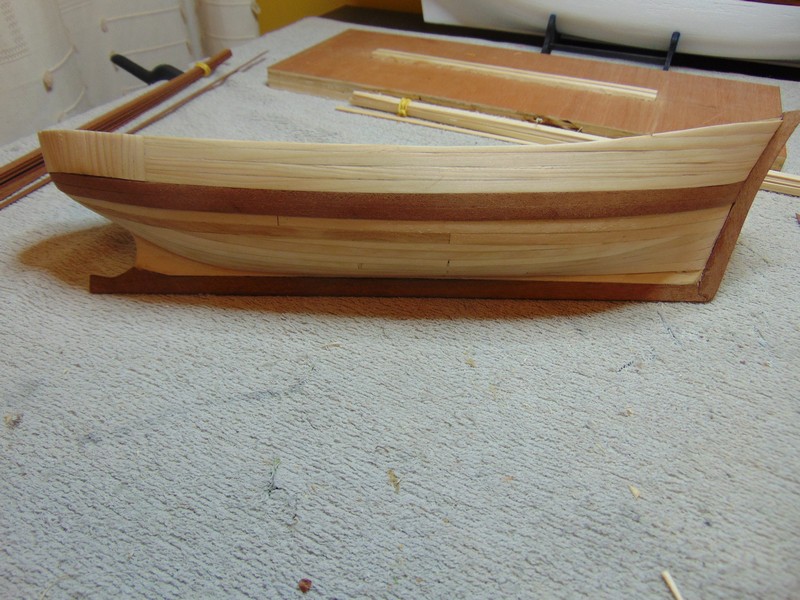
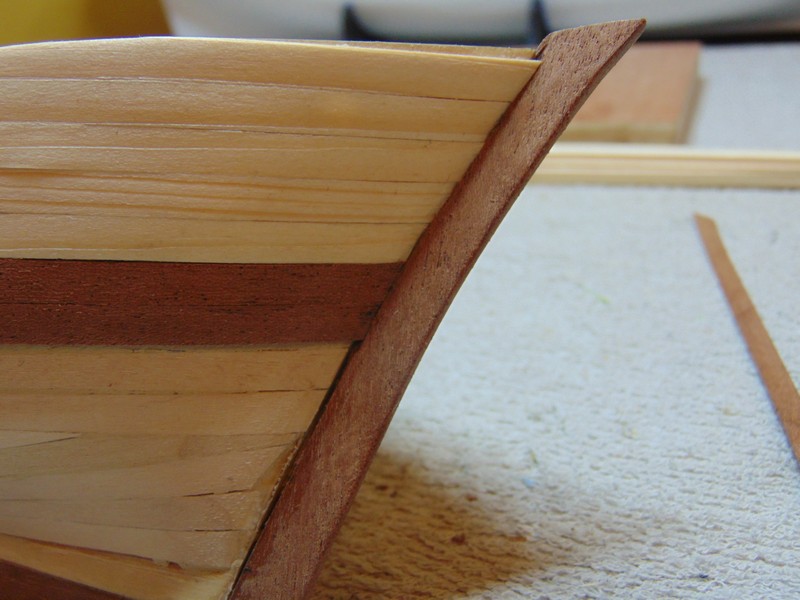
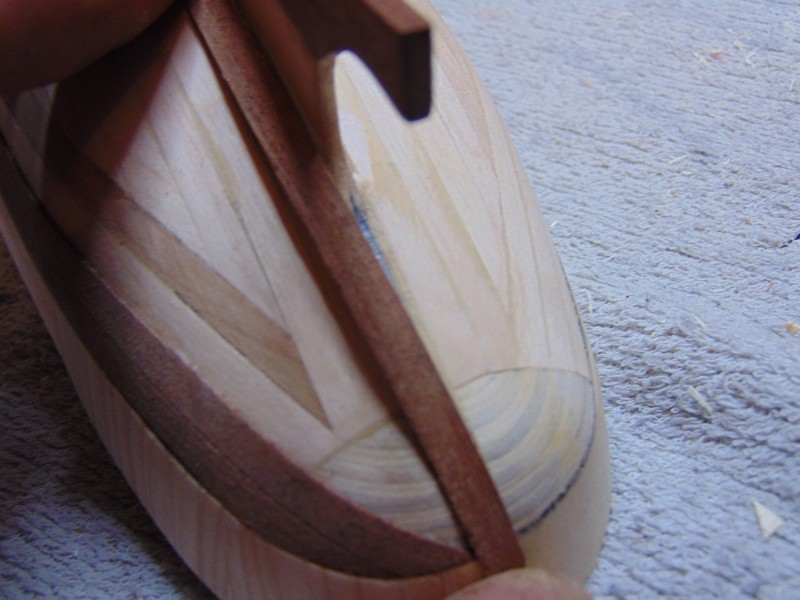
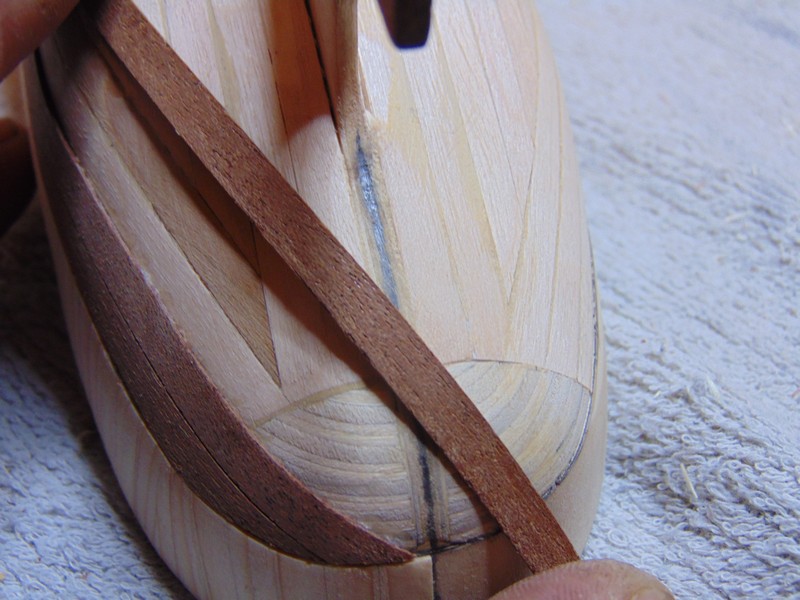
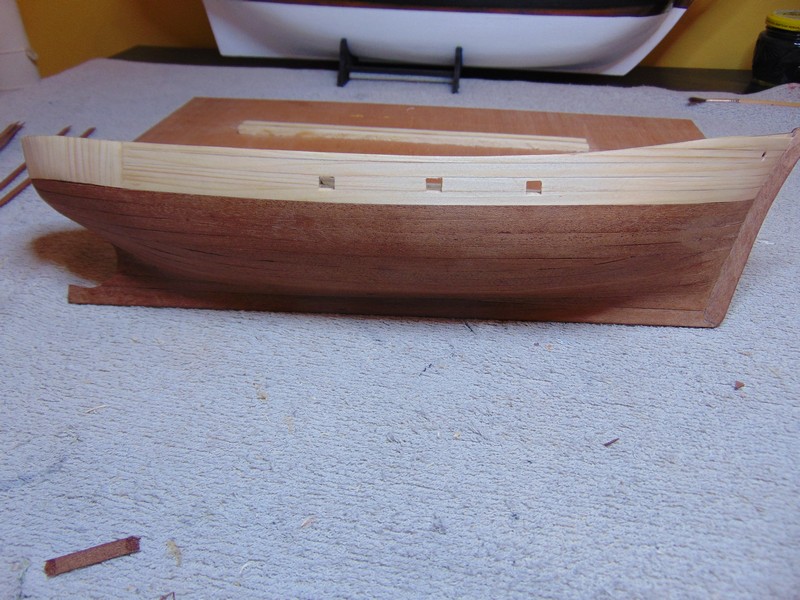
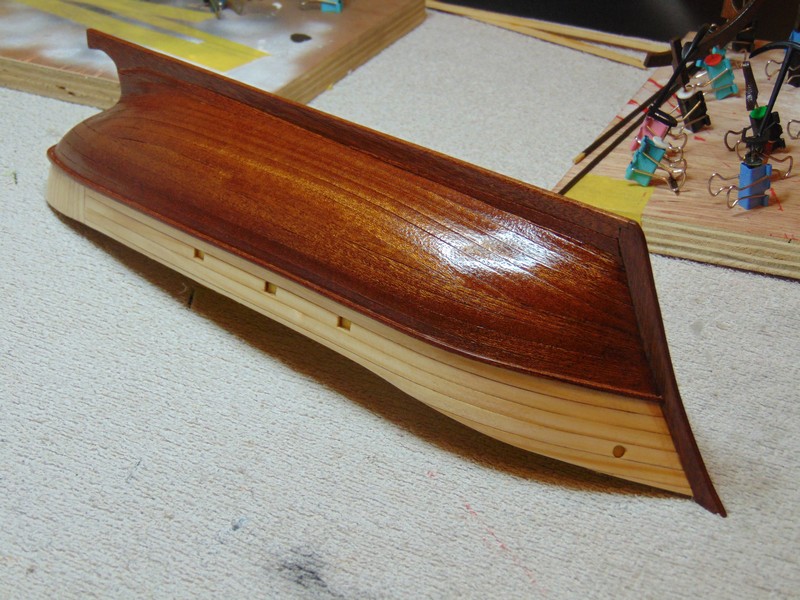
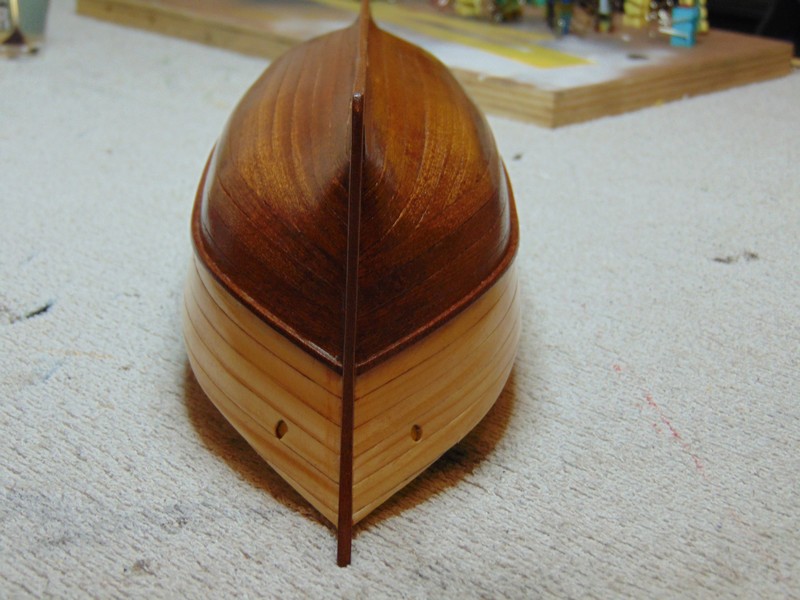
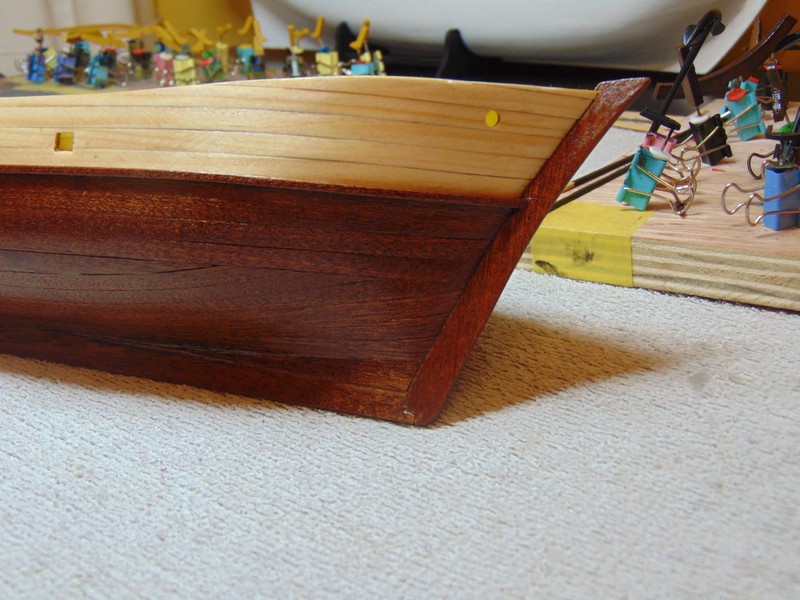
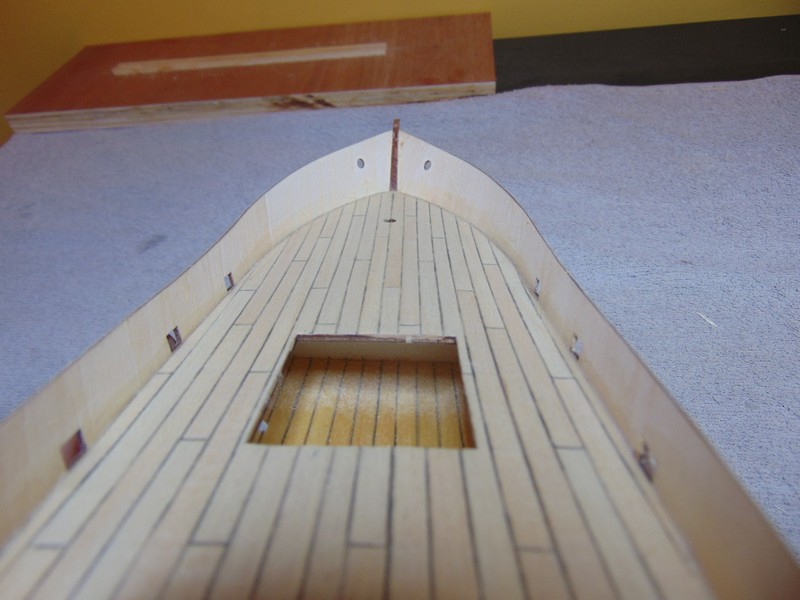
still haven't managed to get good pictures in the daylight but here is some pics of the wheelhouse. I added some extra detail like the dashboard and ships wheel I also decided to plank the exterior different using opposing woods to create a contrast between the two woods I may be wrong but searching through the other logs have not seen this done yet and thinks it makes for a lovely finish

- 130 replies
-
- 3
-

-
- mare nostrum
- artesania latina
- (and 1 more)
-
There is gotta be another steve that comments on this come on people we need a steve
-
Just curious Doug on my victory I done my shrouds in pairs on each side as I perceived Lenard Peterson period ship rigging book how come you have an odd number of shroud lines on each side
- 93 replies
-
- 1
-
-
- billing boats
- bluenose ii
- (and 1 more)
-
I can't speak from experience as I only have a couple of years but on my bounty heat and steam just would not cut it some force was required and soaking would be great if it wasent but it was so I'm not yet convinced Steve
-
Looking good Doug I wouldent go with your first diagram the one piter56 looks much better The first diagram is correct but piter56 is much easily interpreted
- 93 replies
-
- 1
-
-
- billing boats
- bluenose ii
- (and 1 more)
-
Looking good derek I've tried the fit of the rudder on mine it seems they all take a bit of tinkering to fit
-
As for tools I built an Hms victory with nothing more than I found in a dollar store pound shop depending on what side of the pond you live . Close pegs clamps twicors scissors toothpicks cottonbuds paintbrushes
-
$400 sounds a bit extreme surely there is cheaper wood kits out there ? Working with wood for a living I have no experience of plastic and prefer wood kits have you tried local auction sites etc.
-
Hi Doug I'll apply the rest of the coats show it in daylight then gladly share Thanks Steve P.s Brian knows so keep quiet for now please ha ha
-
Thank you guys derek Doug and harry for the kind words I have only applied a couple coats of finish at this stage I hope to apply 8-10 I leave for work in the dark and return home in the dark and very rarely see the model in daylight to show the finish and do it justice I hope to show some daylight photos some stage this week I think you might be surprised as to the finish I apply Steve
-
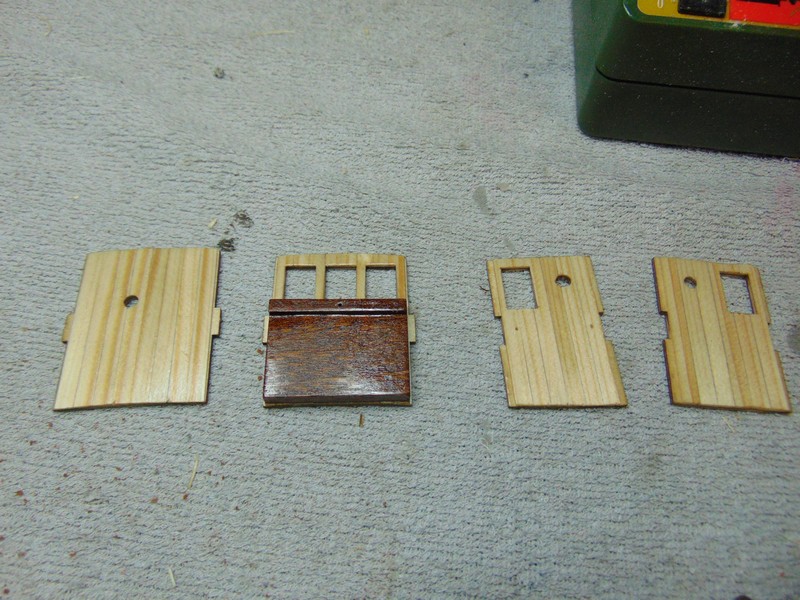
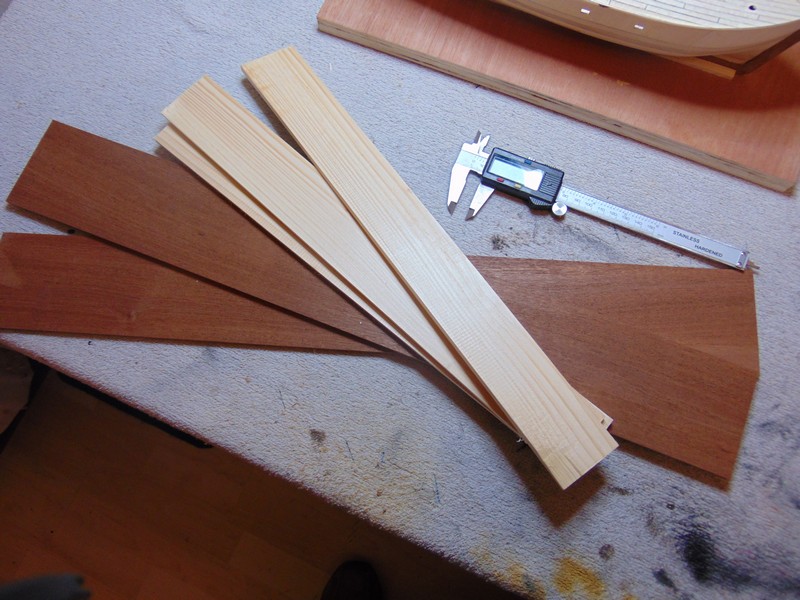
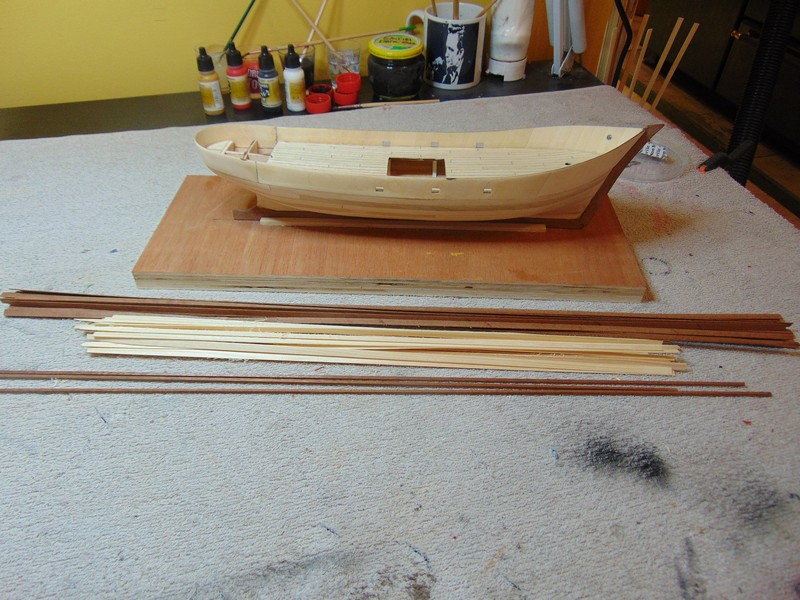
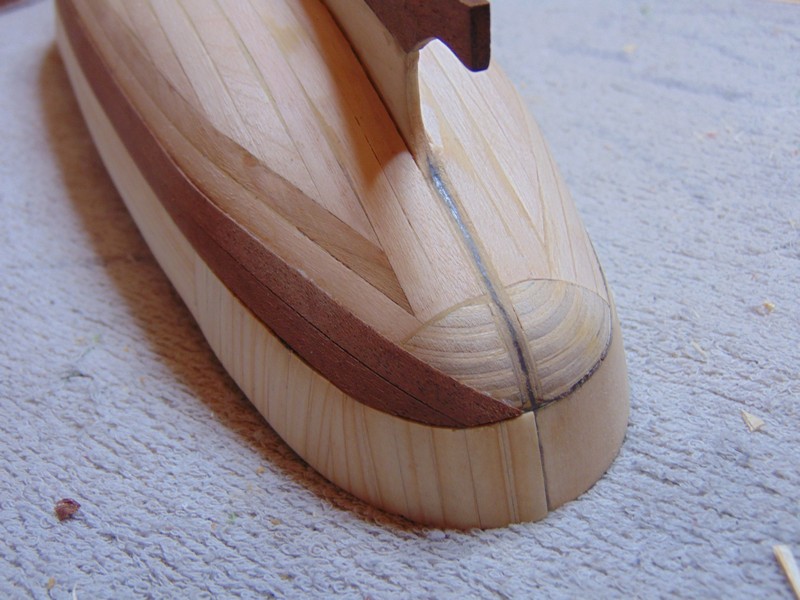
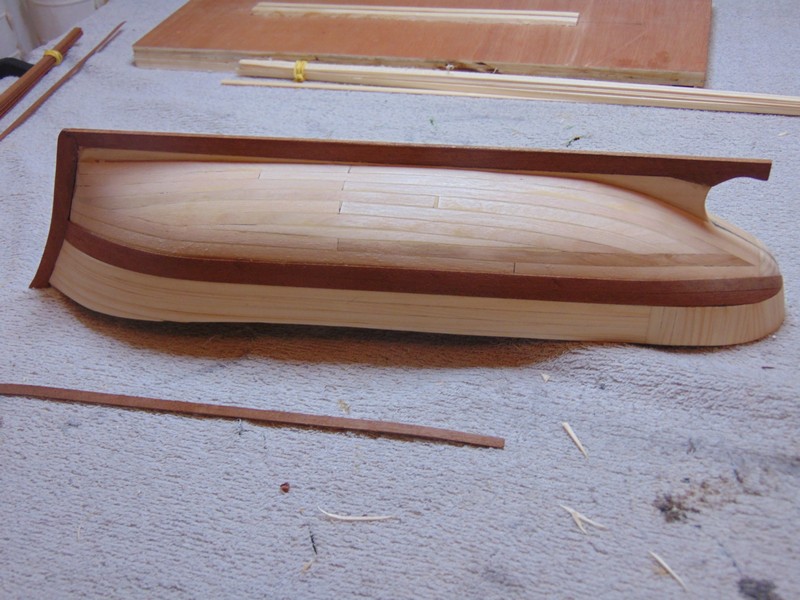
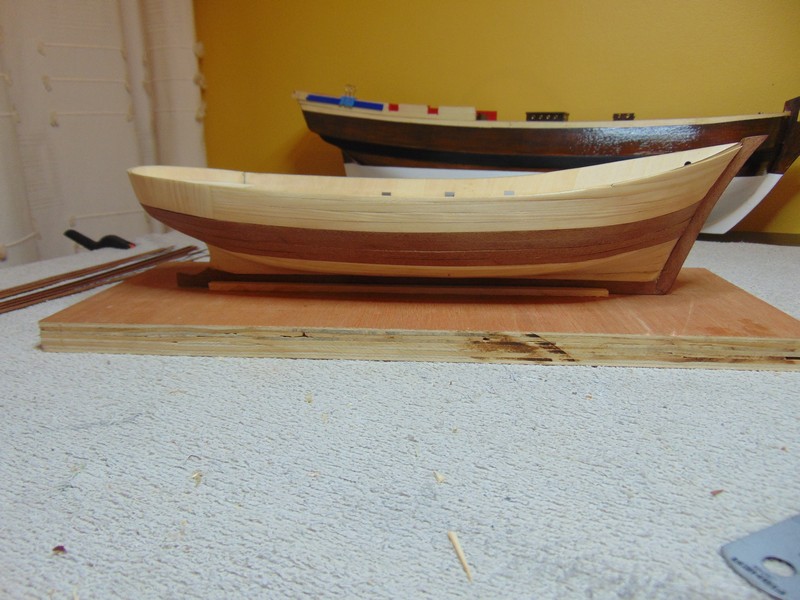
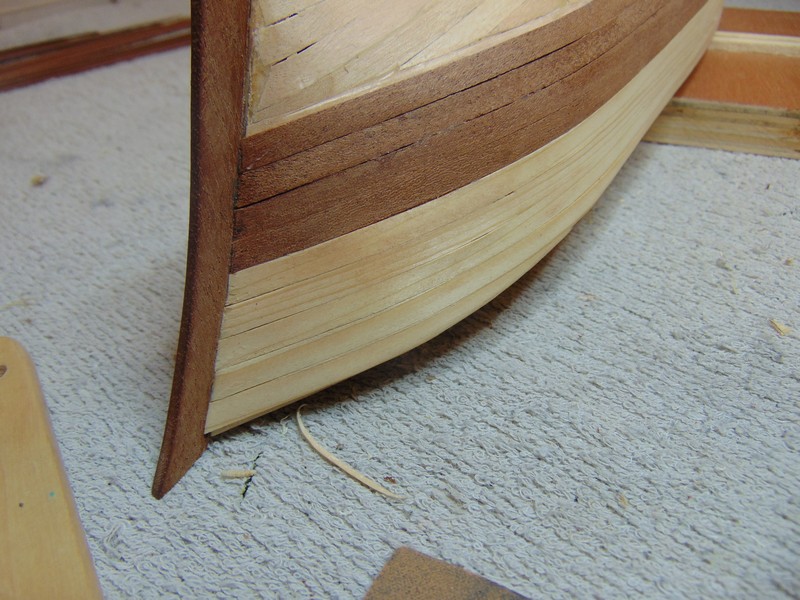
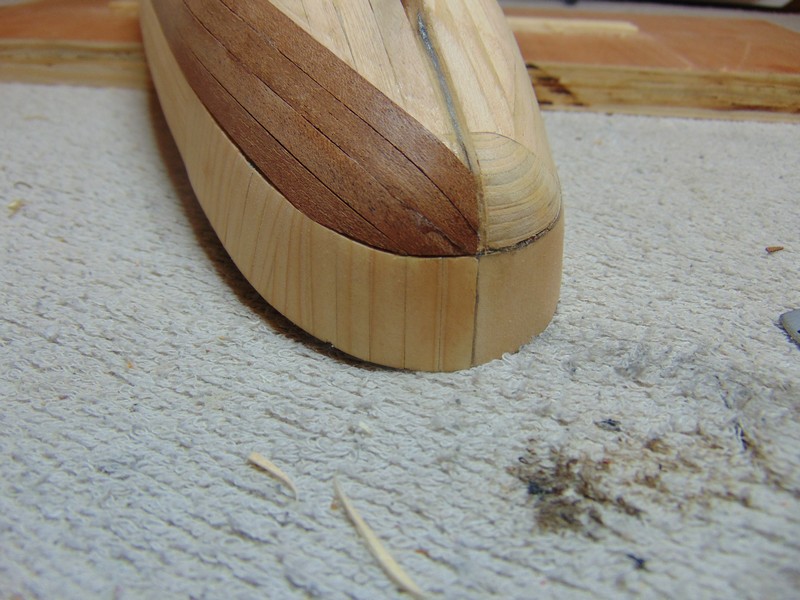
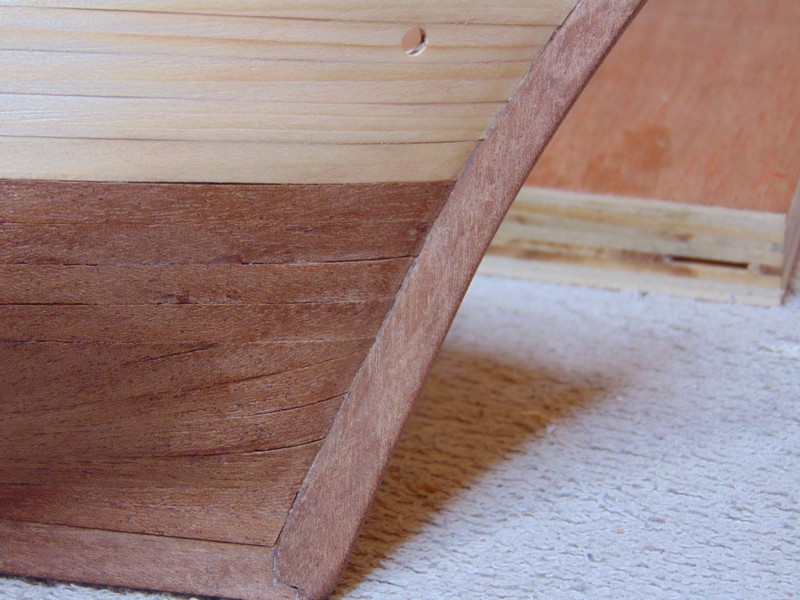
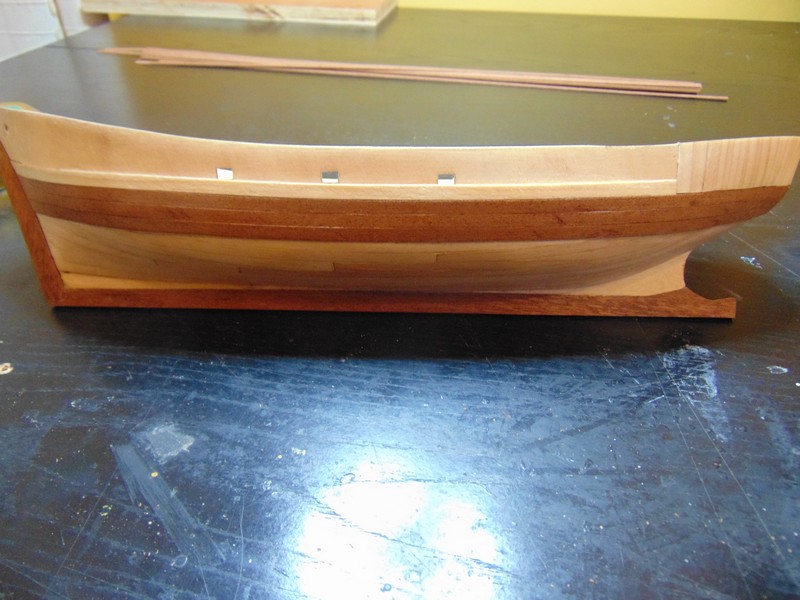
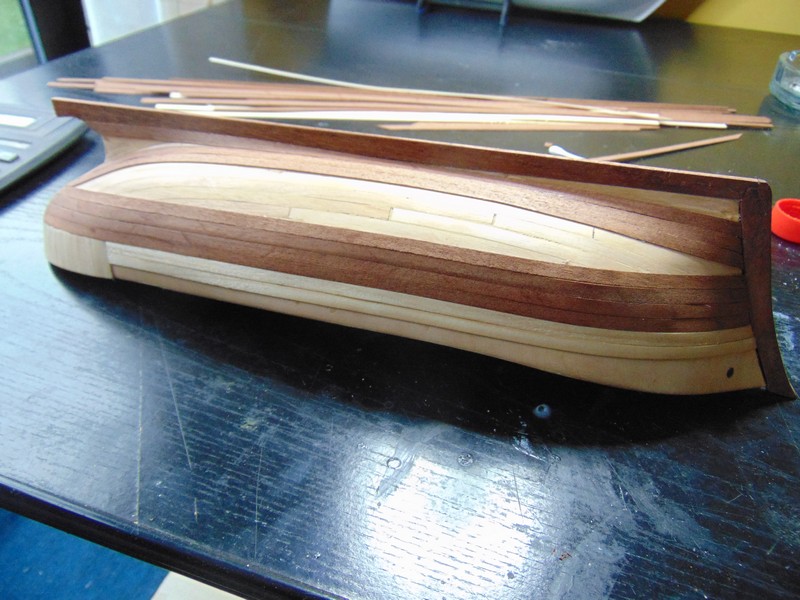
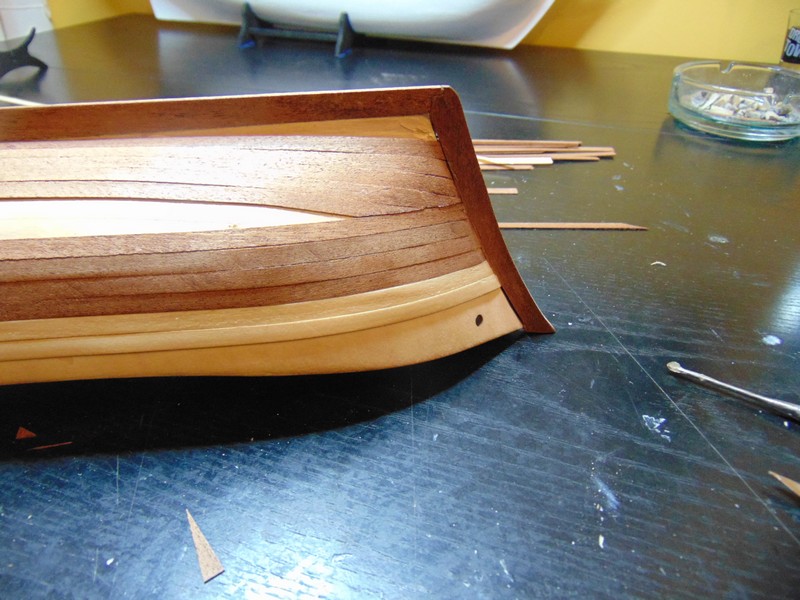
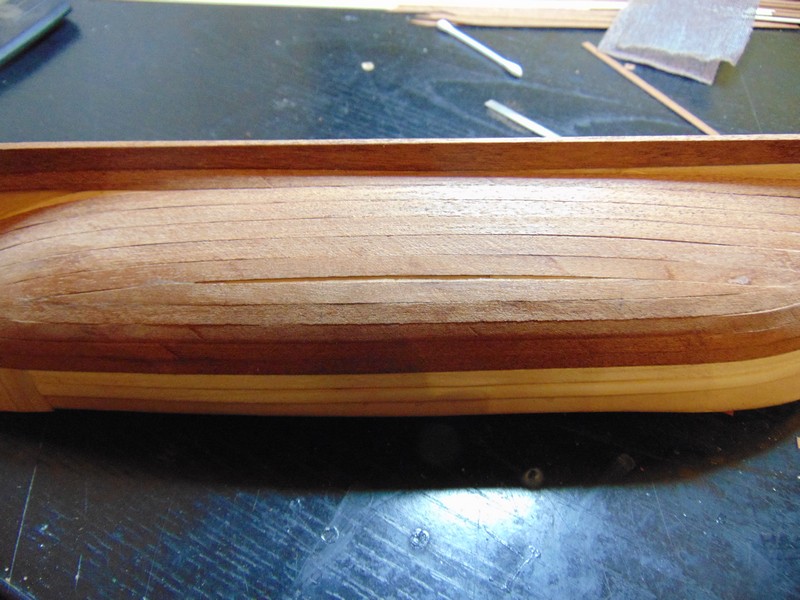
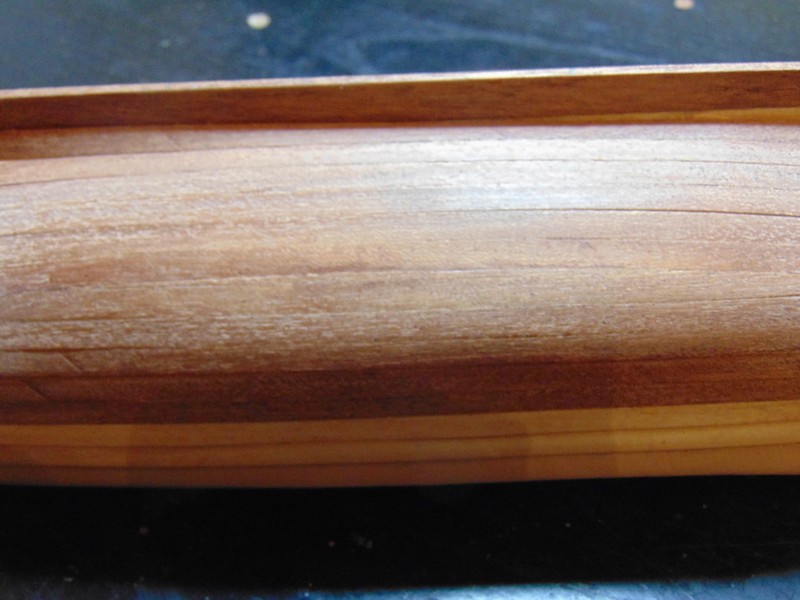
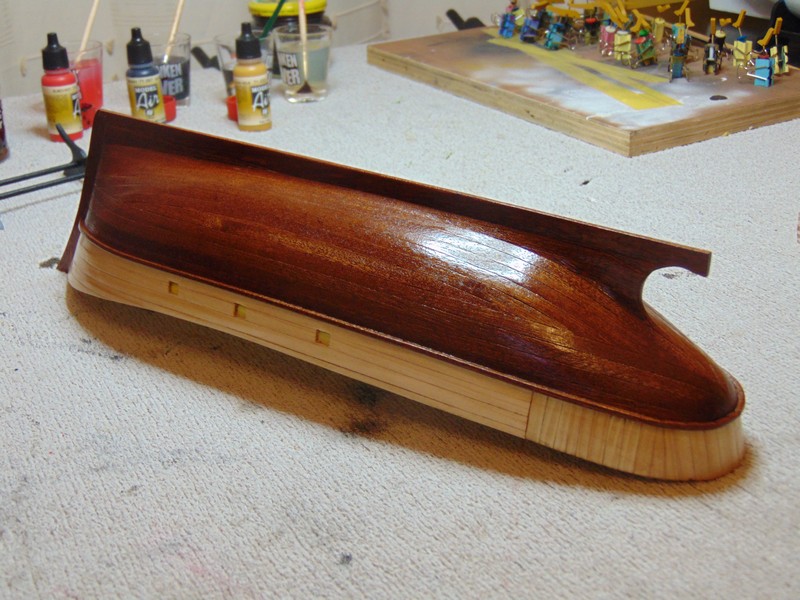
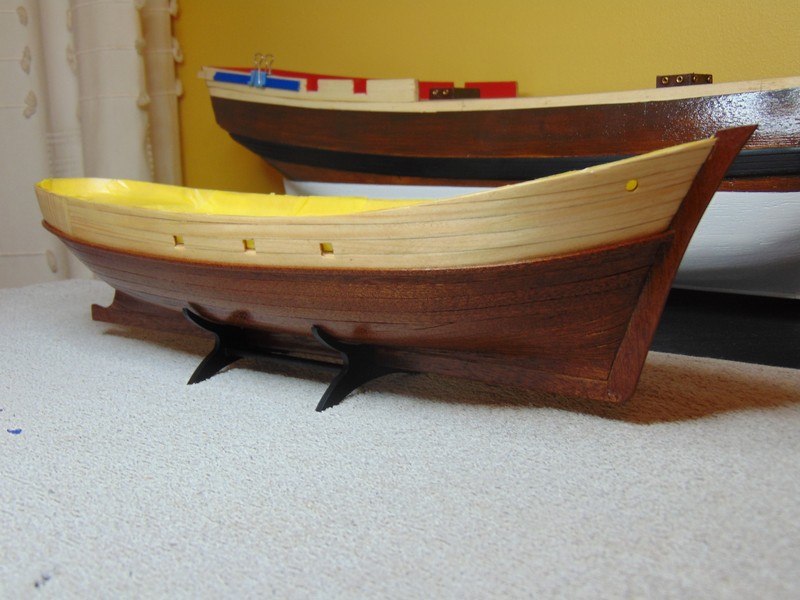
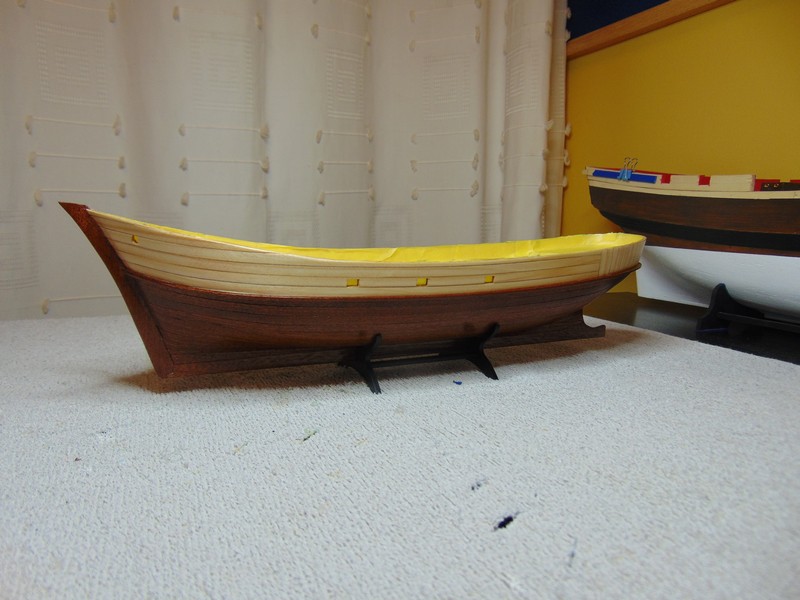
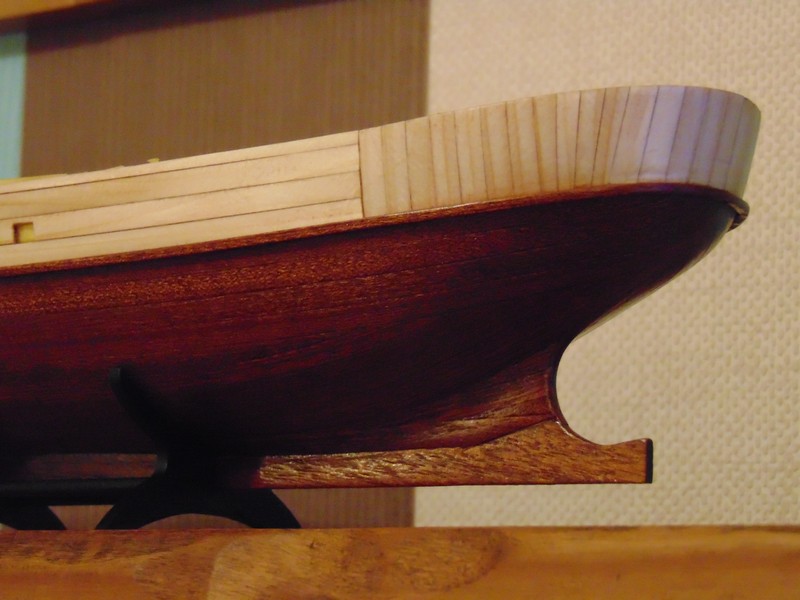
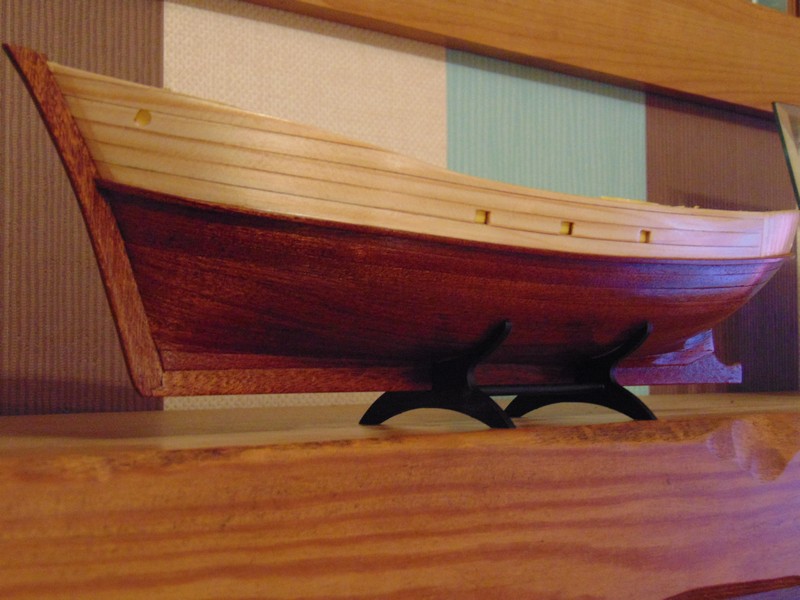
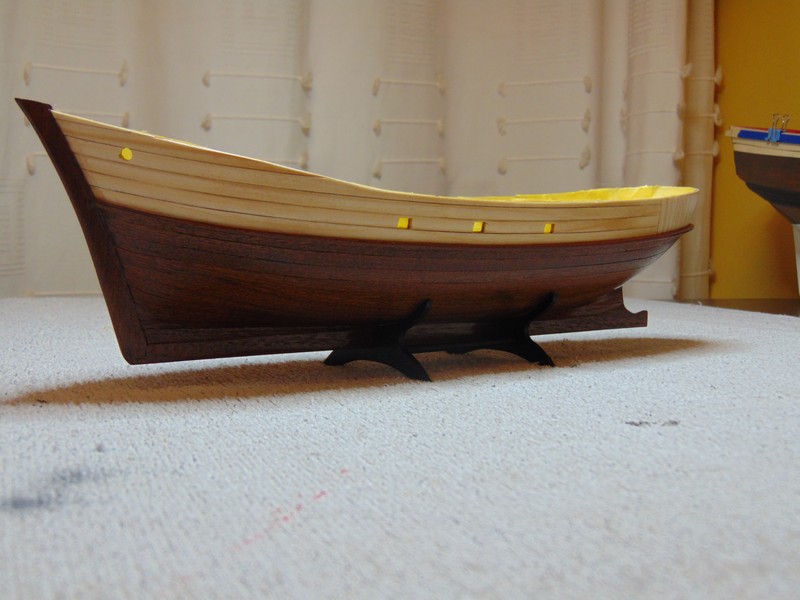
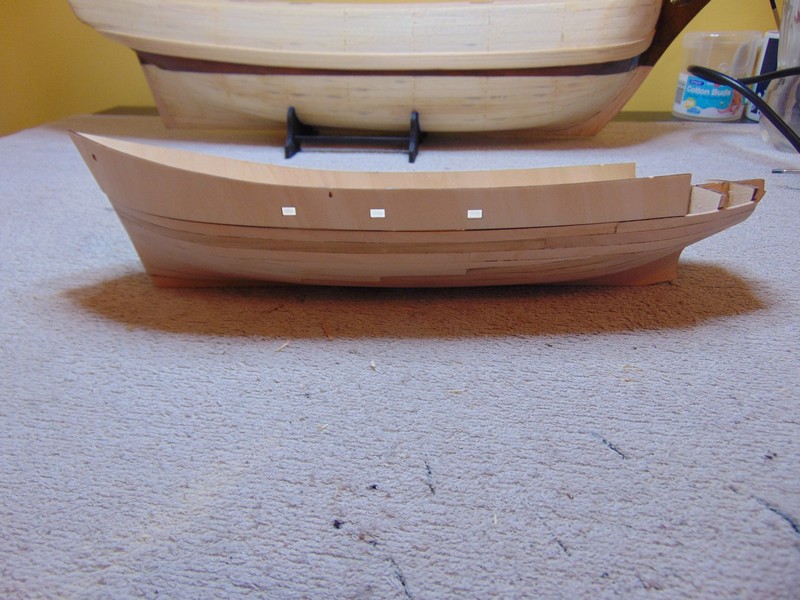
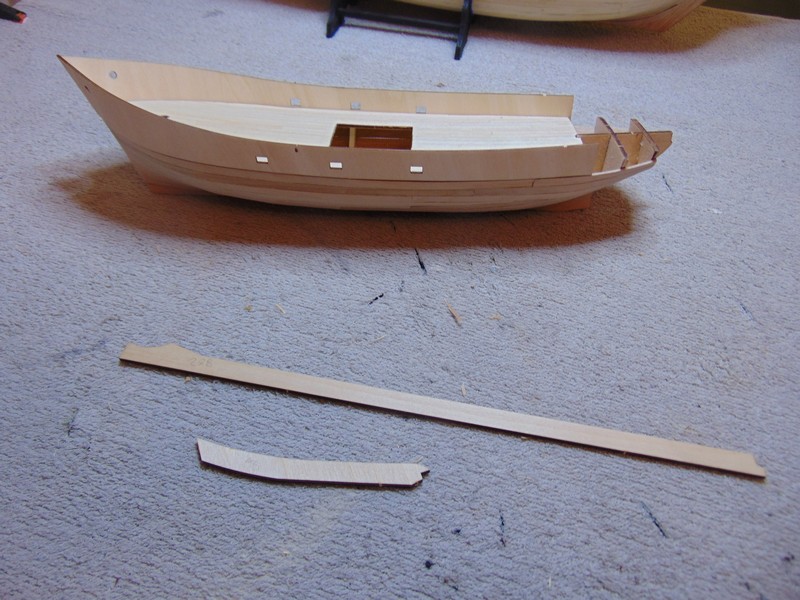
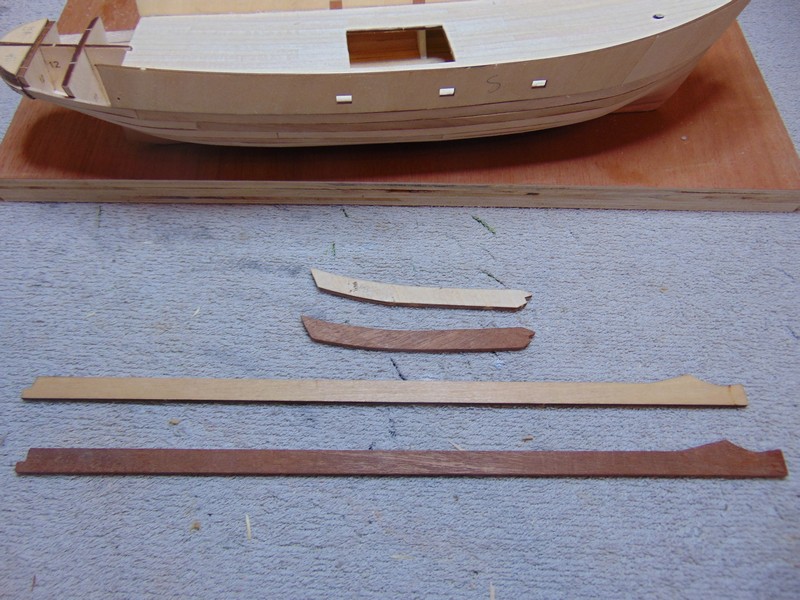
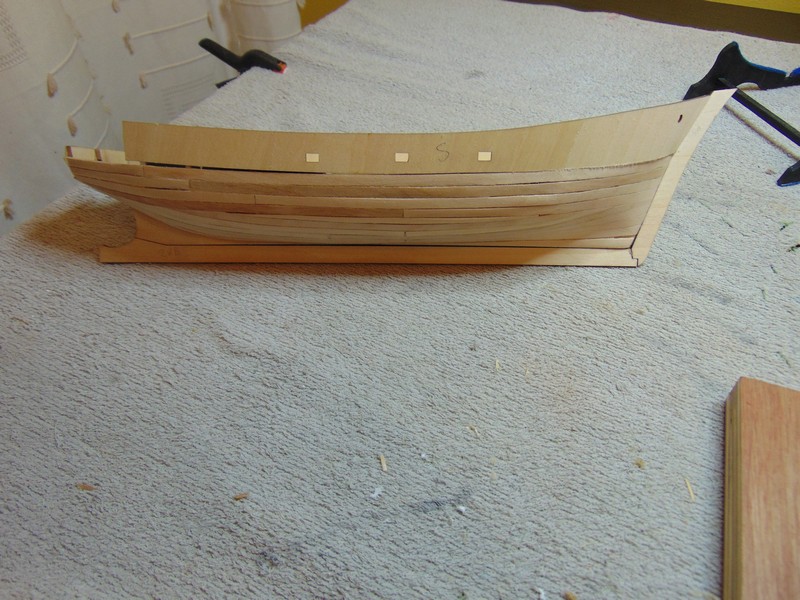
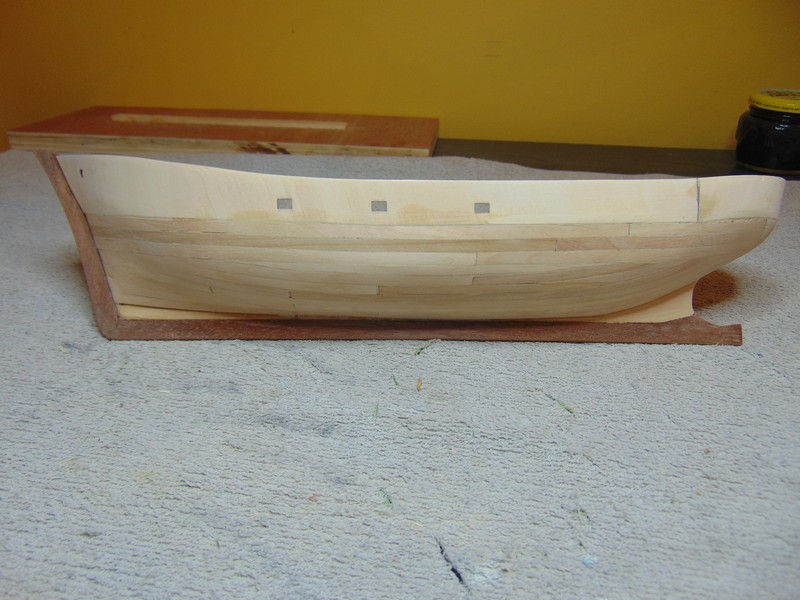
Hello all change of plan from my last post I was gonna plank upward from the rubbing strake then work inside ship however I decided to fit all the planking and then the rubbing strake. As this was a single plank painted version of the kit I have had to make my own planking and hardwood pieces I down this by thicknessing some materials in my garage to 5mm then ripping down to .6mm on my little proxon tablesaw you will notice some saw marks from the little saw however these easily sanded out. I did not taper the planks just shaped the ends of them if that makes sense I like the look of how this turned out as opposed to tapering every plank and the consistency of the taper not being even and obvious in the finish. I planked downward from rubbing strake four planks then planked upward from the keel it left me with sort of a waterline effect. I have not used any filler as even the smallest amount not sanded off will show in the finish Lastly I have applied finish to the hull just to keep my fingerprints off the bare would as I continue to build

- 130 replies
-
- 3
-
-
- mare nostrum
- artesania latina
- (and 1 more)
-
Thank you Nigel for the kind words that makes the log worth while I will follow along with your log it will be interesting to see how different manufactures approach the build Thanks Steve.
- 291 replies
-
- 4
-
-
- bounty
- billing boats
- (and 1 more)
-
Maybe you need to build a manshed for your powertools Doug then you can sand drill plane till your hearts content
-
Hi rexy have you tried the scroll saw blades that cut in any direction pretty handy but can lead to mistakes also Doug don't know if you have a drum sander but that would be helpful Steve
-
Nice neat work peter will enjoy following this Hof I also came across you cutty sark today excellent build This ship is really starting to grow on me and I'm geating a real feel for it perhaps a future build for me
- 207 replies
-
- 1
-
-
- billing boats
- cutty sark
- (and 1 more)
-
Hi peter just found this I will definitely be following along to learn more about billings kits thanks for sharing
-
Thank you for following peter and the kind comments I suspected there was more to the white than just paint and your suggestion confirms my own thoughts
- 291 replies
-
- 4
-
-
- bounty
- billing boats
- (and 1 more)
-
Hi probablynot the newer kit does not include the bunks I have seen your log and they look great and a fine idea if possible to put a small mirror in to show keen viewers . A friend of the family has a Hms bounty he bought in auction and it appears very old he has often wondered what ls beneath the deck and has suggested a small morrow wouldent it be great to find something like the bunks
-
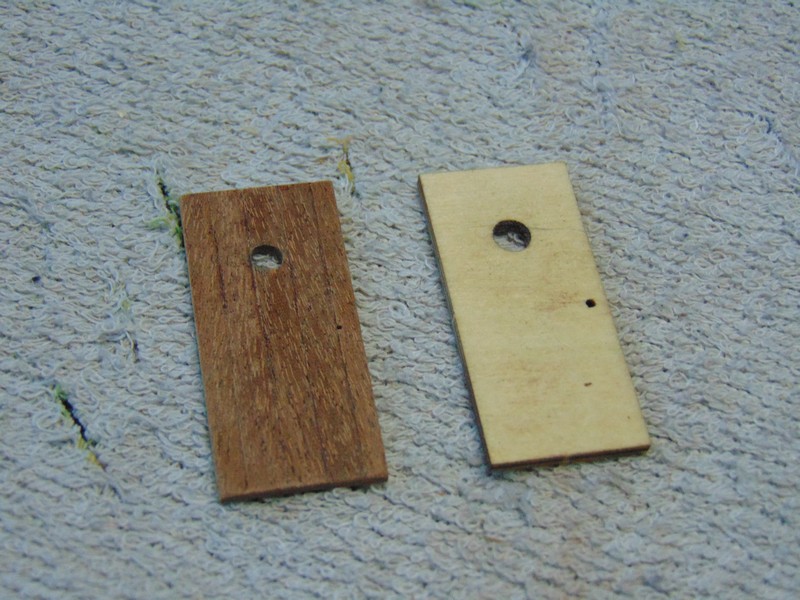
Hi Doug the kit included the stern filler blocks In the form of laminated shapes I have never tried filler blocks before so can't comment but found the plywood laminate approach a breeze to sand just make sure it's hobby ply as ordinary ply wood from builder supply seems lot tougher to sand
- 130 replies
-
- 1
-
-
- mare nostrum
- artesania latina
- (and 1 more)
-
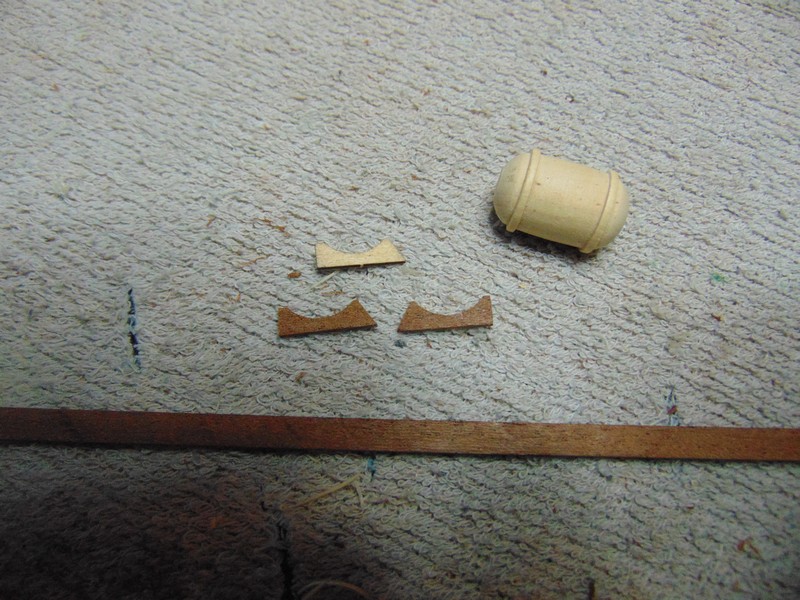
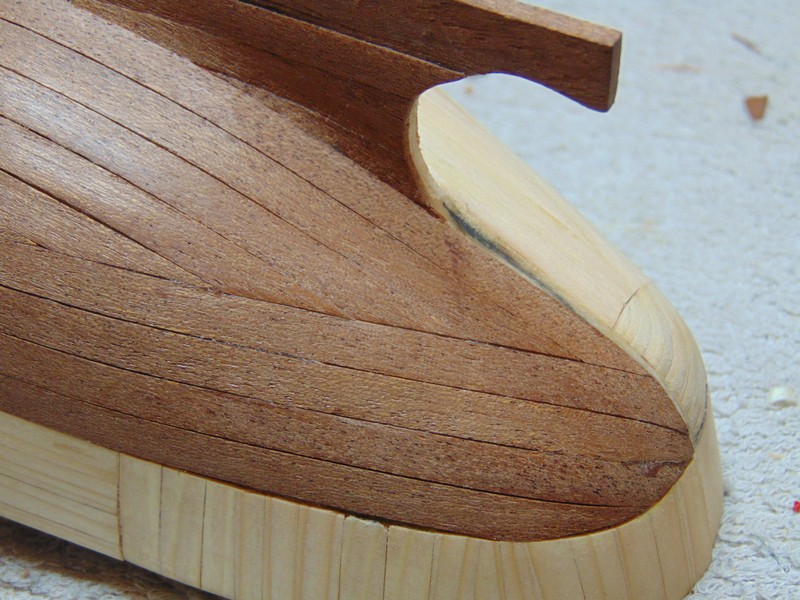
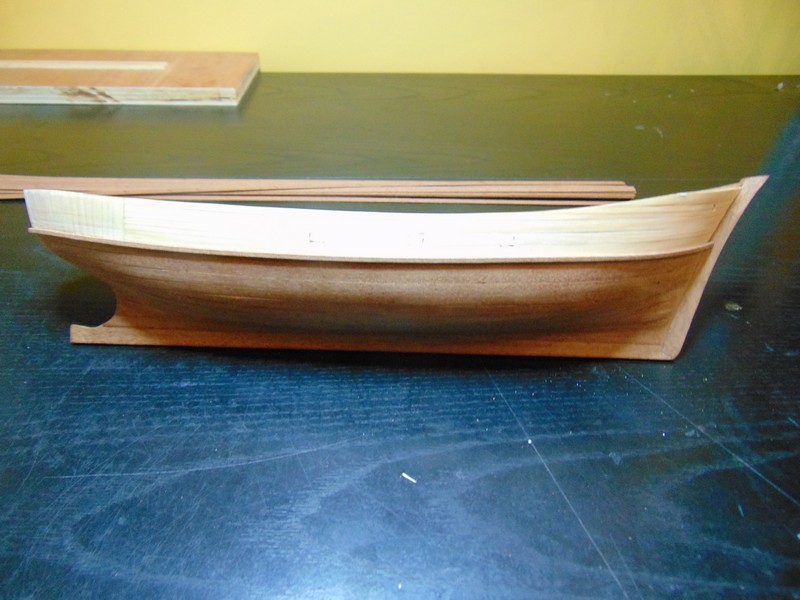
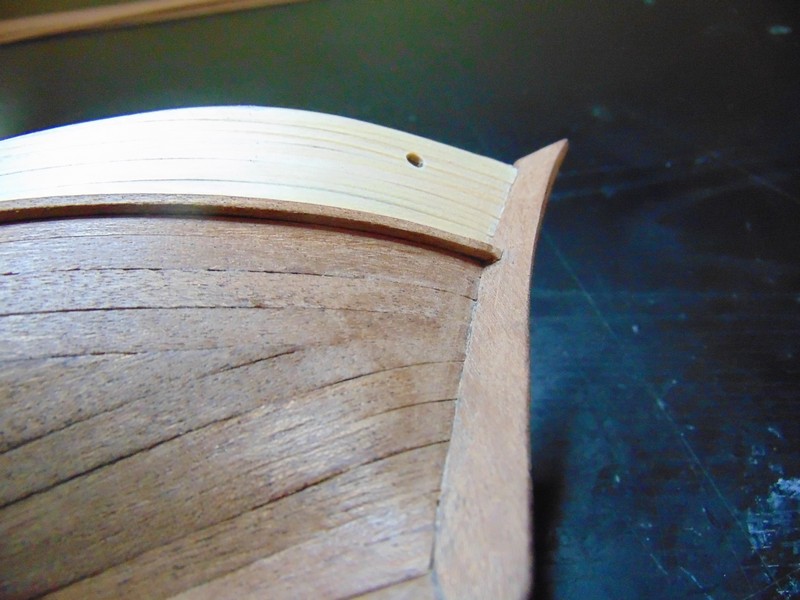
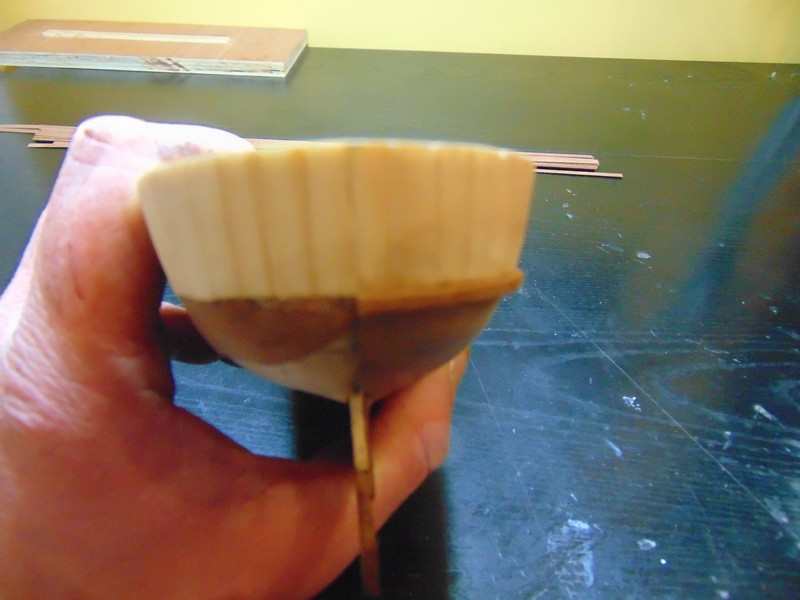
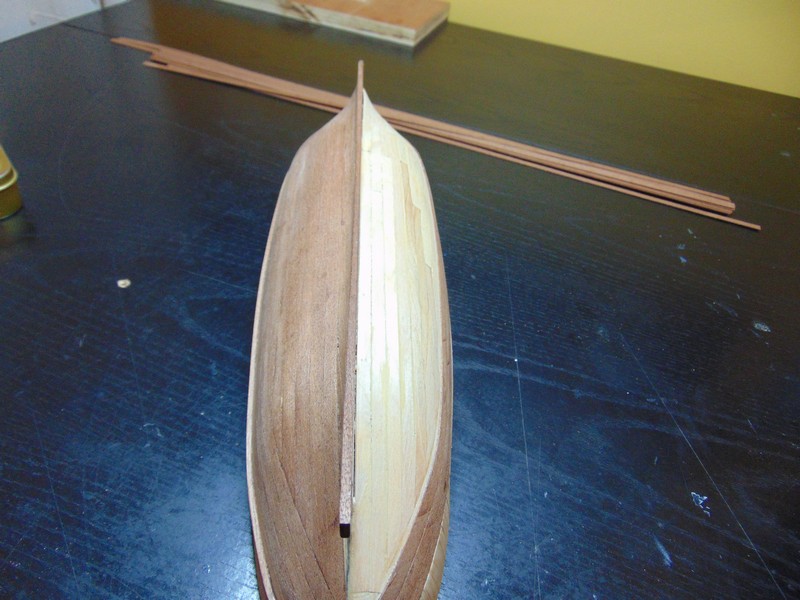
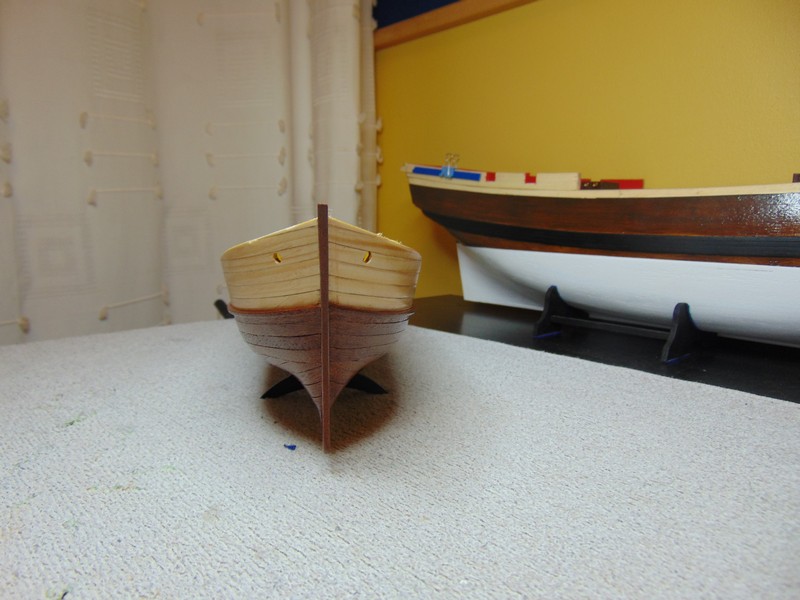
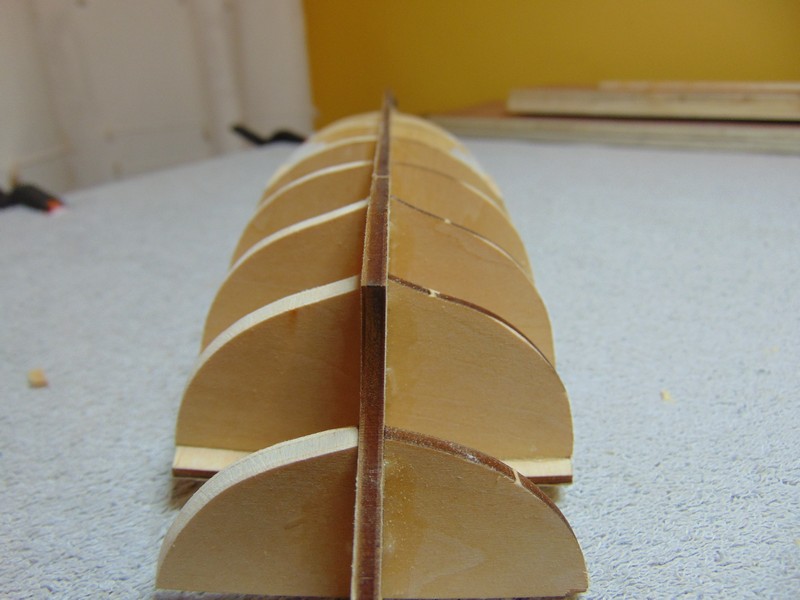
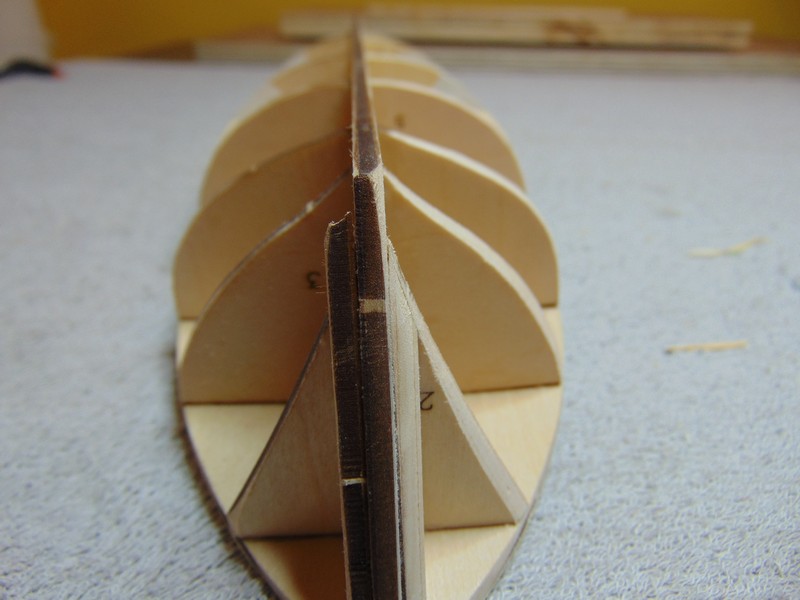
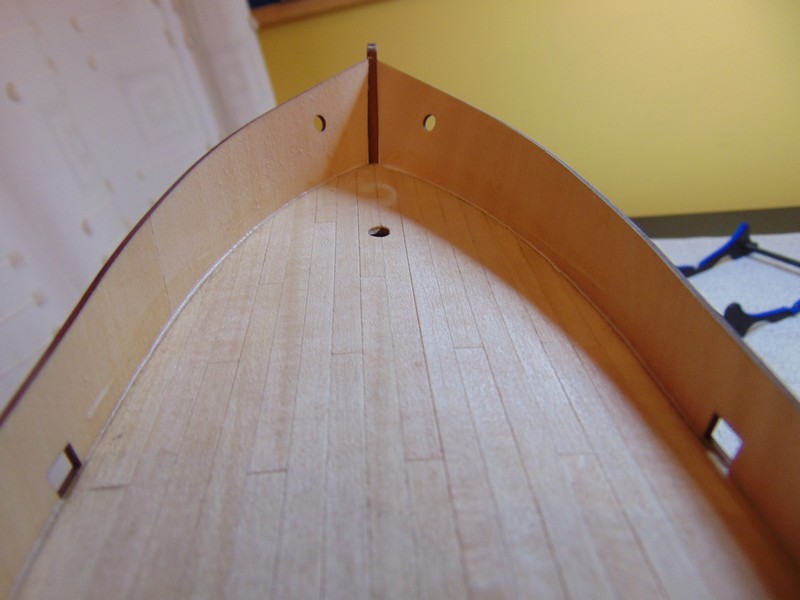
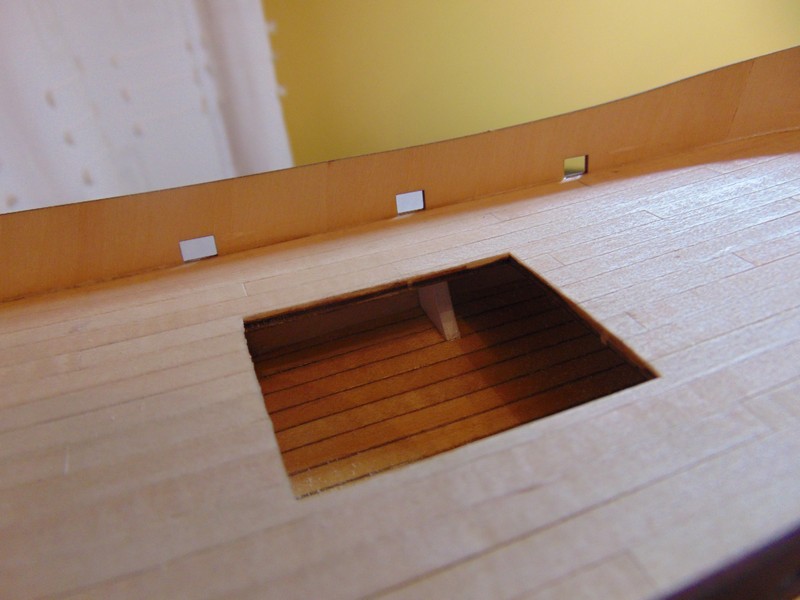
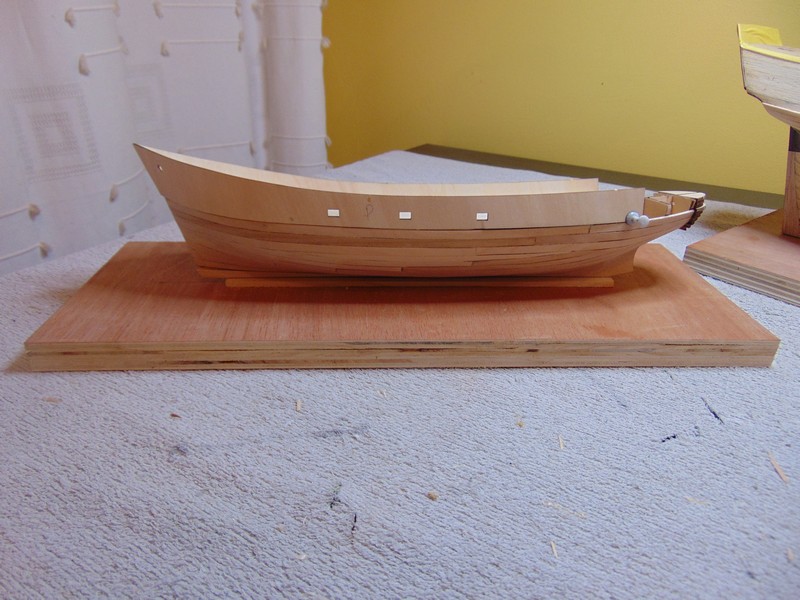
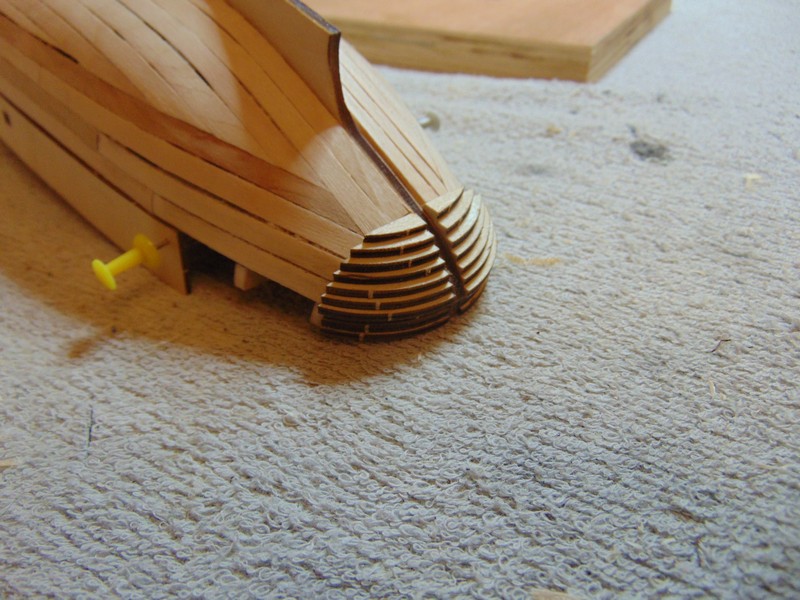
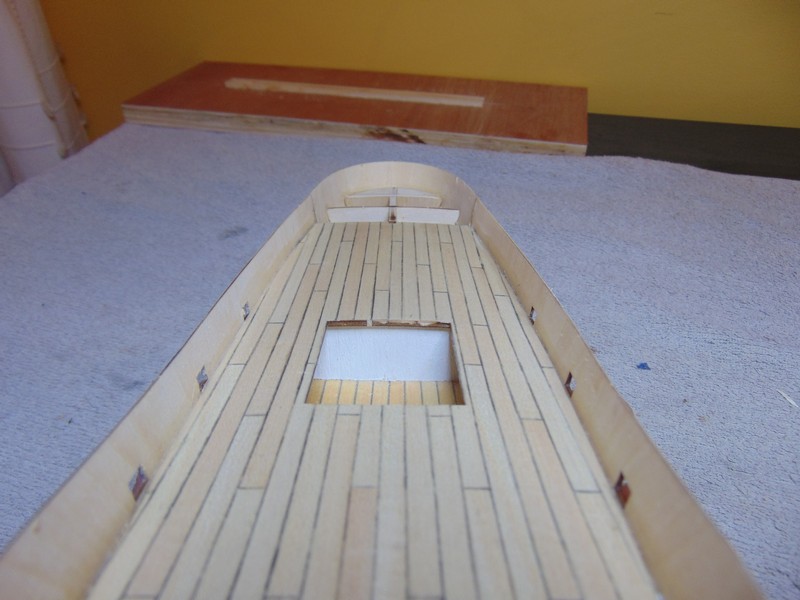
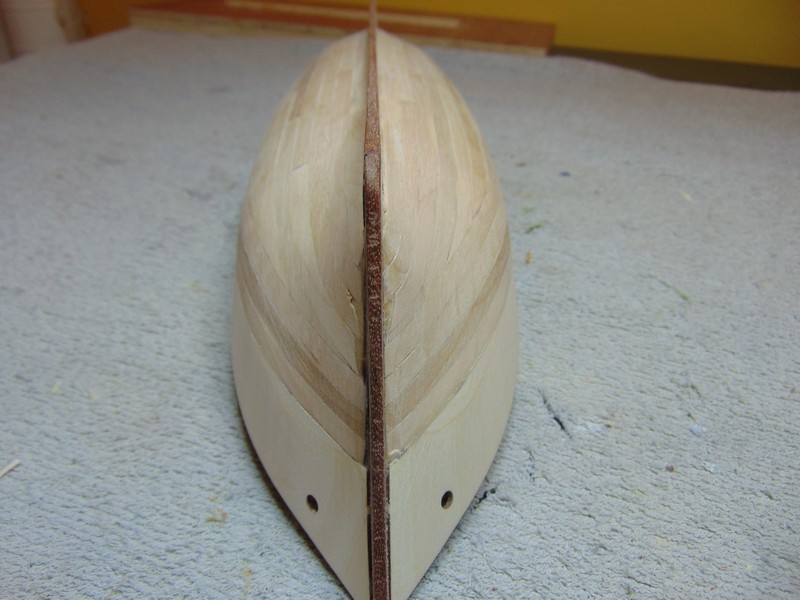
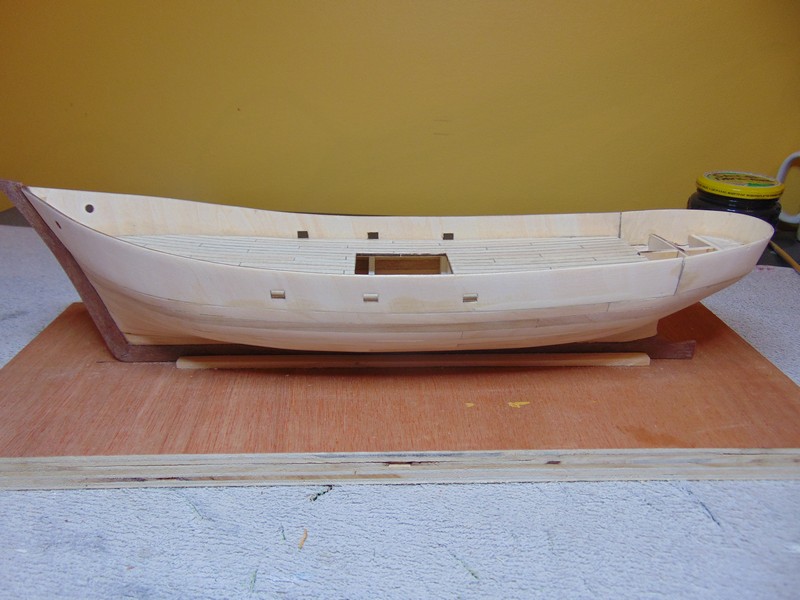
A little progress on the little ship Mare Nostrum My main priority at the moment is HMS Bounty this build is aimed as a glue and paint drying project but is working out very enjoyable After spending a whole evenings work I faired the bulkheads I was quite surprised to find I planked the first layer of planking just as quick in around three hours that was quiet different from spending one or two months on hull planking. This was due to it being the first planking stage the planks where crudely fitted with no tapering just shaping at the ends and for the first time I planked using c a glue I did however paint the edges with white pva the second layer will take a few weeks to correctly fit As im going with the naked wood effect so not to offend hoff as advised by him just kidding I think the unpainted version is beautiful and that is what has drawn me to this model I have and will need to make many scratch parts as my kit being a newer kit does not include hardwood. I have made and fitted the stem piece and keel . the bulwark was difficult to line up and achieve simatry I used small spots of ca and sort of spot wielded them on several times before I was happy . also to get the drainage holes on the bulwark to line up with the deck took some planning on bottom of bulwark. I think for my next step I will follow hoffs lead and fit the rubbing strake plank upward inside and out of the bulwark after this it will allow me to crack on with the further scratch build parts handrails etc . see you back here when that's complete thanks for checking in steve


- 130 replies
-
- 1
-
-
- mare nostrum
- artesania latina
- (and 1 more)
-
Another dilemma I faced Doug was when to start the taper perhaps others could advise further I tended to start from approx half way example bottom of dowel 4mm middle of dowel 4mm top of dowel 3mm
- 93 replies
-
- 1
-
-
- billing boats
- bluenose ii
- (and 1 more)
-
Not sure what else to suggest Doug but have have successfully tapered 3mm down to 2mm in the past after encountering the wrong direction with the sandpaper thing . As for the chuck denting the dowel doesn't the end of the dowel live below deck anyhows . On my first build I experienced the exact same problems with the mast but stuck with the drill and sandpaper technique I hope you find a solution that suits your need Steve
-
Hi Doug roll some masking tape round the dowel before putting into the chuck also when wrapping the sand paper round the dowel if you do this the wrong direction it will tighten and snap the dowel out of your hand have it so if anything the sandpaper will loosen
- 93 replies
-
- 2
-
-
- billing boats
- bluenose ii
- (and 1 more)
-
It sure does Doug thanks for following. Thanks ej I'm enjoying the colour scheme it's a nice change from looking at my victory I was tempted to copper plate but liked the white hull often depicted on bounty . I have no idea why the hull is painted white on bounty and some other ships is it just white paint in real life or does it represent some sort of coating ?
- 291 replies
-
- 5
-
-
- bounty
- billing boats
- (and 1 more)