Tigersteve
-
Posts
1,327 -
Joined
-
Last visited
Content Type
Profiles
Forums
Gallery
Events
Everything posted by Tigersteve
-
 Half deck stanchions complete. Next step is to complete sanding them flush and round the tops. The first photo shows the spacer sizes that were used in this step. Steve
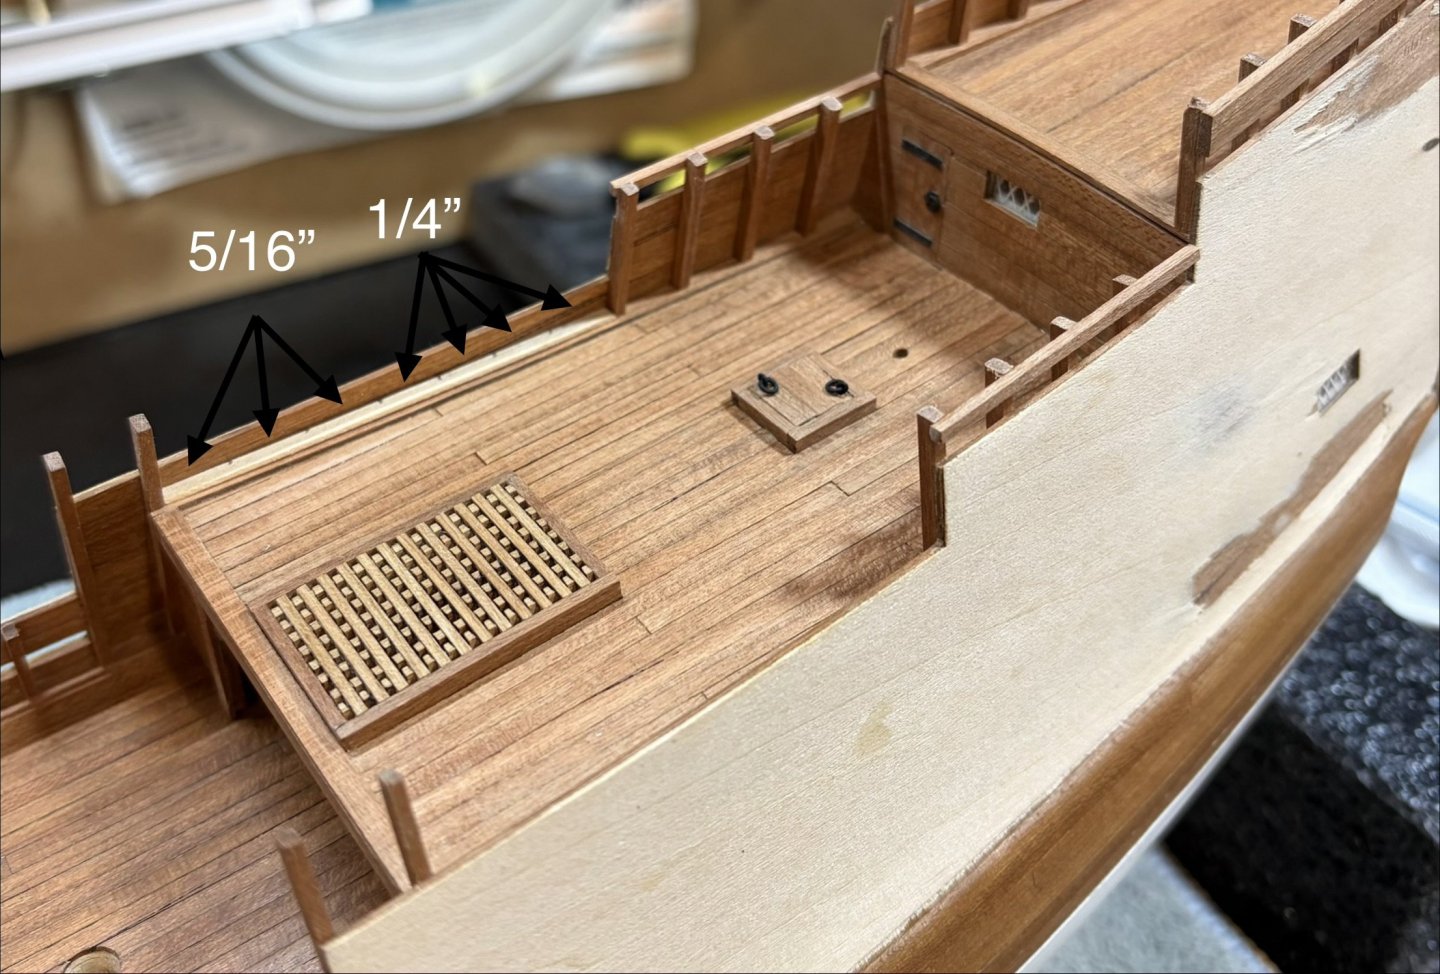
-
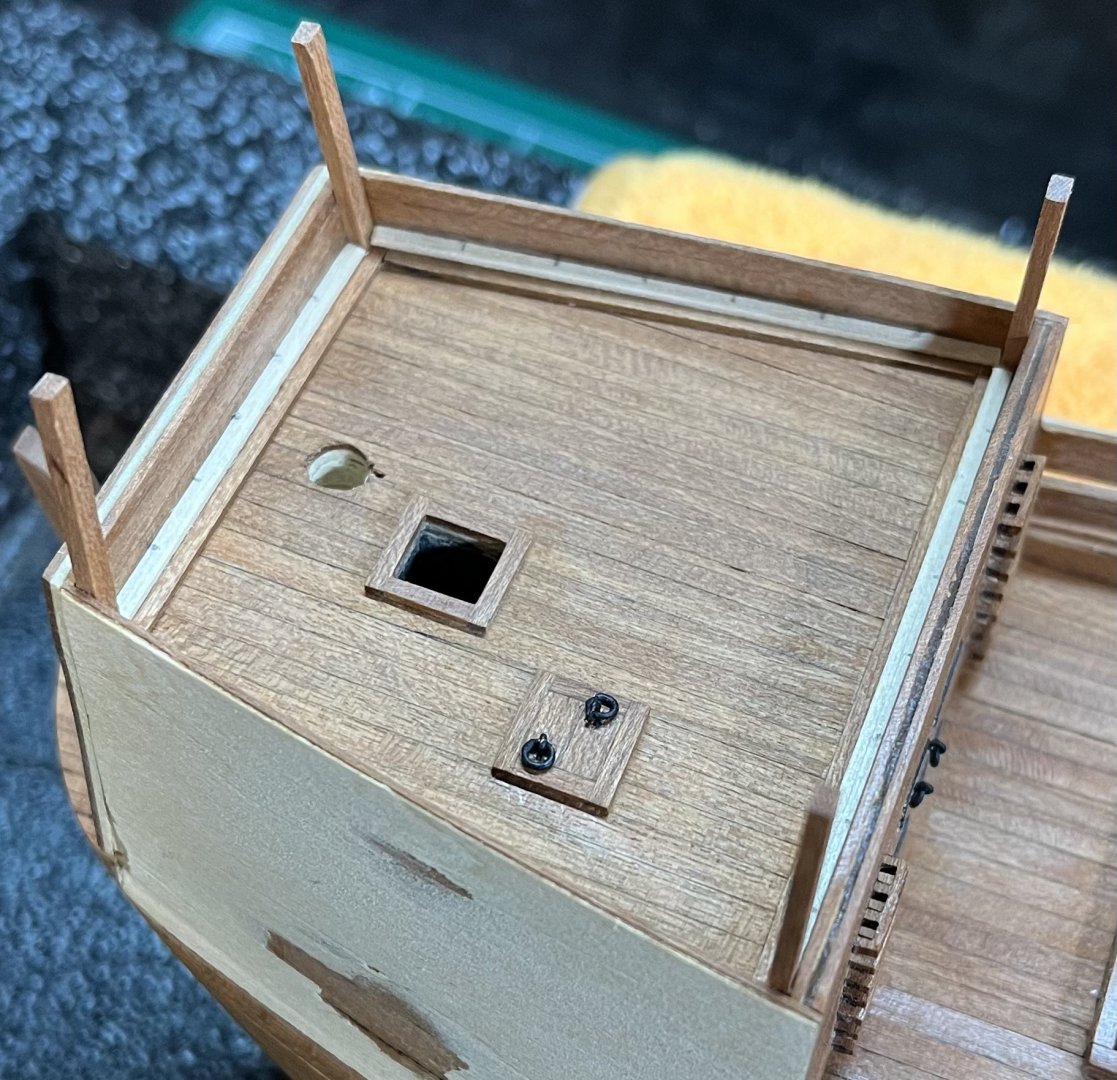
Half deck planked. Steve

-
Hi Kirill- You are two years late on this information! I will keep it in mind for future. Not sure why I missed this. I have two more gratings to make for this ship. I’ll have to decide if I want to match the main gratings already constructed at this point. Steve
-
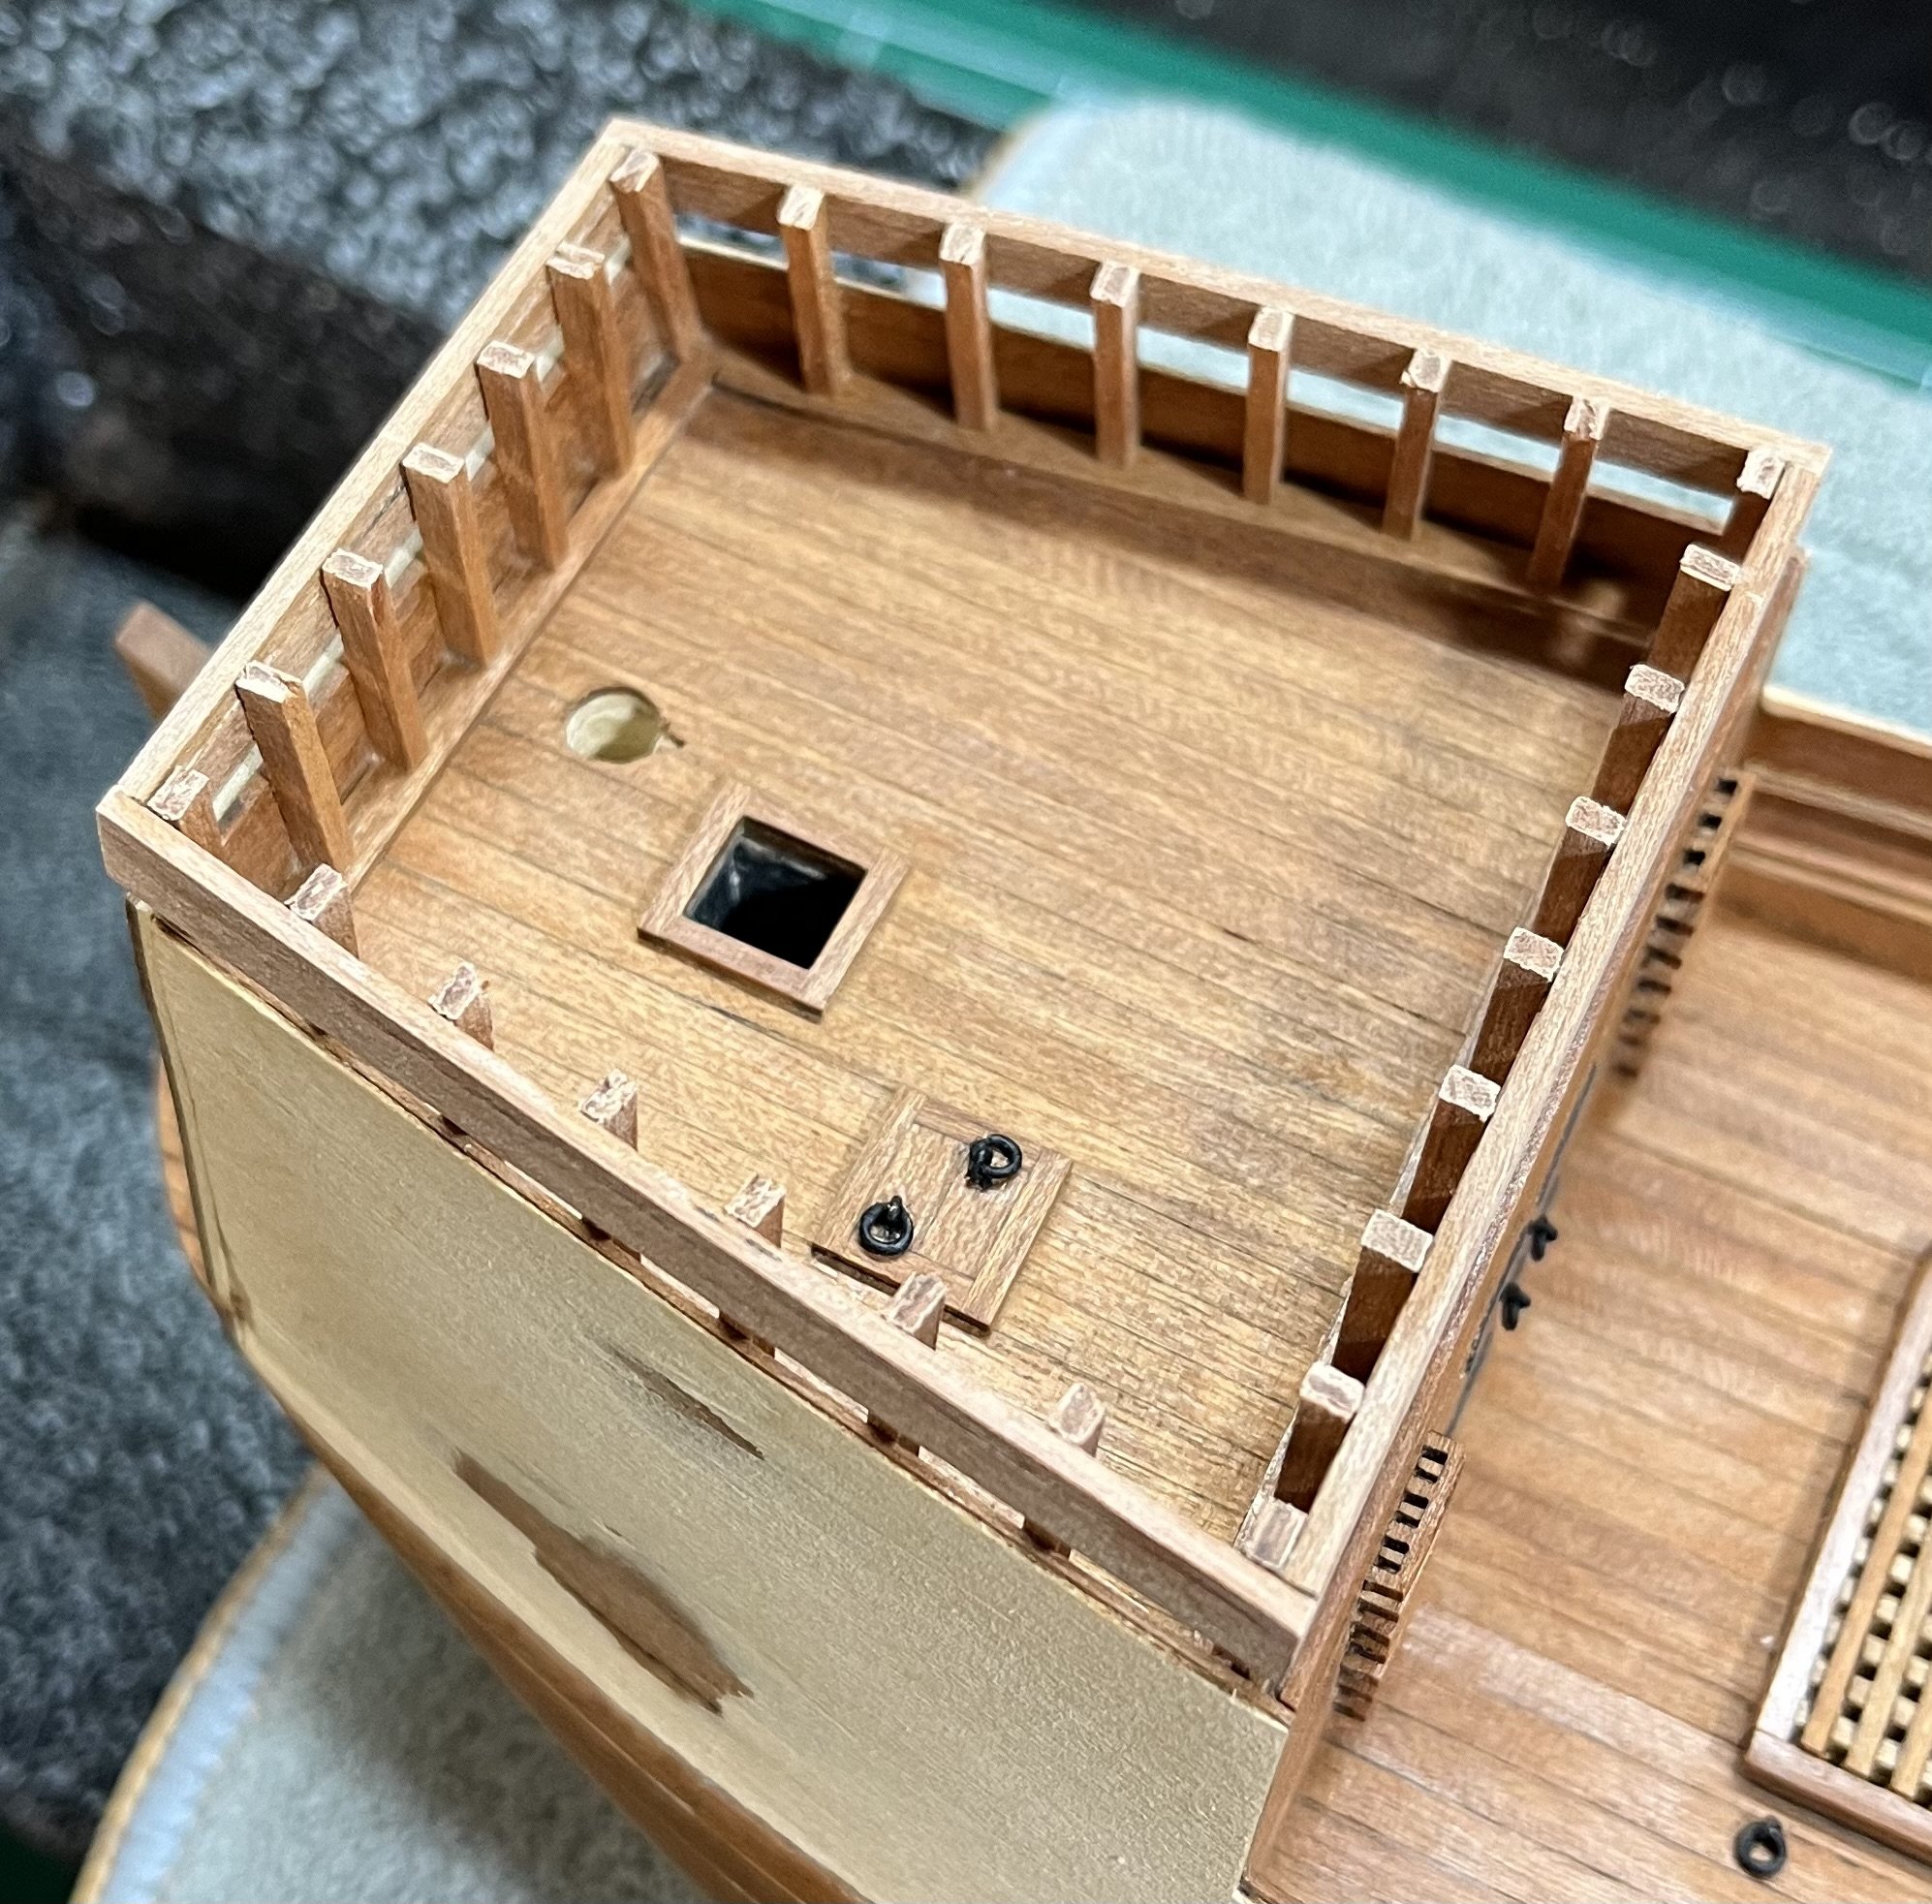
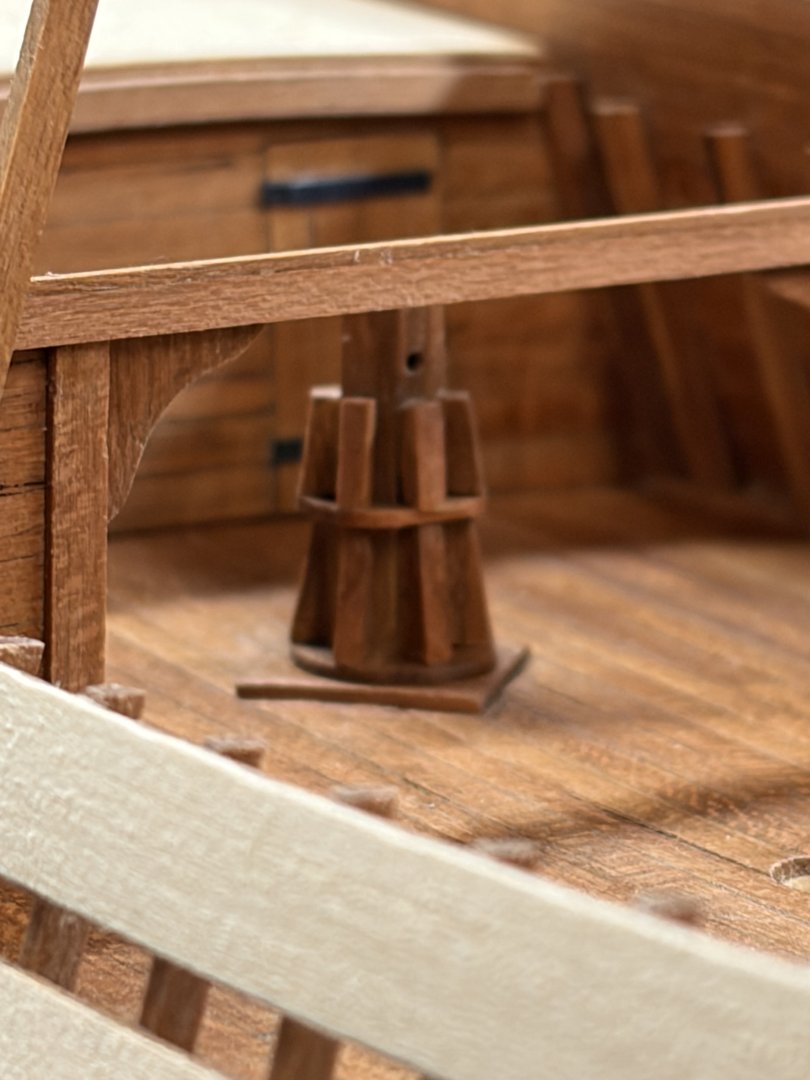
Capstan complete after many attempts. This was not a fun part of the project for sure. Steve
-
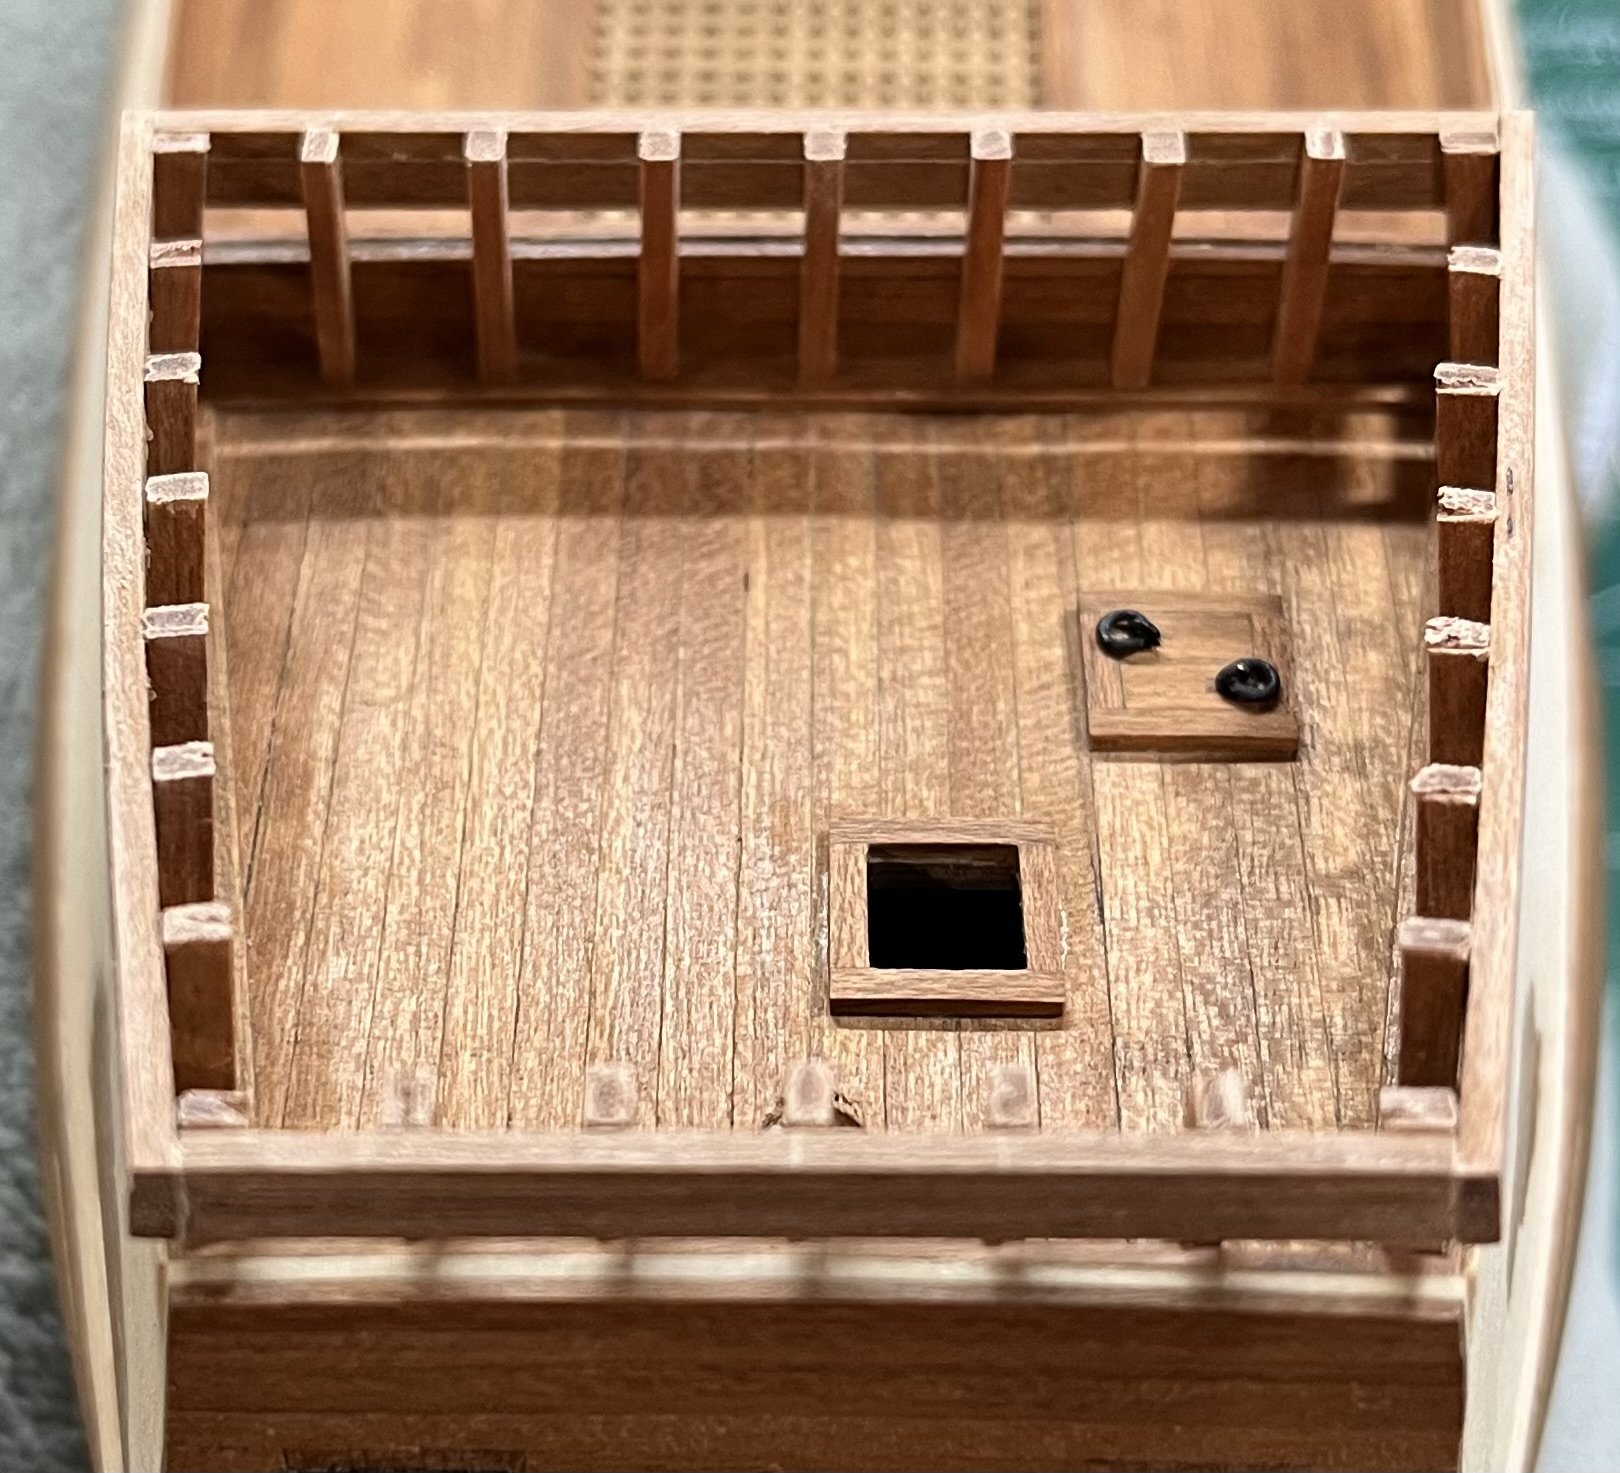
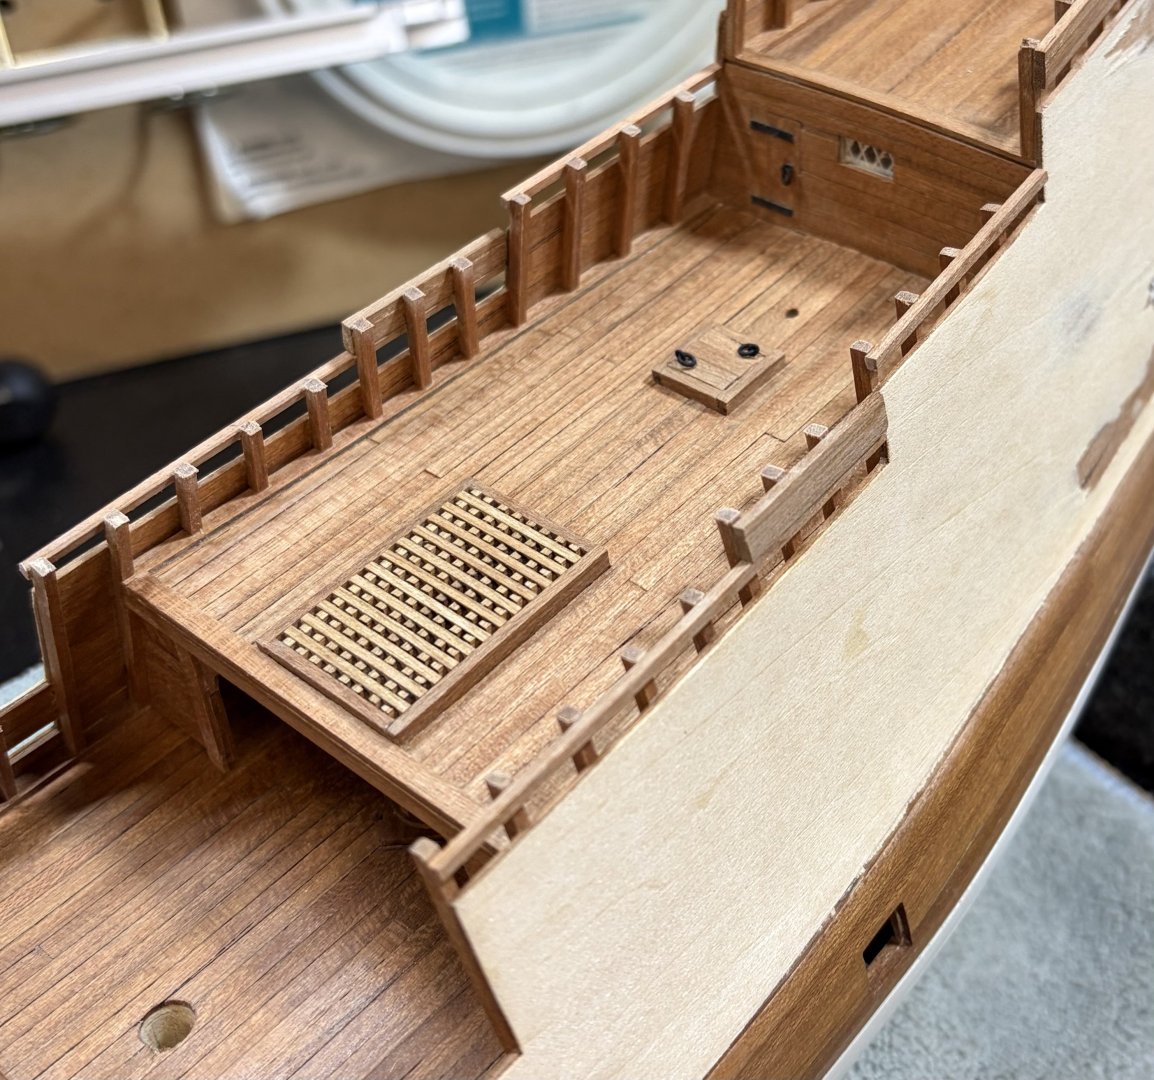
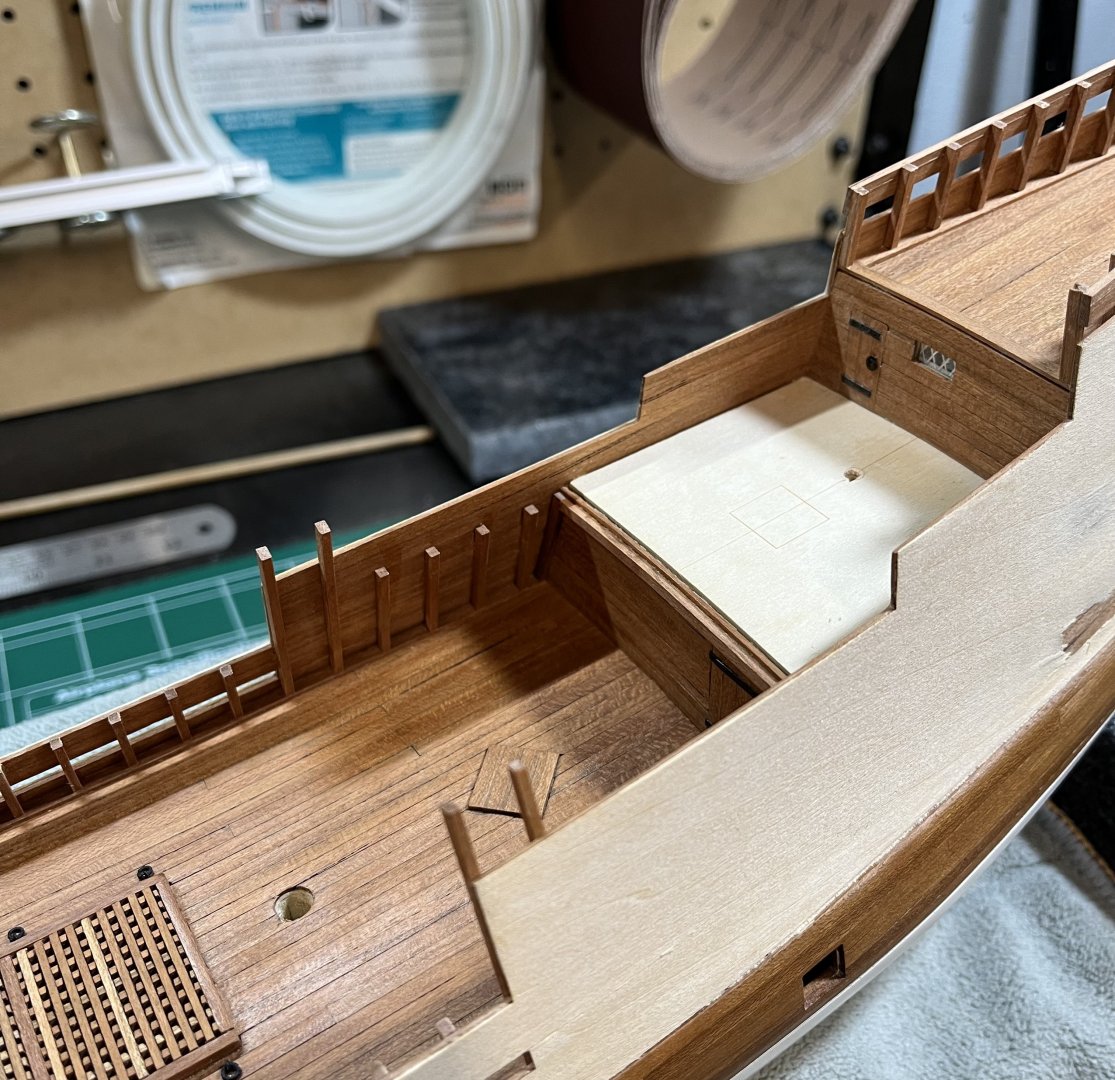
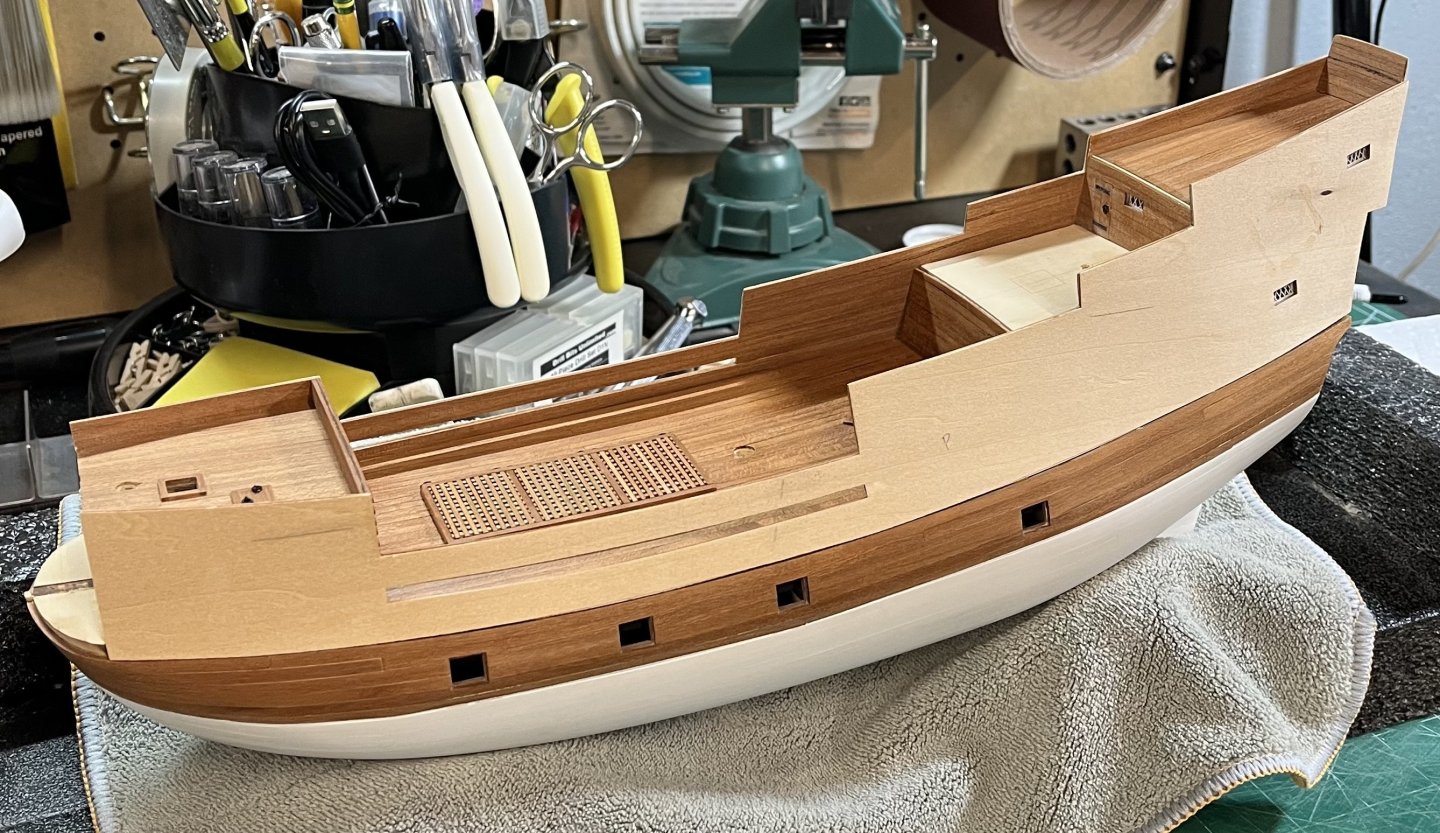
Construction under the half deck is complete minus the capstan. Beams are installed between the planked “j” templates. The decorative knees and columns are also added. You’ll notice a 1/32”x1/32” strip installed over the beam. This will sit flush with the deck when it’s added to create a smooth transition with the cherry deck planking. More sanding of the bulwarks and capstan construction is next. For those of you following- thank you for all the likes! Steve

-
Nice progress on the planking! Steve
-
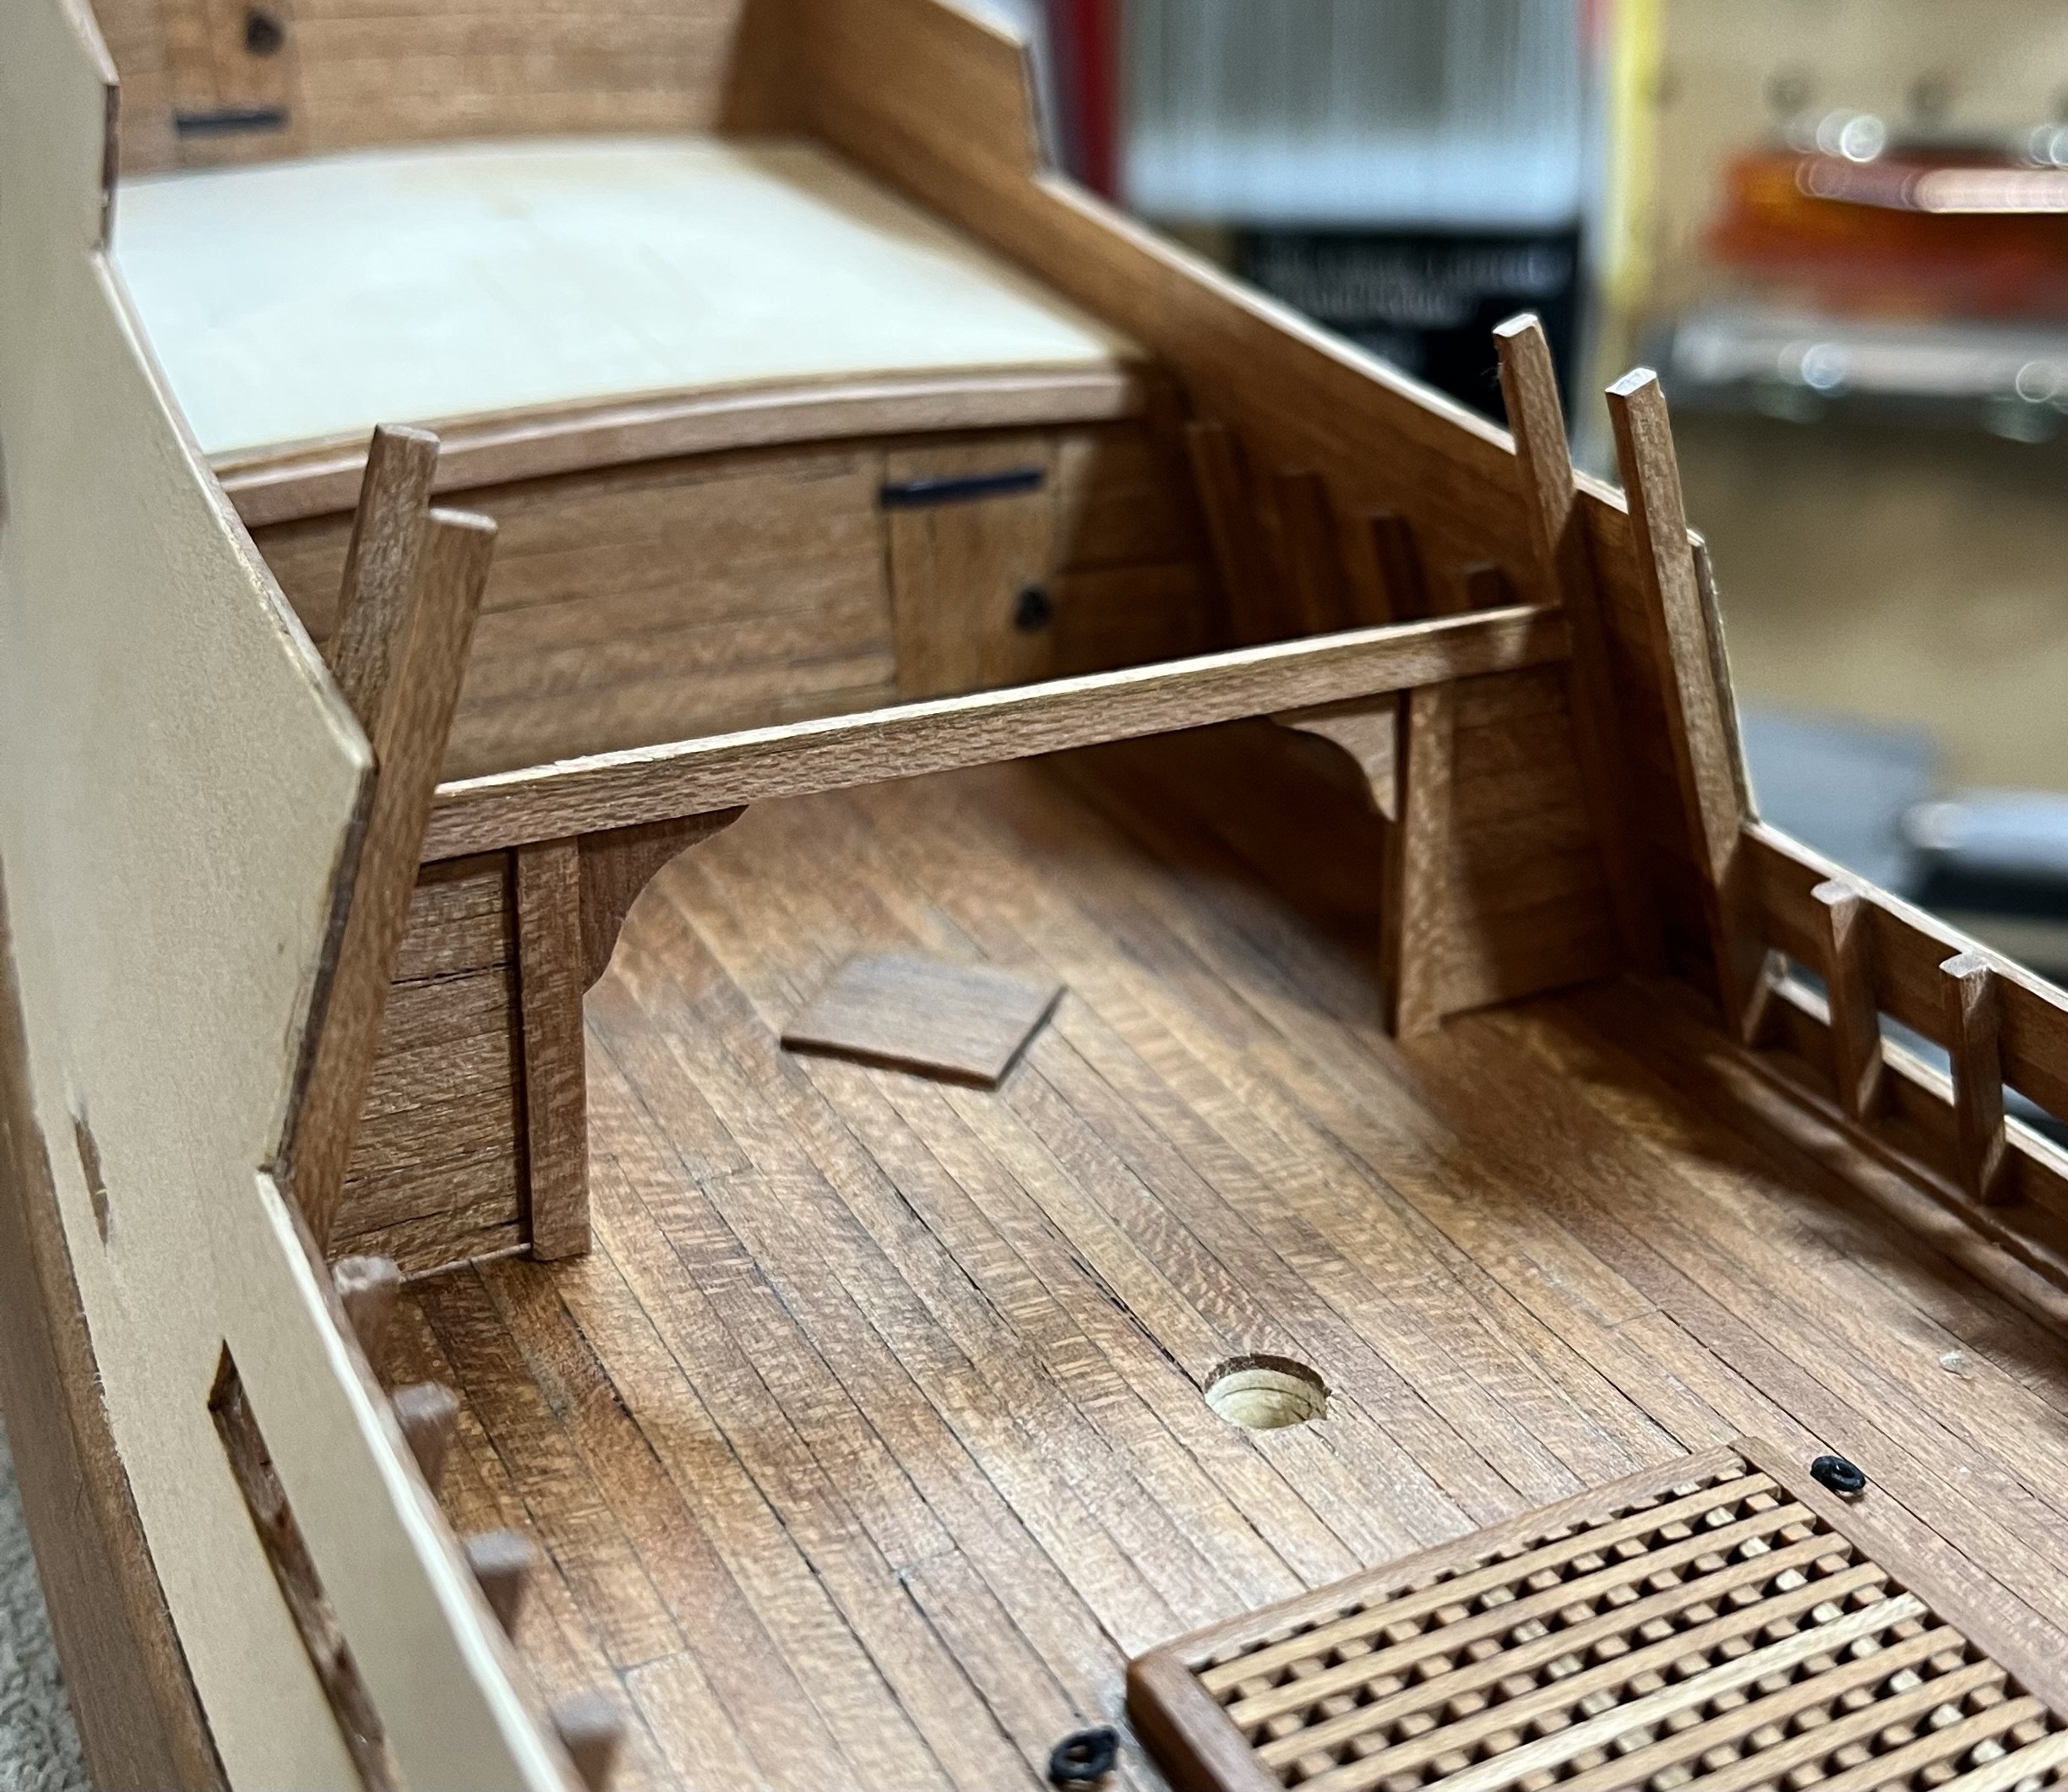
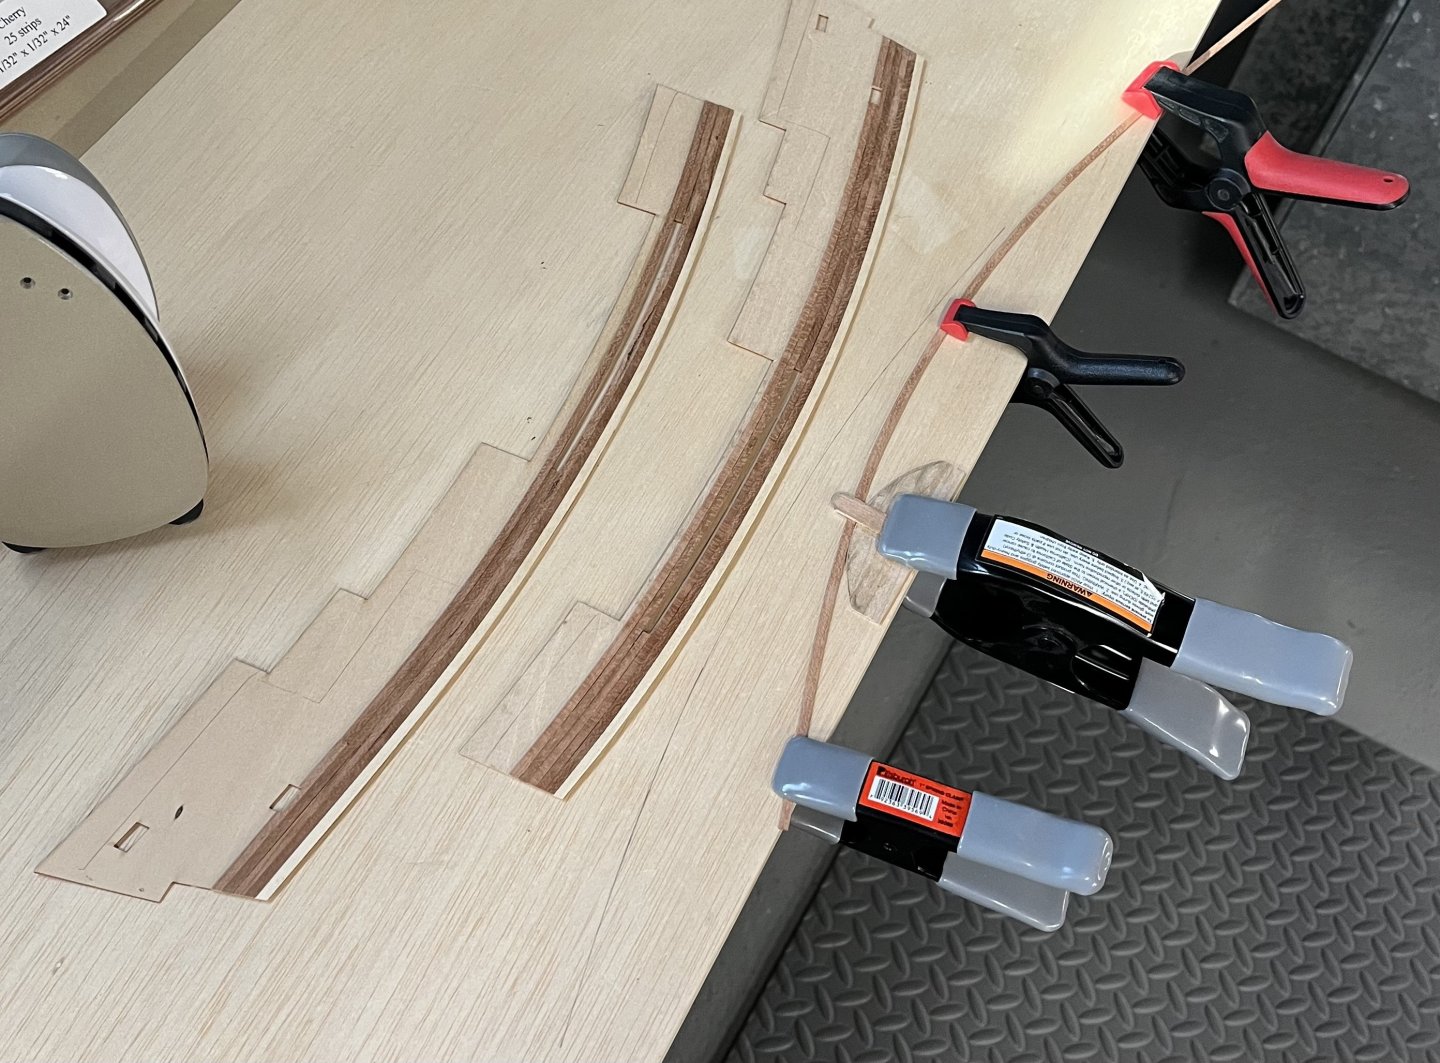
Below quarter deck stanchions complete. These were spaced with a 5/16” strip. I also installed the first beam across the great cabin bulkhead. I am constructing the stanchions in two parts, above and below the quarter deck, to avoid having to notch the waterways. (Yes, another “hack” from Stuntflyer!) Steve

-
All is looking really good. I like the black on the base. Gives a nice accent without distracting from the model. Steve
-
Upper deck stanchions complete. Same procedure as before only this time I used a spacer when I installed. Steve


-
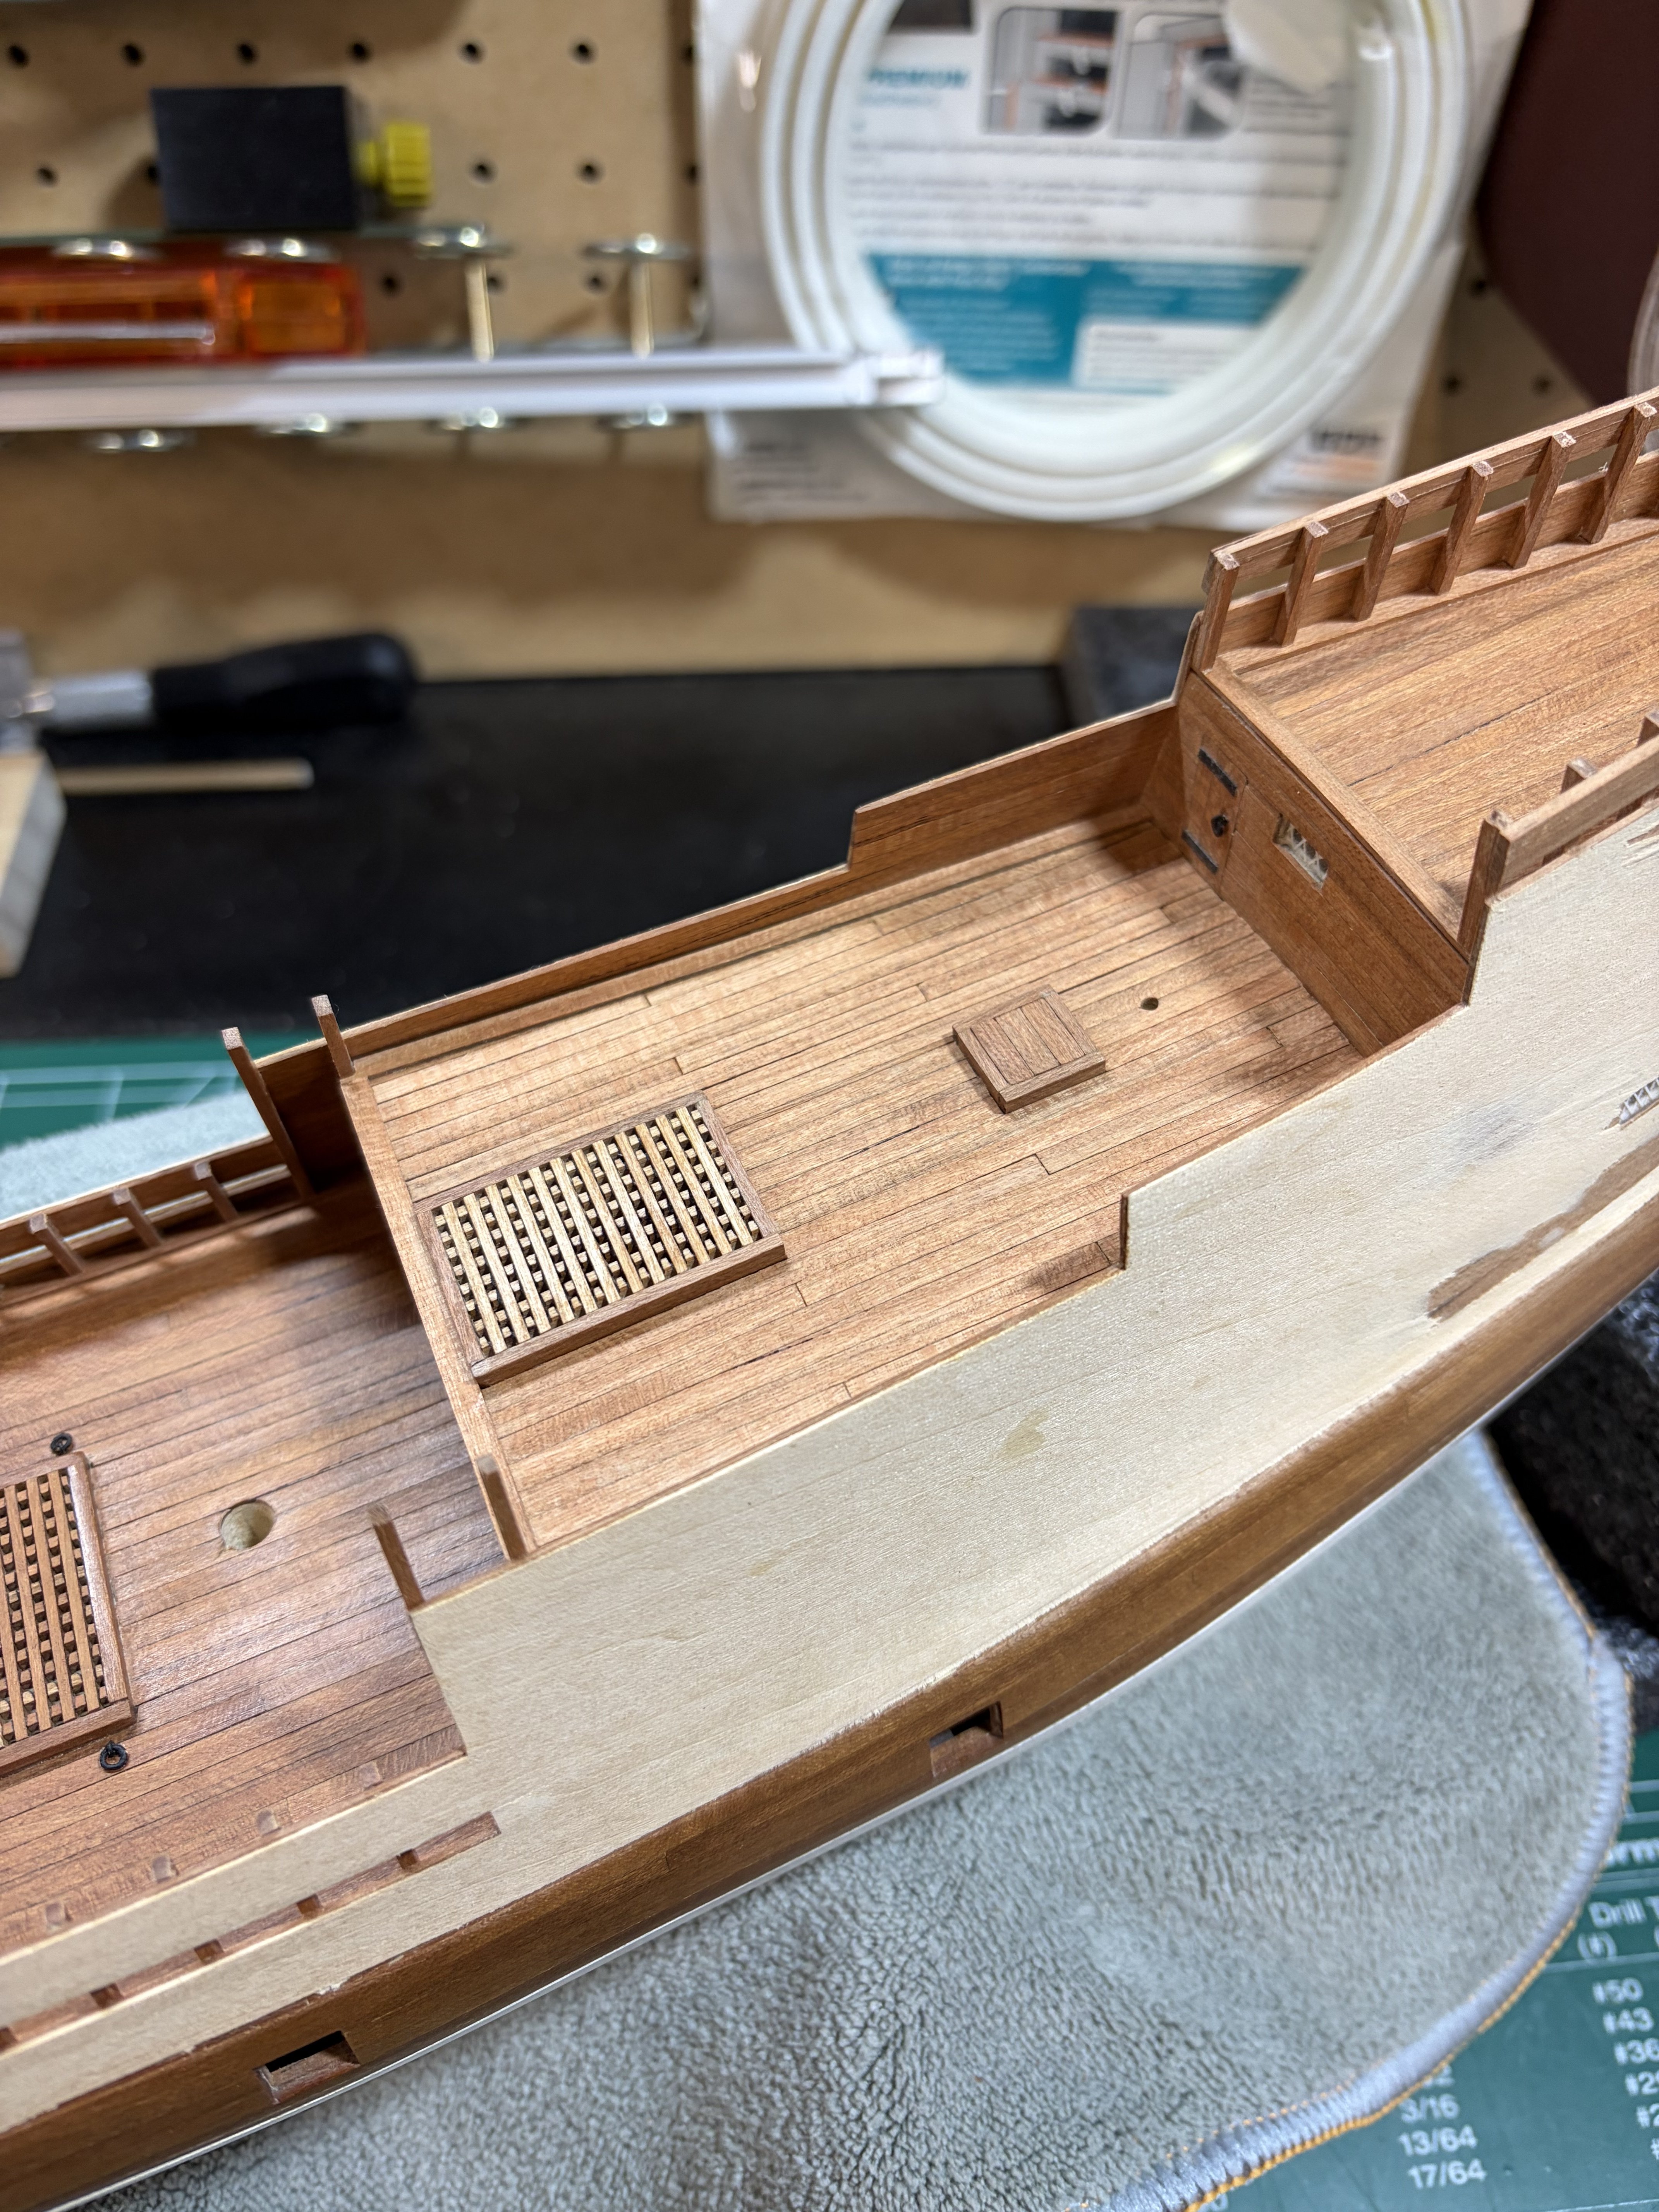
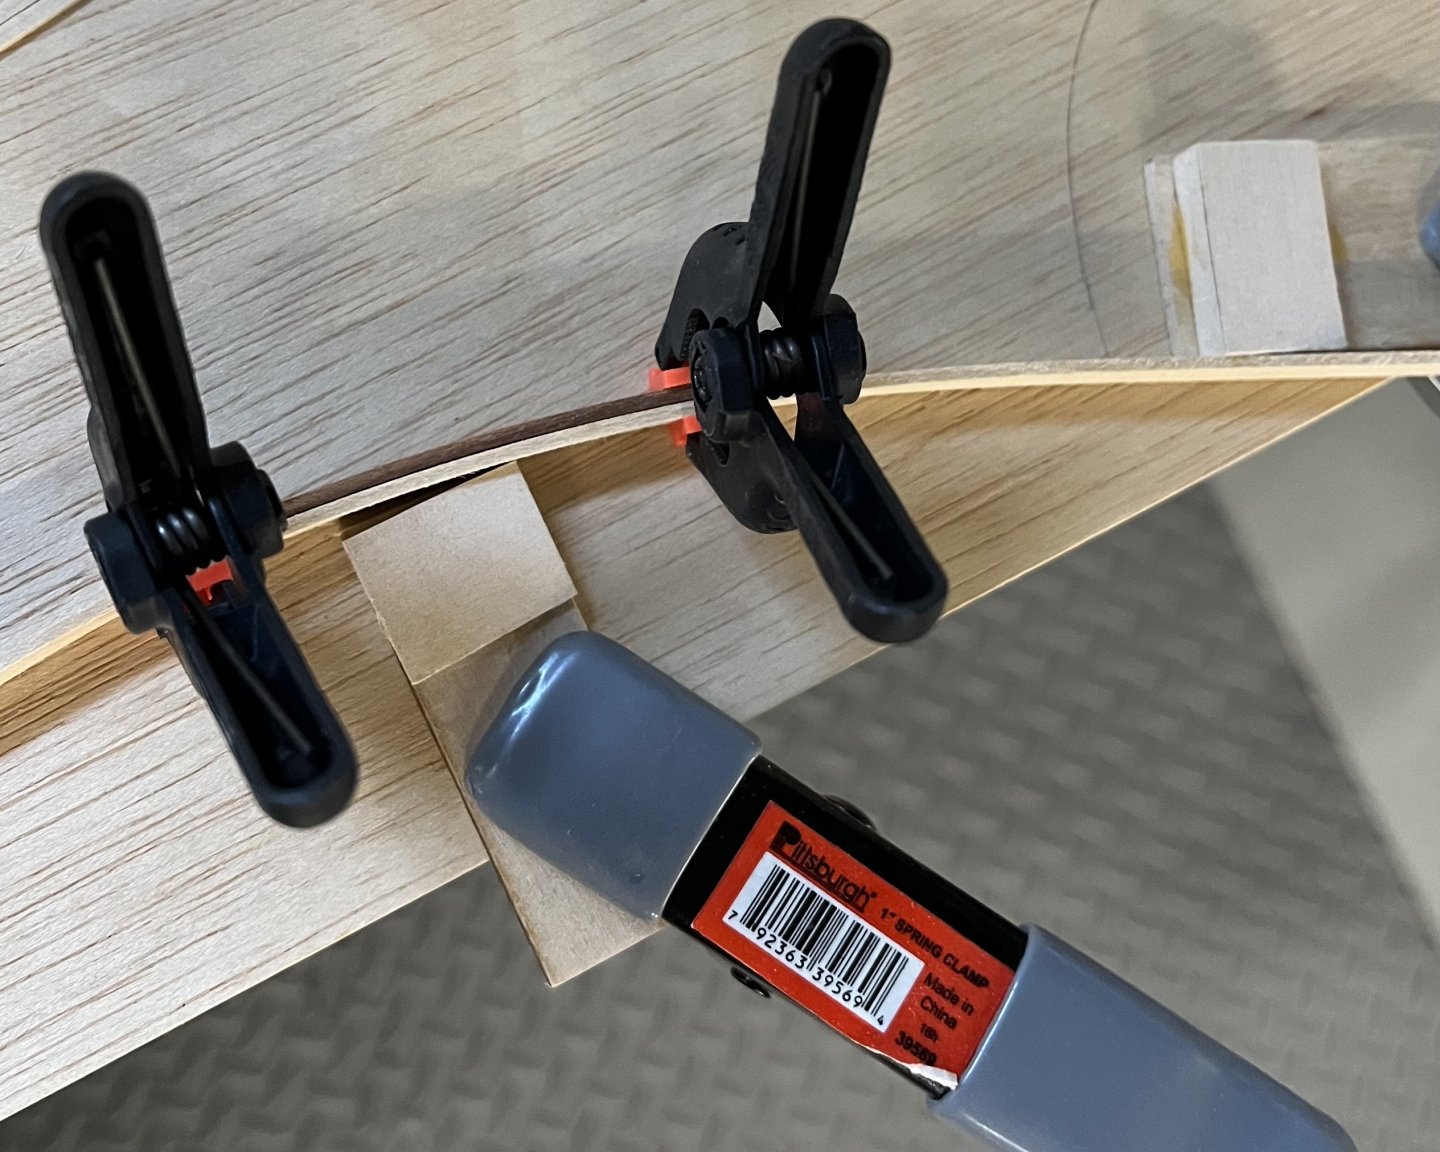
Poop deck stanchions complete. Same procedure as with the forecastle. The transom did need to be raised about 1/16” to accommodate the pre-planking. I noticed in Mike’s log that he had to do the same. More sanding was done on the bulwark templates to get them to 1/32” thick. One photo shows how I measured the thickness. The smaller pre-planking pieces were custom shaped. 1/8” x 1/16” strips did not fit the space proper. One photo points to this area. Just like with the forecastle, there were many redos on this part. Forward progress still outweighs the setbacks. Steve


-
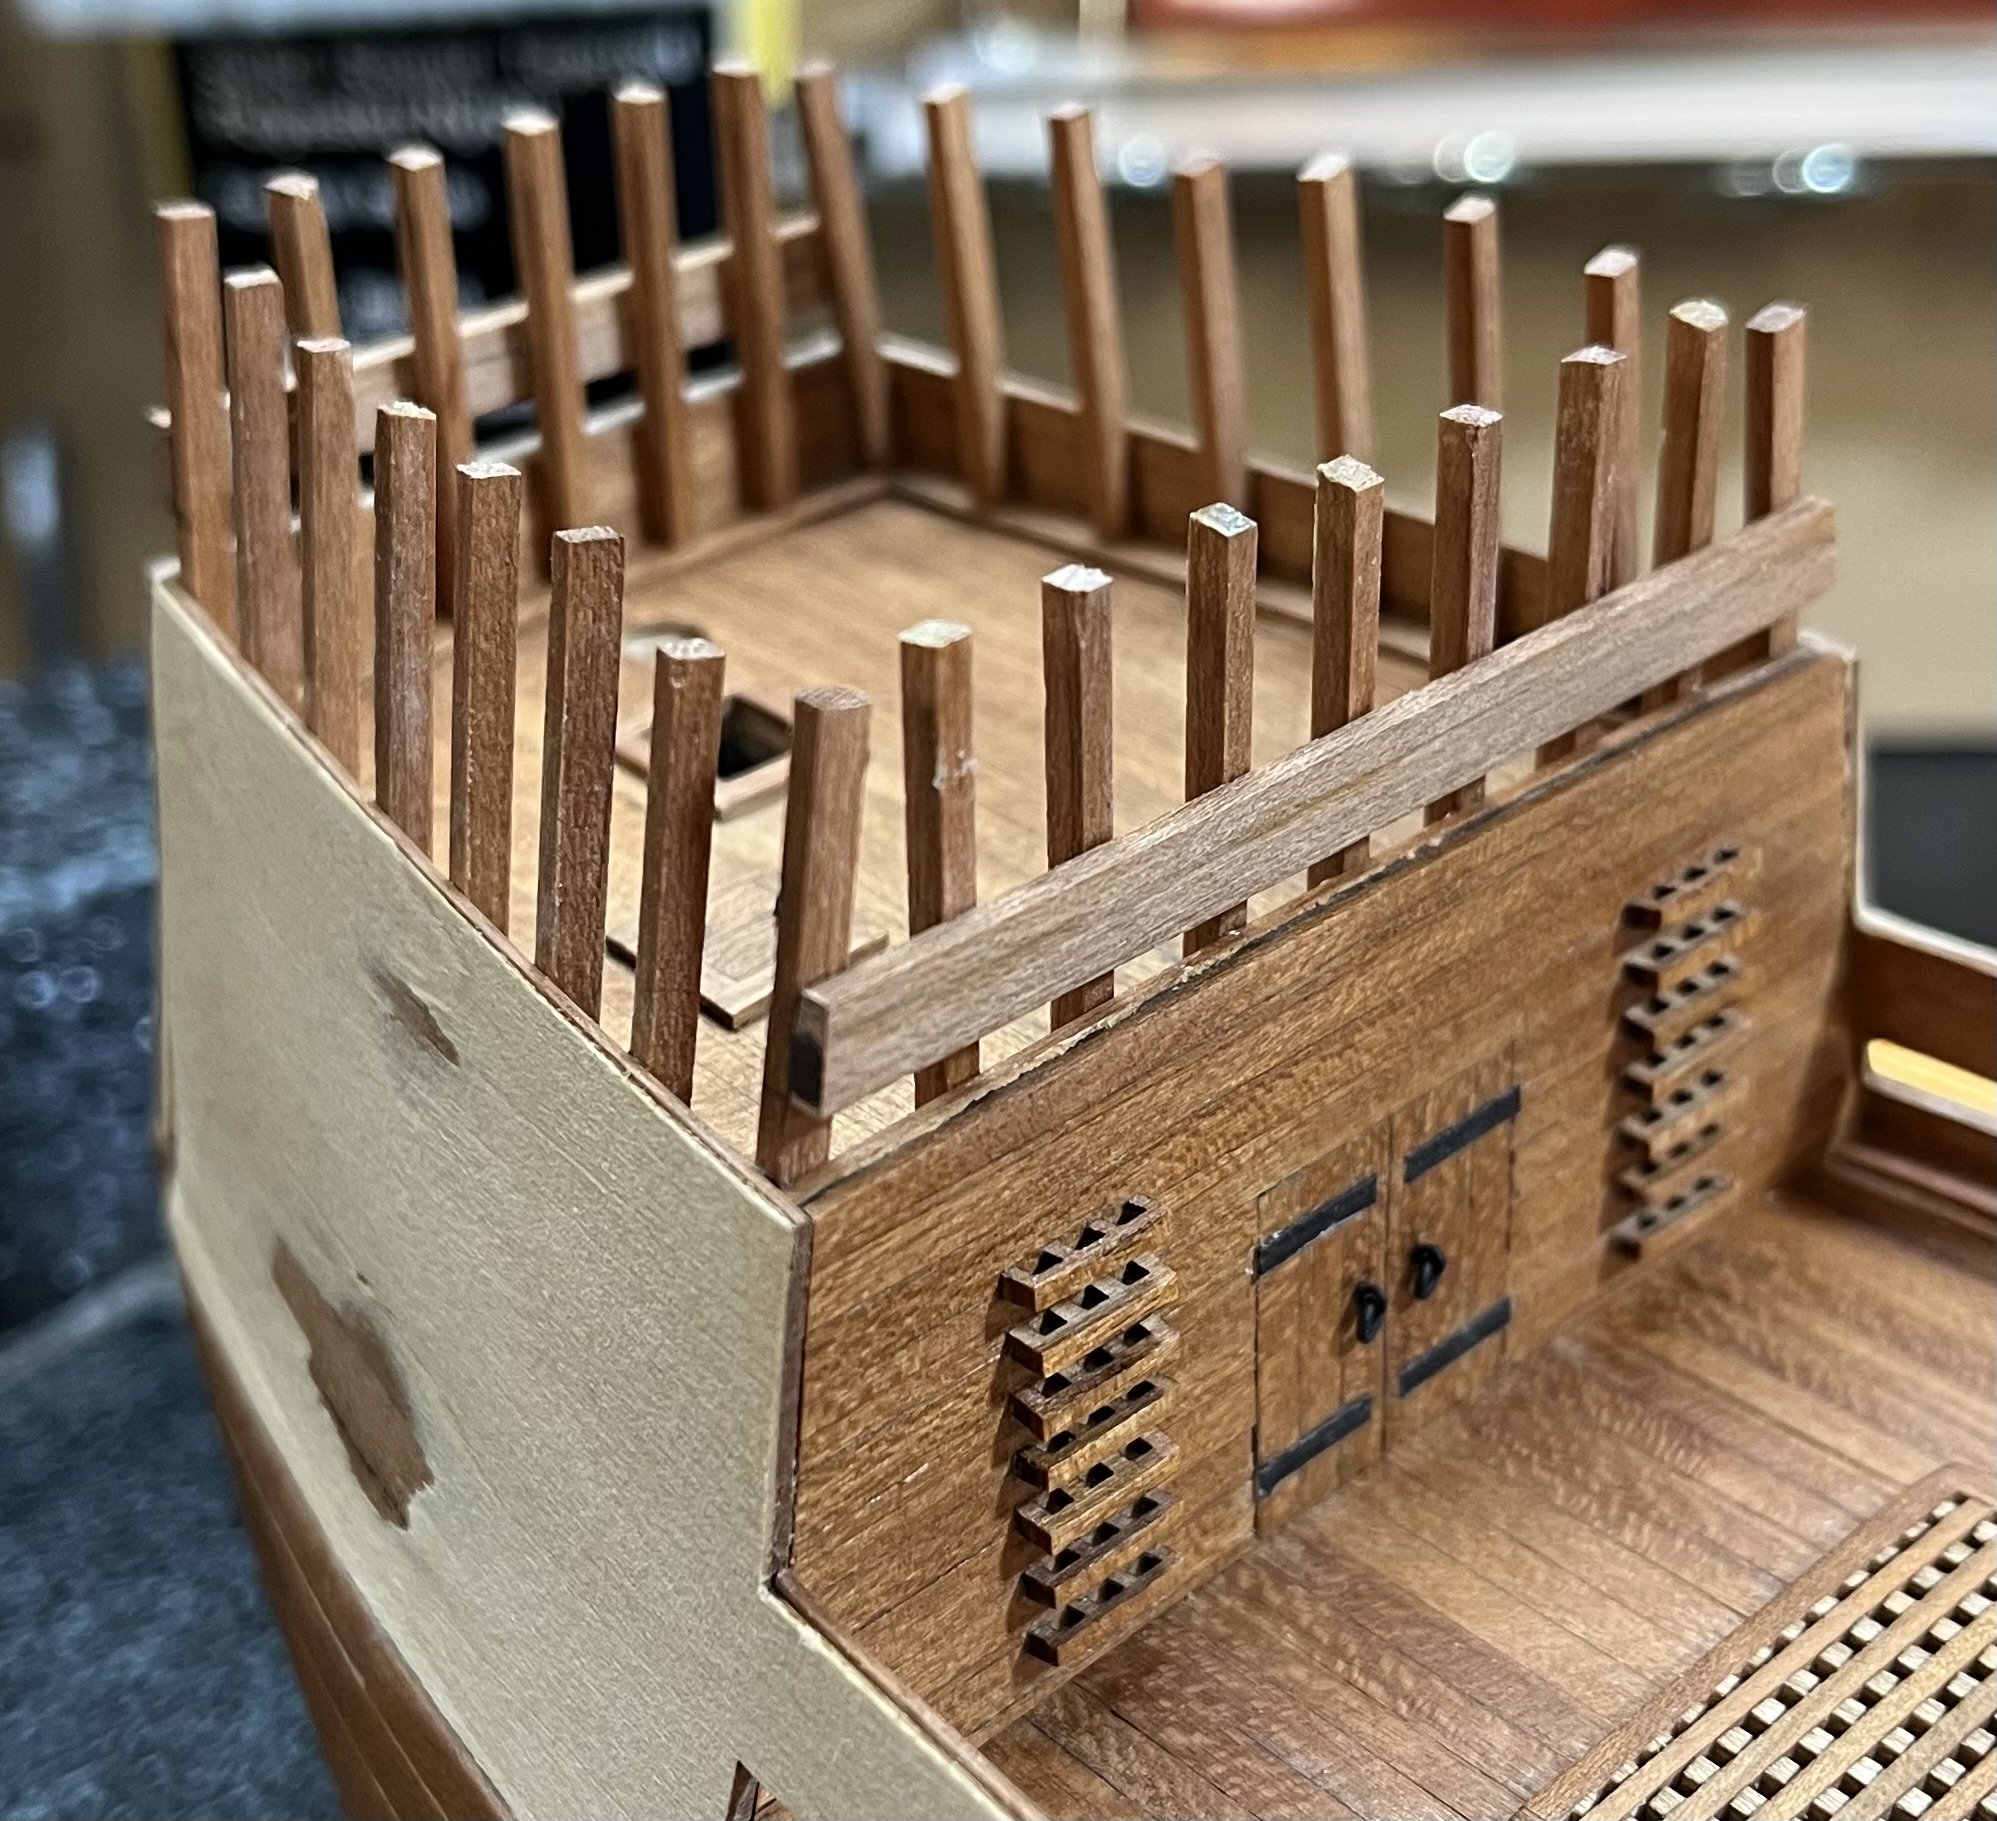
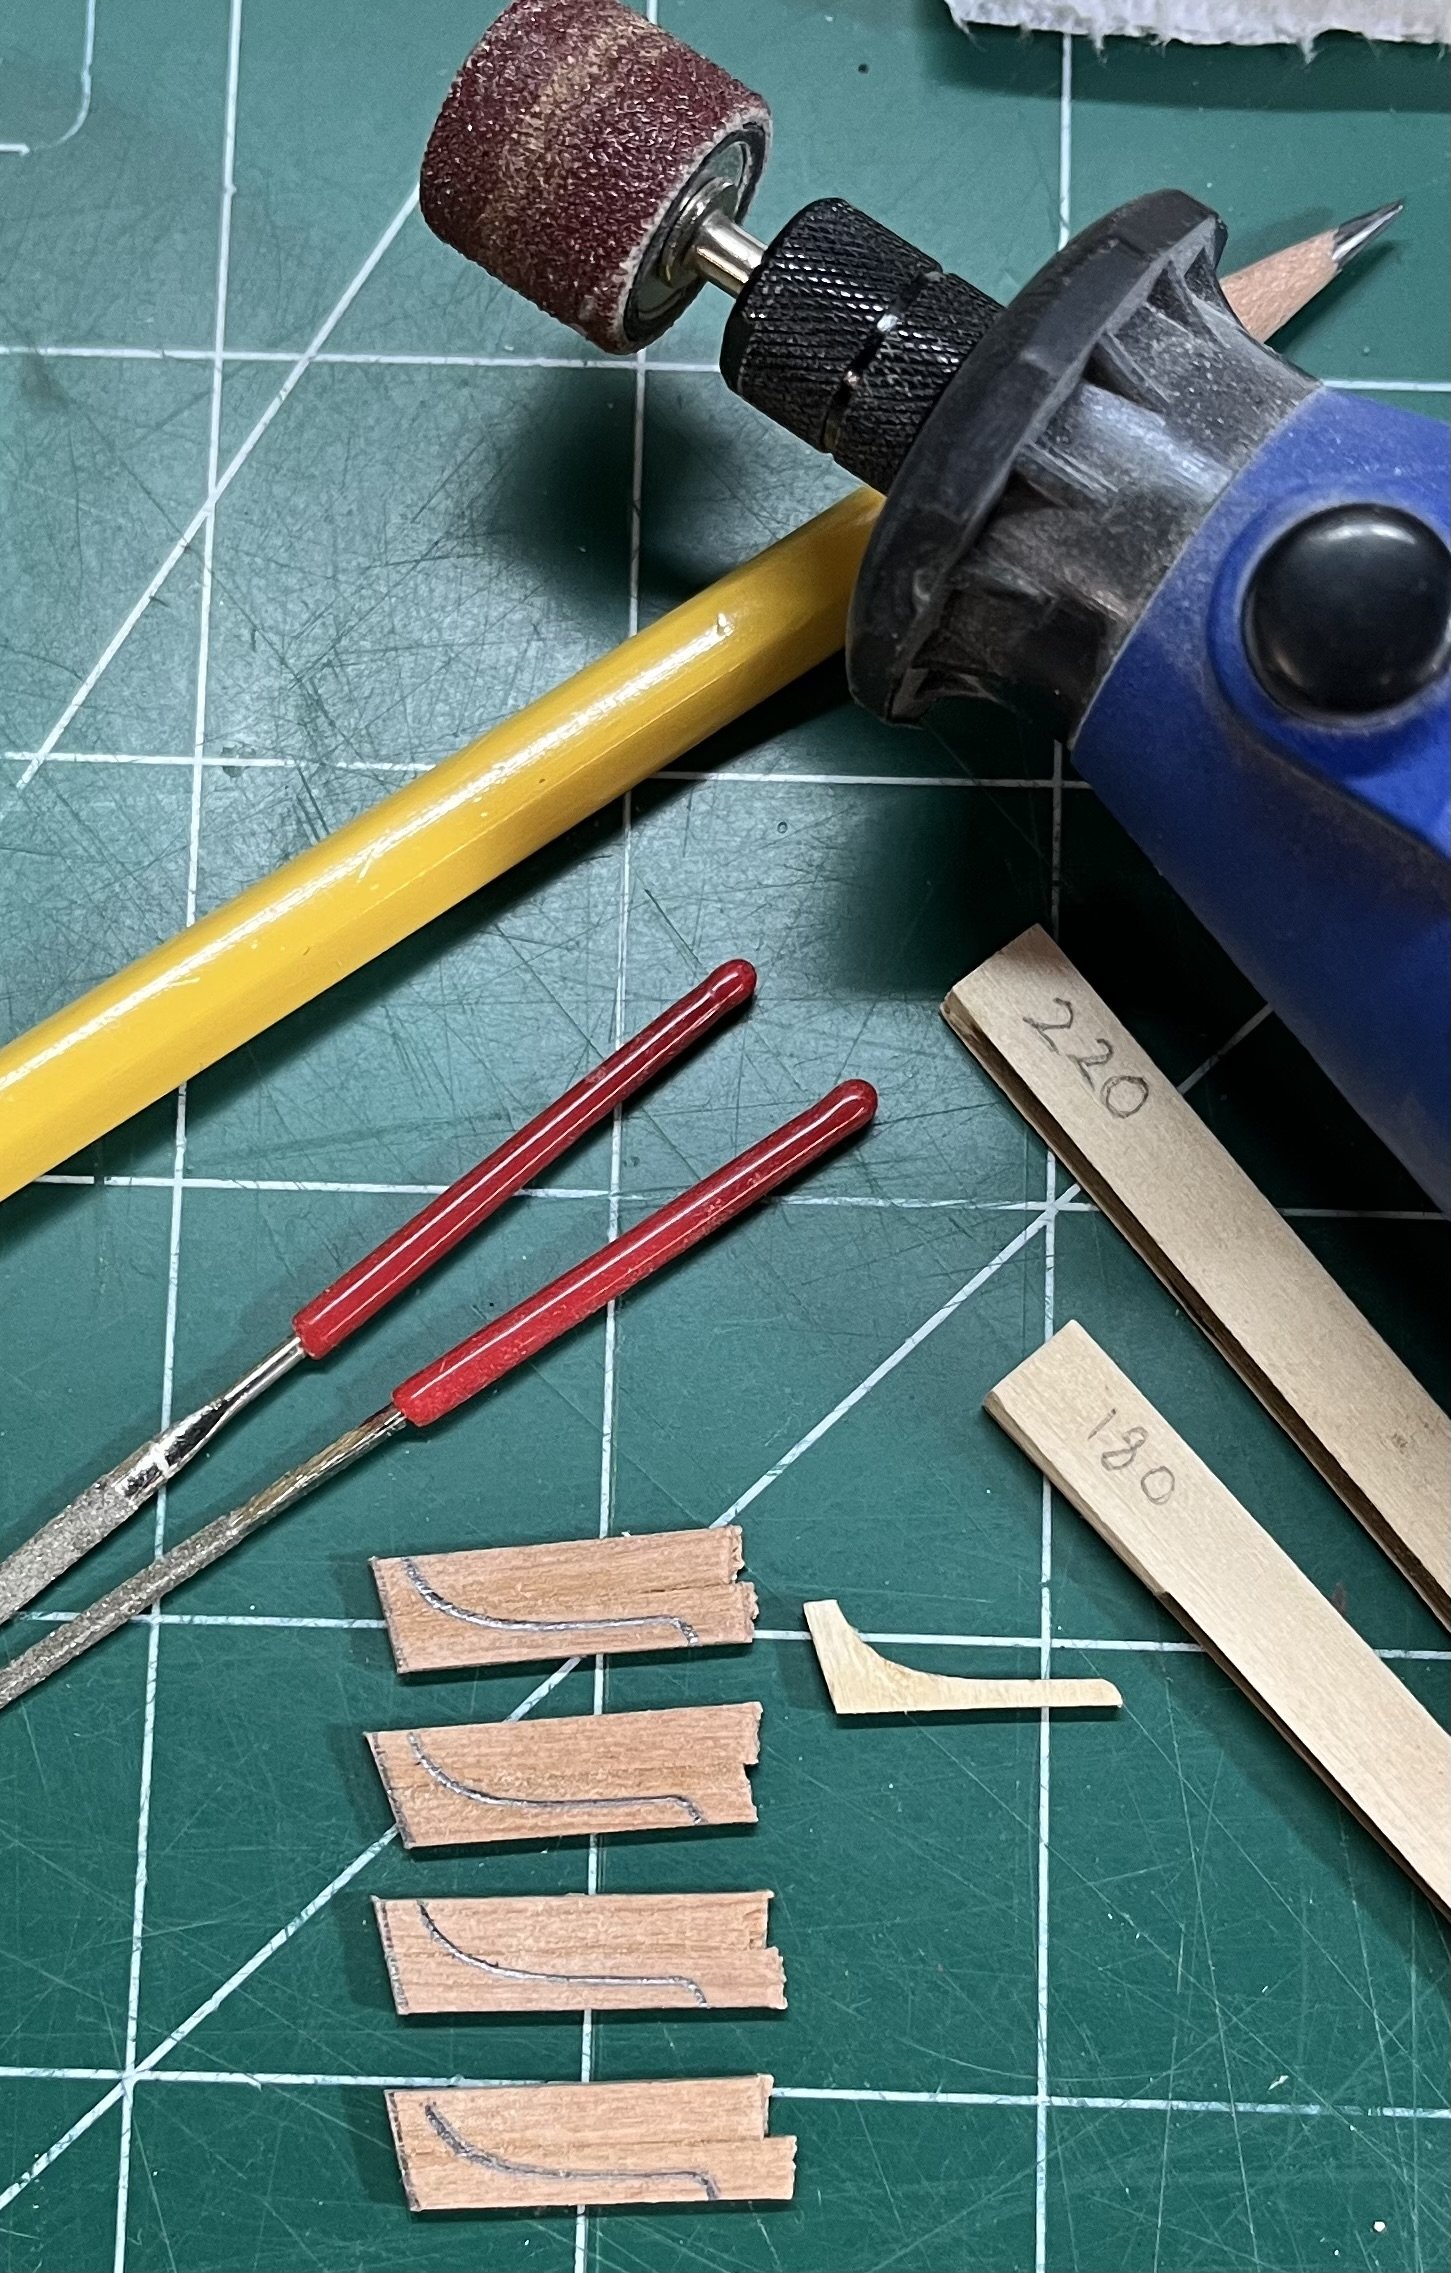
Completing the forecastle stanchions and pre-planking was tedious and required planning and concentration. I’ll outline what I did to assist those few building this kit. I started by sanding and applying Wipe On Poly to the 1/16” x 3/32” strips. I measured 1” sections and cut them using the mini chop saw that I used earlier in this project. The corner stanchions were installed first so I could plan the spacing of the rest of the stanchions. I created tick-strips out of scrap basswood to mark even spacing for the appropriate number of stanchions as shown on the plans. Make sure you check the plans carefully here. Pin rails will be mounted later to specific stanchions. I taped the tick-strips to the deck so I had visible reference points while installing. This was absolutely necessary to line up the stanchions. Using spacers did not work for me here so I adjusted them by eye. I remounted several along the way. It took several days to figure out this method. The pre-planking was prepared and sanded before cutting to length. These were not treated with WOP as they will be painted later on. I installed the fore and aft pieces first. This helped when mounting the side pieces. See photos for this and the method I used to bend these pieces. Hot water then bending as shown. Excess lengths were cut using a sprue cutter. I tried a rotary tool first, but this was a mistake. Sanding sticks were used to polish the rest. I will round the stanchions after the rest are installed on the poop and upper deck. I hope these methods provide useful to others. Steve


-
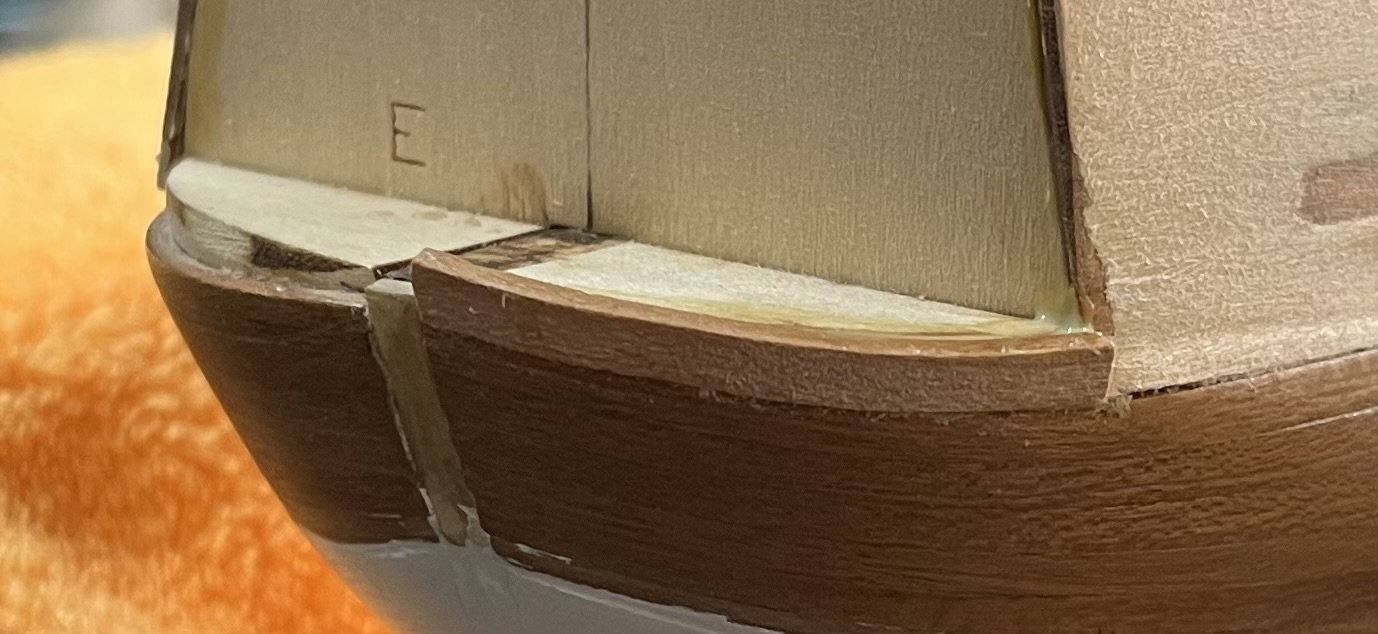
The stem, keel, and stern post have been installed. Some wood filler was added after these were installed to seal any gaps. Before working on the bulwark stanchions, I added the waterways along the sides of the forecastle, poop deck, and upper deck. I will photograph the waterways after I compete the stanchions. Steve
-
Been working on the stem parts for a while. I used my scroll saw finally. Definitely have a lot to learn. Took a while to sand the edges to the correct shape. I used a 1/16” x 3/32” strip to check the size of the notches. They will need to fit these strips later on in the project. Steve
-
Agreed- please do not paint this. It looks great. Steve
-
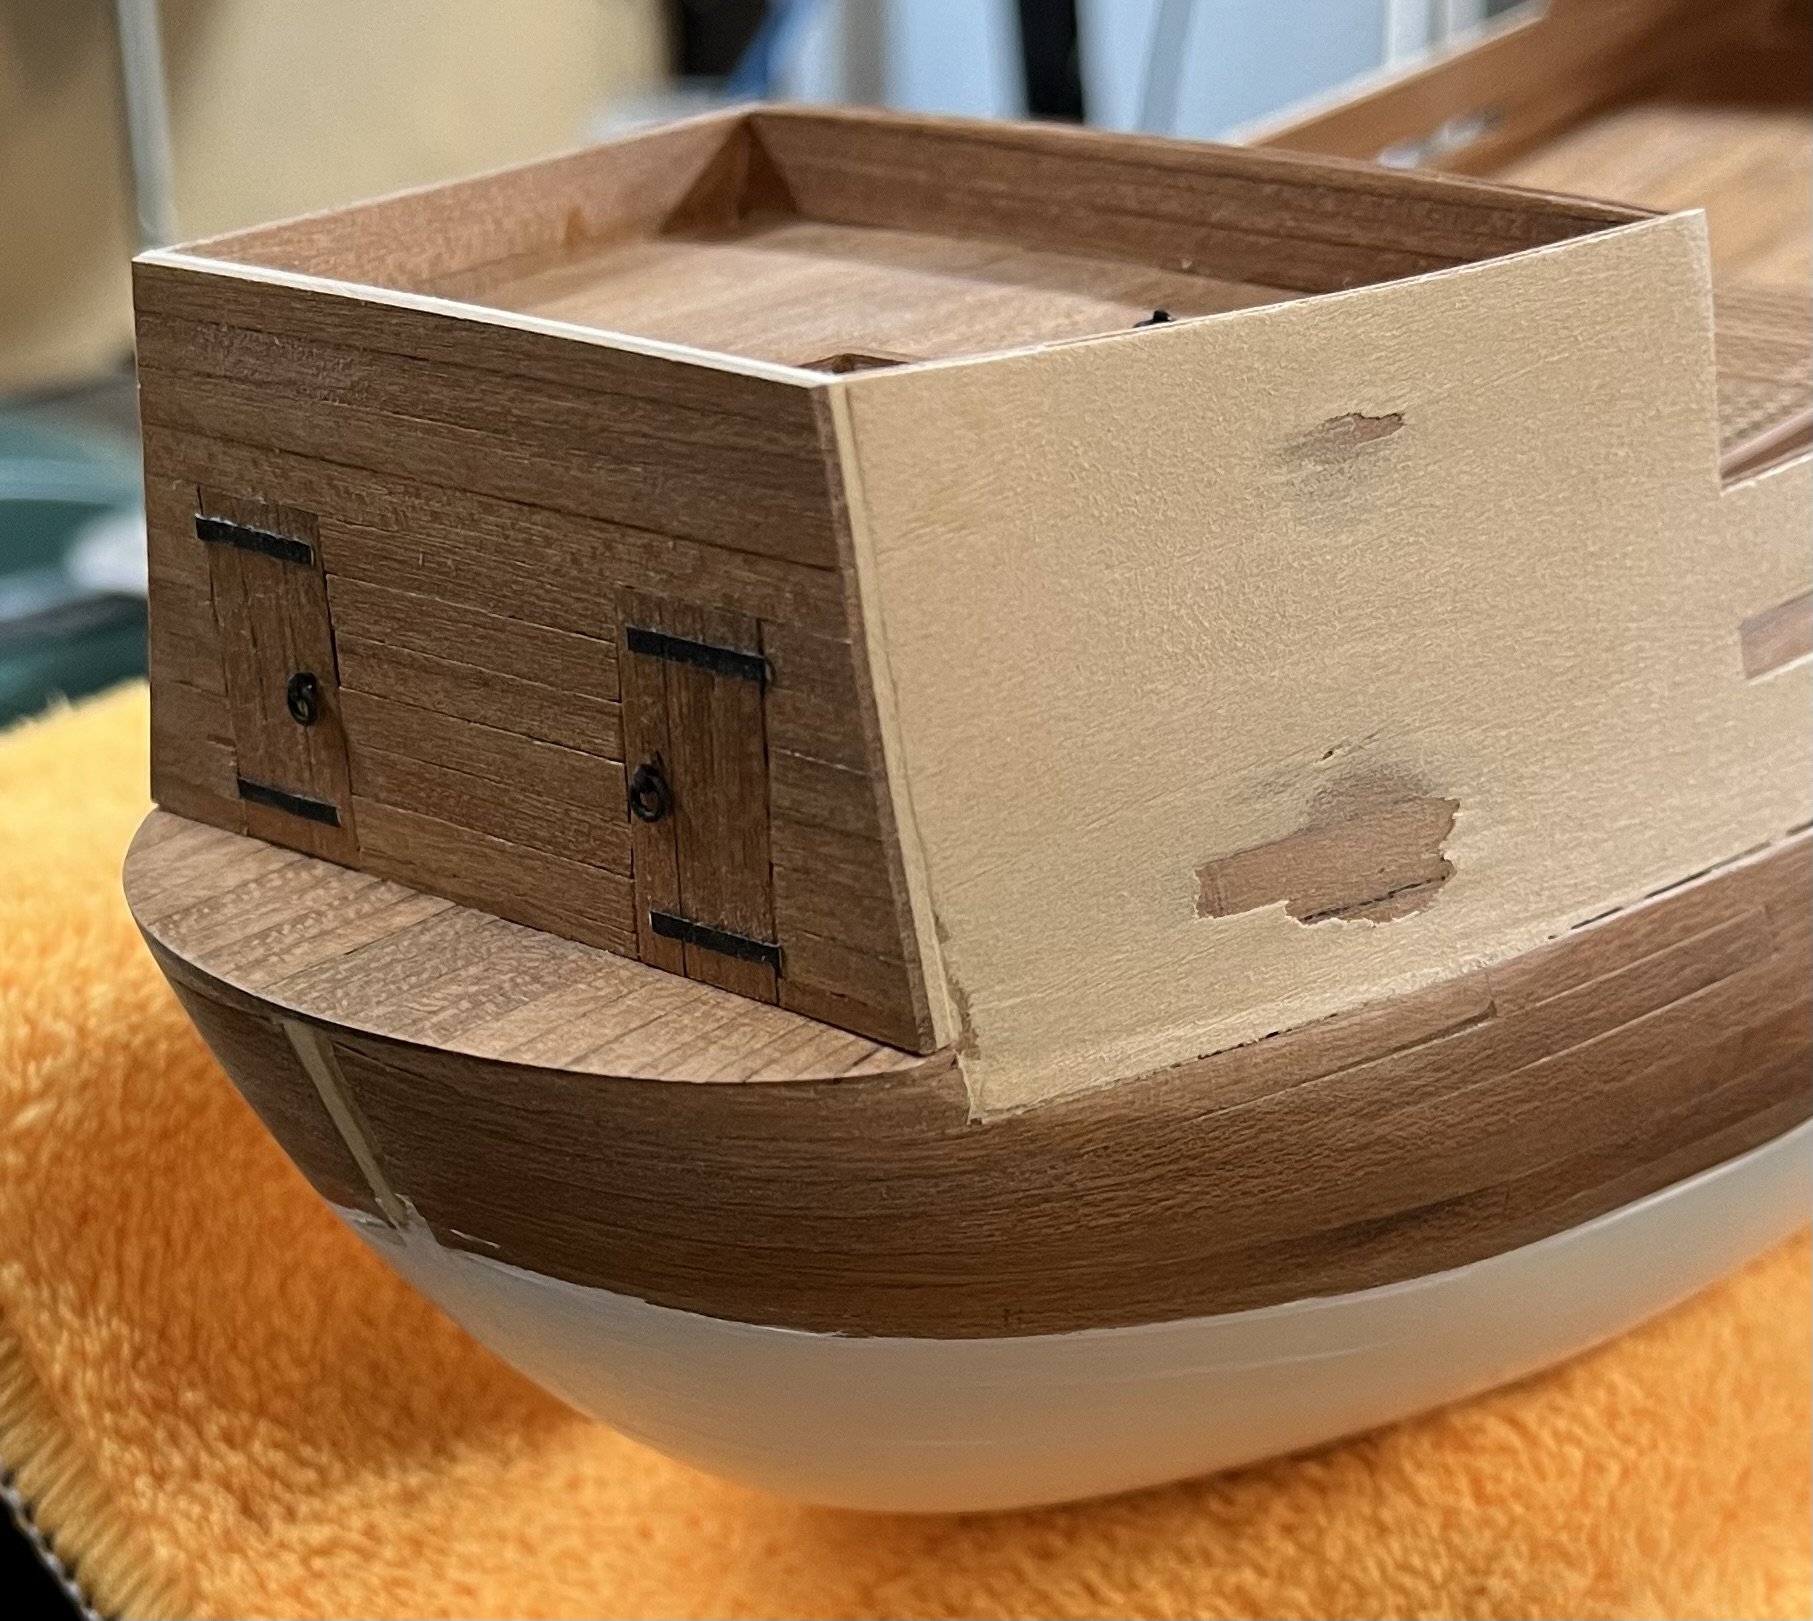
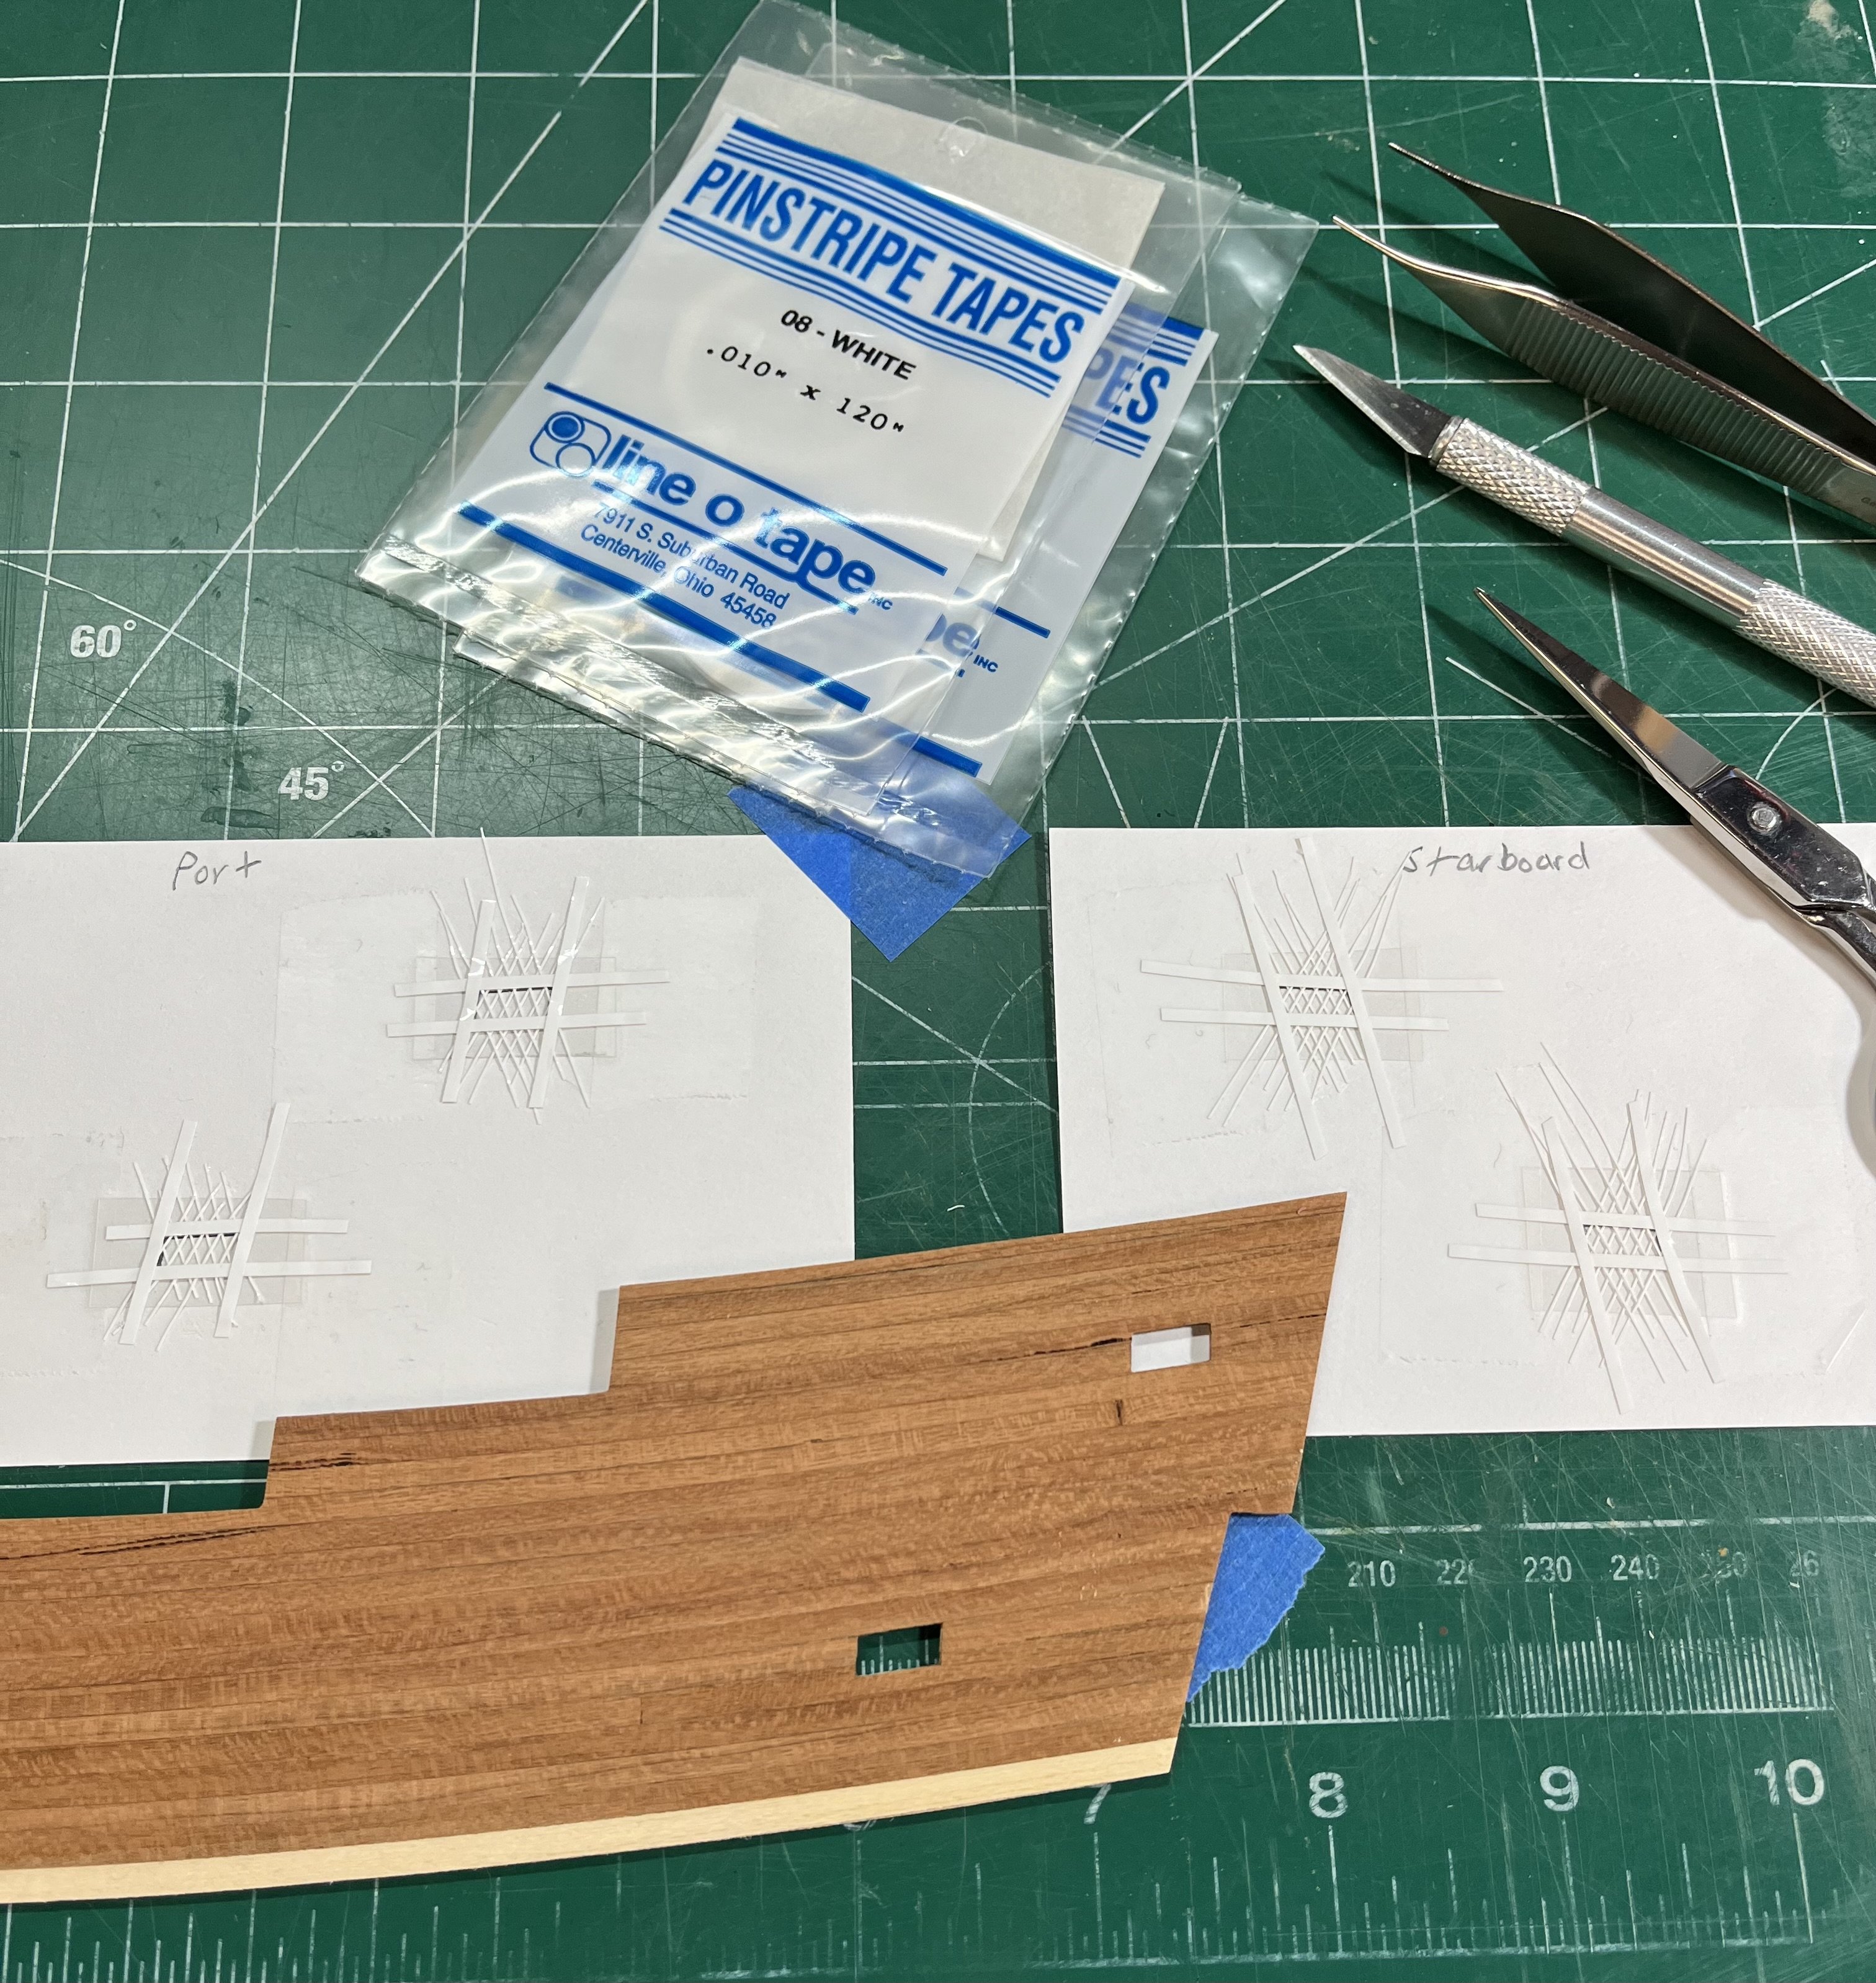
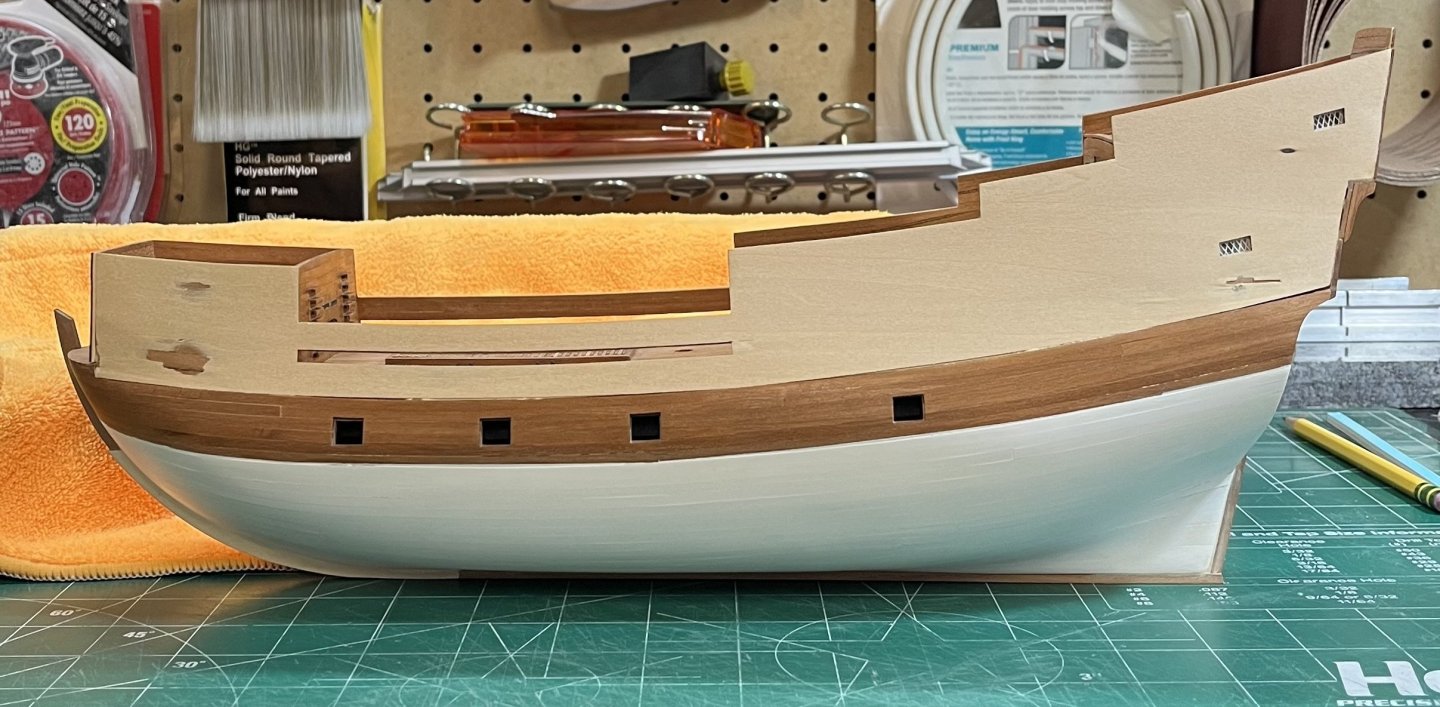
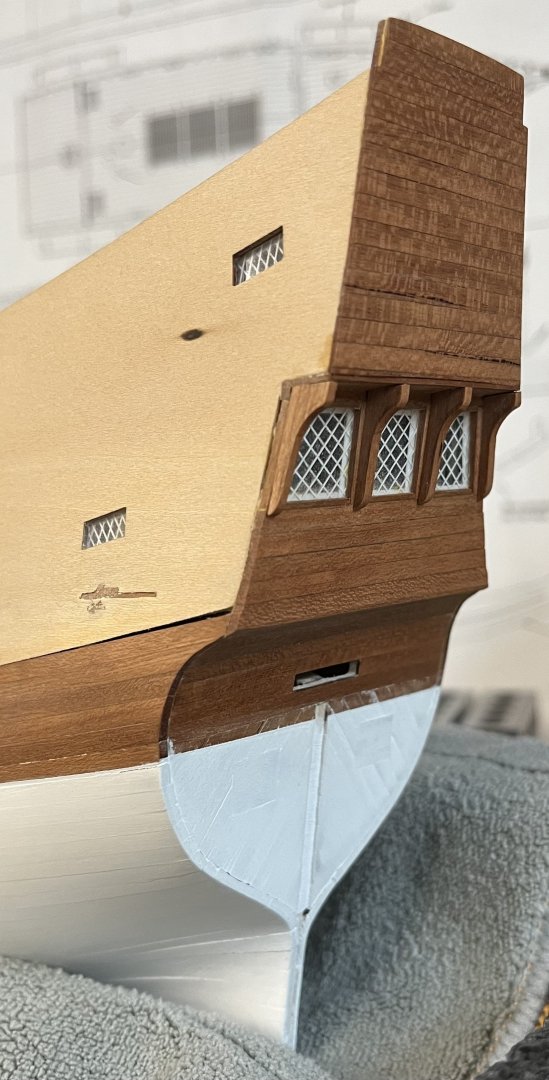
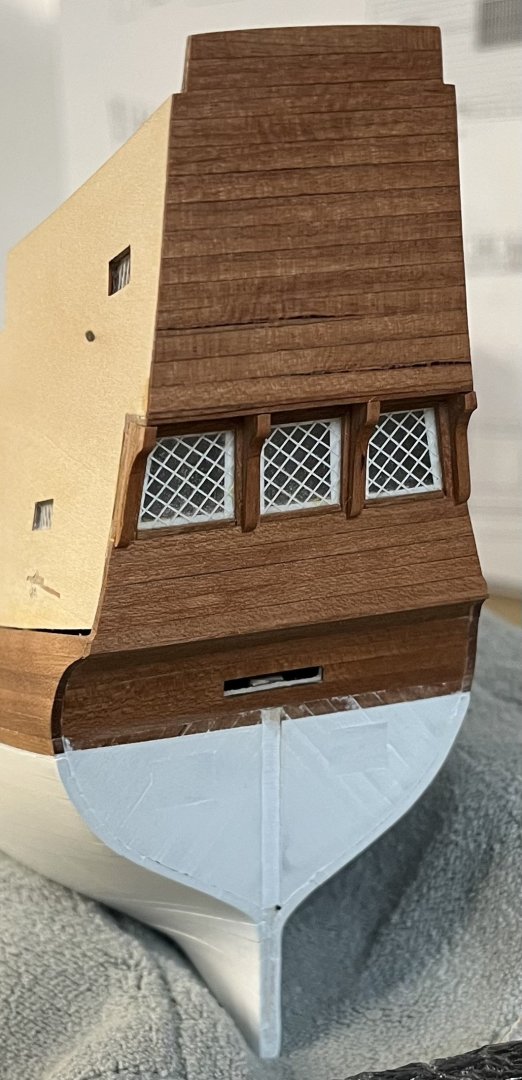
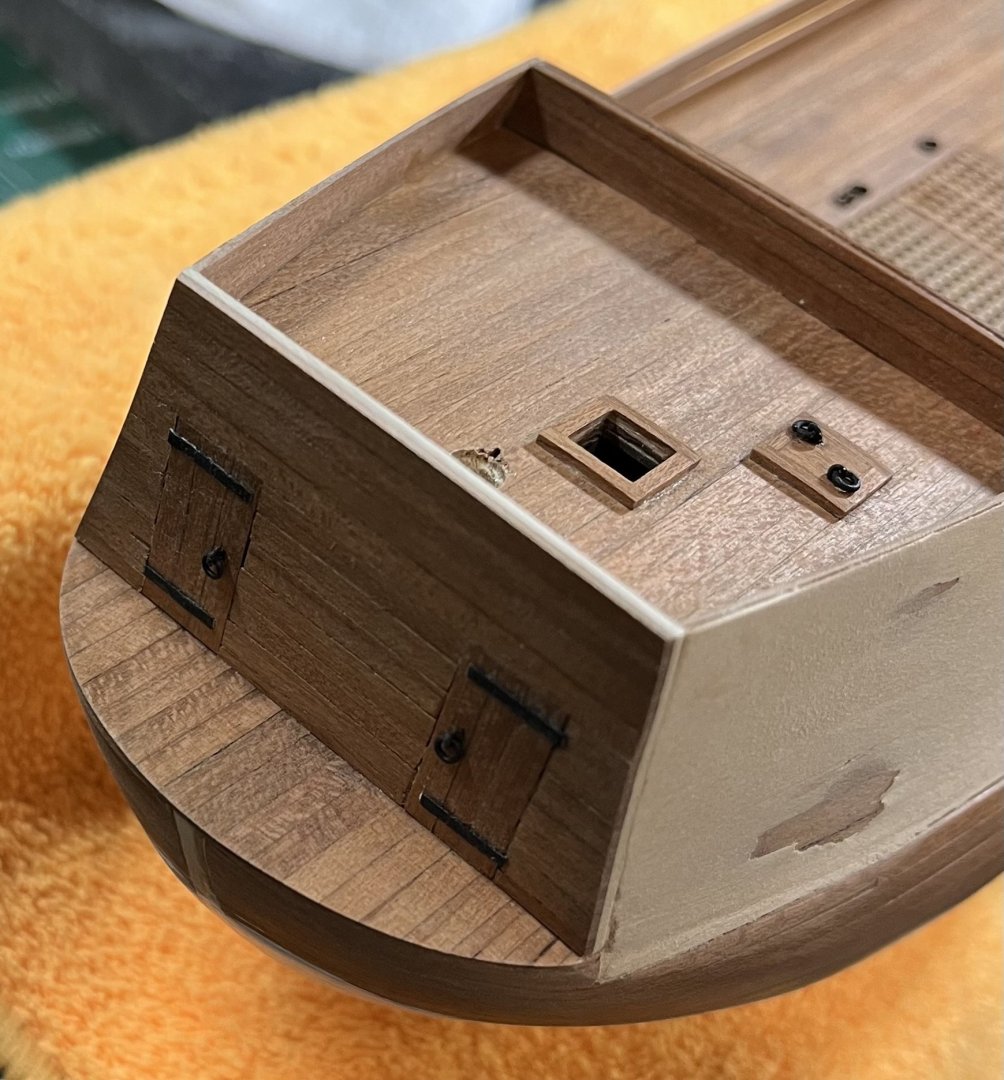
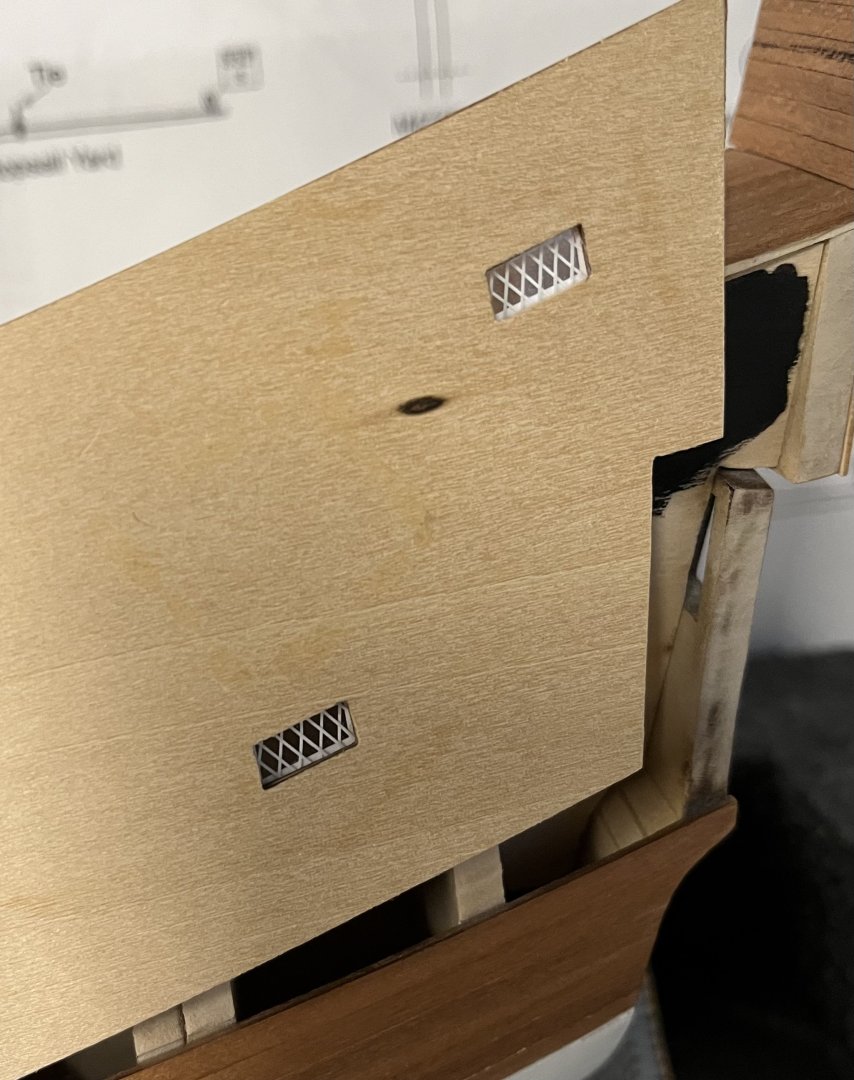
Behold the stern completed. When creating the windows, I did not cut the 1/16” framing tape down to 1/32”. At the time I did not think it would make much of a difference, but at this scale it does! After the windows were mounted on the ship I added 1/32” x 1/16” wood strips on the top and bottom to create a thinner reveal of the white tape around the windows. This helped. The knees were created in cherry as shown in the photo. As with many parts of the project, I figured the stern would be easy. I was proved wrong, as I had to make many adjustments to accomplish acceptable results. I am learning not to linger too long on a particular part of the project, only redoing things that look out of place or inconsistent with the rest of the ship. Steve

-
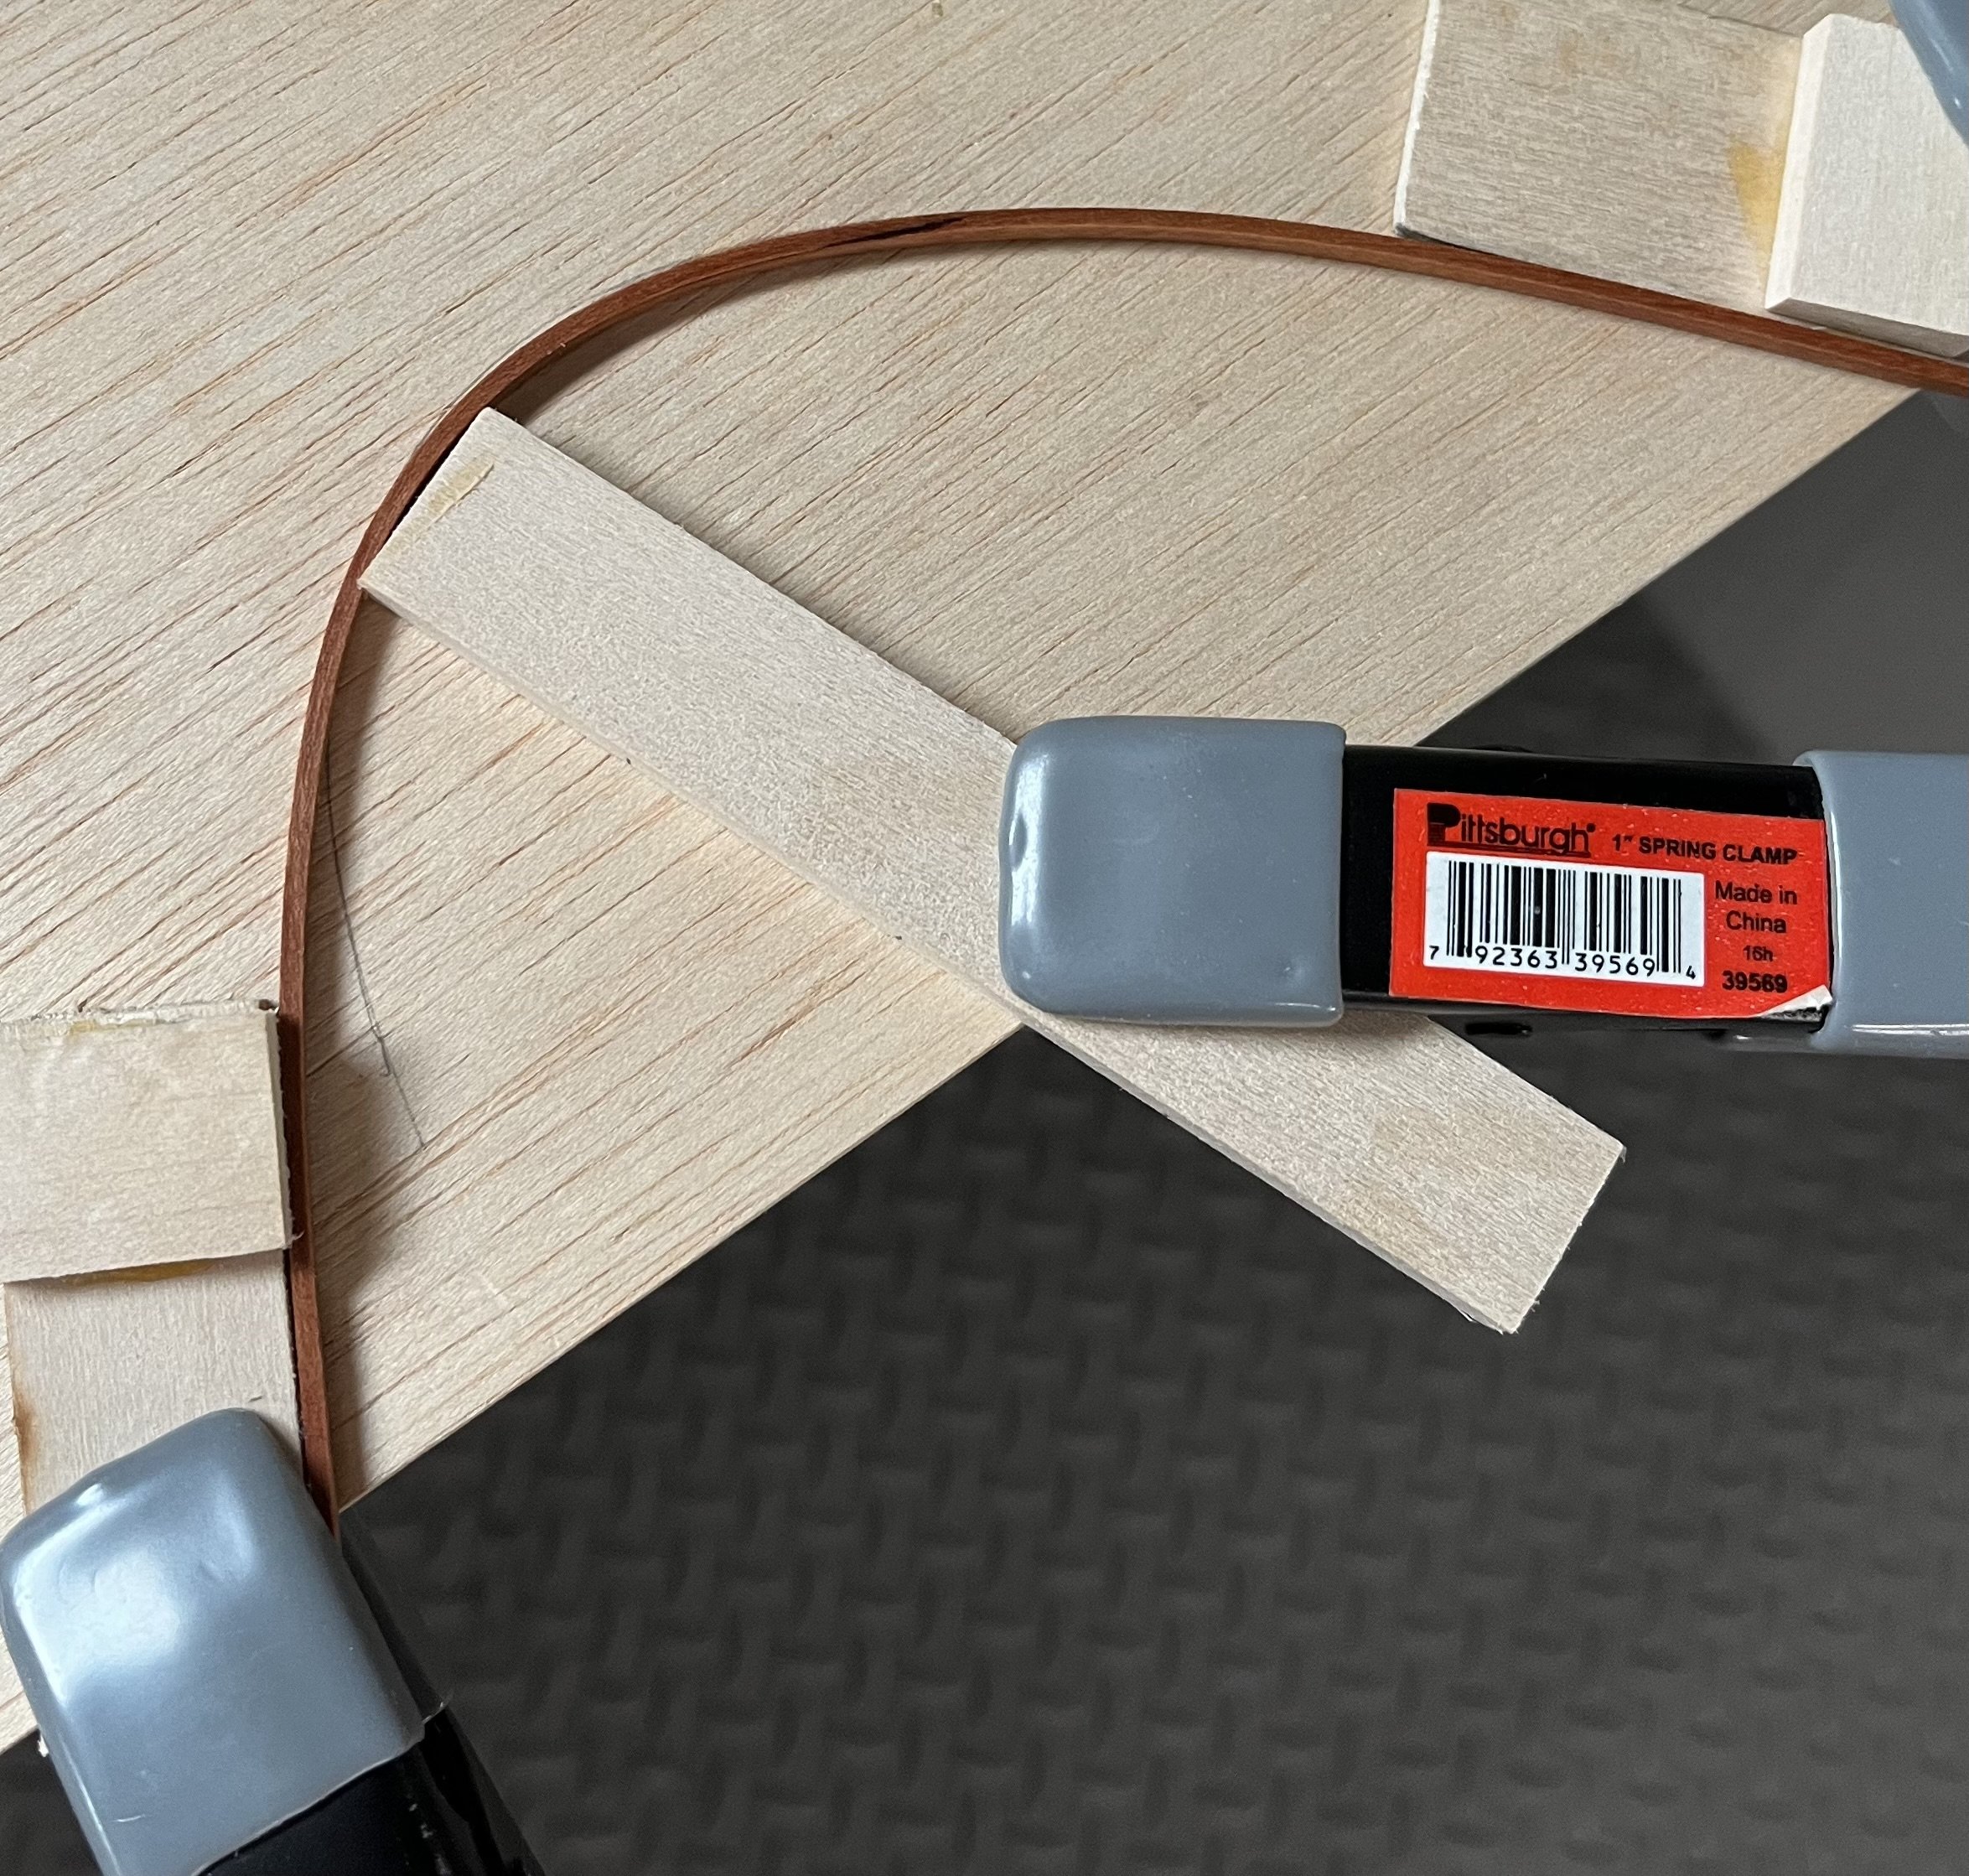
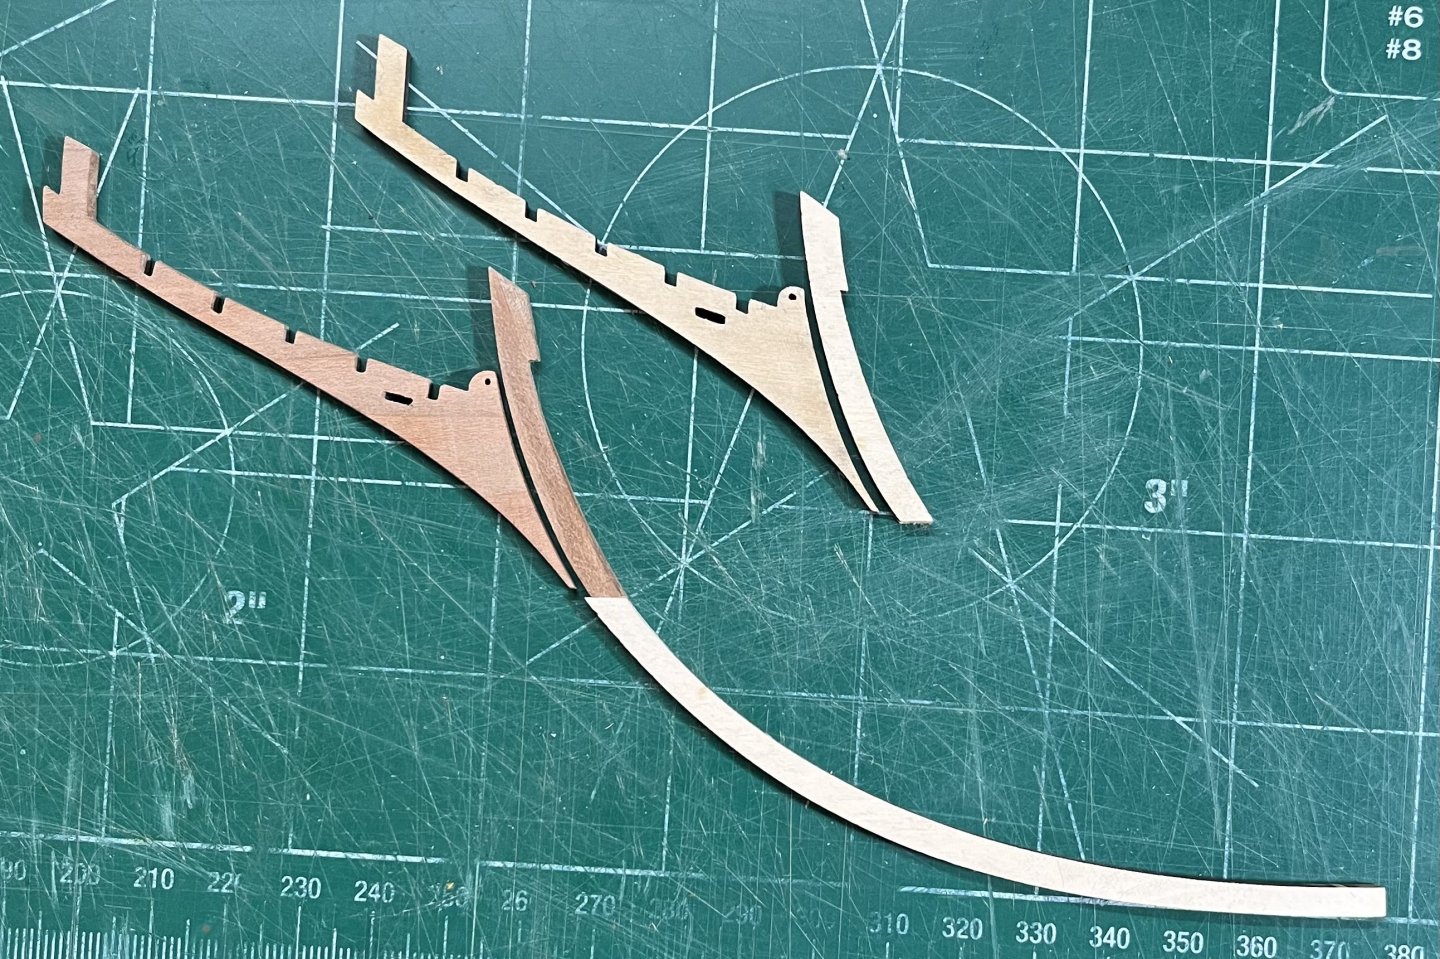
Over a month of fiddling with creating these bow pieces. I used Stuntflyer’s advice of soaking in hot water to create the severe curves. A couple rounds of bending were required. A hairdryer was used as well. Glad to move on from here! Steve


-
Looks great. Consistent with your presentation of the 18th century longboat! Steve
-
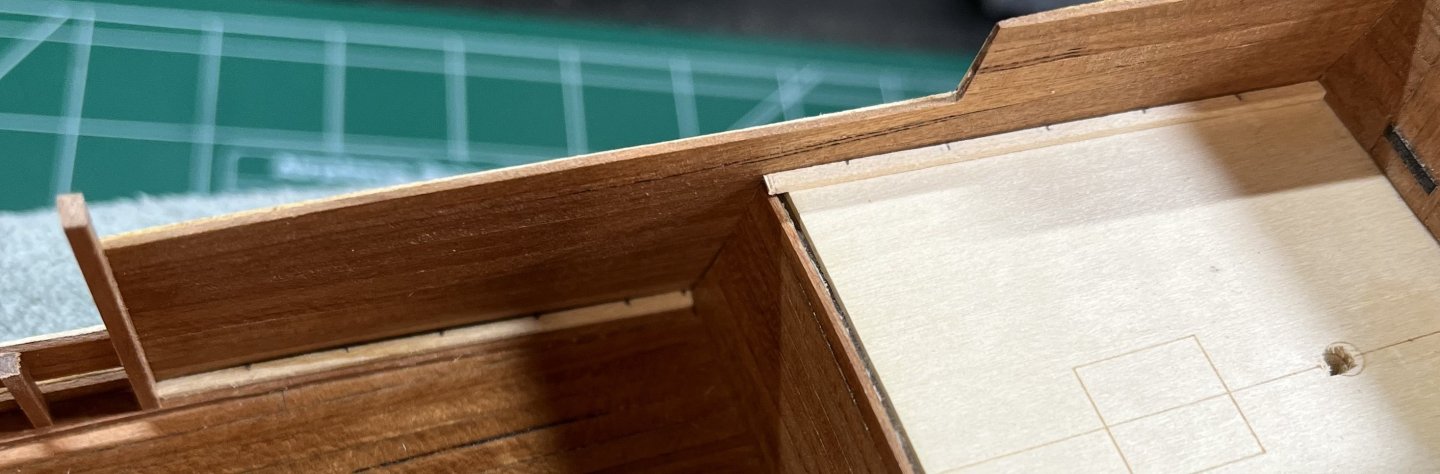
Bulwark templates are secured to the hull. I’m glad to have this step finished. Steve

-
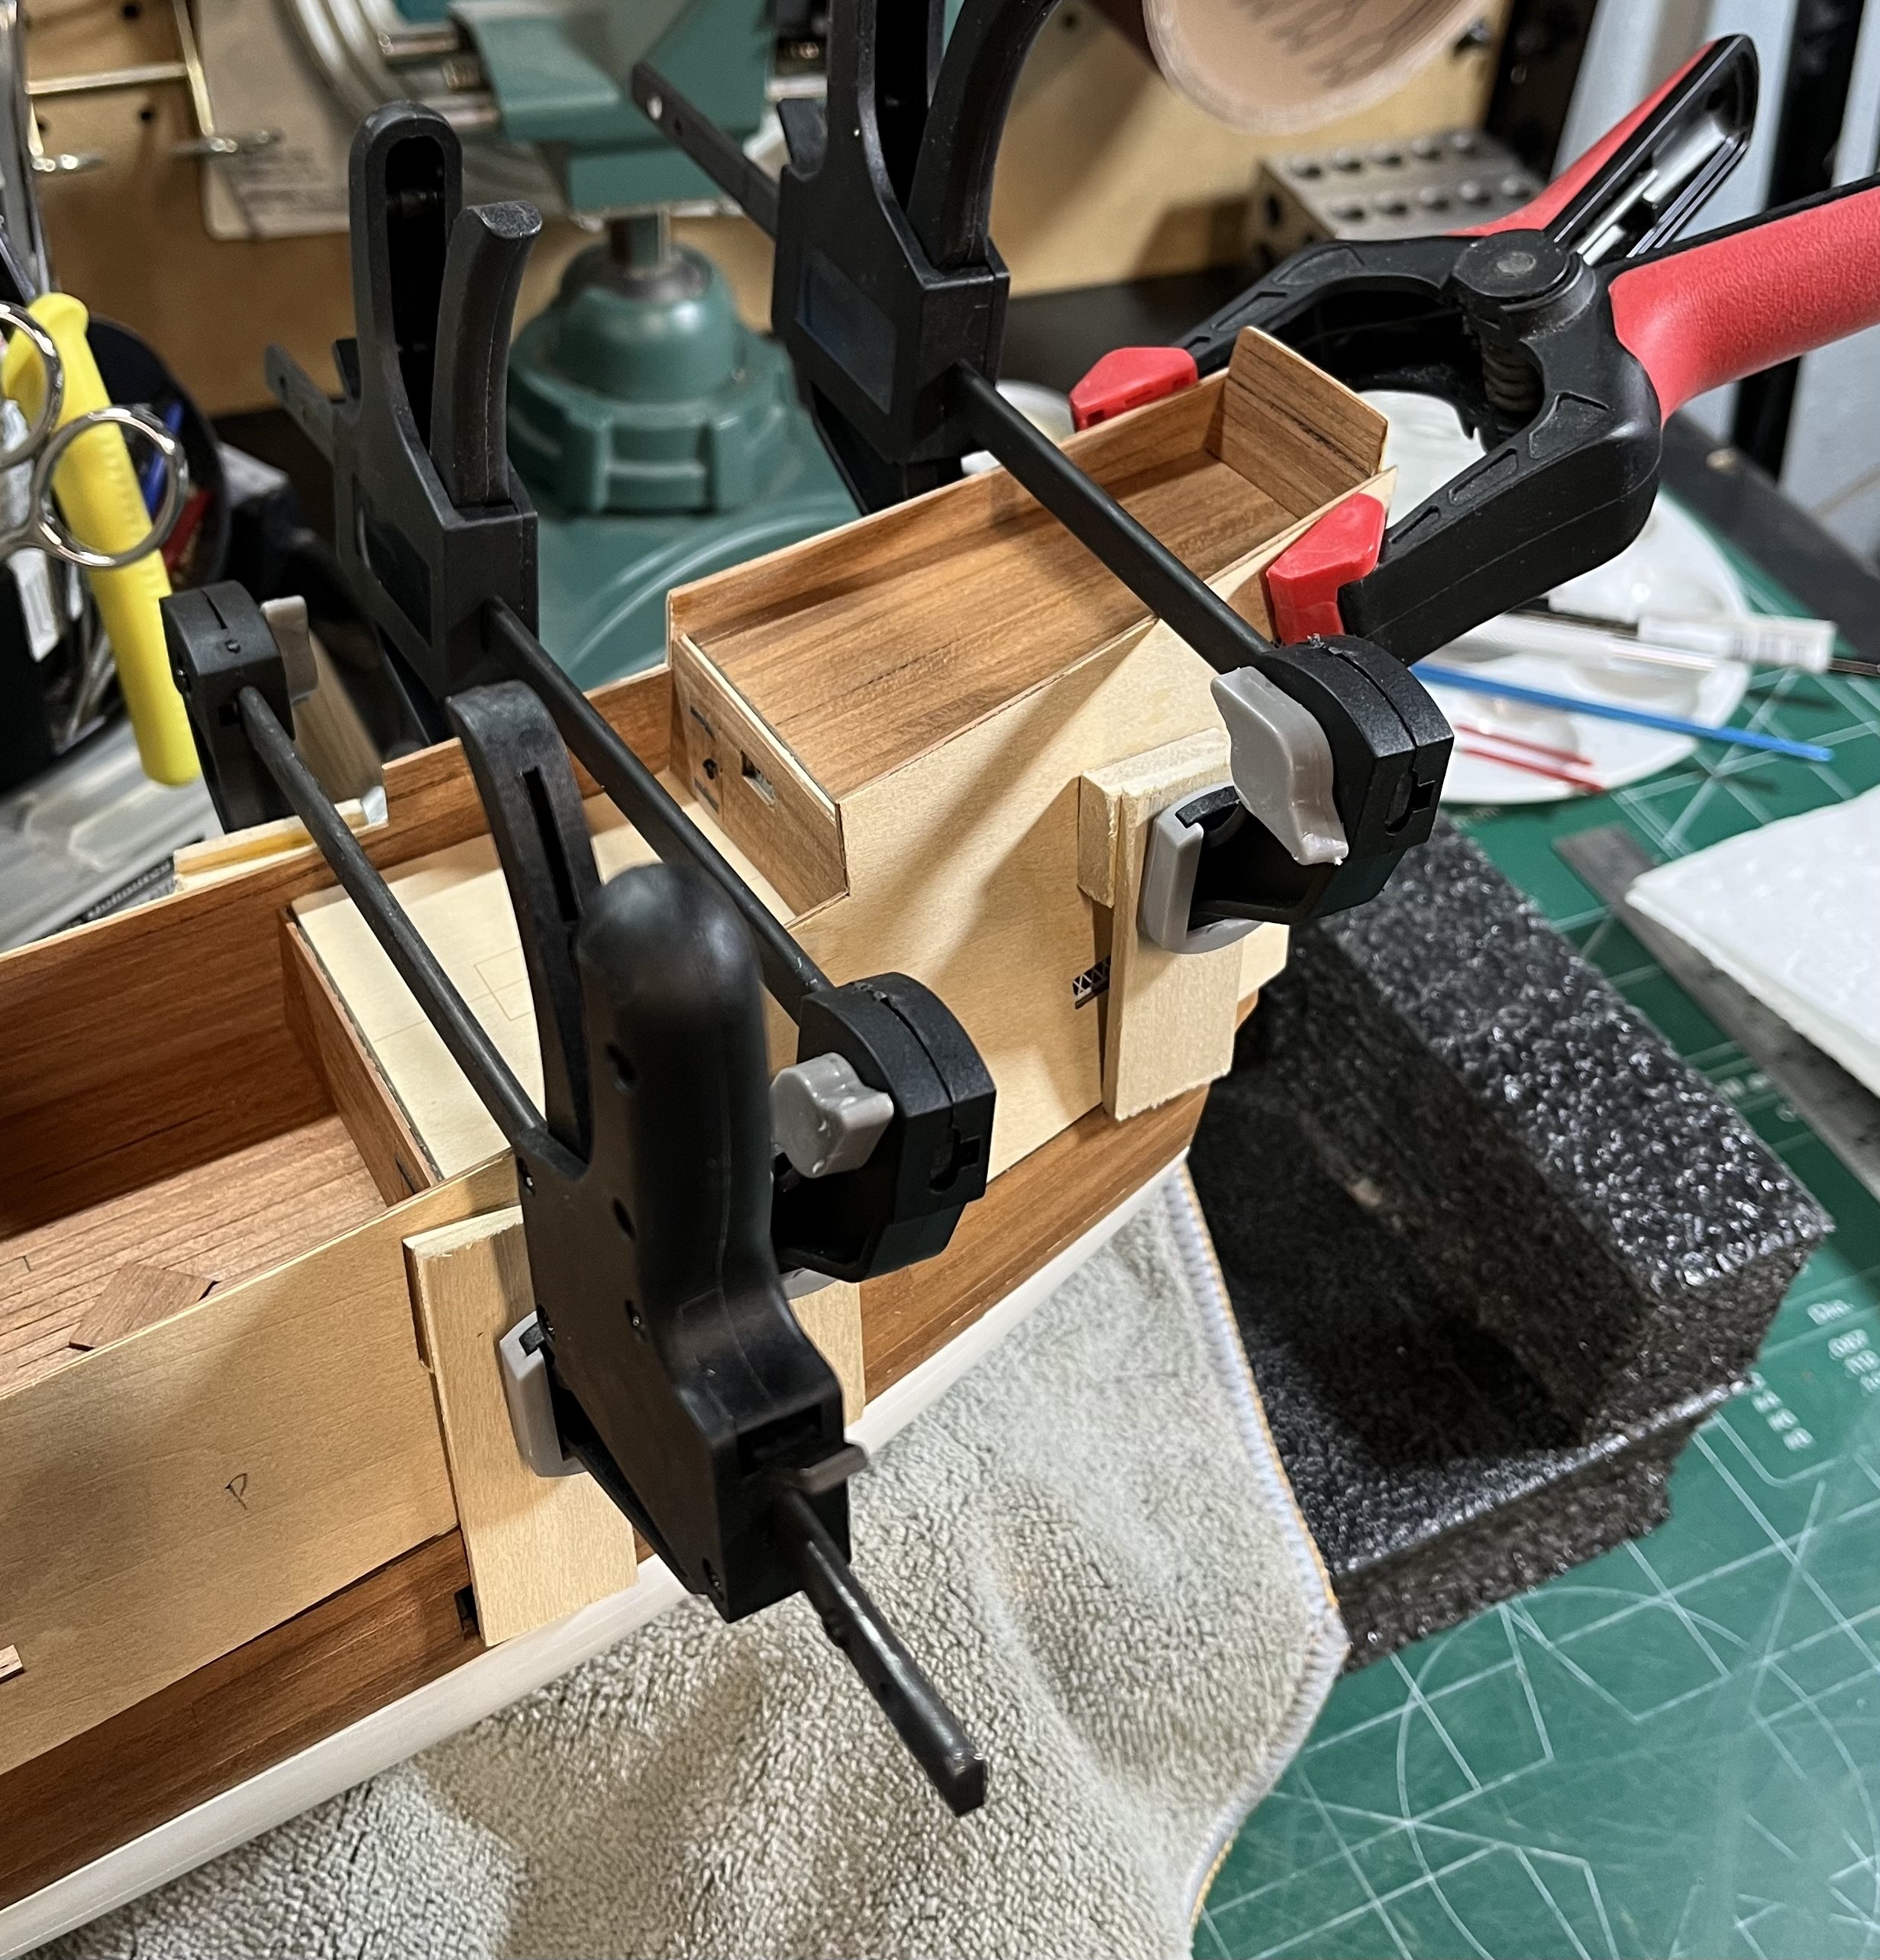
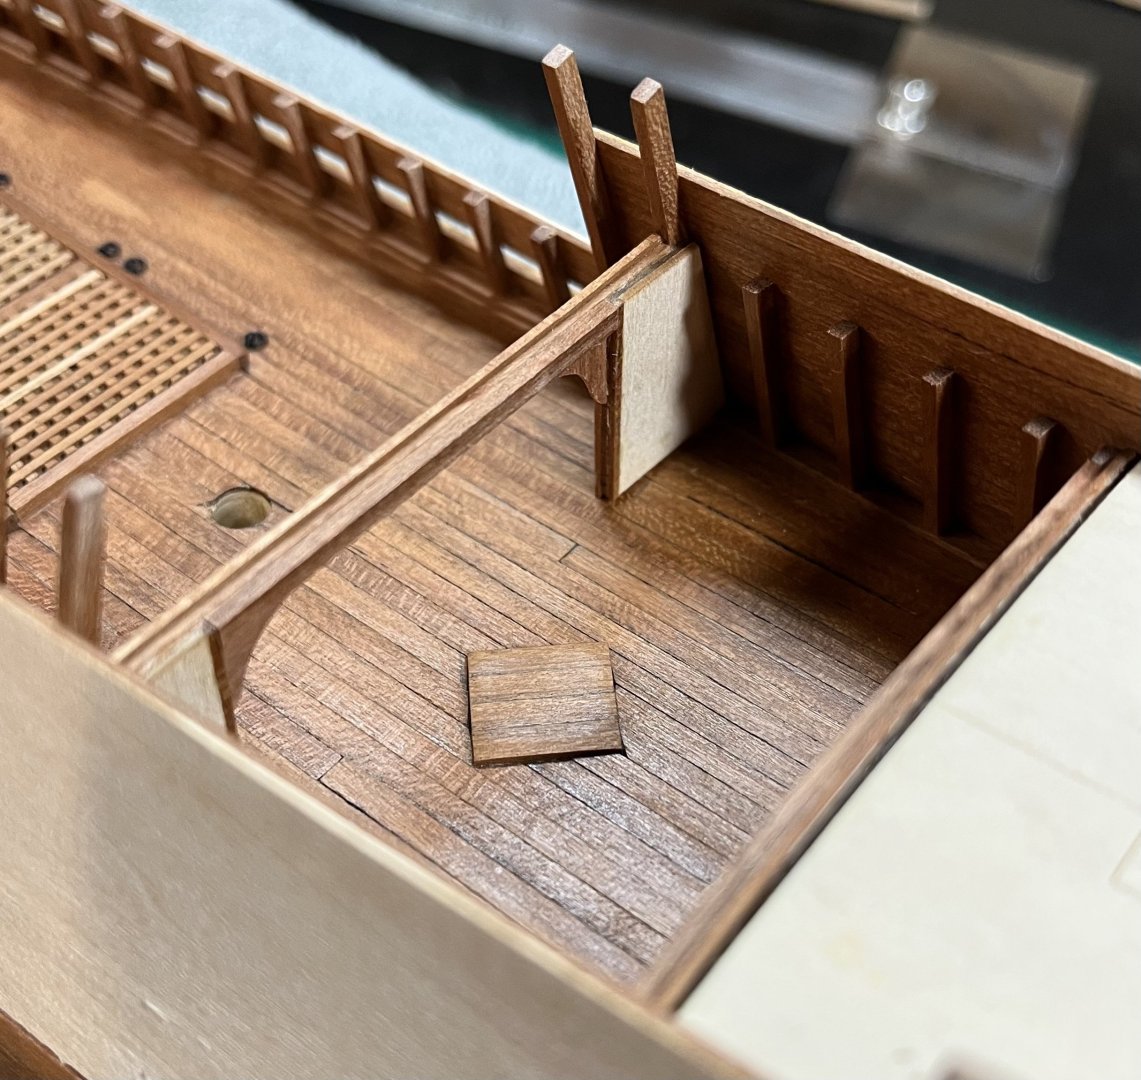
I redid the metal rings around the gratings because they were loose and drilled the mast holes. Finally, the bulwark template install is in progress. It’s not as easy as I thought. It took a couple of glue sessions to secure the first template. I’m making some supports so I can clamp down the next template properly. Steve

-
Congrats! Very nice work! Steve
-
Here’s a couple sites to check out. Have not used them myself. The ones I used don’t seem to offer what you need https://www.ttplasticland.com/products/acrylic-display-case?srsltid=AfmBOoo9eoBuQwHC1ql7_2kjnMWaUFpLD4PyAp2VcHKFNevTj9VJBK4M https://pleximart.com/?srsltid=AfmBOoo1hSpvoTvGuE9w1rog3mQ-DbKJMelmkxB6WJ_Zw-s-bOhM9XdD
-
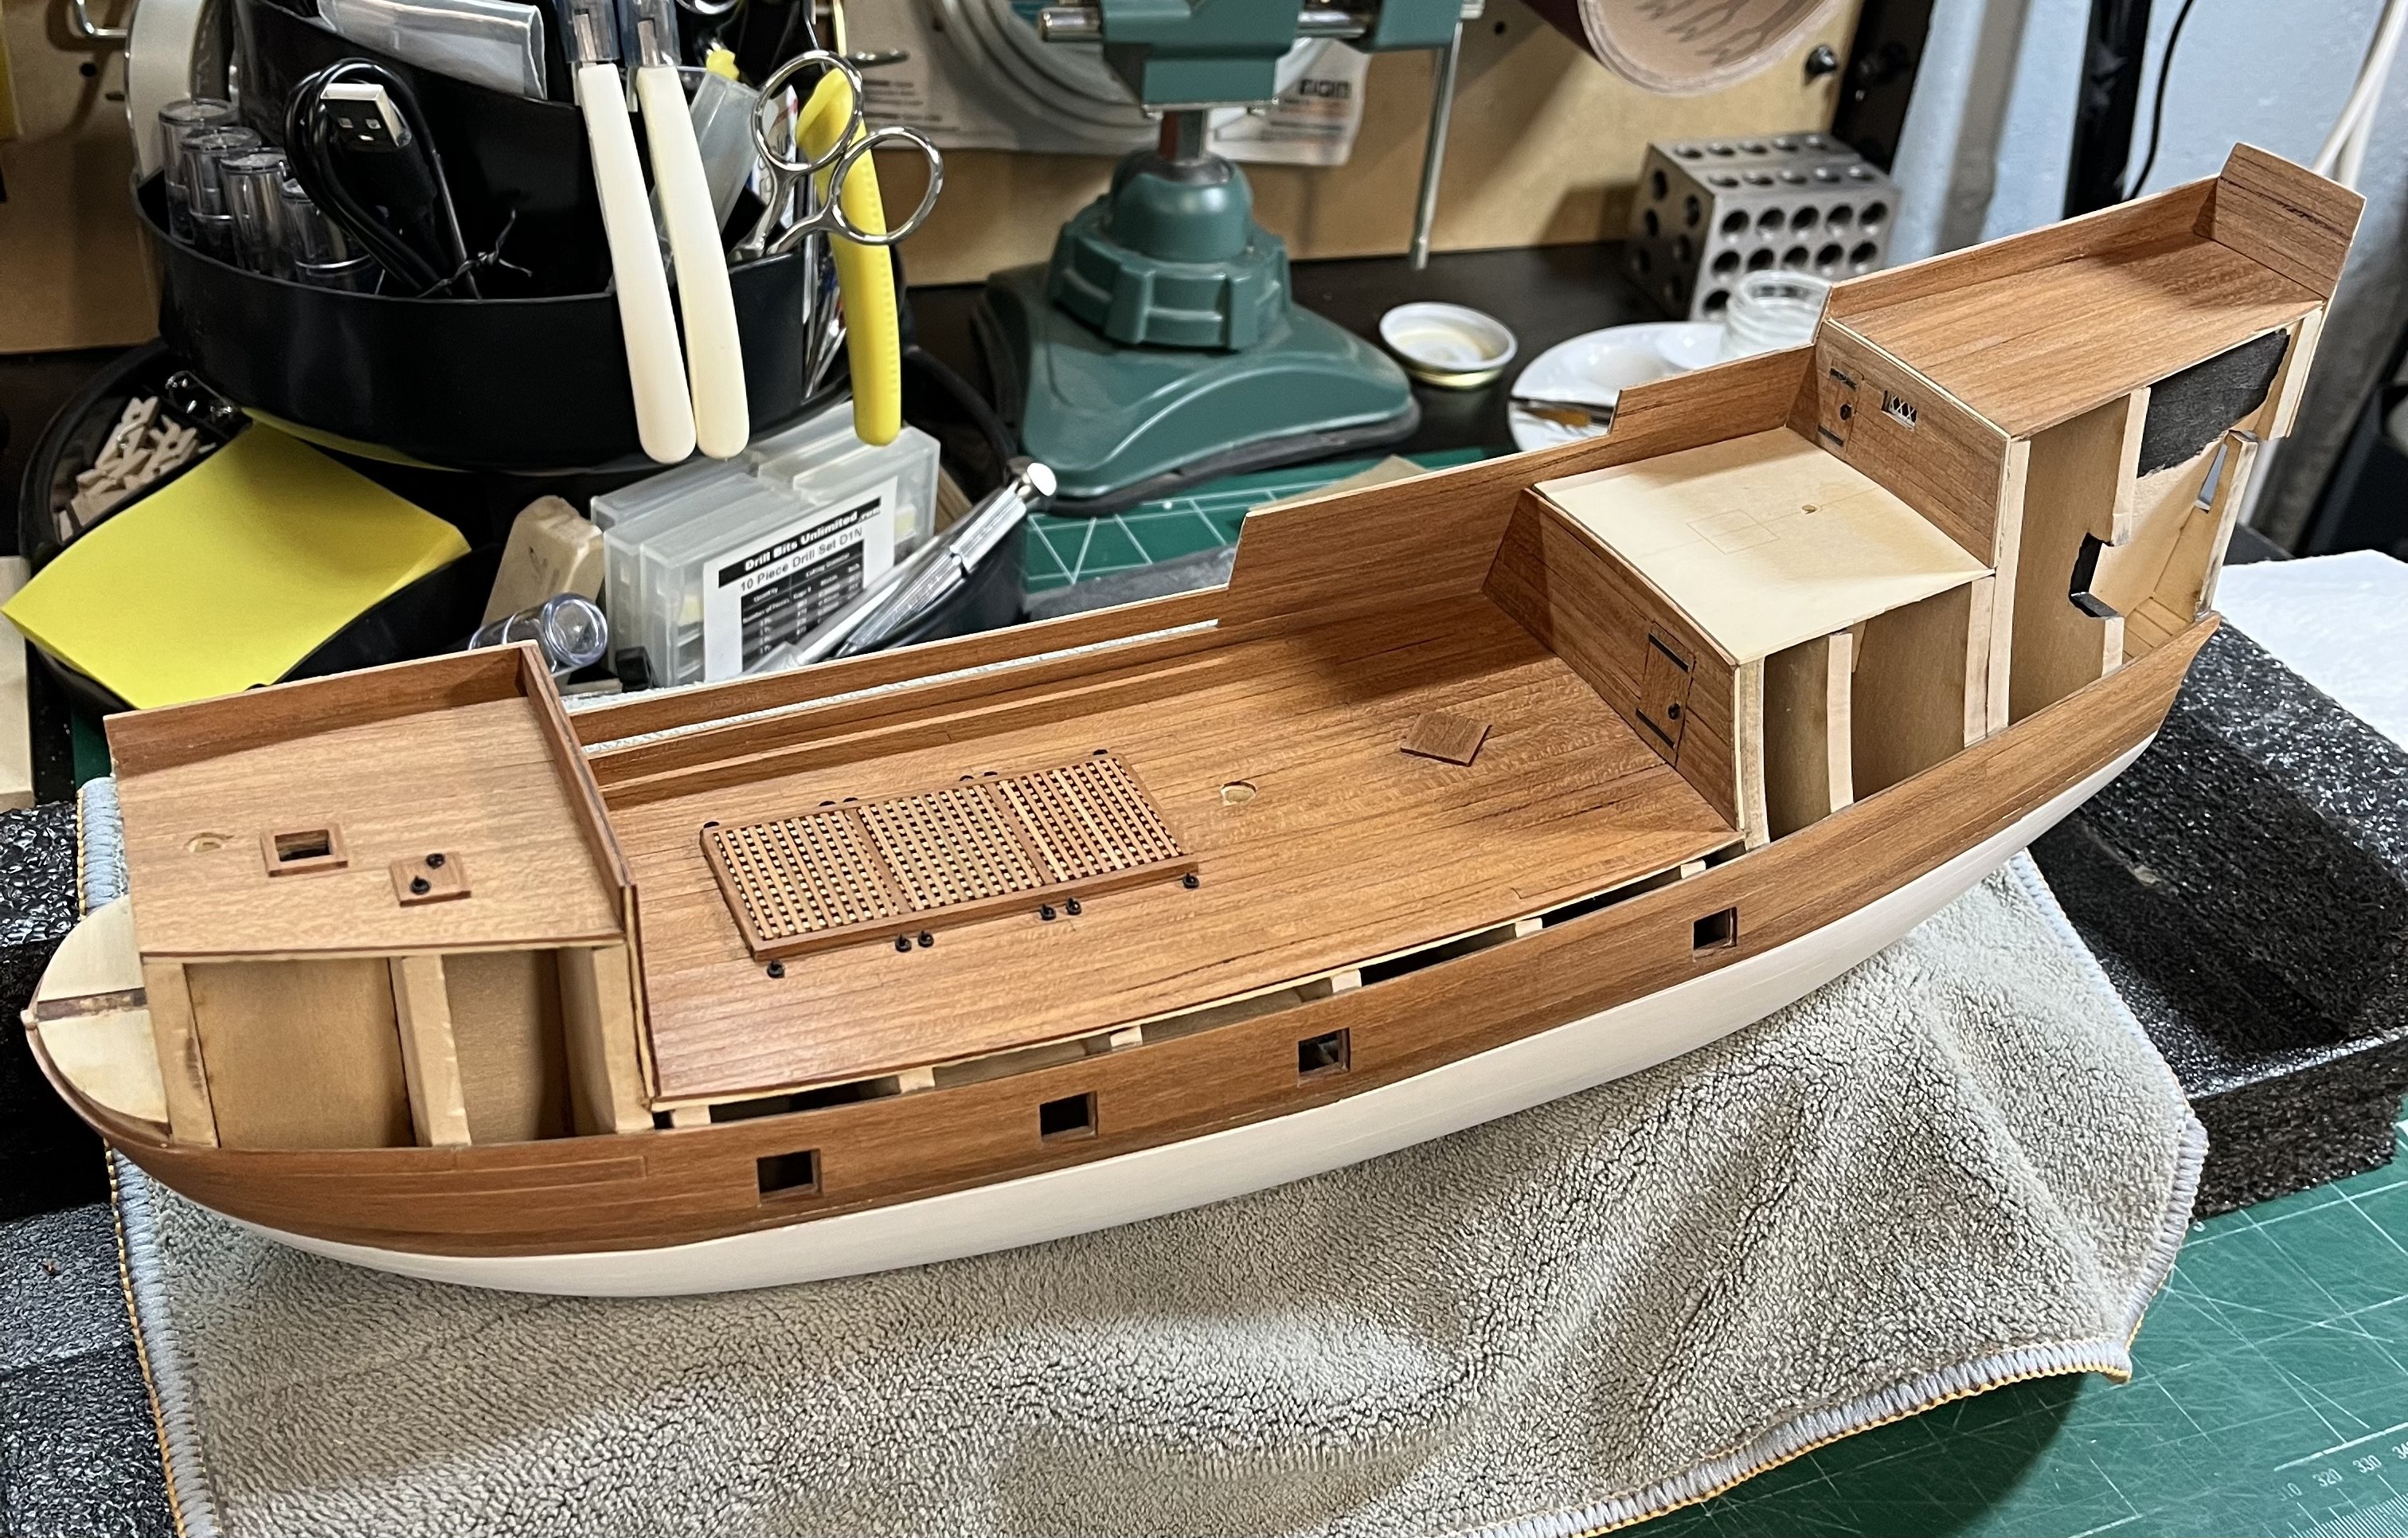
Inboard planking of the bulwark templates is complete. Today I created the windows and drilled holes for the masts. Steve

-
Making slow but steady progress on the bulwark templates. Steve
-
Looks really good and clean. I’m sure the rigging will look awesome Steve