HOLIDAY DONATION DRIVE - SUPPORT MSW - DO YOUR PART TO KEEP THIS GREAT FORUM GOING! (89 donations so far out of 49,000 members - C'mon guys!)
×


Tigersteve
-
Posts
1,327 -
Joined
-
Last visited
Content Type
Profiles
Forums
Gallery
Events
Everything posted by Tigersteve
-
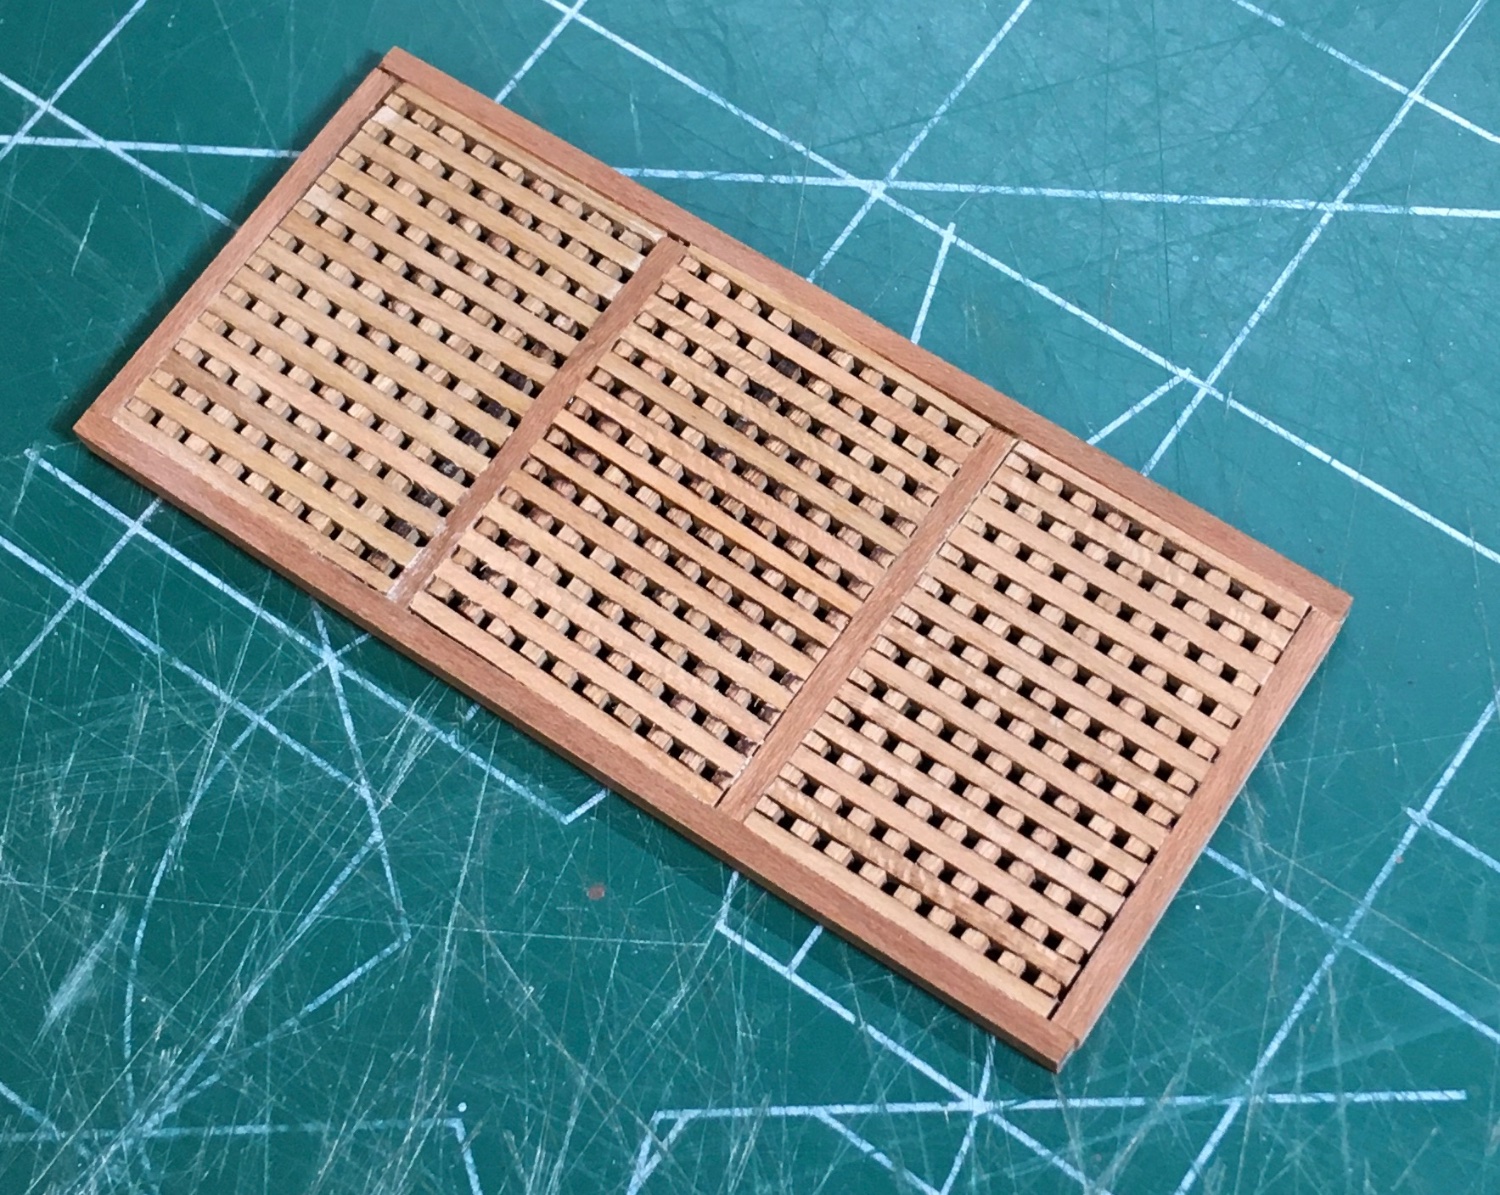
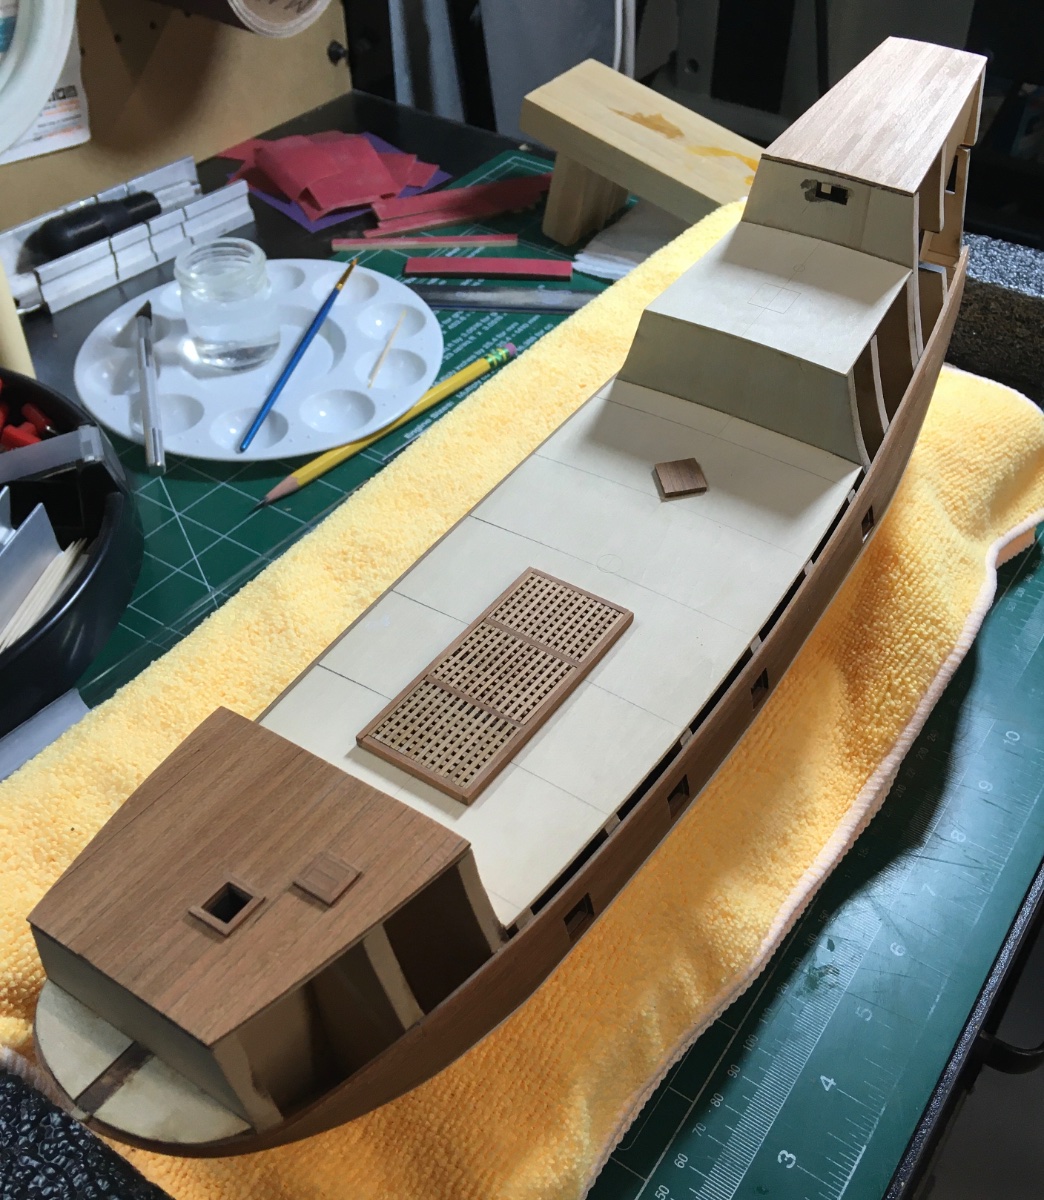
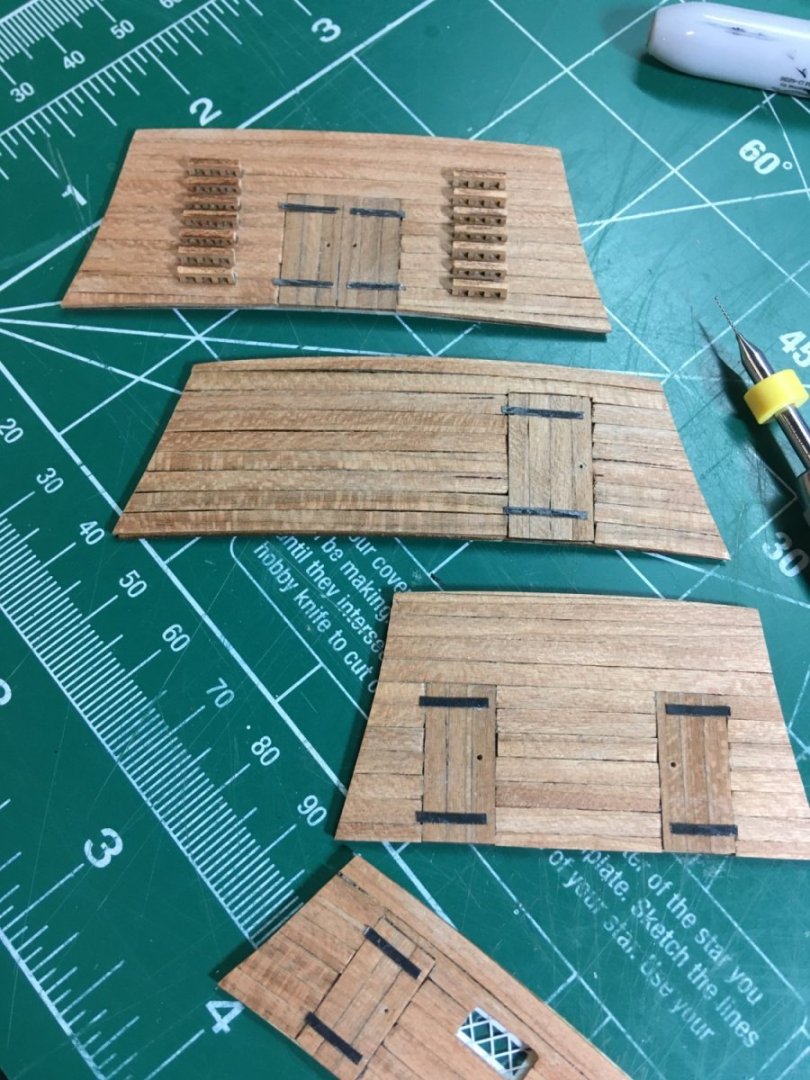
 Gratings for the upper deck were completed using 3/16” cherry grating strips from Model Expo. The coamings were created first using a jig I created from previous projects. The quality of the grating strips were good. It was a tedious and frustrating process. The center gratings are slightly askew. This being my second assembly of this portion, I opted to not redo them. They will be obscured by the ships boat anyway. Steve
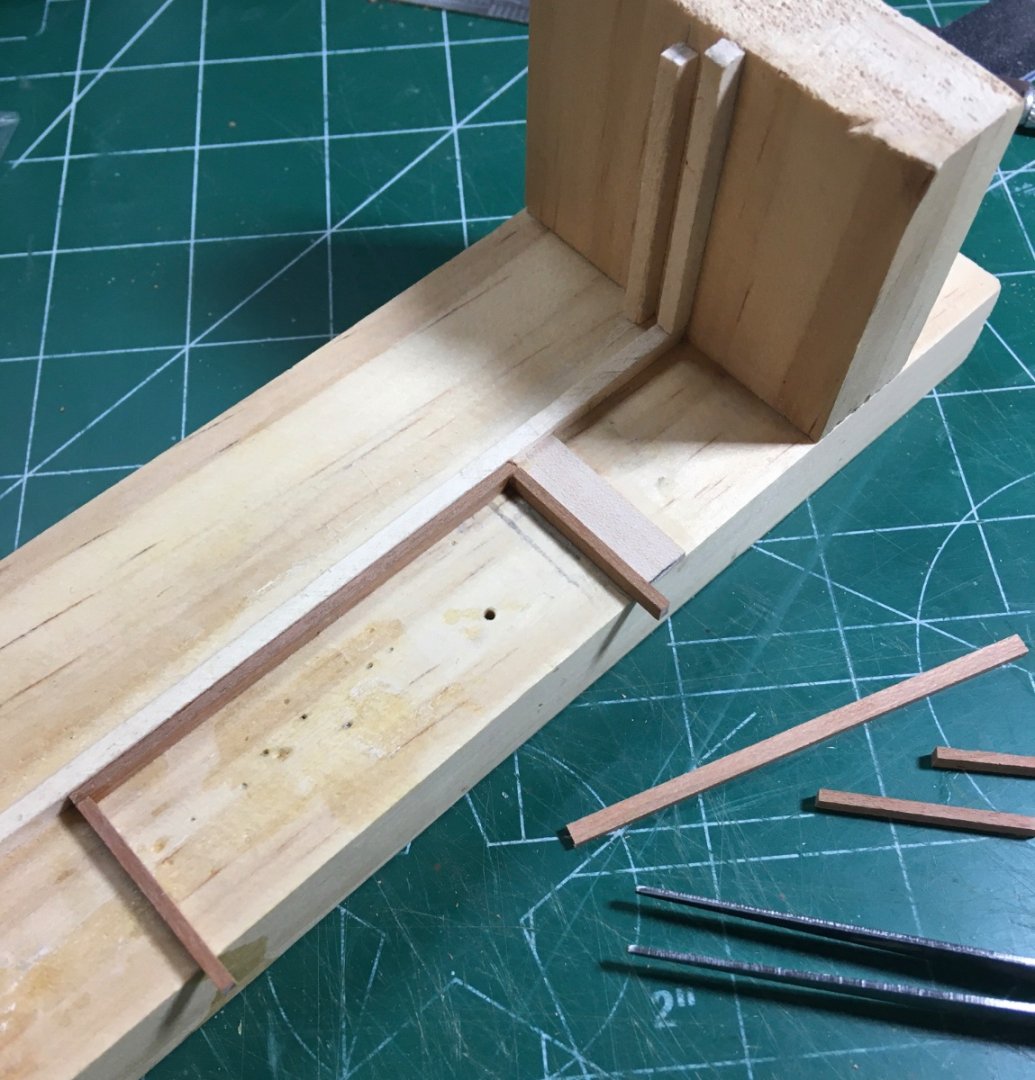


-
Another superb and inspiring build! Steve
- 607 replies
-
- 1
-

-
- winchelsea
- Syren Ship Model Company
- (and 1 more)
-
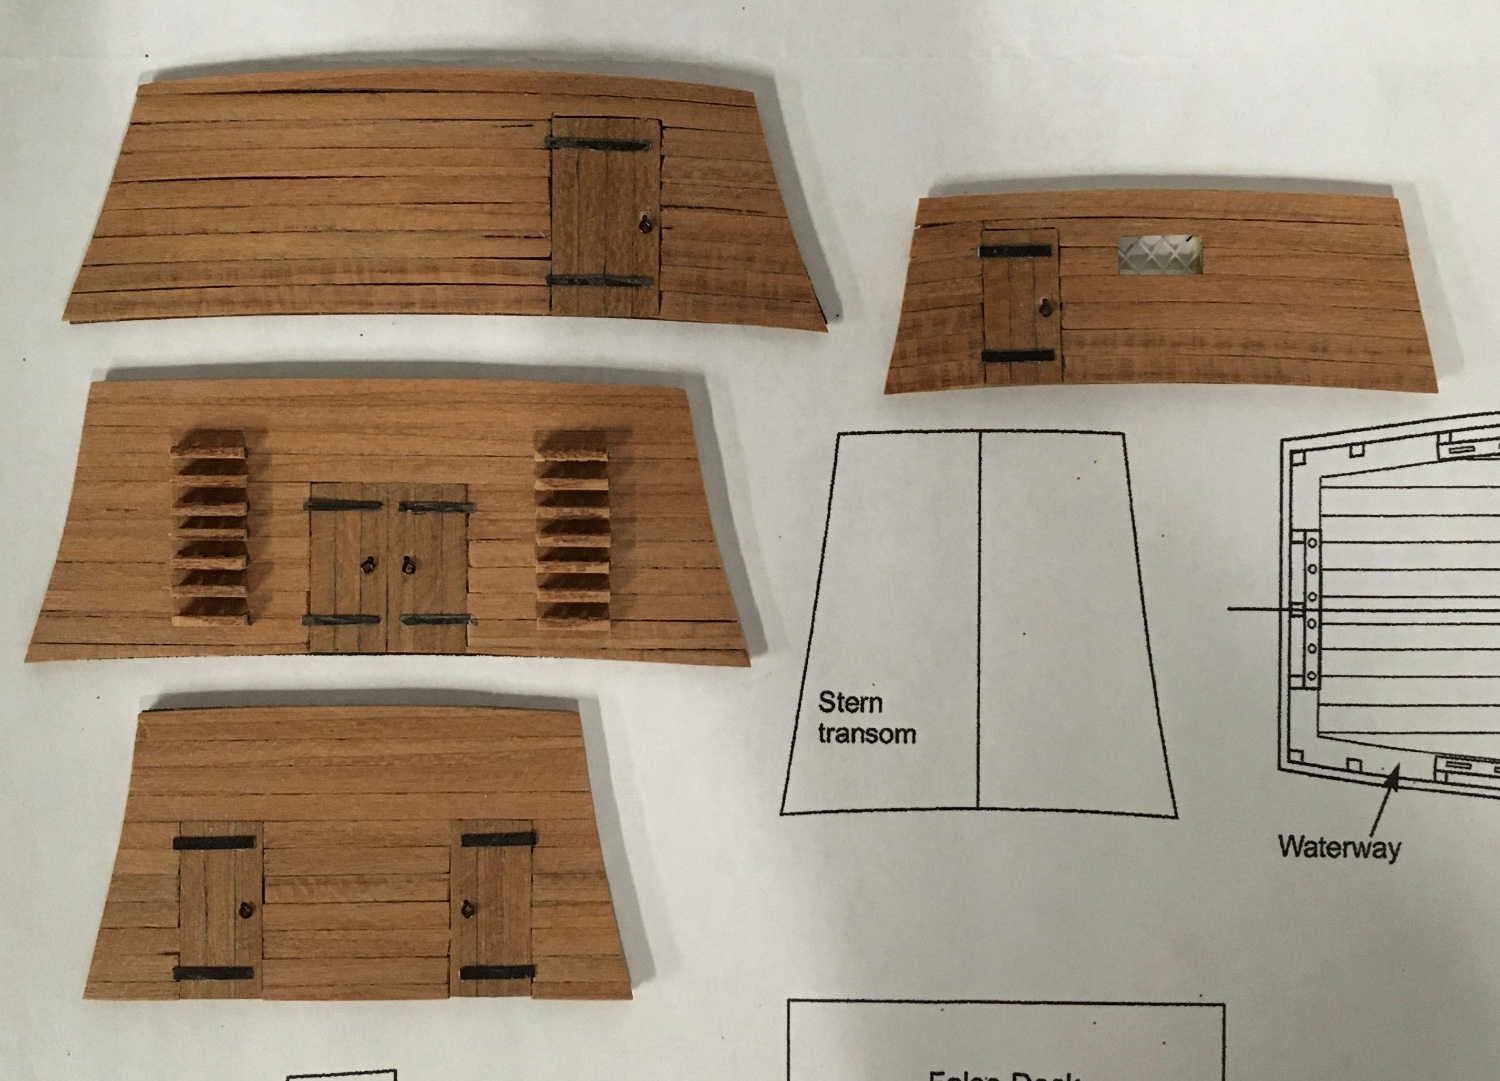
Quick update on the completed door handles. After drilling the holes deeper I was able to place the eyebolts through before bending and using marker to blacken them. The paint I have wouldn’t adhere. I am not completely happy with this result but it is tidy enough for this scale and I believe it will blend in when other details are added. The main hatches and upper deck planking is next. Steve

-
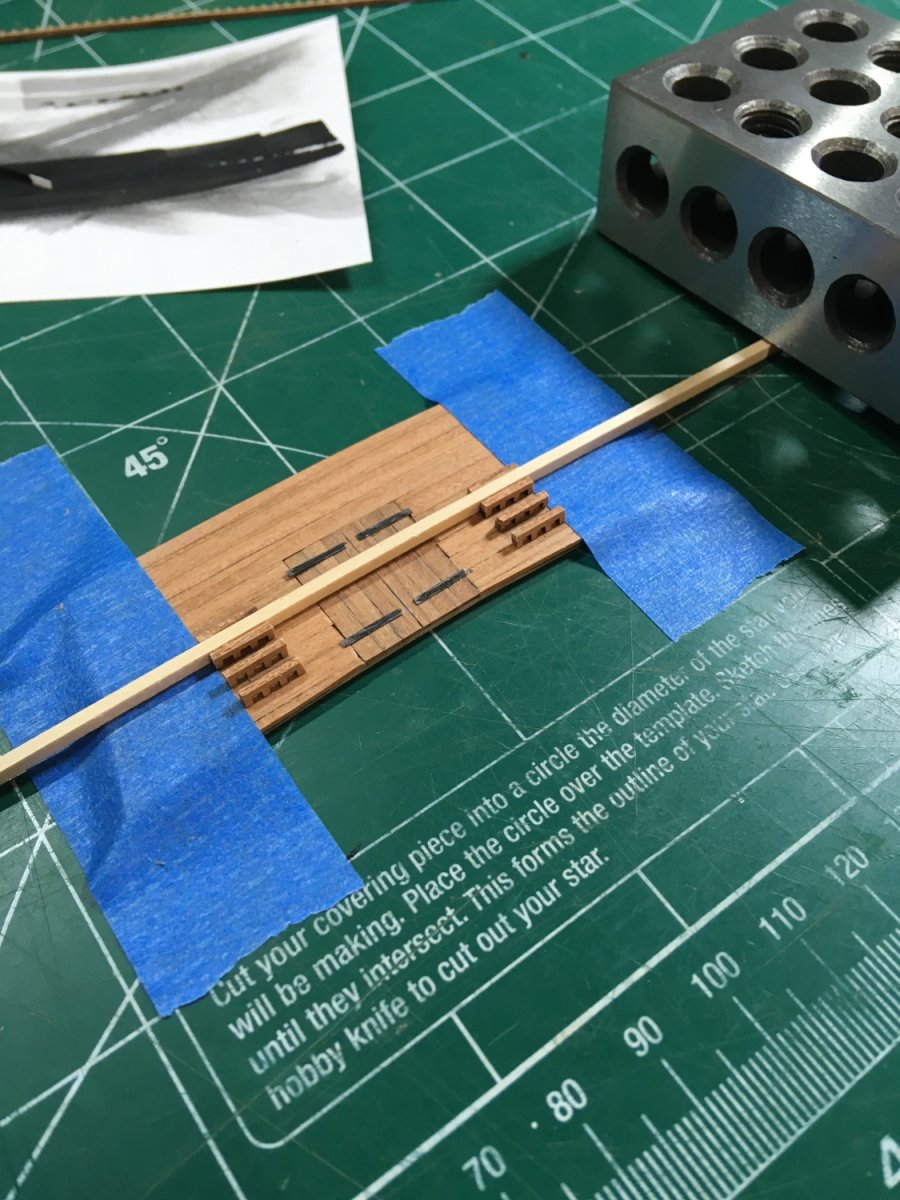
Bulkheads are almost done. I just need to add the door handles, which have been a struggle. I purchased 3/64” cherry grating strips from Model Expo. You can see them on the Forward Cubbridge bulkhead. It’a interesting how much is not seen with the naked eye, but all shows on the macro photos. Steve

-
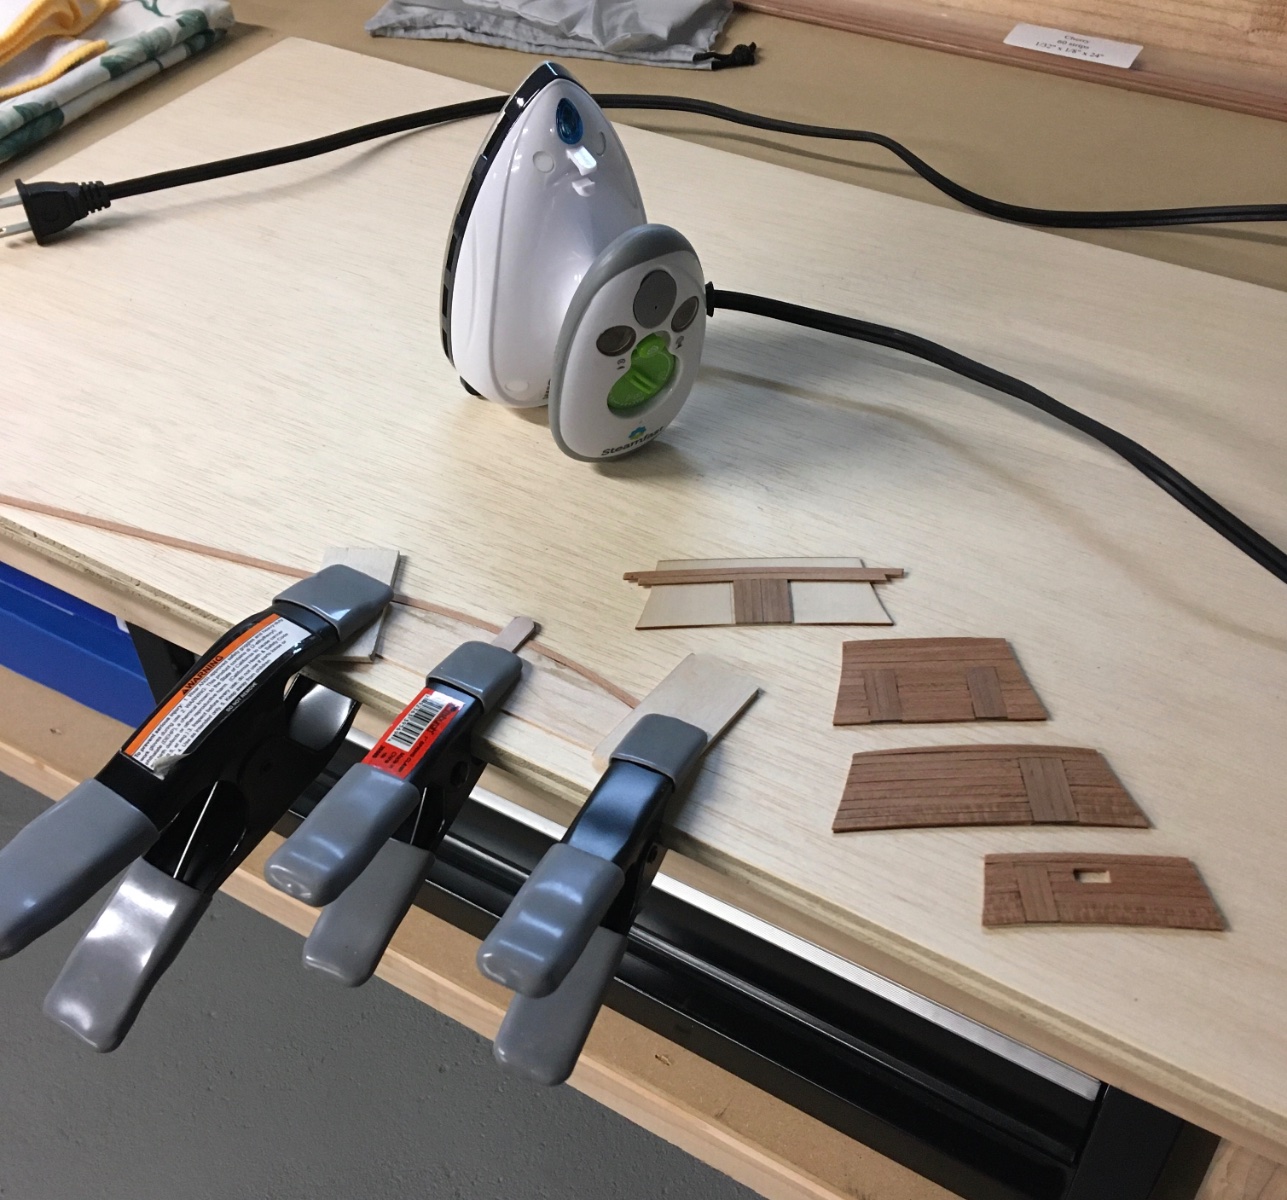
Finally back to work on this project. Bulkhead construction in progress. You’ll see my new plank bending jig via Chuck’s design. It has been working well with the travel iron instead of a hair dryer. Steve

-
Nice work! Look forward to your updates. Steve
-
Love this build! Not sure if you’ve addressed this, but have you considered the case design? Steve
-
Thanks Dave! I’m looking forward to getting back to this project in the coming months. Steve
-
We’ll done! Steve
-
Thank you so much for the kind words! It was a fun project. Steve
-
Looks great! Good luck on the boats! Steve
-
Looking great, Bruce. Steve
-
The hull is looking good! Steve
-
Yes- totally fixable. Nice recovery. Steve
-
That is pretty outrageous. Sorry to hear that. I noticed someone picking up my model to view it at one point. I thought that was a bit out of line as well. Unless you give permission that is not okay. Steve
- 1,784 replies
-
- 2
-
-
- winchelsea
- Syren Ship Model Company
- (and 1 more)
-
Yes- let’s get back to it! Steve
-
I’m in. Steve
-
So sorry to hear. Best wishes. Steve
-
Well worth the wait. Superb work! One of my favorite build logs. Steve
-
I like your homemade waterline jig. Looking forward to seeing it painted. Steve
-
Thank you guys for the nice comments. Mike, back to building the Mayflower. Steve
- 70 replies
-
- 2
-
-
- Lowell Grand Banks Dory
- Finished
- (and 1 more)
-
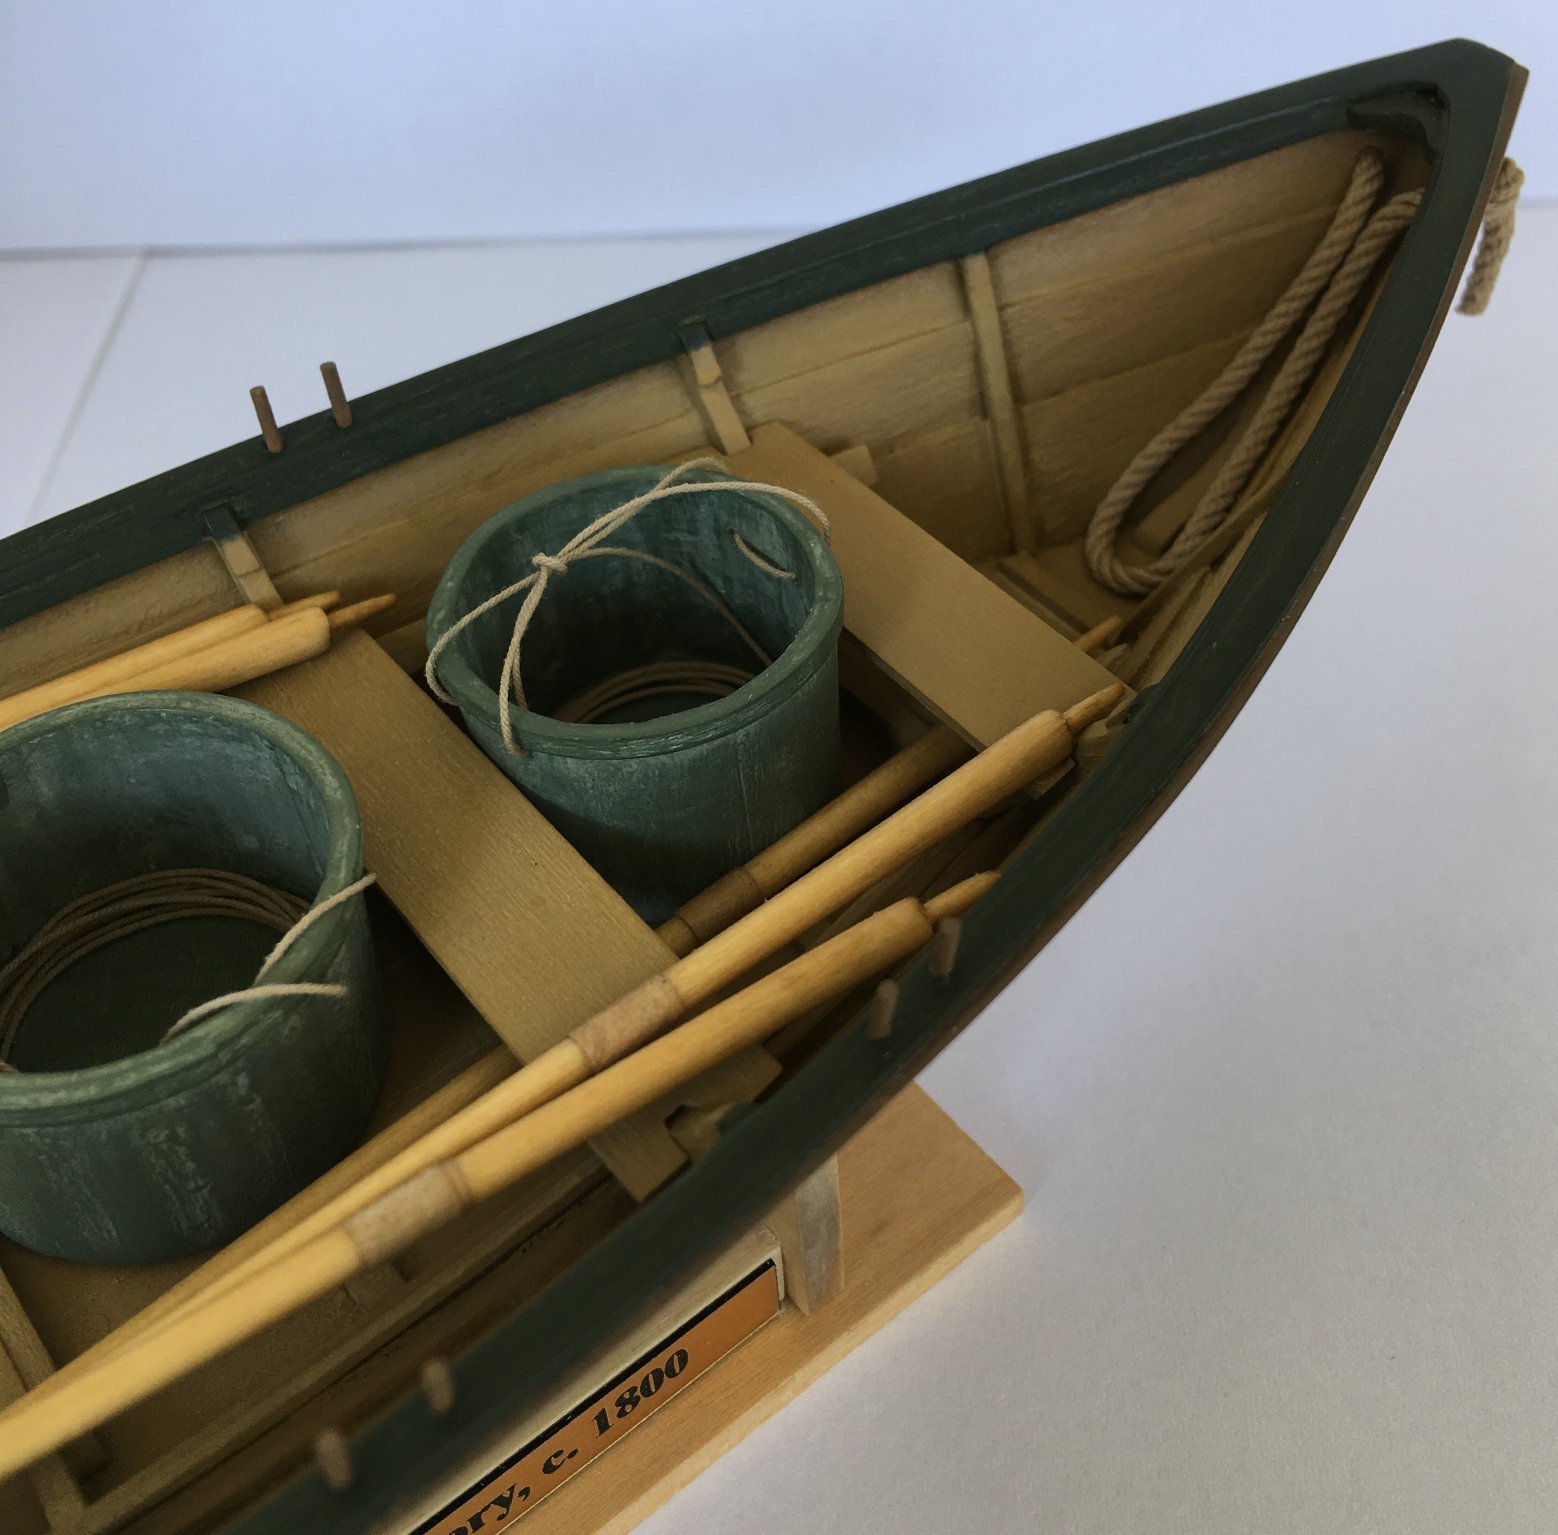
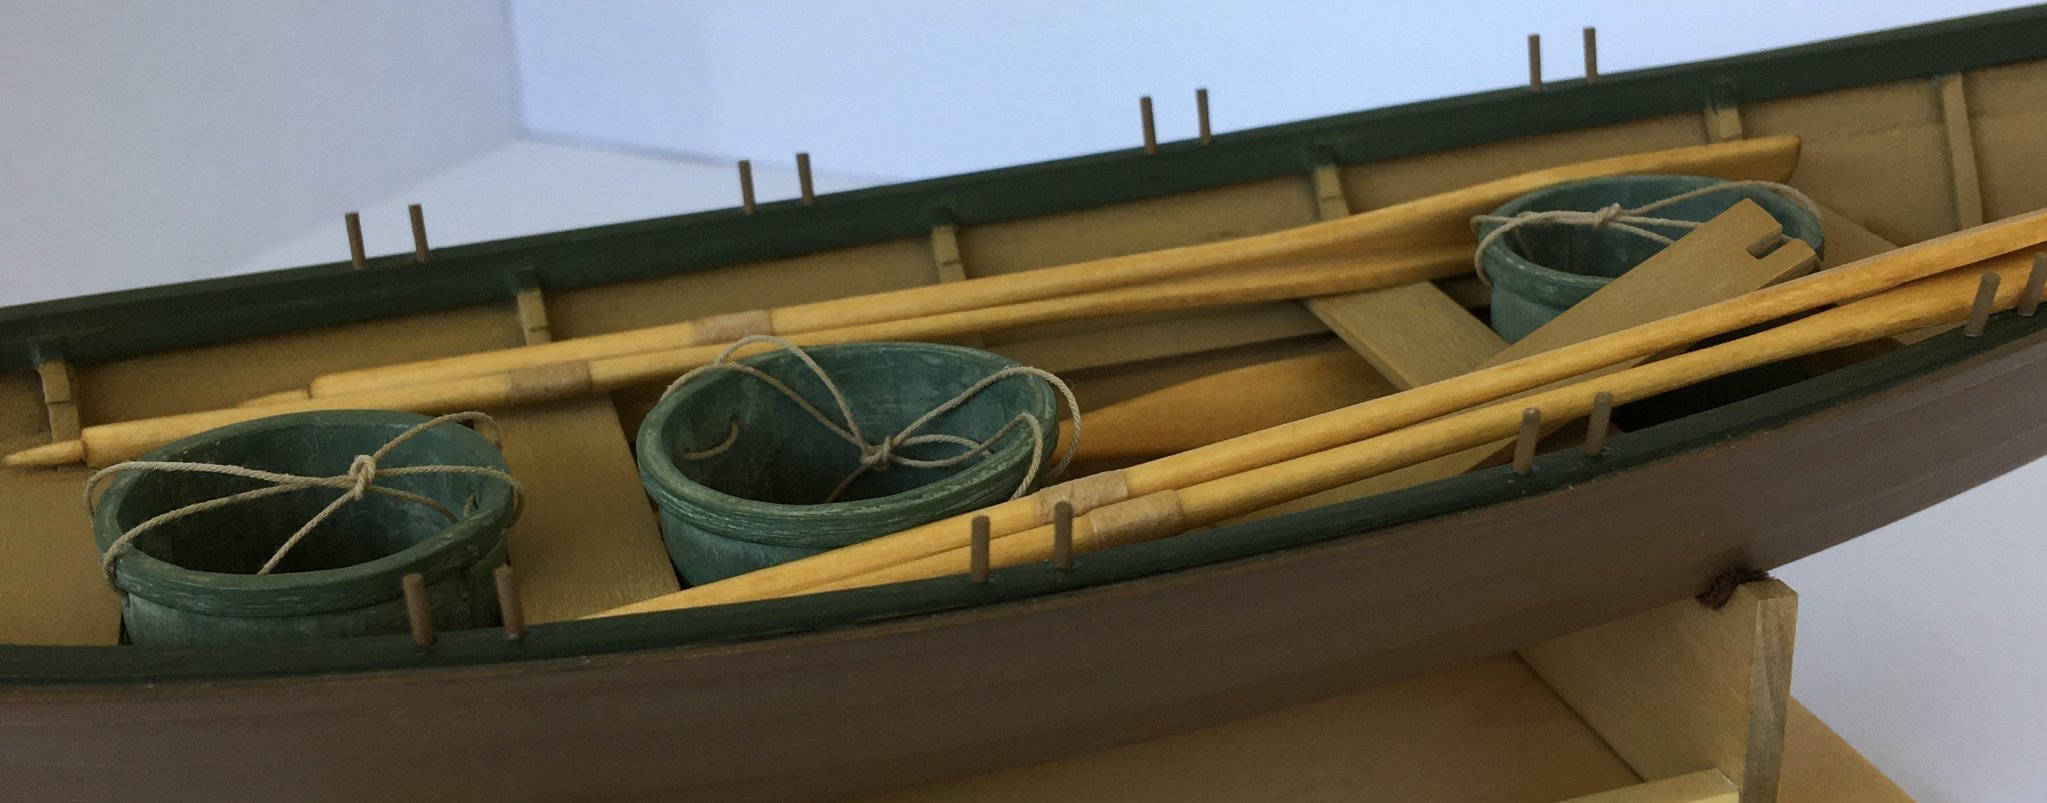
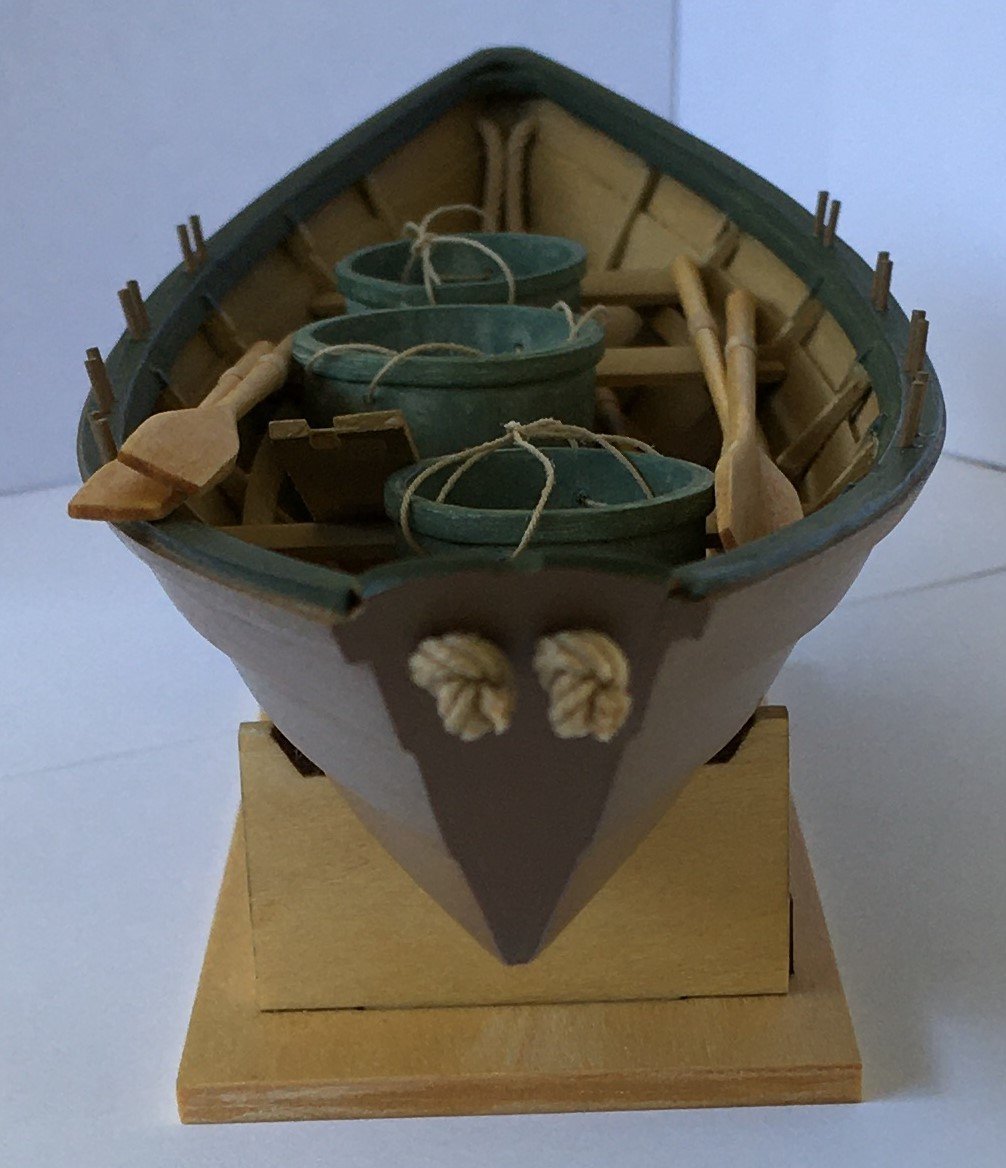
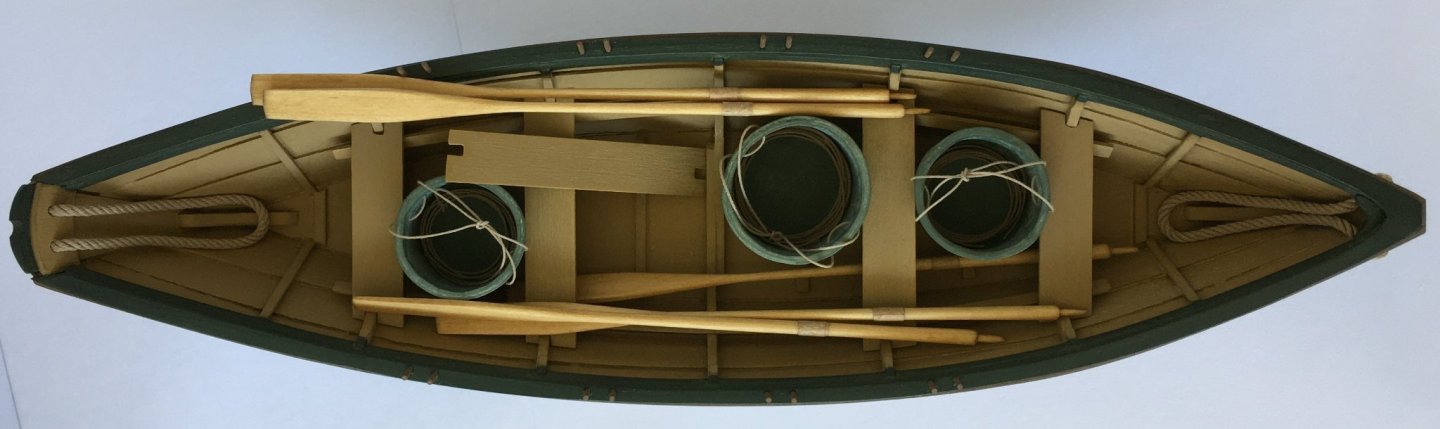
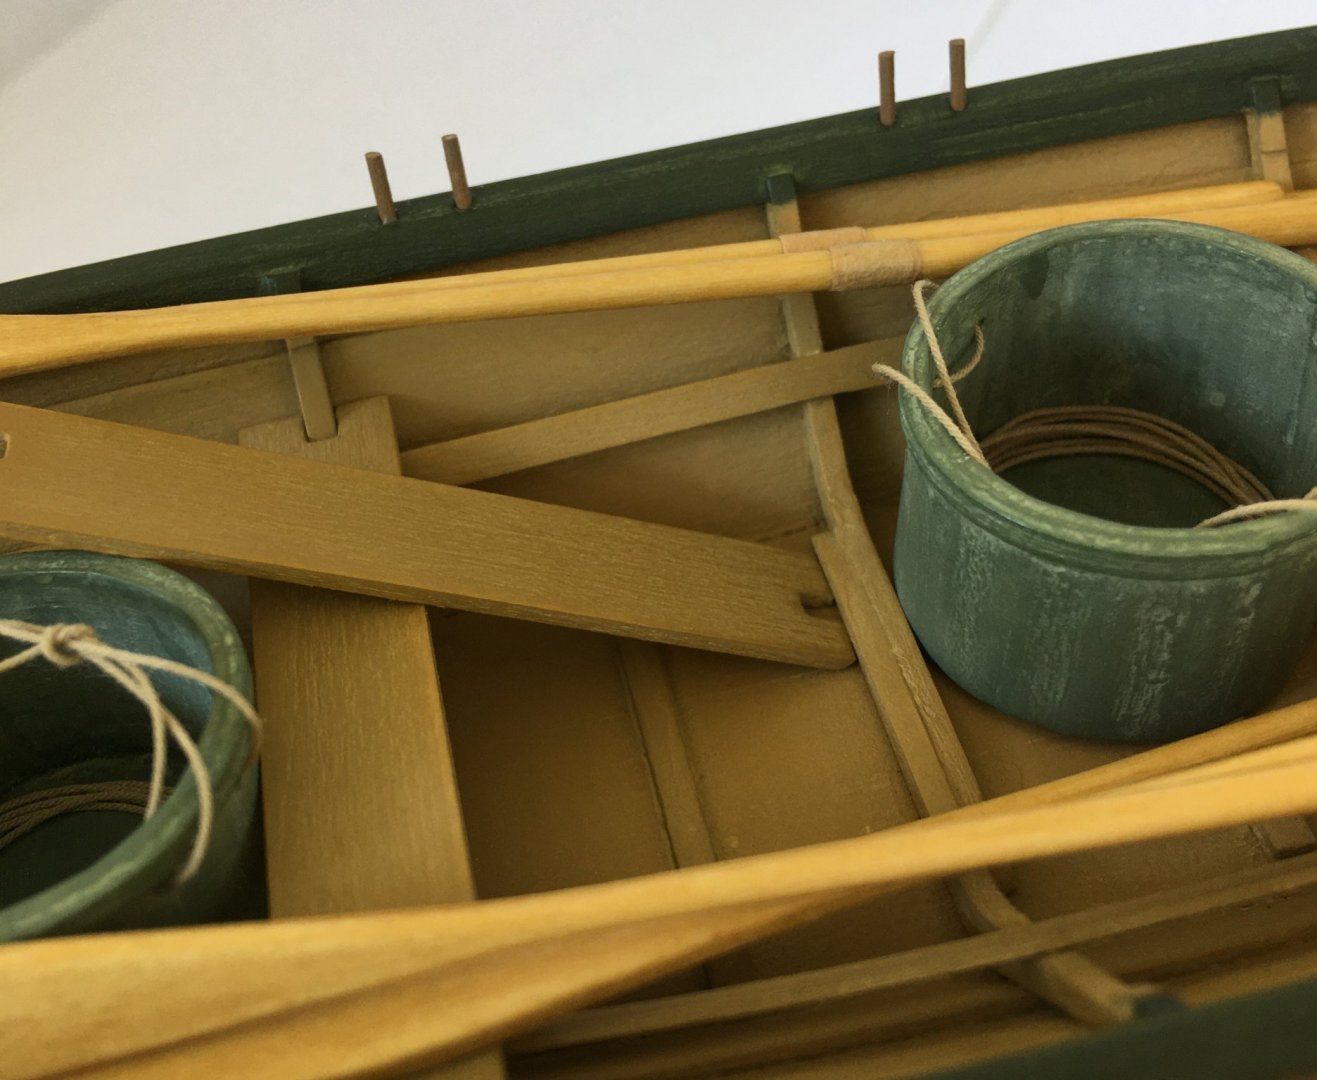
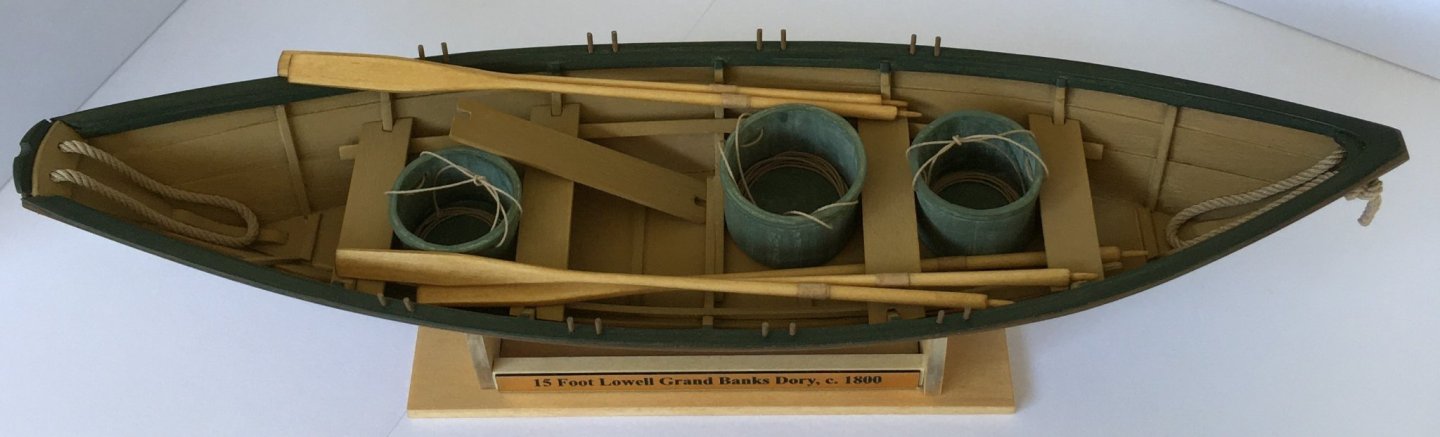
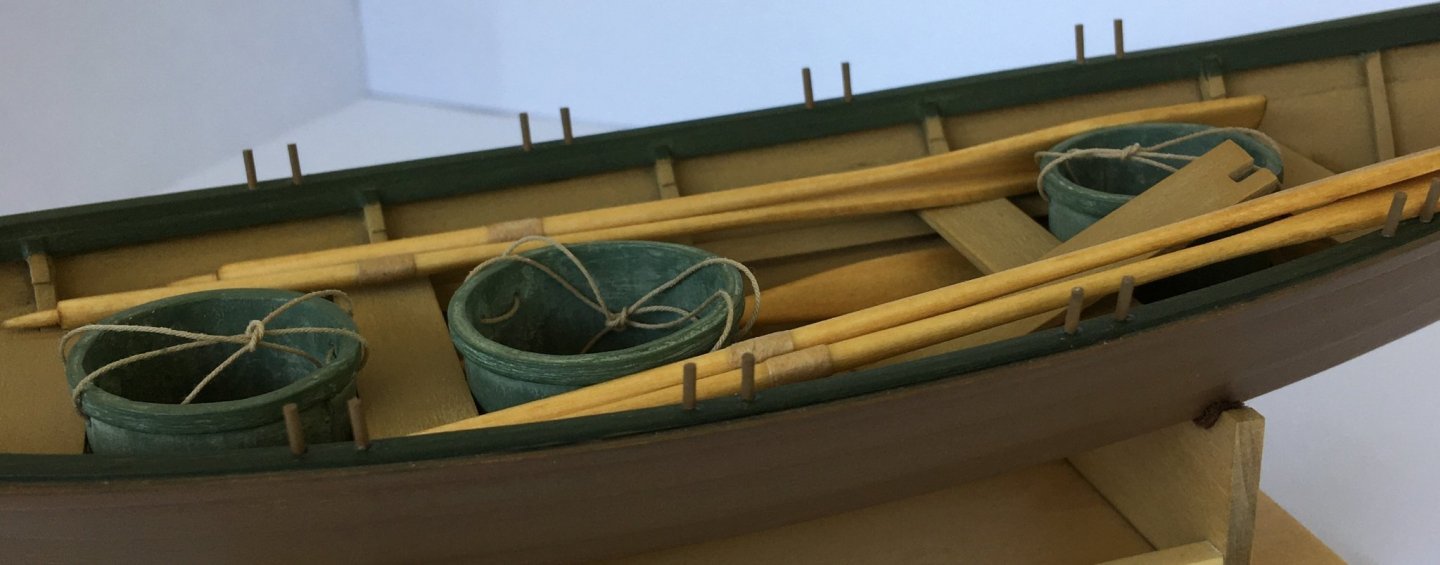
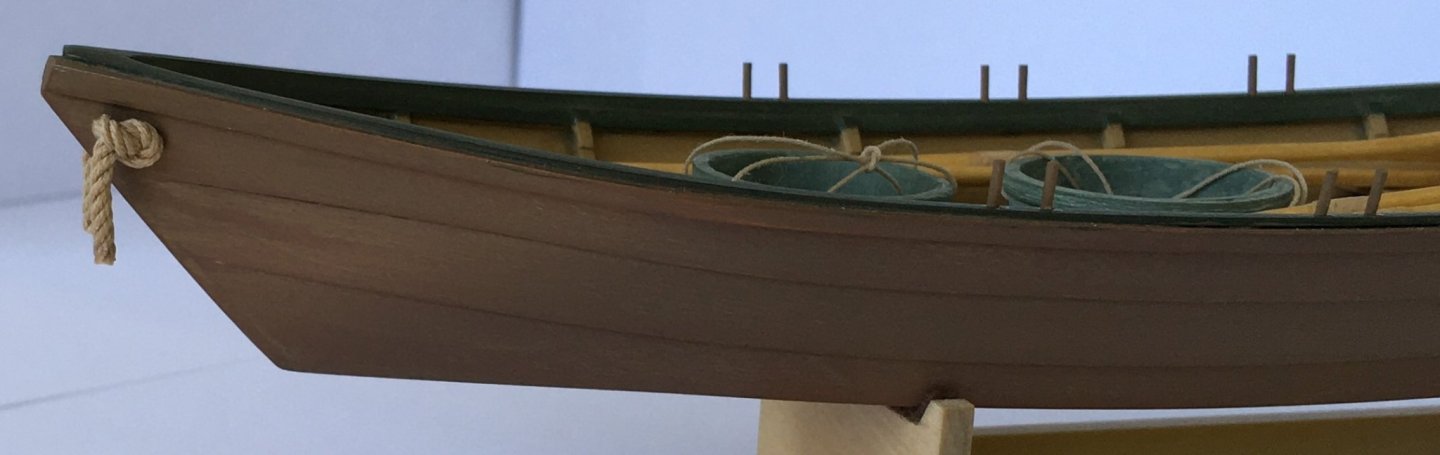
Prior to installing the boat on the display base, strips of brown felt were glued for a custom fit. Three days of rigging the buckets with handles and rope coils using Syren ULTRA scale rope completed the model. I did my best to tie sheet bend knots, although that detail is difficult to notice at this scale. This was an enjoyable project and I learned a lot. Thank you David for designing this kit and keeping an eye on the build. Ryland Craze and Mike Stuntflyer, our exchanges on paint strategies and finishes was invaluable. I hope the rest of you will continue to follow as I get back to the Mayflower- Model Shipways. Steve


- 70 replies
-
- 11
-
-
- Lowell Grand Banks Dory
- Finished
- (and 1 more)
-
Yes, agreed. A drill will be necessary, but I don’t think she will need it for quite some time into her next project.
- 160 replies
-
- 3
-
-
- Model Shipways
- norwegian sailing pram
- (and 1 more)