
Supplies of the Ship Modeler's Handbook are running out. Get your copy NOW before they are gone! Click on photo to order.
×


Robin Lous
-
Posts
564 -
Joined
-
Last visited
Content Type
Profiles
Forums
Gallery
Events
Everything posted by Robin Lous
-
 She's absolutely gorgeous! I have a silly question. You worked 10 years on this...how does it feel now you finished it? I never worked that long (not even close!) on a model and I can imagine it must be a strange feeling to put it aside now. Looking forward to your next adventure. Robin
- 63 replies
-
- 1
-

-
- vasa
- billing boats
- (and 1 more)
-
Today I finished the second rower seat beam and stained both. Also made the two deck hatches and ladders underneath them. What's next? Hull planking (scary job) I'll start working again tomorrow, so I can't start the planking before sunday. Perhaps I do some test bending before sunday, but nothing to show before sunday or monday. More soon! Robin
- 473 replies
-
- 7
-
-
- greek bireme
- dusek
- (and 1 more)
-
That's true, but it still looks good on your last photo
-
Every oarsman brought his own cushion made of sheepskin with him. I think you can compare the "luxury" with modern time sport rowers...none whatsoever But...keep in mind these ships were made for relatively short stay on the sea. Most battles were fought near the coast. The ships hardly ever stayed out for more than 6 to 8 hours. The ships were normally beached to dry and to feed and rest the crew after that time out.. Longer journeys were divided in short legs...along a coast line or from island to island Nice video of the sea trials of the Olympias trieres...you can see the oarsmen (and women) rowing. ...note the comfort (and my seats! between 7:10 and 7:50 some good foot rest views also)
- 473 replies
-
- 8
-
-
- greek bireme
- dusek
- (and 1 more)
-
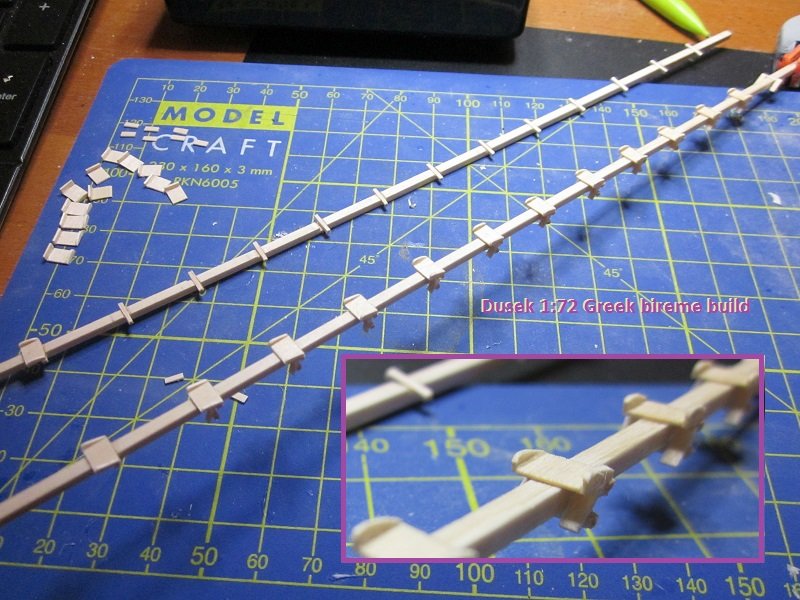
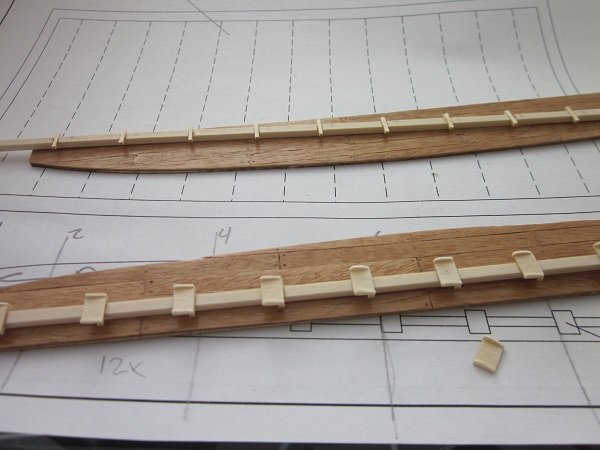
What a job! Me and my big mouth But I managed! A 2x2mm beam, with 2 1x1mm support beams per seat. The seats, seat side supports and the foot rests are made from 0,5mm thick wood cut to size. So indeed the 7 parts per seat. I copied the seats used on the Olympias Athenian trieres reconstruction. Edit: note the first seat has no foot rests, because nobody behind him to use them...and the last rower has a seperate set, because there's no seat in front of him. Maybe the added detail won't be very visible on the lower seats, but they will be visible on the top seats (I hope). But...I come from a strange planet where people detail and paint cockpits and hide them in a plane when finished....so I'm a bit odd More soon! Robin
- 473 replies
-
- 7
-
-
- greek bireme
- dusek
- (and 1 more)
-
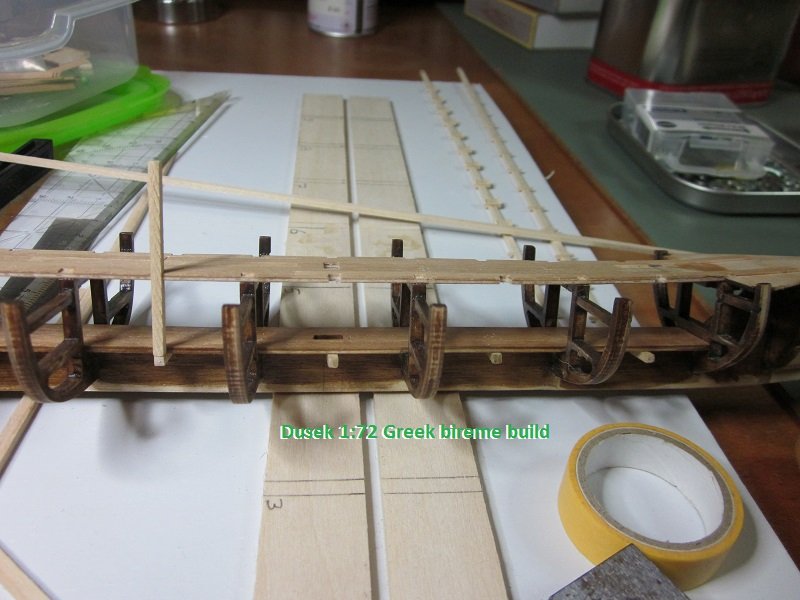
Shipyard in business again Reworked the deck to prepare it for the railing. I removed the planking above the frames for a better railing post attachment there. And removed chunks of the deck where the railing posts will go down to form additional deck support beams. I think these extra support beams make sense and they'll make the railing construction much easier and a lot more sturdy. I'll do the railing later and I wait with finishing the deck planks until I did the hull planking there. Need to finish the rower seats now, because I need to slide in the lower seat beam before I can start planking the hull. So...boring seats tomorrow...I ran out of excuses to do other things first More soon, Robin

- 473 replies
-
- 10
-
-
- greek bireme
- dusek
- (and 1 more)
-
First the Victory and now this...crazy! I'll follow this one also! Robin
- 56 replies
-
- 2
-
-
- sd-14 cargo ship
- card
- (and 1 more)
-
Oh darn! I like both ships! I must not hoard! I must not hoard! I'm strong! ...or maybe I'm not Robin
-
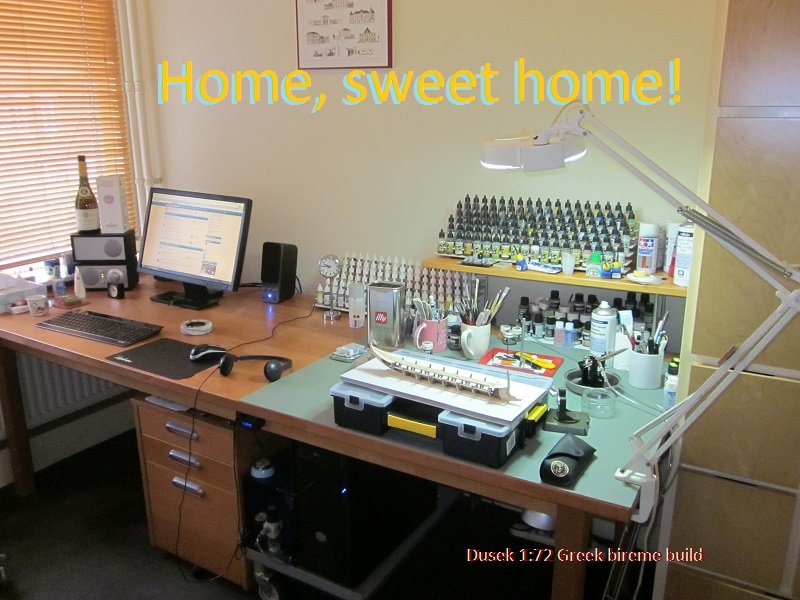
After a fairly uneventful journey home....back home! It was a great vacation, but it's nice to be back home also. Time to unpack and continue my build. I finished fairing the frames, but before I start planking the hull I'll do some deck surgery. I'll add vertical beams in between the frames. They'll be additional deck support beams and continue to be railing posts above the deck. More soon! Robin
- 473 replies
-
- 7
-
-
- greek bireme
- dusek
- (and 1 more)
-
Thanks Frank! All good things must end...after 2 weeks in the Bordeaux wine region we go back tomorrow. A stop over in Normandy, so we'll be back home on sunday. Glorious weather, great wine and food...and plenty shipyard time. Shipyard packed for now Next week I can continue my build on my trusted work desk...with good internet! See you guys next week again. More soon! Robin
- 473 replies
-
- 6
-
-
- greek bireme
- dusek
- (and 1 more)
-
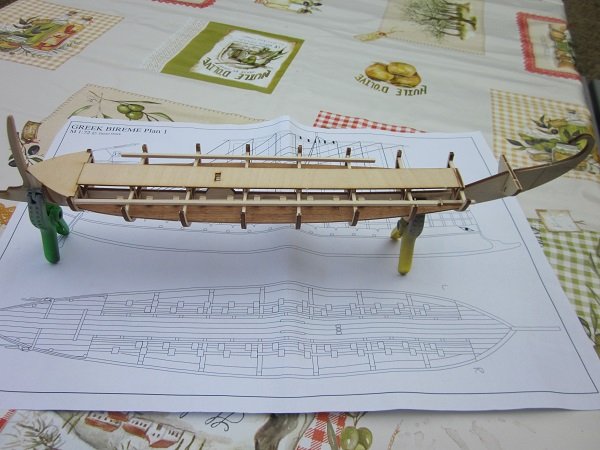
Finished the lower deck and glued on the centre top deck. Did part of the deck planking before I glued it on, because it's easier to do it on the bench I think. I'm also making 2 hatches in the deck. More soon, Robin
- 473 replies
-
- 7
-
-
- greek bireme
- dusek
- (and 1 more)
-
Err...yes...it's a bireme work in progress (penteconter with 2 oar levels for Greek historical accuracy purists). I can't remember I somewhere said it's ready, but when I did...sorry...it's not yet finished...sorry
- 473 replies
-
- 2
-
-
- greek bireme
- dusek
- (and 1 more)
-
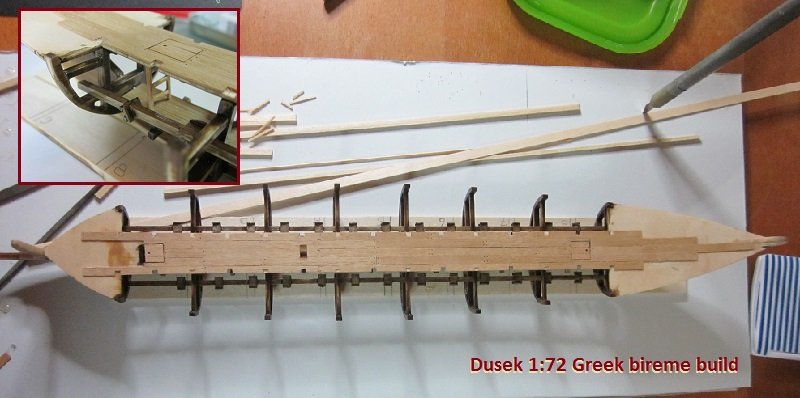
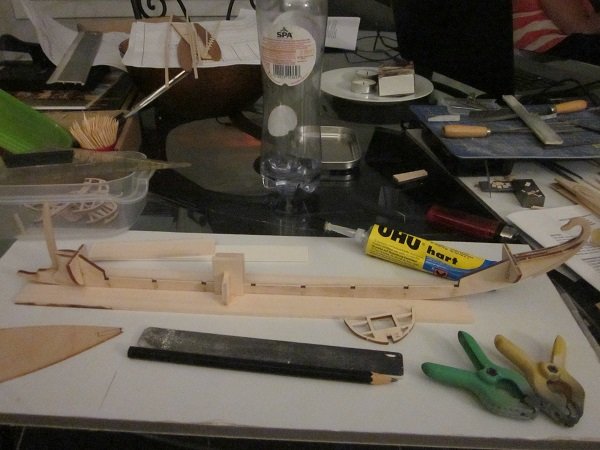
Thanks for the encouraging words guys! much appreciated! Where I am now... Finished the framing and did the forward and aft decks. Top and lower deck, rower seat beams...there for the show. I salvaged the 2 side decks...I cut them up to make the lower centre deck from. Will be 2 parts, so I can slide them in place when I'm ready for them. Finally it start to look like something. Until today it was a pile of bits and pieces...now it's a "thing"! More soon, Robin
- 473 replies
-
- 9
-
-
- greek bireme
- dusek
- (and 1 more)
-
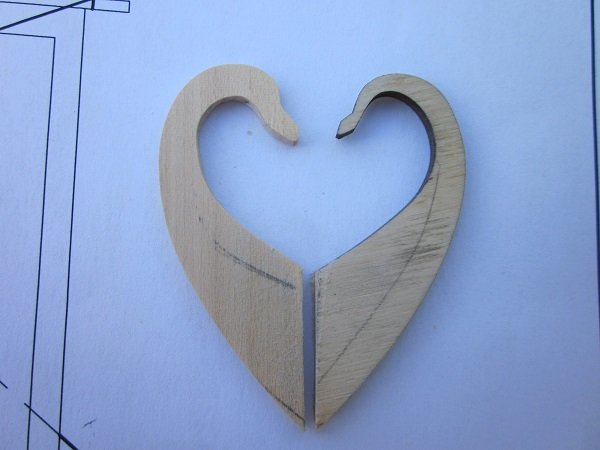
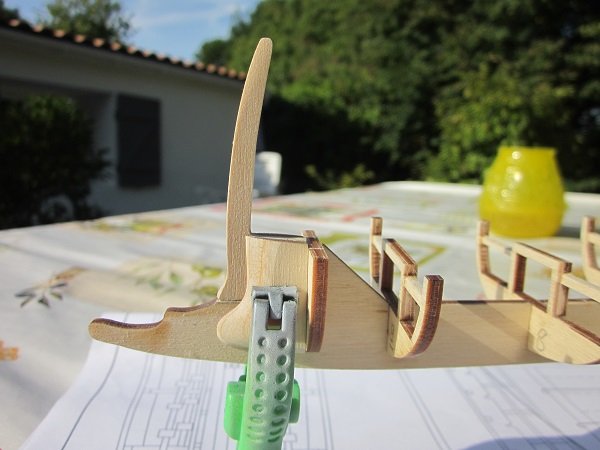
Today I replaced the plywood stern decoration with a new one made of basswood. Slightly larger. I think it's a dolphin head, but when you think it's a swan, duck, seahorse or Nessie...I won't feel offended The filler blocks make it a strong construction again...same with the new bow "spar" btw. More soon! Robin
- 473 replies
-
- 9
-
-
- greek bireme
- dusek
- (and 1 more)
-
A magnifyer lamp or optivisor is very handy for painting small details. I noticed the paint came off on the knees and feet. White metal figures are easier to paint when you basecoat them before you start painting. Paint comes off easily without basecoat. When you have problems holding them when you paint them, maybe stick them to a toothpick with Blutac? Love this build! Robin
- 305 replies
-
- 1
-
-
- deagostini
- vasa
- (and 1 more)
-
My approach is to start simple...and make it complicated for no reason myself.
- 240 replies
-
- 10
-
-
Lol no....building 2 simultaneously is a bit too much. I never build a woorden ship before, so one to start with is plenty! Thinking of the second already also through. When I have several options, I do one now and the next...next bireme. More soon, Robin
- 473 replies
-
- 3
-
-
- greek bireme
- dusek
- (and 1 more)
-
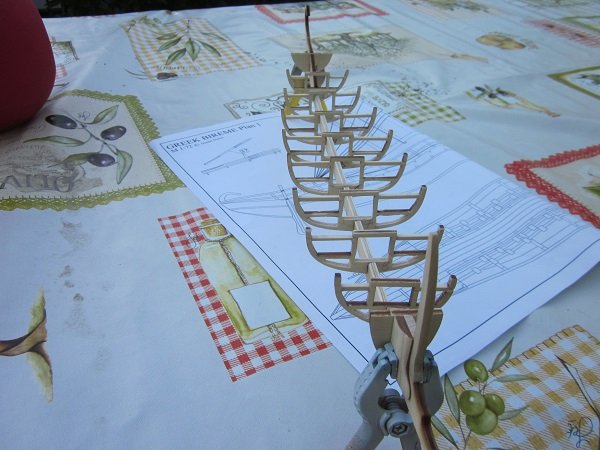
The new "open look" Finished all the frames...and my target for the day (that's a first!) More soon, Robin
- 473 replies
-
- 9
-
-
- greek bireme
- dusek
- (and 1 more)
-
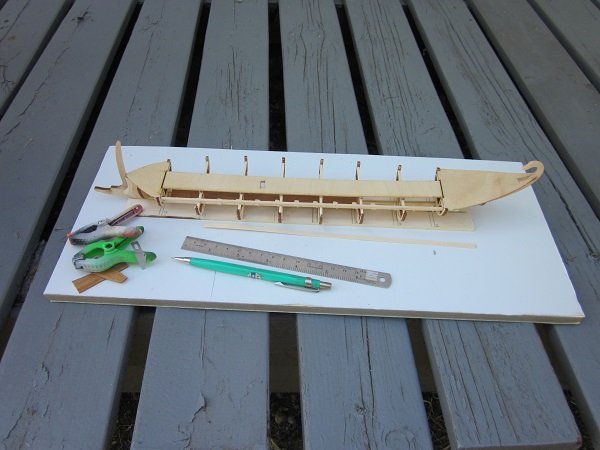
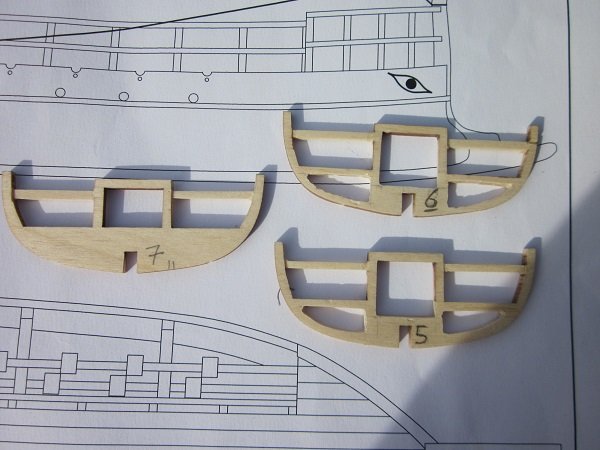
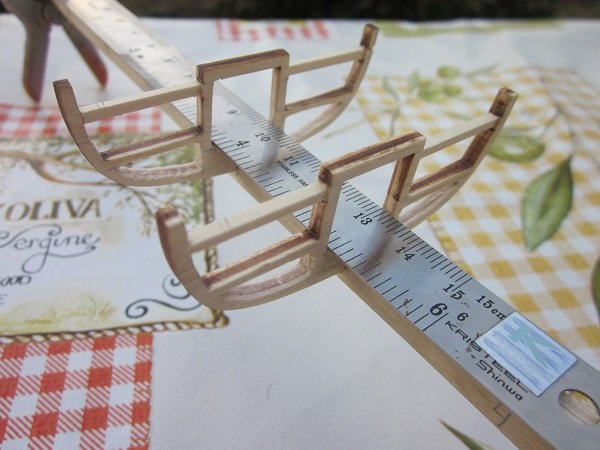
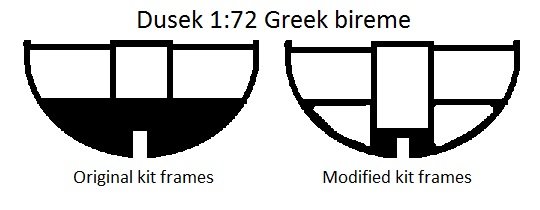
A change of plan! Bireme v2.0 I was thinking about it for a while already, but dryfitting convinced me to do it. The 2 side decks underneath the lower rower seats bothered me, because I think they serve no purpose whatsoever. I doubt these decks excisted (not sure of course). Dry fitting with the decks. Note the visible keel and the void underneath the top deck. My plan...ommit the side decks (triremes didn't had them either btw) and make a centre lower deck instead. To make this work I need to perform some surgery. See above...frame 7 is original...5 and 6 modified. And had to cut off part of the keel to make the deck fit the altered frames. The ruler is where the deck will come. The structure lost some strenght and stiffness because of the surgery I guess, so I'll make some invisible reinforments alongside the keel under the deck to be. More soon, Robin
- 473 replies
-
- 10
-
-
- greek bireme
- dusek
- (and 1 more)
-
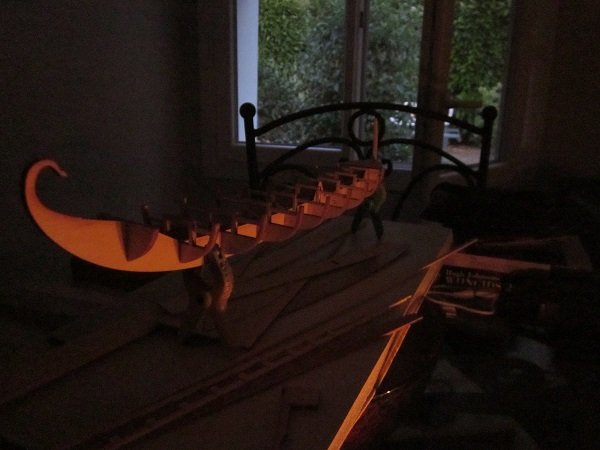
Thanks guys! It's amazing to read about ancient naval warfare. What strikes me is how advanced the tactics and use of recourses were back then. It's also amazing to read about the sheer size of fleets engaging eachother, The pinnacle of ancient naval battles was of course the battle of Salamis, but many more sizeable battles (mainly Greeks fighting Greeks) followed. Faster ships made up for numbers...and a fast ship was a "dry" (not waterlogged) ship with trained, rested and well fed rowers....a fast ship could be a slow ship the next day...and the other way round. The way commanders used their recourses made the difference between winning or losing. People were pretty clever 2500 years ago! Shipyard by candlelight (photo by Admiral of the fleet). Cheers! Robin
- 473 replies
-
- 5
-
-
- greek bireme
- dusek
- (and 1 more)
-
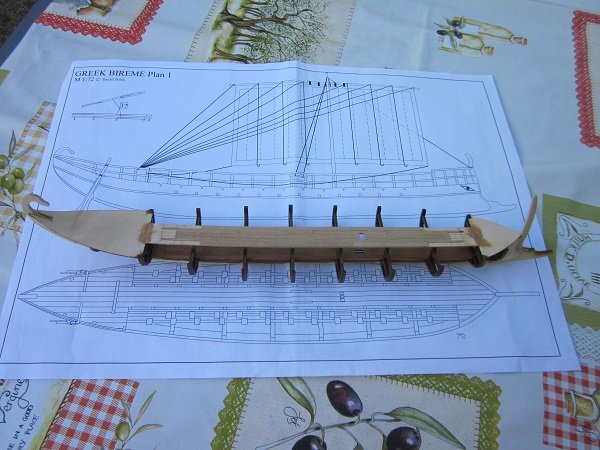
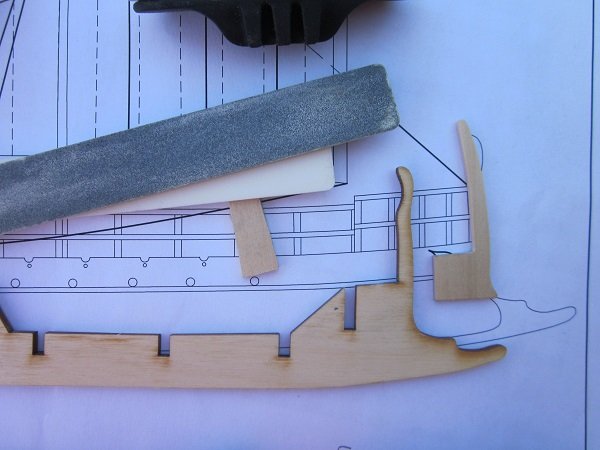
Despite the heat...I made some progress. Still busy with the darn seats. It took me a while to get the hang of making them. Plastic is easier! And I changed the bow to one of my own liking. I used ship images on greek vases as an example for this. Only the new bow glued on. All other parts still dryfitting. I'm also sanding the filler blocks (or whatever they're called) atm. I'll replace the stern section also, but that's a bit more complicated. More soon (but I'm moving slowly...steady, but slow ) Robin.
- 473 replies
-
- 11
-
-
- greek bireme
- dusek
- (and 1 more)
-
I think you can be proud of your first build...really lovely! Cheers! Rob
- 32 replies
-
- 1
-
-
- billing boats
- norden
- (and 2 more)
-
I can't help (new myself), but I can be part of the chearleaders. Welcome aboard! Robin
-
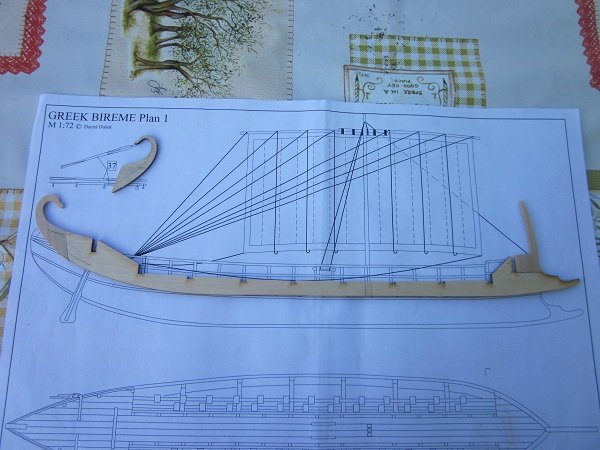
Today was really too hot to make a significant progress, so I didn't reach my "target for the day". But, I did some work...not enough to show a photo of it though...hopefully tomorrow. I enjoy reading the "The Athenian Trireme" book...for now most interesting for me is the development from earlier ships to the trireme, because that's where my bireme comes into play. Noteworthy...the Greek never used the word "bireme" (a latin Roman word for a ship with 2 oar levels). The Greek name was a pentecontor (50 oars) with two levels. The two levels instead of one didn't change the name of the type. It's a great book (the only decent book on the subject really) and it will help me with my future Dusek trireme (in fact a "trieres"...trireme is also a latin Roman word). I absolutely love building this ship and I think Daniel Dusek did a fantastic job, even though lots is (estimated) guesswork. Not only because it's a good starter kit, but because it's a subject appealing to me. Also nice to be able to change stuff to my own liking and/or interpretation...something you can't do with (set in stone) historical ships. Anyway...sorry I wasn't able to show stuff, but I'm enjoying myself building this! More soon! Robin
- 473 replies
-
- 7
-
-
- greek bireme
- dusek
- (and 1 more)
