-
Posts
564 -
Joined
-
Last visited
Content Type
Profiles
Forums
Gallery
Events
Everything posted by Robin Lous
-
Will look stunning! I also look forward to the Riva bling bling on the side of the hull. Robin
- 414 replies
-
- riva aquarama
- amati
-
(and 2 more)
Tagged with:
-
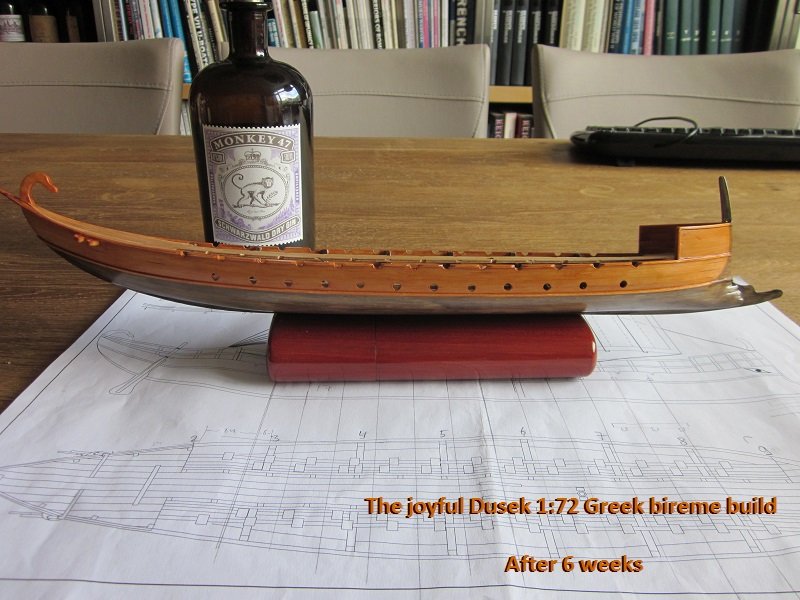
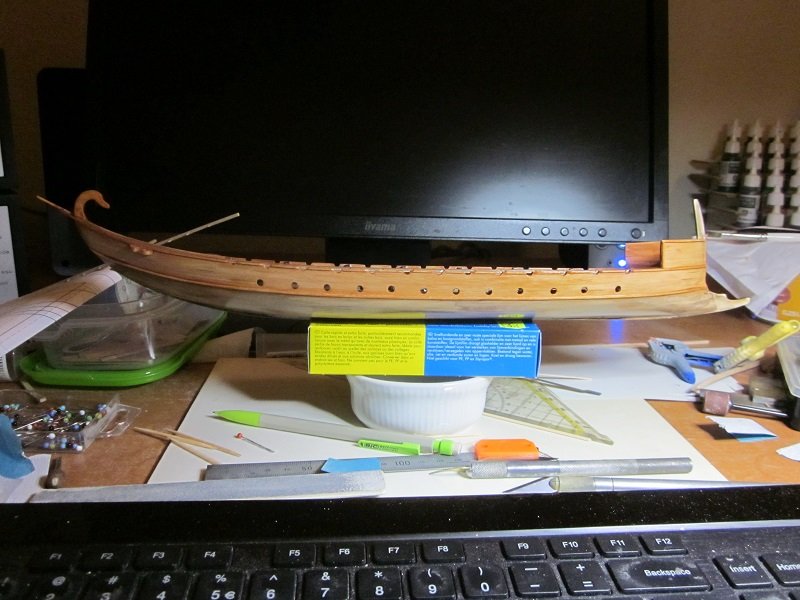
After 3 layers of wood stain. It's a slow process, but I think it's nicer to stain than to paint. Also started staining the front of the bow. Painting with wood stain isn't easy, but with a small flat brush, it's doable. I think 2 more layers of Hennessy and 3 or 4 layers of ebony are needed to get the desired result. Working on this for 6 weeks now. I think I need 4 or 5 weeks more to finish it, but that's just a wild guess...no clue really. More soon, Robin
- 473 replies
-
- greek bireme
- dusek
-
(and 1 more)
Tagged with:
-
Thanks! 2 right now...both top wales...there will be some more when the railing goes on. Since I can watch paint dry most of the day, I'll tidy my workspace a bit today. It's a mess right now and I need space to use my airbrush for the ships eye soon. Apart from staining, I'll make the copper oar beam plates. Furthermore...a lazy day. More soon, Robin
- 473 replies
-
- greek bireme
- dusek
-
(and 1 more)
Tagged with:
-
Today I finished the other side (wales and rudder attachment), cleaned and lightly sanded the hull...and did the first layer of Hennessy and ebony staining. Well...don't expect wonders after just one layer, but it gives an idea of what's happening. Tomorrow (well that's today, after some sleep ) I'll sand again and do the 2nd and 3rd layers. That will be enough for the Hennessy, but the ebony might need some more. We'll see. More soon, Robin
- 473 replies
-
- greek bireme
- dusek
-
(and 1 more)
Tagged with:
-
Thanks guys! Finished the wales and rudder attachment point on one side. When the other side is done, I'll stain the hull...inside and outside. I'm eager to do the staining, because that will make the model much more attractive. I think...hope...well, we'll see. Also found a solution to paint the ship's eyes neatly. Looking forward to that also. Will be a challenge to keep the wale extending at the stern from breaking off More soon, Robin
- 473 replies
-
- greek bireme
- dusek
-
(and 1 more)
Tagged with:
-
Nice! Dreadnought and Yamato. The mother and the pinnacle of battleships! This will be amazing! Robin
-
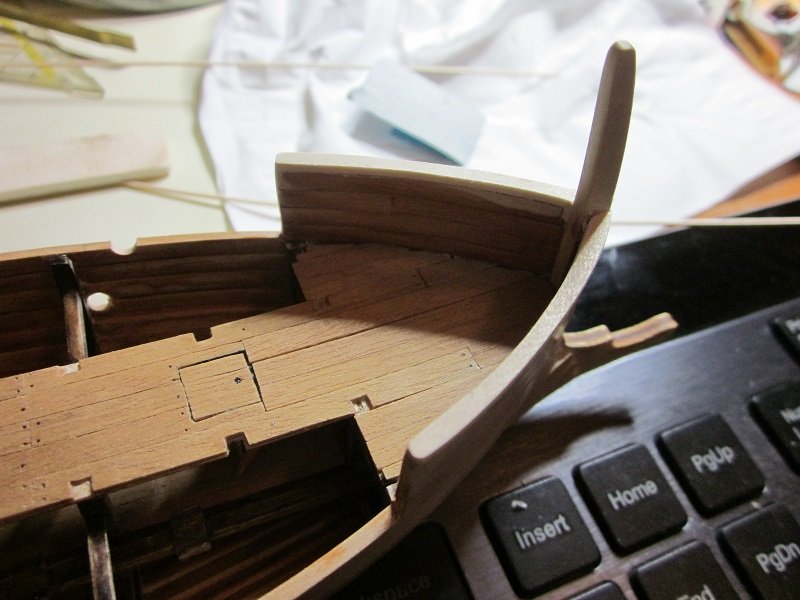
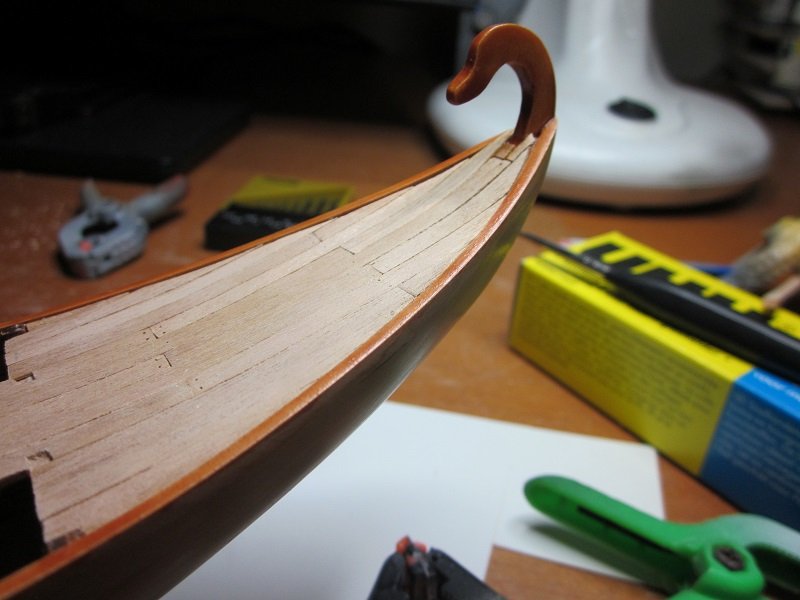
Made some progress. Varnished the deck and made planks on top of the forecastle. Working on the wales now. More soon, Robin
- 473 replies
-
- greek bireme
- dusek
-
(and 1 more)
Tagged with:
-
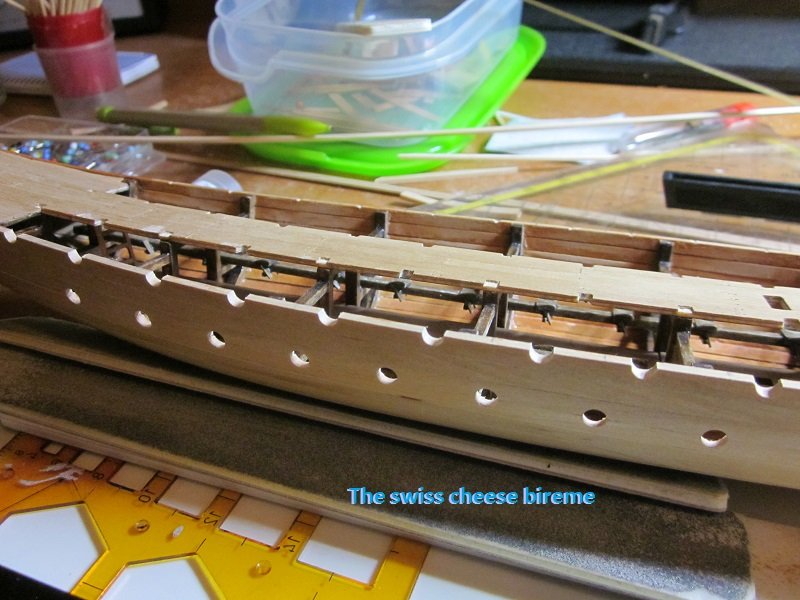
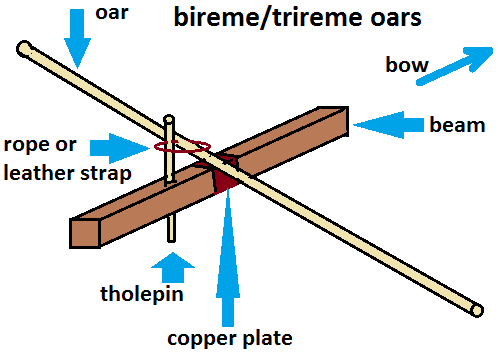
Thanks Bob and Steven! I was just thinking about this myself and I came to the conclusion...the wood of the hull planks is just amazing....really fantastic wood. And again...no idea what kind of wood it is...I'll ask Daniel Dusek, because I'm curious about it. It's so easy to sand it smooth and file sharp looking holes. The wood is kinda hard...not soft whatsoever. When you sand or file...it takes effort to get it done, but no fuzzy rough edges, no splinters or chipping. Still fairly easy to bend when wet. I was a bit scared about the oar-holes, because there's no glue between the planks. They're only glued to the frames. Perhaps the files I use have some magic in them....they're almost 40 years old, but they never let me down. Good old pre-rubbish files A bit more about the oar attachment and why I made the holes larger... The oar-holes are just that...holes...and they must be large enough to allow the oars to move freely. The oars are not even supposed to touch the wood around the holes. The holes don't support the oars. Behind the holes runs a beam with a copper sliding plate (to reduce friction) on it. That's the spot where the oars find their support. They're attached to a tholepin with a leather strap or piece of rope (the tholepin should be right next to the copper plate...me bad ) So I still have a lot of work to do on the inside More soon, Robin
- 473 replies
-
- greek bireme
- dusek
-
(and 1 more)
Tagged with:
-
You're Riva looks fantastic! And there's absolutely no need to airbrush (highlight, or whatever) those seats. That won't even look good, because the Riva you build is pretty big. I was responding to Sunsanvil's post. Robin
- 414 replies
-
- riva aquarama
- amati
-
(and 2 more)
Tagged with:
-
This is true! A 100% match with a...let's say RLM colour...will look wrong on any model. Smaller scale...lighter shade needed. On armour models it's good to use the (too dark) colour as a basecoat and lightly drybrush increasingly lighter shades of the colour to add depth....and get a more realistic lighter finish. Example: http://i344.photobucket.com/albums/p347/beychevelle/IMG_1339_zpsgz4sto5q.jpg Here I started with the typical panzer yellow...ended with almost ivory.
- 414 replies
-
- riva aquarama
- amati
-
(and 2 more)
Tagged with:
-
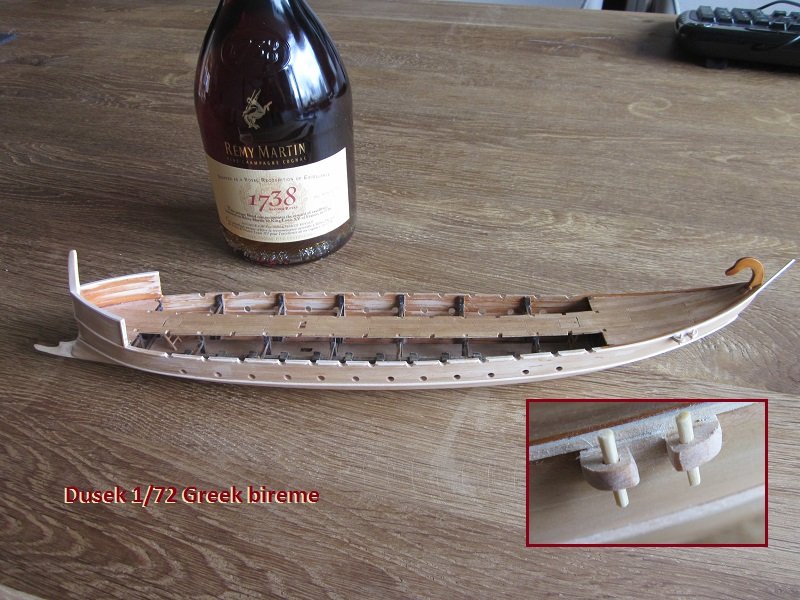
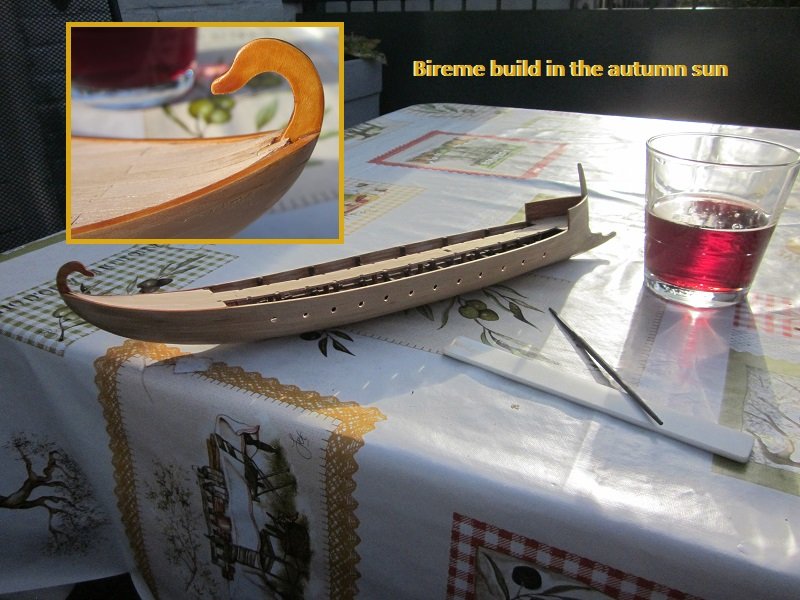
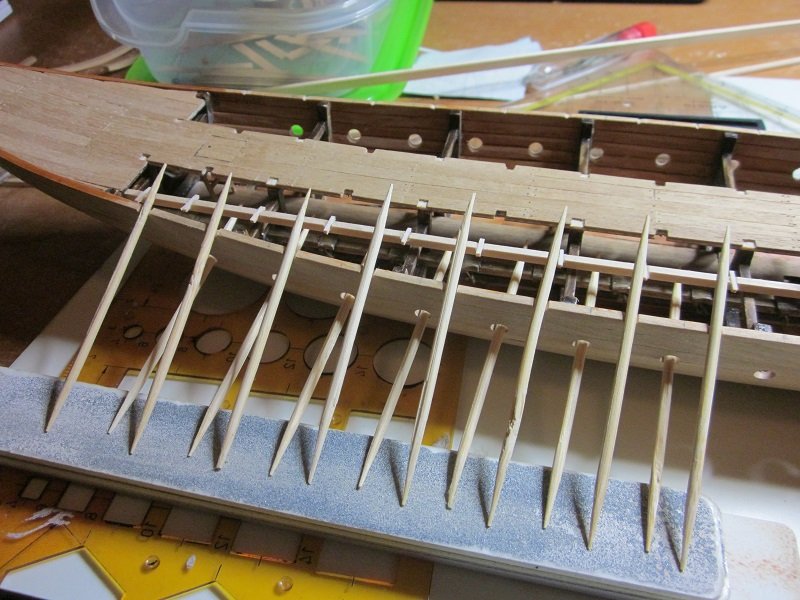
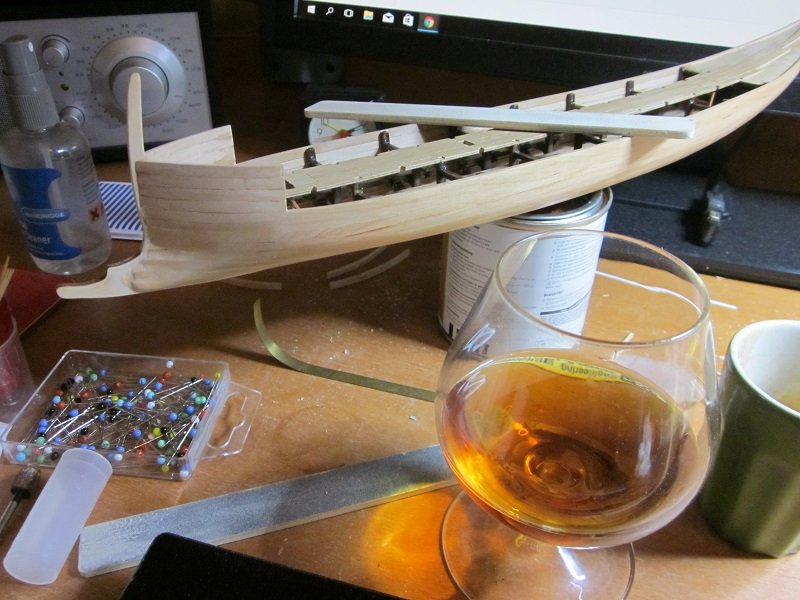
Lovely weather today, so I moved outside with my build, a file, a sanding stick and an americano cocktail. Finished the lower oar-holes and started with the top holes. Insert: For Bob...a better Hennessy wood stain photo. The top oar-holes are actually half round cups. I'll make horizontal beams underneath the oar-holes with tholepins (wooden pegs). Checking the oar-hole placement with cocktail sticks. More soon, Robin
- 473 replies
-
- greek bireme
- dusek
-
(and 1 more)
Tagged with:
-
Good choise to revisit the turquoise. It's one of the Riva hallmarks. It's very difficult to get the turquoise spot on, so I feel your pain! Robin
- 414 replies
-
- riva aquarama
- amati
-
(and 2 more)
Tagged with:
-
Just when I started to wonder about how to make nice eye bolts...I stumble upon the answer! Now I see your workspace mess...I feel a lot better about mine Thanks for the explanation! Robin
- 608 replies
-
- la couronne
- corel
-
(and 1 more)
Tagged with:
-
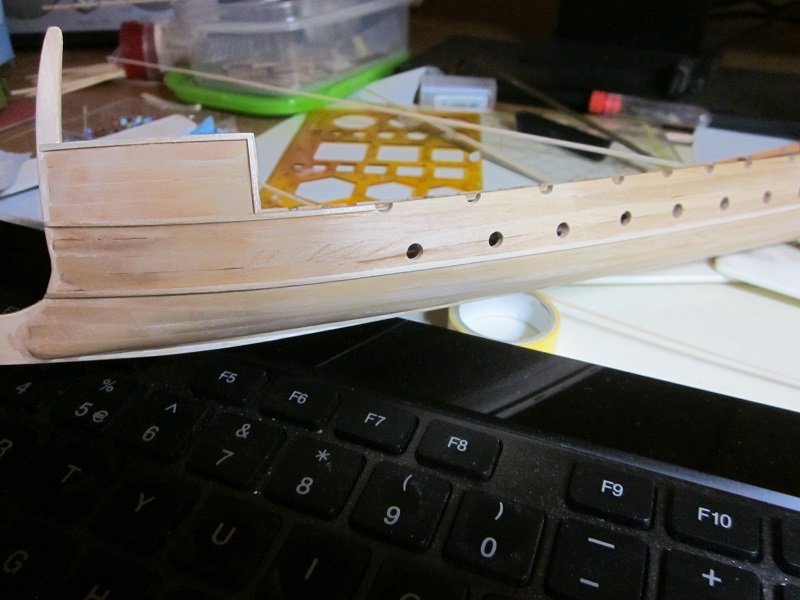
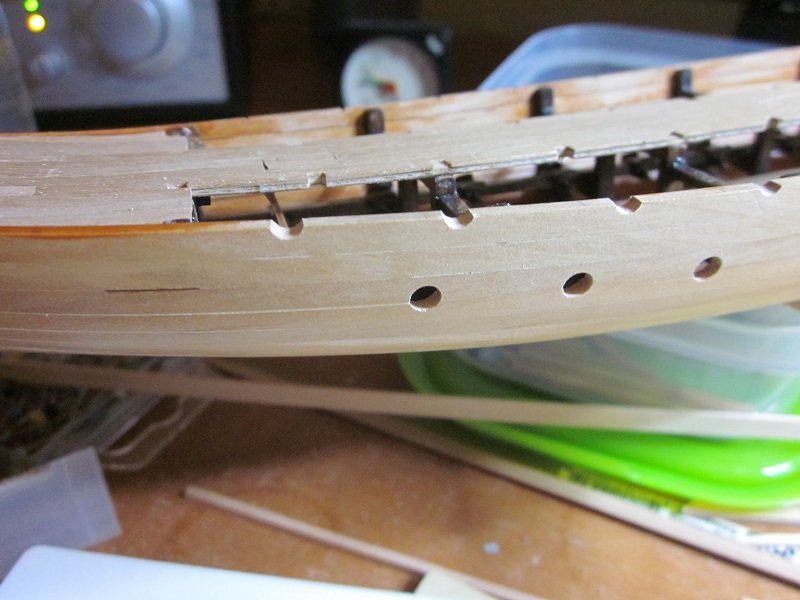
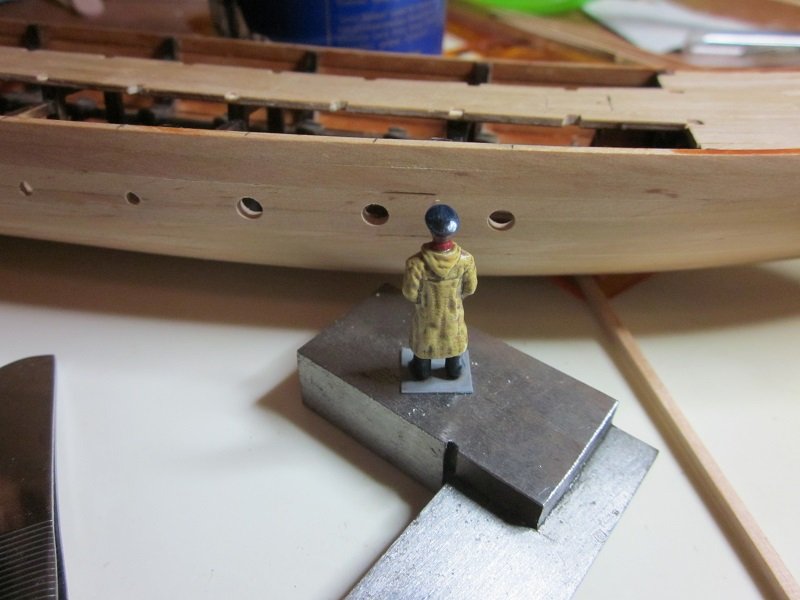
I wasn't sure what was best to do next, but I guess it's time to do the oar-holes for the lower oars now. Like much...I do it slightly different The manual tells me to drill 2,5mm holes in the 3rd plank. This scared me...2,5mm holes in a 3mm wide plank This will most likely result in cutting the plank into small sections with nasty edges were the holes meet plank 2 and 4. I wasn't looking forward to that. The solution was handed to me on a silver platter when I checked the position of the wale directly underneath the oar-holes. On the edge of planks 3 and 4...according to the manual. I didn't like that position...it looks better one plank down...edge of 4 and 5. Also a good point to start the pine tar for the hull bottom. So I lowered the oar-holes to halfway plank 3 and halfway plank 4....no more fear of plank destruction! And...instead of 2,5 mm....3,5 mm holes. I didn't dare to drill 3,5 mm. Started with 1 mm and widened with a 2 mm drill bit. From there...a fine round file. The larger holes are more realistic and they look better I think. They're closer to the waterline now, so I'll make leather sleeves (like used on the Olympias) from thin lead foil. Note: the 2 dark lines are CA glue stains...not gaps. The lower one will be hidden underneath the wale, but the one above the hole will remain. It bothers me, but nothing I can do to get rid of it. Hopefully less visible after staining. 3 done...21 to go! More soon, Robin
- 473 replies
-
- greek bireme
- dusek
-
(and 1 more)
Tagged with:
-
Painting eyes isn't the easiest job, but with a good approach it's doable. Ignore the flesh colour around the eyes at first...don't try to fit the eye in...that wont work. 1. a horizontal line of off ivory or cream (don't use pure white). 2. a thin vertical line of black through the centre of the eye. 3. a very thin brown wash (will show the shape of the eye). 4. a thin line of flesh colour above and underneath the eye...follow the shape of the eye. With a little practise...you get the hang of it soon enough Robin
- 305 replies
-
- deagostini
- vasa
-
(and 1 more)
Tagged with:
-

Glue efficiency (most useless topic ever!)
Robin Lous replied to Robin Lous's topic in Modeling tools and Workshop Equipment
Guys...keep in mind I use a tube of glue with 33 ml (35 grams) in it. I work on my build several hours each day for 5 weeks now...and that one tube of glue is still not empty. That's less than 0,7 grams of glue used per day! It's not like I'm throwing buckets of high explosives around in a careless fashion. I doubt that I, my build and my house are in grave danger, because of the use of this type of glue. Robin -
Thanks Bob, Carl and Frank...and thanks to the guys who like my build! Sadly...the Admiral had plans for the day, so my shipyard time was limited today. Only had time to finish the deck planking. I stained the edge of the hull before I did the bordering planks. I'll only varnish the deck with semi matt varnish. I'm still wondering about what the type of wood the deck planks are. They come from a Billing Boats wood display in my local shop. Since they're very nice and the right size for me (4mm wide, 0,5mm thick)...and since they were a bargain (20 cents each)...I took the whole lot. Enough to plank the decks of a fleet of penteconters and trieres. It's not birch, boxwood or linde / basswood, but I've no idea what it is. The guy in the shop had no idea either. For now it's just "nice plank wood" About the cherry wood stain. It's not as dark as it seems on the photo (magnifying lamp light only). I like it and I think it's a good replacement for red ochre paint. Good colour and I don't have to hide the wood underneath paint now. Well....hoped to show more today, but...more soon. Robin
- 473 replies
-
- greek bireme
- dusek
-
(and 1 more)
Tagged with:
-
That's about the cherrywood colour I use for my build. I expect to stain the hull early next week, so you can check it soon. Now doing the last deck planks. Painstaking work to let them meet the rounded bow and stern. Cut...fit...sand...fit...sand...fit...sand...fit...sand fit. More soon, Robin
- 473 replies
-
- greek bireme
- dusek
-
(and 1 more)
Tagged with:
-
Yep, the patina treatment is on the list also...and it might work, because I used it on copper photo etched seatbelts and the result was great on them. Today I did the forecastle (maybe forecastle not the right word for this...dunno) planking. Still need to sand these planks. Tomorrow i'll do the frame on the inside, 2 small pin rails in between 2 frames...1 each side....and Ill finish the deck planks. Perhaps even time to drill the oar holes and do the wales. Oh...and I'll scratchbuild 16 deadeyes from walnut wood, but that's prolly a bit ambitious for a sunday. Now the planking is done, things will speed up I think. 5 weeks...about 150 hours in it so far. More soon, Robin Edit: the Hennessy for Carl (cog)
- 473 replies
-
- greek bireme
- dusek
-
(and 1 more)
Tagged with:
-
lol... I mostly use 1 to 3 bottles...not all of them I'm not looking for a massive green oxide effect, but a bit of it over time...nice! I try to get a neat dark moody brown bronze look. Edit: btw...for the use of polished body armor, shields and helmets...I agree...brass will be the better choise.
- 473 replies
-
- greek bireme
- dusek
-
(and 1 more)
Tagged with:
About us
Modelshipworld - Advancing Ship Modeling through Research
SSL Secured
Your security is important for us so this Website is SSL-Secured
NRG Mailing Address
Nautical Research Guild
237 South Lincoln Street
Westmont IL, 60559-1917
Model Ship World ® and the MSW logo are Registered Trademarks, and belong to the Nautical Research Guild (United States Patent and Trademark Office: No. 6,929,264 & No. 6,929,274, registered Dec. 20, 2022)
Helpful Links
About the NRG
If you enjoy building ship models that are historically accurate as well as beautiful, then The Nautical Research Guild (NRG) is just right for you.
The Guild is a non-profit educational organization whose mission is to “Advance Ship Modeling Through Research”. We provide support to our members in their efforts to raise the quality of their model ships.
The Nautical Research Guild has published our world-renowned quarterly magazine, The Nautical Research Journal, since 1955. The pages of the Journal are full of articles by accomplished ship modelers who show you how they create those exquisite details on their models, and by maritime historians who show you the correct details to build. The Journal is available in both print and digital editions. Go to the NRG web site (www.thenrg.org) to download a complimentary digital copy of the Journal. The NRG also publishes plan sets, books and compilations of back issues of the Journal and the former Ships in Scale and Model Ship Builder magazines.

