HOLIDAY DONATION DRIVE - SUPPORT MSW - DO YOUR PART TO KEEP THIS GREAT FORUM GOING! (Only 20 donations so far - C'mon guys!)
×


Robin Lous
-
Posts
564 -
Joined
-
Last visited
Content Type
Profiles
Forums
Gallery
Events
Everything posted by Robin Lous
-
 Nice EJ! How do you fix the pin rails to the deck? Just glue, or do you also pin them? Robin
- 608 replies
-
- 3
-

-
- la couronne
- corel
- (and 1 more)
-
Thanks for the nice and clear explanation E.J. I also sit in the classroom here. Robin
-
Happy birthday! And stop the self mutilation! Just kidding...I guess we all have less pleasant encounters with sharp hobby blades now and then. And...enjoy building your Mayflower. Robin
-
You're right Joe, I do take all the time it needs, so in a way...I'm not rushing, but eager to get something done I tend to glue myself to my desk chair and keep going until it's done. That's not rushing, but it's not good either. I can make stupid mistakes because I'm too tired to think straight sometimes....not to mention my eyesight....not to mention the Admiral giving me "the look". So...I call it a day! but...but...I did finish the staining! More tomorrow! Robin
- 473 replies
-
- 7
-
-
- greek bireme
- dusek
- (and 1 more)
-
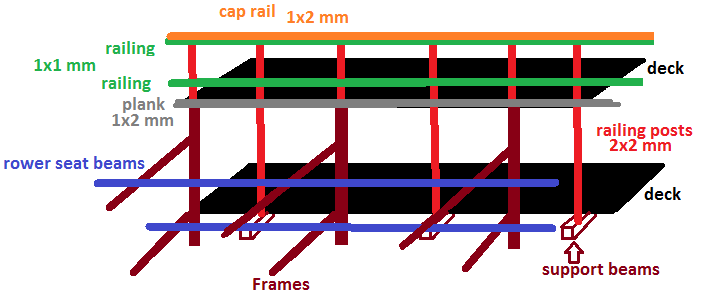
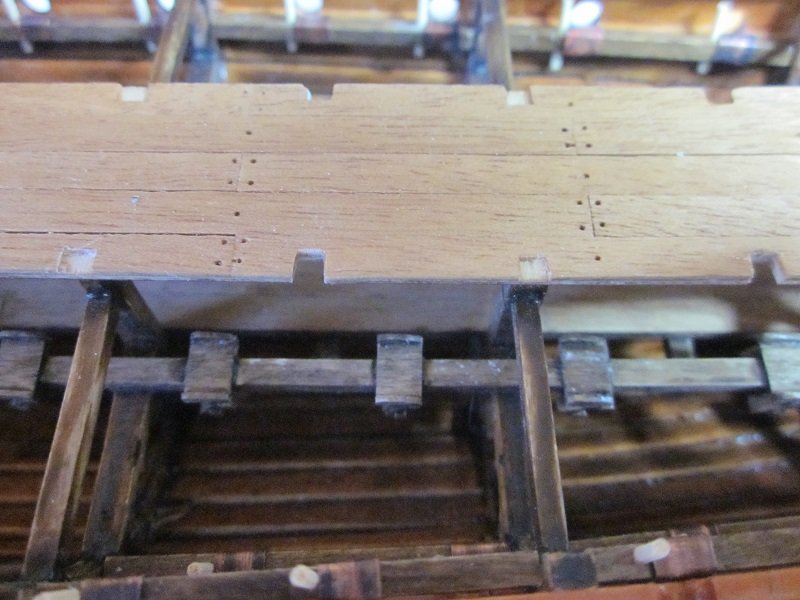
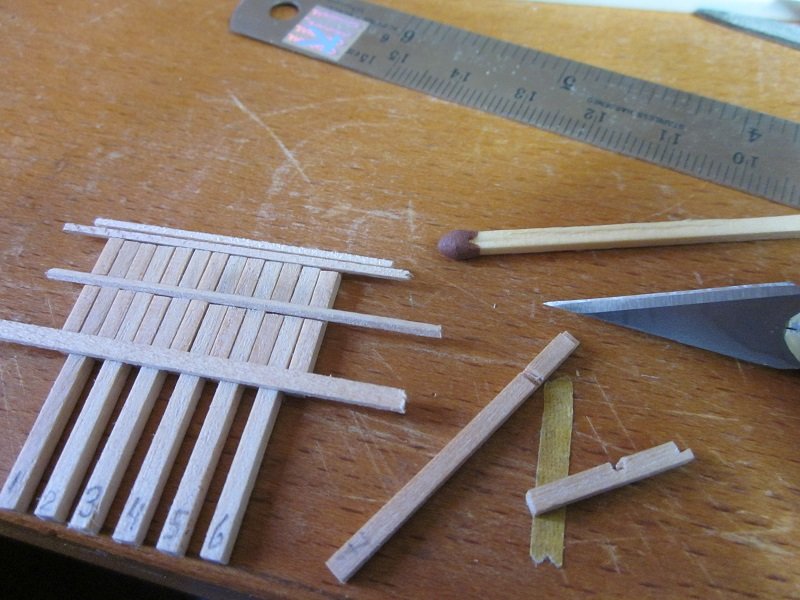
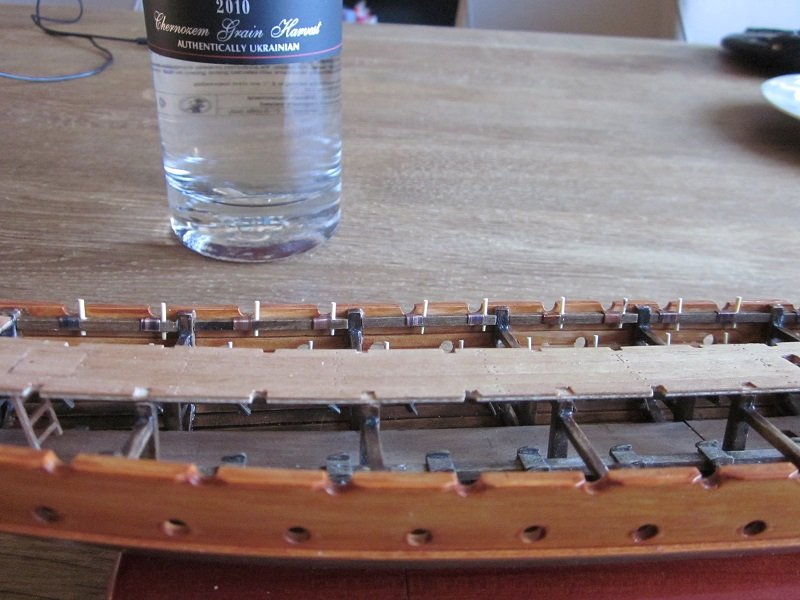
Thanks guys! Busy with the centre deck railing. The plan.... Where it will happen... What happened today (so far).... This took me 6 hours! For one side only. Much of it was measuring. The short posts all have the same lenght, but the long ones, I had to measure one by one. I don't own a milling table (yet ), so it took time to cut all the recesses with a fresh X-acto blade. The cap rail will be stained with "cherry" (or Hennessy for intimi) wood stain. The rest oak wood stain. I'll do that tonight and perhaps there's time left to start putting it together. So, maybe another update late tonight...otherwise tomorrow. Will also show the oars with the wider blades...straight and teardrop. Sooooo....more soon, Robin
- 473 replies
-
- 12
-
-
- greek bireme
- dusek
- (and 1 more)
-
Ancient Tireme being maintained by the Greek Navy
Robin Lous replied to dgbot's topic in Nautical/Naval History
...after they neglected the poor thing for many years. A fungus munched the hull planking away. The rotten planks are now replaced (but they didn't use the traditional building method). She'll likely never sail again...and that's very sad. Still an awesome reproduction on display. Things went downhill with Olympias when the Trireme Trust (Trust inactive since 2010) handed her over. I was hoping for more sea trials. They never did any with the masts left ashore (battle rigging)...never read anything about it anyway. Her performance would be mindblowing. Glad they patched her up, but a shame they didn't took good care of her before. Robin -
That's clever and it looks good! I hope your birthday isn't too far away, so you can start working on your next model soon. Robin
-
Thanks Bob, I don't think it will be a painful experience to make the oars, even though I need about 60. I'll start making small batches of about 5 per day before I continue with the part of the build I'm working on. When I spread it out, it won't become slave labour...I hope. With the trireme (170+30 spares) build on the horizon...I think I'm condemned to this daily routine for a long time now. More soon....including oars! Robin
- 473 replies
-
- 5
-
-
- greek bireme
- dusek
- (and 1 more)
-
Enjoy the ride! Robin
-
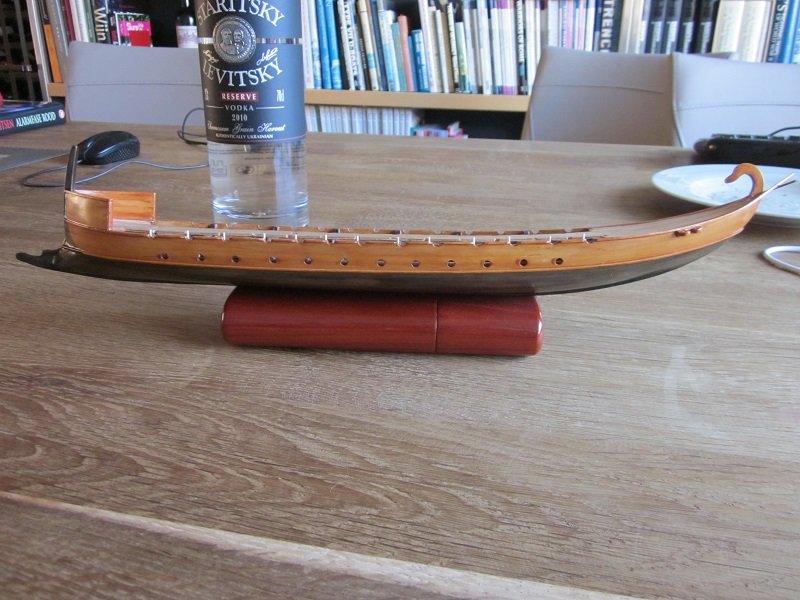
The whole tholepin affair came to an end... ...and placed the rudder attachment pins. The weathered bronze test strip.... I treated 4 swaps differently and left them outside for a week to let the weather and salty sea breeze do it's thing. This one I like most. I burnished the copper. Dipped in oil and burned it with a blow torch. Some green oxide starts to appear already, but it needs a little bit more outdoor time I think. I'll get it right soon! So, what's next? The centre top deck railing! And with it...the additional deck support beams. Also gave the oars some thought.... The nice Dusek tutorial video... Great!...but ....I want the paddle blades a bit wider and maybe teardrop shaped (undecided). The 2mm x 2mm rod works fine, but I think the blades will be a bit too narrow. My "simple" solution....glue 1mm x 2mm strips to where the blades will be. Sand down to the desired size and shape...teardrop or straight. A bit more work, but hey! I'm used to that by now. Okey...that's it for now....I worked very hard to get this done, so tonight I take an evening off! Thanks for watching...and more soon! Robin
- 473 replies
-
- 10
-
-
- greek bireme
- dusek
- (and 1 more)
-
I'm a huge fan of Vallejo acrylics...I use nothing else anymore, but I dislike their rattlecan primer with a passion. I prefer the Tamiya primer.
-
Nice workspace and the lamp is a great idea. I went from a small desk to a huge desk. The only difference...I went from a small mess to a huge mess No matter how much...or little... space I have...it will become a mess to the point where I have 10x10cm left to work on. Robin
- 84 replies
-
- 5
-
-
- hanse kogge
- dusek
- (and 1 more)
-
You can use 3mm brass tube from the base to the crows nest and 2mm brass tube to the top. Several brands...like Albion Alloys...have sliding brass tubes. At the base of the 3mm tube you can insert a brass rod bent to the right angle....or insert the 3mm tube into another...larger tube there. Another option...use the angled base of the kit provided mast....pin the brass mast into a hole drilled in the plastic base. Robin Edit: I still need to finish my Flower
-
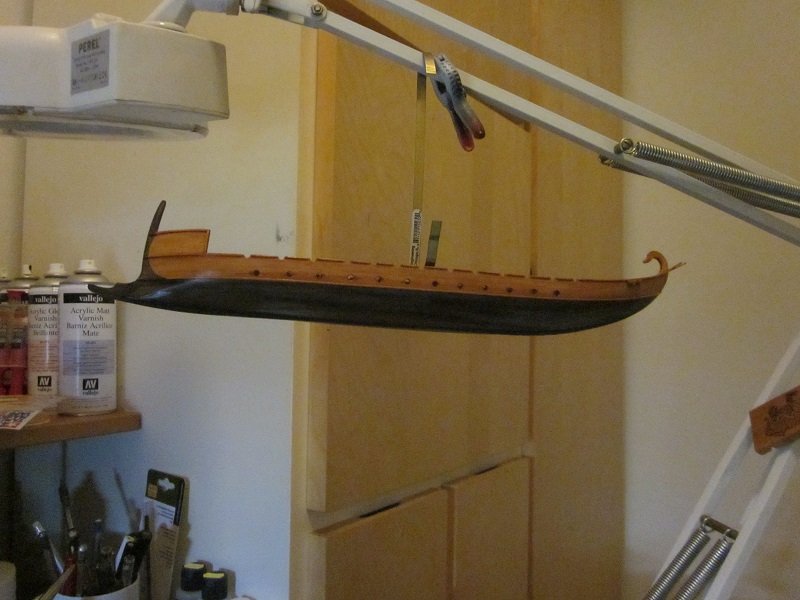
One side done....that wasn't too time consuming after all. Not to lose momentum...I'll do the other side also now, so no "in between" job needed. It's good to have those beams there. 2 stays on each side need to go there. A near-death experience today, when my magnifying lamp crashed down on top of my poor bireme Luckily only some minor damage. 2 broken tholepins and a piece of top wale snapped off. I repaired the damage already, but I'll be more careful from now on. It's a sturdy ship, but not immortal Edit: forgot to mention...I stained the lower inside of the hull "dark smoked oak"....the cherry looked wrong there. More soon! Robin
- 473 replies
-
- 11
-
-
- greek bireme
- dusek
- (and 1 more)
-
It's incredible how you manage to make such a small scale model so neat and packed with detail. Beautiful! Robin
-
I love the staining, looks great! Be careful with the blackening stuff. Rinse the treated part with water well, or it will keep munching the part away. ...and a most awesome cannon! Robin
- 84 replies
-
- 3
-
-
- hanse kogge
- dusek
- (and 1 more)
-
That's a lot of ship for just over 2 weeks 1/54...this will be BIG...nice! Robin
-
bookmarked! I almost convinced the Admiral about a city trip to Athens. Still working on it...such things take time and a careful approach.
-
The amount of self torture (pe) going on here is out of this world. This is so good.... to watch. And watch only...I'll never be able to handle this amount of pe myself. My respect! Robin
-
Oh...there are flaws and mistakes here and there But, I'm pleased with it so far...completely to my own amazement. I never worked with wood before, but I'm used to work with small plastic, resin and photo etched parts....and I can handle a brush (and airbrush). What I like about wood...it's forgiving and it doesn't matter when you mess up a plank...just pick another and start again. With plastic it can be a drama when you mess up a single part. So...I have loads of fun now
- 473 replies
-
- 5
-
-
- greek bireme
- dusek
- (and 1 more)
-
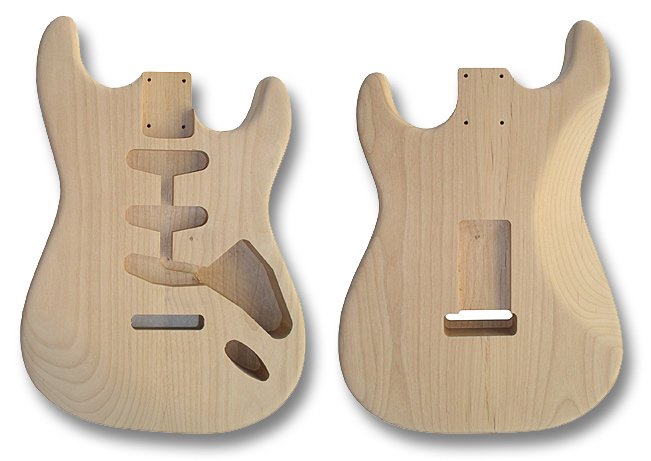
No kidding...that crossed my mind...sheepskin cushions, but since the cushions were not part of the ship (the oarsmen brought their own cushions with them)...I won't I must be half crazy, because yesterday I ordered a trireme. This one has 50 oars...the trireme 170! By the way...Daniel Dusek is a great guy to deal with. The bireme has alder wood hull planks and I like them a lot, so I asked Daniel about the trireme hull planks.... they're walnut. I get a "custom *Stratocaster trireme kit" with alder wood planks from him now. *Fender makes great guitars from alder wood.... Well...when my builds won't look good...they still sound good! Robin
- 473 replies
-
- 9
-
-
- greek bireme
- dusek
- (and 1 more)
-
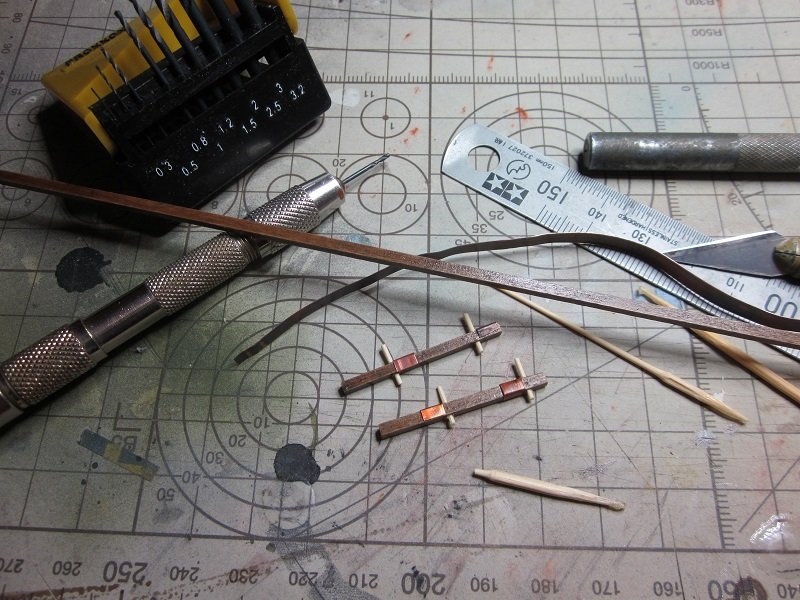
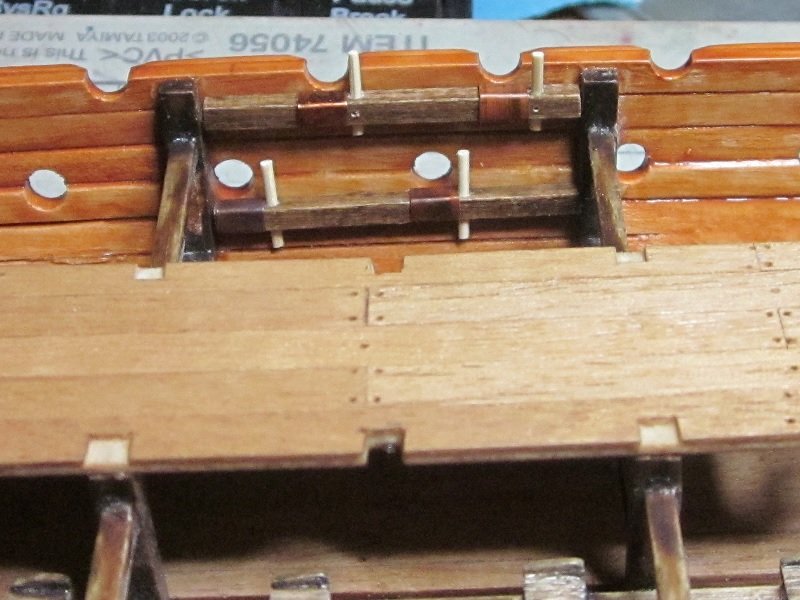
Thanks again for the likes and nice comments! So with the staining done... ....It's time for the next chapter. The beams with the tholepins and the copper sliding plates. 2x2mm beams with dowels made from cocktail sticks...reduced to 0,8mm thickness and the copper plates made from burnished 0,15mm thick copper plate...cut into 4mm wide strips. 2 beams done...26 to go The amount of fiddly repetitive jobs is stacking now. This, the top rower seats and the 50 (+8 spares) oars. It's a bullet to bite....a whole box I'll squeeze in some nice in between jobs somewhere...like making the rudders. More soon, Robin
- 473 replies
-
- 12
-
-
- greek bireme
- dusek
- (and 1 more)