tlevine
-
Posts
2,033 -
Joined
-
Last visited
Content Type
Profiles
Forums
Gallery
Events
Everything posted by tlevine
-
 Thanks, Greg. Tricky would be one word. A right-royal-pain-in-the-*** would be another.
 -
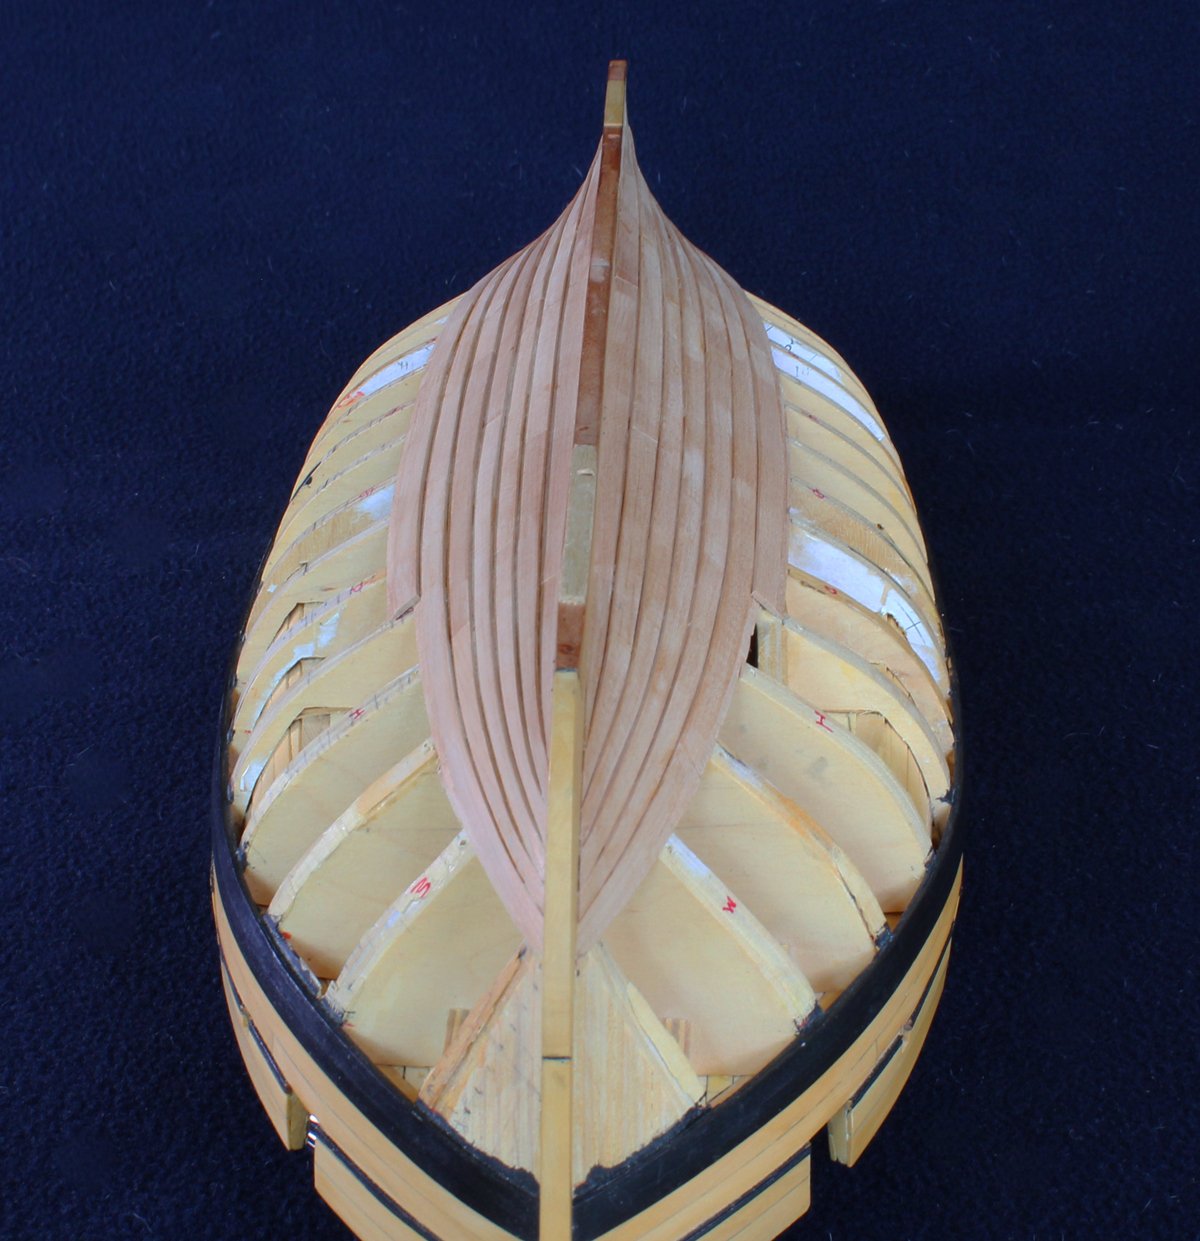
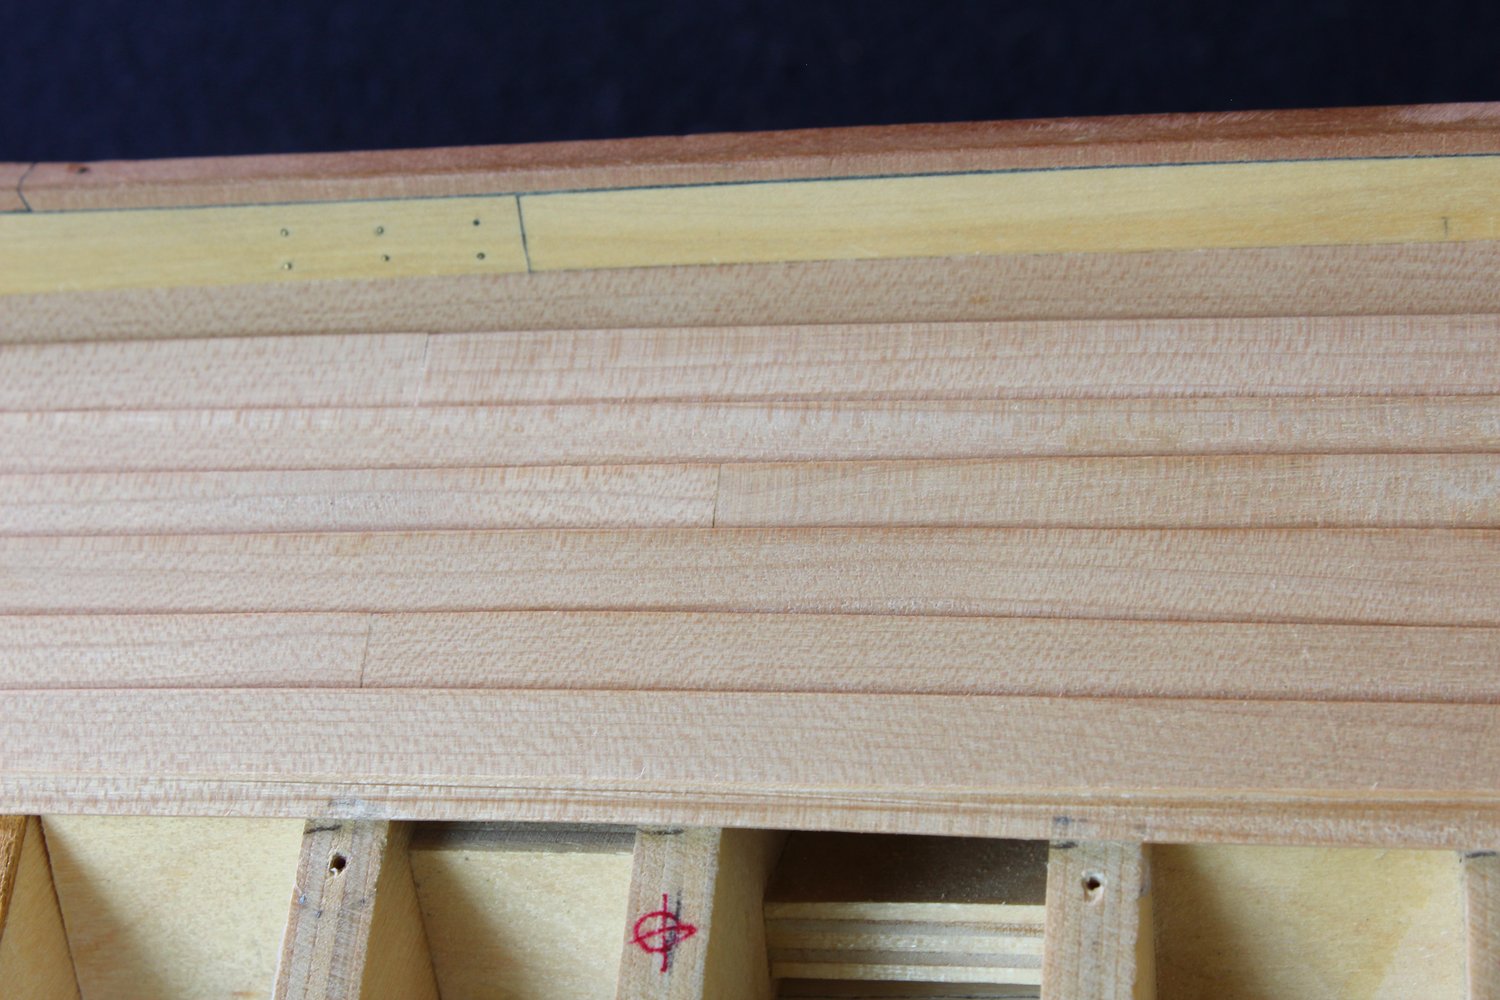
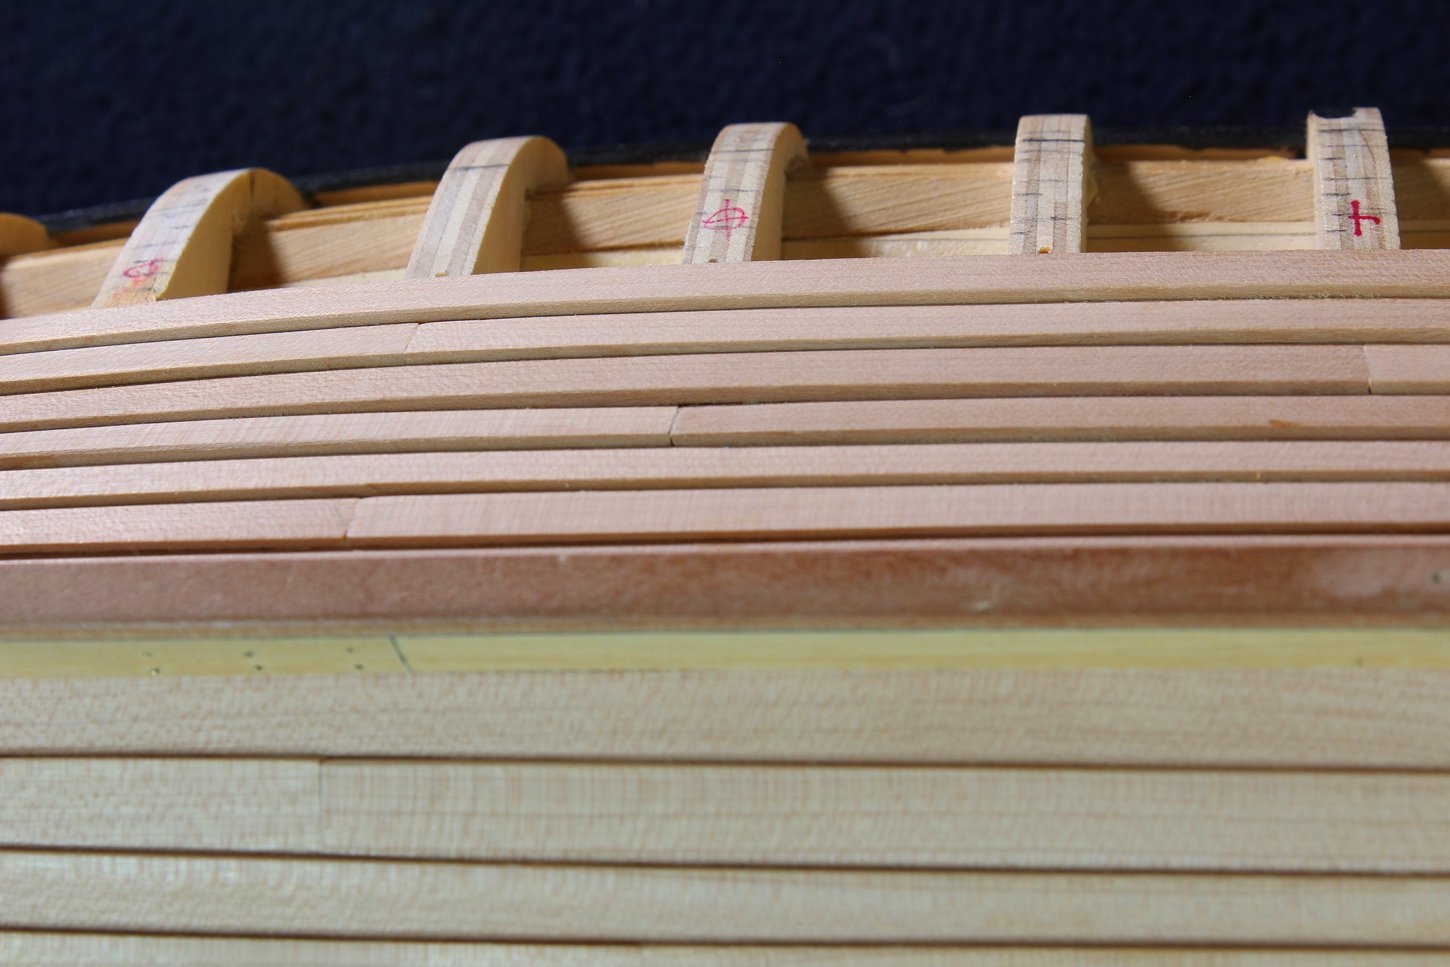
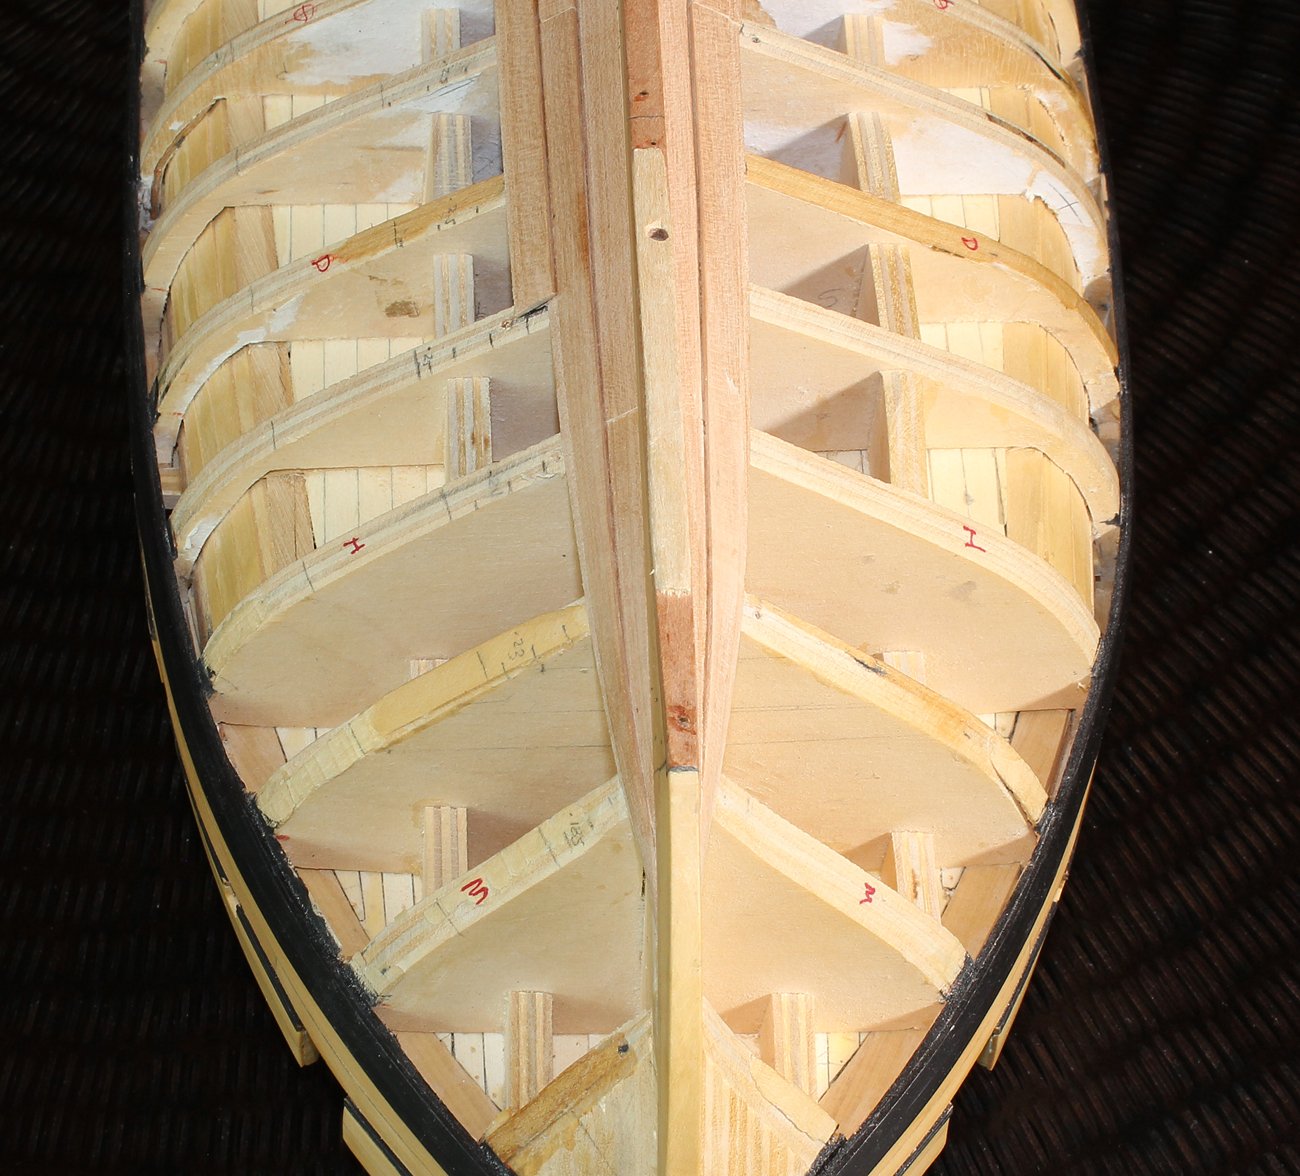
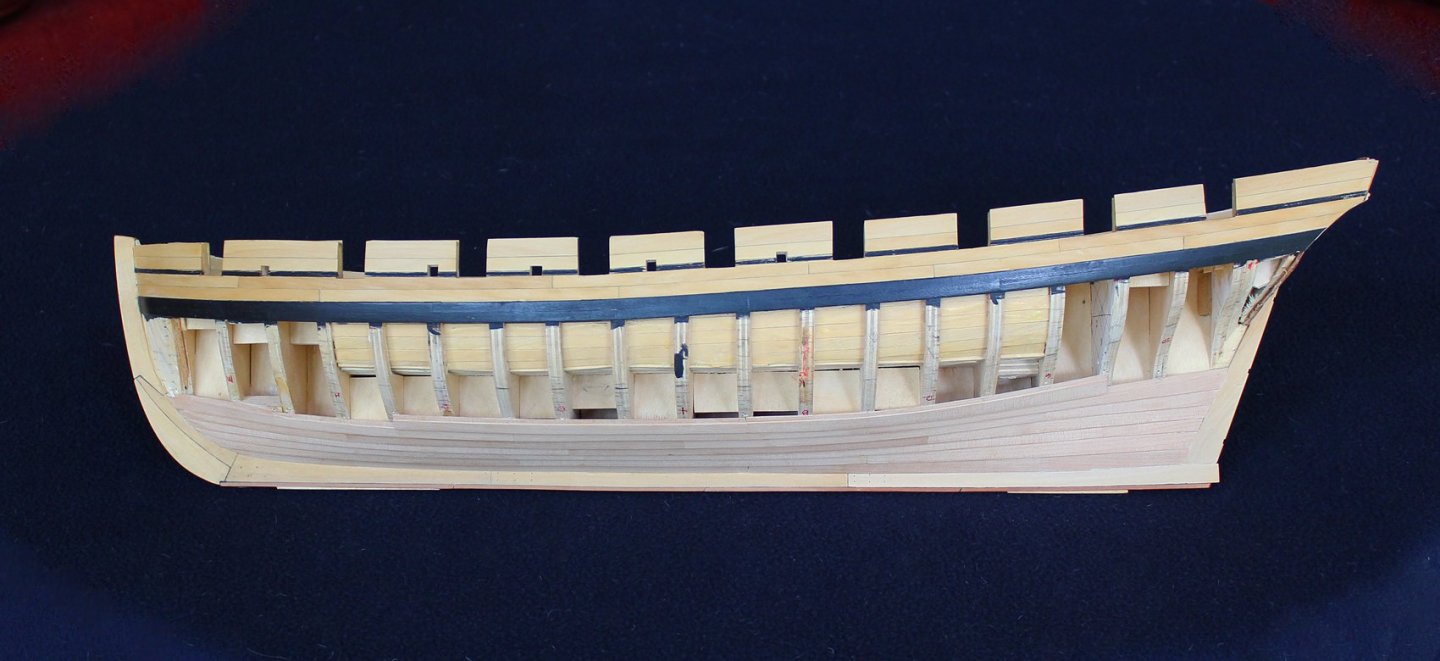
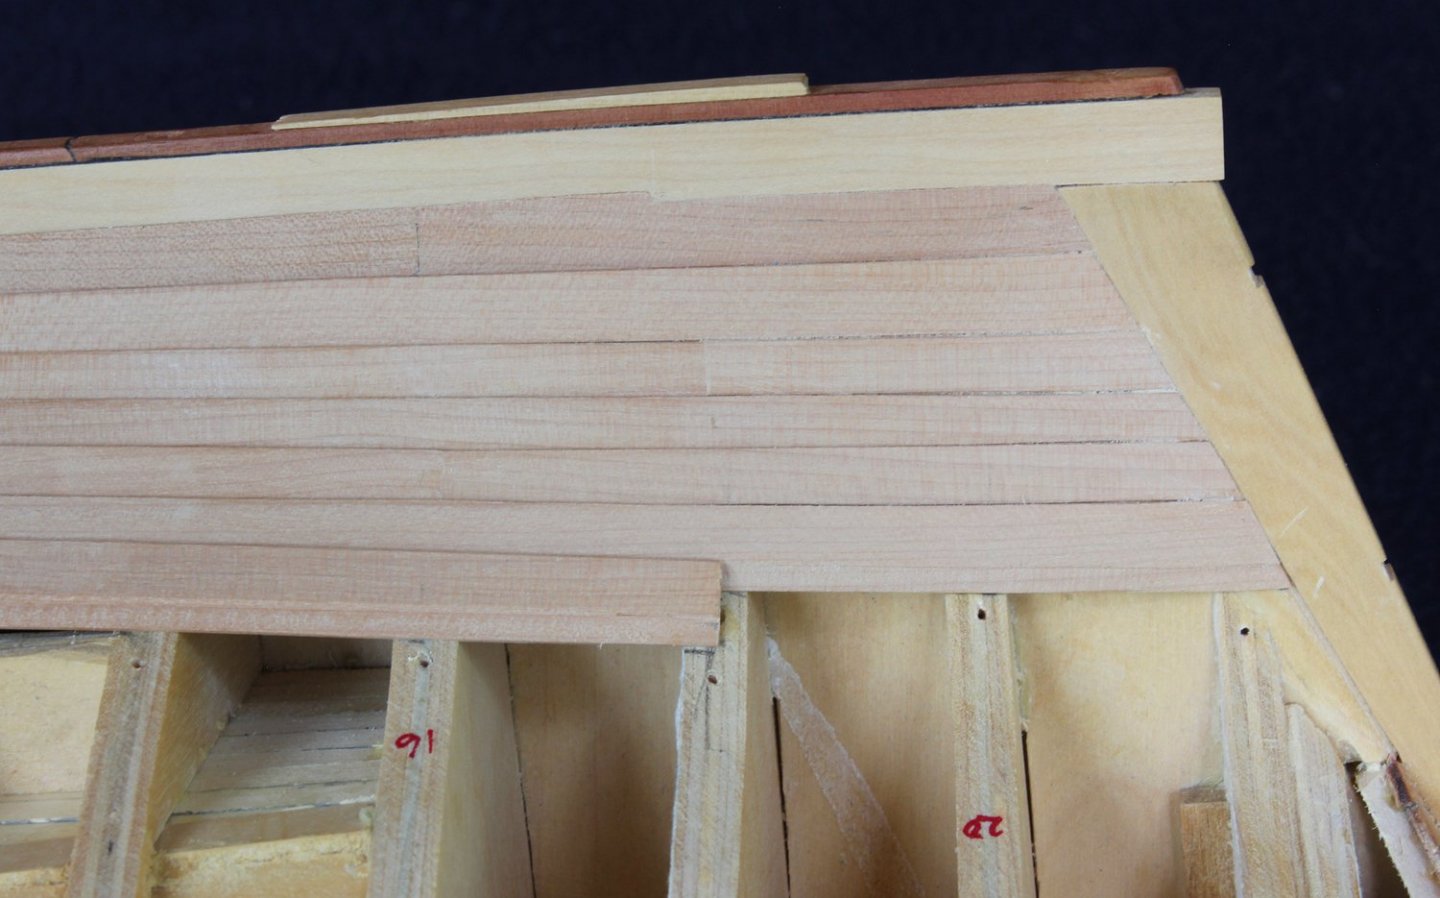
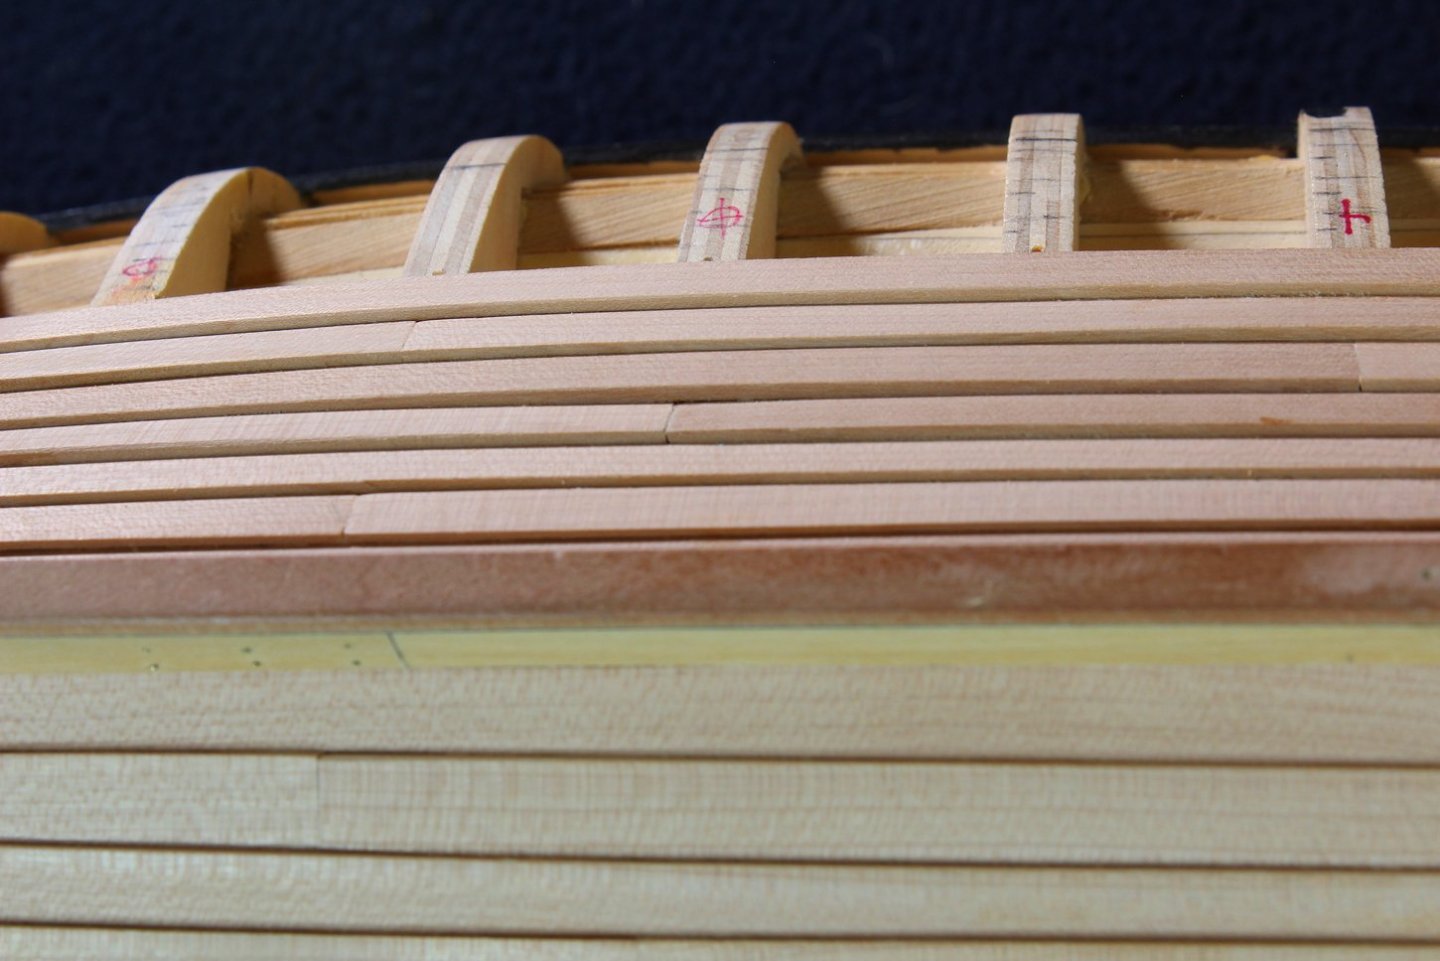
I reached a milestone today: the first planking belt has been completed. So far, I am pleased with the appearance. For anyone toying with the idea of building a clinker- planked hull, I am finding this a lot more difficult than carvel construction. There is no room for error and edge-bending that last half-millimeter does not work the way is would on a carvel hull. I have found that the easiest way to secure the planks during gluing-up is with planking screws, placing a piece of scrap between the cross-piece of the planking screw and the plank to prevent denting. My layout has a butt joint at frame M. I decided that this was too far forward and placed a basswood filler between frames K and M. The first belt has four rows of planking; the upper two belts will each have five. So far it appears that a stealer will not be necessary but I will have a dropped plank in the upper belt.


- 277 replies
-
- 25
-

-
Thanks, Paul.
-
After you posted, I went back to my discs and noticed the same problem. The situation is as follows: you (and I) have the original discs from the early 2000's sold by Clay Feldman. The discs sold by the NRG are not the same. The NRG Early Years disc includes the information on the 4 discs sold by Clay. The Middle and Later Years discs contain the remaining volumes. The NRG indices work on Win 7 and 10; Clay's discs only work on XP. To view these articles you would need to have the Later Years disc.
-
Thank you to everyone for the likes. JD, I am using diluted yellow glue. And yes, I am gluing along the rabbet as well as on the bulkhead. I tried it with gluing just the bulkhead for fear of glue bleeding out onto the hull but that was a disaster. Waiting for the glue to become tacky has prevented any problems.
-
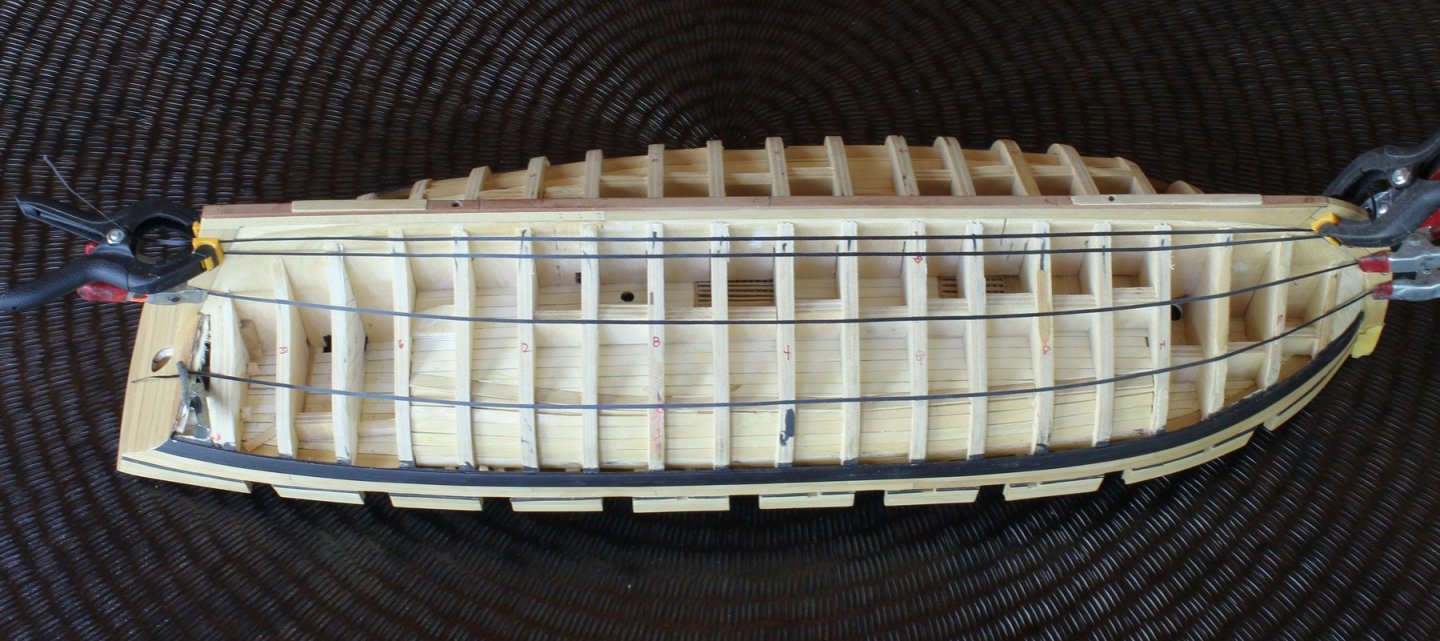
Thank you, druxey. That is the only place there will be an issue. I did several layouts and this one was the least problematic unless I installed bulkhead filler blocks. This is the first POB model I have made in a long time; I really appreciate the spacing options provided by POF construction.
-
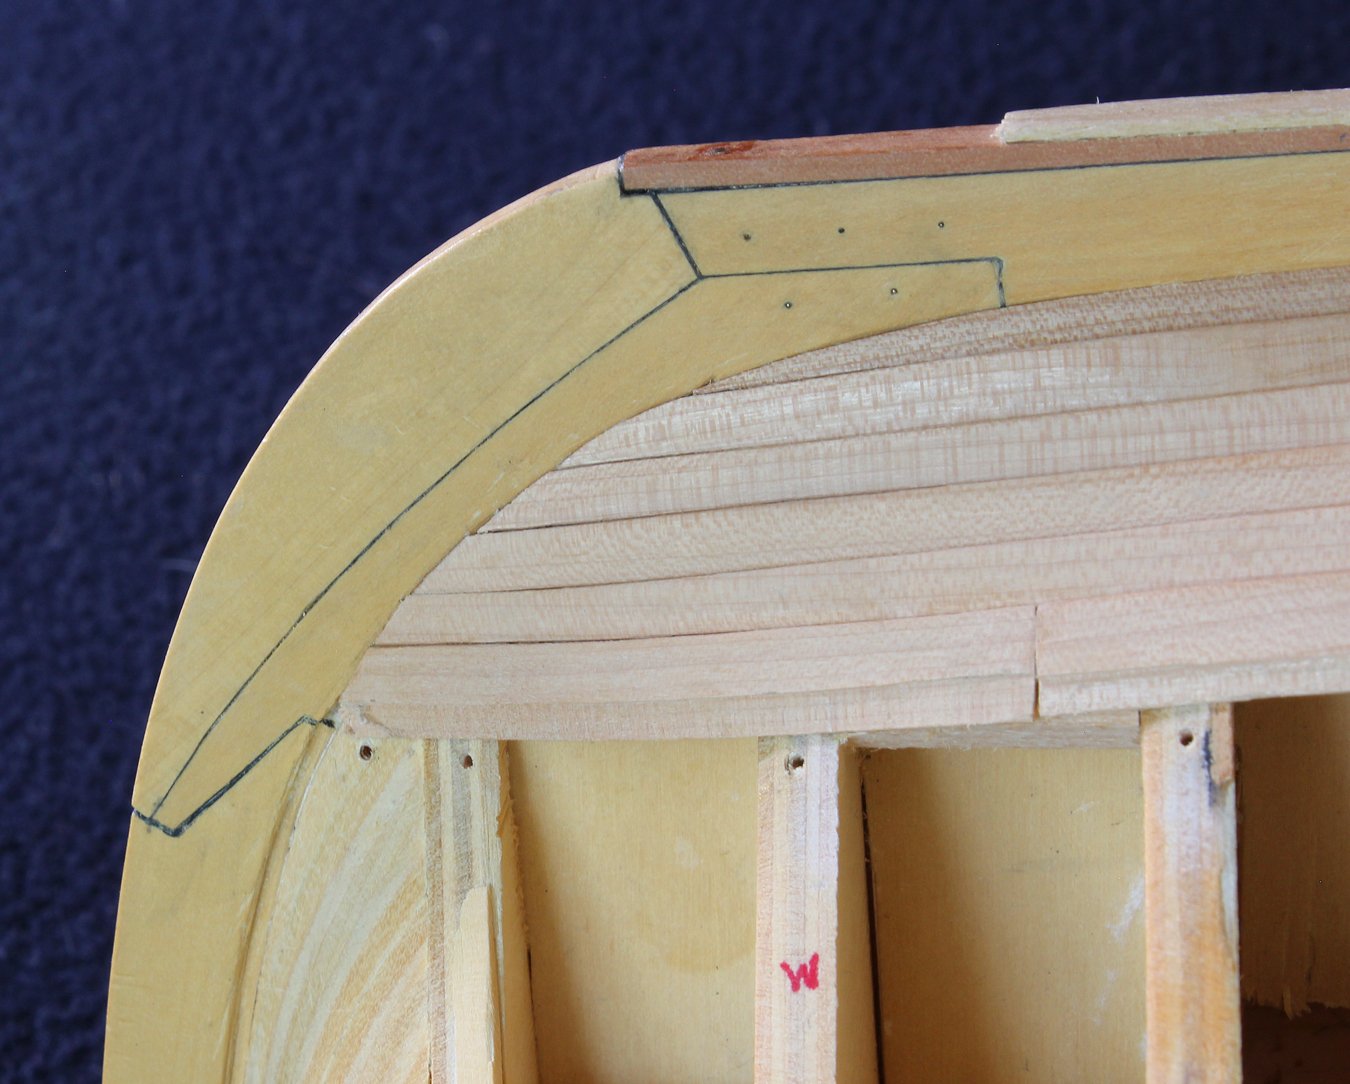
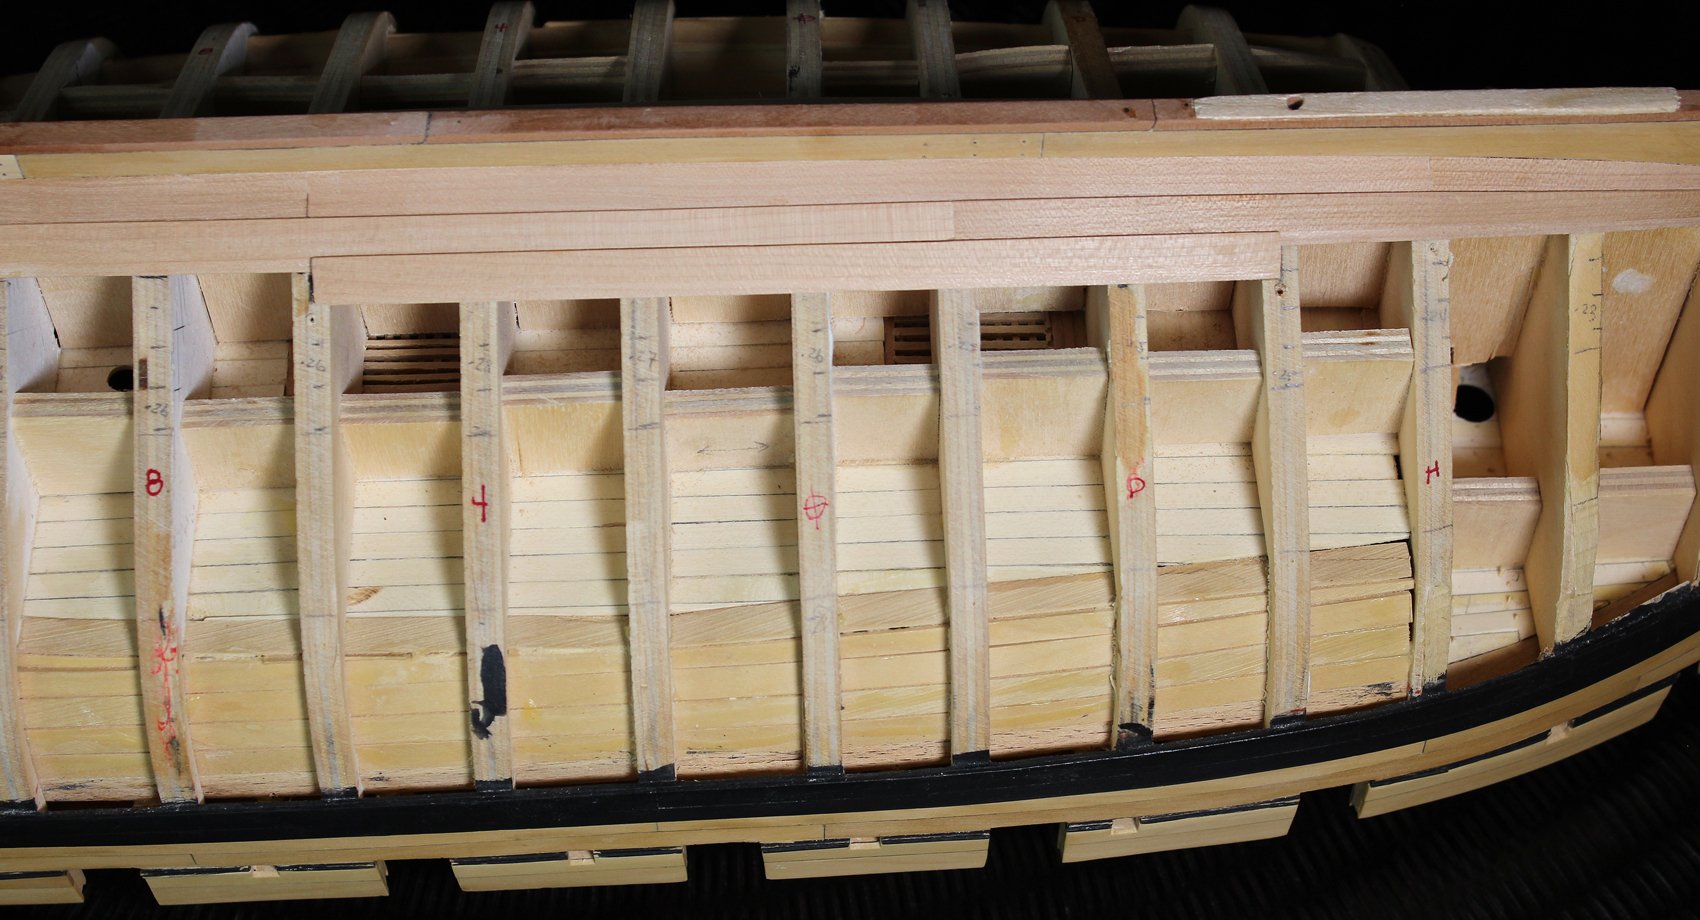
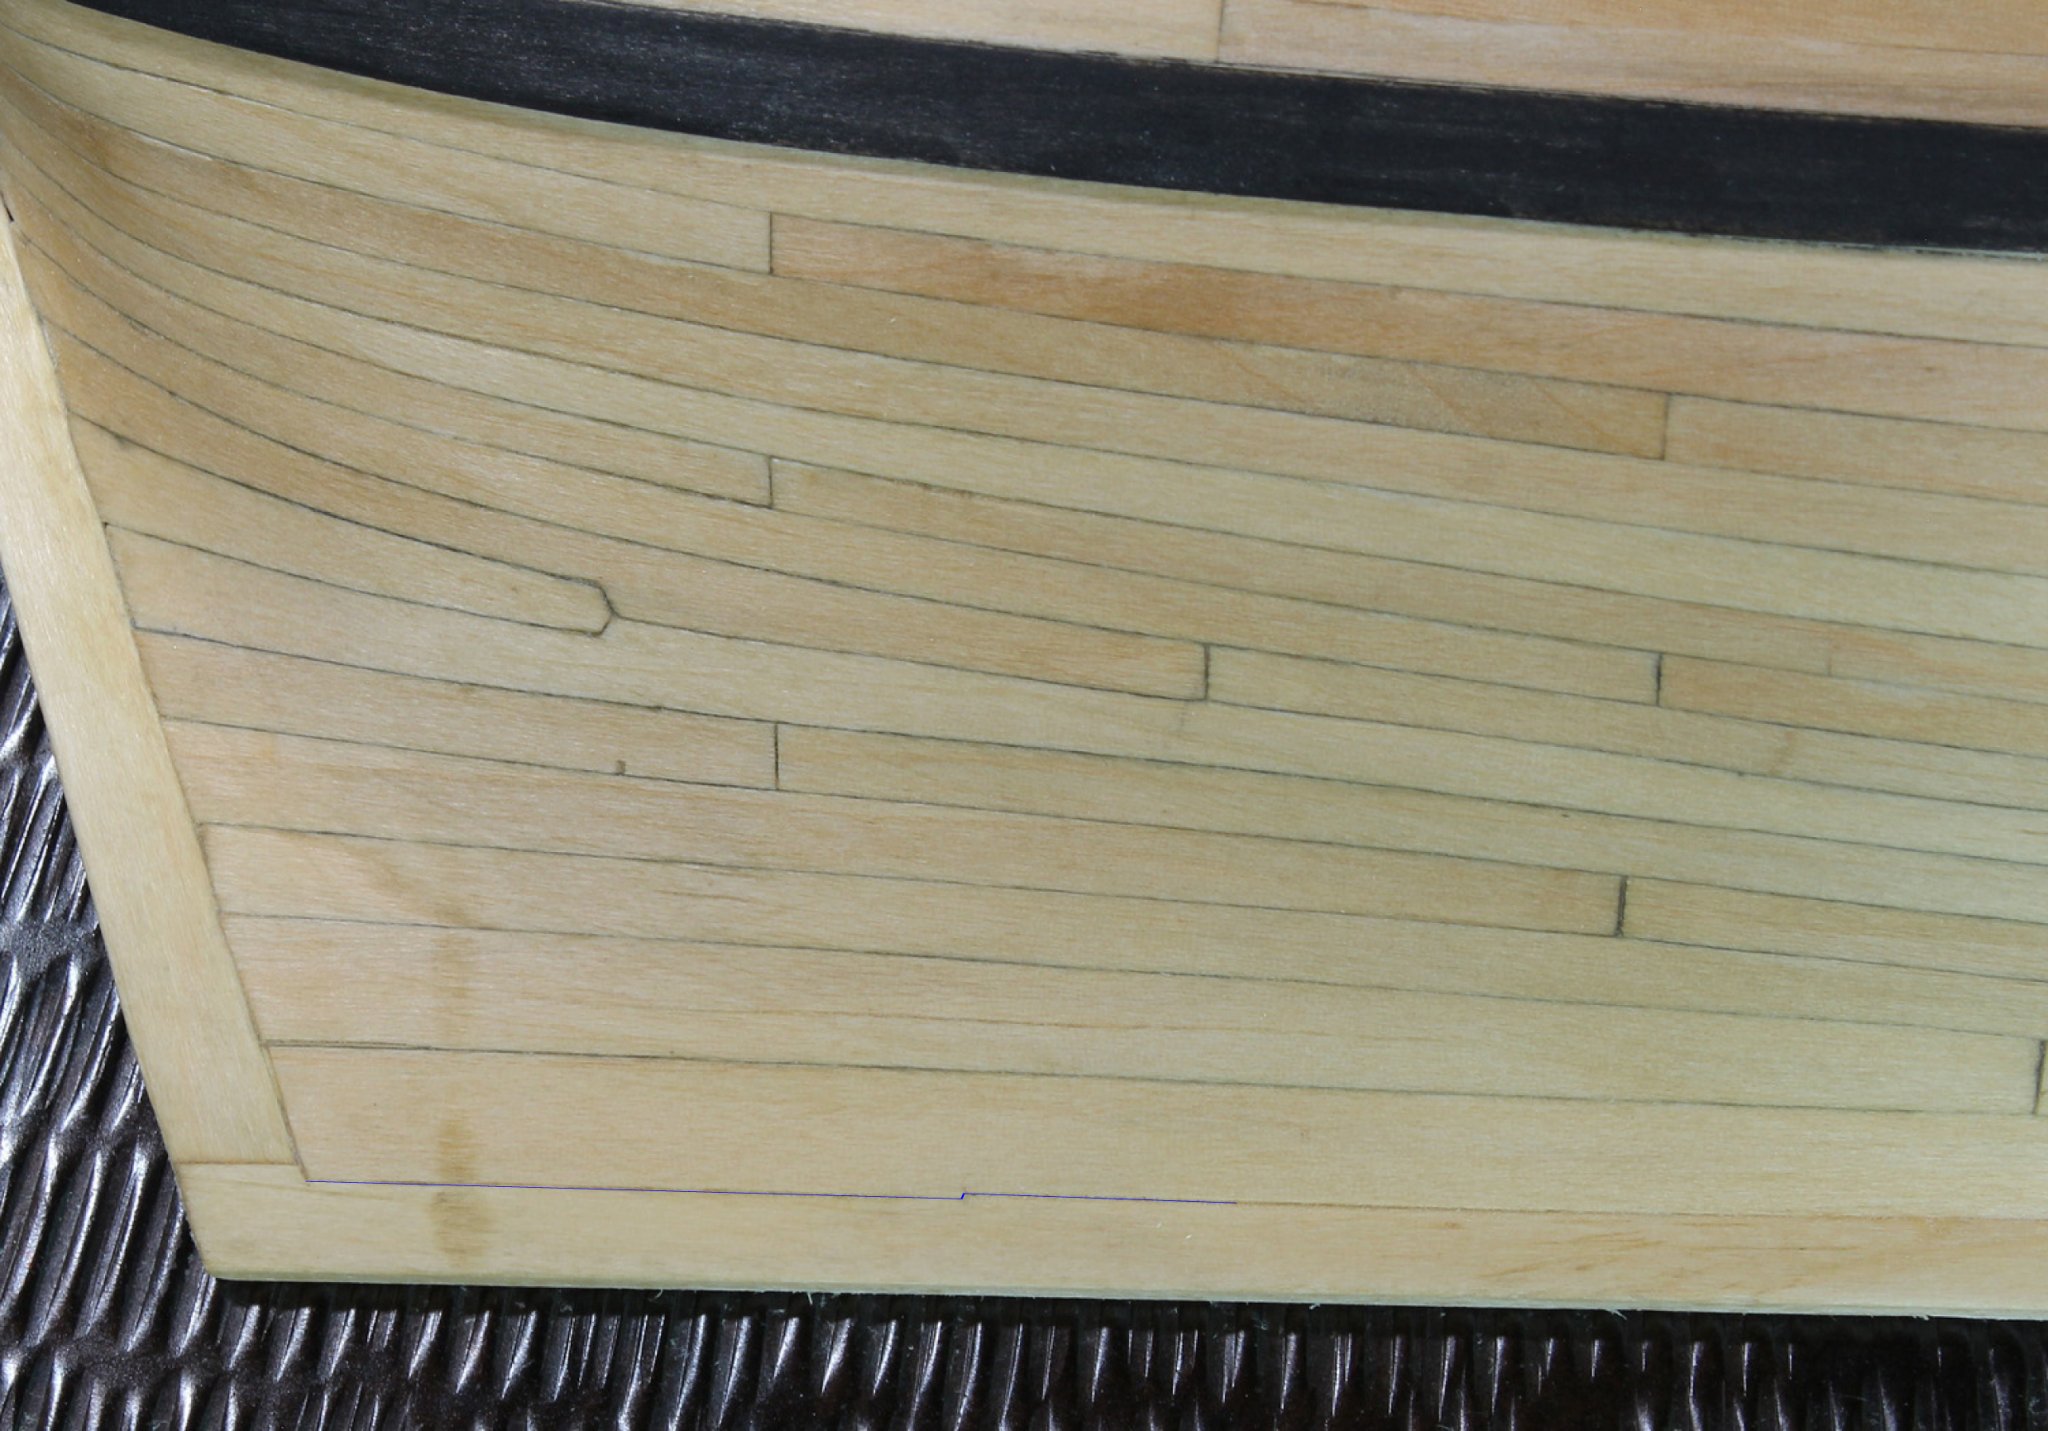
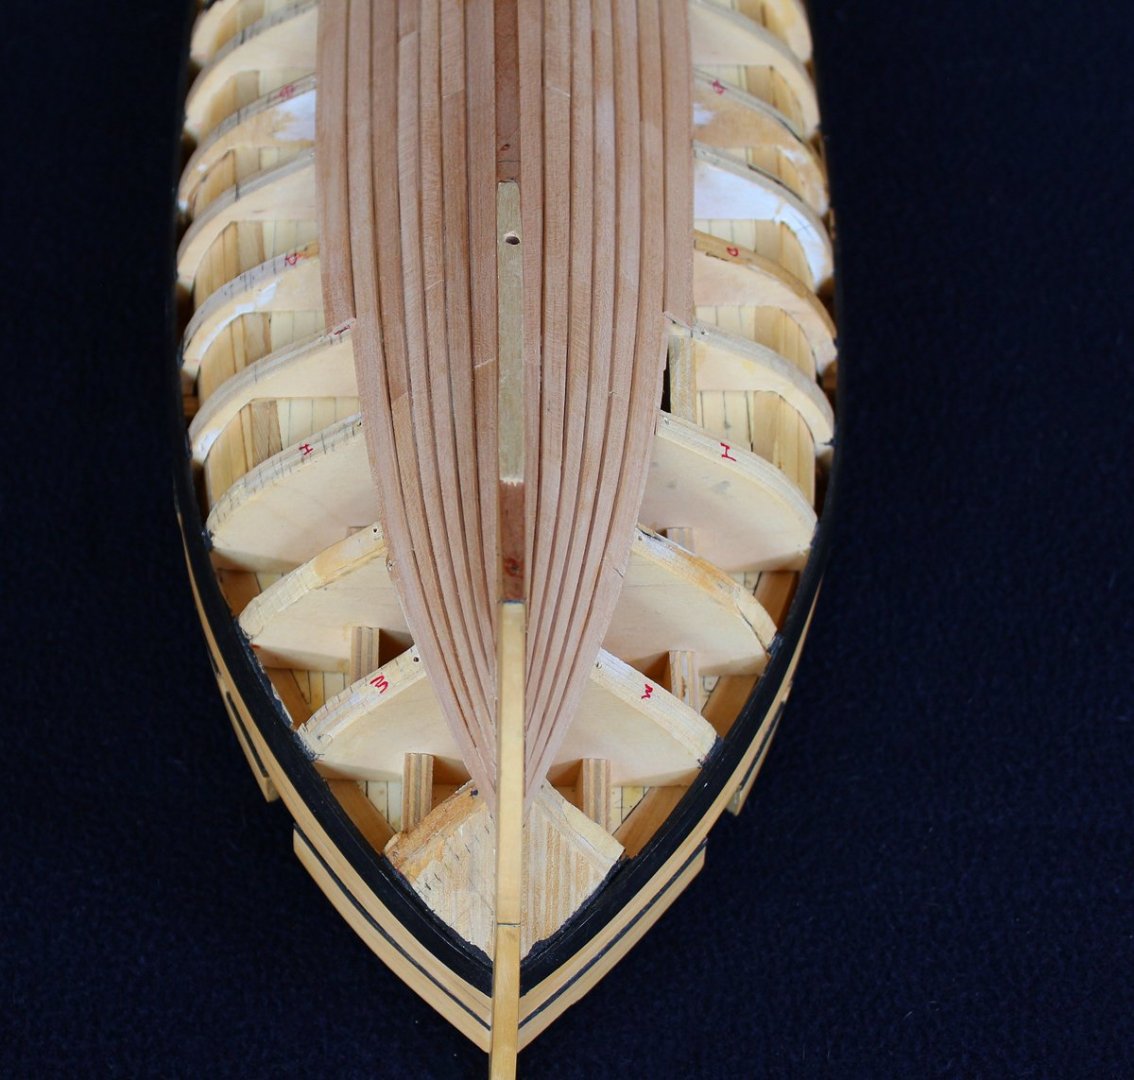
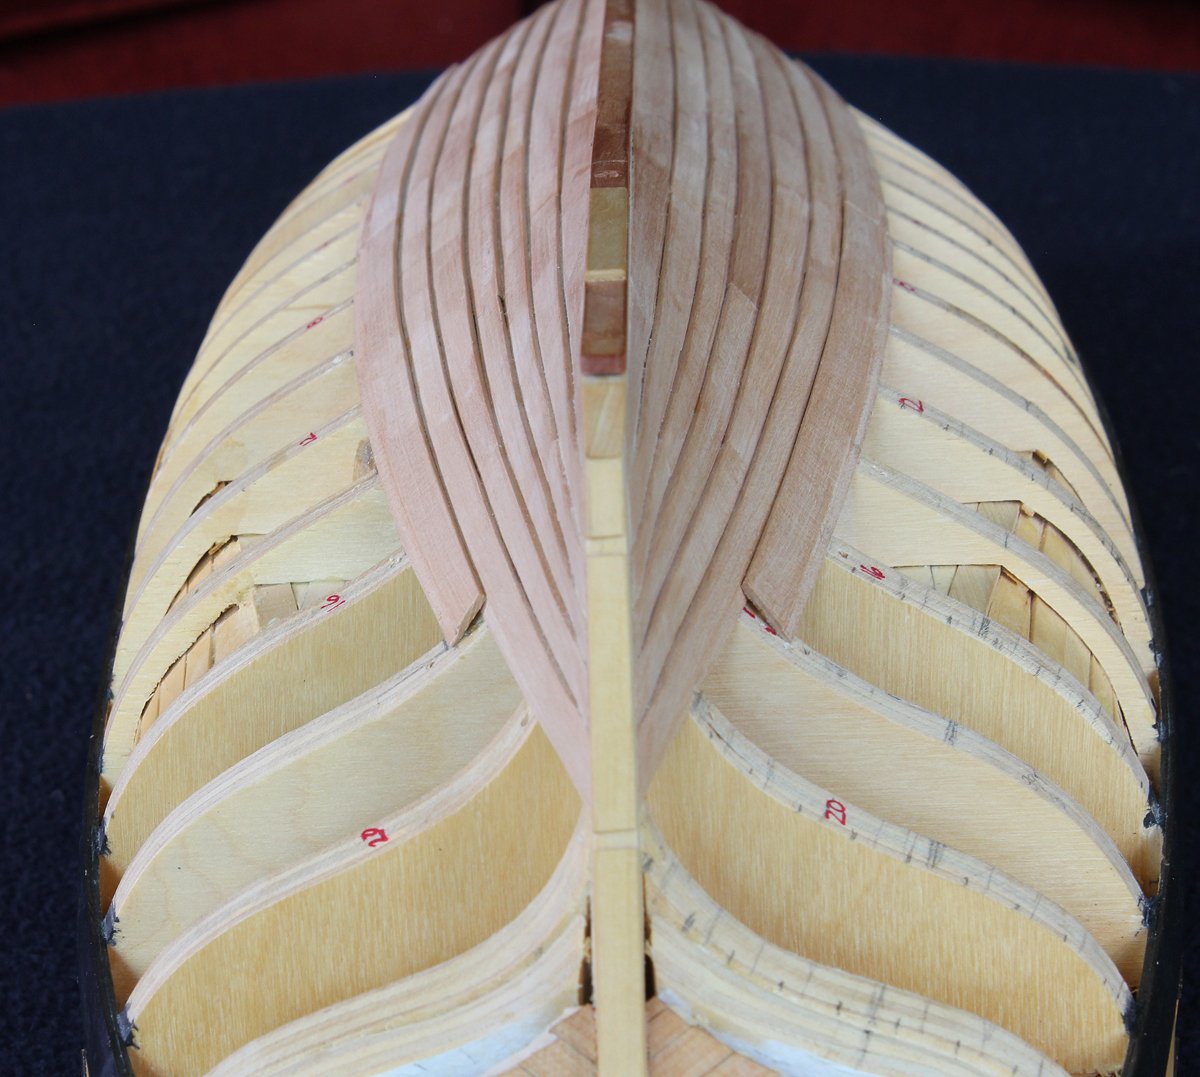
Planking has commenced. Thanks to everyone who responded to my request for more information on clinker planking. Before any planking could be cut, the planking belts needed to be laid out. This was done with chart tape. The lowest rows of tape represent the garboard and broad strakes. The garboard was made up of four planks. It feathers into the sternpost and keel at the deadwood and ends on the stem just above the boxing joint. On the upper part of all the planks is a rabbet to accommodate the overlapping plank. After some experimentation and based on the diagram from Goodwin's book on Alert, I decided to make the rabbet approximately one-third the width of the plank and at a 10 degree angle. The prototype had a narrower rabbet but this gave me a wider gluing surface. The rabbet was formed on the mill and cut to a depth of 2/3 the thickness of the plank at the widest part. The broad strake was made up of three planks. At the stern and stem posts the clinkering gradually tapers to a smooth surface. The overlap of the planks is easily seen in the next pictures. The easiest place to see the planking rabbet is on the broad strake at frame "H". These pictures illustrate the tapering of the garboard and broad strakes into the keel and stern post, and each other.

- 277 replies
-
- 18
-
-
I have a variety of 'gators...3", 5", 7", straight, curved, serrated teeth and toothless. The same with Bellucci scissors (the correct name for alligator scissors). After all, I am an ENT. I rarely use any of them and reach instead for curved watchmakers forceps or a Webster needle holder. The scissors are not designed to cut thread larger than 7-0 (0.07mm diameter) and would dull quickly with rigging thread. I do not know about the cheap ones but "real" ones are made from a an alloy that is next to impossible to sharpen except by a professional. The same can be said for Castro-Viejo's but I have used them to cut nylon serving line since the diameter I use is 8-0. The Webster has no serrations on its jaws so it will not shred rigging thread.
-
On the contemporary model, the hull is clinkered below the wale. No fastenings are shown either above or below the wale, which prompted the question initially. I am showing her at the time of commissioning in 1779. She was not coppered until 1780.
-
All they had at the local store was coated wire so I ordered bare wire from Amazon. I was not sure how the coating would affect the patina over time, as I will not be blackening the copper. I considered purchasing Goodwin's Alert until I saw the price: $153 plus shipping!
-
Thanks everyone. Roger, that article is perfect. For anyone else who is interested, it is on page 204, not 220, December 1999. That issue has several other interesting articles: capstans, building Cyane by Gil McArdle and how to make planking clamps. B.E, I do not have Goodwin's book. If it isn't too much bother, please send me the information. Allan, I was surprised how inexpensive a roll of copper was. I have decided to use 3/4 inch copper nails which at scale is 0.02" or 24 gauge.
-
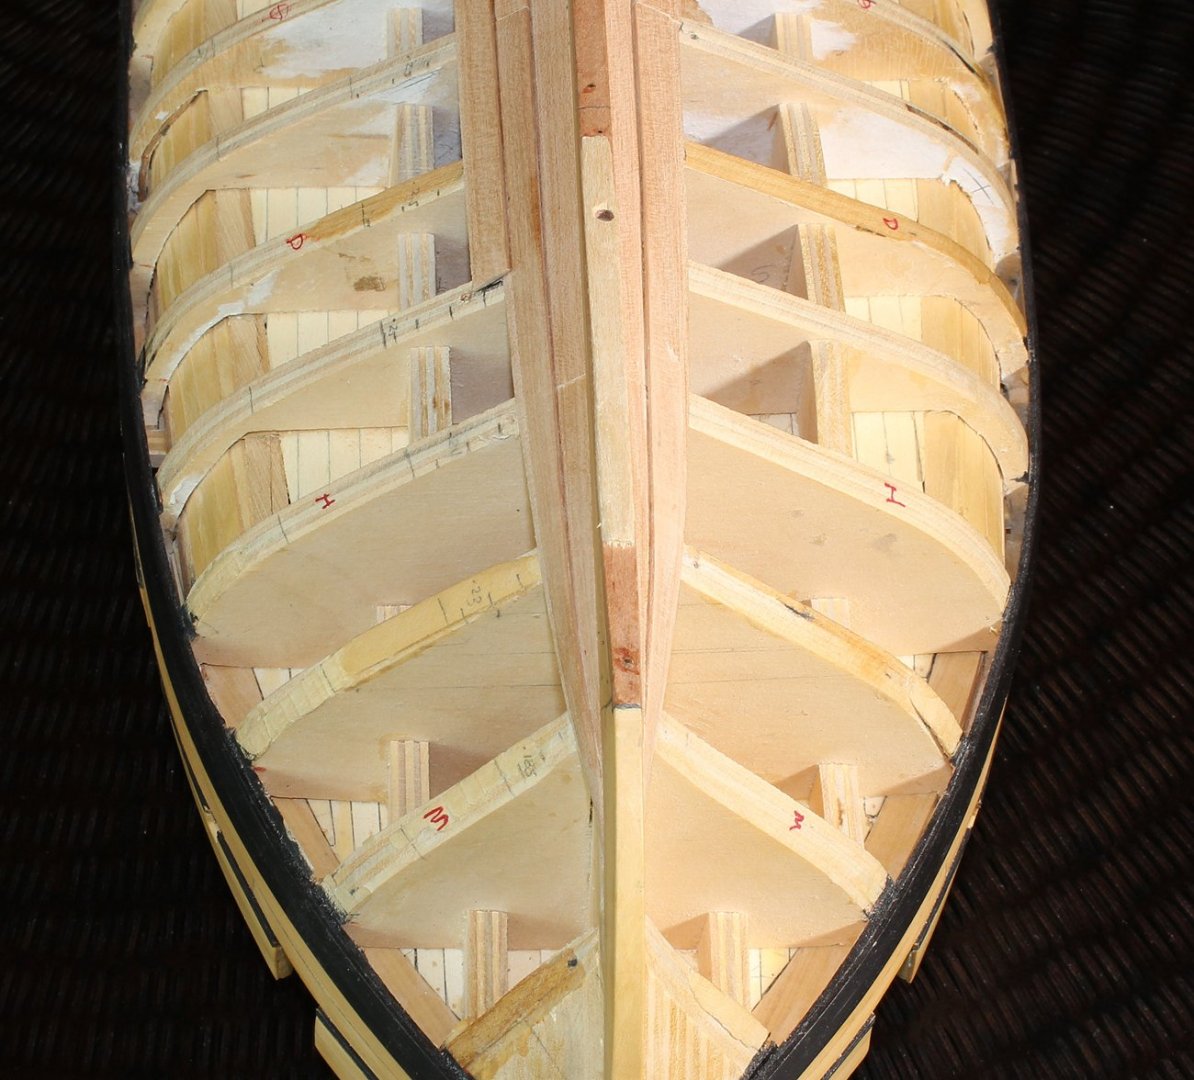
I will do my best to explain. As you go aft, the angle of the garboard relative to the keel diminishes from almost 90 degrees at the dead flat to zero at the deadwood. The "notch" represents that transition point. The photo in the manual is exaggerated. This is a picture of the area in question. The transition is in blue. Omitting it is OK too.. The shape of the garboard is different on every ship and depends on the hull shape. On this hull, the width of center part of the garboard does not change much.

-
John, druxey, thank you for the information. Time to start looking for the appropriate diameter copper wire.
-
I am getting ready to begin the planking on Swallow 1779, a British clinker-planked cutter purchased by the Royal Navy when half built. I cannot find any reference as to how the hull planking would have been fastened to the frames. Any help would be appreciated.
-
Thanks for the information, druxey. By any chance, would you know why pear is so susceptible to insect problems whereas other fruit woods (like apple) are not?
-
I do not have any reference other than logic. If the rudder needed to be unshipped, at least some of the platform decking would need to be removed to raise the rudder high enough to clear the pintles. I am also guessing that it would be much easier to install the tiller if you could see the mortise in the rudder head, rather than blindly fishing around with a relatively heavy chunk of wood. Also, on the photo of the model, the center planks are missing, exposing the rudder head. Leaving only the center part of the platform unplanked was my original plan but as this is a POB model, the area looked too messy to leave open. I much prefer the look of natural pear vs. swissed. I find the latter too pink. My understanding is that the steaming process makes the wood more stable but my billets are over 20 years old and show no cracking or warping.
-
There have not been any modifications to the half hull kit this year. Did you have something specific in mind?
-
My very sophisticated background is a black fleece blanket! It works nicely since it does not show wrinkles and is extremely portable. I am thinking of buying a light grey one for a more neutral background.
-
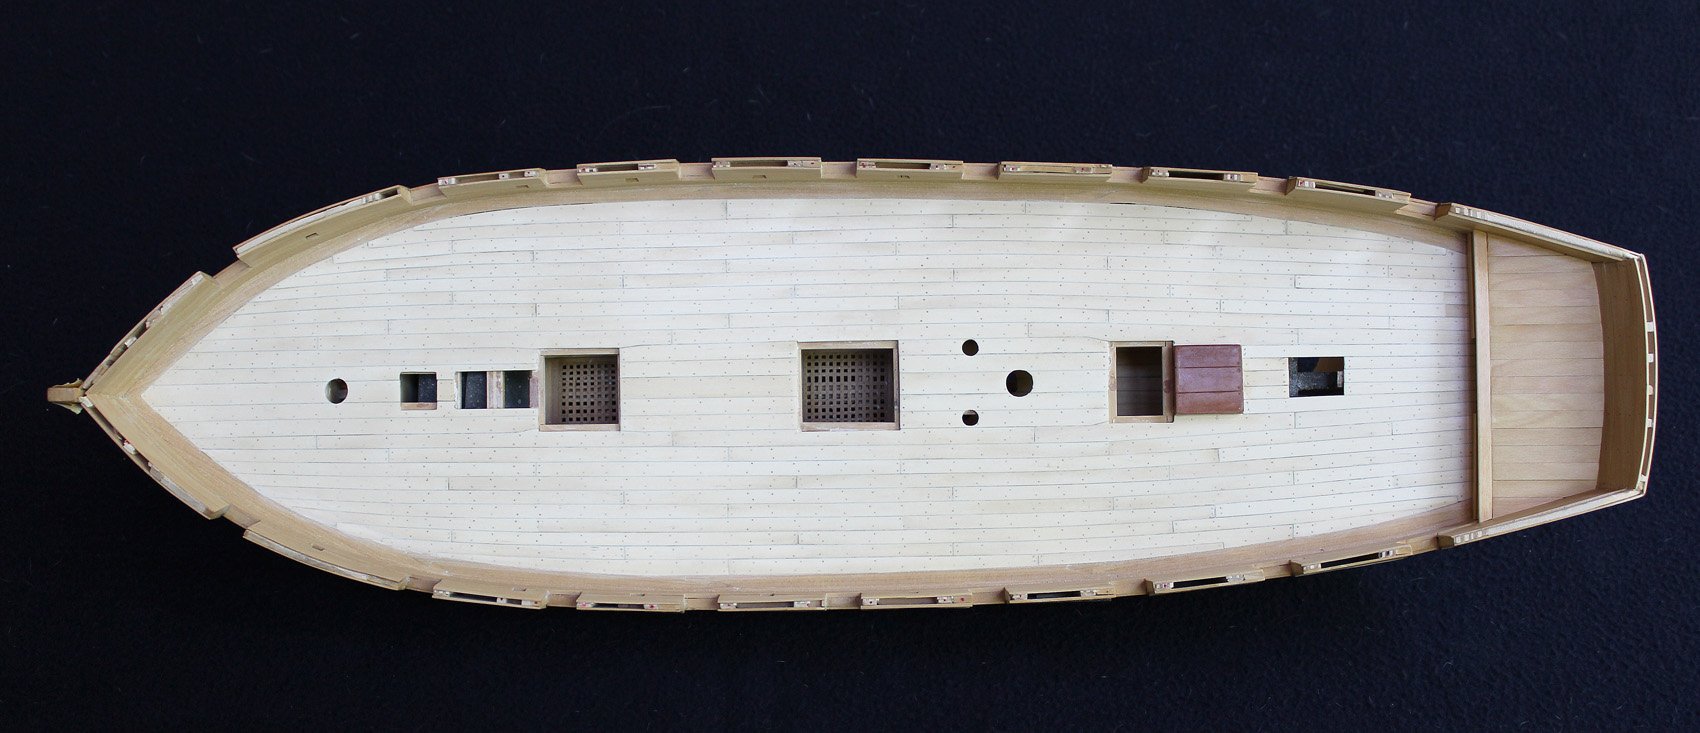
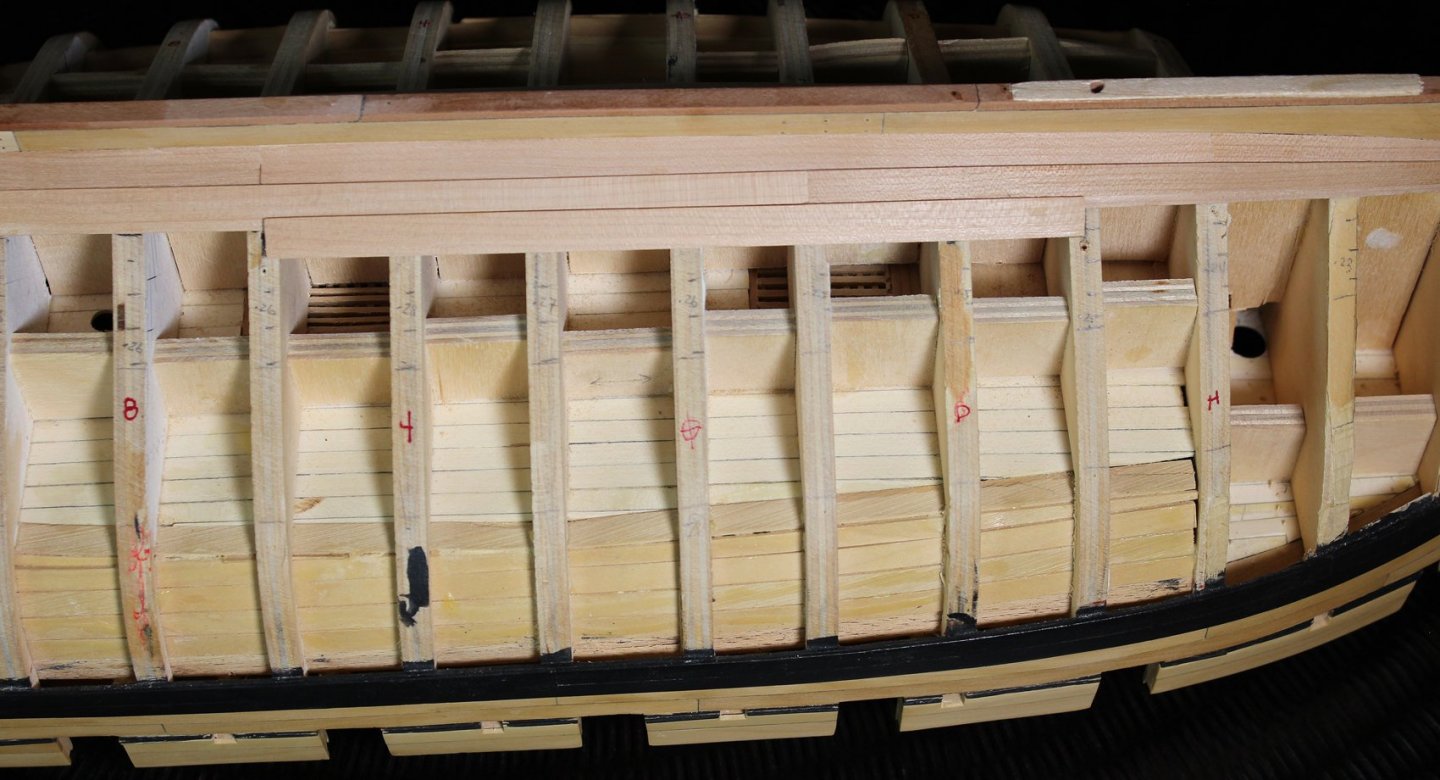
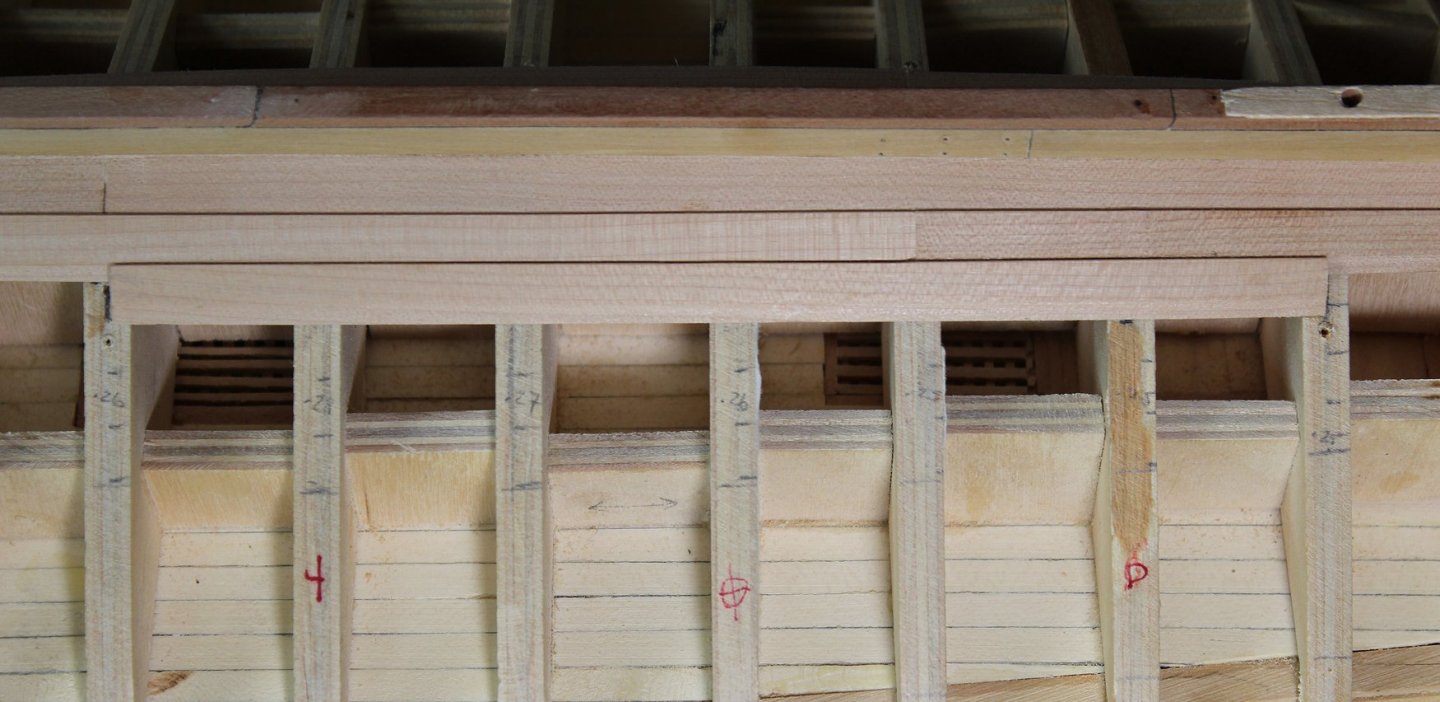
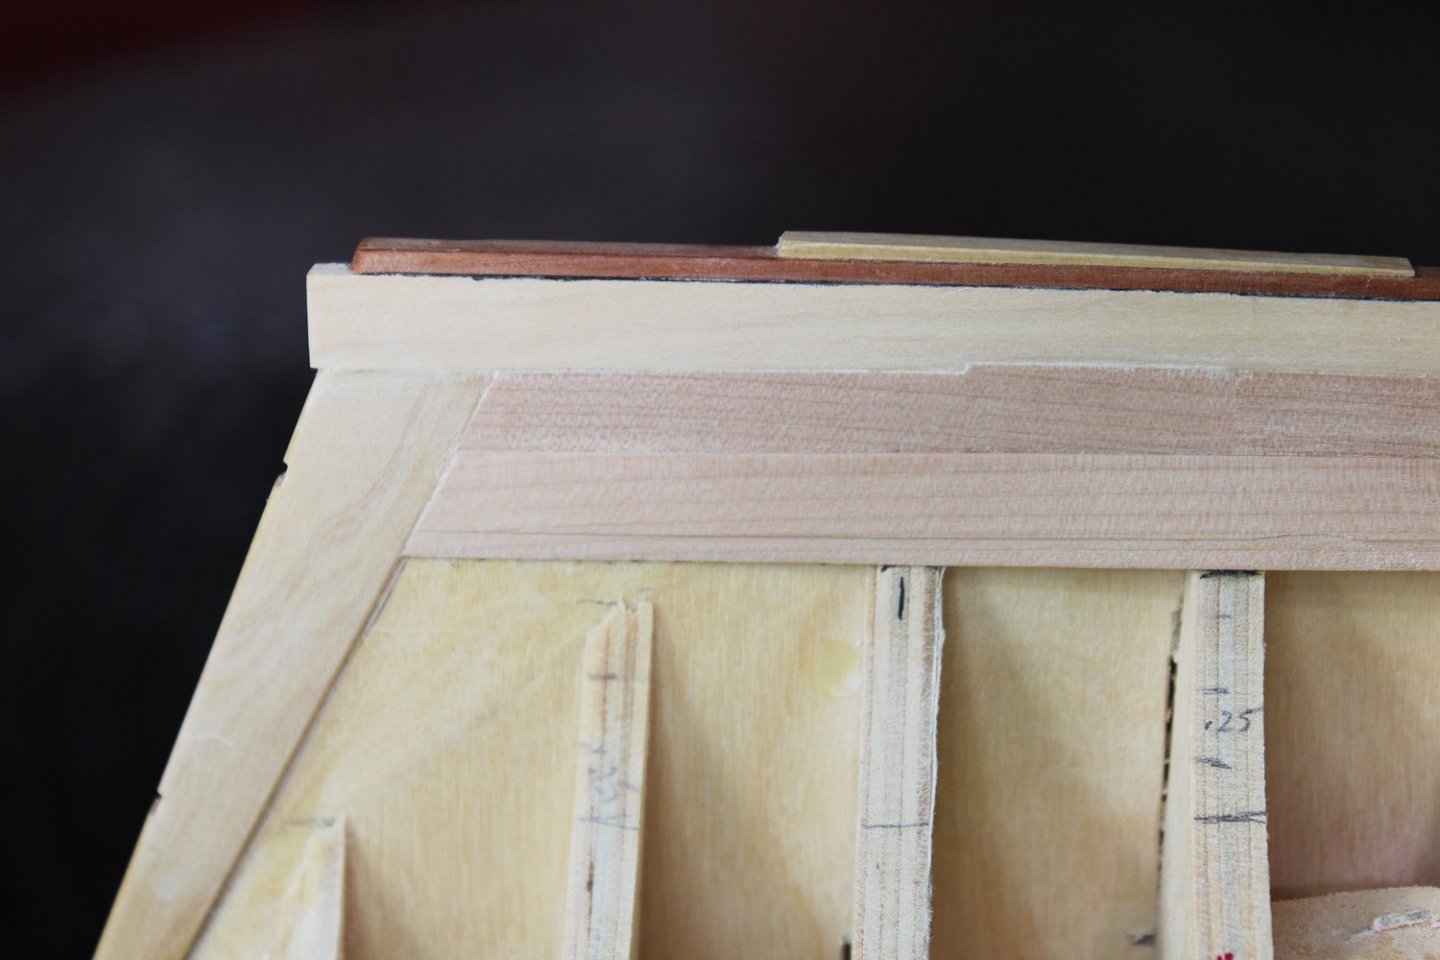
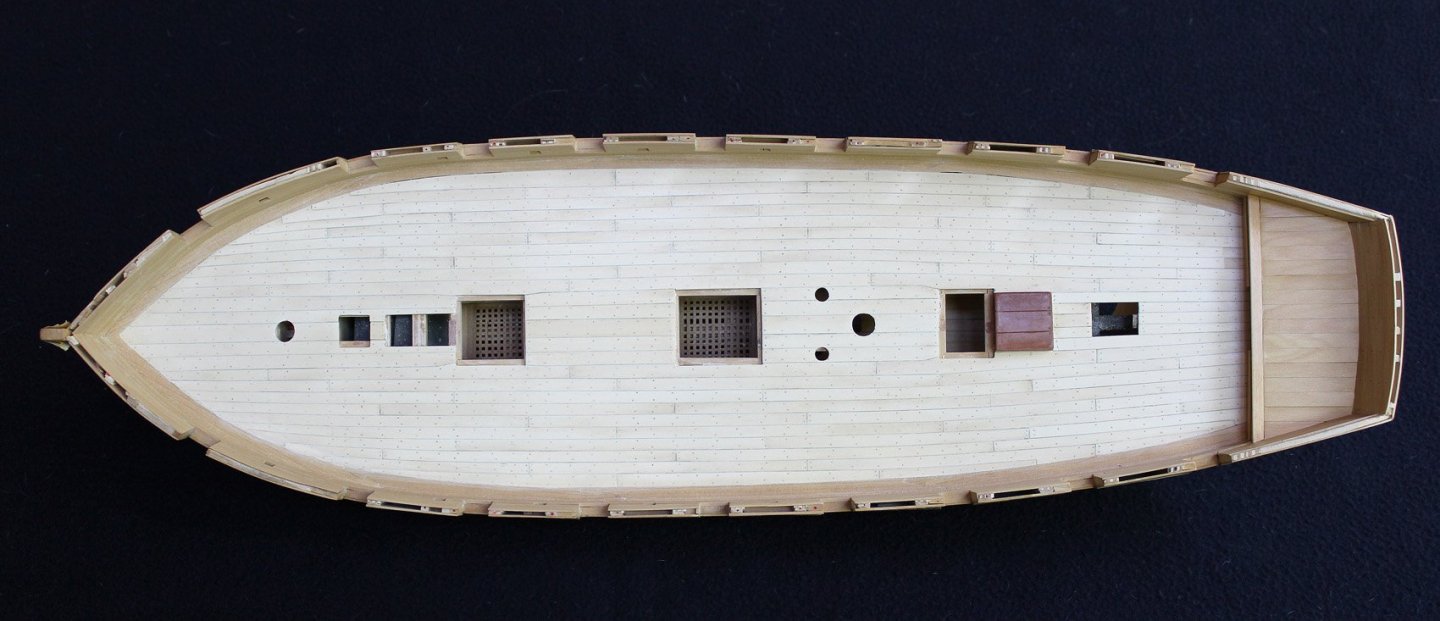
This is probably the last update for a few weeks. There is always so much to accomplish when the weather is nice. After the rudder was finished, I located where the tiller would have been inserted and made a square opening for it. I could now finish the platform. I viewed the platform as a lightweight structure which had no permanent fastenings. Boards could be removed to get access to the rudder head and the whole assembly could be disassembled for extra deck space when in action. For this reason I made the structure from box rather from the holly I was using as decking. For the same reason, there are no treenails. Later I will add ring bolts to facilitate removal of some of the boards. The model shows two rows of planking on the platform bulkhead. The lower row is thicker and I duplicated this here. The center opening is for the sweep of the tiller.


- 277 replies
-
- 16
-
-
Thanks John. I agree Gregory that it is a unique appearance. It is simply pear (not swiss pear) that I had been saving for several years. I will be using the same wood for the hull planking.