Hubac's Historian
-
Posts
3,308 -
Joined
-
Last visited
Content Type
Profiles
Forums
Gallery
Events
Everything posted by Hubac's Historian
-
 Hey EJ - it’s great to see you back on the forums! I’m excited for the latest project, and I am here for it!
 -
Hi Bill - yes, I just recently became aware of this kit. I can see the appeal of open frames, but I don’t think the kit is at all representative of the ship, and I think it is way over-priced.
- 2,699 replies
-
- 1
-

-
- heller
- soleil royal
- (and 9 more)
-
Bravo, Eric! I really admire your willingness to keep revising and developing different processes to arrive at your desired results. Your method of applying the triangles to the mouth, as a means of guiding the buildup, is really an excellent idea. And, of course, the copper wire really does give the dolphin body a dynamic sense of 3D movement. I predict that your build following will really jump, once you begin assembling all of this work that you are so meticulously modifying and scratch-building. Patience and determination have carried you this far, and ultimately they are going to produce an entirely unique interpretation of the Heller kit. You have corrected a number of things like the wale sheer, gun placement and head structure that I did not previously think could be corrected. Hat’s off, my friend!
- 422 replies
-
- 1
-
-
- soleil royal
- Heller
- (and 1 more)
-
Incredible work, Patrick!
-
My plan for the poop deck is to make this kind if bridge gangway, over a cannon, and down to the QD: For the poop royal deck, I have not yet decided whether to do this kind of simplified Dutch bulkhead with simple treads attached to the bulkhead, directly, or to do another bridge gangway to a ladder between the 4-pounder guns: In other developments, the capstan mod is complete:


- 2,699 replies
-
- 14
-
-
- heller
- soleil royal
- (and 9 more)
-
Henry - do you mean making custom breast-rails, a capstan or both?
-
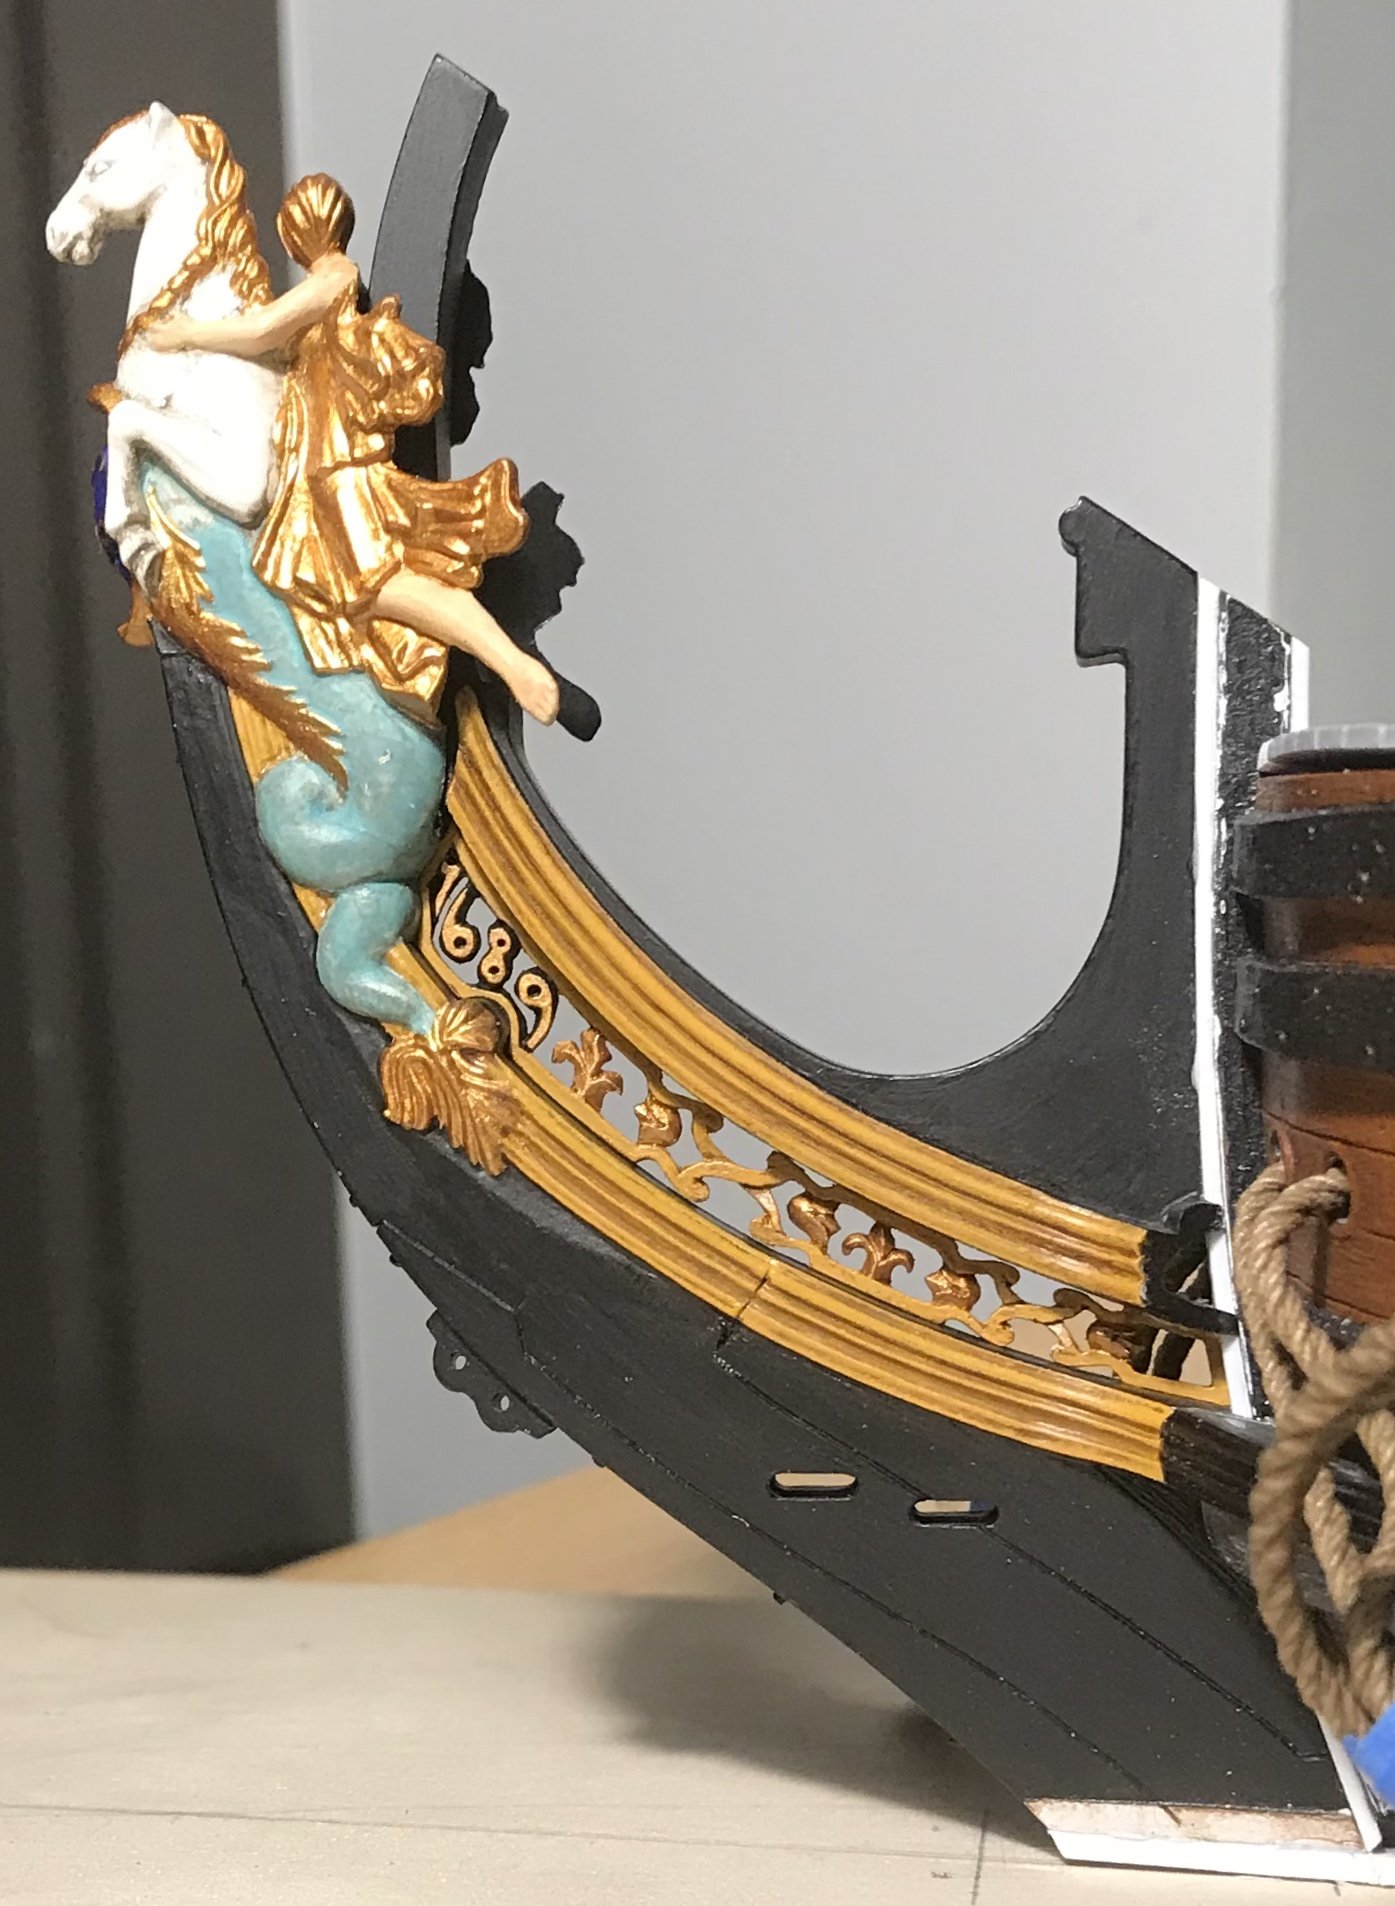
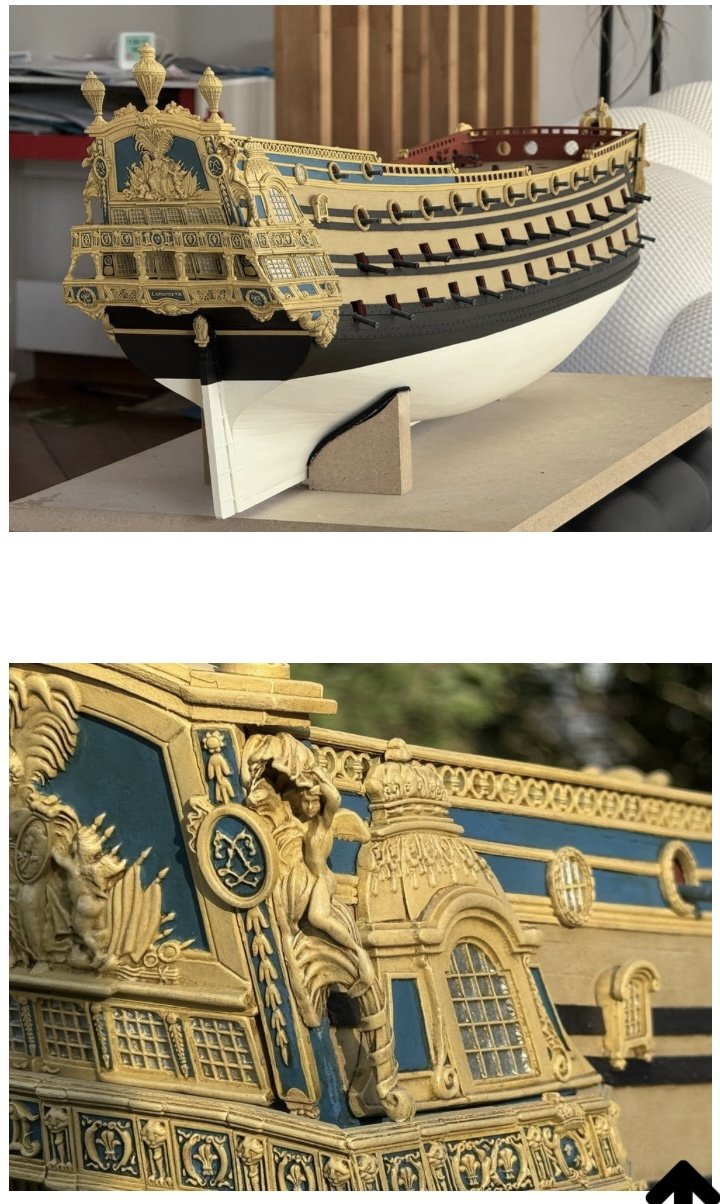
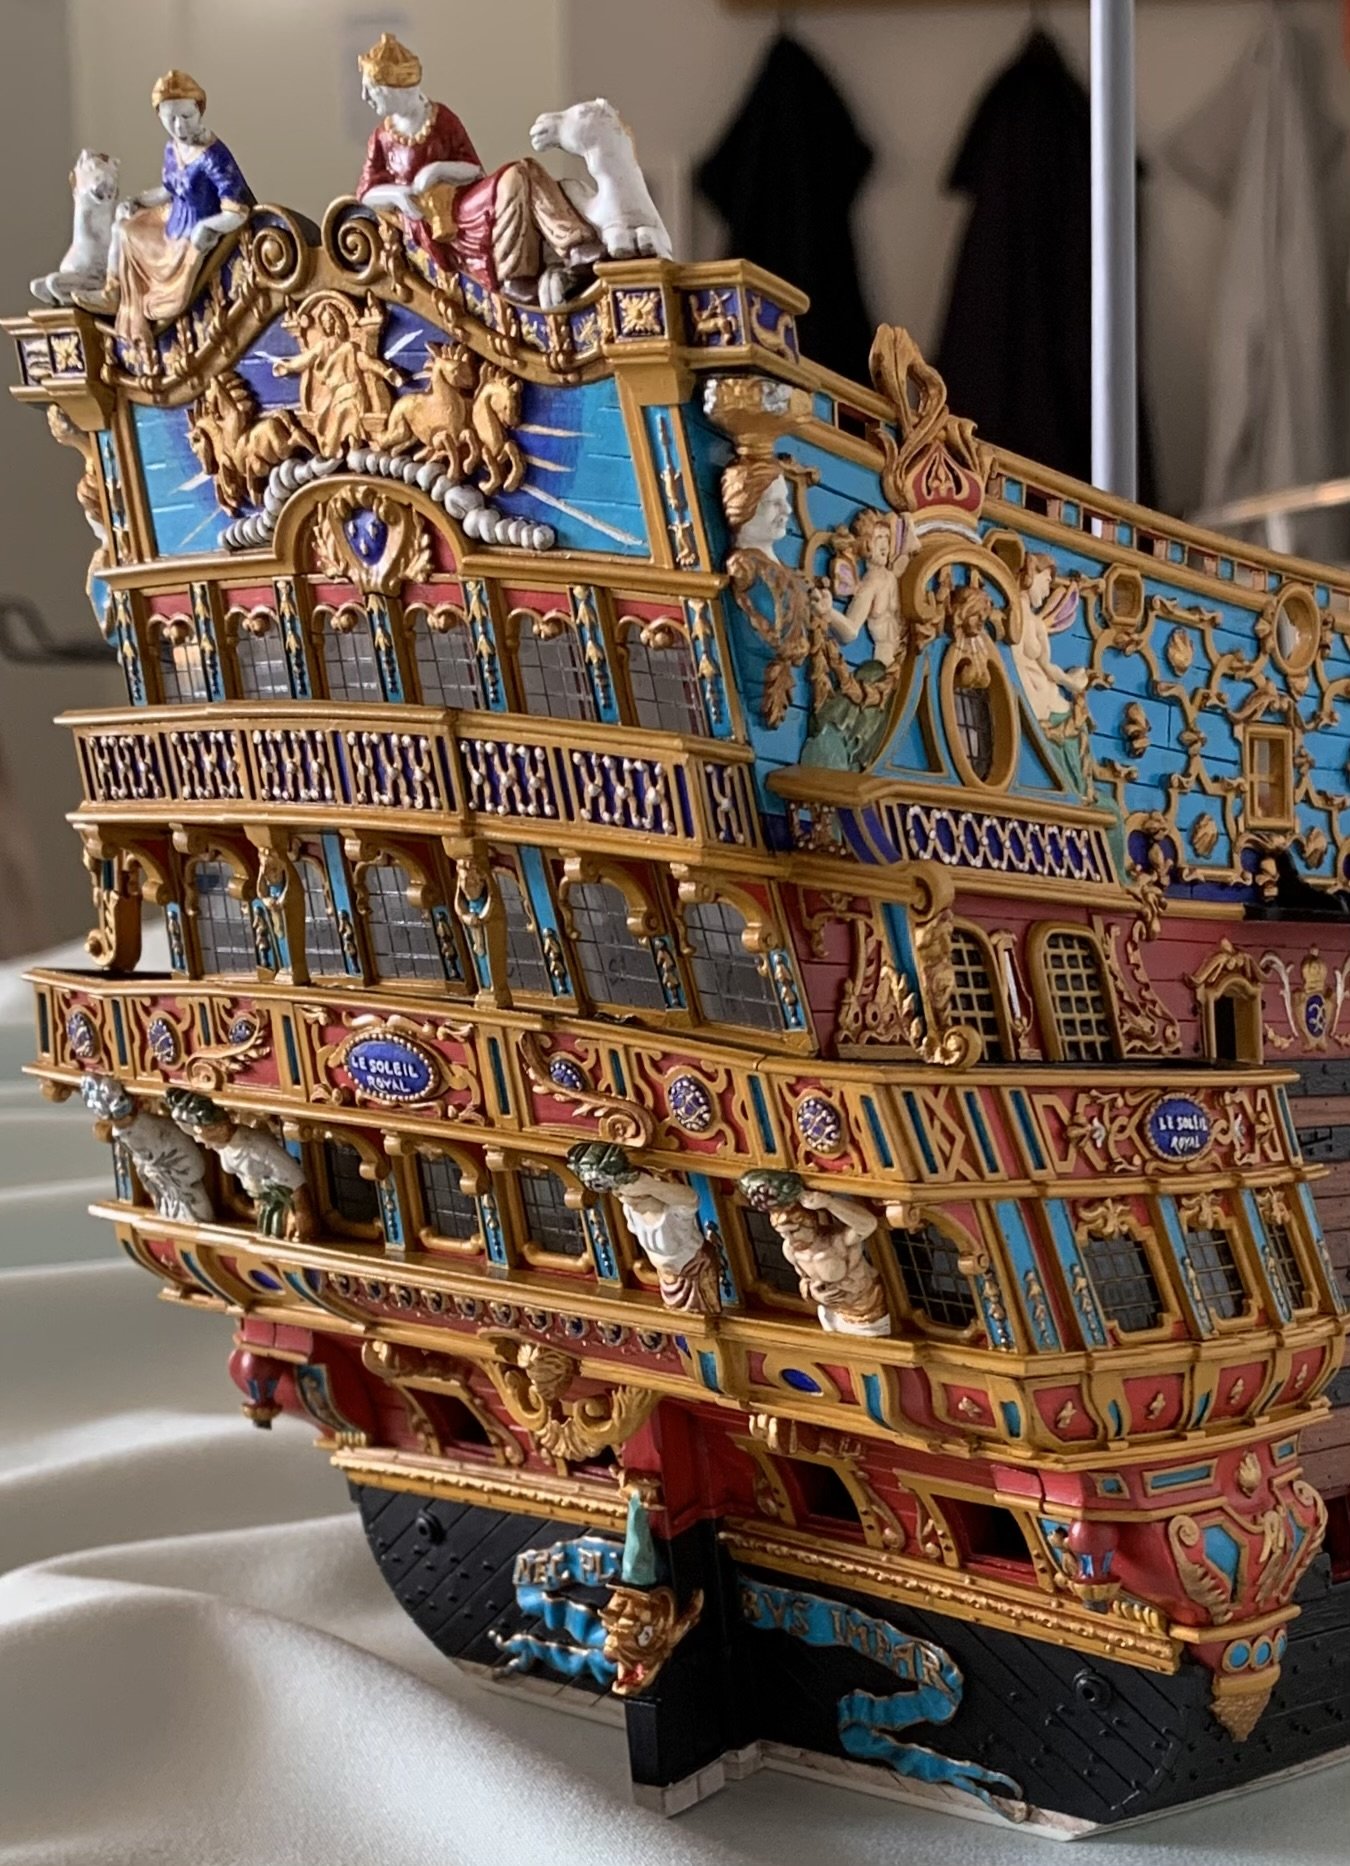
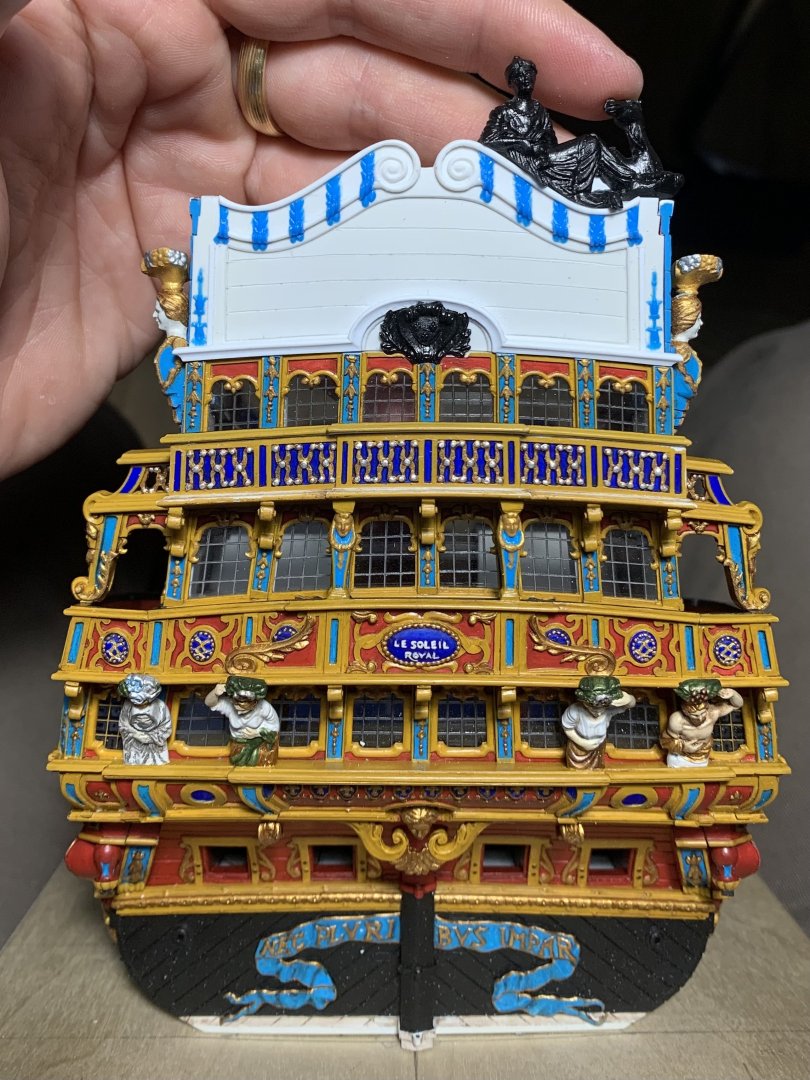
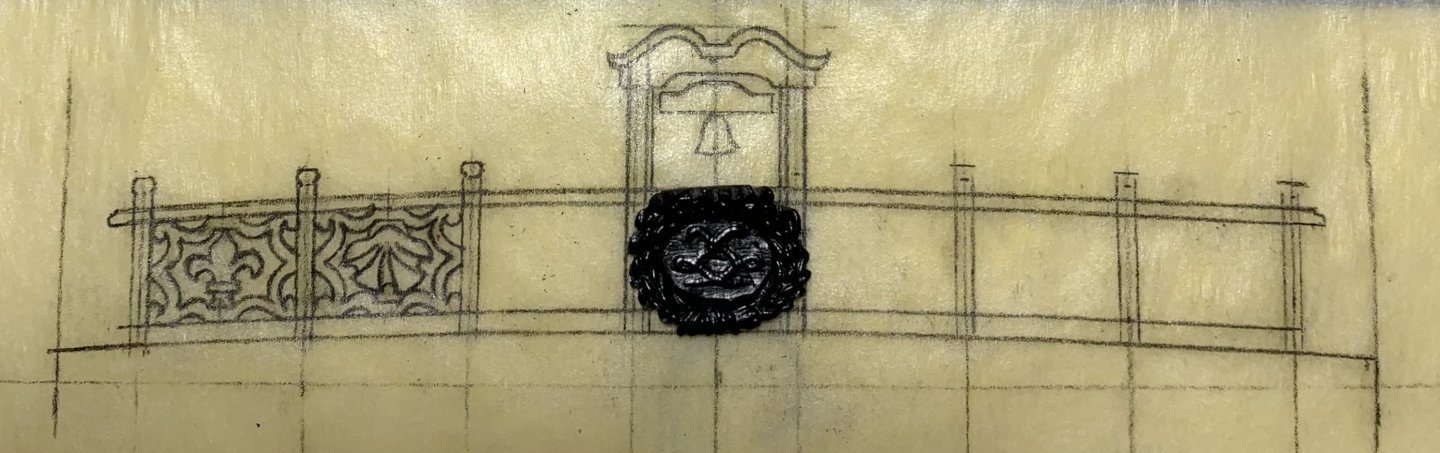
Thank you, Gentlemen. I’m going to go ahead and modify the capstan. Over the course of this build, you guys have made a number of really good suggestions. I don’t always follow-through on them, but here is an instance where I can bring a detail more in-line with historic reality, without having to scrap the truly labor-intensive aspect of the part. I value all of your input, and Waldemar is quite right to point this out. I am also happy to report that I have arrived at my f’ocsle breast-rail design. My idea with the breast-rail will be to adapt an exterior detail - in this case, the bow trailboard - and bring it in-board. For a reminder of the particular framing of the trailboard: The trailboard is, itself, an adaptation of the original design. Where the “X’s” are, there should be shells in the top and bottom negative spaces. At the time that I made this part, that was just too small and fiddly for me to make a good job of, so I chose to leave those spaces open. For this breast-rail, though, I could show alternating shells and fleurs within the same lattice framework: The beauty of this process is that I only have to draw one of each panel. The spacing remains the same for all six openings, so I merely have to make a mirror photocopy for the starboard side. It will be fleur/shell/fleur, which picks up on the alternating design of the bulwark frieze. French belfries tend to be rather plain, in comparison with their English counterpoints. There’s enough ornamental work going on below, so I decided to pick-up the reverse cyma curves of the tafferal for the belfry’s coronation. When I get to the quarter deck rail, I will again draw inspiration from an exterior detail. In this instance, I will adapt the framing and monogramed cartouches of the middle balcony rail: At the poop breast rail, I will adapt the quarter deck level of the gallery, with it’s series of X’s: The Arms of France will also appear at this level. The breast rail of the poop-royal deck will adapt the simple sheer rail “linked circles” of L’ambiteaux: (photo courtesy of Marc Yeu)


- 2,699 replies
-
- 15
-

-
-
- heller
- soleil royal
- (and 9 more)
-
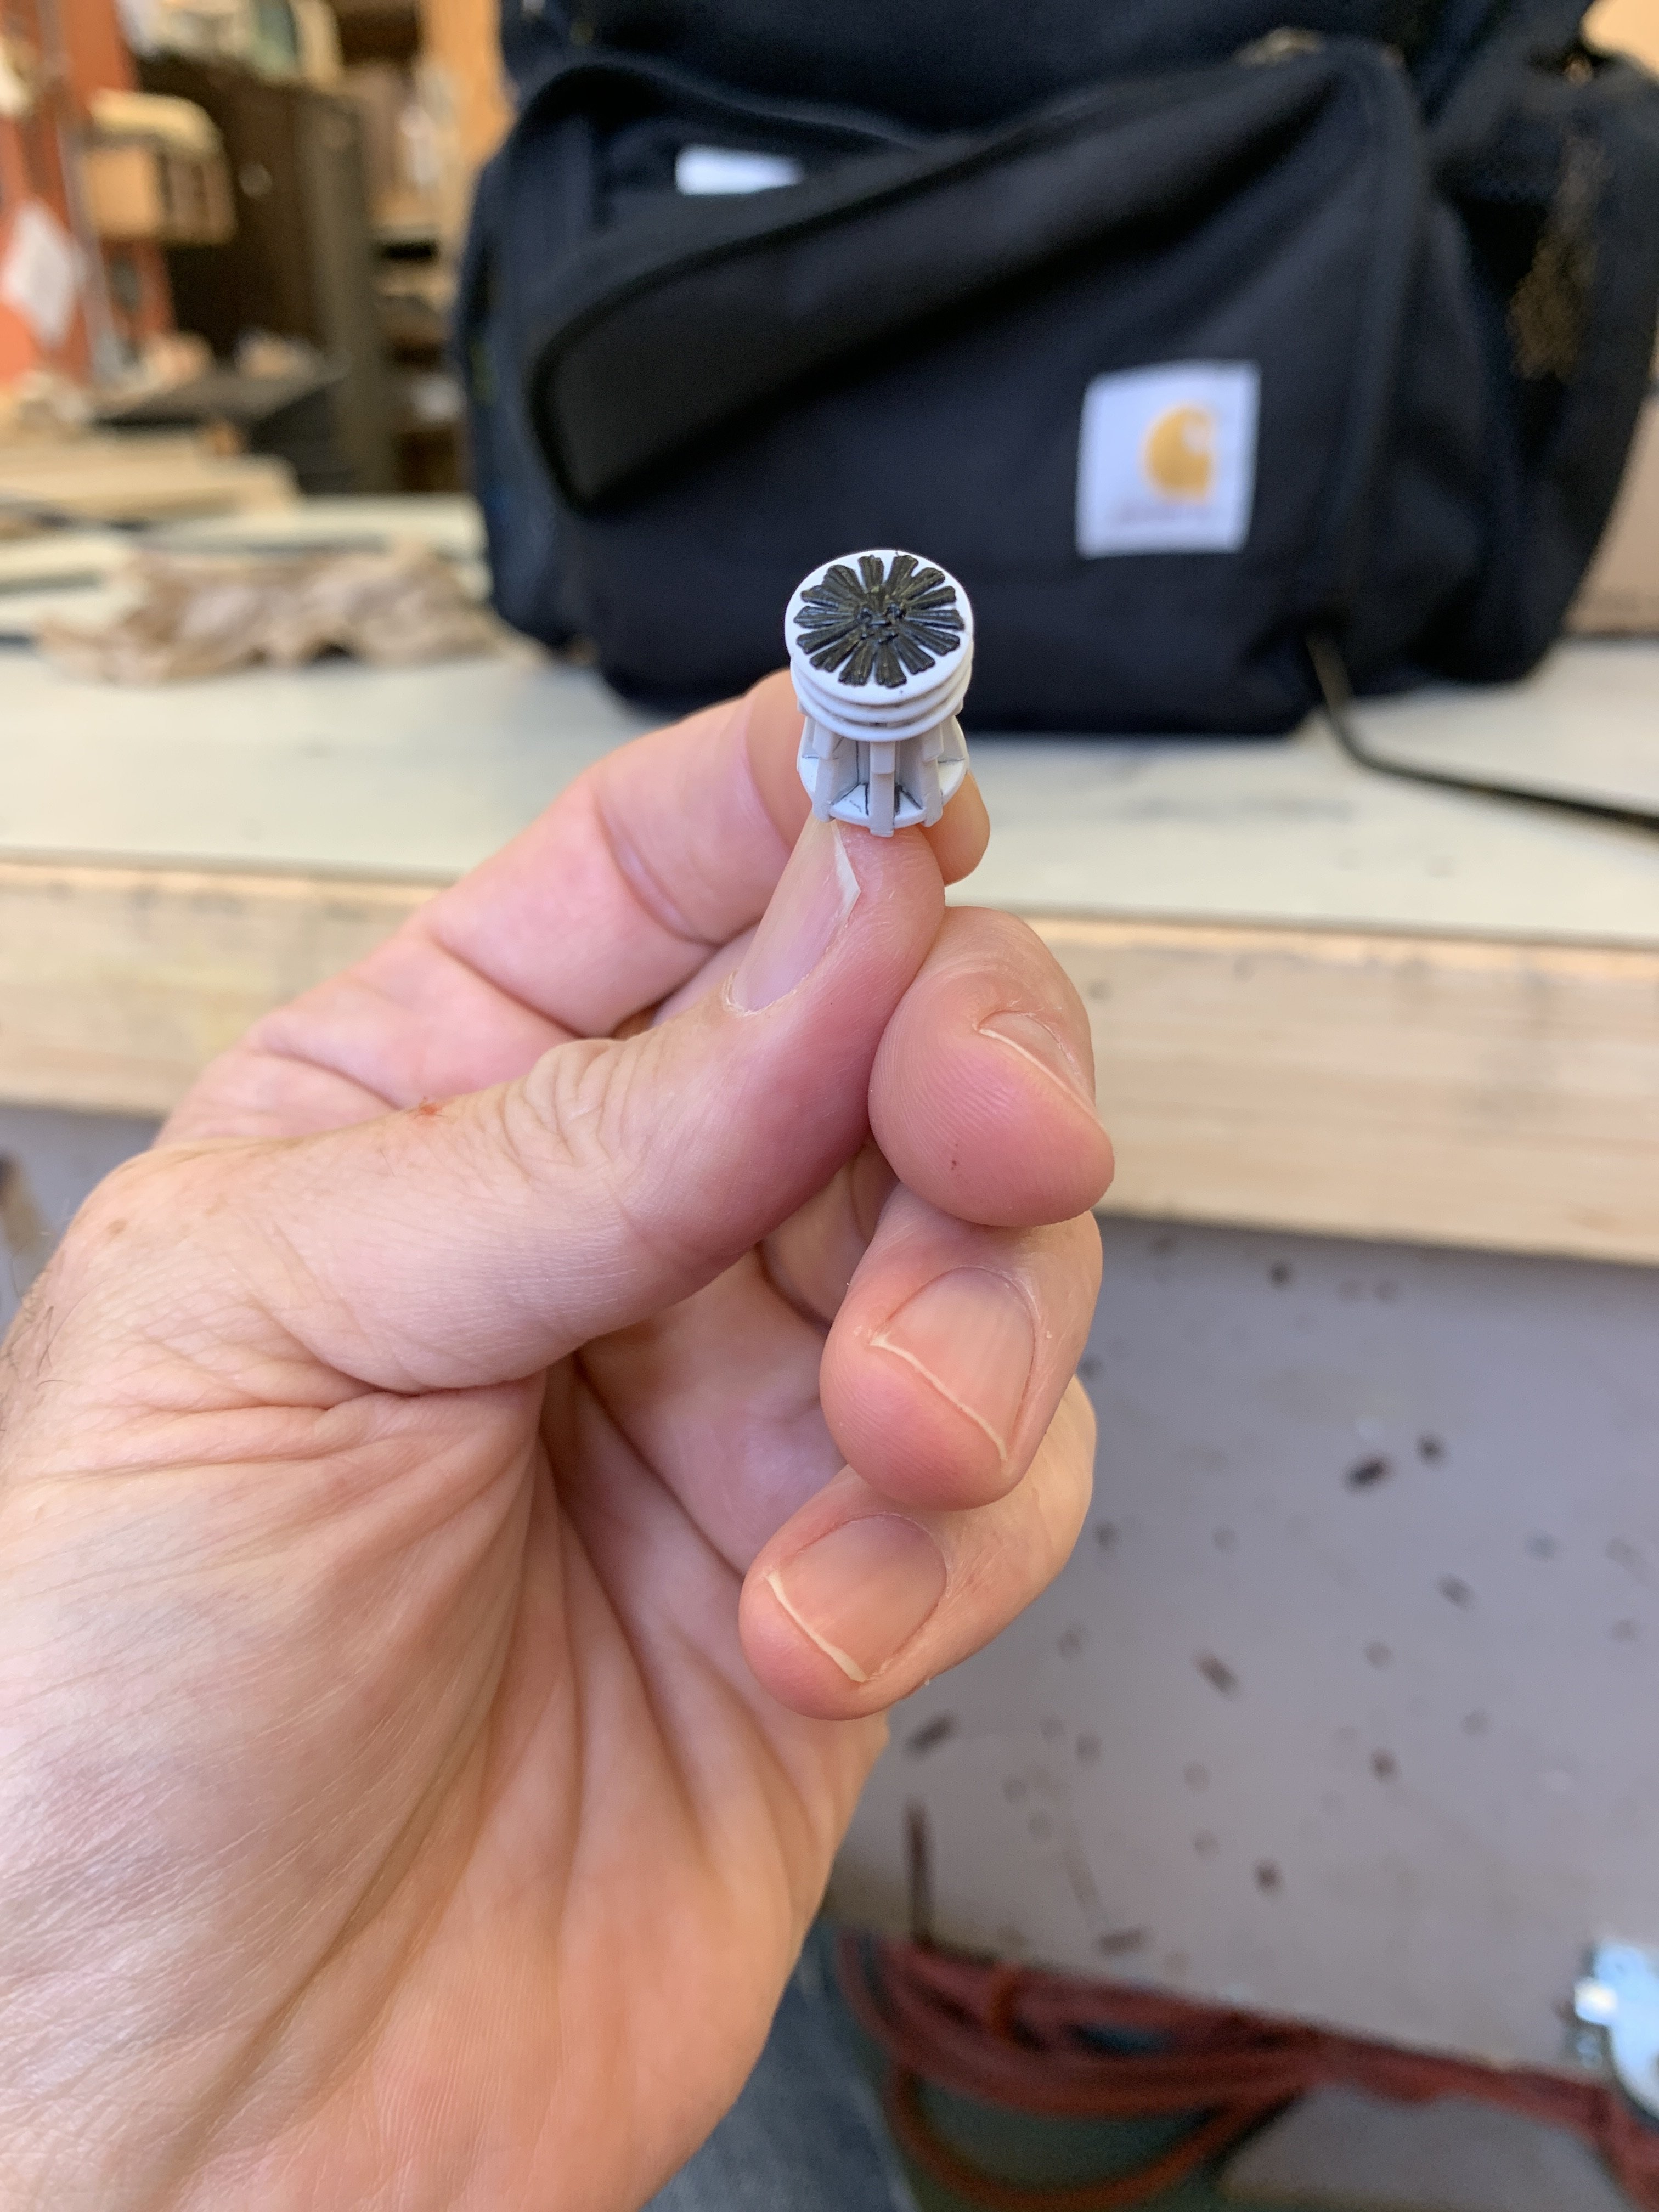
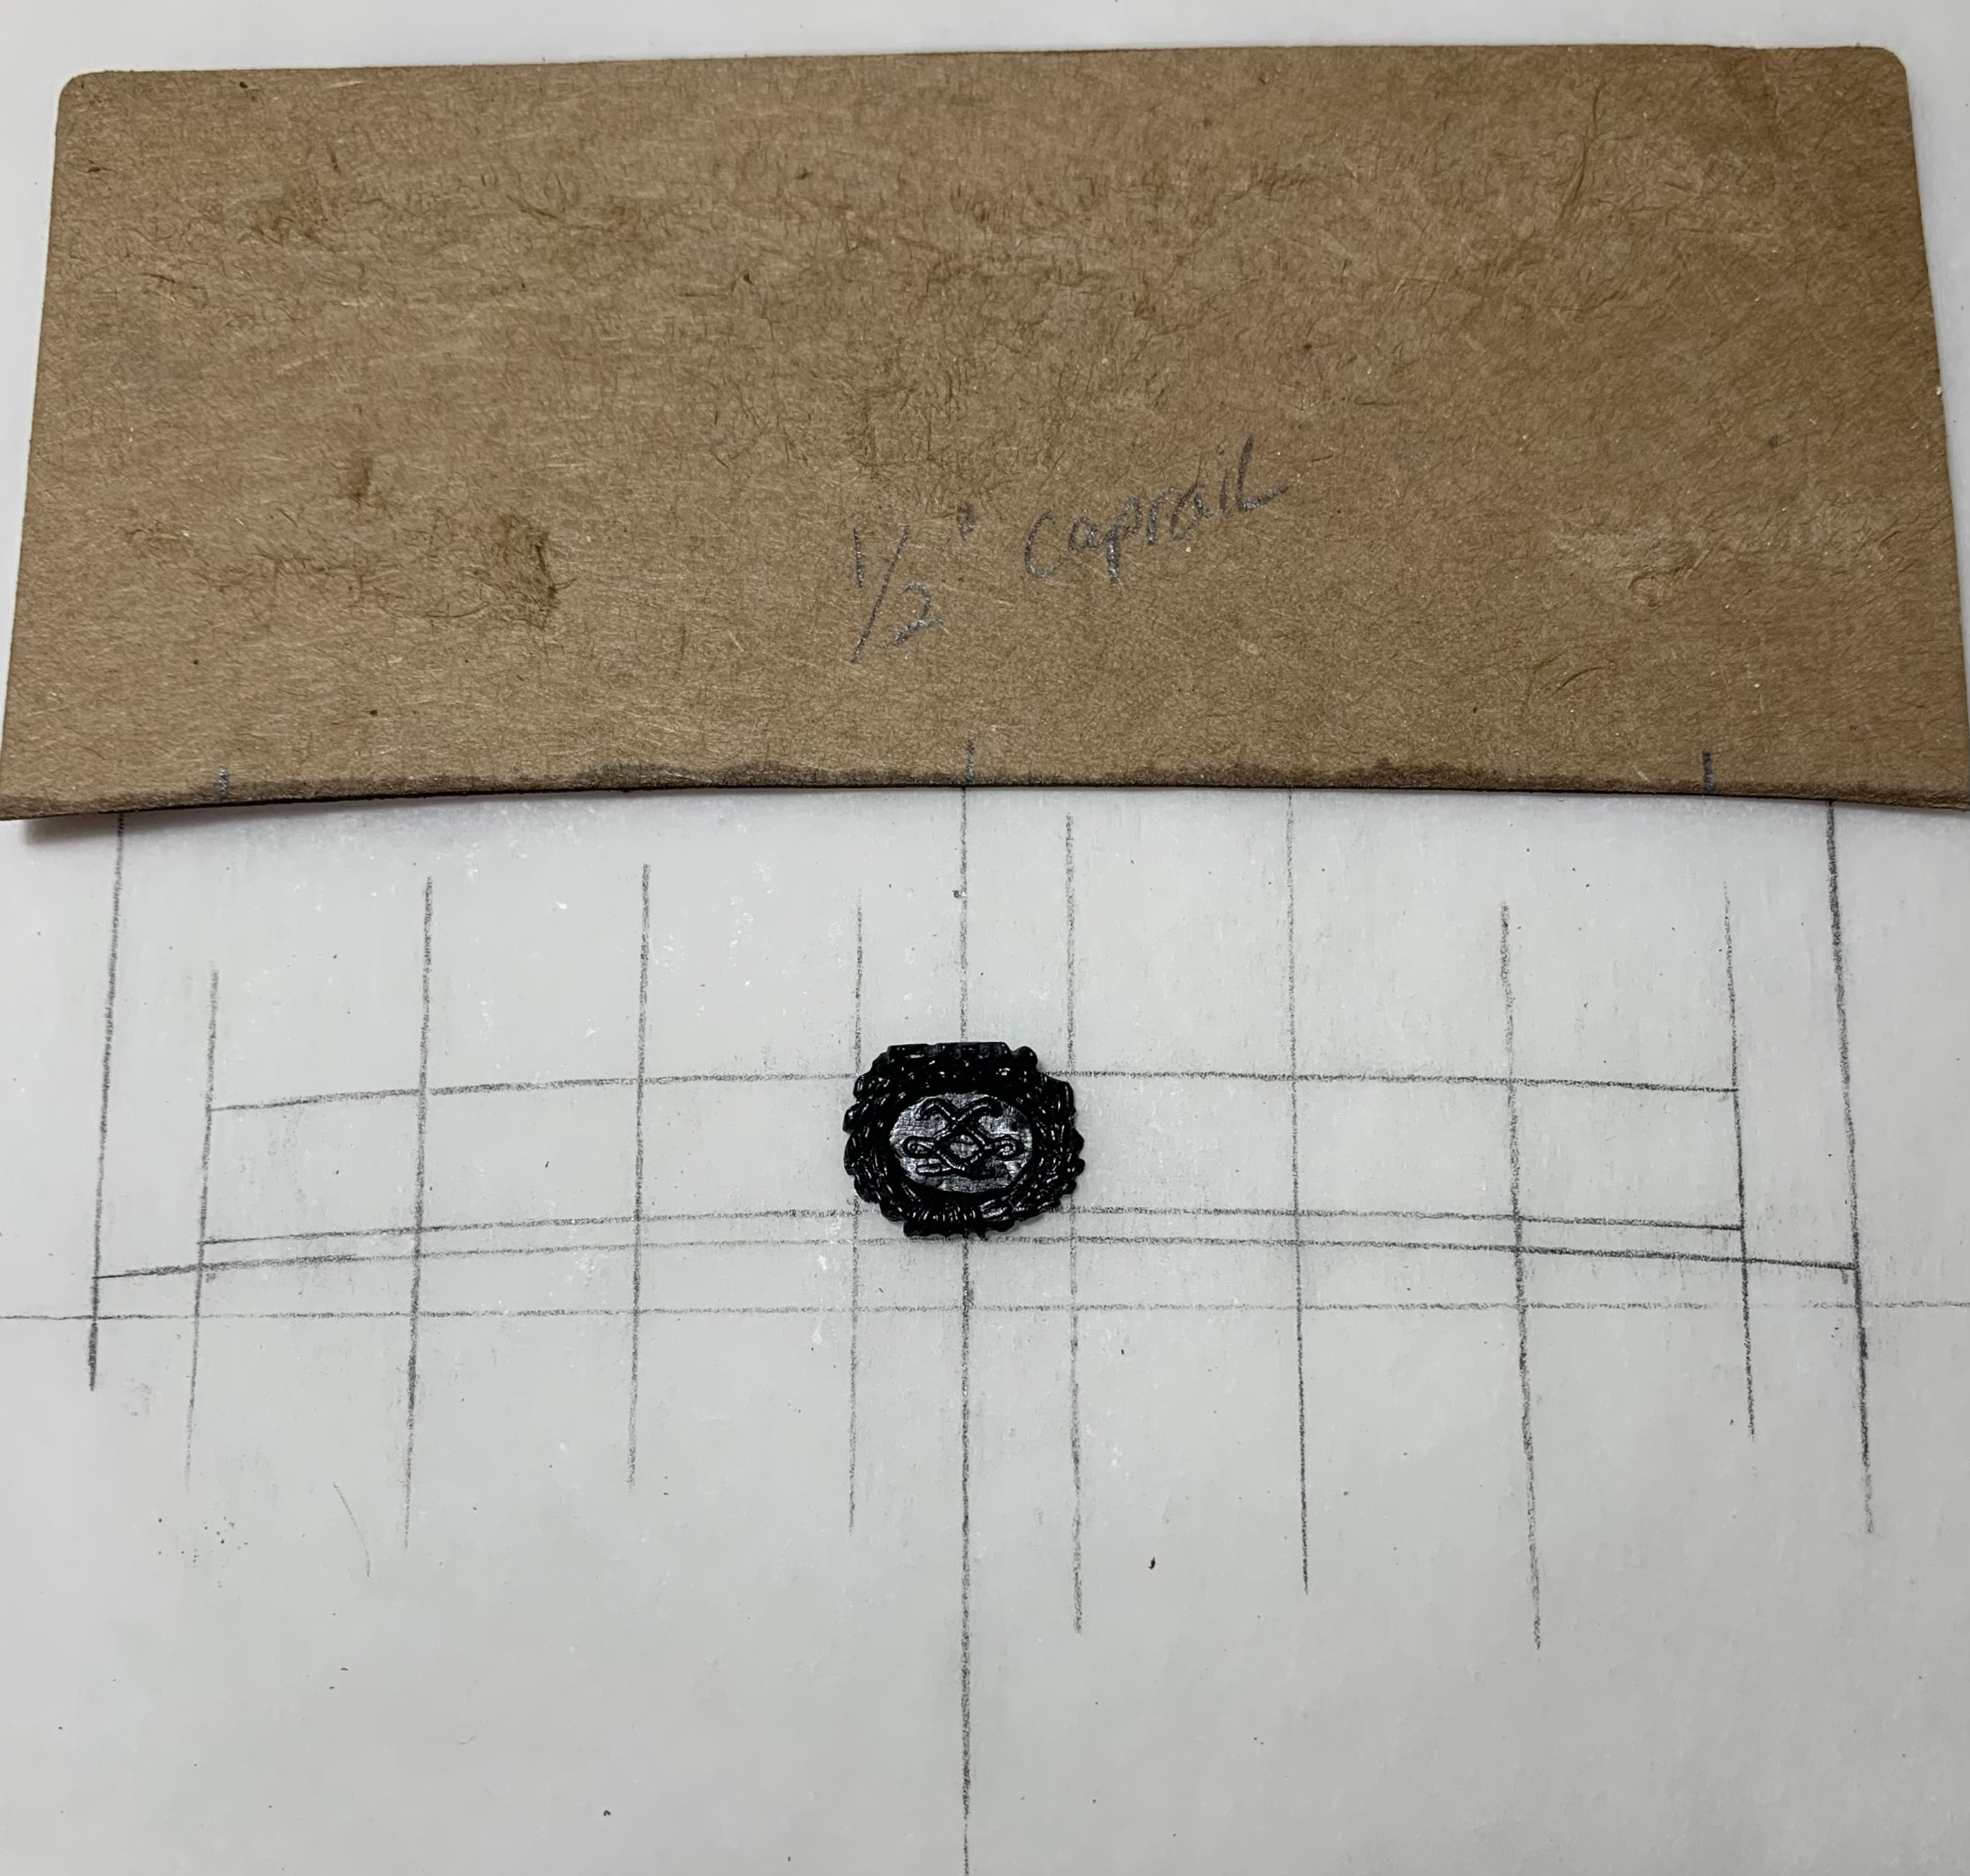
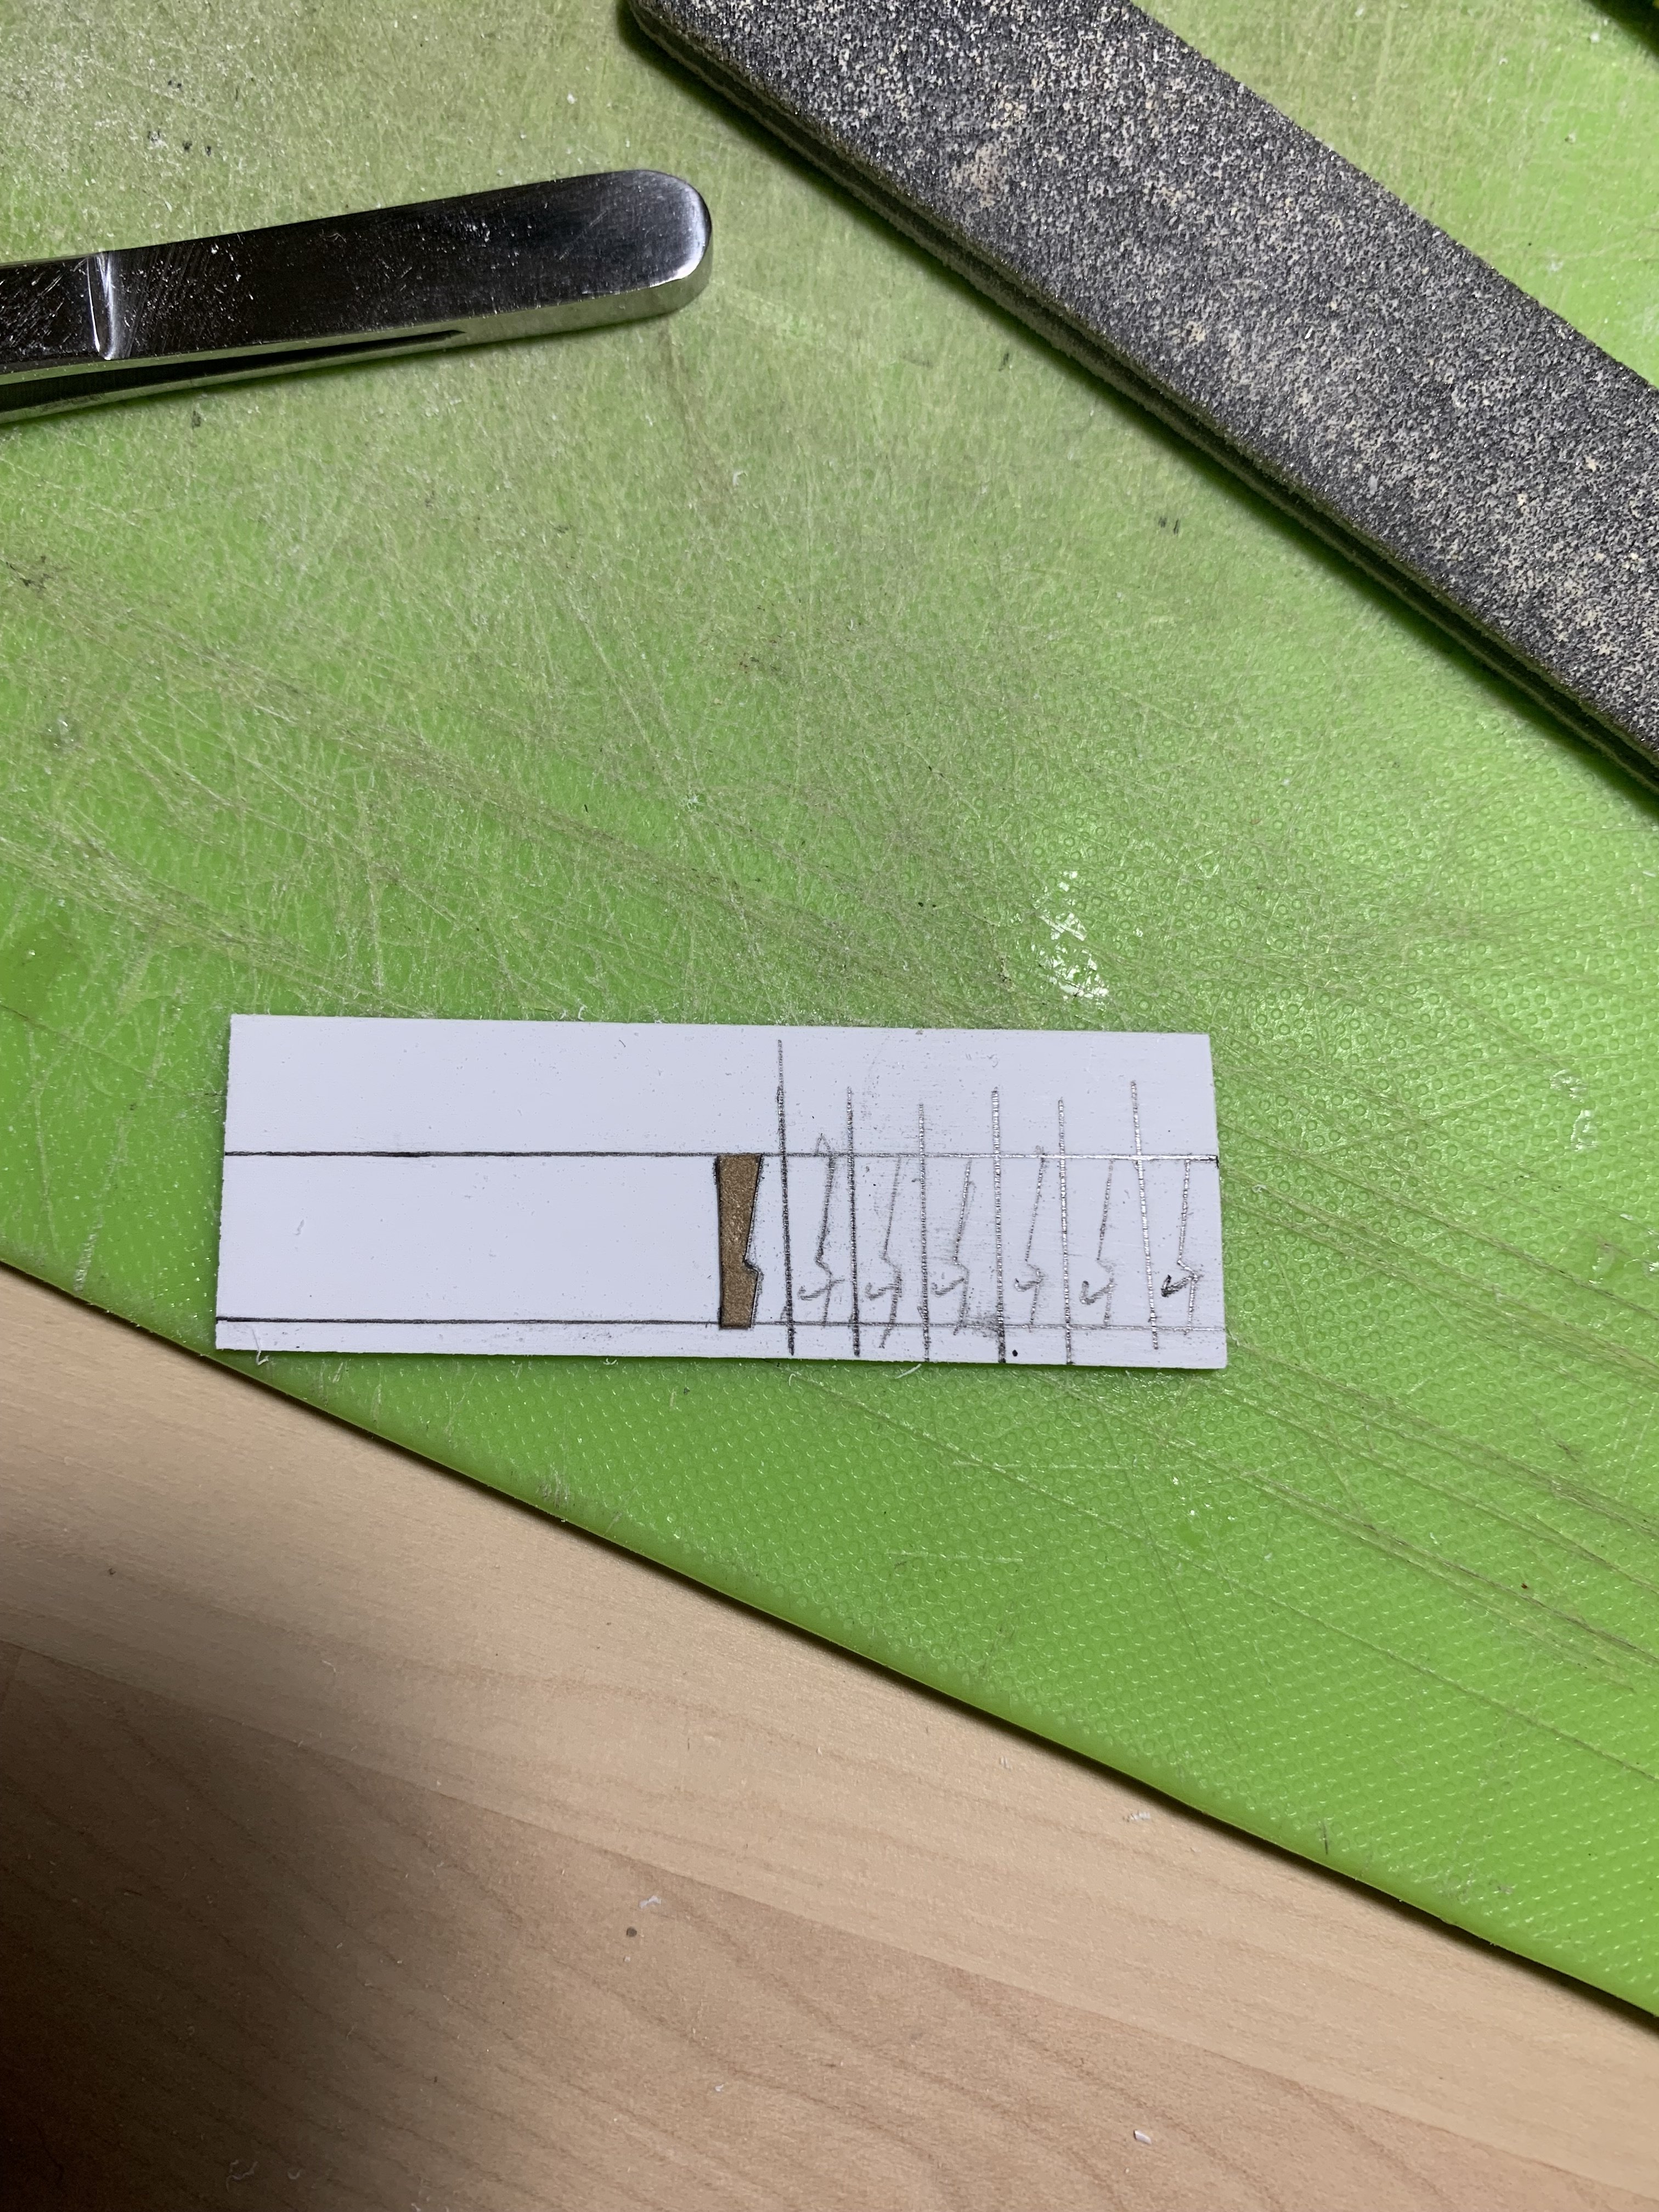
One last thought on Waldemar’s observation - a closer look at the L’Ambiteaux capstan does show a staggered 2-level series of sockets for the capstan bars, while Lemineur’s SP is a single level of sockets. Really, I have no idea whether that represents an evolutionary timeline from 1680 to 1693, or whether it is merely a designer’s assumption that has the privilege of plausible deniability for the lack of primary source information. As I have one more radiant fleur emblem at my disposal - I could grind off the existing emblem; fill every other socket on the existing level; add an upper level of alternating sockets; and re-cap with a new top and emblem. That is a possibility that - so long as I don’t botch the emblem extraction, wouldn’t take too long to do. What do you think guys? Is it worth it? I will weigh your responses, carefully. Currently, I have begun designing the f’ocsle breast-rail and belfry. I’m playing around with another ornamental extraction. This time it is the garland-ensconced royal monogram that would be a fitting central panel beneath the belfry: This whole process begins by fitting a card template (always soda boxes) to the exact camber of the f’ocsle deck beam. Once my sanding stick brings the template to rest, I like to harden the card edge with CA, because this template is now a drawing tool for transferring that camber up the breast-rail. The central belfry will rise up above the breast caprail by almost the same height as the breast-rail.

- 2,699 replies
-
- 4
-
-
- heller
- soleil royal
- (and 9 more)
-
Always a pleasure to look-in, here. Everything is so crisply executed. I love the capstan and breast-rail details. Also, that is a very clever way to make the rudder hinges.
-
Well, as I well know - you have gone to great depths to reconstruct line drawings into more plausible outcomes. Your insight on a wide array of vessels is invaluable. I’ll take a look at the Delacroix forum, though. Thanks for the reference!
-
What are the other main issues you see with Lemineur’s reconstructions?
- 2,699 replies
-
- 1
-
-
- heller
- soleil royal
- (and 9 more)
-
Agreed - I am hearing from a number of friends who are interpreting the SP drawings, in particular, and there appear to be a number of inconsistencies. As for the capstan, I’m not sure whether I will remake it. Probably not, but if it gets under my skin, I will have to revisit that possibility.
- 2,699 replies
-
- 1
-
-
- heller
- soleil royal
- (and 9 more)
-
Hello Waldemar! Your observation, on this point is well-received. Honestly, I did not think to consult the Album de Colbert. I, instead, referenced Boudriot’s L’Ambiteaux: And Lemineur’s SP: Interestingly, the style you reference shows up on Lemineur’s Francoise, which is closer to the 1670’s. I did not think to look here, though, before you raised this question: Generally, I assumed that by the late 1680’s, France had shifted to the more familiar drum capstan.
- 2,699 replies
-
- 6
-
-
- heller
- soleil royal
- (and 9 more)
-
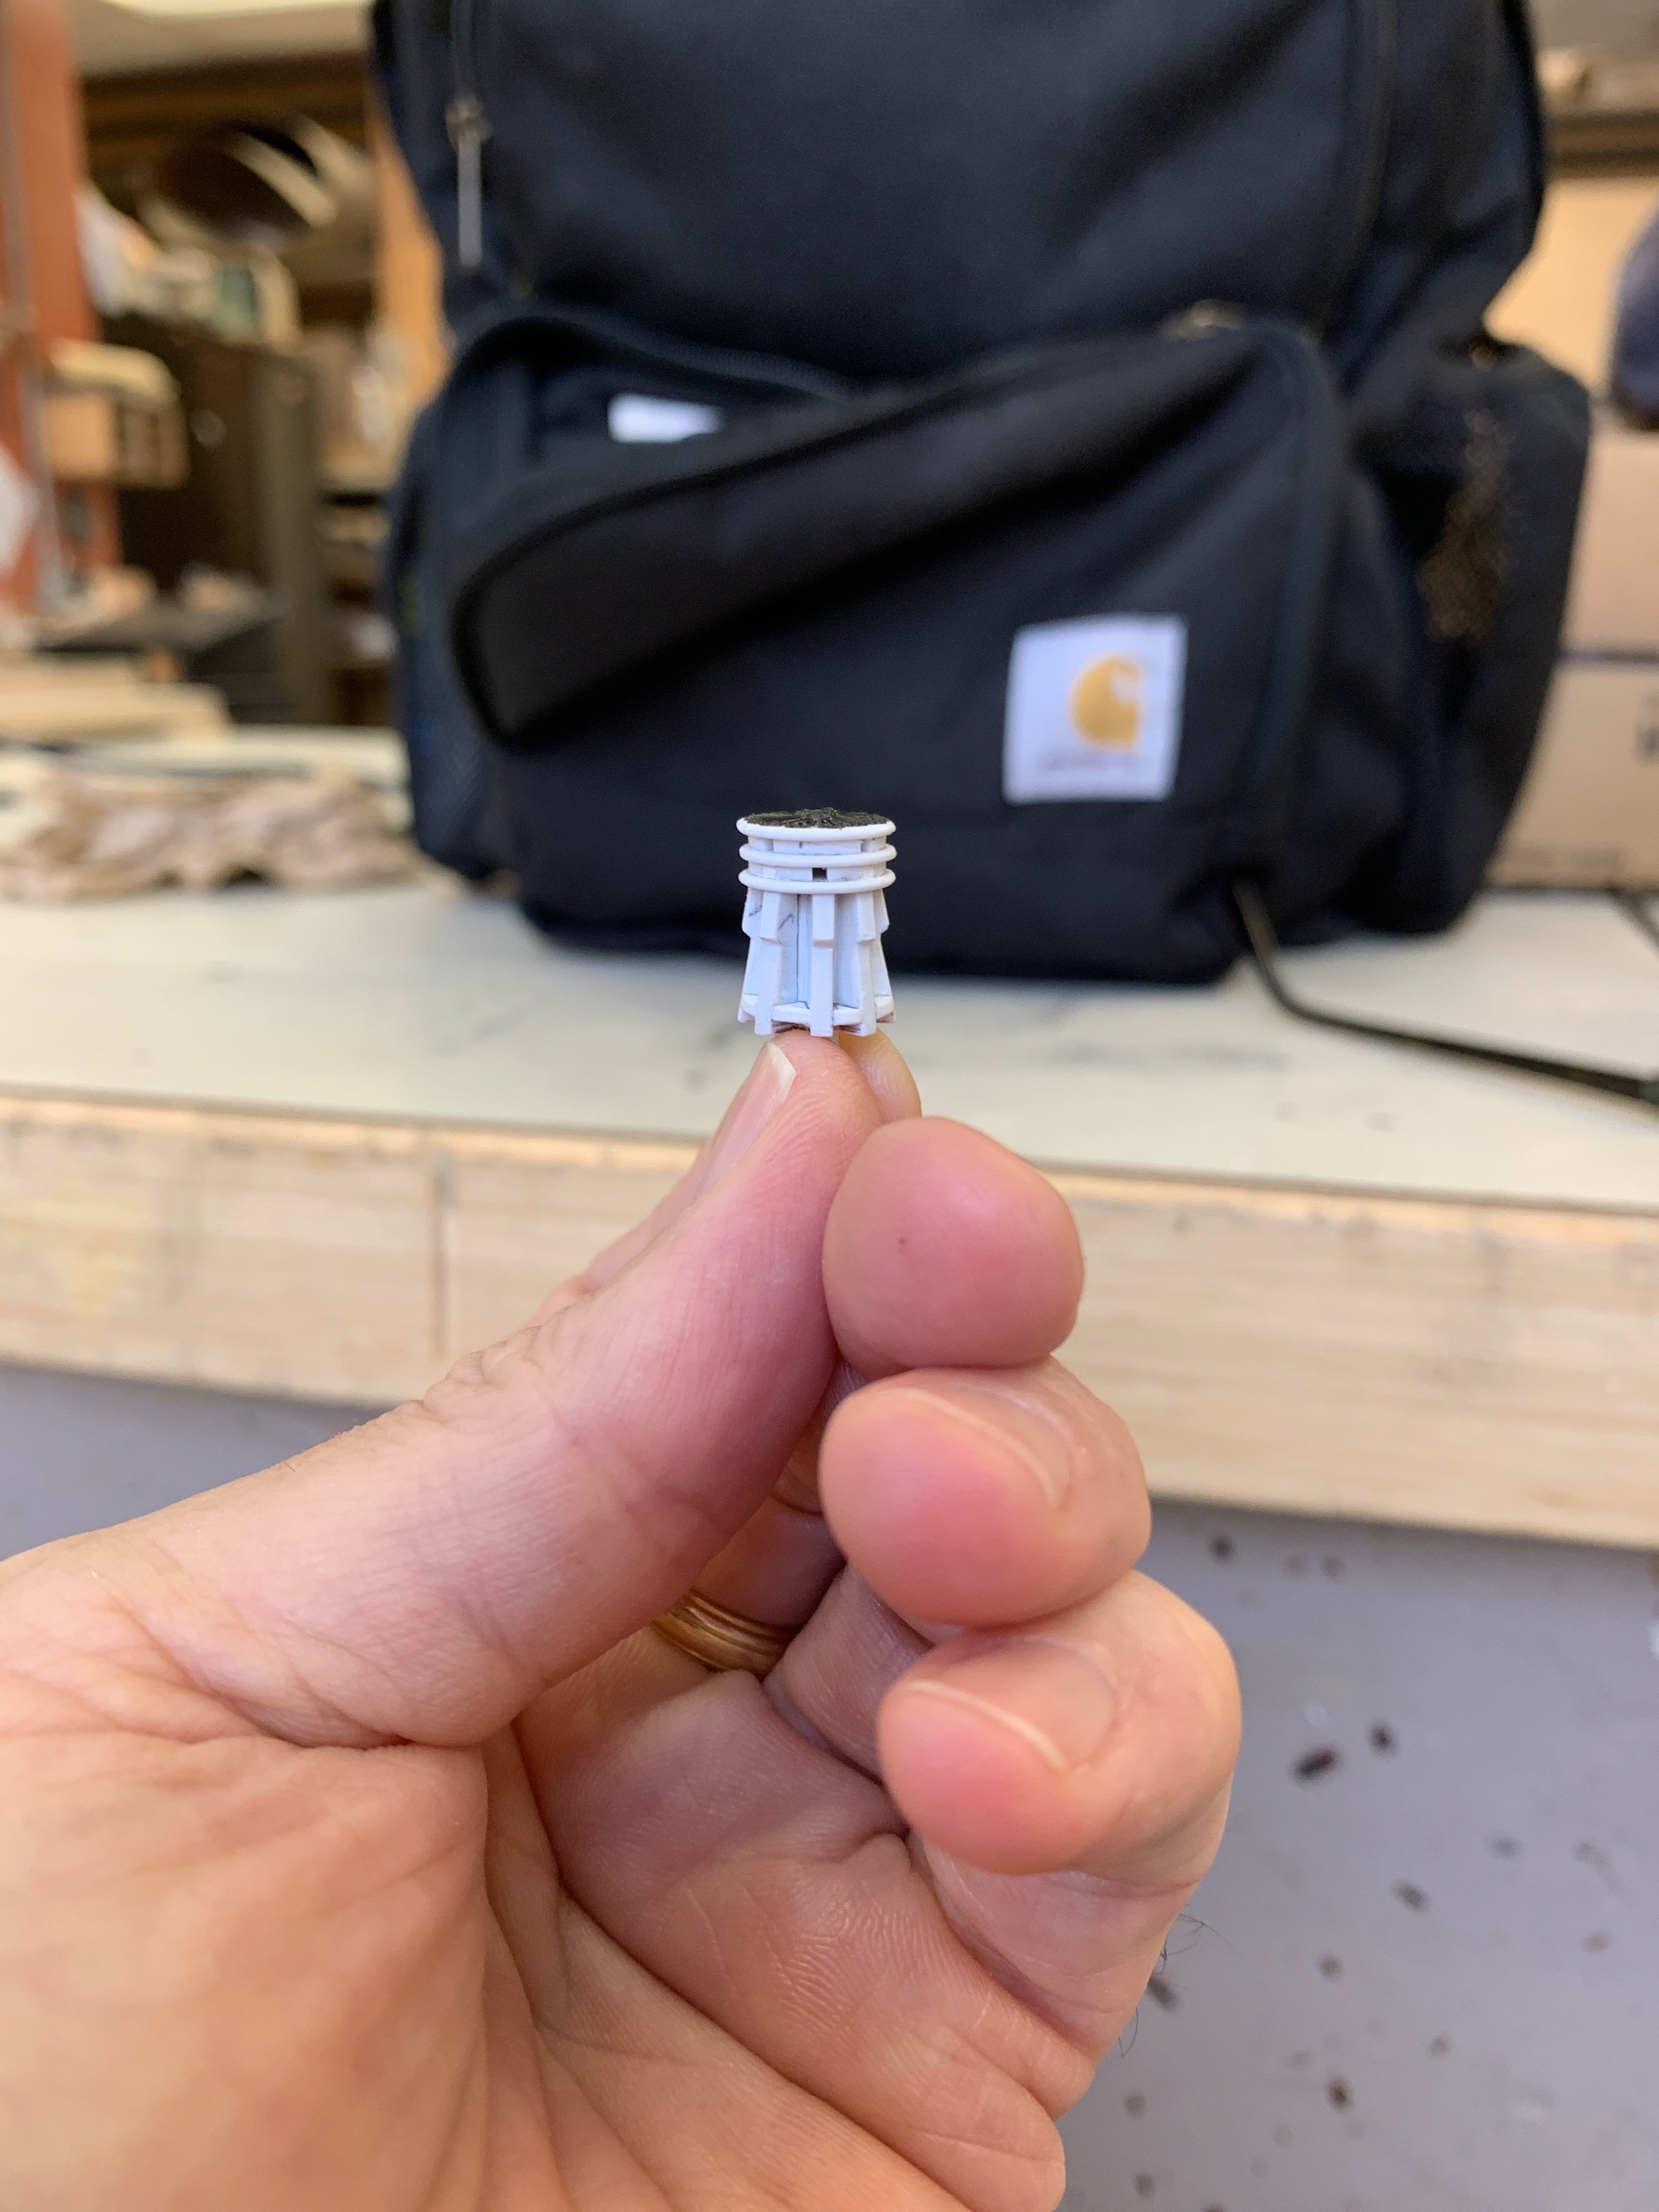
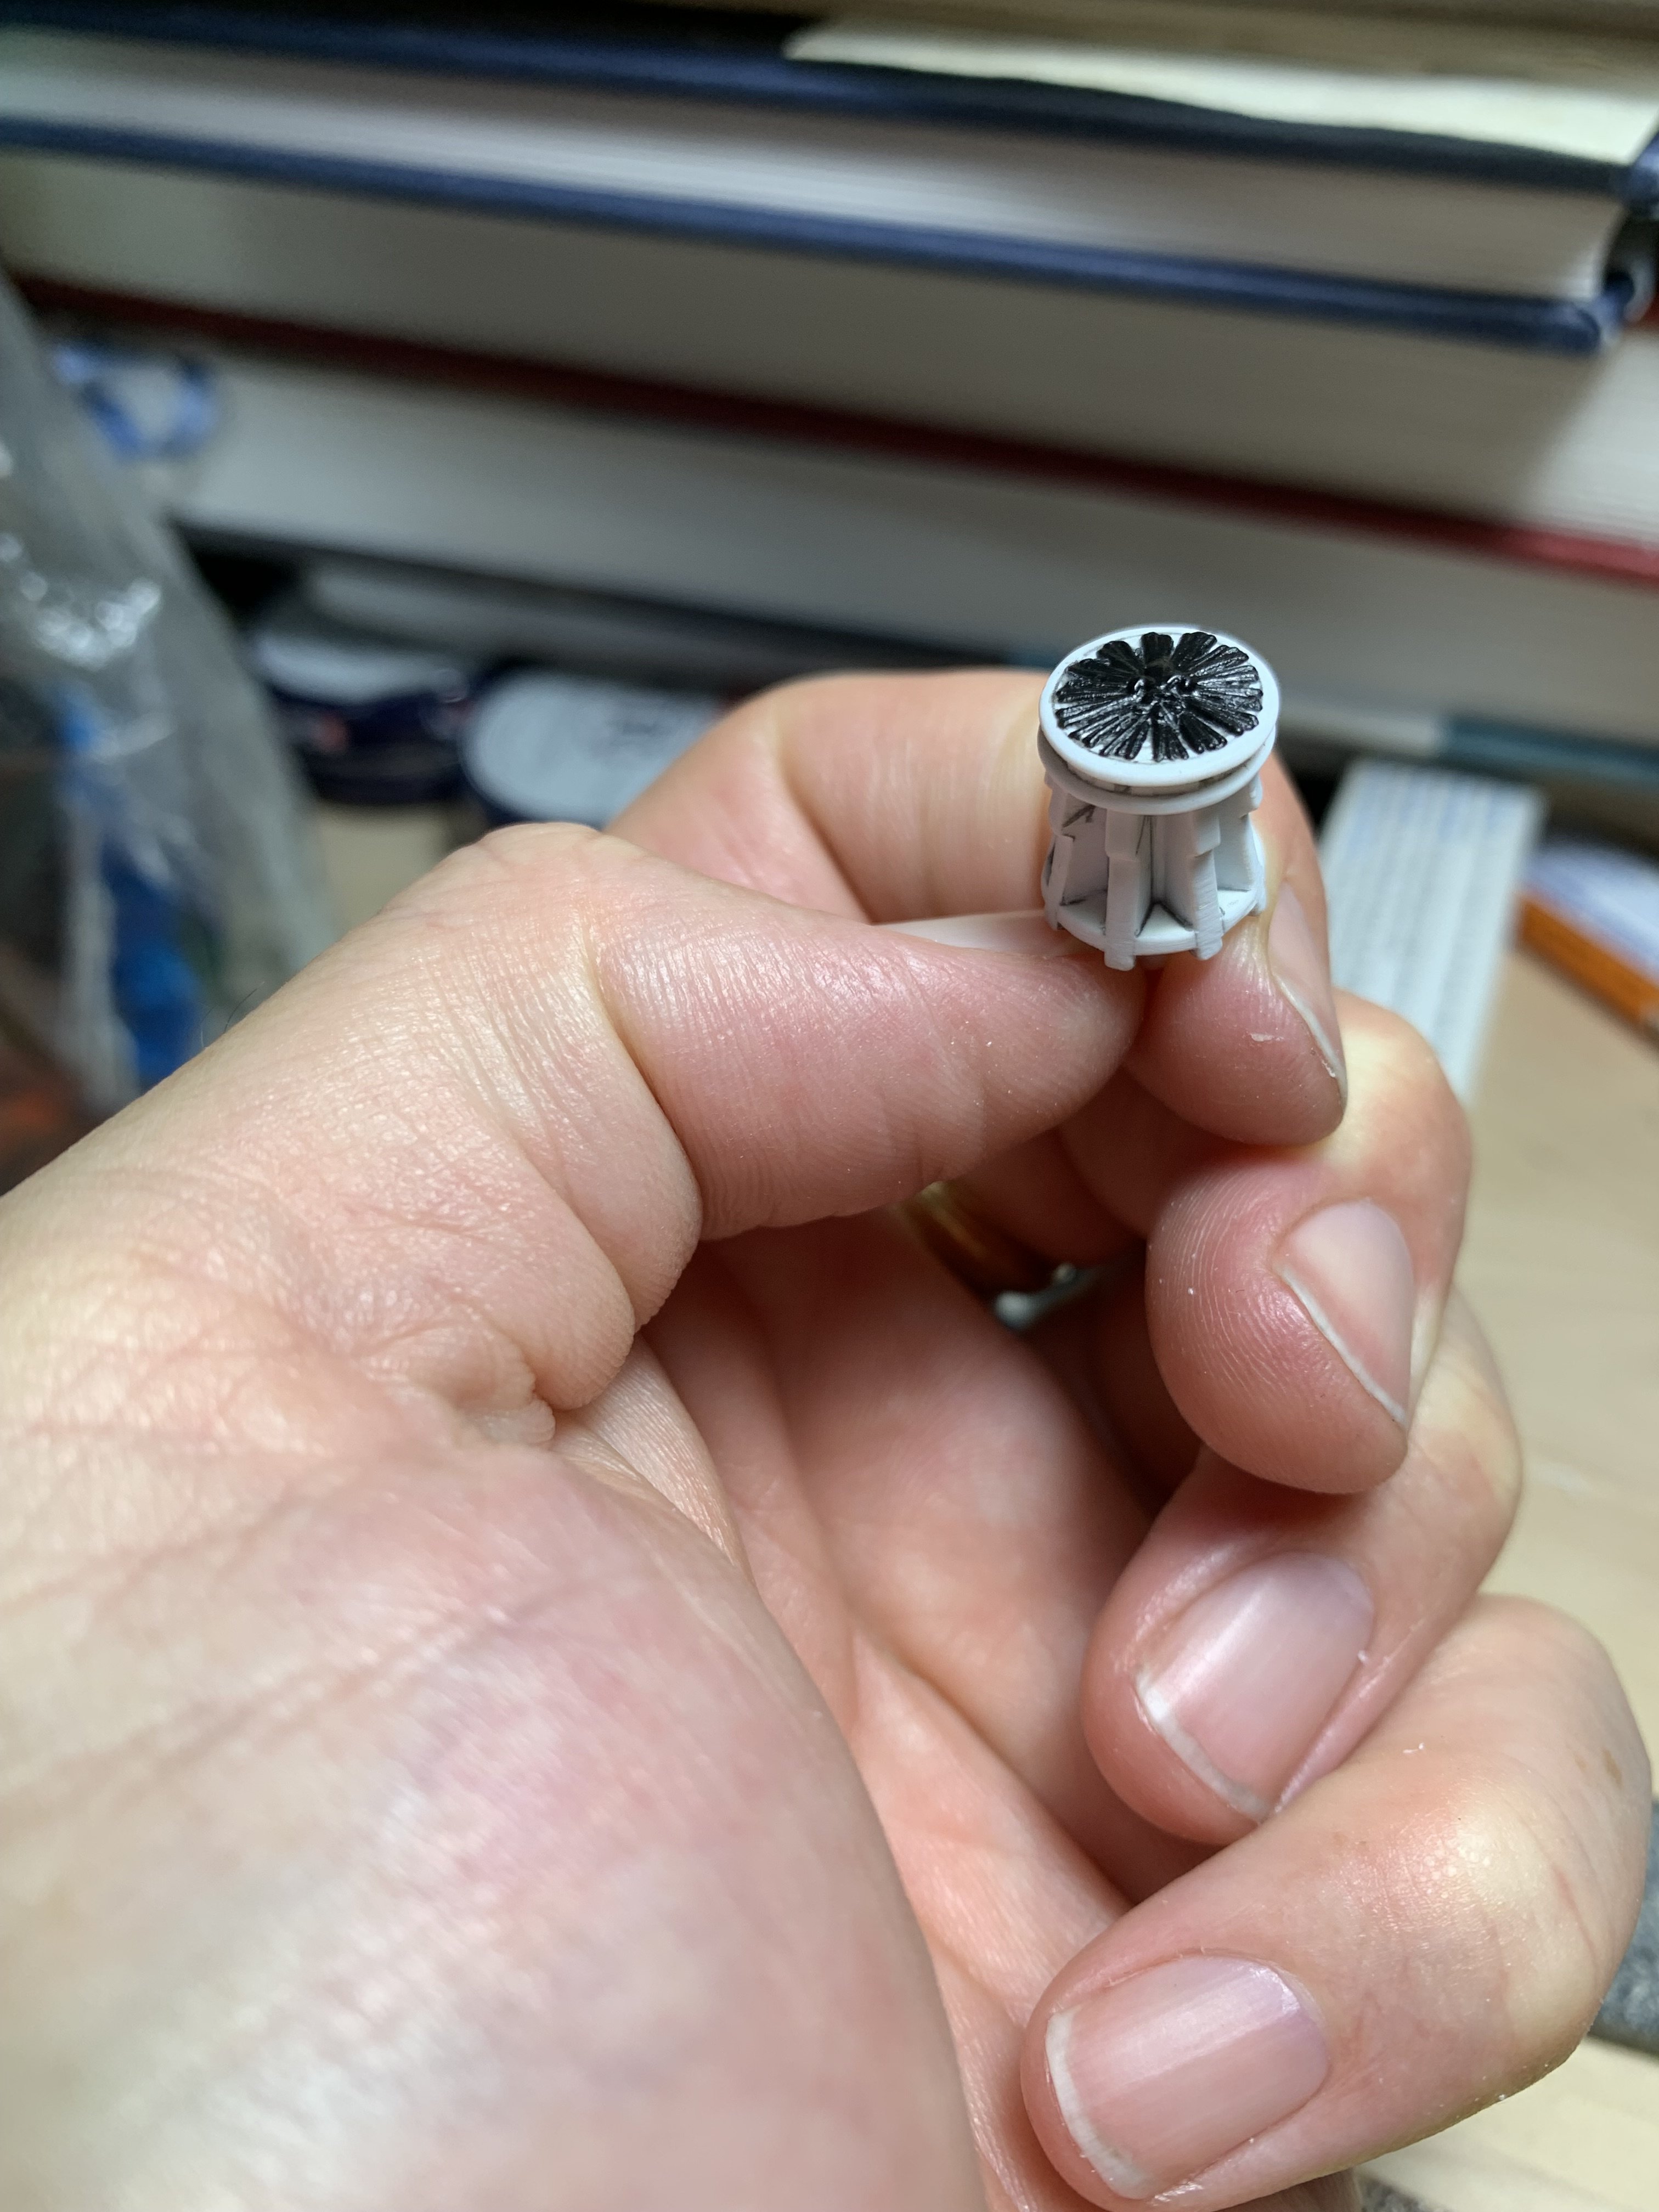
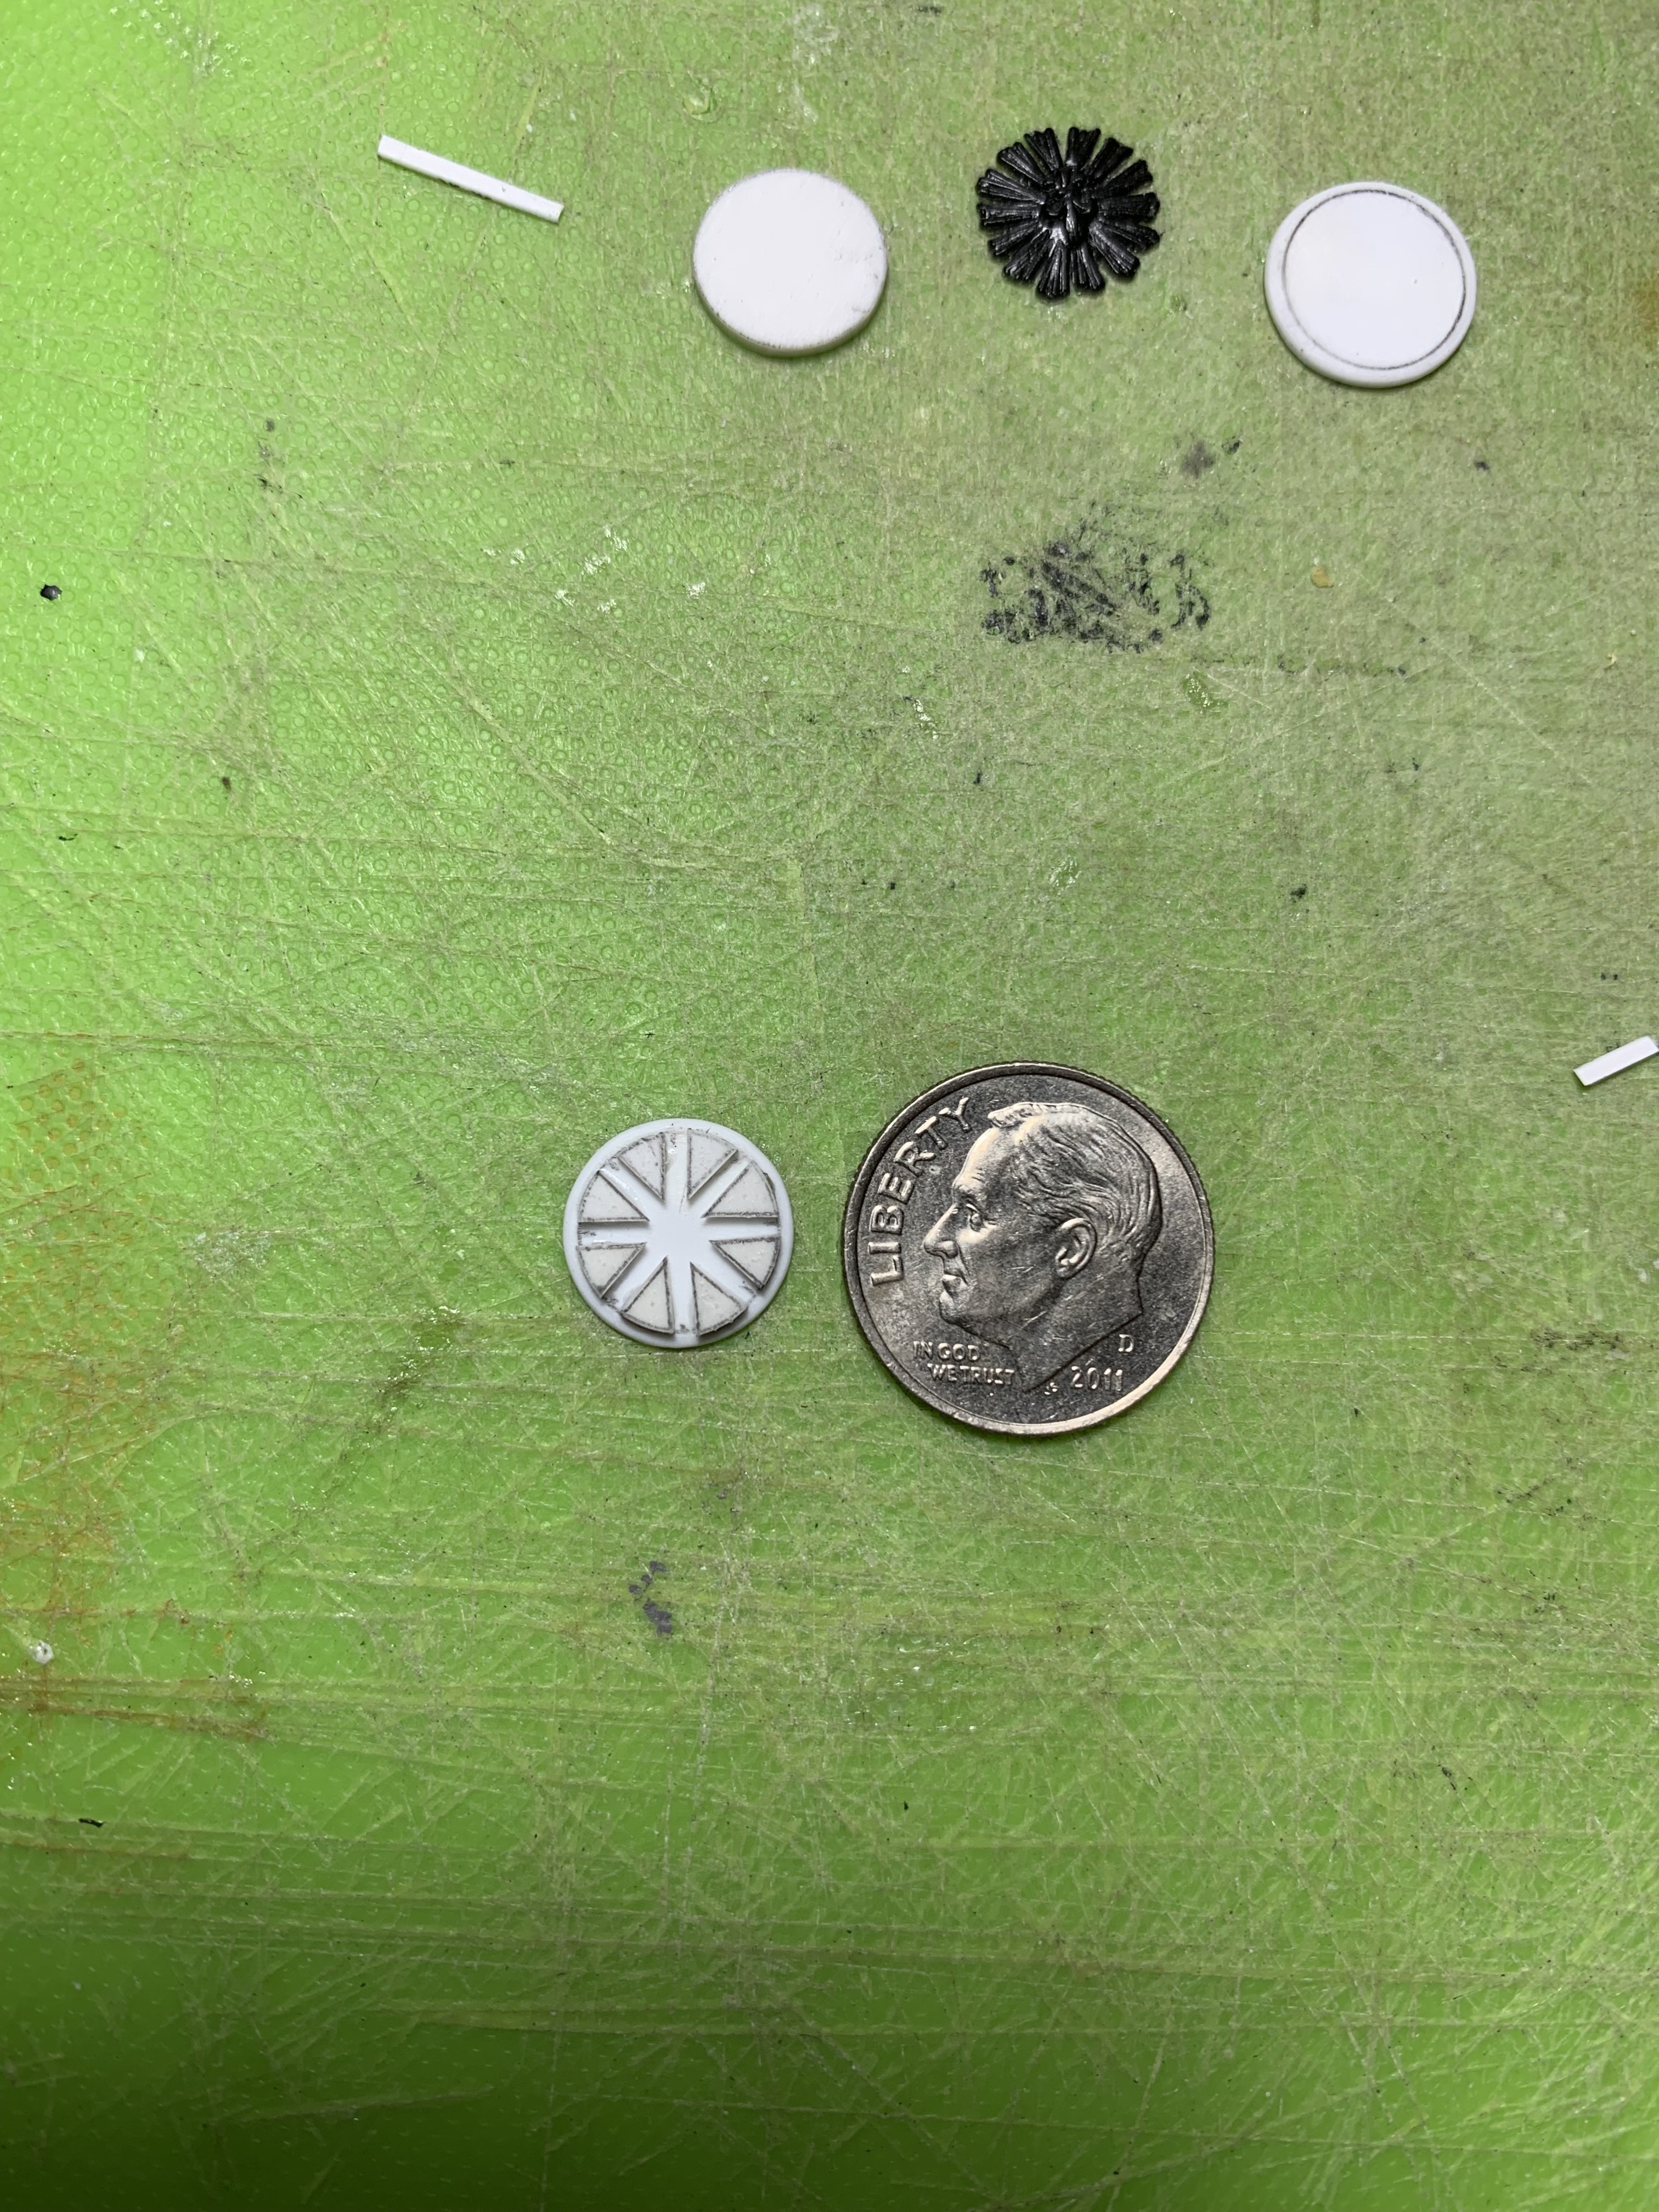
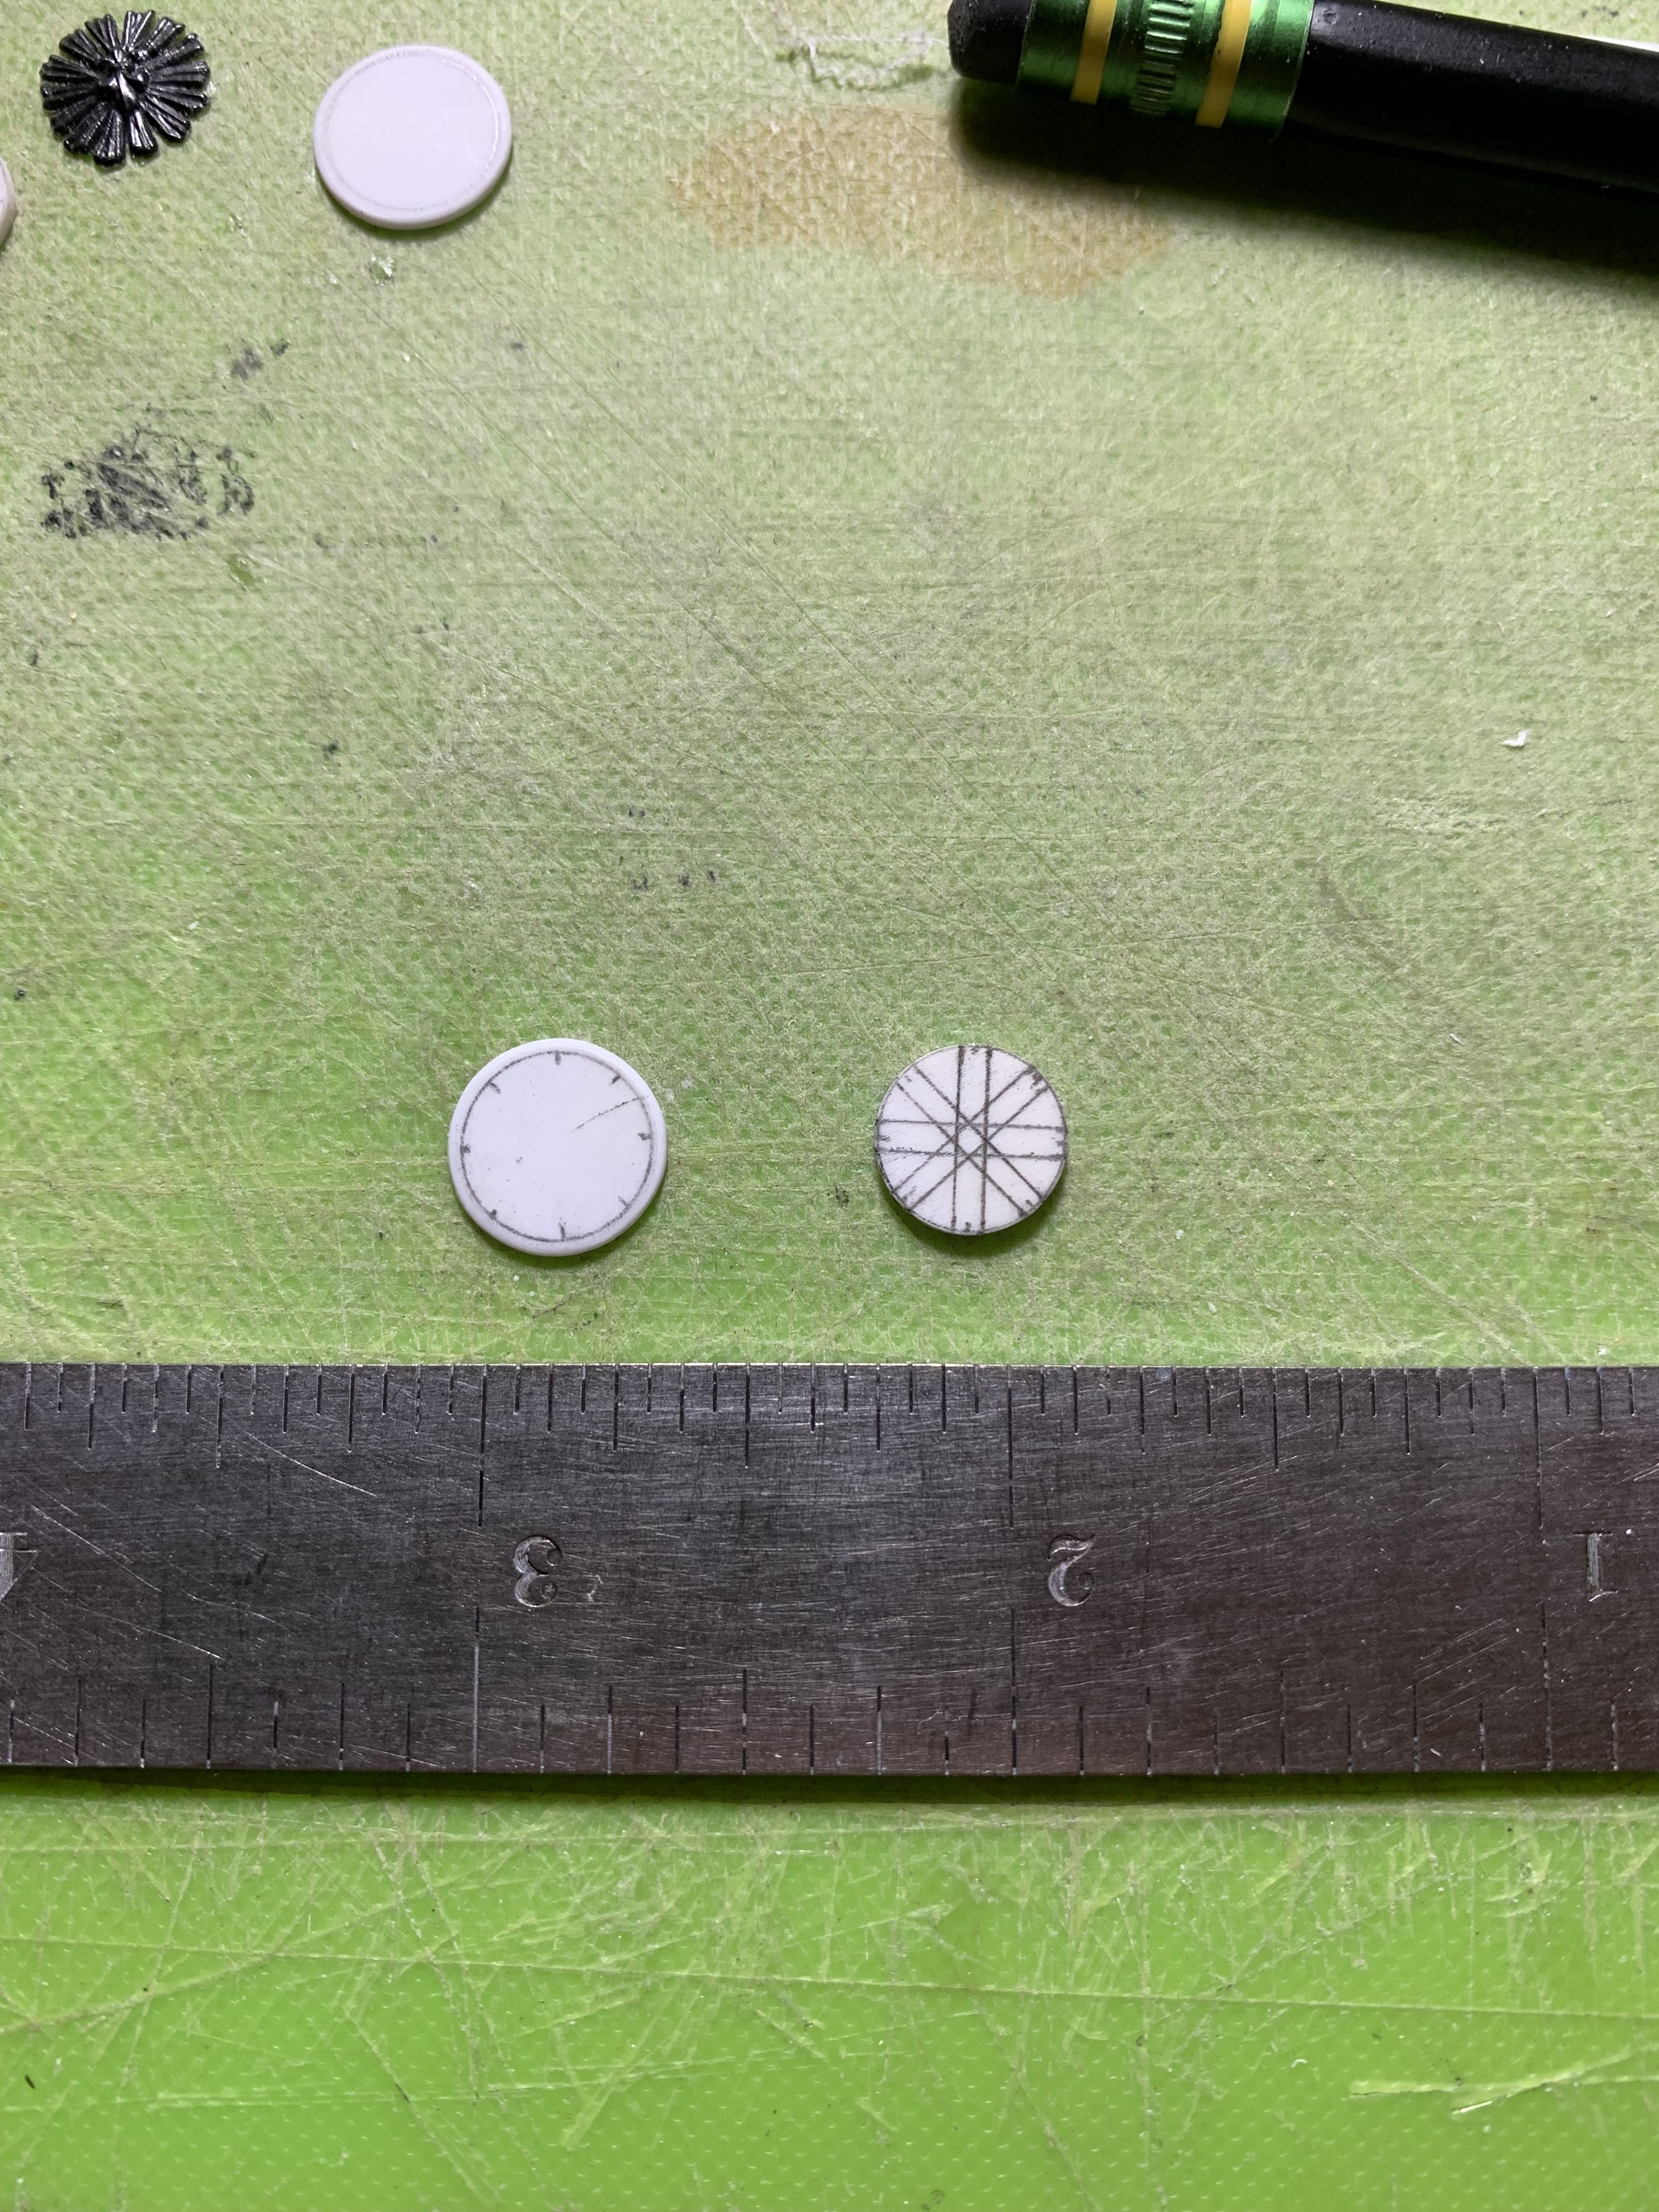
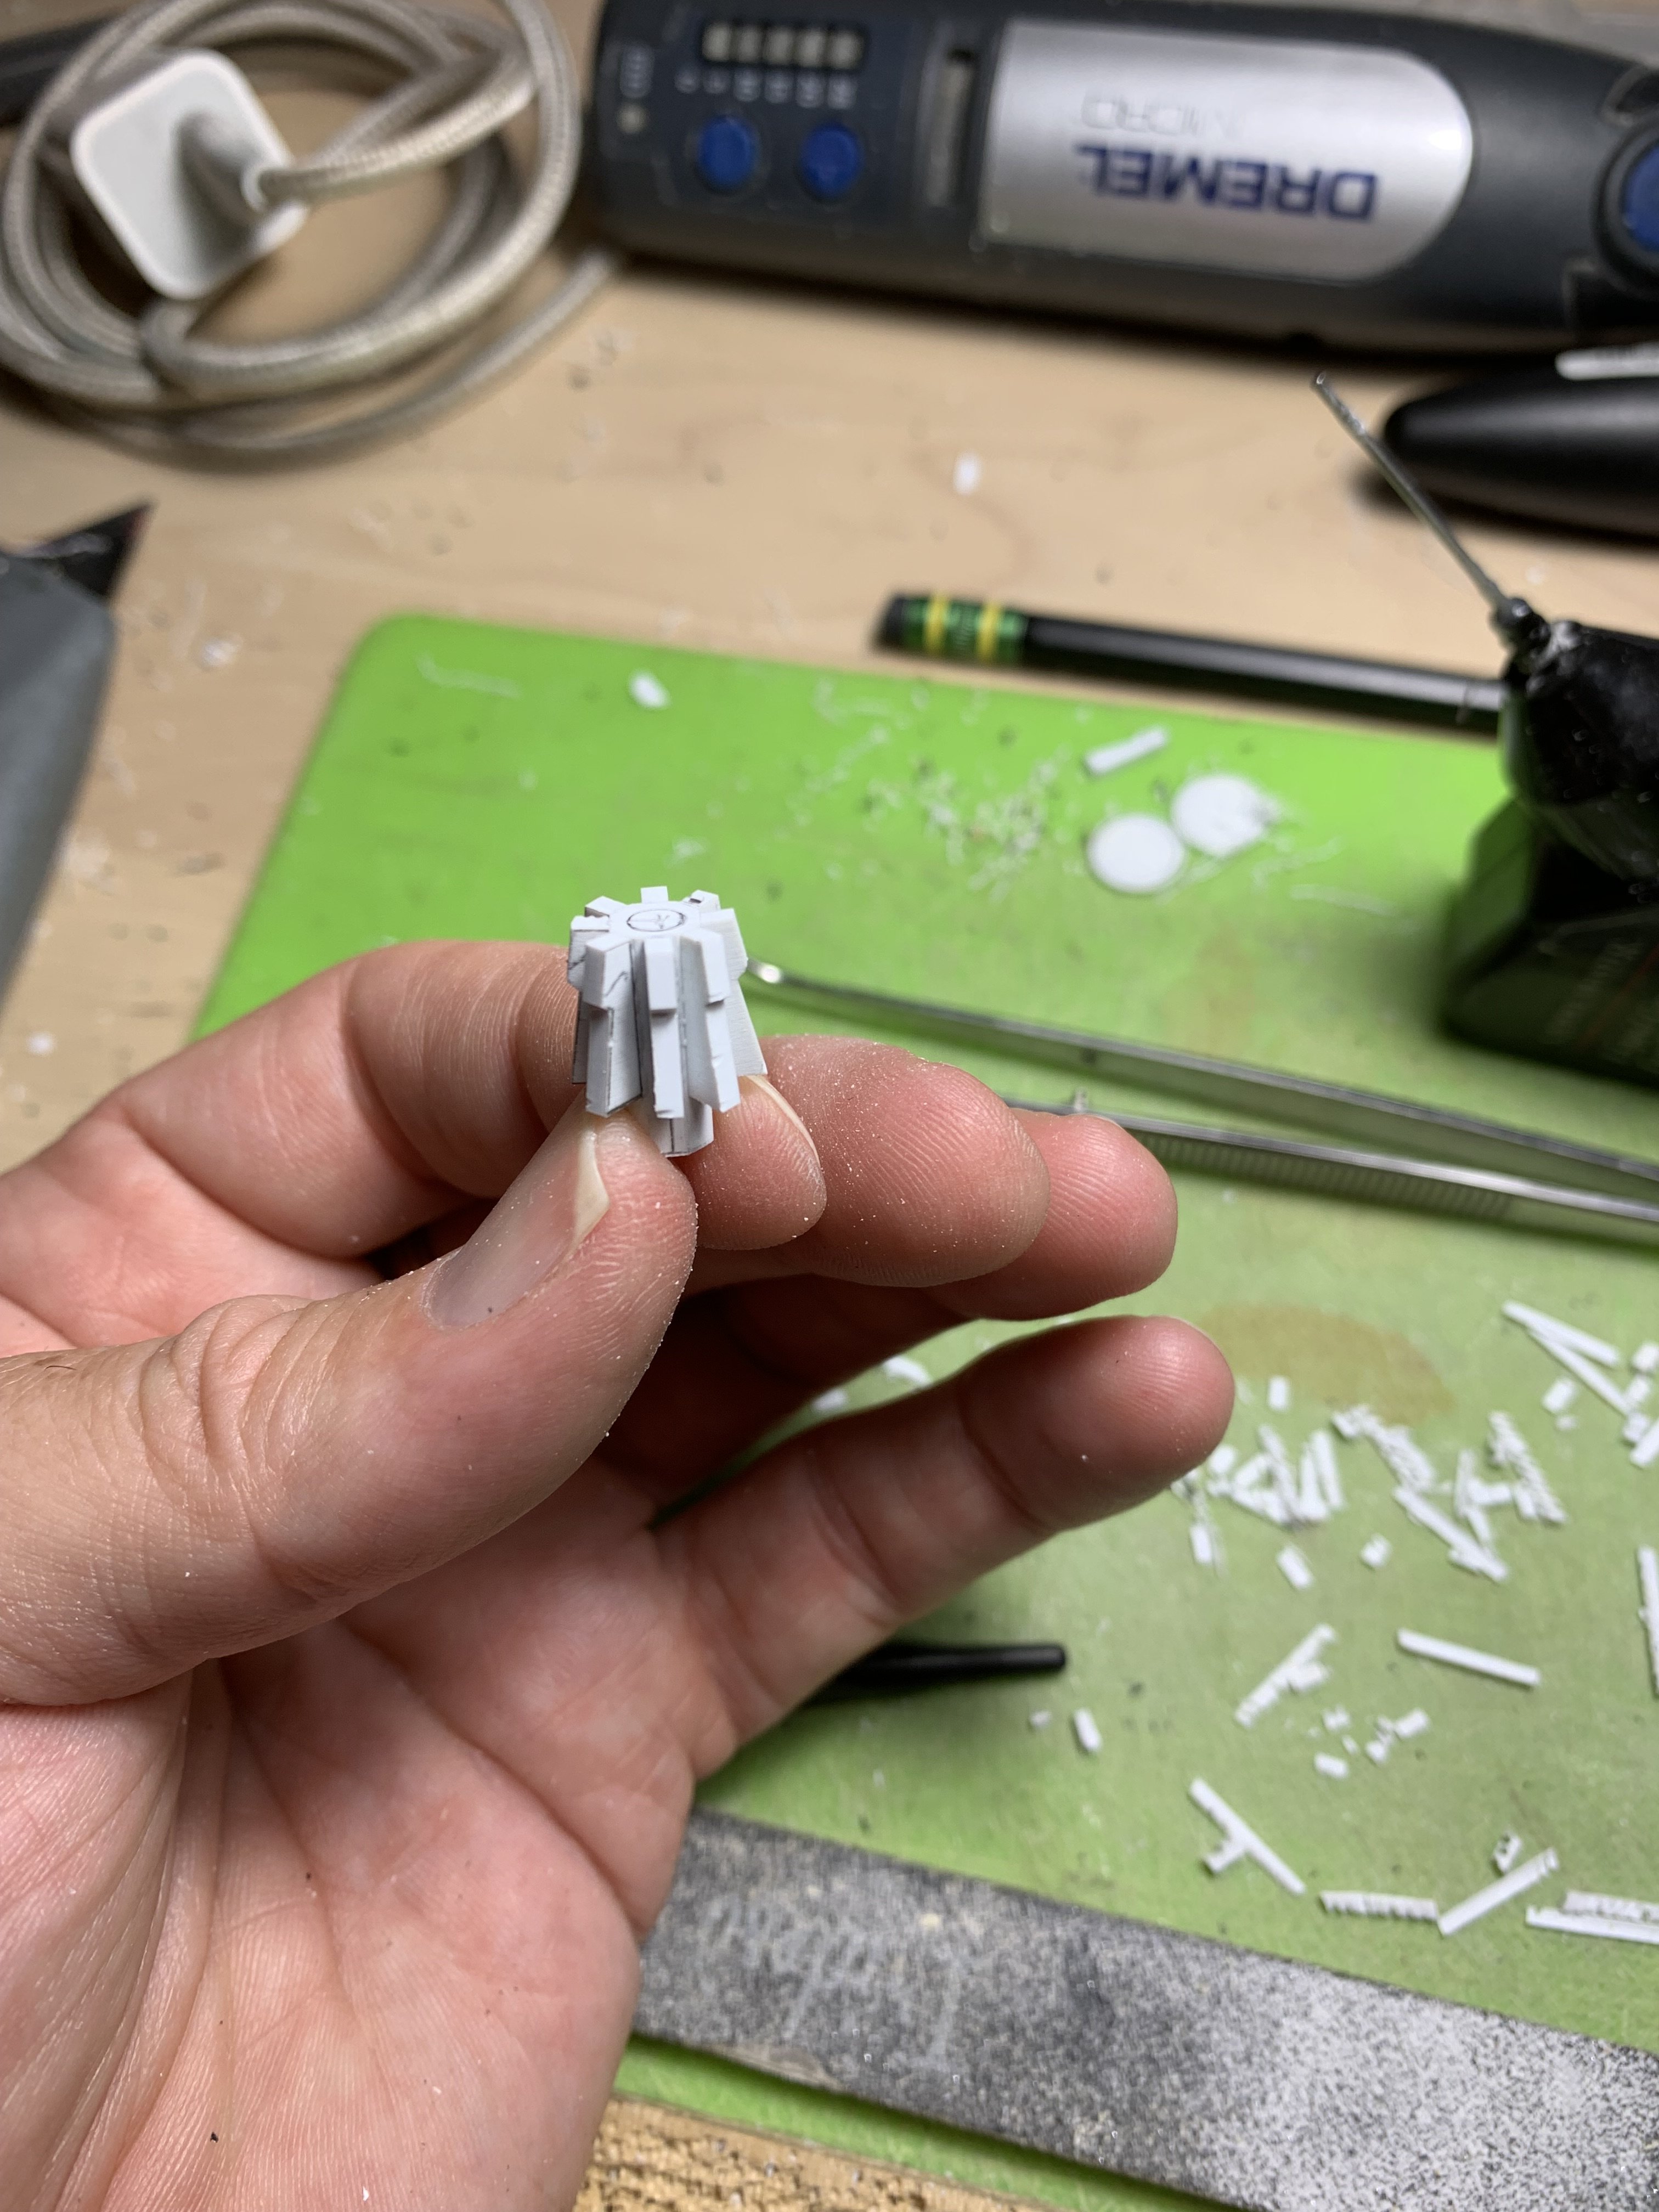
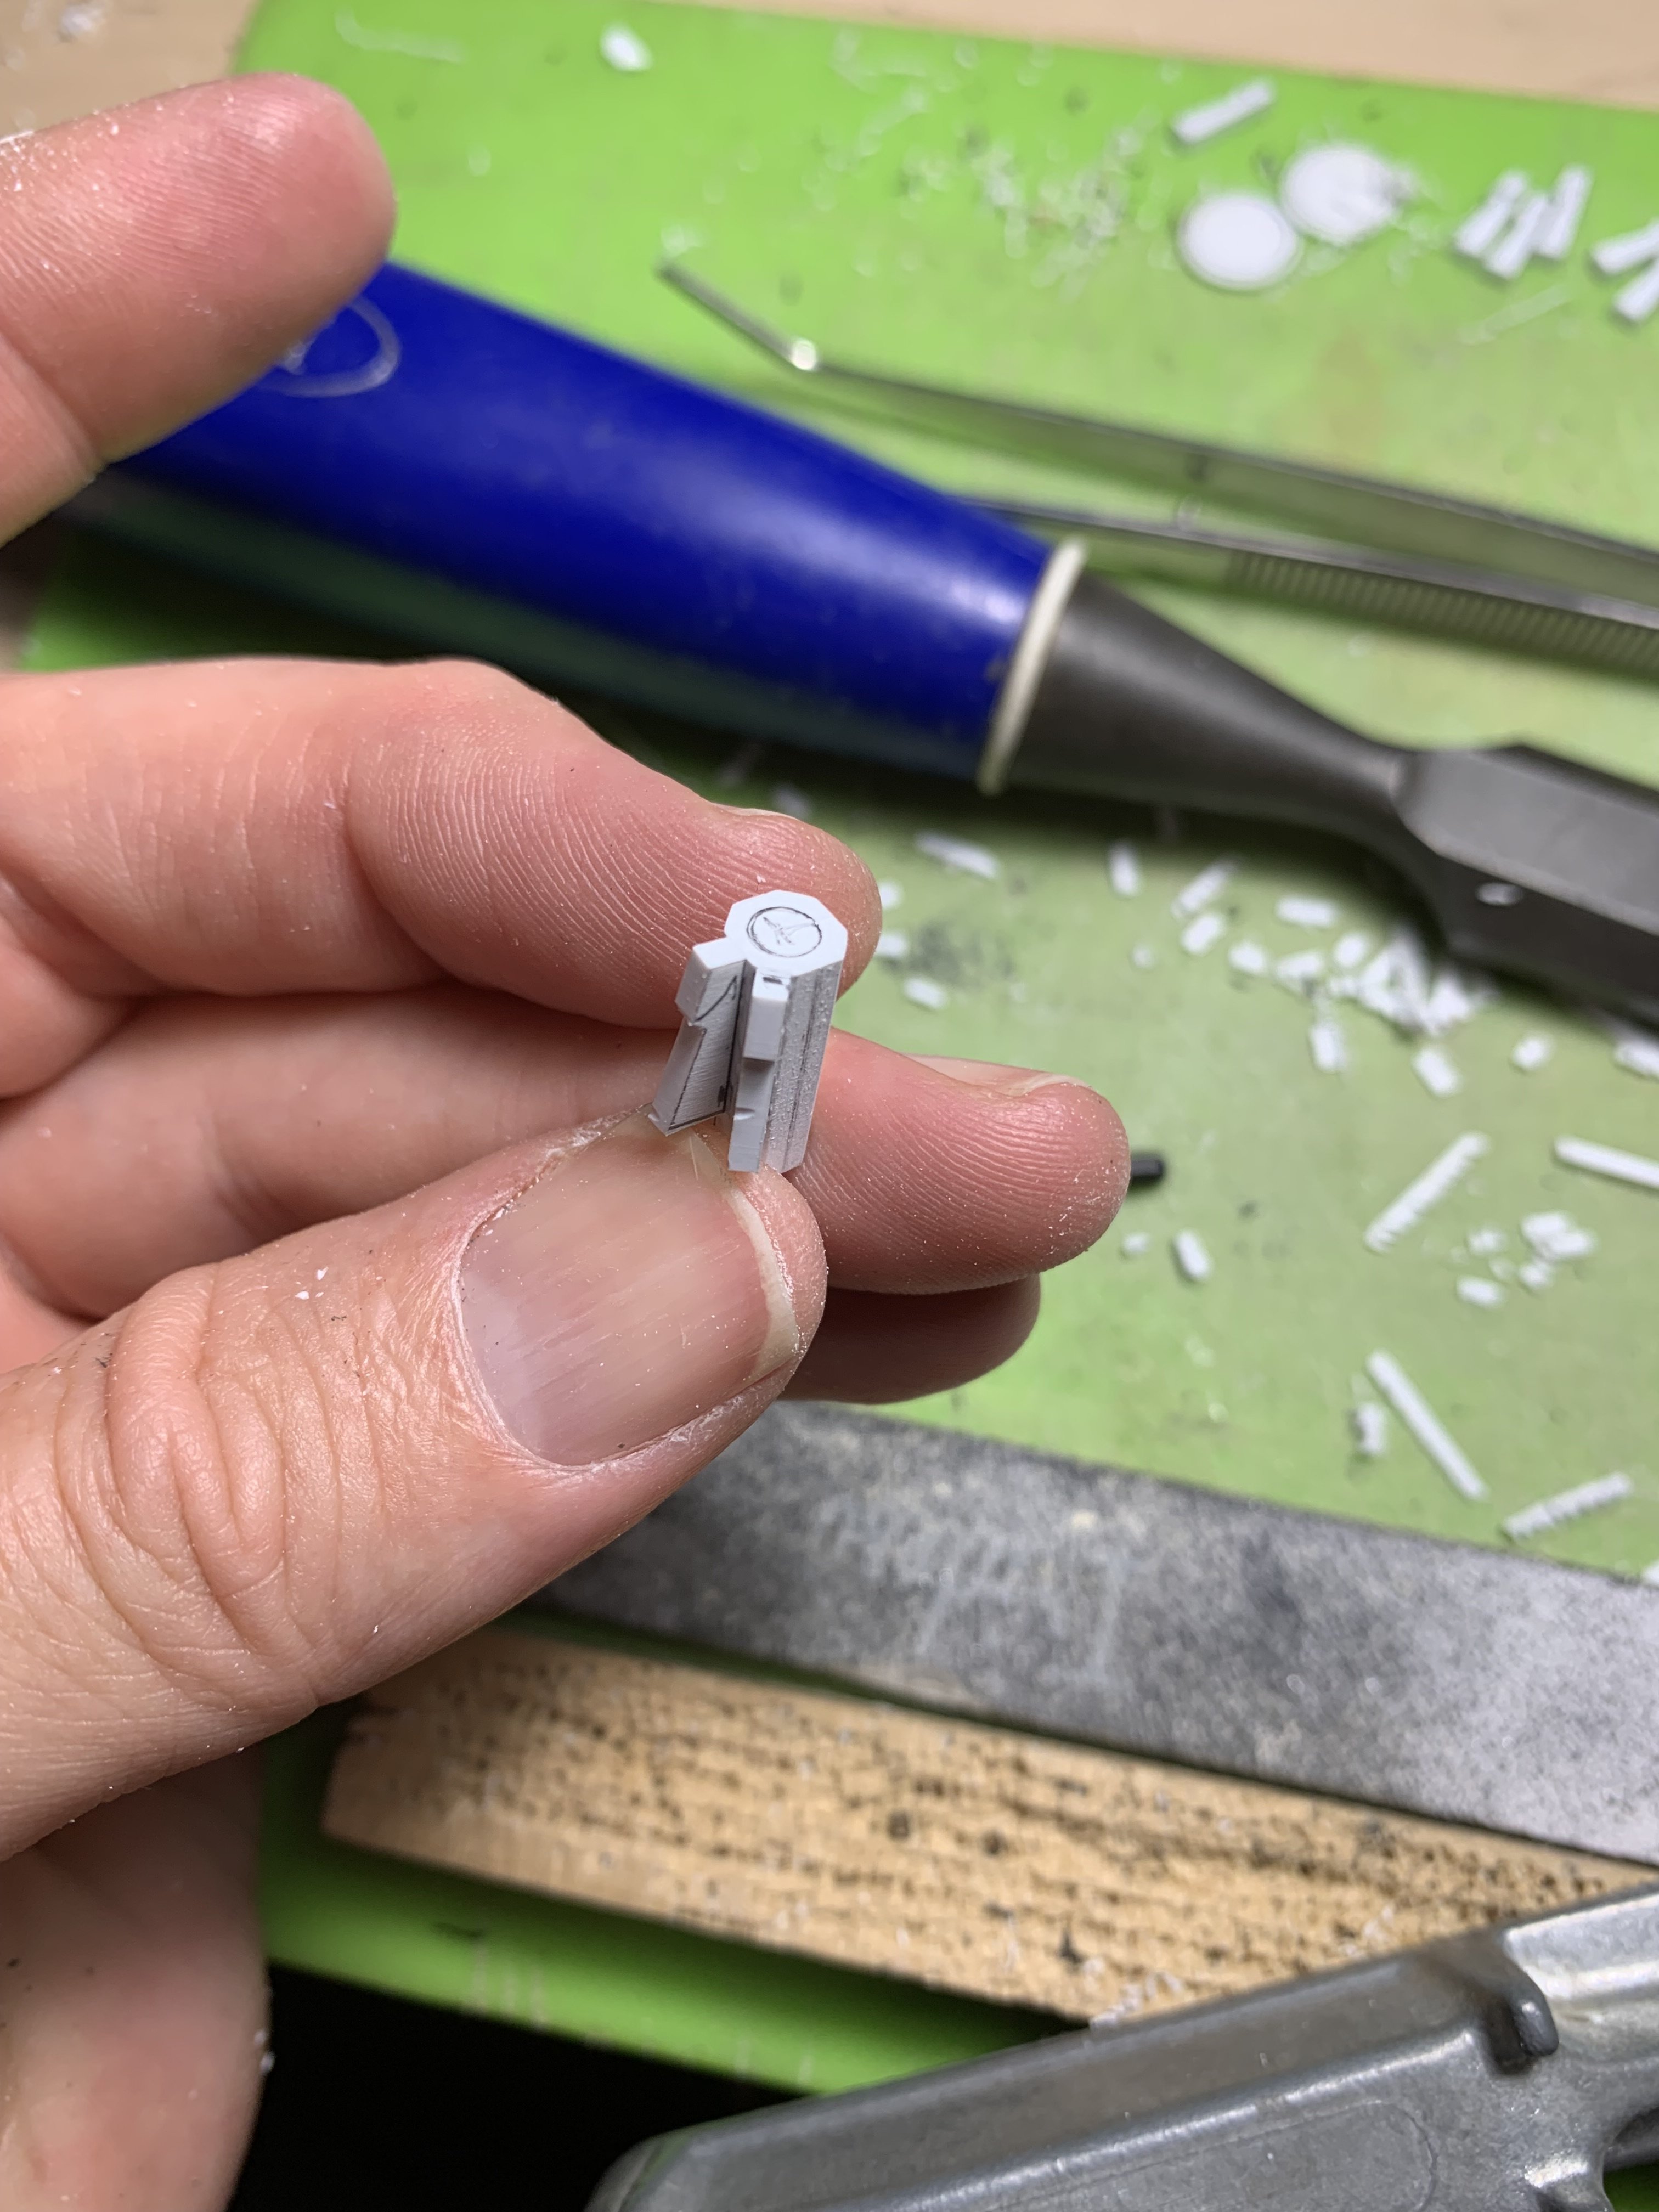
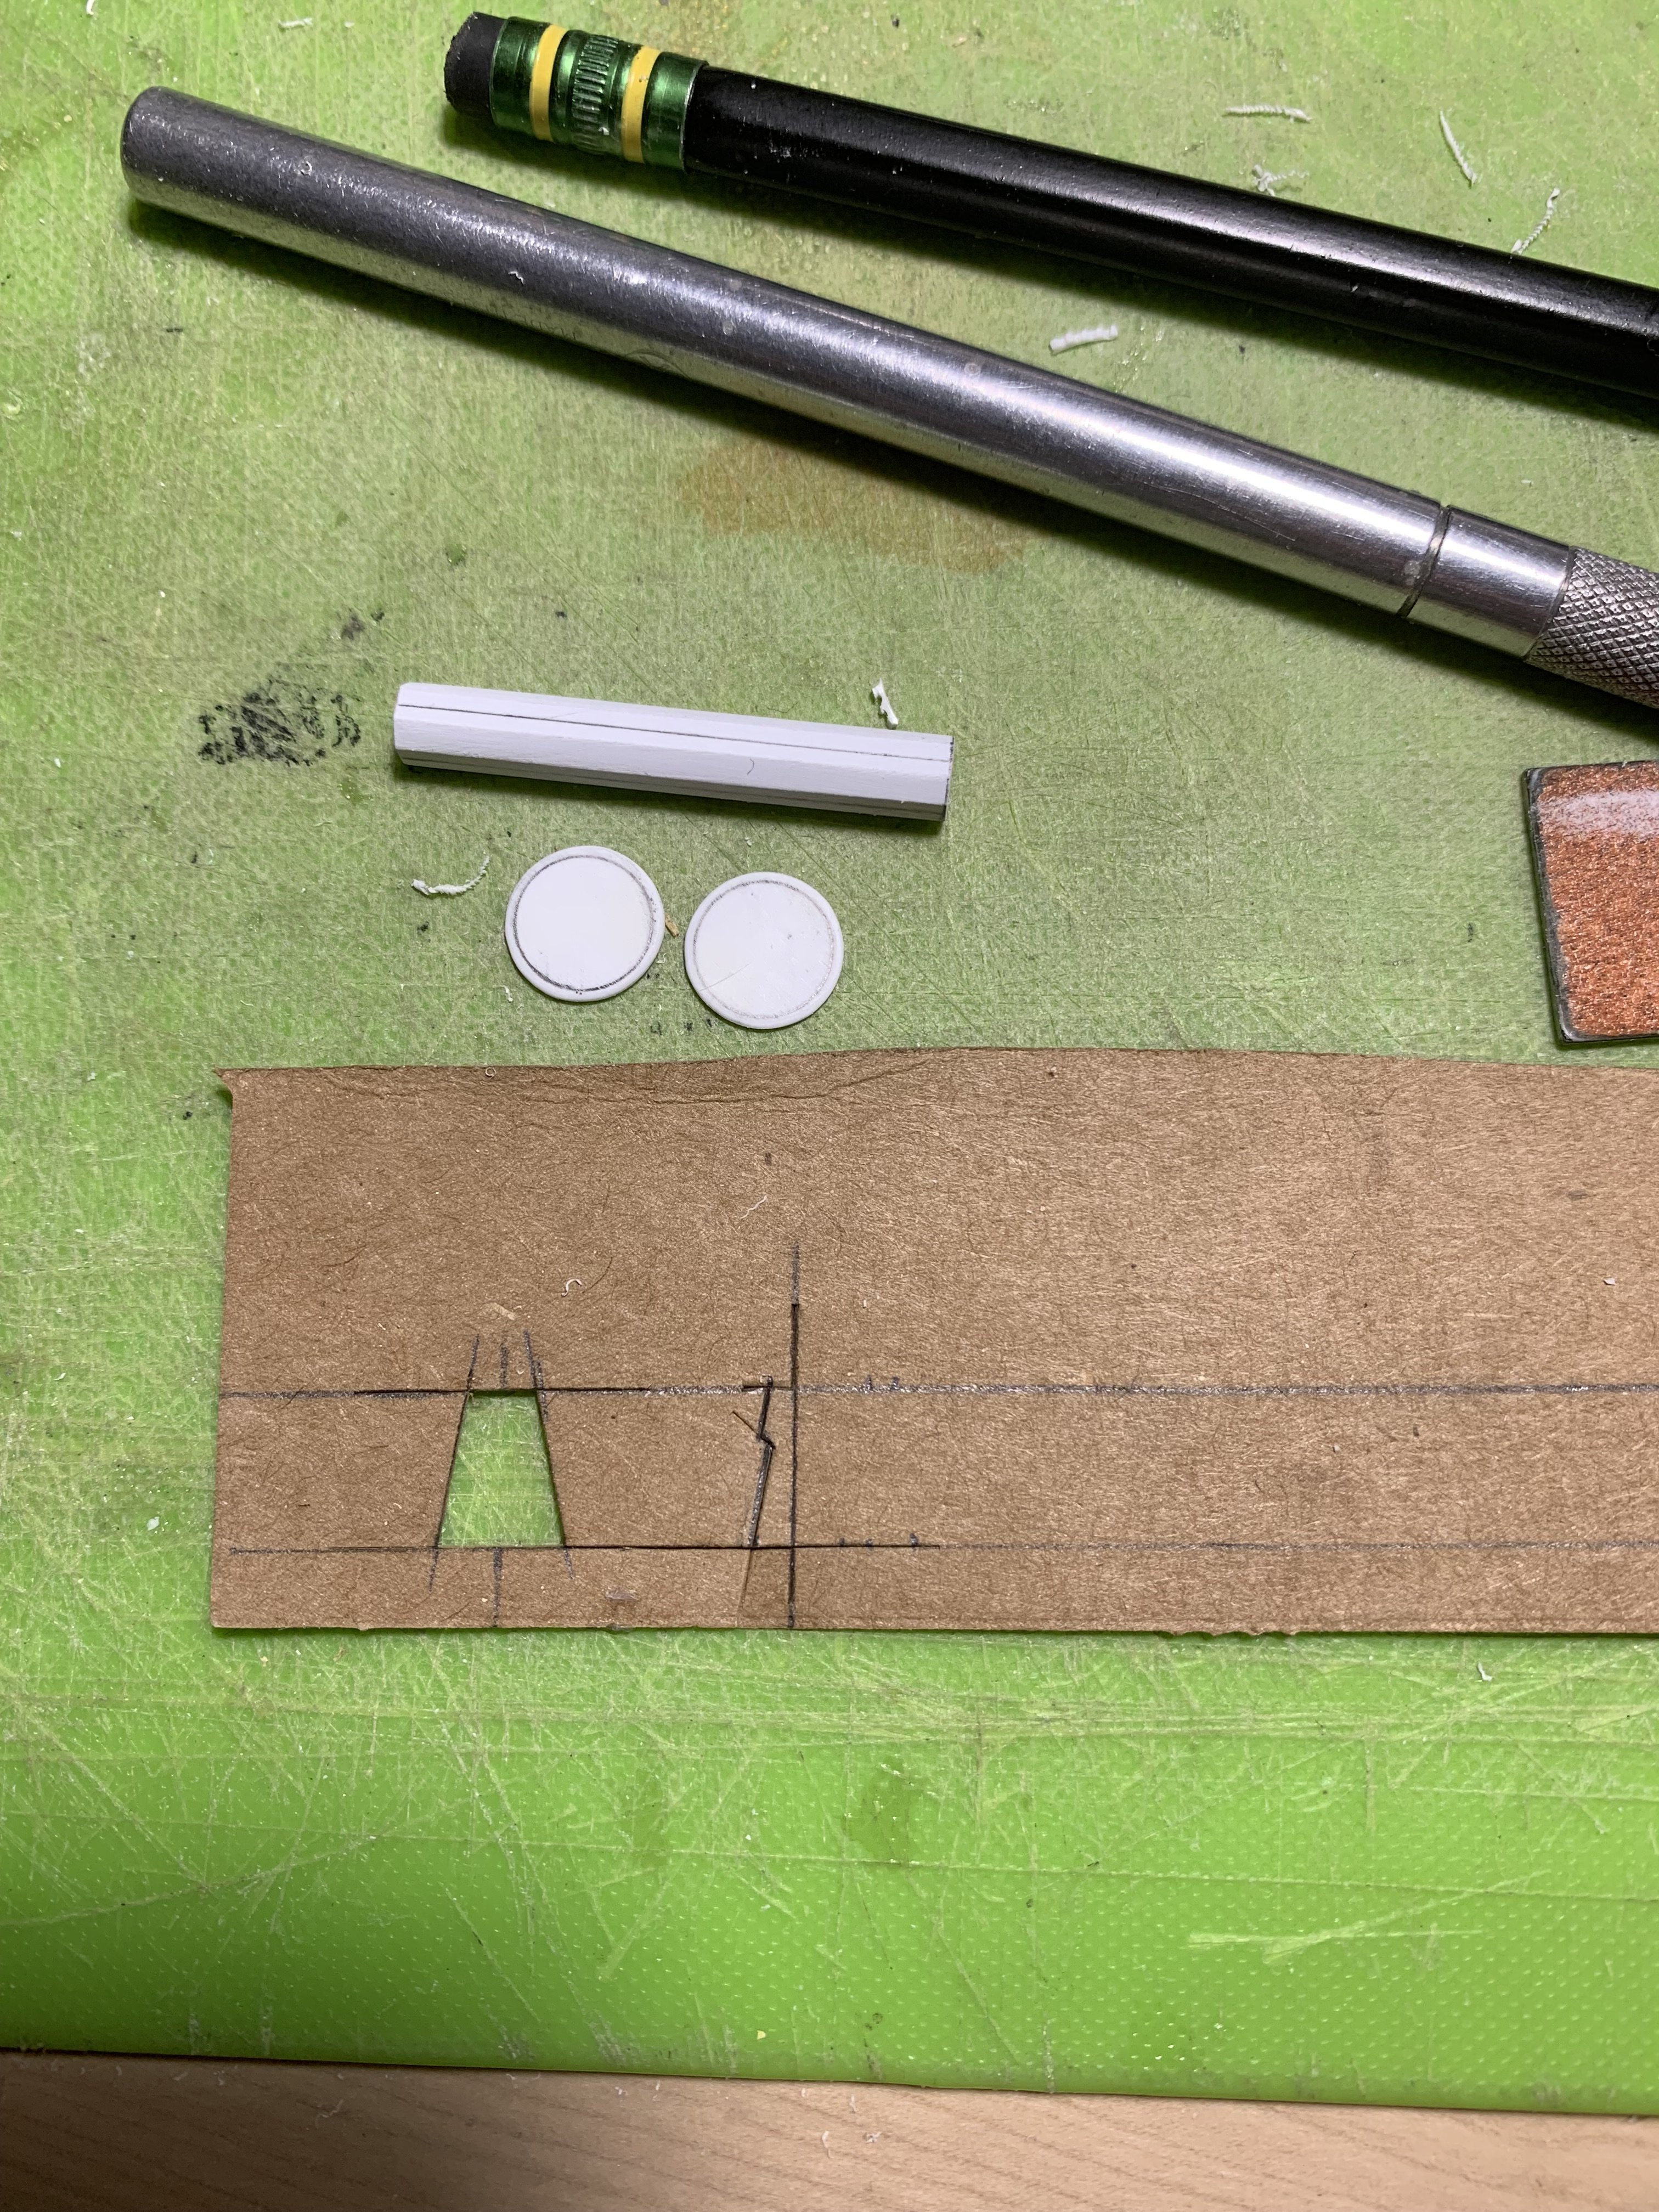
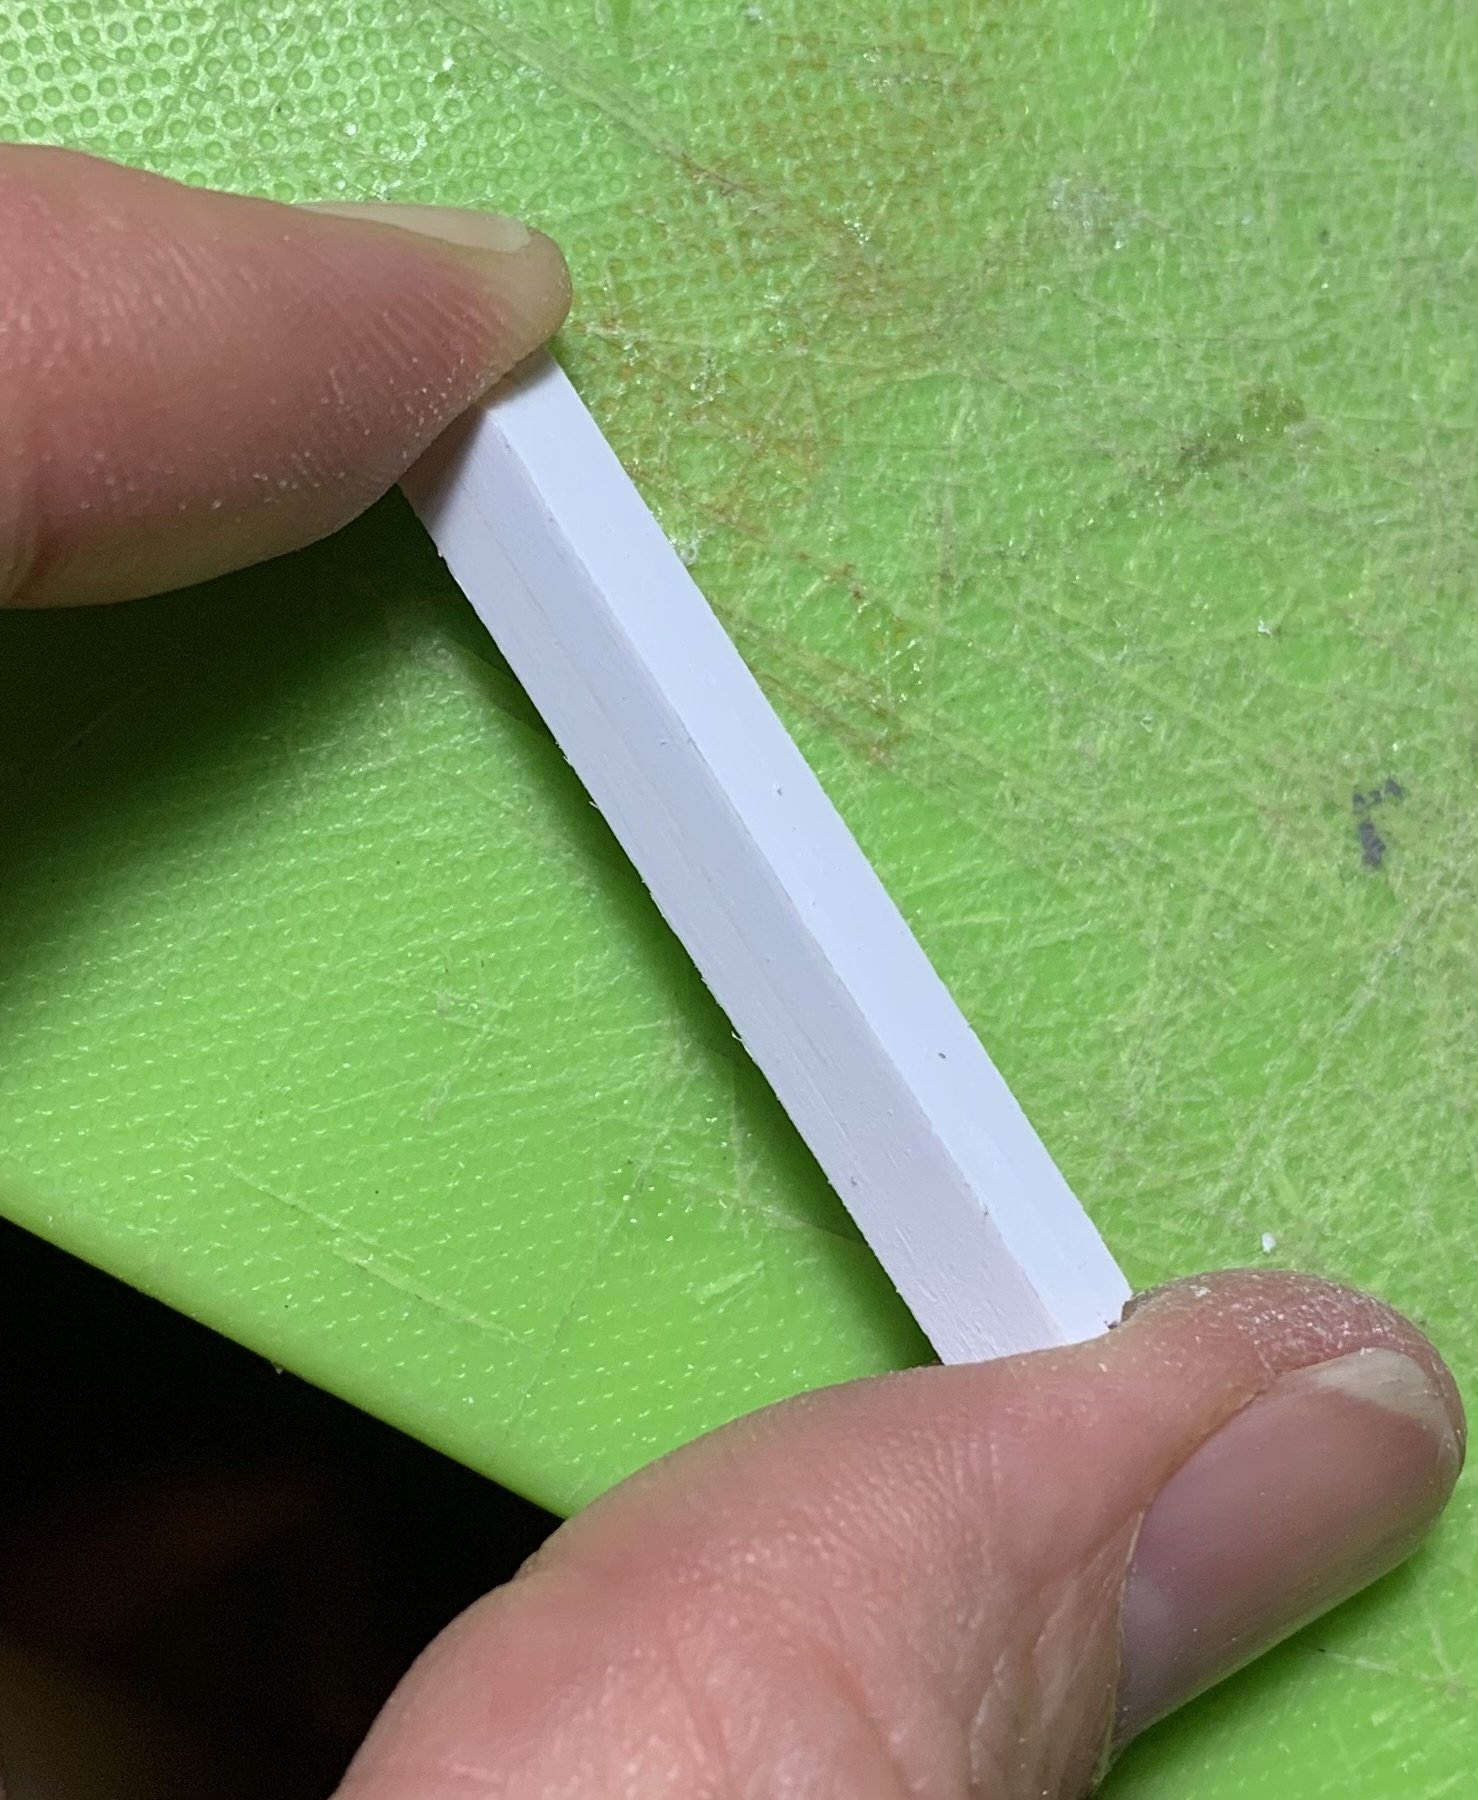
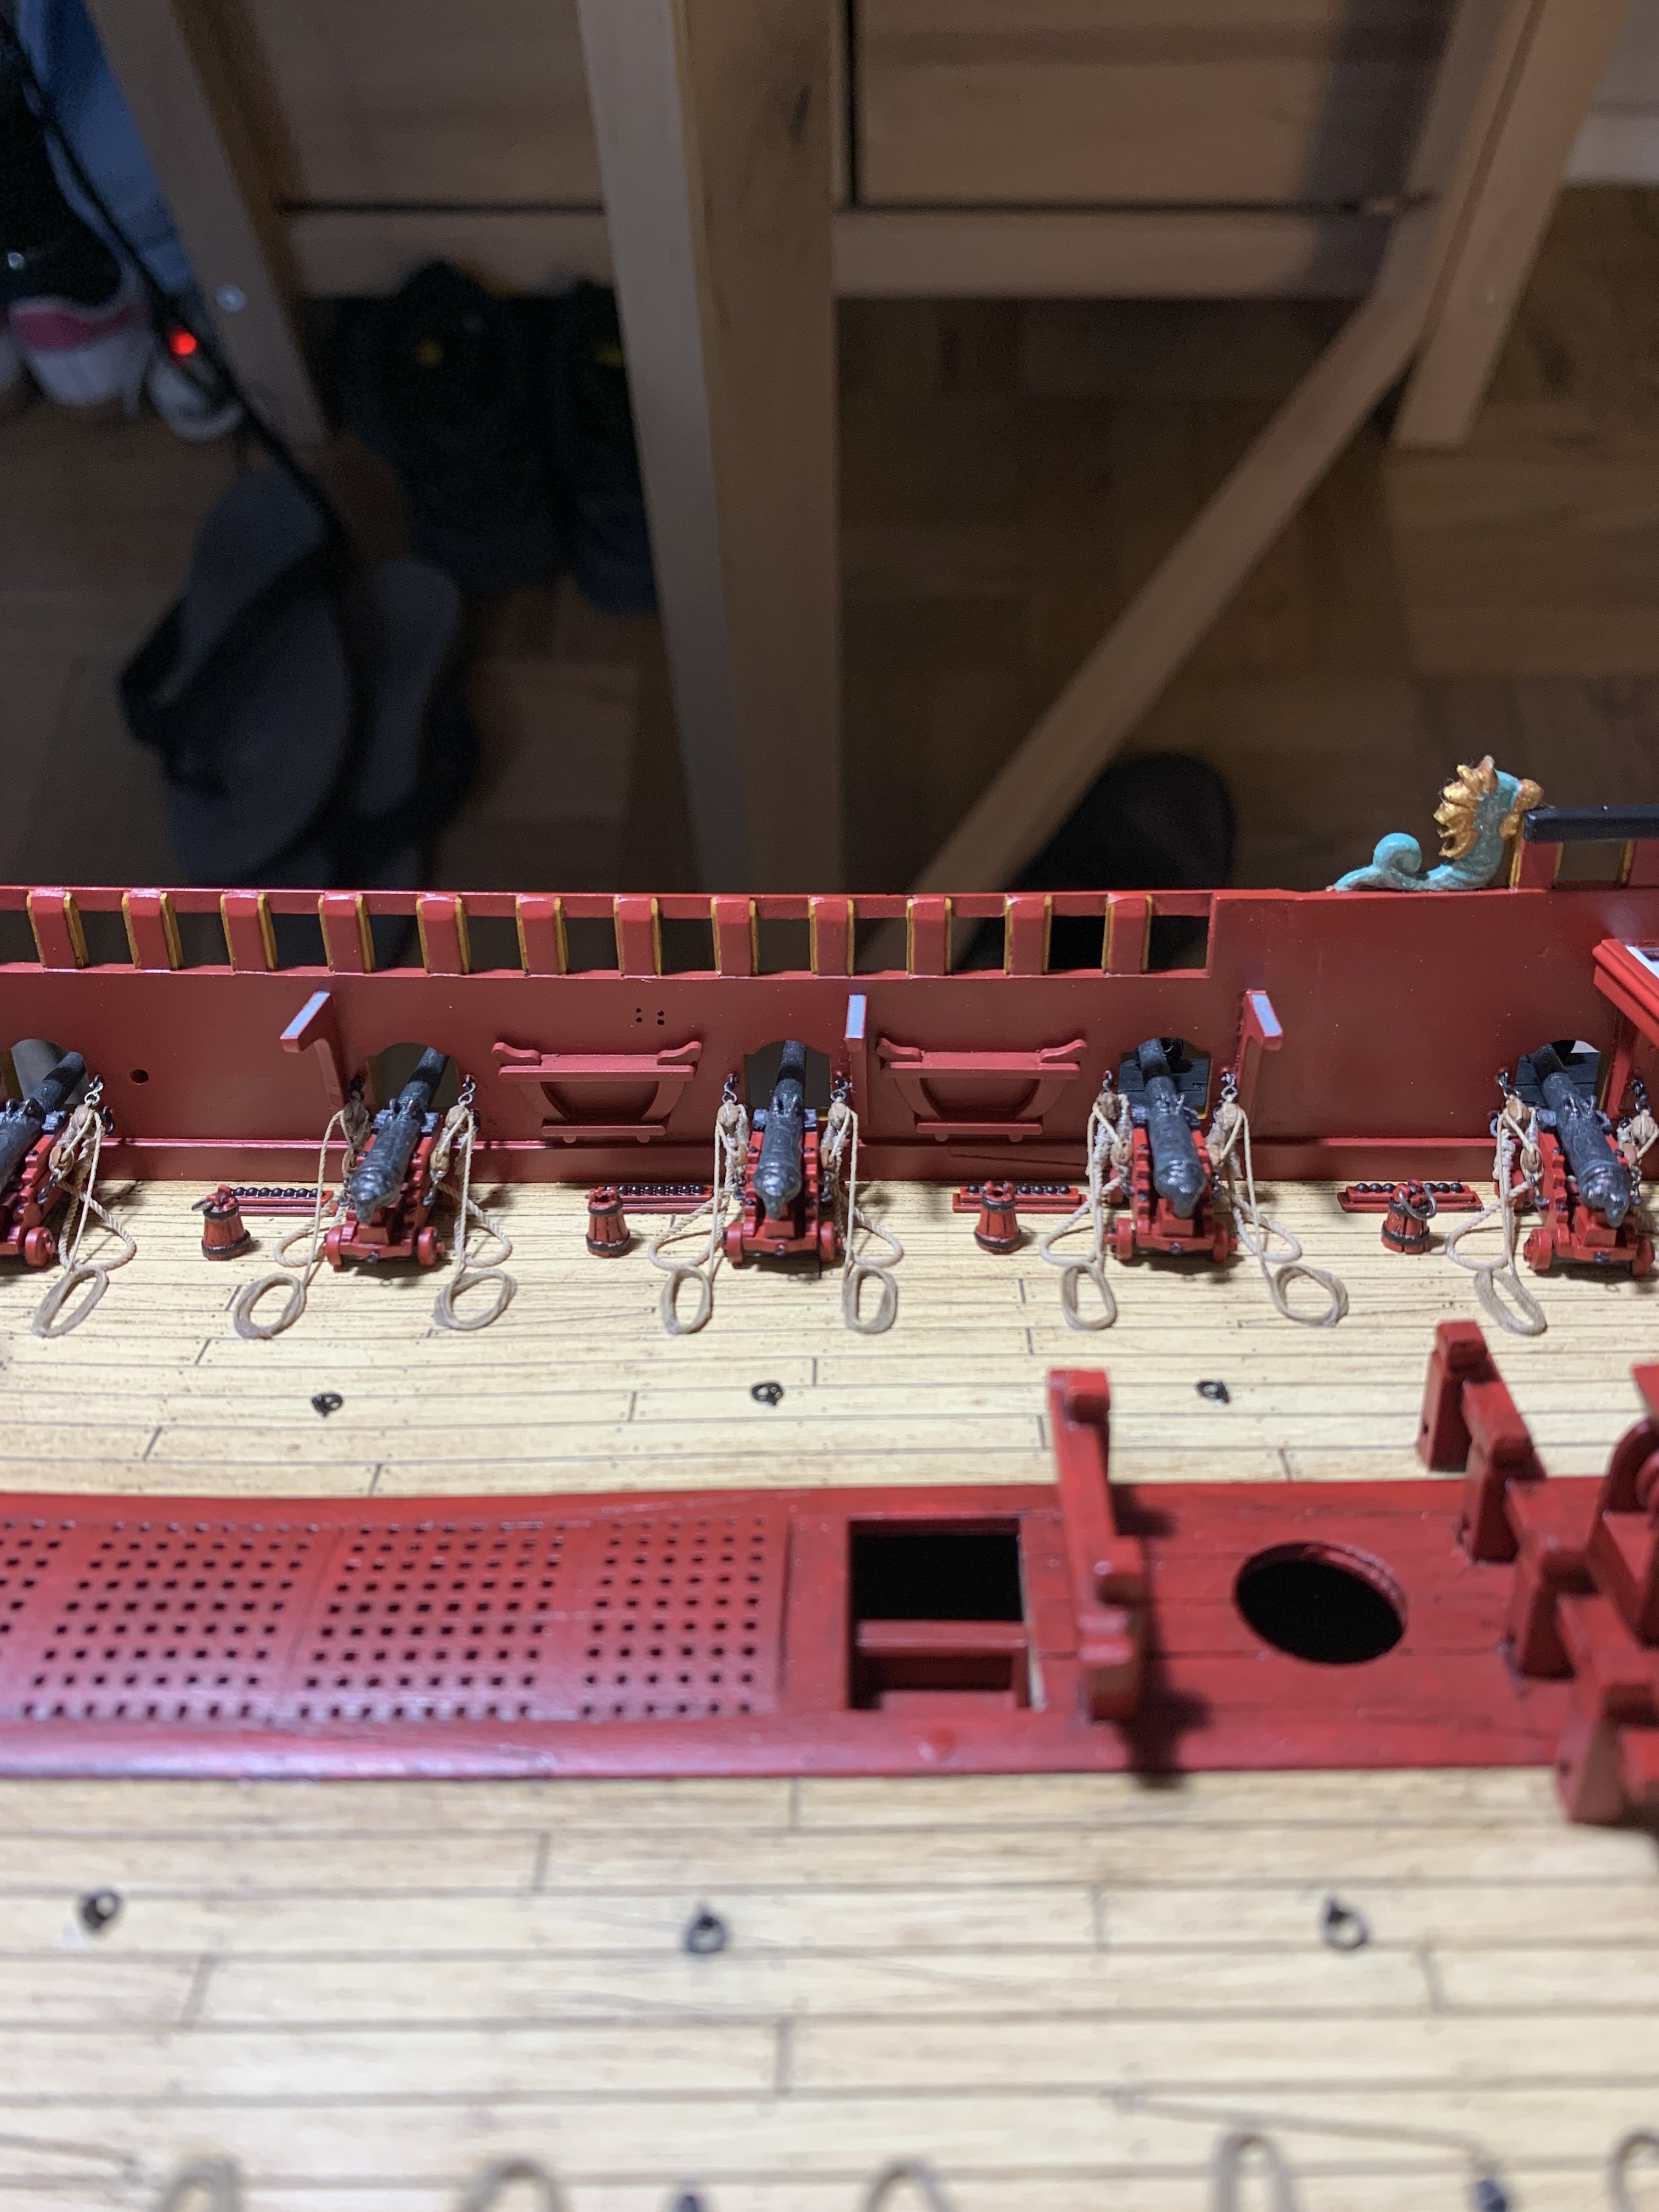
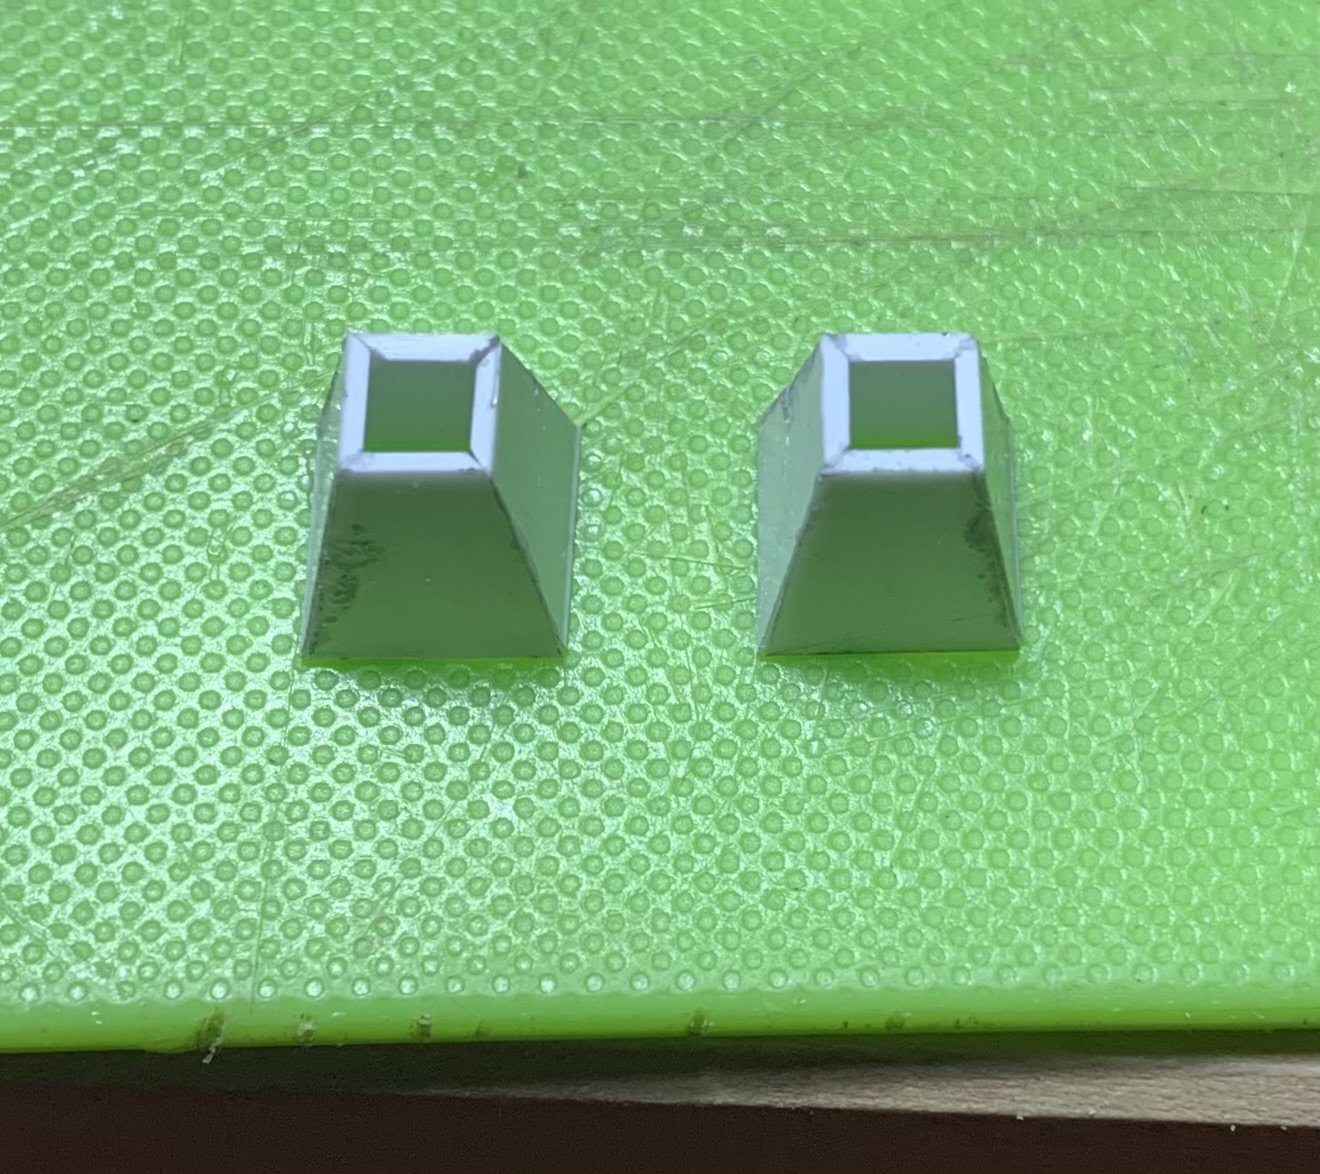
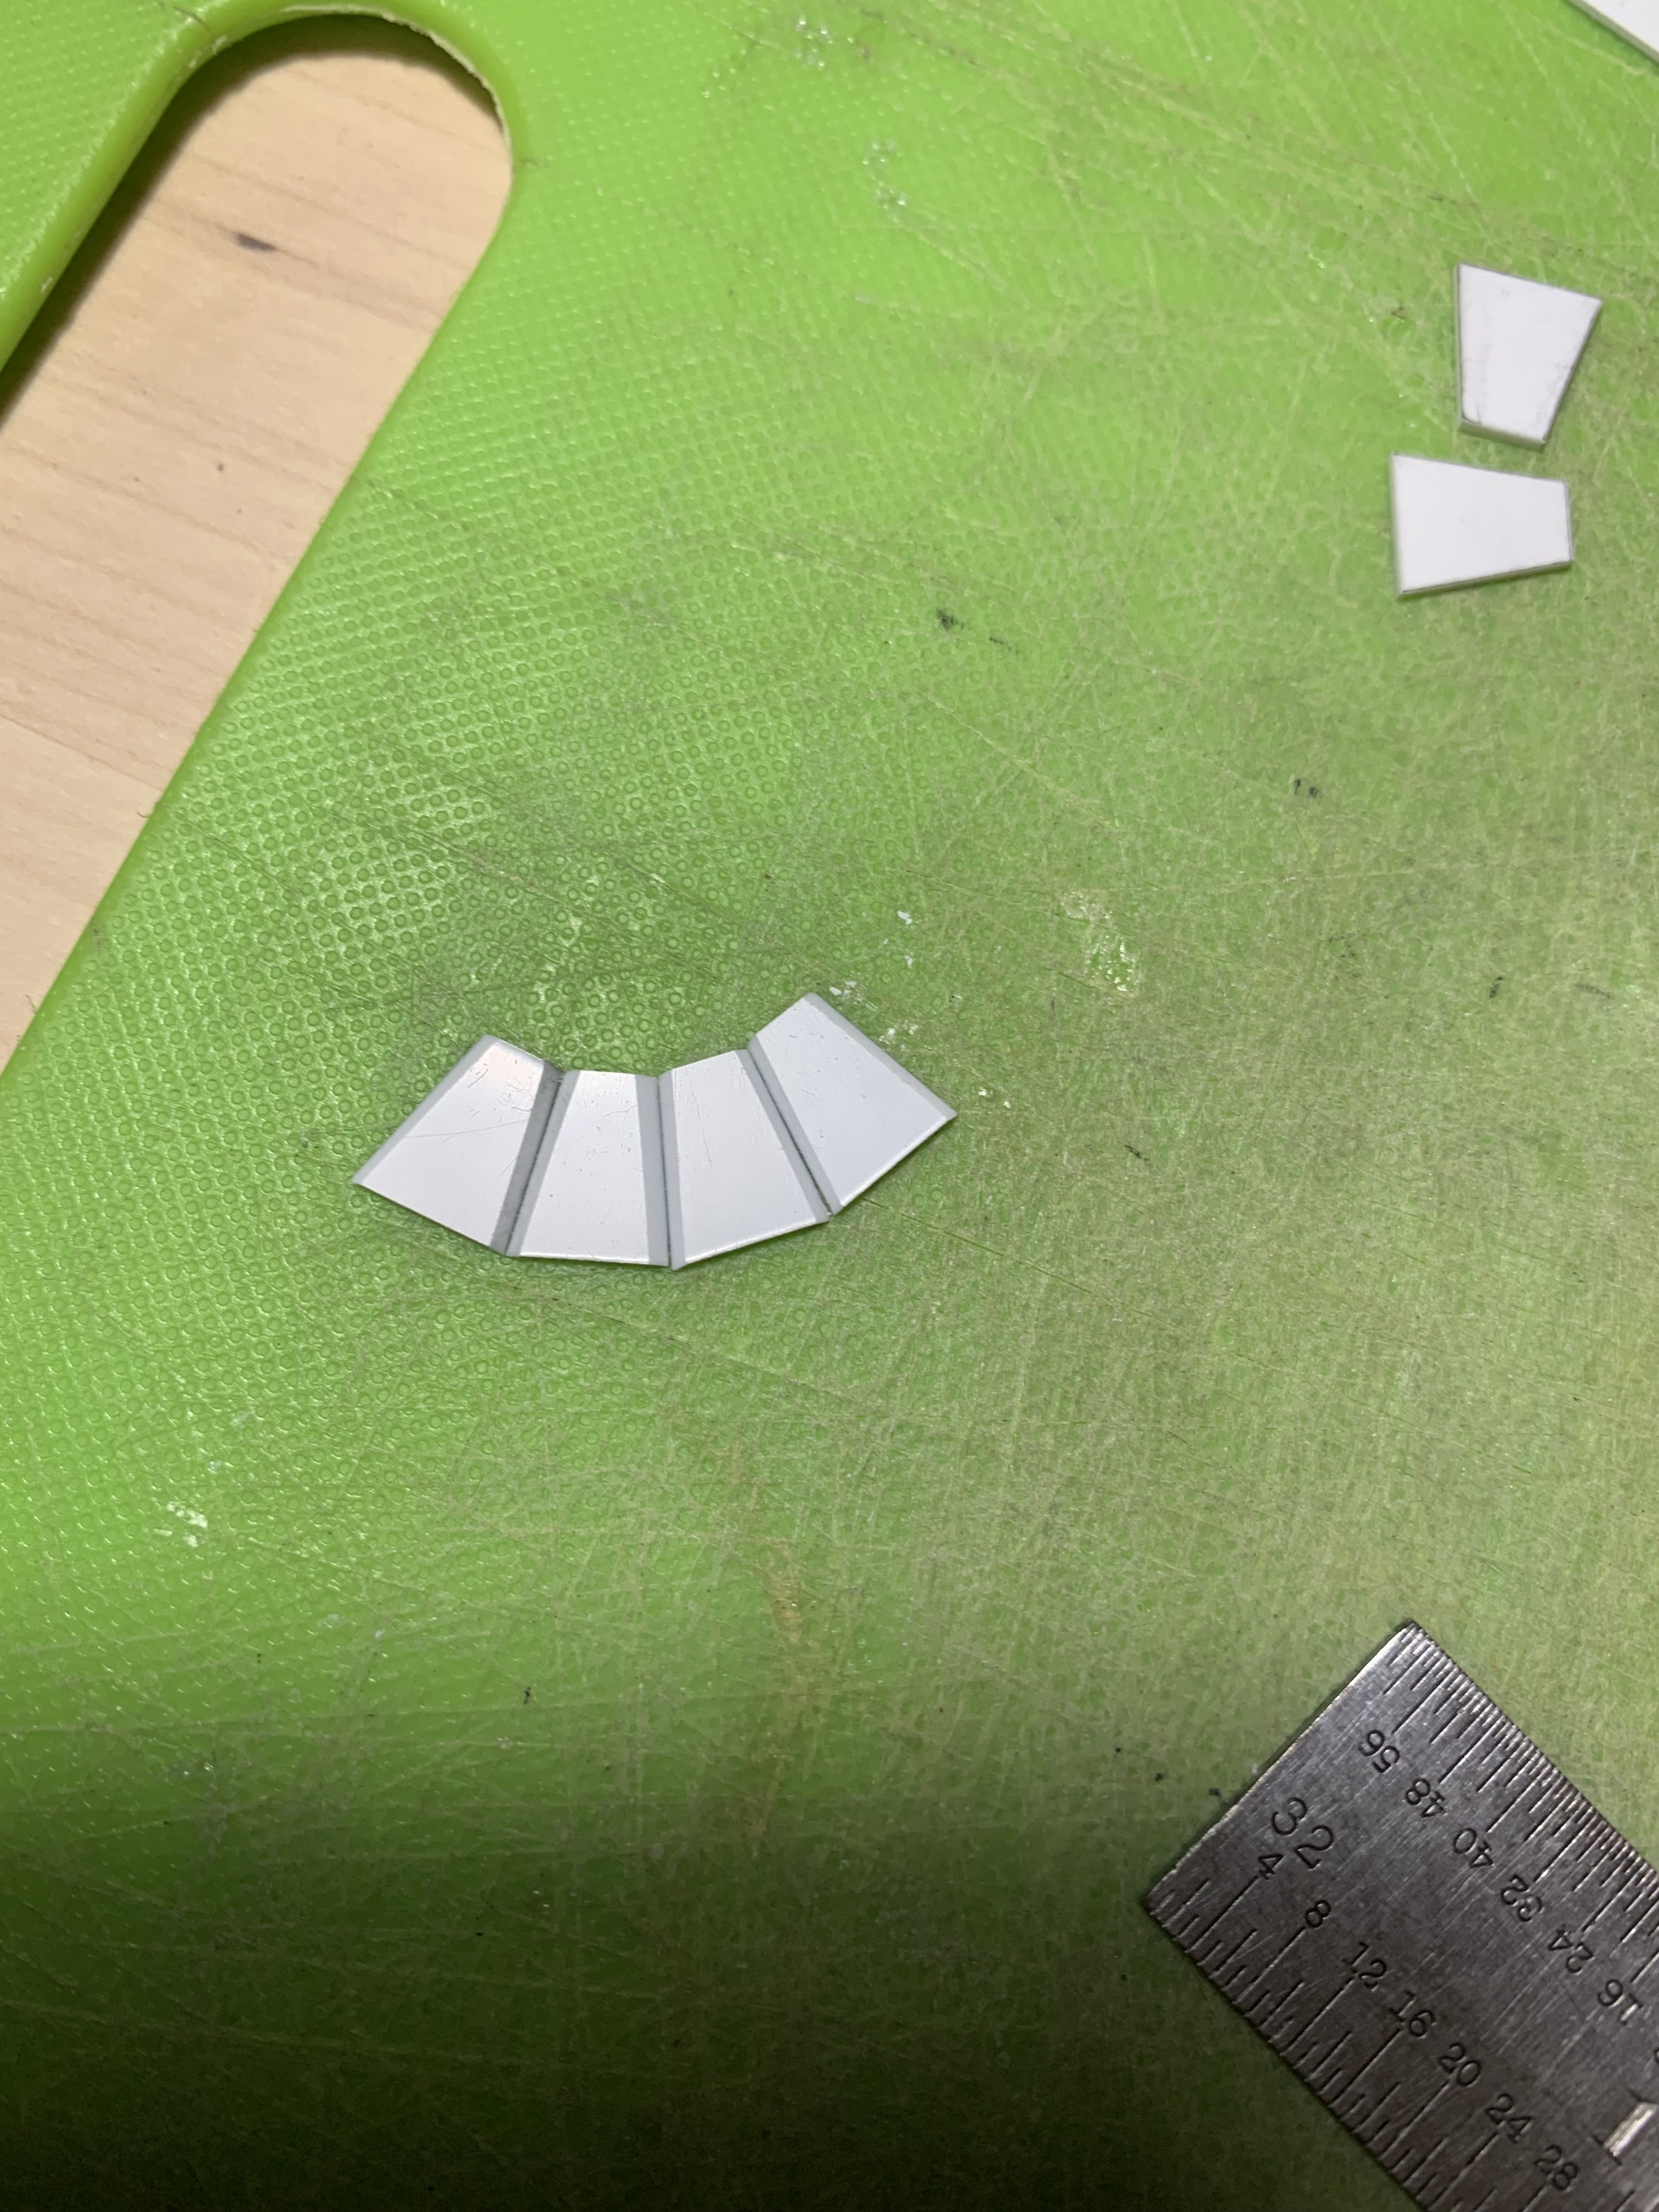
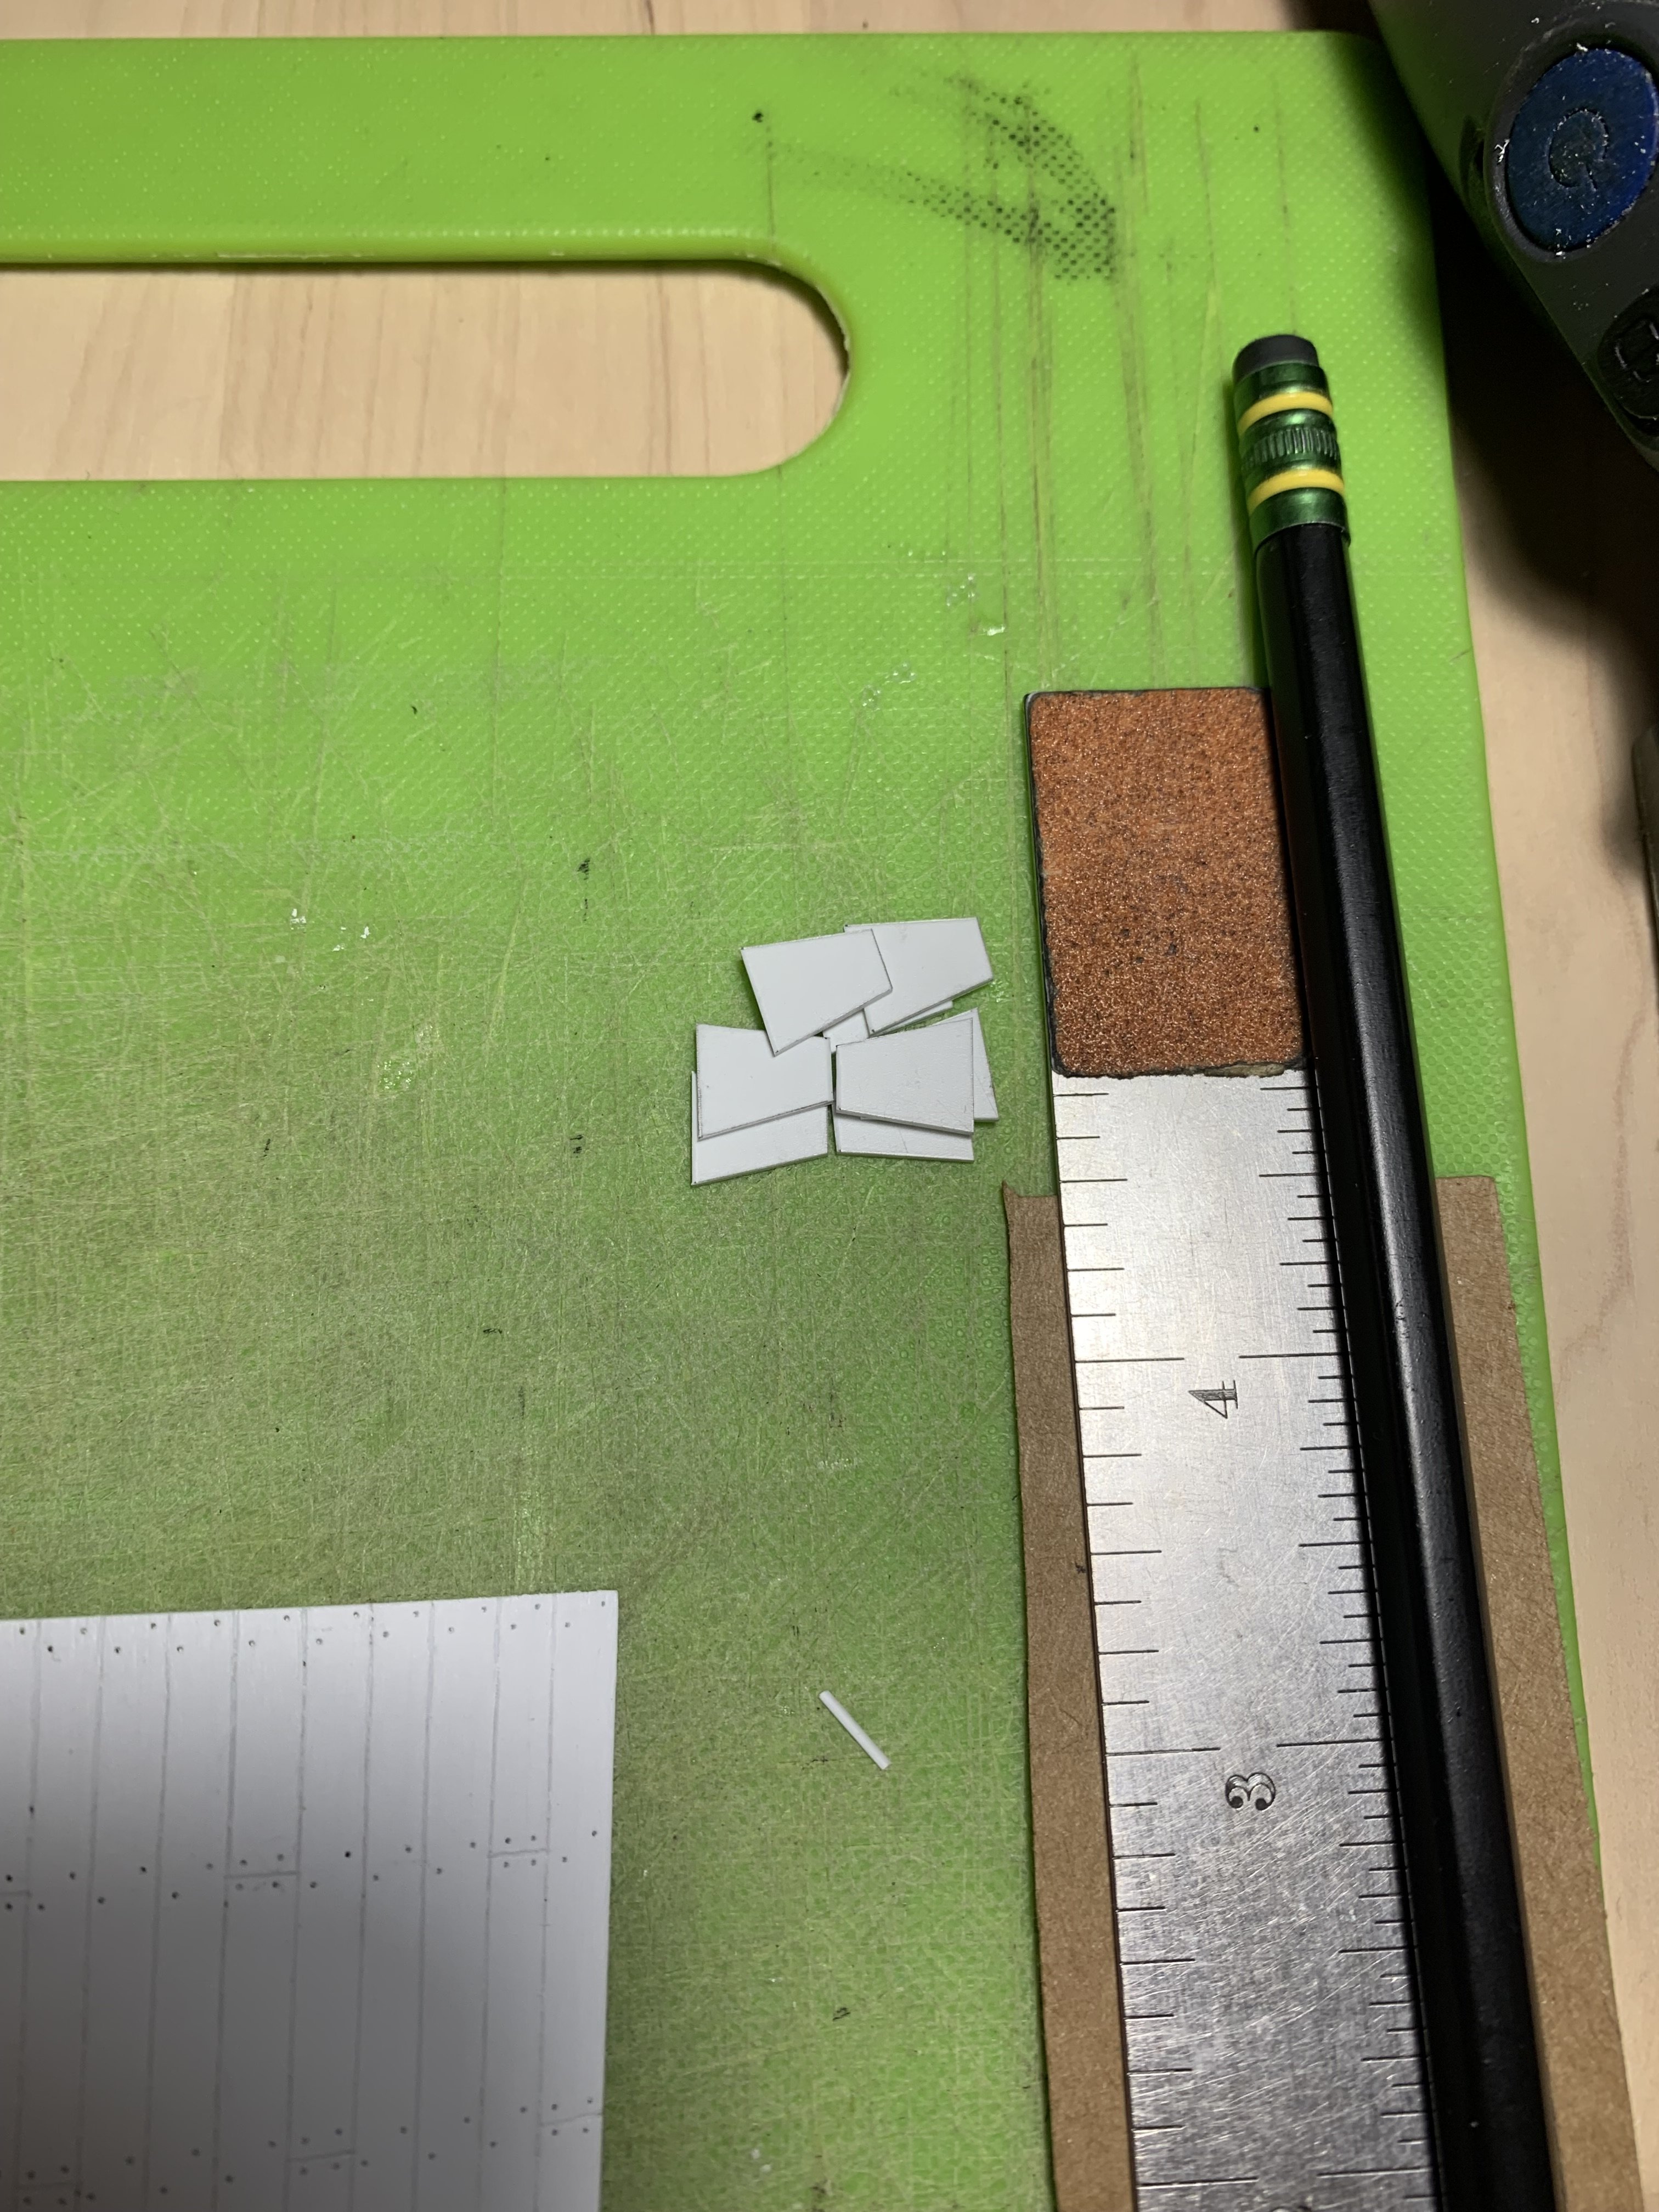
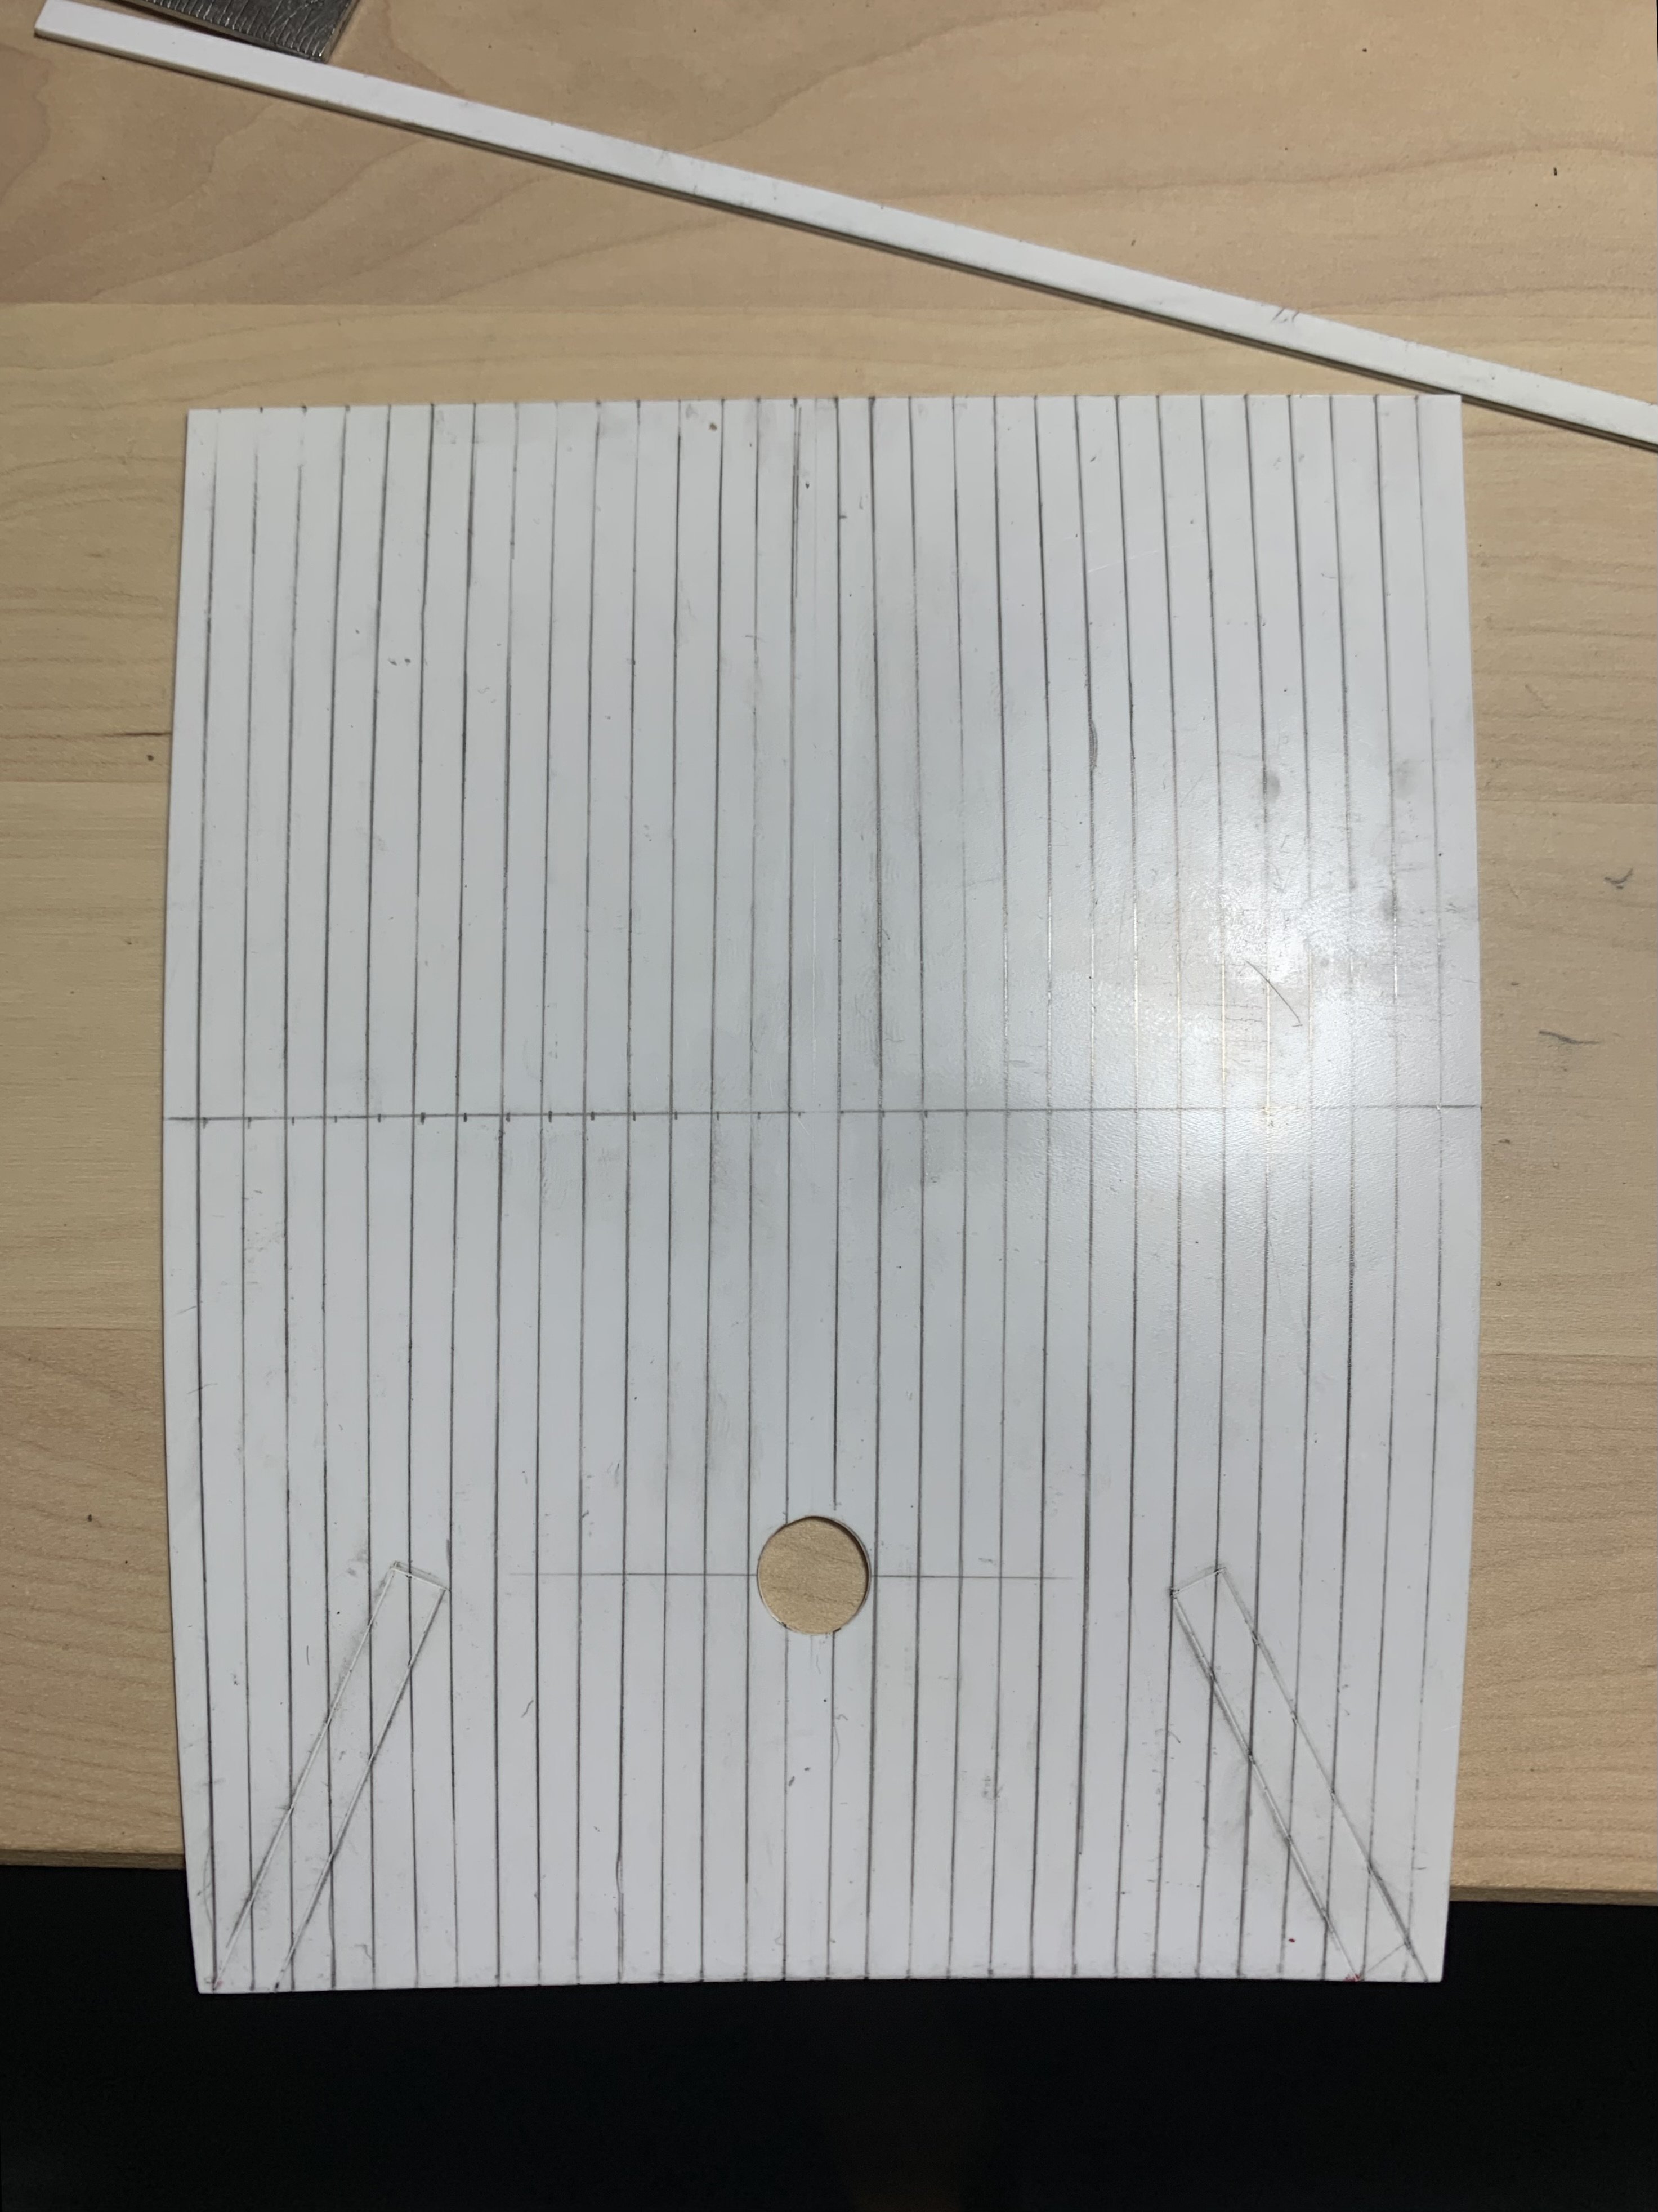
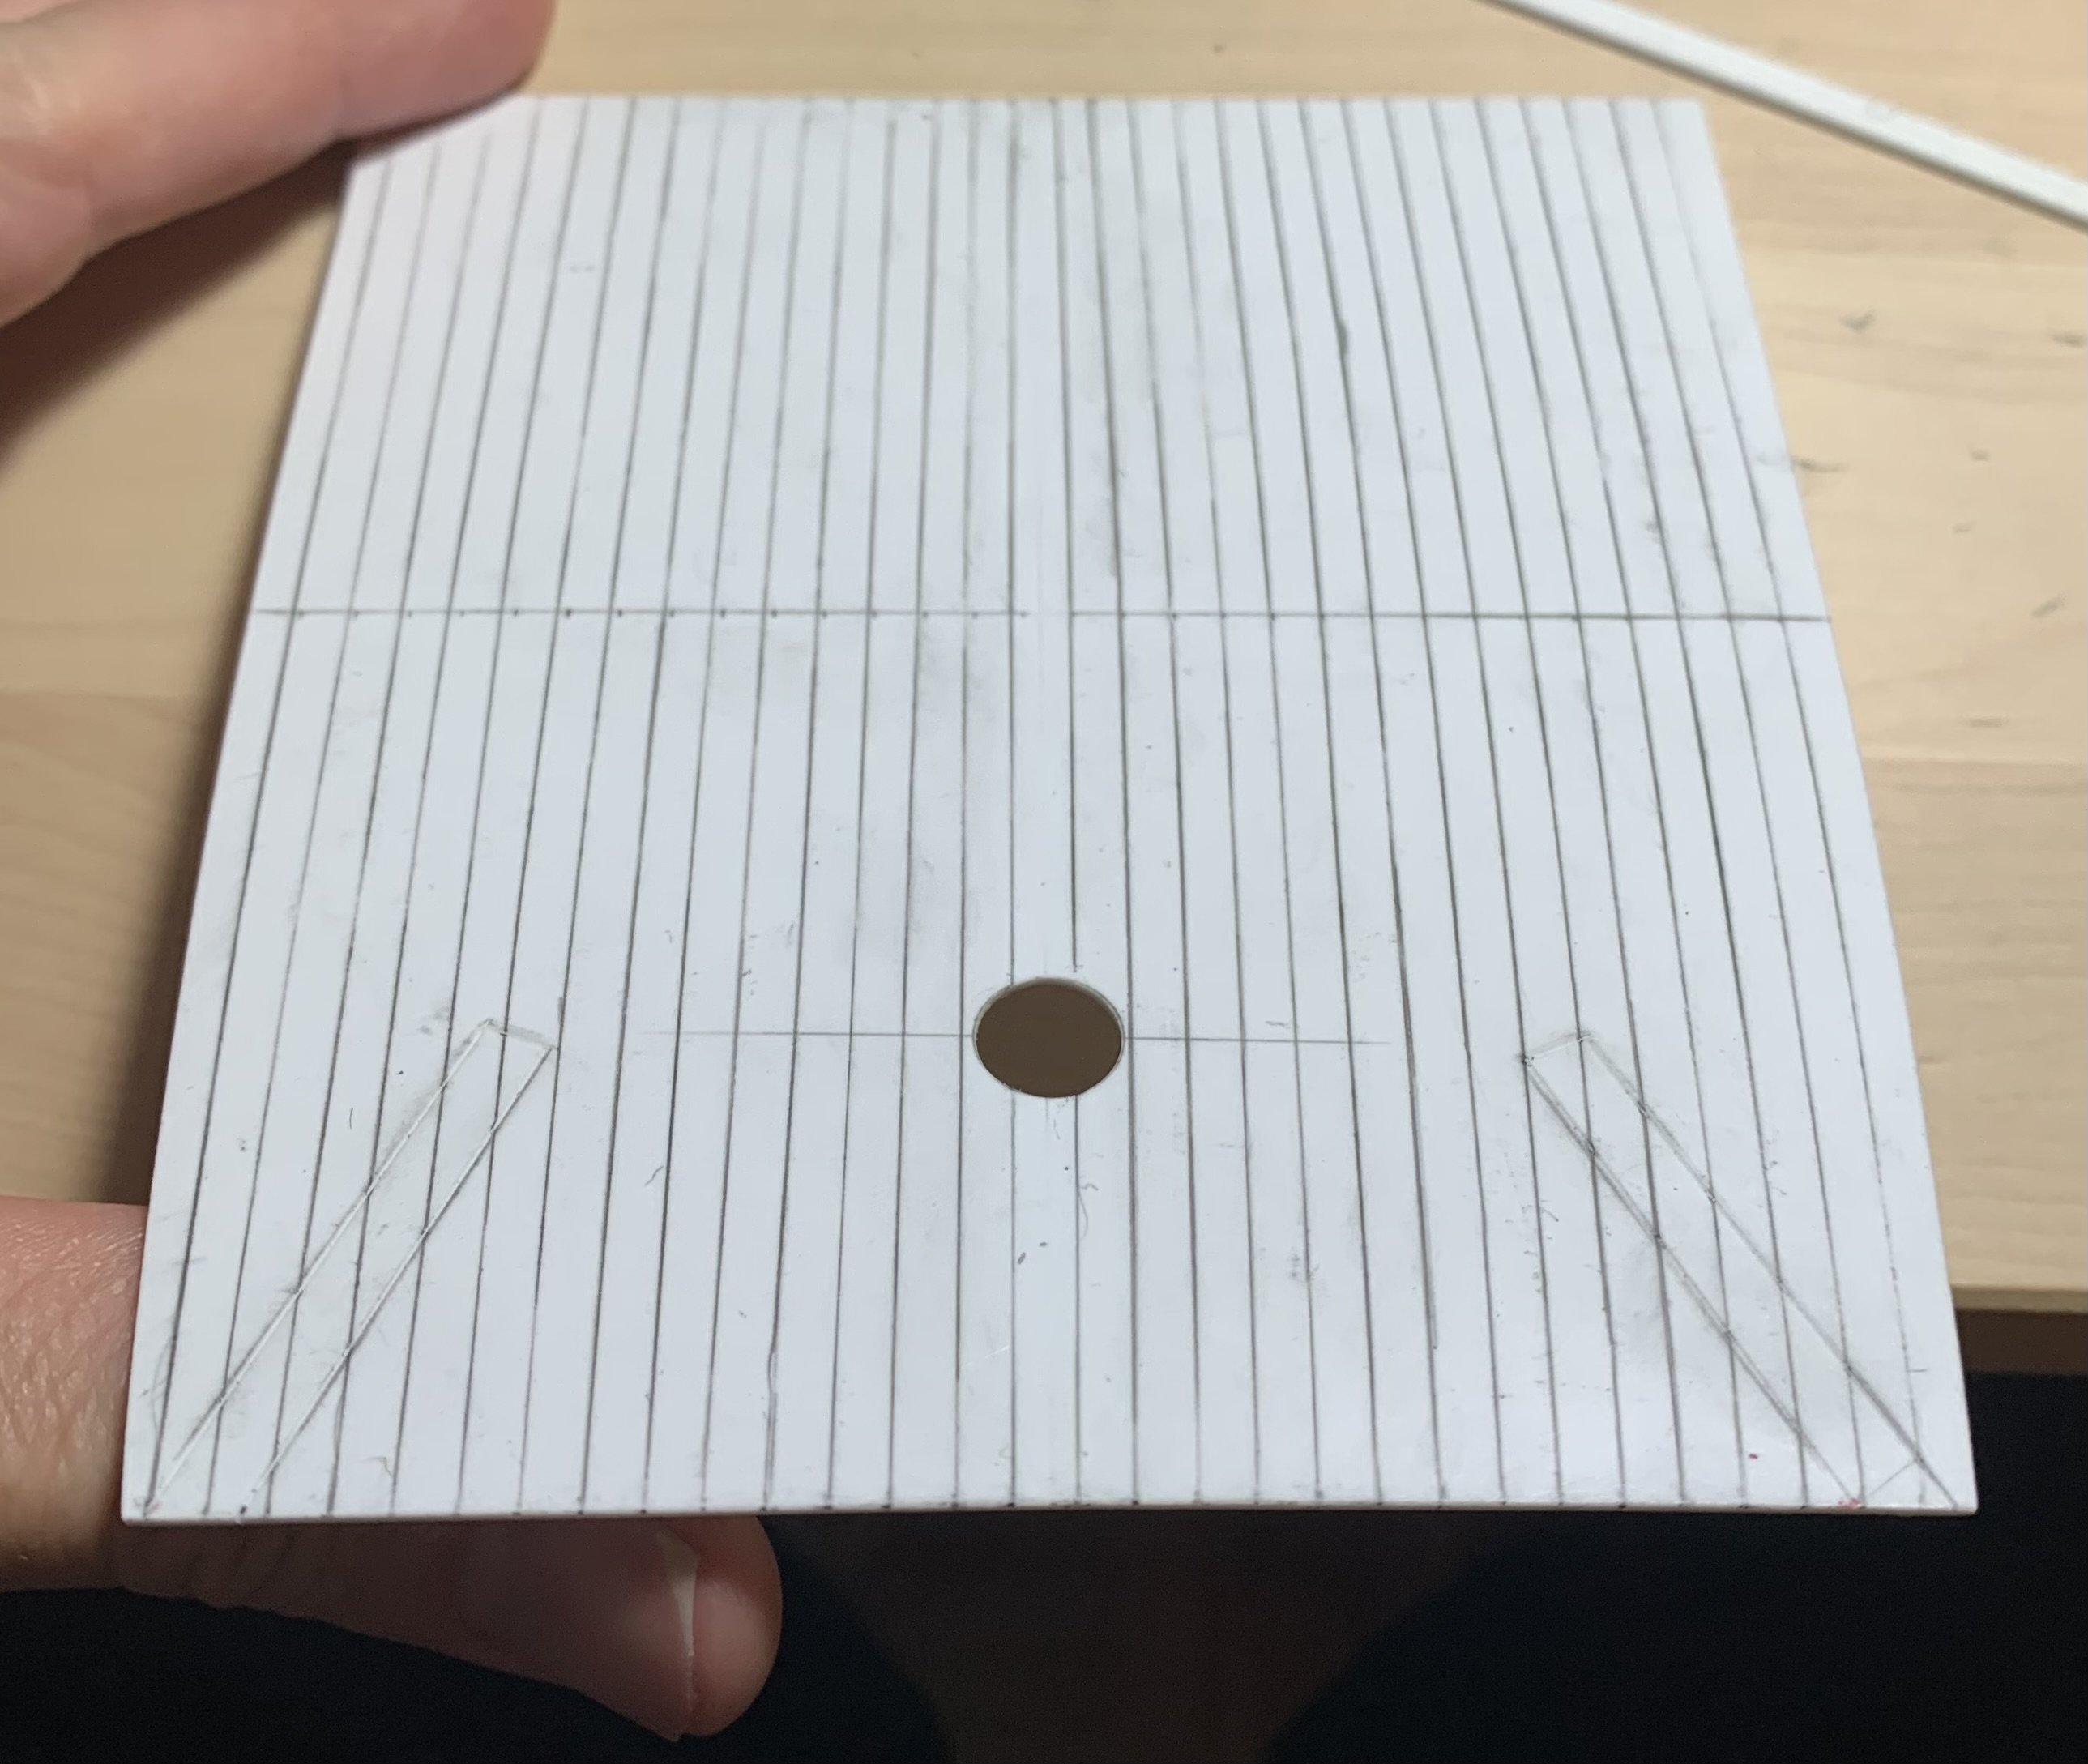
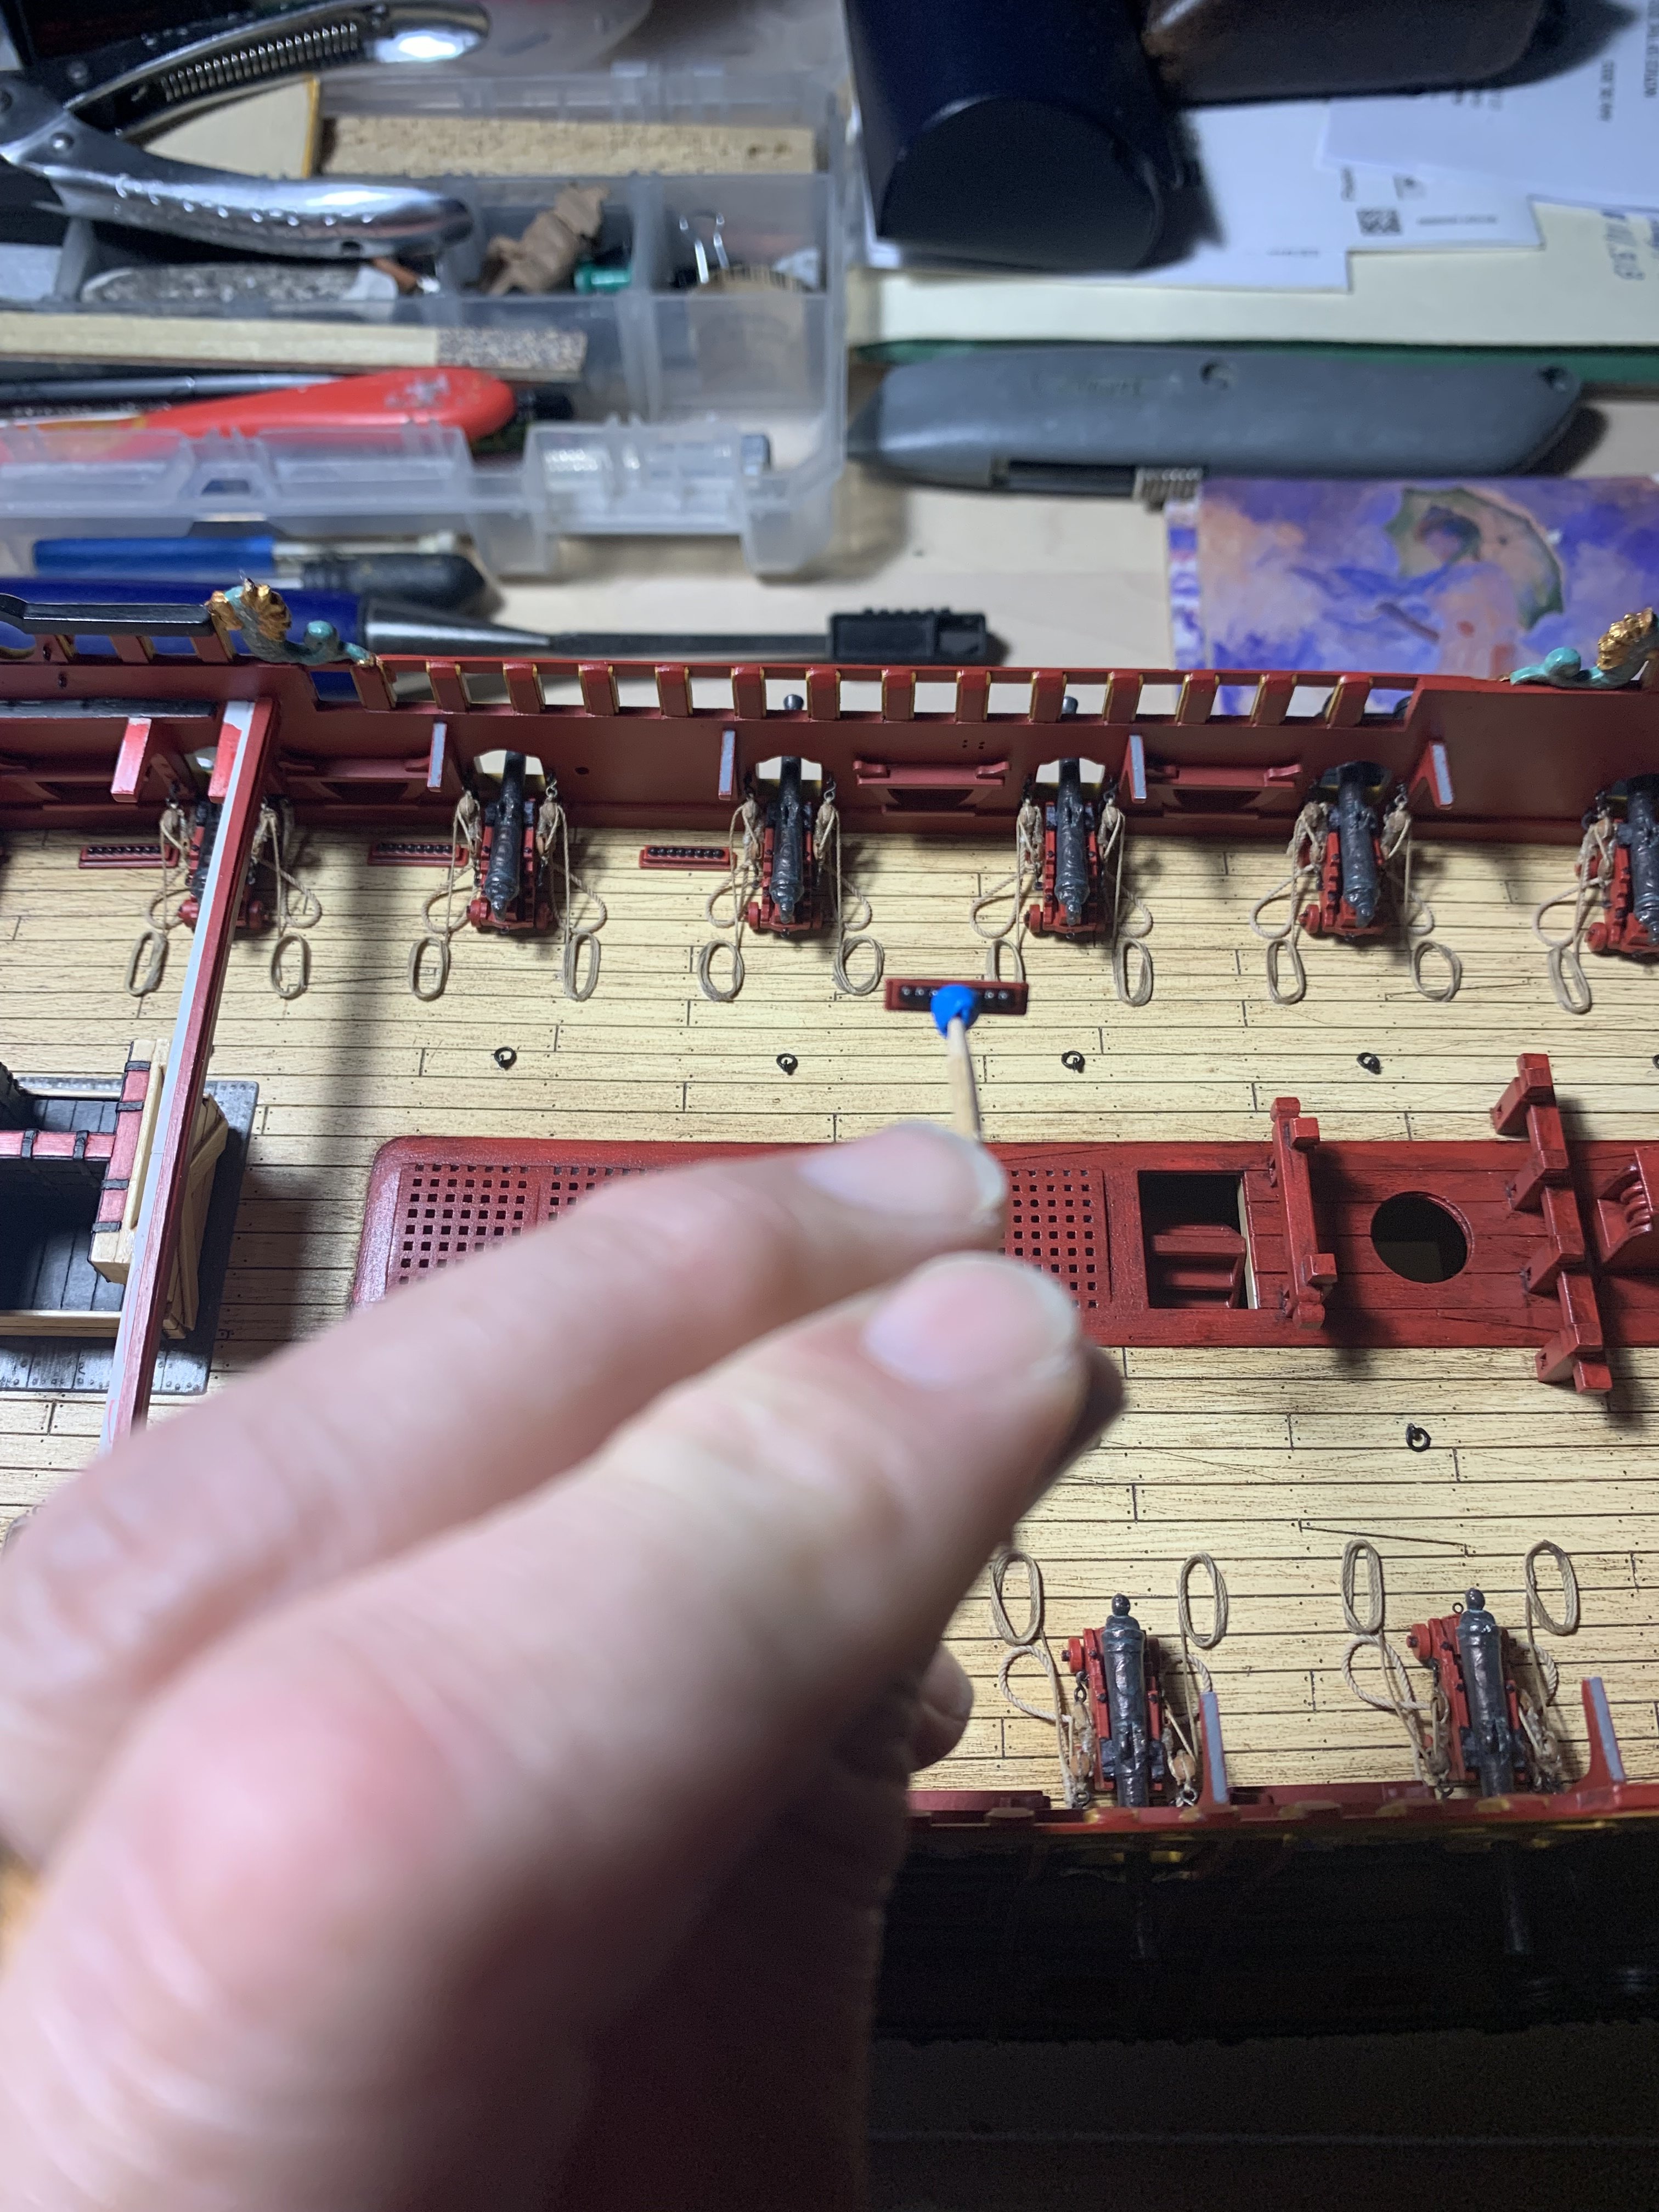
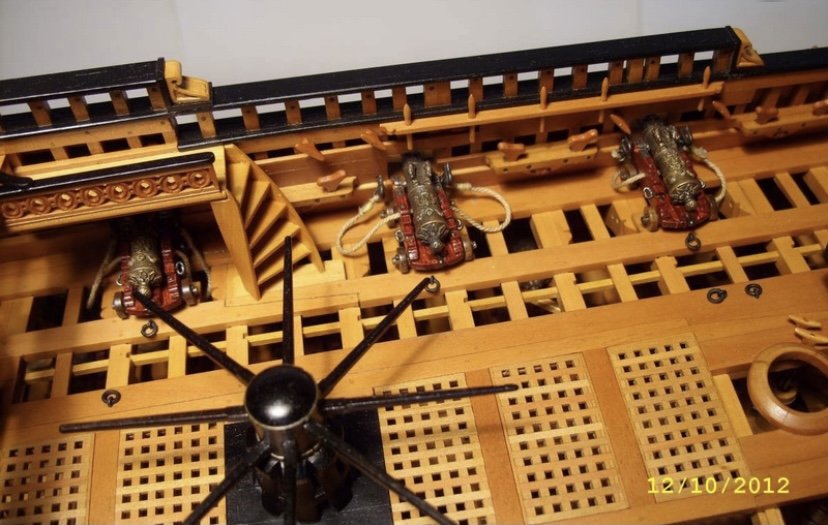
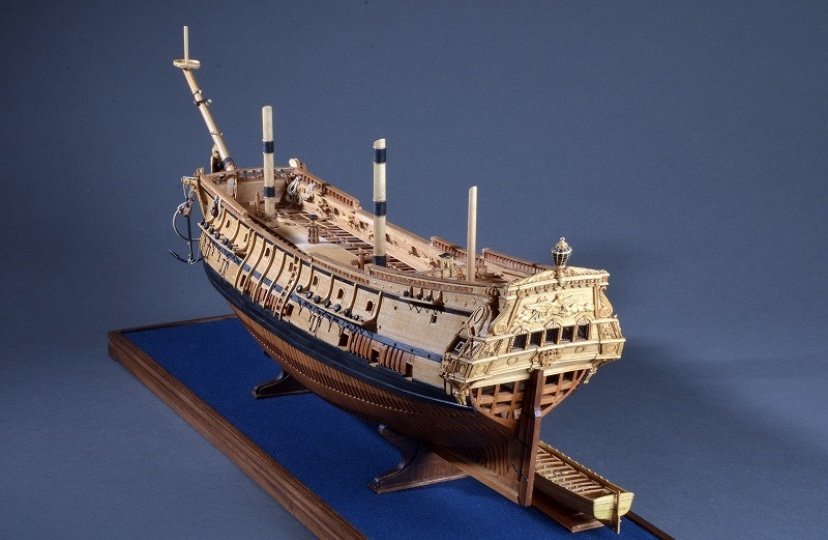
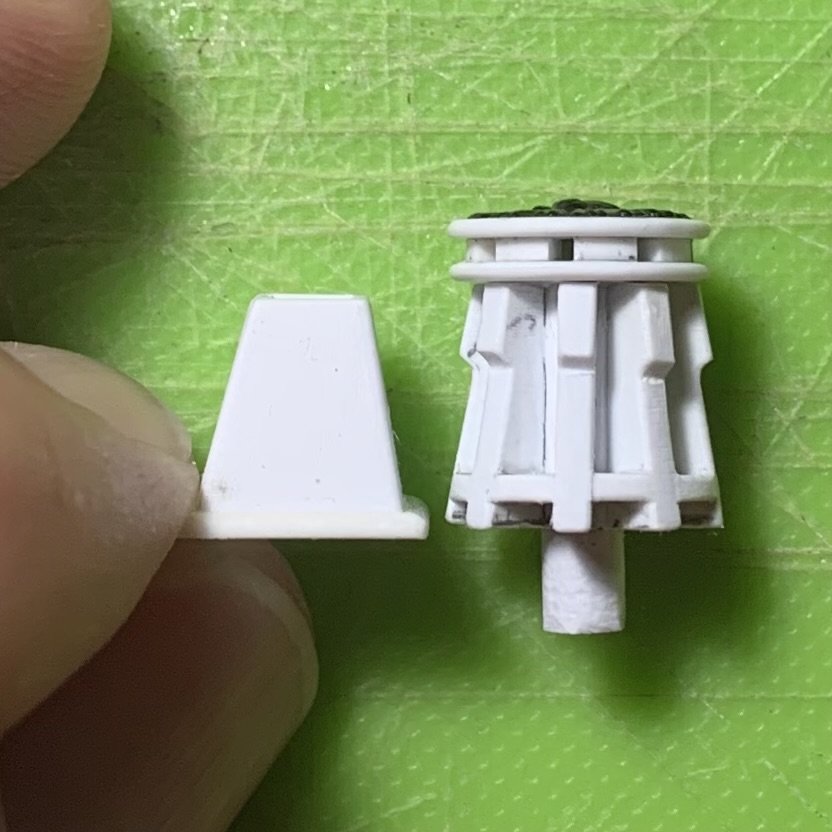
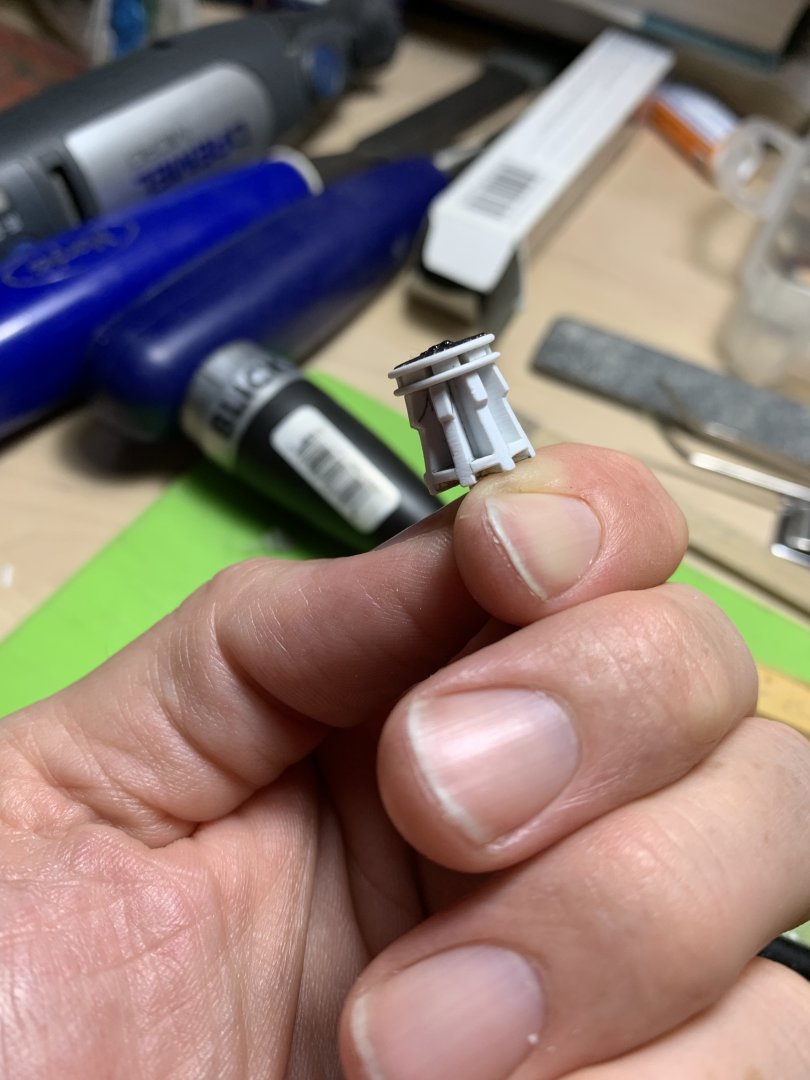
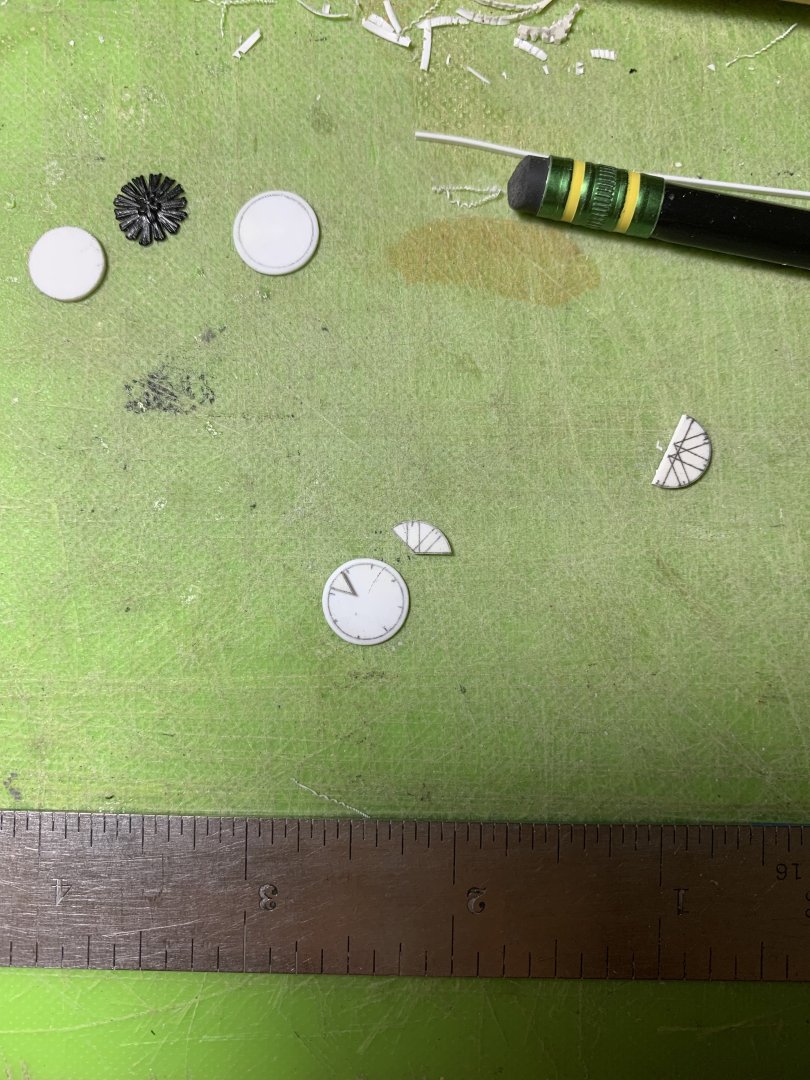
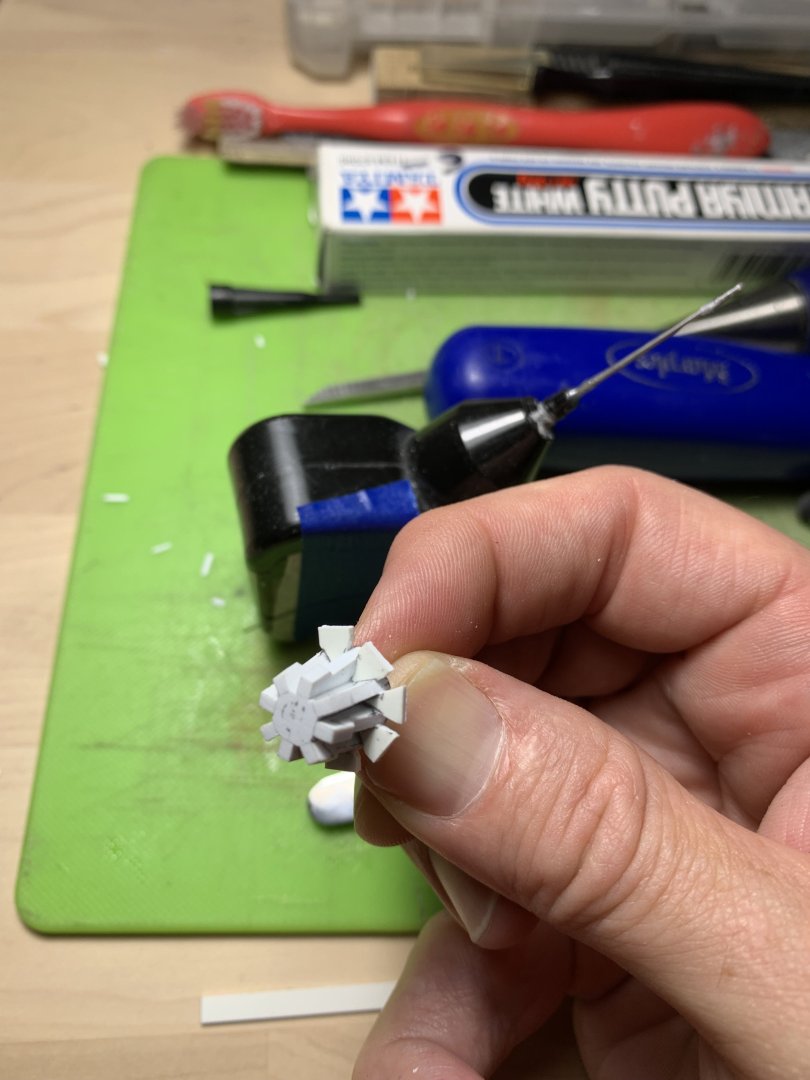
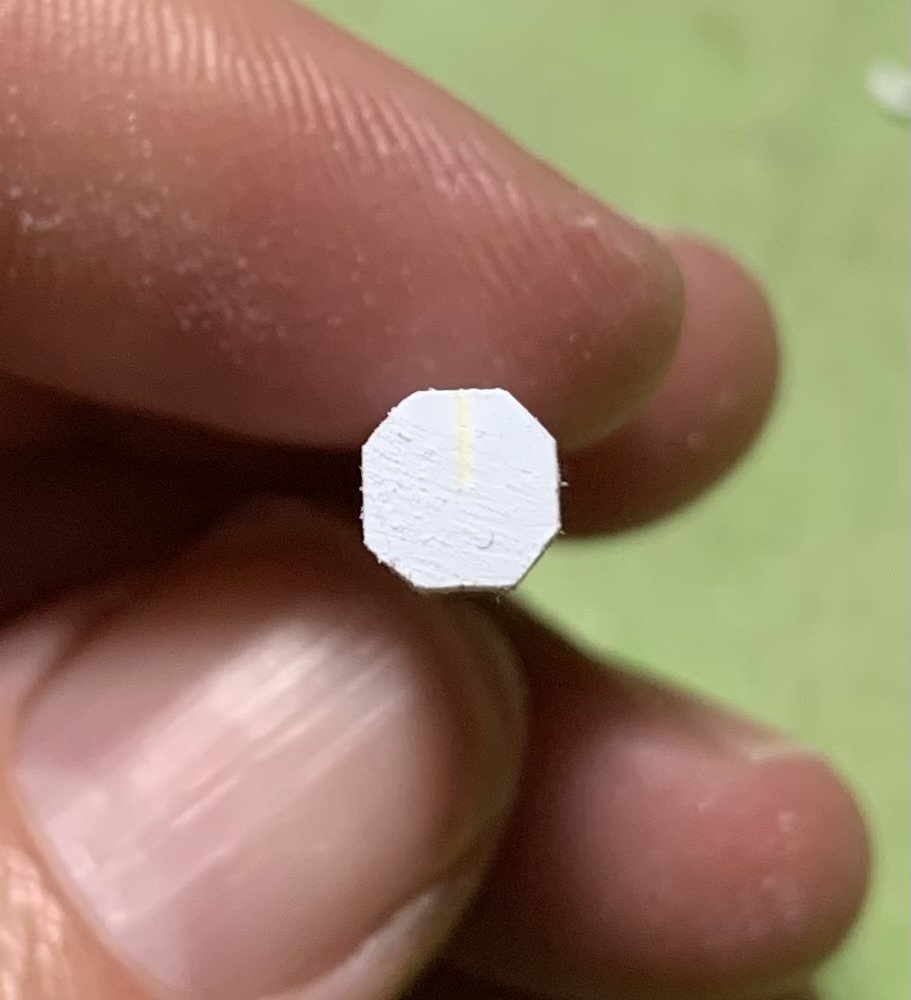
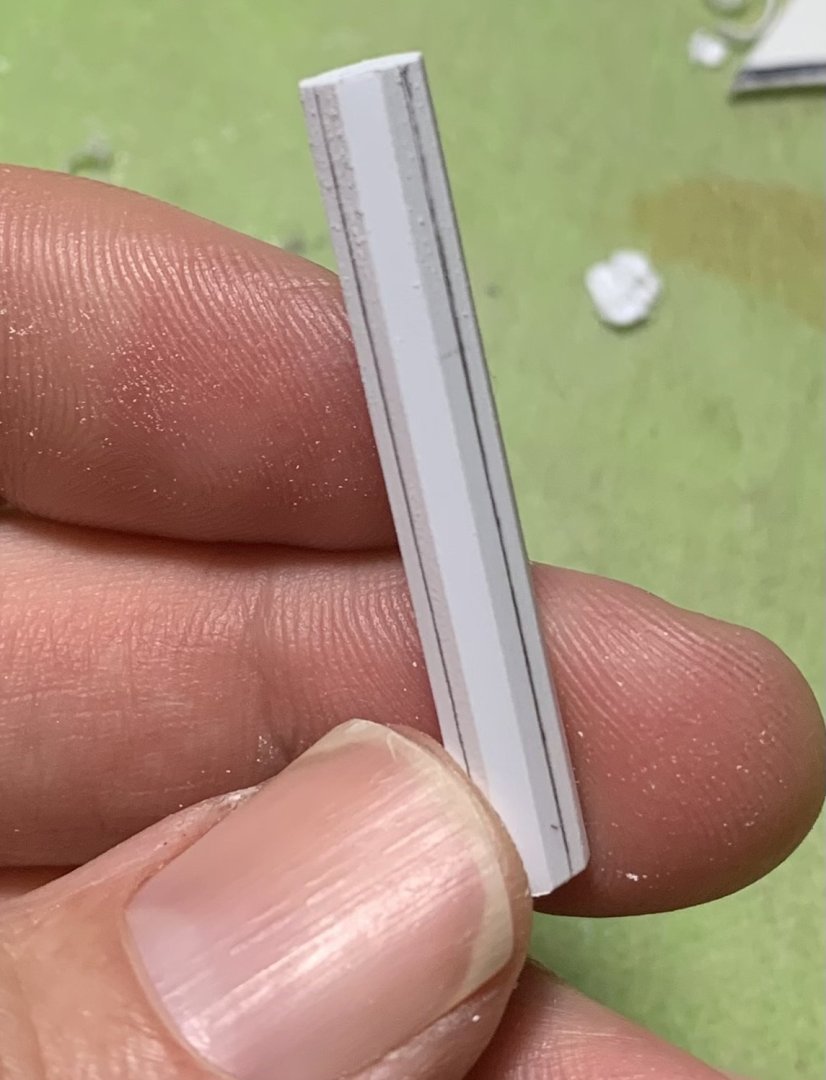
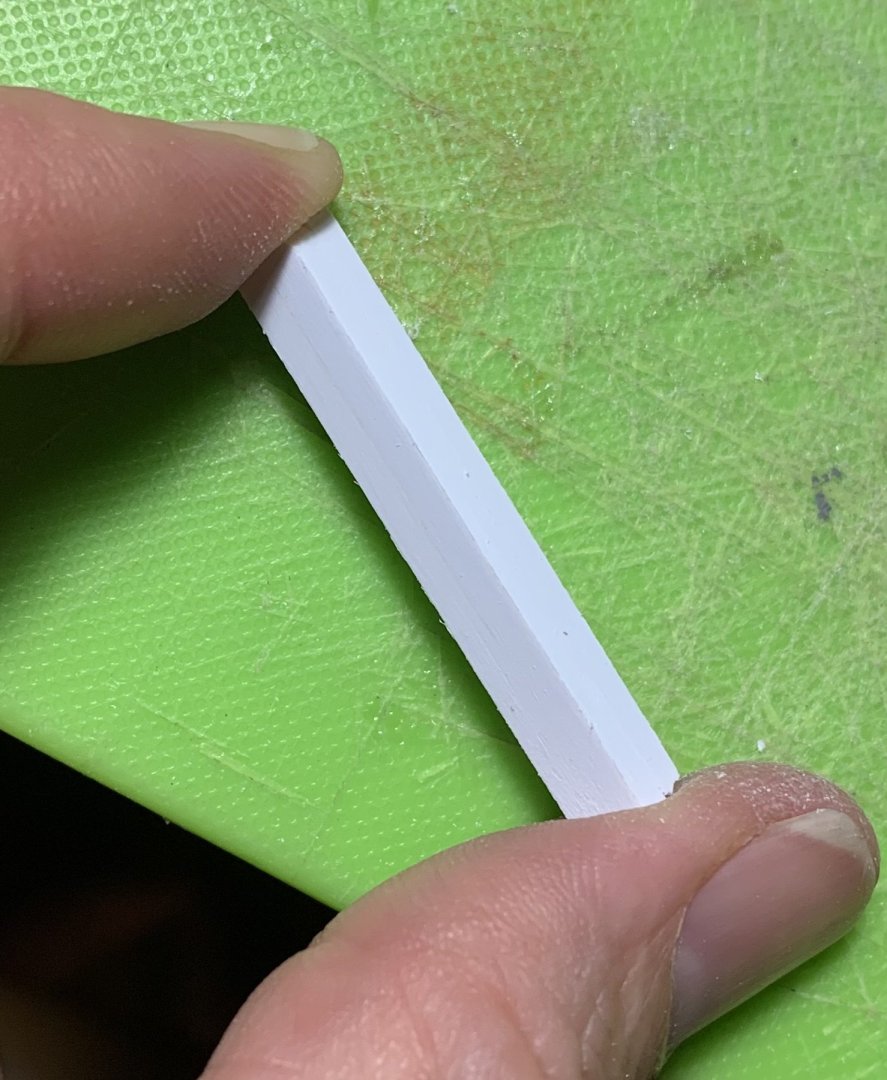
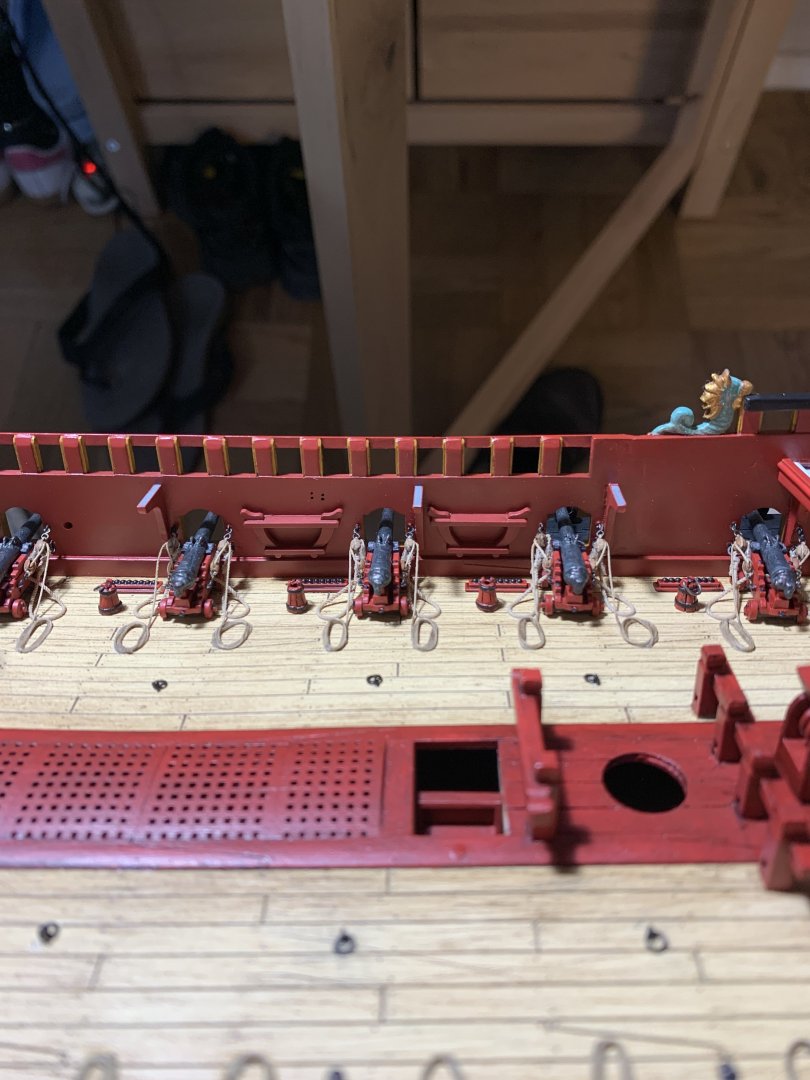
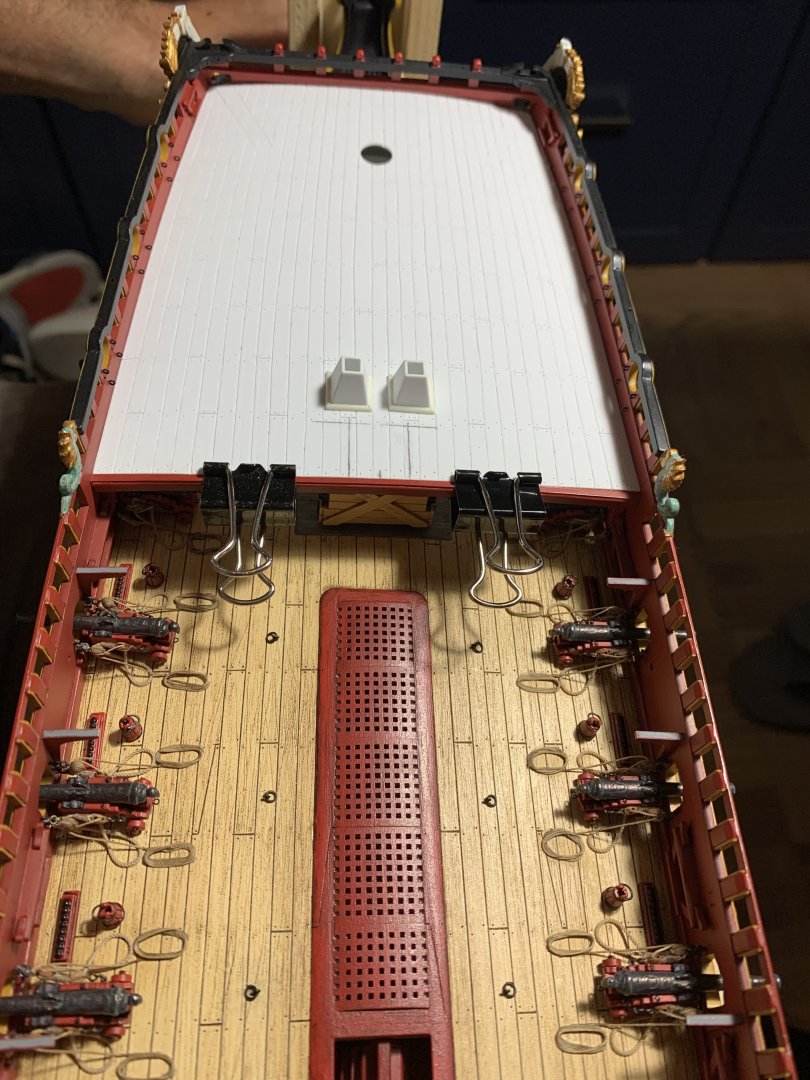
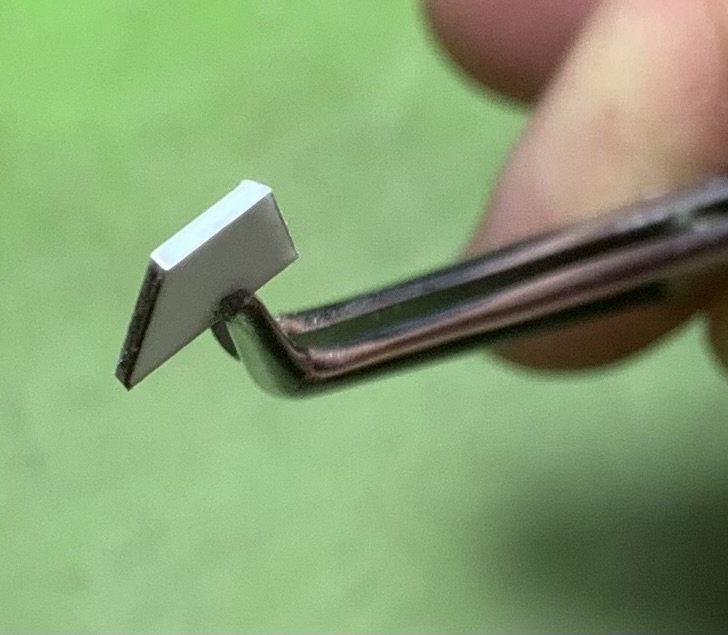
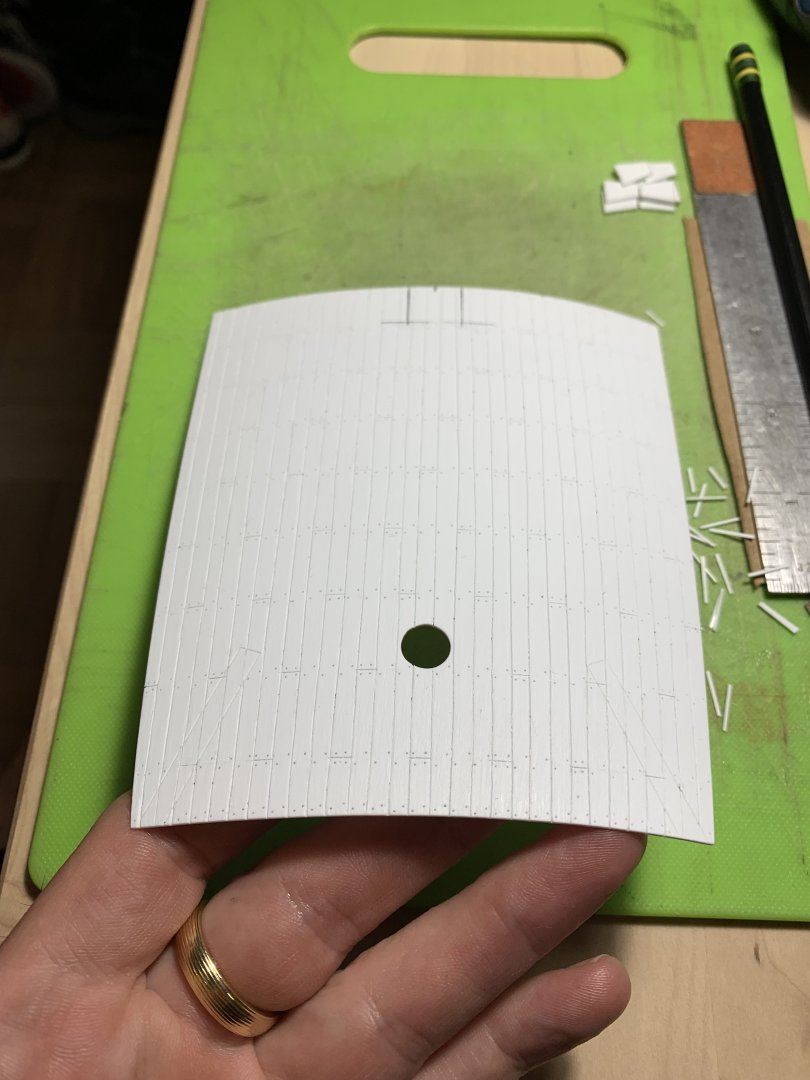
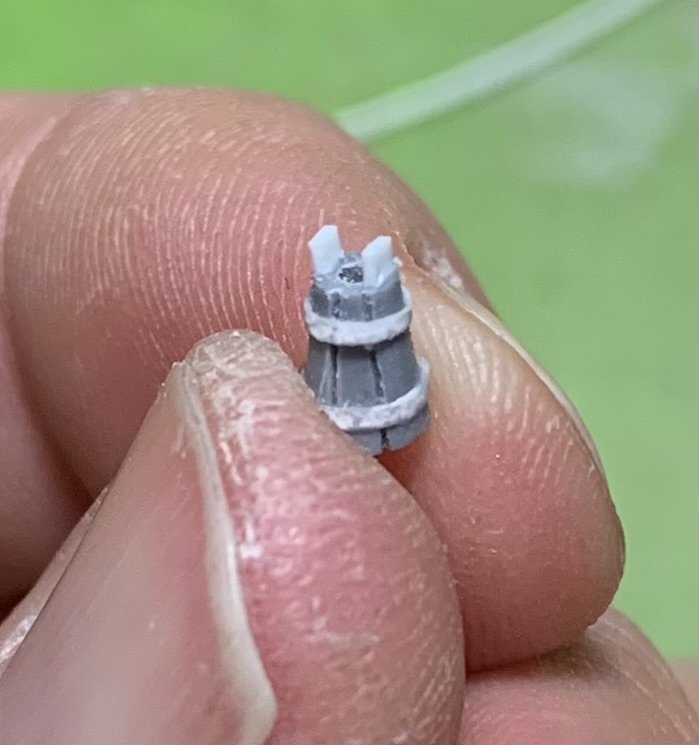
So, I’ve managed to make some progress. I finished painting the deck hardware. On the one hand, the degree of detailing I put into the lin-stock tubs may seem like overkill for something so small, that is largely overshadowed by the waist gangways. However, I truly enjoyed the process of engraving them, boring them out, banding them, painting/weathering them, and making ears and annealed wire handles for them. It gave me the sense, once again, that I was engaged with the project, in the limited time I had available. For placing these tiny items where clumsy fingers fear to tread, I found that wall-tack putty rolled around the end of a toothpick enabled me to place these items precisely, in the limited time before the CA sets. I did make one shot-rack placement error, but it will be completely concealed beneath the f’ocsle deck. It wasn’t worth creating a paint repair problem. Now, I still have cleats and blocks and cavals to place on the main deck. I still also have to belay sheet and tack lines to the inner bulwarks for the eventual rigging. I had momentum, though, and wanted to continue making significant progress. I decided to begin detailing the f’ocsle deck as a motivator to finally route my belay points on the main deck, so that the whole project can move forward. A few of these plank lines are a little ragged, but from most perspectives those flaws will not be very apparent. I found that, at first, I was moving a little too quickly with the engraving, and not taking enough score passes to create a clean channel to back-drag the tip of my blade. The proof will be in the paint, when those lines really jump out, but I think it will be okay. Next up, I decided to make the galley chimneys: I blacken the edges with graphite, so that I can more easily gauge the bevels I am filing into them. Next up - I wanted to make a f’ocsle capstan because I see evidence of one on the Louis Quinze model at the musee. A montage: The foundation of the machine are 4 pcs of .100 square stock cemented together, and then trimmed to 3/16” square. I then faceted the barrel into an octagon: I am always looking for places where I can re-purpose the stock ornamentation, and these radiant fleurs from the quarter galleries seemed like a fitting complement to this machine. The capstan will stand four scale feet above deck and the capstan bars will just clear the height of the chimneys: All-in-all, this little machine was one of my favorite elements to make for this project. I still have to make the capstan locking pawls that engage at the foot of the machine. Next, I think I will design the break rail and belfry. Thank you, as always, for the likes and looking-in.


- 2,699 replies
-
- 15
-
-
-
- heller
- soleil royal
- (and 9 more)
-
Nice progress on your latest build, here, Bill! I really like the herringbone decks - they look really cool. Also, love the GH project with your grandson!
-
Wow - these are a tremendous improvement over earlier efforts, Eric! I like how you did the scale detailing.
- 422 replies
-
- 1
-
-
- soleil royal
- Heller
- (and 1 more)
-
David, I am surprised every day. Life moves real fast with teens today. All good, though.
- 2,699 replies
-
- 2
-
-
- heller
- soleil royal
- (and 9 more)
-
Your correction at the cutwater as something I was wondering about. It would not have detracted from the model, if you had left it as-is, but it is a nice improvement, nonetheless. Thank you for posting such good chimney pics. They are really helpful. While you may feel that you aren’t going too overboard on the details, I think you have added so much to this kit, and corrected quite a number of its fundamental flaws. So much with sailing ships has to do with the lines, and the lines of your ship ring so true!
-
So true, about Children! I will look on your log for the pics - much appreciated!
- 2,699 replies
-
- 1
-
-
- heller
- soleil royal
- (and 9 more)
-
That’s a nice creative solution to enhancing the 3-D appearance of the dolphins.
- 422 replies
-
- 1
-
-
- soleil royal
- Heller
- (and 1 more)
-
From what I know about cataract surgery, Bill, it should help model-making a ton! This is one if the more low-risk, high reward procedures.
-
Hi Kevin! Yes, I will be borrowing a knee walker from my work partner, who also recently had bone spurs removed from his ankle. Definite game changers. And, yes, as I was making chimneys last night, I was reminded just how much I love the process of design and fabrication. I can totally lose myself in that for hours at a time!
- 2,699 replies
-
- 1
-
-
- heller
- soleil royal
- (and 9 more)
-
Thank you, Marc! I just visited your Ambiteaux log because I needed to clarify a few details, regarding the galley chimneys. I will have a small update on this project in the very near future. I’ve been puttering around with the f’ocsle deck - engraving plank seams, fabricating chimneys and the capstan. Soon, I’ll design the break rail filigree and the belfry. Unfortunately, the school year is about to start which means I will, again, become completely engrossed with coaching basketball for one more season. We are also in the process of getting my daughter into University and my son into high-school. So, yeah, family first for sure! Necessarily, not a substantial amount will happen on this build until around April of next year. I am planning a major left foot and ankle surgery for that time, which will mean three months of recovery. I plan to invest a lot of energy into the project, at that time. In the meantime, I will do what I can reasonably do. As always, thank you to all for maintaining your interest in this project. It is all very much appreciated!
- 2,699 replies
-
- 6
-
-
- heller
- soleil royal
- (and 9 more)