Hubac's Historian
-
Posts
3,316 -
Joined
-
Last visited
Content Type
Profiles
Forums
Gallery
Events
Everything posted by Hubac's Historian
-
 I like your approach with this figure, Eric. Personally, I would spend some time engraving some “movement,” or striation into her hair. The kit figures are a good guide for this.
- 449 replies
-
- 1
-

-
- soleil royal
- Heller
- (and 1 more)
-
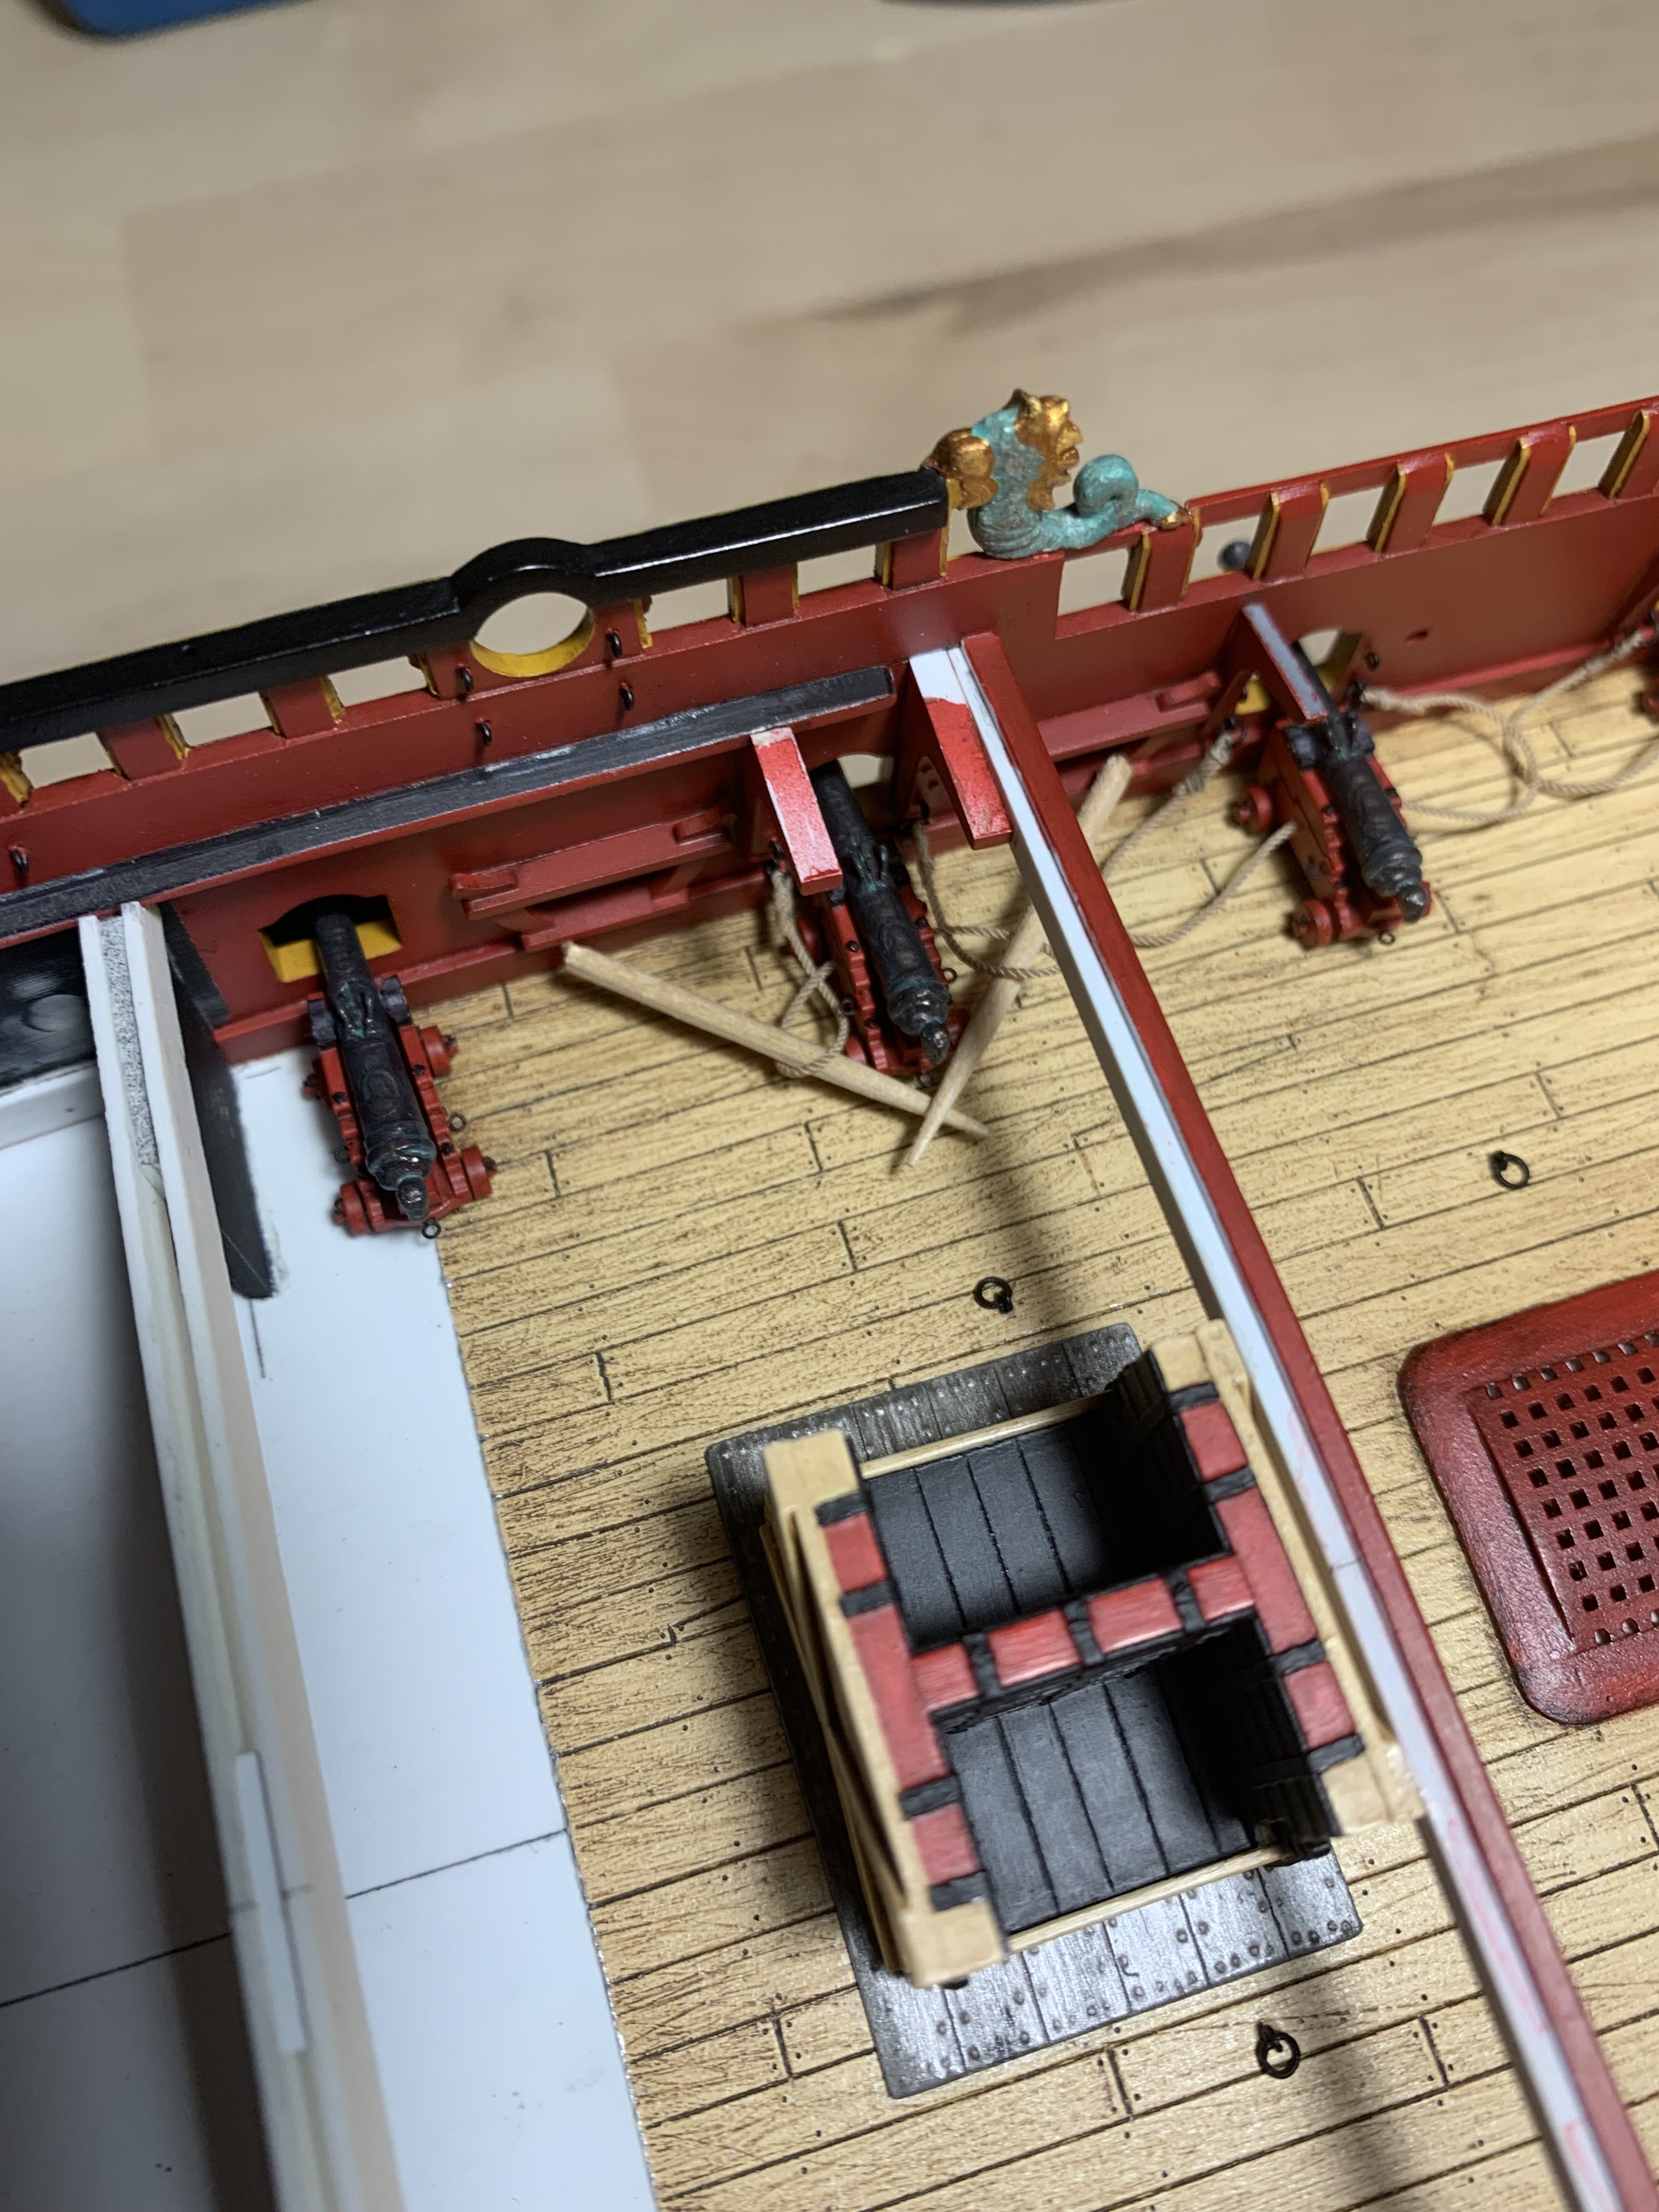
You may have to re-locate the gammoning blocks on the sprit-mast so that they align vertically with the gammoning slots on the cutwater.
- 449 replies
-
- 1
-
-
- soleil royal
- Heller
- (and 1 more)
-
When I’m trying to take accurate inside measurements, as when you are trying to determine what the new bottom and top spans of your beakhead bulkhead need to be, I like to use two lengths of styrene scrap plank that are each shorter than the shortest span. I taper the ends to a blunt “point”. Then I hold the strips between my fingers, one over the other, and slide them outward until my “points” make contact with the hull interior. I have a sharp (wicked sharp!) pencil, at the ready, to mark the overlap line of the styrene strips. I can then transfer that span to a good steel ruler (with up to 1/64” increments) for a reliably accurate measurement.
- 449 replies
-
- 1
-
-
- soleil royal
- Heller
- (and 1 more)
-
Fait accompli!
-
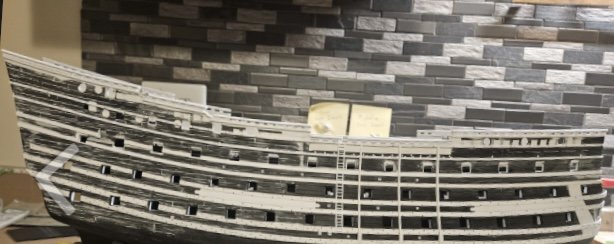
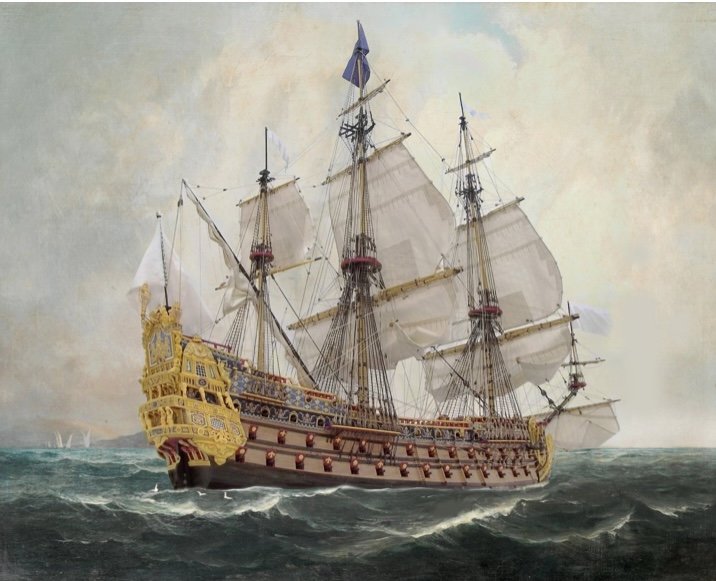
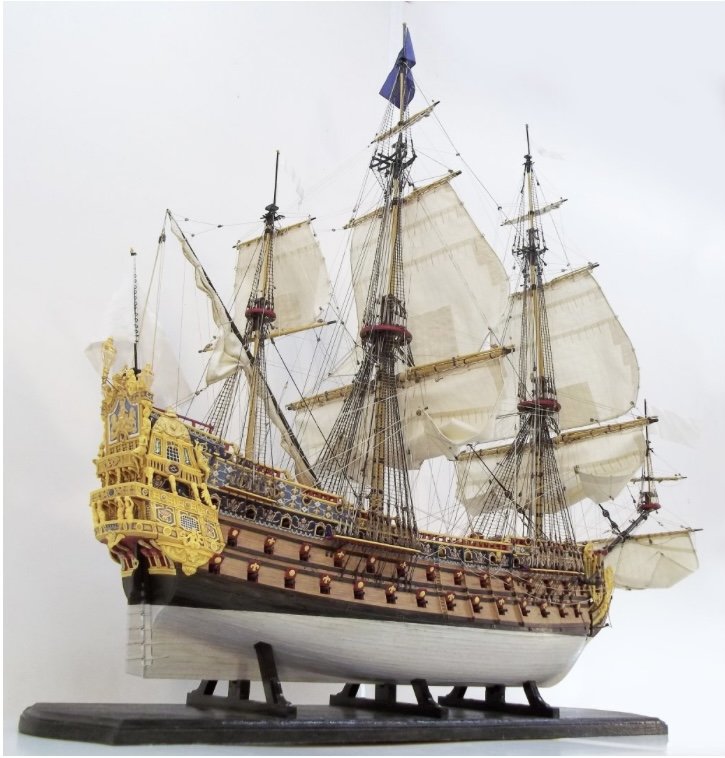
Okay, so the former battens are only temporary. They are merely there to lend shape to the planking continuation. Once that has set, though, the formers are ground away with the Dremel drum sanding attachment. The reason you glue the plank to the formers is to ensure that you get a nice, fair bend around the formers. I realize your card profile pattern is approximate, but keep in-mind that this should be a nice fair curve, like what Marc Yeu did here: The run of your pattern looks a little stiff. Ultimately, this curve mirrors the sweeping curve of the top-most headrail. And, yes, the wales should continue forward into the plank extension. This is easy to patch-in, after the rest has been established. Now, as for the DR and the RL, I mention that more for the sake of visitors to your log who might be inspired to take the kit in another direction. What you have established so far, is the correct wale, plank and top sheer for the epoch. The timber railings are correct and the arrangement of the batteries is far more correct for the time. With this as a basis, one could scratch build the stern, quarters and bow for any of those ships, and you would end up with a pretty solid facsimile of what those ships actually looked like. That the dimensional parameters of the hull don’t exactly match the particular dimensions of those individual ships hardly matters for an impressionistic model.
- 449 replies
-
- 1
-
-
- soleil royal
- Heller
- (and 1 more)
-
At gym with my son, so will respond in detail a little later. You are misunderstanding my intent a little bit.
- 449 replies
-
- 1
-
-
- soleil royal
- Heller
- (and 1 more)
-
The other thought I have is that, at this stage of modification that you have established, one could build SR 1671 (of course), but you could also do representations of the Royal Louis of 1668, or the Dauphin Royal of 1668. You could probably also do the Dauphin Royal of 1680, if you eliminate tue poop royal deck and reduce the overall height of the stern a little.
-
My idea is really pretty simple: I’d begin by sanding the interior surface of the hull smooth, beneath where the short beakhead deck will be. Heller has moulded raised ridges in here that serve no functional or aesthetic purpose. Then, I’d take a few lengths of .100 square styrene rod - at least three, and maybe four - and I’d glue them to this now-smooth surface with styrene cement. These are your formers. Let that set-up strong. Now, you can plank around these in two layers of .032 styrene strip. you’ll want to make sure that their is a really good mating connection between the first styrene strip and the upper main wale; bevel the bottom strip edge, accordingly. Be sure to use two different widths of strip so that the seams overlap each other. Also be sure to edge glue the strips to each other. You can induce a curve to styrene strip simply by pulling it between the spine of a knife and a hard surface. Repeated passes introduces incrementally more curve. This will reduce or eliminate the need for clamping beyond finger pressure for 20-30 seconds, until the bond sets. IMPORTANT: you will also be gluing the first-layer planks to the formers. Once all of that is set, you can establish the descending arc of the new planking, and trace that profile onto the outsides. I like to use a 1/2” coarse sanding drum in my Dremel to blast away waste. The #2 setting will cut without excessive melting, if you just pull away every few seconds. Get close to your line, but give yourself a little room for hand-fairing. Lastly, use that drum sanding attachment to blast away the formers on the back. With a little fore-thought, one can make it so that the second plank layer matches the width of the scribed planking on the hull. I would just sand a micro-bevel onto the plank edges so that those lines show. Or you could simply scribe-in the lines afterwards.

- 449 replies
-
- 1
-
-
- soleil royal
- Heller
- (and 1 more)
-
One other thought to keep-in-mind is to leave space along the channel wale for the channels, themselves. Since your listons d’or are copper wire, it will be much easier to determine the channel locations, in advance, and fit the listons in-between.
-
Tomorrow, I’ll do a quick napkin sketch to show you what I have in-mind.
- 449 replies
-
- 1
-
-
- soleil royal
- Heller
- (and 1 more)
-
If so, I have a suggestion for doing this with strip styrene and temporary backing formers that will make this fairly easy and produce a nice, perfectly fair result. I wish I had thought of this, back in the time that I was modifying the hull.
-
Okay, so one detail did just catch my attention. Are you still planning to wrap the exterior planking past the beakhead bulkhead, in a descending arc toward the stem?
-
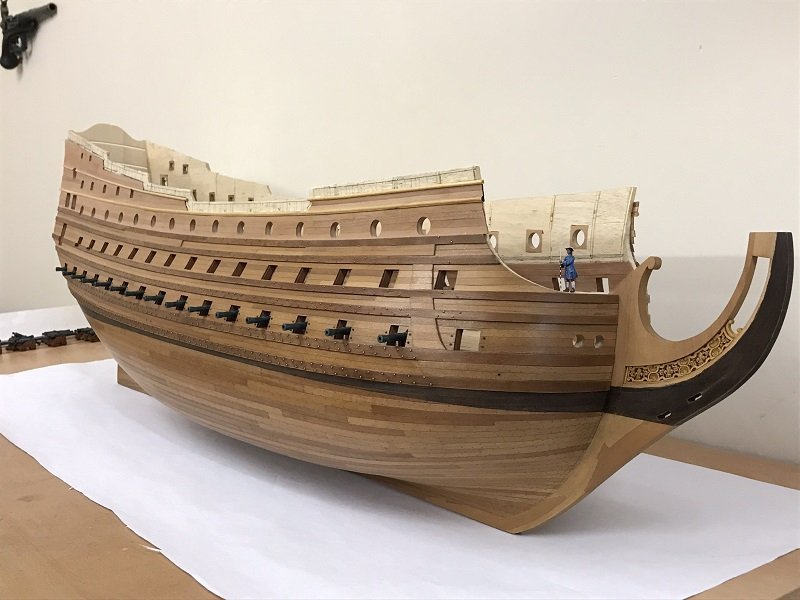
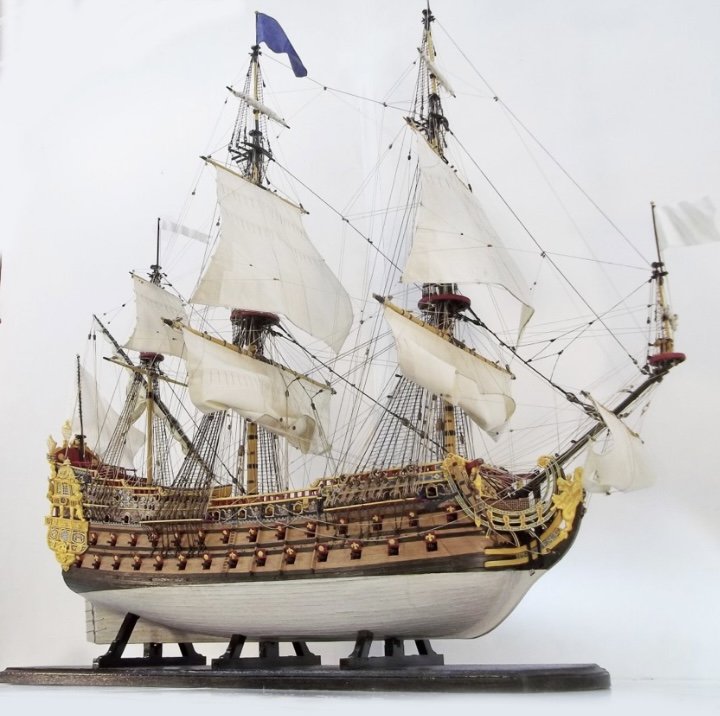
I just did a little photo manipulation to get a better sense of her on her waterline: I do think you can go to about mid-lower wale with the white stuff, in the waist. This all looks very good to my eyes!
- 449 replies
-
- 1
-
-
- soleil royal
- Heller
- (and 1 more)
-
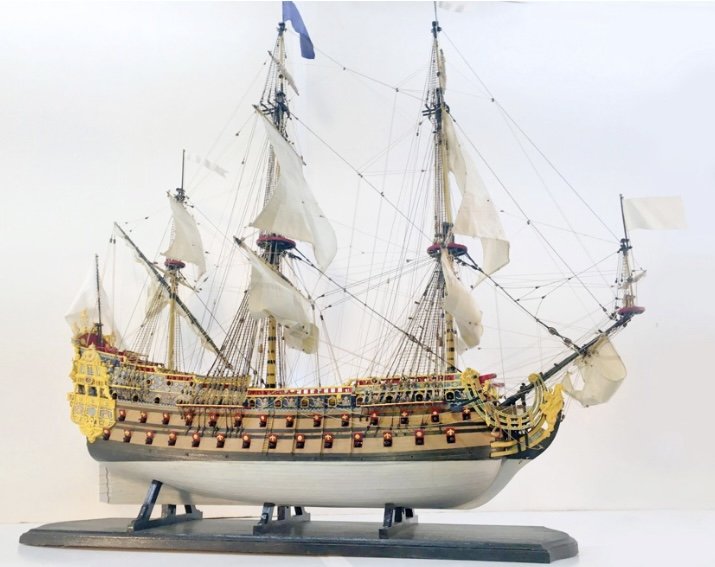
As I zoom-in, here, and really look - two things: First, you have done a really excellent job of fine-tuning the wales. Their run is impeccably consistent. All of your effort to fill and re-scribe plank lines has been well worth it! It is interesting to note the difference in sheer, between the kit and what you are representing; 1693 vs 1671.
-
She looks fantastic, Eric! As for cleanup, exactly what you are doing has always been my go to. Just a little dish detergent in water and an old toothbrush to get into all the tight spots. This is really the best method for degreasing the hull, without using anything harmful to the plastic.
-
Perhaps the nuts have a high oil concentration? I am certain you will find an alternative. I think the patination you have chosen is just enough to lend depth to the details. As always, the work is a joy to behold!
-
Merry Christmas, Aleksandr! That is such a curious thing about the carvings freeing themselves from the glue. Even if you were using the same type of silicone that one might use to seal a gasket around a sink, it is remarkable that they would work themselves free. I’d have thought they’s break along weak spots sooner than that.
-
Exquisite, as always, Mark.
-
I have not. I was concerned about the ways in which cotton reacts to humidity changes. Is this an overblown concern?
- 2,699 replies
-
- 1
-
-
- heller
- soleil royal
- (and 9 more)
-
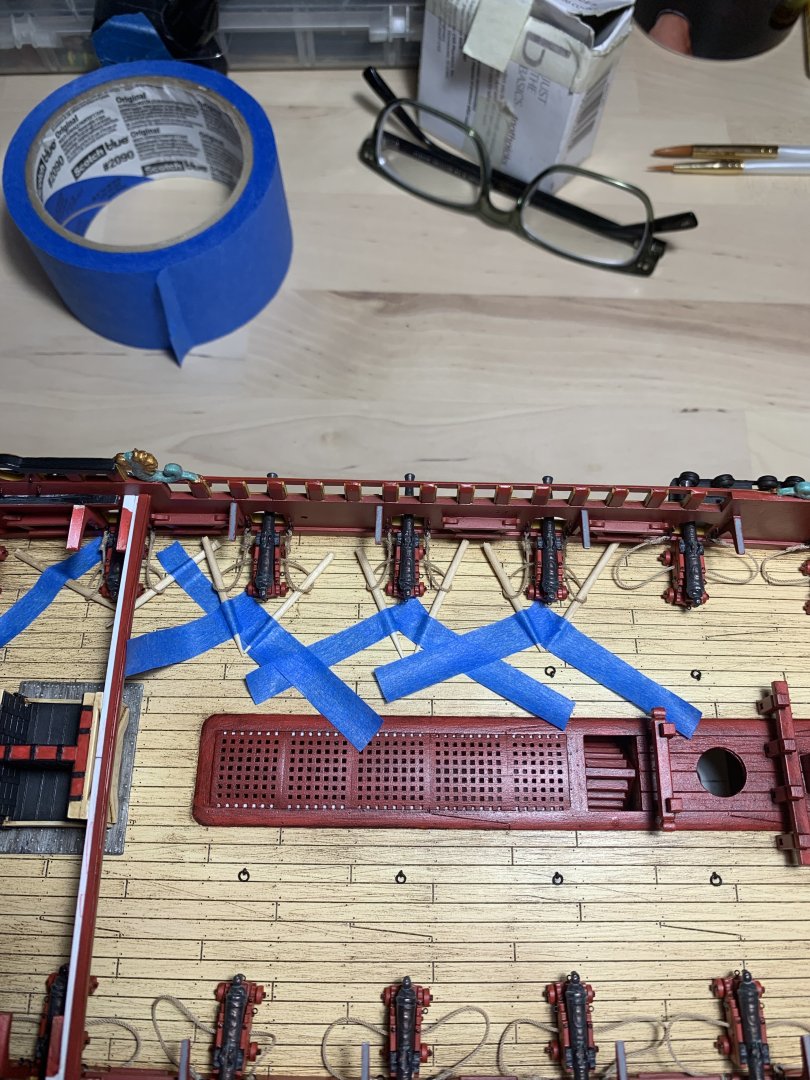
As life muddles along, on my end, I am happy to use this space to highlight the outstanding work of my fellow Heller modification enthusiasts. Today, John Ott was the first person to actually finish his magnificent representation of Soleil Royal 1693, carrying sail as represented on the Velez Malaga scroll. A few screen shots: I joke with John that he’s already created the box art for the Heller re-release of this Prestige Series classic, in a more historically accurate representation: A few overall perspective shots: There are many more finely detailed shots of the decks, rig and stern on his build page, here: As you all have gathered by now, I hold John and his many talents in very high regard. I hope you will all find a little time to take a closer look. Congratulations, John, on a magnificent piece of work! ___ This past week, I had a few hours to start playing around with and manipulating the breeching lines. I did as Dan suggested and saturated the ropes with water. This, alone, does little to make them more compliant. What it does do, though, is make it easier for the dilute Elmer’s glue to wick into the polyester yarns: While I haven’t yet had a chance to see whether these shapes will hold when I undo the tapes, this is intended to be a two-step process; next, I’ll tack the loops down to the deck with a less dilute Elmer’s solution. Then, I can move-on to the haul-out tackles. Thank you all for looking-in!


- 2,699 replies
-
- 13
-
-
- heller
- soleil royal
- (and 9 more)
-
Well, John, what a fabulous and innovative journey this has been to follow your project. I am as awestruck with this being your first complicated ship model, as I am with Marc Yeu’s Soleil Royal, in wood - also a first attempt in that medium. You are a true artist, colorist, engaged and engaging historian and an extremely resourceful problem-solver. Your execution is superb! I often wonder whether Heller representatives look-in on these kit-bash projects and ever consider a re-issue of the kit in a more historically accurate edition. If they do, you have created a prototype that the world-over would scramble to get their hands on. In typical John Ott style, you have even created the box art for them. I love your model for many reasons, but the totality of it, I think, conveys a strong sense of the magnificence that the actual ship must have embodied. I sincerely hope it won’t be another 10 years before your next ship model. I have really enjoyed getting to know you, a bit, and hope that you will stick around! Fair winds mon ami! - Marc
- 106 replies
-
- 4
-
-
- Soleil Royal
- Ship-of-the-line
- (and 2 more)
-
Thank you, guys! The hospital cleared him to go home yesterday. His kidney function returned to normal, and he’s no worse for the wear. Thank you for asking.
- 2,699 replies
-
- 8
-
-
- heller
- soleil royal
- (and 9 more)
-
David, Bill, Dan, and all who have visited recently - thank you for your well-wishes! We are all an aging crew, and I know that so many of you have tread the path I am walking now. It is so appreciated, on my end. My Dad is going to be okay. His scans all came out clean; no internal bleeding or broken bones. He isn’t happy to be there, but he will remain in-hospital for a few days to monitor his UTI and kidney function. Dan - as always, your advice is TIMELY! This was exactly what I needed to know. Thank you, again, my friend!
- 2,699 replies
-
- 4
-
-
- heller
- soleil royal
- (and 9 more)