


gsdpic
-
Posts
819 -
Joined
-
Last visited
Content Type
Profiles
Forums
Gallery
Events
Everything posted by gsdpic
-
Lotus 72D by gsdpic - FINISHED - Tamiya - 1/12 - PLASTIC
gsdpic replied to gsdpic's topic in Non-ship/categorised builds
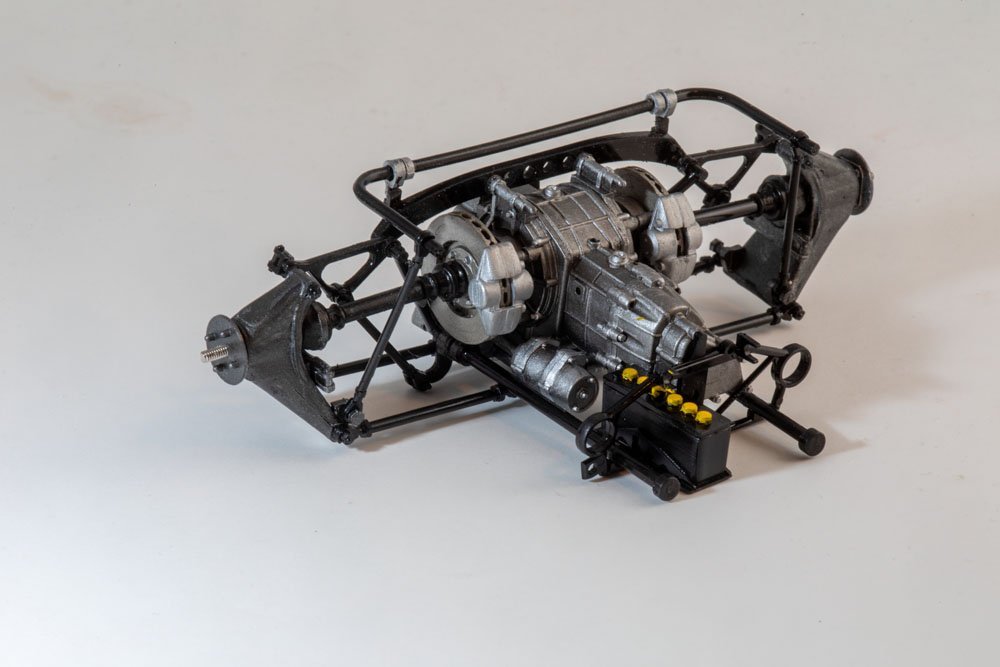
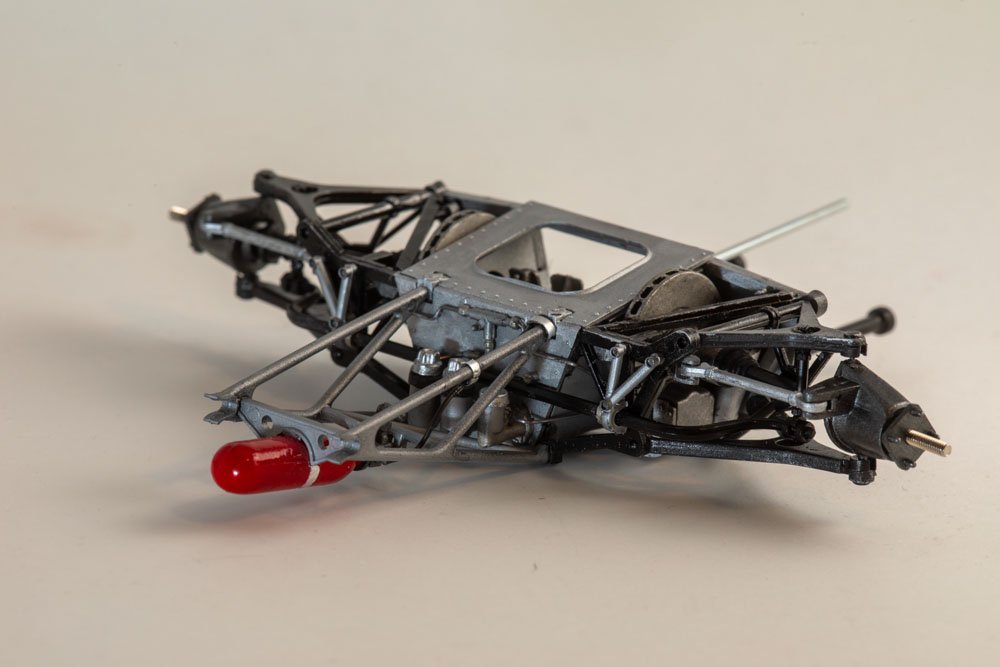
Thanks for the history lesson, egilman, and thanks to others for the likes. I received the braided metal line that I ordered and used it for the front fire extinguisher. The diameter is not quite as large as I expected and it is a bit floppier than I expected, so not sure if it will be appropriate for the oil lines. I'll figure that out much later in the build. I've also almost completed the gearbox and rear suspension. It was not quite as tricky as the front, but close. The remaining thing to do is to add the shock absorbers (aka dampers) which is done when attaching the gear box to the engine, as the shock absorber mounts on a brace between the two pieces. I hope to still do a bit more detailing on the gear box, with some brake lines to the calipers and also some wiring harness to connect to the battery and I think that is the starter just ahead of the battery. Next up is exhaust, then connecting the gearbox and engine to each other and then to the body. But, I still have not done any clear coat on the body panels. I am waiting for a delivery that is expected on Friday that includes some Tamiya X-22. I have more experience with that since I got my air brush than any other clear, so figured it was the best/safest choice for this model.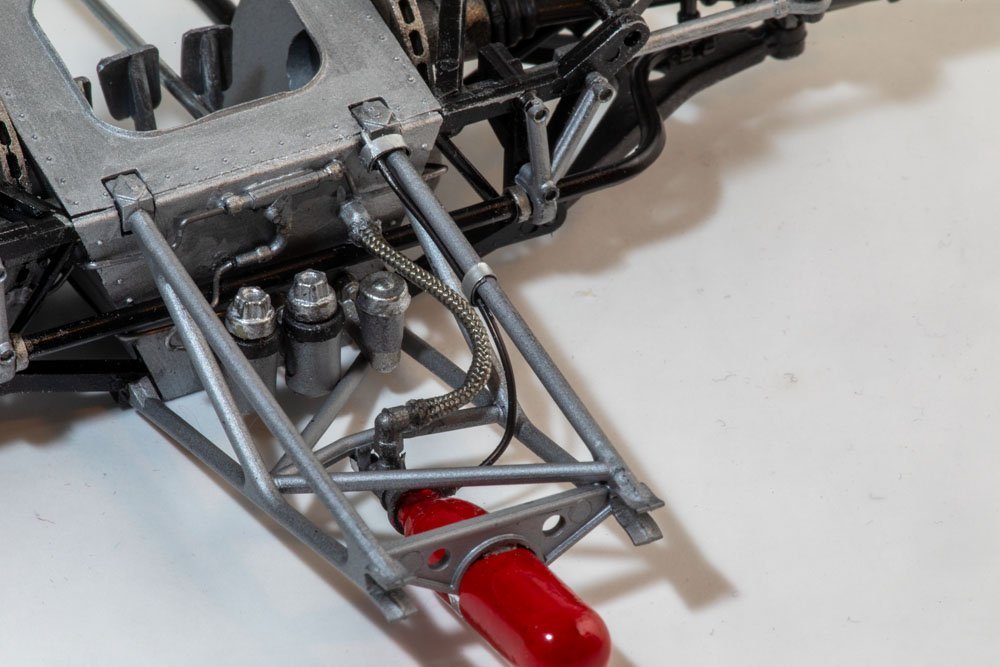
- 53 replies
-
- 12
-

-

-
Bugatti Type 35B by CDW - FINISHED - Italeri - 1:12 Scale
gsdpic replied to CDW's topic in Non-ship/categorised builds
I'm in. Just what I need, to be tempted by another 1/12th scale old race car build. I prefer the fresh out of the factory look, but only because I am too chicken to attempt any serious weathering. Maybe some day. I am preparing to be amazed by what you come up with -
Lotus 72D by gsdpic - FINISHED - Tamiya - 1/12 - PLASTIC
gsdpic replied to gsdpic's topic in Non-ship/categorised builds
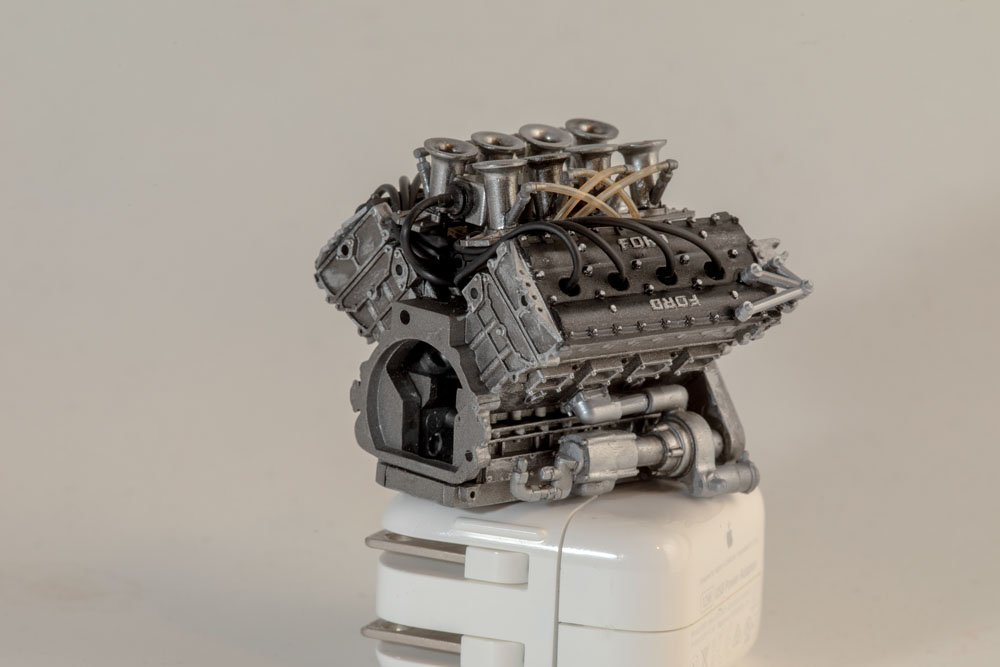
I hope you are patient And and thanks to the others for the likes. I've now pretty much completed the engine. The gear box, along with rear suspension and rear brakes, is next. I painted the engine block with metallic gray (XF-56) then used black panel line accent and some dry brushed flat aluminum (XF-16) to provide some variation. I have to say in the pictures, the variation shows up more than it does in real life. I also think the spark plug wires/tubes are a bit out of scale but will leave them for now. Funny thing is that in my stash I have both the Lotus 49 and the Lotus 78, which were also powered by the Ford/Cosworth DFV engine so I'll have two more chance to build pretty much the exact same engine, whenever I get around to doing those other two.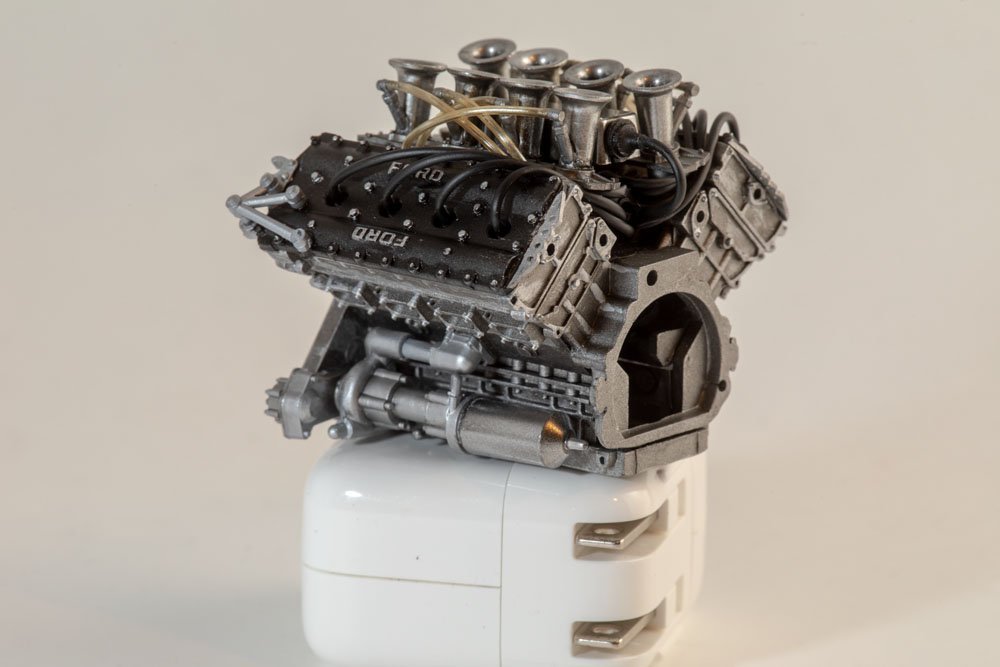
- 53 replies
-
- 11
-
-
-
P-38J Wicked Woman by DocRob - FINISHED - Tamiya - 1/48
gsdpic replied to DocRob's topic in Non-ship/categorised builds
Beautiful! Looks like she just rolled off the assembly line. -
Lotus 72D by gsdpic - FINISHED - Tamiya - 1/12 - PLASTIC
gsdpic replied to gsdpic's topic in Non-ship/categorised builds
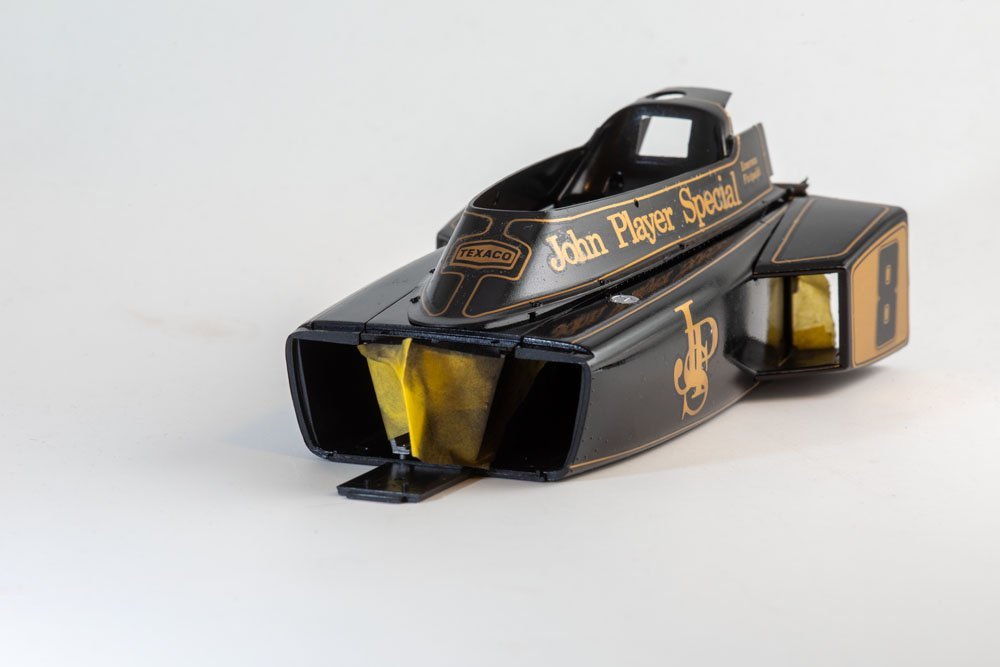
Thanks to OC for the comment, and to everyone else for looking in and hitting the like button. I've completed the decals on the body parts. It went quite well....sure there are a few wrinkles and a few places the decals tore and a little bit of silvering here and there but overall I am pleased with the way it went. I was surprised that the long skinny stripe decals did not pose too much issue, though a couple of them did break apart. But I was able to just nudge the two edges together. The larger decals seemed a little more problematic, as there were more likely to be spots where the decal film did not want to release from the backing paper. In a few cases I had to grab the decal with tweezers and delicately pull it off of the backing paper. Below are a couple of pictures. Excuse the masking tape, I am leaving that in place until after I do the clear coat, which I have not started yet. Also, the upper cowl is just sitting on the main tub now. Unfortunately it is slightly warped. I think the kit intends you to not glue that in place so that it can be removed for better viewing of the cockpit but I may need to glue it down to have it sit nice on the tub. That's probable not a big loss as there is not a lot to view in the cockpit. I also started assembling the engine and gearbox. I placed the front cowl, the body, the engine/gearbox and rear wing all next to each other on my table and was a bit surprised just how big this model is going to be. I guess I should have thought about that before I started hoarding 1/12th or 1/16th scale car models bought off of ebay. This is one of 9 that I have. Oops.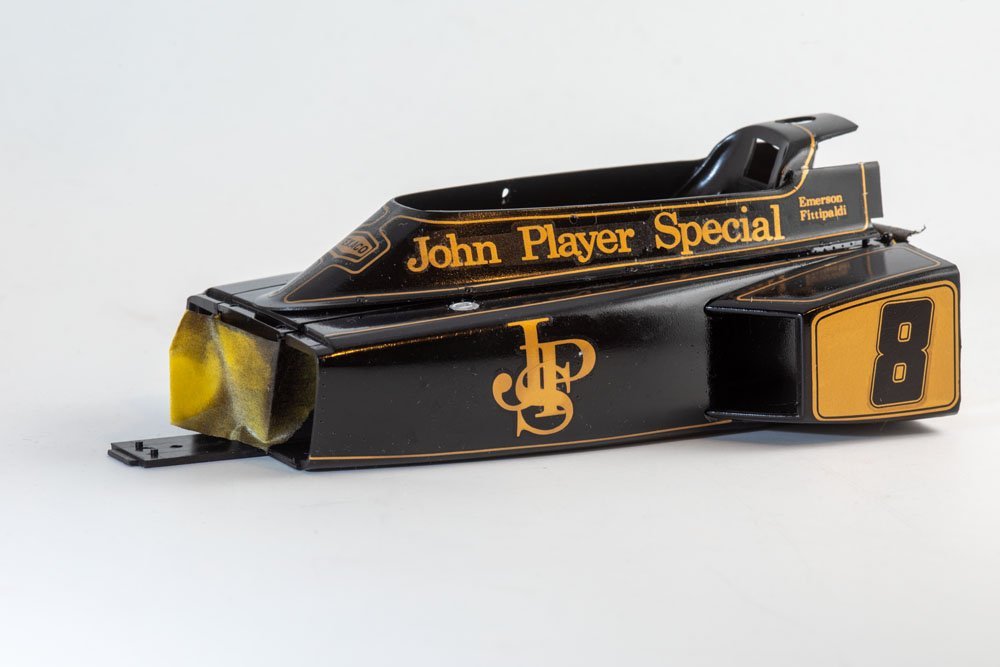
- 53 replies
-
- 10
-
-
Well done! Another tremendously creative and entertaining build. Maybe the first time on MSW that the builder used his own livestock as the prototype for part of the build!
- 290 replies
-
- 5
-
-

-
- Quinquereme
- Finished
- (and 1 more)
-
Wonderful result! The carvings, the rigging, everything is just superb. Thanks so much for sharing your work in this build log.
- 208 replies
-
- 2
-
-
- kitbashing
- Woodcarving
- (and 4 more)
-
Lotus 72D by gsdpic - FINISHED - Tamiya - 1/12 - PLASTIC
gsdpic replied to gsdpic's topic in Non-ship/categorised builds
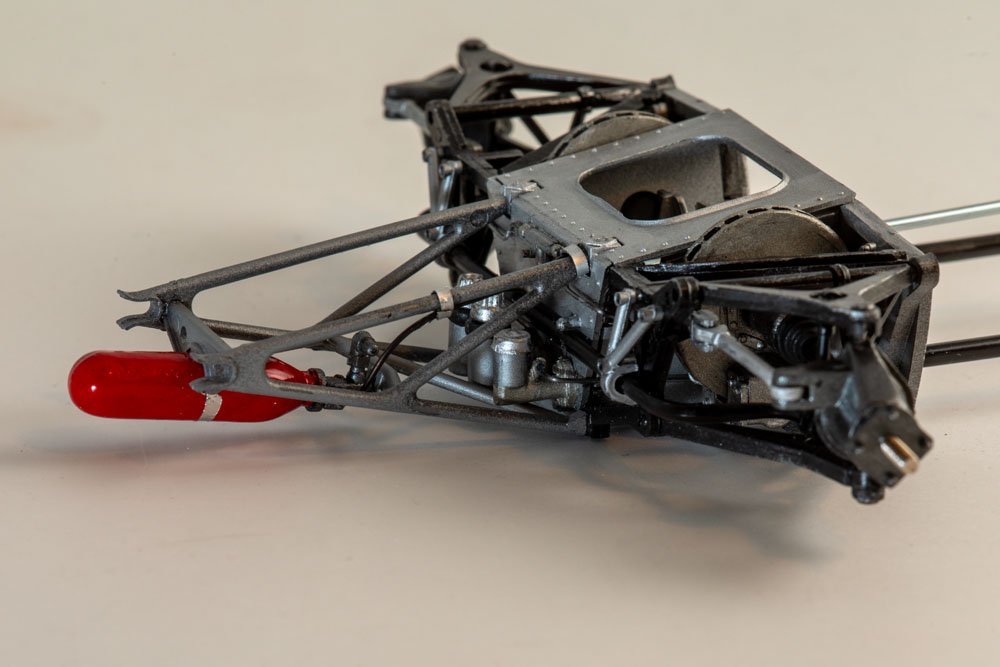
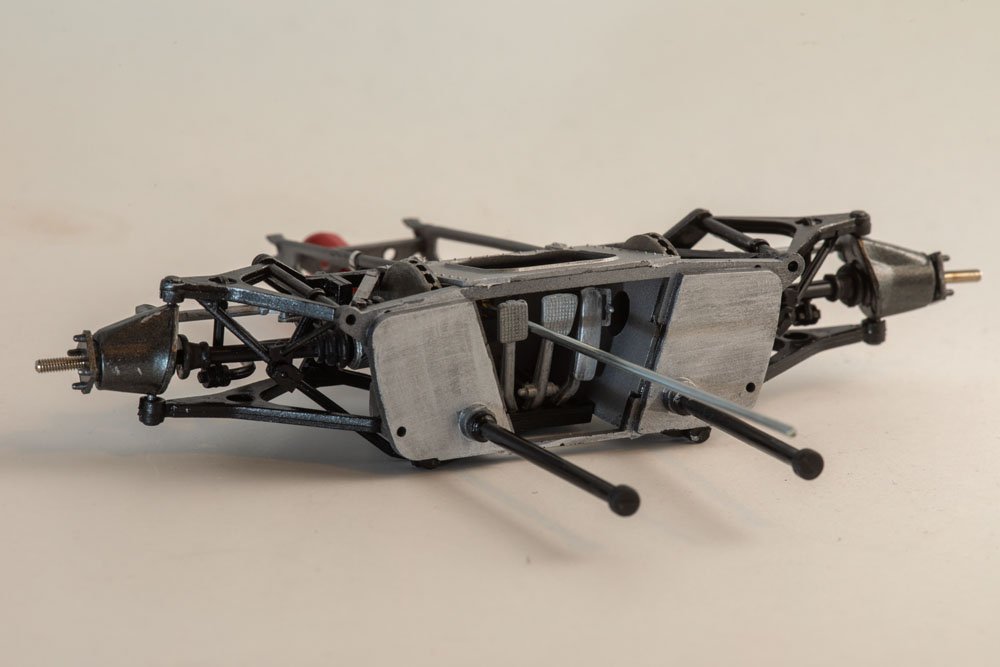
Thanks as always for the comments and likes! I have the front suspension structure 99% done now, shown below. The fire extinguisher is toward the front of the car, the back bulkhead/frame fits against the main tub of the car. The one part that I have not done is the hose from the fire extinguisher to the front bulkhead. The kit supplies some black rubber/vinyl tube for that purpose. I hope to obtain some of the metal, braided lines and use that in place of the vinyl hose. Note also the bare wires on the front, representing the hydraulic lines for the brakes and clutch. The three cylinders in front are the master cylinders. I added those wires, they were not part of the kit. I also added the black control wire from the bulkhead to the fire extinguisher. The front cowl snaps on, so in theory, most of this stuff can be made visible by removing the cowl. It cannot be seen in these photos, but I also added rods from the pedals to the opposite side of the master cylinders. They can be seen if you look straight down through that square opening in the top. I presume that is how this worked....the pedals acted as levers pushing rods into the cylinders to provide the pressure needed to brake or release the clutch. I am also tempted to add a rectangular decal or two to the fire extinguisher, as it looks a bit bare as is. With this, I am through step 26 out of 45 in the instructions. The next step begins assembly of the engine. I might also go back and resume putting decals on the main tub. The gloss black paint there has been curing for a week or two and is no longer tacky at all.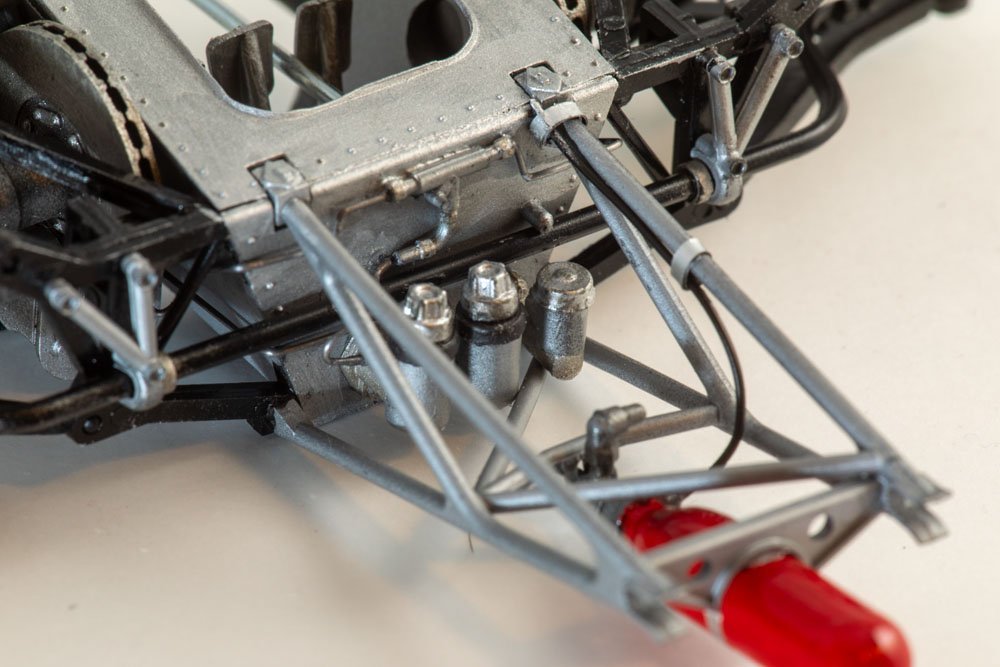
- 53 replies
-
- 10
-
-
-
Lotus 72D by gsdpic - FINISHED - Tamiya - 1/12 - PLASTIC
gsdpic replied to gsdpic's topic in Non-ship/categorised builds
Thanks again CDW and egilman. I also thought about possibly painting the gold stuff if the decals were not usable. Or microscale suggests painting on decal film to create decals, saying it may be easier to paint on a flat surface than directly on the model. Though for something like stripes it may be tough to map the curved decal to the flat decal sheet if you do not have existing decals to work from. I did scan in the decal sheet before I cut it up in case I needed to refer to it in the future. I've used Indycals in the past when I messed up the decals on a Fujimi Ford GT 40 model and was pleased with what I got. The lotus 72D is one that they do not have decals for....perhaps he also cannot print metallic gold. -
Lotus 72D by gsdpic - FINISHED - Tamiya - 1/12 - PLASTIC
gsdpic replied to gsdpic's topic in Non-ship/categorised builds
Thanks. This is only about the second time dealing with such old decals. I still have some of the longest and most complex ones to do so I am not out of the woods yet. And on a few that I have done, I could see that about as much of the color stayed on the backing paper as on the decal film. In the past I've made a few decals using the inkjet printer compatible decal paper but I am sure my inkjet could not recreate the metallic gold decals on this kit. Thanks for the links! I've bookmarked them just in case...I hope not for this kit but possibly in the future. And thanks to all the others for the likes. I've continued with the kit. The next part is mostly construction of the front suspension. And yes, that was quite a beast to complete. I've got it about 80% done but the rest should be much easier. They design it so that the suspension moves like the real thing....deflects up and down, the front wheels turn left and right, and they rotate as well. When they rotate, drive shafts also cause the inboard mounted brake disks to rotate. So, many of those parts just snap together to allow movement but when gluing the two main frames together, you need to hold about 8 other pieces in place, so it was not easy. And with all that, one of the wheels does not turn as freely as I would like but it'll do. I had one near catastrophe. The uprights/hubs have two ball-and-socket joints, one on top and one on bottom. On one of the hubs, I broke off one of the balls. Without that ball, the hub would not attach to the suspension. Fortunately I had some sewing pins with small, round plastic heads. I was able to sand down the round head of one of those pins to make it the same size as the broken ball, drill a hole into the hub and cut off most of the pin and then CA the pin into the hub. That worked surprisingly well. For now, just one picture. Once I complete this a bit more, I'll post a few more pictures. I've used a variety of paints on this....tamiya gun metal, metallic gray, and black, alclad black and semi-matte aluminum, and model masters steel.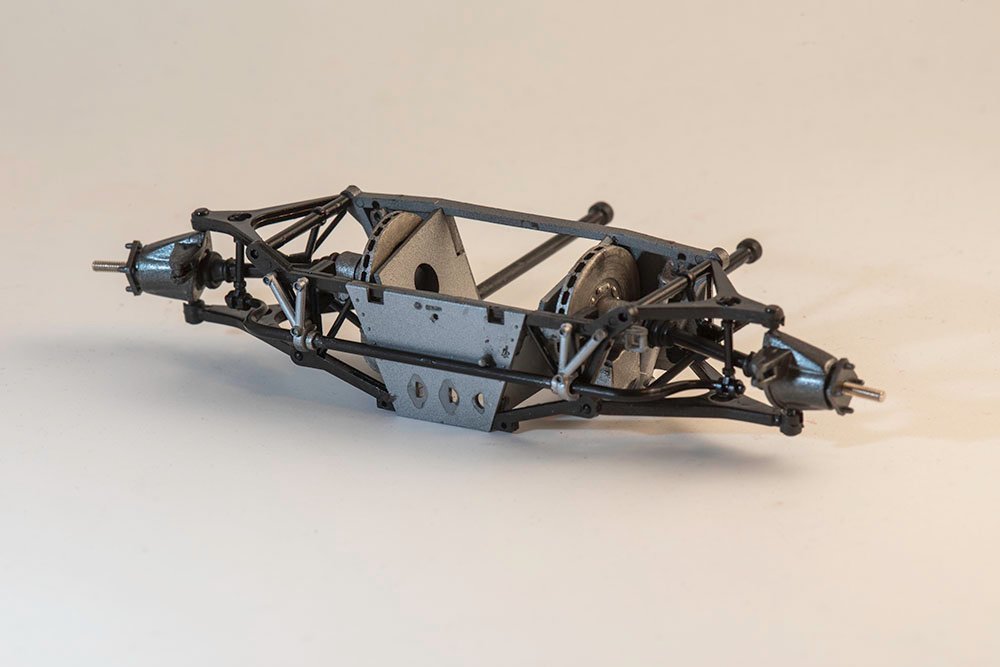
- 53 replies
-
- 12
-
-
-
Lotus 72D by gsdpic - FINISHED - Tamiya - 1/12 - PLASTIC
gsdpic replied to gsdpic's topic in Non-ship/categorised builds
Just a quick update. First, I have done all the decals on the front cowl now. A couple were a bit dicey but overall it went ok. The line around the very front broke in a couple pieces but I was able to slide the pieces together and (mostly) hide it. I need to very carefully clean some of the water spots off of the cowl and then clear coat it. I've also resprayed the body panels on the main tub. It looks much better now and it seems to be less tacky even after just 12 hours. This time I was far more diligent about shaking up the bottle of paint before using it, so I think that might have helped. I've also done a bit more work on the front suspension bits but not enough to bother showing at this time. Oh, I also stripped all the chrome off of the one small sprue of chrome parts, as a couple of them are on the front suspension. Most of them I'll likely repaint with either chrome or polished aluminum paint from Alclad. Here's the fully decal'ed front cowl. That stripe around the top edge of the cowl was made up of 5 individual decals that you butt up against each other to form the complete line. I started with the one in the front then worked my way up each side.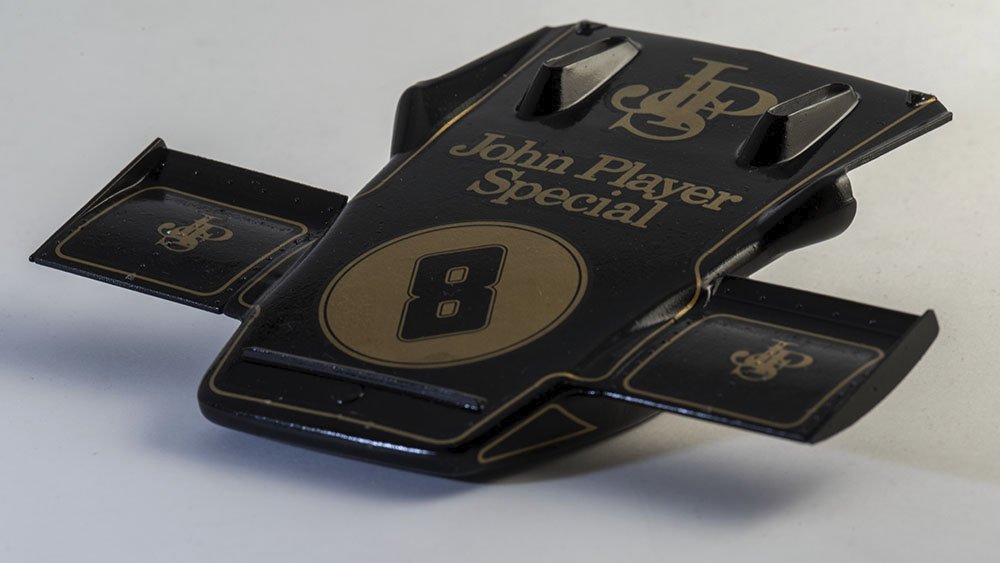
- 53 replies
-
- 11
-
-
-
Lotus 72D by gsdpic - FINISHED - Tamiya - 1/12 - PLASTIC
gsdpic replied to gsdpic's topic in Non-ship/categorised builds
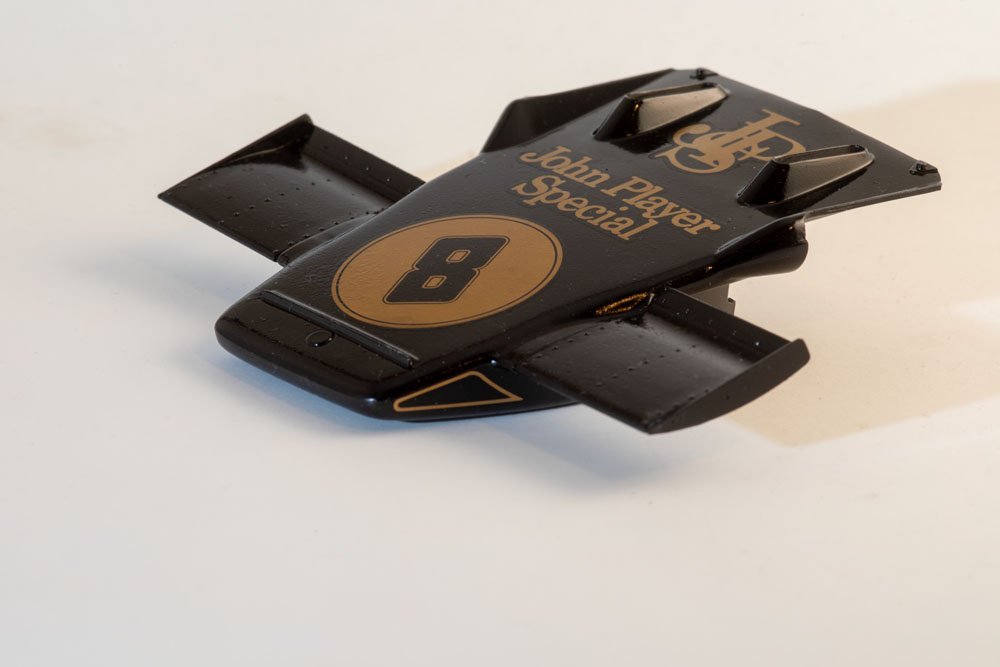
Thanks everyone for the likes and comments. I've made more progress, switching between adding decals or building the next steps. I think I have all the decals on the rear wing done now and a few decals on the front cowl with about 10 more to go. I've assembled the main tub as well. Annoyingly, the black paint on the main tub is still a tiny bit tacky (see discussion above) and does not look as good as the paint on the front cowl. The paint on the rear wing is somewhere between the two but obviously I can't repaint it now. But I might try adding another coat of black paint to the main tub and then let it sit without touching it for a week or two while I work on all the suspension and engine bits. The front suspension is next in the instructions and I've started a bit on that as well. Here are pictures of the tub, the rear wing, and the front cowl. There are two radiators to be placed in the side pods of the main tub; I've left them out for now in case I do decide to repaint the tub, that'll be two less things to mask. I believe that the radiators are one of the places where the new kit provides some photo etch parts. Oops, I see now an unfortunate glue spot on the inside of the cockpit just ahead of the seat, guess I need to try to repaint that. The rear wing....there is a bit of silvering on the gold stripe near the front edge but it is not as noticeable in real life. None of this stuff has been clear coated so maybe that will help.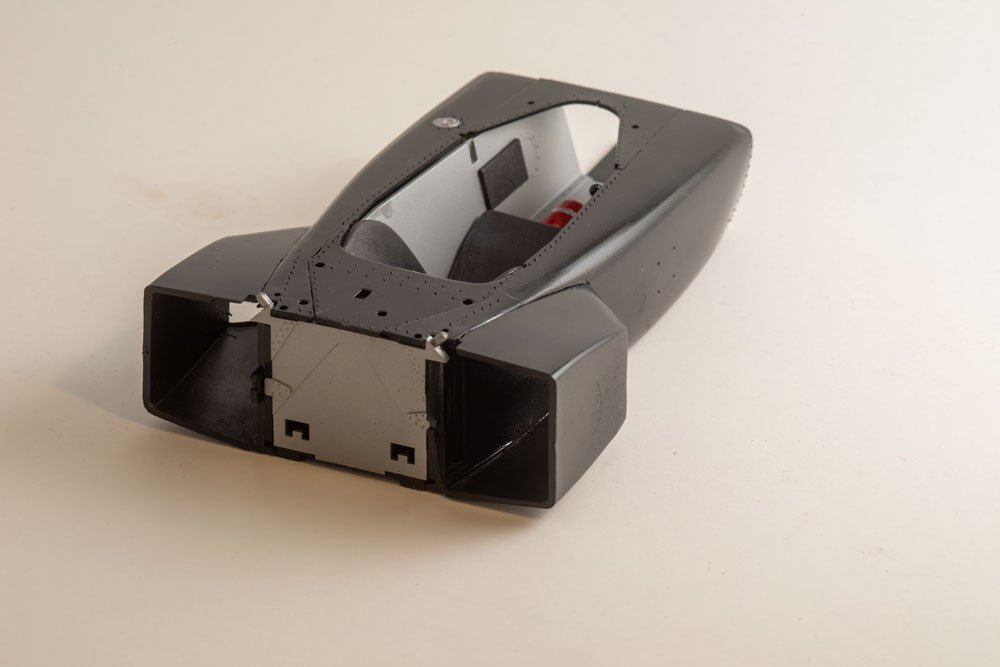
- 53 replies
-
- 14
-
-
Yea, I should have been more clear in stating that scalemates will help answer your first question, but not so much on the others. The Sopwith Camel has been on the shelf for 6 or 7 months while I do other projects. Overall I have a positive impression of it though (as always) there were some frustrations and some negatives to the kit. I still don't like the 2-d photo etched "turnbuckles" but was not ambitious enough to replace them with something more realistic. A few of the other bits and pieces annoyed me as well. But, as I said, overall it seems to be a fine kit and one of these days I'll get back to it and finish it off.
-
Lotus 72D by gsdpic - FINISHED - Tamiya - 1/12 - PLASTIC
gsdpic replied to gsdpic's topic in Non-ship/categorised builds
Thanks, I noted your praise for the Tamiya Laquers in your build log. They also are a bit hard to find, though I have seen at least one USA based web site that carries them. But for now I pretty much have all the body panels sprayed with the Alclad base, so maybe next time. And yes there will be a next time as I also have the Lotus 78 in my stash. -
I find the website scalemates.com very useful for this sort of question. I have no idea where they get their information from or how reliable it is, but when you look at a kit there, they show the history of when it was released, under which brand names, when it was "reboxed", etc. I searched there for Kearsarge and Alabama, and found the following, which I believe are likely the two kits you are referring to. According to scalemates, both were released in 1961. https://www.scalemates.com/kits/revell-05603-civil-war-steam-ship-uss-kearsarge--103477 https://www.scalemates.com/kits/revell-5621-css-alabama--143850
-
Lotus 72D by gsdpic - FINISHED - Tamiya - 1/12 - PLASTIC
gsdpic replied to gsdpic's topic in Non-ship/categorised builds
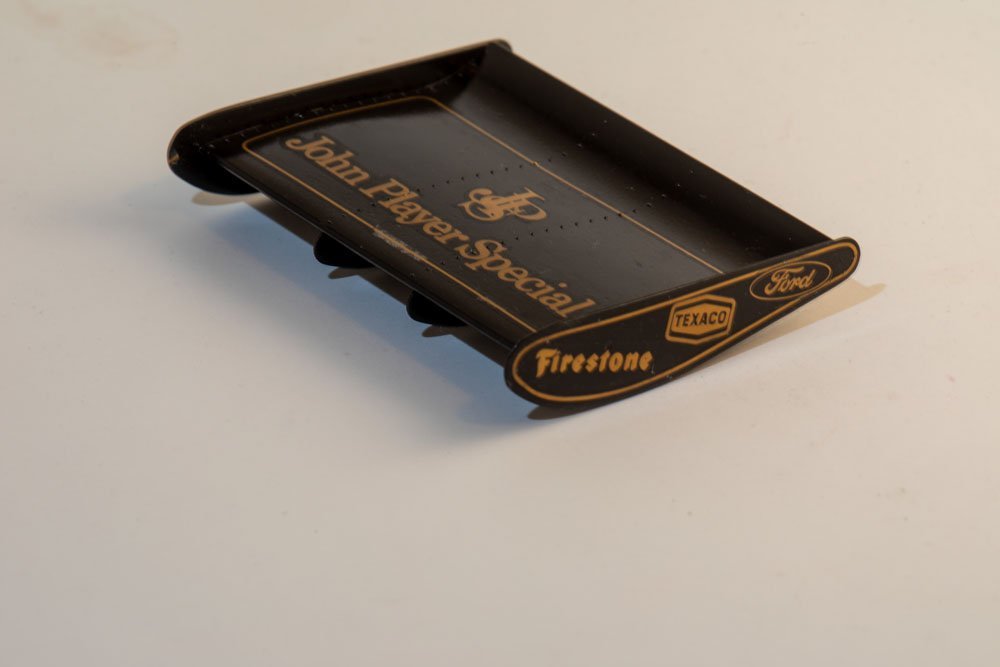
The first step of the build has you construct some of the body parts such as the wing, front cowl, oil tank and cooler, and the air induction box. This all went fairly well, though as was the case with DocRob's Renault, the fit and molding of the parts was not quite up to the current standards of Tamiya. It also seemed to me that this plastic was a bit harder than they use today or perhaps it is just because it is older. Anyway, I got those parts assembled along with fixing (or at least reducing) some of the flaws with the Tamiya putty as shown below. It was then time to paint them and start on the decals. For paint, I first used the alclad black primer/microfiller, particularly on the parts that had the putty patches and any other possible scratches from sanding. That went on well. For the finish coat, I am trying to use the Alclad gloss black base. That is normally used as the base coat below their chrome or other shiny metals. But I have a largish bottle of the stuff so figured I'd use it here too. But it seems a little problematic, as it stays tacky for quite some time, then even after it seems to no longer be tacky, once you start handling the part it becomes tacky again, I guess just from the heat from your hands. Or, if you try to polish or sand it, the heat generated from those operations make it tacky again as well, at least for the first 24-48 hours. Anyway, I have painted all four of the parts shown above as well as some additional body parts, and started applying the decals to those parts. I think I have all the decals on the air box done and just 2 (out of about a dozen) decals on the rear wing. Unfortunately you can see a little bit of "silvering" on the air box decal and the one on the other side has a couple very small wrinkles that I could not remove. Once I have all the decals in place on the body, I'll apply some sort of clear gloss though I have not yet decided which clear gloss to use.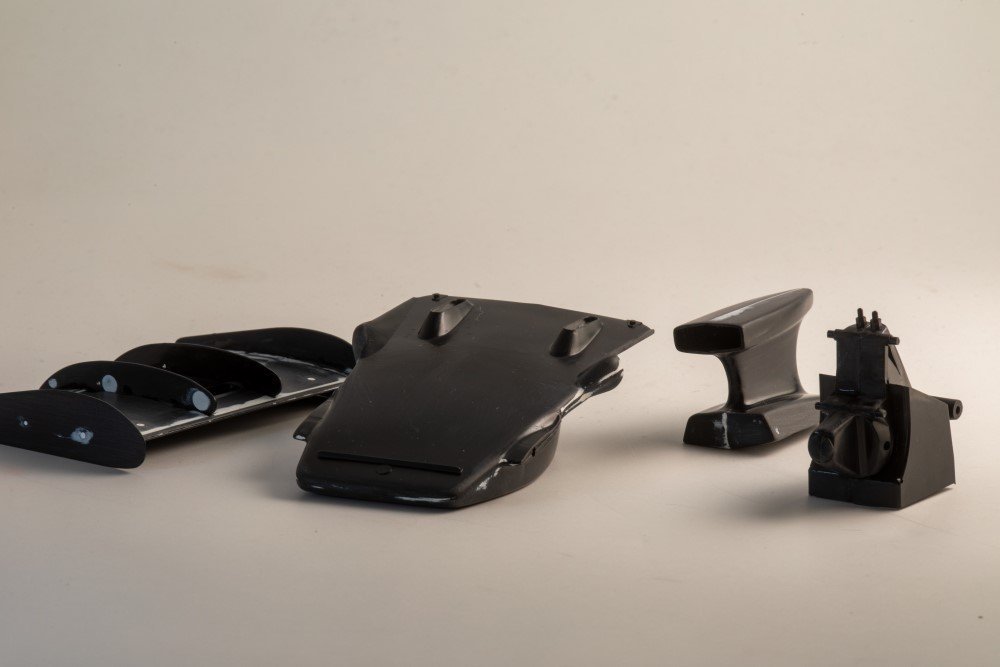

- 53 replies
-
- 14
-
-
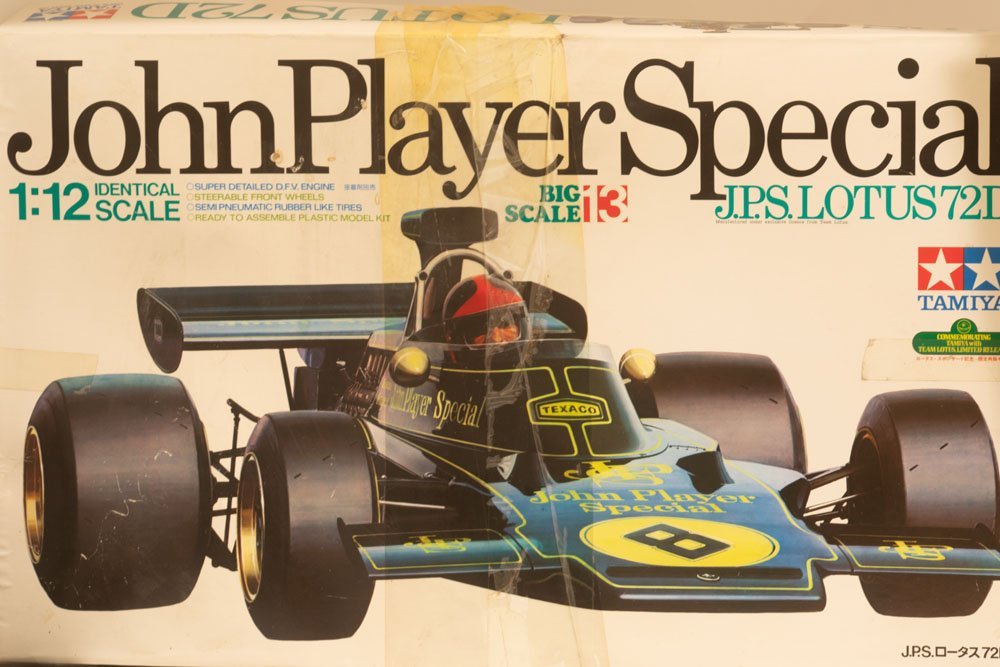
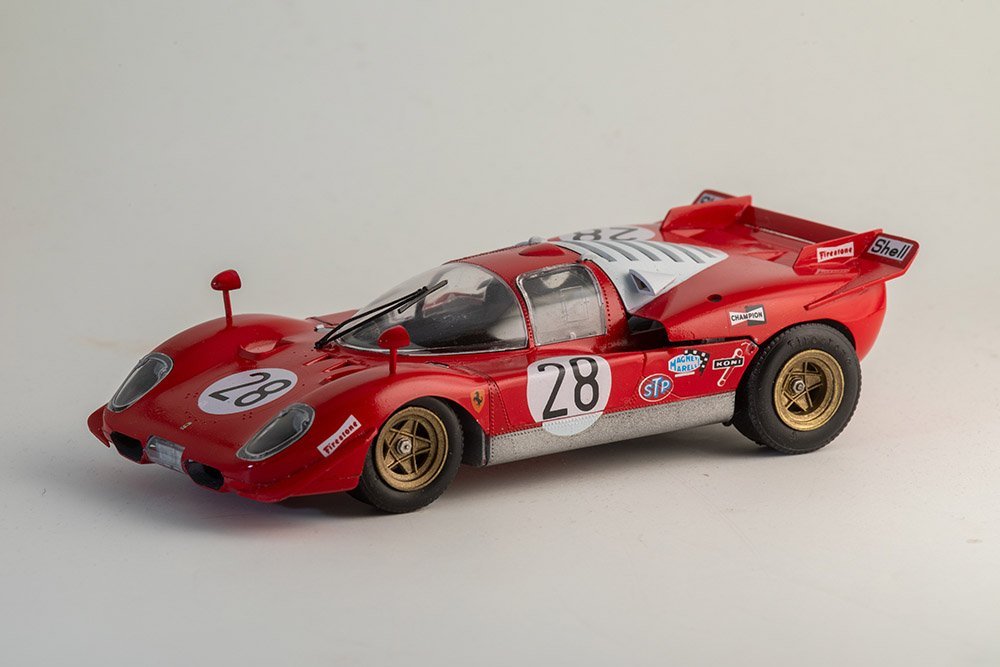
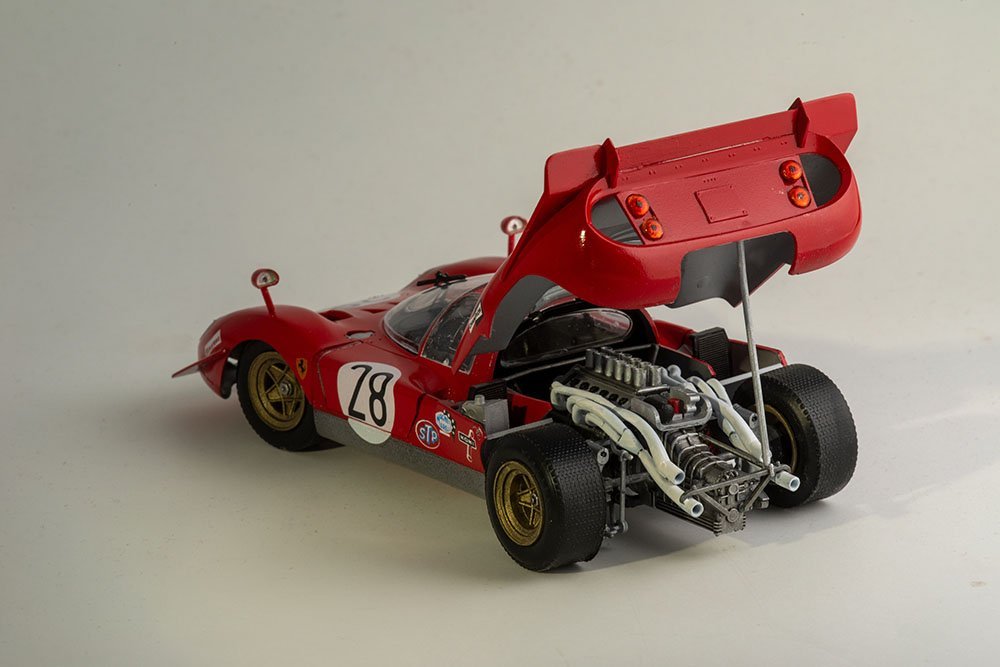
Hello to all of you troublemakers, like me, who read and post non-ship build logs on MSW Inspired by @DocRob's recent Renault F1 car build, I decided to both build and log my Lotus 72D. This is part of the same series of 1/12th scale F1 cars by Tamiya. They have very recently re-released this model, including some photo-etch parts. However, I am building the old, original version. I got this kit off of ebay. The box was in a bit rough shape, as shown below, but the kit contents appear to be in good shape. The part sprues were all still in their plastic bags. I might've preferred the new one, but this one was about 60% of the cost of the new one. The Lotus 72 was used in Formula 1 by Team Lotus for several years, from 1970 - 1975, in several different versions. The "D" version was used in 1972 and for the first few races of the 1973 season. I believe that 1972 was also the year that the black and gold "John Player Special" livery was introduced. Emerson Fittipaldi was the lead driver and won the 1972 championship and Team Lotus won the team championship. Fittipaldi had victories in Spain, Belgium, Great Britain, Austria and Italy that year. I'll be building it as shown on the box, which represents the car raced in Great Britain in 1972 (info from The Single-seat Lotus Formula 1 and Indy Cars, a definitive history by Doug Nye). The seller indicated that the kit came from an estate, so the seller had no more information on how old the kit is. The decal sheet had a 1991 copyright date, while several of the sprues had molded in copyright dates that were even older, so it could be as much as 32 years old. Those decals were my main concern about this kit. There were a few extras (e.g. the markings include the driver name so there were decals for both drivers but only one will be used. The decals also provided three different numbers, 6, 8, and 32). Before starting, I tried out some of these spare decals and they worked fine. However, some of the decals near the edge of the sheet look like they might be in a bit rougher shape. I have a bottle of Microscale's liquid decal film on the way in case I need it to help revive those decals (thanks to Ken @Canute for making me aware of that product). The decals, particularly the thin gold lines, may be a challenge. I will likely mostly build it out of the box, with a few enhancements, I hope. For one, I likely will not use the included driver figure but the only seat belts supplied are molded into the driver figure. I really like the MFH seatbelts that DocRob acquired but MFH products seem difficult to purchase in the US. I might need to order them from Europe or Japan if I want them. I may add or replace a few other connectors, fuel lines, spark plug lines, etc. as well. That will mostly come in to play when I get to the engine, which is pretty far into the build if I follow the order of the instructions. And yes, one of these days I'll get back to working on my Sopwith Camel, but for now it is on the shelf. I've been on a bit of a plastic car model kick lately. Below are two pictures of the most recent one, the Testor's (nee Heller) Ferrari 512S 1/25th scale. This one was driven by Andretti at the 24 hours of Daytona in 1970. That's enough of an introduction. I've actually started on this kit so will add another post or two with the initial build steps.
- 53 replies
-
- 11
-
-
2023 Donations drive
gsdpic replied to James H's topic in Using the MSW forum - **NO MODELING CONTENT IN THIS SUB-FORUM**
I renewed membership and donated a couple weeks ago. Just adding a comment now to bump the thread and increase visibility! -
Renault RE20 Turbo by DocRob - FINISHED - Tamiya - 1/12
gsdpic replied to DocRob's topic in Non-ship/categorised builds
The usual...life gets in the way, I have two other kits in progress, I spend too much time looking at MSW and not enough building. Actually, this week I expect to have more time and hope to make a lot of progress on one of those in-progress builds, a Ferrari 512S race car (testors, 1/25th). And just today I received the Tamiya 1/12th scale Lotus 72D I snagged off of ebay. The kit looks complete but could be as much as ~30 years old, so who knows what will happen when I try to use the decals. 😬 -
Renault RE20 Turbo by DocRob - FINISHED - Tamiya - 1/12
gsdpic replied to DocRob's topic in Non-ship/categorised builds
What they said 👆. Beautiful end result. Makes me want to dig into one of the 1/12th scale F1 cars I have in the stash. -
Renault RE20 Turbo by DocRob - FINISHED - Tamiya - 1/12
gsdpic replied to DocRob's topic in Non-ship/categorised builds
Wow. I agree with Yves, it looks fantastic, both the wing picture and the other pictures as well. I know you mentioned using the AK Extreme metal line of paints. I've not used them, though I've used the alclad metal paints a few times. Maybe your technique is better or maybe the AK paints are better, but the metal bits definitely look more metallic than I've achieved with the Alclad paints. And it is not just the wing...the exhausts, turbos, brakes all look like metal. I might have to give the AK paints a try. One minor nit....and maybe it is just the photo angle or maybe there is more you plan to do with it....but that one braided line in the wing picture looks a bit loose, like it would just be flapping in the breeze there. Maybe add a couple of wine cap foil clips to hold it to the structure. -
Off to a good start, I'll follow along. I, and I think most others, also like the "elegance and sporty look" of these boats as you put it so well.
-
Renault RE20 Turbo by DocRob - FINISHED - Tamiya - 1/12
gsdpic replied to DocRob's topic in Non-ship/categorised builds
Looks great! And yes, for me also, "phew" is the proper reaction to getting decals applied nicely. Have you, or do you intend to, put additional clear coat over the decals? -
Focus Stacking
gsdpic replied to Dennis P Finegan's topic in Photographing your work. How to do this.
And with that, google sees a small spike of "doddle definition" searches from the USA dod·dle noun informal•British noun: doddle a very easy task. "this printer is a doddle to set up and use" -
I've heard or read that the plastic parts can have some residual mold release agent as well. I often do a quick wash and rinse of the sprues before using them and then try to not touch the actual parts (much) before paint or primer. Having said that, I've never seen a problem arise from not doing it. And just make sure you do not wash a small part down the drain while cleaning.
