HOLIDAY DONATION DRIVE - SUPPORT MSW - DO YOUR PART TO KEEP THIS GREAT FORUM GOING! (Only 13 donations so far - C'mon guys!)
×


drobinson02199
-
Posts
1,071 -
Joined
-
Last visited
Content Type
Profiles
Forums
Gallery
Events
Everything posted by drobinson02199
-
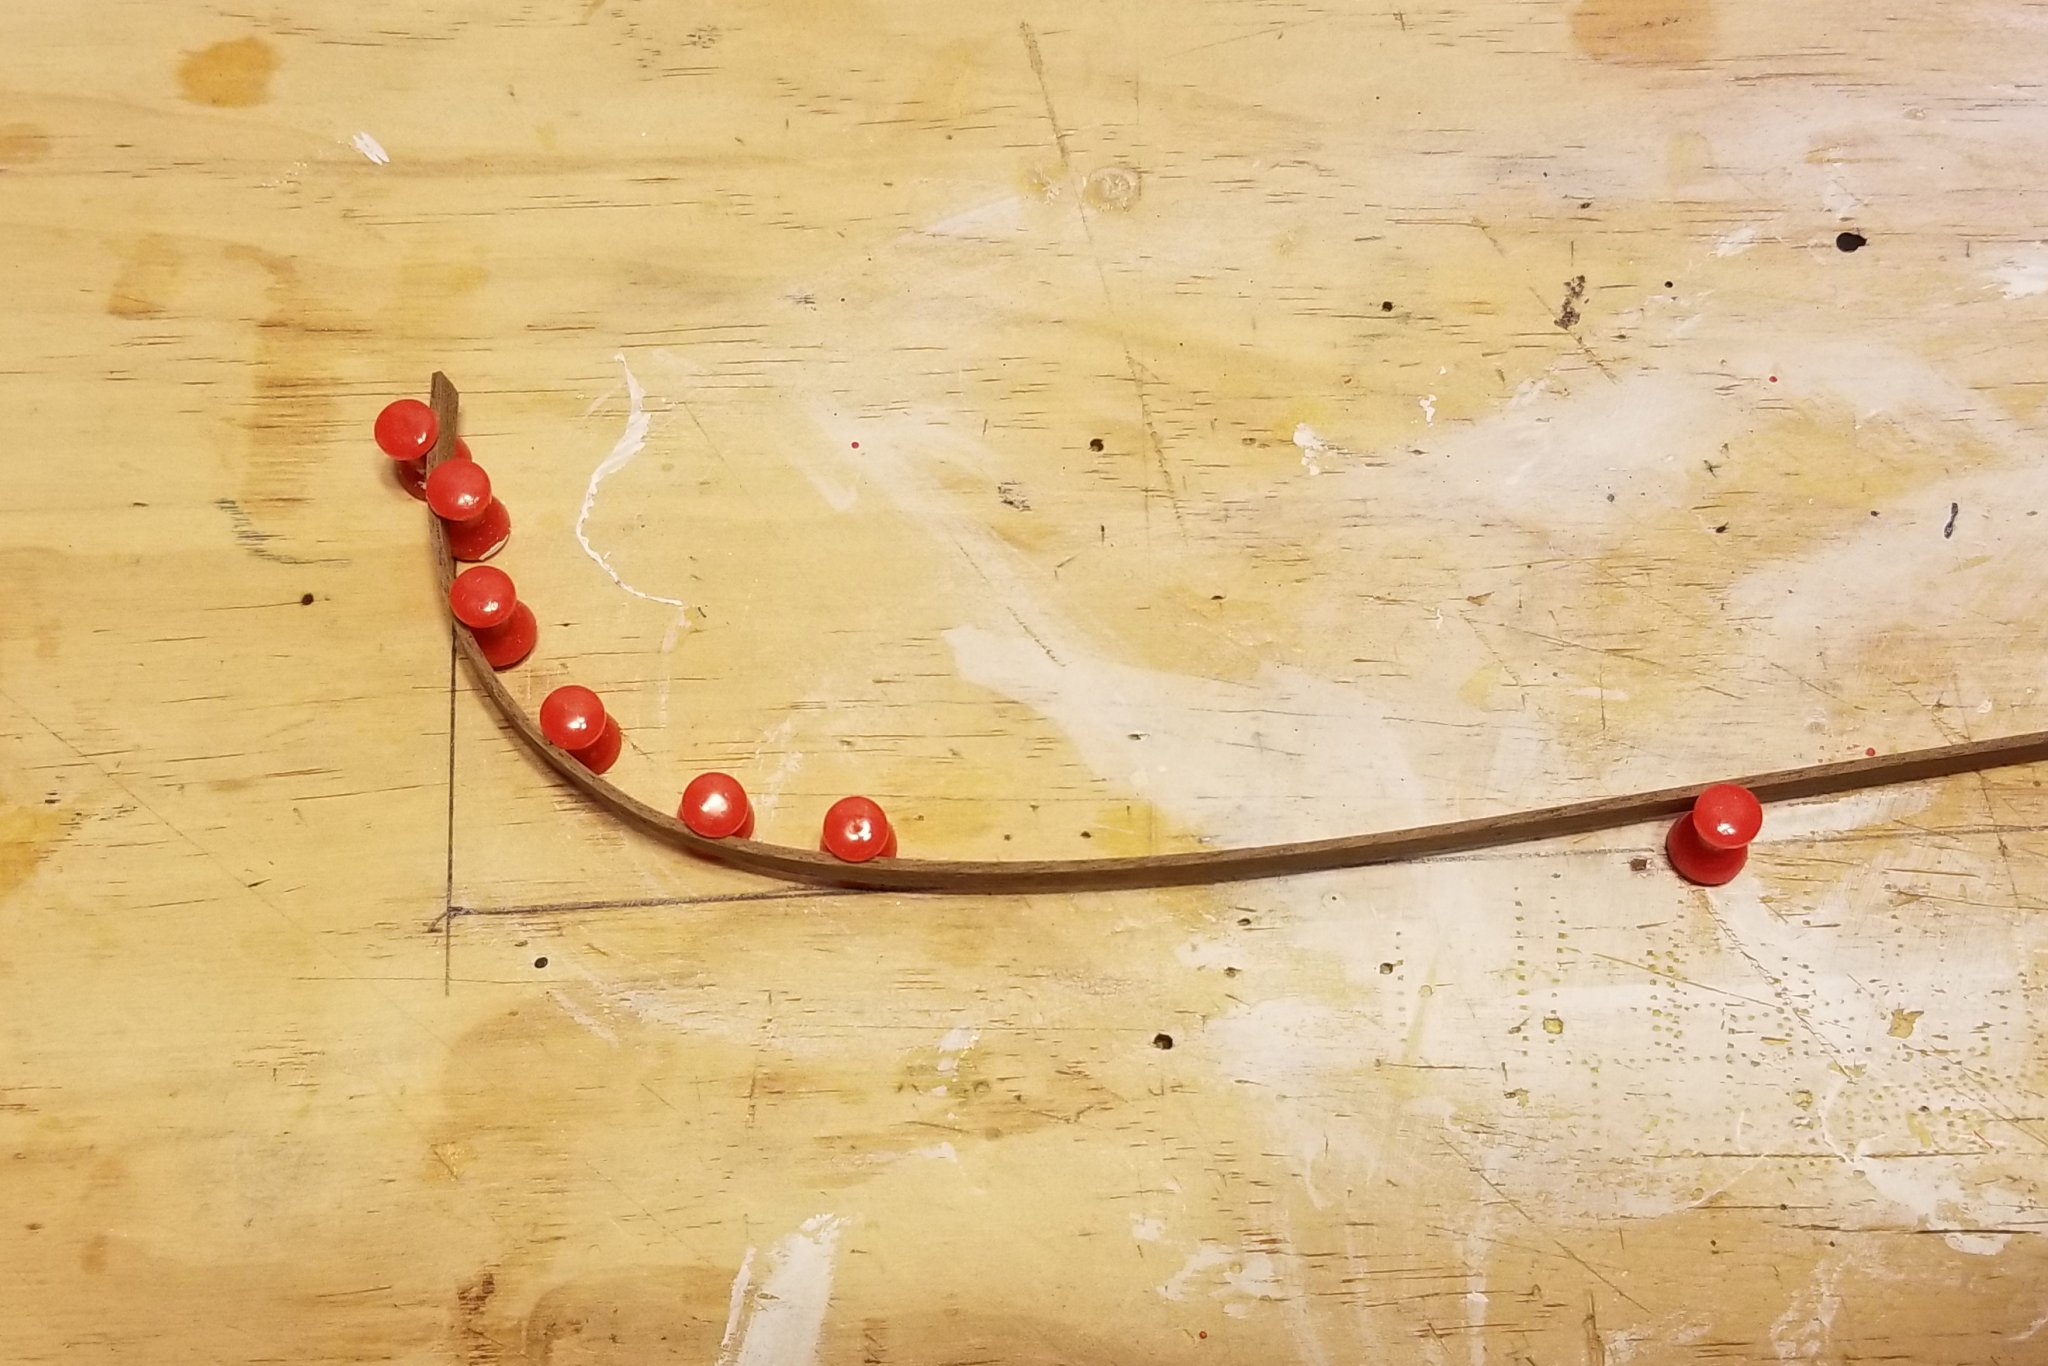
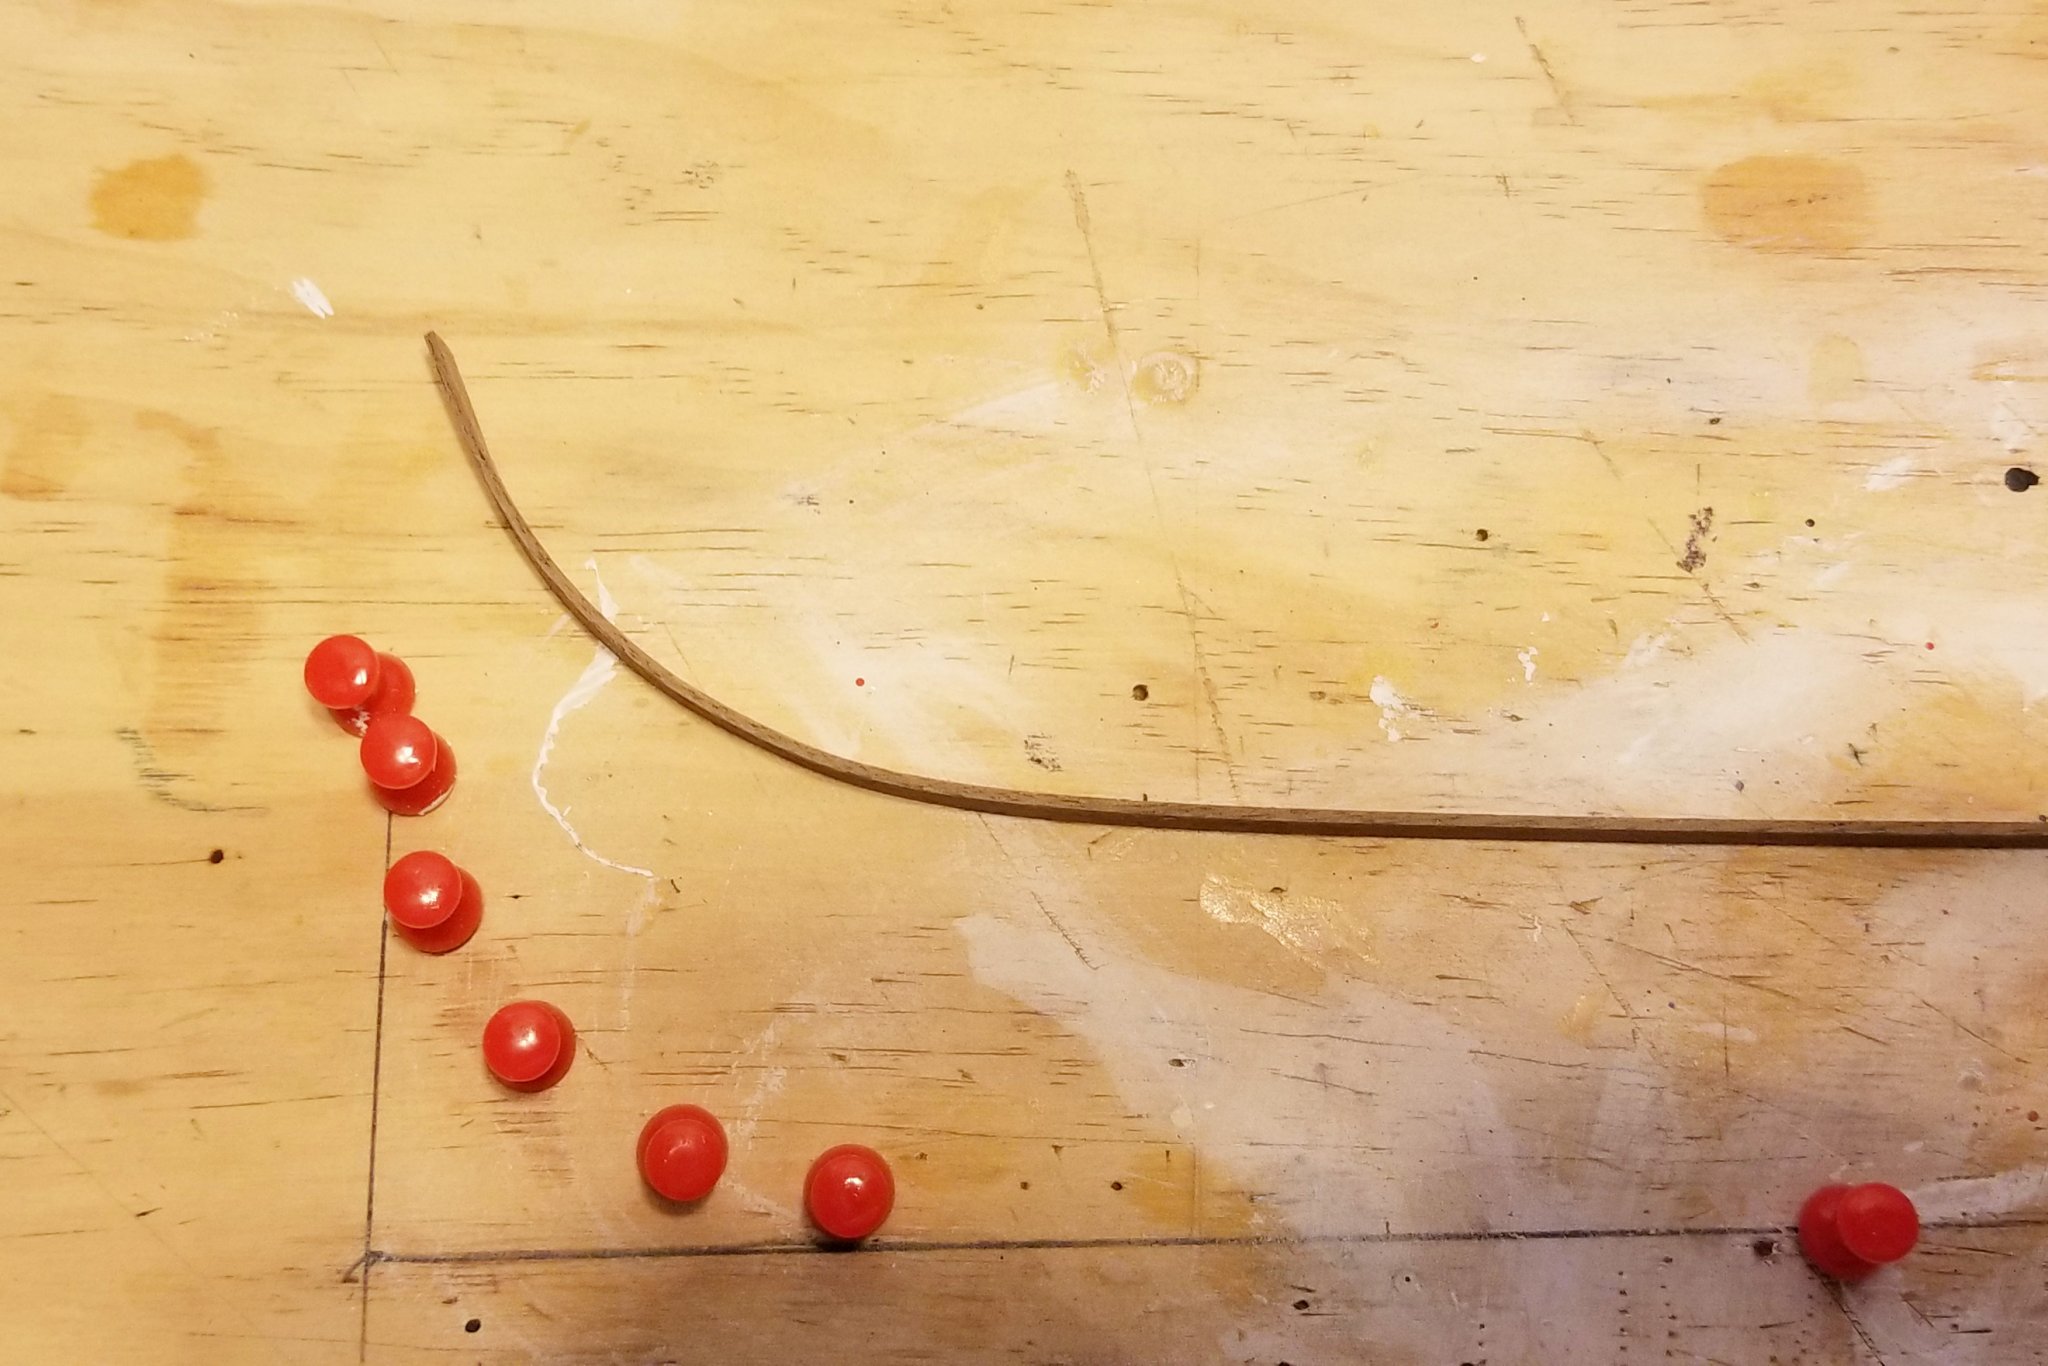
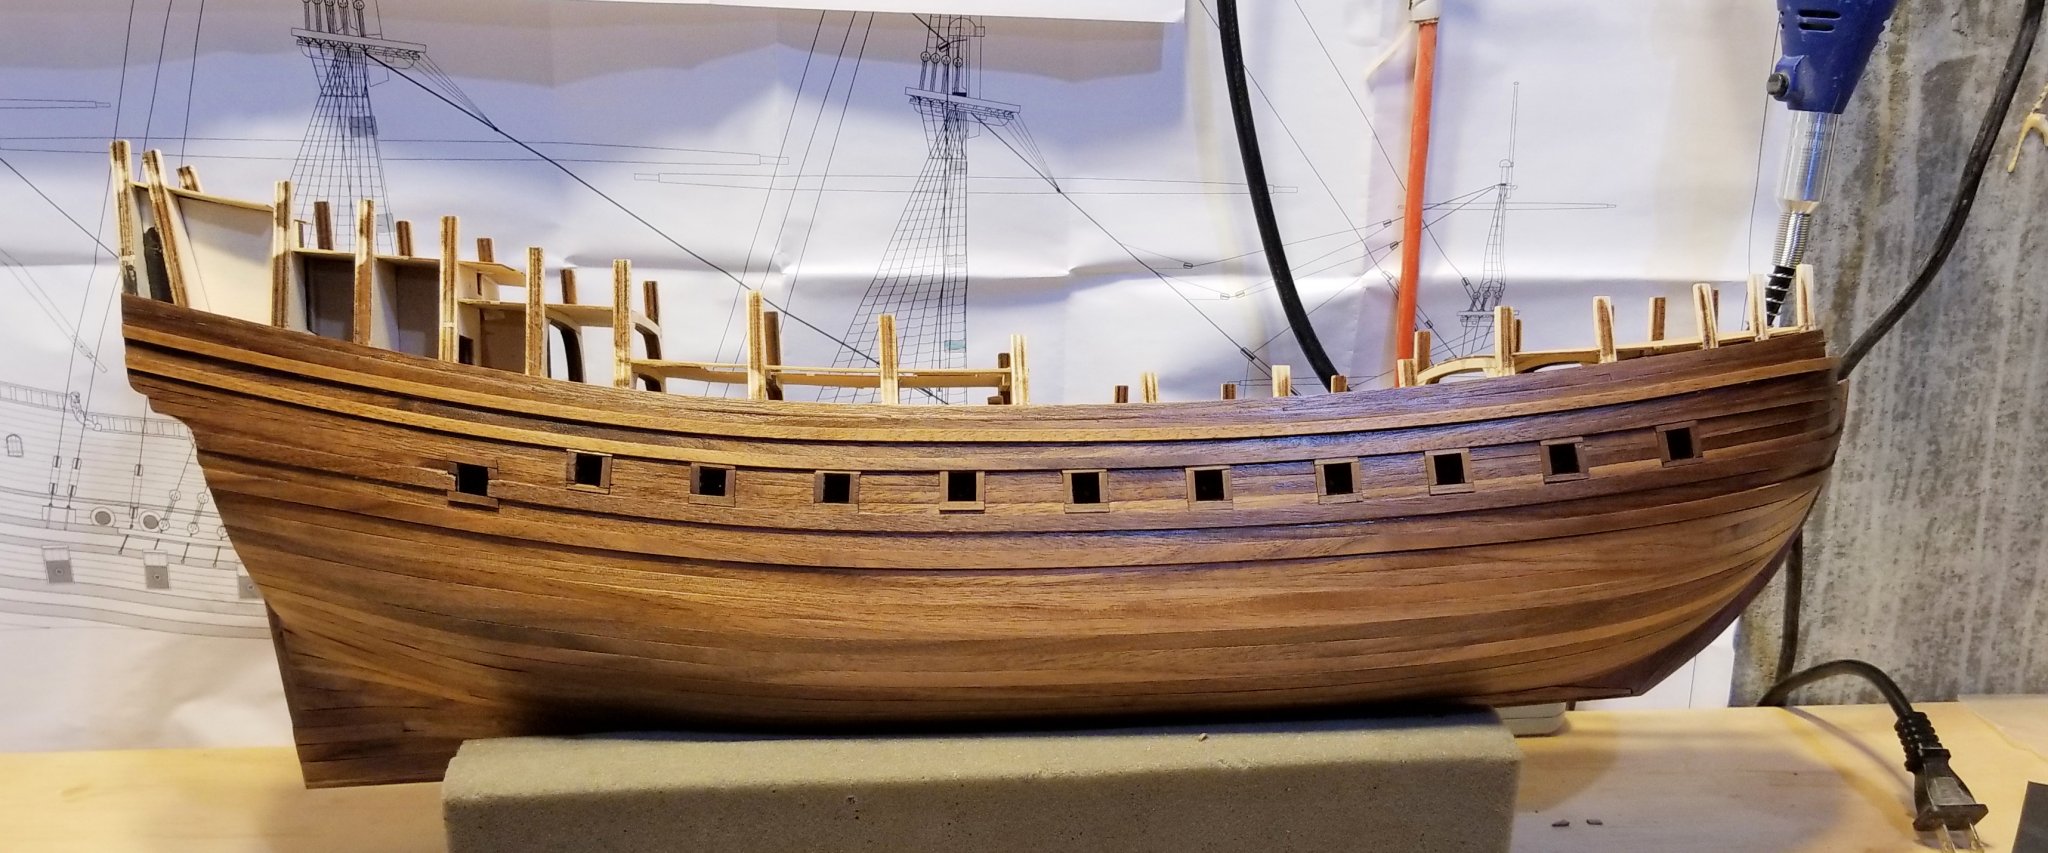
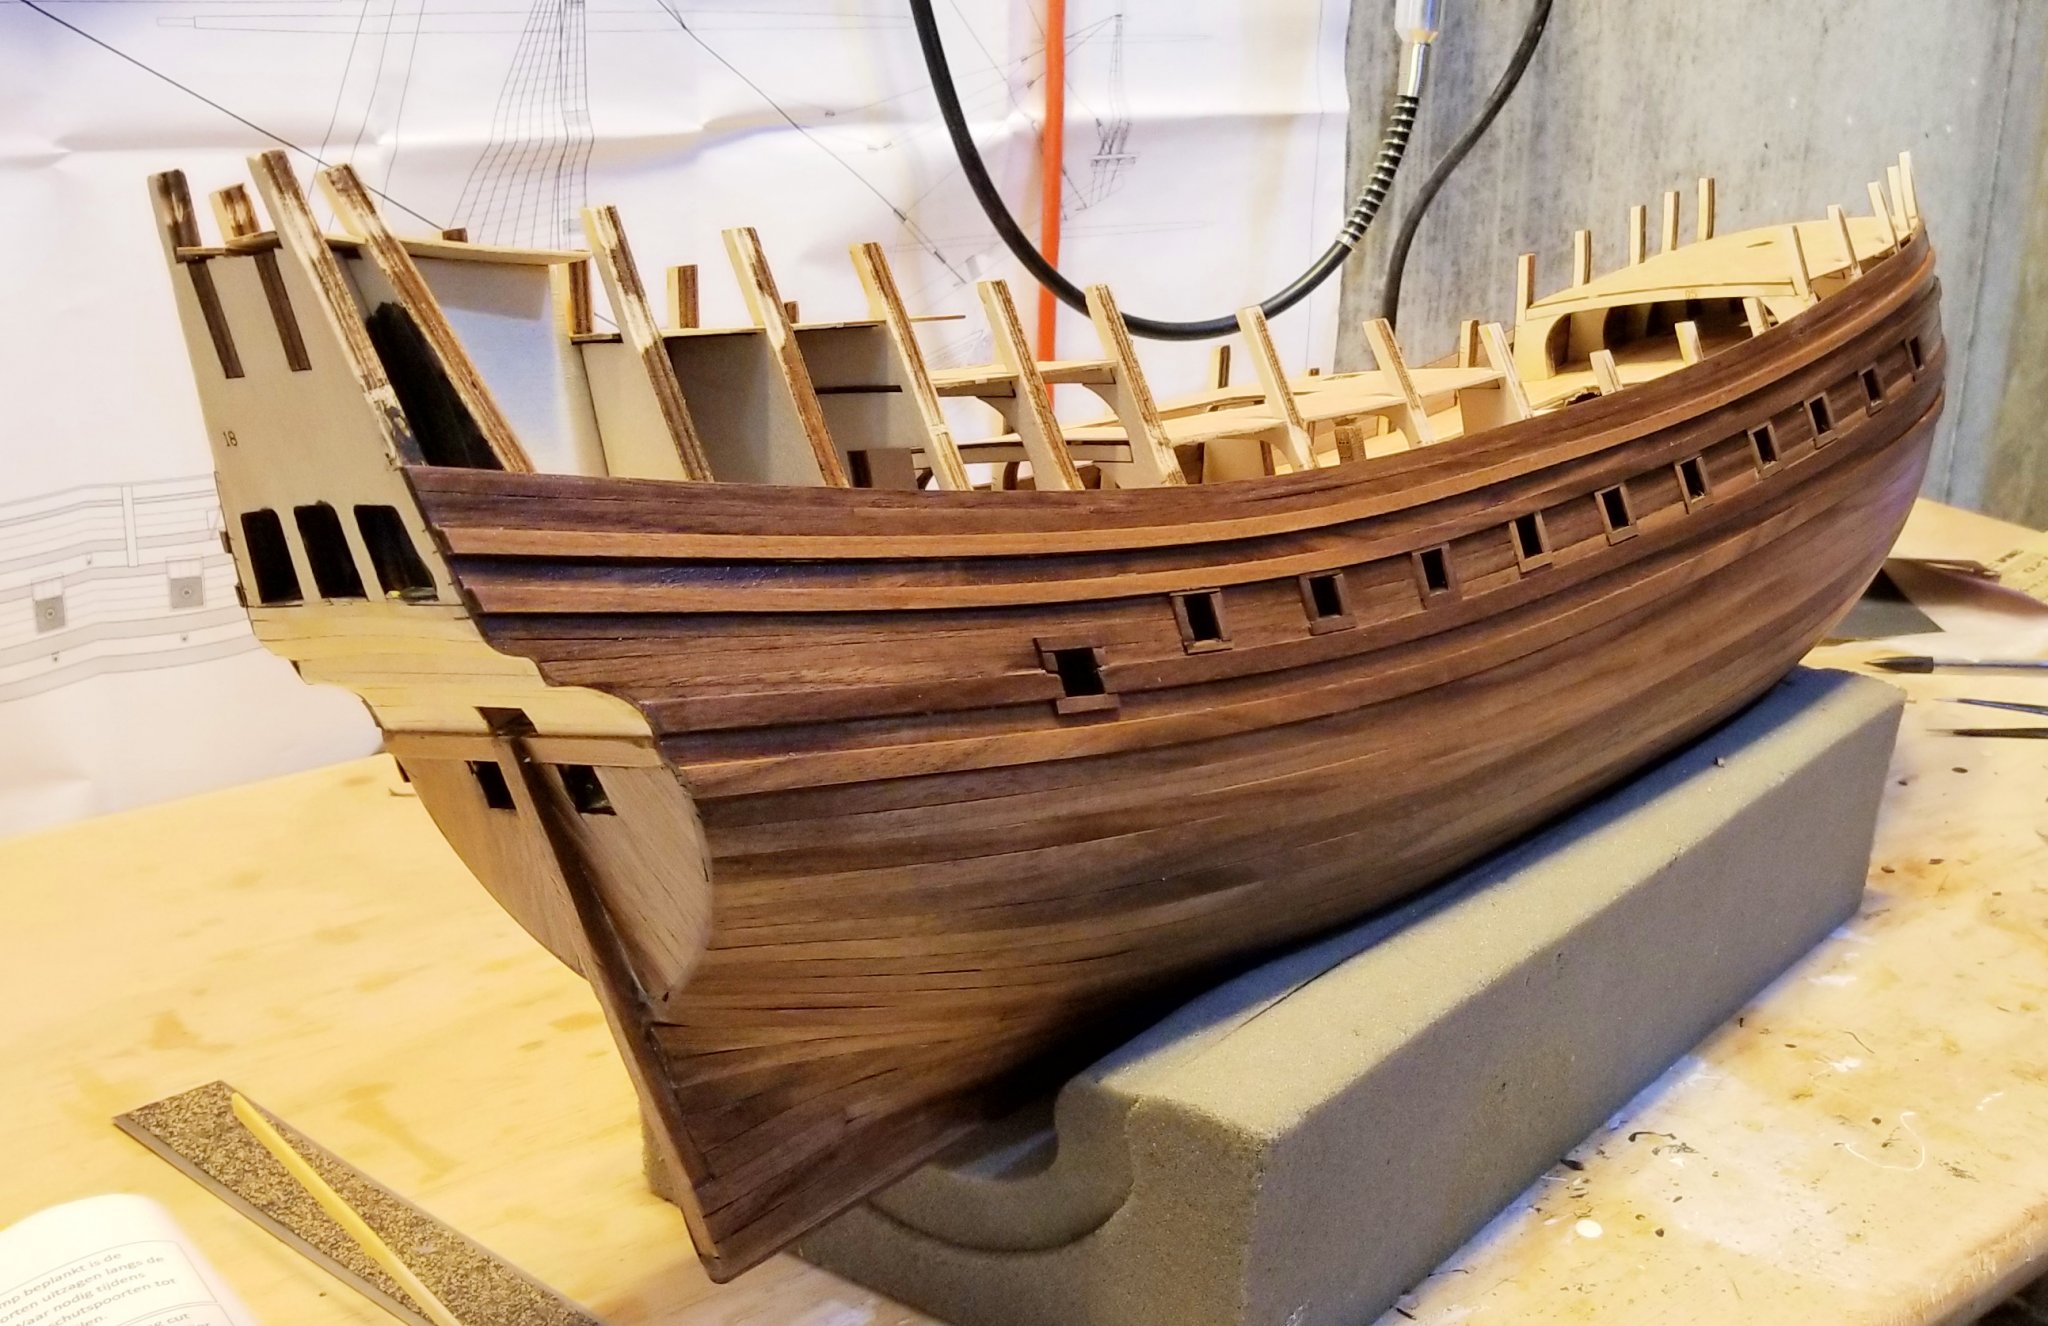
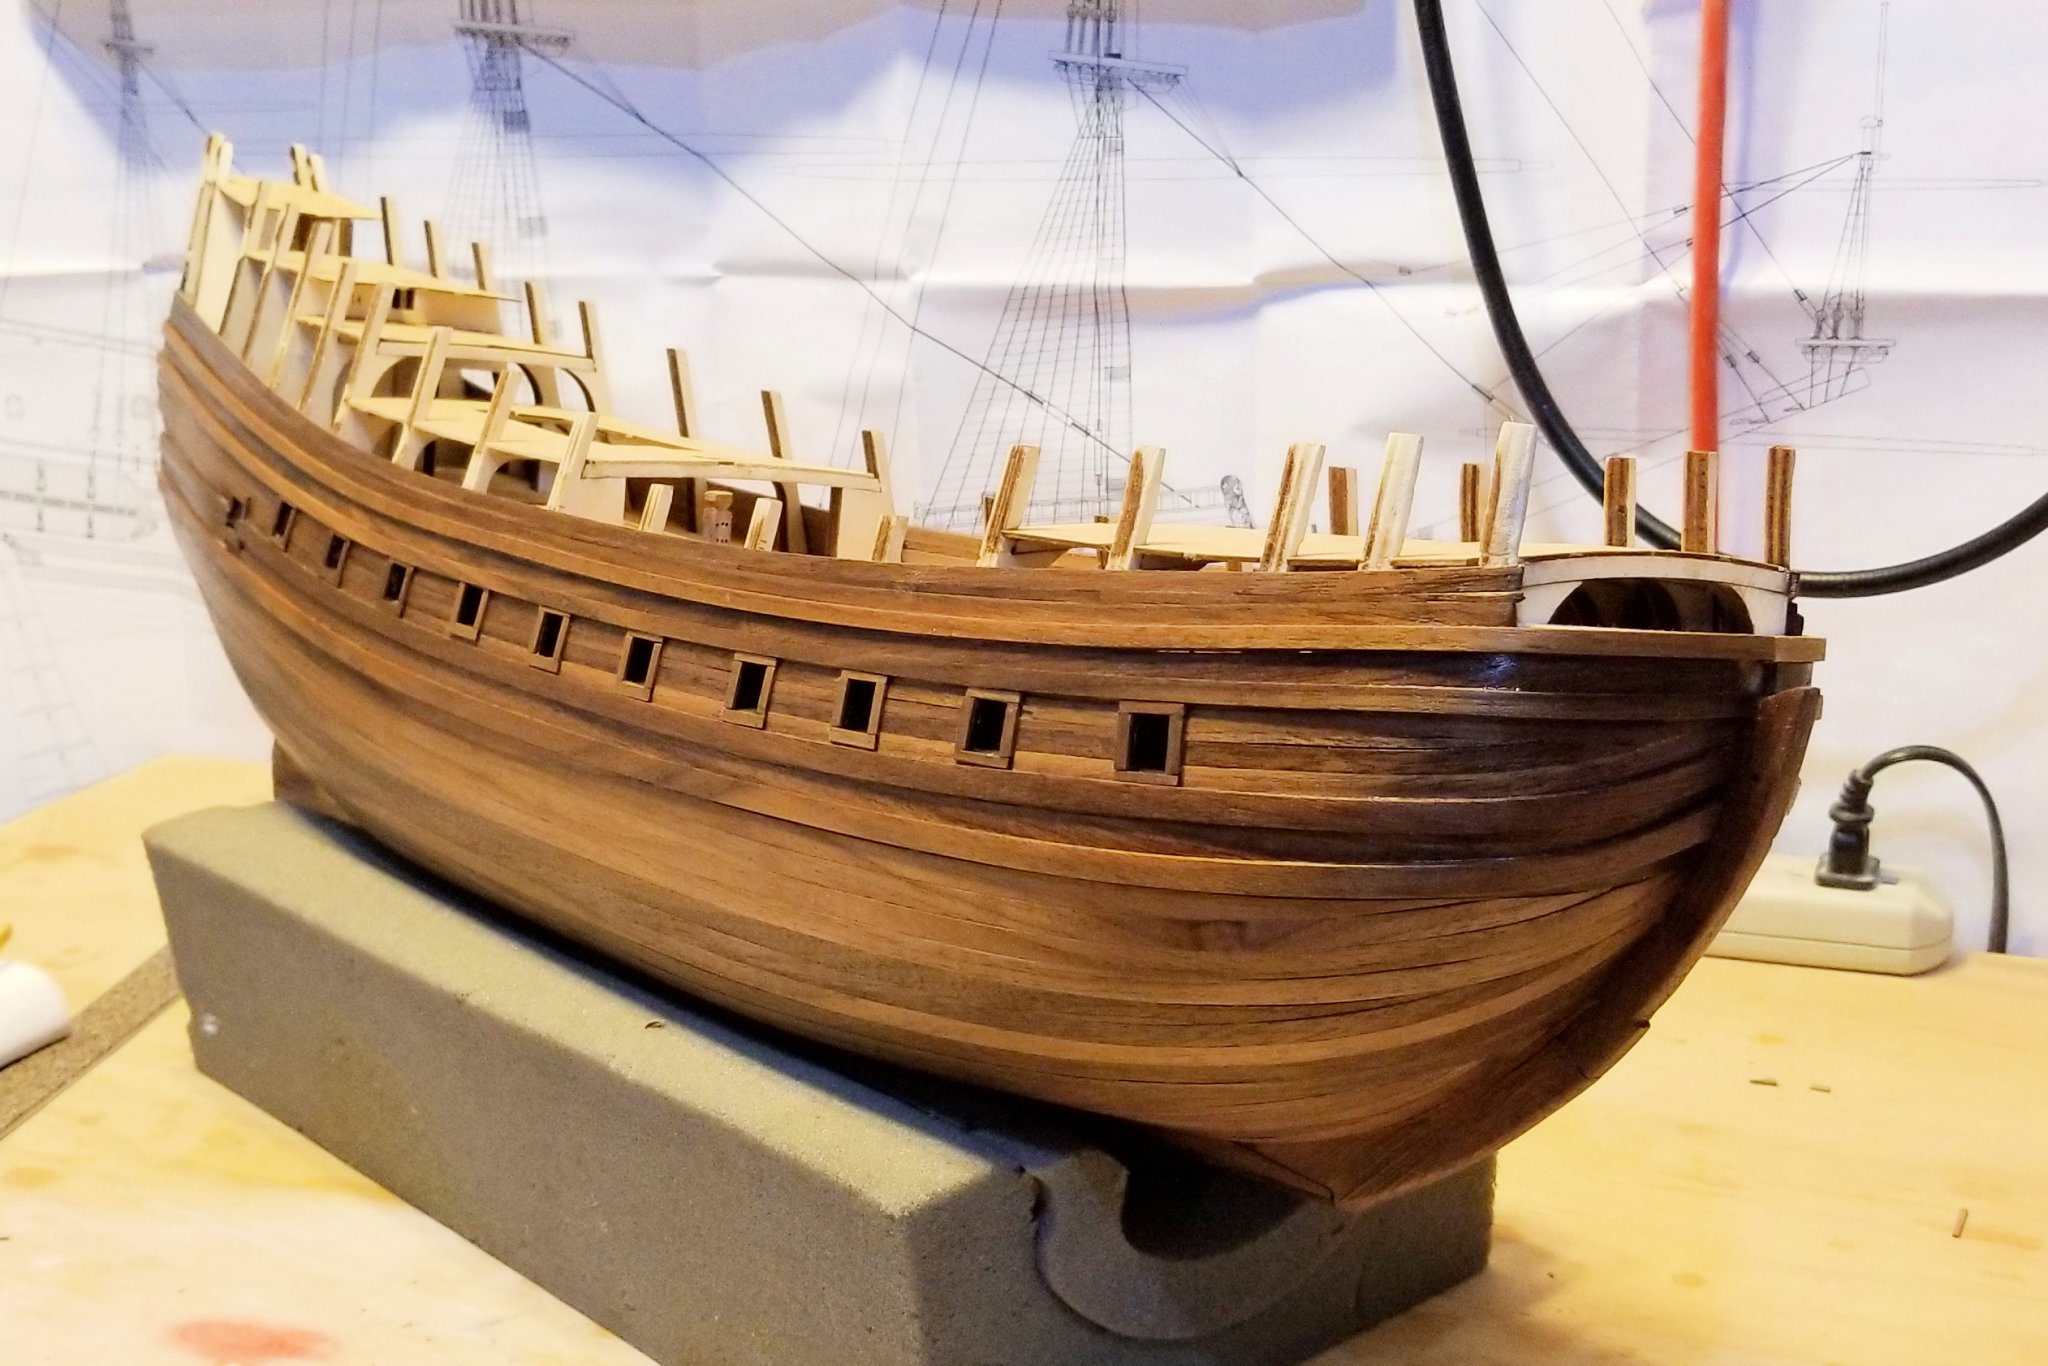
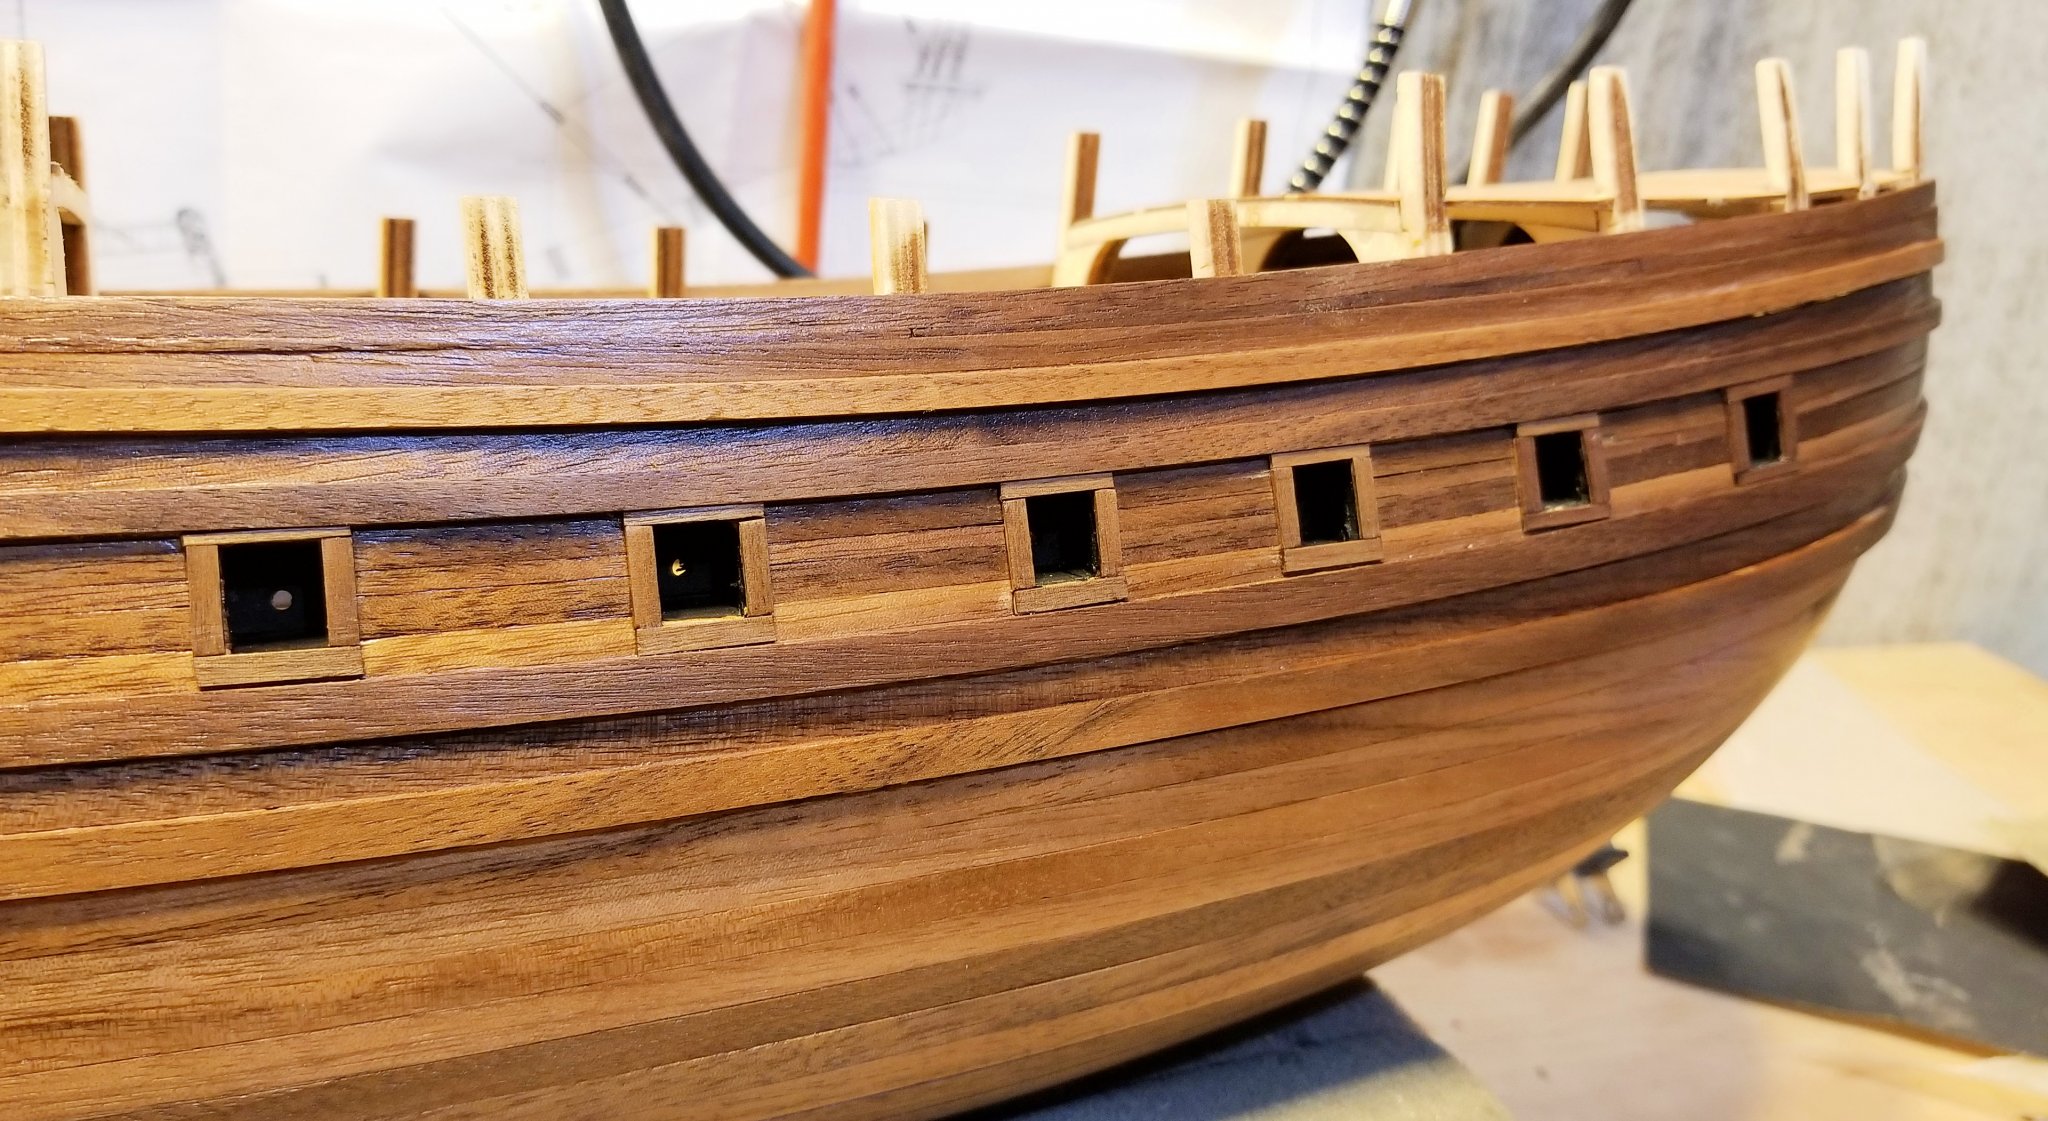
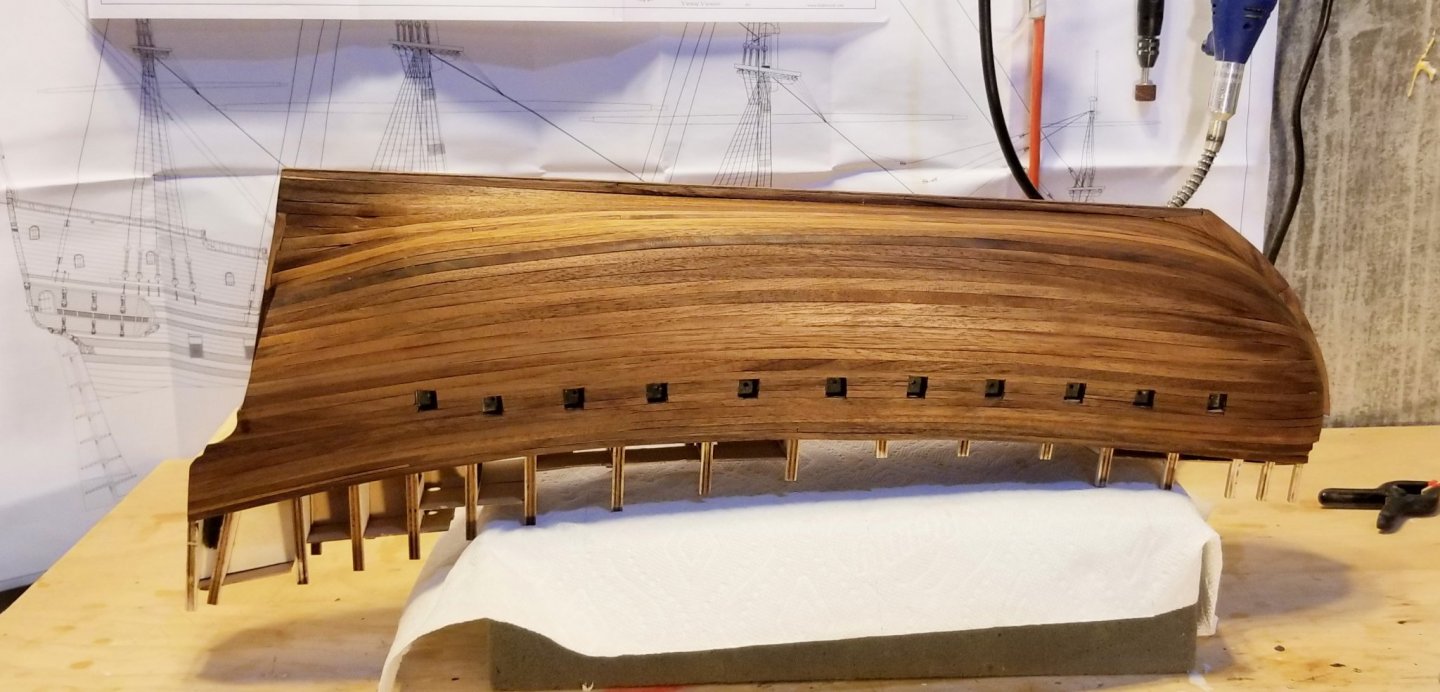
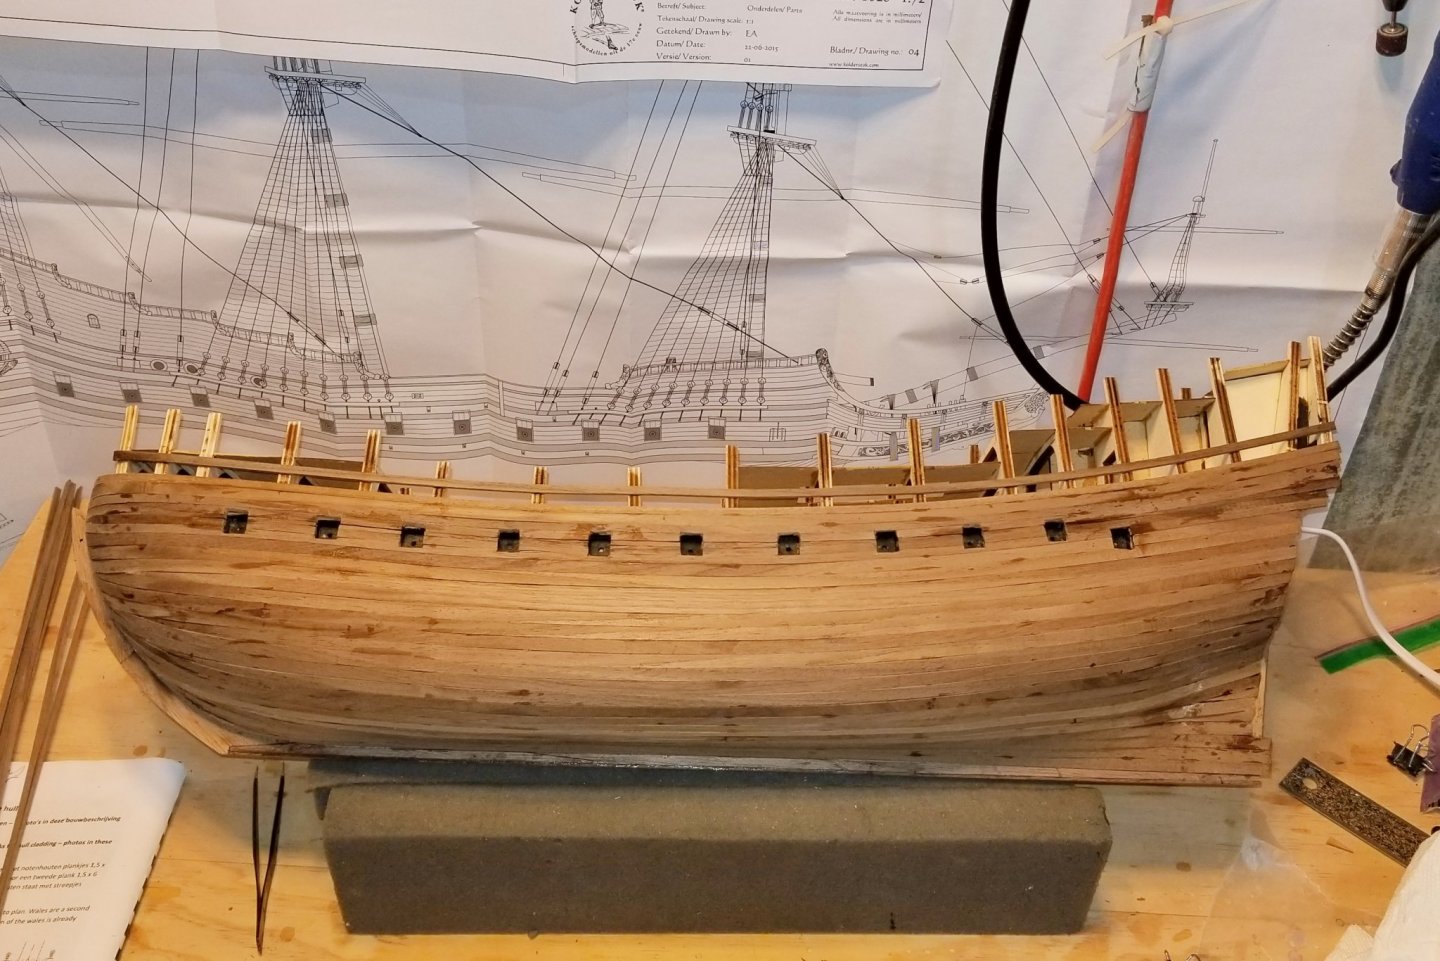
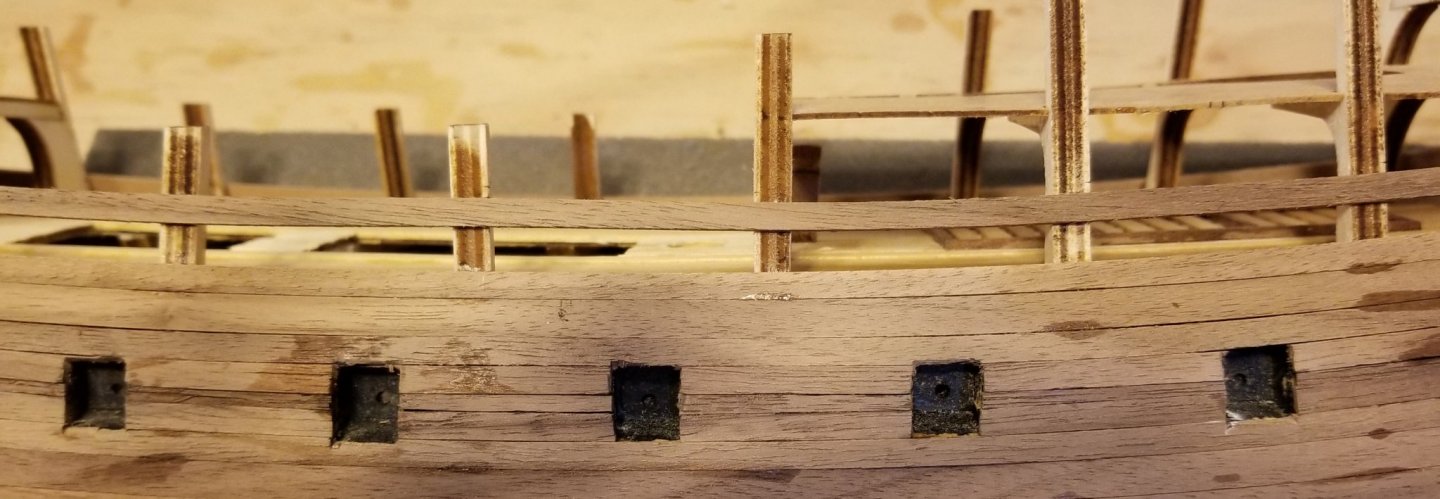
 I decided to go with the natural look for the wales. I built a jig on my worktable to bend the wales. I free-bent the main planks using my steamer, but I wanted to make sure that the wales laid down well and in the right position, so I used the jig for those. I used steam to allow me to bend the wood into the jig and soften it, and then a hair dryer to set the bend. The other pictures show the wales from several different angles, and also show the framing I did on the gun ports. As mentioned earlier, I really butchered the cutting of the gun ports, so I took some walnut strips I had left over from a previous build and framed them. Looks much nicer now, although it's not the look that Kolderstok specifies in the manual and plans. Regards, David
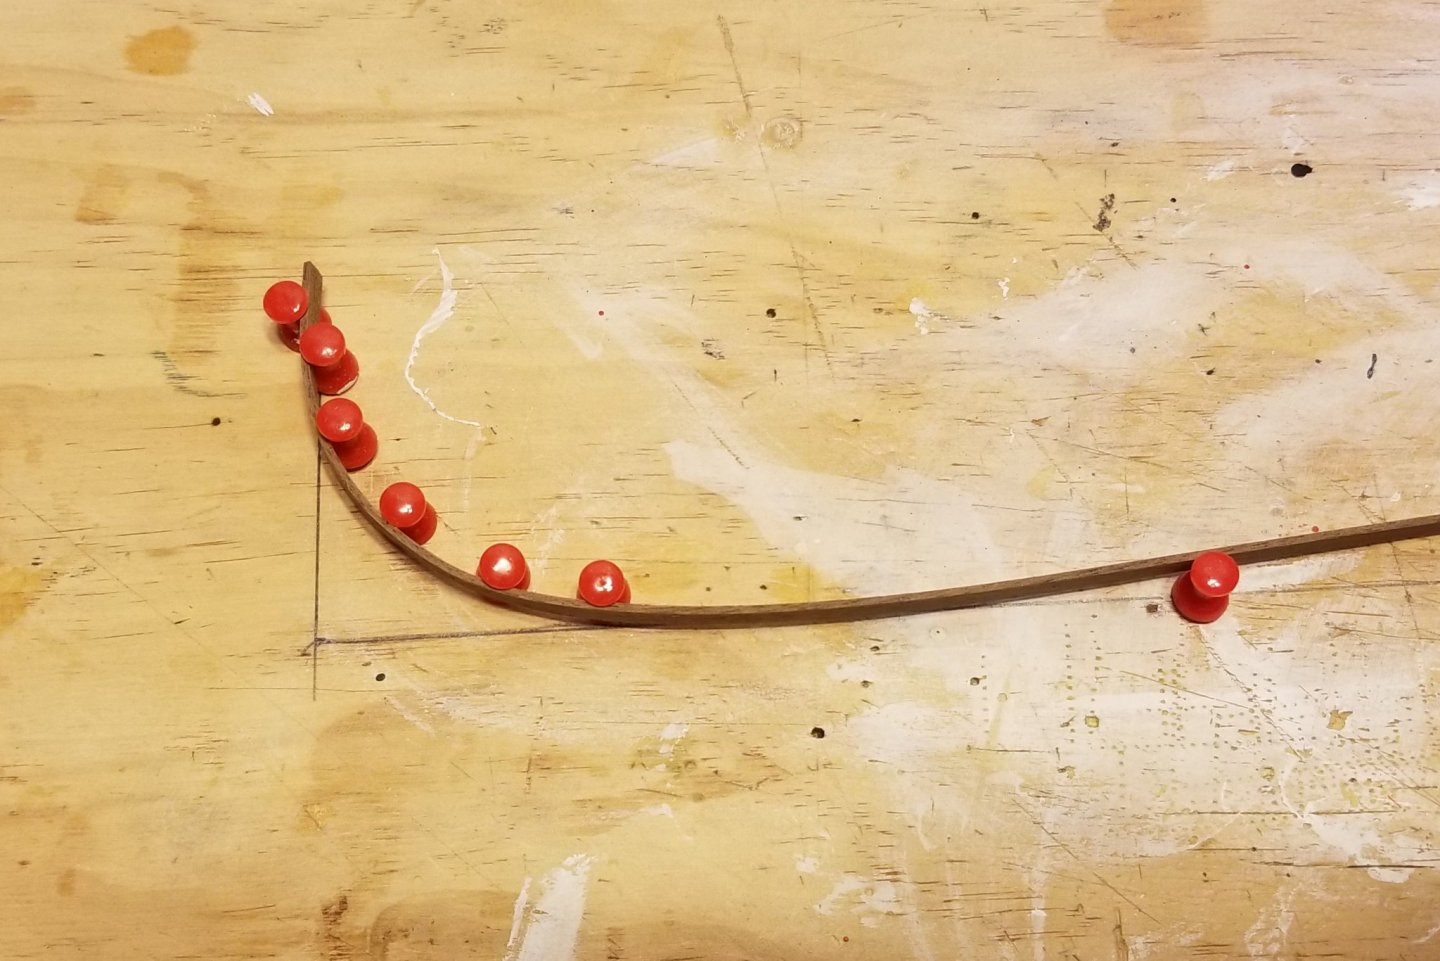


- 136 replies
-
- 2
-

-
- kolderstok
- batavia
- (and 1 more)
-
Here's a picture of the walnut part of the hull after the first coat of varnish. A couple of comments on this kit. ' When I bought the kit, Hans of Kolderstok asked me if I'd like an all-walnut hull (compared to the stock hull with painted bottom made of basswood). I opted for all-walnut because I love that look on my hulls. Hans provided it at no extra charge. I had some concern about how this would look because it's a single-planked hull, and most of my first planking layers have some visible flaws. But the walnut Hans provides is the best quality I've worked with to date -- 1.5mm thick and doesn't have the "chips and flakes" I've encountered with other walnut. So my first and only layer (taking my time) came out well. My next step (after sanding and varnishing this again) is to add the wales. I'm currently debating whether to paint them black (as on the stock model), or keep them natural. Leaning toward natural. I pre-selected some darker strips for the wales so there should be some coloration difference if I stay natural. Regards, David
- 136 replies
-
- 7
-
-
- kolderstok
- batavia
- (and 1 more)
-
I have almost finished planking the walnut part of the hull, and I'm eager to sand and varnish this to see how it looks. Another alignment exercise: at the top, there are two painted planks that go on above the walnut, and they need to be aligned with tic marks on the frames. So as you can see in the close-up, I have jumped to the highest walnut plank and have aligned it just below the tic mark for the first painted plank. Then I will fill in the gap that will have an odd-width plank. If I had just "planked up", I'd have ended up too high on the frames. Once I get these done, I'm going to sand and varnish the whole hull, which at the moment is a single level of planks. Then I'll add the wales on top. It would be more difficult to sand in between the wales if I put them on before varnishing. Regards, David
- 136 replies
-
- 10
-
-
- kolderstok
- batavia
- (and 1 more)
-
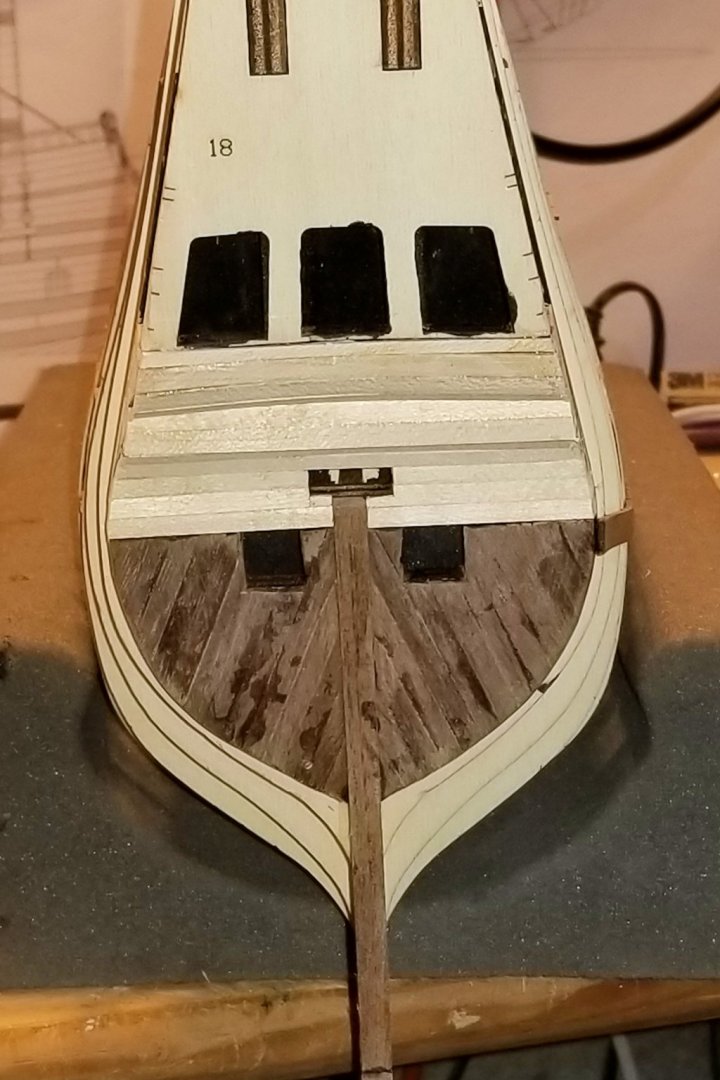
OK, so here's round 2 on the planking issues raised in my not-so-clear post above. On this ship, it's important that the planks follow a line defined by small marks etched into the frames. That makes it easier to find the right line -- but those marks also define where certain special planks should be vertically on the frames: the wales (double planks), and two painted planks at the top. You can't just plank up to the top and then sand down. It has to end with the right colored planks in the right place vertically. If you just plank up from the middle to the top, you can't hold that vertical alignment because, as Hans says above, there are variations in wood width. So it's important to "re-set" by installing the next key wale up and then fill in. You can see that in the picture that has a gap in the planking. I started with the bottom 3 planks, which are 6mm wide. The lowest and third up of those will become wales by adding a second plank on top. Then the planking diagram calls for four 4mm planks followed by a fifth 4mm plank that will also become a wale. That fifth plank (the top one in the picture) needs to be in a certain vertical position indicated by tic marks on the frames. So after planking the bottom three 6mm planks, I moved up and installed that top plank. What that left was insufficient room to install four 4mm planks, and you can see that I've done 3, and the remaining gap is about 2mm wide. So then I used my planking vise to cut down planking to fit into that gap, and you can see the result of that in the finished picture with no gaps. The process was easier because I could use short lengths between the gunports. I'll have to do the same thing moving up again, because there is another key plank further up that has to be properly aligned. I mention all this in case it's valuable to others who get to this point. Once you figure it out, it's actually pretty straightforward. Finally, it should be obvious that I can't neatly cut gunports. Never have been able to, never will. I will eventually dress these with external walnut frames. Regards, David
- 136 replies
-
- 5
-
-
- kolderstok
- batavia
- (and 1 more)
-
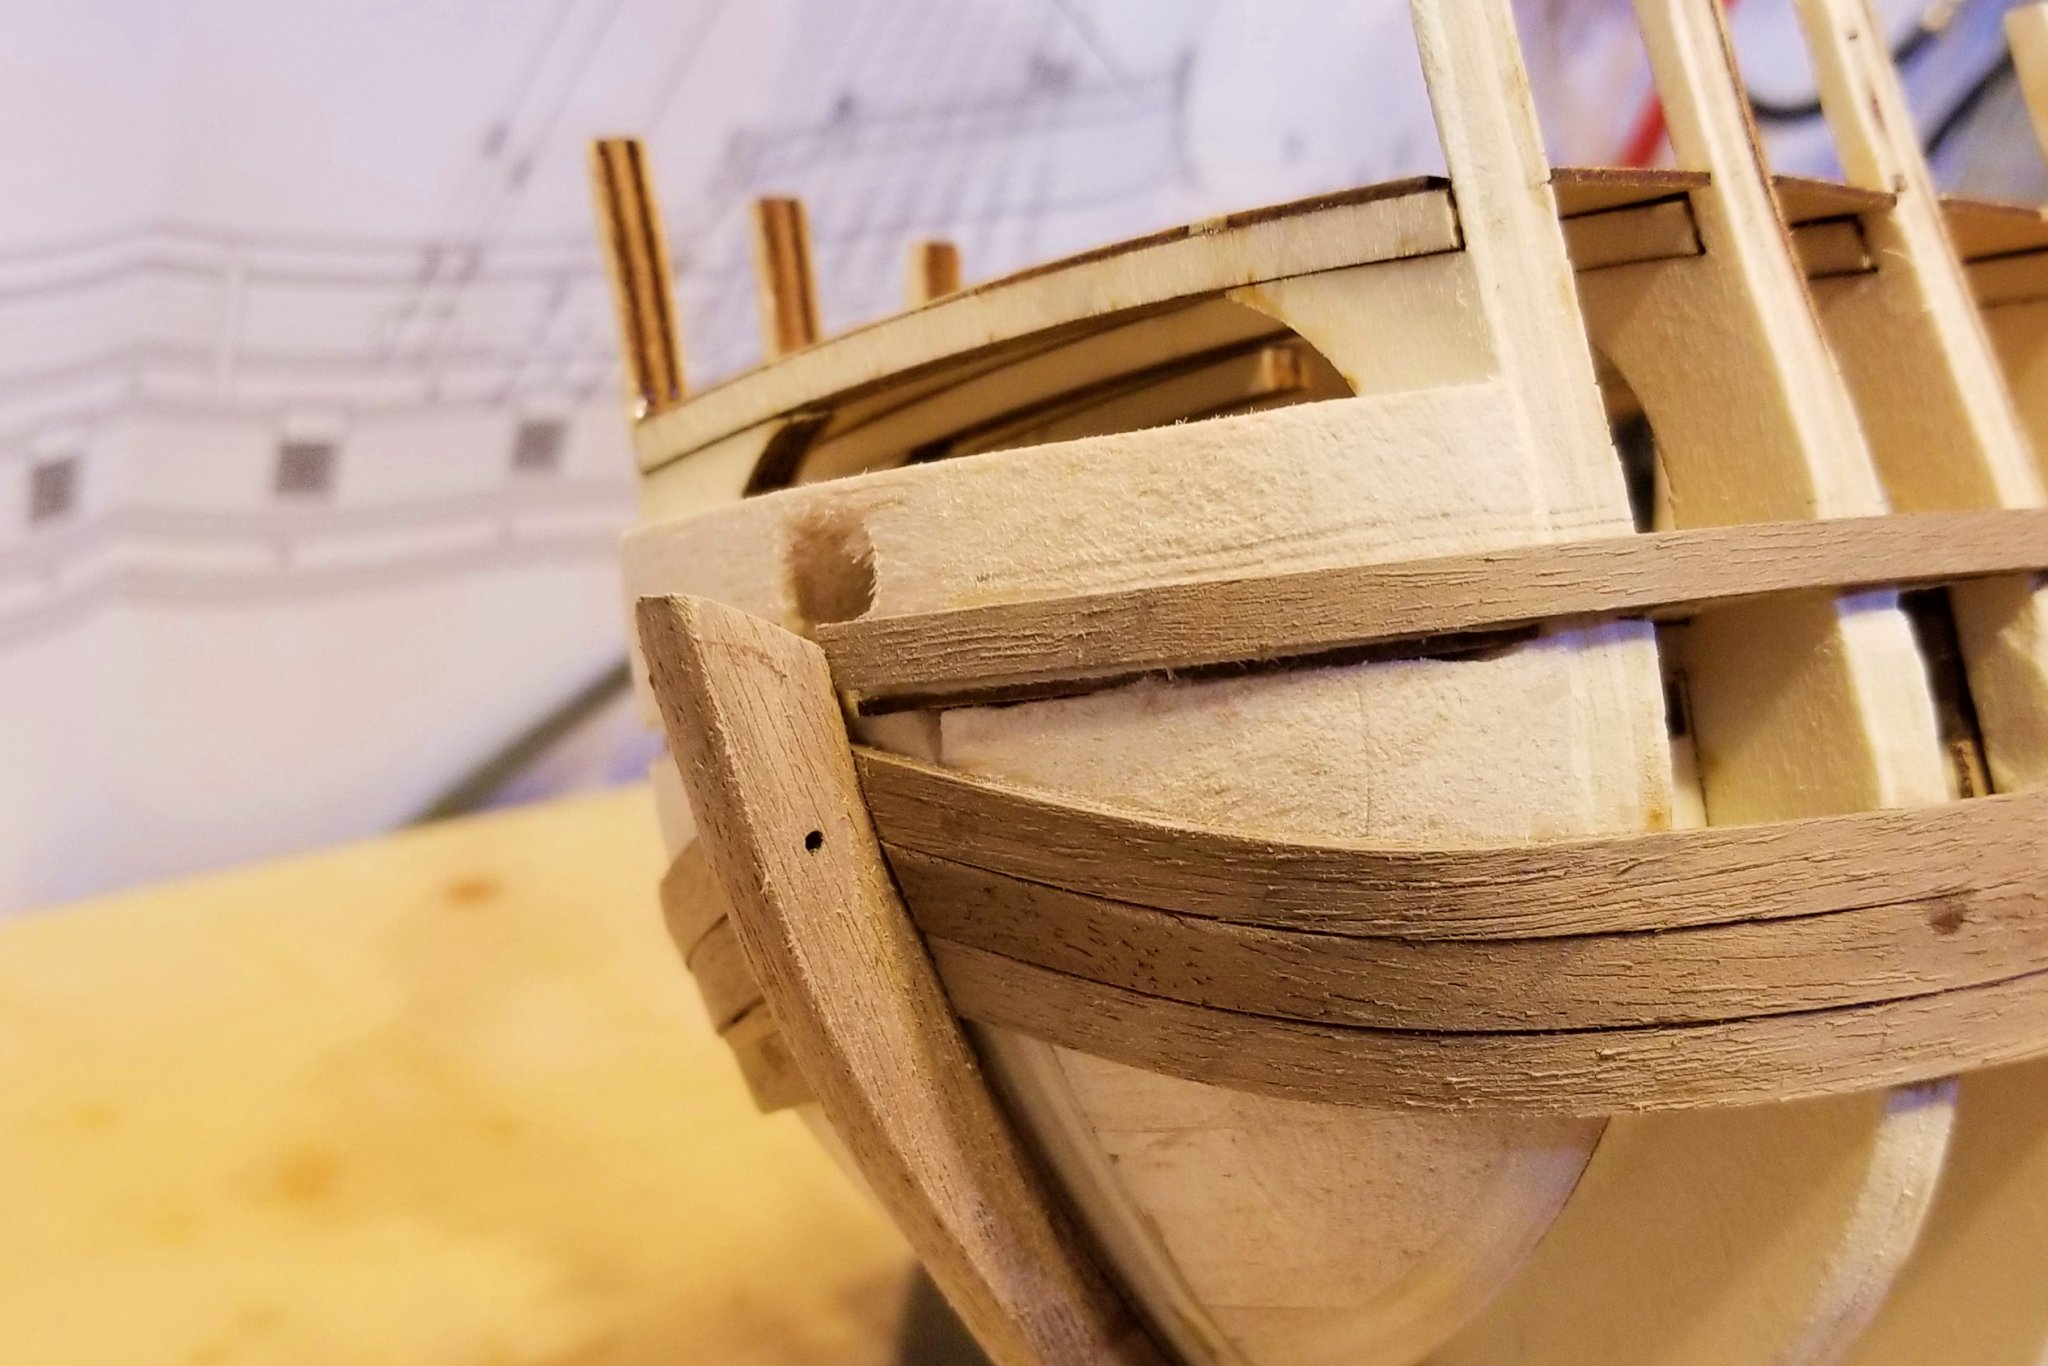
Addressing two planking issues: I have installed the two 6mm wales (with a 6mm spacer in between). Hans wonderfully provides tic marks on the frames to guide the placement of these so that you get the right line. I haven't installed the second planking layer over the wales yet. The next wale above is 4mm, with four 4mm spacers between it and the ones I had installed. I wanted to be sure that wale was back on the tic marks for it, as it creates a nice line for the planking above. But I also figured that if I kept it on the tic marks, there wouldn't be space for exactly four 4mm planks between. Or alternately, if I went ahead and installed the four 4mm planks first, the wale above them would be slightly above the tic marks (because nothing on my models fits perfectly 😁). Turns out all that was right. I decided to install the 4mm wale anyway, as shown in the large hull picture, to be sure it was on the right marks. You can see in the close-up that there is in fact space now for only 3 1/2 4mm planks between. That is easily solvable, because these planks run right through the gunports, and so I can cut down shorter lengths to 2mm wide and install them between the ports. The second issue is running those four 4mm planks up at the bow. The 6mm wales take an upward line at the bow. I've seen a log where they level off there, but that log used basswood, which is much easier to twist and bend. So I let the 6mm planks run naturally at the bow. Looking at the resulting bow picture after installing the 4mm wale, I can now taper the 4mm planks up to that 4mm wale at the bow and get them flush, and it will all work out. I know the text above is convoluted, but hopefully the pictures will help sort it out. Regards, David


- 136 replies
-
- 7
-
-
- kolderstok
- batavia
- (and 1 more)
-
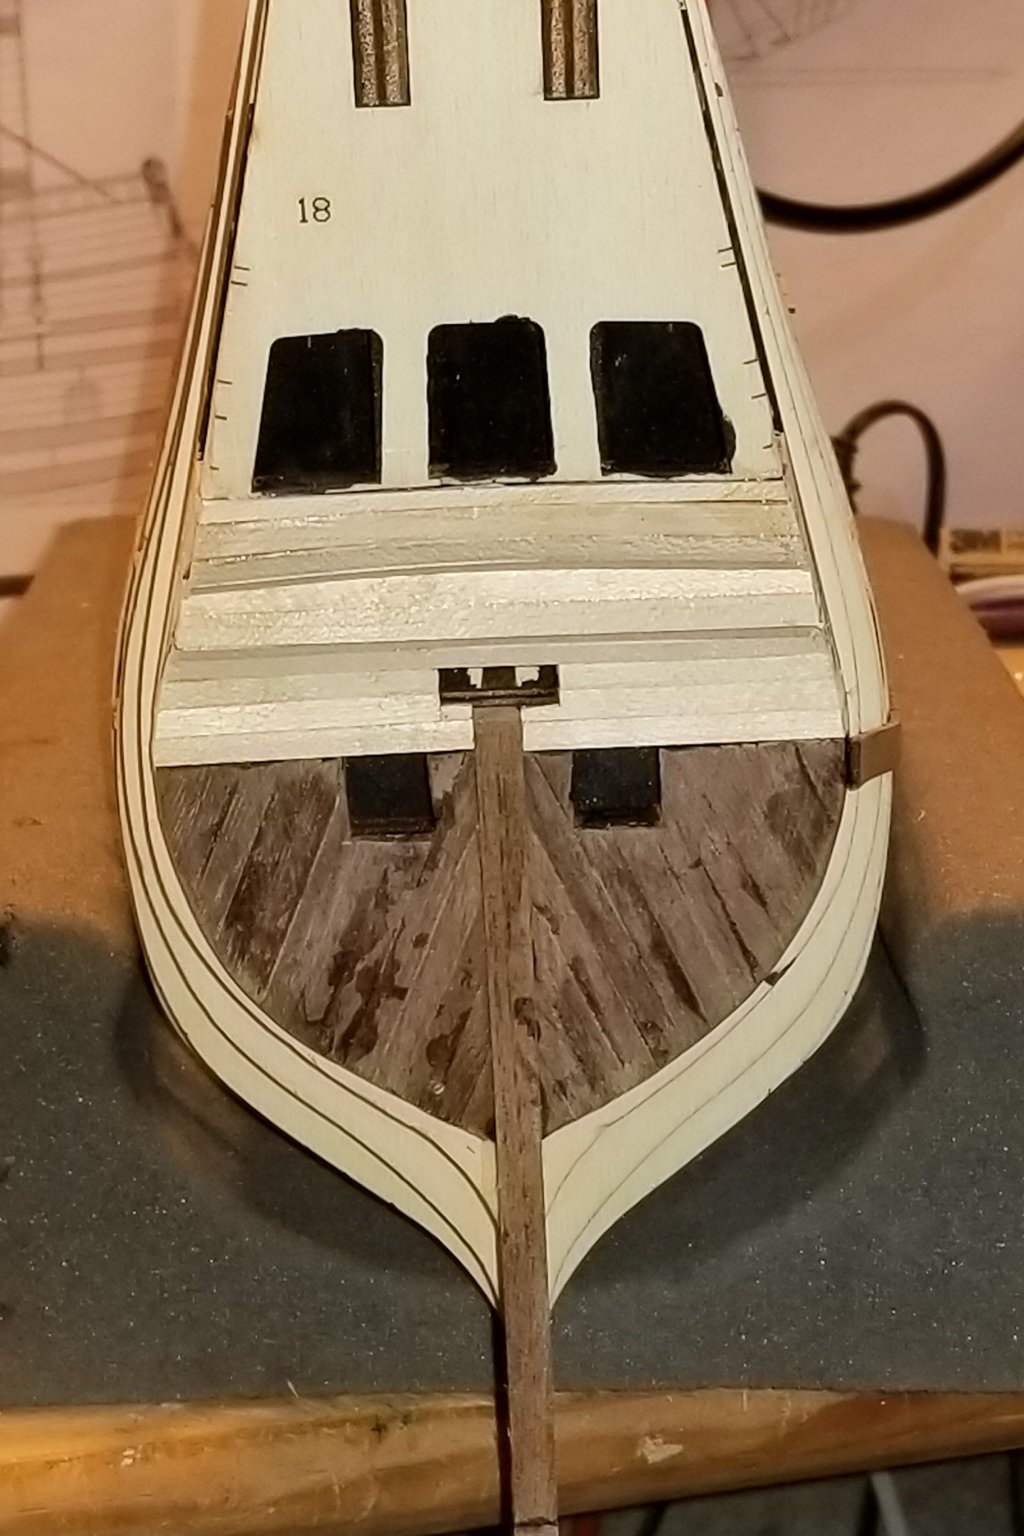
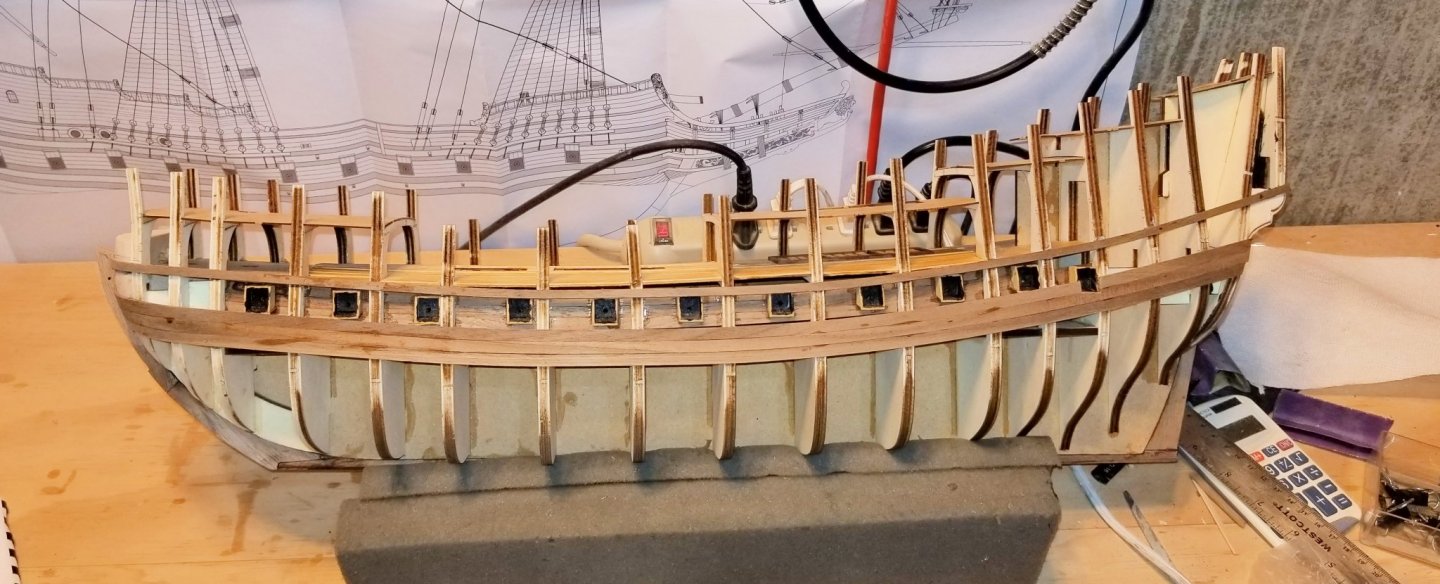
All of the decks are now on, and I've installed the first wale on the starboard side (see picture). Then I hit a sequence issue. I began to install the wale because of the manual sequence, but looking ahead, I saw that the hull planks need to flank the edges of the stern planking. So I stopped gluing the wale toward the stern, completed that and sanded the stern edges (see picture), and then completed the wale to the stern. I'll sand out the glue marks later on. Now I'll focus on hull planking. Regards, David
- 136 replies
-
- 8
-
-
- kolderstok
- batavia
- (and 1 more)
-
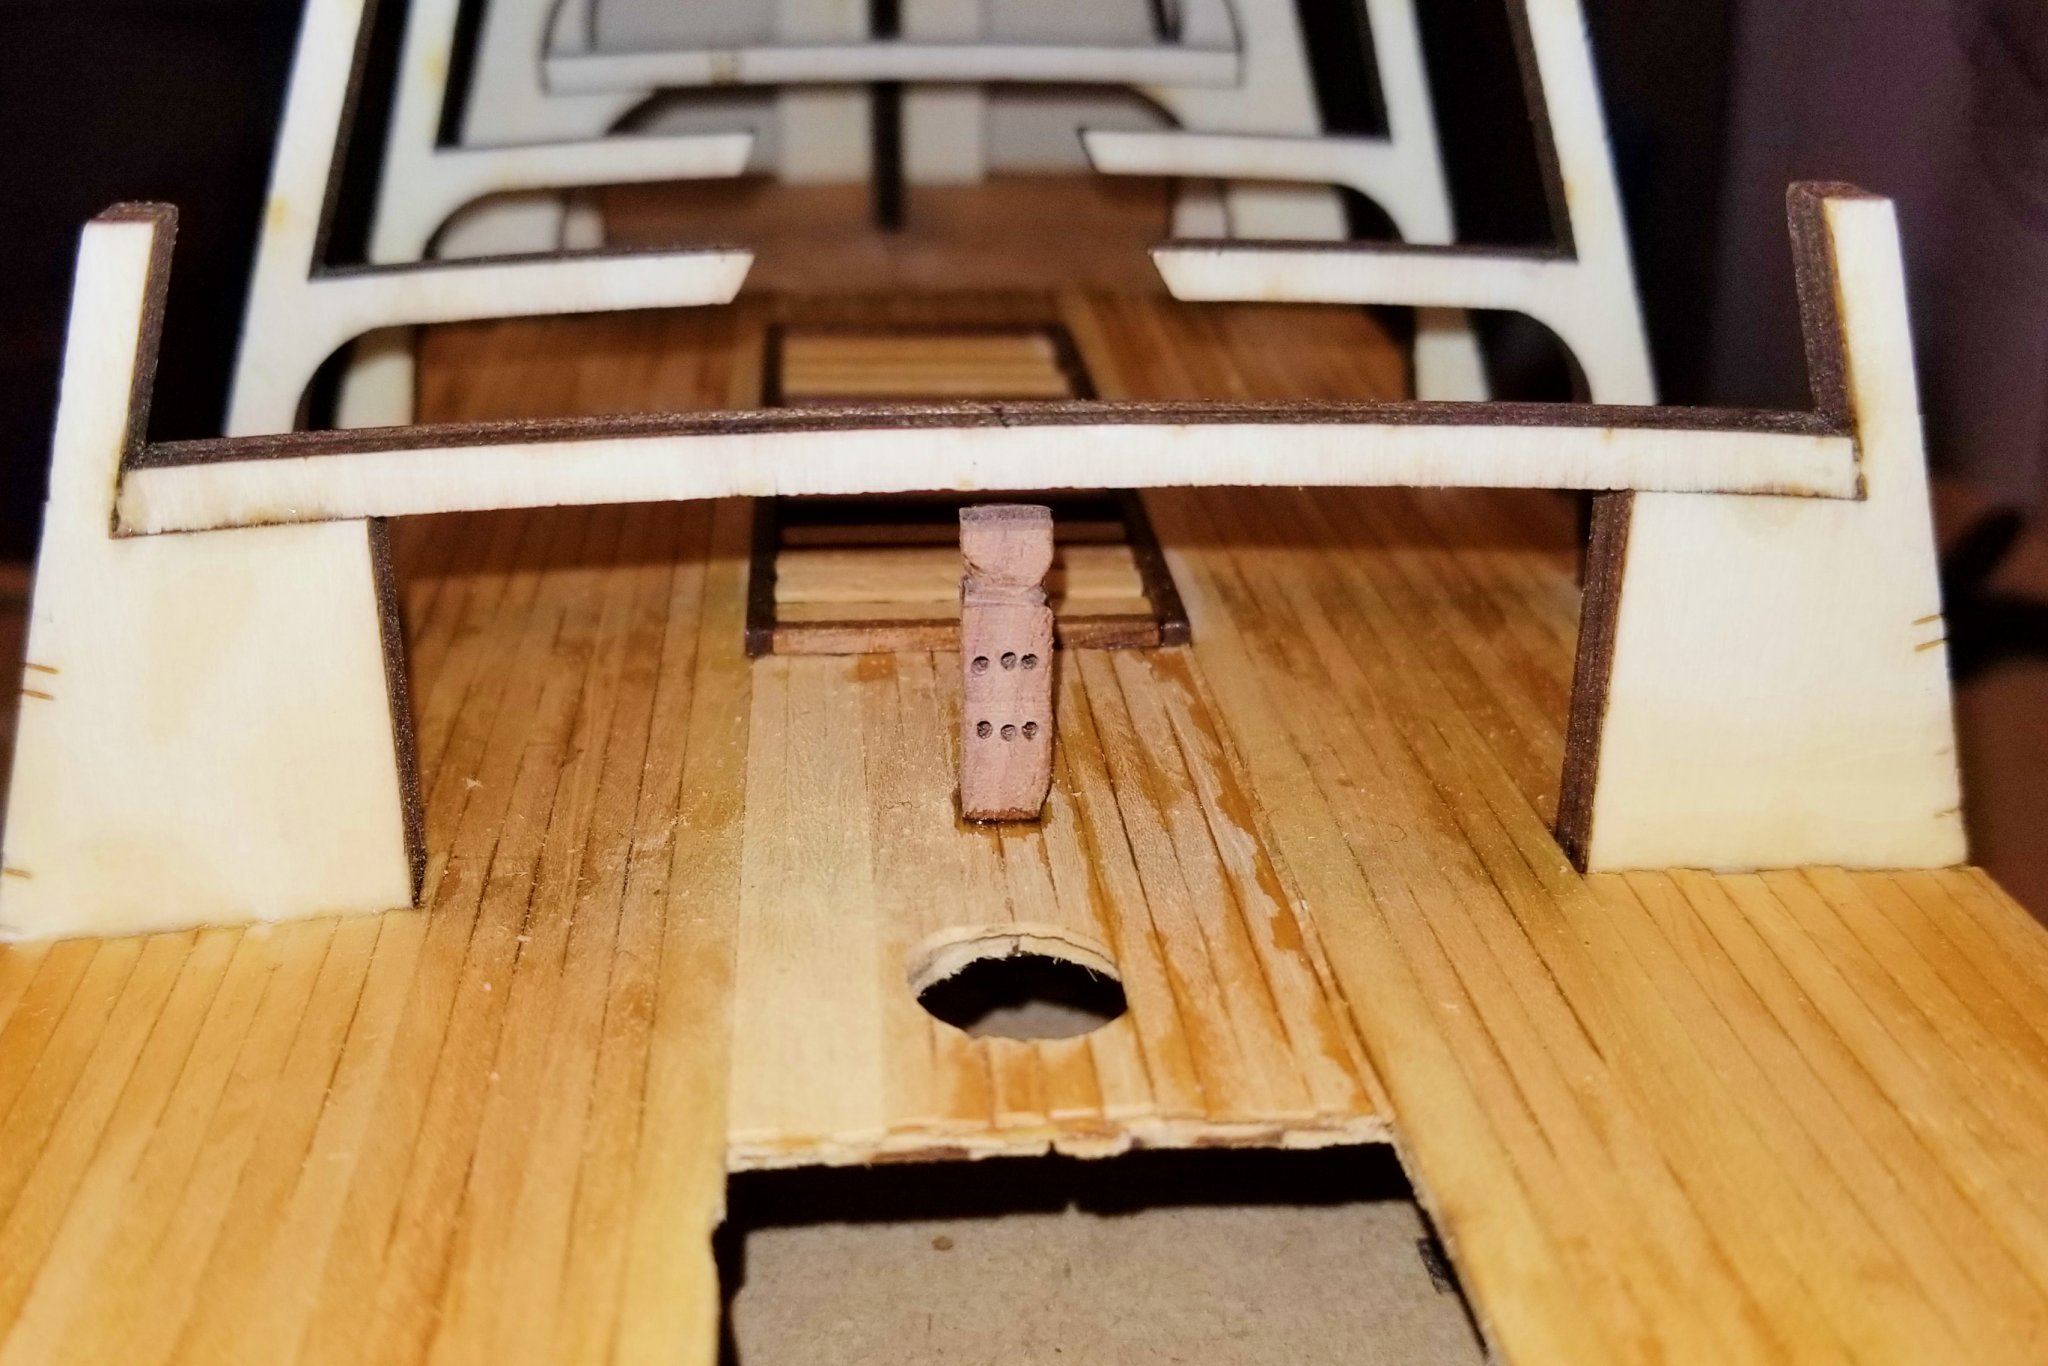
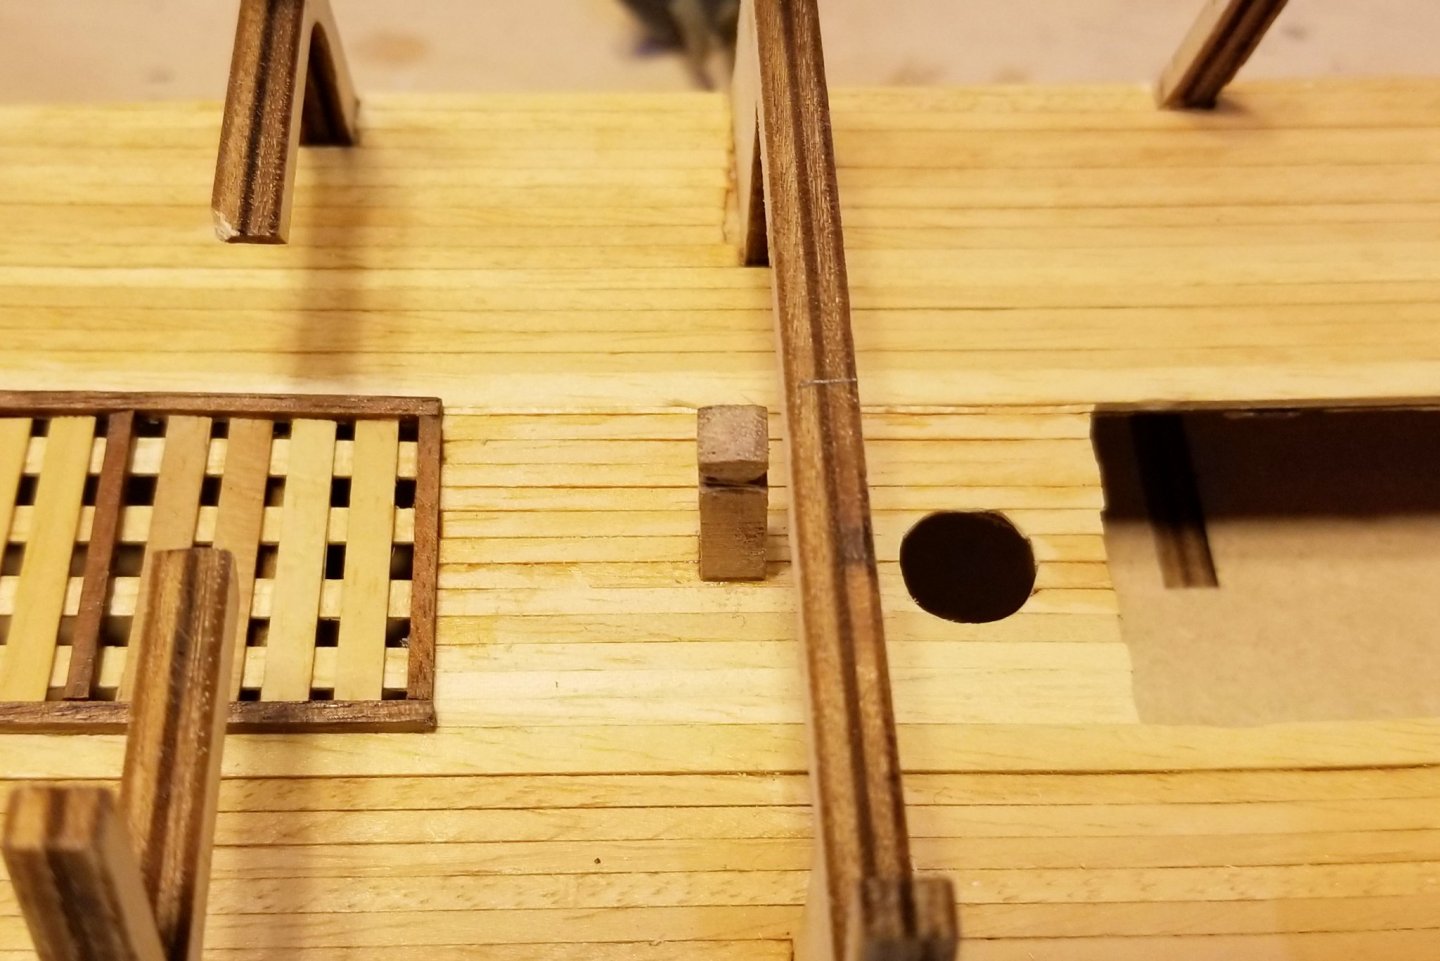
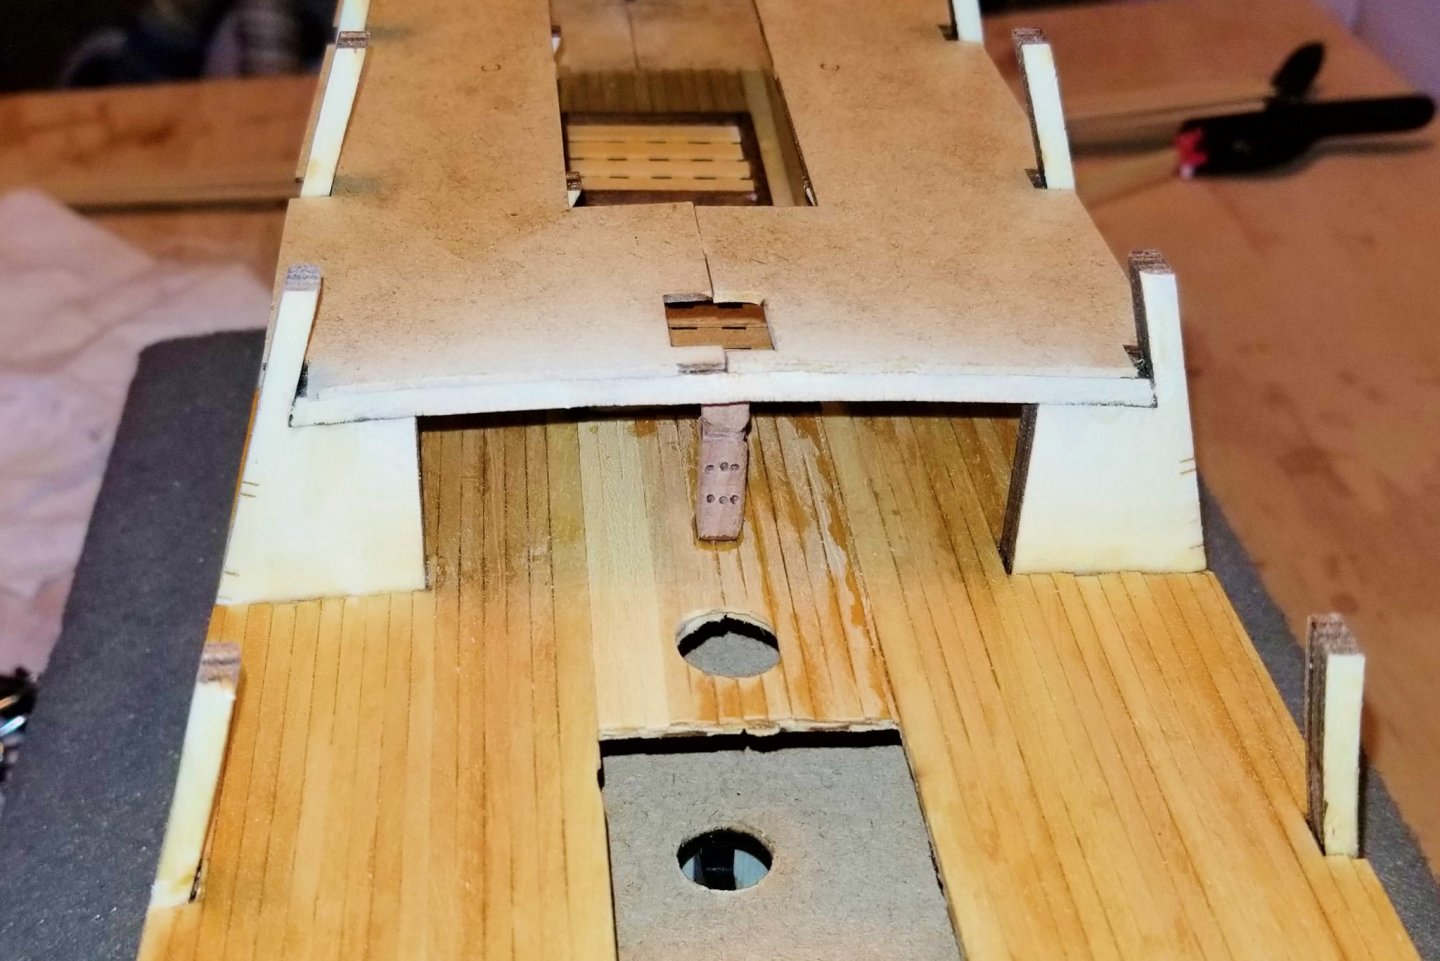
I've made and installed the knighthead referred to in my previous post. Pictures show it installed before the upper deck was installed, and then after. You can see that it would be difficult to install after -- although there is a small hatch directly above it that would provide some access. Regards, David

- 136 replies
-
- 5
-
-
- kolderstok
- batavia
- (and 1 more)
-
Hans: Another "fix" I might suggest is to not replace the beams on frames 4, 5 and 9 until after the Deck A planking is done and sanded. Would make the sanding just a bit easier, but not a big issue. I am loving this kit so far. 😁
- 136 replies
-
- 2
-
-
- kolderstok
- batavia
- (and 1 more)
-
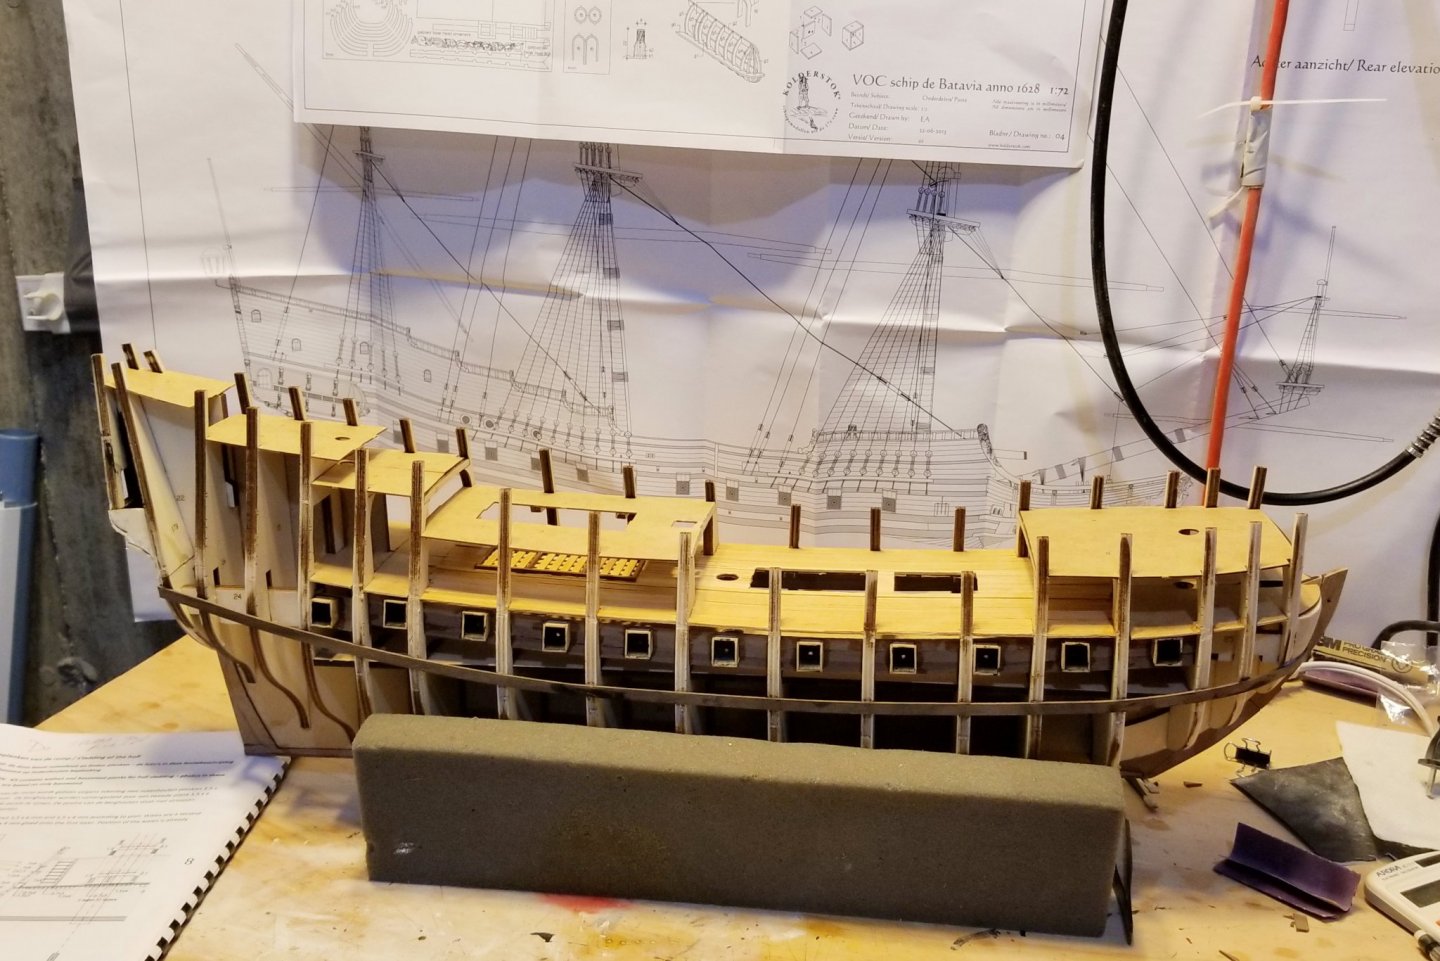
I've planked the lower deck, and fashioned and installed a hatch that will be visible from decks above. The sharp-eyed among you will notice that I forgot to plank one small section between the right upper frames -- but I've checked the drawings and it will be completely enclosed, so I'm not going to fix it. Speaking of drawings, I also noticed that I need to add a second layer of planking in the center area moving forward from the main hatch. I'll do that and varnish it on the next varnish round. What this made me realize is that I have to study the plans and drawings much more carefully, as there is info on them that isn't referenced in the manual. There are also some sequence issues to catch -- for example, reading ahead I've noticed that there is a knighthead attached to this deck aft of the main mast. It would be very difficult to install once the deck above is installed, but the deck installation comes much earlier in the manual then the place where the knighthead is mentioned. So i'll fashion and install it now before that deck goes on. So more reading forward, and more studying the plans. Regards, David
- 136 replies
-
- 8
-
-
- kolderstok
- batavia
- (and 1 more)
-
I have mounted the lower deck (see below), and I have a building note. The sternmost deck won't fit unless you cut it. I cut it in the wrong place on the starboard side, so had to make a second cut, and then replicated that cut on the port side. It's all planked over, so no problem, but it took me a while to figure out why I couldn't get that deck to fit in one piece. Regards, David

- 136 replies
-
- 6
-
-
- kolderstok
- batavia
- (and 1 more)
-
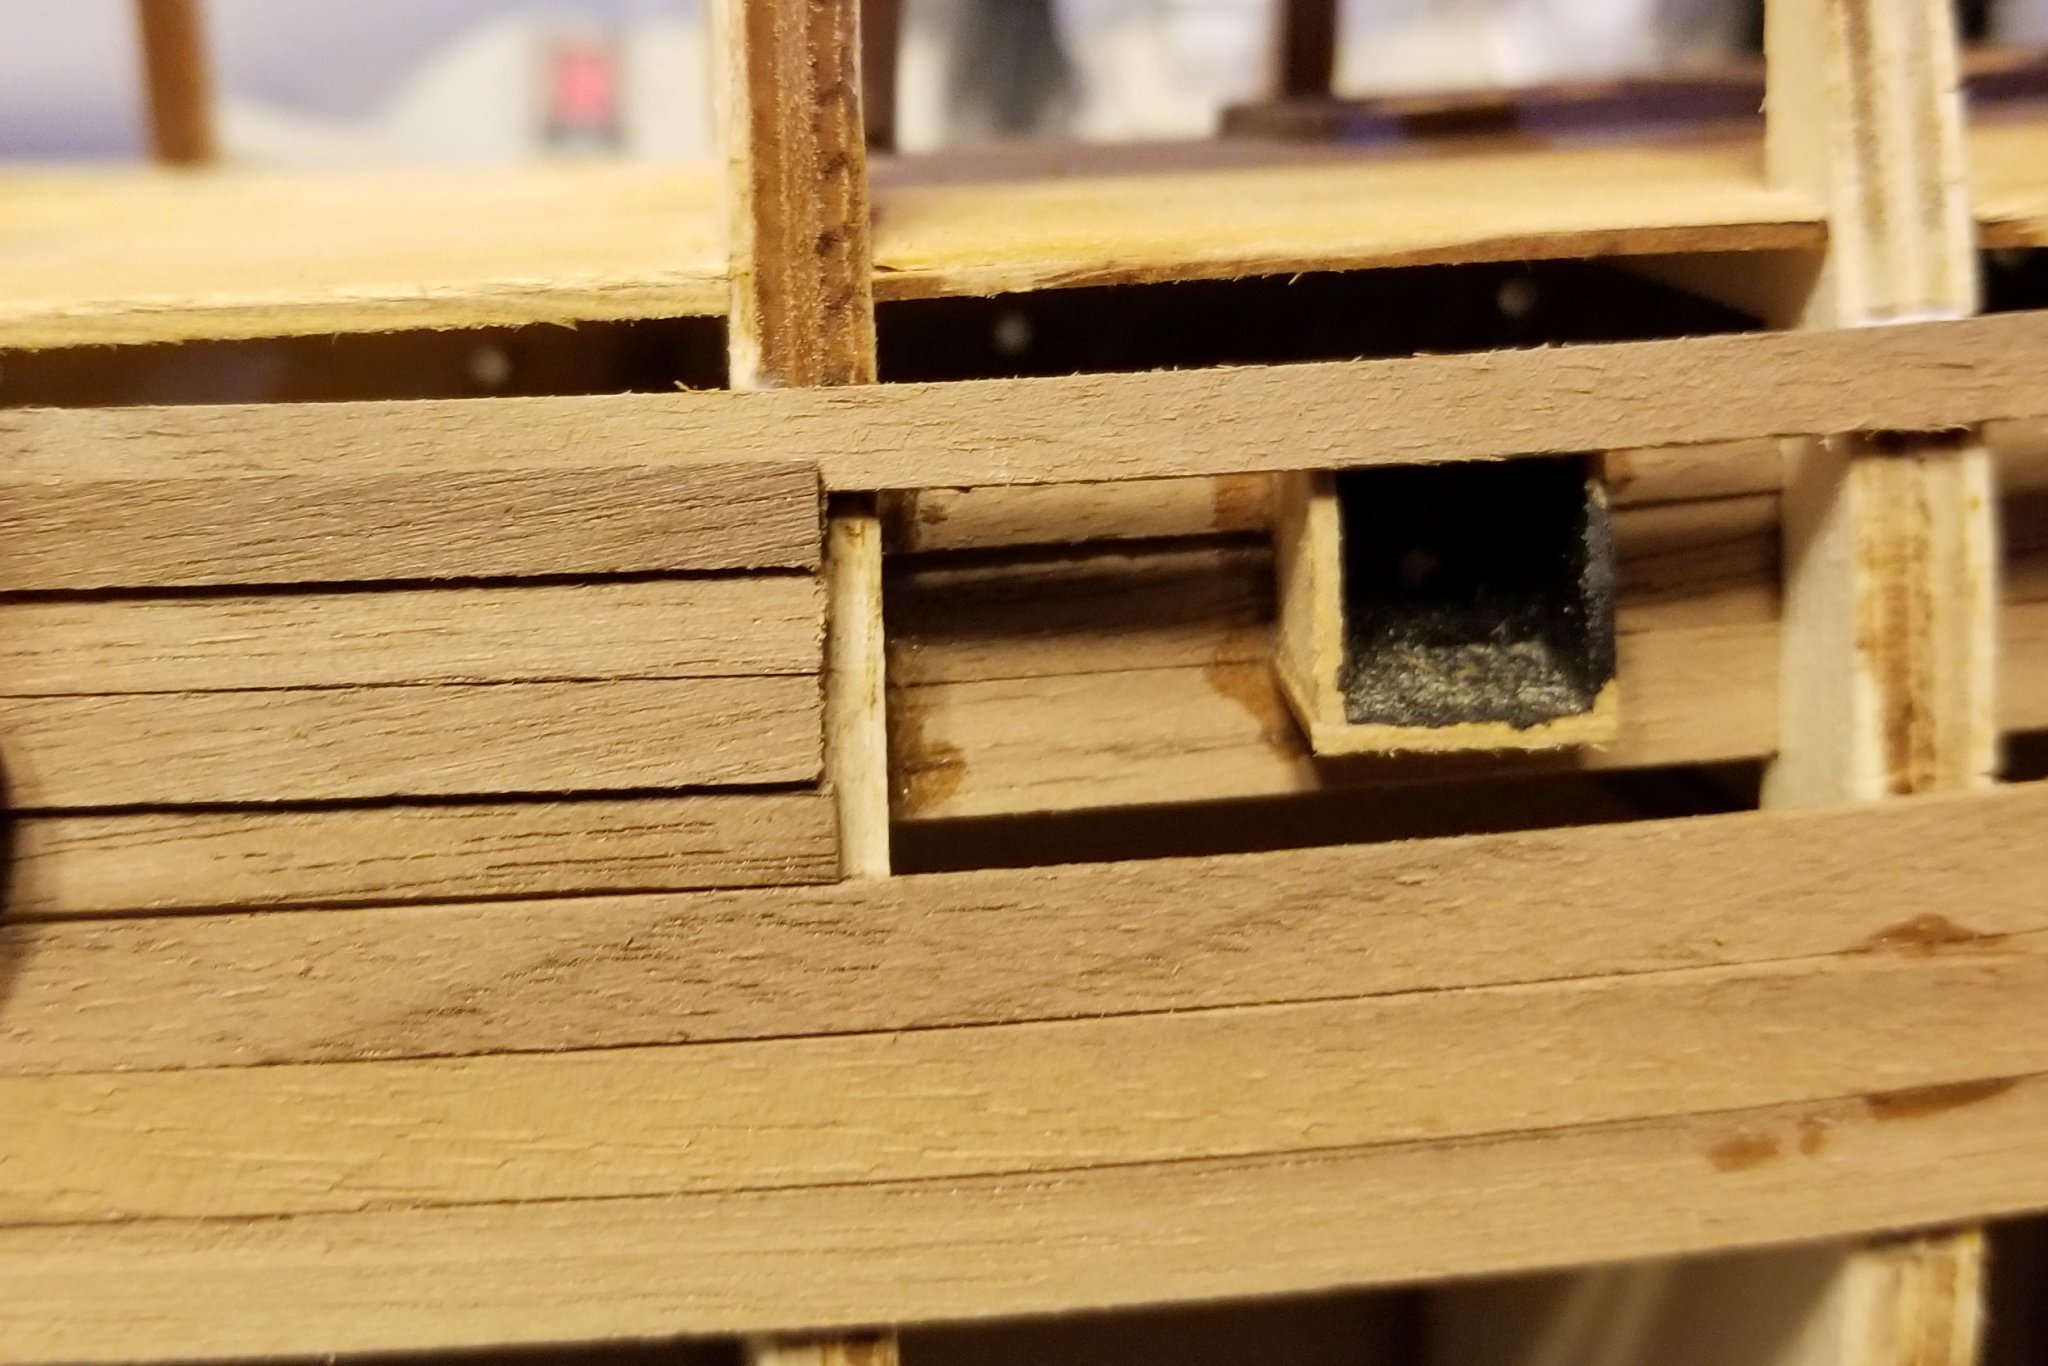
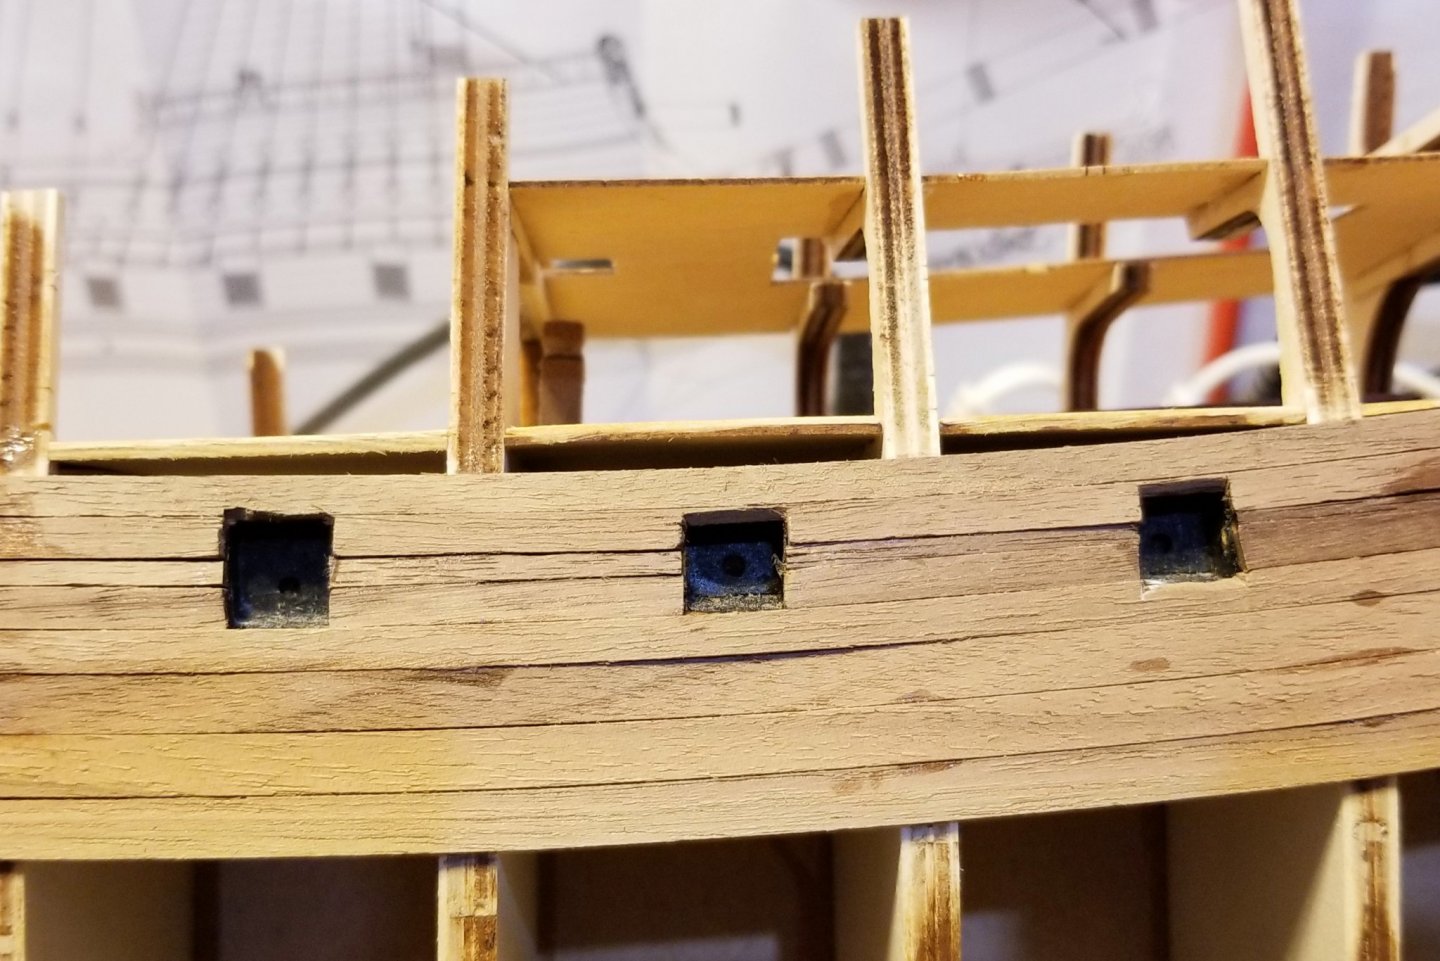
The starboard gunports are now done and mounted. I'm going to run an extra bead of glue around them to be sure they are really fixed on so that they won't pop off when they are sanded down to flush with the frames. Now on to the port side. Regards, David
- 136 replies
-
- 9
-
-
- kolderstok
- batavia
- (and 1 more)
-
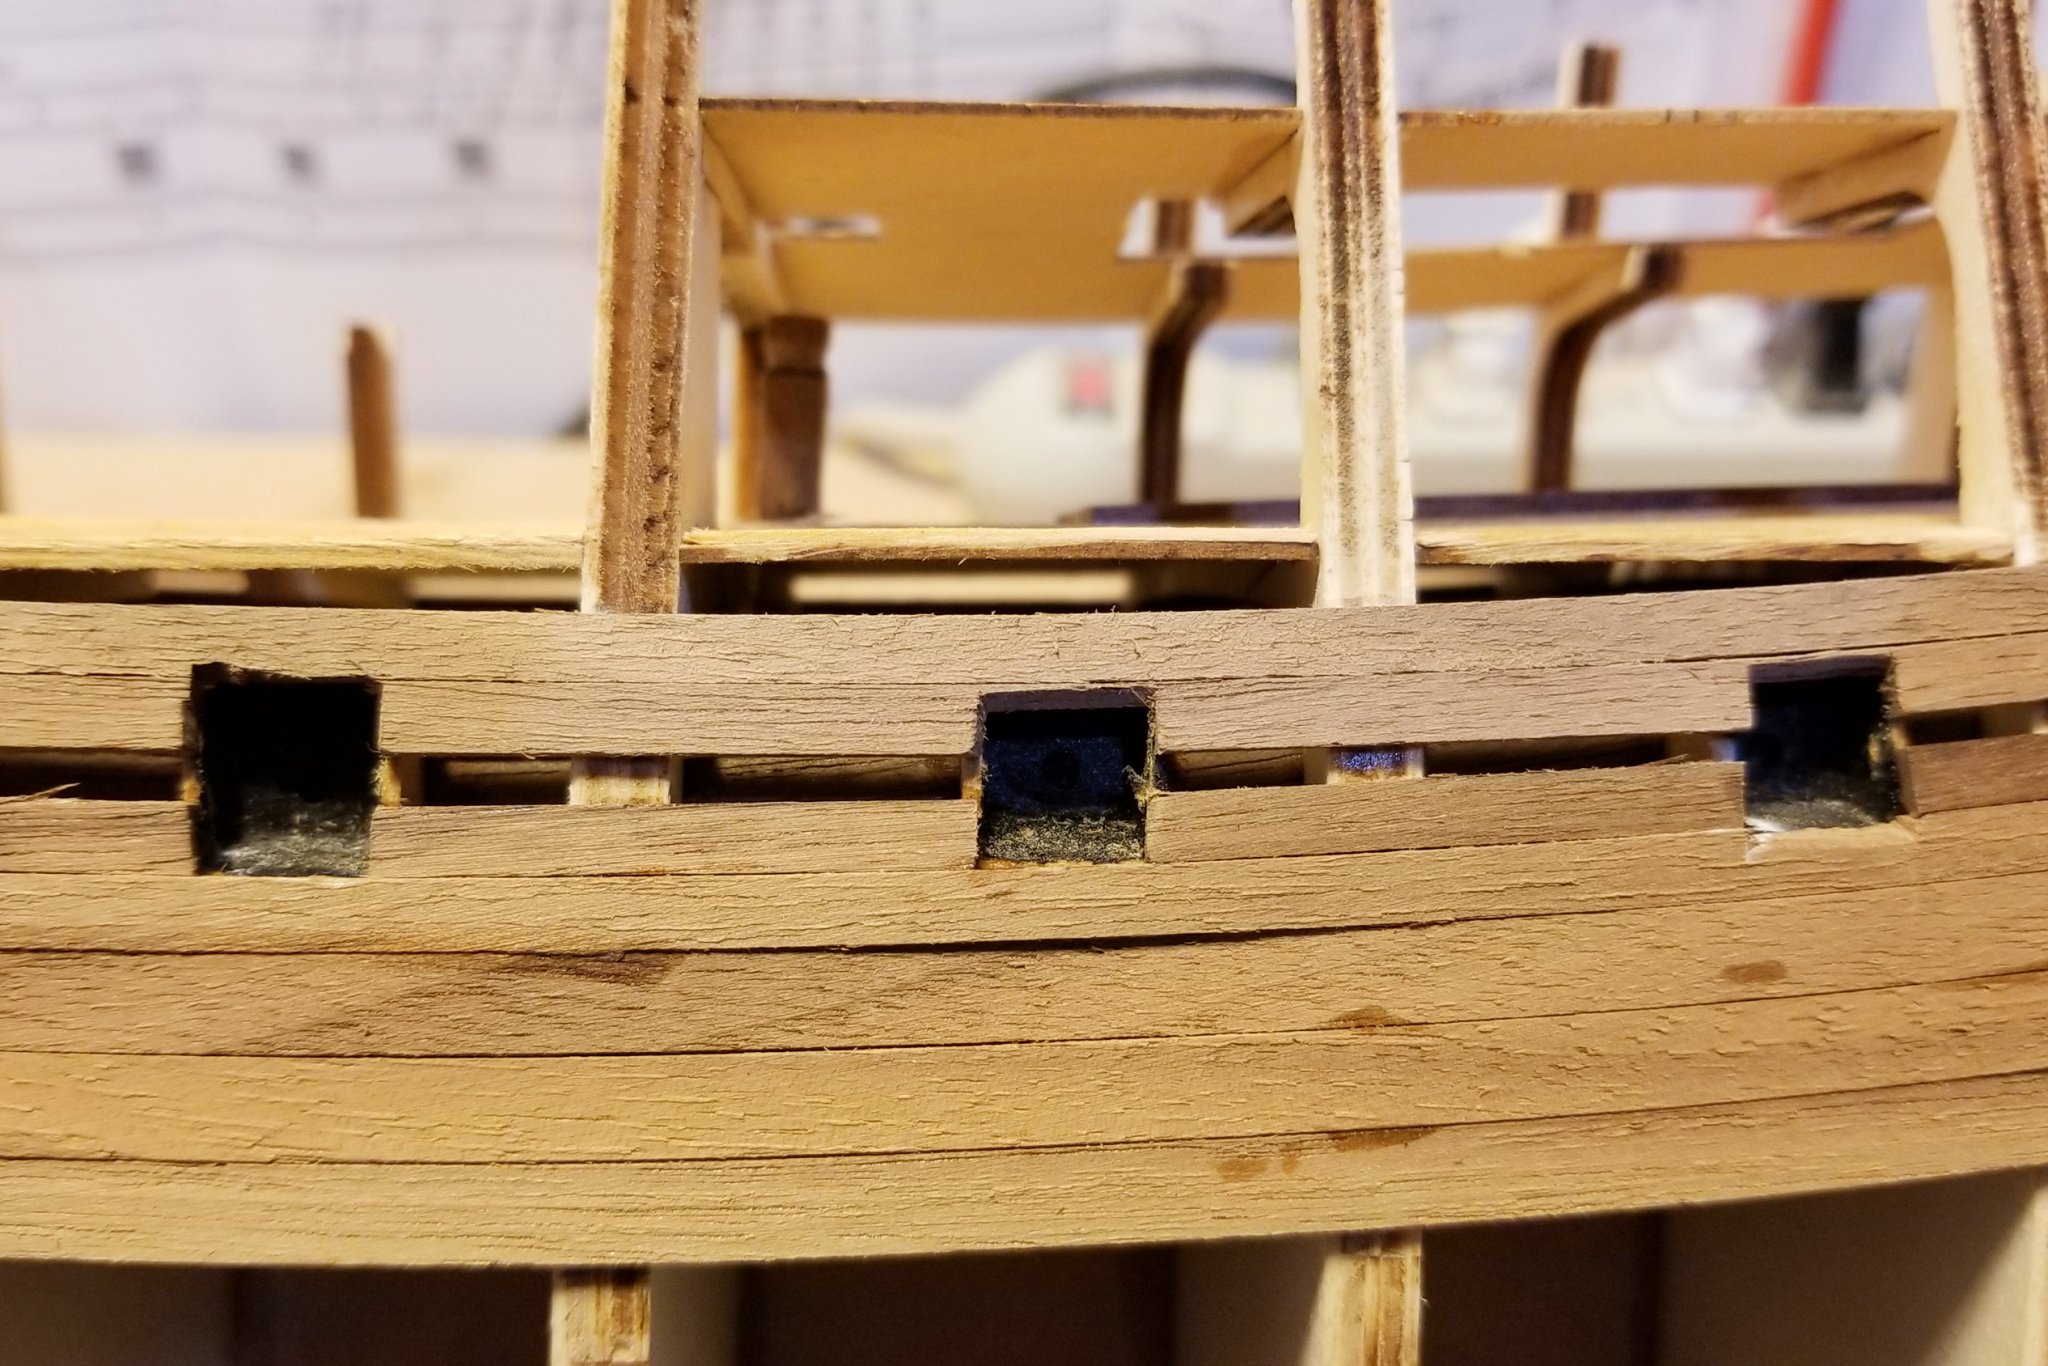
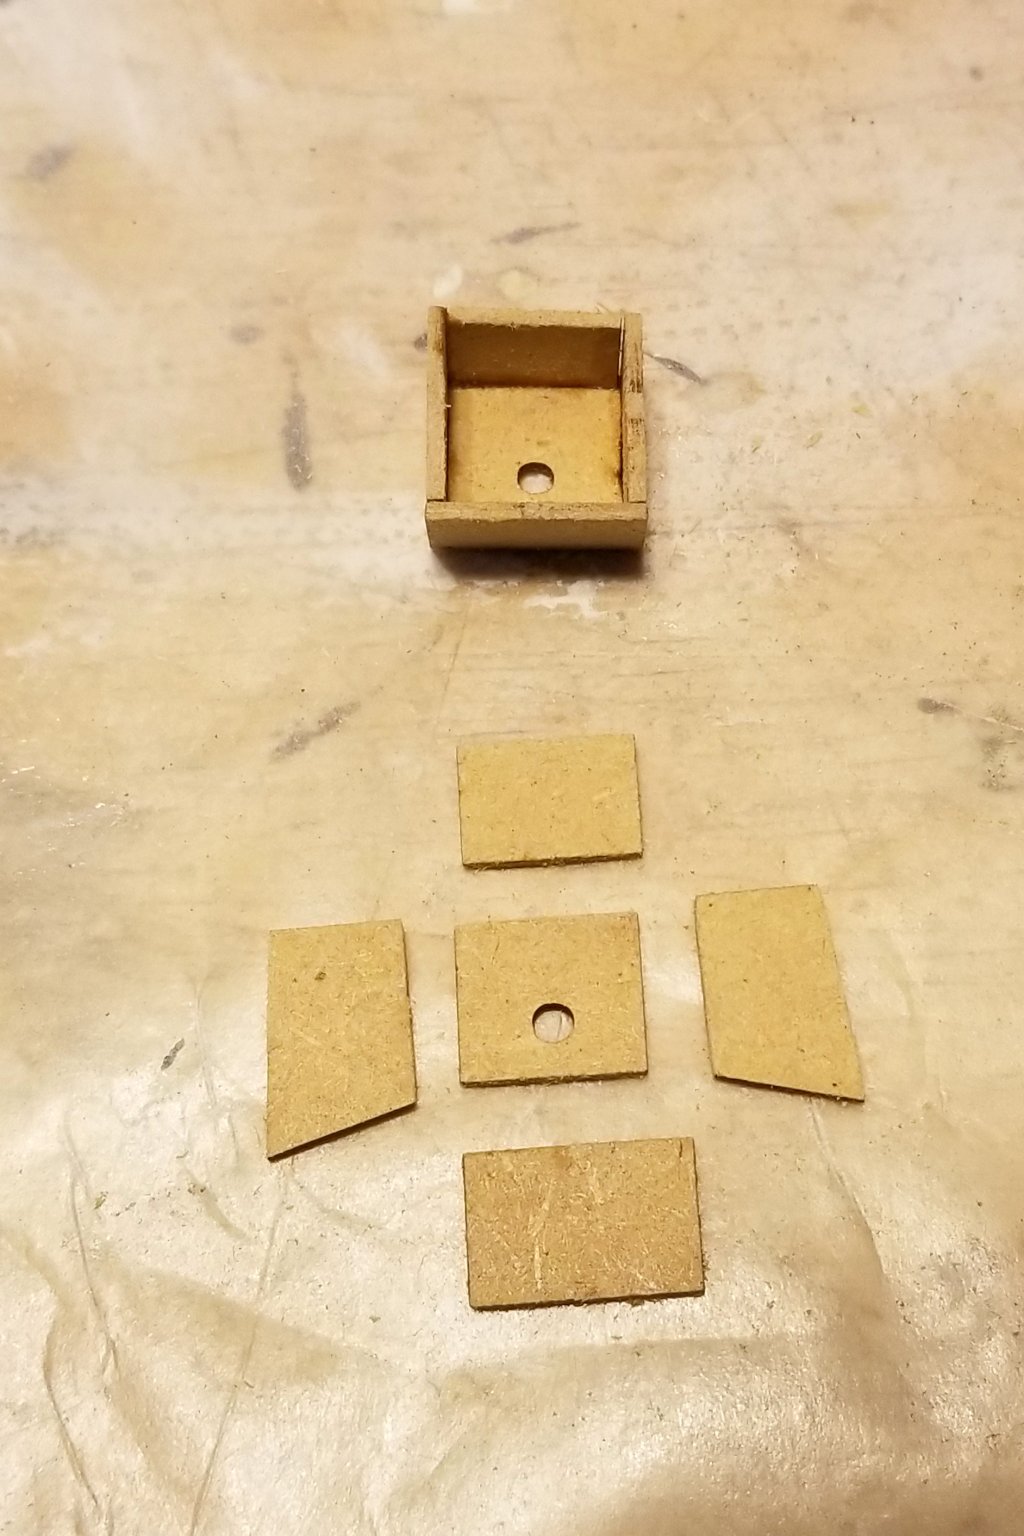
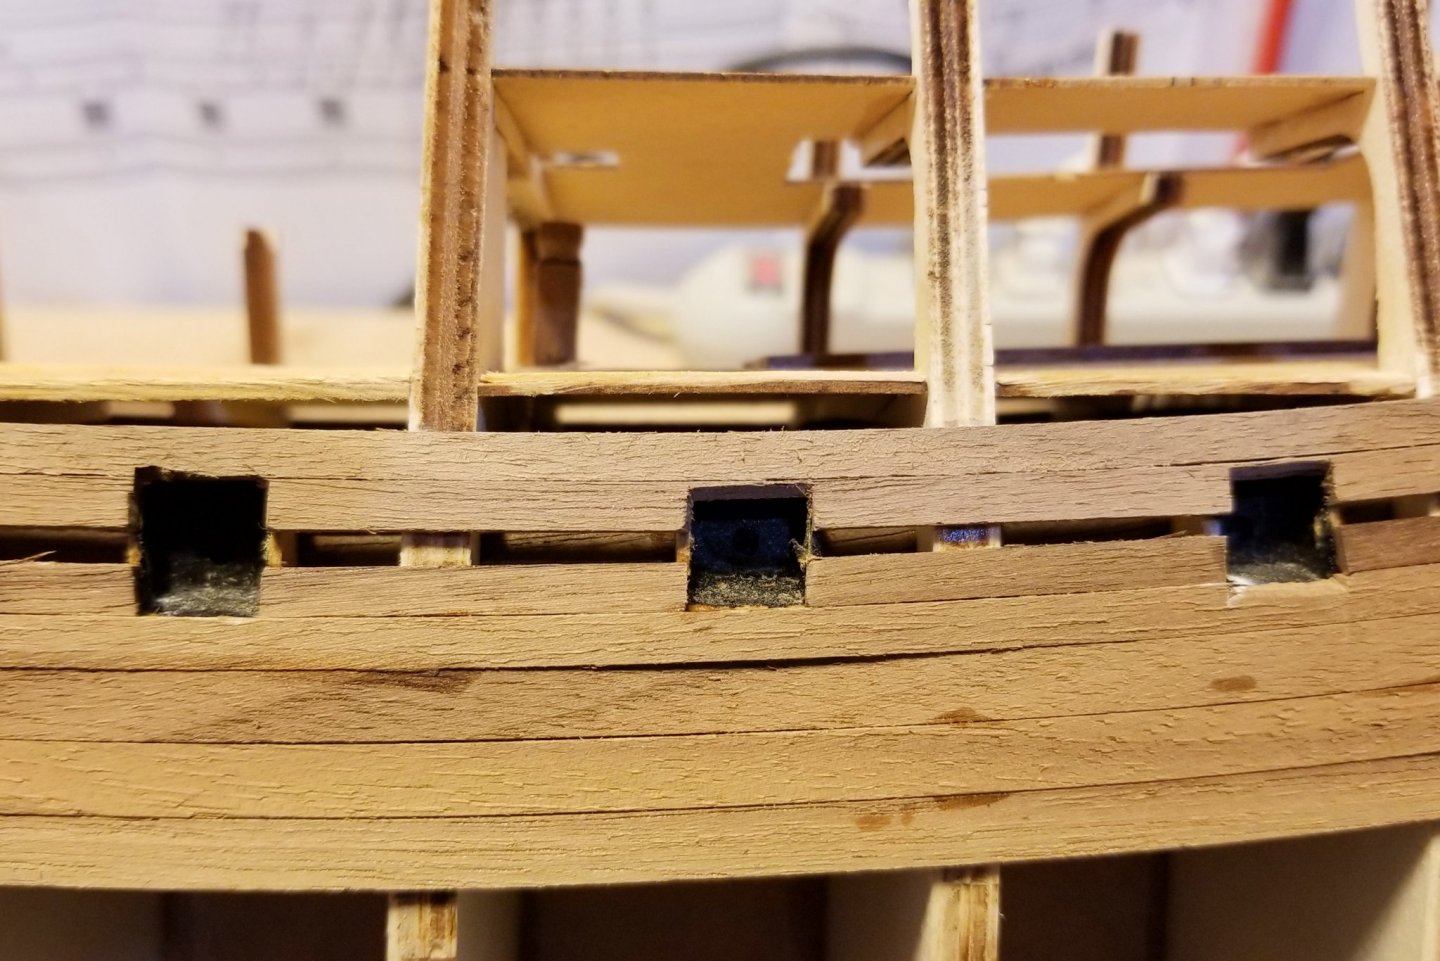
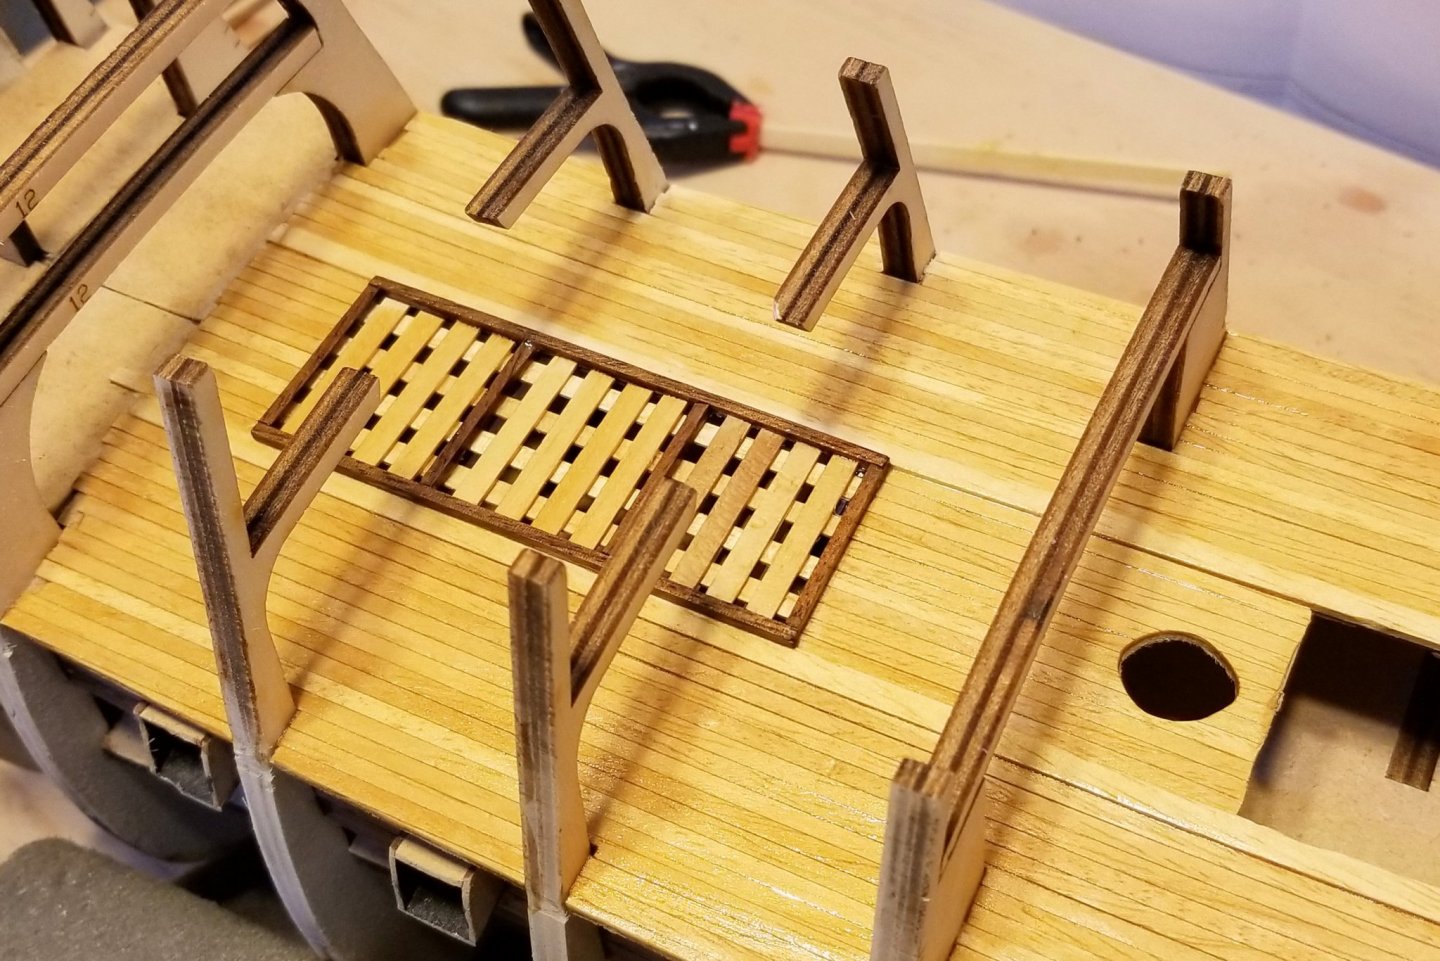
I have begun work on the gun ports. They are mounted on three slats you can see in the second picture. The manual suggests mounting the rear of the gun port (the piece with the hole) on the slat first, and then building the gun port around that. I felt it would be easier for me to build them off the ship and then mount them, as you can see in the first picture. Third picture shows two mounted gun ports. The cannons have a shaft extending from the back of the cannon that fit into the hole. There are no gun carriages, as they would be below decks and not visible. By the way, Hans provided me with an all walnut hull planking option, which I like better than a painted hull, so there is no basswood hull planking in the kit -- that's why you see the slats made from walnut. Regards, David

- 136 replies
-
- 7
-
-
- kolderstok
- batavia
- (and 1 more)
-
Charles: The five parts on the right are part of the lower yard attachments. They attach to the yards (5 of them) through the center hole, and the two holes on the "wings" are for a pin that goes through a brass part attached to the mast to create a swivel. There are drawings of this somewhere on the mast or yard plans. I had a very difficult time attaching those to the yards without them coming loose, and finally resorted to lashing them to the yards, and gluing the lashings, which worked well. I think there's an entry about that somewhere in my build log. The other parts I'm not sure of, but they look like they might possibly be part of the two deck winches. Have you built those yet? If the parts on the left are hollow inside, then I think they are the ends of a winch axle made from a dowel that fits into the hollows. I call these "winches" but the manual may have a different name for them -- but there are two on deck, one in front of the fore mast and one in front of the main mast. They have a lot of brass parts. The center parts might also be part of those winch assemblies, or they could be the body of small cranked winches that mount on the side of the channels. Hope this is helpful. Regards, David
-
Chris: It's a single-plank ship, so lots of bulkheads is a good thing. Regards, David
- 136 replies
-
- 2
-
-
- kolderstok
- batavia
- (and 1 more)
-
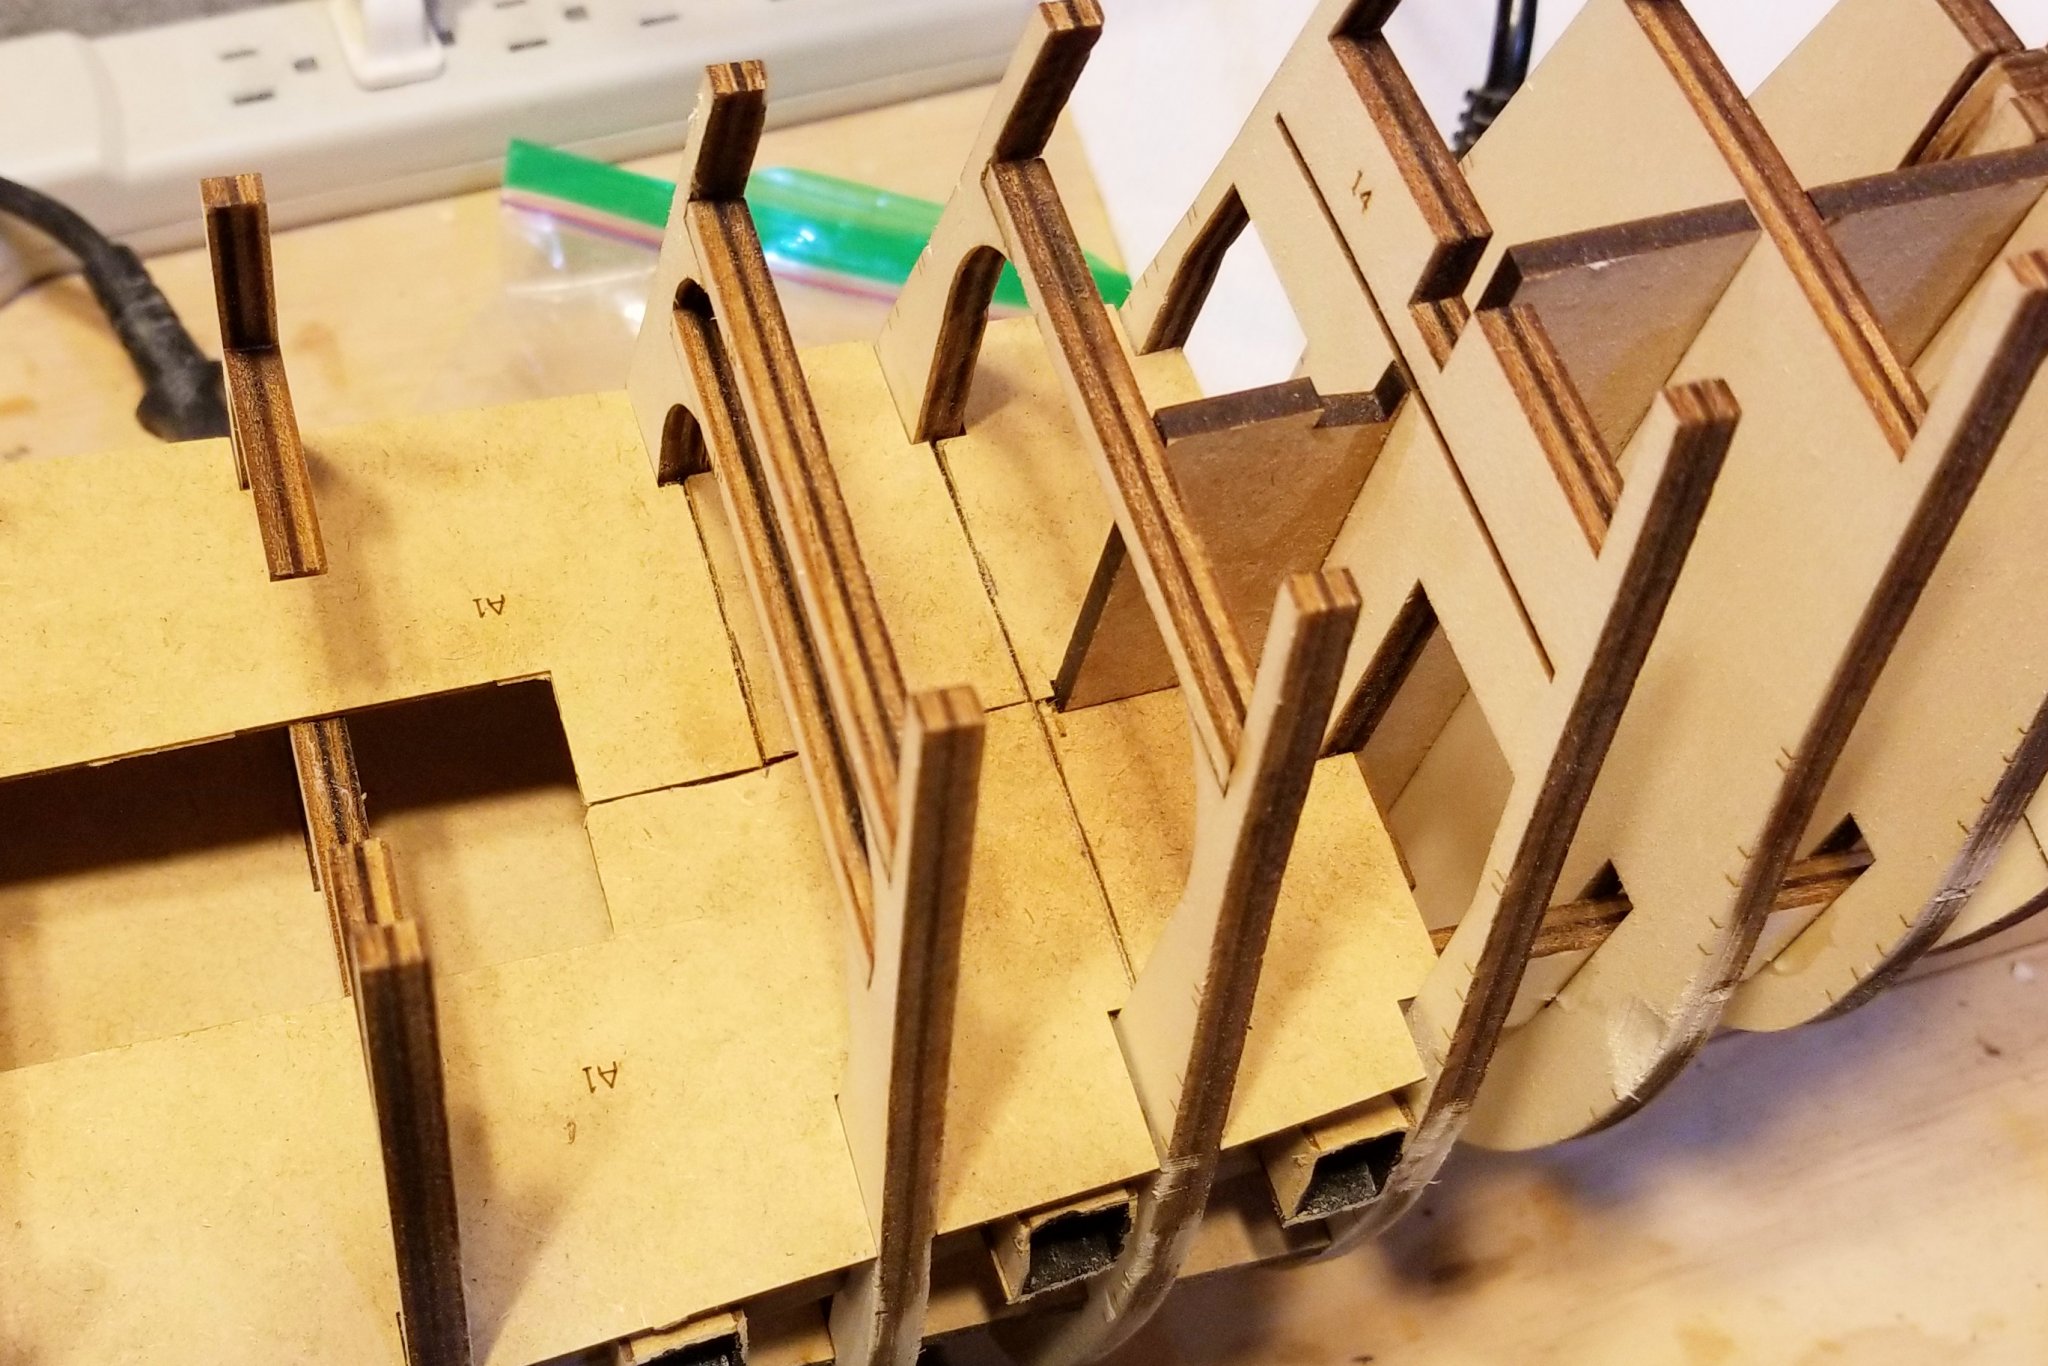
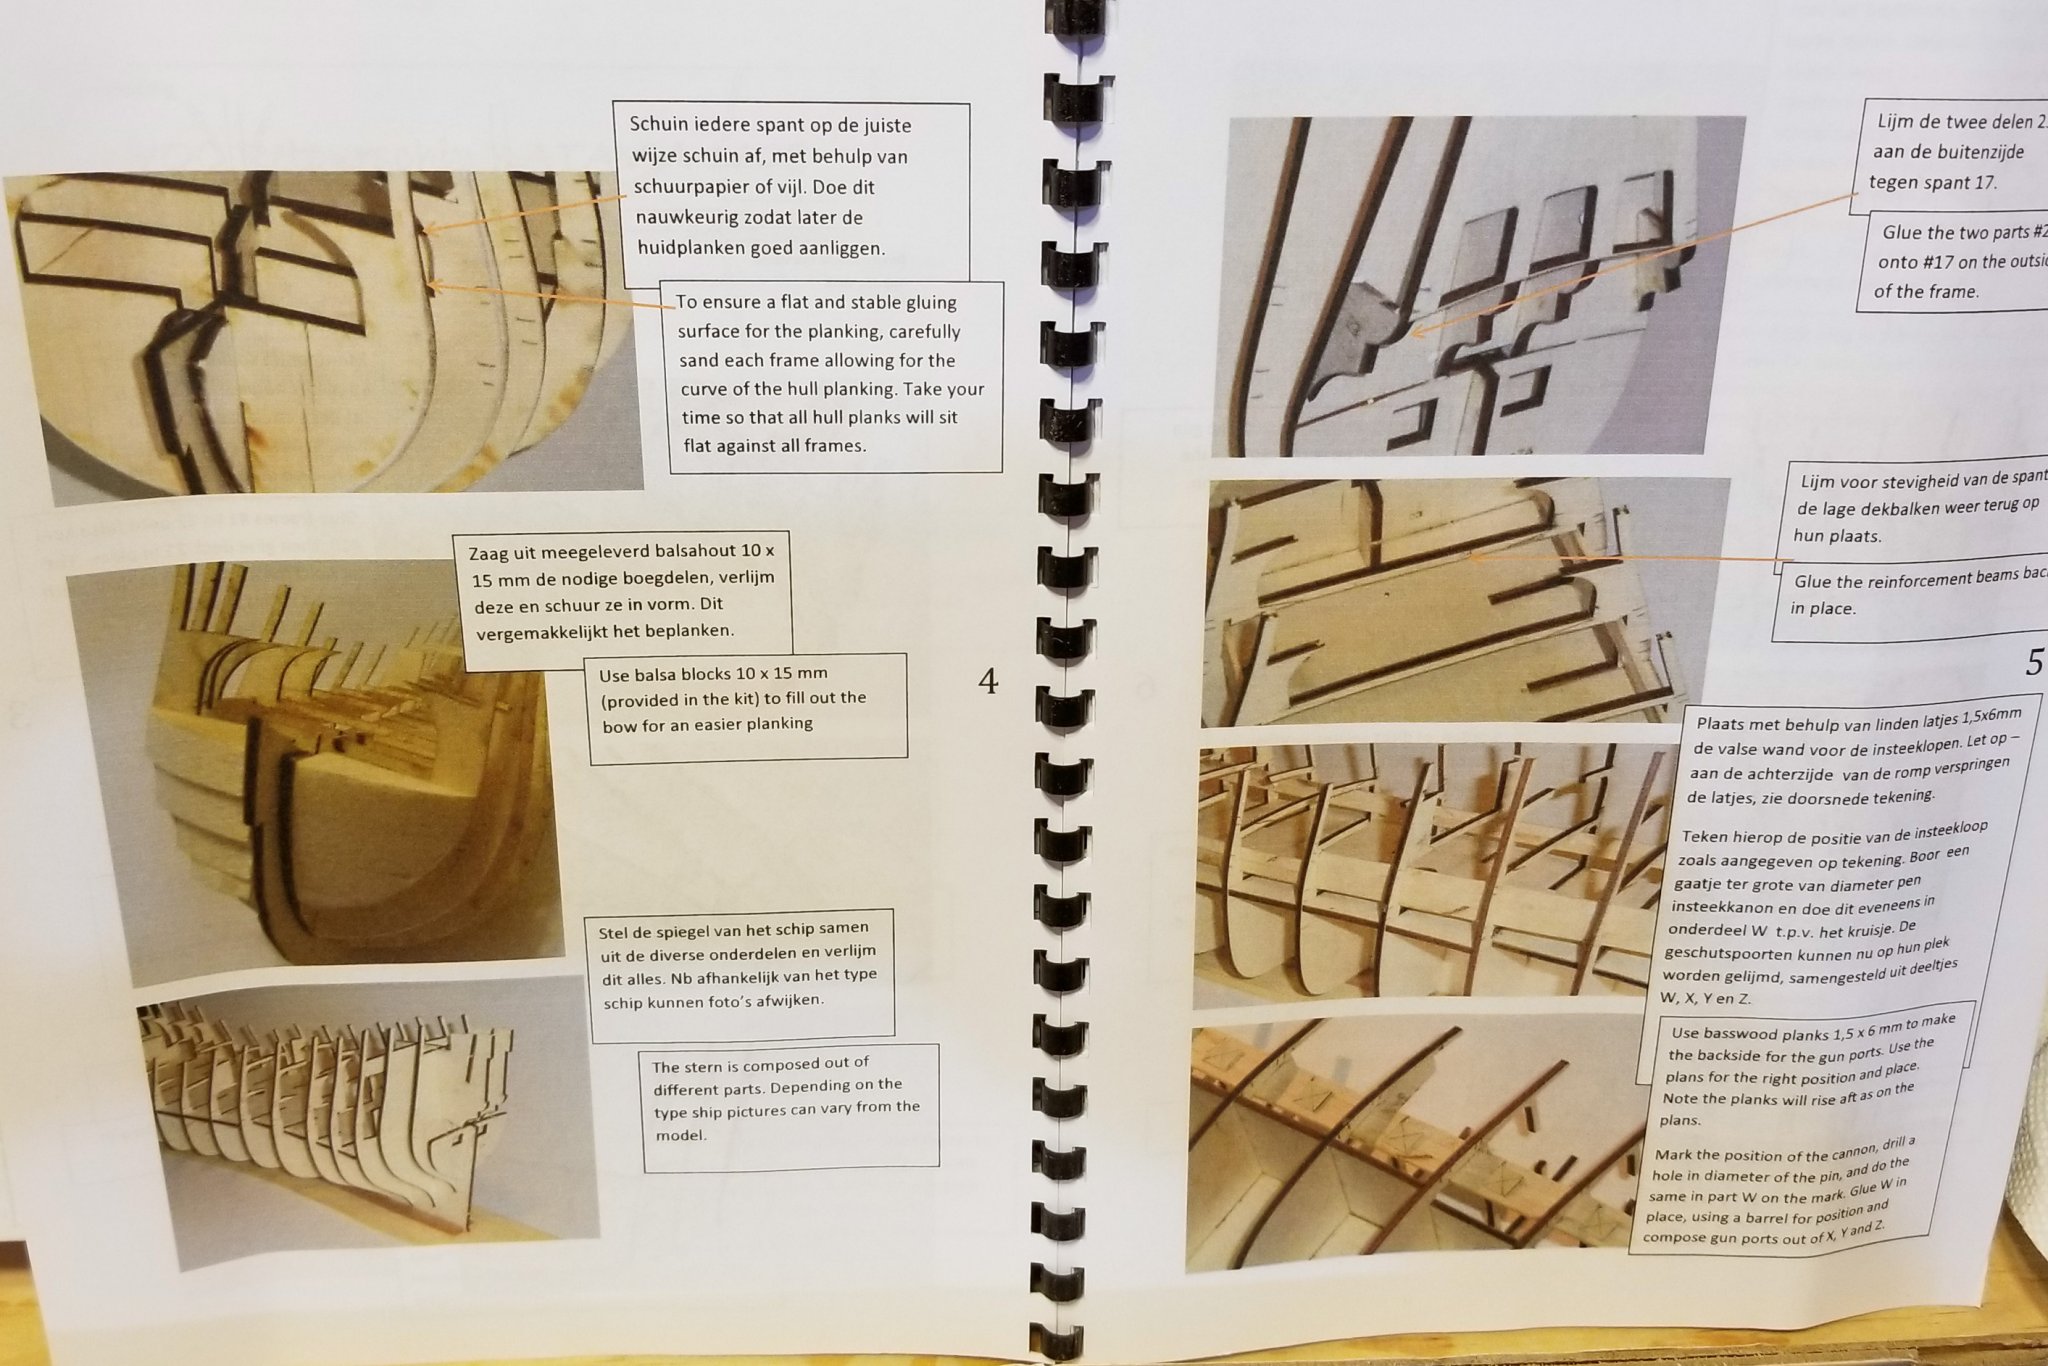
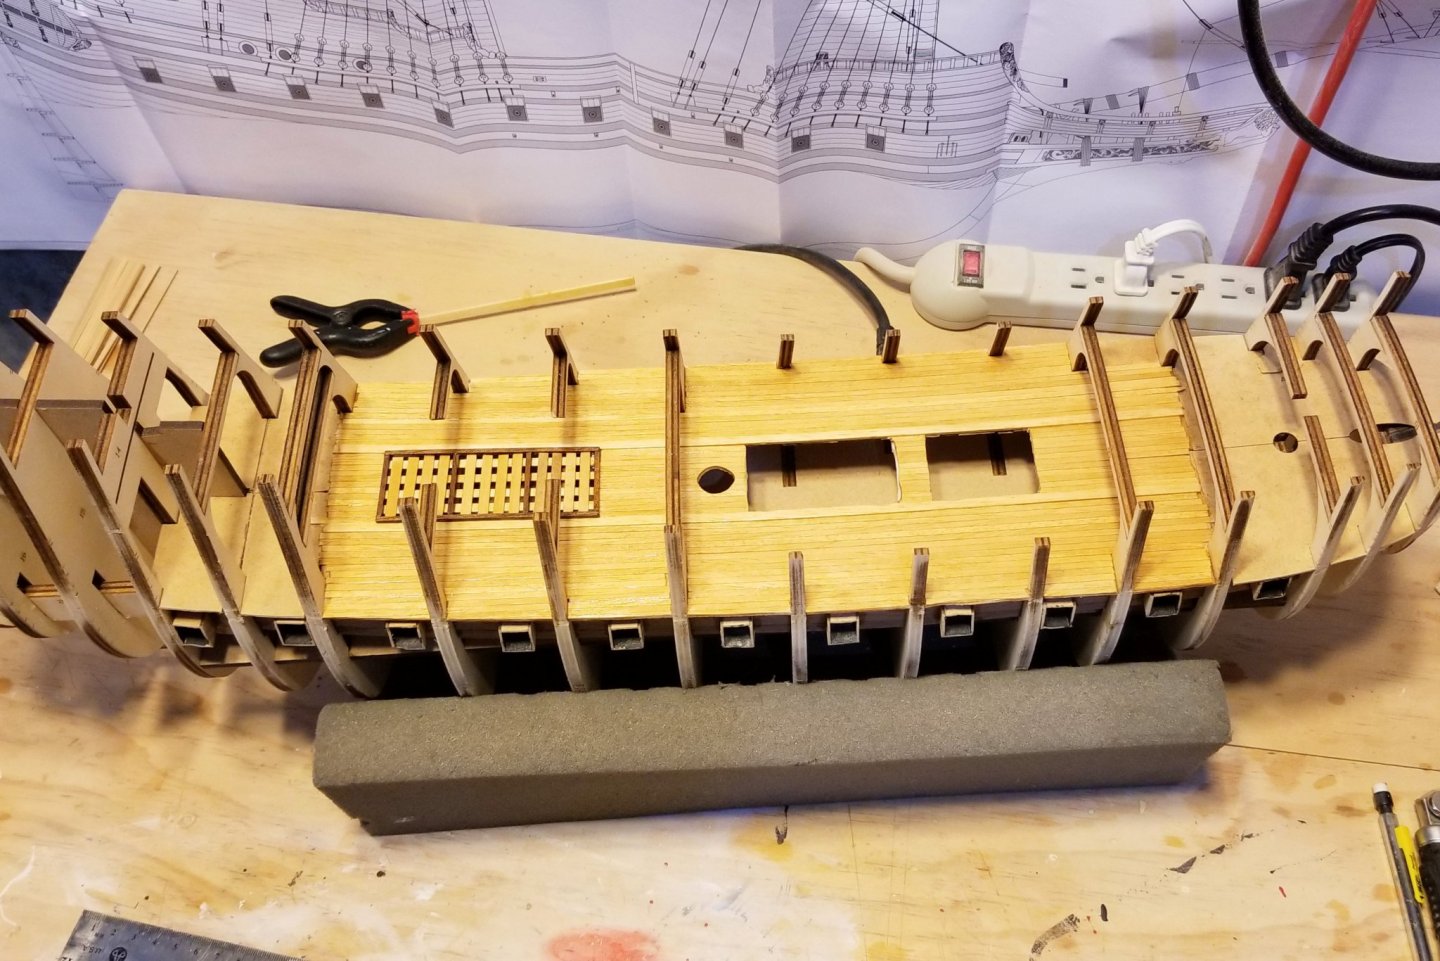
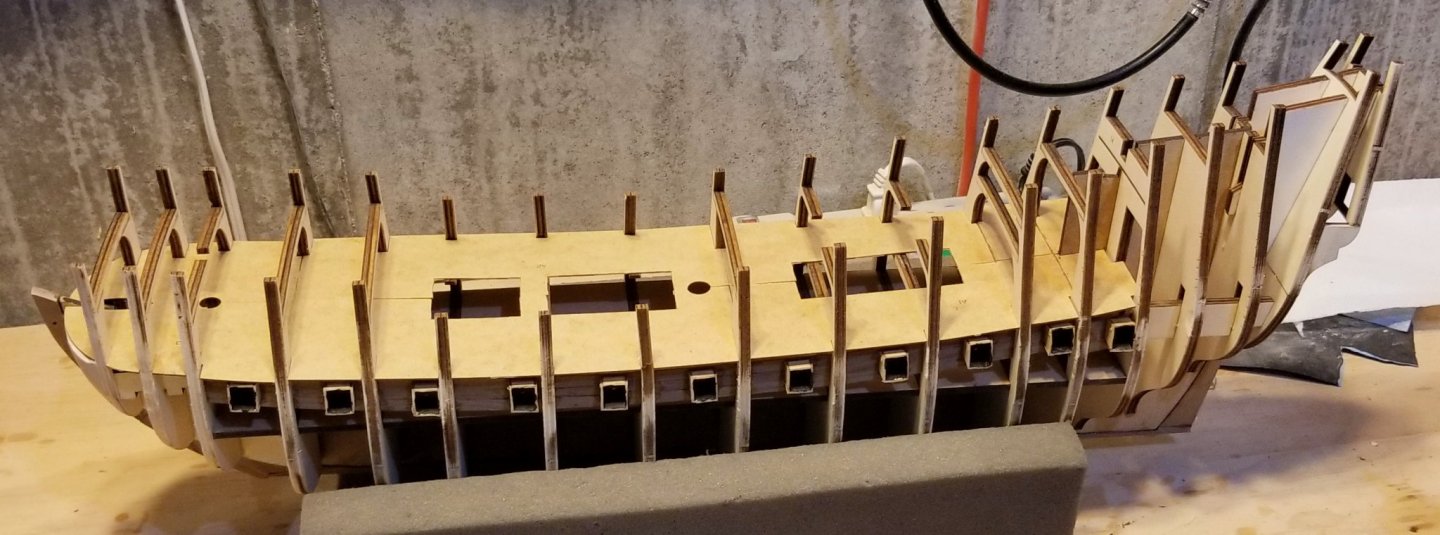
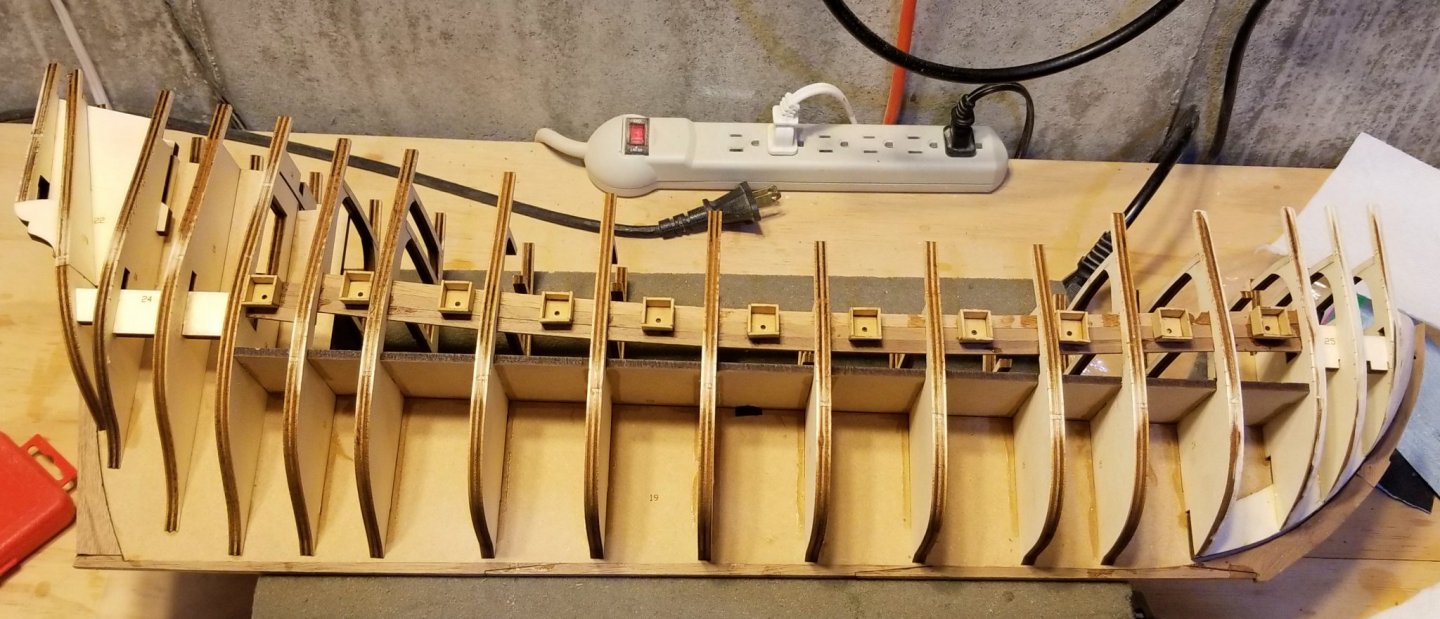
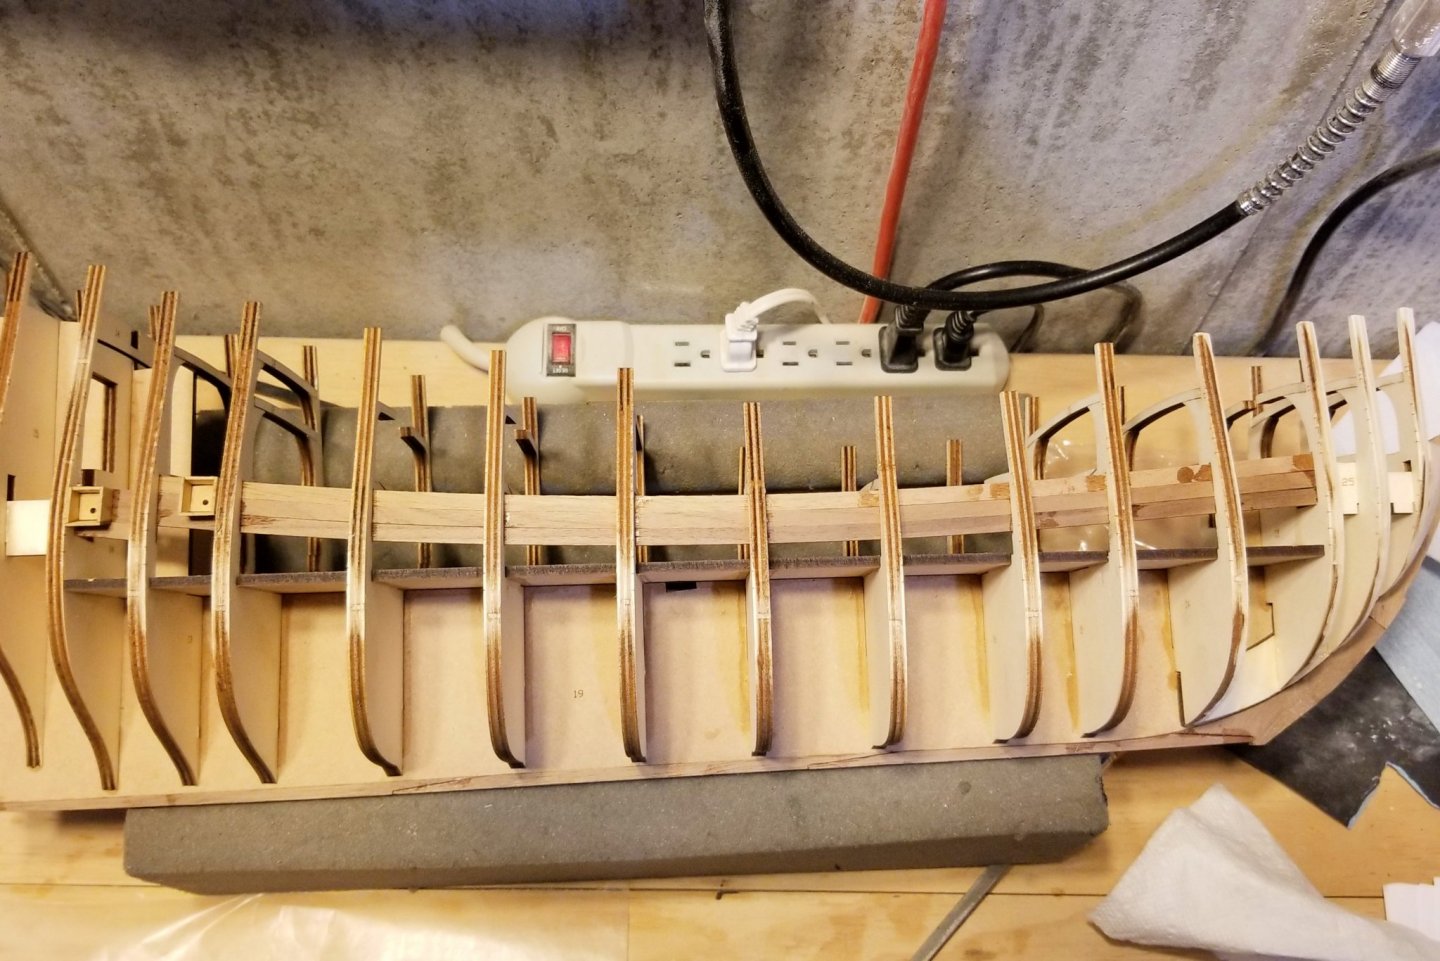
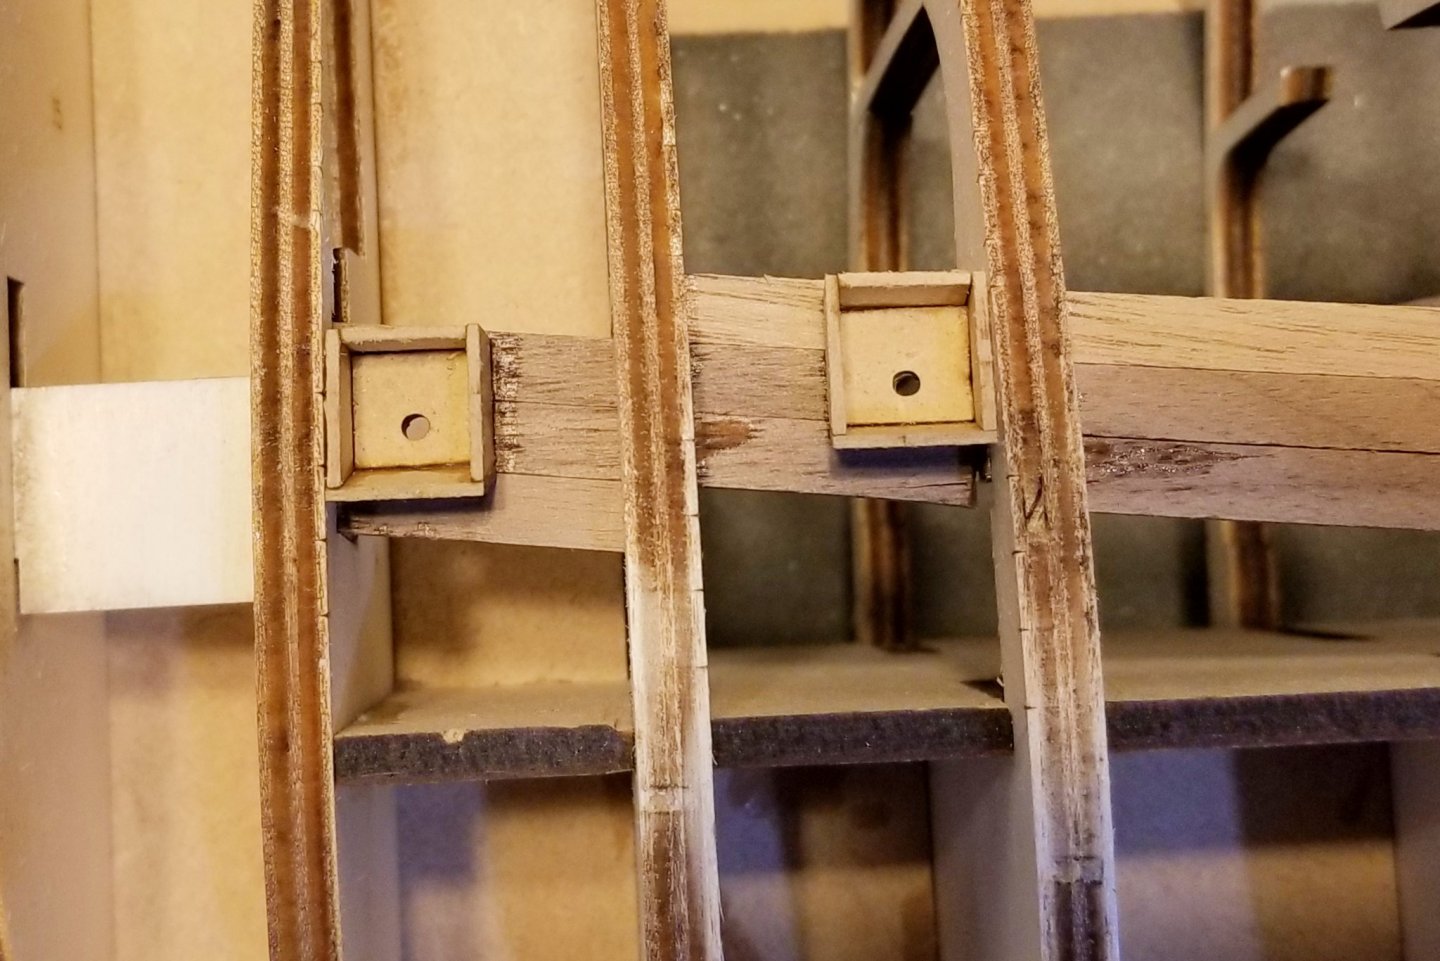
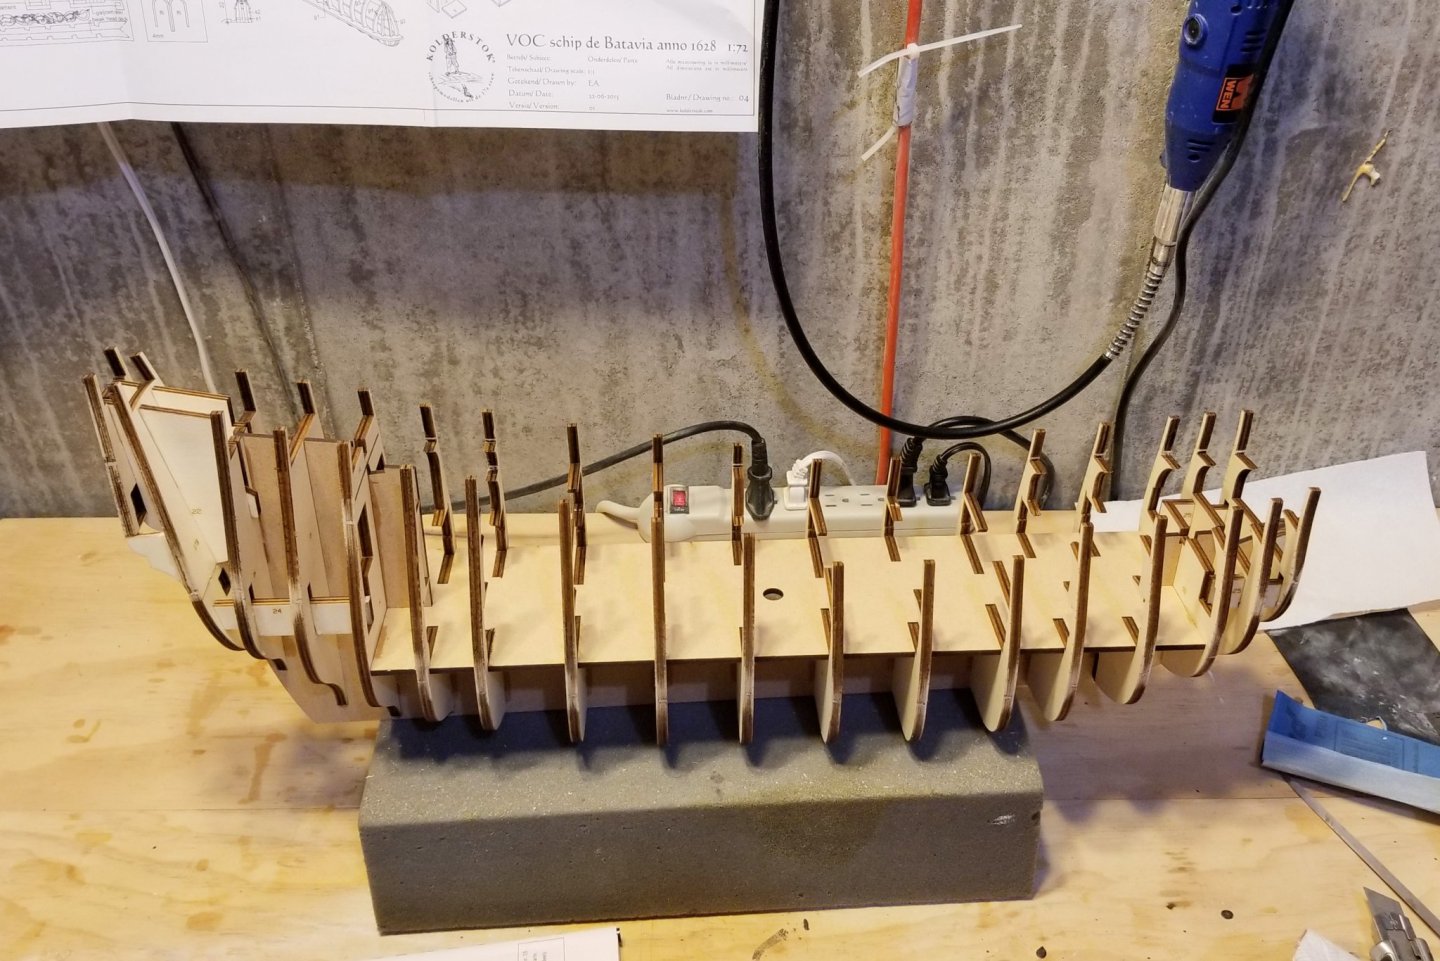
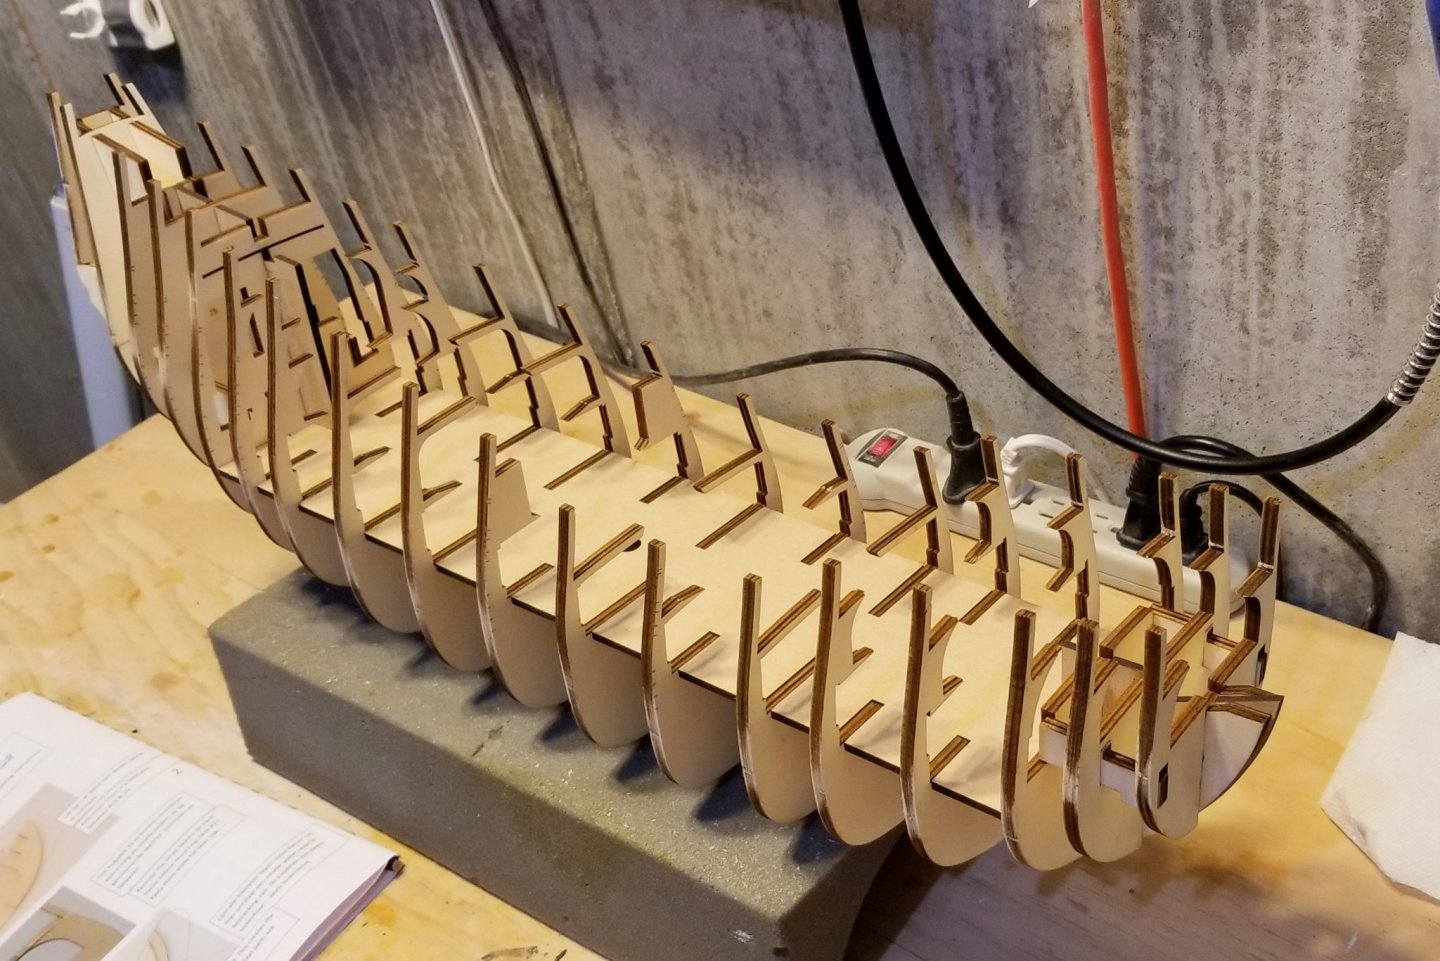
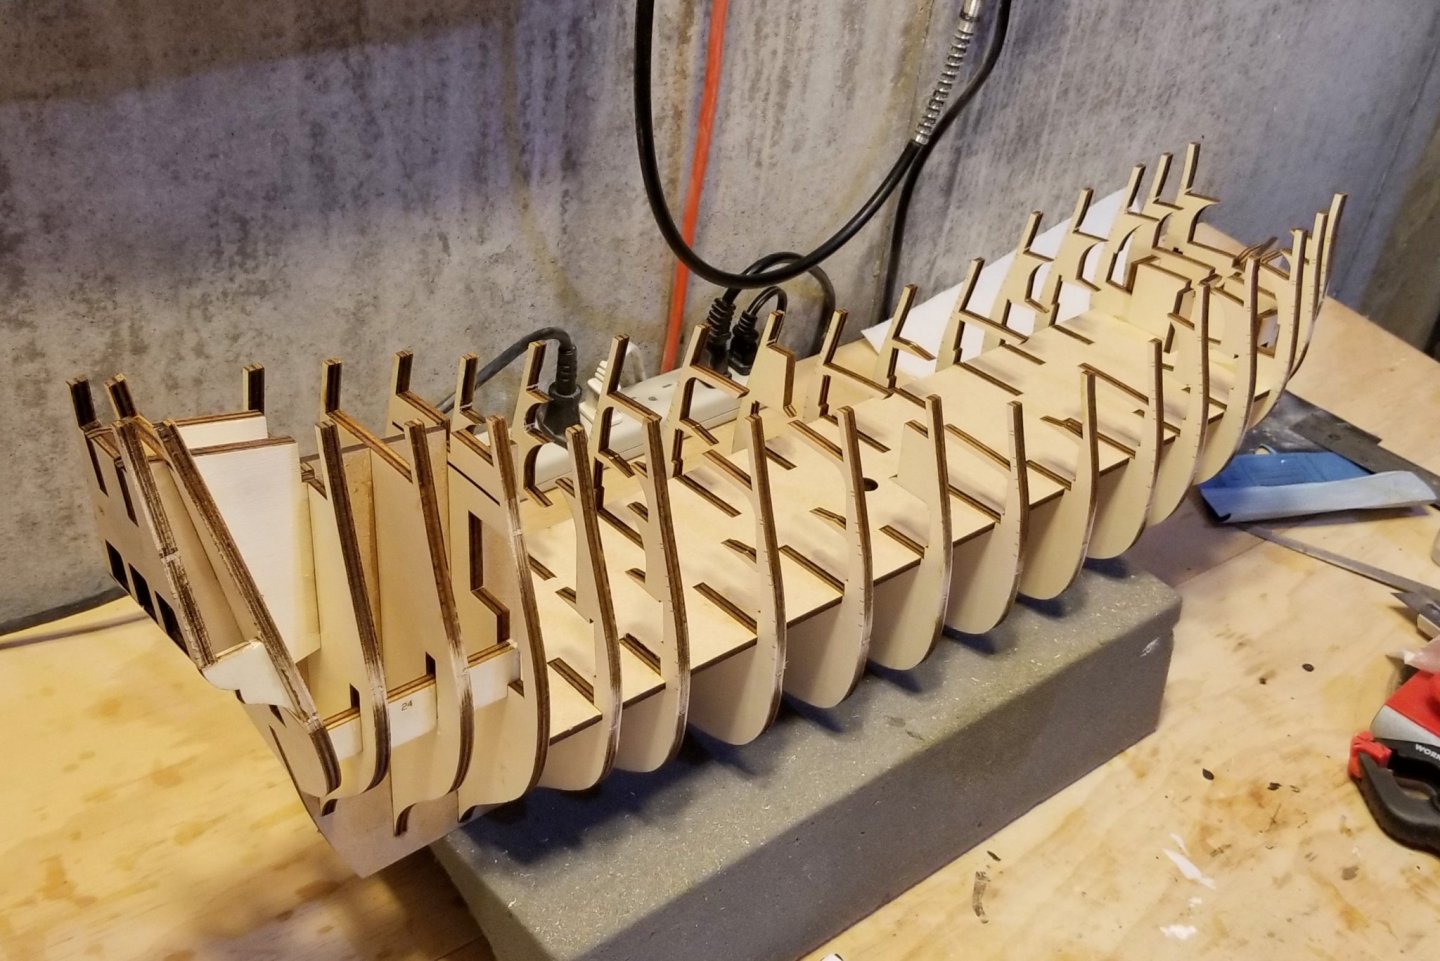
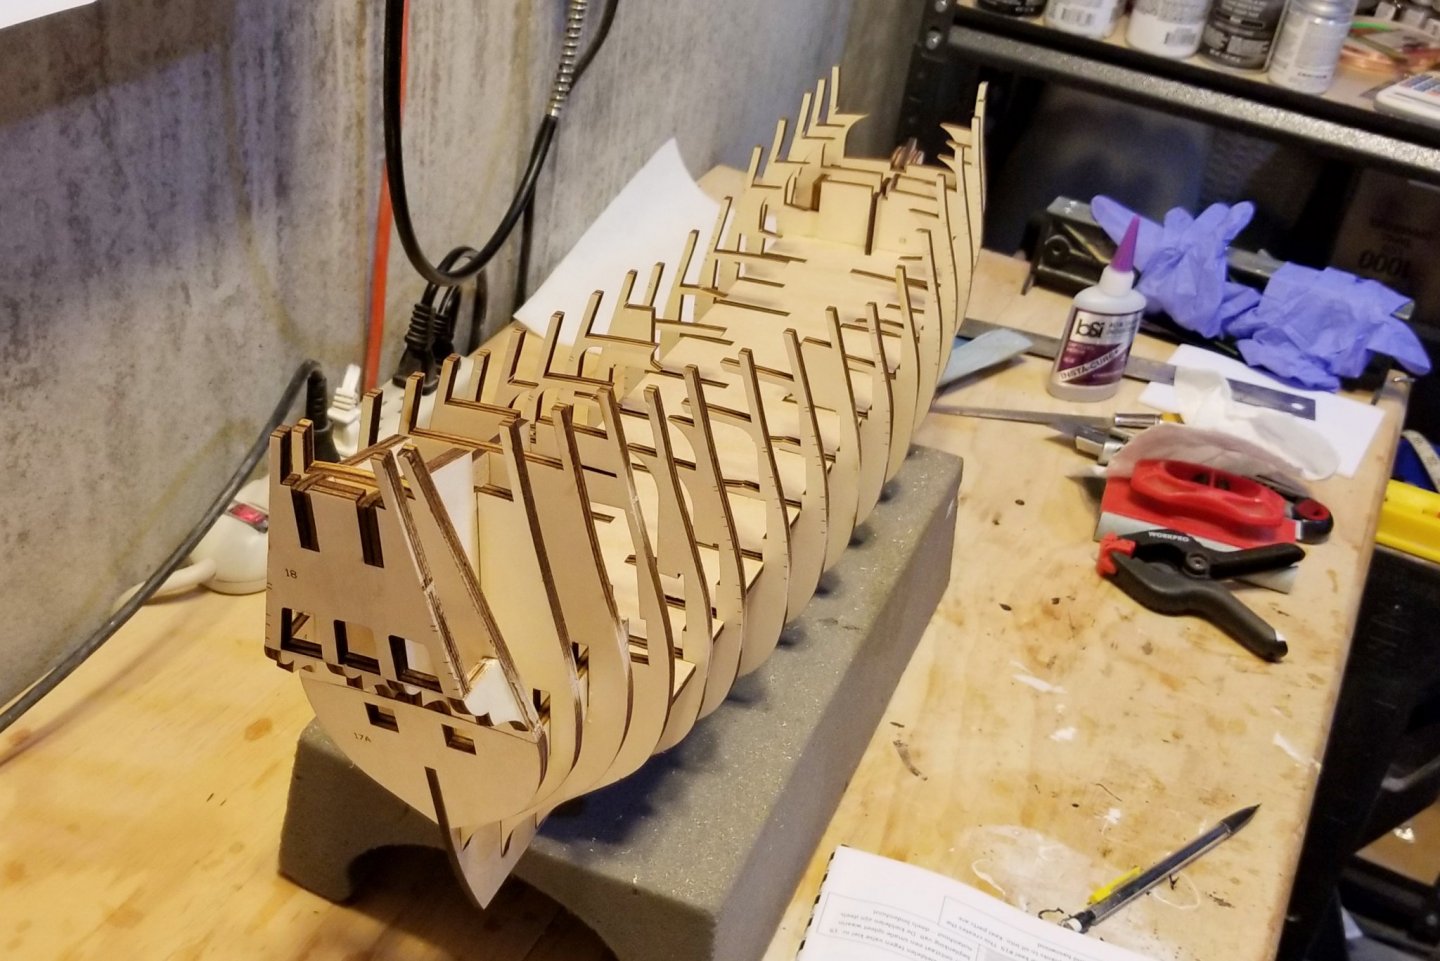
The basic hull structure is complete, although I still need to do: keel parts, sanding frames, balsa blocks, and reinforcing rib replacement. I built this by dry-fitting everything you see in the pictures before gluing anything, which was important as there were a couple of tight deck slots that needed to be opened, and the alignment of the stern parts depends on having them all installed. Then I glued from the front back, using CA gel along the joints. Regards, David
- 136 replies
-
- 11
-
-
- kolderstok
- batavia
- (and 1 more)
-
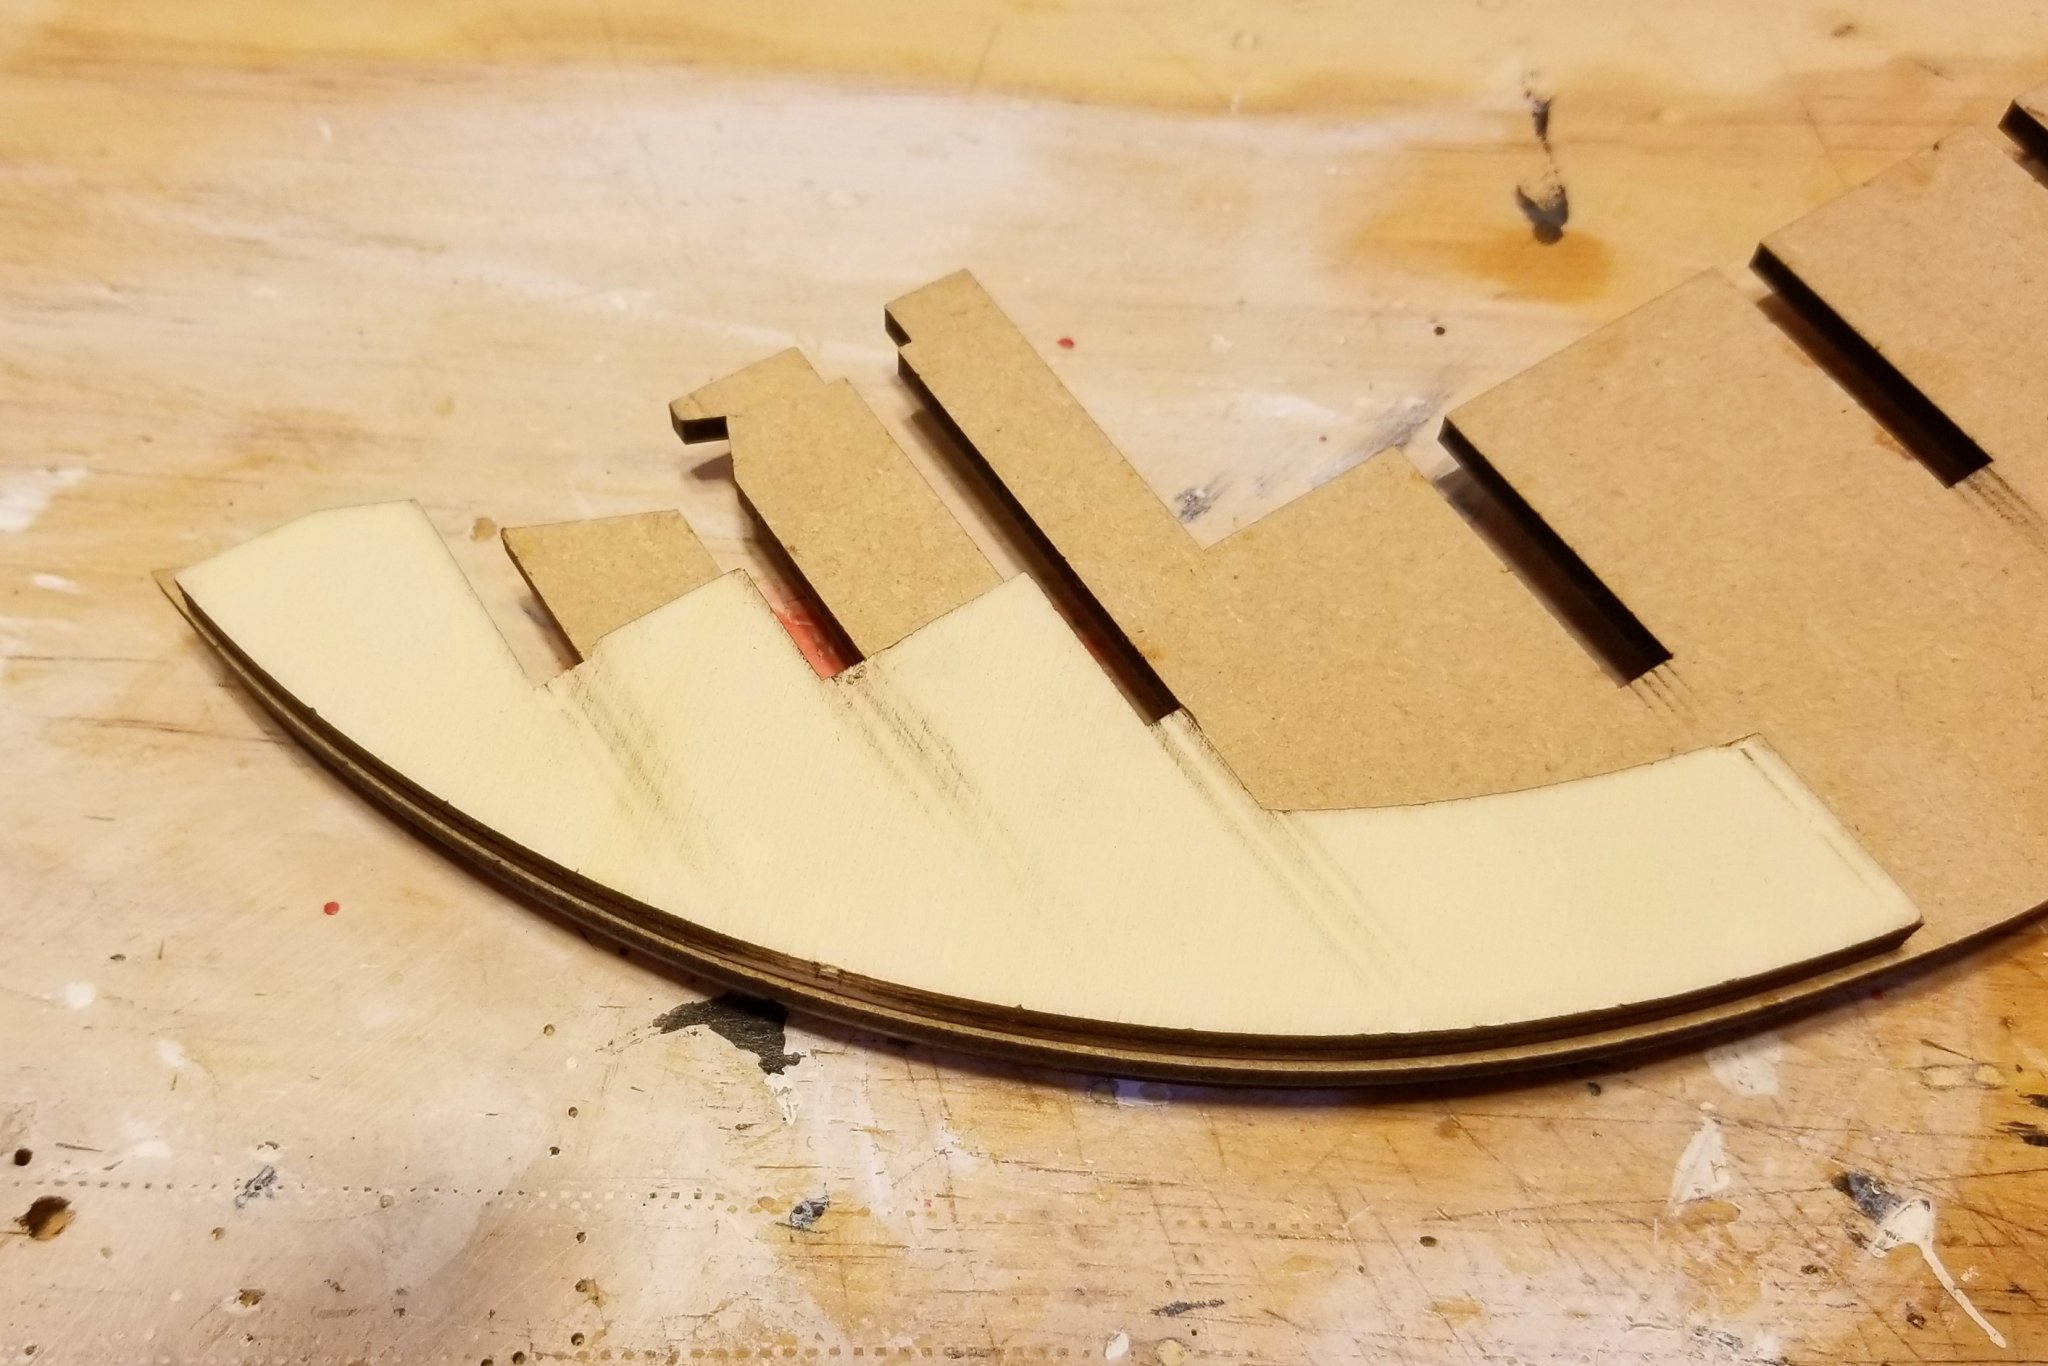
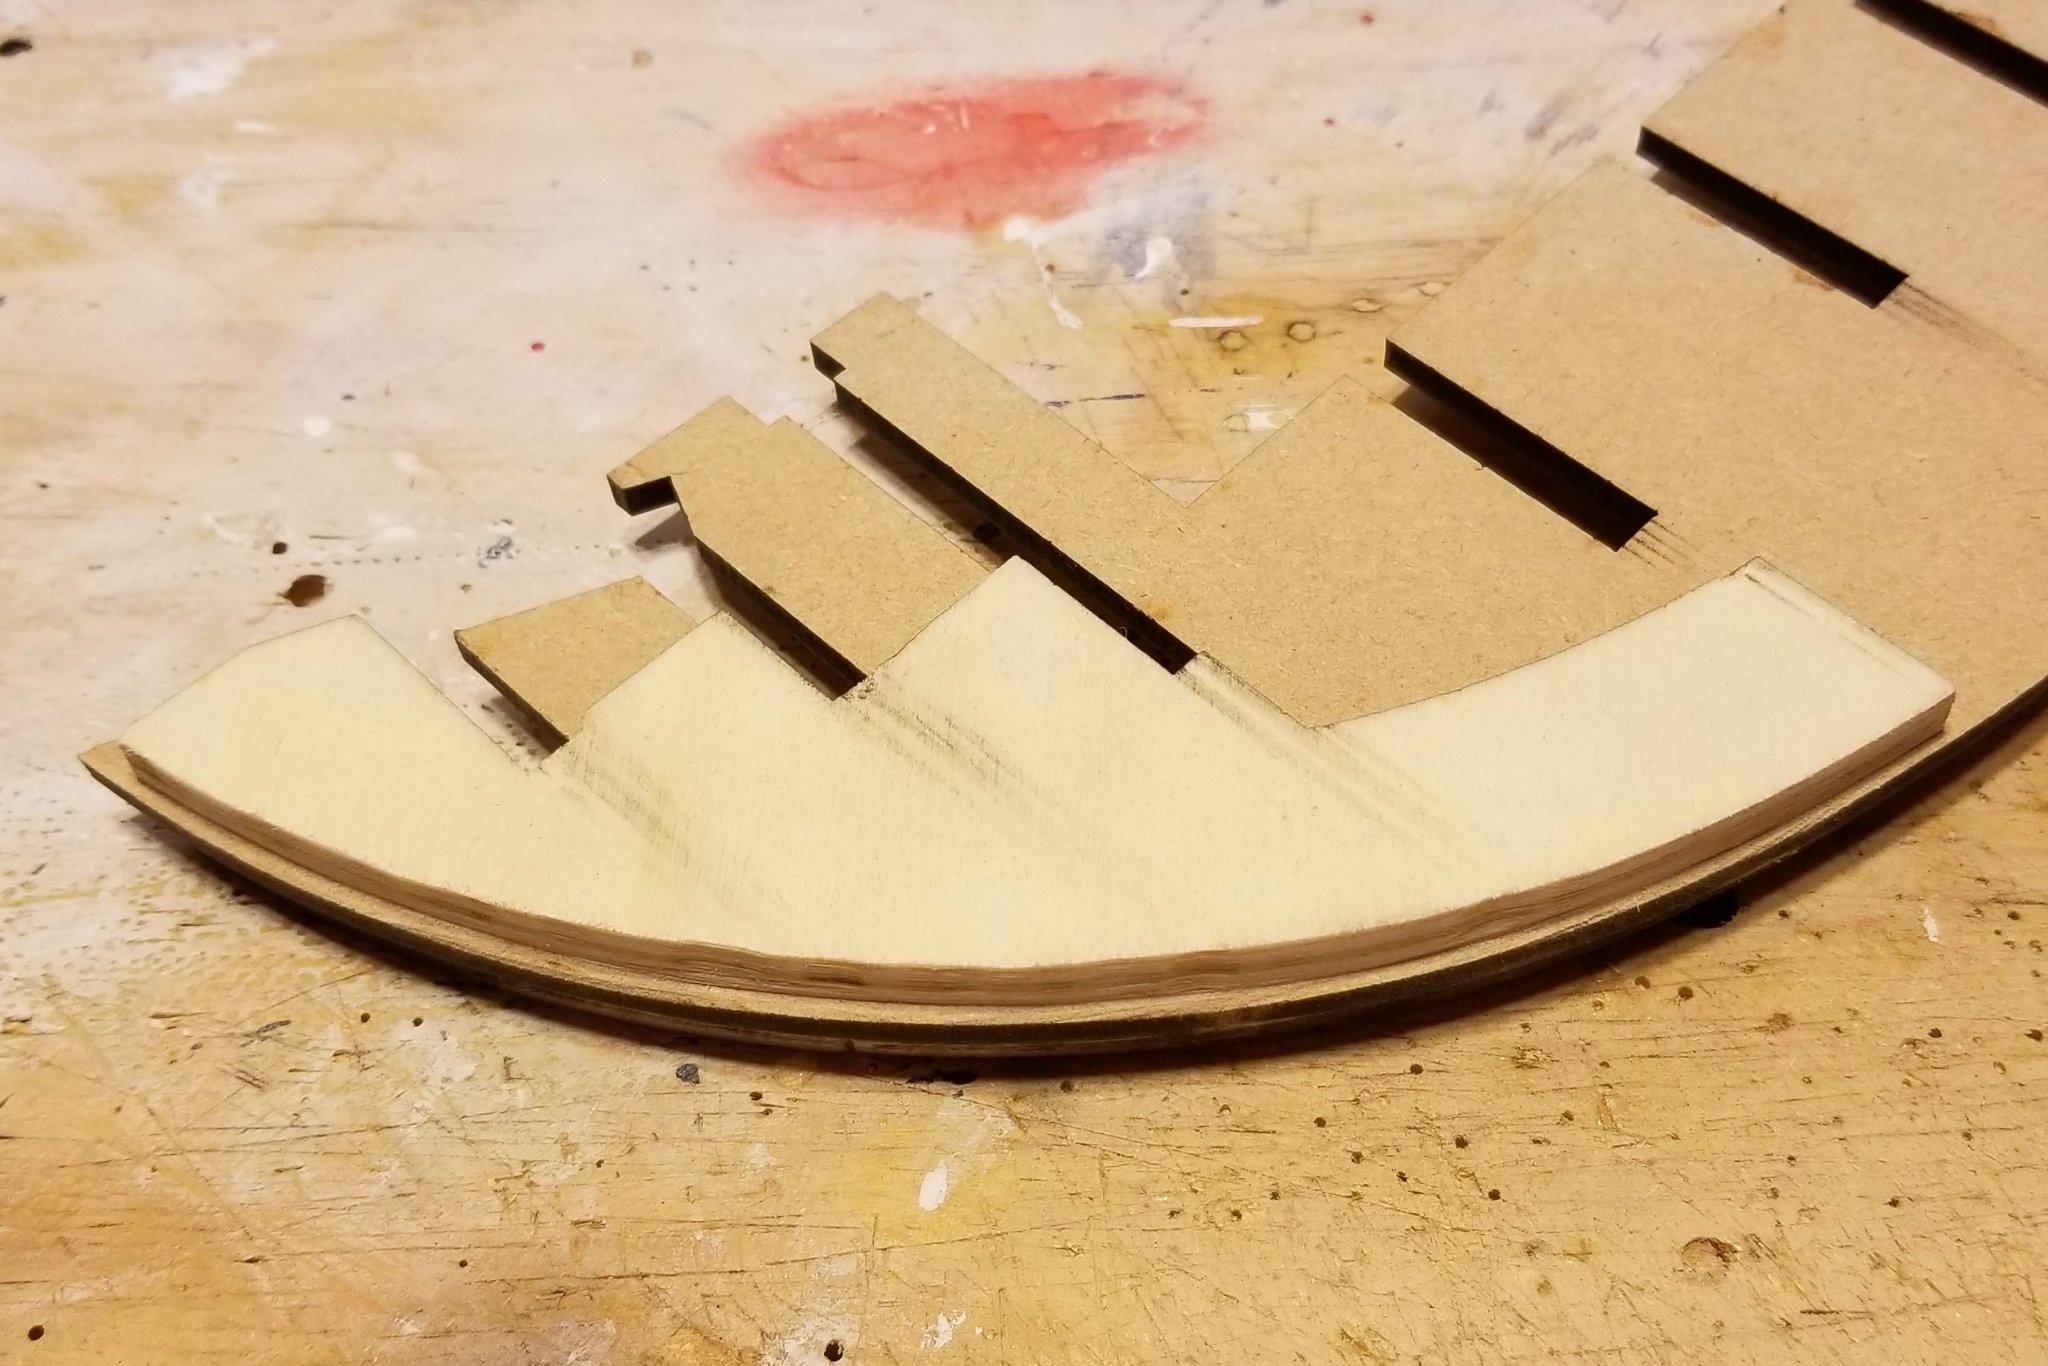
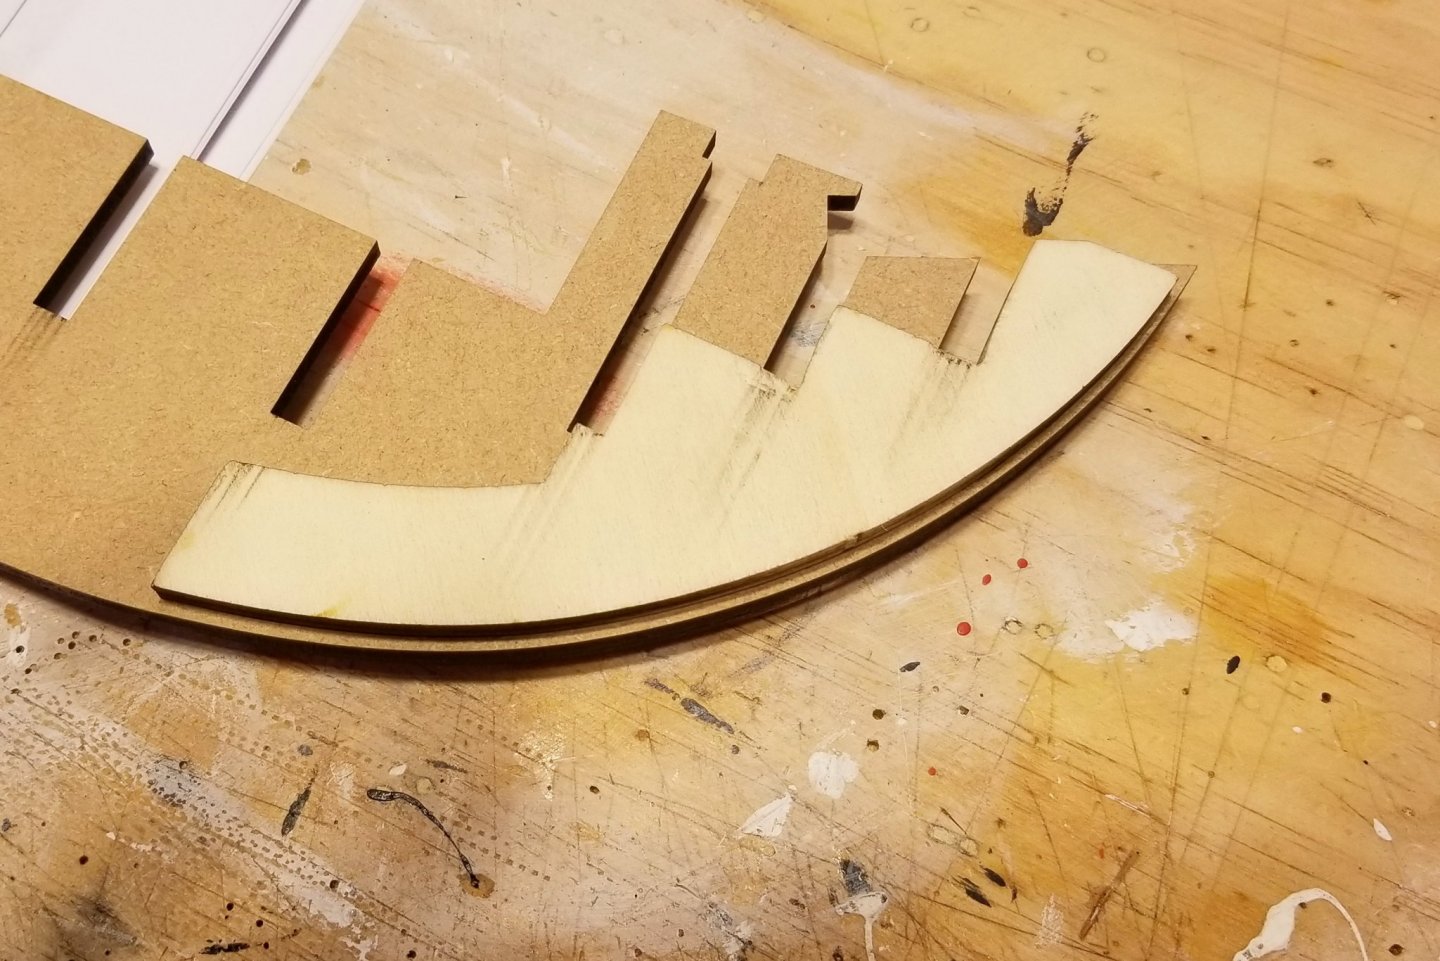
The first step is to add two pieces to the keel at the bow, and the alignment of those is very tricky. It wasn't until after I had mounted them that I looked ahead and realized that there needed to be a constant gap of 1.5-2.0mm where the bow curves. This is to provide a slot for the frames once a slightly wider keel piece is installed. On the starboard one (Bow Piece 1), I got the gap right (more or less by accident) but had to do some filing to get the slots perfectly aligned, although I thought I had accomplished that when I mounted it. Then on the port one (Bow Piece 2), I got the slots aligned but the gap along the curve disappears at the top. So after studying the fit of the slightly wider keel pieces, I sanded and filed it down to create the right gap (Bow Piece 3). I mention all this because that sanding/filing operation has to be done, if needed, before the frames are mounted. I have also started dry-fitting the frames and they are made of very nice plywood, and fit perfectly. Regards, David


- 136 replies
-
- 9
-
-
- kolderstok
- batavia
- (and 1 more)
-
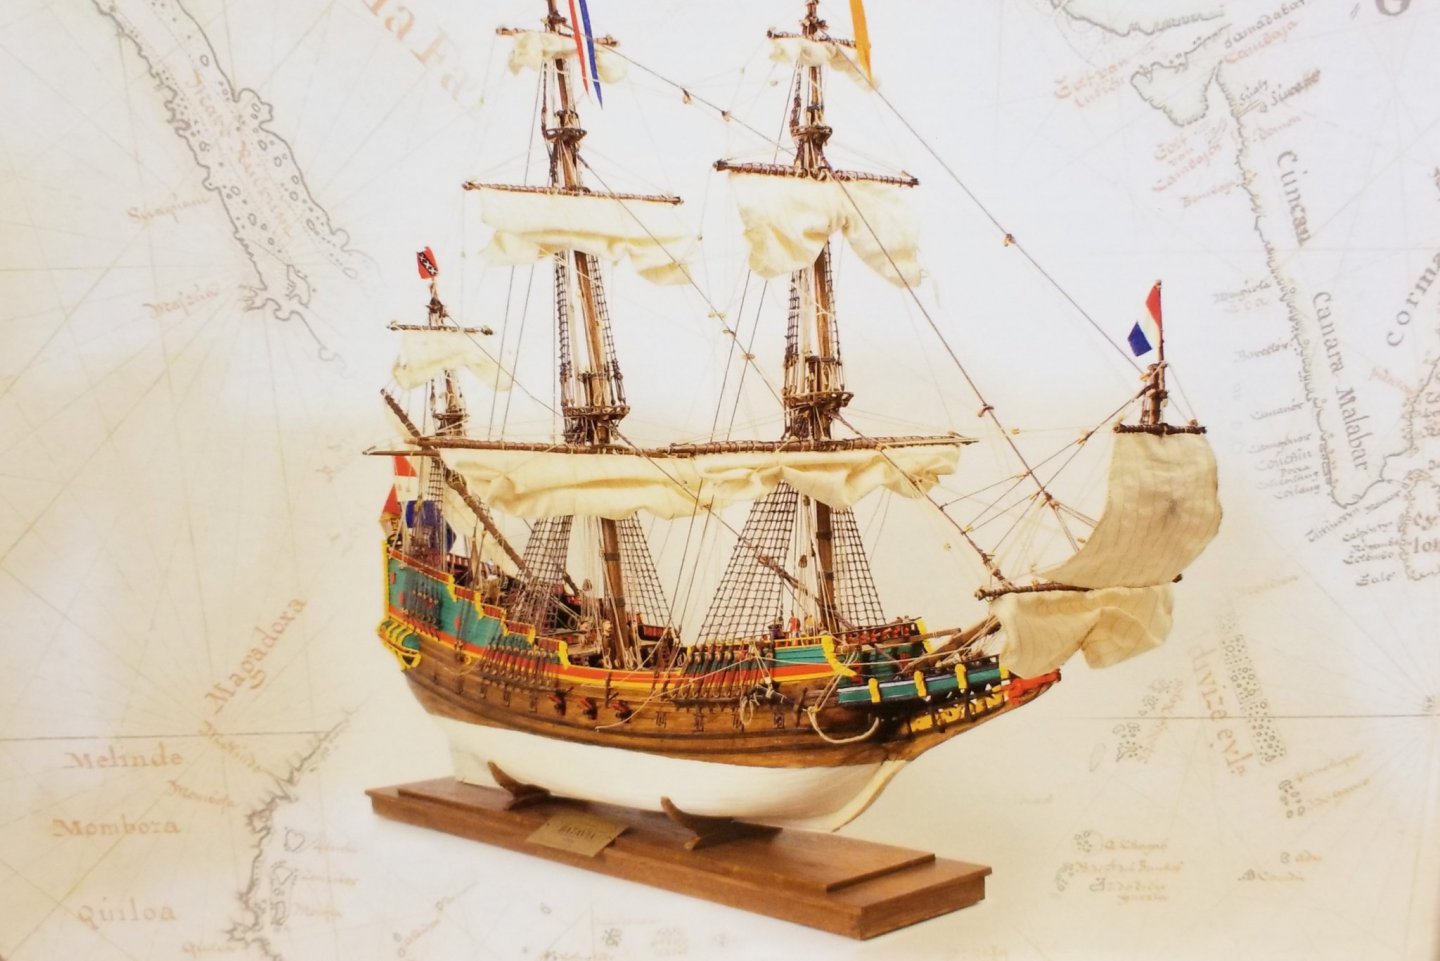
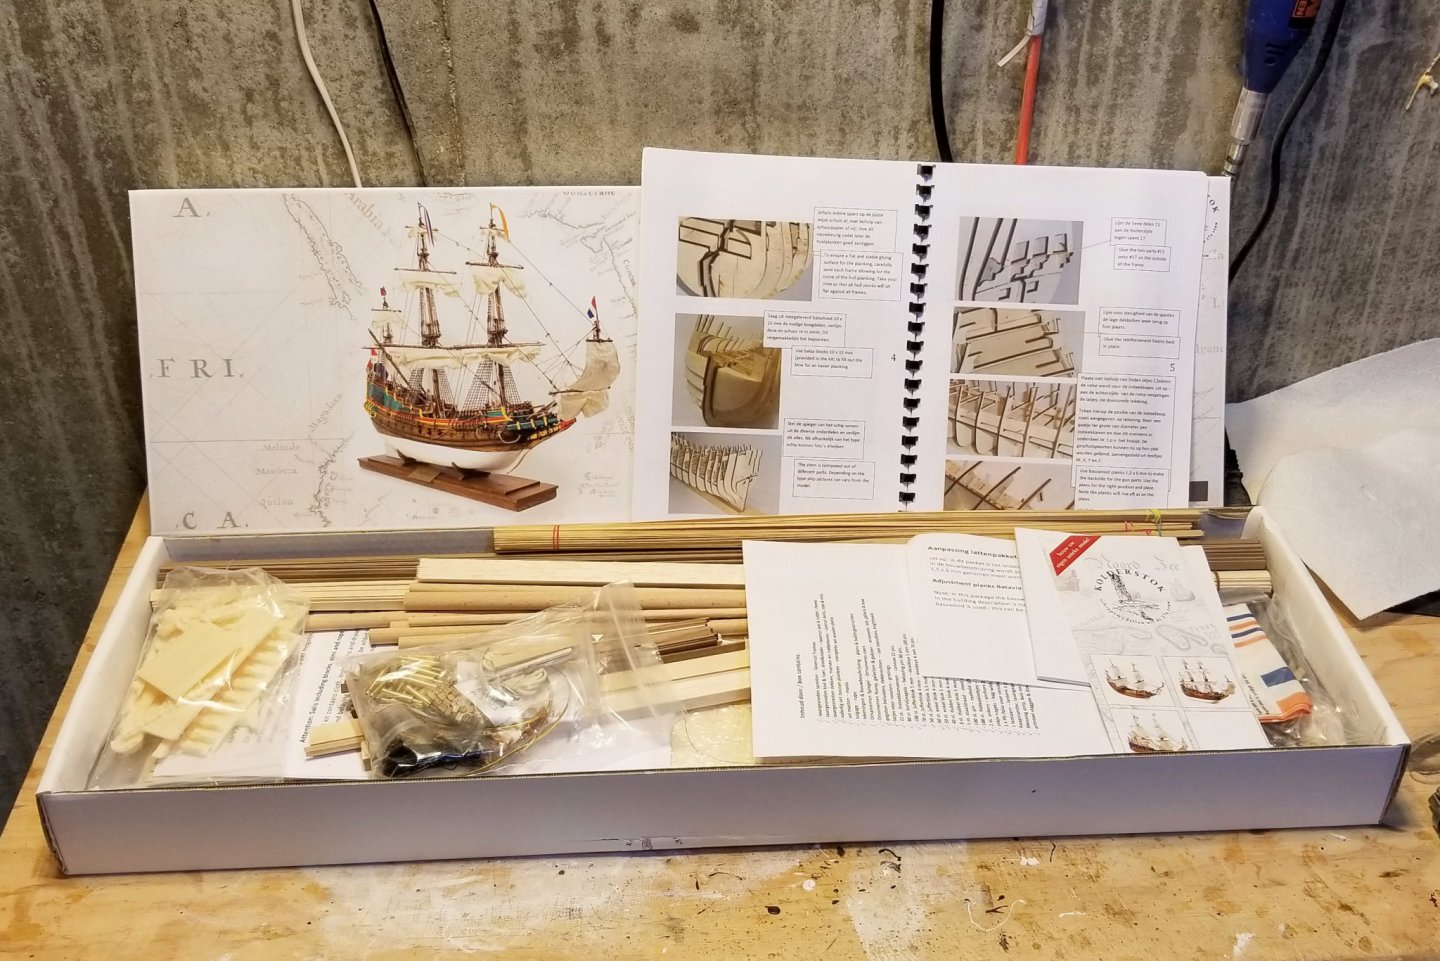
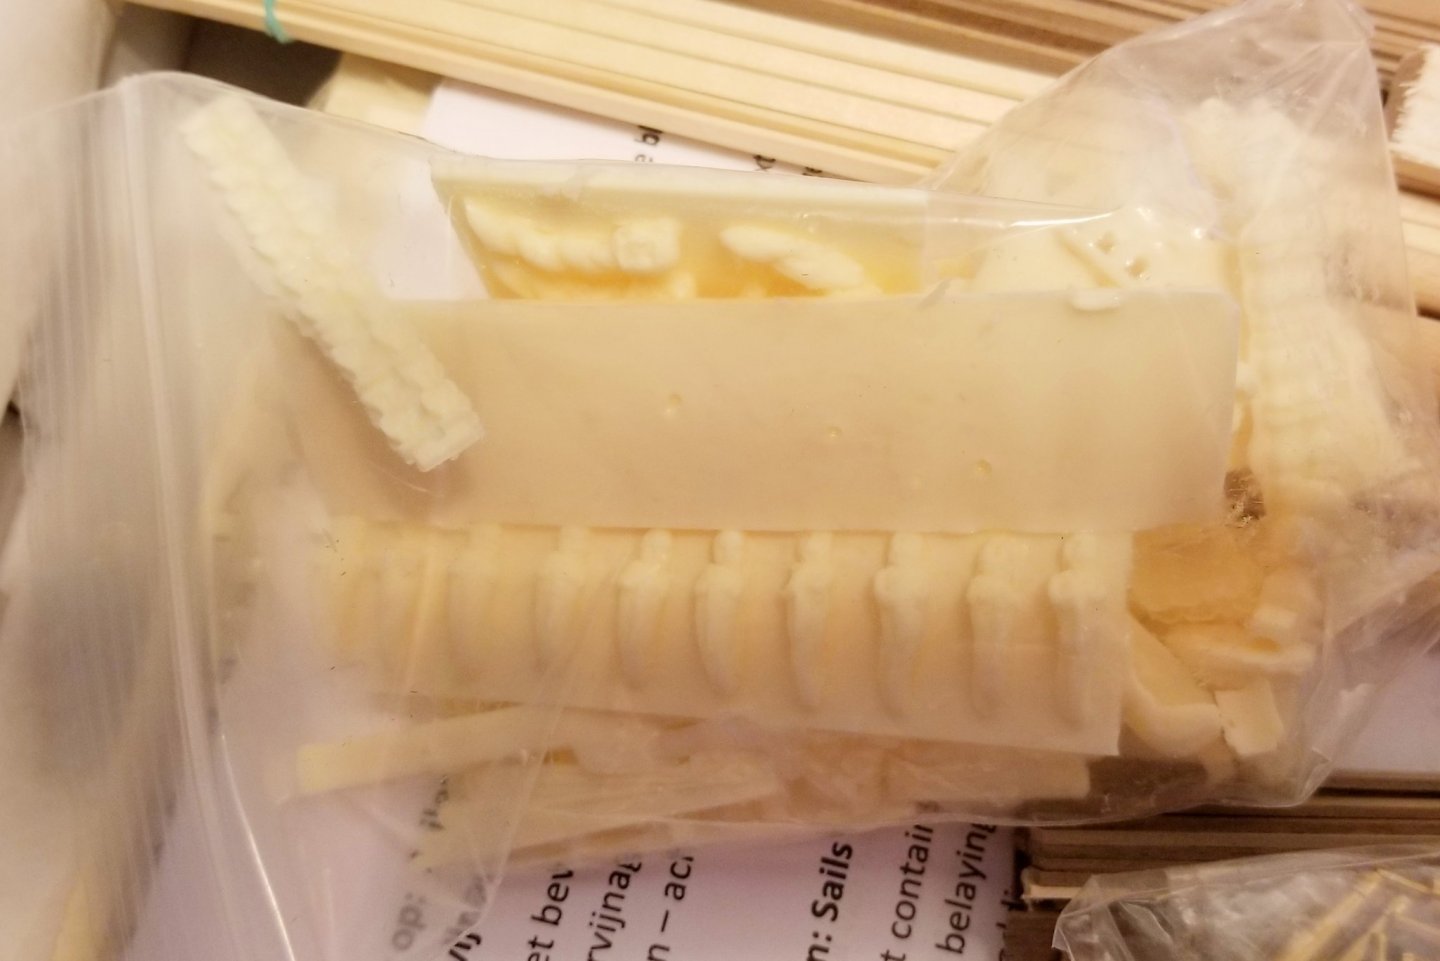
I'm going to start on the Batavia by Kolderstok. I was attracted to this model because of the colors (see Pic #1), and also because I wanted to try out a Kolderstok model. What's in the box: Laser cut boards Lots of wood Parts Instruction manual and plan sheets Note the manual -- I really like manuals with accompanying pictures. There's also an interesting parts bag with white resin-like parts. I haven't seen this before. Either it's injection molded, or possibly done on a 3D printer, which would be a first for me. I ordered this model directly from Kolderstok (http://www.kolderstok-models.com/index.en.html), and I want to particularly commend the wonderful pre-sale service I received from Hans van Nieuwkoop. I had outstanding communication from him via email, and he offered me several different customization options, one of which (an all-walnut second-planking) I took, because I like the look of all-wood hulls vs. painted hulls. Really excellent service and professional shipping. So here we go on another one. I haven't seen any logs on Batavia, so I hope this one contributes. Regards, David

- 136 replies
-
- 12
-
-
- kolderstok
- batavia
- (and 1 more)
-
Rick: Here's the quotation from Mantua's writeup on the boat: "This is a lovely scale reproduction of an ocean going fishing boat, converted into a pleasure yacht" Regards, David
-
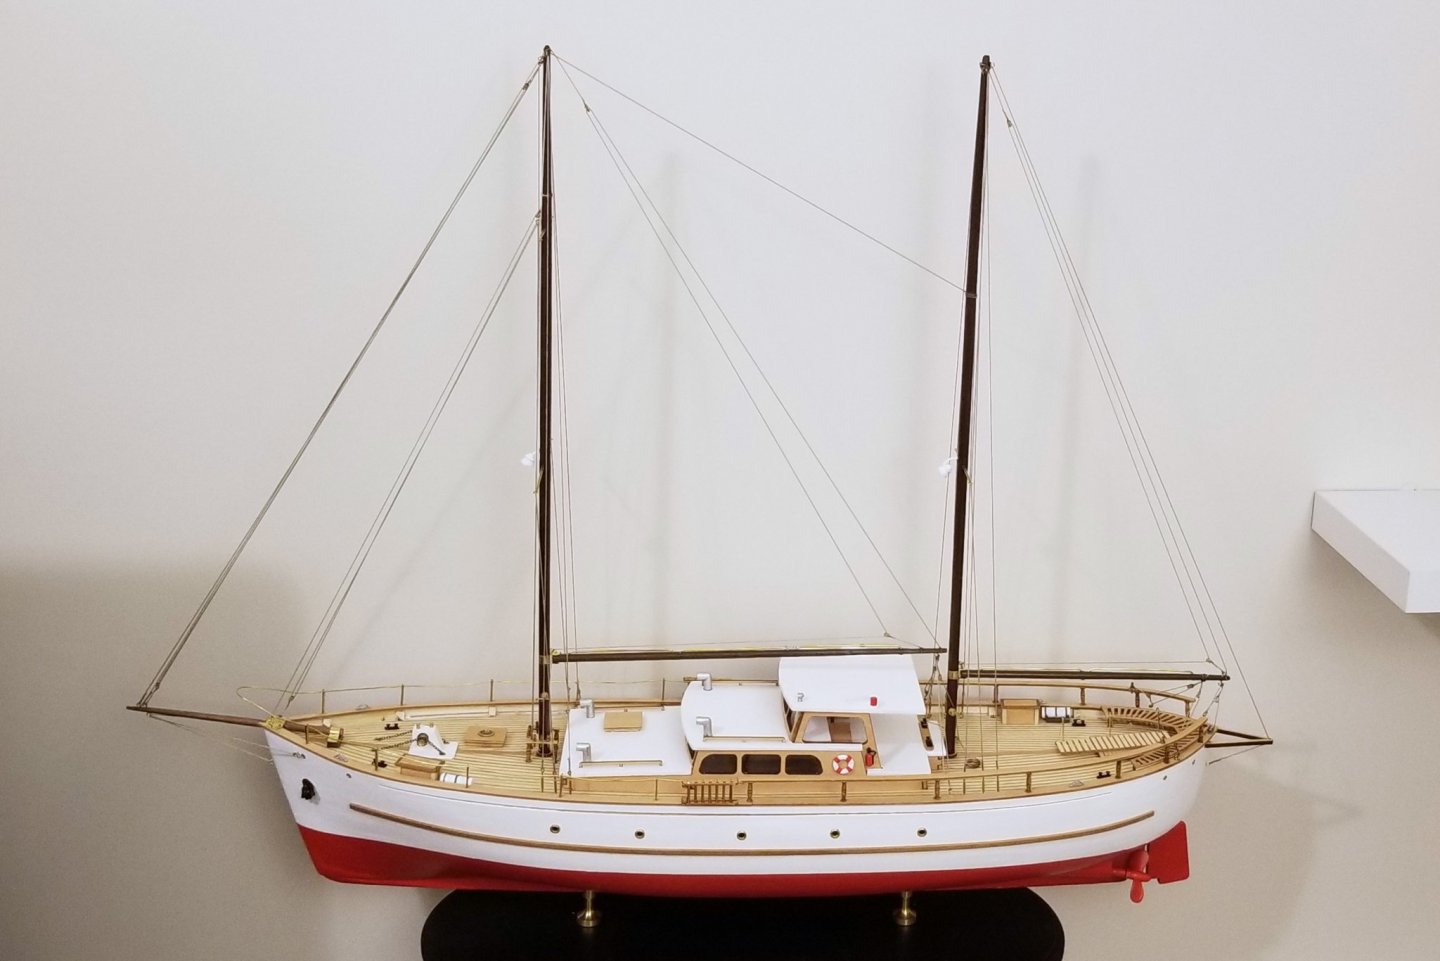
The Bruma is complete. I've posted a set of completion photos in the kit-built ship gallery. This was a relatively easy kit, which was my intention after building the Cutty Sark and laying all of those copper plates! A few comments on the kit: A number of missing small parts, none of them fatal. I was able to go to my spare wood/parts store and improvise. There is one rigging diagram, and while the rigging isn't complex, the diagram is very hard to read. You need to pull all the photos you can find from the internet and use them as a reference to be sure what goes where. Regards, David
- 47 replies
-
- 10
-
-
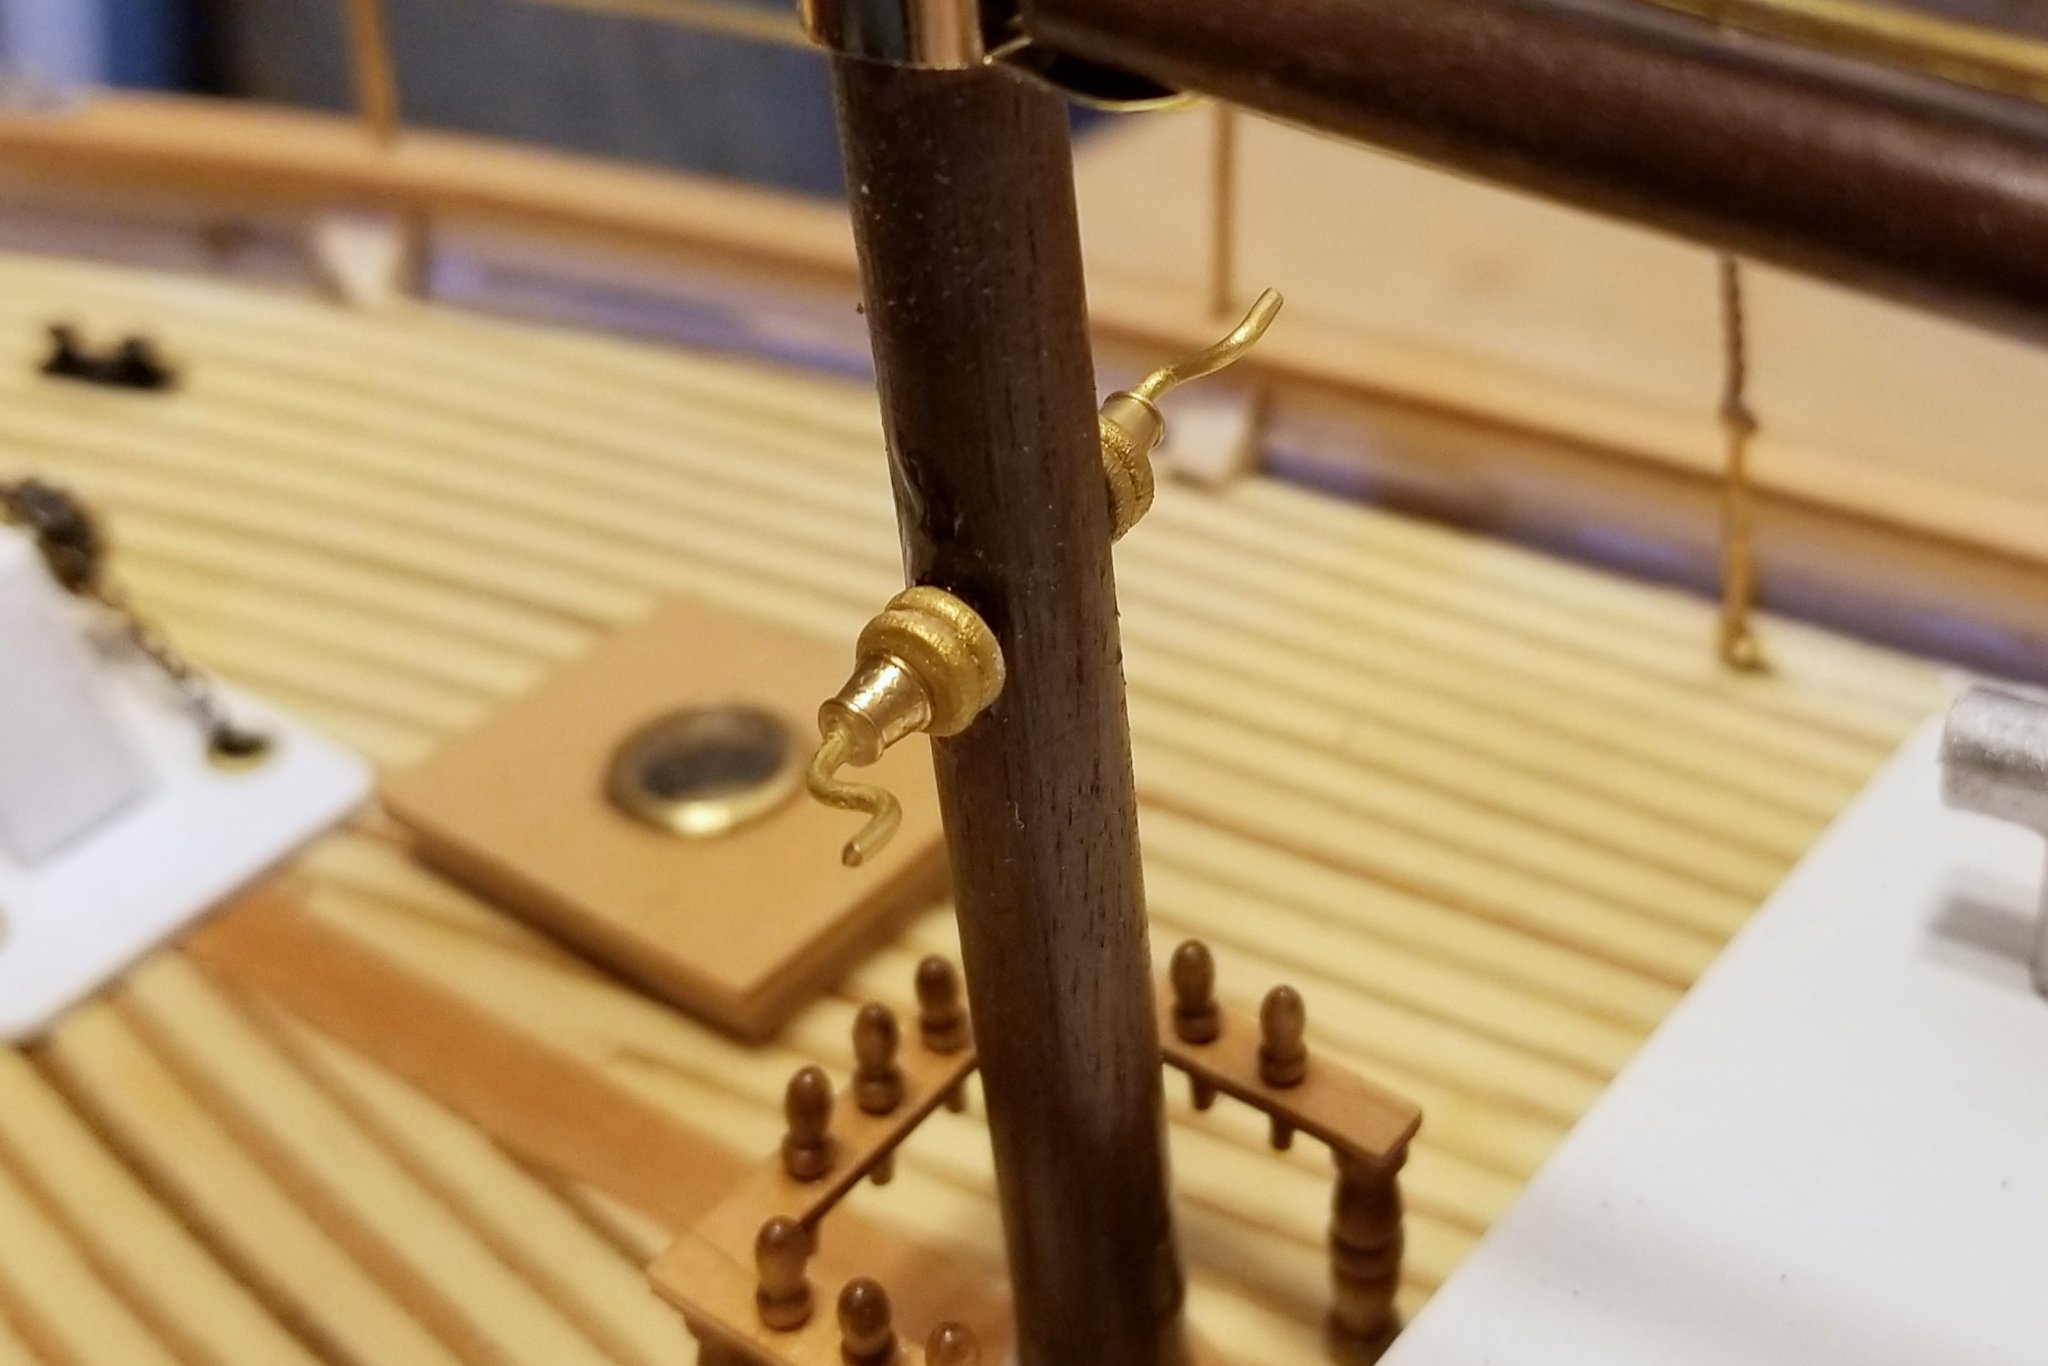
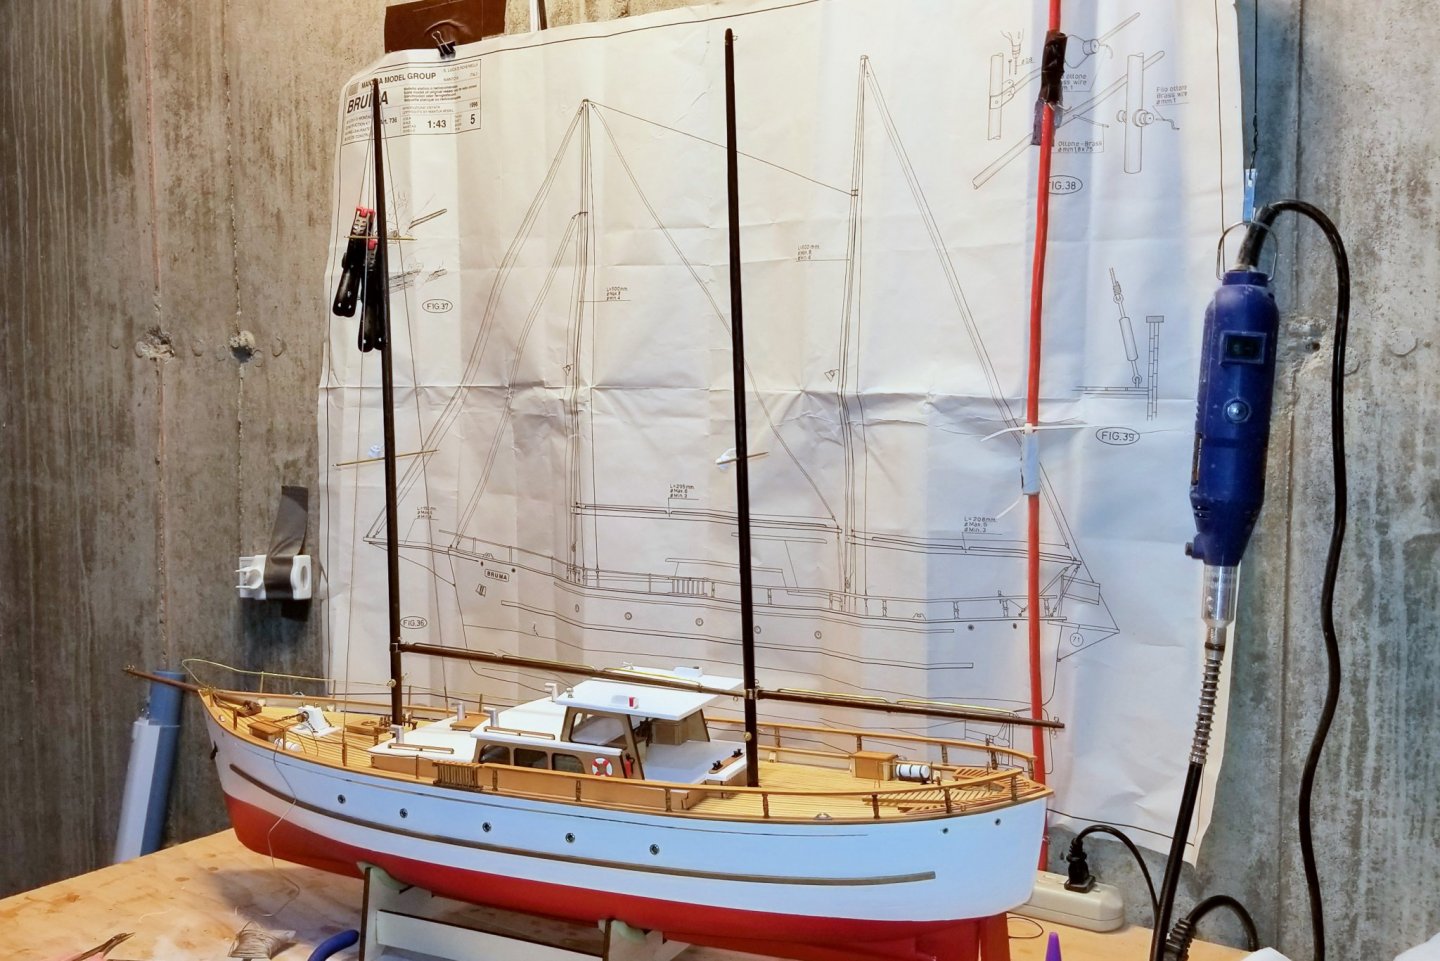
Masts, booms and bowsprit are shaped and mounted, and I'm now starting on the rigging. One of the detail drawings indicates that brass winches were supplied, but I can't find them anywhere, so I made them from my spare parts stock using deadeyes, filled with wood filler and painted gold, some brass parts that I think were supposed to be deck buckets, and wire. Regards, David

-
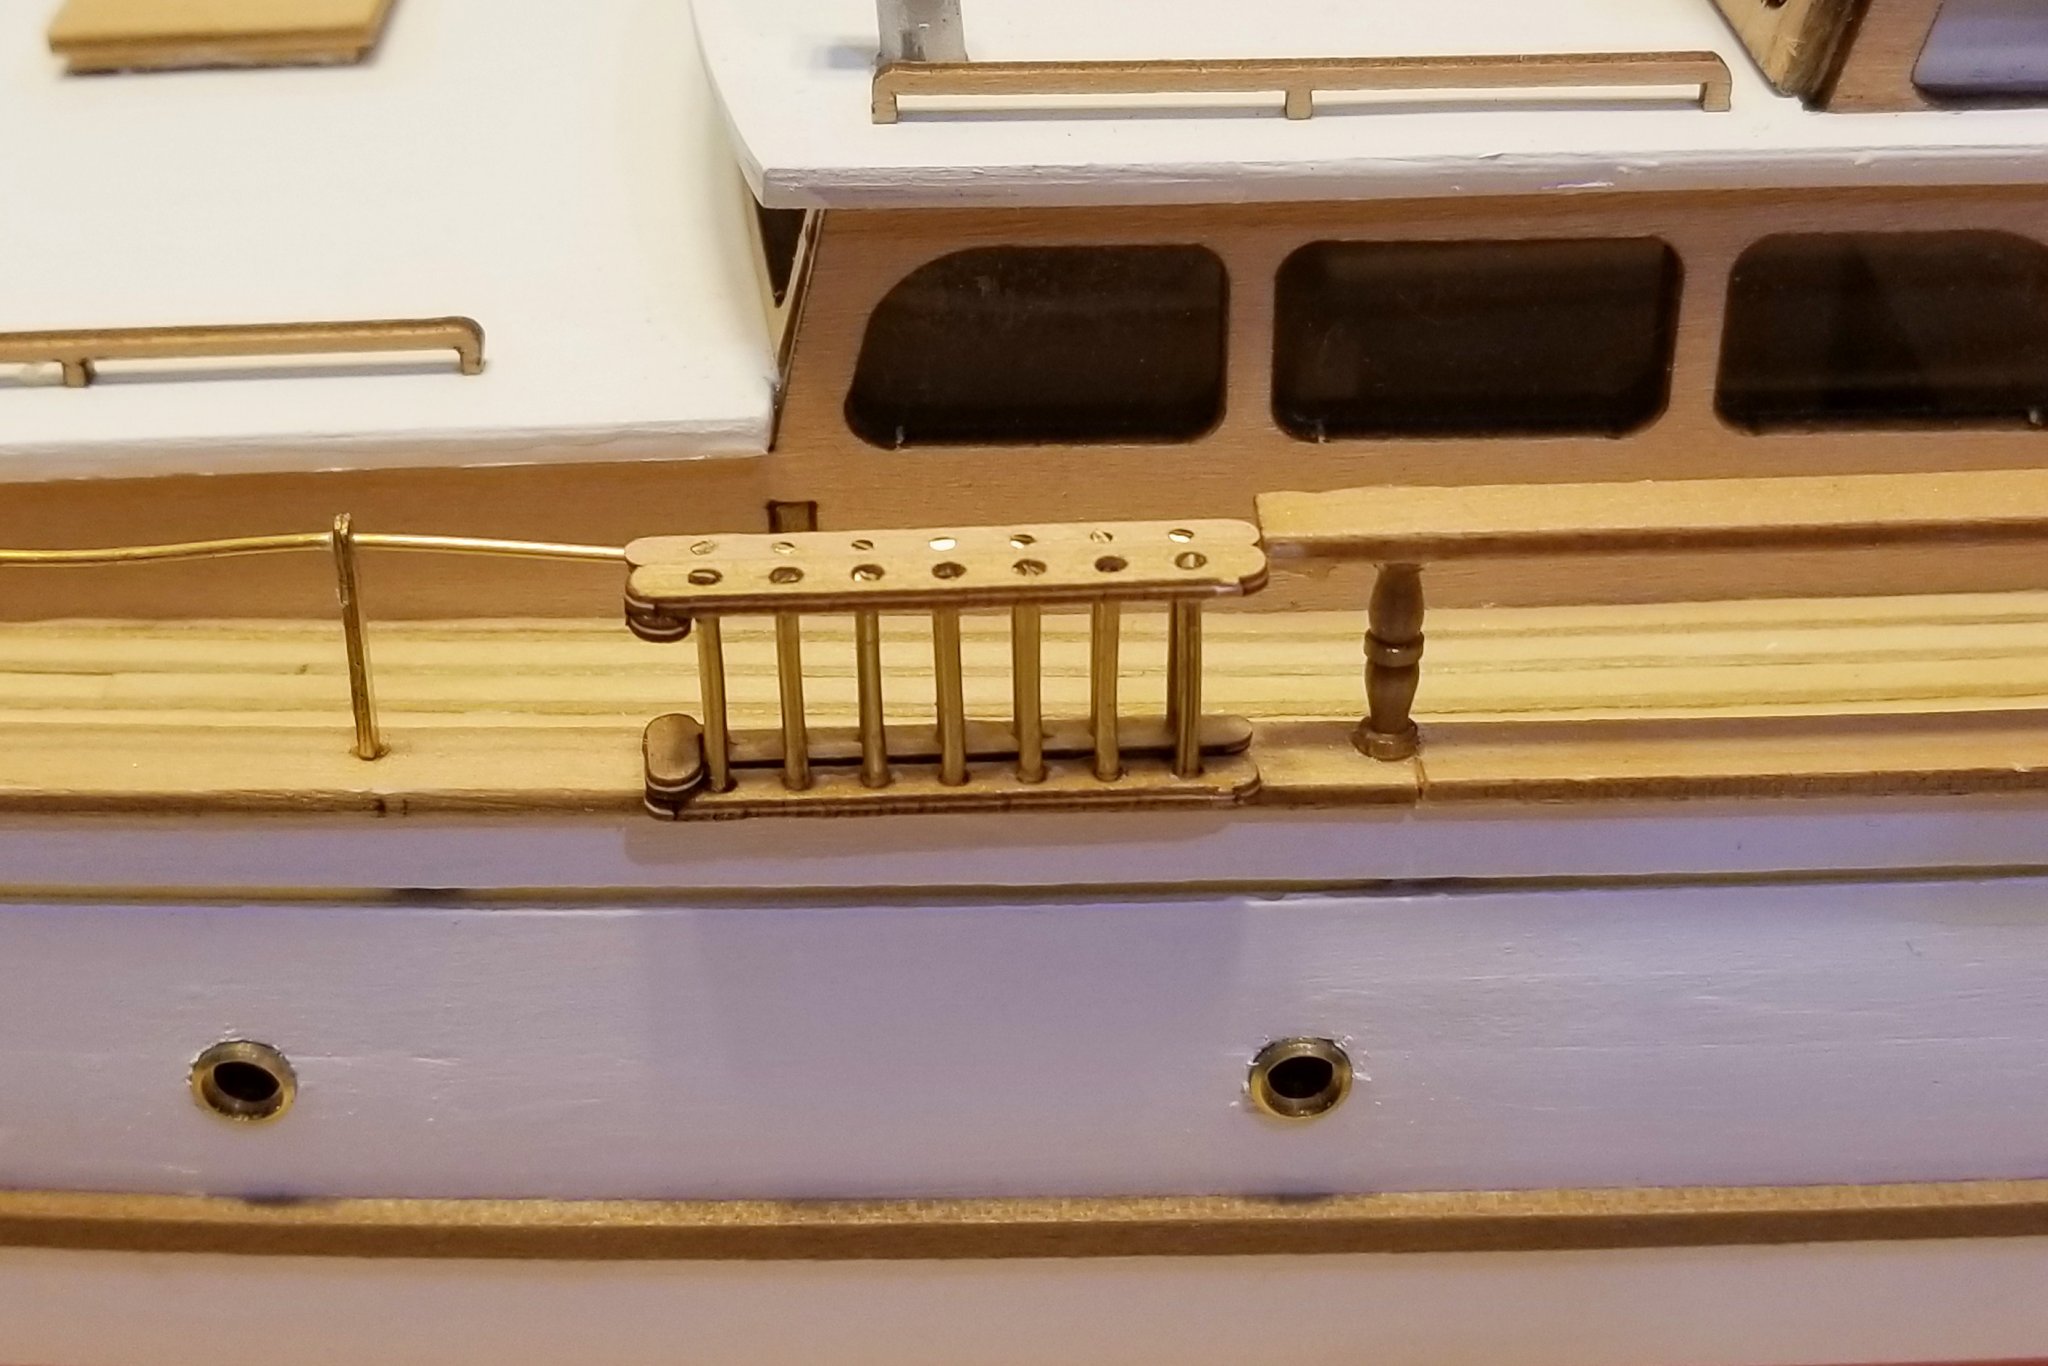
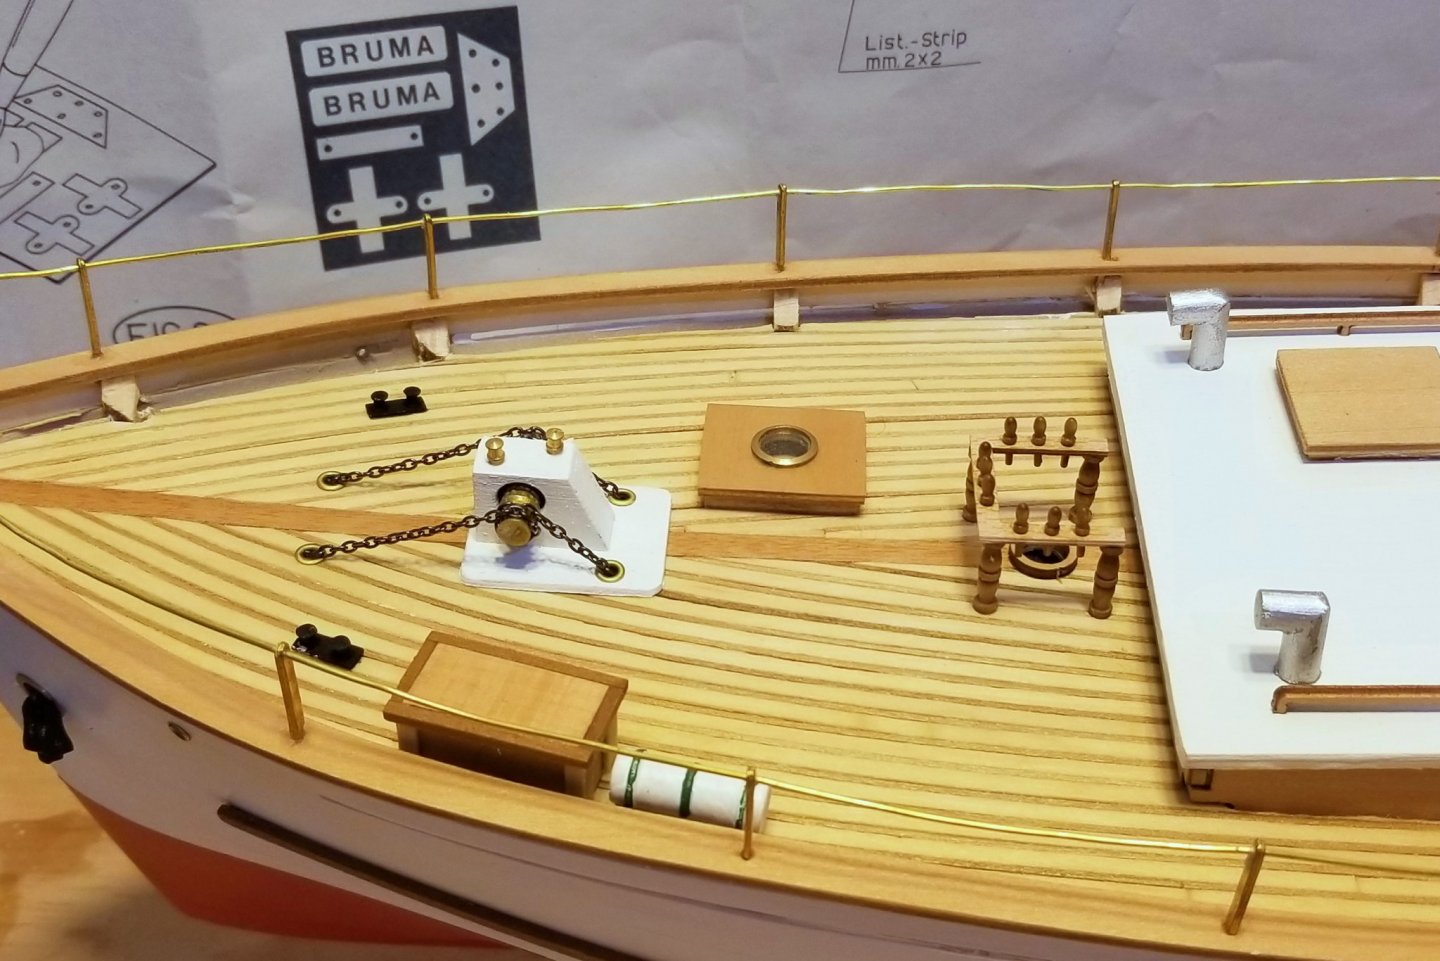
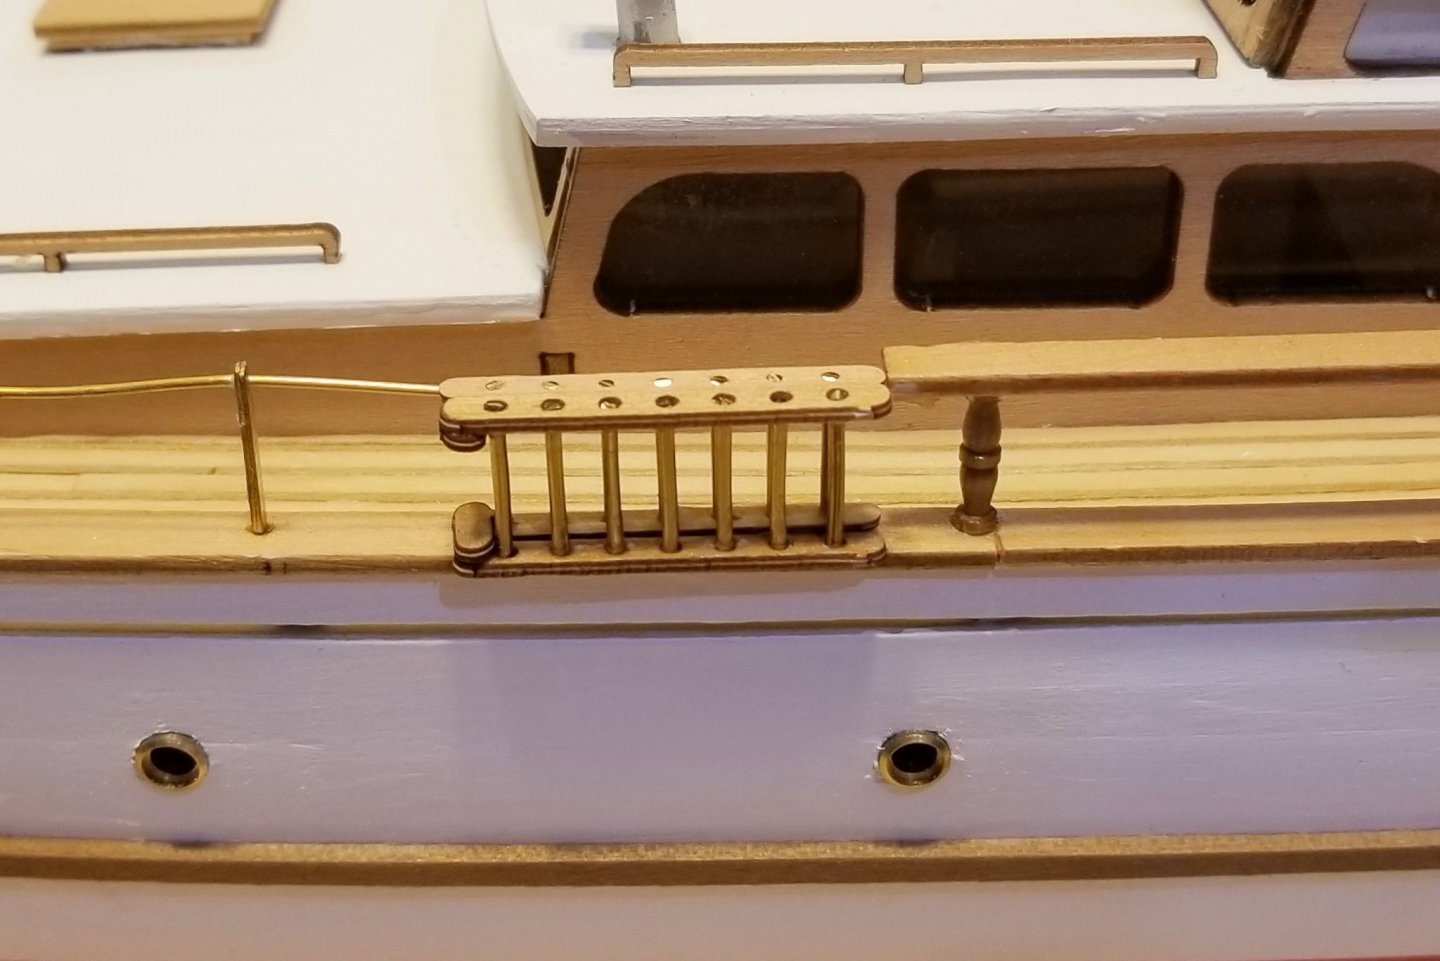
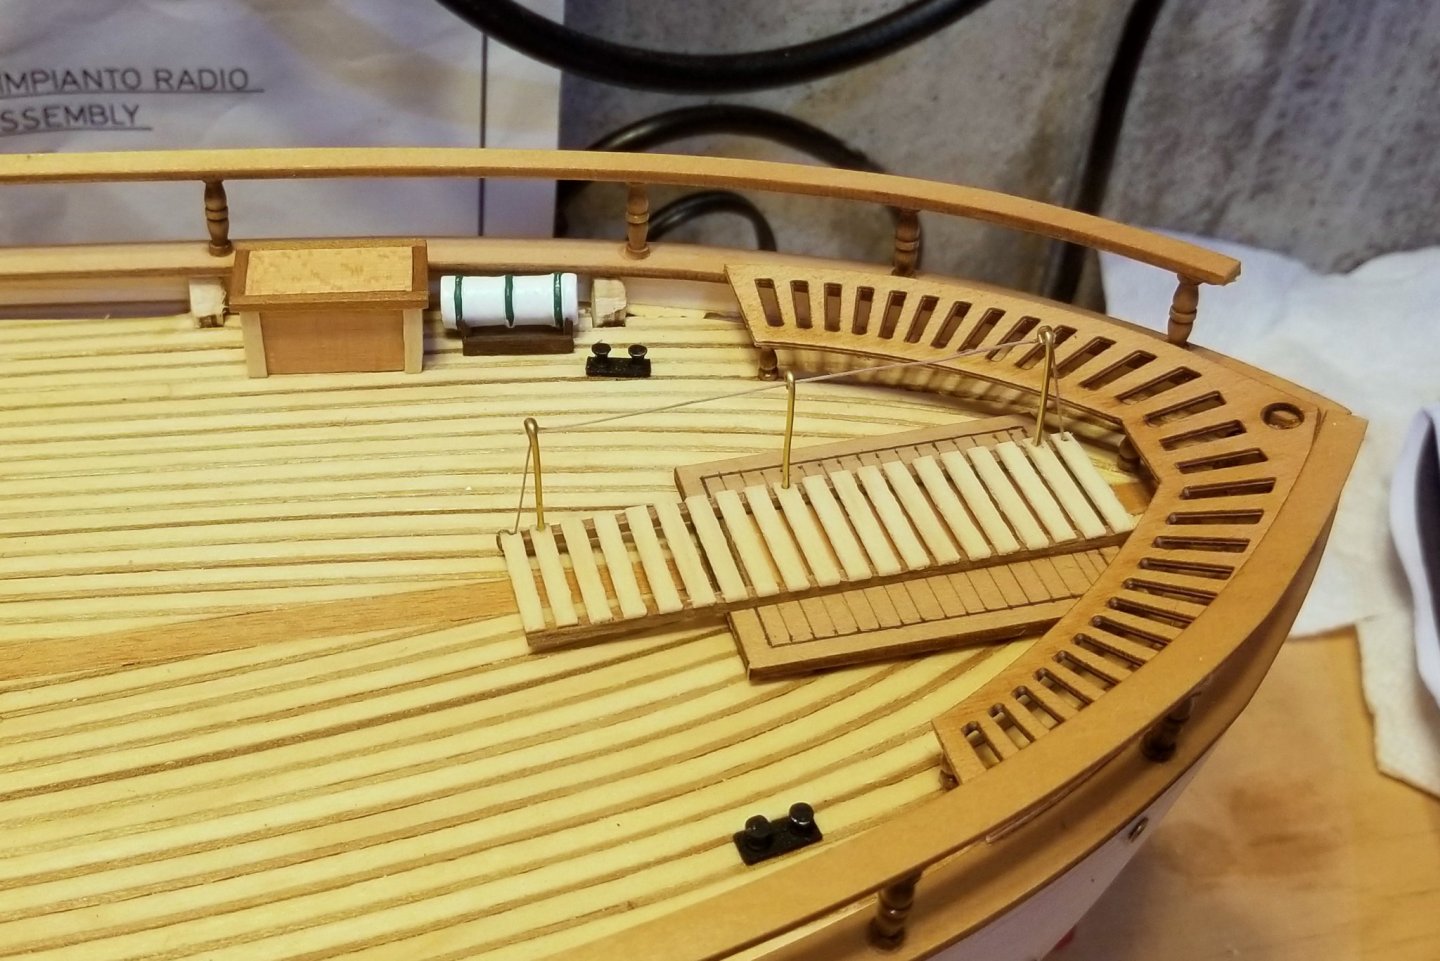
All of the deck detail is now complete. Pictures show bow area with capstan, life preserver containers, small tables, hatch covers, ladder, boarding walkway and stern seat. That's it for the hull -- now on to the masts and rigging. Regards, David
-
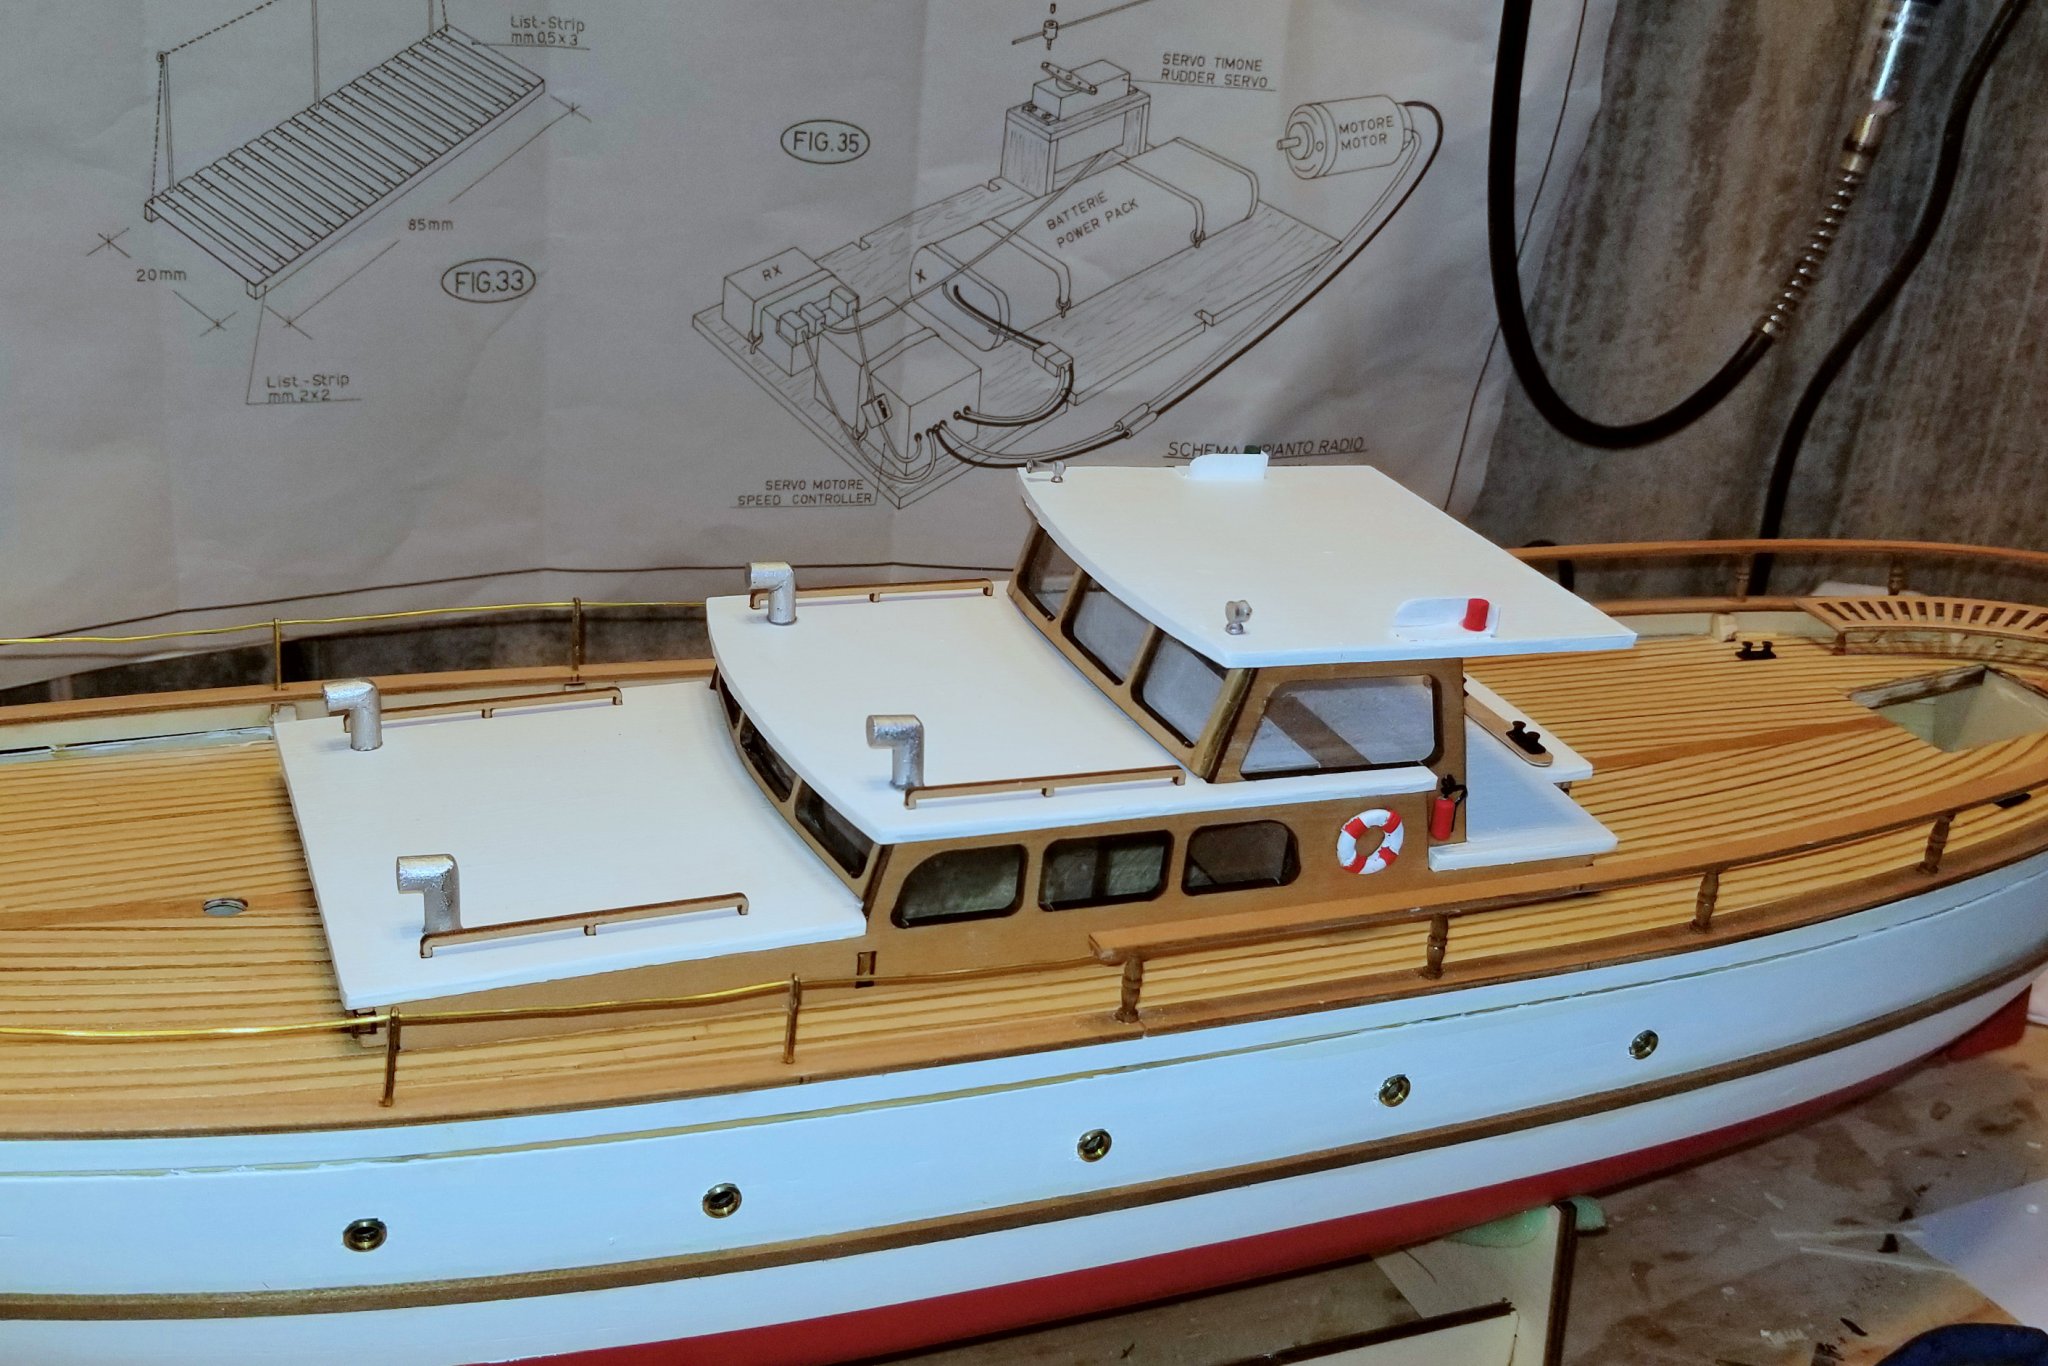
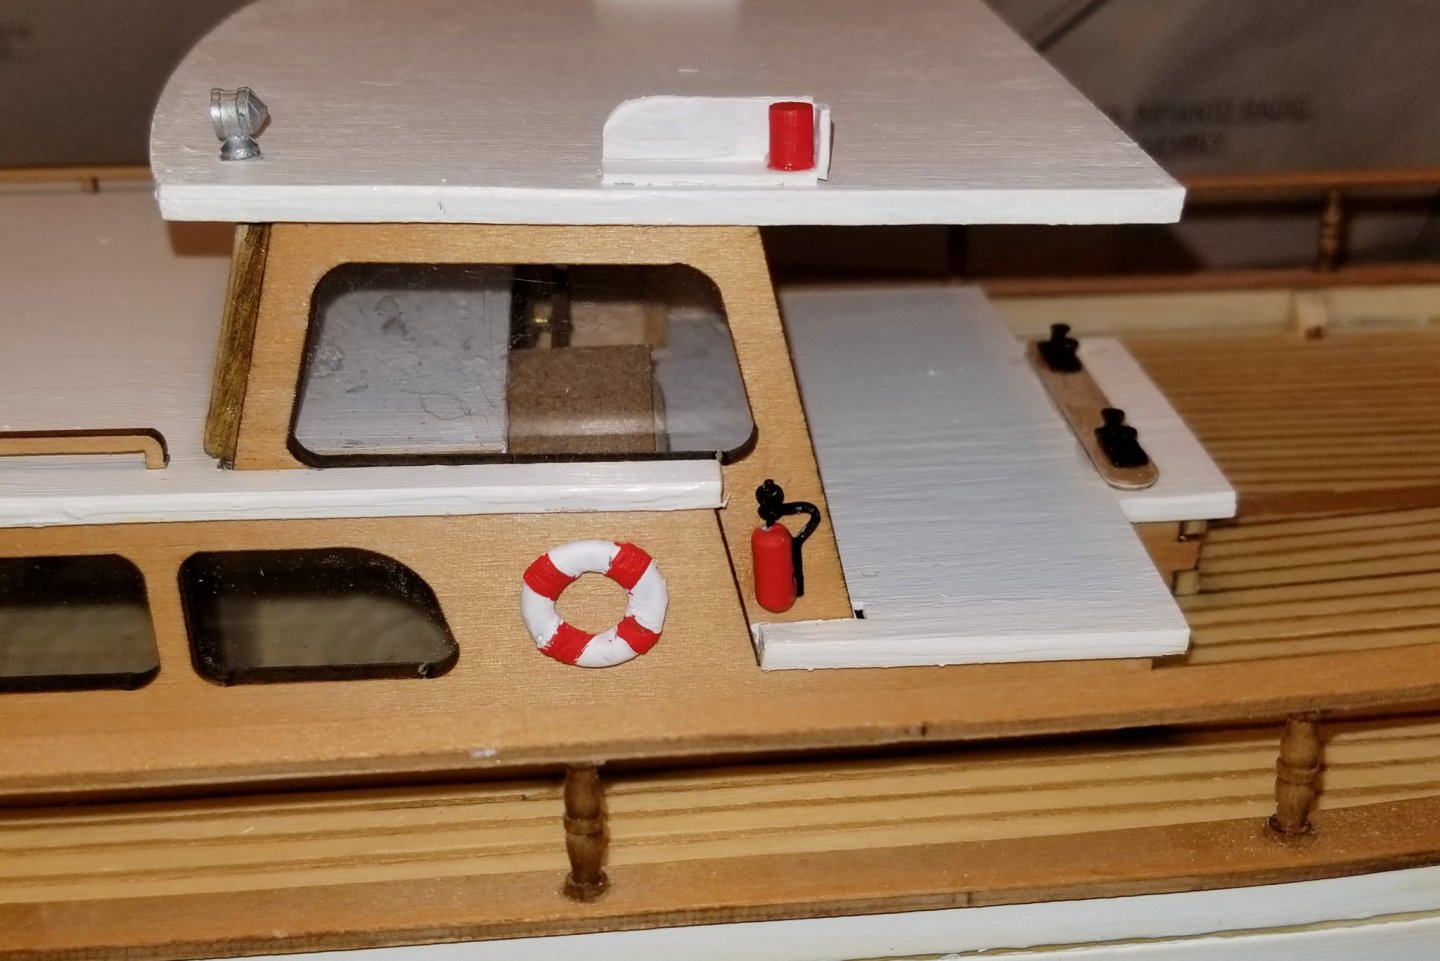
Back to work on the Bruma after a couple of weeks in Florida. Finished the cabin exterior details including handrails, vents, horn and light, and fire extinguishers and life rings. Tricky paint work on the extinguishers. Regards, David

-
John -- Yes, it does angle back just a bit. Just the way it came out when I drilled the hole for the mounting. Regards, David
-
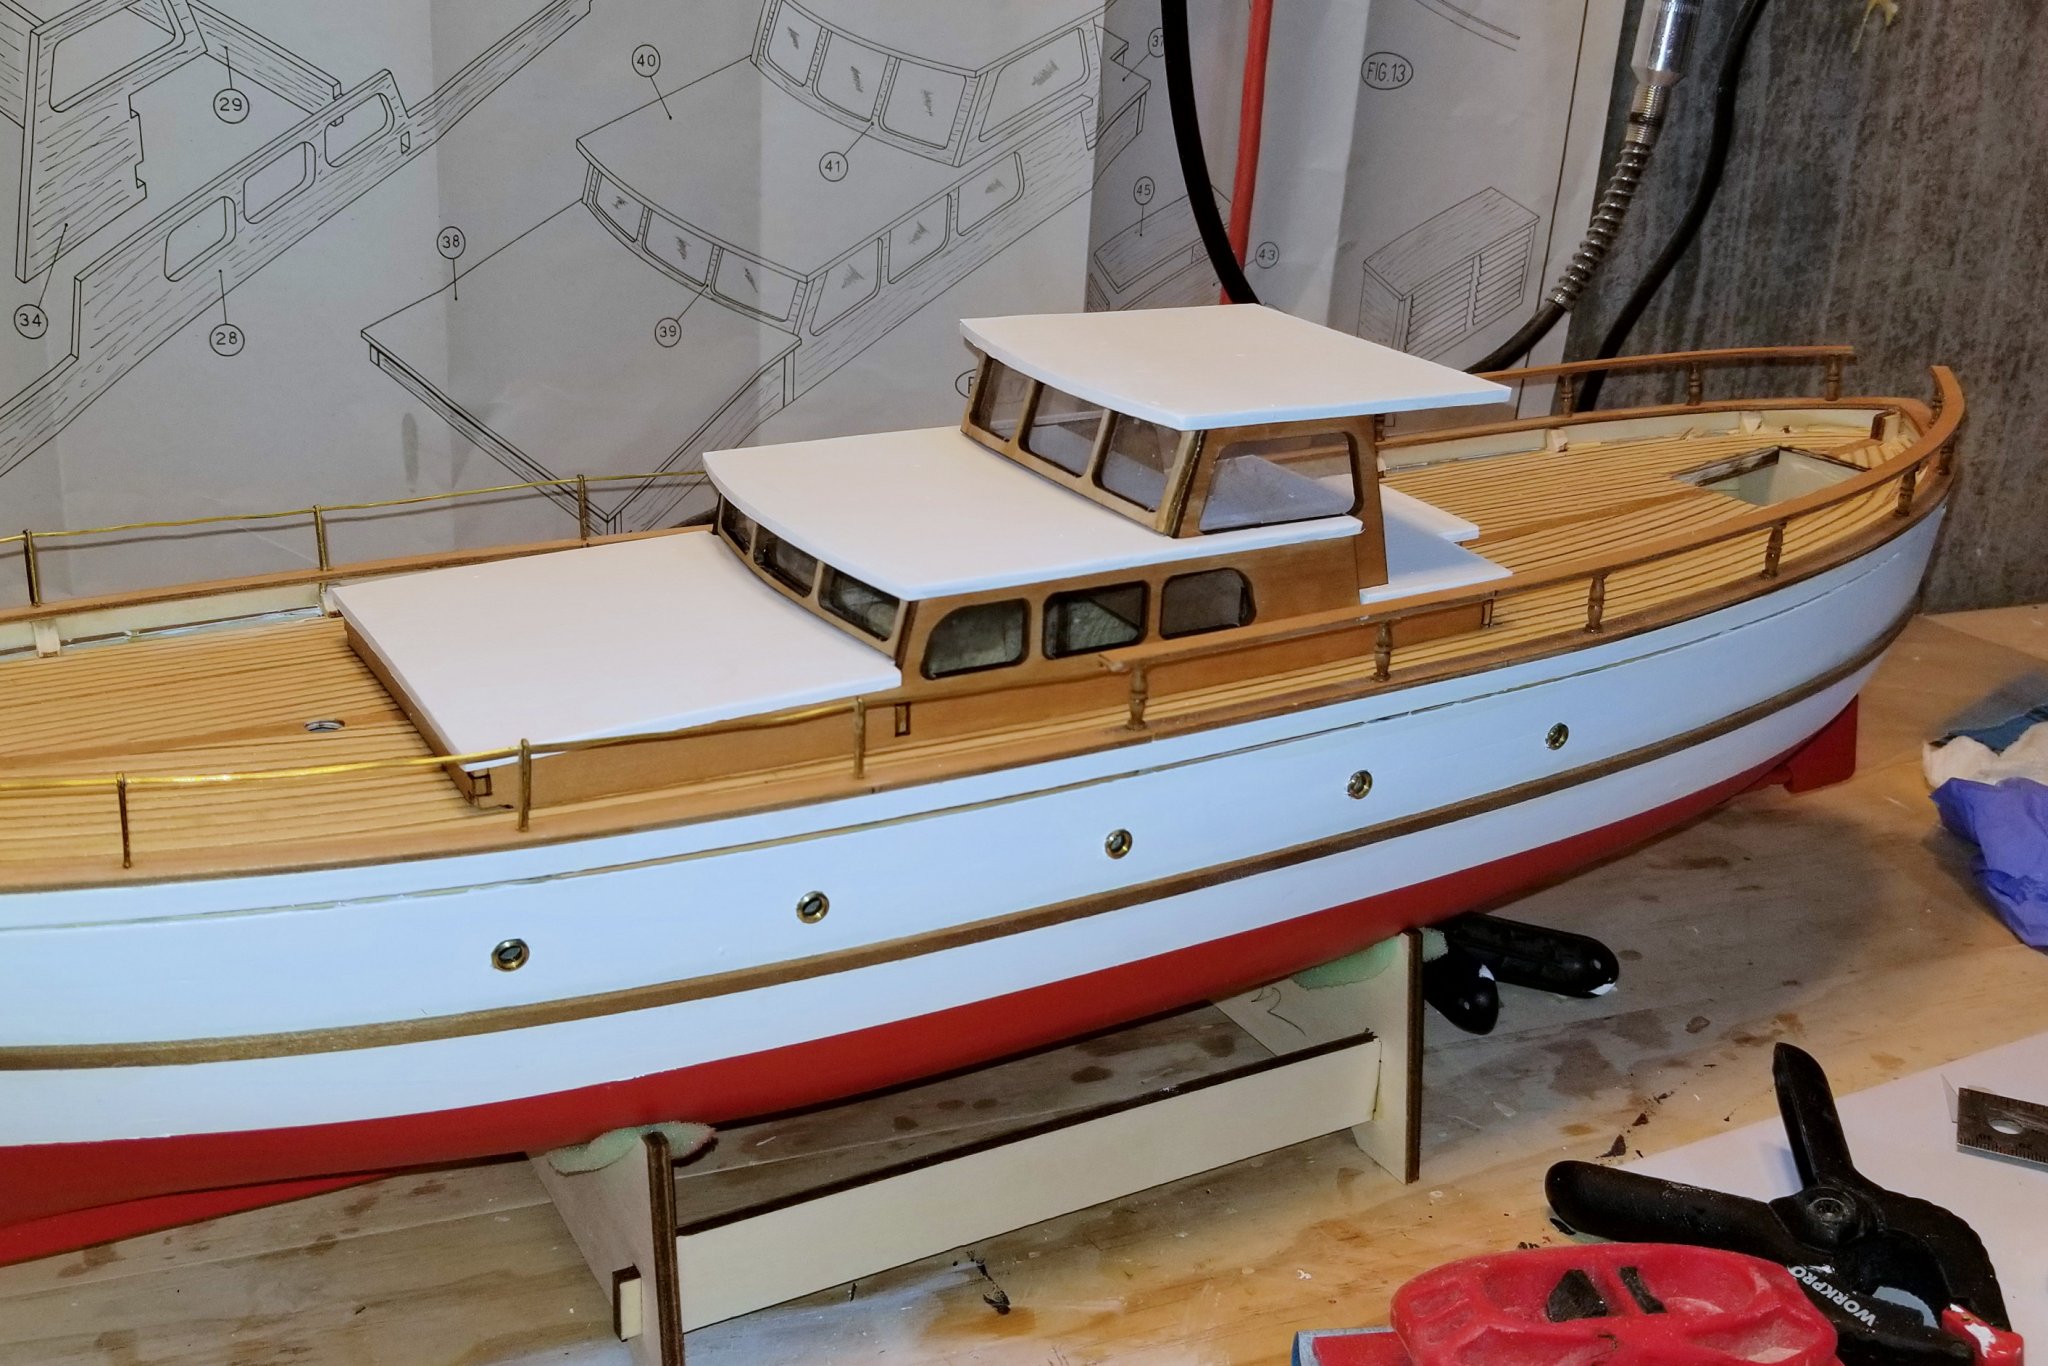
Assembled and mounted the cabin structure. Building this takes some forward planning, to get the subassemblies right and square, and then paint and assemble things in a workable order. The instruction sequence isn't the best. Regards, David