


leginseel
-
Posts
177 -
Joined
-
Last visited
Content Type
Profiles
Forums
Gallery
Events
Posts posted by leginseel
-
-
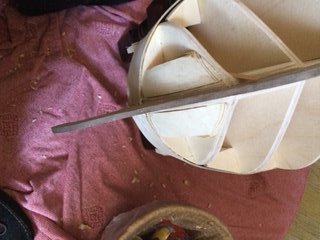
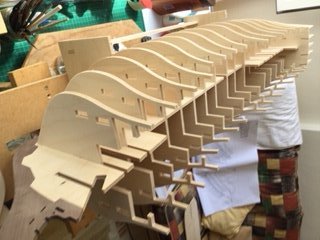
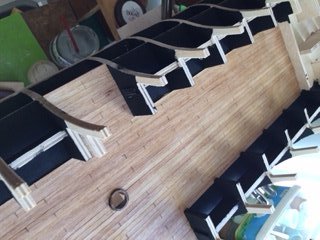
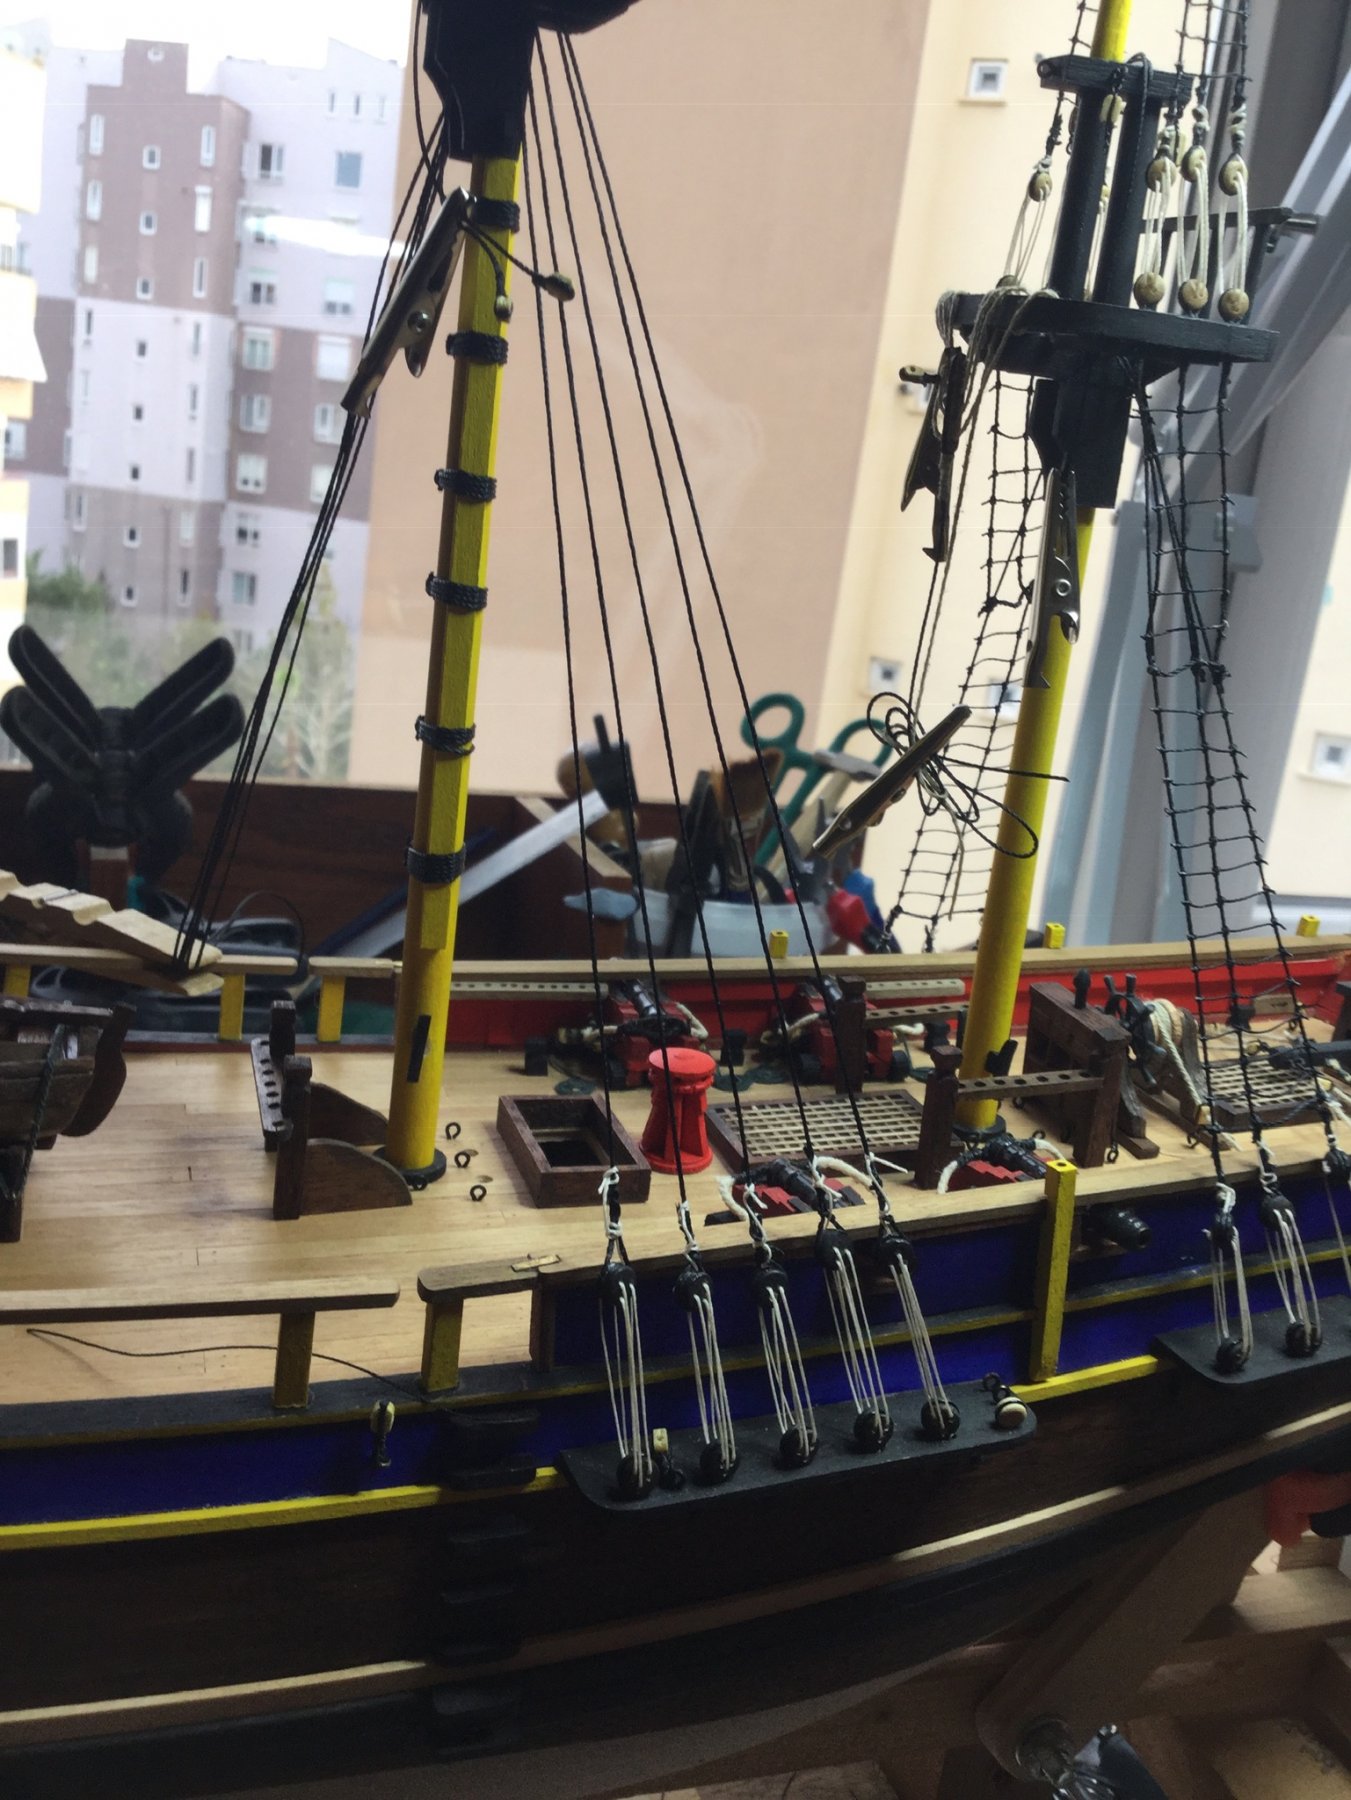
I'm now back in Turkey with my Victory after 4 months in UK.
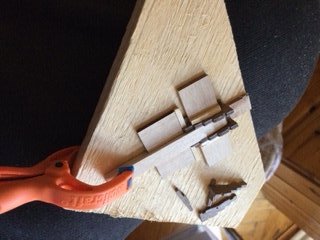
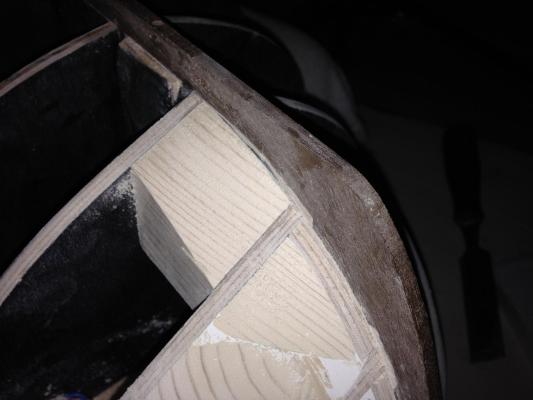
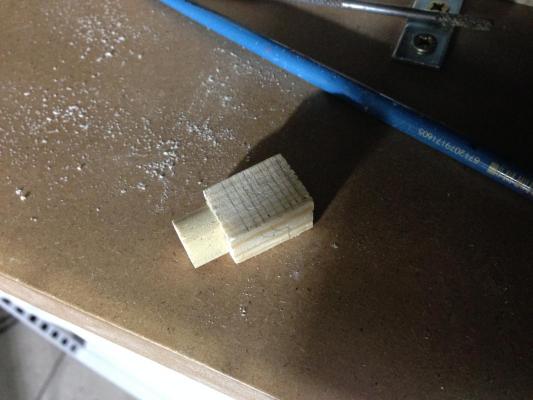
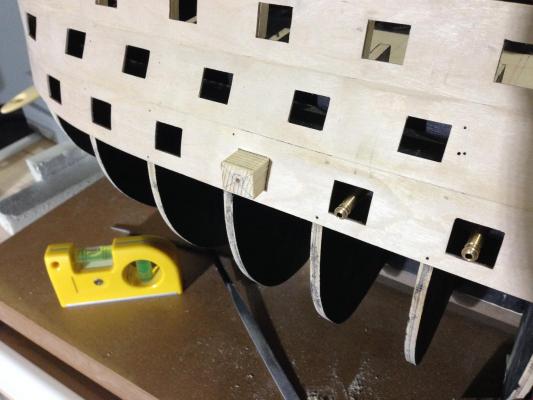
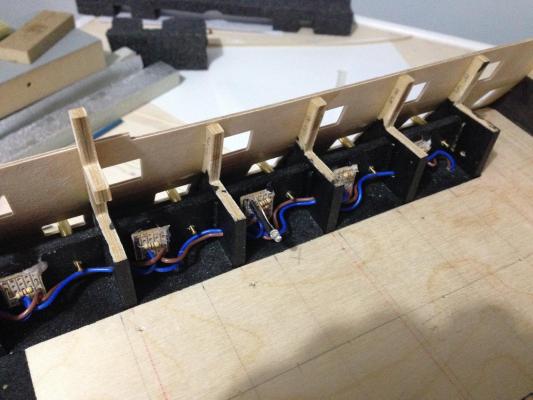
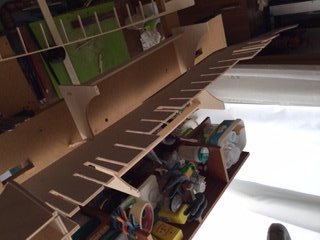
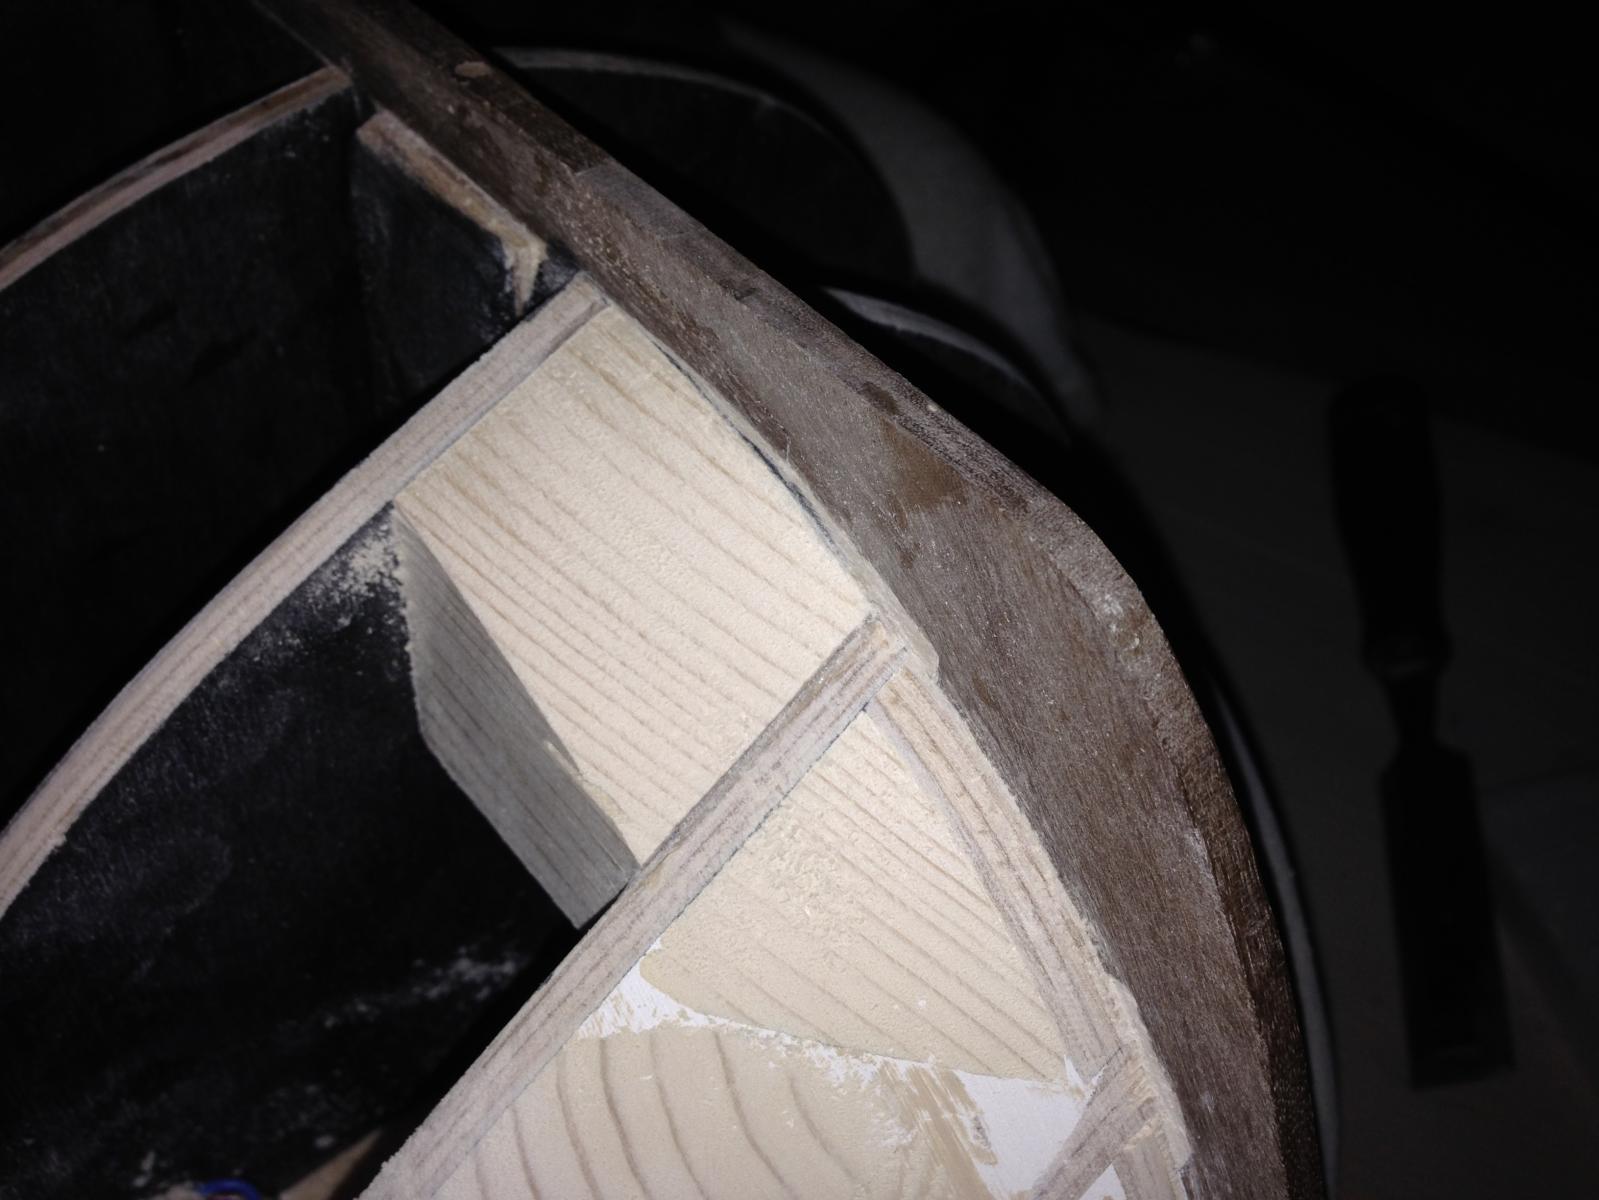
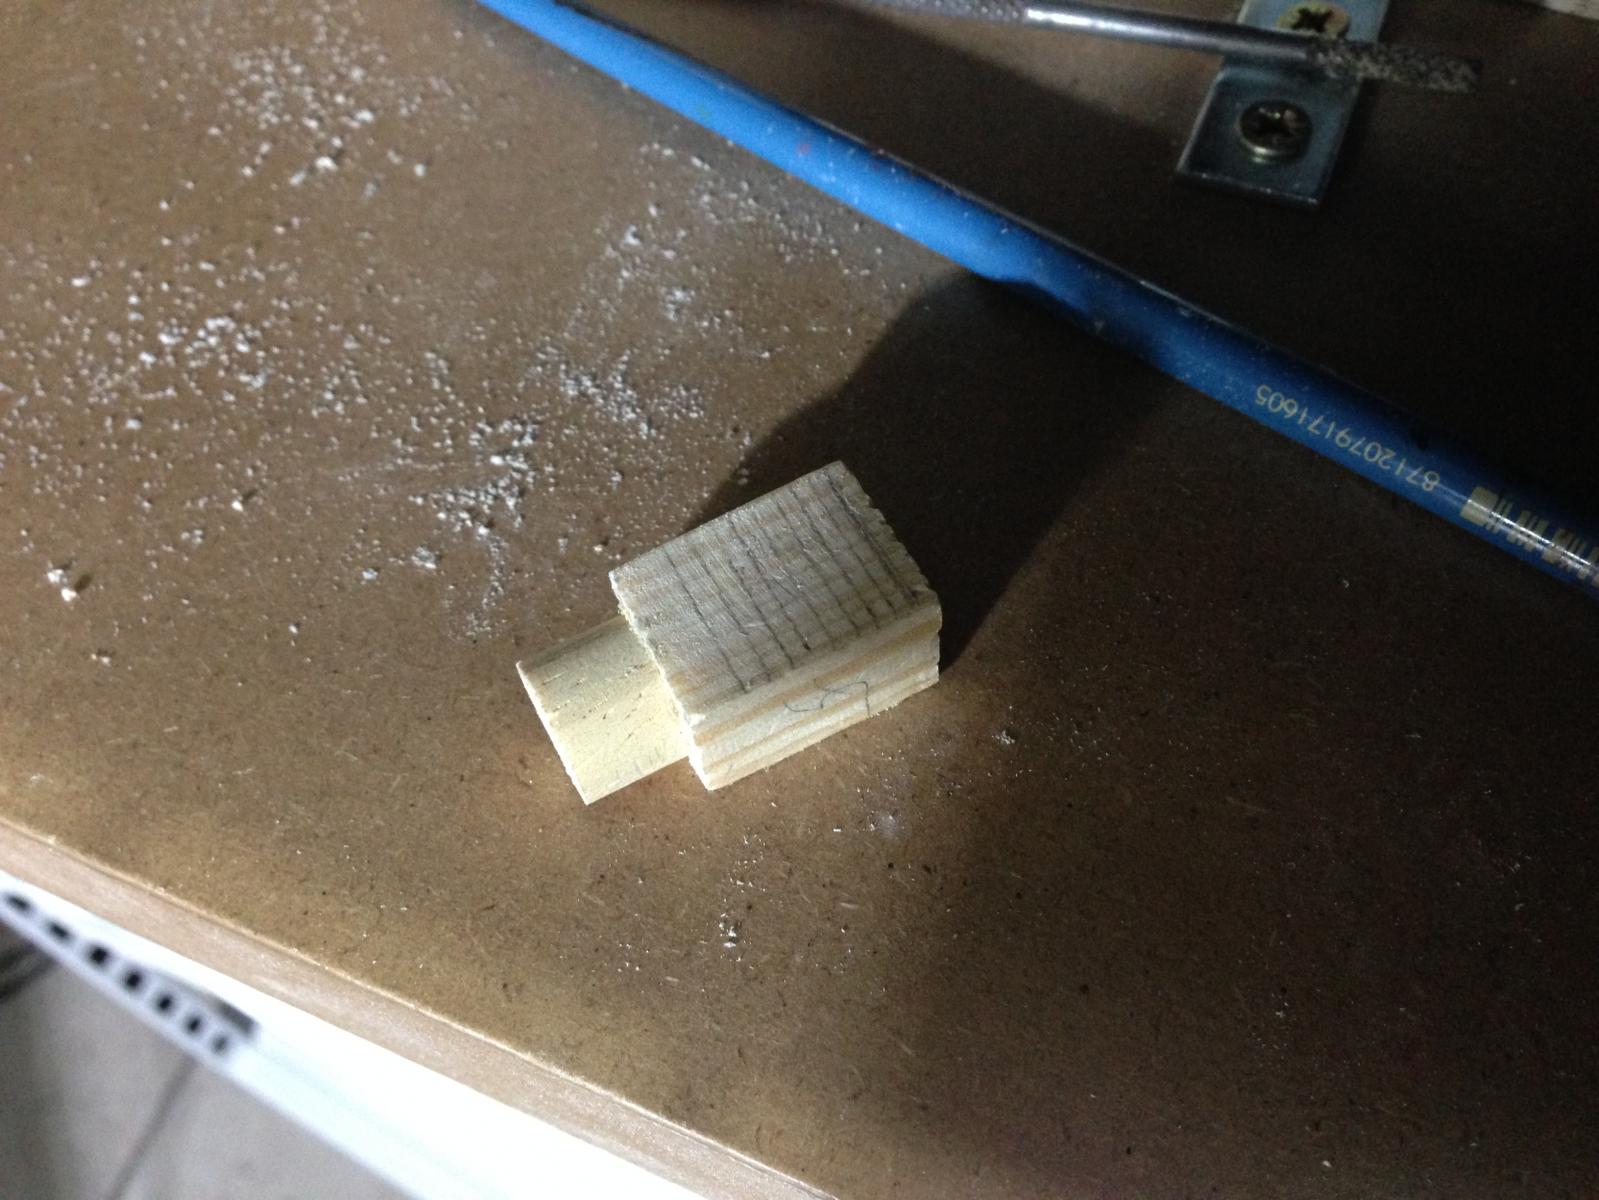
I started to look at the first planking and decided that the bow need some extra support, so I crafted two filler pieces out of limewood. I've added half a dozen planks straight off and I now need to shape the next set as I go towards the keel. As there is so many cannon trucks to make I've decided to make a start by fashioning a small jig which seems to be working ok. My last photo shows the lower and middle deck cannons mounted but not secured. I decided to do this now as I thought it may get a little unwieldy later down the line.

-
On 9/23/2017 at 11:52 AM, Robert29 said:
Thank you Heinz, and thank you for the likes.
Donn, thank you for your comment, much appreciated. The material I used for the quarter gallery is all the once supplied with the kit. I can't really complain for the wood supplied with the kit. Up to now the only strips I had to change was the walnut 1mm x 16 mm which is used to line the gunports. It's thickness was 0.8mm instead of 1mm and very brittle. It kept splitting in two easily whist trying to trim it down to size. But otherwise the rest was very good.
Robert
I’m reading ahead as I’ve not got this far with my build yet, but do you think soaking the walnut before cutting might help?
-
Robert, I’m only on my first planking but find myself time and time again coming back to your wonderful log for reference. I cannot hope to match your skill and patience but I thank you for such an informative build, I have it constantly open near my bench!!
-
On 2/10/2016 at 5:06 PM, Robert29 said:
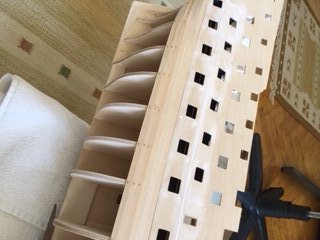
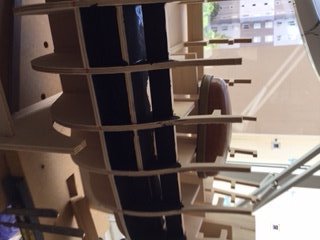
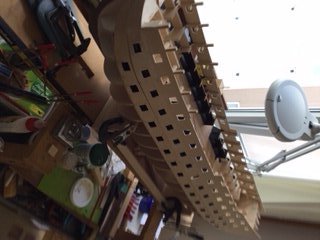
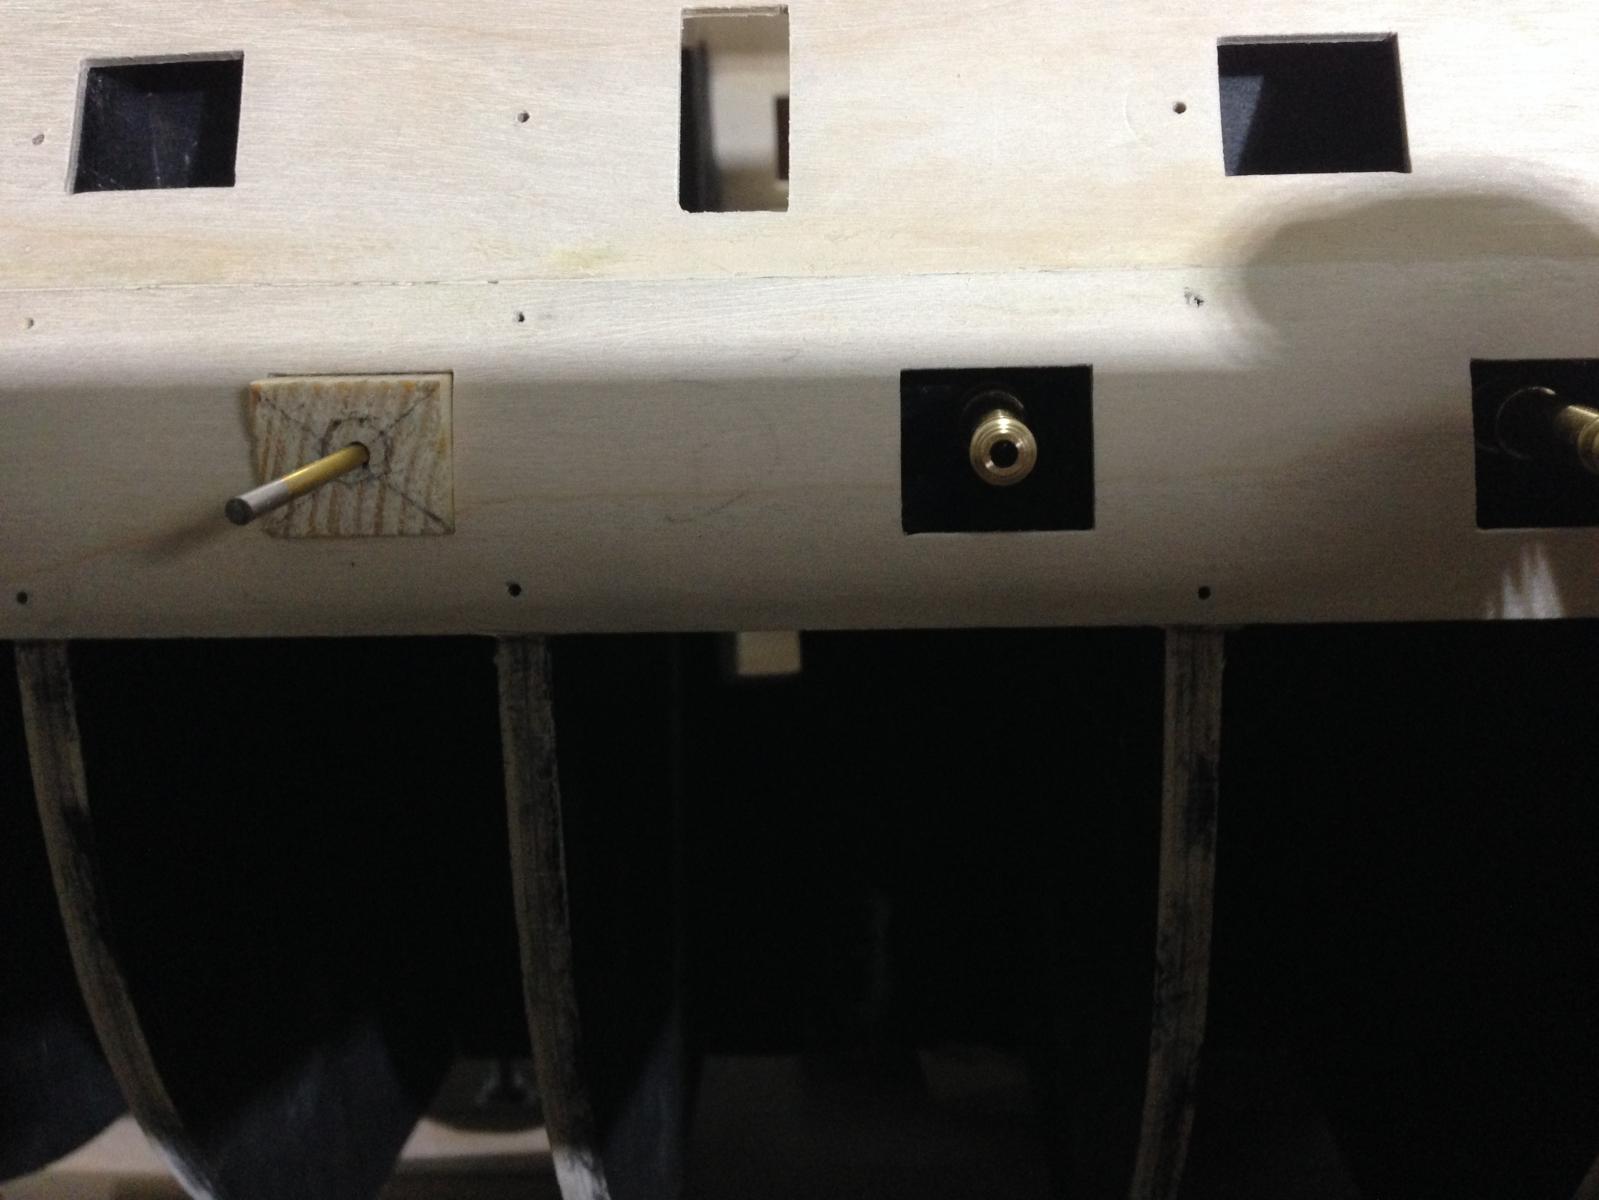
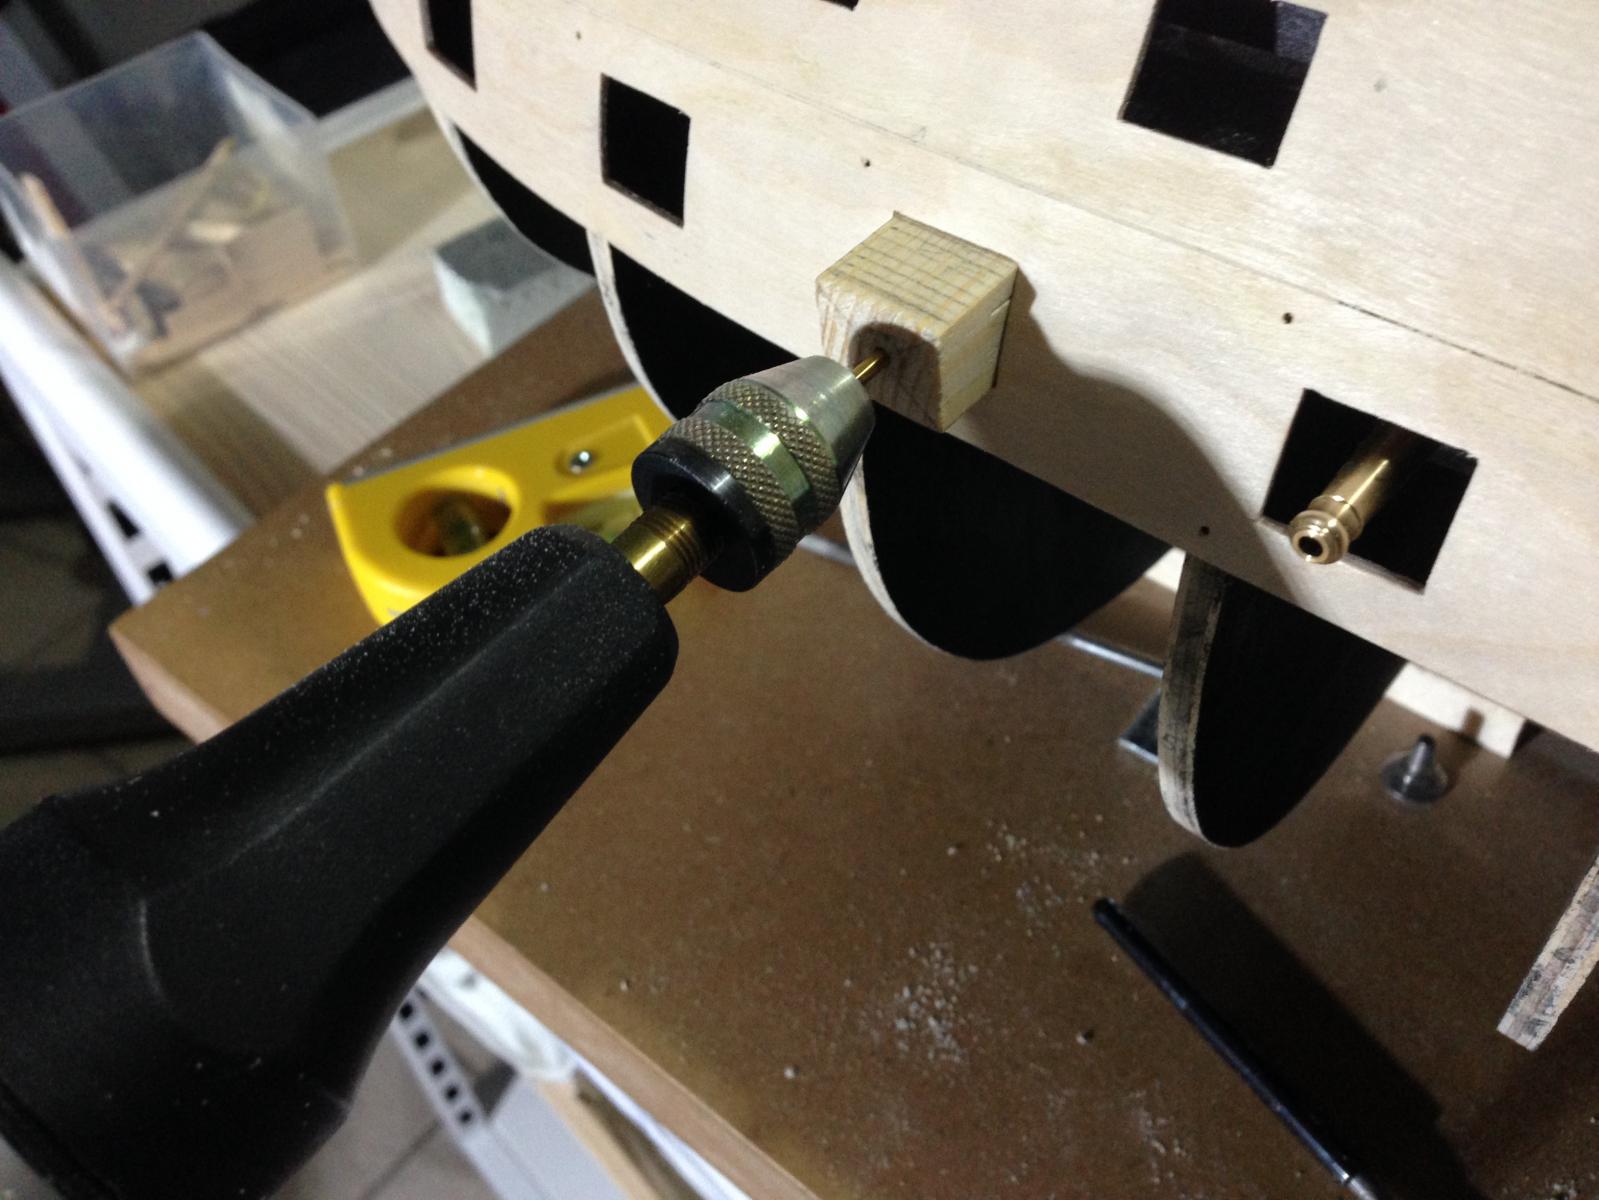
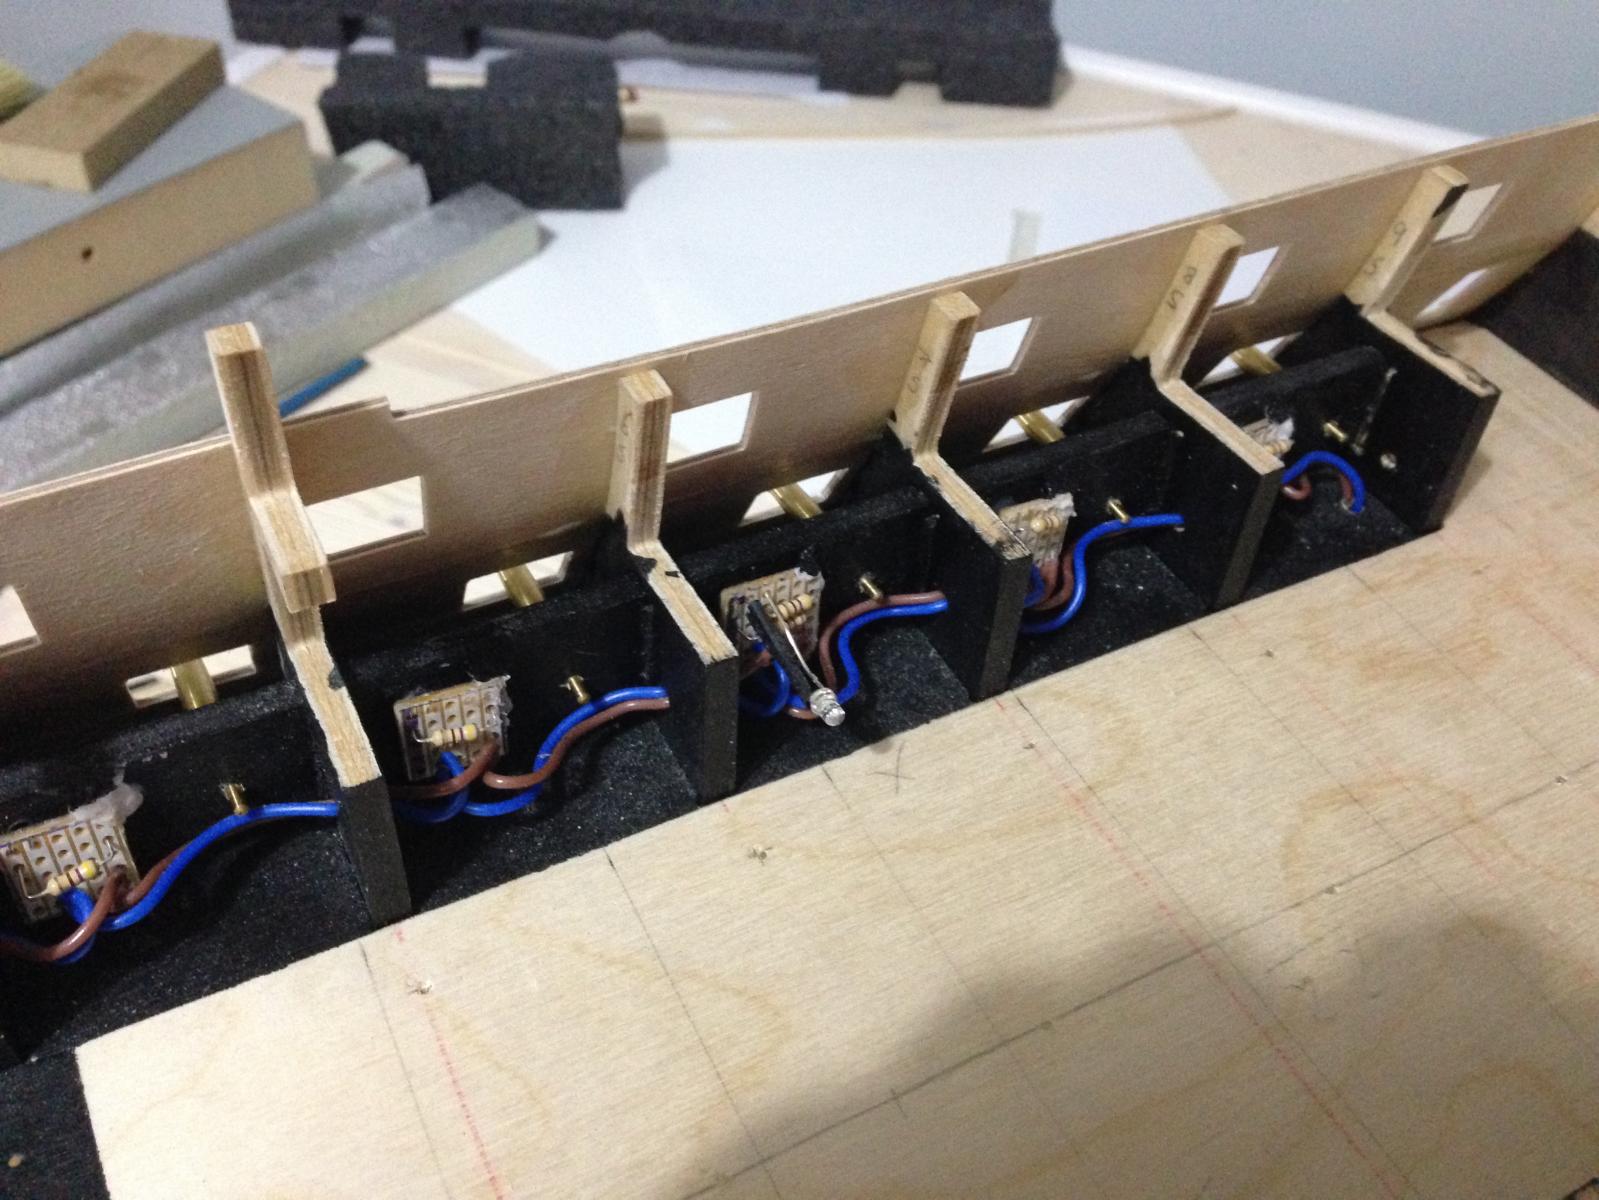
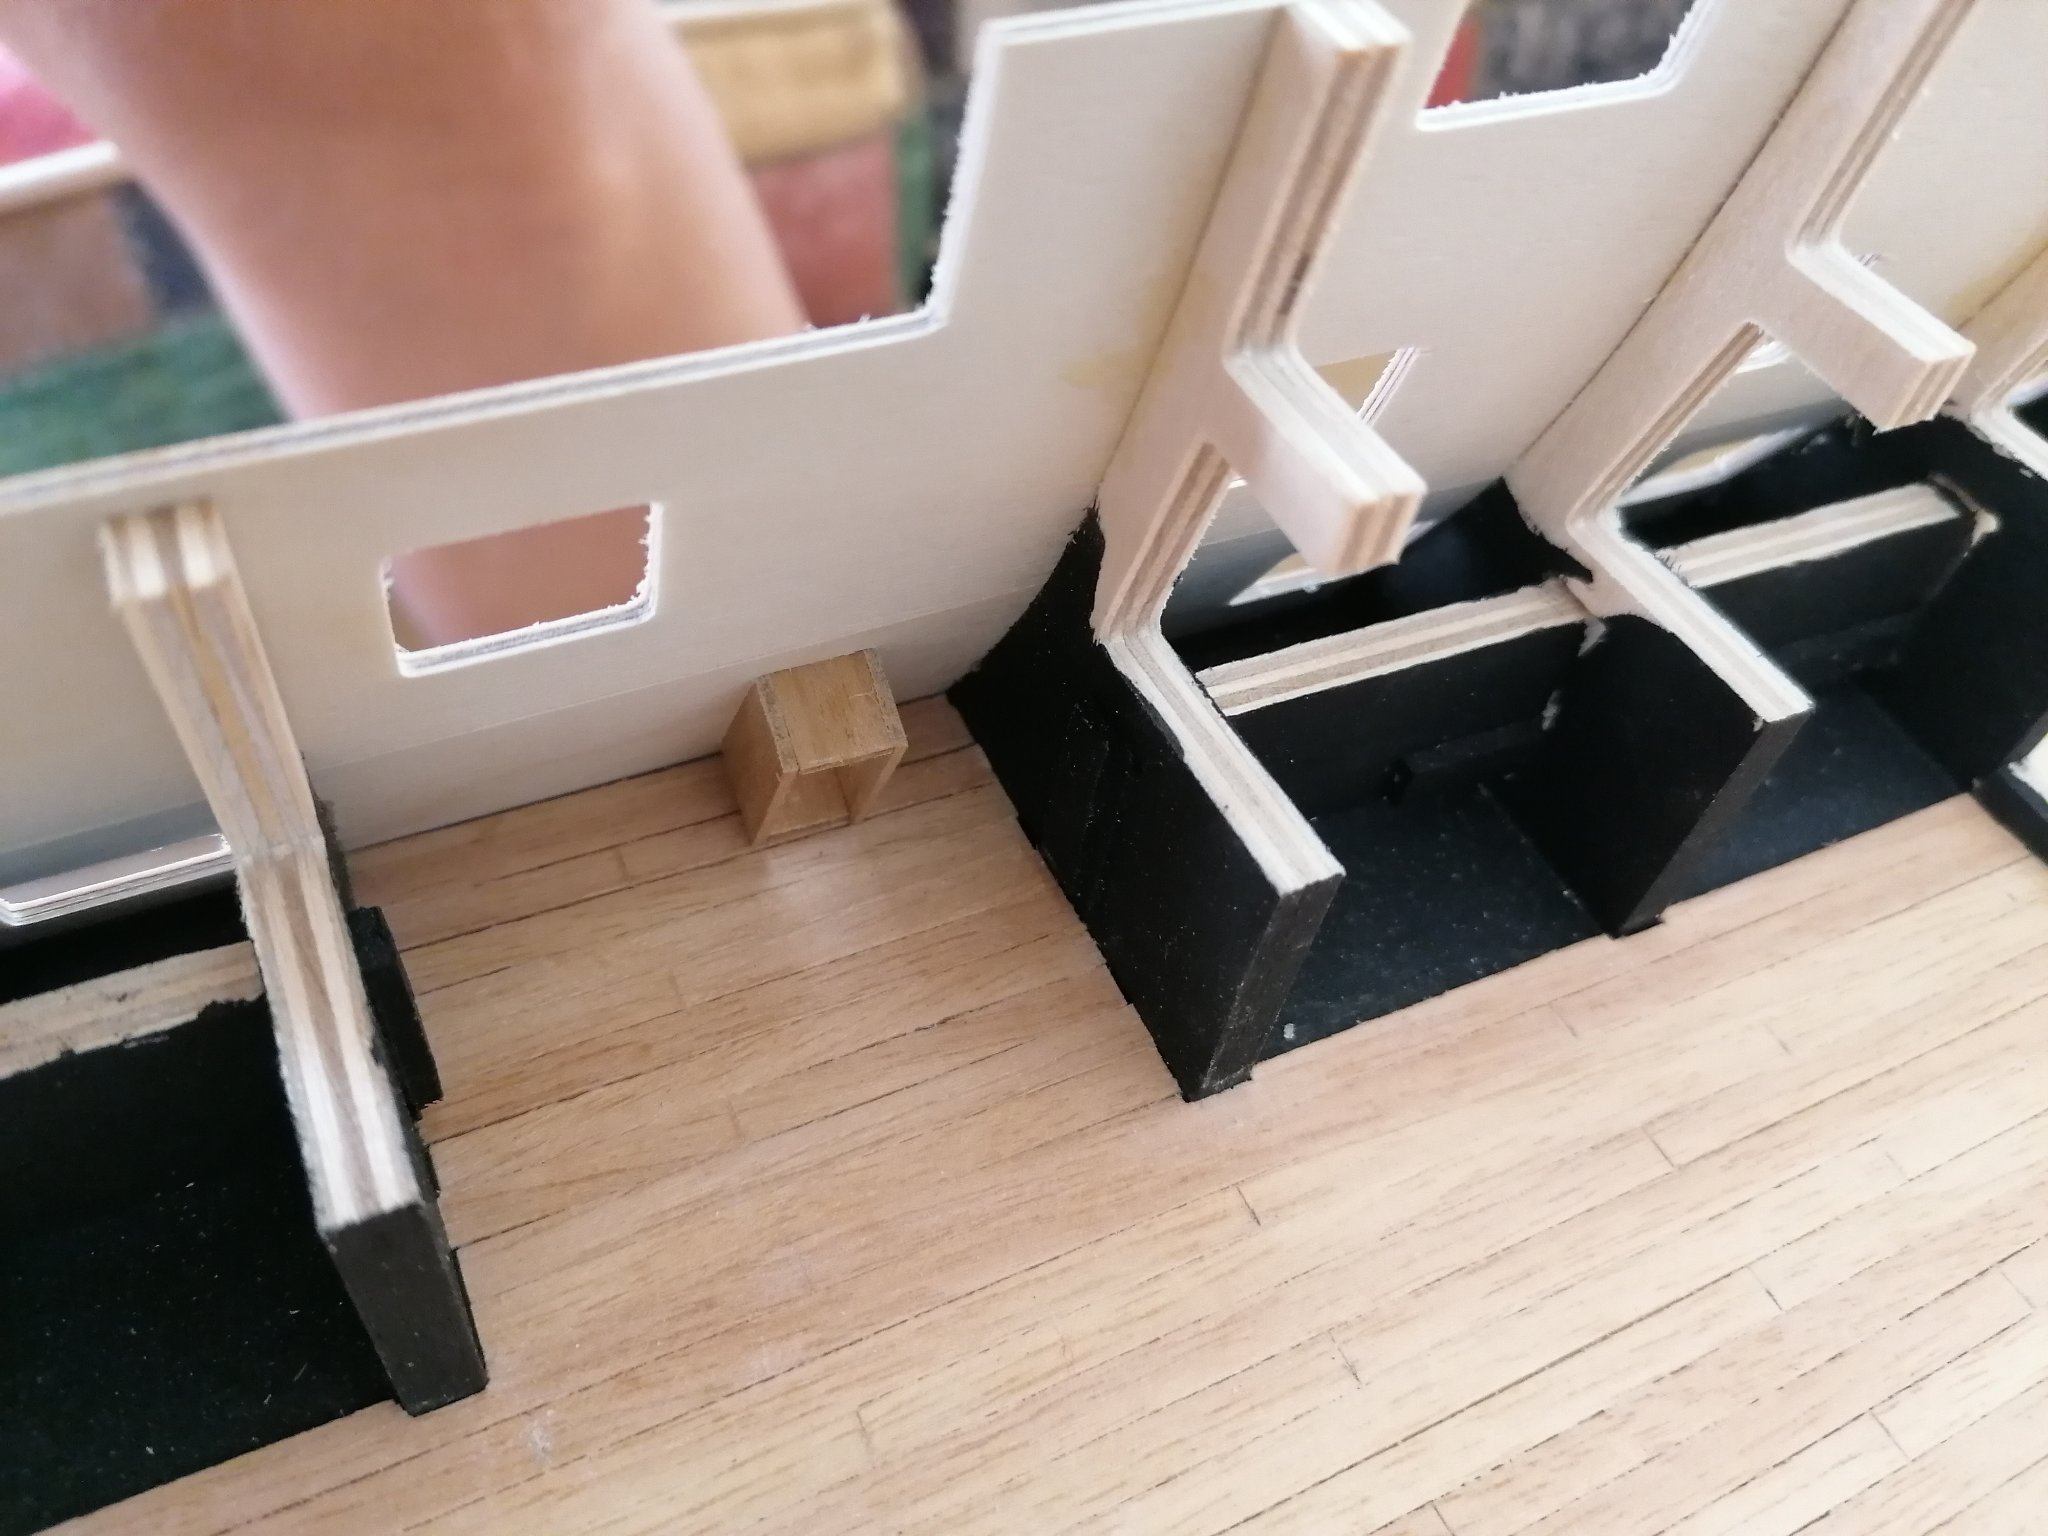
Today is a public holiday here and did some work on the Victory. I decided to prepare the holes for the cannons on the dummy barrel strips. One main reason is because at the back of the strips I have the wiring for the gunport leds and if I damage any of them when drilling there is no way I can get to them after I plank the hull.
Ian
I took your advice, I think this is the area you referred to. I added filler blocks just at the base. Thanks.
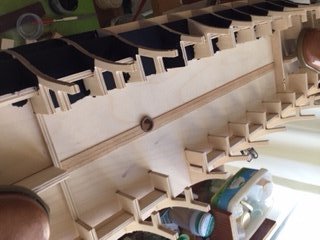
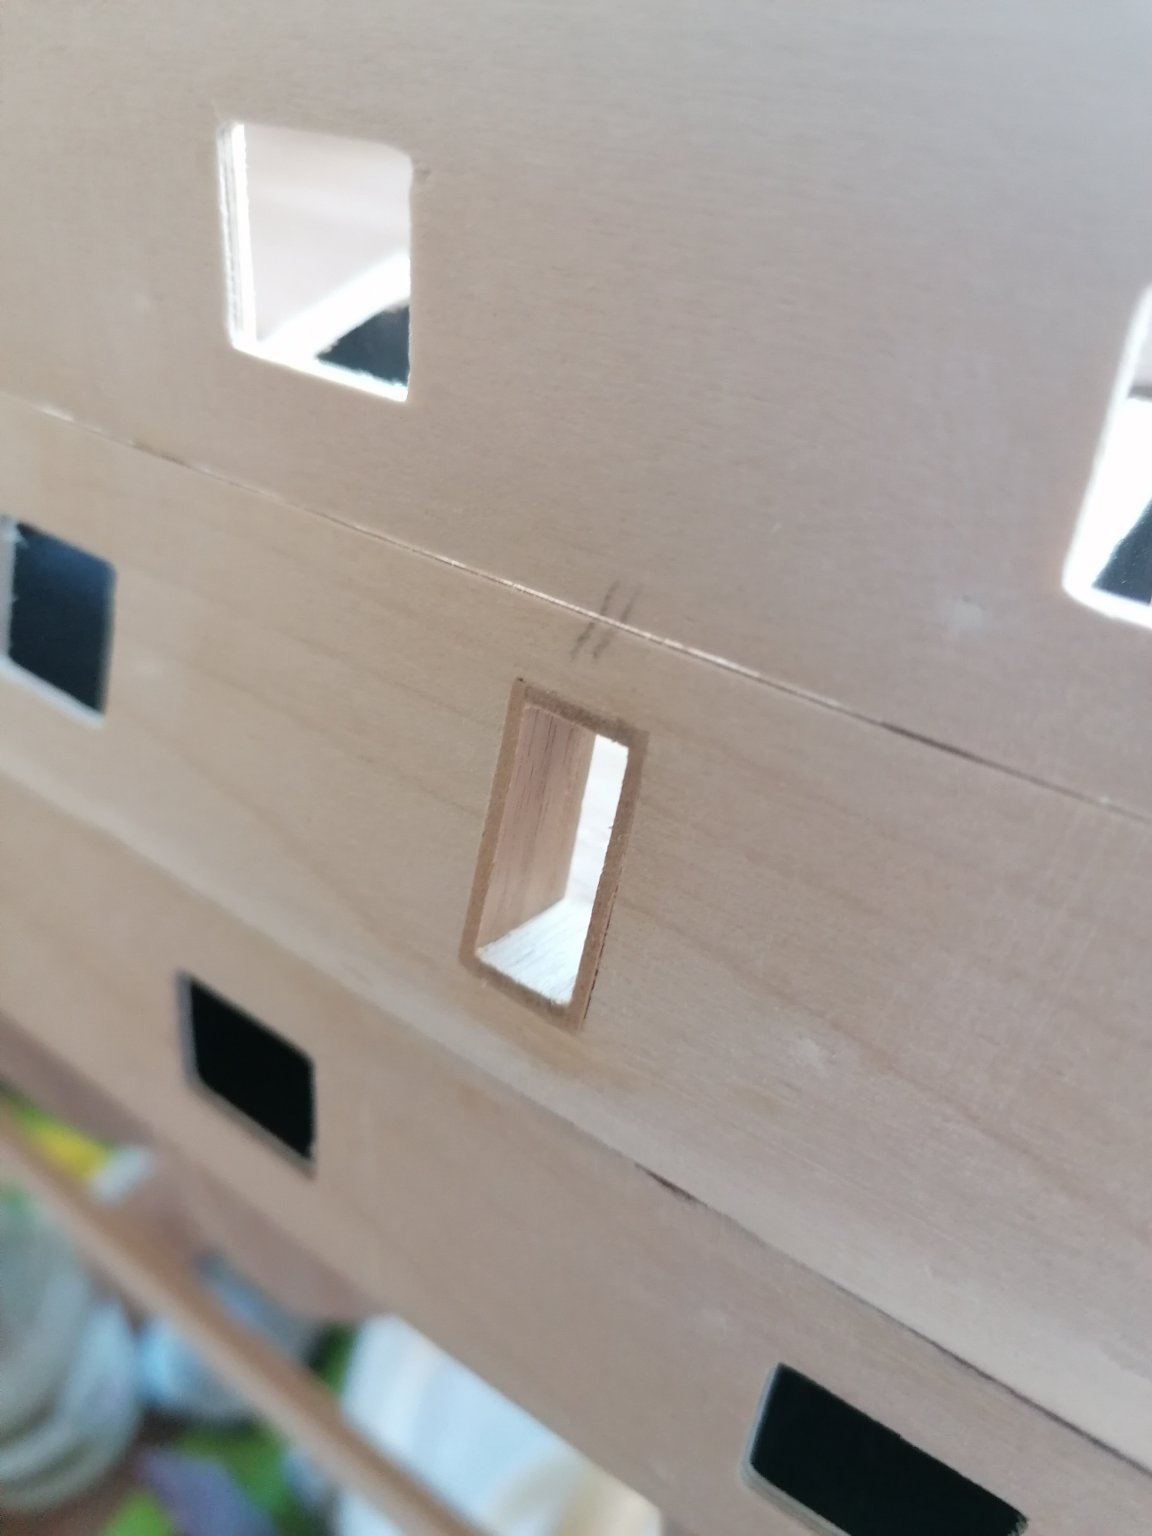
I made a jig to centre the holes, but when I started drilling I was not very happy with the result. A couple of the cannons were coming out of the gun ports at an angle sideways. I realised the jig was too short.

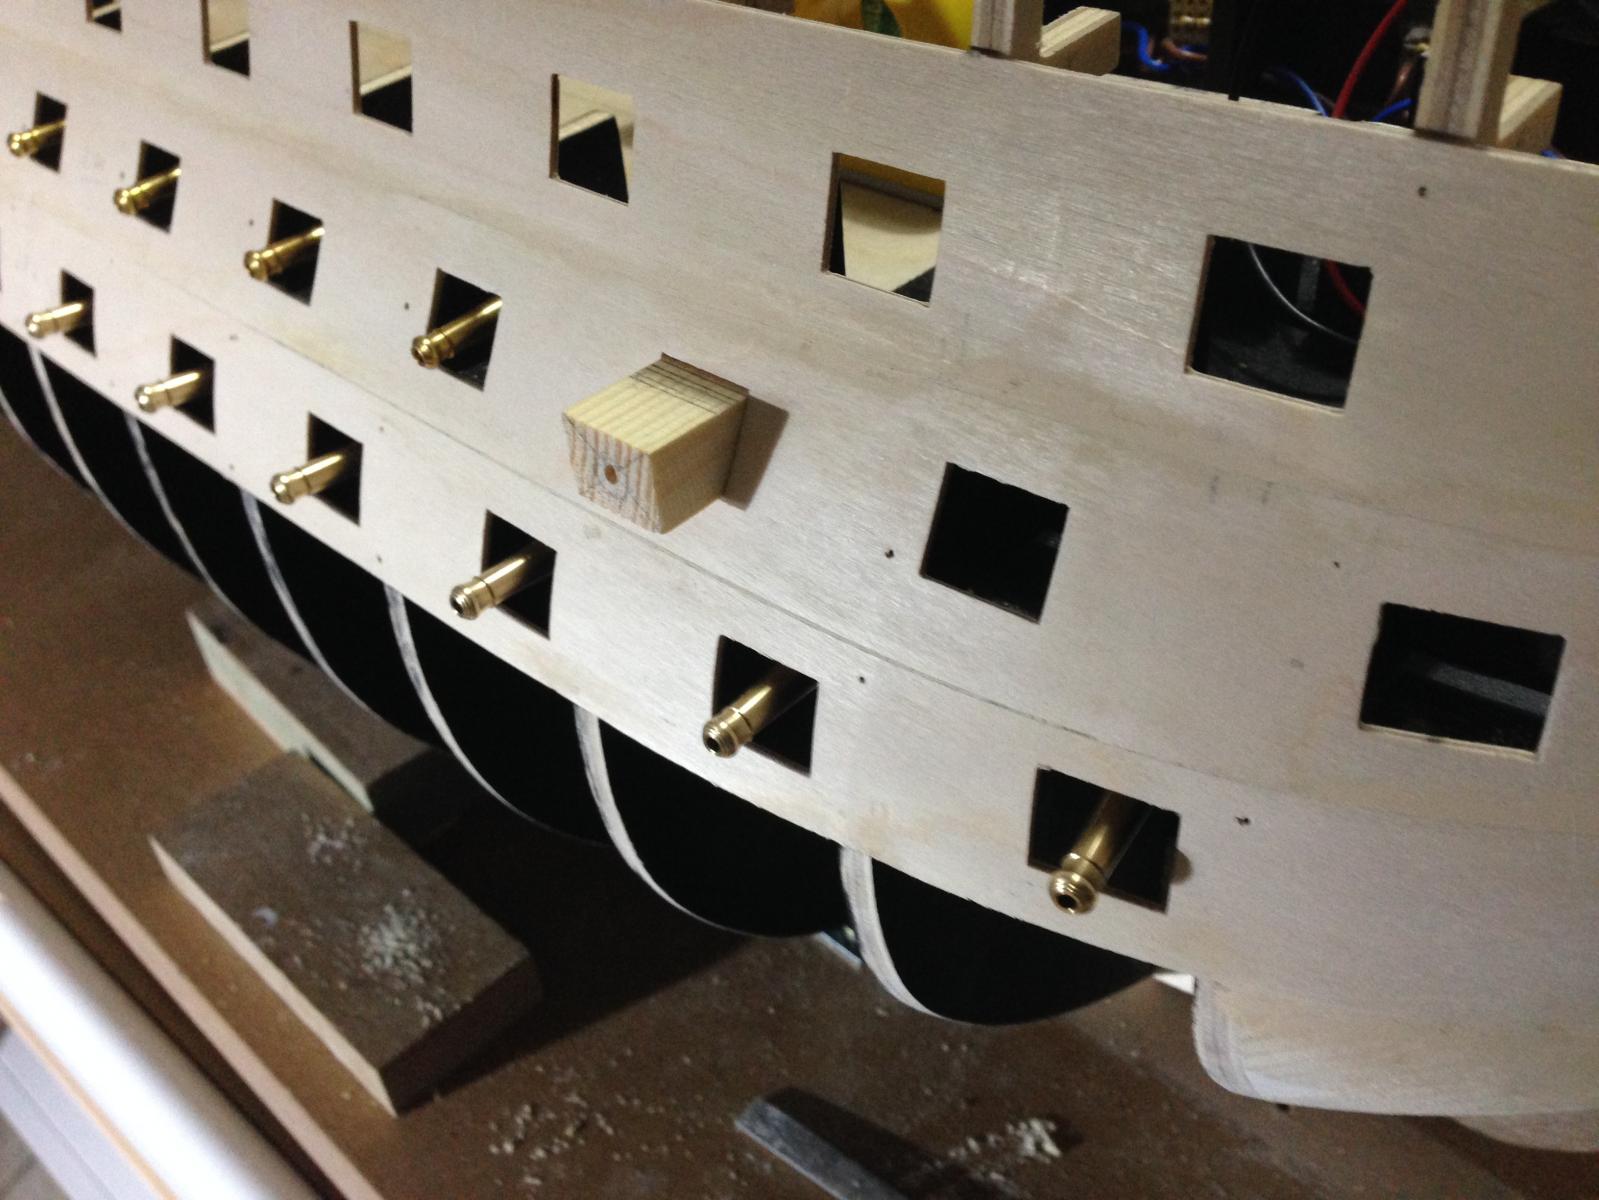
I extended the jig and drew some parallel lines on top to guideme keep it at right angle with the patterns. Worked fine. I blanked with a dowel the two I didn't like and drilled them again.


Cannons dry fitted

Robert
Genius idea with the jig. I have been scratching my head on how to achieve the correct cannon fitting angle. Thank you I will borrow this if I may.
-
I knew that there would be a reasonable explanation, thank you javajon, I'm a bit of a dinosaur when it comes to stuff like that.
I'm due to fly to UK on Thursday having been in Turkey for two years so this will be my last post for 3 to 4 months. I'll miss my Victory but I'll get to play with the grandkids instead. Take care everyone and see you in 2022.
-

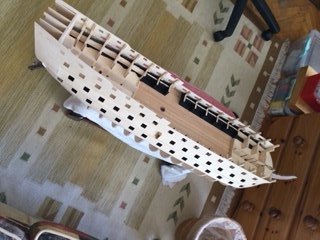
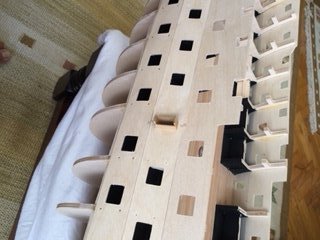


Try as I might I cannot upload these images in the right profile, so please accept my apologies for the state of them. But if there is a genius out there who knows what I've done wrong I'd be very pleased to hear from you.
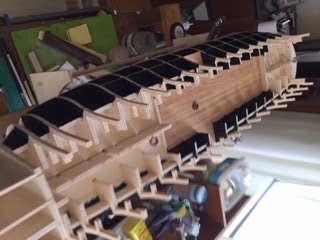
This is my current progress with the build and will now go into a 3 month break as Im flying back to UK next week. Any comments or criticisms greatly appreciated.
- GrandpaPhil, ccoyle, Fernando E and 2 others
-
 5
5
-
Build started September 2021. Early days log and photographs to follow
- DARIVS ARCHITECTVS, bruce d and ccoyle
-
3
-
I have just started on the same model. Your build log is excellent and has already helped me and given some positive ideas on how to solve a few issues that I was concerned about. Brilliant well done and I will definitely be using you log as a tutorial, thank you.
- Chris_P and Keith Black
-
2
-
On 7/9/2021 at 12:44 AM, drobinson02199 said:
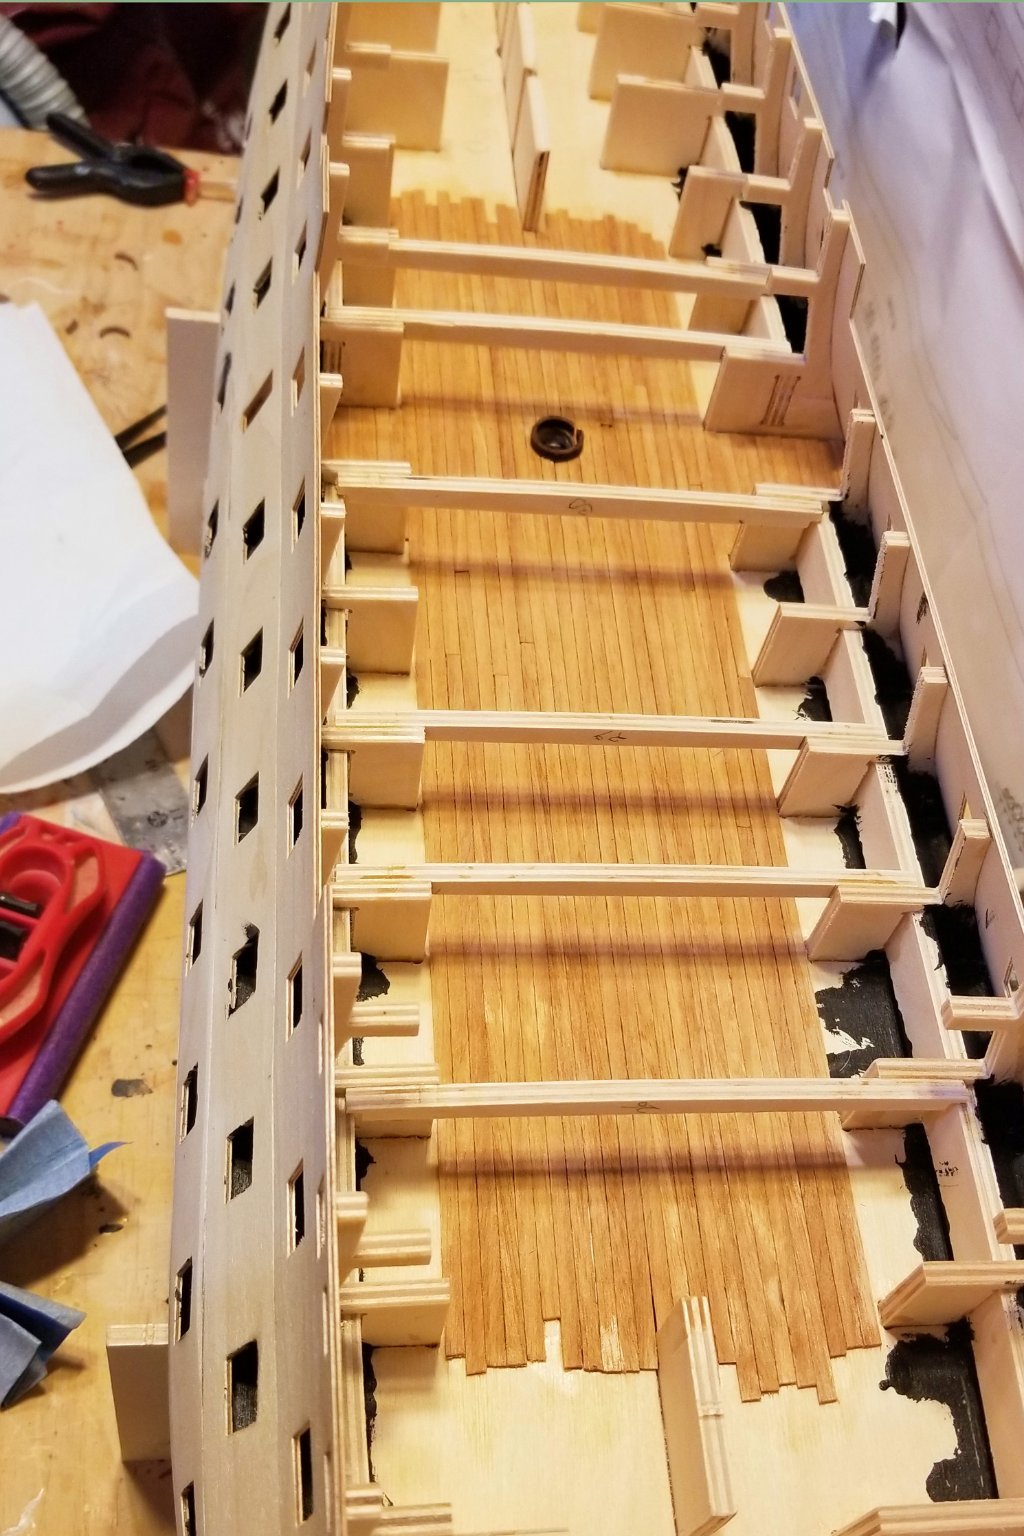
Planked the portion of the Middle Gun Deck called for in the manual (the part that is visible from above or outside.
I made a sequence goof and put the crossbeams in too early, so had to work around them when doing this planking. I also wish the manual had called for painting the areas black that can be seen through the gunports before the gunport templates went on, vs. after during this planking step. Would have been a whole lot easier.
Regards,
David

I read further on before I did this and decided to paint the sides black on mine and also install a floor to the lower gun deck ports so that later on when lining I won’t drop stuff into the hull.
-
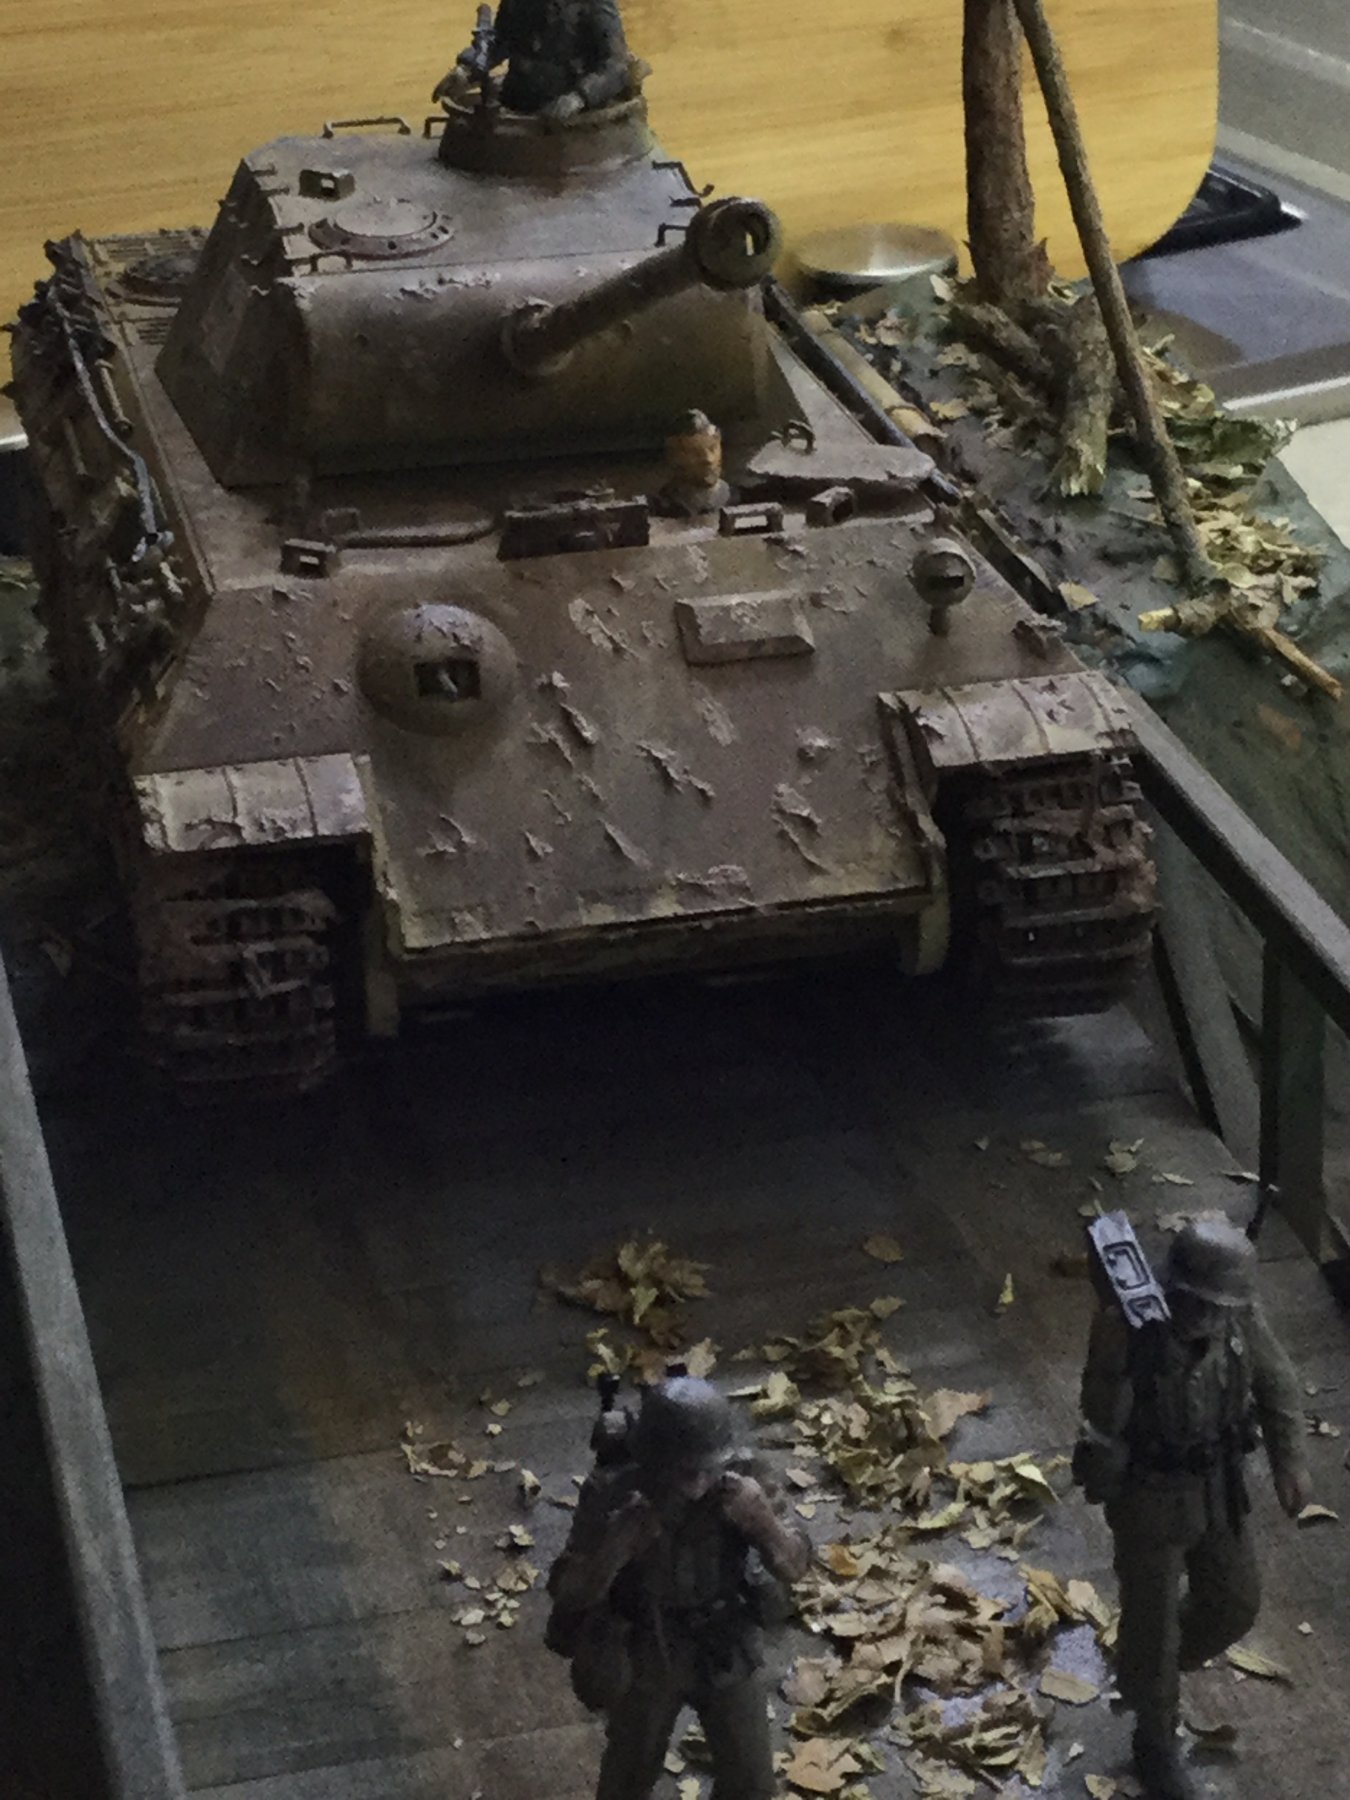
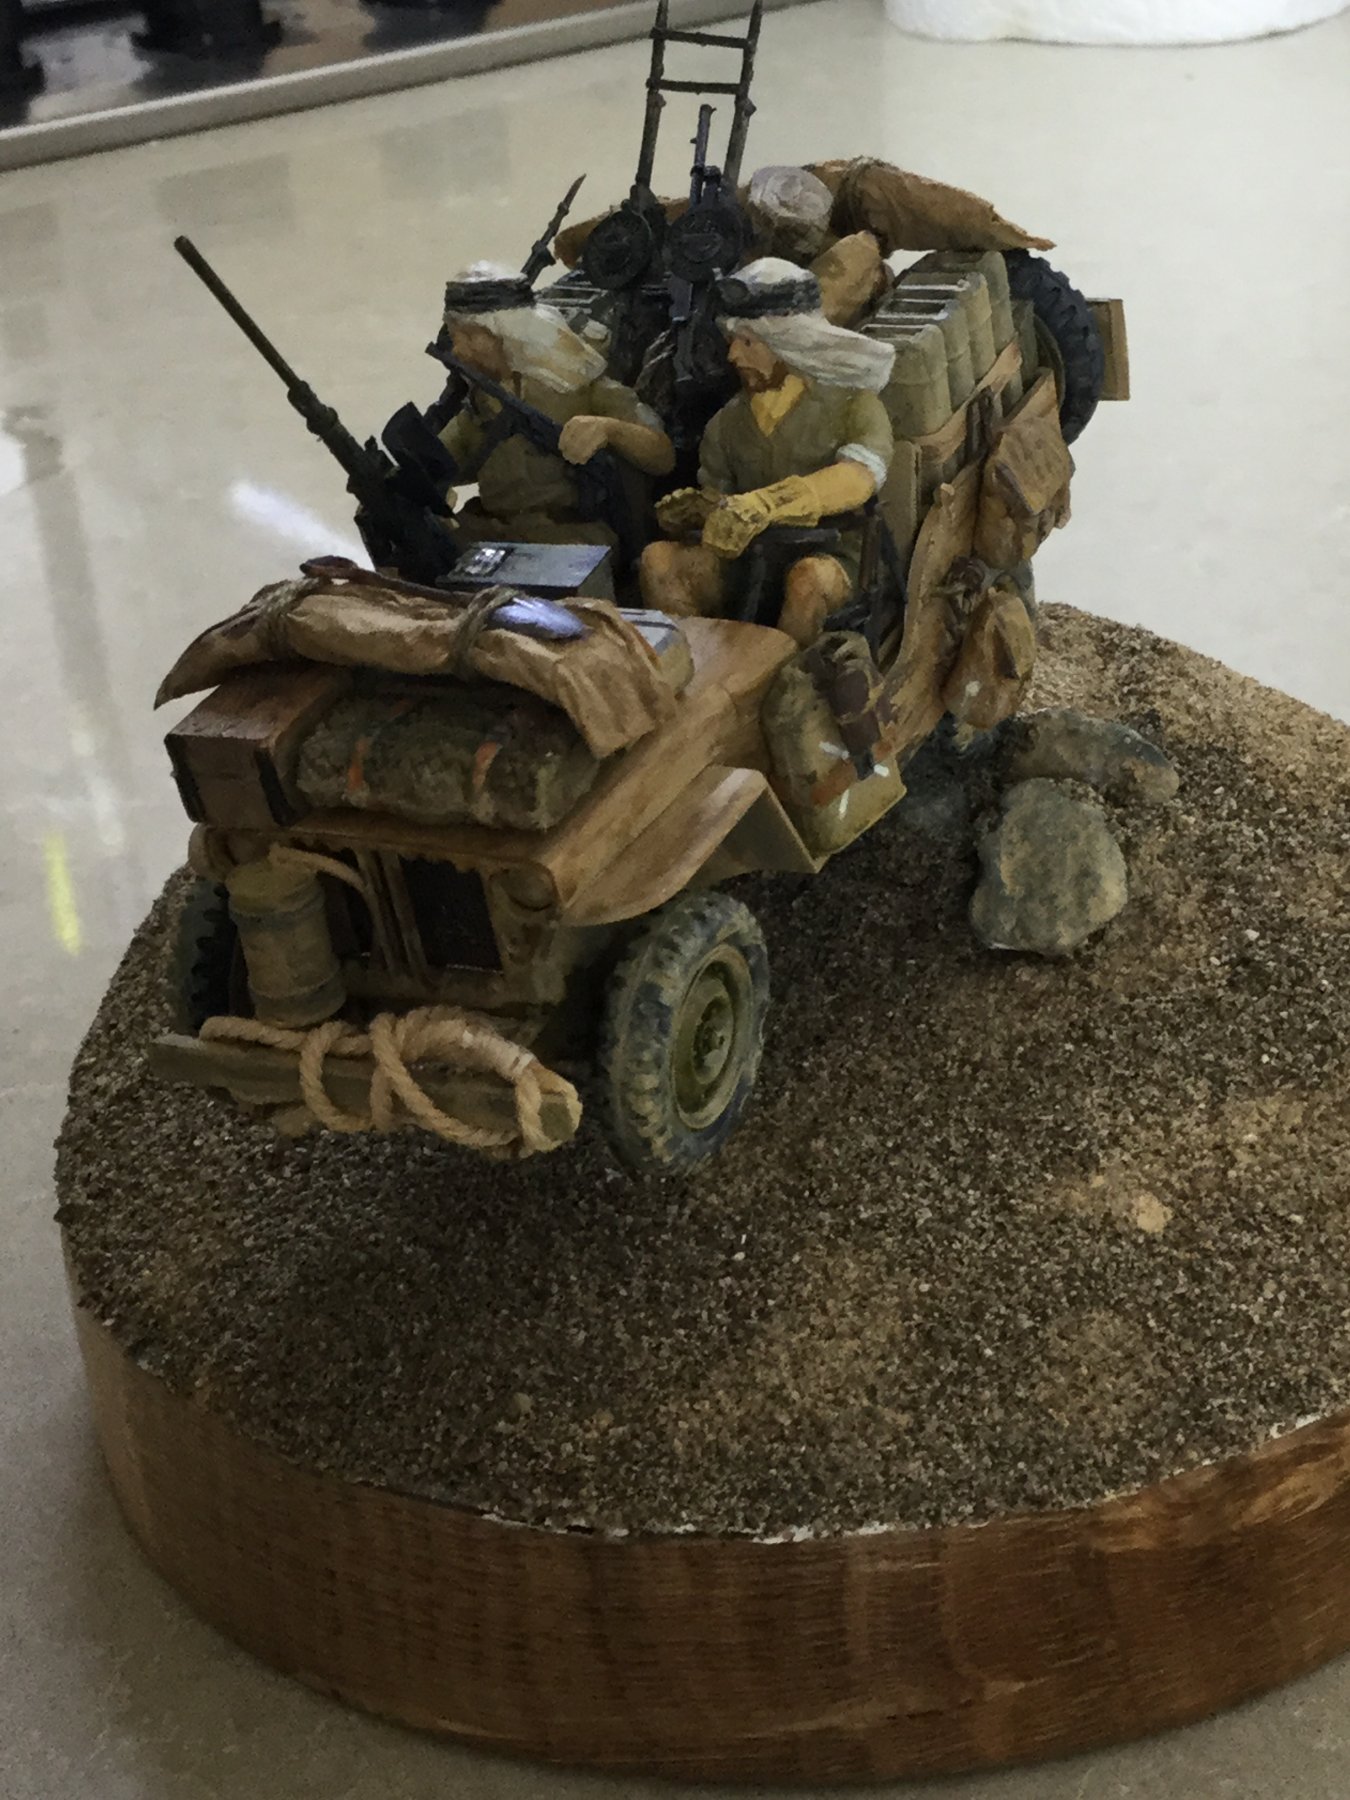
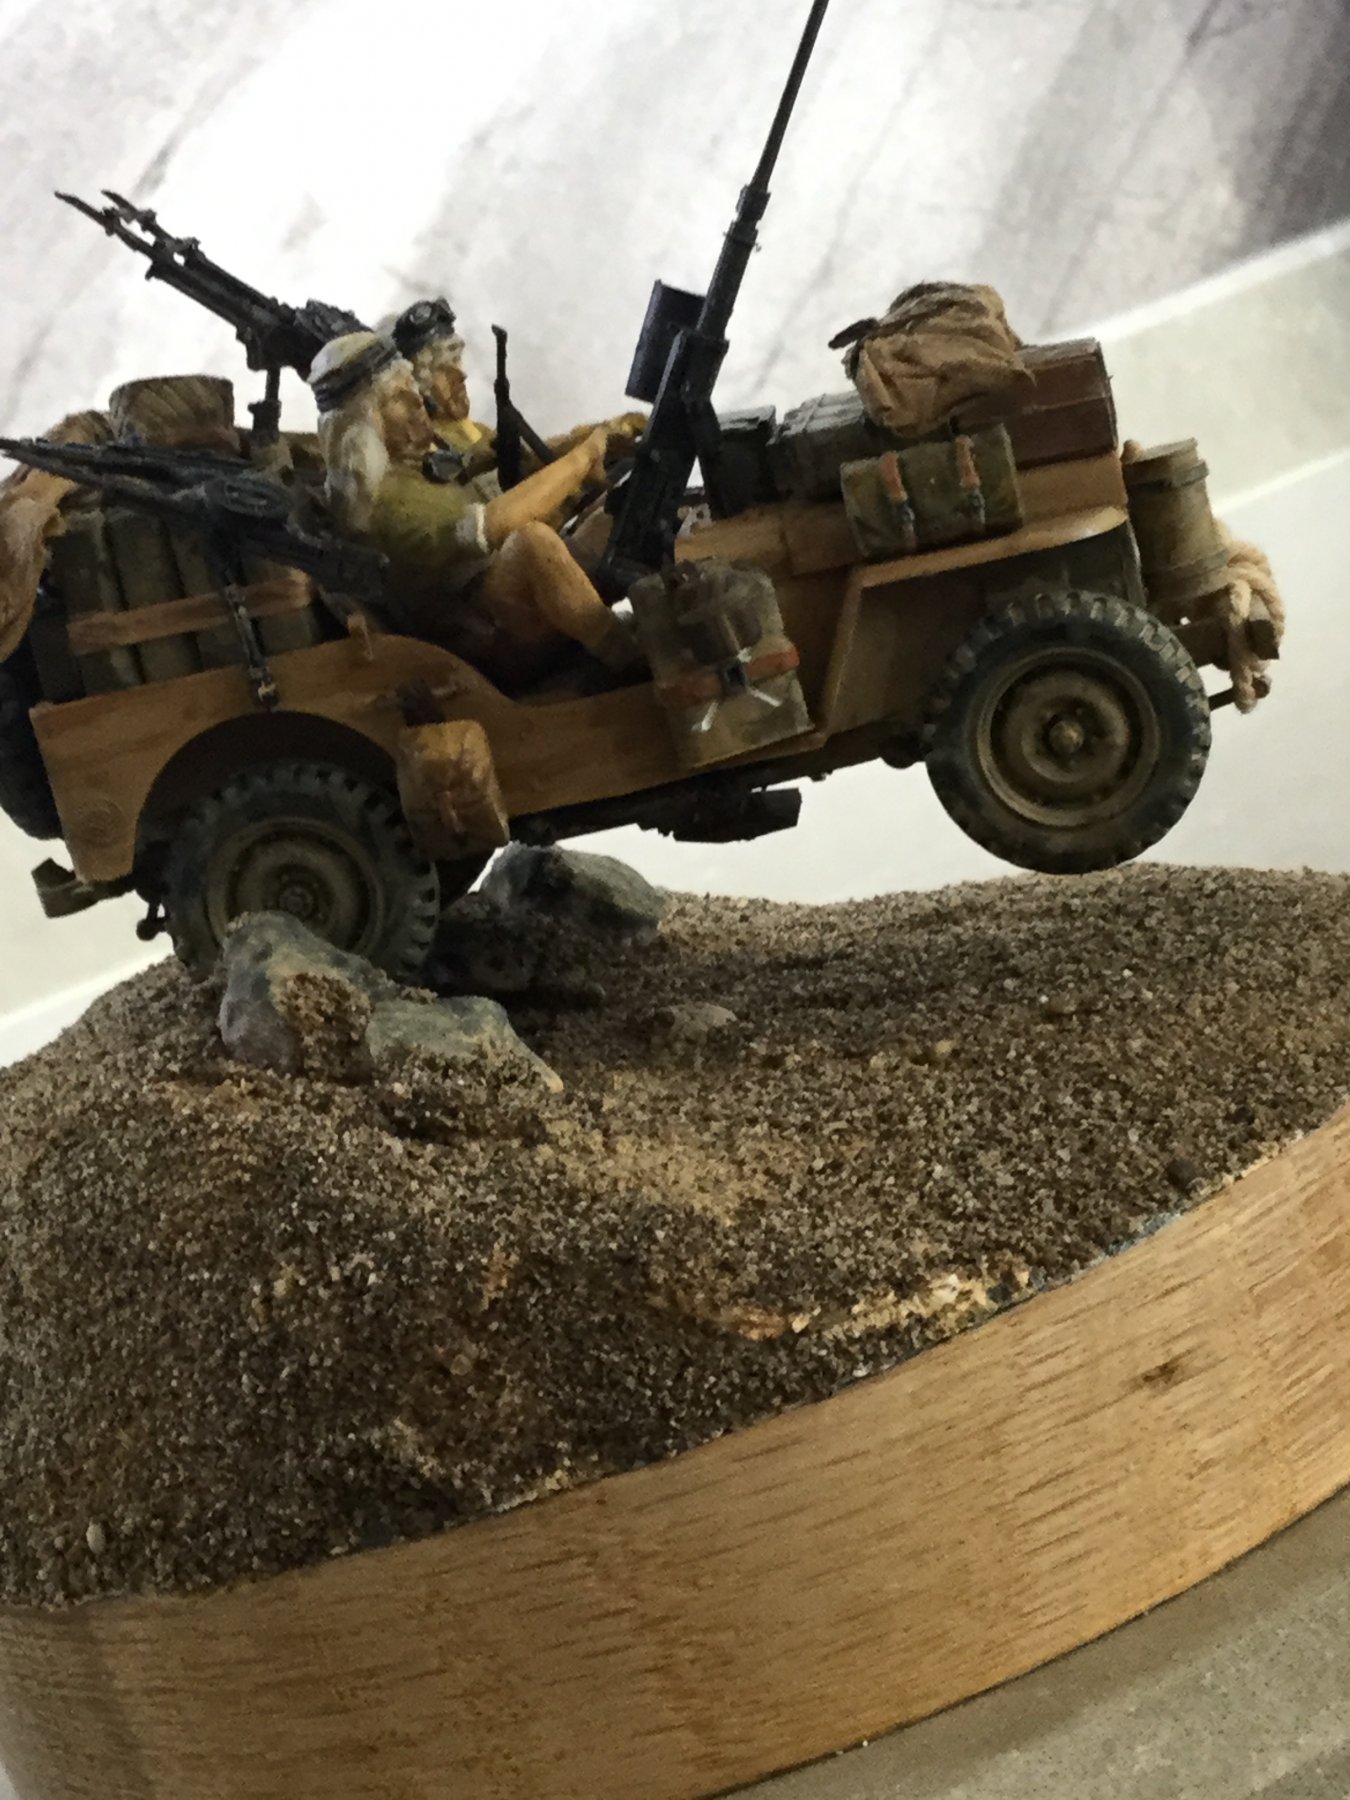
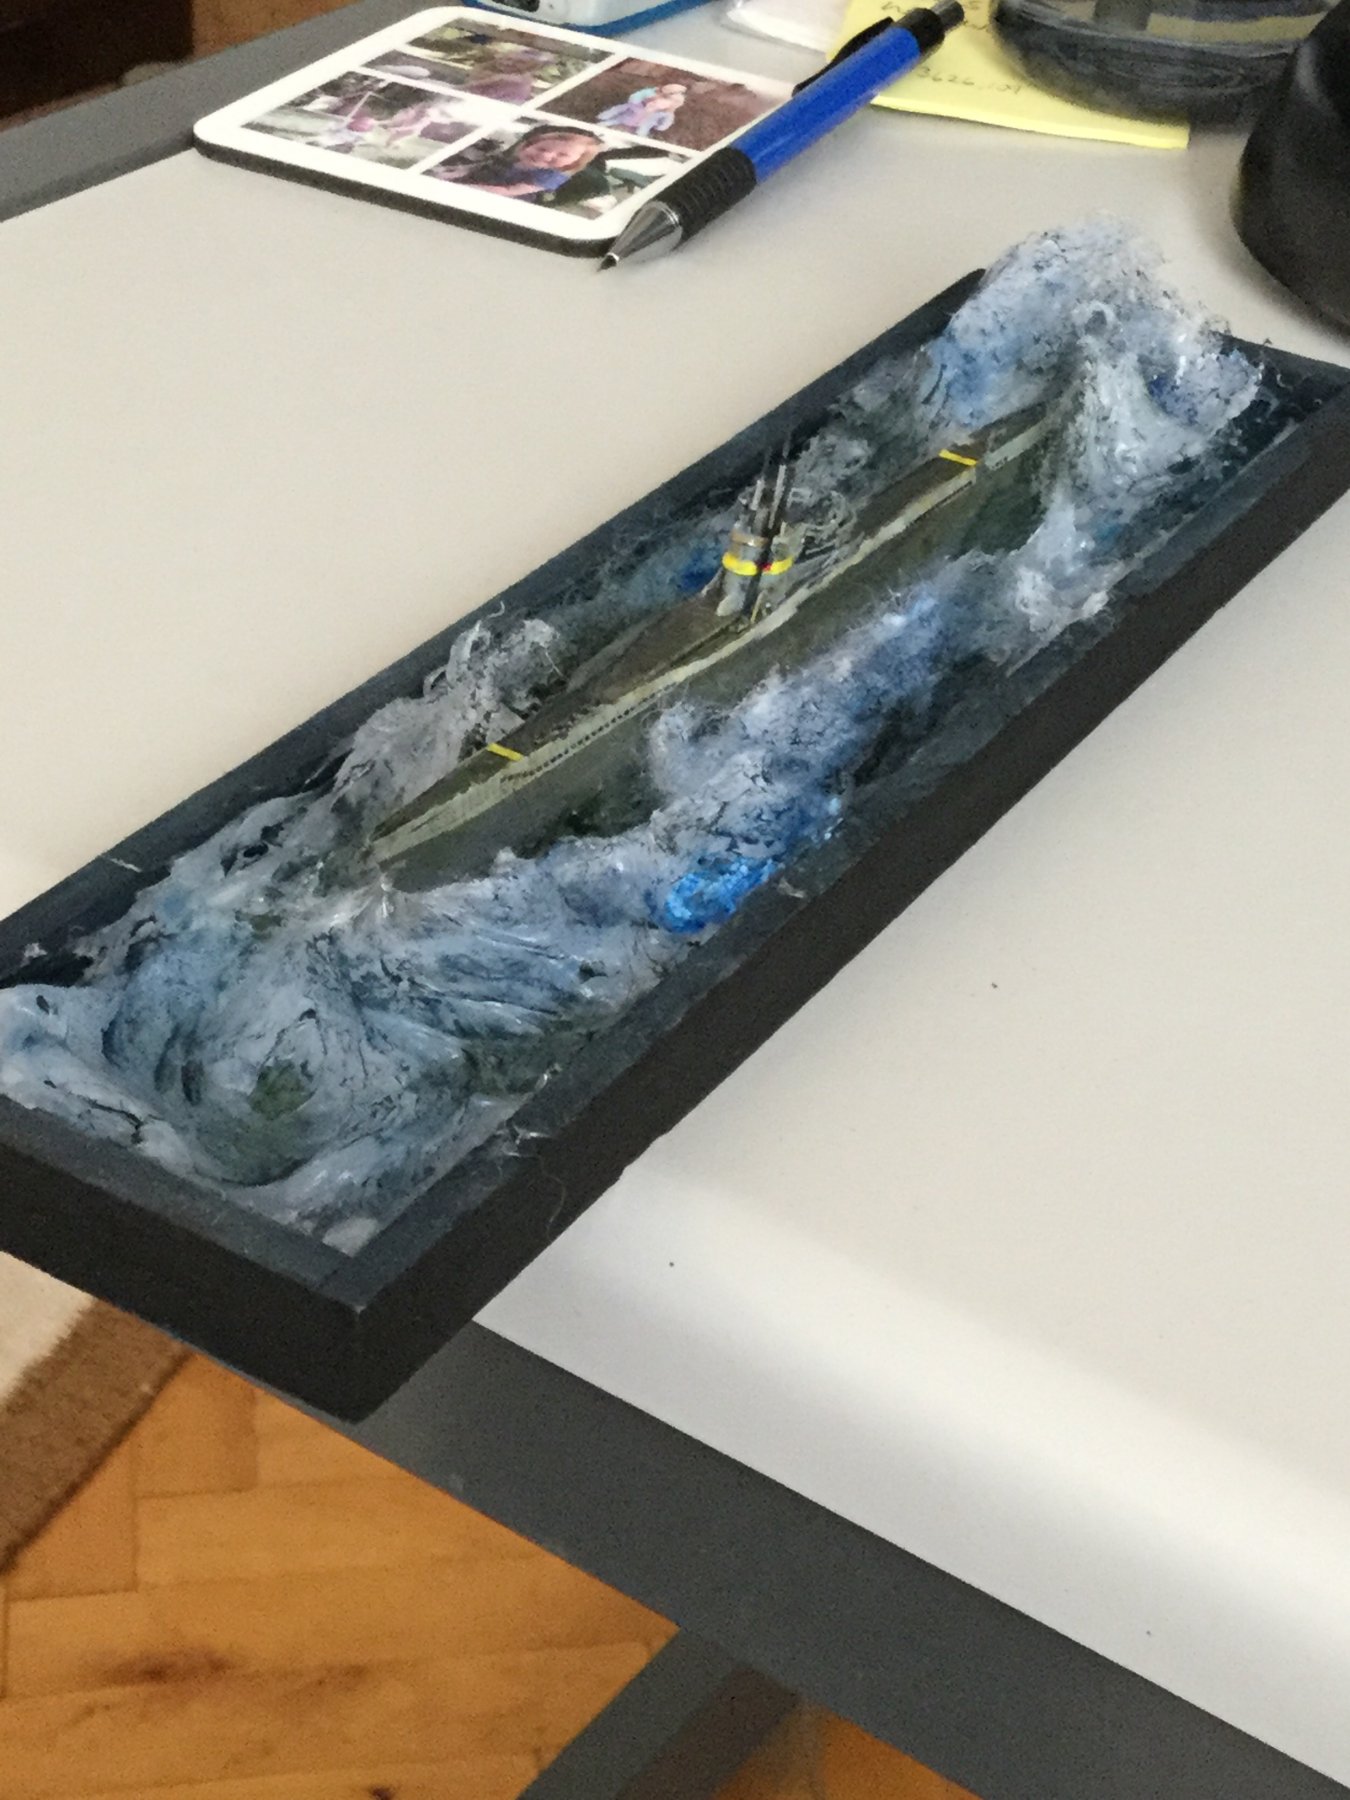
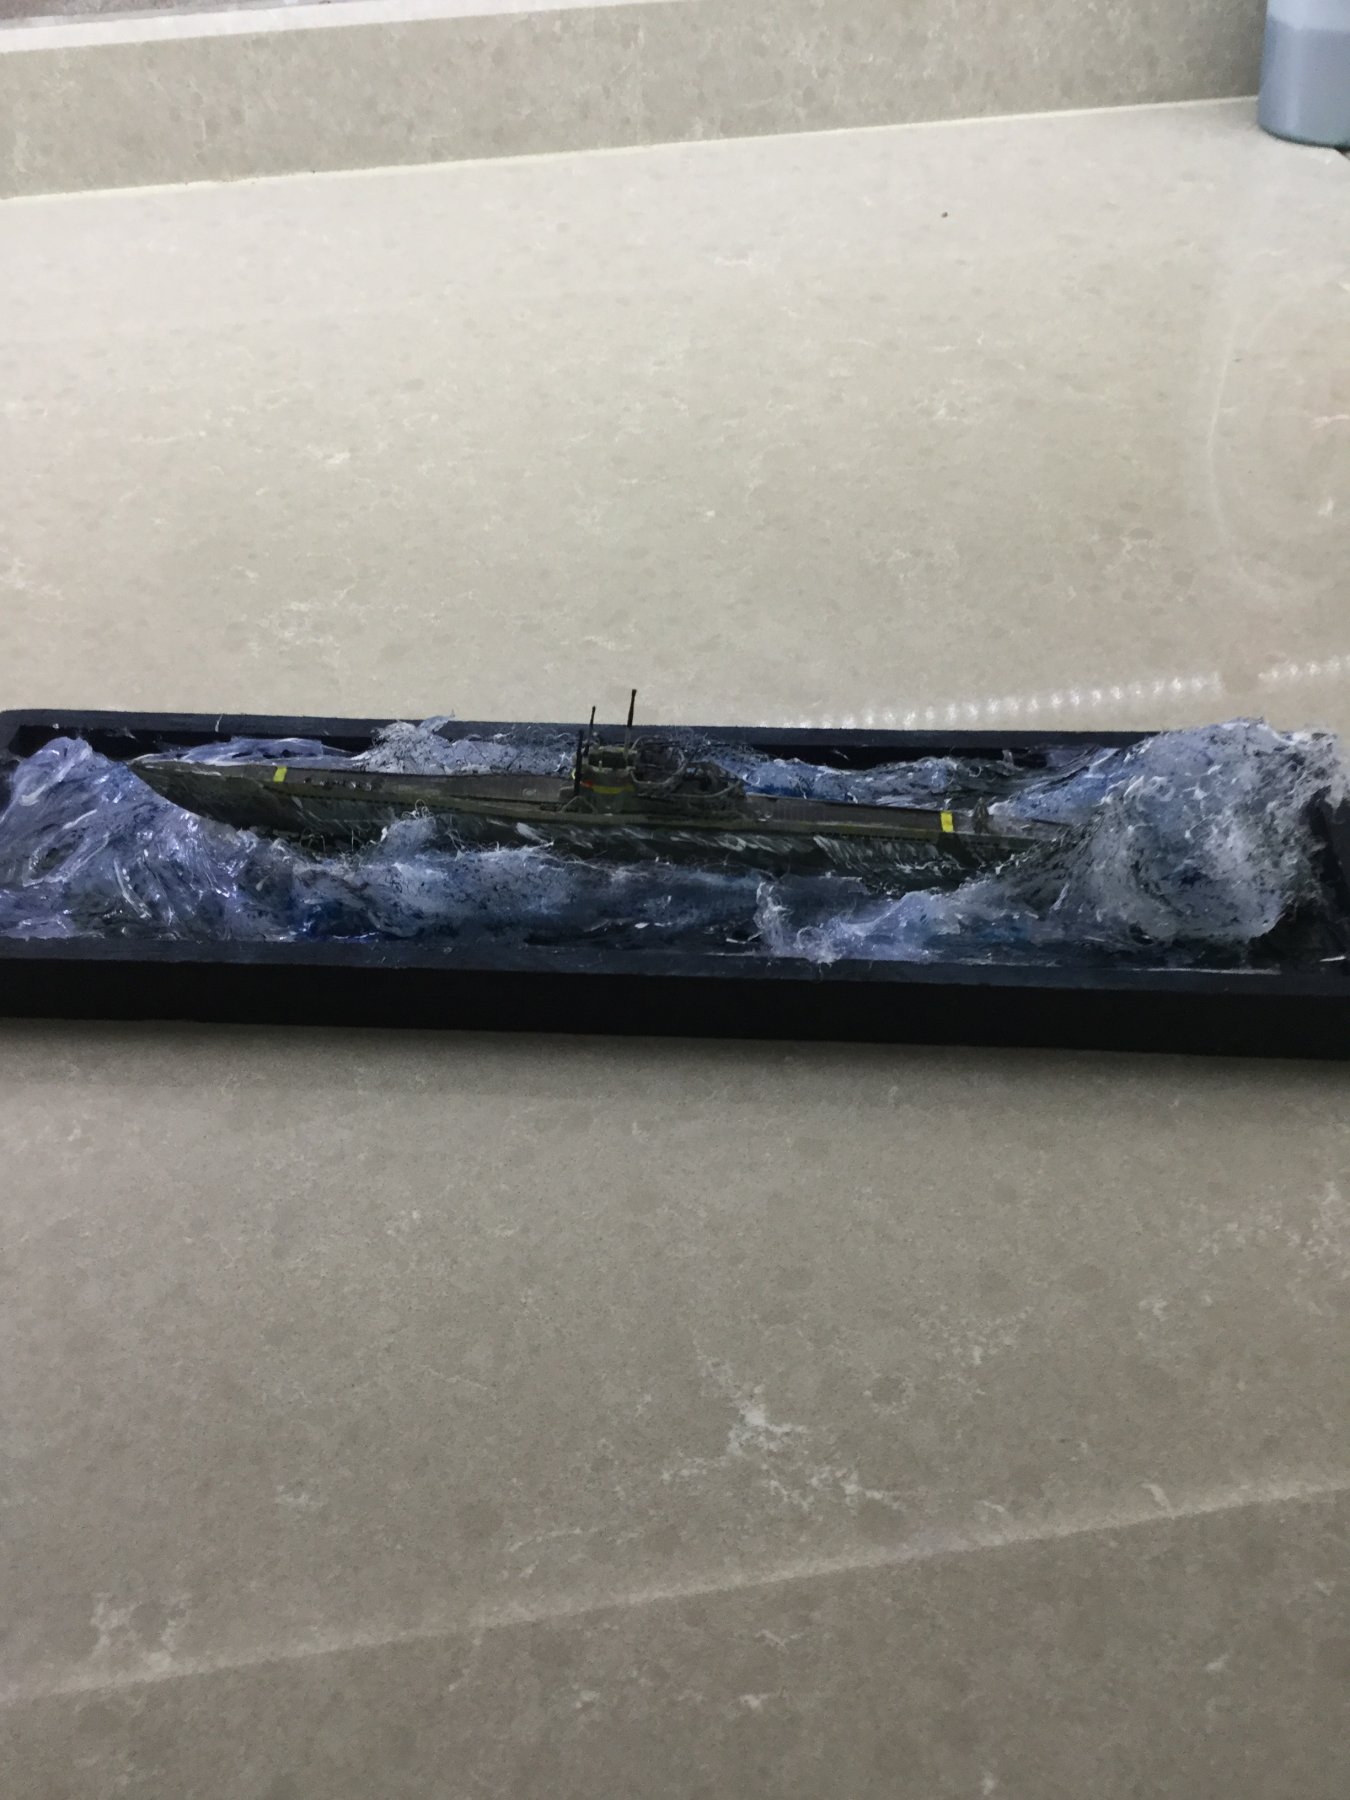
Hi Guys, thank you so much for all your kind remarks. My wife is getting along nicely thank you. She has had M.S. for the past 35 years and she is undergoing some new treatment which will not cure it but we are hoping that it will stop it from getting much worse. As a consequence I'm not taking on any new big projects for the time being. I had planned to do a Victory but that is very much on the back burner now. Consequently I'm trying my hand at some Dioramas, which keep me occupied and don't take up too much time. One or two of you have been asking for photos with apologies to the administrators but these will be the last posts by me on here,
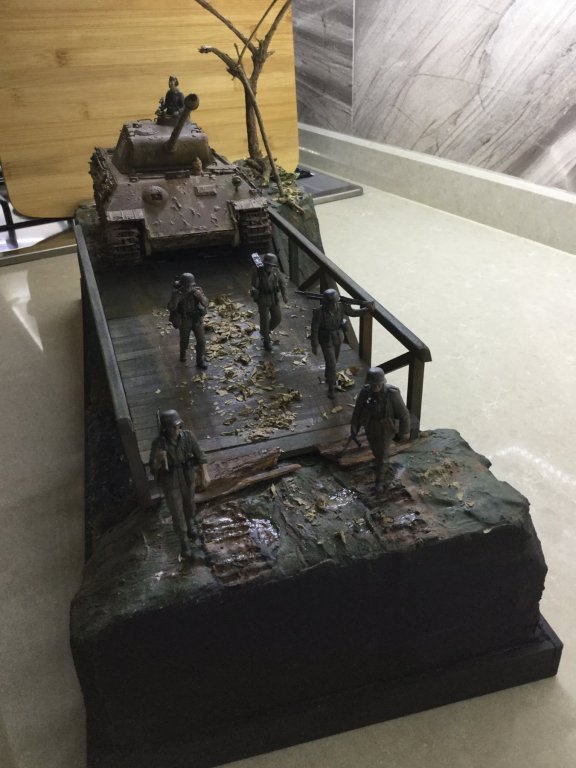
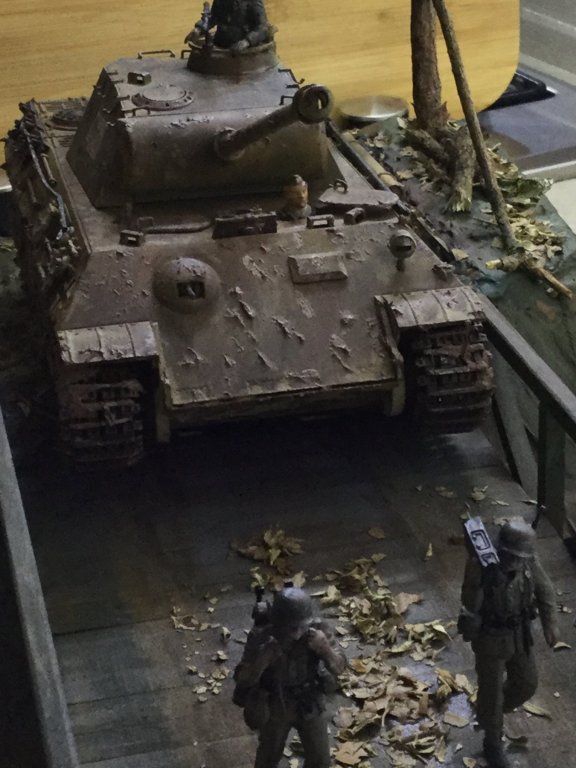

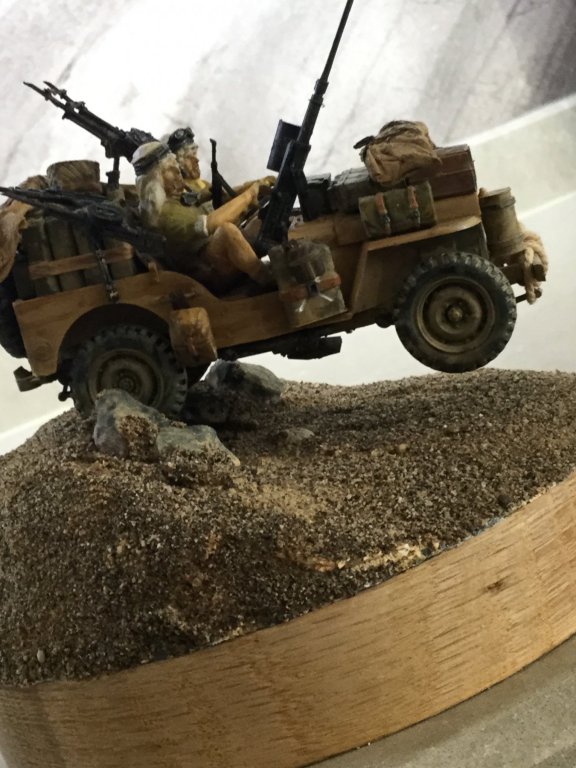

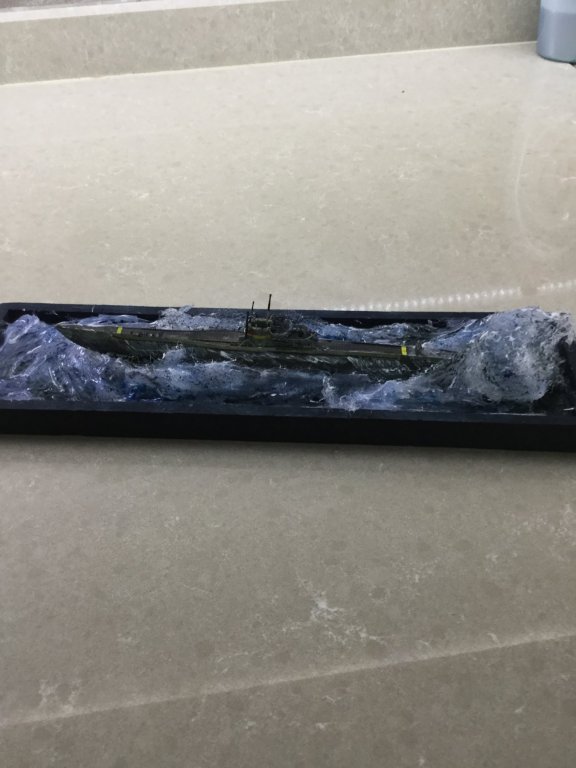
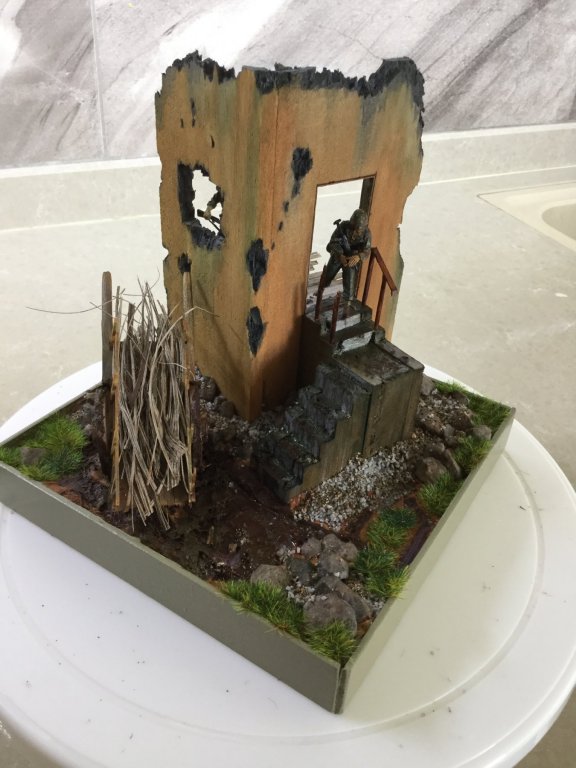

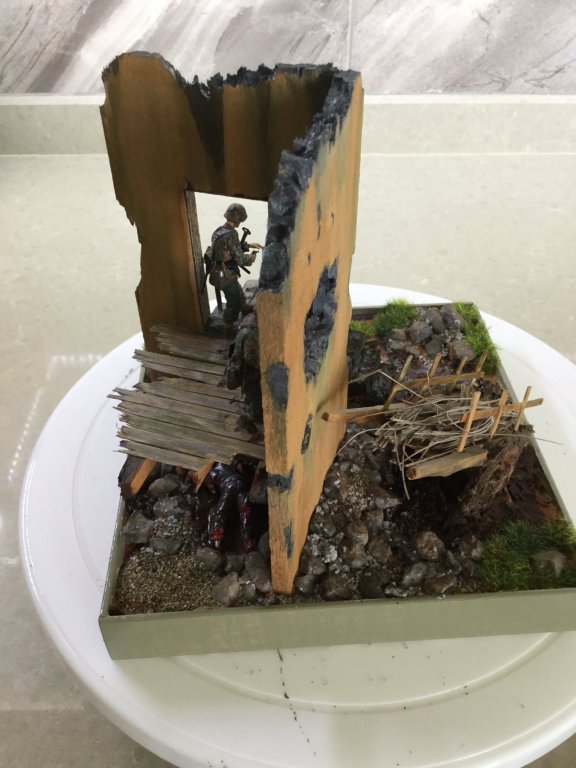 so here goes. The last ones are still work in progress but the others are complete. Thank you guys for all your support.
- mtbediz, GrandpaPhil and Fernando E
-
3
-
1 hour ago, Warnerade said:
This is a fantastic piece, and definitely is now on my “todo” list, sorry to hear about the wife.
Thank you you're very kind.
-
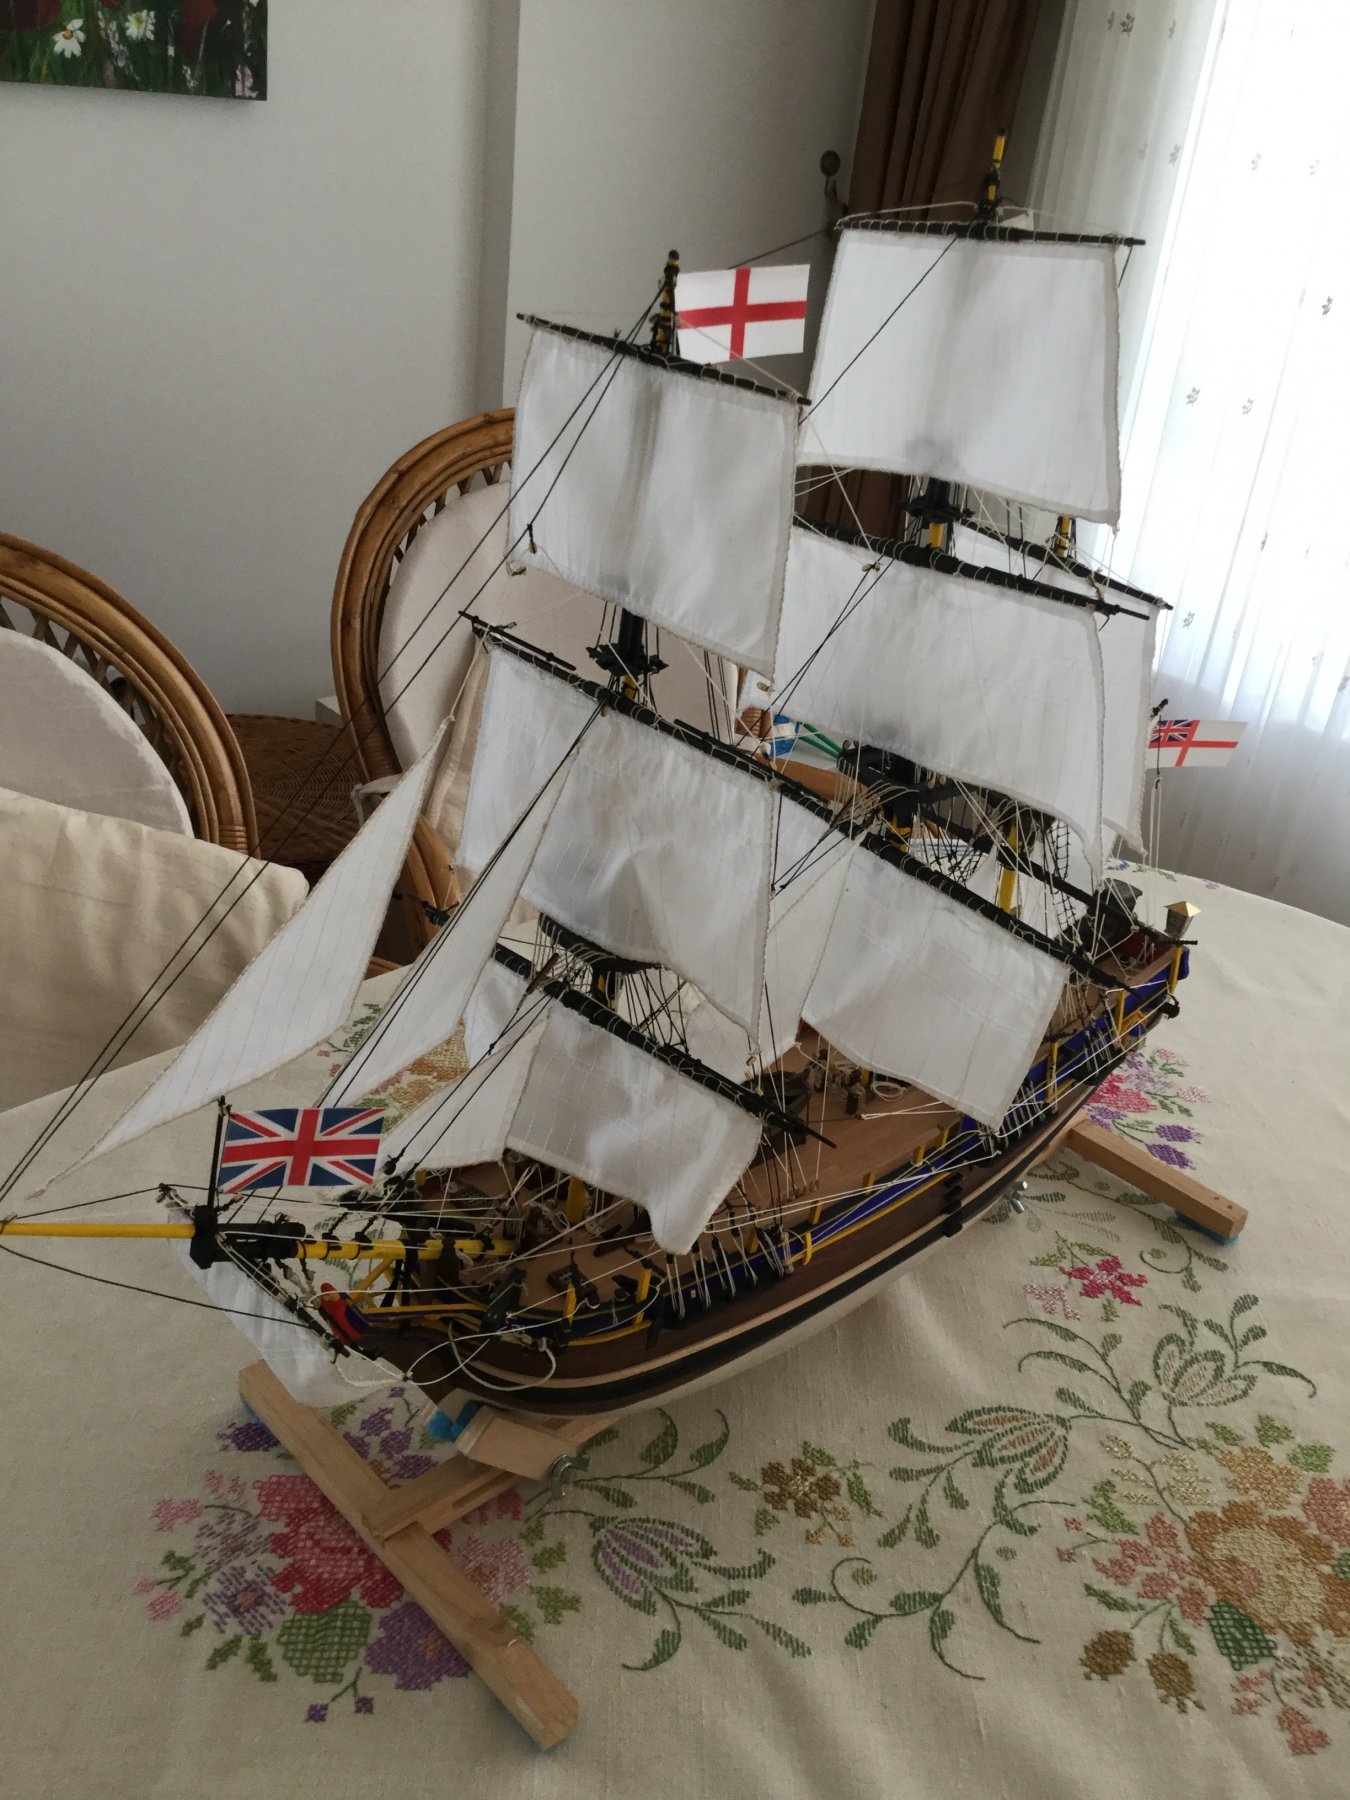
Hi guys I had a bit of a nightmare as I've had to spend so much time looking after my wife and travelling back and forward to various hospitals so I haven't been posting in my log as I should but I have finally completed my Bounty. Here are my final photos

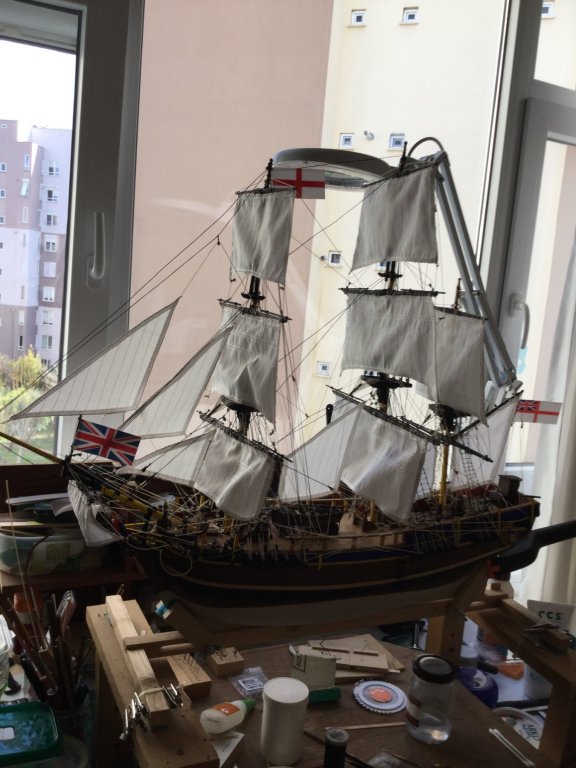
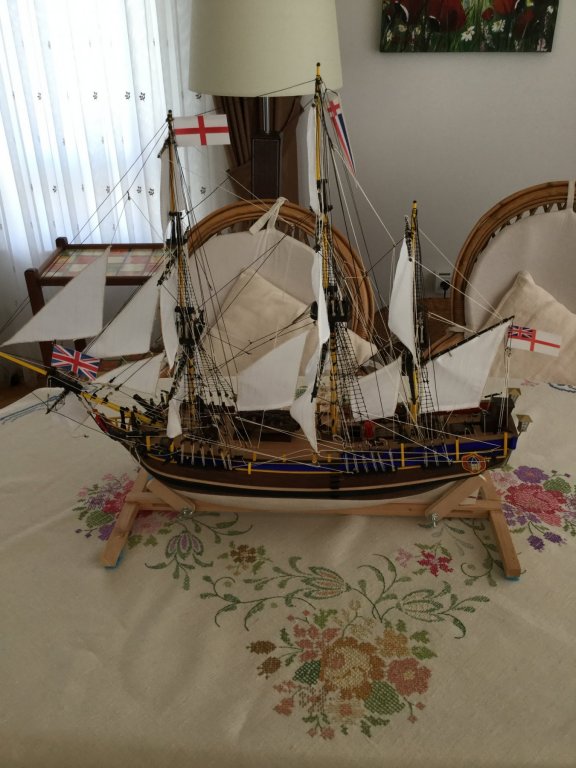
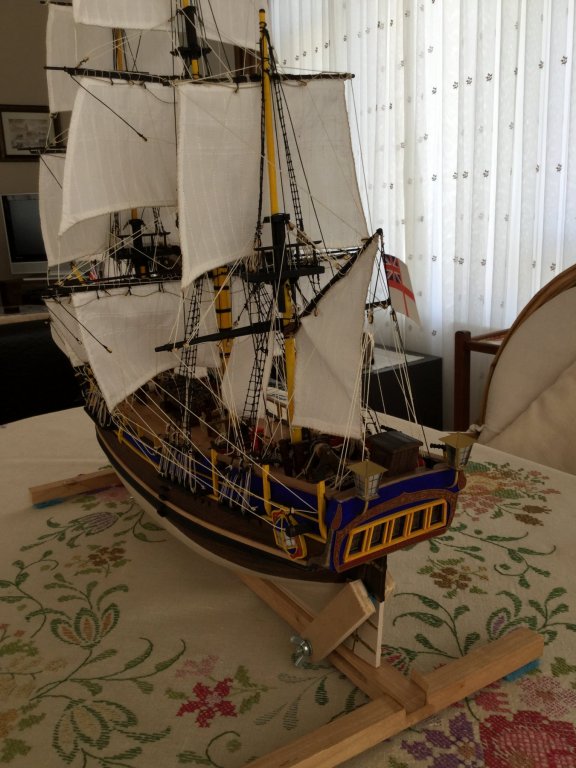

Please forgive the lack of detailed progress pictures. All I have to do now is make a base and a glass or perspex cover. Thank you all for following my build, i've thoroughly enjoyed doing it over the past two and half years. I have to say that the encouragement and advice gained from this site has been invaluable, thank you.

- GrandpaPhil, mtbediz, Fernando E and 2 others
-
5
-
Stunning work Mustafa, well done on completion. I look forward to your next project.
- popeye the sailor, CDW and mtbediz
-
3
-

.thumb.jpeg.0e5acc7a309acc6c18507cedf8fde0d6.jpeg)
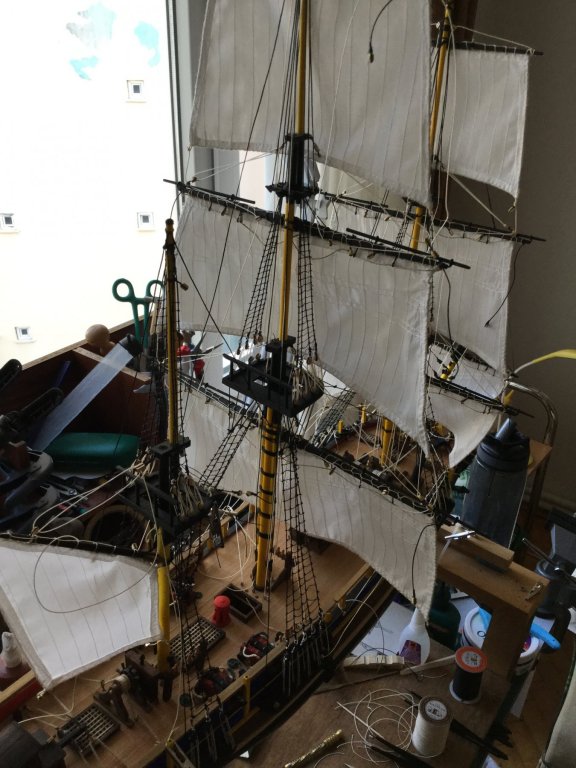
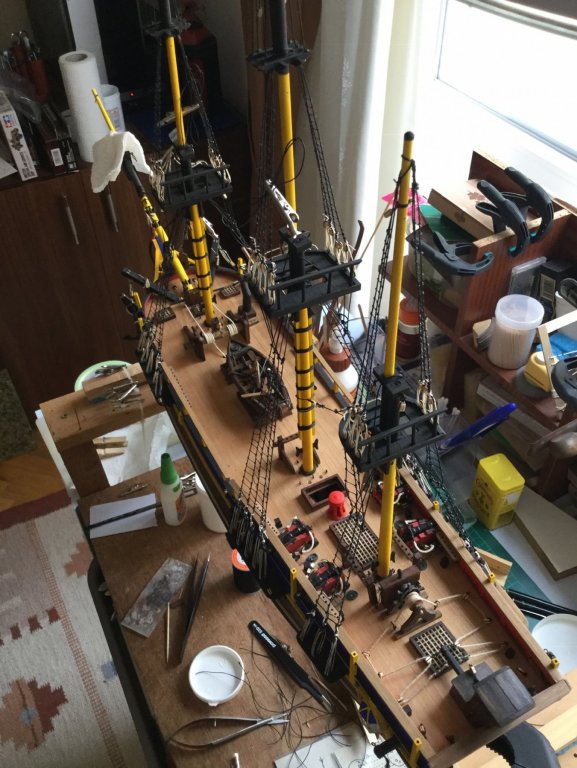
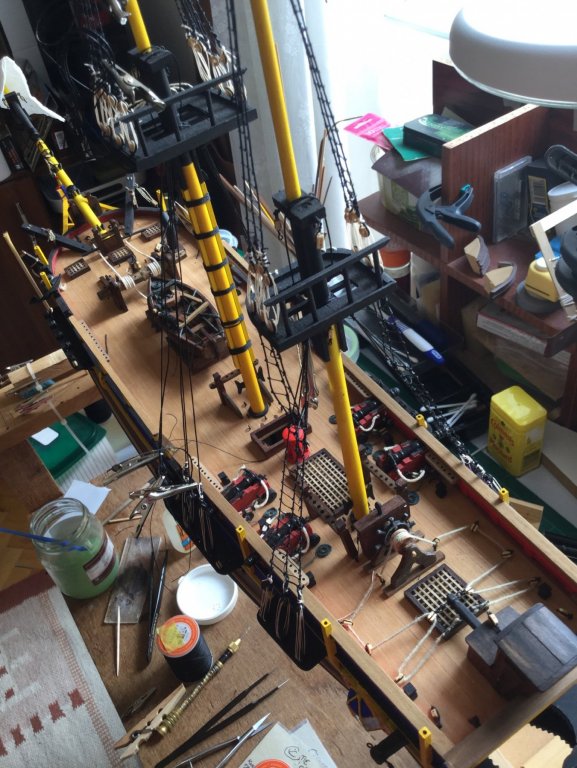
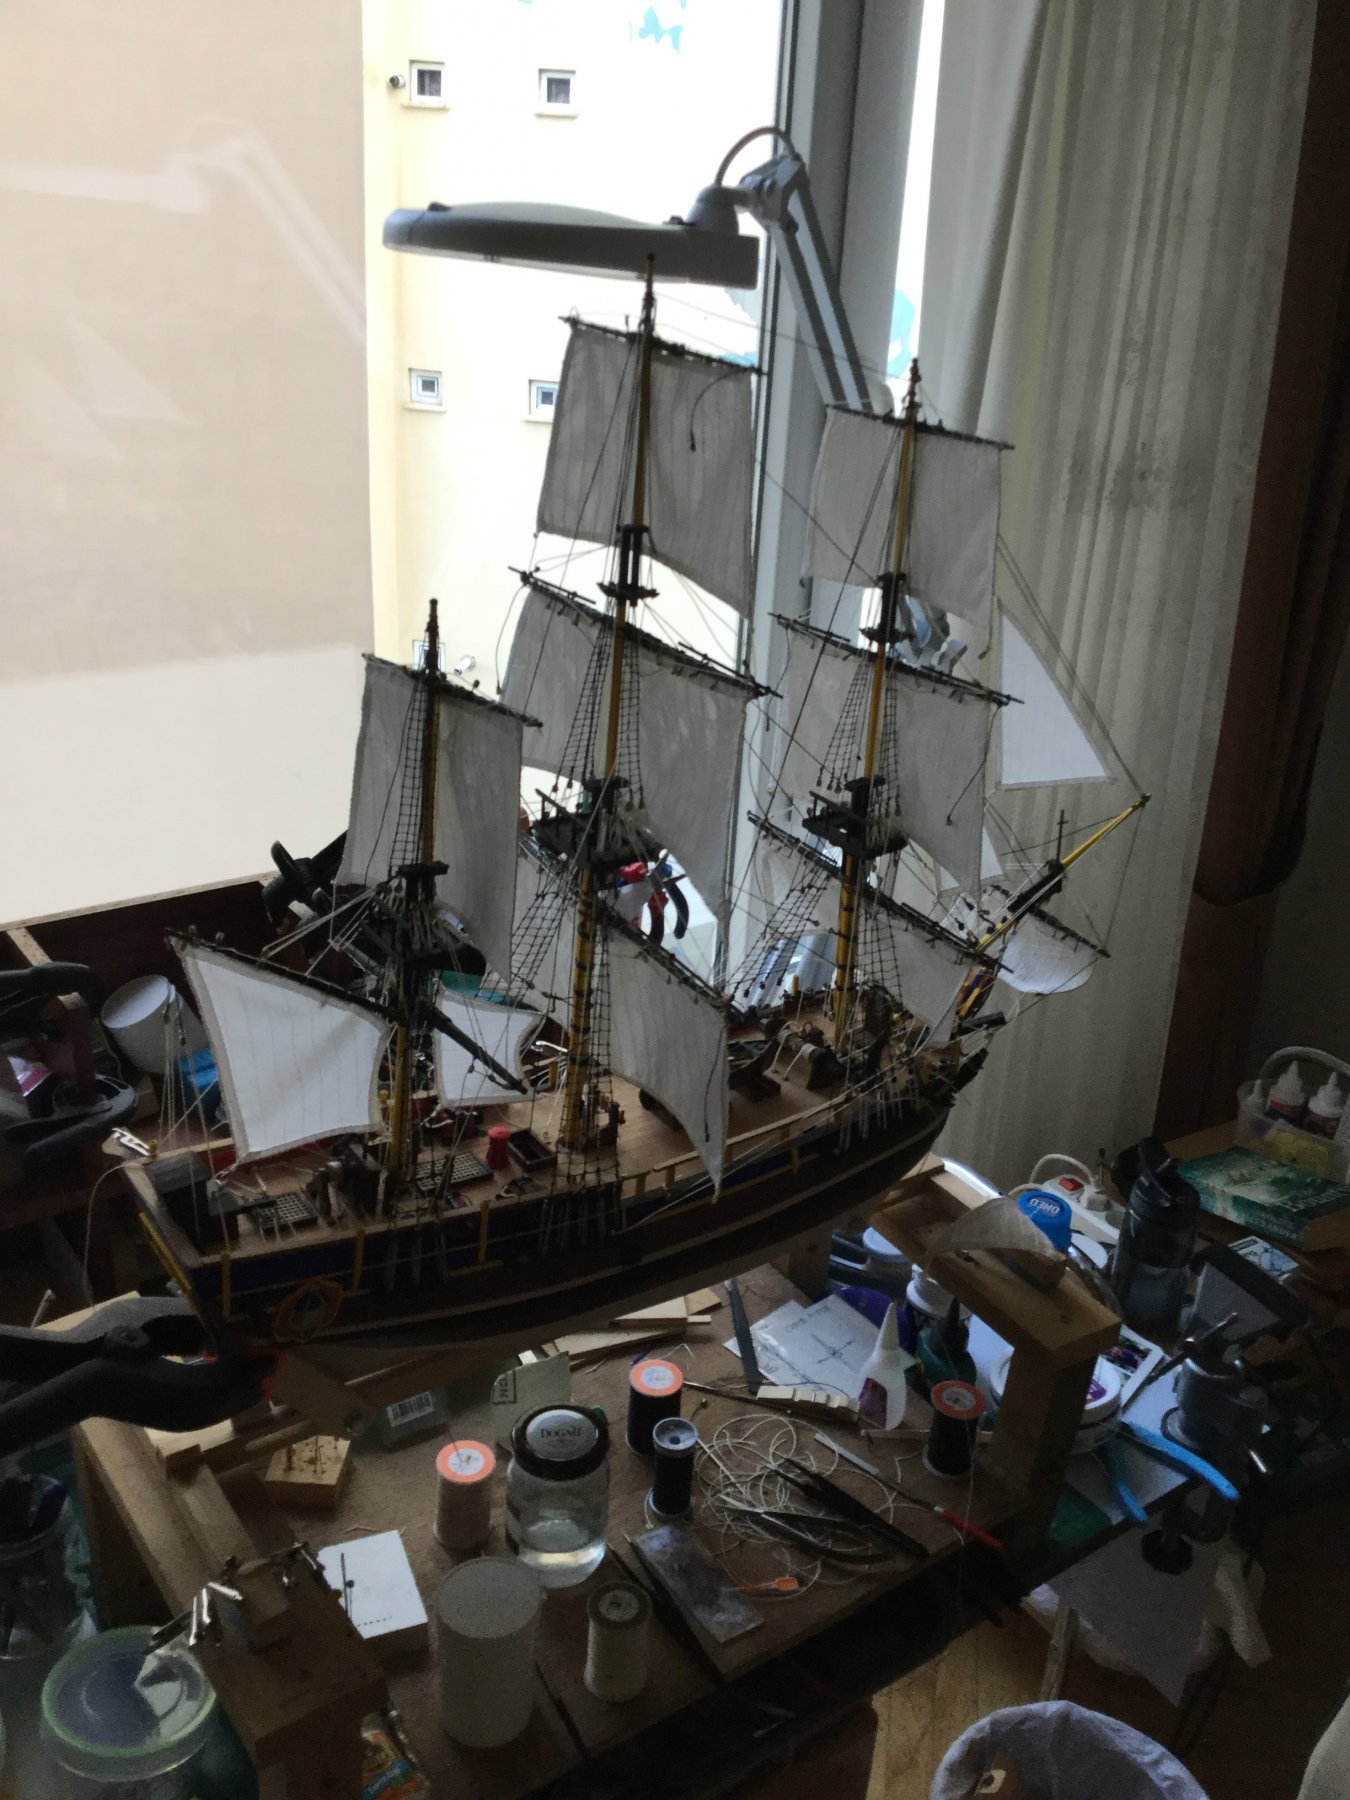
.thumb.jpeg.804918983bfb720f7b88a8c10e6bccdc.jpeg) Hi Guys, that was a long break and I've returned refreshed. I've managed to complete all the ratlines and most of the standing rigging but I've been sidetracked by building WW2 dioramas which I'm greatly enjoying. So I have two benches working at the same time . One with the Bounty and the other dioramas. Anyway here is where I'm at at the moment. I'm clearly out of practice at inserting photos and they are in the wrong order, but I'm sure that you get the picture.
Hi Guys, that was a long break and I've returned refreshed. I've managed to complete all the ratlines and most of the standing rigging but I've been sidetracked by building WW2 dioramas which I'm greatly enjoying. So I have two benches working at the same time . One with the Bounty and the other dioramas. Anyway here is where I'm at at the moment. I'm clearly out of practice at inserting photos and they are in the wrong order, but I'm sure that you get the picture.

- mtbediz and Fernando E
-
2
-
Apologies to those of you that follow my progress but I'm having a break at the moment. Having tried to do my ratlines in 30+degrees with sweat running down my face and not really enjoying it, I've decided to wait until the weather cools down. Have a great summer to you all.
- OrLiN and Fernando E
-
2
-
-
10 hours ago, Steve 12345 said:
Buetifull work Nigel I still check in from time to time and your progress is fantastic
Thanks Steve, good to hear from you. Progress is slow but I'm getting there. Doing ratlines at the moment and have already started again twice!! I keep telling myself I'm learning, albeit the hard way.
-
On 19/03/2018 at 5:47 PM, OrLiN said:
The only problem you may have is tensioning everything and from what I can see you should
OMG you were right OrLiN !! The top shrouds presented me with the biggest headache but I've got round it I think with a little bit of cheating (apologies to the purists). I decided to pin the shrouds in the holes with brass pins, wrap them with CA underneath and the cut them off. Seems to have worked thus far, here are the photos -
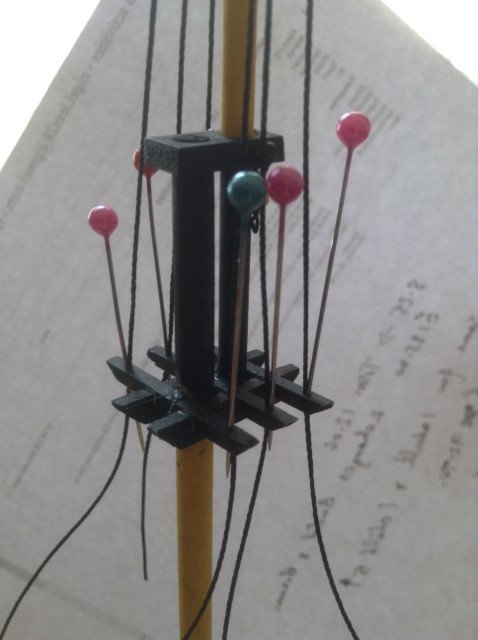
I'll blacken off the pin tops when they are all done.
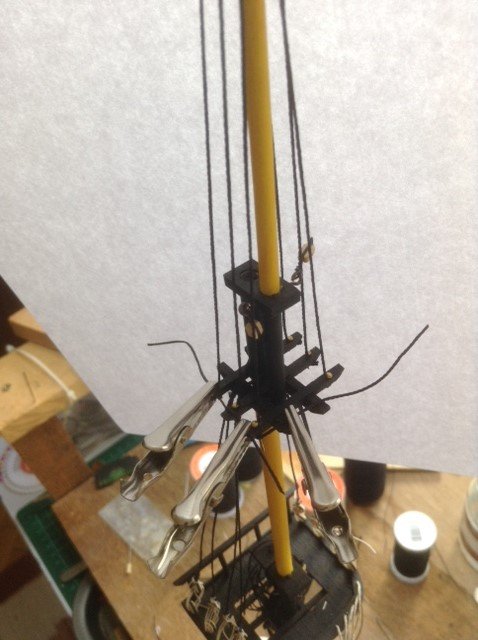
I've progressed with the main mast shrouds and deadeyes and the air around here has been decidedly 'blue' I can tell you. However, I've learnt such a lot and as they say next time I hope they will look better -
I took this photo as it looked the best then realised the third one from the left was wrongly tied up - Doh!! It's now been corrected.
When I look at these close-ups I just want to tear it down and start again, but I'm taking the pragmatic view that I can only get better and hopefully I'll look on this with a smile in a few years time.
Thank you for all the likes and comments
- Vinnie, Fernando E, OrLiN and 2 others
-
5
-
On 26/03/2018 at 1:27 PM, Vinnie said:
Speaking of paints if anyone could tell me what they think of airbrushing compared to paintbrushing I’d be delighted to hear? If it is a better quality paint job I’d consider it for my next model.
Beautiful work as ever Vinnie and welcome to your new crew member. Like you I brush painted my hull and after I looked at a number of other logs on here and the quality of airbrushed paint looked far superior. So I persuaded my son to buy me an airbrush compressor for my 60th birthday and it's wonderful. It took a little practice but the results are great. Also I use it to give the whole model an acrylic varnish which protects it and doesn't affect the colour. It wasn't expensive - around £80 I think and then you'll need a couple of airbrushes plus cleaning kit. I would highly recommend it and if you need anymore info let me know.
-
10 hours ago, vmwilson1 said:
Leginseel,
I am also building the HMS Bounty (Constructo 1:50). I am at the rigging stage. I built out each masts by sections (Lower, top and topgallant) which included the complete construction and placement of the Mast Top and I have installed each mast. I have just completed tying off the shrouds/deadeyes to the deadeyes on each channel but I have not tied the rat lines yet nor have I done anything to the top or topgallant shrouds but plan on doing so as my next step. I have ran a few of the standing lines but I stopped to review my way ahead with the rest of the standing lines and how the running lines connect. Each time I look at these drawings, I get more confused.
Attempting to gather all the rigging information from the drawings. Constructor advised they provided step-by-step drawings (never have found step 1 or any other step) and all you have to do is follow them from beginning to end. Well I find that is easier to write but most difficult to follow. Once I get a better handle on what goes where and connects to what, I will restart my rigging…
Vic
Hi Vic, thanks for the comments and I've tried to find your log but can't find it for some reason. I'm with you totally over the Constructo rigging instructions as they are non existent and for them to say just follow the drawing is a complete cop out. Thank goodness for sites like this and YouTube. Hope all goes well with your build and I look forward to viewing your log.
- Fernando E, OrLiN and Zapto
-
3
-
22 hours ago, OrLiN said:
Good work on the masts and spars. Bold move fitting shrouds and ratlines off the ship and not in-situ.
Things are looking good.
Thanks for the comment OrLiN but I thought that trying to do as much of the rigging off the ship as possible was normal practice. Either way it seems much easier at the moment but perhaps I'll come up against a big problem later - we'll see.
-
4 hours ago, Vinnie said:
Nice job on the rigging legineel. Your Bounty is really starting to come together nicely😁...how much work was involved in your yards? Do they come mostly pre milled or do you have to sand them down from scratch?
Thank you for your kind comment. The yards took a bit of time but I cut all the pieces and did each step as a production line. I'm lucky to have a small lathe which meant that the tapering of the yards from the provided dowels was relatively easy. The actual rigging and knot tying when you've big sausage fingers like mine is pretty tricky but rewarding.
-
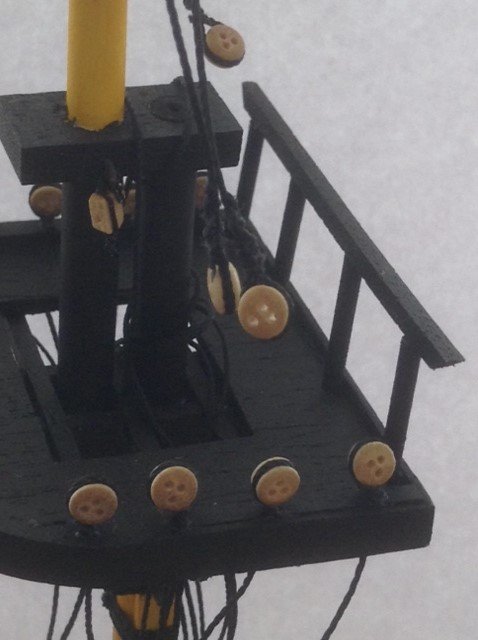
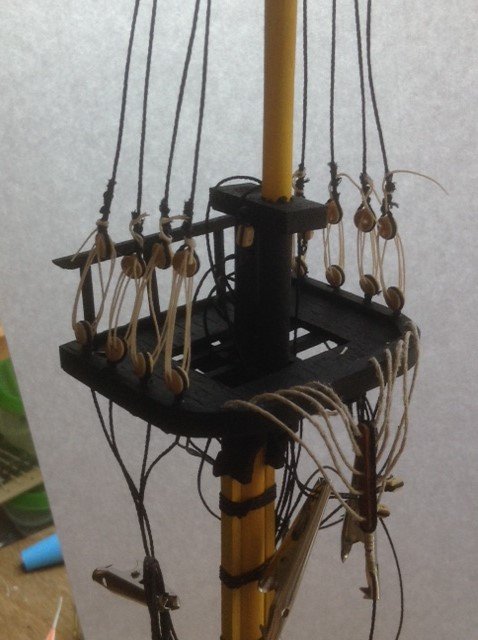
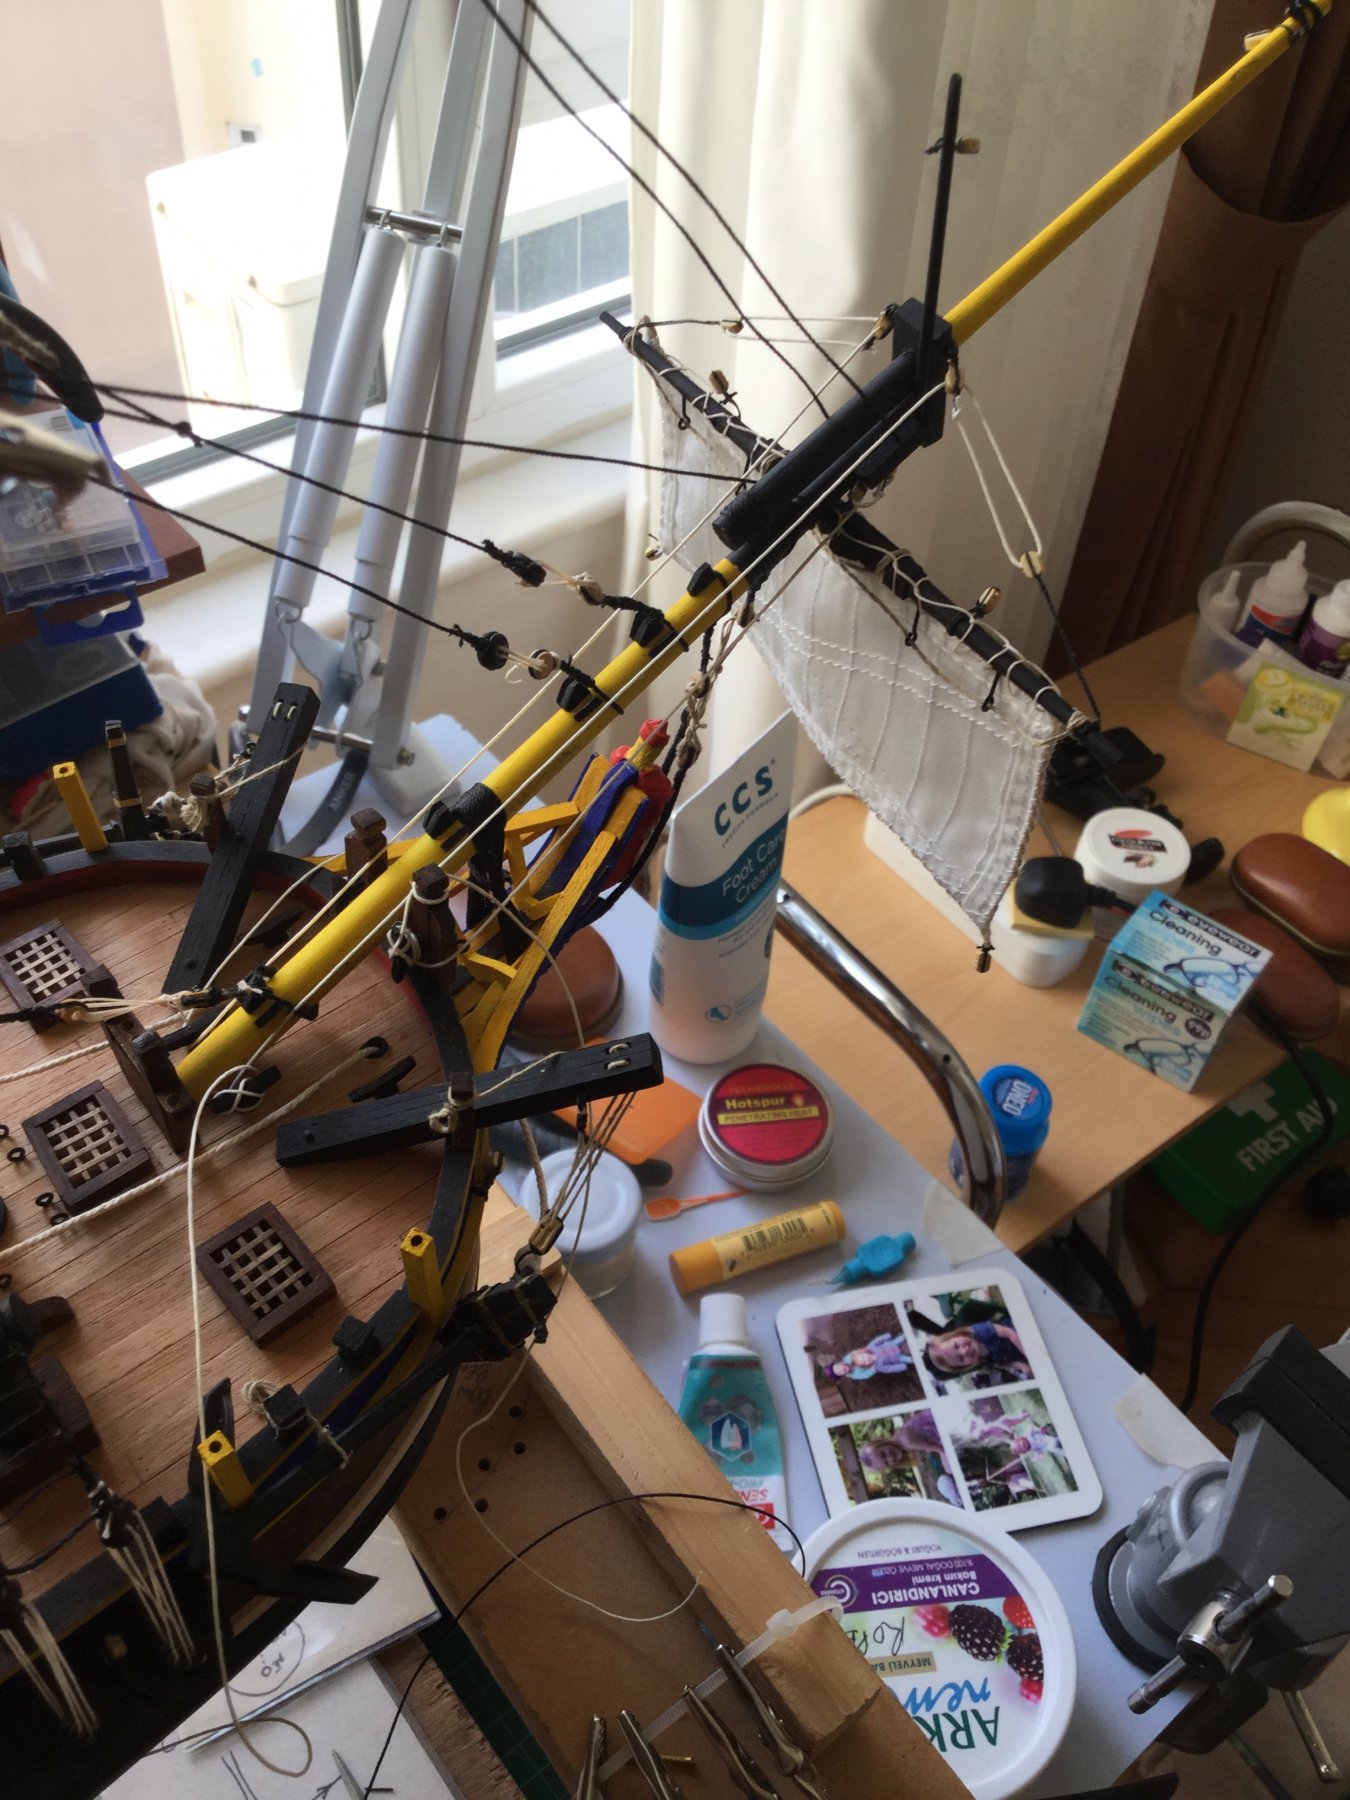
Hi Guys I've just re read my post above and realize that I've mentioned the shroud loops over the Mizzen Mast and didn't post a photo, so here goes

You see what I mean, the loop is awful and those blocks are equally embarrassing so I changed both
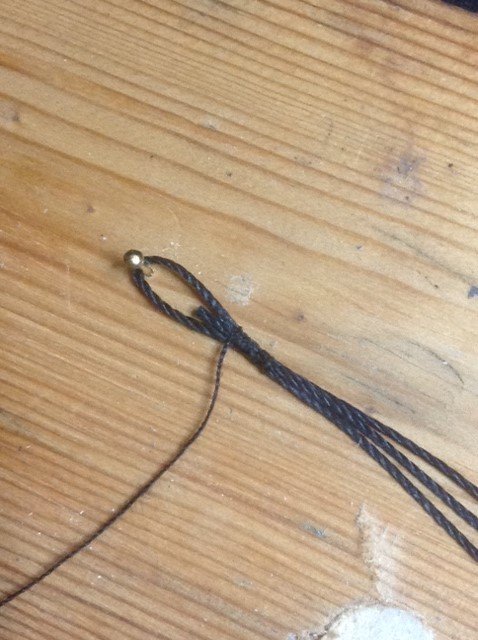
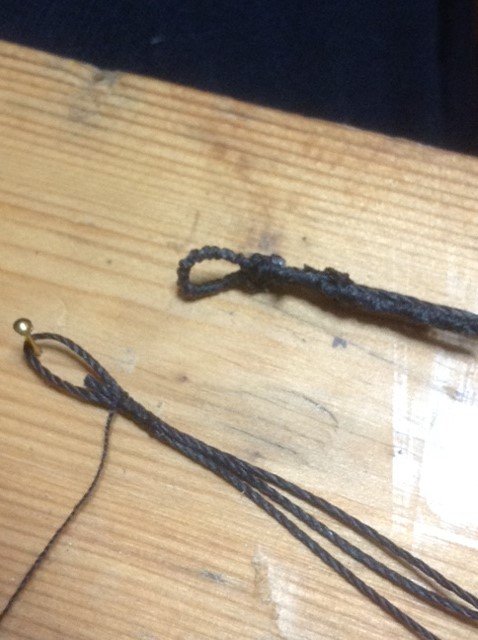
You'll see here the difference. I left the final seizing until it's placed in position.
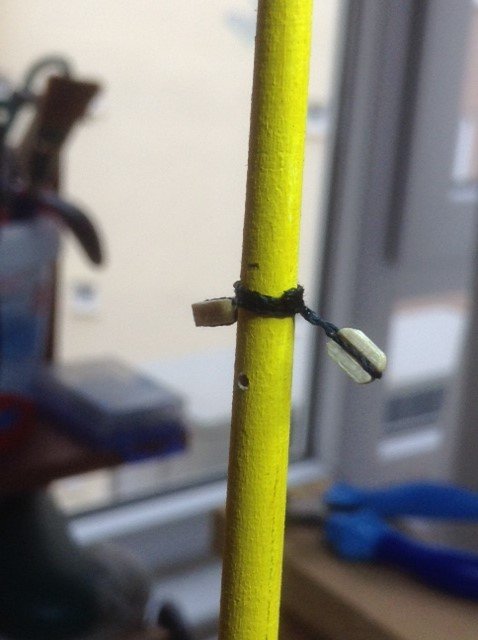
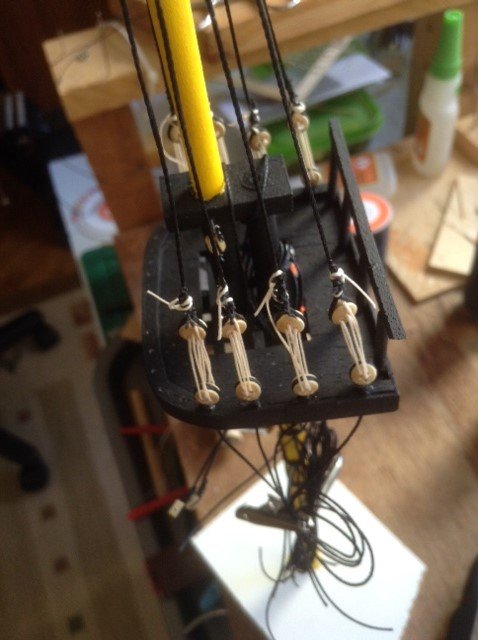
These blocks are much neater. I then re looked at the deadeye rigging, see the photos in the previous post. I wasn't happy with them so I re did them and after three attempts got the following result
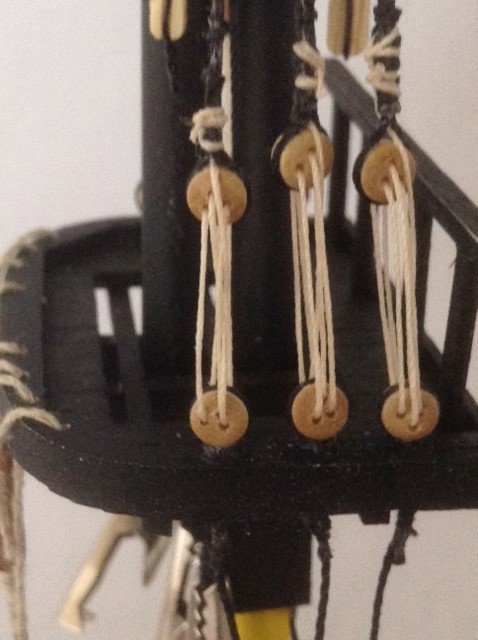
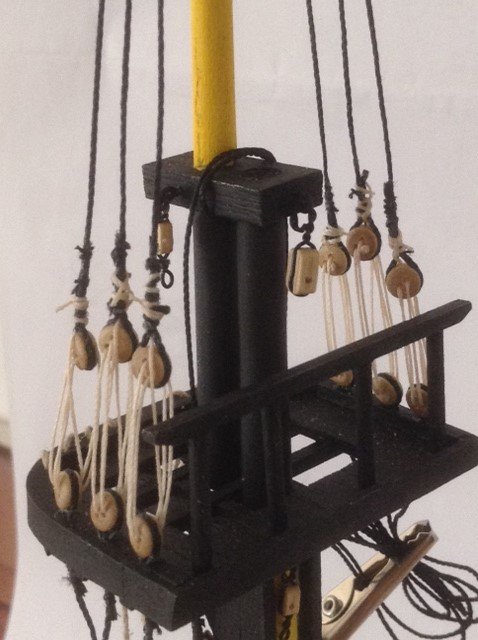
I know that the eyes aren't in alignment and the final tying off leaves much to be improved upon, but I'm happier with the result than before and I've learnt so much in the process, which is what this is all about in my book.
- Fernando E, mtbediz, CDW and 1 other
-
4
-


.jpeg.ee030ea410ff8c2991e556c3eb71288f.jpeg)
.jpeg.48c9143e8e39a5467b9fbd7f8ed25beb.jpeg)

HMS Victory 1805 by leginseel - Caldercraft - 1:72 scale
in - Kit build logs for subjects built from 1751 - 1800
Posted
Ive just realised that my photos are in the wrong plane again. Apologies I need to take Javajohns advice but after four months away everything has fallen out on the pillow!!