Keith Black
-
Posts
6,684 -
Joined
-
Last visited
Content Type
Profiles
Forums
Gallery
Events
Everything posted by Keith Black
-
 Tight and tidy, Paul. Closeups don't show a smidge of error.
 -
Welcome to MSW. Glad to have you aboard.
-
Rick, Gary, and Eric, thank you so very much for your kind comments.
- 457 replies
-
- 3
-

-
- sternwheeler
- Hard Coal Navy
- (and 1 more)
-
Marvelous job on the jolly boat, it looks really good. 👍
-
What little I've done altering 3D printed resin figures, I've found it pretty easy to remove unwanted features using an X-Acto # 11 blade. Micro Master products are great but expensive. You might try purchasing a inexpensive piece and see if you can alter it as I suggested. Then you'll have a pretty good idea of the difficulty involved.
-
The Astrolabe rigging is looking great, Bob. And the penguins are way cool.
-
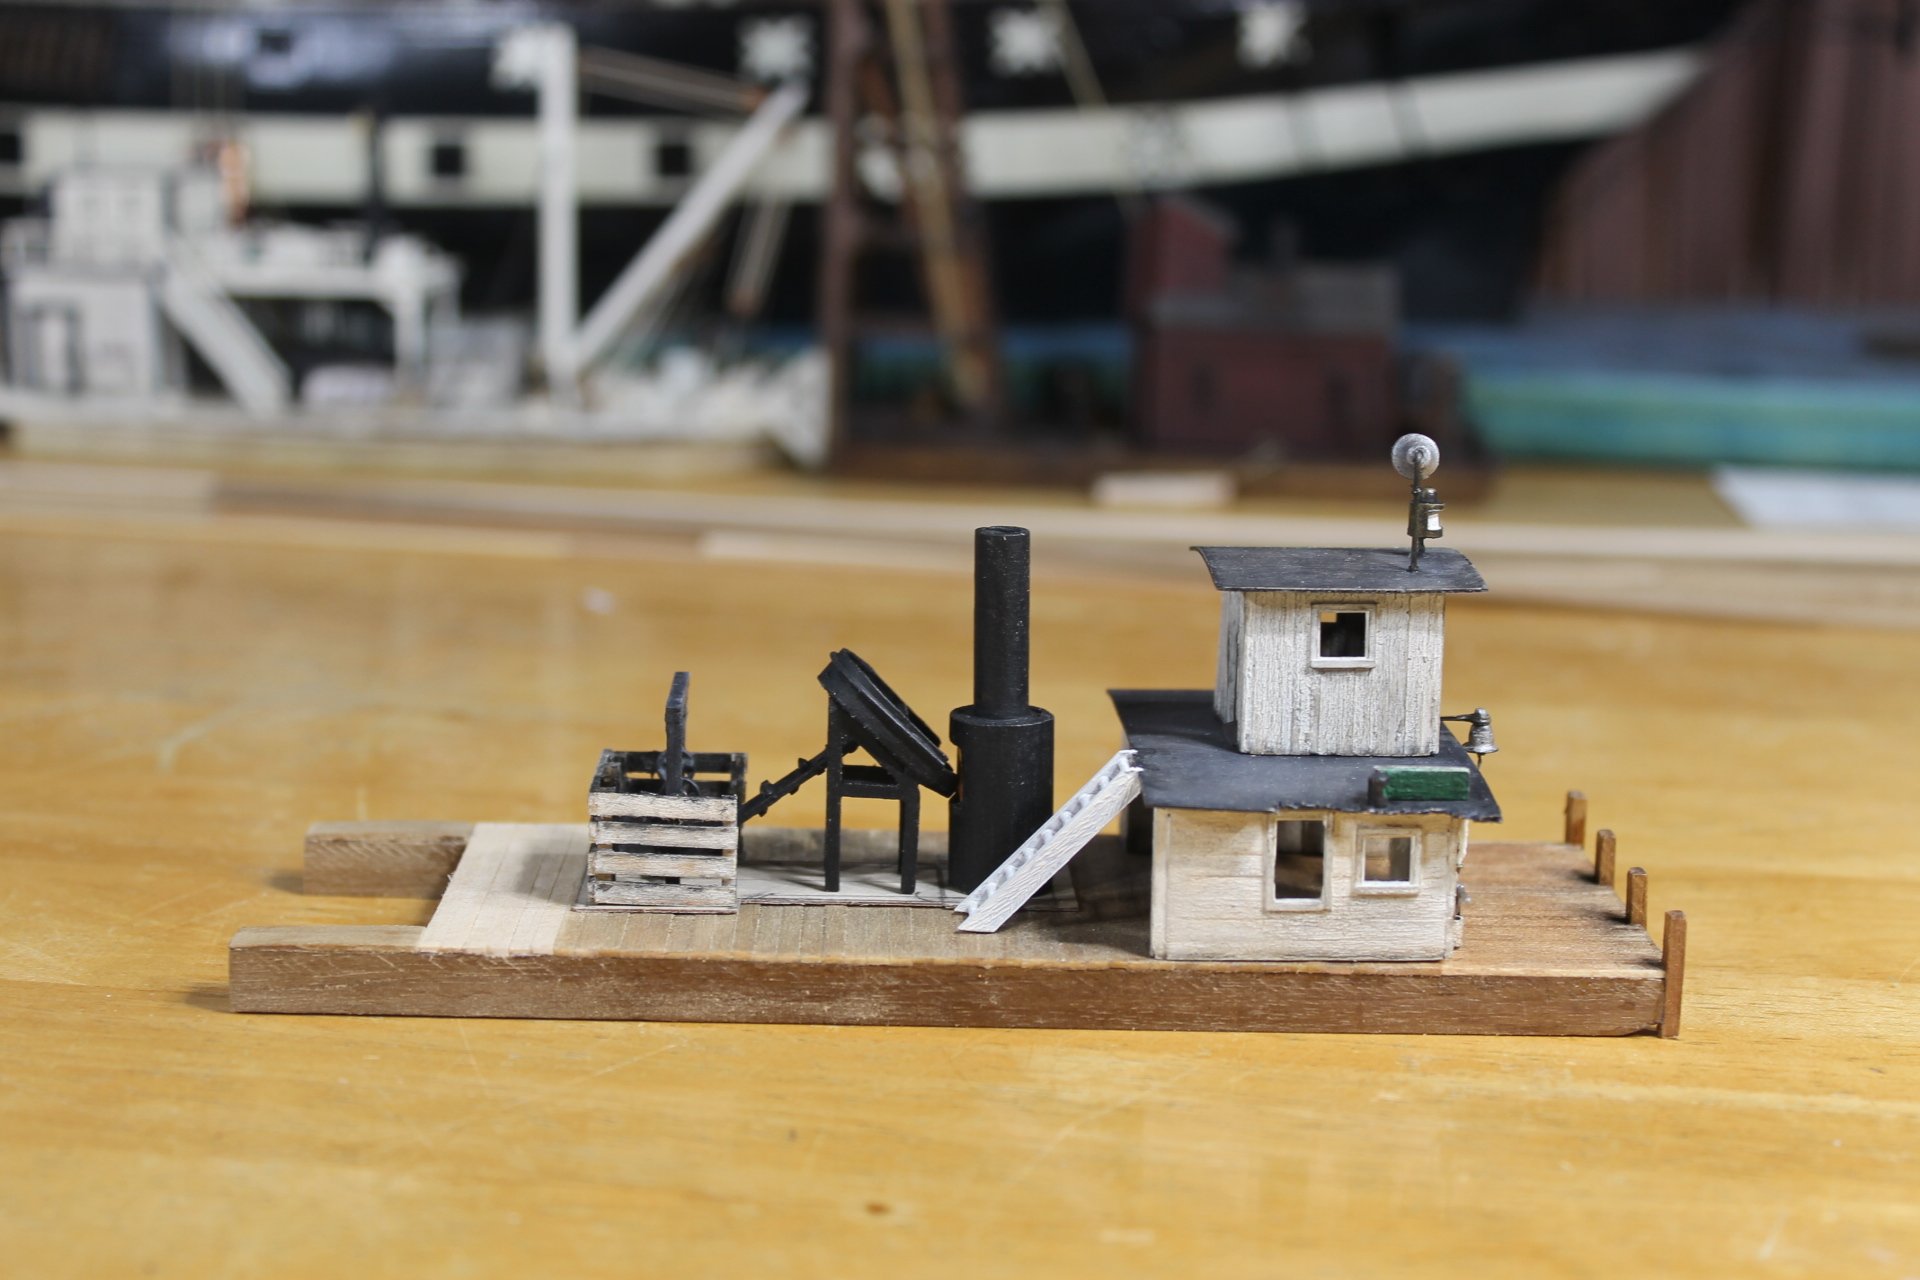
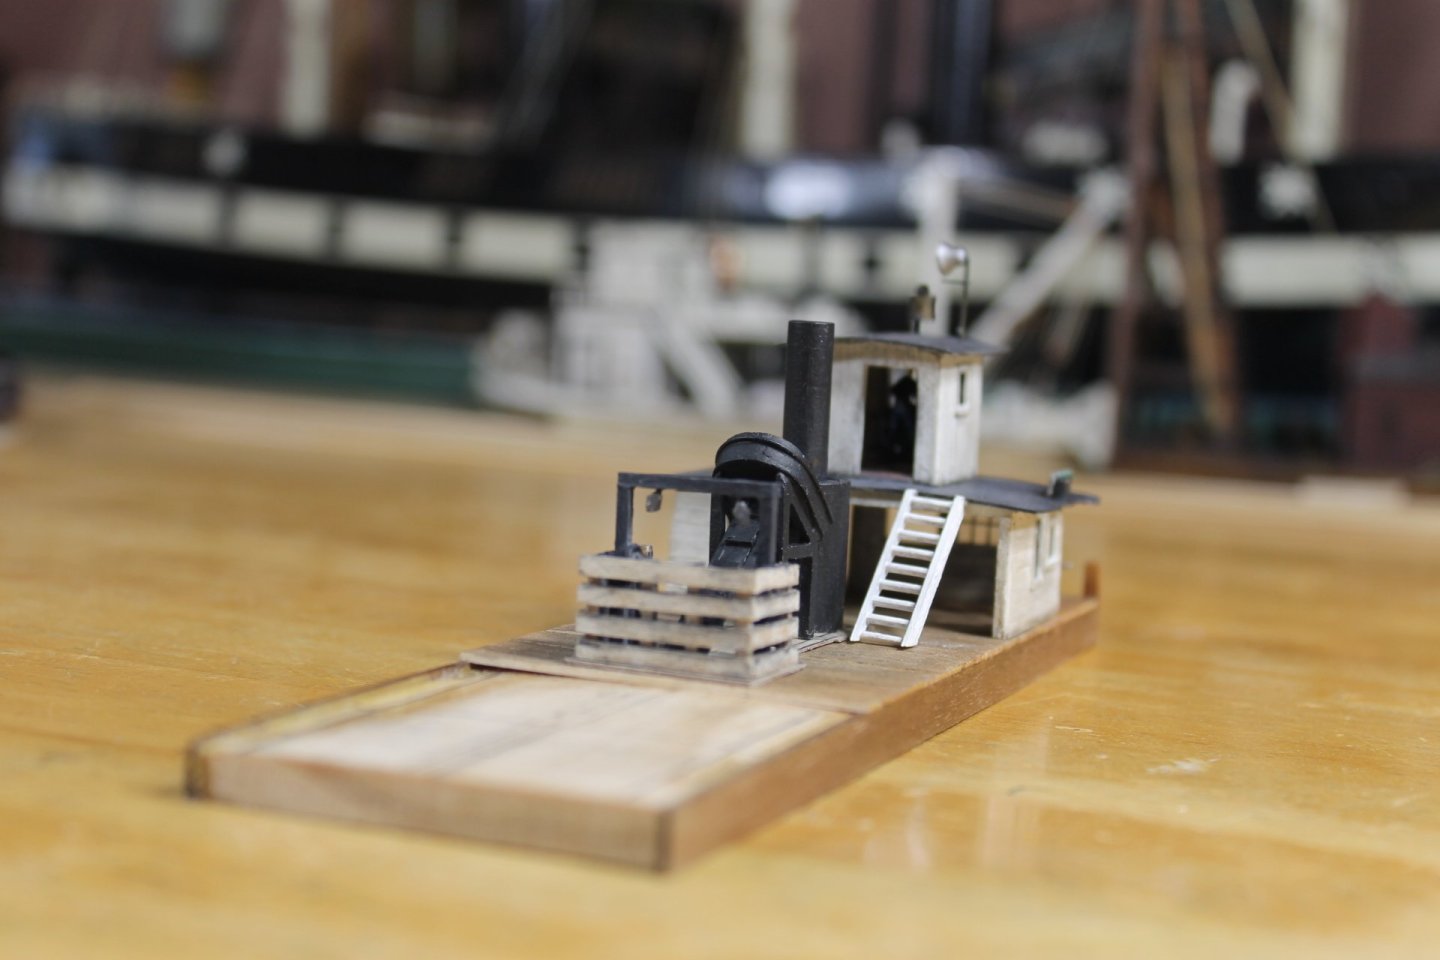
Thank you my MSW family for your kind support, it warms the cockles of this old man's heart. A quick update. After what seems forever we finally have a hull. The length is 63 feet. I'll create an access hatch for the rudder chain and shaft tunnel aft of the coal crib. The pace should quicken a wee bit getting the knows made and placed. The wheels will take some time but I look forward to getting them made and installed making this look the proper towboat. Thank you everyone for your support, the likes, and for being part of the journey. Keith
- 457 replies
-
- 16
-
-

-
- sternwheeler
- Hard Coal Navy
- (and 1 more)
-
Glen, Grant, Bob, and Ken, thank you so very much for your kind comments. Your kindness is a gift I will always treasure.
- 457 replies
-
- 5
-
-
- sternwheeler
- Hard Coal Navy
- (and 1 more)
-
That's the great thing about MSW. The willingness of of nearly everyone to share information with one another. We are the Collective.
-
Jacques, Steve, Kurt, John, Paul, Keith, Craig, and LJP, thank you so very much for your comments. Your kindness touches my heart.
- 457 replies
-
- 6
-
-
- sternwheeler
- Hard Coal Navy
- (and 1 more)
-
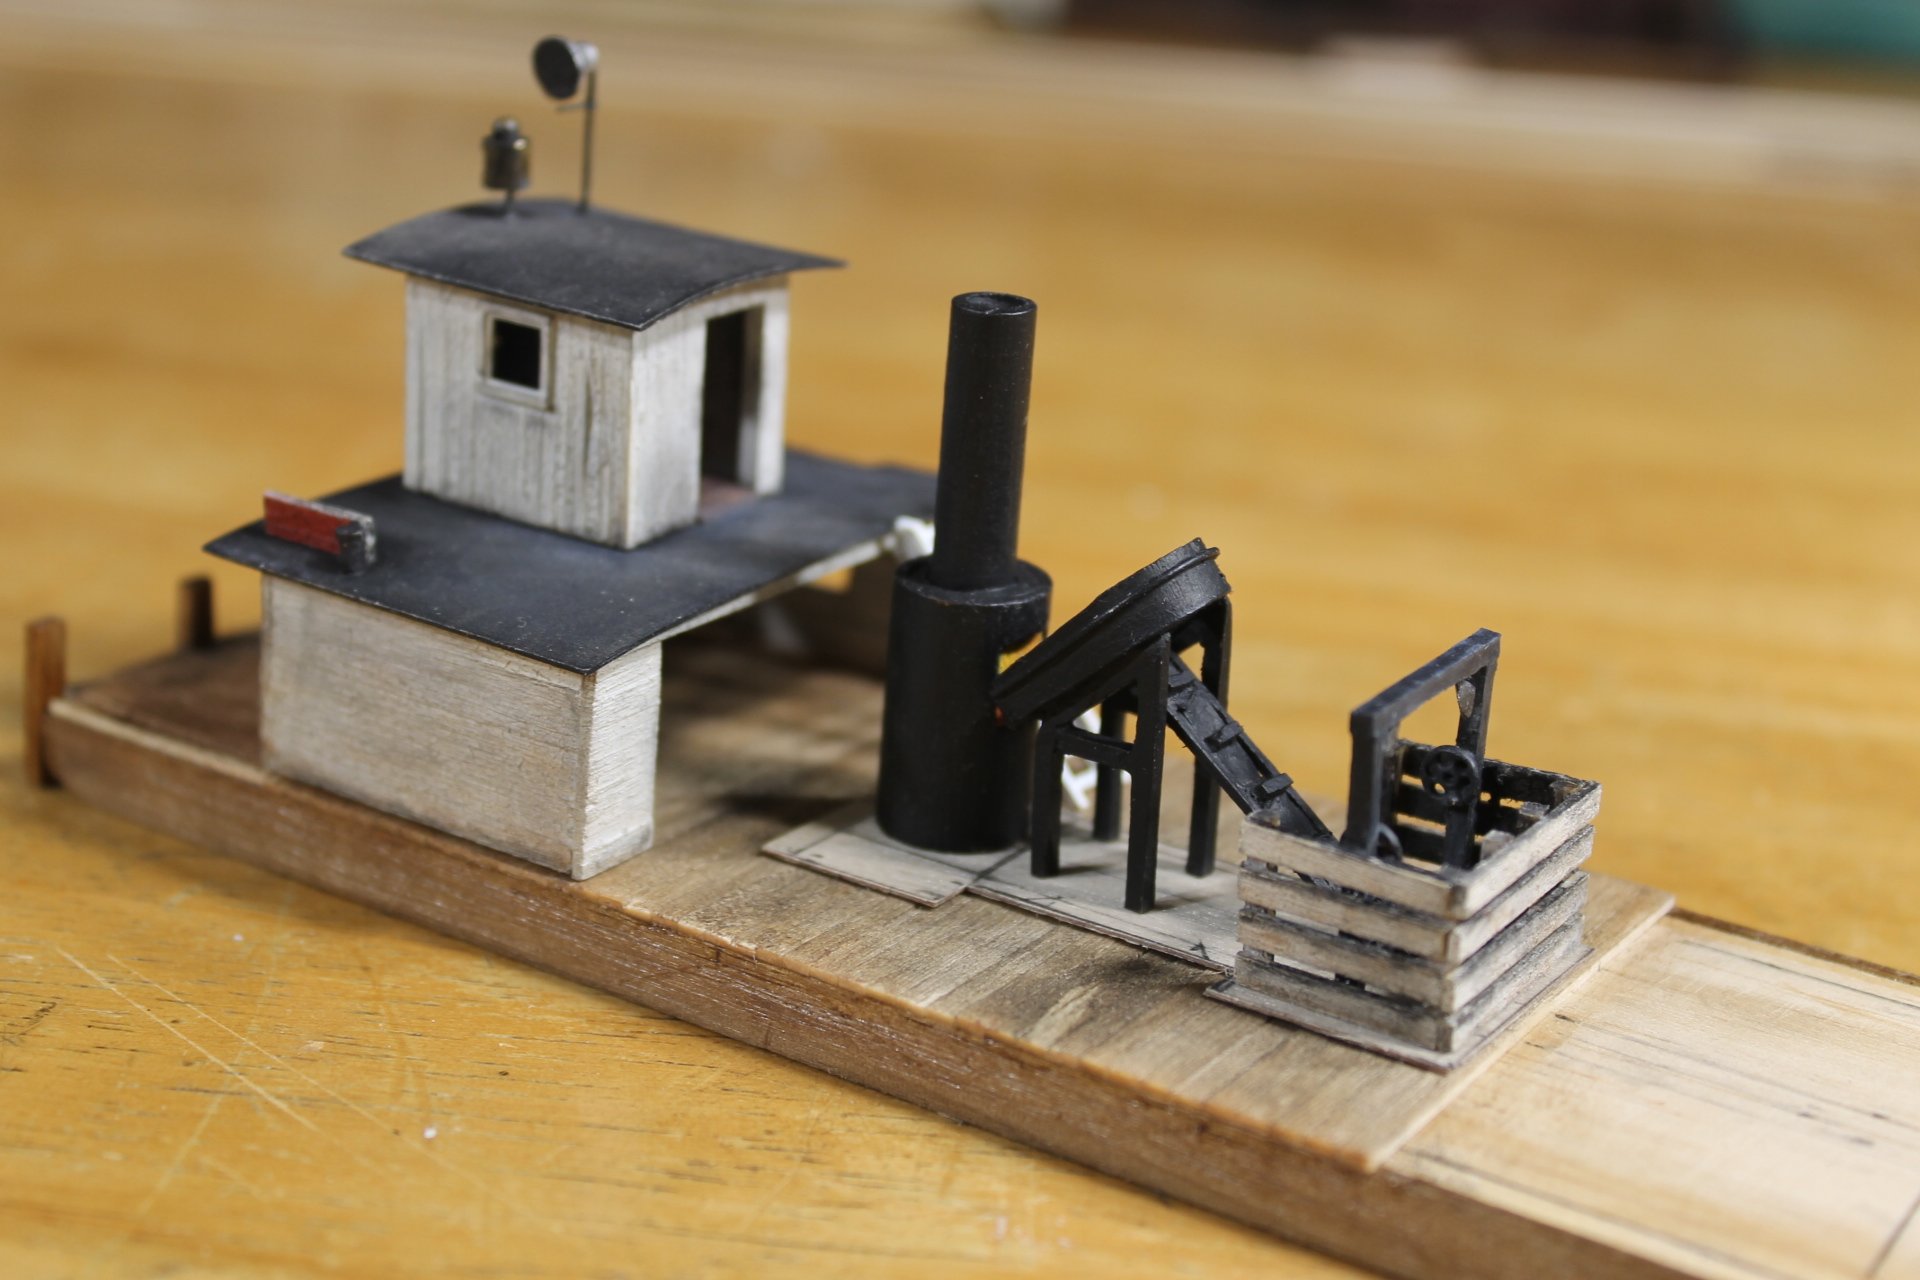
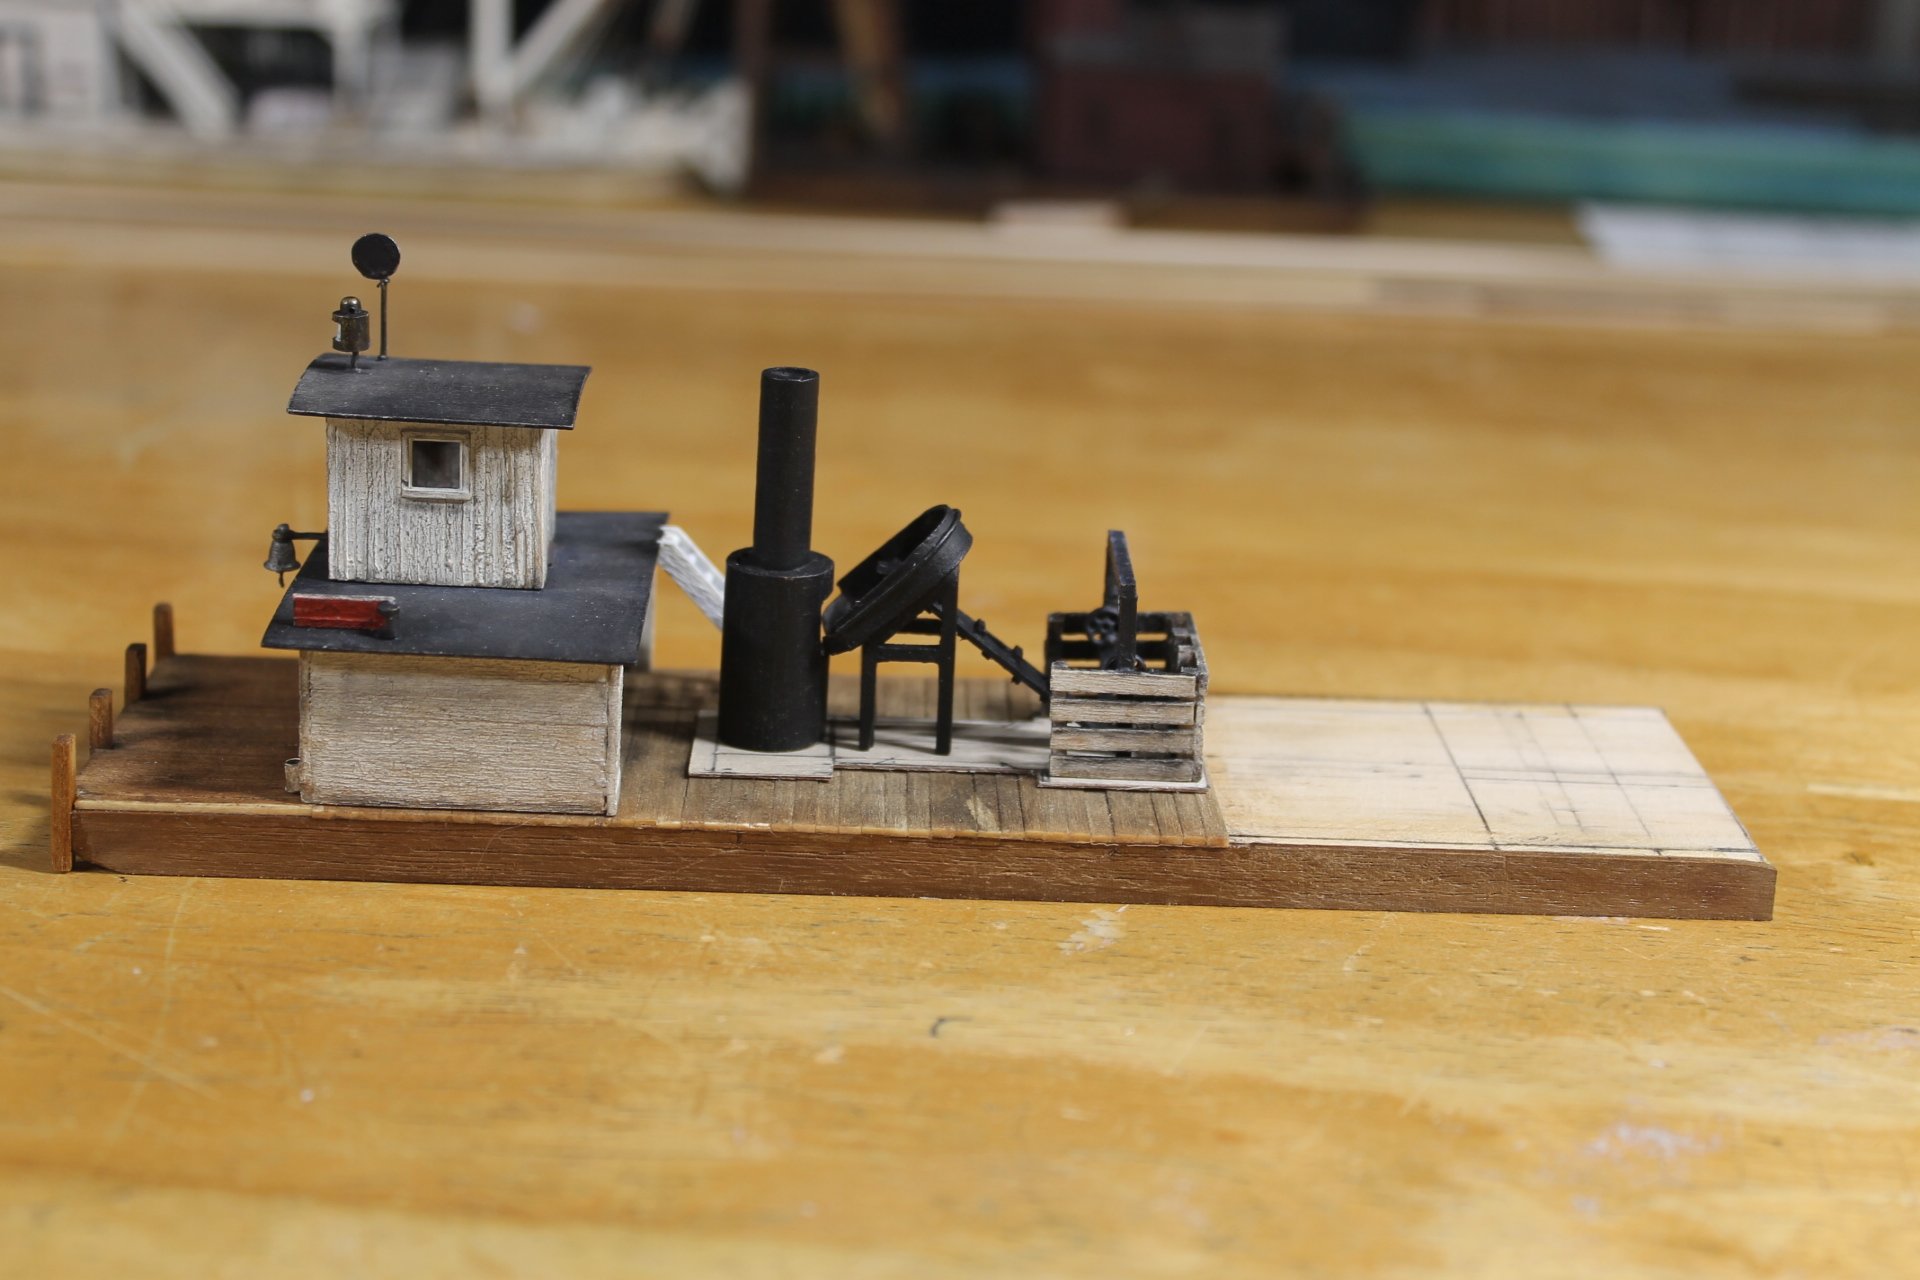
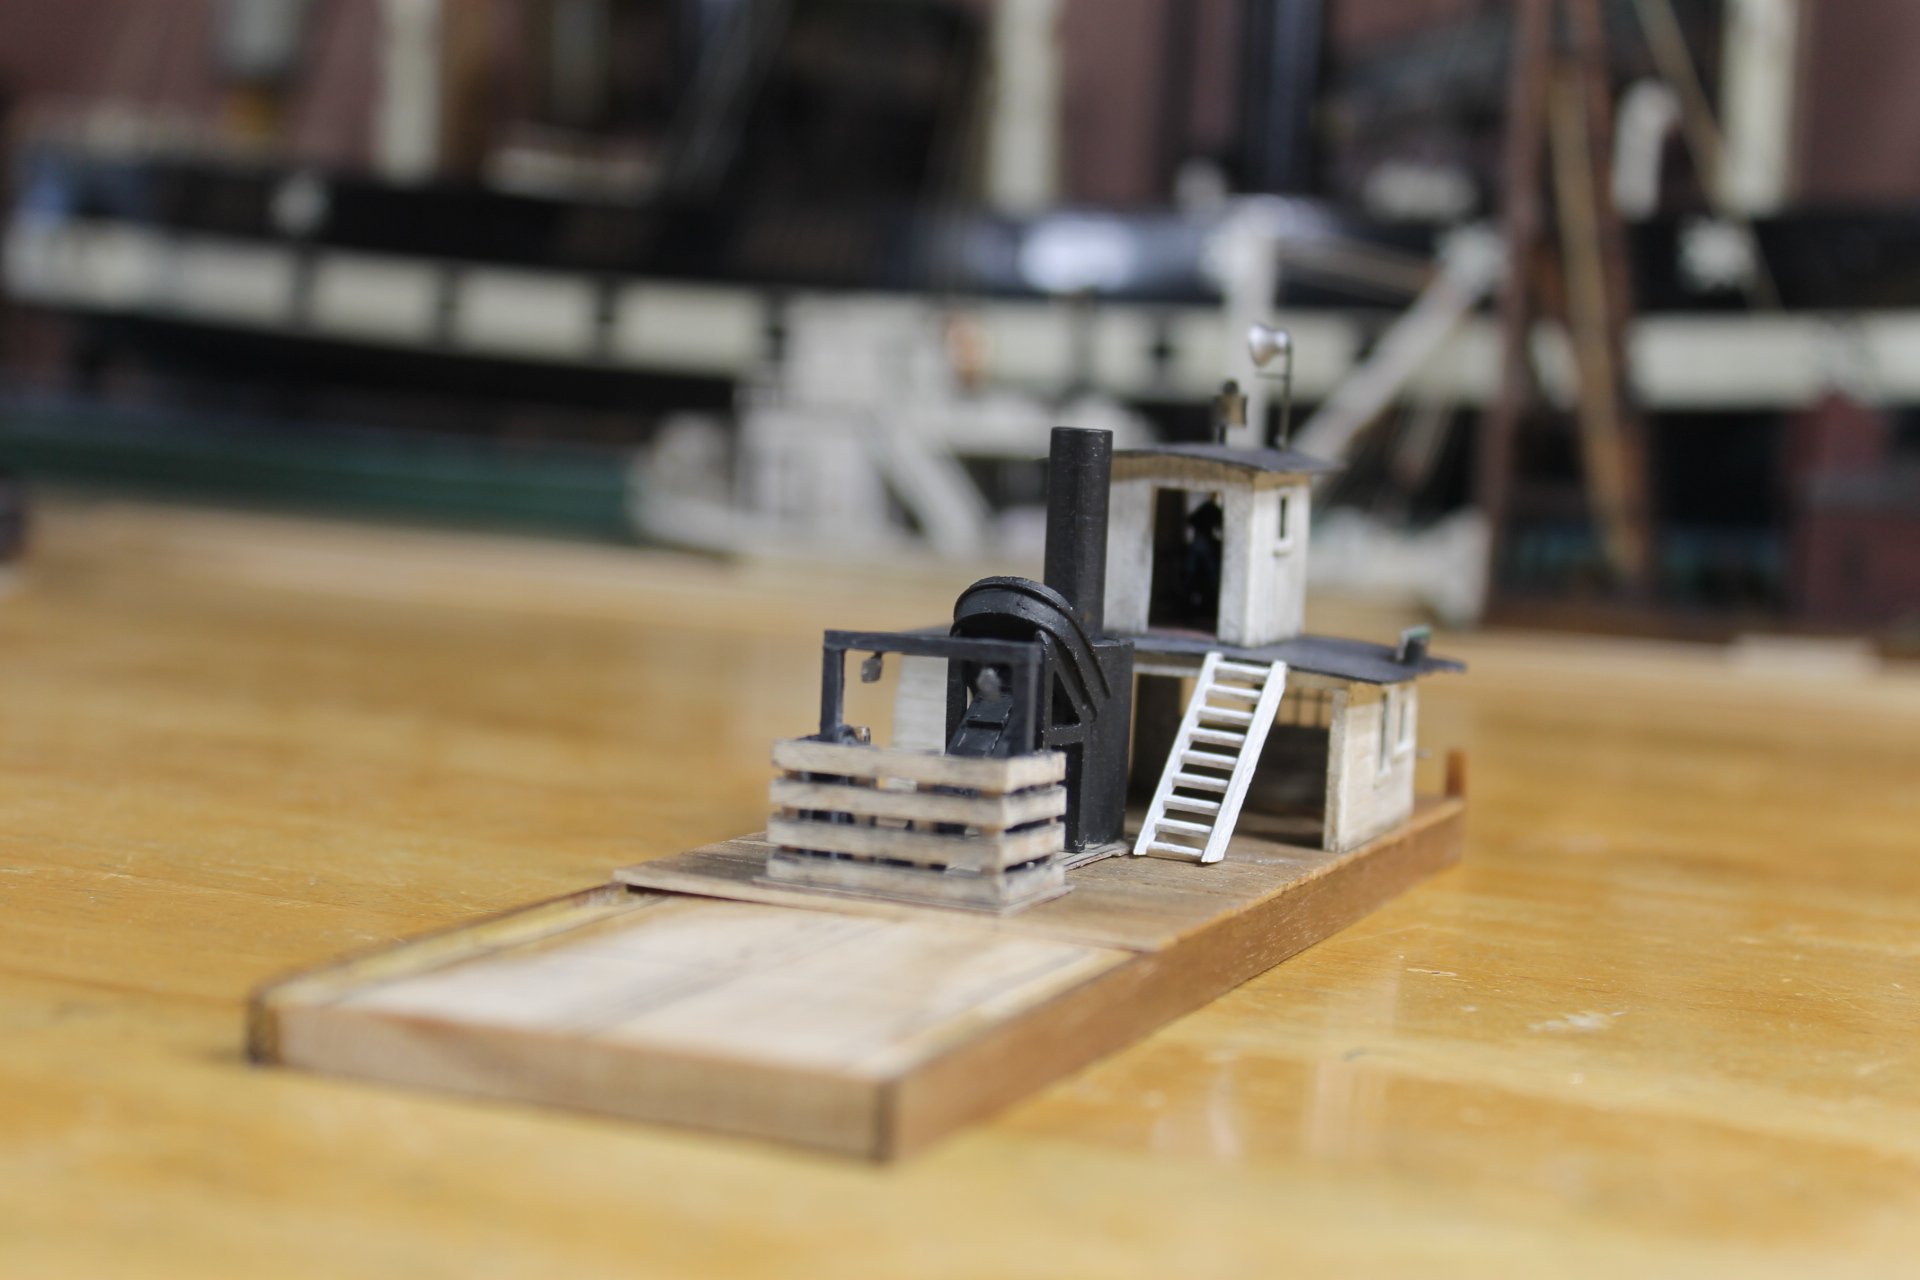
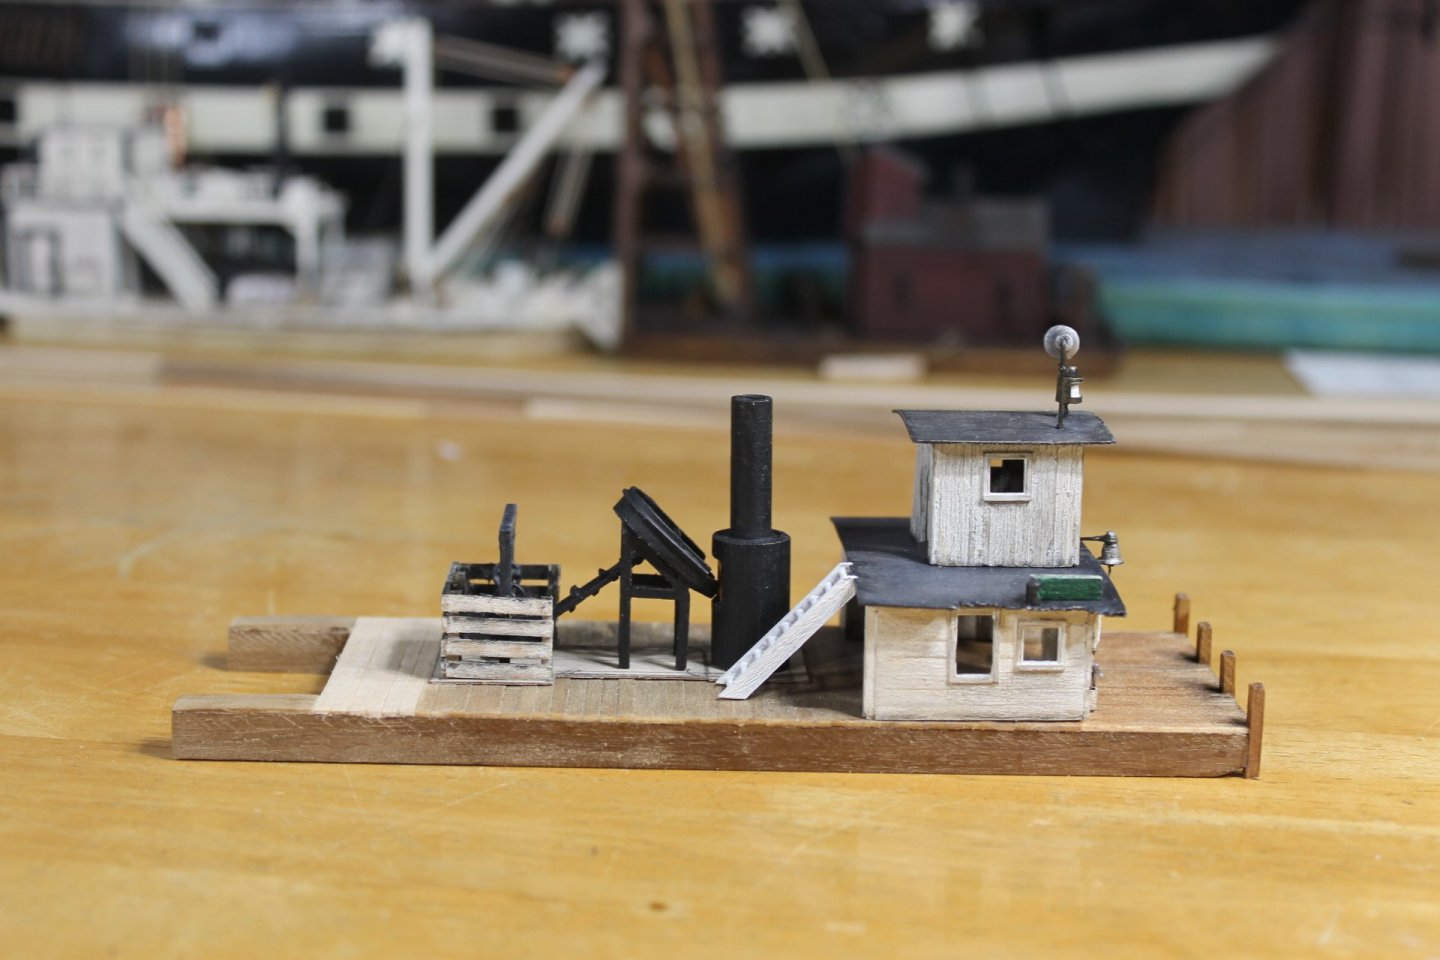
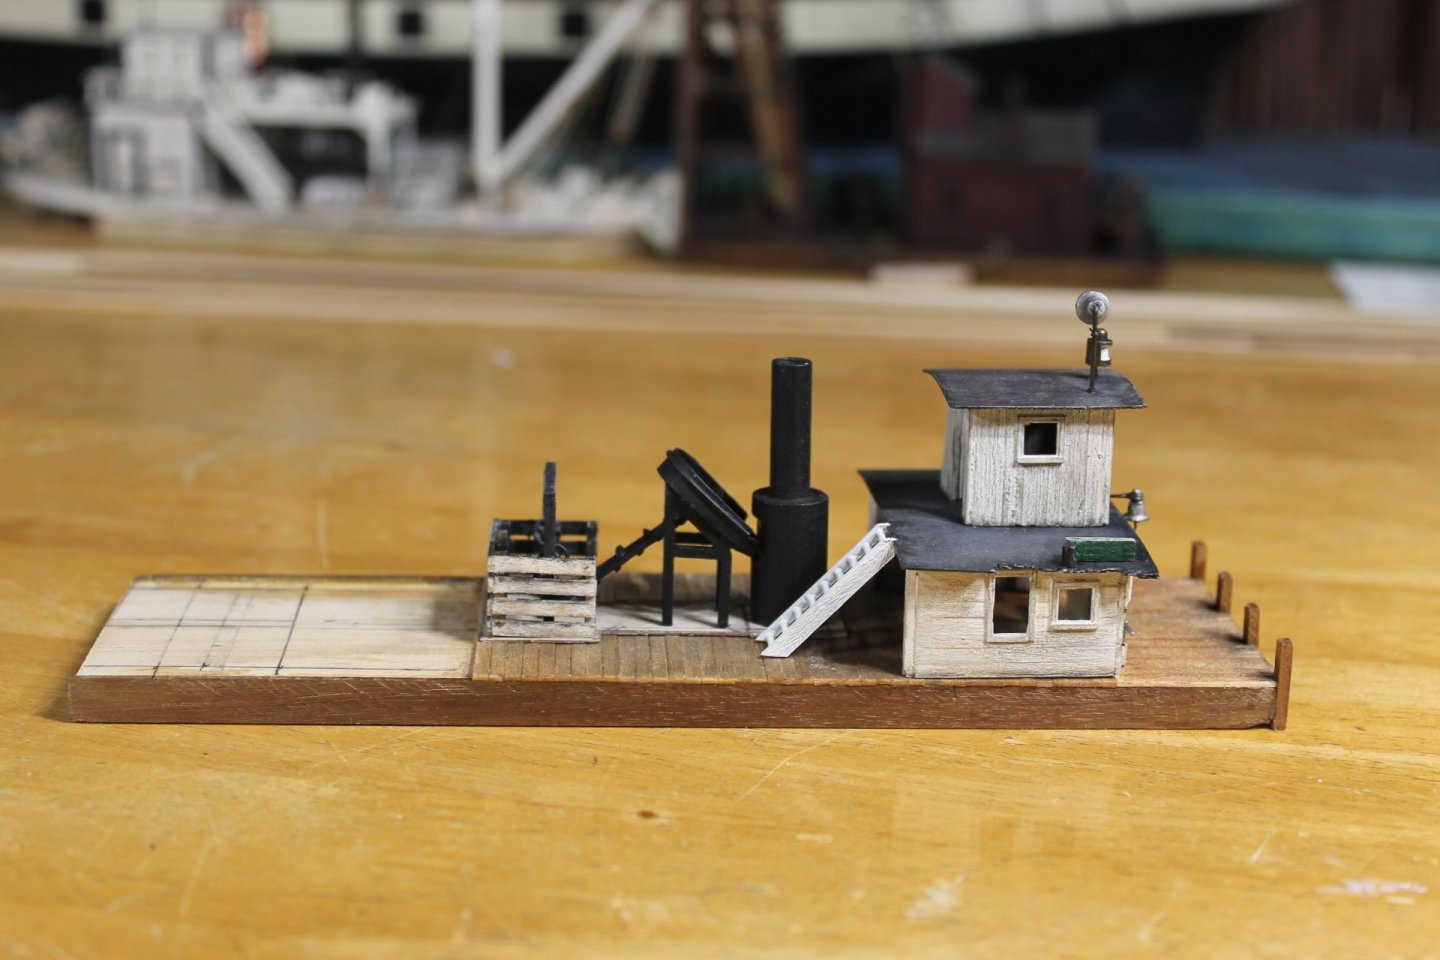
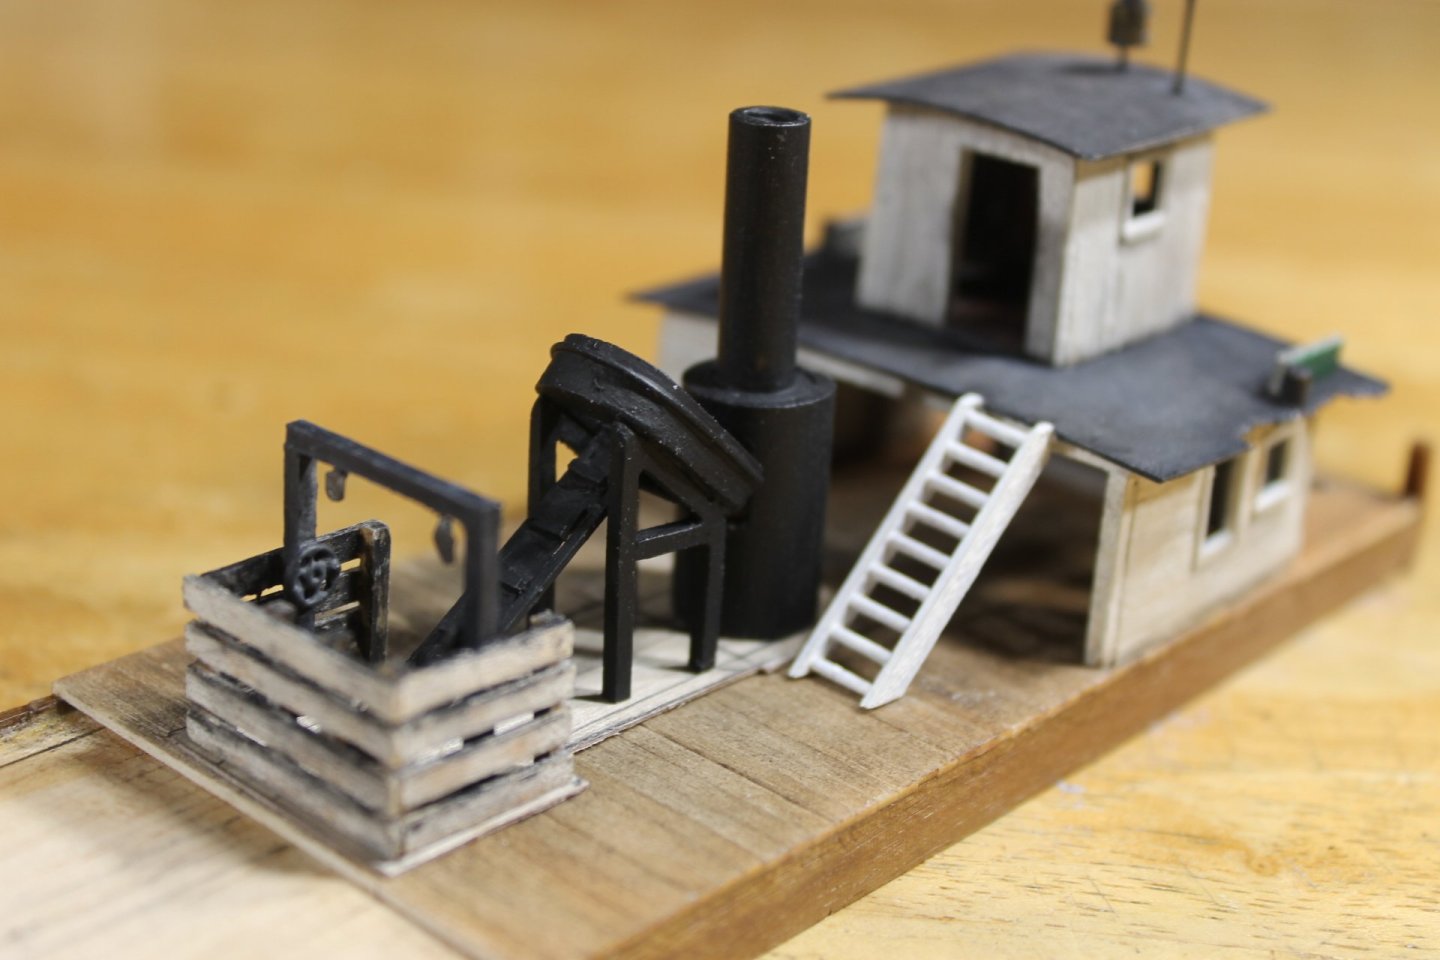
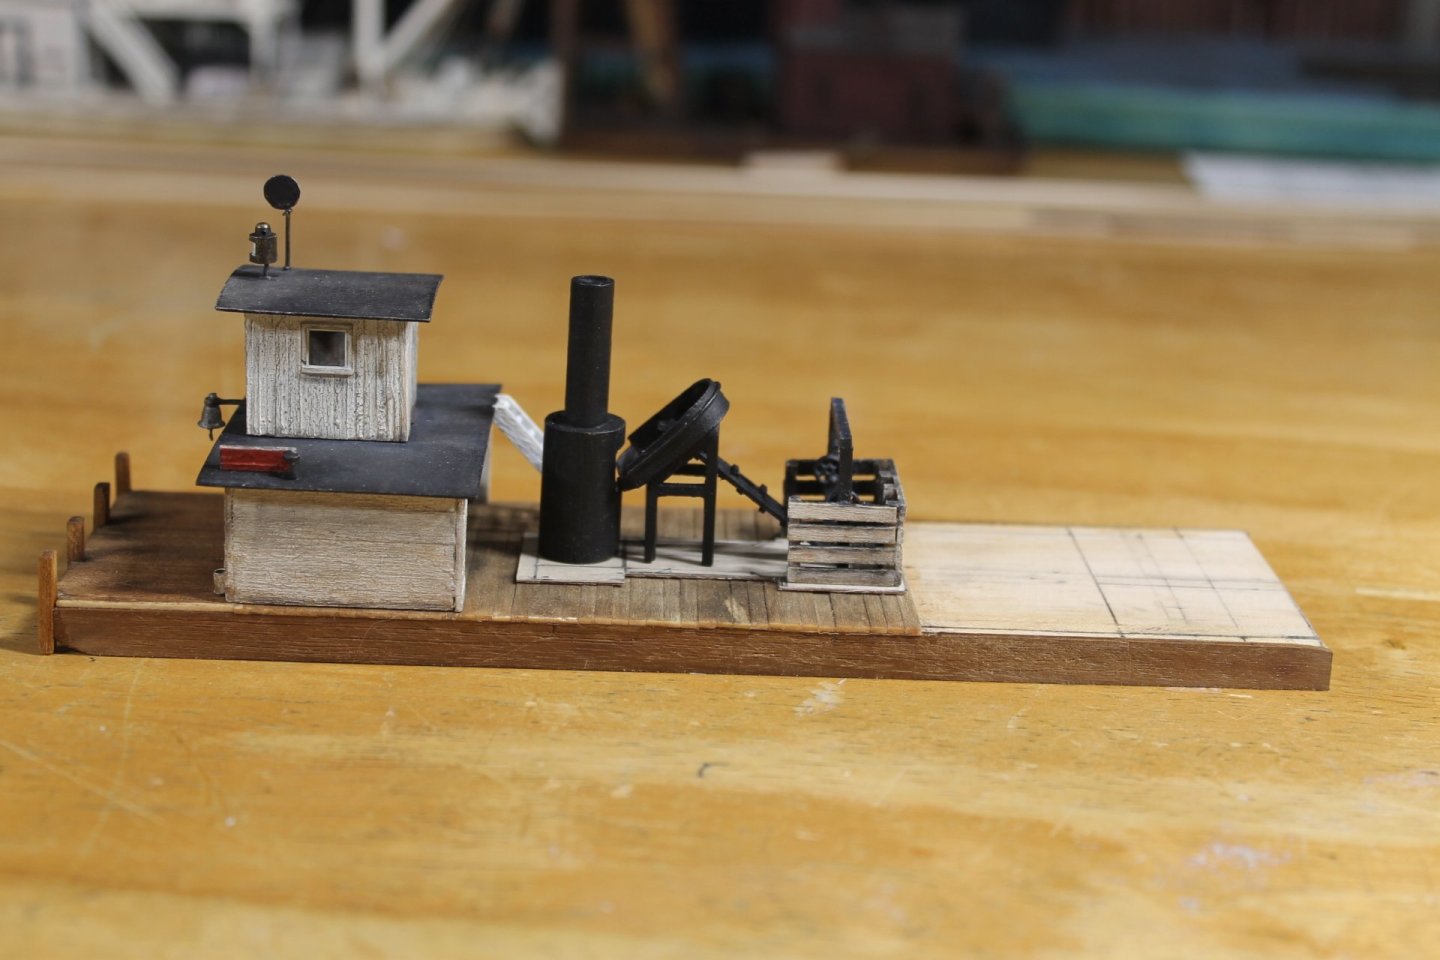
Thank you to everyone for your comments and likes. The coal feeder body is done, sorry I just realized I didn't add a photo of the table throat. I still need to add lever, gears, rig the lines to conveyor tail, and put coal on the conveyer. There is a sequential gluing order to that list and I'm still trying to figure out the best way to do that. Once I have the boiler's port side fire and clean out doors added I can the glue the boiler to the steel plate. I can add coal to the conveyer at any time but the trick is adding coal to the coal crib without the crib being glued into place because I need to be able to lift the crib to rig the blocks to the conveyer tail. It's kinda like needing three hands to do something. As you can see in this photo I got the boiler lit. I'm going to add five feet of deck space (0.5 inches) aft of the coal crib and then make the wheel's cutouts. Once the cutouts are made she should start looking more like a towboat. View as seen in the original from aft photo. Thoughts The steam engine is directly underneath the pilothouse in the engine room. This allows the Skipper to control the engine without need of an engineer to do so. This means the shaft ran below the boiler, coal feeder and coal crib in the rudder chain tunnel. The deckhand's bluejeans, teeshirt, and baseball cap wasn't normal work clothes till the late forties early fifties. The photos show a vessel with antiquated machinery in a general rundown condition. Had this ole gal been pushing barges for twenty/twenty five years? Other than electricity, what other "modern" updates had been added through the years? I am fairly certain there was a water tank connected to the boiler on the port side up next to the pilothouse. Water would be pumped to the tank and from tank to boiler. With that setup there would always be water available for boiler startup without the need to start a pump as the boiler water on startup would have been gravity feed. Health update. Months ago in my Lula log I mentioned i might have an aorta aneurysm stent endoleak that would require surgery. I could never get an answer from my then healthcare provider's vascular department so I changed healthcare providers and, I'm good. I have an area of concern that we need to monitor closely but I'm not about to blow, surgery is not required at this time. This is an answer to prayer that allows me to get on with my life and continue my care for Maggie. For those of you who have prayed for me and for those who have kept me in your thoughts, from the bottom of my heart, thank you. Thank you everybody for your support and for following along. Keith

- 457 replies
-
- 21
-
-
-
- sternwheeler
- Hard Coal Navy
- (and 1 more)
-
You too? I restored a 37 MGTA, 60 MGA, 59 TR3A, 58 Morris convertible, and various American iron. Pre war MGs are my favorite cars and as goofy as the TA engineering was, it is the car I remember most fondly. I still have my collection of car badges, golly knows what I'll ever do with them?
-
Rick, welcome to MSW. Glad to have you aboard.
-
As well you should be, Phil. She's turning into a gem of a build. 👍
- 288 replies
-
- 6
-

-
-
- Card
- Pre-Dreadnought
- (and 3 more)
-
Congratulations on completing a fine looking model, David. 👍
-
Welome to MSW. Glad to have you aboard.
-
John, do you have any notion as to when they might have been added? Now that you know it is a running light, are you going to portray it as such on your Klondike model?
-
I just looked at a bunch of images and both light boards are below and just aft of the pilothouse. I don't know what your mystery circle is, John. I thought I could see a lantern in the circle, now, I don't know what I'm seeing.
-
I enlarged the photo of the Klondike and it looks like it's the starboard light board? If so, it's a cool design and makes a ton of sense. Is there one on the drawings in the same place on the port side?
-
I guess saying you were displaying them in your half didn't work out?
- 457 replies
-
- 7
-

-
-
- sternwheeler
- Hard Coal Navy
- (and 1 more)
-
Love the overhead snap, Keith. It looks so nice and tidy. 👍
-
One reason models maybe going to smaller scales is because once finished they take up less space to display? Funny comment, Tom. Thank you for the laugh. Thank goodness for 6X glasses! Thank you, Gary. It seems this particular build is going to require a lot of small pieces parts.
- 457 replies
-
- 5
-
-
- sternwheeler
- Hard Coal Navy
- (and 1 more)
-
Looking spiffy, Bob. 👍
-
I'm praying for you, Tom. All my issues are above the belt, I'm trying to keep my doctors to a minimum as I just changed health care systems because the previous Vascular Department is in total disarray. I see a new, for me, vascular surgeon this coming Tuesday regarding my aneurysm stent. I sure took my health for granted when I was younger, stupid me.
- 341 replies
-
- 1
-
-
- Sophie
- Vanguard Models
- (and 1 more)
-
Everything is looking great including you dear brother.
- 341 replies
-
- 1
-
-
- Sophie
- Vanguard Models
- (and 1 more)