


Keith Black
-
Posts
6,684 -
Joined
-
Last visited
Content Type
Profiles
Forums
Gallery
Events
Everything posted by Keith Black
-
Derek, welcome to MSW.
-
Welcome to MSW. Glad to have you aboard.
-
 SS, the scale is going to limit how detailed I can make the gears if gears are used.
- 457 replies
-
- 2
-

-
- sternwheeler
- Hard Coal Navy
- (and 1 more)
-
Look at all that cloth! I love the way you've done the sails, John
-
He couldn't have picked a better birthday present made by one of the best.
- 106 replies
-
- 4
-

-
-
- Kentoshi-Sen
- bottle
- (and 1 more)
-
Good to see you back at it, Bob. Praying you heal completely.
- 46 replies
-
- 1
-
-
- Golden Hind
- airfix
- (and 2 more)
-
Congratulations, Glen. A very impressive SIB that should be packed up when the time comes to go north next year.
- 106 replies
-
- 2
-
-
- Kentoshi-Sen
- bottle
- (and 1 more)
-
Yes it is, Eric. That's neat that you've ridden on her. I think I remember reading that she's Cat powered? The great coincidence of this build is your personal connection to the Susquehanna. Thank you for the link, Eberhard. From reading about chain drives it seems they were abounded for gear drives due to weakness of the chain but research continues.
- 457 replies
-
- 2
-
-
- sternwheeler
- Hard Coal Navy
- (and 1 more)
-
Sometimes modeling can be a bit masochistic, that's for sure. I think I'm gonna research steam tractors and see if there's in relatable information there. Keith, I like the idea of chain, it's coupling chine drive with steam where I'm having difficulty.
- 457 replies
-
- 3
-
-
- sternwheeler
- Hard Coal Navy
- (and 1 more)
-
It all looks really neat, Eric. I'll be the first to admit I'm a non-railroader but maybe you'll kindle a fire?
-
Thank you for the information, Eberhard. At 1:120 I could probably cheat on the gears if I go that route and none would be the wiser, As you very well know, at these small scales often the suggestion is good enough.
- 457 replies
-
- 3
-
-
- sternwheeler
- Hard Coal Navy
- (and 1 more)
-
Absolutely beautiful work, Keith. I just placed a pretty good size bits order from Cornwall, I should have added another bell. Your's turned out great.
-
Eric, it's ALL conjecture on my part at this time. I have many many holes to fill with hour upon hours of research before I can say with some certainty that was the way it was. In the end, putting a dinghy would probably be the simplest solution.
- 457 replies
-
- 1
-
-
- sternwheeler
- Hard Coal Navy
- (and 1 more)
-
I assume so, Eberhard but not sure how a geared drive system would have been engineered. I had a good B&W close up view of a center geared wheel but I'll be danged if I can locate it at the moment. I'll continue to try a find it. The image below is for a center drive chain system. If I could figure out how to make a steam driven chain drive I'd go that route in a New York minute.
- 457 replies
-
- 3
-
-
- sternwheeler
- Hard Coal Navy
- (and 1 more)
-
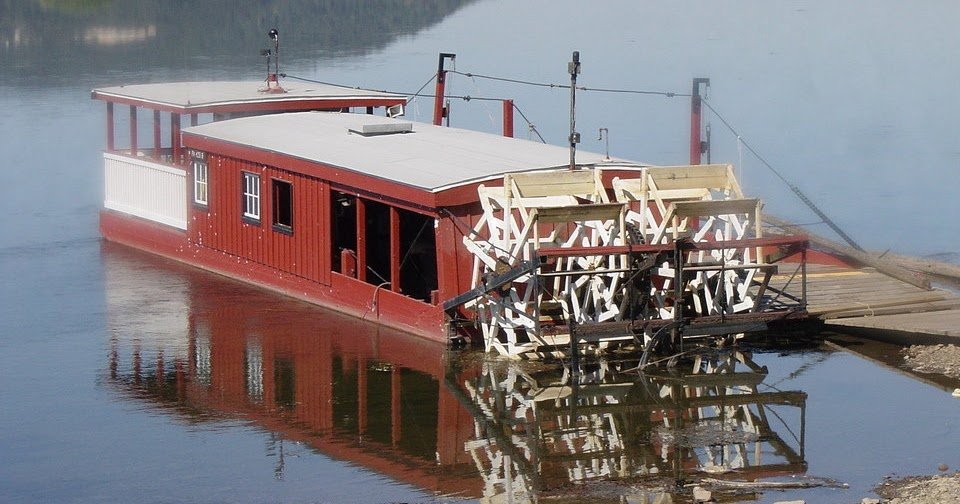
Eberhard, the only chain driven paddle wheels I've seen were/are run by internal combustion engines but this vessel is definitely steam driven. I'm inclined to think the half wheels were gear driven which would have saved space by eliminating pitman arms.
- 457 replies
-
- 1
-
-
- sternwheeler
- Hard Coal Navy
- (and 1 more)
-
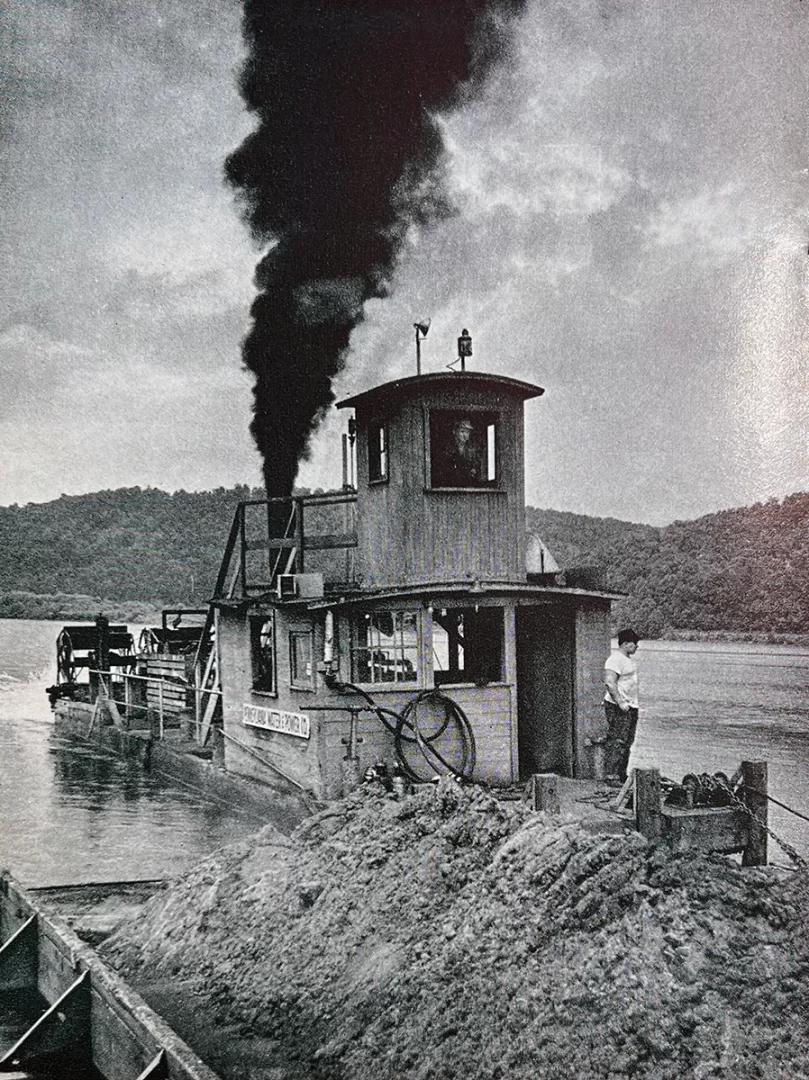
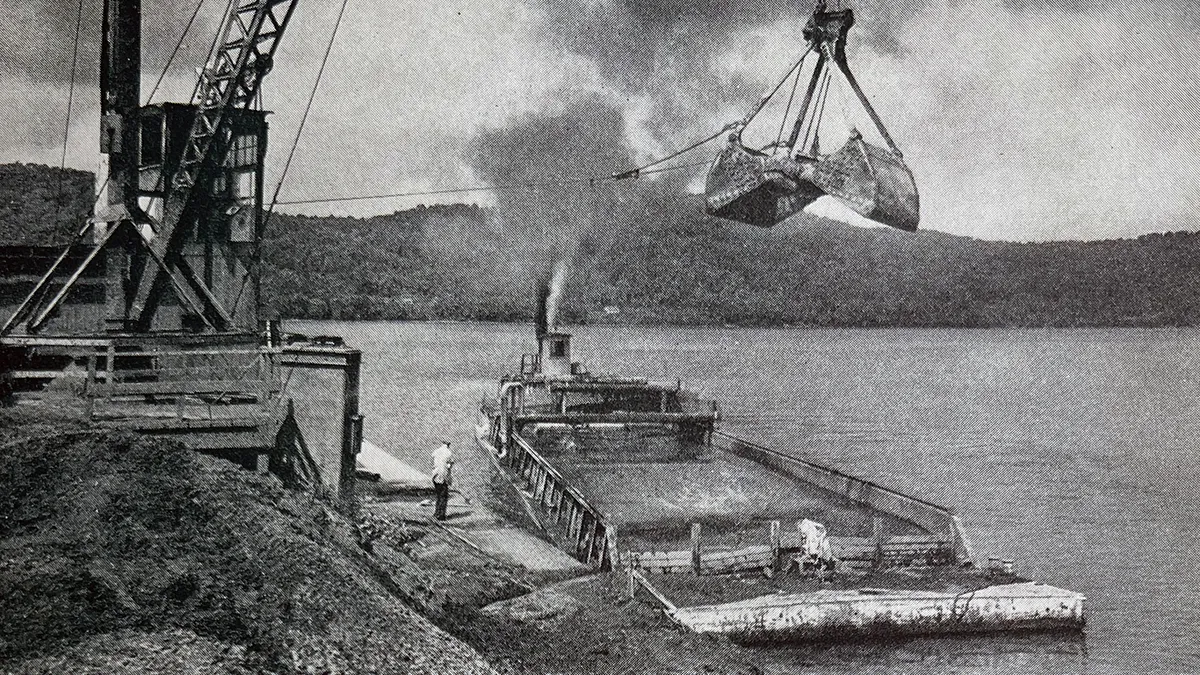
This short video is a great look back on the subject at hand. The sternwheeler in the background (not the one pushing the barge) is a split in two halves paddlewheel. One of the main questions is, how where these split paddlewheels engineered to turn. I'm starting to think they may have been gear driven. If you'll note, there's a very narrow width at the center of the two halves, it doesn't appear to be enough space for two cylinders unless the shaft was made with offsetting journals and the pushed at an upward angle. So much research and not knowing where to look is a killer. For whatever reason the last video link does not alway play. in the first link you have to click the link and then click the far left image to bring up the video. https://www.google.com/search?q=https%3A%2F%2Fmedia.gettyimages.com%2Fid%2F2104816477%2Fvideo%2Fsusquehanna-river-bottom-is-dredged-by-laborers-for-salvage-coal-run-off-from-upstream-mine.mp4%3Fs%3Dmp4-640x640-gi%26k%3D20%26c%3Dn-LdslyjCMPXAAQ5VTzYzbTr9i2ORyt7P0AEneuitJU%3D&sca_esv=7fef18164babfbf6&source=hp&ei=YR1OaLb_JfrIp84P1qLnmQc&iflsig=AOw8s4IAAAAAaE4rcWLxqF8GmSh8Mh3YCHahhR0Si6mZ&ved=0ahUKEwj2s8v-nvKNAxV65MkDHVbROXMQ4dUDCA8&uact=5&oq=https%3A%2F%2Fmedia.gettyimages.com%2Fid%2F2104816477%2Fvideo%2Fsusquehanna-river-bottom-is-dredged-by-laborers-for-salvage-coal-run-off-from-upstream-mine.mp4%3Fs%3Dmp4-640x640-gi%26k%3D20%26c%3Dn-LdslyjCMPXAAQ5VTzYzbTr9i2ORyt7P0AEneuitJU%3D&gs_lp=Egdnd3Mtd2l6ItYBaHR0cHM6Ly9tZWRpYS5nZXR0eWltYWdlcy5jb20vaWQvMjEwNDgxNjQ3Ny92aWRlby9zdXNxdWVoYW5uYS1yaXZlci1ib3R0b20taXMtZHJlZGdlZC1ieS1sYWJvcmVycy1mb3Itc2FsdmFnZS1jb2FsLXJ1bi1vZmYtZnJvbS11cHN0cmVhbS1taW5lLm1wND9zPW1wNC02NDB4NjQwLWdpJms9MjAmYz1uLUxkc2x5akNNUFhBQVE1VlR6WXpiVHI5aTJPUnl0N1AwQUVuZXVpdEpVPUgAUABYAHAAeACQAQCYAQCgAQCqAQC4AQPIAQD4AQL4AQGYAgCgAgCYAwCSBwCgBwCyBwC4BwDCBwDIBwA&sclient=gws-wiz#imgrc=dKKHNdGkDUEucM&imgdii=JAkcoAbrXzNgcM https://www.gettyimages.in/detail/video/the-bottom-of-the-susquehanna-river-is-dredged-by-news-footage/2104816477
- 457 replies
-
- 5
-
-
- sternwheeler
- Hard Coal Navy
- (and 1 more)
-
The skylight turned out very nice, great job. if you wanted to give the skylight the look of glass you can cut thin clear plastic from processed food containers. I've done this a number of times and it woks really slick. You have to do all the painting or staining first and once that is done just add a tiny dab of CA on the inside corners, only doing two corners will work to hold the plastic. Just add enough CA so it doesn't smear onto the visible area.
-
Good morning, Eric. I've got some windows arriving from Itchy Train today and I'm about to start building the hull. Did you see Lula and the pile driver in the Album images section? About a week ago I had a chance to check out the port side area next to the pilot house and I don't think that's a skiff/dinghy, If you look through the engine room window toward the port side you can see a vertical pipe with a circular valve handle near the top. A diagonal (?) crosses in front of the vertical pipe just below the valve handle. There is a horizontal pipe more to center of the vertical pipe. All this piping could be part of a centrifugal pump system with parts of it next to the pilot house on the port side? Though small, the photo below is the best view of the area on the port side next to the pilot house. For that "white" to be bow, the stern would hang off the edge and would make for a crazy storing angle. Thank you for checking up on me. I should have a final answer on surgery this coming Tuesday. As of last Tuesday the surgeon wanted me to travel to Detroit for surgery but after further discussion he is going to get with two over vascular surgeons and go over all the reports to make sure everybody is on the same page. Keith
- 457 replies
-
- 6
-
-
- sternwheeler
- Hard Coal Navy
- (and 1 more)
-
Well, that tugs at me ole heartstrings.
- 301 replies
-
- 8
-
-
- Constitution
- Bluejacket Shipcrafters
- (and 1 more)
-
Jacques, don't waste the box. Close up the open end, put some outside bracing and turn into a crate. It's the perfect size.
- 312 replies
-
- 3
-
-
- Chile
- Latin America
- (and 6 more)
-
Congratulations, Chris. A lovely model, very well done.
- 38 replies
-
- 2
-
-
-
- Alert
- Vanguard Models
- (and 1 more)
-
The more I look at the "rock" the more I like it just as is. There are natural steps on the left side leading up to the SIB.
- 106 replies
-
- 2
-
-
-
- Kentoshi-Sen
- bottle
- (and 1 more)
-
Valeriy, your metalsmithing work is always a pleasure to see.
-
Plywood has its place but that place isn't for parts that will be out in the open. It's that kind of attention to detail that turns a good model into a great model. Well done, Mark.
