HOLIDAY DONATION DRIVE - SUPPORT MSW - DO YOUR PART TO KEEP THIS GREAT FORUM GOING! (89 donations so far out of 49,000 members - C'mon guys!)
×


rwiederrich
-
Posts
5,518 -
Joined
-
Last visited
Content Type
Profiles
Forums
Gallery
Events
Everything posted by rwiederrich
-
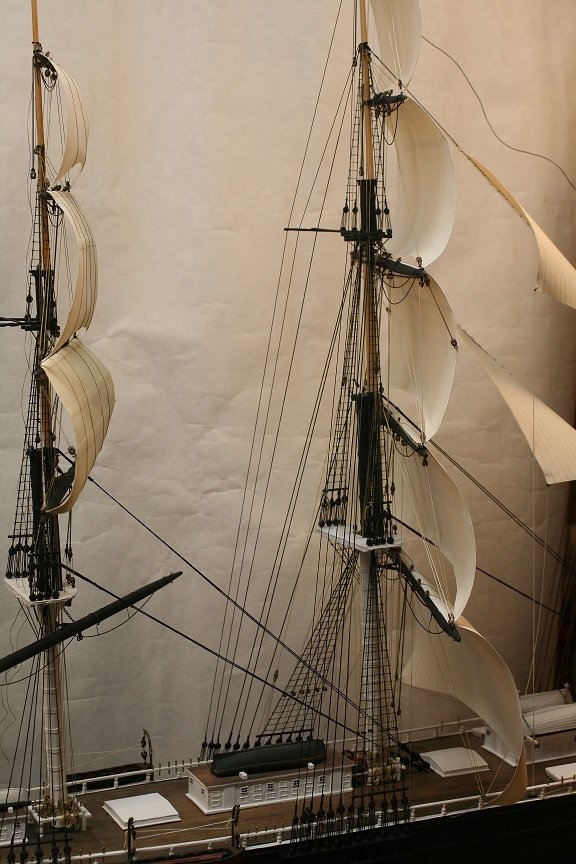
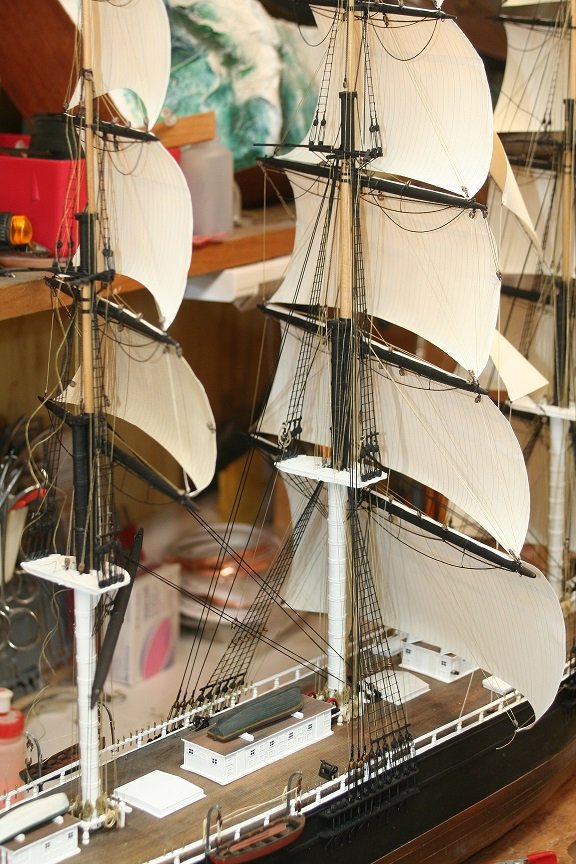
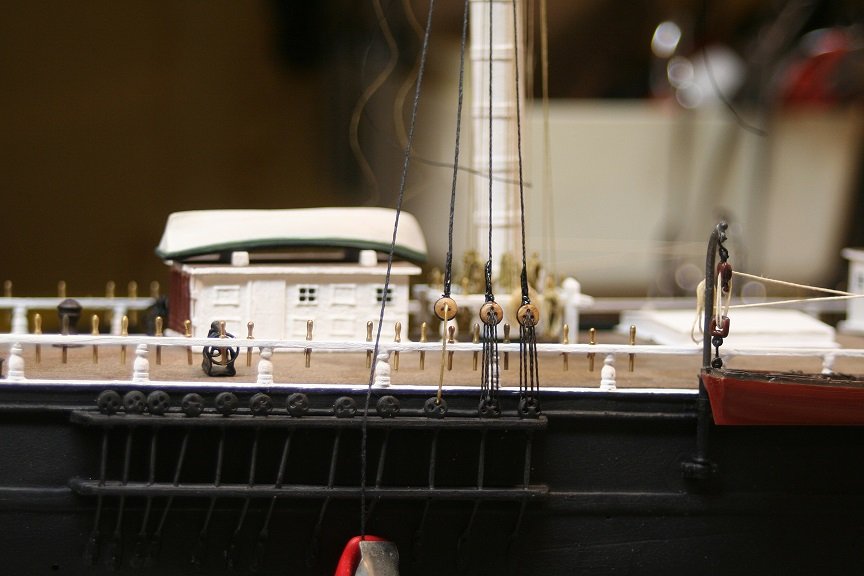
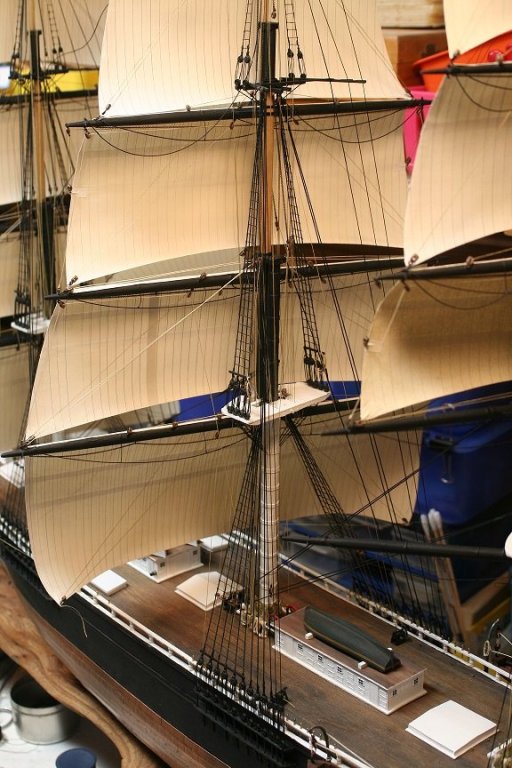
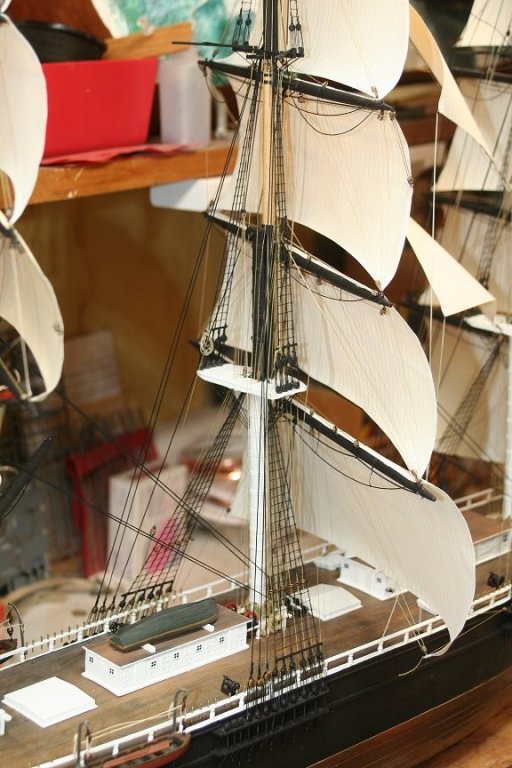
A few more of the main backstays with the mizzen atarboard shrouds.


- 1,208 replies
-
- 12
-

-
- great republic
- clipper
- (and 1 more)
-
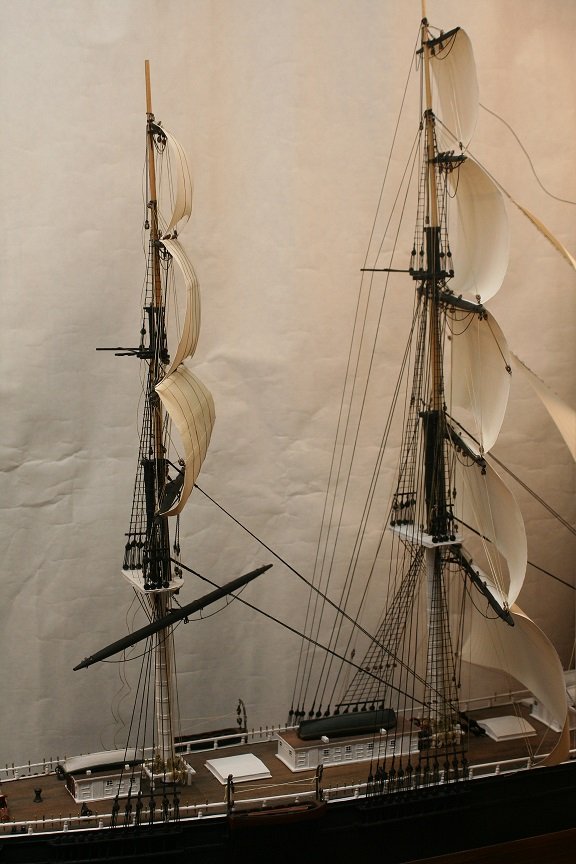
Began working on the mizzen shrouds on the starboard side.
- 1,208 replies
-
- 9
-
-
- great republic
- clipper
- (and 1 more)
-
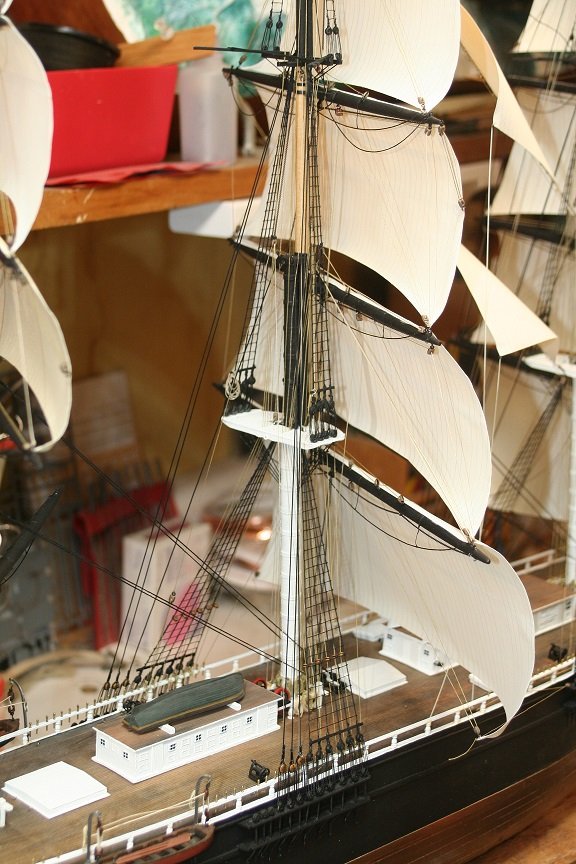
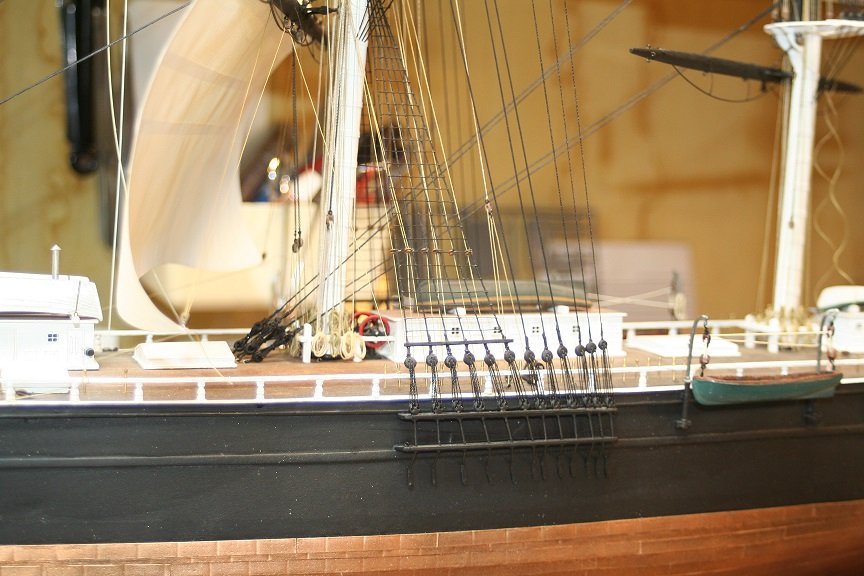
Well I worked on the main backstays and finished them up..here are some pics. Rob

- 1,208 replies
-
- 9
-
-
- great republic
- clipper
- (and 1 more)
-
Thanks so much Popeye...yes I'm feeling much better and the numbness has diminished considerably....allowing me more fine detail work to be done. I plan on putting many hours in the shipyard tomorrow..so that means some rigging is getting done........Yippy. Rob
- 1,208 replies
-
- 2
-
-
- great republic
- clipper
- (and 1 more)
-
Bob..as much as I would love to accommodate you....I think I'm going to stick with just the main sails....like in the painting of her. Just a reminder: The area she will be mounted won't be able to accommodate that extra width. I have entertained the notion myself....but the fact of the matter is...the Great Republic never ever set her stunsails as originally designed. It must have been a real sight of the imagination to have seen her in that rig under a brisk flury. I have nothing but respect for your opinions...never *Hate*. Even if it means having to tare stuff apart and redo all kinds of stuff and add more stuff with more rigging and stuff...... Rob
- 1,208 replies
-
- 3
-
-
- great republic
- clipper
- (and 1 more)
-
Thanks. Even when I think I know everything there is to know about this ship...I surprise myself. I've tried so many new techniques and perfected others on this build it's dizzying for me. But I think the result is acceptable to most. Trying to cram in as much detail as possible in the wake of EDT's fabulous YA build is a daunting task and in a far smaller scale to boot. The bar is surely high. Rob
- 1,208 replies
-
- 2
-
-
- great republic
- clipper
- (and 1 more)
-
Thanks Grandpaphil. I hope to get moving along...so much still to do. Rob
- 1,208 replies
-
- 2
-
-
- great republic
- clipper
- (and 1 more)
-
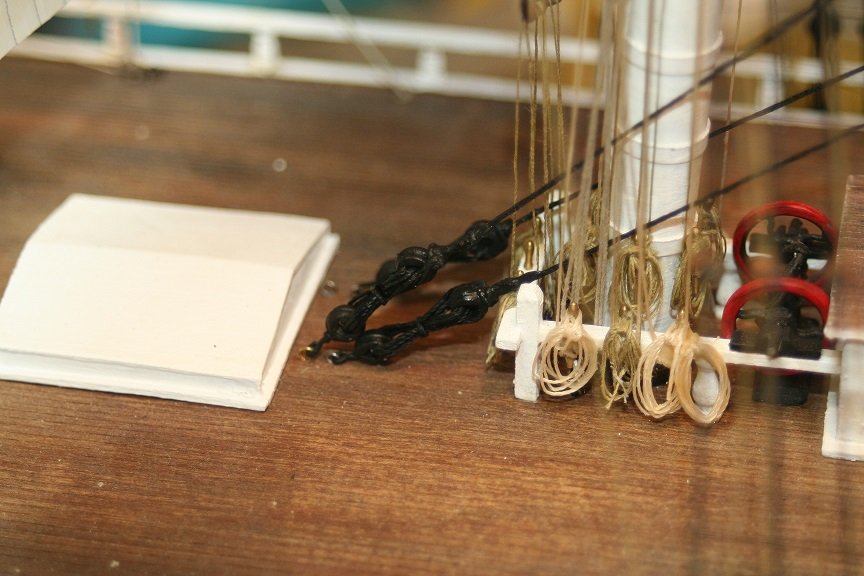
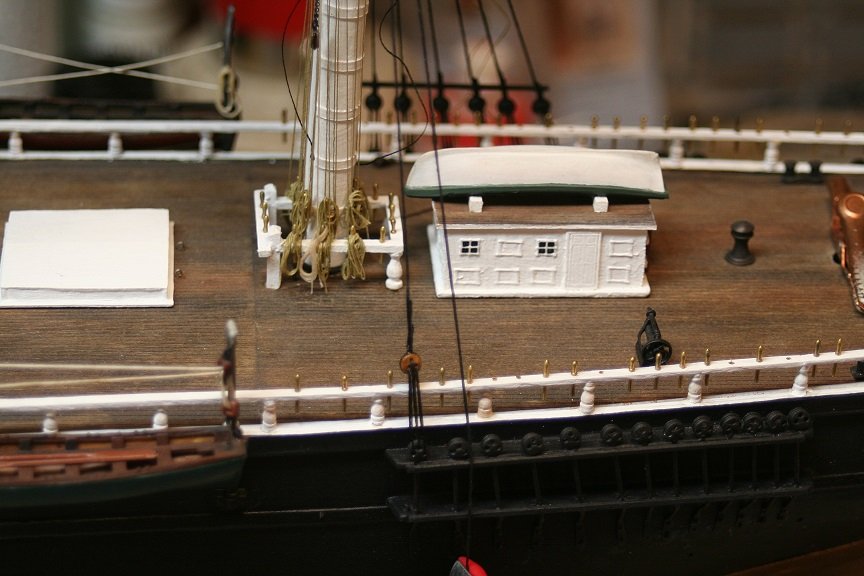
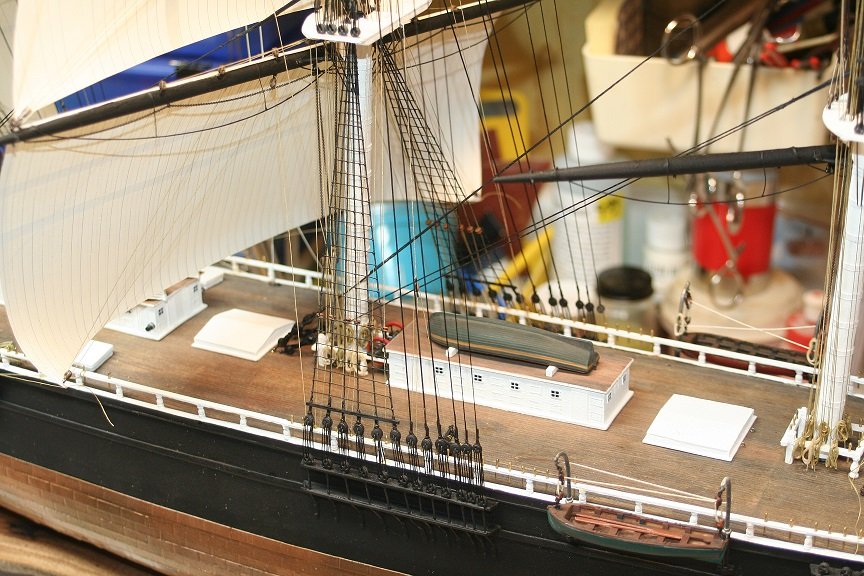
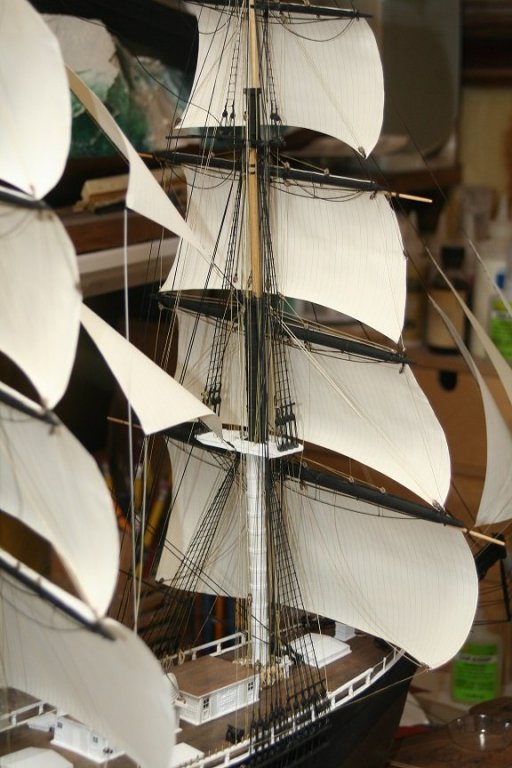
Finally, are some pics of the main backstays and also of the mizzen main and the topsail stays. Slow going, but I'm exercising tha machinery... and soon the yard will be back in full operation. Rob

- 1,208 replies
-
- 6
-
-
- great republic
- clipper
- (and 1 more)
-
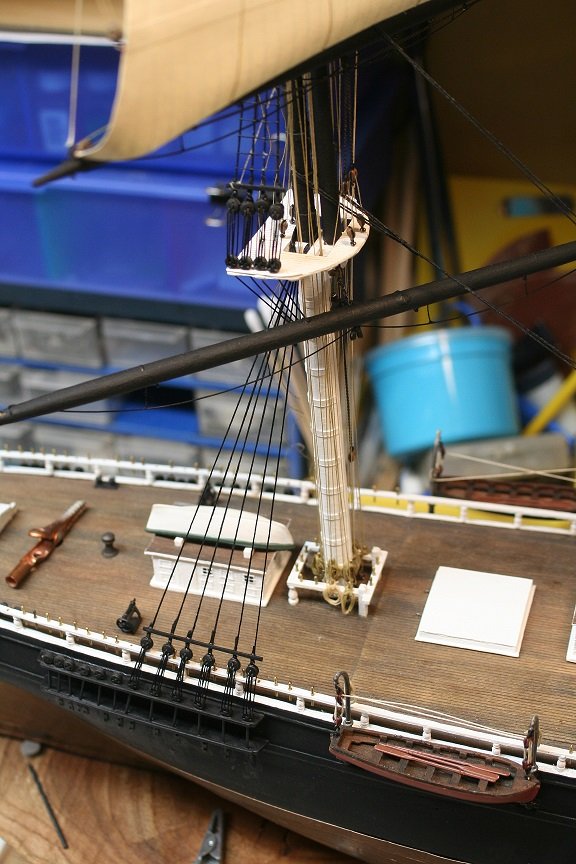
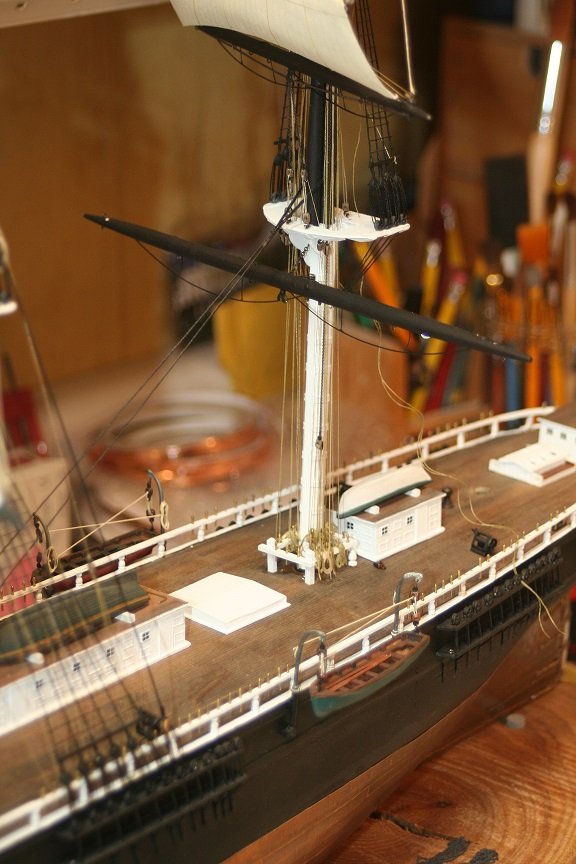
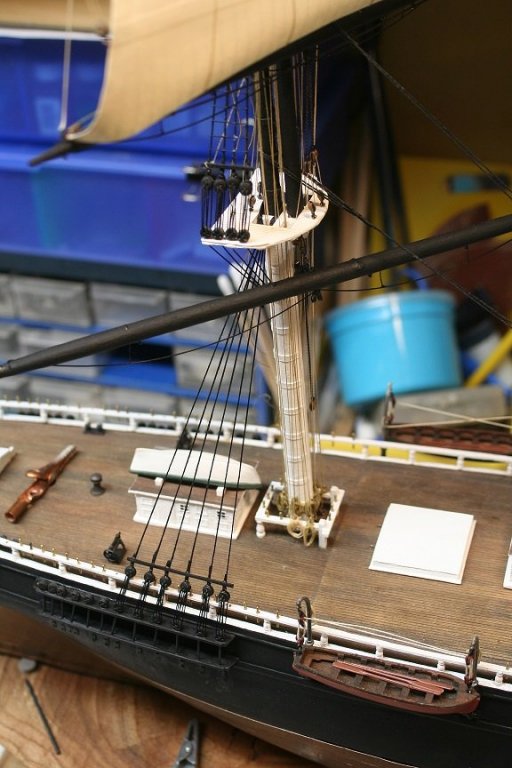
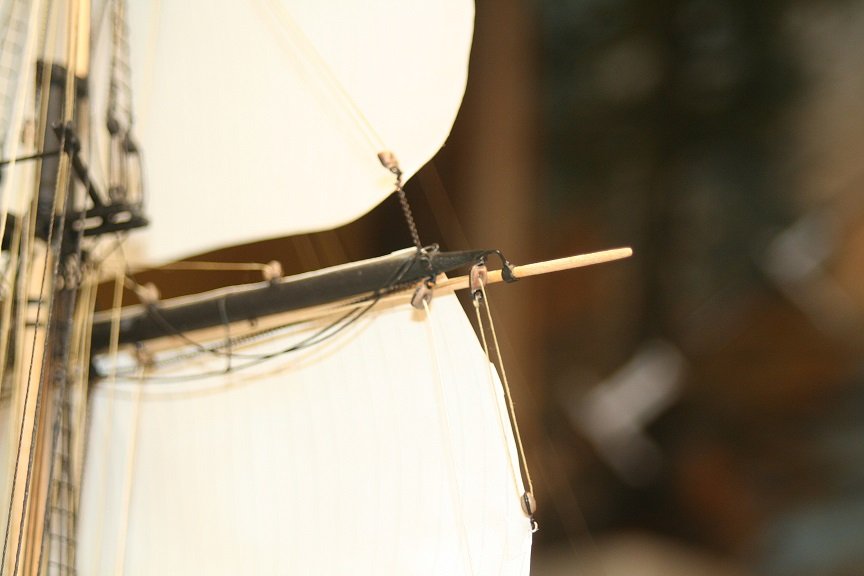
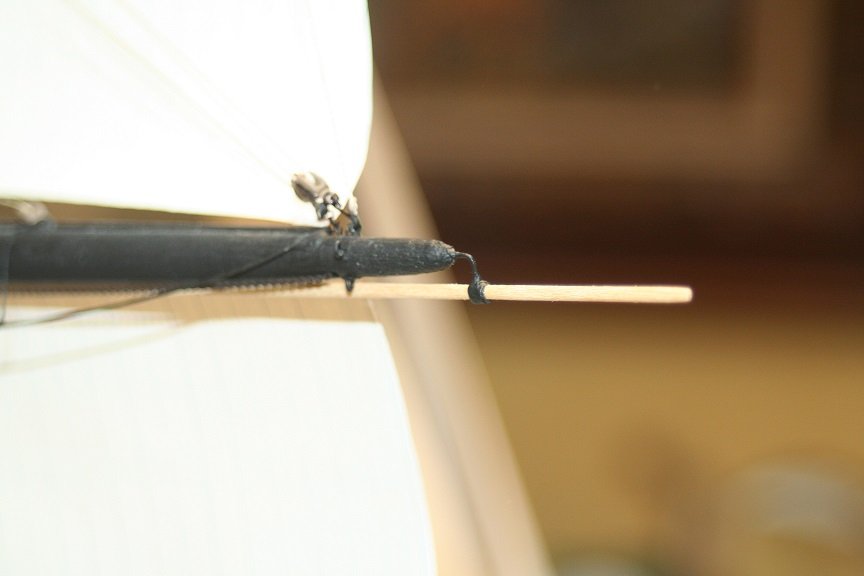
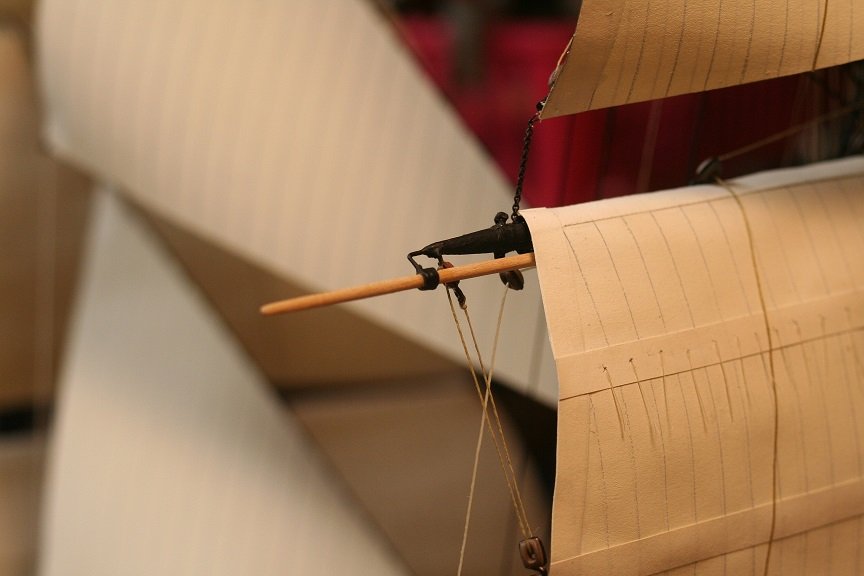
Well it's time to get back to the shipyard...my hand is doing better, though I still have some numbness..I can work around it. I finished up the fore mast stunsail booms and I worked on the mizzen main stays and I worked on the main backstays. First, here are some images of the booms and their ironwork. Much better then before. Rob
- 1,208 replies
-
- 5
-
-
- great republic
- clipper
- (and 1 more)
-
MONTAÑES by Amalio
rwiederrich replied to Amalio's topic in - Build logs for subjects built 1751 - 1800
Just wonderful...... Rob -
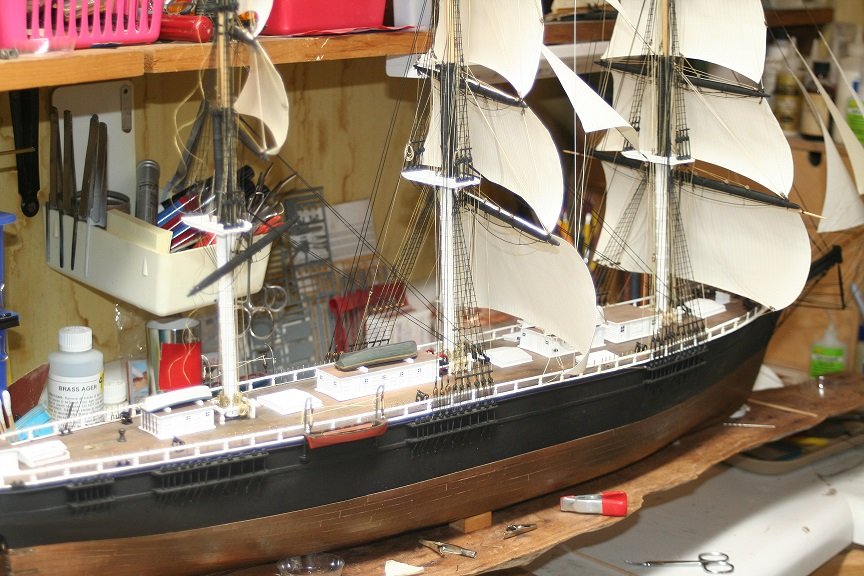
Starting back up in the shipyard is a slow process. My arm is slowly healing and most of the pain has subsided, but I still have lingering numbness in my hand and fingers...though I can successfully use them to some degree. Fine work is still an issue. I also returned from a weeks long holiday at Sunriver in Bend Oregon and at Cannon Beach on the Oregon coast. I feel very refreshed and had a most wonderful time. I spent about an hour last night working on the Port side stunsail booms...so not much to report, nor do I currently have any new images to post. I'm gearing up to begin the final backstay install on the main mast before I finish up with the main stays. Balancing out the forces imposed on the mast is a crucial process if one wants the masts to remain undistorted. More to follow. Rob
- 1,208 replies
-
- 4
-
-
- great republic
- clipper
- (and 1 more)
-
Wonderful....just wonderful Ed What a relief to finally be complete. She is magnificent to say the least. so much to glean from. Rob
- 3,618 replies
-
- 3
-
-
- young america
- clipper
- (and 1 more)
-
Welcome clipper fan..from another clipper fan. Try https://www.castyouranchorhobby.com/Category/deadeyes I'm currently building the clipper Great Republic. Rob
-
Fantastic job for sure..well done. Very clean Rob
-
Right. This is my first full set of sails implemented,...until now, Running the braces never extended me this problem. Your solution for the crojack yard braces works, even thought the fulcrum angle is not overly taxed. These clippers (GR, YA) were build in the same year and it can be safely assumed the solution was universal. Paintings do not replicate this epiphanous revelation. 2 dimensional images can easily mask 3 dimensional issues. I will surely make known my resolution for the brace issue...when I can return to the shipyard in full health. Thanks for the fine comments and observations. Rob
- 3,618 replies
-
- 3
-
-
- young america
- clipper
- (and 1 more)
-
Wonderful work Ed...Interesting solution to the lower mizzen braces. I discovered a while ago that I too will be facing this dilemma with my Great Republic...even more so, because I have no space to fudge, since I have sails that will definitely be in the way of many braces. Ingenious disguising will have to prevail. I have fully enjoyed your log and have gleaned much. Not sure you caught this, but it appears the aft backstay may have slipped out of its place on the main mast. The image you posted of the main mast braces definitely shows the aft port backstay out of its station. Thanks for the wonderful way you presented this build.....Clippers being my love...you kept me enthralled. Rob
- 3,618 replies
-
- 3
-
-
- young america
- clipper
- (and 1 more)
-
Wonderful work and attention to detail... Beautiful model. Rob(dust-er off)
- 1,306 replies
-
- 4
-
-
- syren
- model shipways
- (and 1 more)
-
Thanks Scott...yes the arm is doing better, still a bit tender....but the hand is still numb in part. Making fine work hard....since I can't feel my fingertips. I have put an enormous amount of research into this build, and even something as minor as stunsail booms can fall between the research cracks. Part of the fun is updating as you go if research points you in a different direction. I've seen this happen to many and surely I fall victim to it myself. Gladly the *repair/corrections* can be made early without any really horrific damage being cause by it. Thanks for your compliment and encouragement. Rob
- 1,208 replies
-
- 3
-
-
- great republic
- clipper
- (and 1 more)
-
Thanks Pat...the first booms were far too heavy and the irons were not what I wanted. PLus moving them beneath the yards makes them more typical with the era. I think they look better. Again...thanks. Everything is evolving as my study reveals the needed changes. Rob
- 1,208 replies
-
- 3
-
-
- great republic
- clipper
- (and 1 more)
-
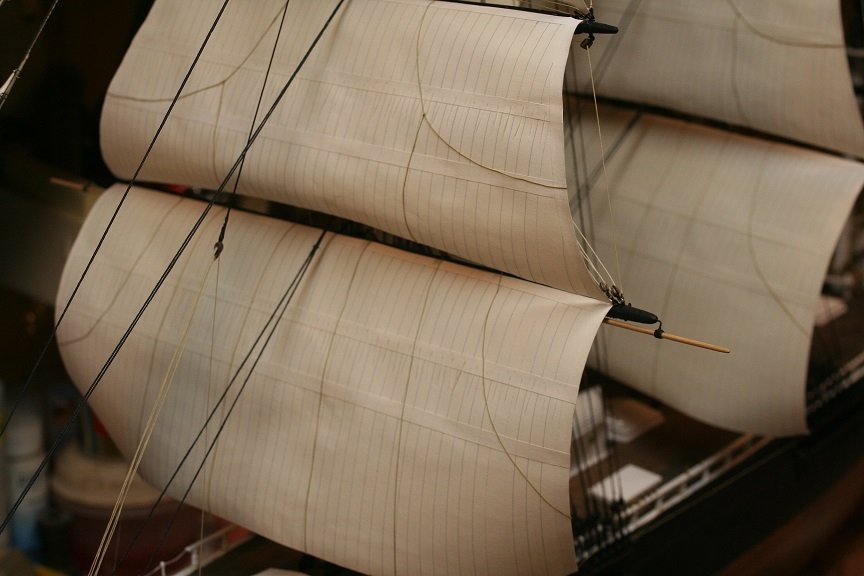
Thanks.... I spent some time correcting the stunsail booms and the irons. I adopted the underneath design.....it makes the most sense. Rob

- 1,208 replies
-
- 9
-
-
- great republic
- clipper
- (and 1 more)
-
Yes...I have this image and yes this is after her rebuild. Interesting to see her stunsails in both configurations.. . because other ships do the same. It's hard for me to tack down a real good example..since it seams it might have been preferential instead of typical. Searching the model world...stunsails have found themselves mounted on top...slightly abaft....in front, slightly forward(similar to Ed's fine model), slung from beneath. It just seams to be how they get modeled. Personally I think I want to make my irons beefier and repair the missed center iron. No matter what I do...I'll make them far better. The lack of a good operating left hand definitely shows. Rob
- 1,208 replies
-
- 4
-
-
- great republic
- clipper
- (and 1 more)
-
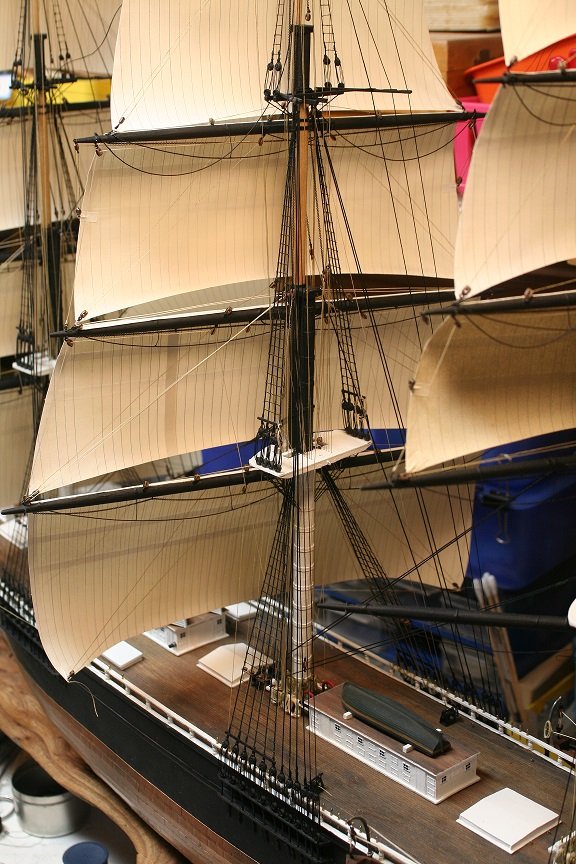
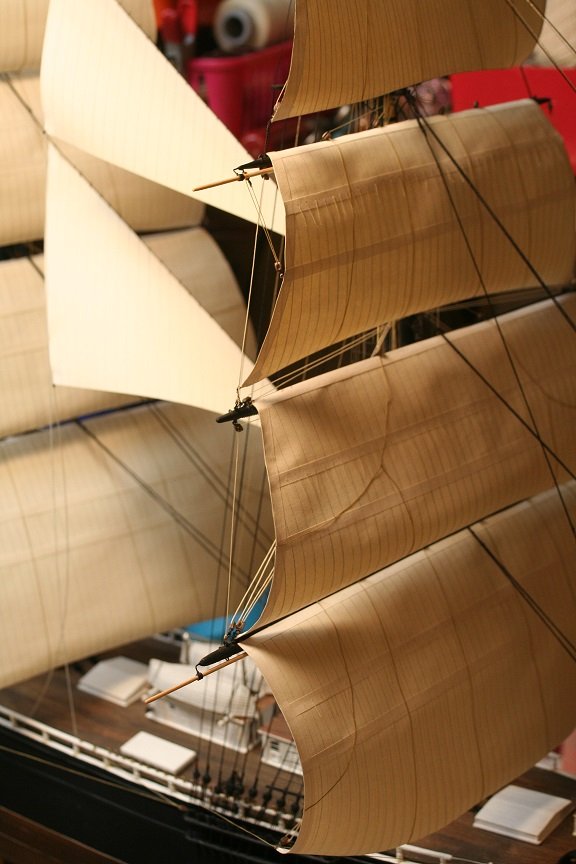
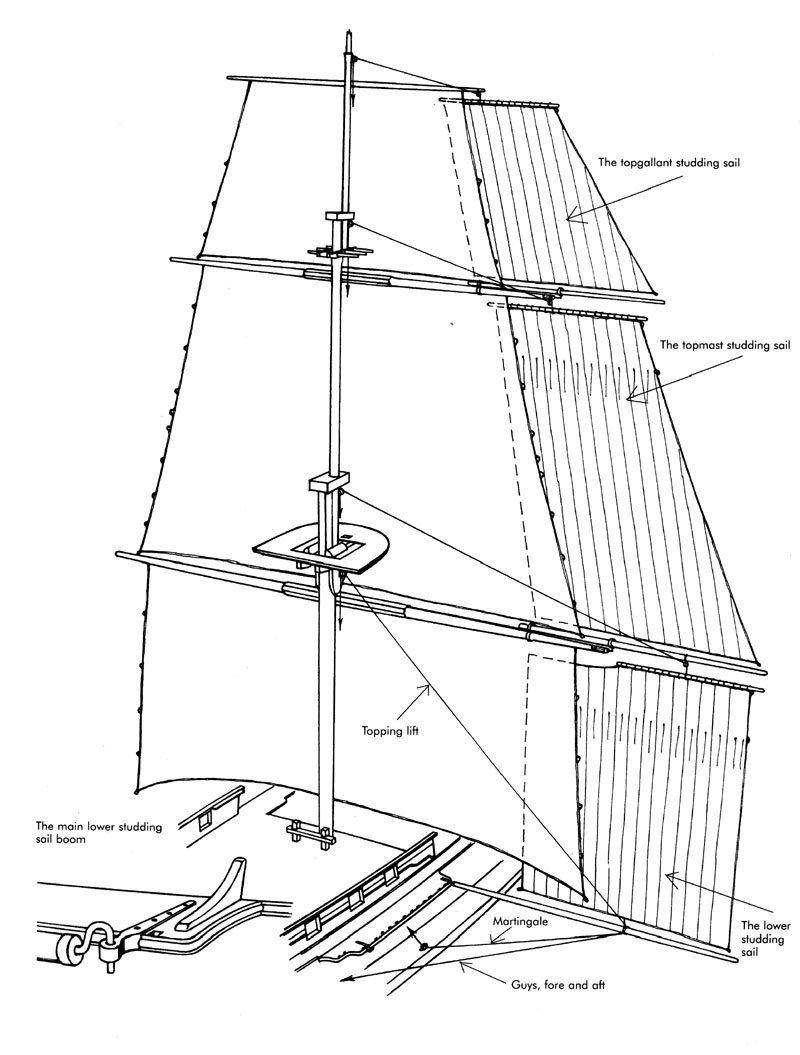
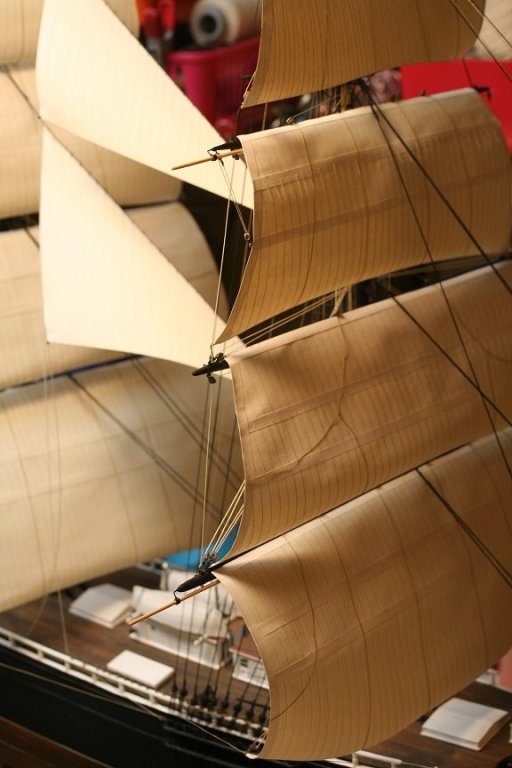
More to follow...…. Just for information sake here are some images, one a drawing, of the stunsail boom suspended from the top of the yard...similar to mine.
.jpg.145dde994b87b625d80c47917d310fec.jpg)

- 1,208 replies
-
- 6
-
-
- great republic
- clipper
- (and 1 more)