HOLIDAY DONATION DRIVE - SUPPORT MSW - DO YOUR PART TO KEEP THIS GREAT FORUM GOING! (Only 36 donations so far out of 49,000 members - C'mon guys!)
×


rwiederrich
-
Posts
5,518 -
Joined
-
Last visited
Content Type
Profiles
Forums
Gallery
Events
Everything posted by rwiederrich
-
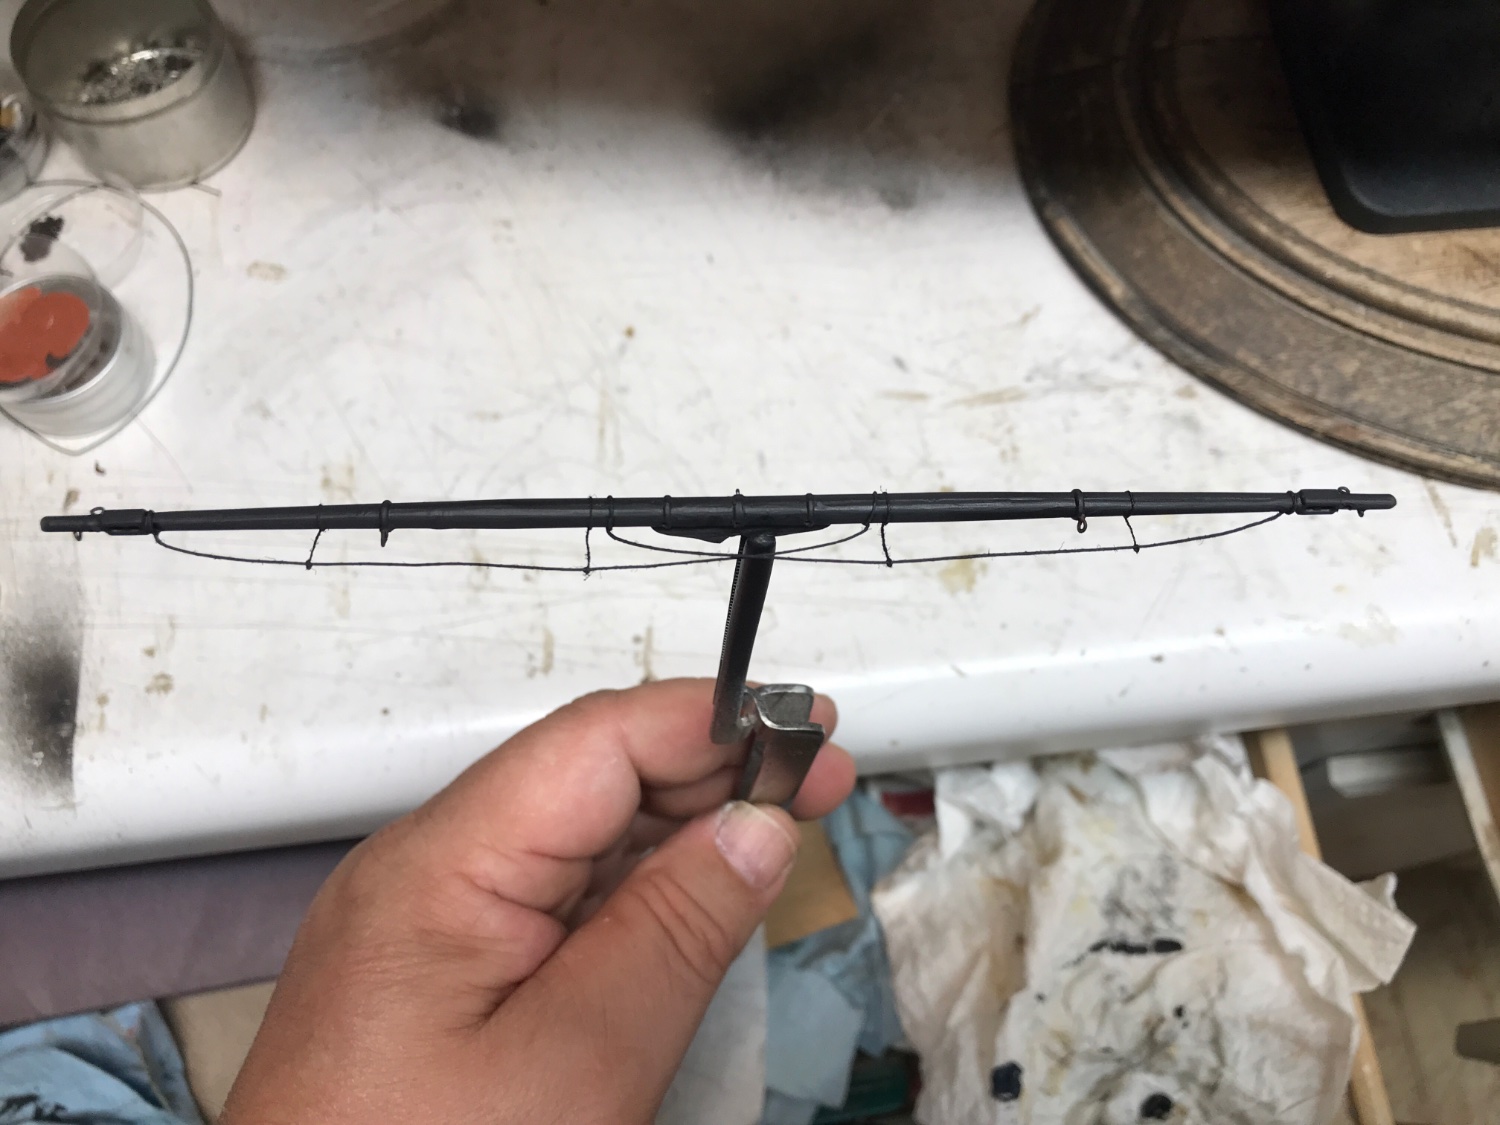
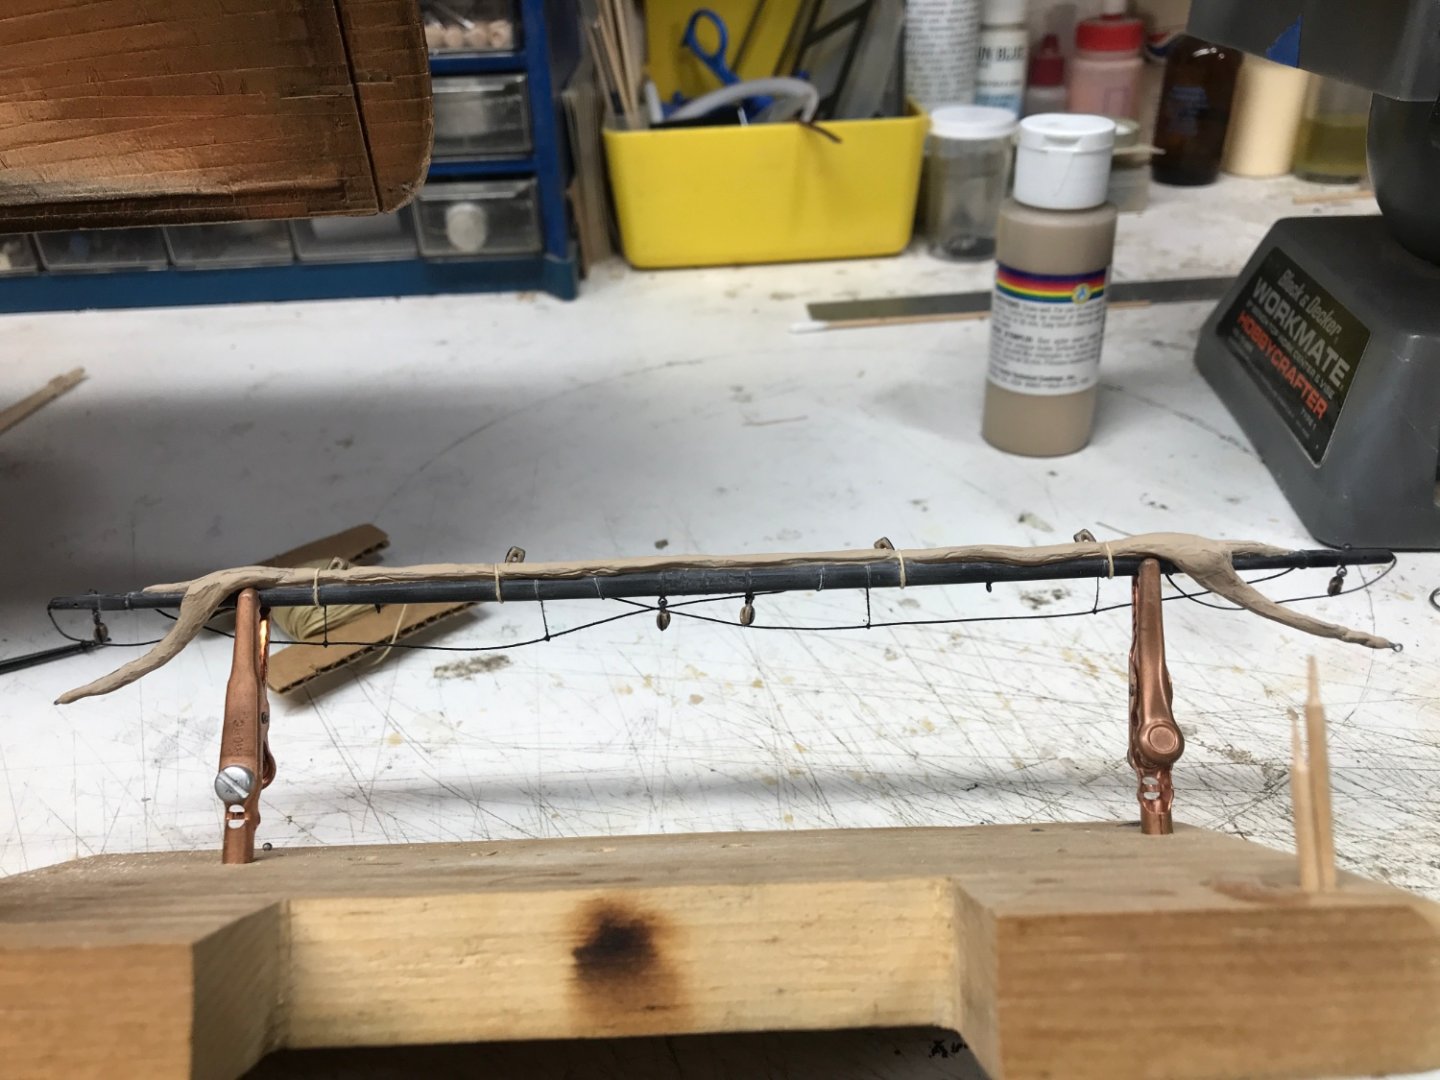
Finished up the upper topsail yard/sail. Now I have 2 yards done. Rob
- 3,560 replies
-
- 5
-

-
- clipper
- hull model
- (and 2 more)
-
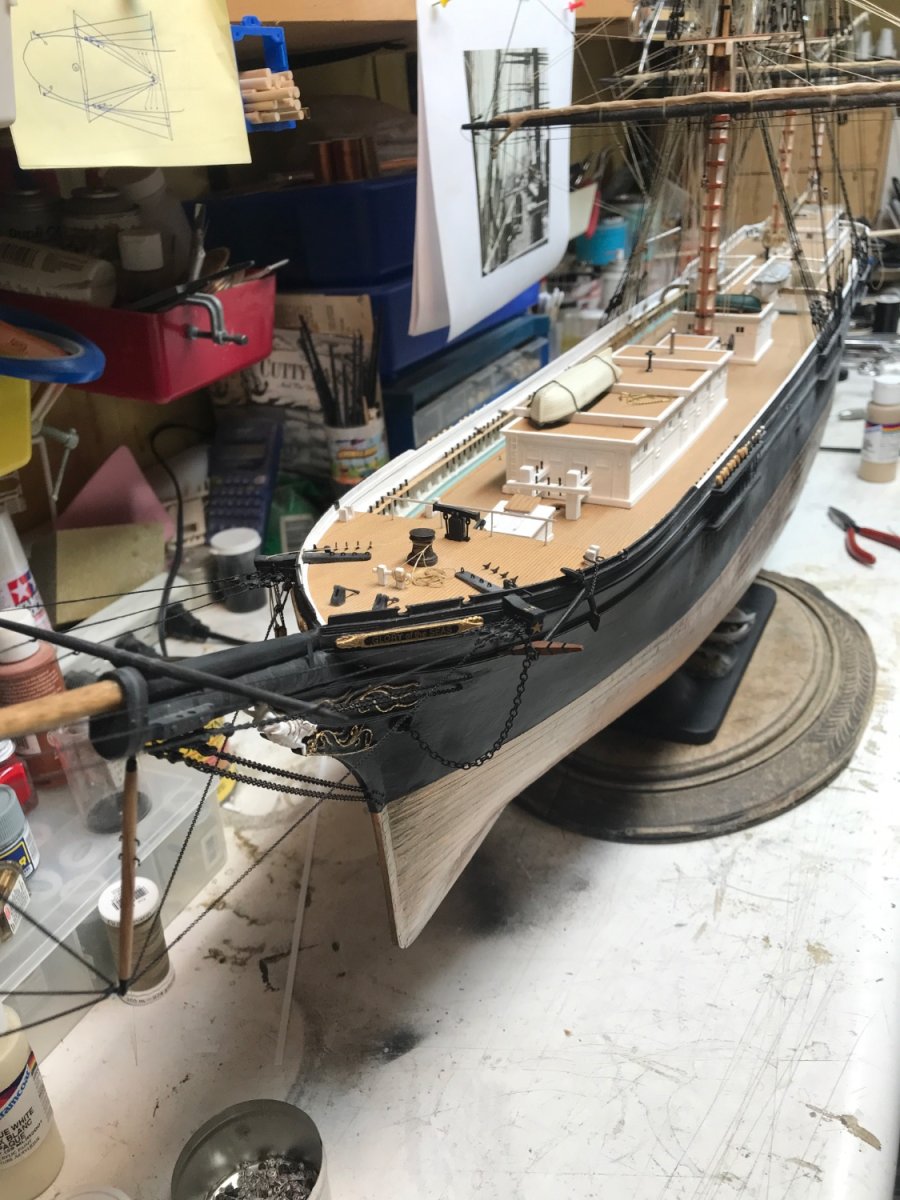
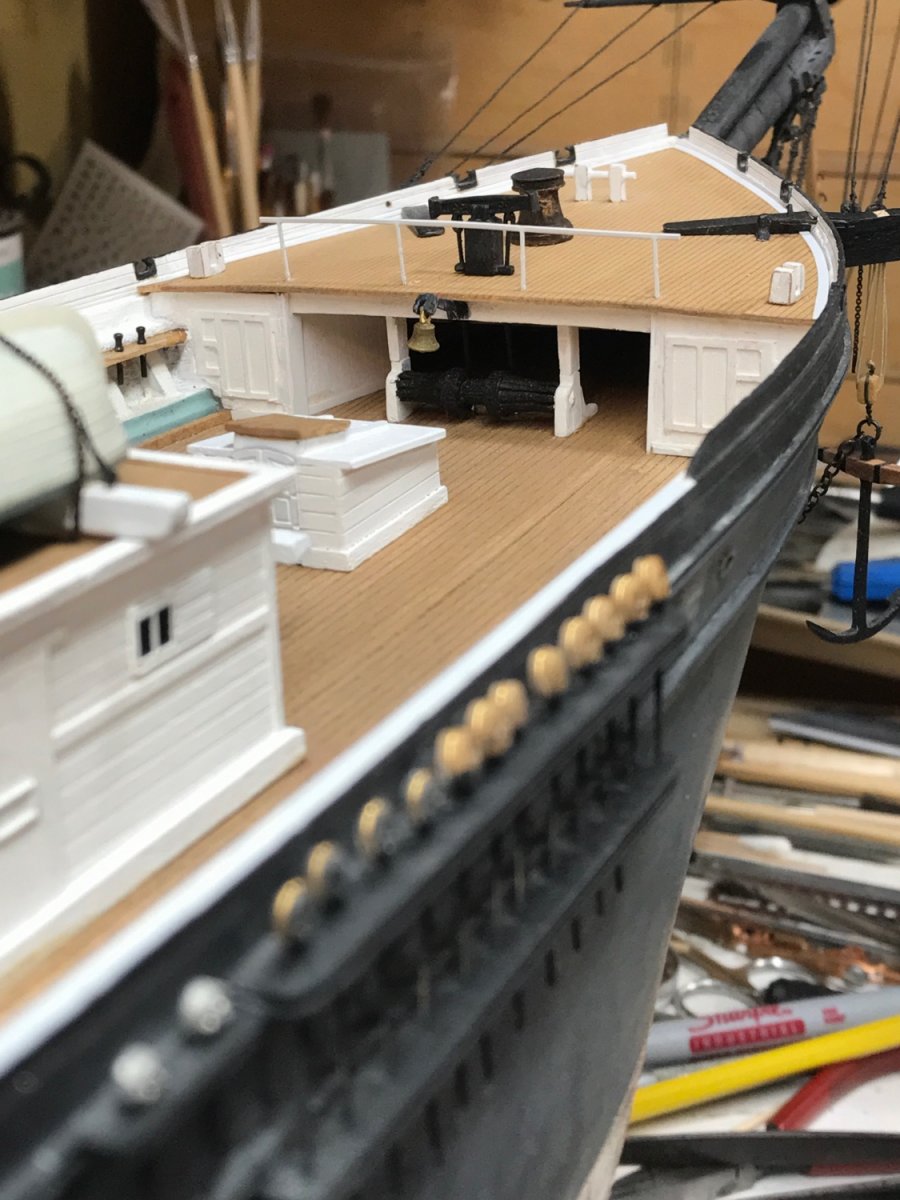
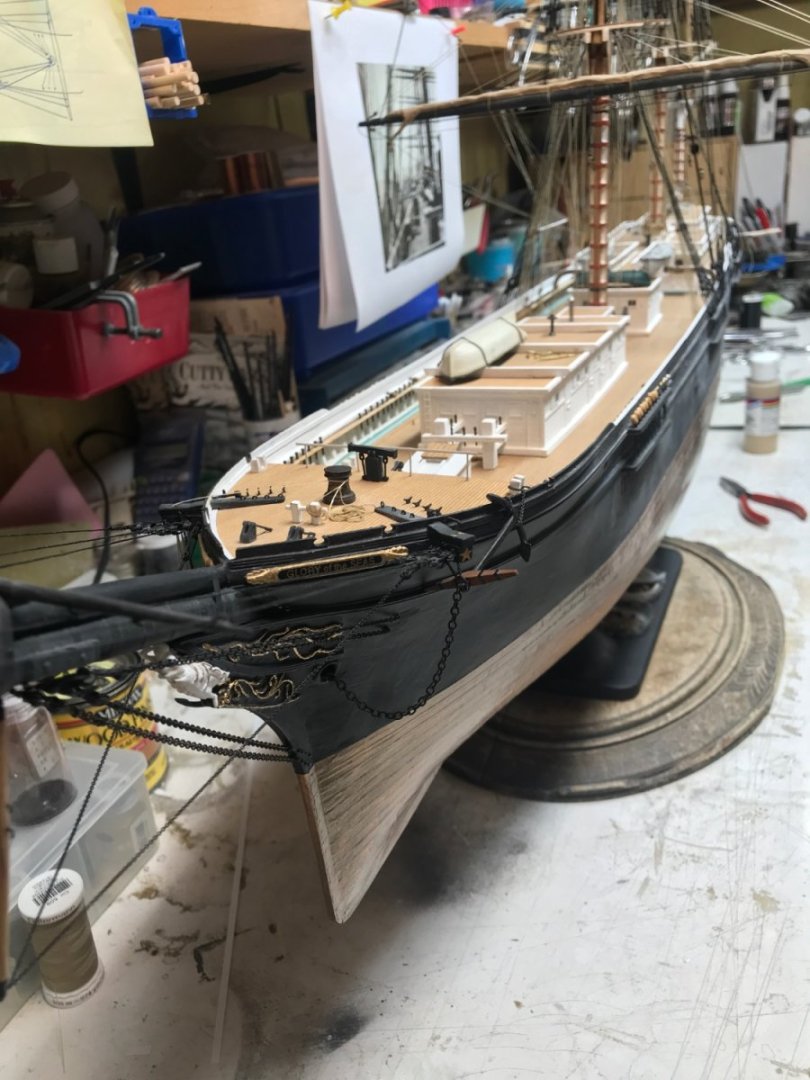
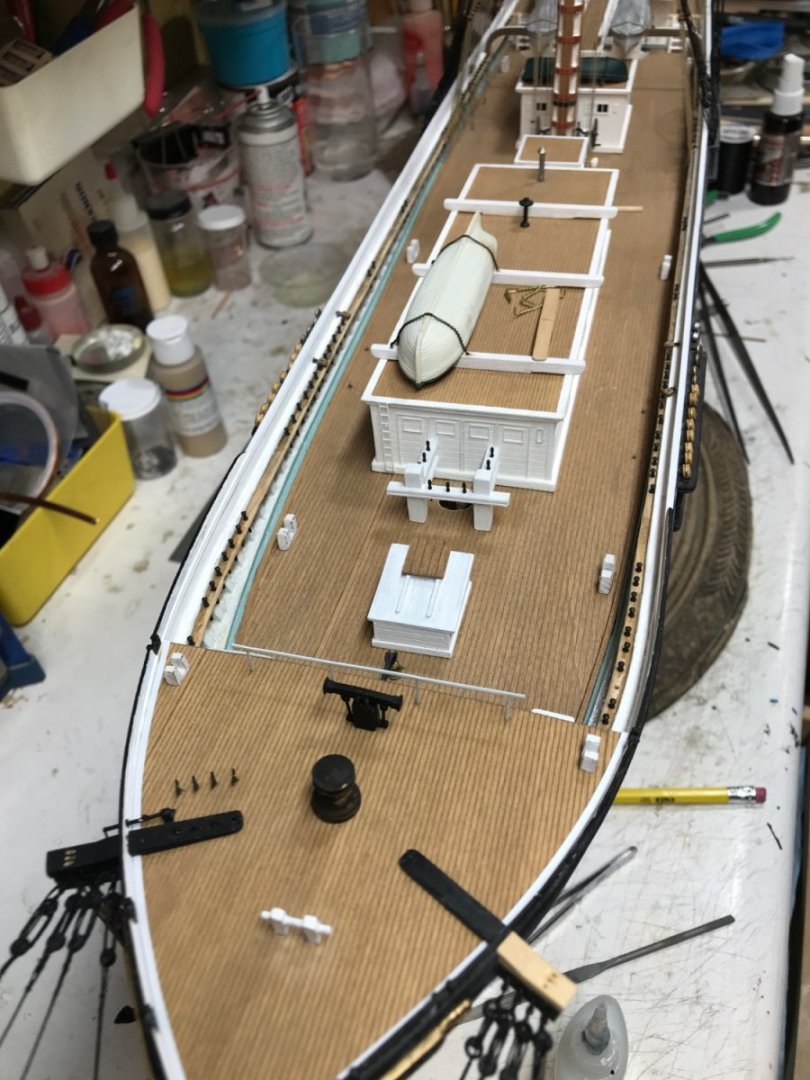
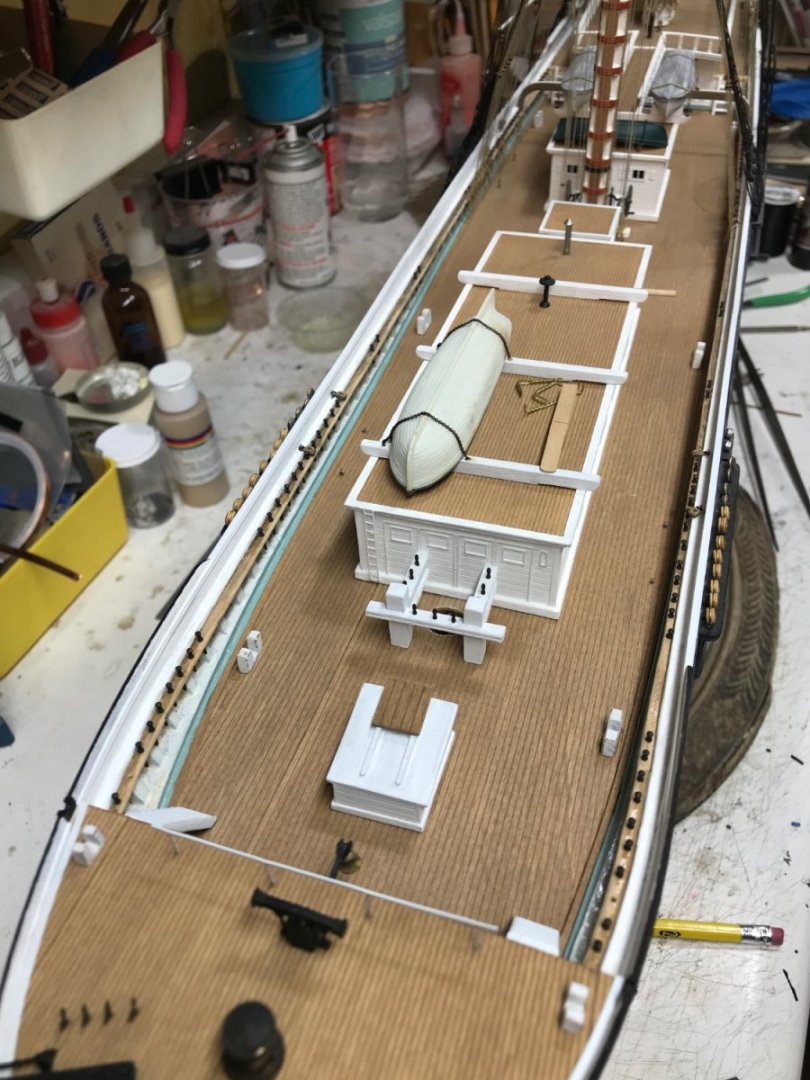
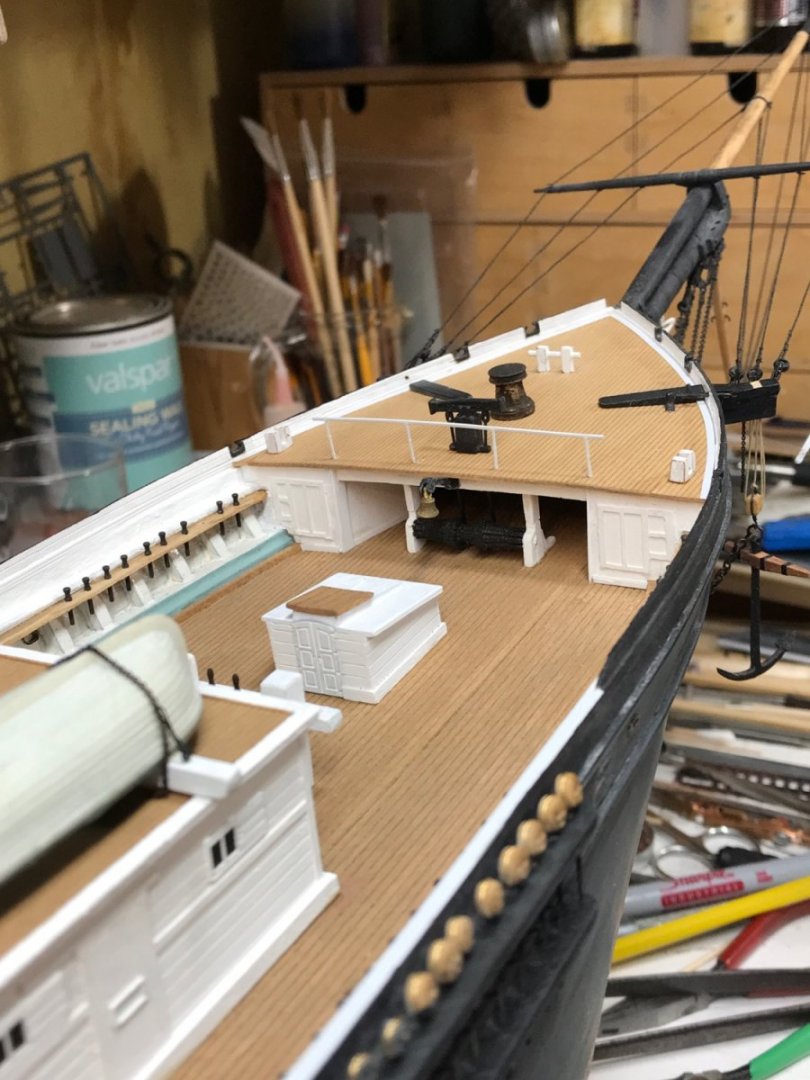
Ya know, that new forecastle actually balances the ship far better then before. The aft carriage house is elevated, the main cabin is elevated and the original forecastle was not and it just looked unbalanced. Now it looks symmetrical. I like it. Good job remodeling crew. Rob
- 3,560 replies
-
- 2
-
-
- clipper
- hull model
- (and 2 more)
-
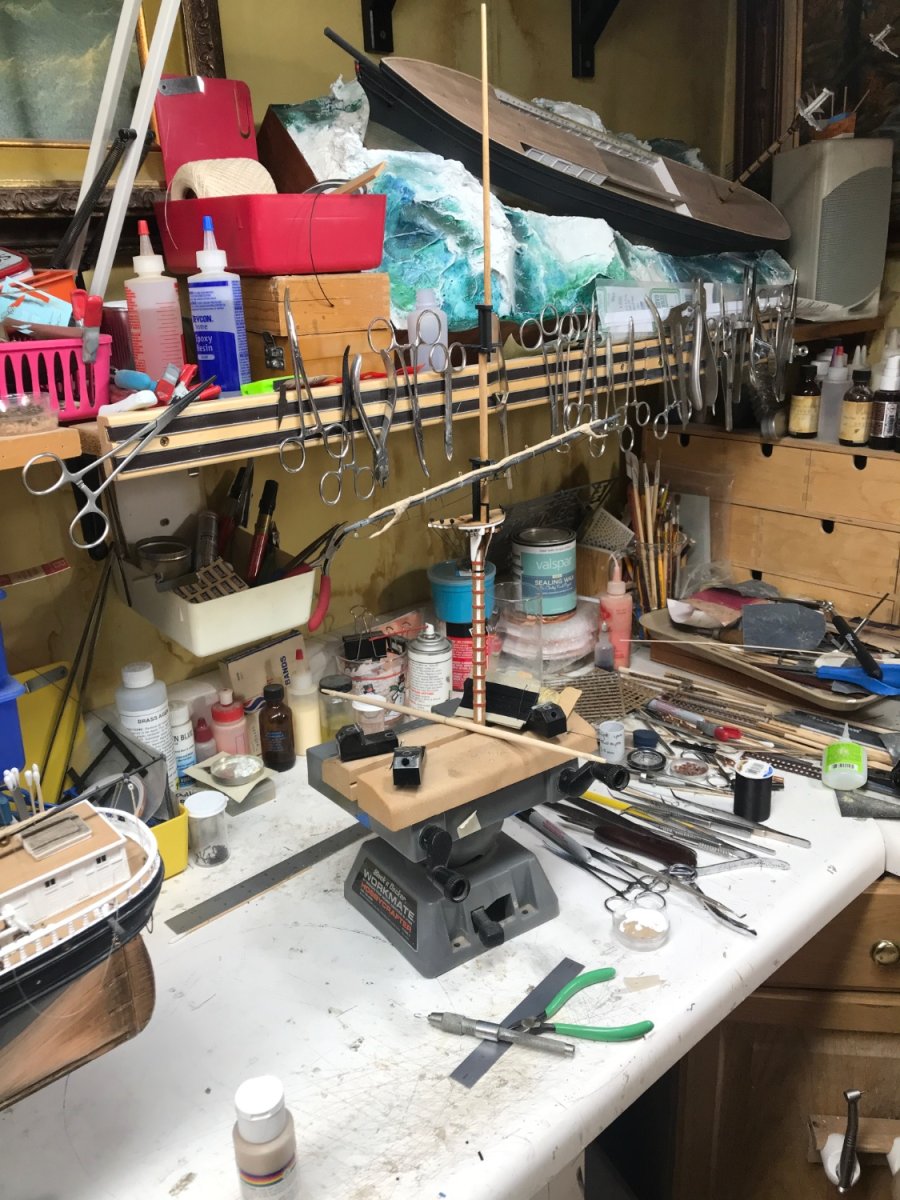
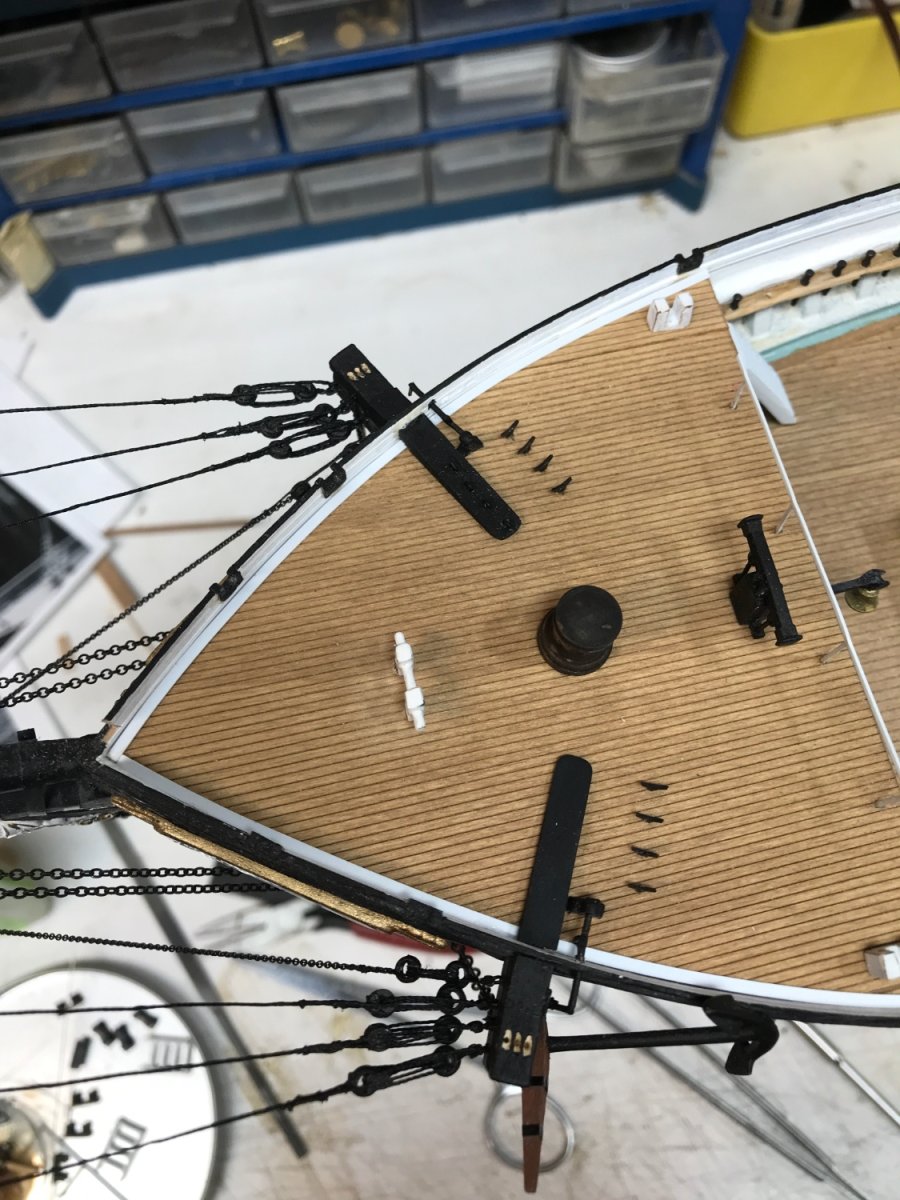
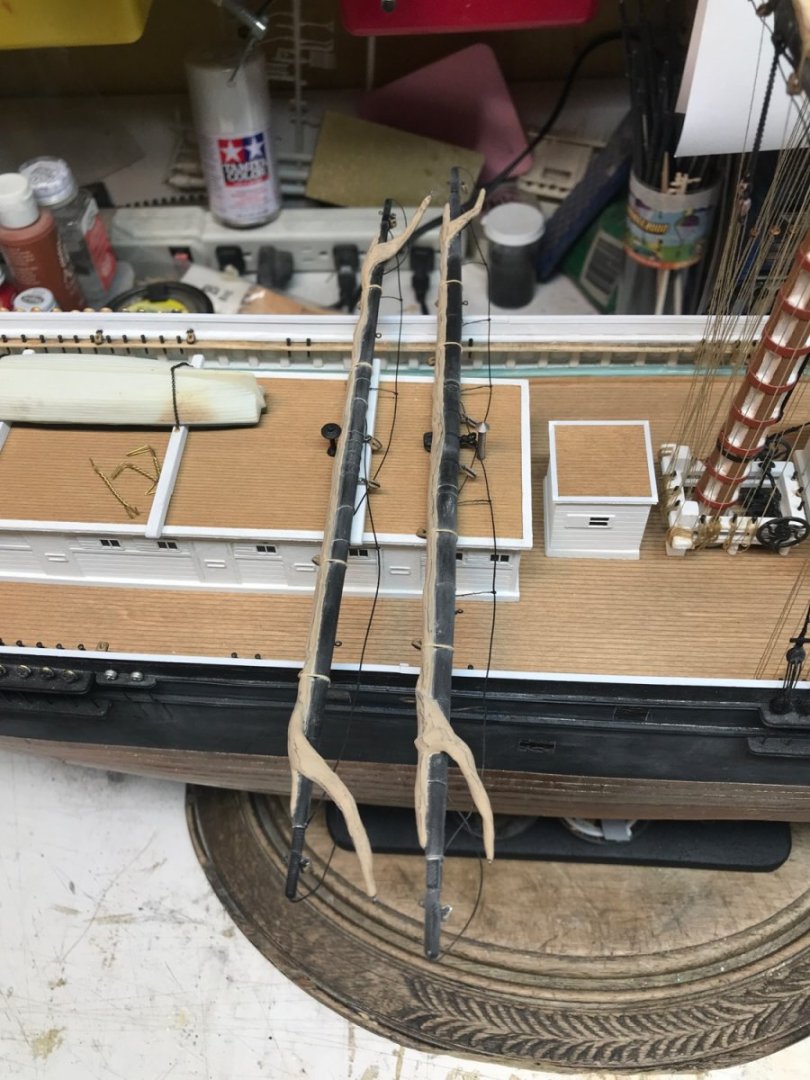
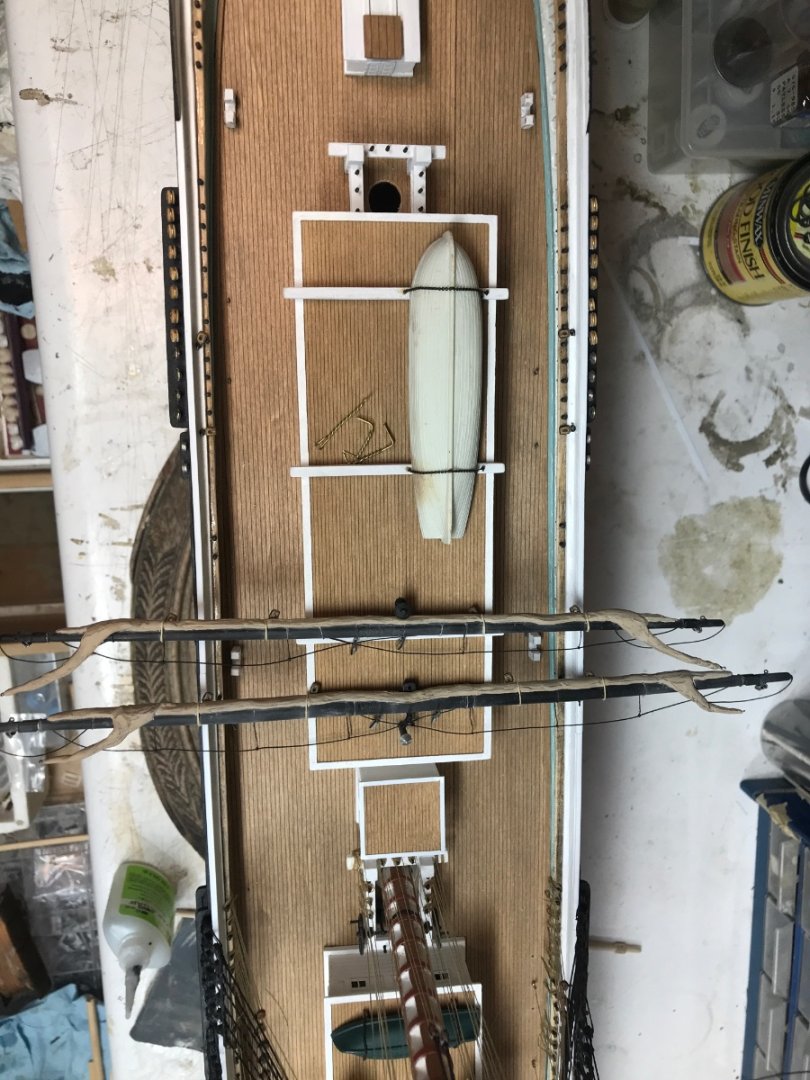
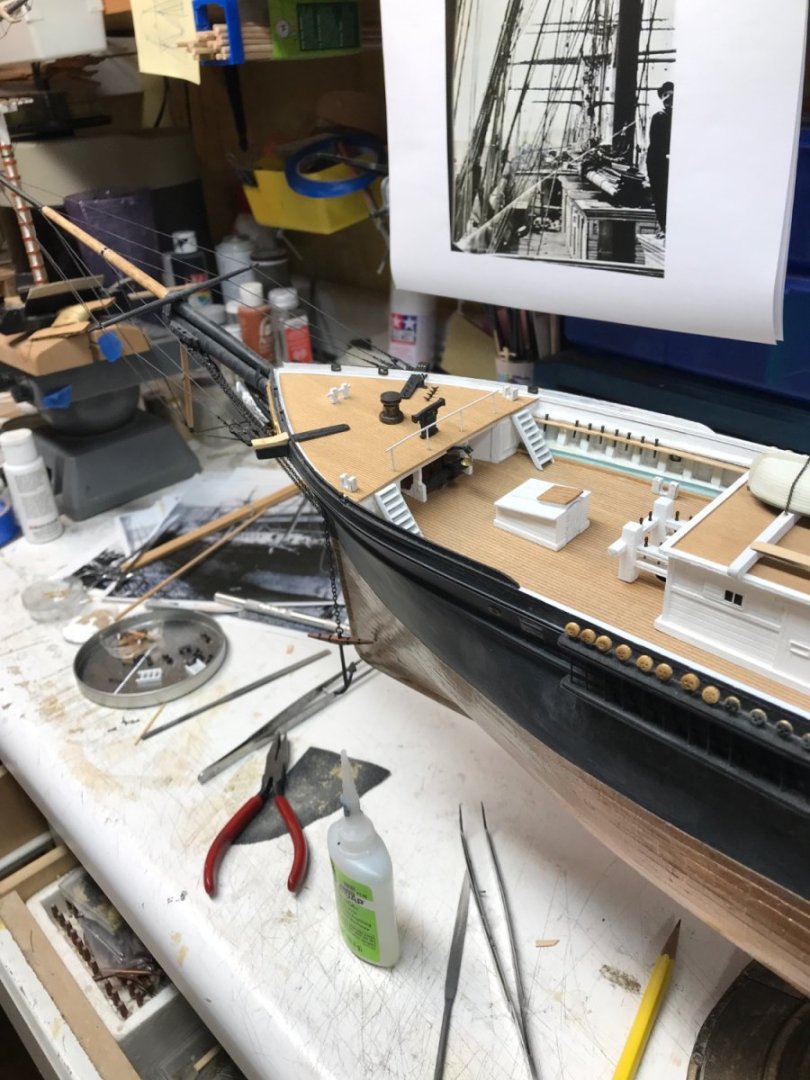
Moved everything out of the way to get ready to begin again on the fore yards. Rob


- 3,560 replies
-
- 6
-
-
- clipper
- hull model
- (and 2 more)
-
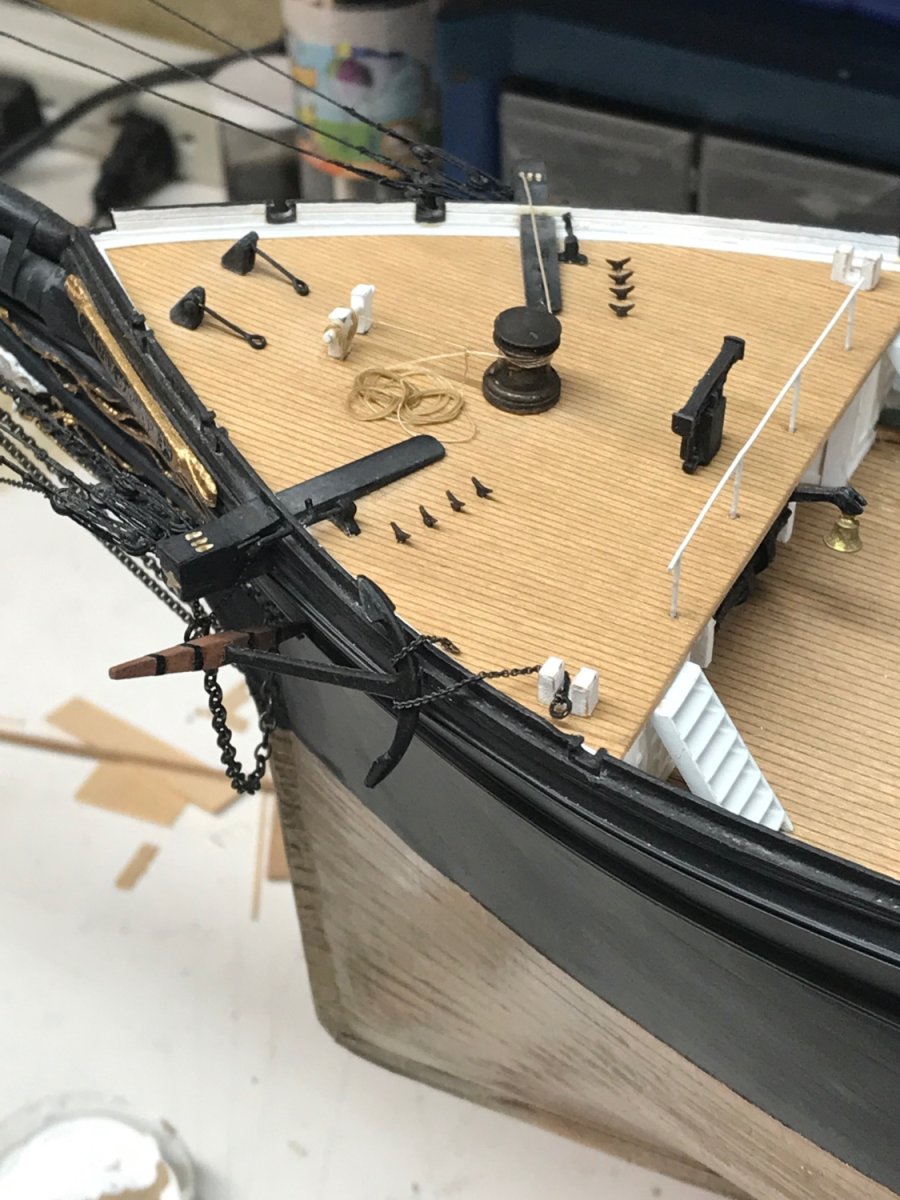
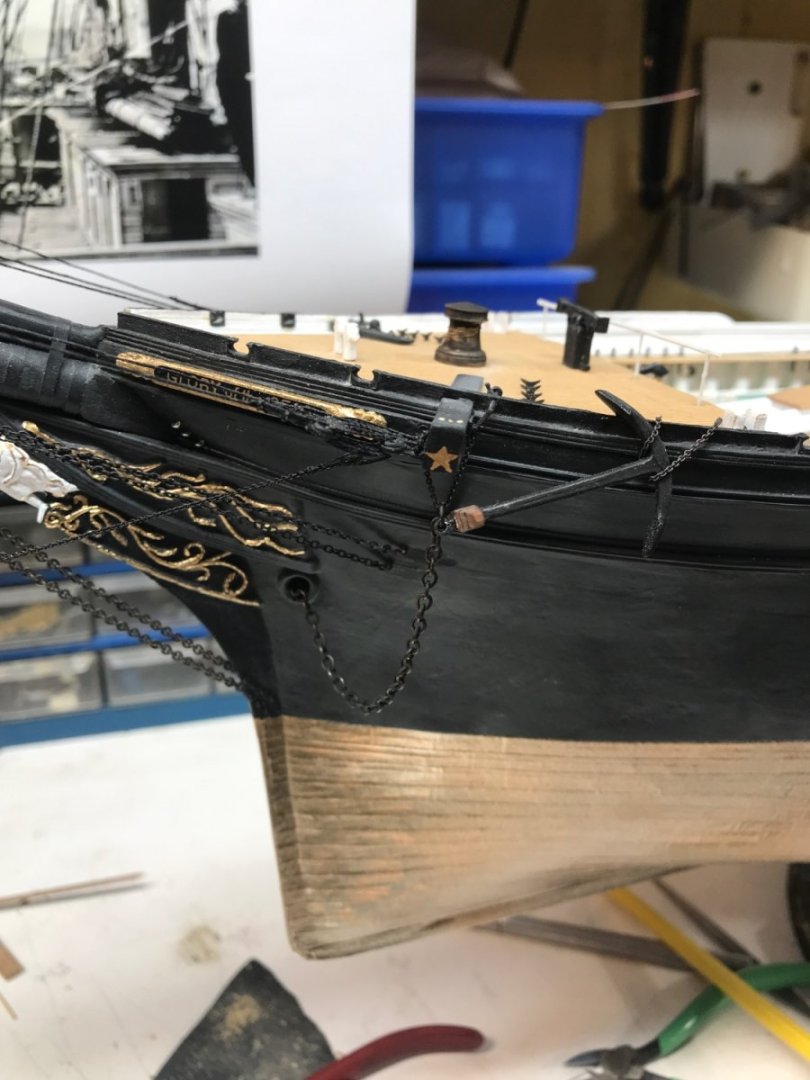
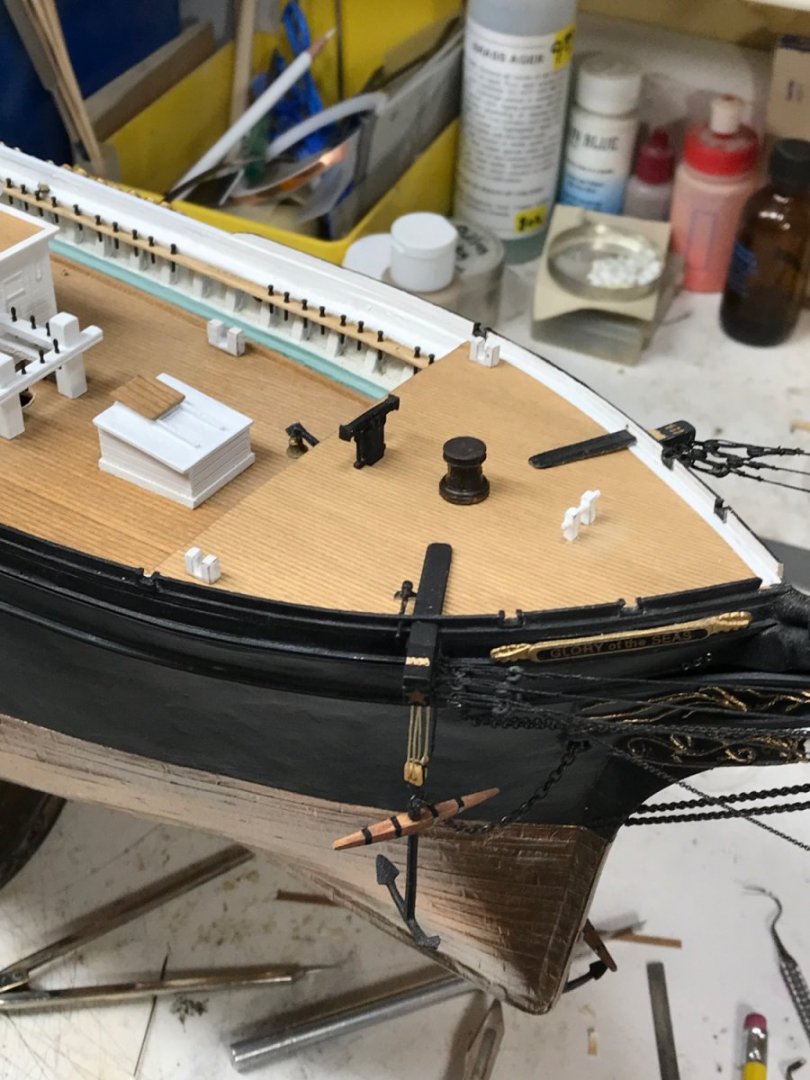
Added the fore main stay shackle boots and irons. And secured the starboard anchor tackle with a lead belayed at the forward bitt . Rob


- 3,560 replies
-
- 6
-
-
- clipper
- hull model
- (and 2 more)
-
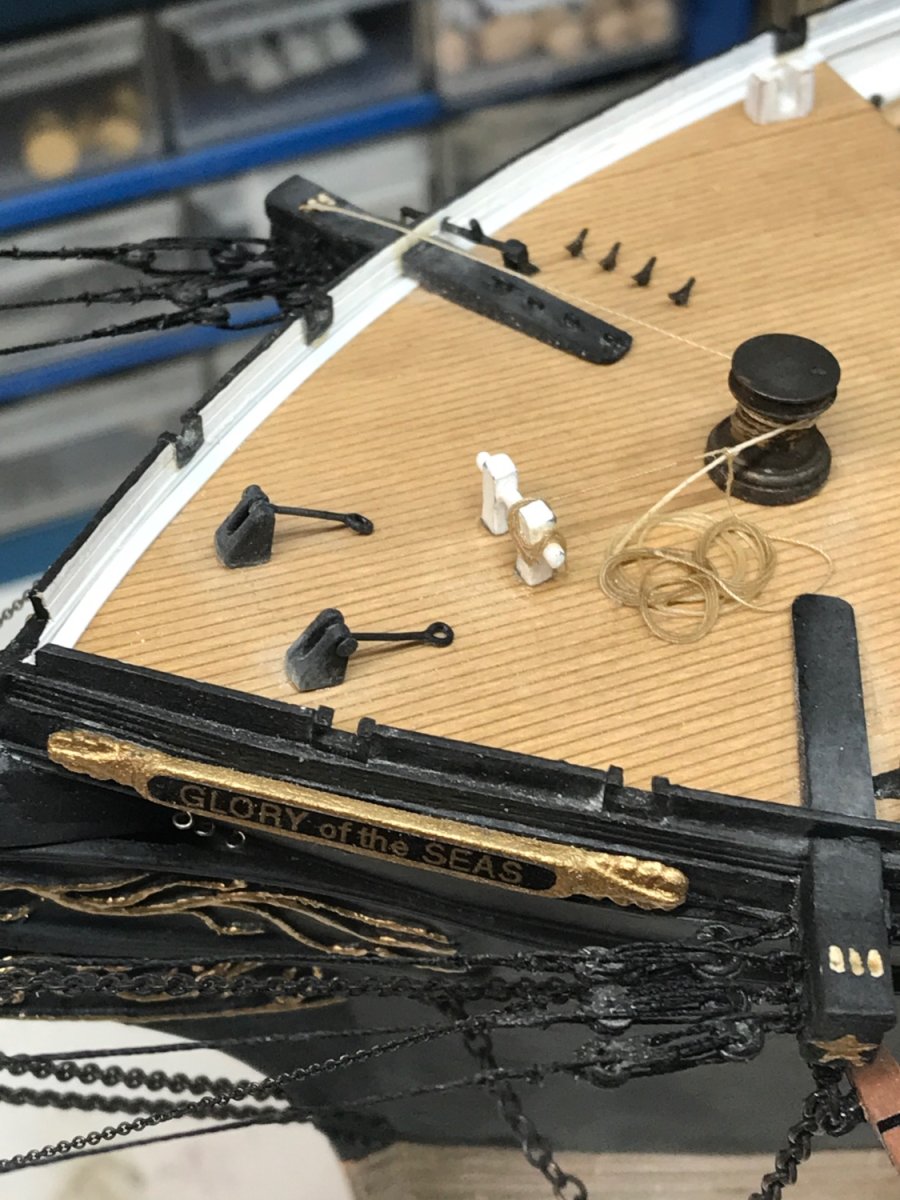
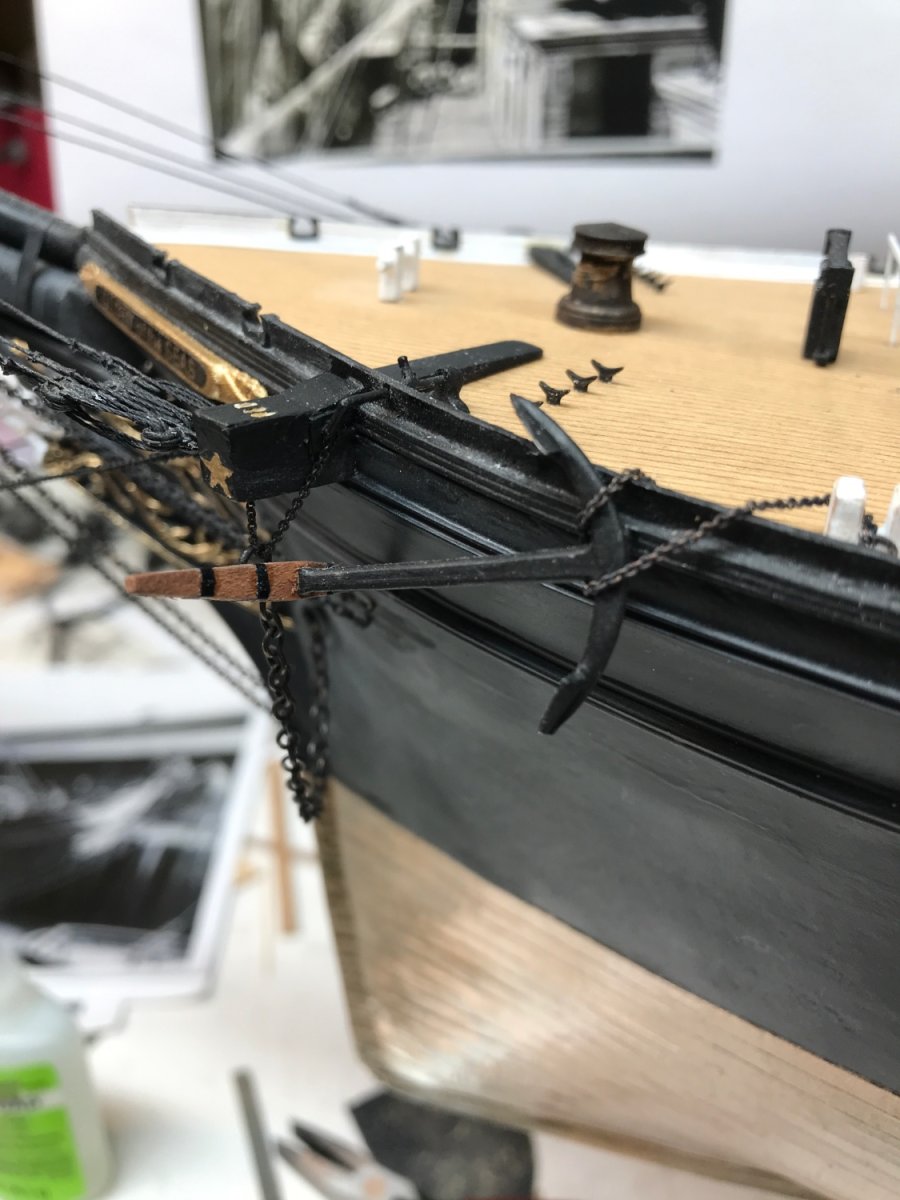
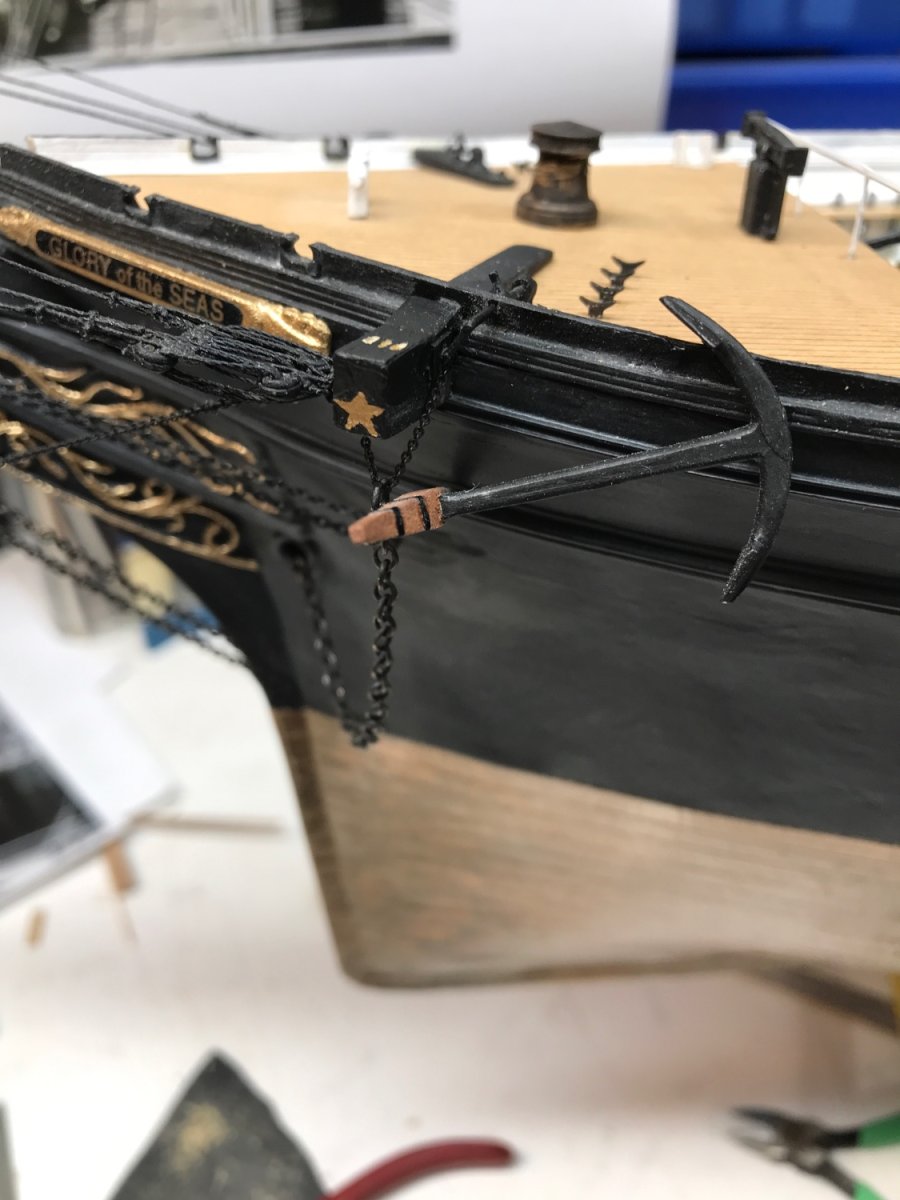
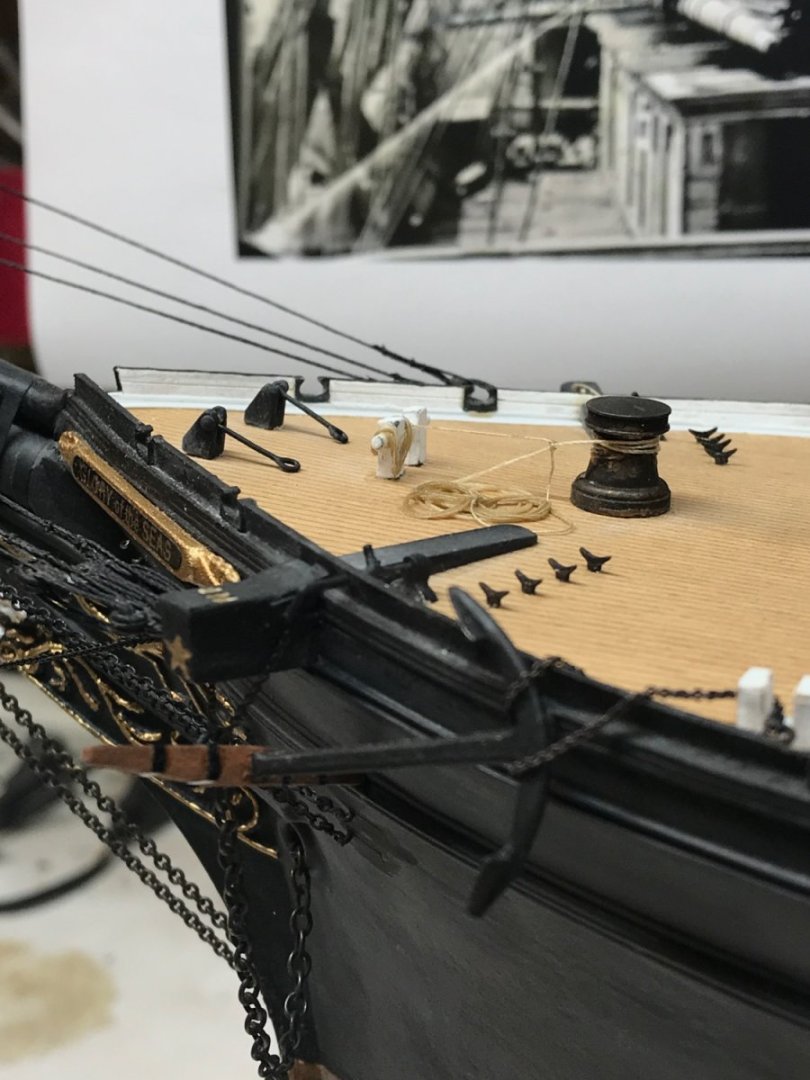
Finished up the cat head details and the anchor release mech. And secured the anchor. Rob

- 3,560 replies
-
- 2
-
-
- clipper
- hull model
- (and 2 more)
-
“Fair”……….just to be fair……..not requiring any fare for askin. I will be putting in some quality time today on Glory……hope to get some stuff done. Rob
- 3,560 replies
-
- 1
-
-
- clipper
- hull model
- (and 2 more)
-
My dumb phone keeps auto correcting me and half the time I keep missing it.
- 3,560 replies
-
- 1
-
-
- clipper
- hull model
- (and 2 more)
-
Thanks for keeping me straight……when I go astray. Rob
- 3,560 replies
-
- 2
-
-
- clipper
- hull model
- (and 2 more)
-
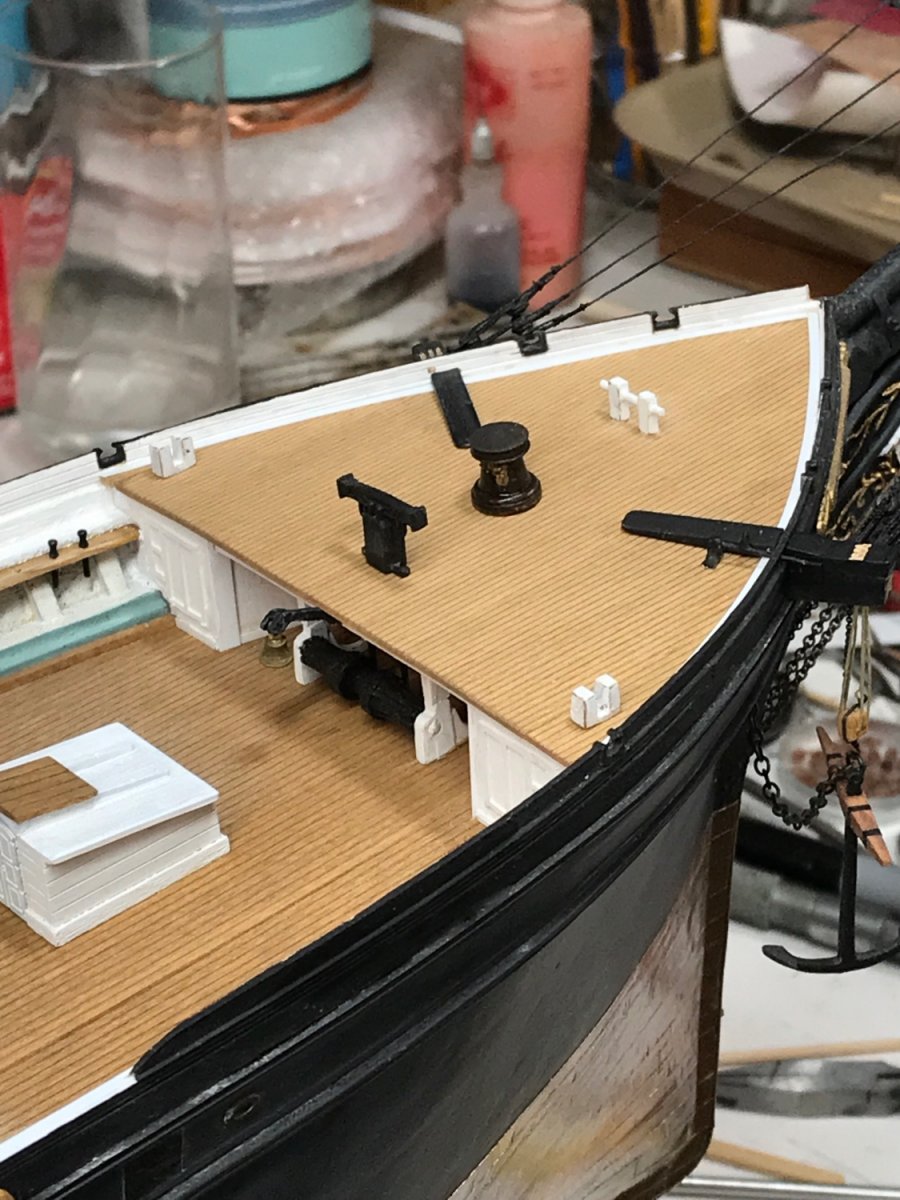
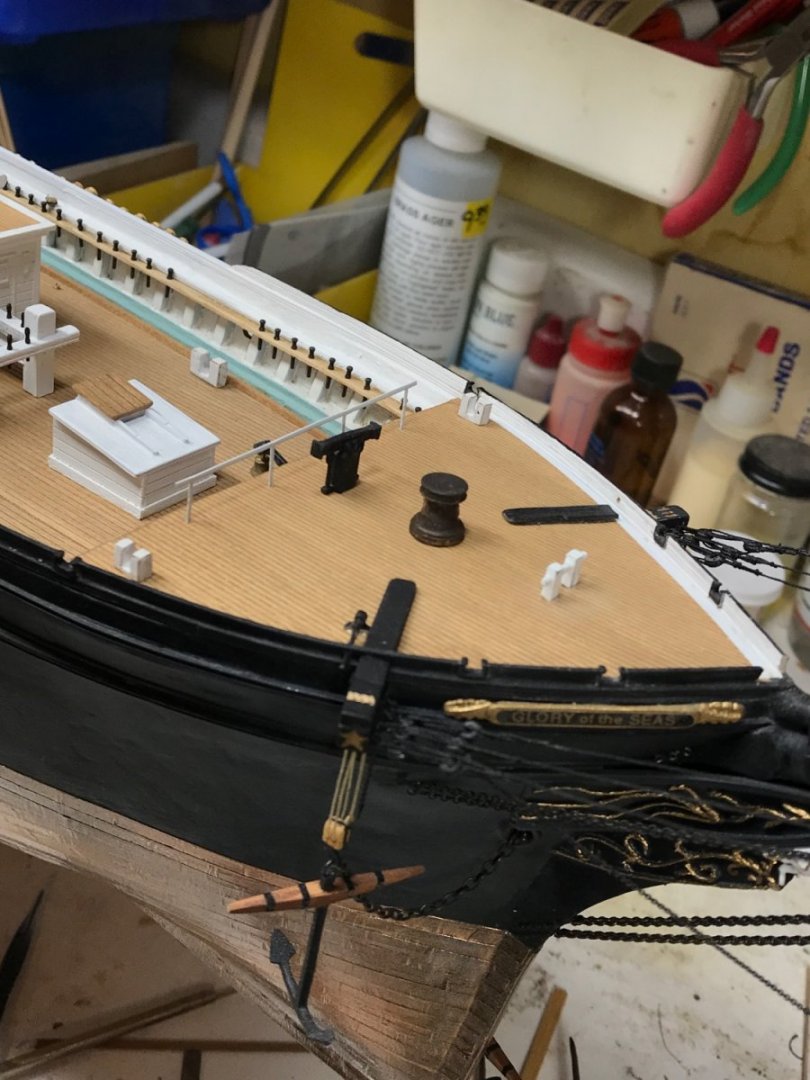
Those large black ones mounted on the splash rail are called, mooring fareleads. And the eyelet ones on the cat head are called, stay/jibsail fareleads. Rob
- 3,560 replies
-
- 1
-
-
- clipper
- hull model
- (and 2 more)
-
Thanks Rich. I’m talking about the stay sail and jib sail brace fairleads that are mounted atop the cat head body on the deck, that direct the braces to their appropriate cleat. Rob
- 3,560 replies
-
- 1
-
-
- clipper
- hull model
- (and 2 more)
-
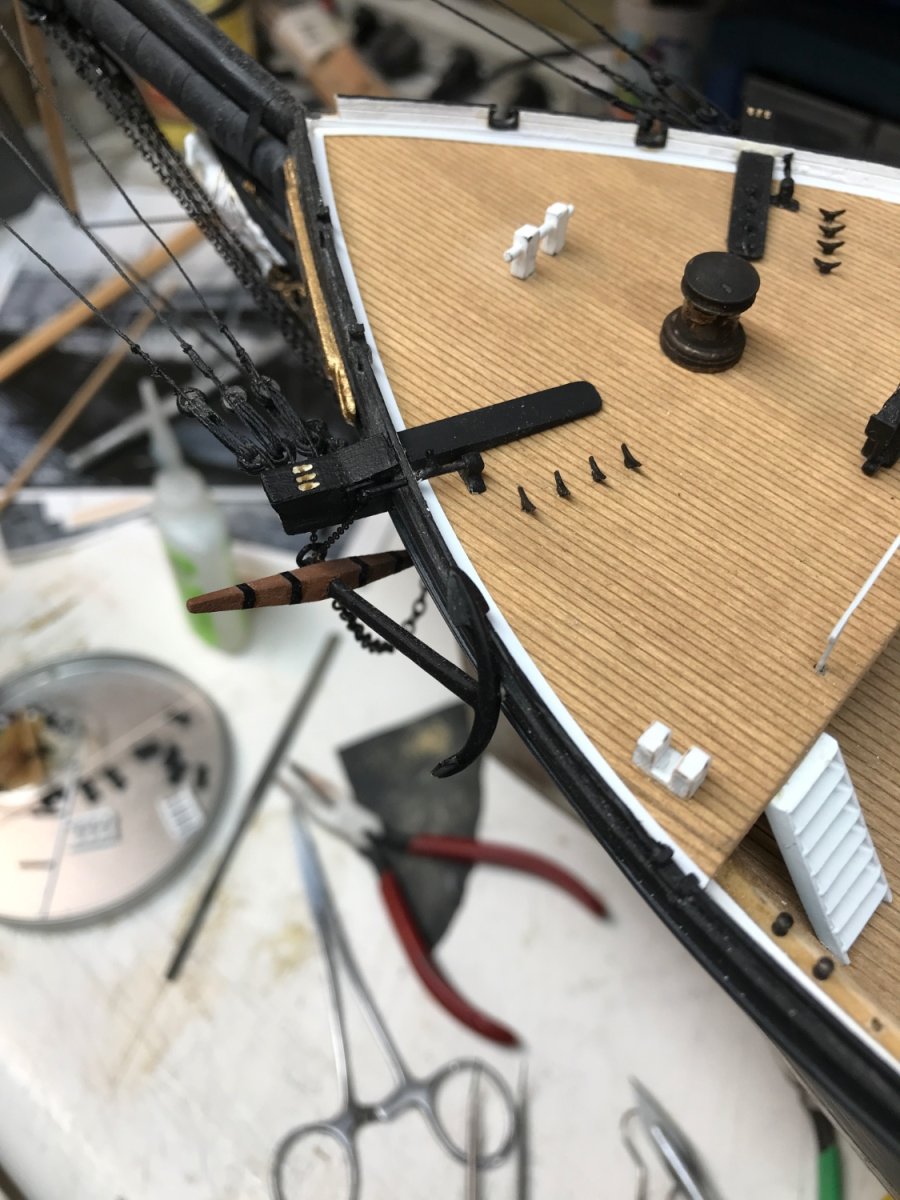
Working on the port anchor release mech. And finishing off the cat head. Just a few more Additions, the fairleads. Rob


- 3,560 replies
-
- 4
-
-
- clipper
- hull model
- (and 2 more)
-
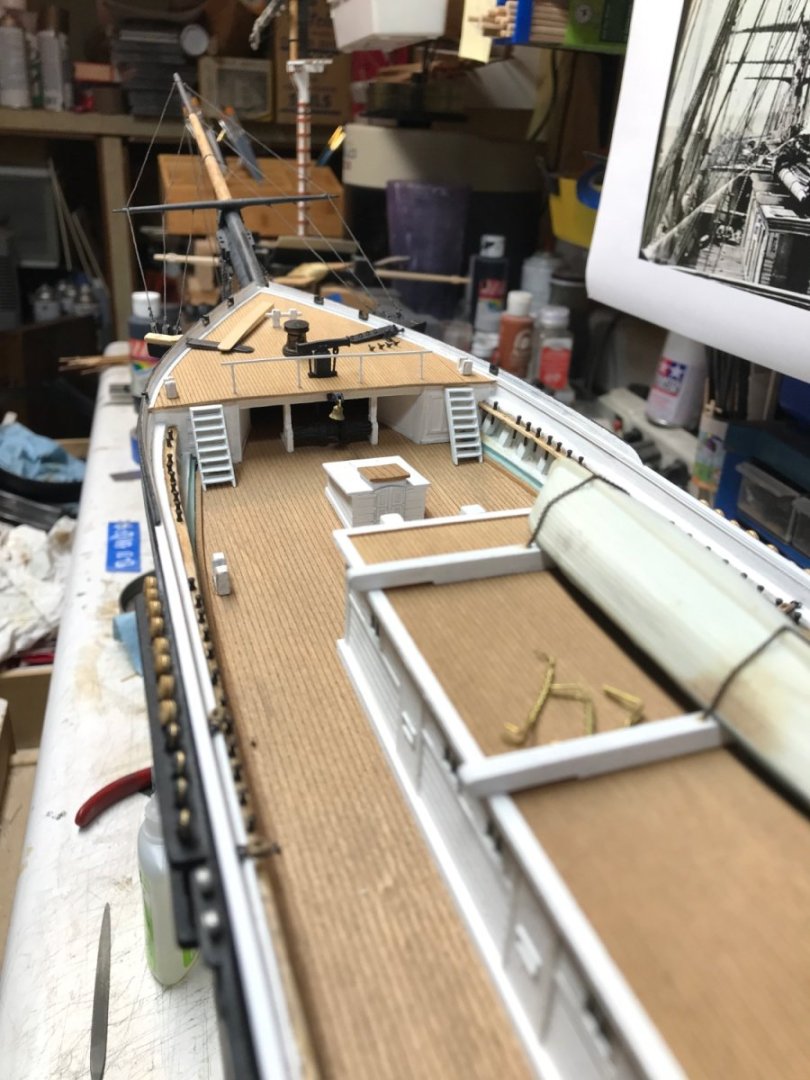
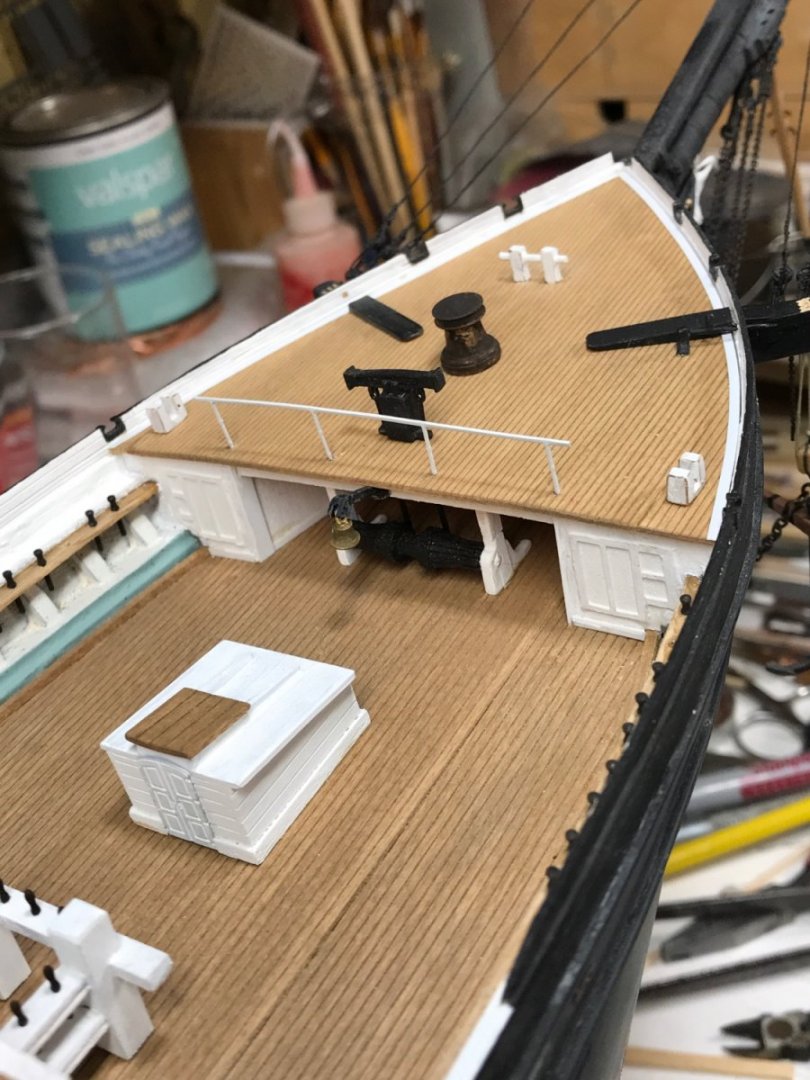
Thanks Vlad......and I completely agree...what were we thinking? Personally, I think, we were so concentrated on replicating her stem(bow) and her stern, that pretty much everything else was a second thought. We both had originally only planned to build *HULL* models. But where do you stop? It just kept getting bigger and bigger....until nothing short of a full reconstruction was in order. One thing about that Crothers drawings of Great Republic and Lightning. They had no real forecastle deck...GR was originally built with a complete *Weather* deck....which included stem(forecastle) to stern(poop)...one big long, uninterrupted deck. Lightning's main deck dropped down and her forecastle and poop were at the same level, with a gangway connecting them. Both requiring railings. However, on most clippers the raised forecastle height was probably 6ft. That is where the crew bunked in most cases. So it had to be tall enough for them to get around under it. We both fell for the old magicians trick.....*look over here, while I distract you from what I'm doing over there*. I'm glad you are looking in from time to time......and I hope you can find time to get back to your glory. Rob
- 3,560 replies
-
- 1
-
-
- clipper
- hull model
- (and 2 more)
-
Thanks Glen. I truly don’t know what I was thinking. The image of the cabin boy sealed it and after noticing how shallow the forecastle deck truly was by seeing men standing on it………well, that is all it took. I’ll finish things up tomorrow I think, then back to rigging yards. Rob
- 3,560 replies
-
- 1
-
-
- clipper
- hull model
- (and 2 more)
-
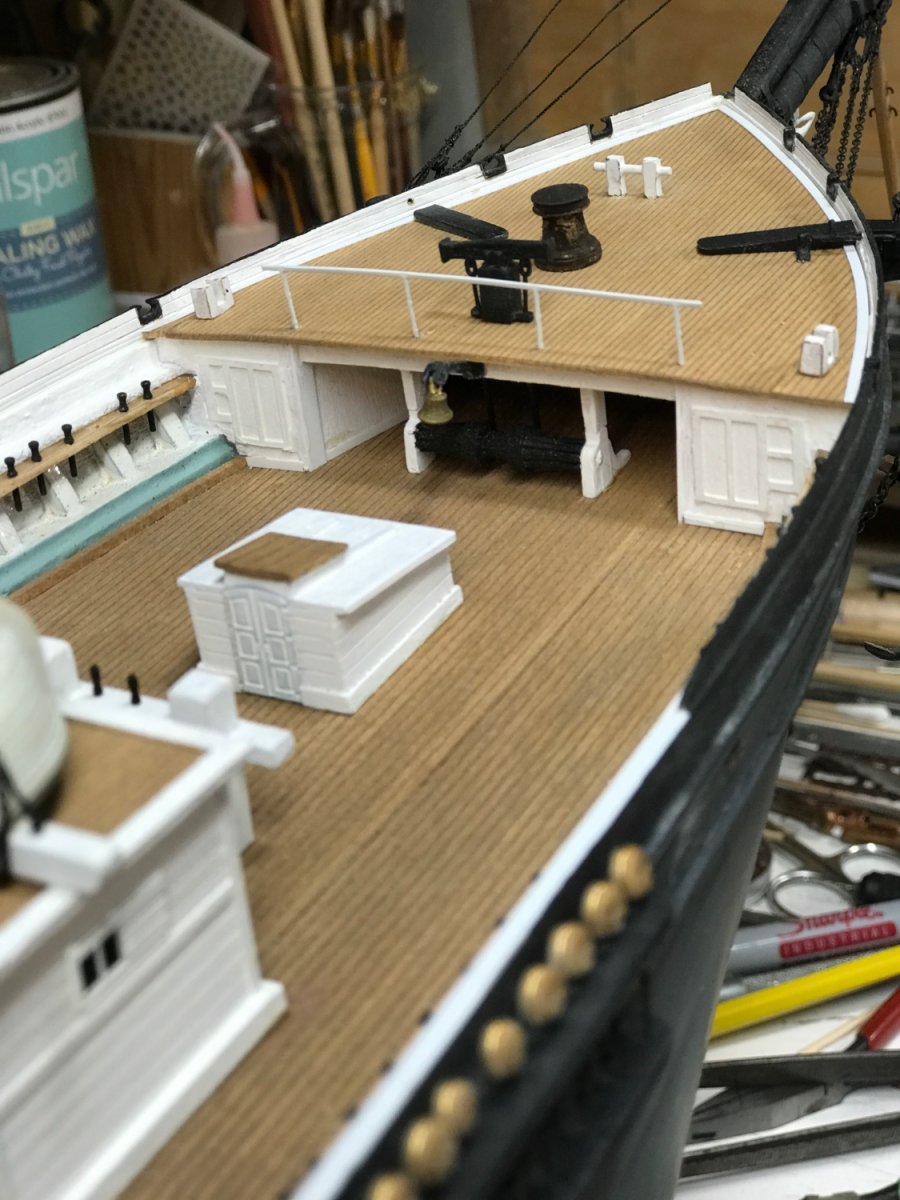
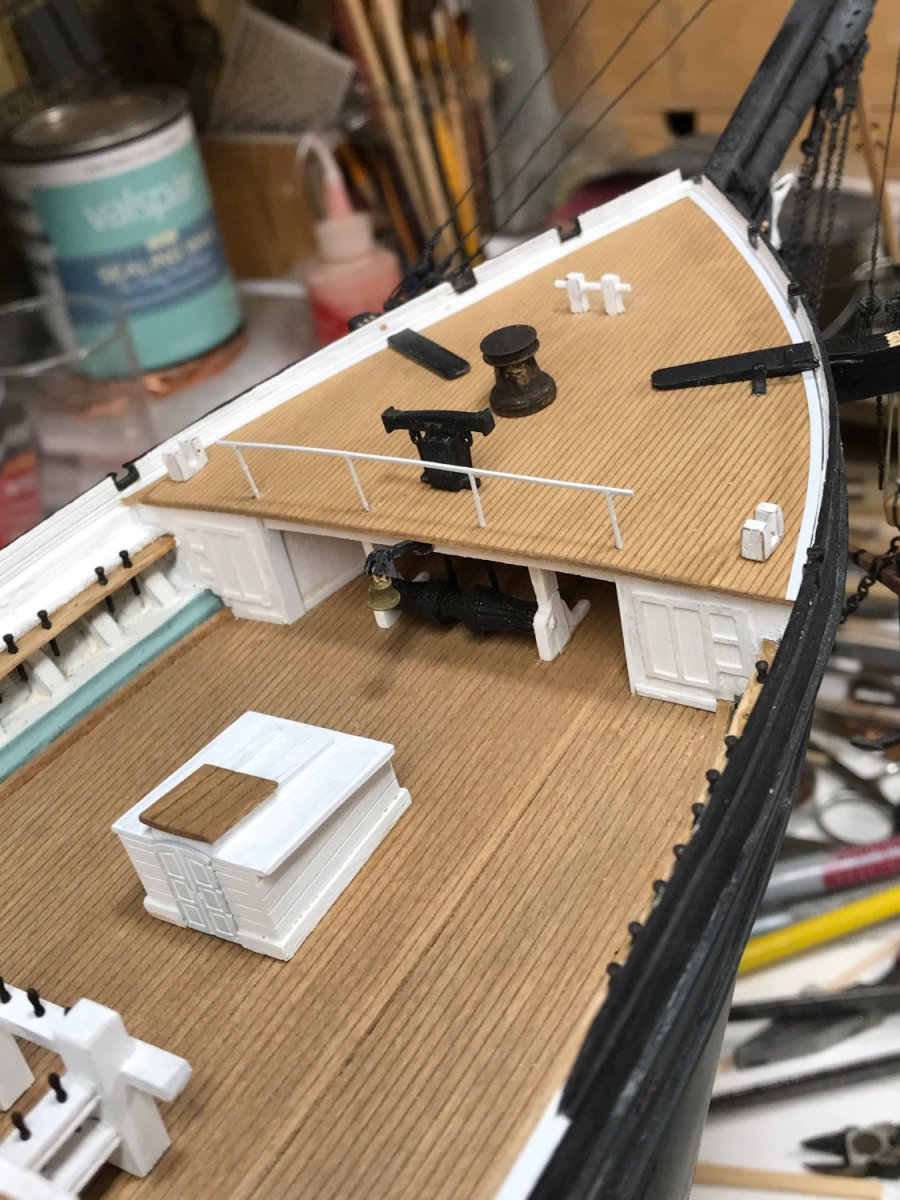
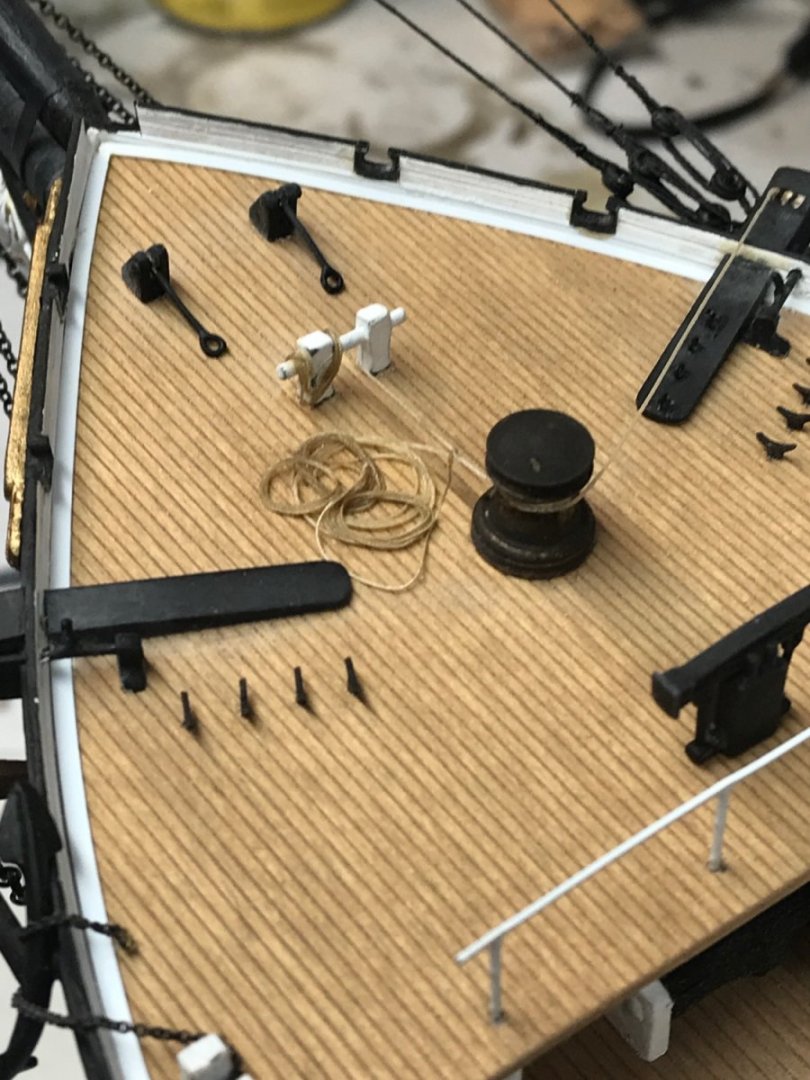
I also replaced all the iron bits with wooden bitty……..to keep to the documented historical practice of Donald McKay for many of his clippers. Rob
- 3,560 replies
-
- 5
-
-
- clipper
- hull model
- (and 2 more)
-
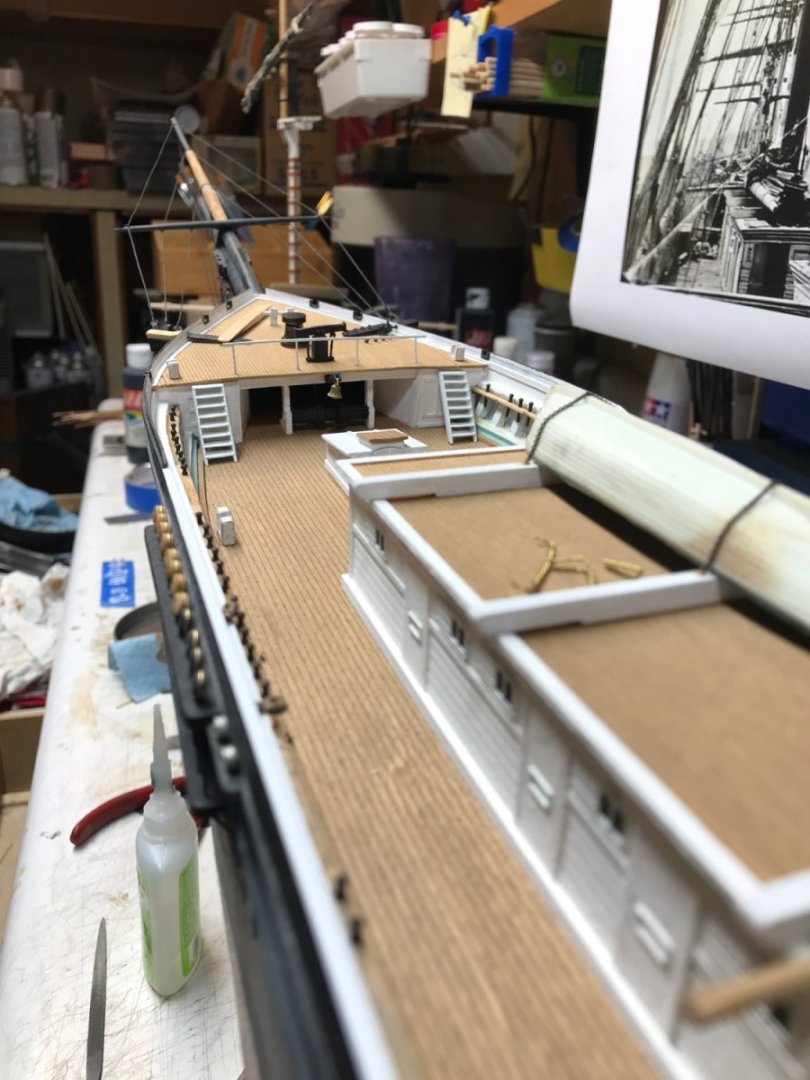
Spent some time finishing up items on the new forecastle. Still have to finish up the port cat head. Rob


- 3,560 replies
-
- 4
-
-
- clipper
- hull model
- (and 2 more)
-
Records.......once the cargo is in your hold...and you set off your pilot you have the clock running. Rob
- 481 replies
-
- 1
-
-
- Cutty Sark
- Revell
- (and 2 more)
-
Spreaders had a 2 fold employment. They, like Nic pointed out, enact more leverage against the natural flex of the mast under stresses(spreading it out), and acting (Like a bowsprit martingale)....AND they stabilize the backstay from whipping in the strong wind and from entangling with the others. Rob
- 602 replies
-
- 2
-
-
- Flying Fish
- Model Shipways
- (and 2 more)
-
Add all the padeyes and rollers.....they were still present even though they may have not been in use during lengthy periods at pier side. Sometimes the leach and buntlines were brought down and even their blocks...and at other times the lines were brought down but the blocks remained. It all depends on the length of your stay and how fast you want to rig and bend sails to the yards for getting under way. While the gear was down, ropes were mended and blocks were repaired/repainted/varnished or discarded if beyond repair. Saving the gear and tackle from the weather was paramount if it was going to be a long stay. They would even rig and unrig stunsail booms and rigging often during a voyage. Sometimes often even during a single days sailing. Rob
- 481 replies
-
- 2
-
-
- Cutty Sark
- Revell
- (and 2 more)
-
Running Rigging _ Running in Circles....
rwiederrich replied to USNCHief's topic in Masting, rigging and sails
Rigging generally is paired...unless you are talking about lifting yards and certain haulyards. But in general if it happens on the port, it happens on the starboard. A brace is a line at the end of a yard(and its blocks) used to pull a yard aft(back)...to position it to catch the best wind. You pull on one side and slack on the other. There are of course two types of rigging....standing(the kind that holds the masts stiff)(black), and the running rigging(used to move the yards and sails around(Tan). Standing rigging is always paired(shrouds and backstays), the *stays* are the standing rigging that goes between masts and holds them from shifting back and forth relative to each other. If you are only interested in rigging running rigging that controls the yards...that is the easiest. If you are not rigging any sails.....you can eliminate lots of rigging...such as the bunt lines(used for raising and lowering the sails on the masts....sheets and tacks for controlling the ends of sails, and then the downhauls and haulyards for all the stay sails. If you're real ambitious...all the stunsail rigging can be added or as mentioned...... not installed if you are NOT installing stunsails. If you break it all down into the least component or function...it isn't all that difficult. Rob -
Thanks for stopping in Vlad. Yeah...I just had to do it. With my own conscience nagging me...along with Rich's continual prompts to stay true to her design....I had to act and break out the demo hammers and saws. The pain is over now...and all that is left is to finish up the port cathead mods with its anchor release mechanism and glue a few things down. Still have to add the fore stay anchor bolts/fixtures too. Have to gotten the bug yet to begin the final masting and rigging of your Glory? Rob
- 3,560 replies
-
- 2
-
-
- clipper
- hull model
- (and 2 more)
-
“Fairleads”. The splash rail is opened up and the metal failead is inserted………giving the ropes protection from marring on bear wood. I wanted them to look intentional and detailed……something different. The little details make all the difference. Thanks for the compliment. Rob
- 3,560 replies
-
- 2
-
-
- clipper
- hull model
- (and 2 more)
-
Now I’m adding a new railing that more closely mimics the one in her photograph. Rob


- 3,560 replies
-
- 9
-
-

-
- clipper
- hull model
- (and 2 more)
-
Thanks Keith. Just couldn’t live with the error. Break it up now with a little pain or live with it wrong, for a lifetime I’m replacing all the iron bits for wooden ones too……..while I still can reach them. Rob
- 3,560 replies
-
- 4
-
-
- clipper
- hull model
- (and 2 more)
-
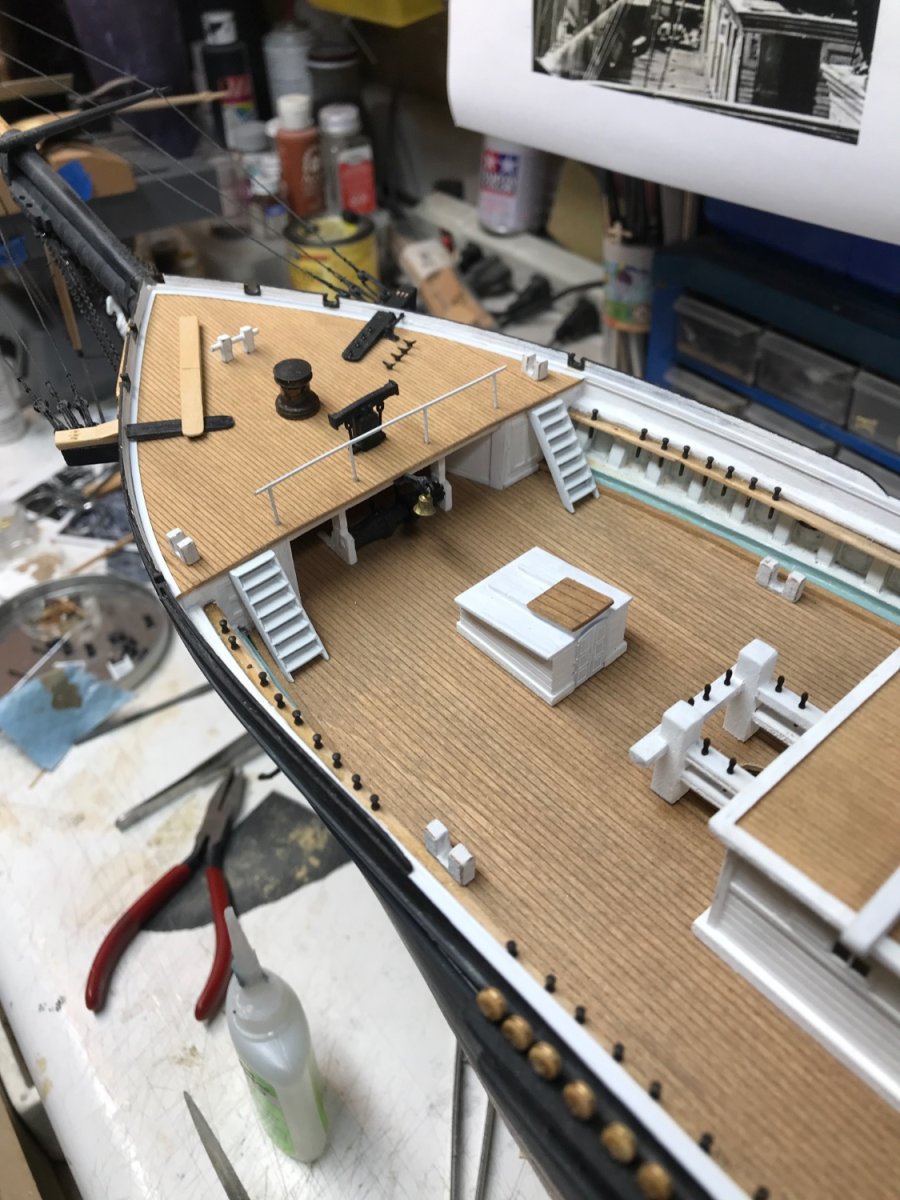
Thank Rick…….doing the best I can. Here are some more changes and additions to the forecastle. Rob

- 3,560 replies
-
- 8
-
-
- clipper
- hull model
- (and 2 more)