HOLIDAY DONATION DRIVE - SUPPORT MSW - DO YOUR PART TO KEEP THIS GREAT FORUM GOING! (Only 36 donations so far out of 49,000 members - C'mon guys!)
×


rwiederrich
-
Posts
5,518 -
Joined
-
Last visited
Content Type
Profiles
Forums
Gallery
Events
Everything posted by rwiederrich
-
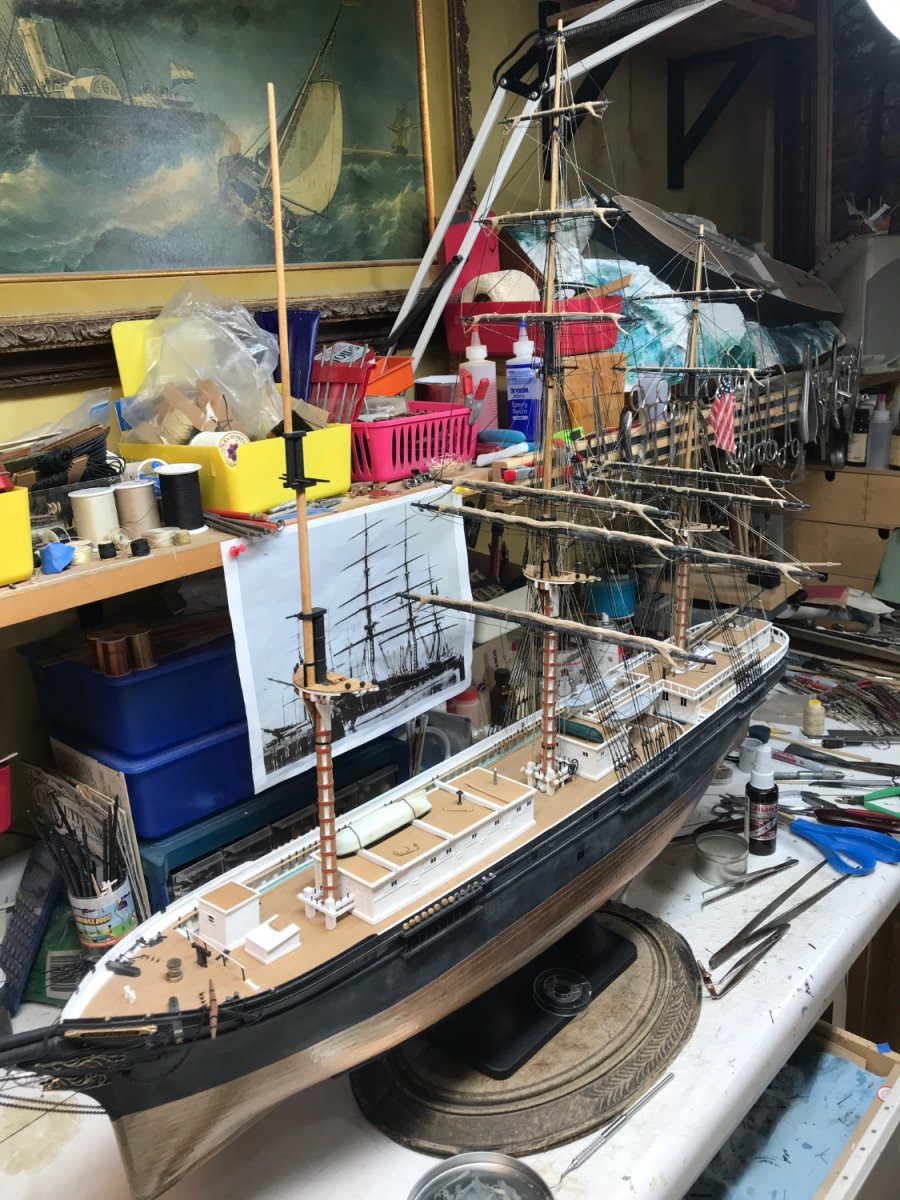
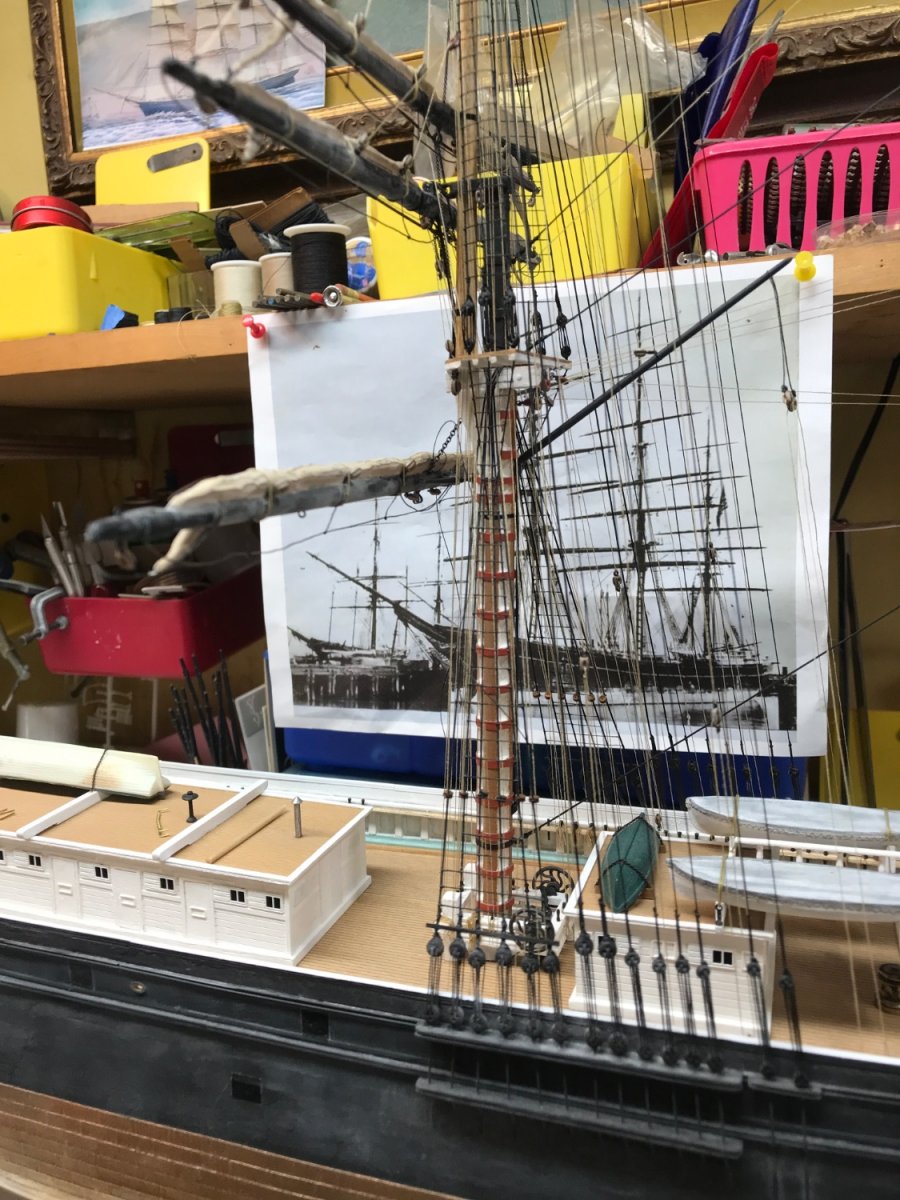
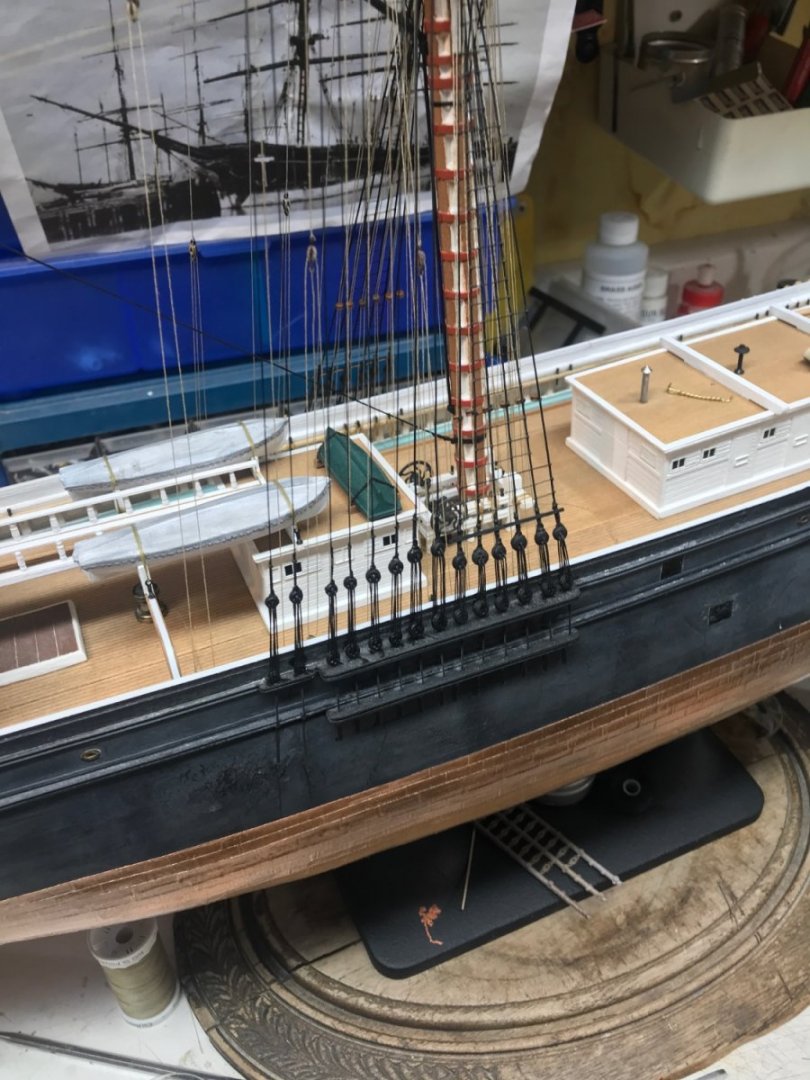
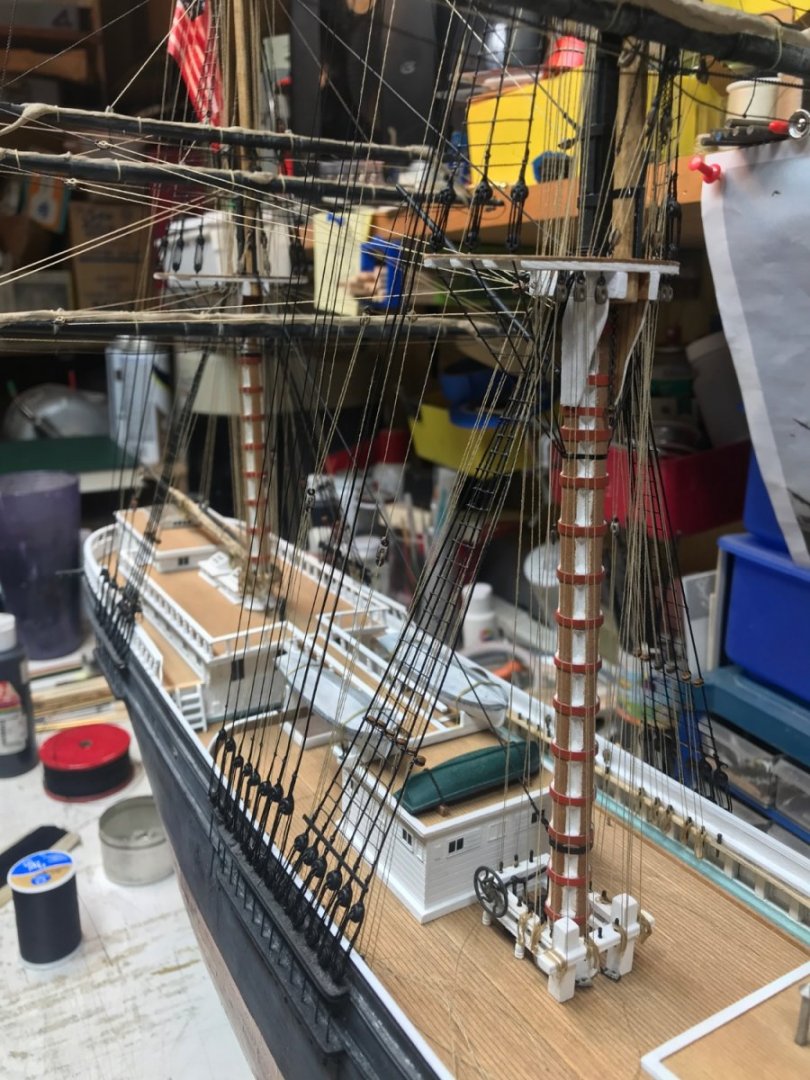
I worked and finished up the back stays for the main mast. Rob


- 3,560 replies
-
- 7
-

-
- clipper
- hull model
- (and 2 more)
-
There is, but if you reeve from the knot in the right hole or from the left hole….you can induce a twist that is either counter or equal to the twist of the rope/string. Rob
-
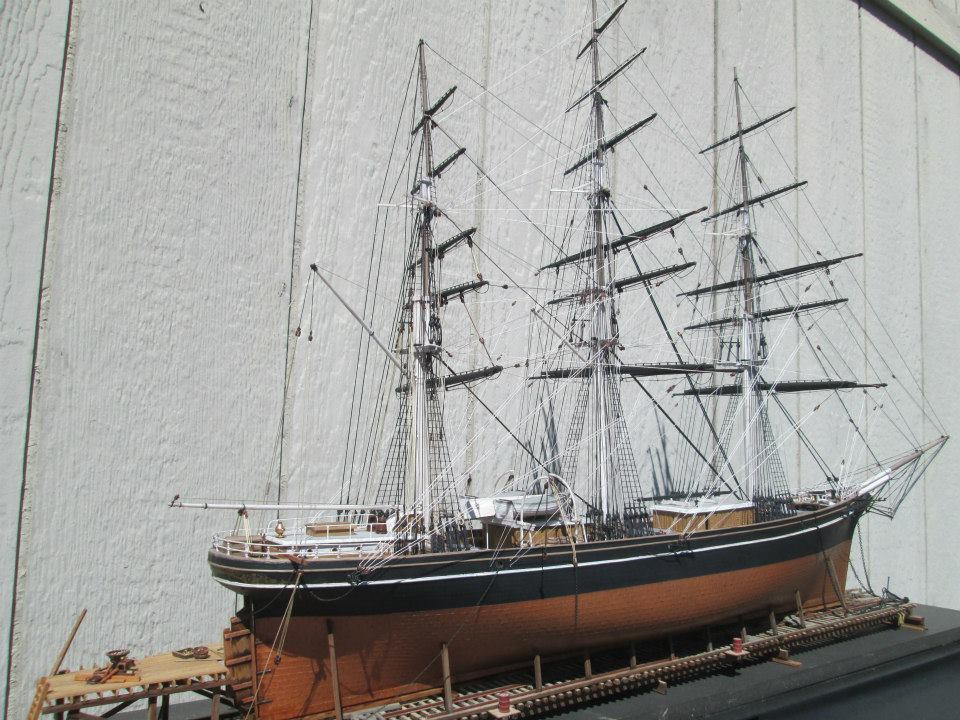
Model Ship World posted on their Facebook page a picture of my Glory on the work bench…….pointing out how all of us have experienced a messy building bench. I was honored, at the same time, realizing my work area is a mess…….worthy of pointing out. Rob
- 3,560 replies
-
- 2
-
-
- clipper
- hull model
- (and 2 more)
-
Great job Rich…….I’m gonna use the name / scroll and redo mine, I think. Super work. Rob
- 3,560 replies
-
- 2
-
-
- clipper
- hull model
- (and 2 more)
-
One thing to remember……..Cutty never went out on the open ocean with her anchors rigged in this fashion. The Fish tackle would be employed to hoist the anchors up and onto the forecastle deck and lashed down tight. That loosely slung anchor would beat the ship to death. Also, use the kit supplied blocks. You guys are new at this and they are acceptable an will release you from a lot of stress. You will not become an expert with this one build…….but you will gain great experience and enhance your skills. Your builds are wonderful. Rob(just my HO)
- 481 replies
-
- 1
-
-
- Cutty Sark
- Revell
- (and 2 more)
-
Sailor……..I don’t have any good full views of her…… but some like this on the bench. Rob

- 3,560 replies
-
- 6
-
-
- clipper
- hull model
- (and 2 more)
-
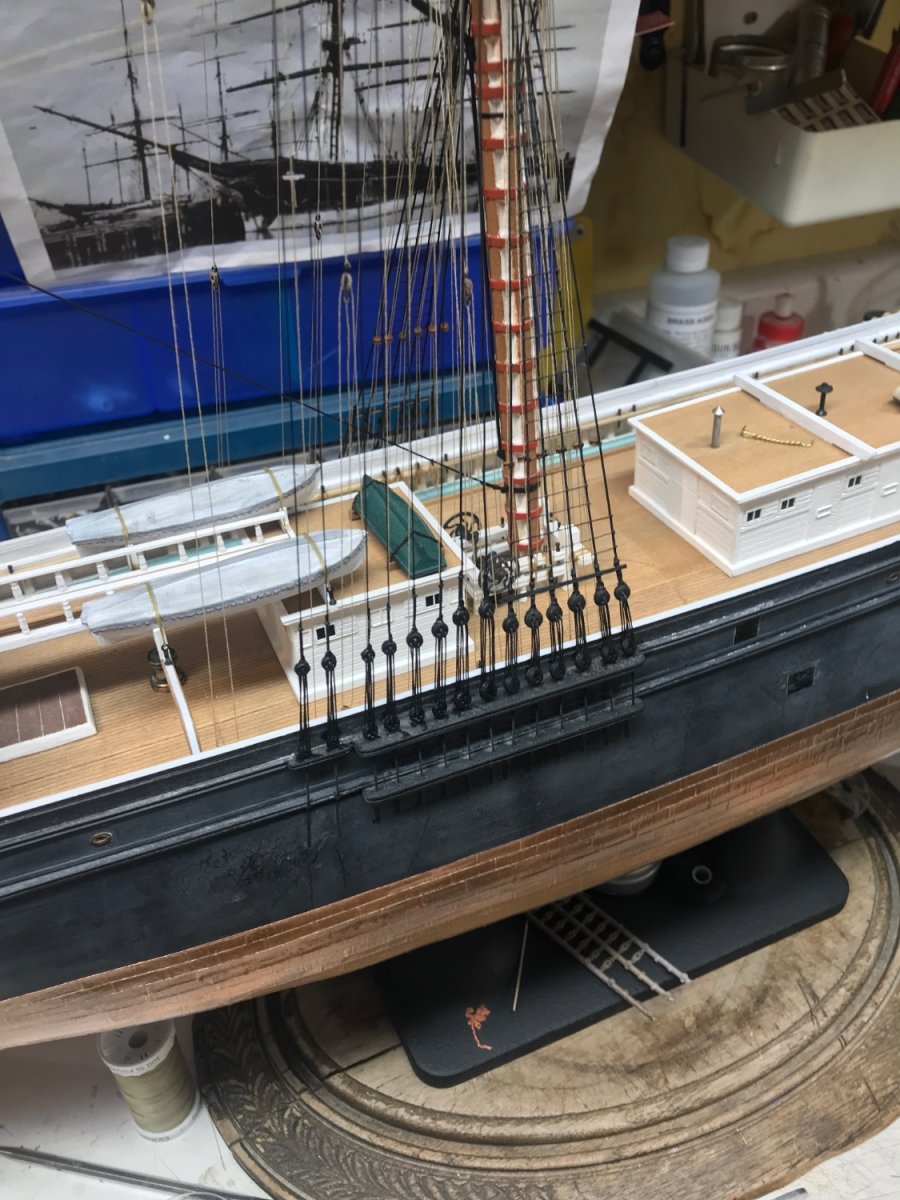
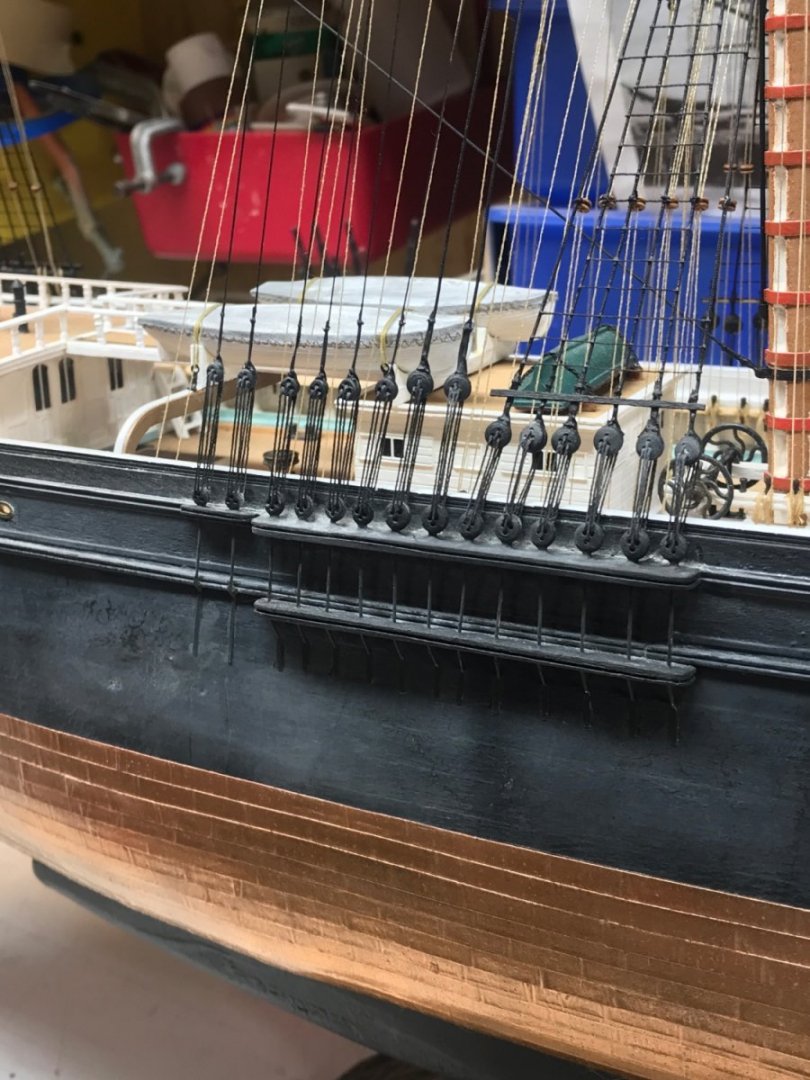
Take the lead end of the lanyard from the bullseye......pull it snug, tightening the lanyard and then use a small alligator clip and clip it to the stay...leaving ample room. Then tie off the lanyard in 3 places as it runs along the stay. Glue then simply trim off the excess thread used to tie the lanyard to the stay. Easy. I wouldn't worry about painting the ties as you se in the image....this was generally done while she was in port or on display to brighten her up and make her look shipshape. This is generally how the bullseye lanyards were secured to the stay. If you are simply attaching the stay/guy to the outer bullseye...wrap the stay around the bullseye and secure like I explained for the lanyard. Generally they were seized at least twice. Keep it simple. Rob
- 481 replies
-
- 1
-
-
- Cutty Sark
- Revell
- (and 2 more)
-
Moving ahead nicely...for sure. Now it starts to get real fun..... Rob
- 602 replies
-
- 1
-
-
- Flying Fish
- Model Shipways
- (and 2 more)
-
She's looking very nice. Clean, and ship shape. Wonderful job. Rob
- 481 replies
-
- 1
-
-
- Cutty Sark
- Revell
- (and 2 more)
-
Most clippers shipped 2 to 6 boys. They did most of the furling and letting out of the royals and sky sails and the stun sails. Their size permitted then easy access to scurry up the royal mast and mount the royal and sky sail yards. Rob
- 481 replies
-
- 1
-
-
- Cutty Sark
- Revell
- (and 2 more)
-
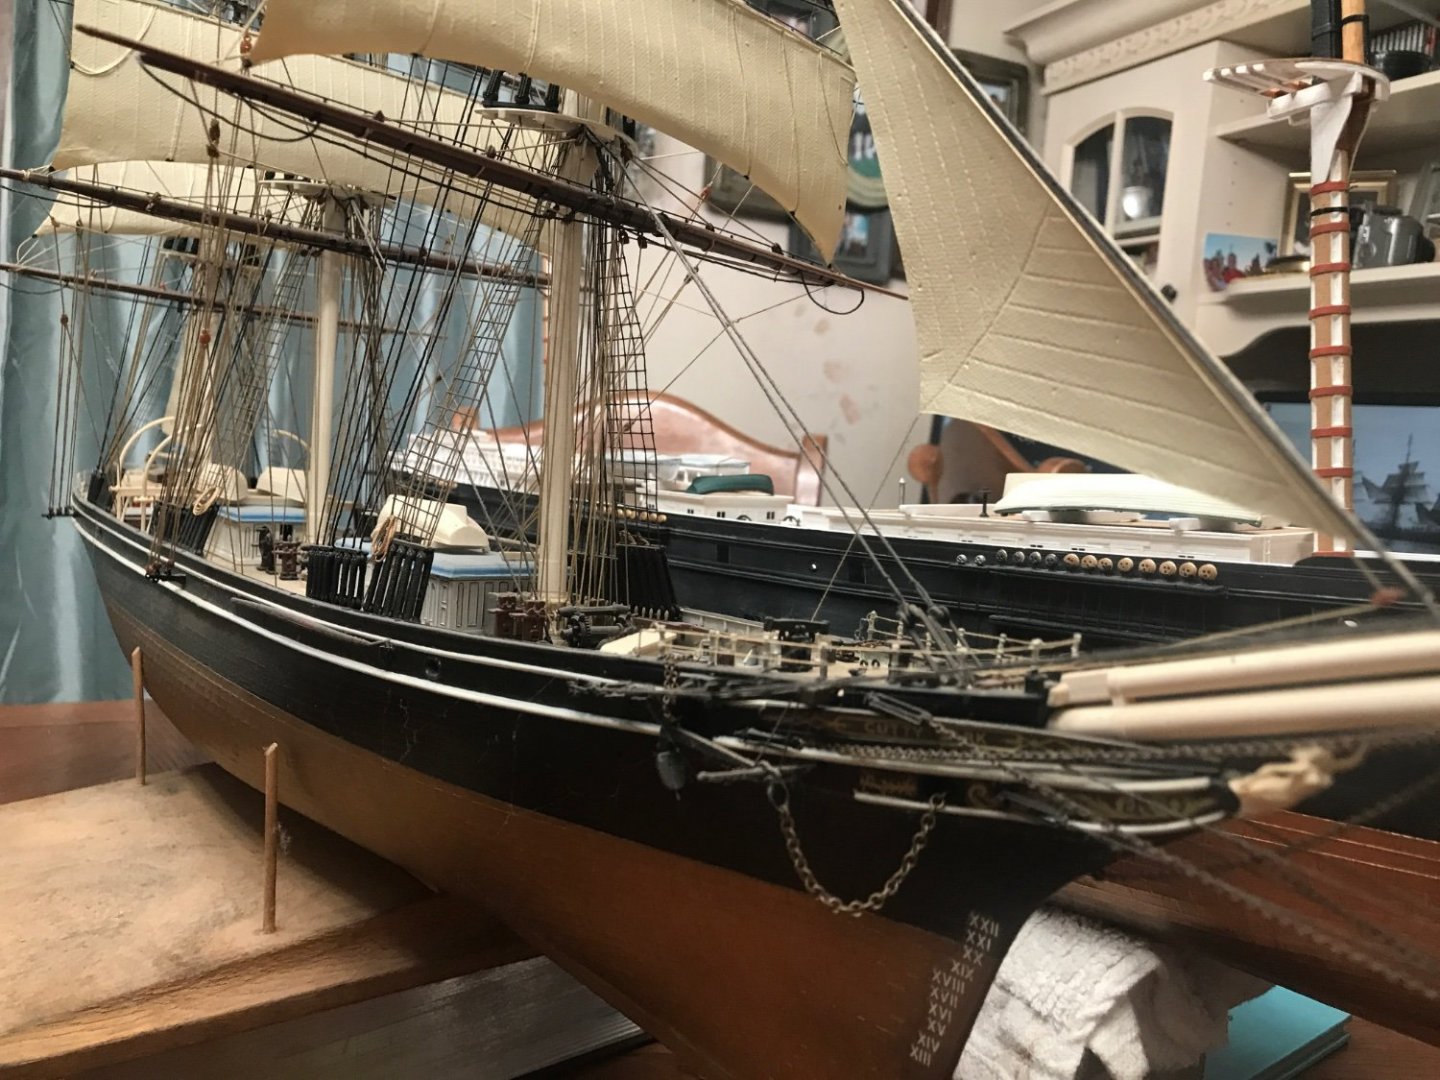
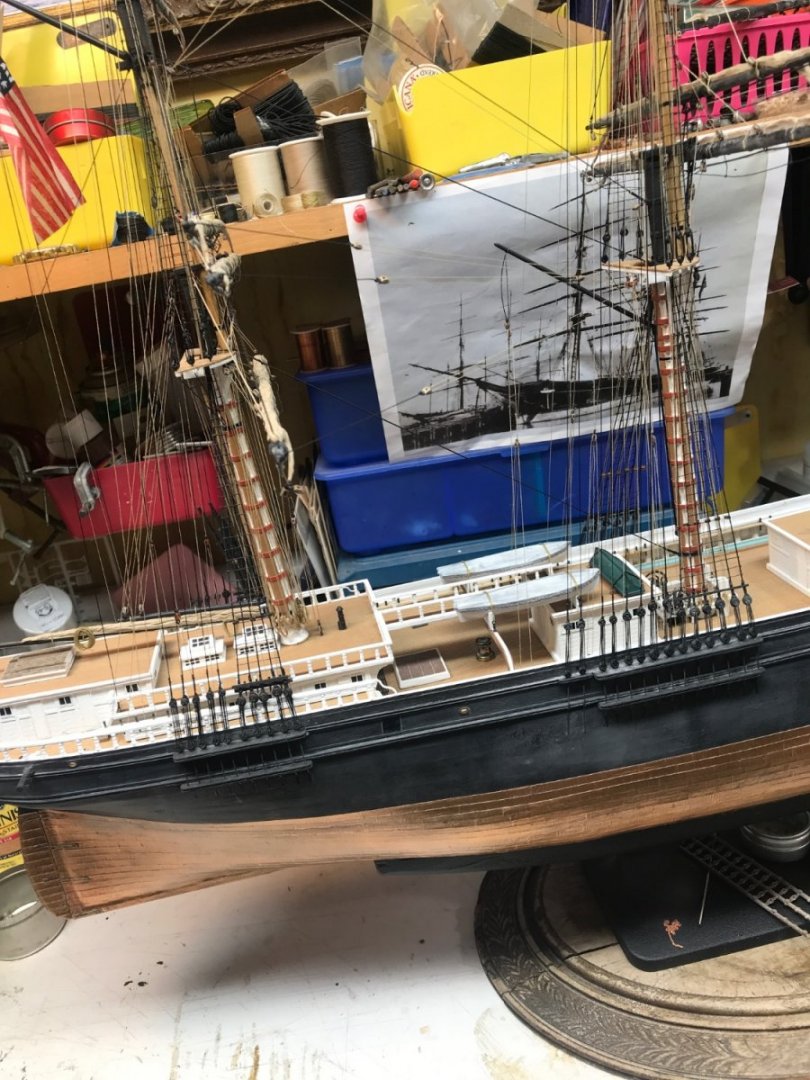
This idea is quite sound…… and was actually the case on sailing vessels. When the sail was being drawn down, it’s rigging came down with it, such as stun sails and jibs. On my Glory of the Seas I opted to retain the haul yard and down haul and simply connect their shackles. You can see this on the mizzenmast top gallant stay. All my sails are dressed tightly on their yards, as would be typical in port. Rob
-
Actually, I try to add rope coils pretty quickly, but sometimes the process requires me to wait till a segment is finished. I tell you it’s a juggle. But it’s all worth the effort. Rob
- 3,560 replies
-
- 1
-
-
- clipper
- hull model
- (and 2 more)
-
I built a CS following that sail arrangement too.

-
Thanks…….I wanted to demonstrate different sail applications. Rob
-
Well...you've posed many good questions....many of which I have done myself....Sails(paper), for my 1/128 Great Republic,.... Diorama, my Ferreira(AKA Cutty Sark), .....Repair scene, Cutty Sark getting a new rudder,..... furled sails my current build Glory of the Seas.


-
Bob...clear your mind and just try to remember...there is standing and running rigging. Standing generally gets rigged first...however if you build in sections Like I do, then you will combine your rigging to accommodate your process. Ask me any questions about rigging and I can help. I've been rigging clippers for 45 years and apart from some specific unique items...the rigging is generally all the same. Rob
-
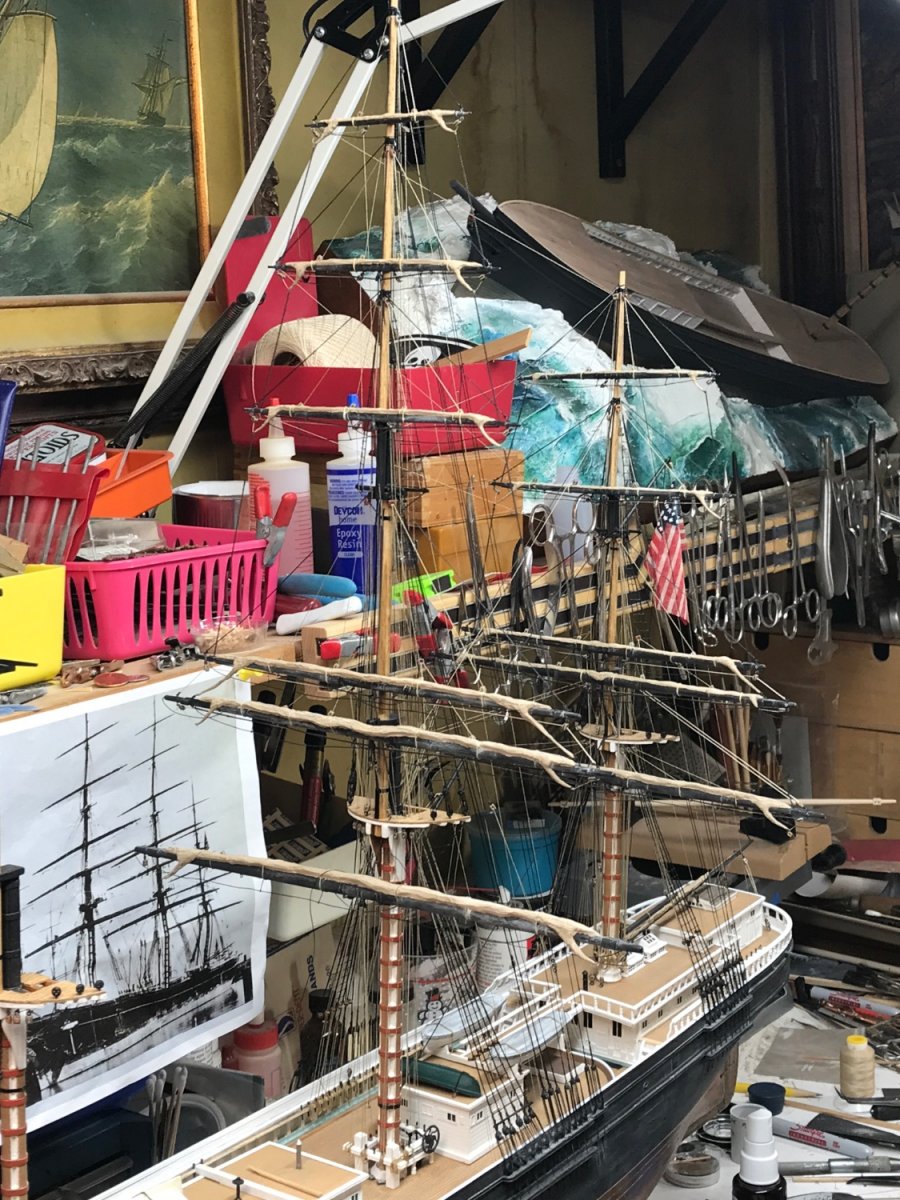
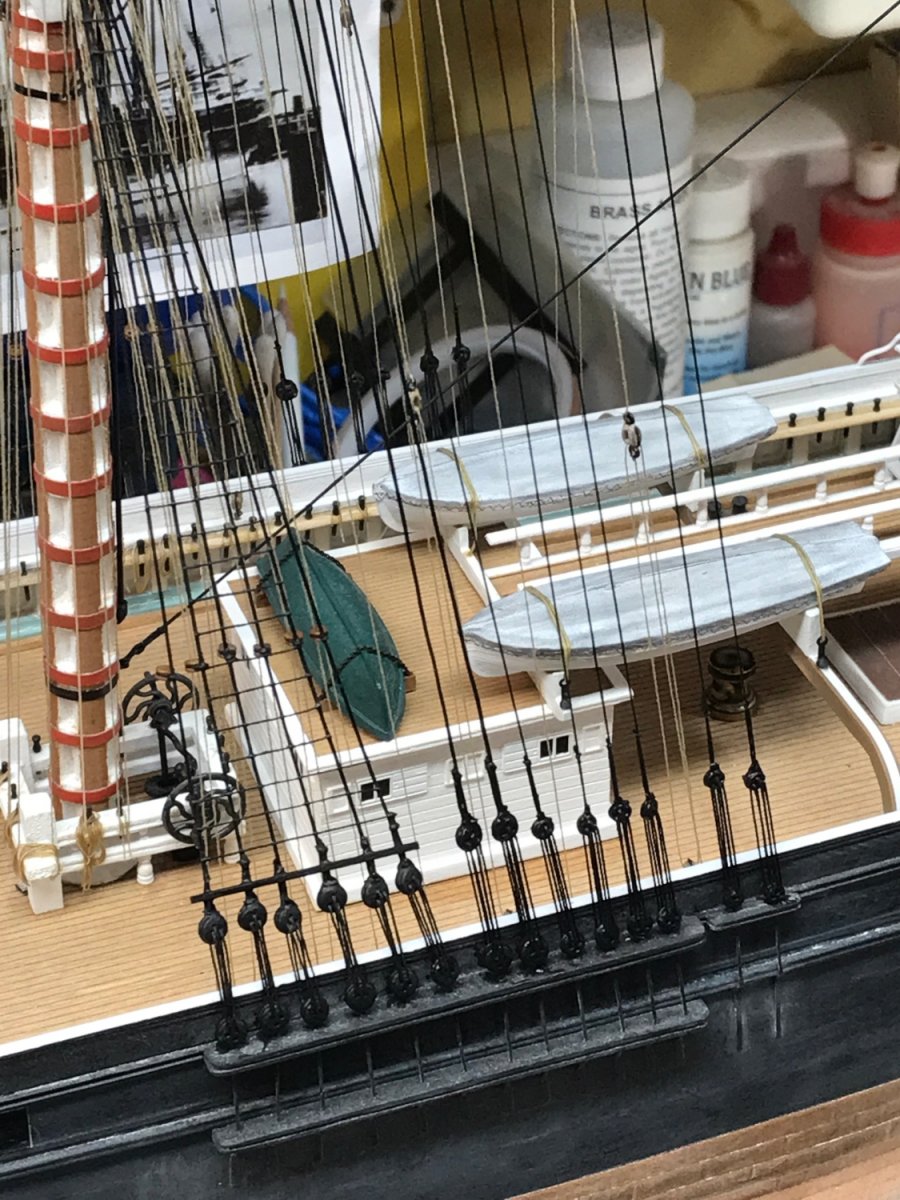
Thanks Druxey. The more lines that go in...the more and more I need to be diligent not to tangle or cross them.(I almost get crossed eyed). Praise God, I have had only one line I had to remove and re rig due to slight crossing, and that was a main topgallant brace...I failed to recognize it had to have a greater range of motion, because the yard is hauled down. When she is raised the brace would interfere with the brace from the mizzen counterpart. All is well. I think my plan is being fruitful...by doing all the internal work first...to include braces, downhauls and any stay work....and leaving the backstays for near last. Once I figured out the sequence...even though it appeared to work against what seamed to be the logical next step, things move along quite nicely. The real work will come when I need to introduce all the rope coils at all the belay points....using ft long tweezers...... Rob
- 3,560 replies
-
- 2
-
-
- clipper
- hull model
- (and 2 more)
-
Thanks Rich. Still have the top yards and the entire main yard rigging. It will be a great contribution to the gossamer web of lines. After the rigging is finished on the main mast, I will add the Davit’s and their gear. Then one more mast and I’ll be through. yeah………. Rob
- 3,560 replies
-
- 2
-
-
- clipper
- hull model
- (and 2 more)
-
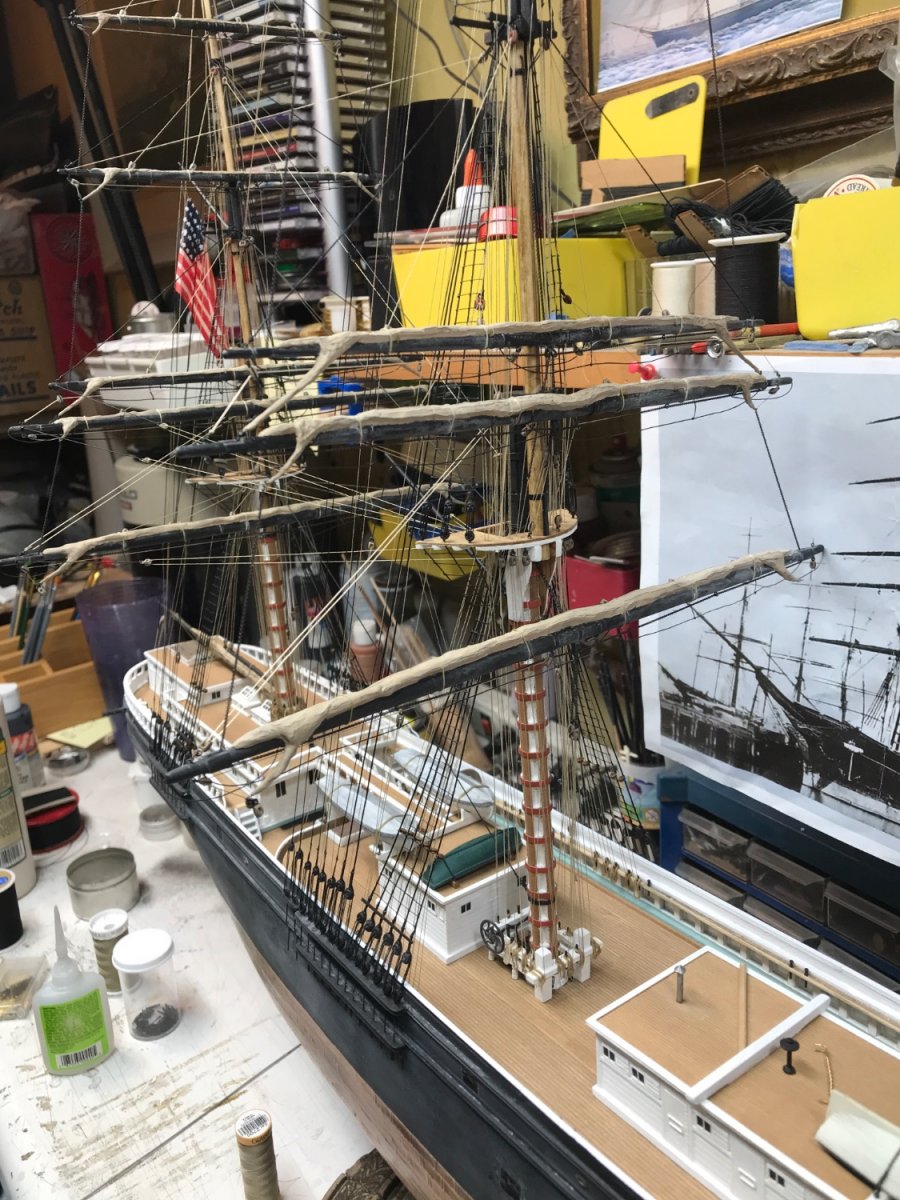
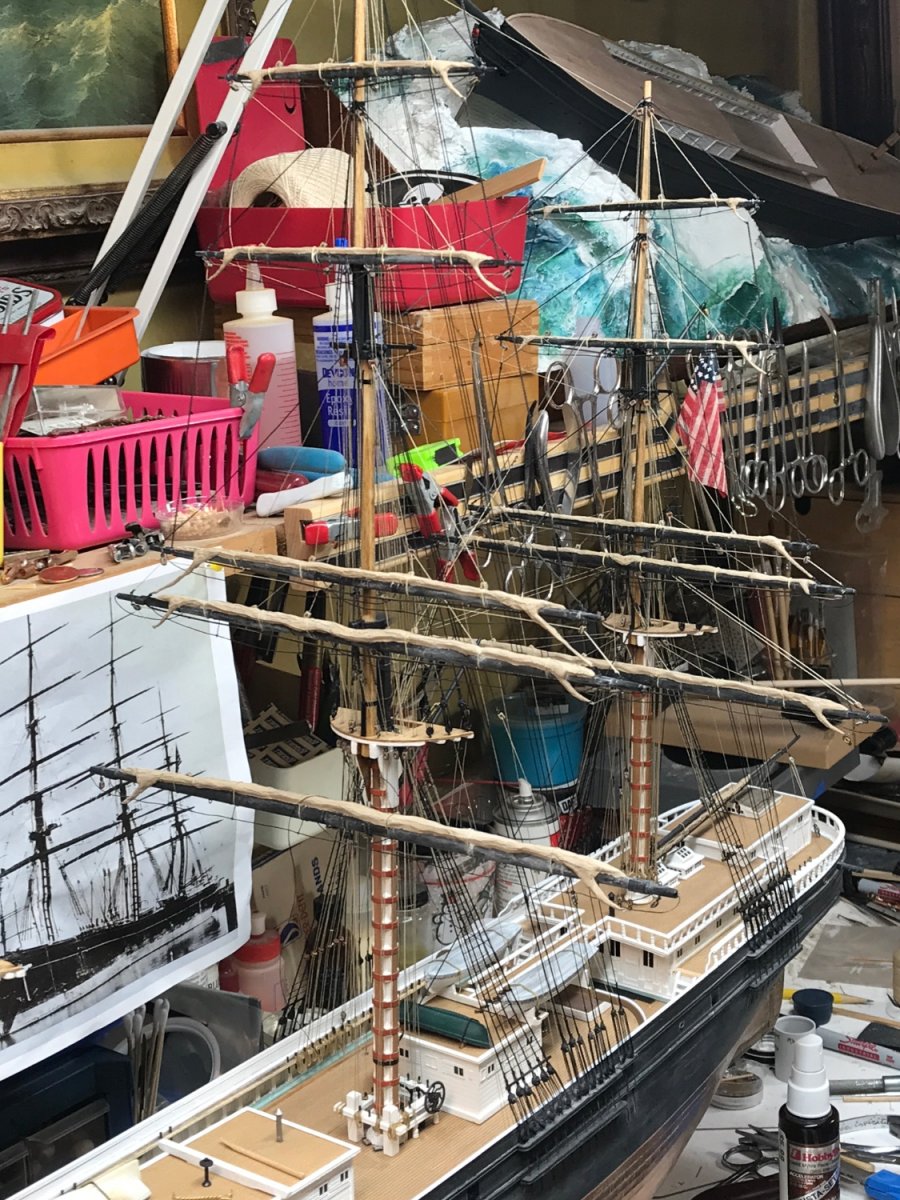
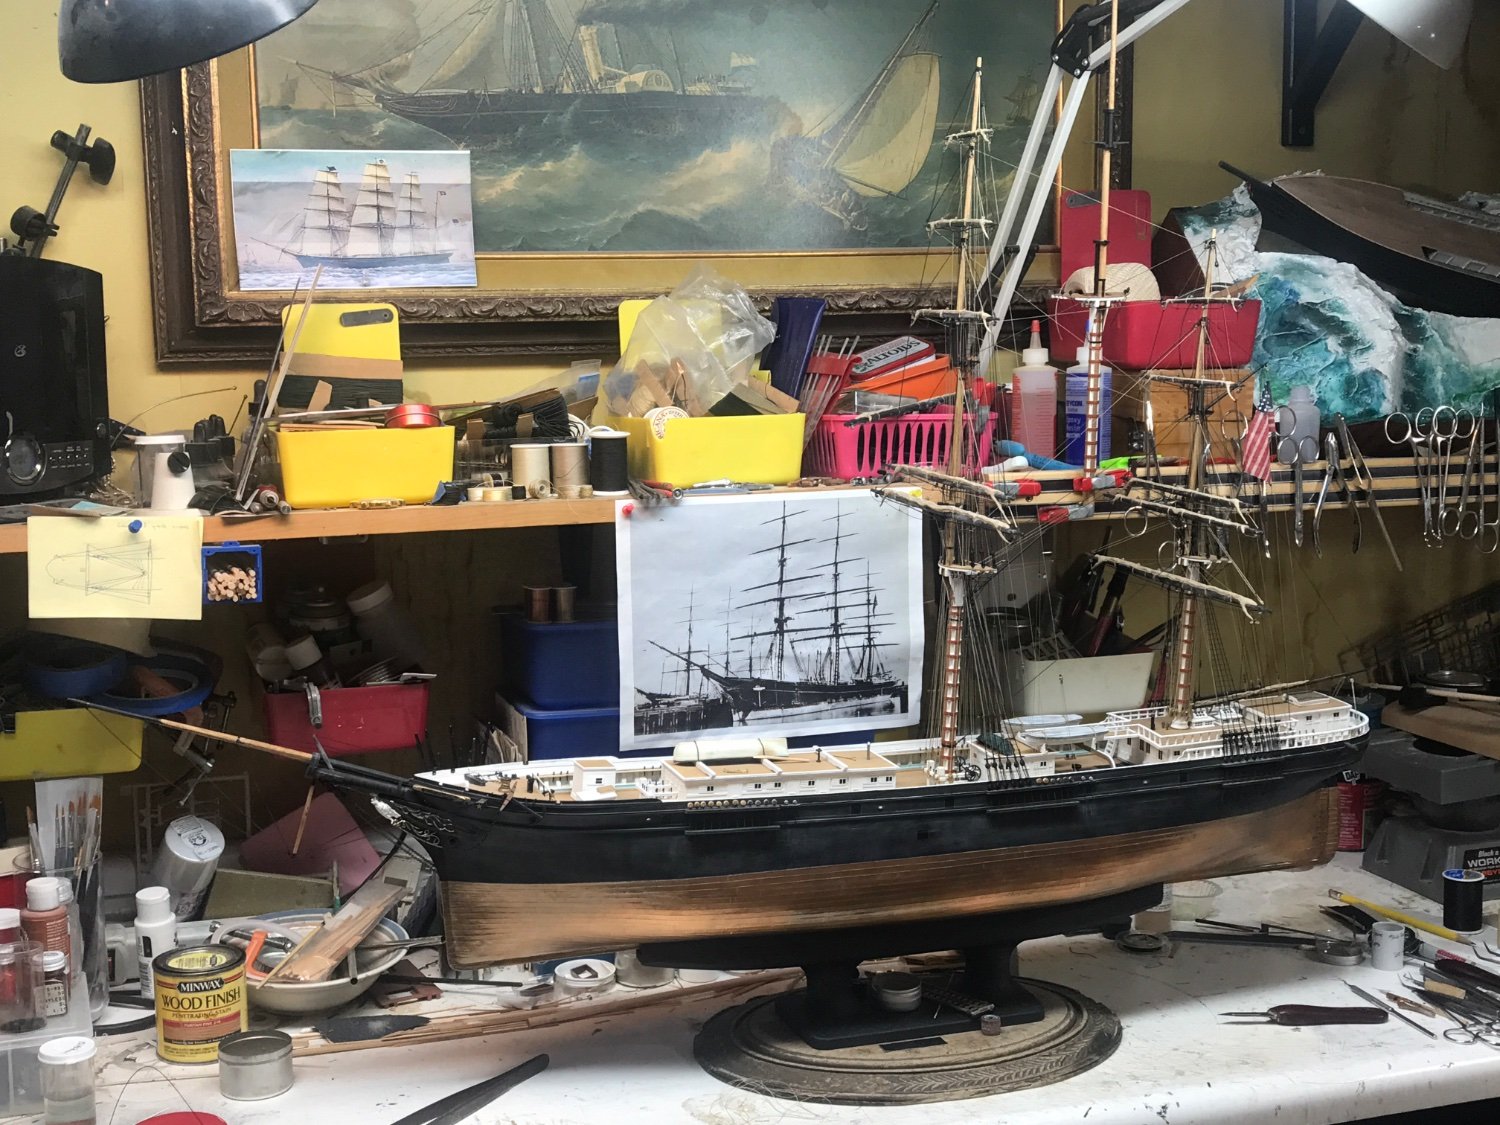
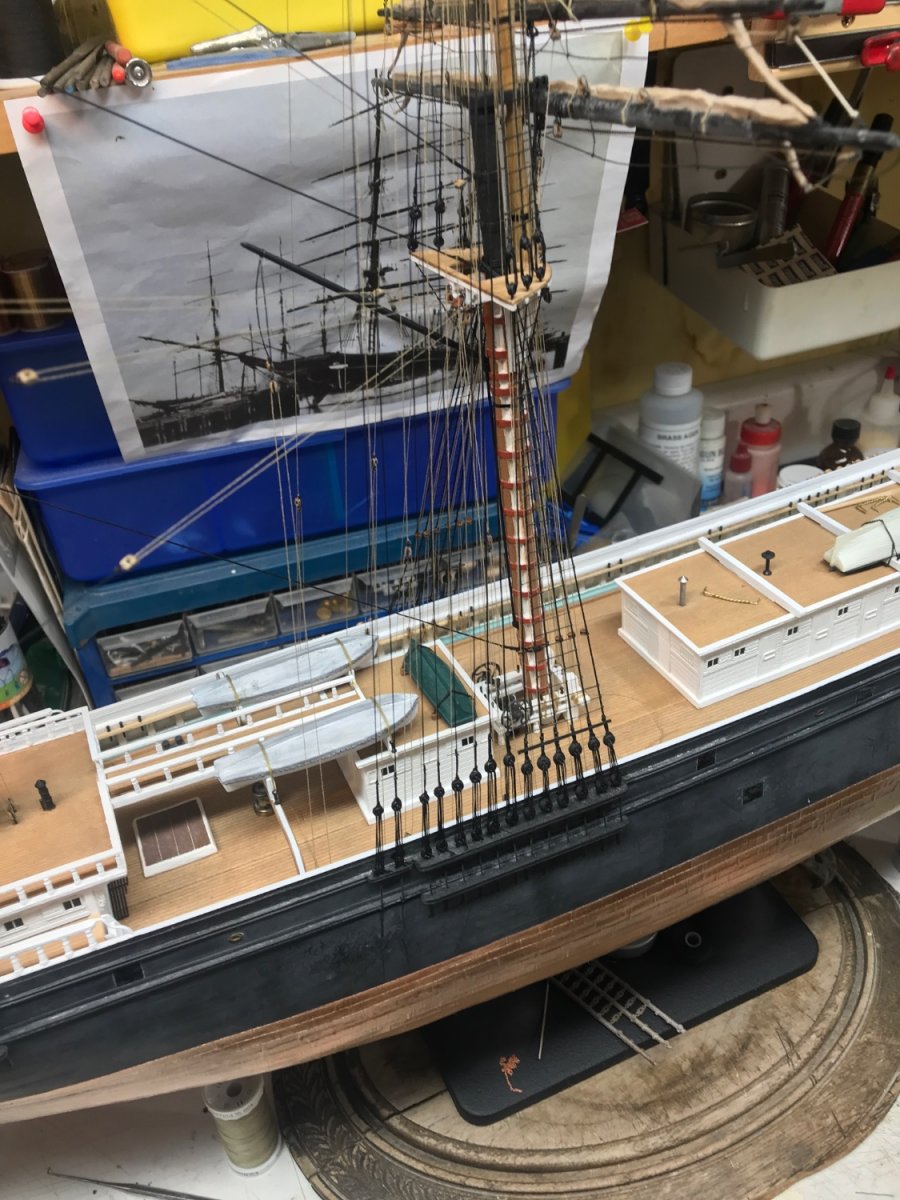
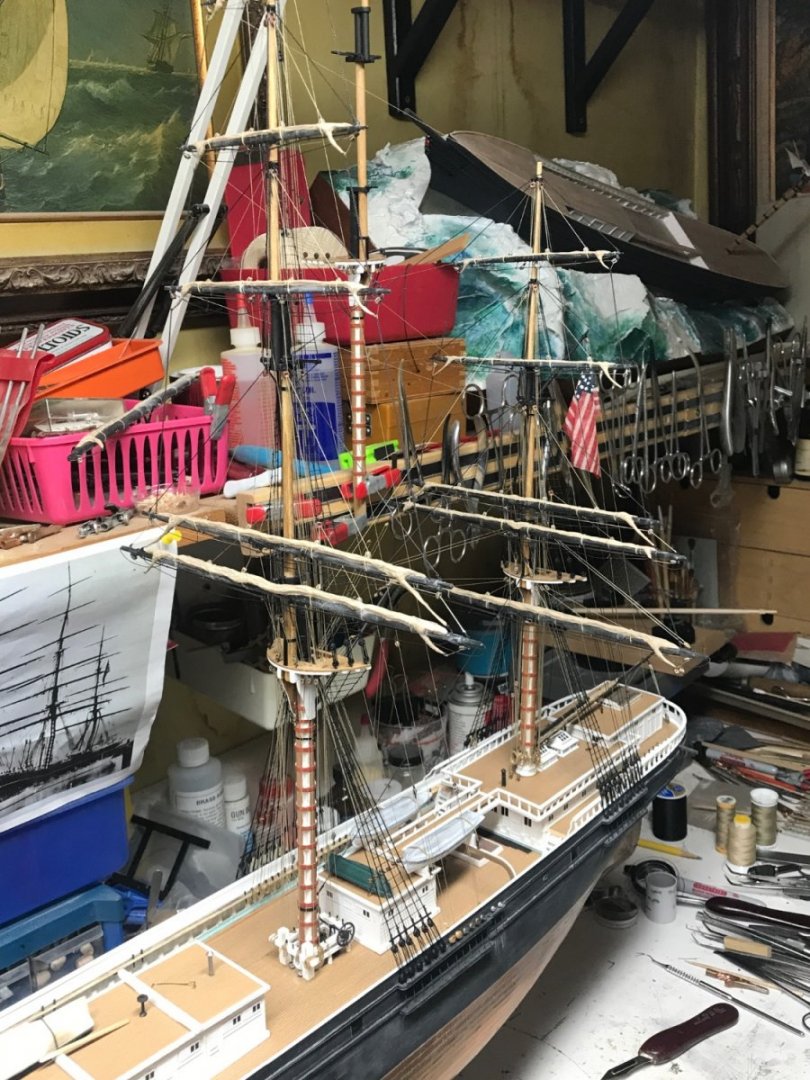
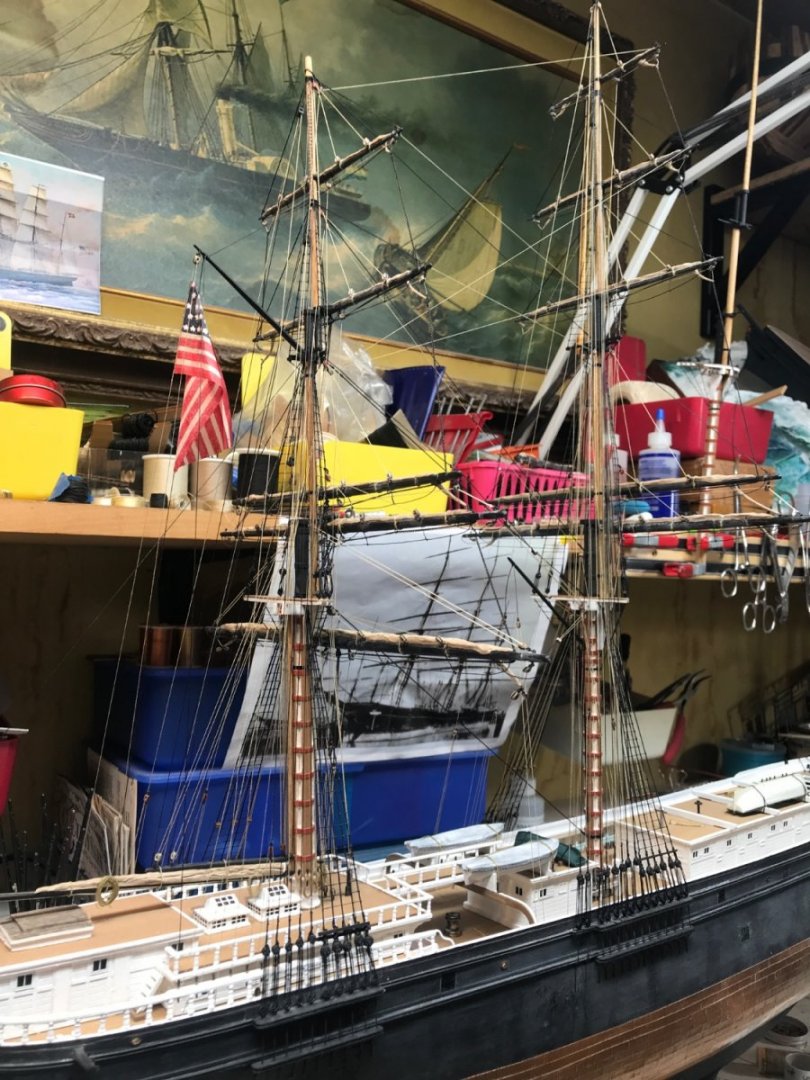
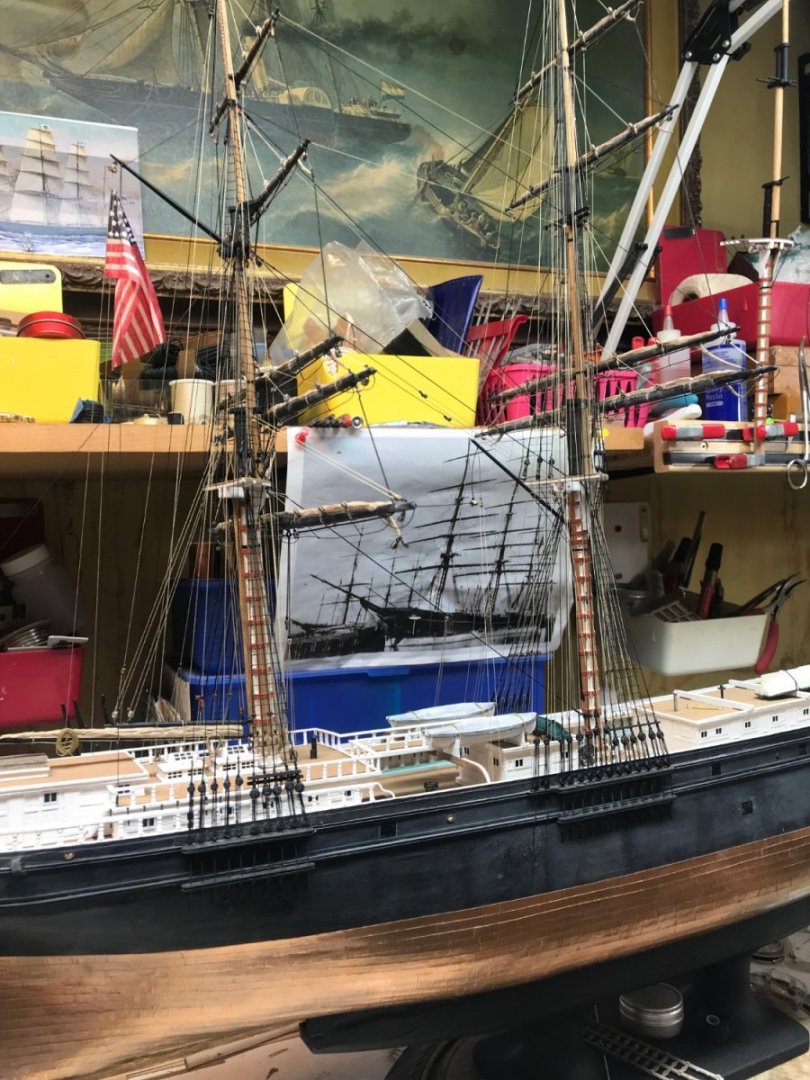
Turned her around and am setting up to do it all over again. Some close ups too. Rob
- 3,560 replies
-
- 6
-
-
- clipper
- hull model
- (and 2 more)
-
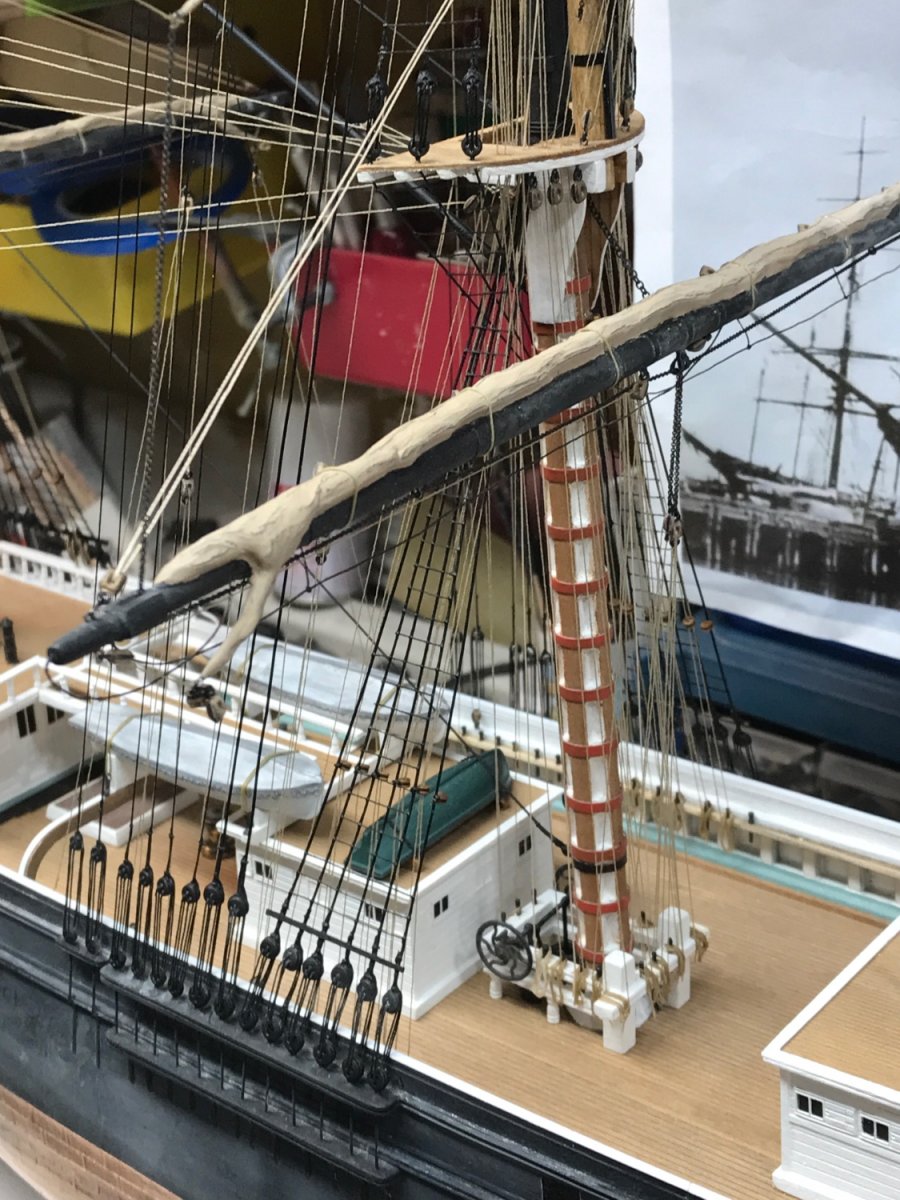
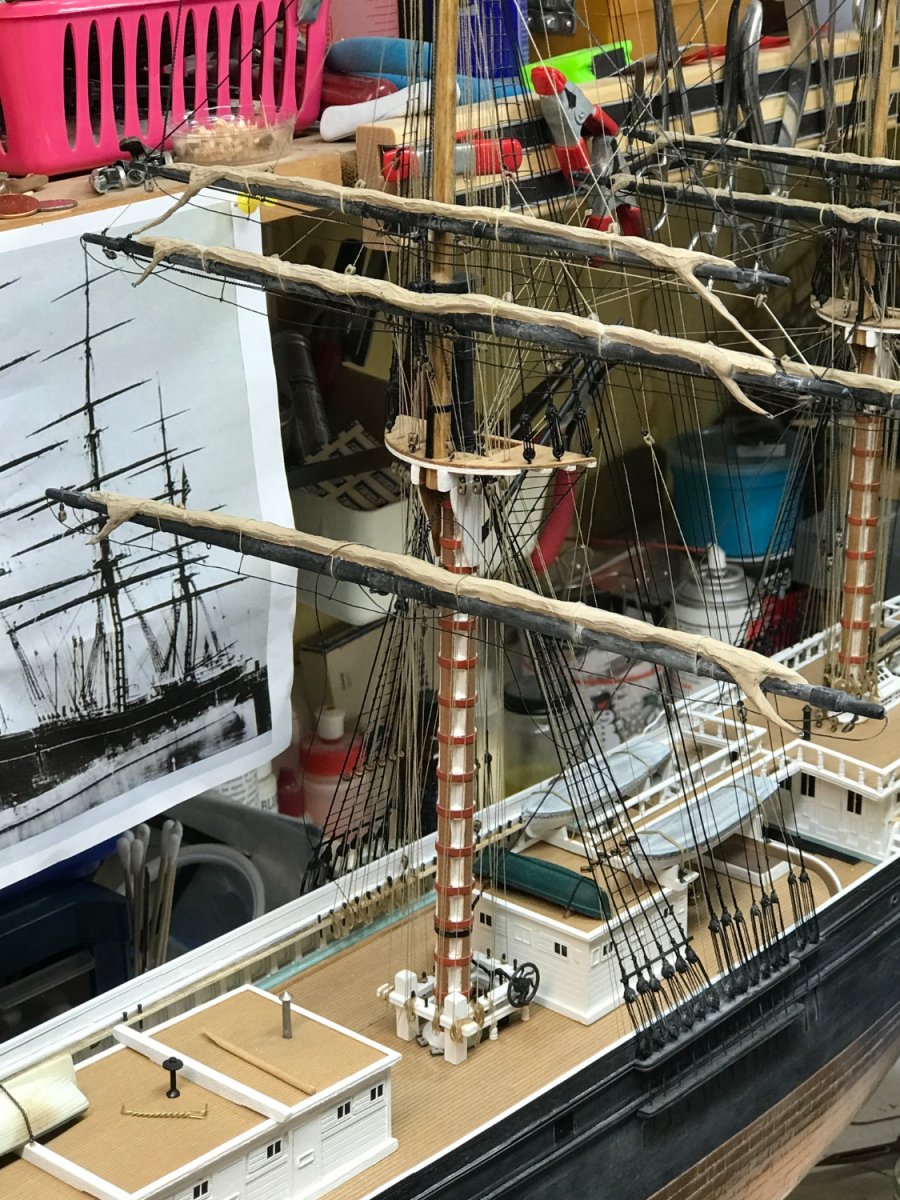
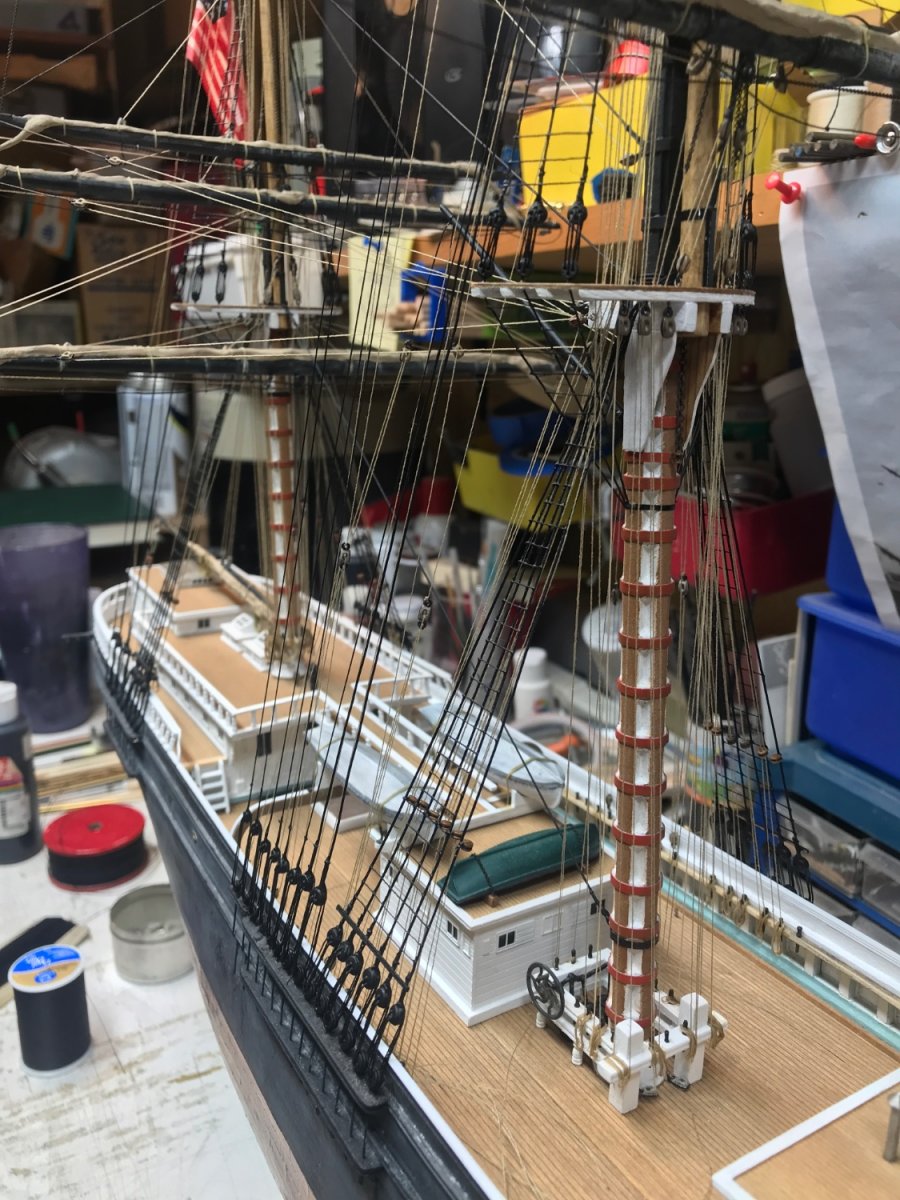
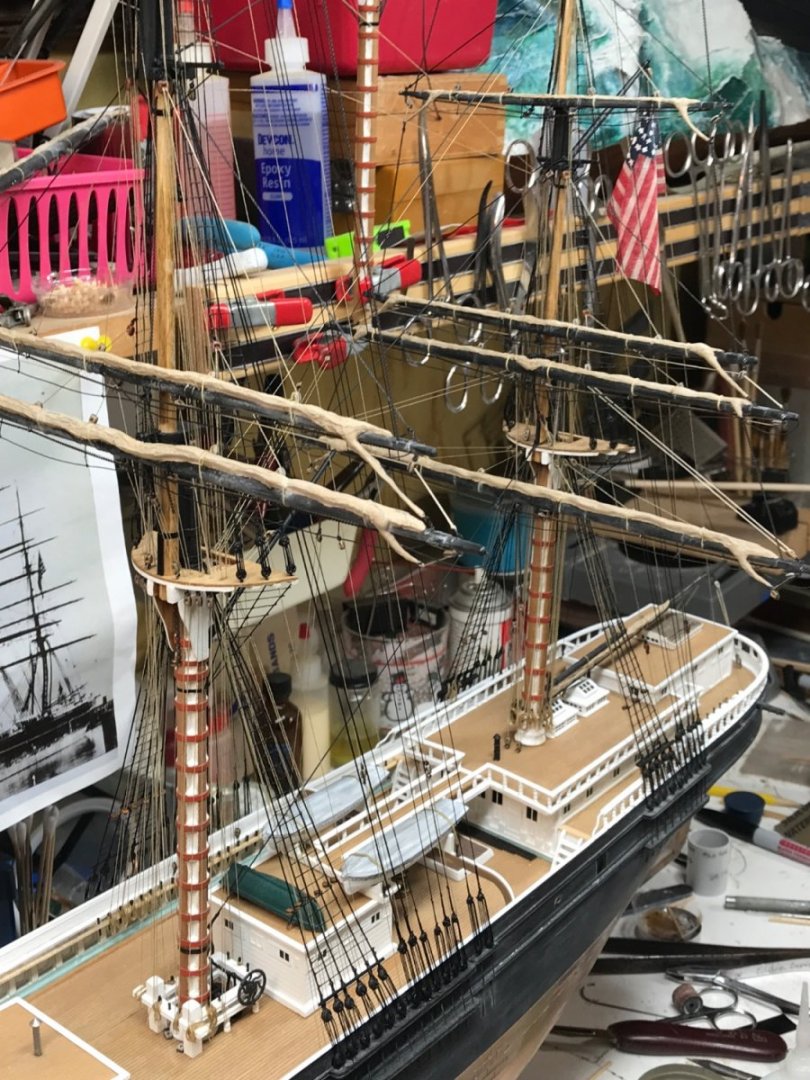
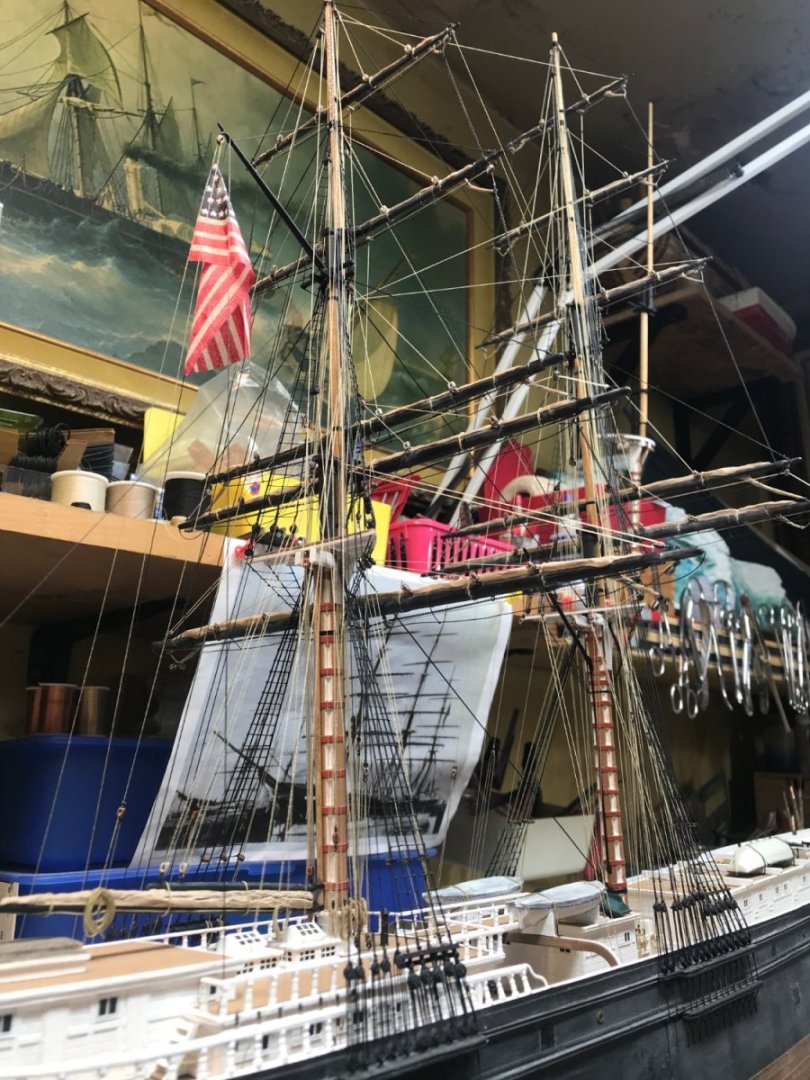
My goal is to get the main mast rigging all done on the starboard side today. I did a lot of work……about 8 hours of work. Rob
- 3,560 replies
-
- 1
-
-
- clipper
- hull model
- (and 2 more)
-
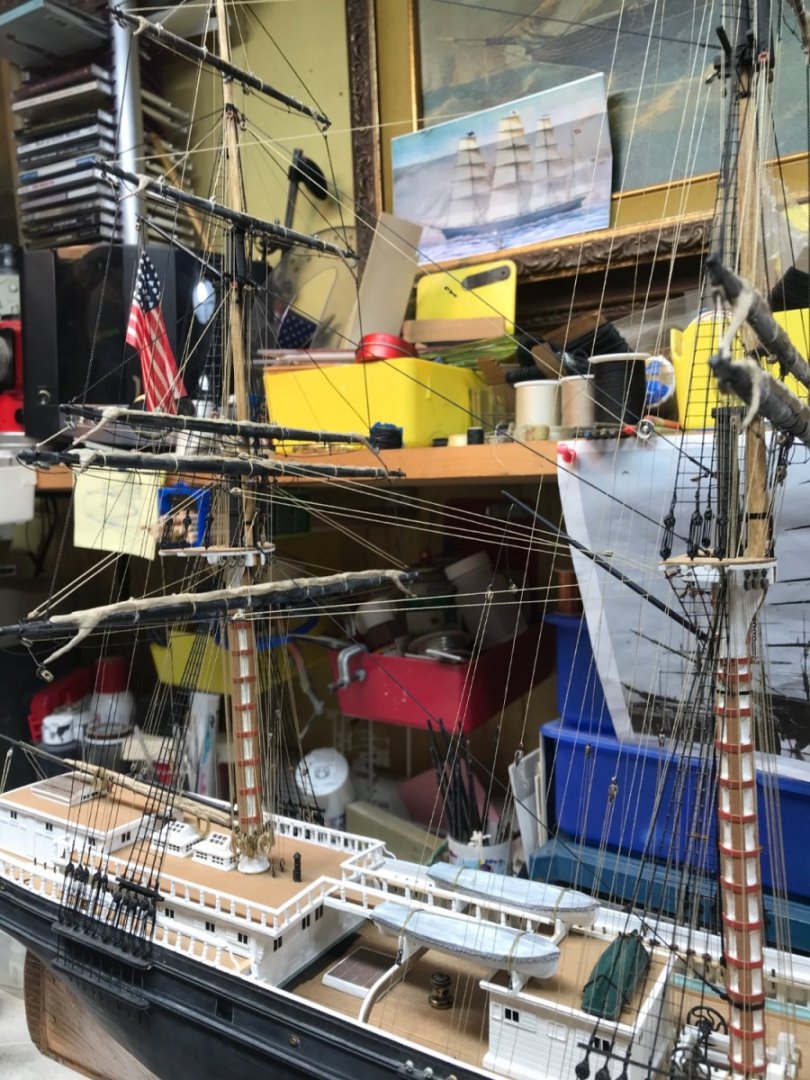
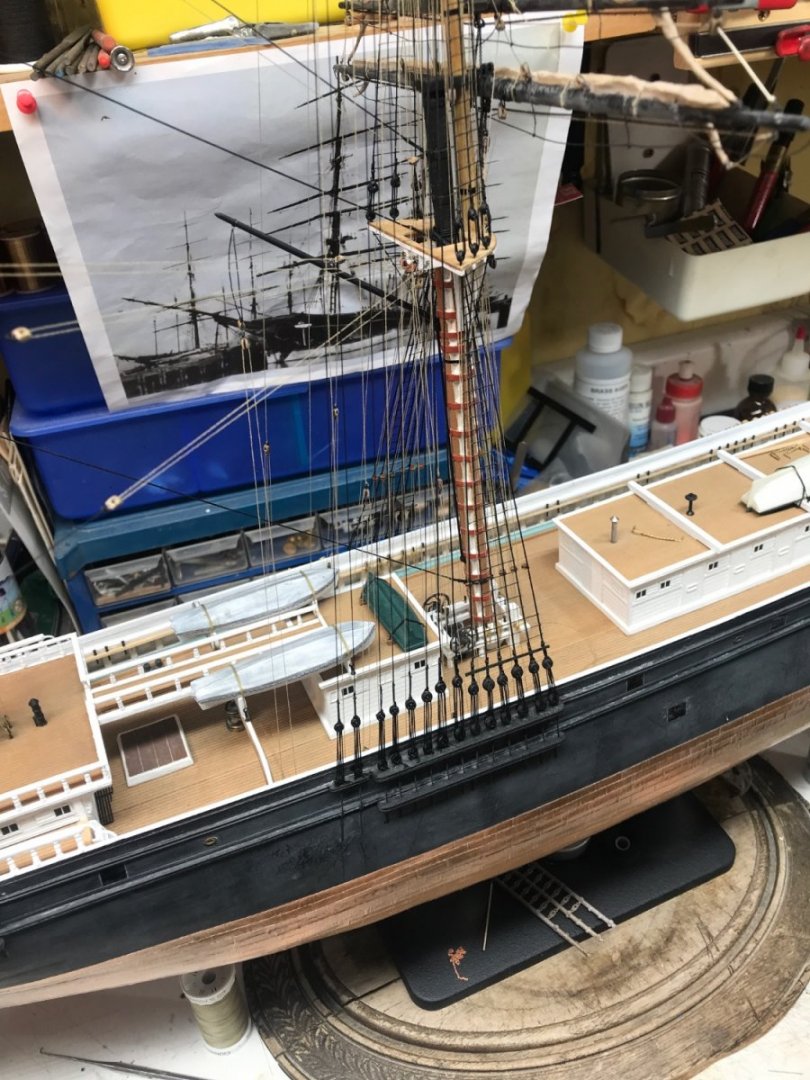
Finished the top gallant, royal and sky sail yard braces for this side. I’m not addressing the topsails till I mount the main. Makes working around it easier. Rob

- 3,560 replies
-
- 6
-
-
- clipper
- hull model
- (and 2 more)
-
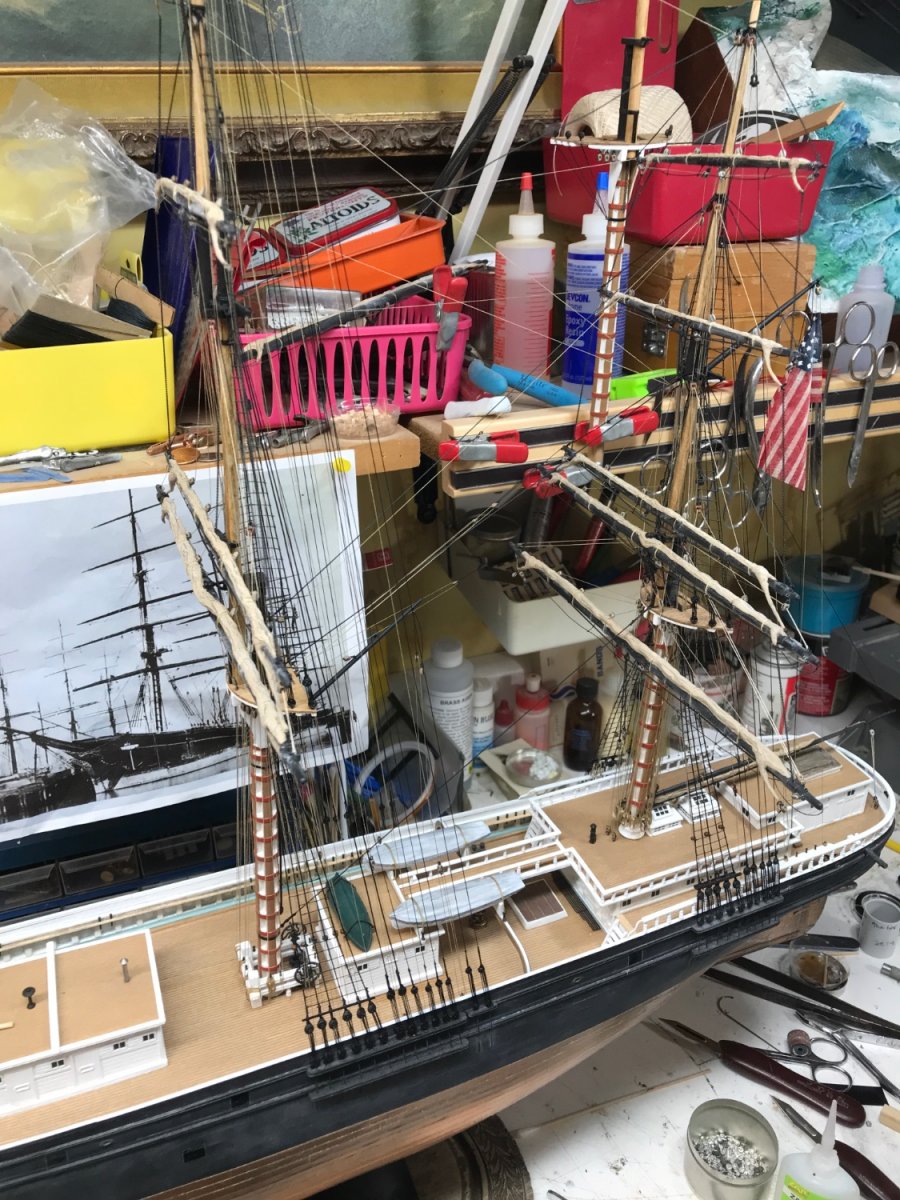
All starboard back stays installed. Now it’s time to add the main mast yard braces…………man what a spider web.


- 3,560 replies
-
- 7
-
-
- clipper
- hull model
- (and 2 more)