HOLIDAY DONATION DRIVE - SUPPORT MSW - DO YOUR PART TO KEEP THIS GREAT FORUM GOING! (Only 13 donations so far - C'mon guys!)
×


lb0190
-
Posts
686 -
Joined
-
Last visited
Content Type
Profiles
Forums
Gallery
Events
Everything posted by lb0190
-
 Hi Brian, I looked on model expo this morning and they say an adapter is needed. I noticed it's on sale again for $21 USD. Here is the link to this item : http://www.modelexpo-online.com/product.asp?ITEMNO=MS7205
 -
Your welcome Joe. It"s amazing how many ideas and solutions are developed and shared on MSW after an initial post. there are a lot of ingenious people on our forum.
-
Thanks Popeye. I forgot to mention how impressed I am with your build. It's so easy to make a mistake but it's usually not obvious until the glue is applied or the knot is tied :D For some strange reason I'm looking fwd to rigging my ship. I managed to get a little work done in the shop today, I'll write something up along with a couple of photos on my log tomorrow... Take care.
-
I call my goofs the model ship builders waltz: three steps fwd, two steps back, step away mad then four steps fwd, two steps back...
-
Thanks David. I didnot think of that method. I'll give it a try.
-
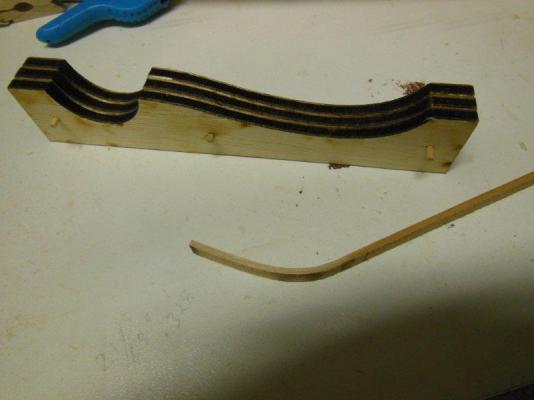
Your welcome Jack. Yes, I did get some char transfer, but I'll sand it off as you suggested. Take care,
-
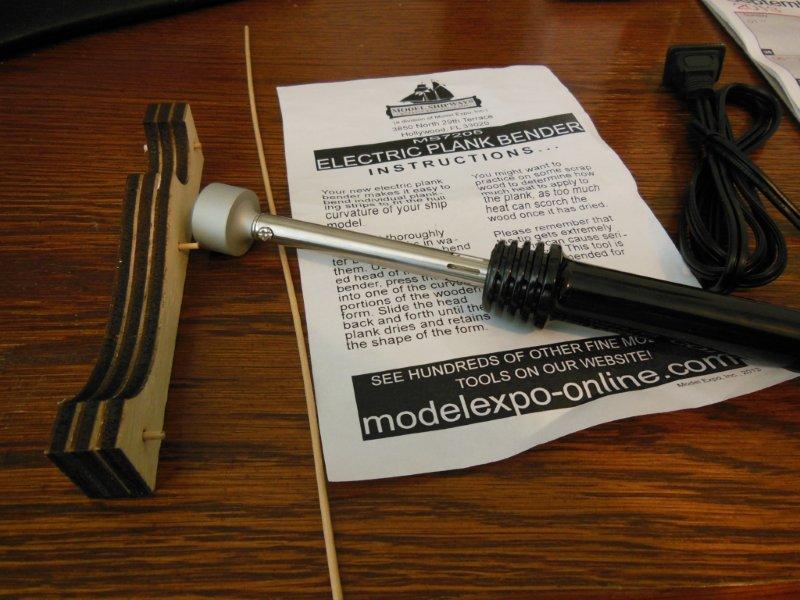
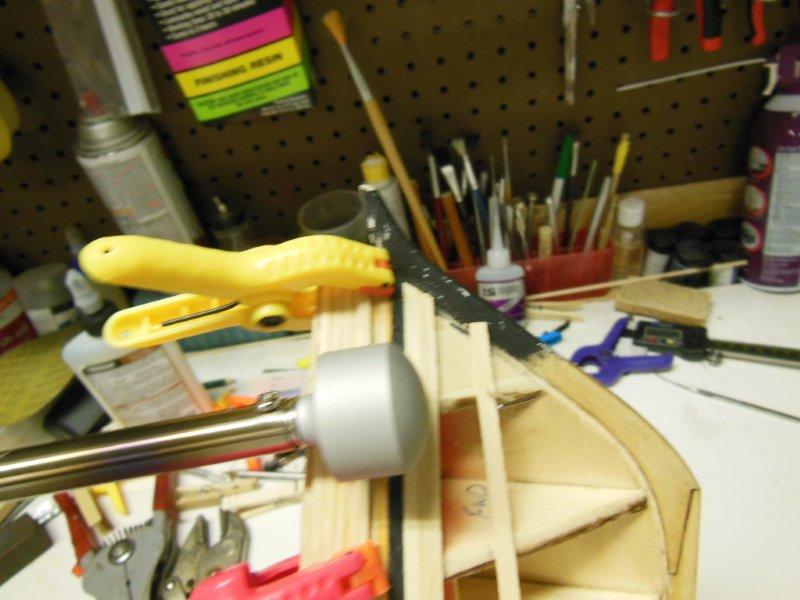
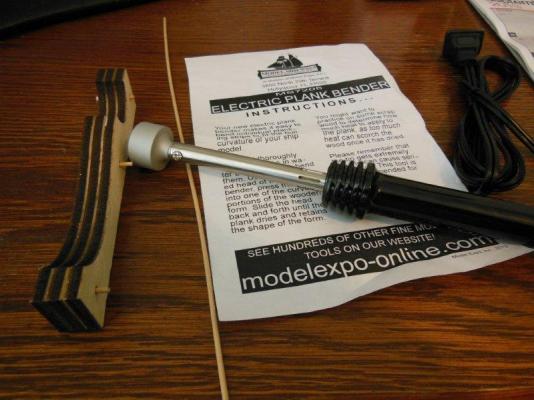
I purchased an Electric Plank Bender from Model Expo and thought I should share my purchase and initial experience. I have never used anything like this for bending planks, but I thought it may be useful to post on how well it works for me. Also, please keep in mind my experience in model ship building is very low and this post reflects a few initial attempts. The bender retails for $41.99, but like most of Model Expo's products you can always find it on sale fairly often. I paid $21.99 plus tax, S&H for a total of ~$32. The bender looks like a modified soldering iron with a heat shield (very hot) and a heat sink on the end of the iron that gets even hotter. Below is a picture of what arrived; instructions, electric bender, small dia. wood dowel and a three piece wood form. The wood dowel allows you to assemble the three wood forms into one thicker form. I have yet to sand the form to get rid of any mis-match, but sanding needs are very minimal. I'm sure one can use any form that provides the needed contour providing you keep aware of the heat your dealing with for potential fire or burns to material or yourself. As I plugged in the bender, I realized it did not come with any type of stand to lay it on while hot, so I quickly set up a temporary stand until I come up with what will probably be made of bent wire. I soaked two pieces of bass wood for 20 minutes in hot water and managed to bend and dry a nice curve using the provided wood form in less than a minute, I also contoured a plank I needed for my ship which also took less than a minute. I held the ship plank on the hull using small clamps to hold in place at the shape I needed and applied the iron to dry it out – all very quick . You can easily burn the wood if you hold it in place too long. Prior to the iron I would clamp a wet piece of wood in place and wait until the next day for it to air dry. So far, a great improvement in reducing time for plank bending. I believe more use and different bending needs are needed to determine the overall benefit.


-
Top notch work Augie. I'm impressed with the build as well as the ship.
- 2,191 replies
-
- 1
-

-
- confederacy
- Model Shipways
- (and 1 more)
-
Hi John, WOP is wipe on poly. I apologize for not being more specific.
-
I hope you do not mind my jumping in on this discussion for pre-stain. Minwax makes the pre-stain as oil based as wellas water based to match the type stain your using.I used the water based version on my tugboat display case and was very pleased with the results.
-
Augie, What are the steps and sequence you use for deck planks? If the steps below are accurate, would you mind listing them in the sequence you prefer. Cut plank to length Sand as needed Trial fit Pencil edge Stain WOP Glue in place THANKS!
- 2,191 replies
-
- 1
-
-
- confederacy
- Model Shipways
- (and 1 more)
-
She's looking good Augie and no animal footprints anywhere! Your choice of one edge only for caulking simulation worked out well.
- 2,191 replies
-
- 1
-
-
- confederacy
- Model Shipways
- (and 1 more)
-
Hi Popeye, The rigging looks great - as well as the entire build.
-
Welcome back! Glad to hear no one was hurt. You never know when something like this will take place. Many years ago I walked into my home and found three guys robbing me blind. Fingers still crossed...
-
I'm starting to feel the same way. I may just have to move the Von Wappen down the priority list one notch.
- 2,191 replies
-
- 1
-
-
- confederacy
- Model Shipways
- (and 1 more)
-
She's looking good Augie. I believe your right about bracing the uprights. I must have busted mine at least eight times on the Niagara. I was lucky they would snap back in place for an easy repair.
-
Hi John, Chuck's web site says carronades will be a future addition, but I did not see anything regarding timeframe. At the pace I'm moving I will not need them for months. I'm still pretty much anchored to a recliner all day. The daytime pain level has decreased to where I do not need any of the heavy pain killers, but during the evening it comes back like clockwork, making sleep difficult. Tomorrow I'm going to push myself to try and clean up the workbench and maybe lay a plank or two. I'll sent an e- mail to Chuck to see if he has an idea when the carronades will be available and at what scale.
-
I also liked the brass cannons and would pay extra to include them in a kit. Maybe kit manufacturers could consider changing their business model to offer options. Standard kit includes white metal guns, option (1) for X dollars adds brass guns, etc. This may open another source of revenue to offer a list of various higher quality upgrades specific for the model being purchased.
- 2,191 replies
-
- 2
-
-
- confederacy
- Model Shipways
- (and 1 more)
-
Hi Augie, The cannons and figurehead look very nice. I will have to look on Chuck's web site to see if he has guns suitable for the Niagara.
- 2,191 replies
-
- 1
-
-
- confederacy
- Model Shipways
- (and 1 more)
-
WOW! What a difference the deck fixtures make. She looks absolutely grand and almost ready for battle. Your ship is something to be proud of. Have a safe flight and good luck with the interview. Everyone on MSW will be hoping for a successful outcome.
-
HAPPY BIRTHDAY Popeye! Your ship looks impressive!
-
A trip to Viginia!!! That's great news and hopefully the beginning of a long and successful career.
-
In my opinion, the Terminator movies represent the best SciFi has to offer.
-
Happy Birthday Rich! Hopefully you'll get a NWS as a gift.