king derelict
-
Posts
3,294 -
Joined
-
Last visited
Content Type
Profiles
Forums
Gallery
Events
Everything posted by king derelict
-
Thanks very much Mike. I’ve got HMS Zulu and Eskimo. I’m tempted to work on them next while I’ve got the parts to hand. All different camouflage schemes. alan
-
What a great subject Mike. Lots of super details and very unusual. Your PE work is superb, especially for working in a hotel room with presumably lower quality lighting. Congratulations, I look forward to seeing more. alan
- 24 replies
-
- 5
-

-

-
- Akitsushima
- Pit Road
- (and 1 more)
-
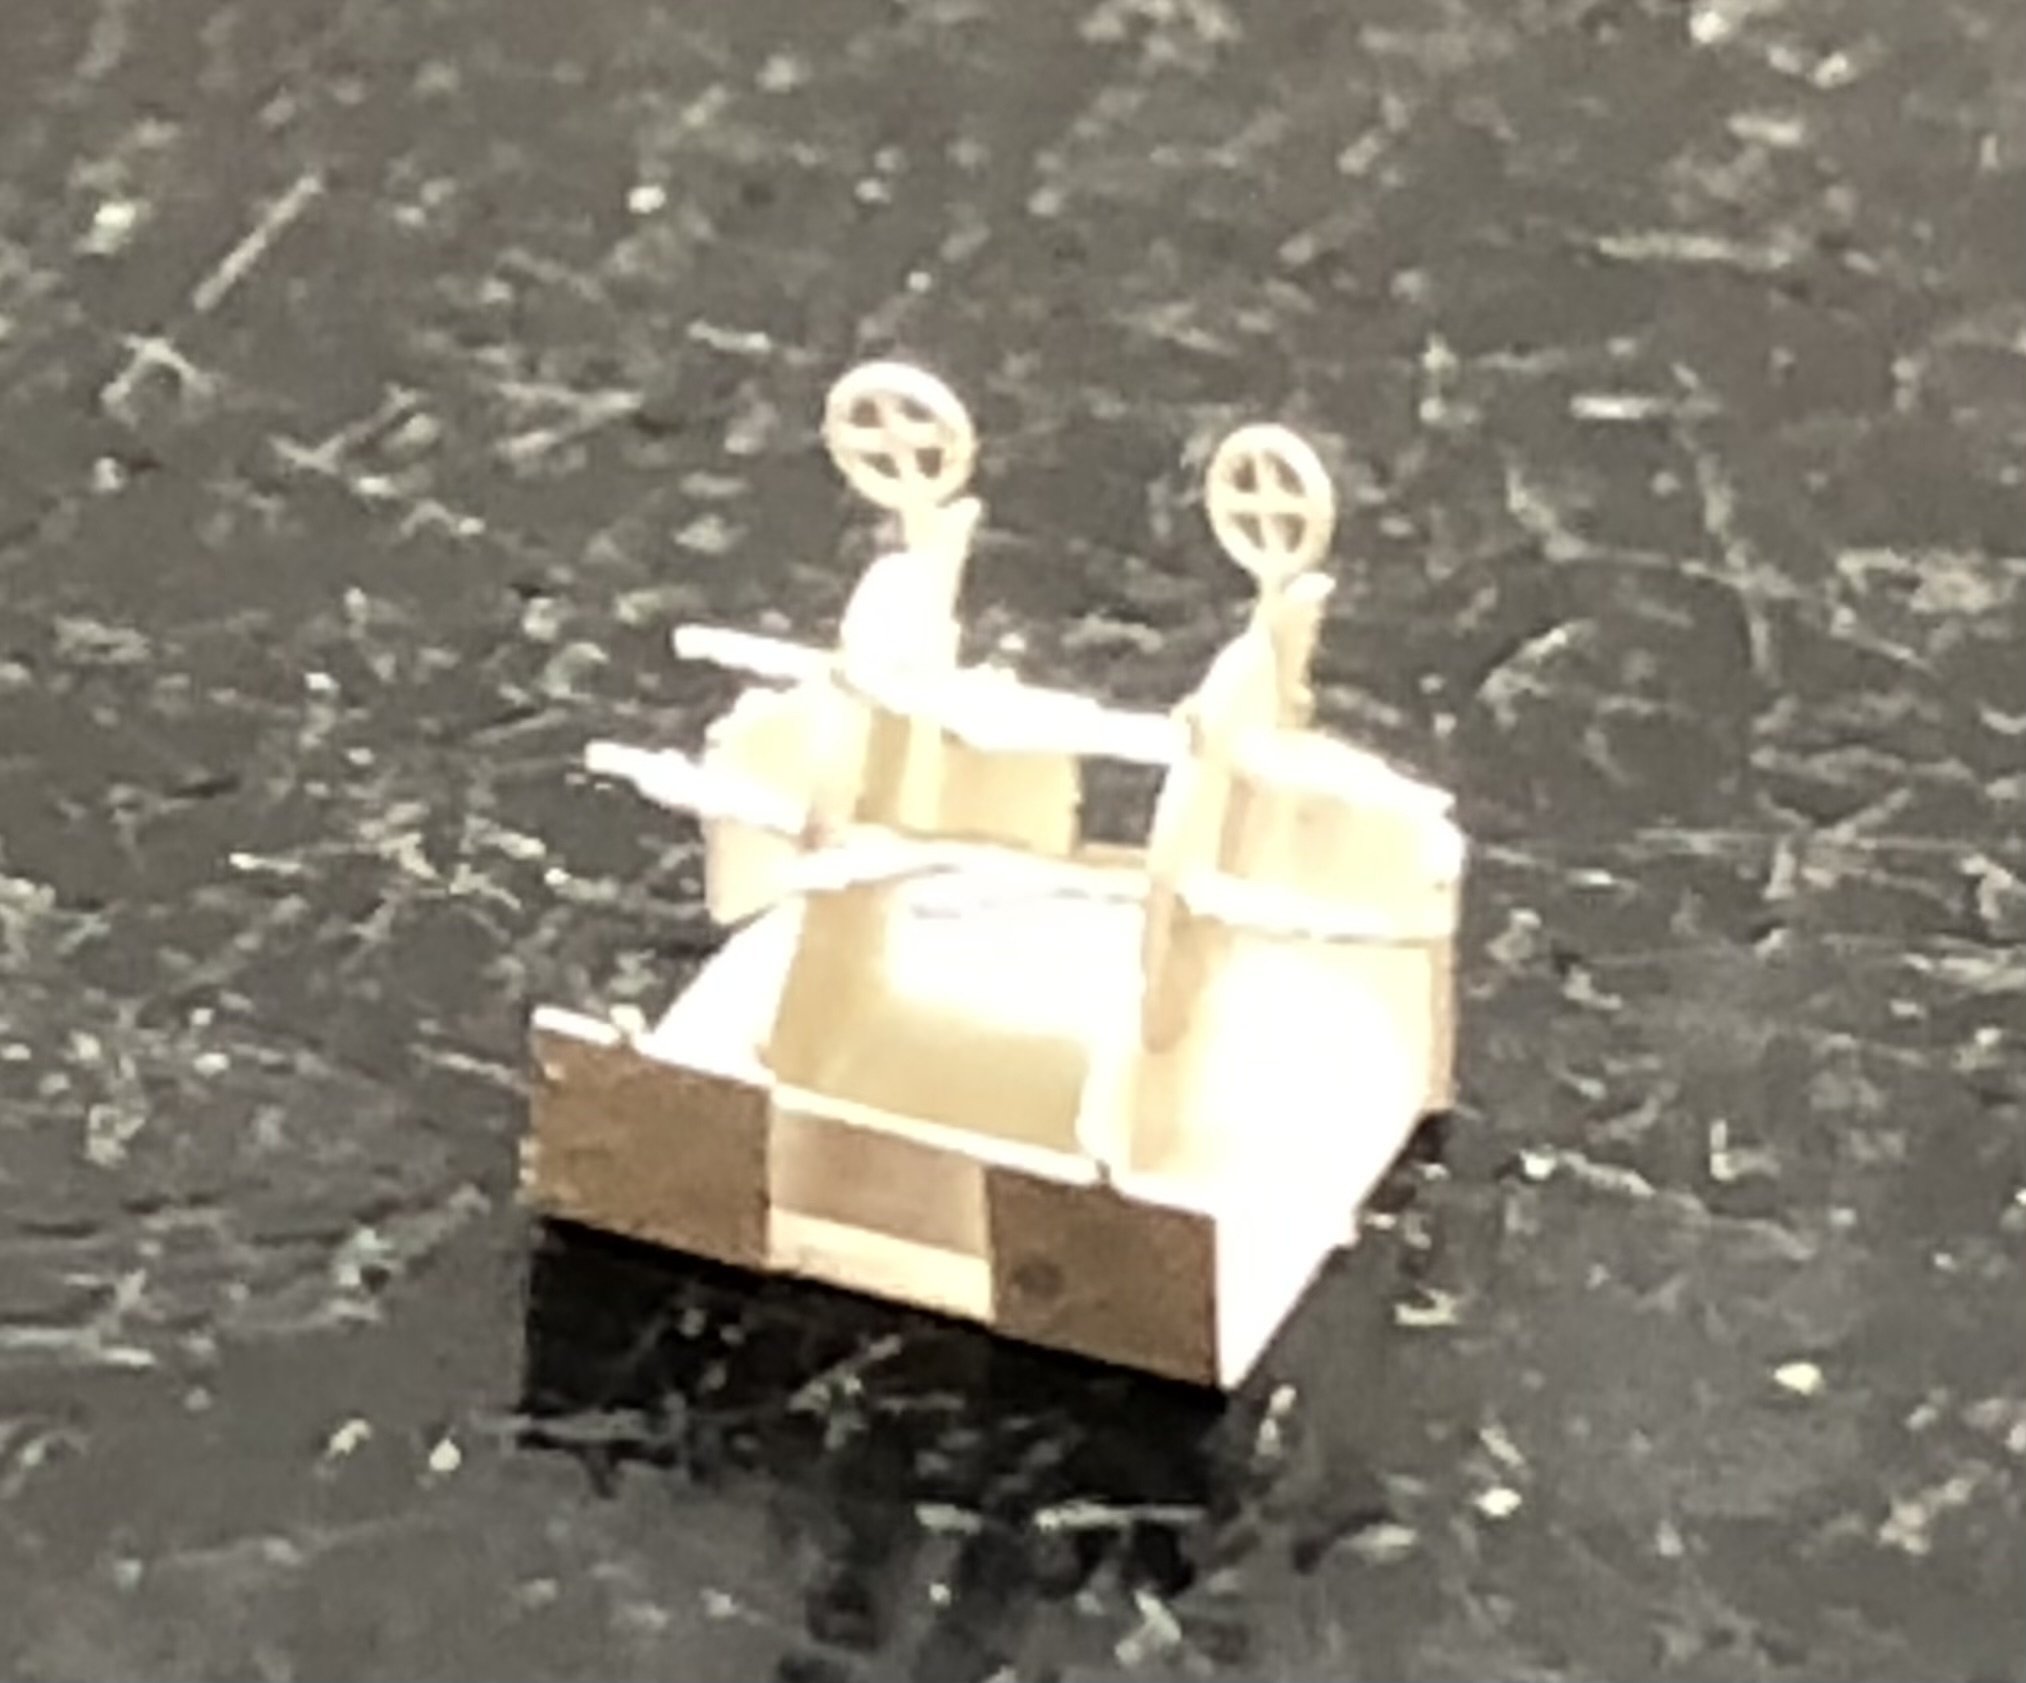
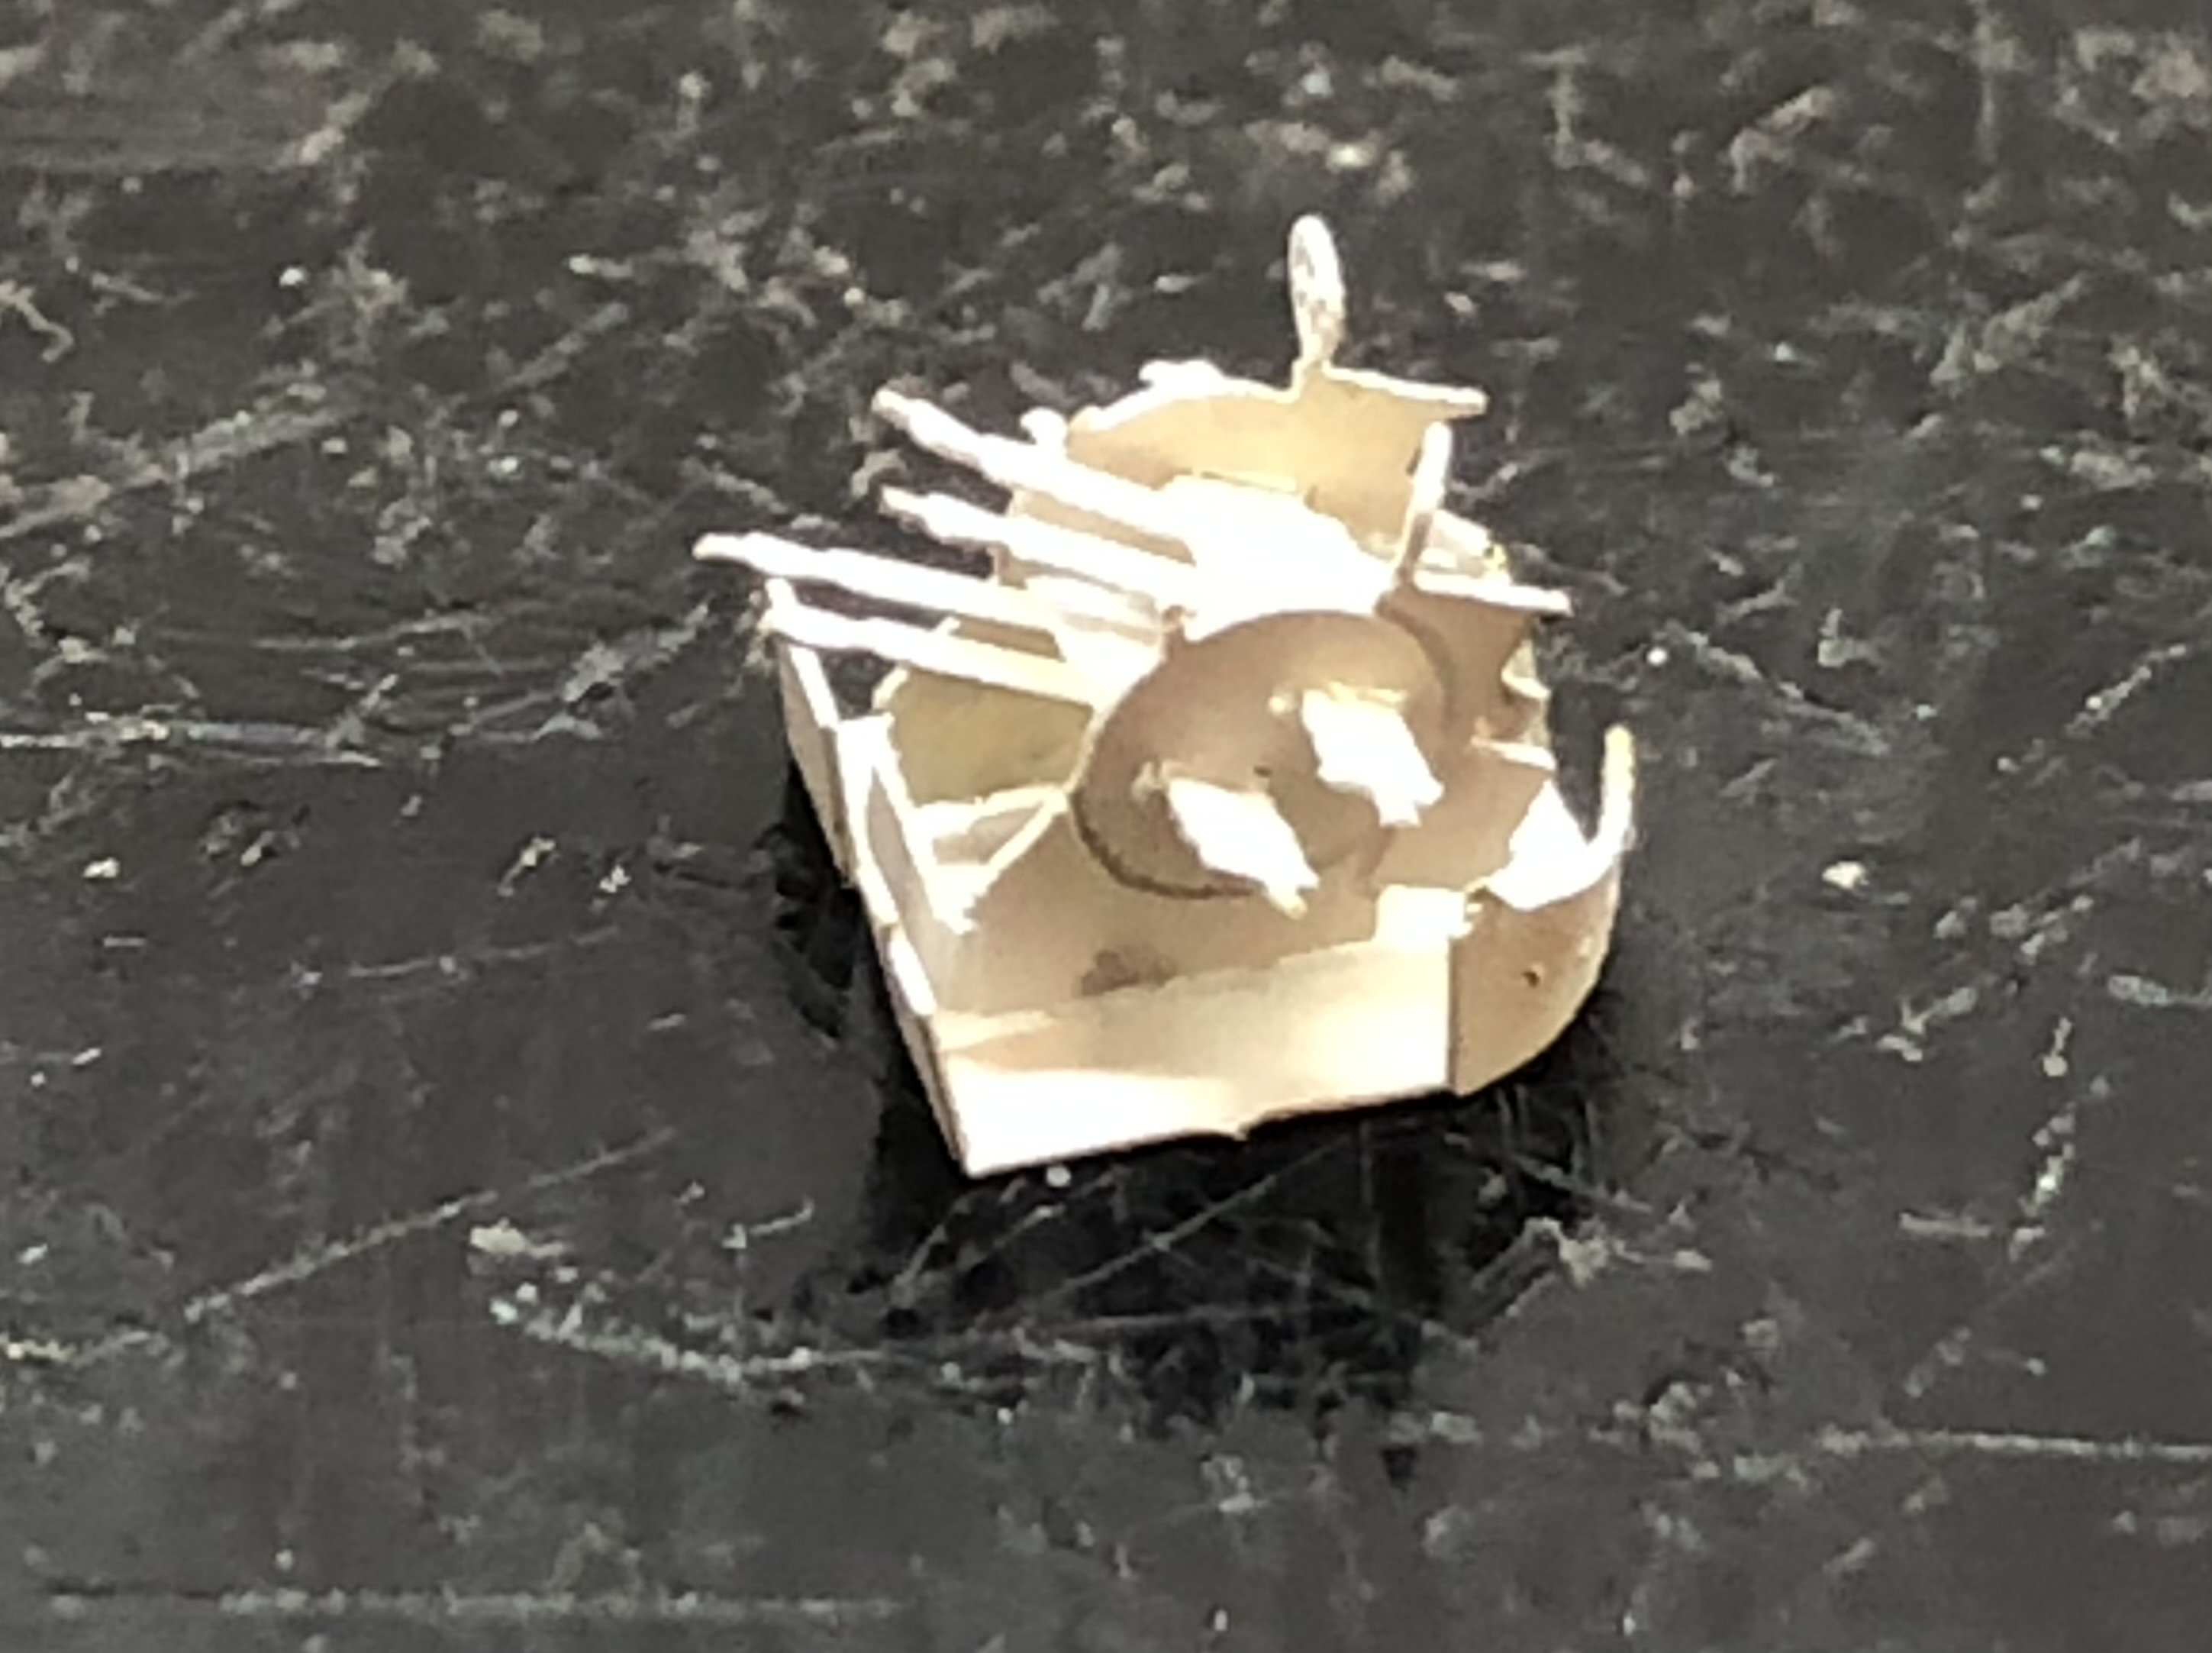
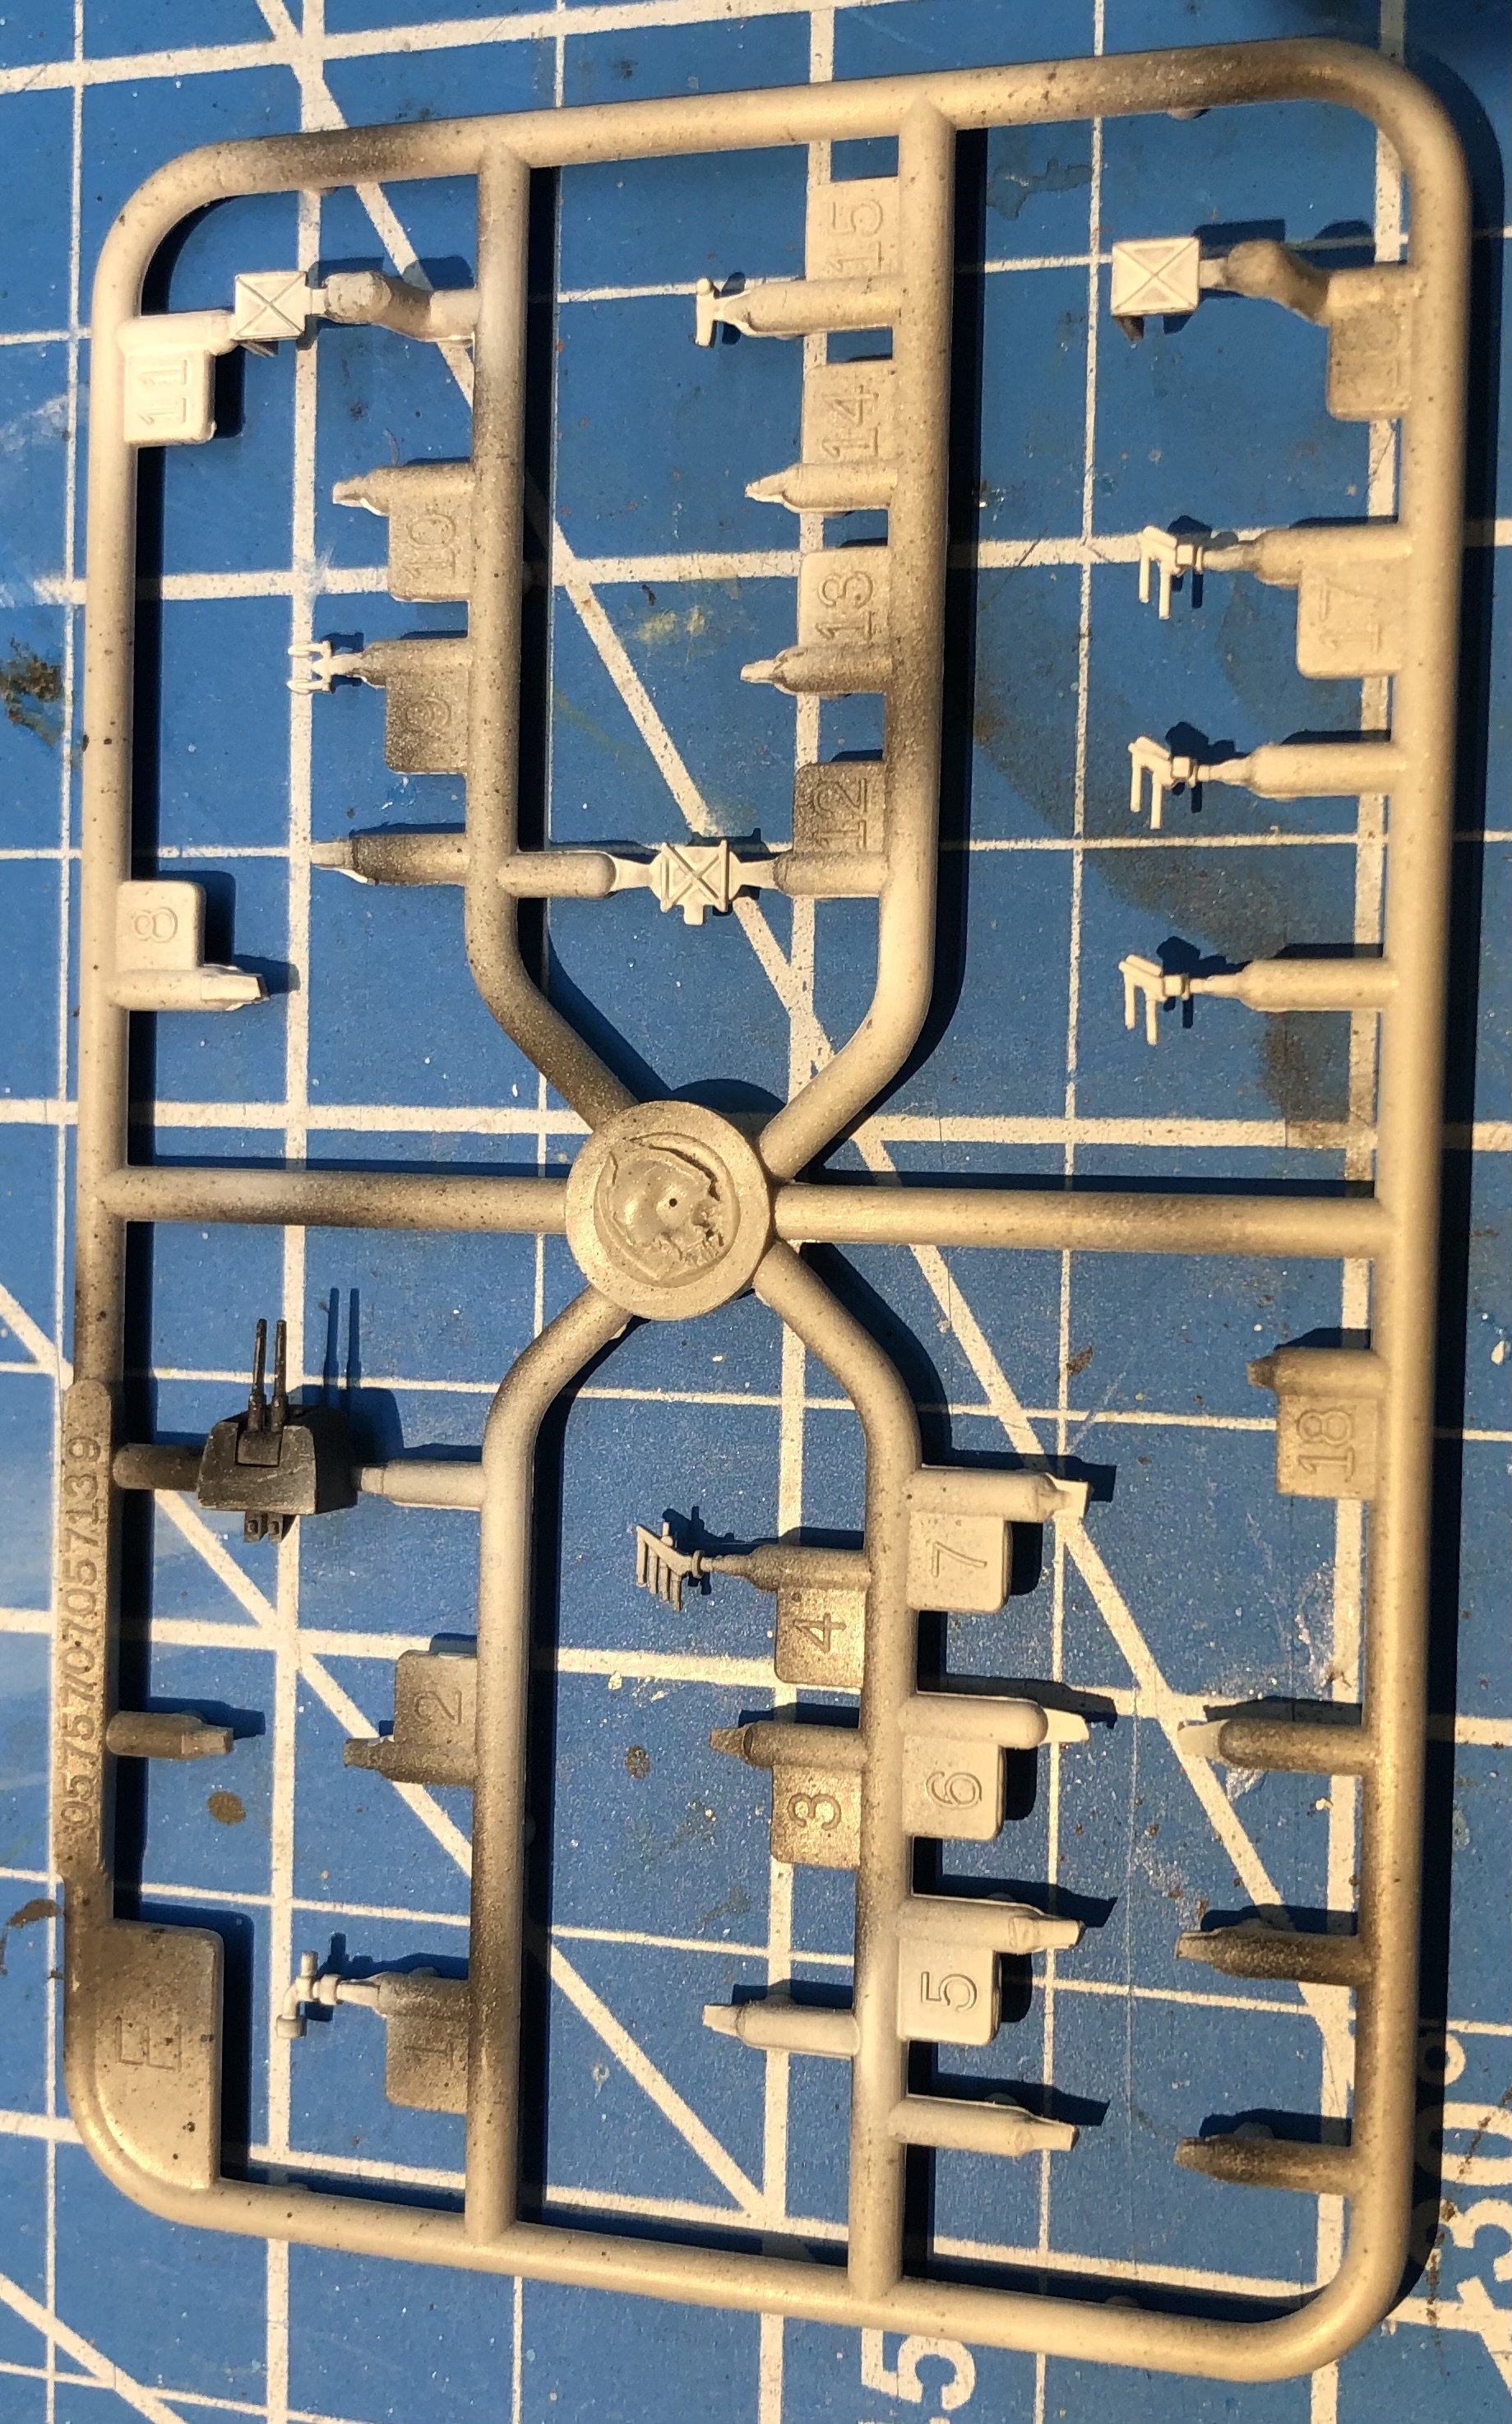
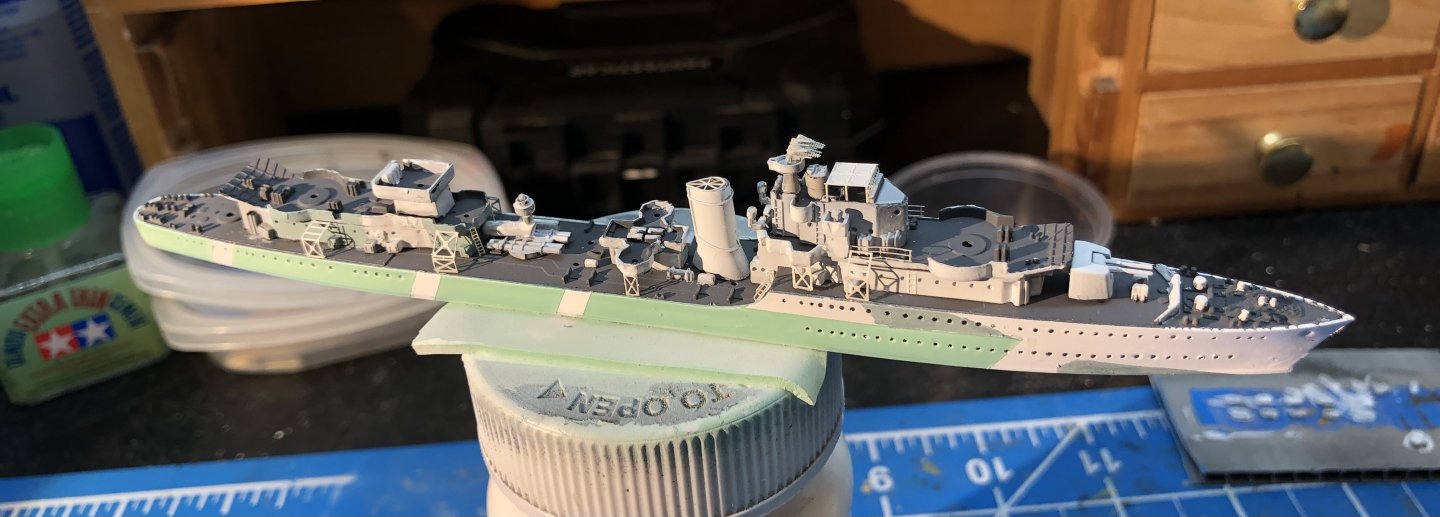
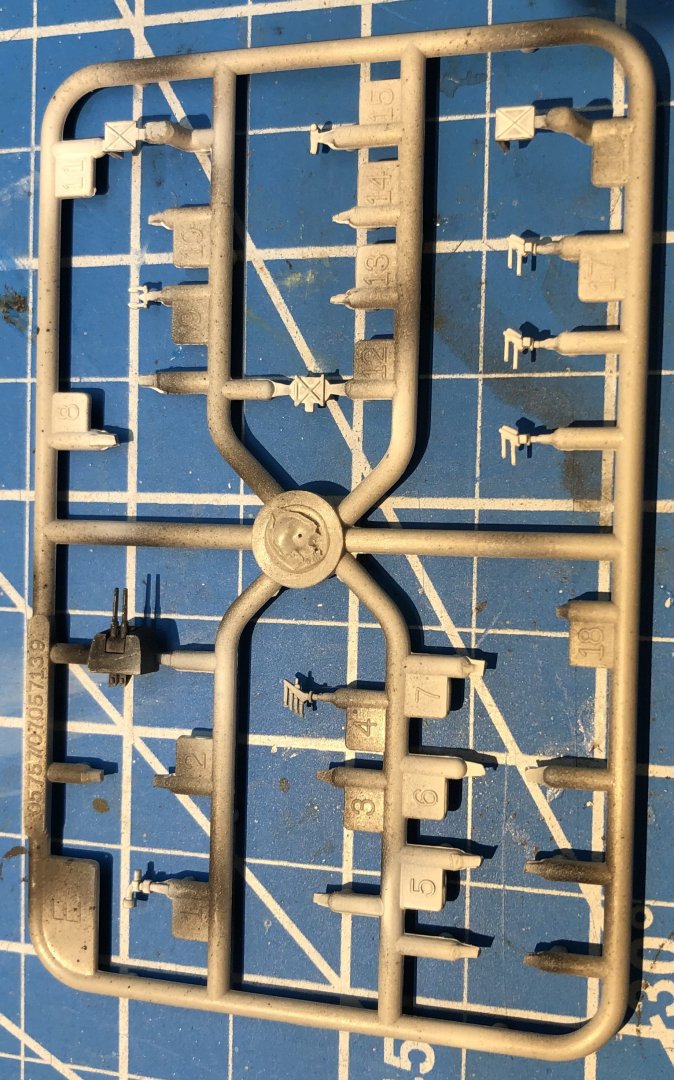
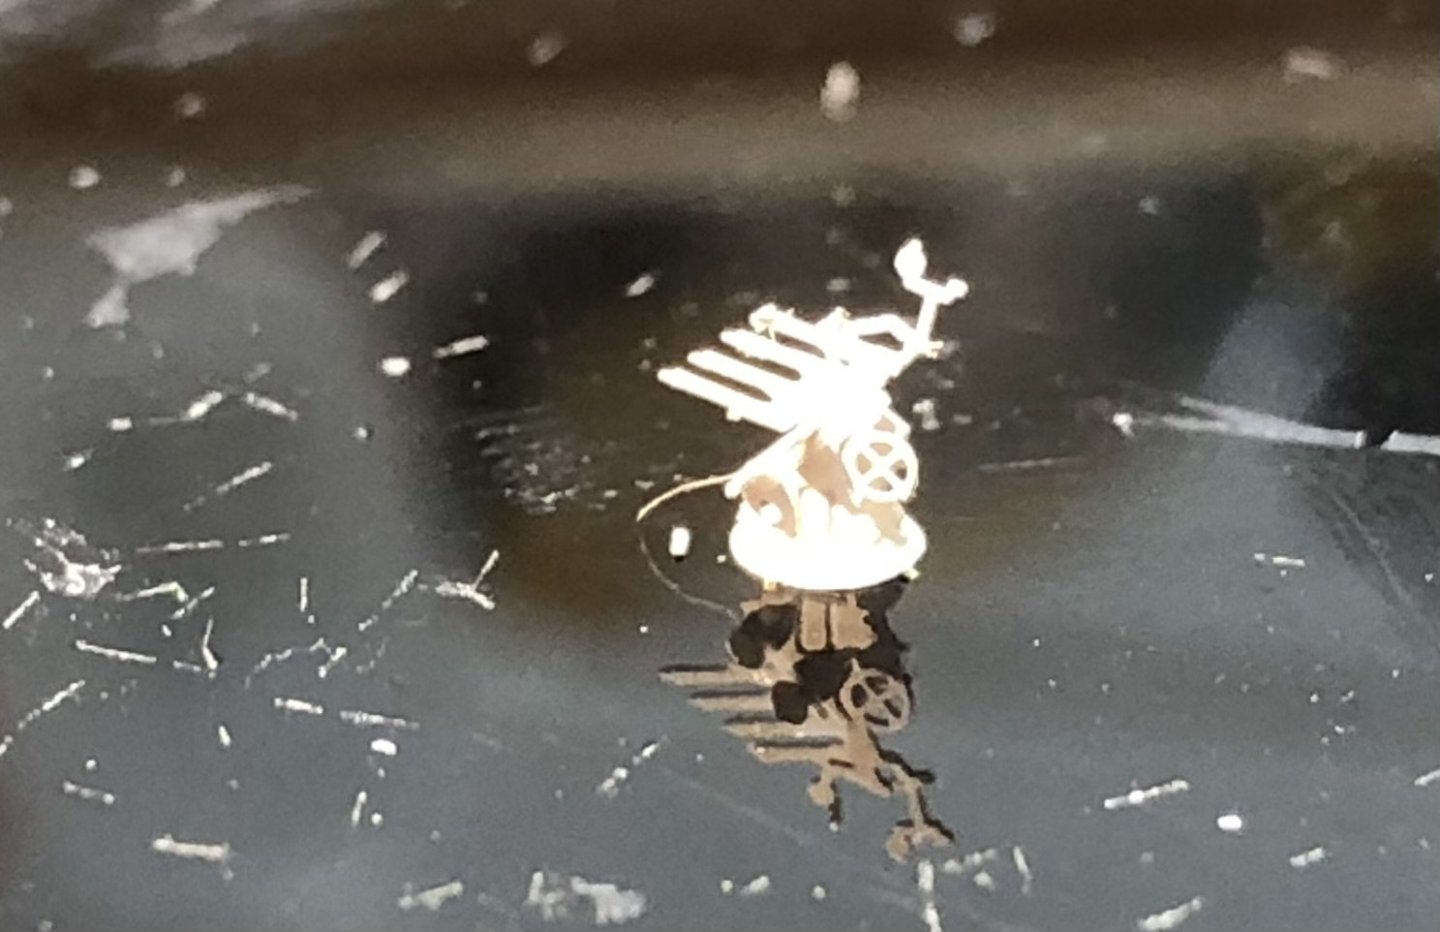
Ive made some progress in the last few days but it’s slow going. Next source of confusion was the number of Carley rafts on board. The kit says six but and inspection of the 1942 photo shows twelve. Luckily I found some spare Flyhawk rafts of about the right size and the WE PE has the support structures for all locations. Fairly easy but then I moved onto the secondary guns. I spent an indecent amount of time on Sunday making the quad Pom Pom and the quad 20mm guns which were a real eye stretching exercise. Compared to the kit parts I think they are better even if flatter. However according to my research Huron had no quad 20 mm guns but just six singles which the kit doesn’t acknowledge. I may have some Flyhawk singles that are not too bad but then I’m looking at the 1942 photo which seems to show a number of twin Oerlikons. Maybe the twins were fitted before 1942. Squadron have Black Cat twin mount 20 mm so maybe I’ll go shopping after searching the spares box. So in amongst all this prevarication I got a bit done, some railings, life raft supports, and fitted a few more bits of the structure. Thanks for looking in, the likes and comments. Alan


-
Thanks for the useful resources for replacing the secondary guns. I’m with you, the kit guns are usually horrible and the PE looks flat and is fiddle and fragile. I think I need to invest in some resin replacements, I found a fair selection on the Squadron / Black Cat category. Thanks again Alan
-
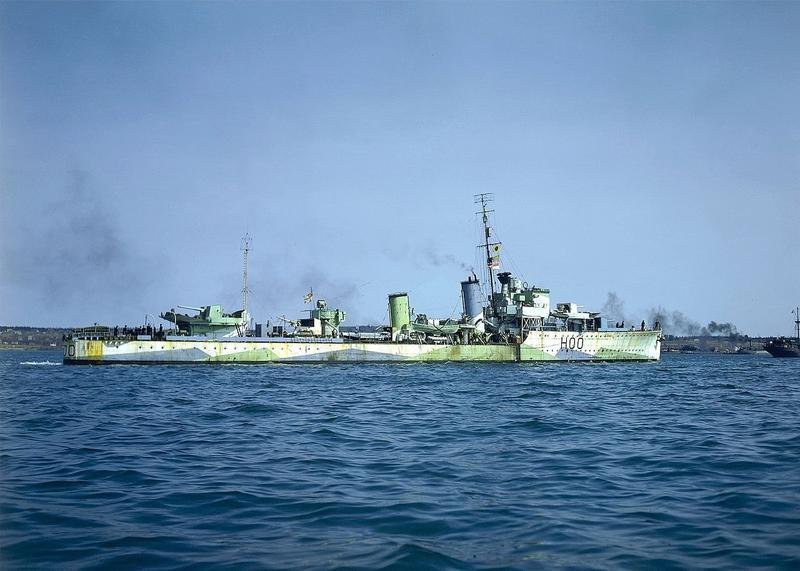
Hi Andrew. I looked in the book British and Commonwealth Warship Camouflage and although it has several Castle Class corvettes, sadly Knaresborough is not among them. The Western Approaches schemes are a nightmare to research and getting paint colours is another issue. I was lucky to find the HMS Comet one but even so the green seems brighter than shown in the reference books. Sovereign Hobbies has this super RN colour chart and the WA green actually matches the WW2 colour photo quite well https://sovereign-hobbies.myshopify.com/pages/royal-navy-periodic-table-of-paints I hope it helps Alan
-
That’s something that didn’t occur to me but you’re right. Maybe he just found a hairball. That’s more likely with my two. alan
-
Thanks Jack. He should be fun to paint. alan
-
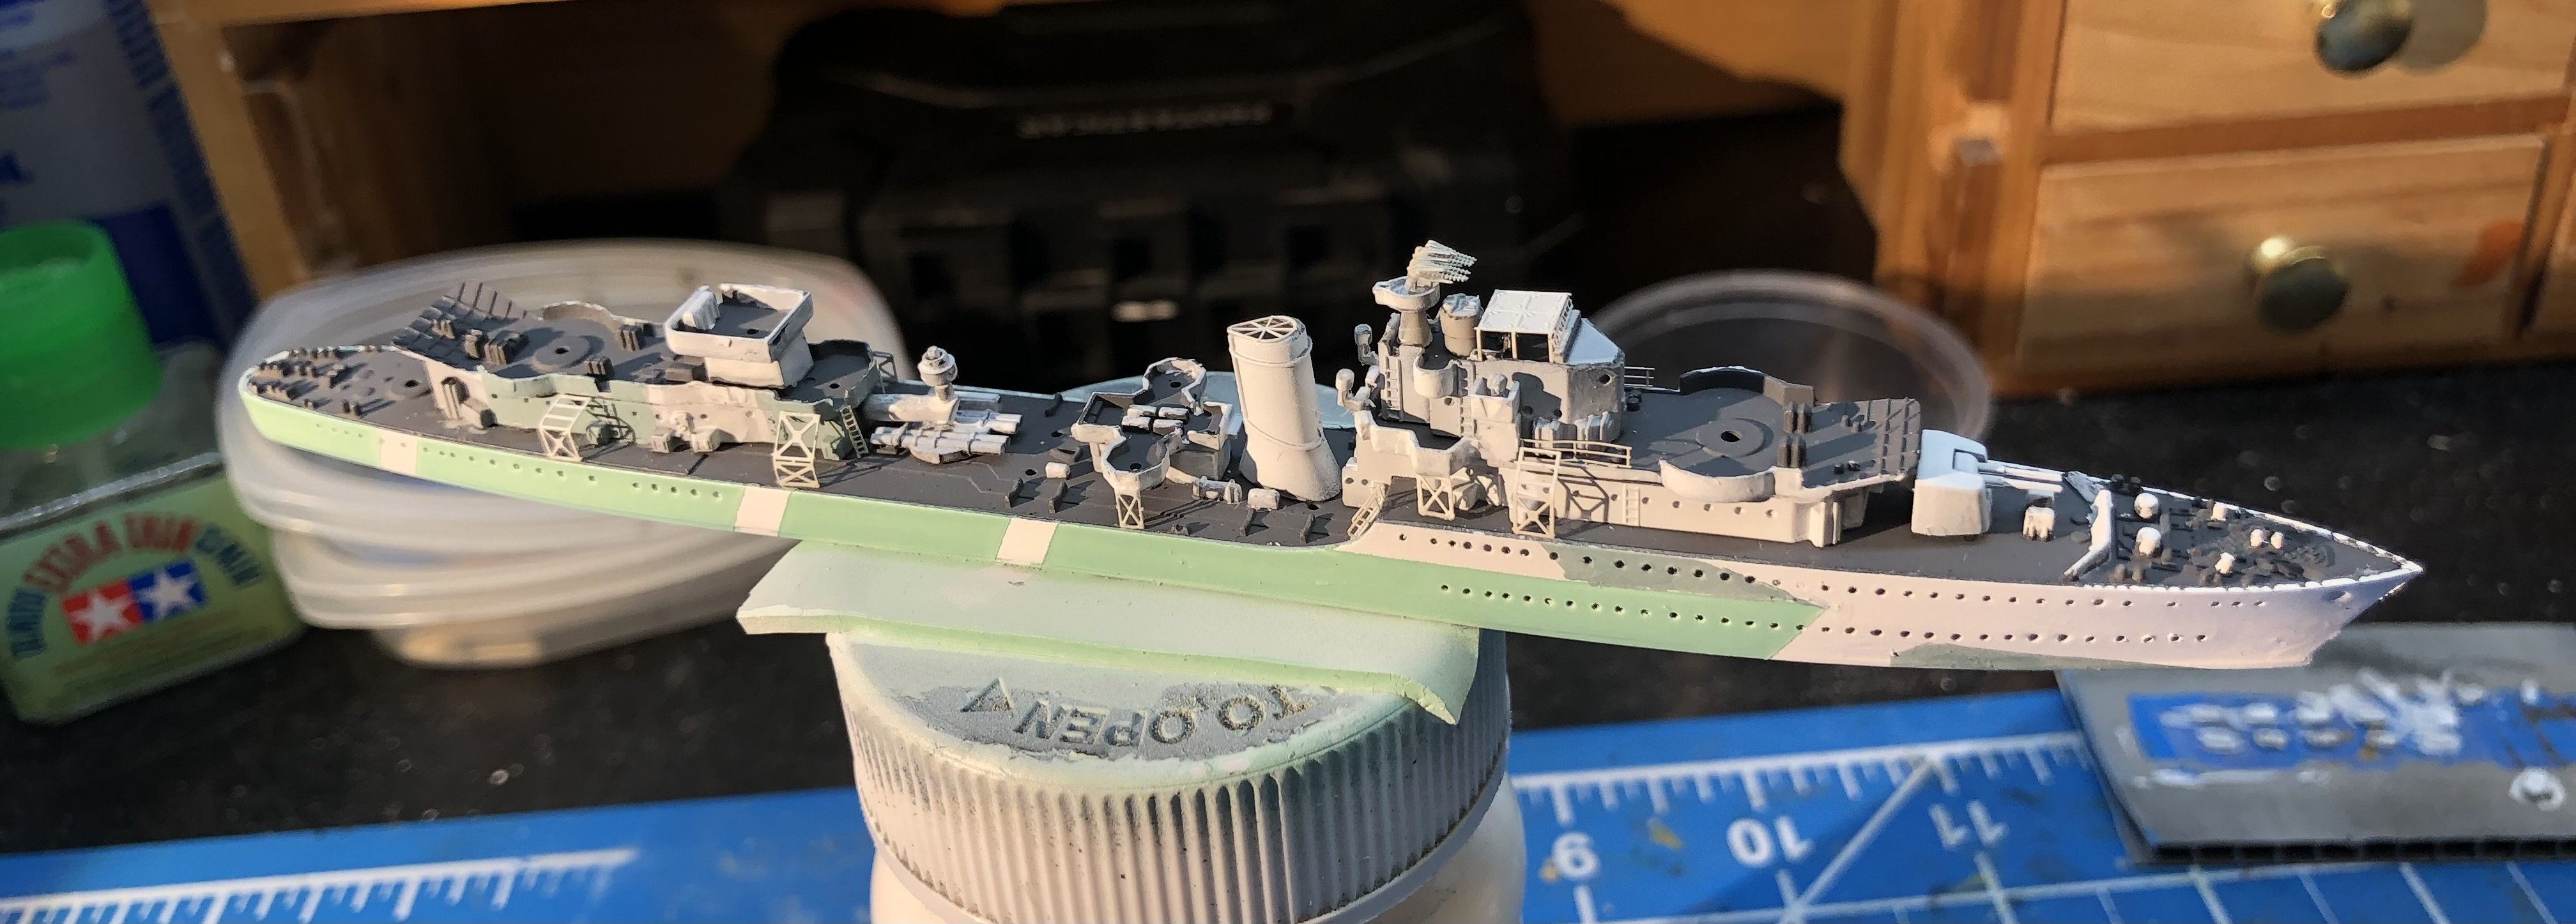
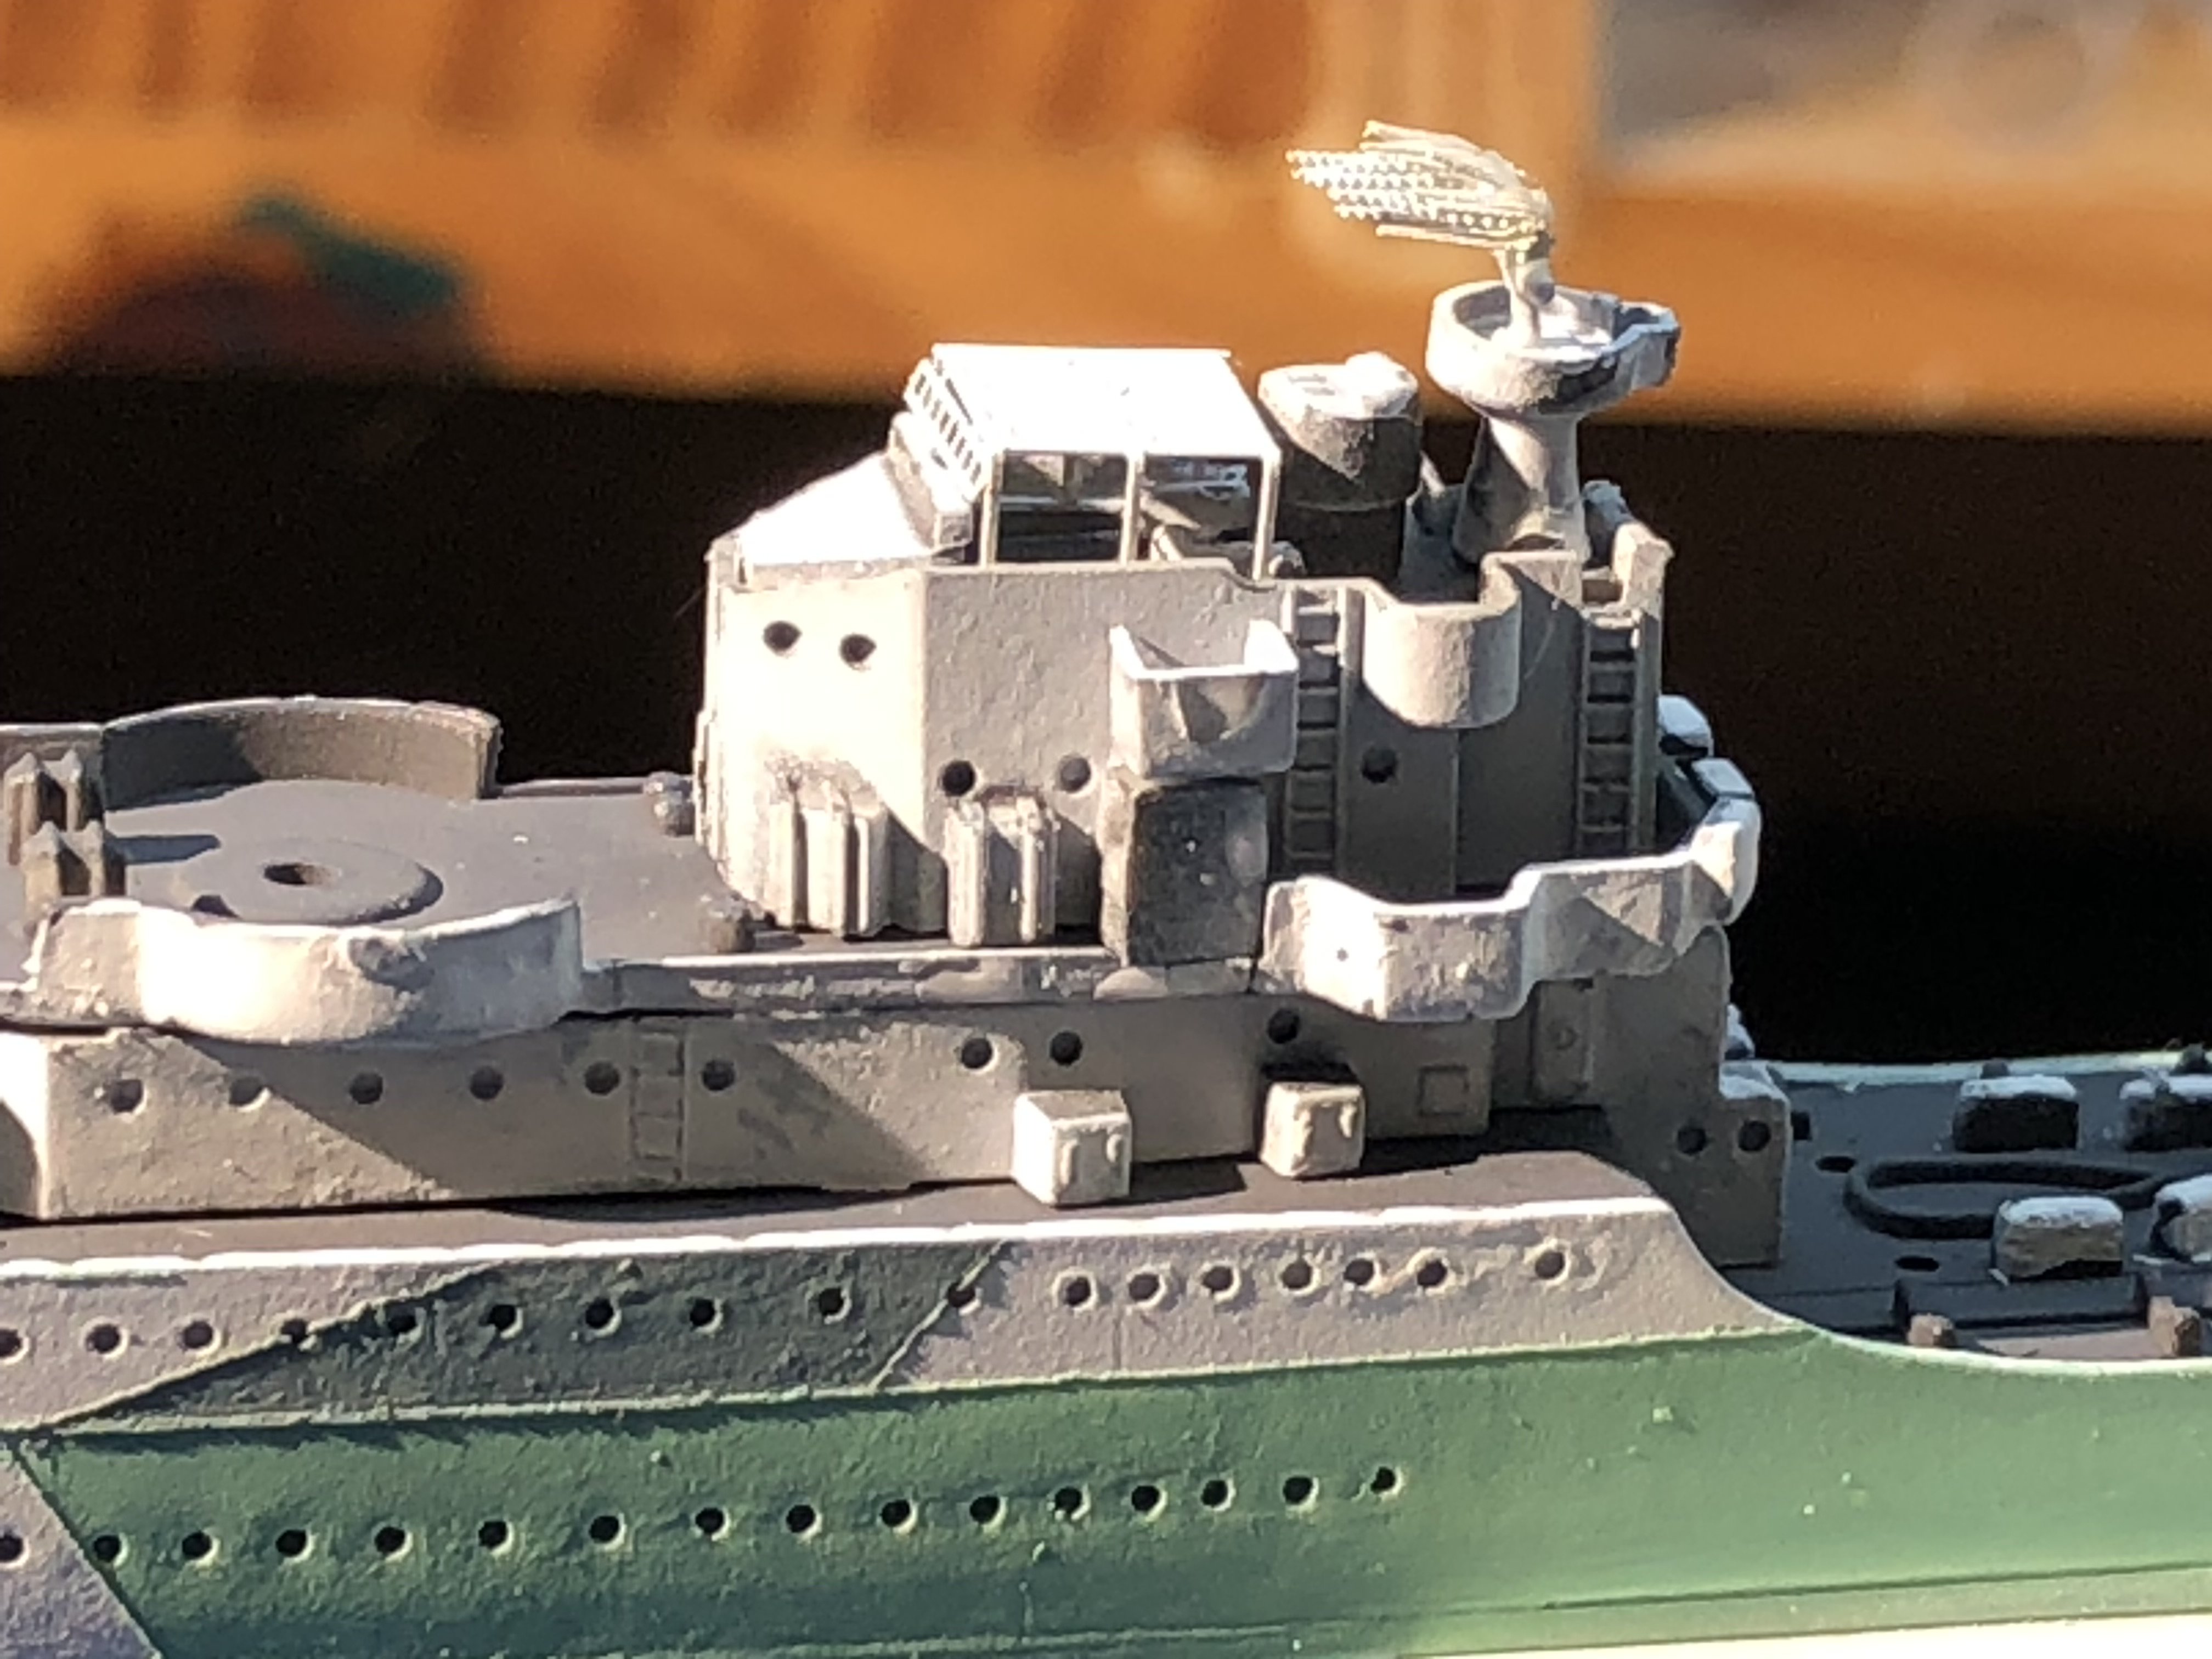
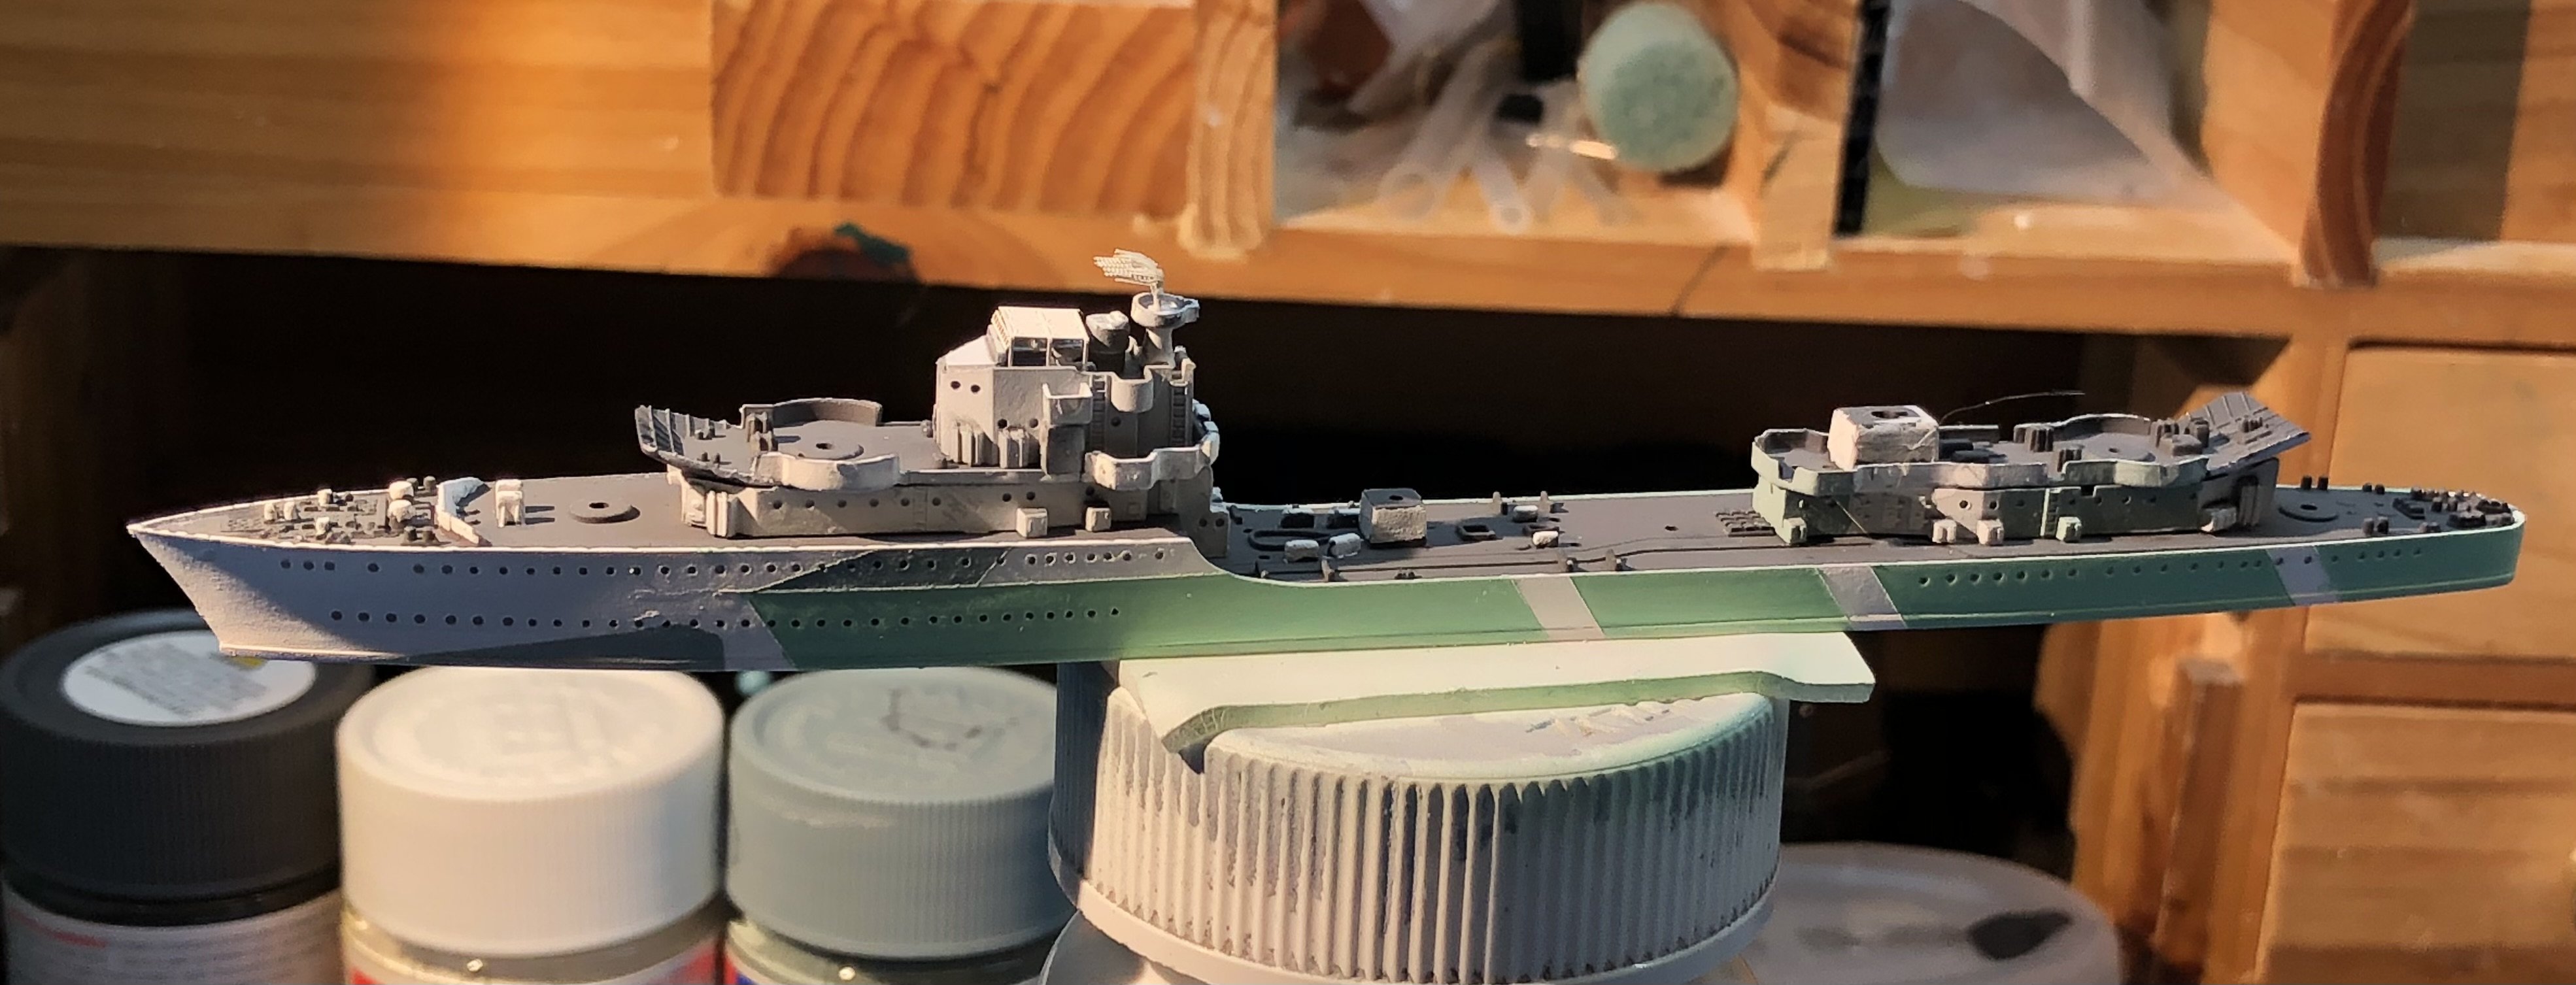
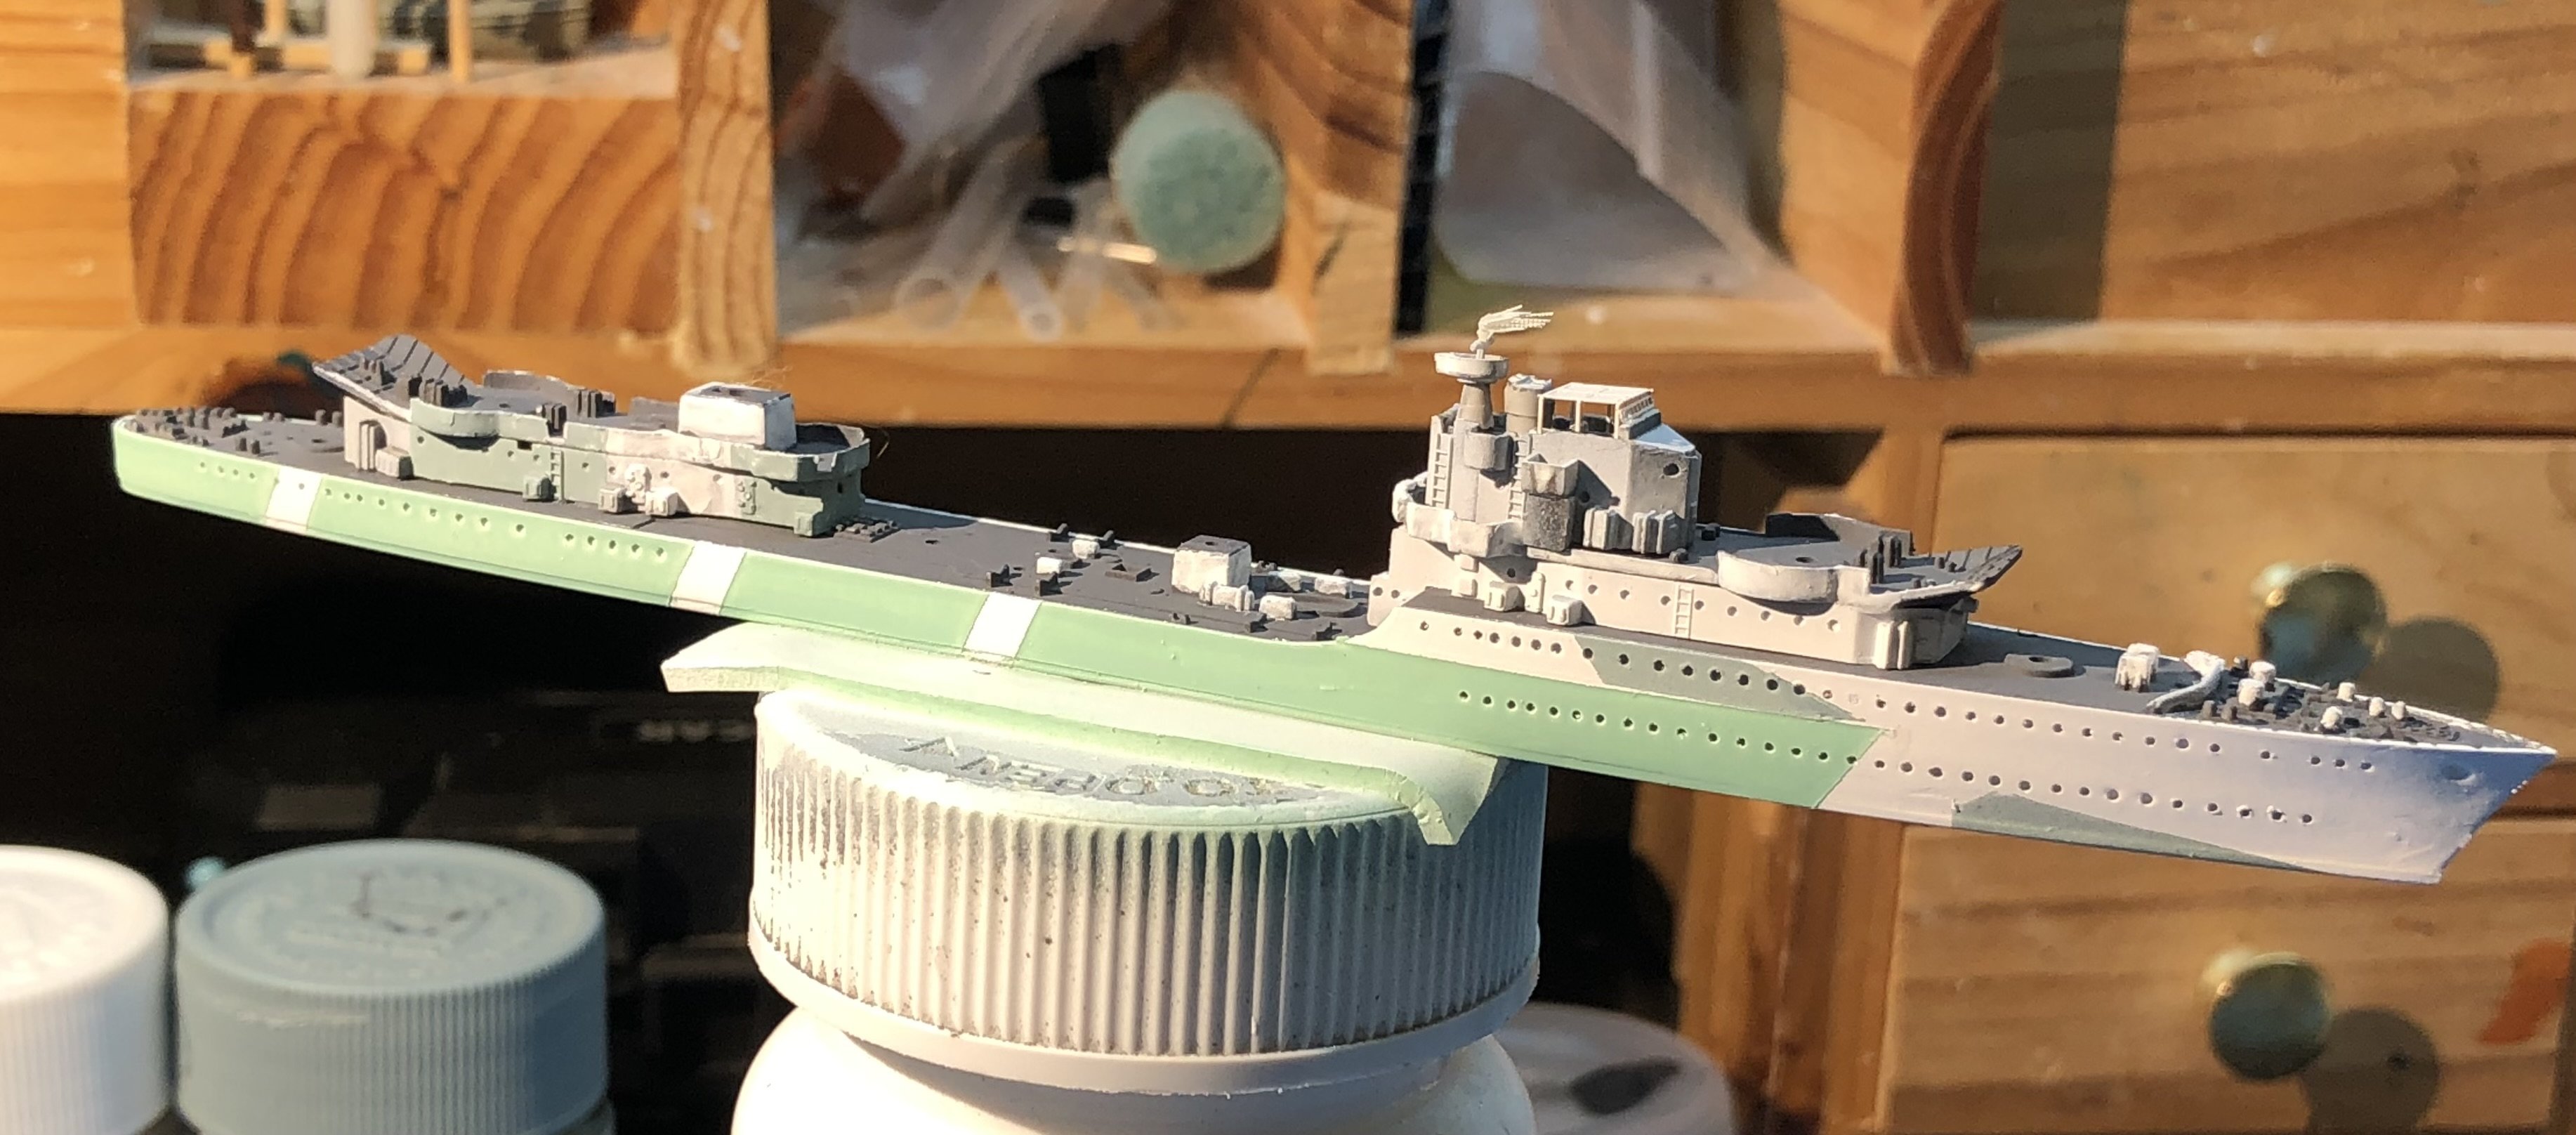
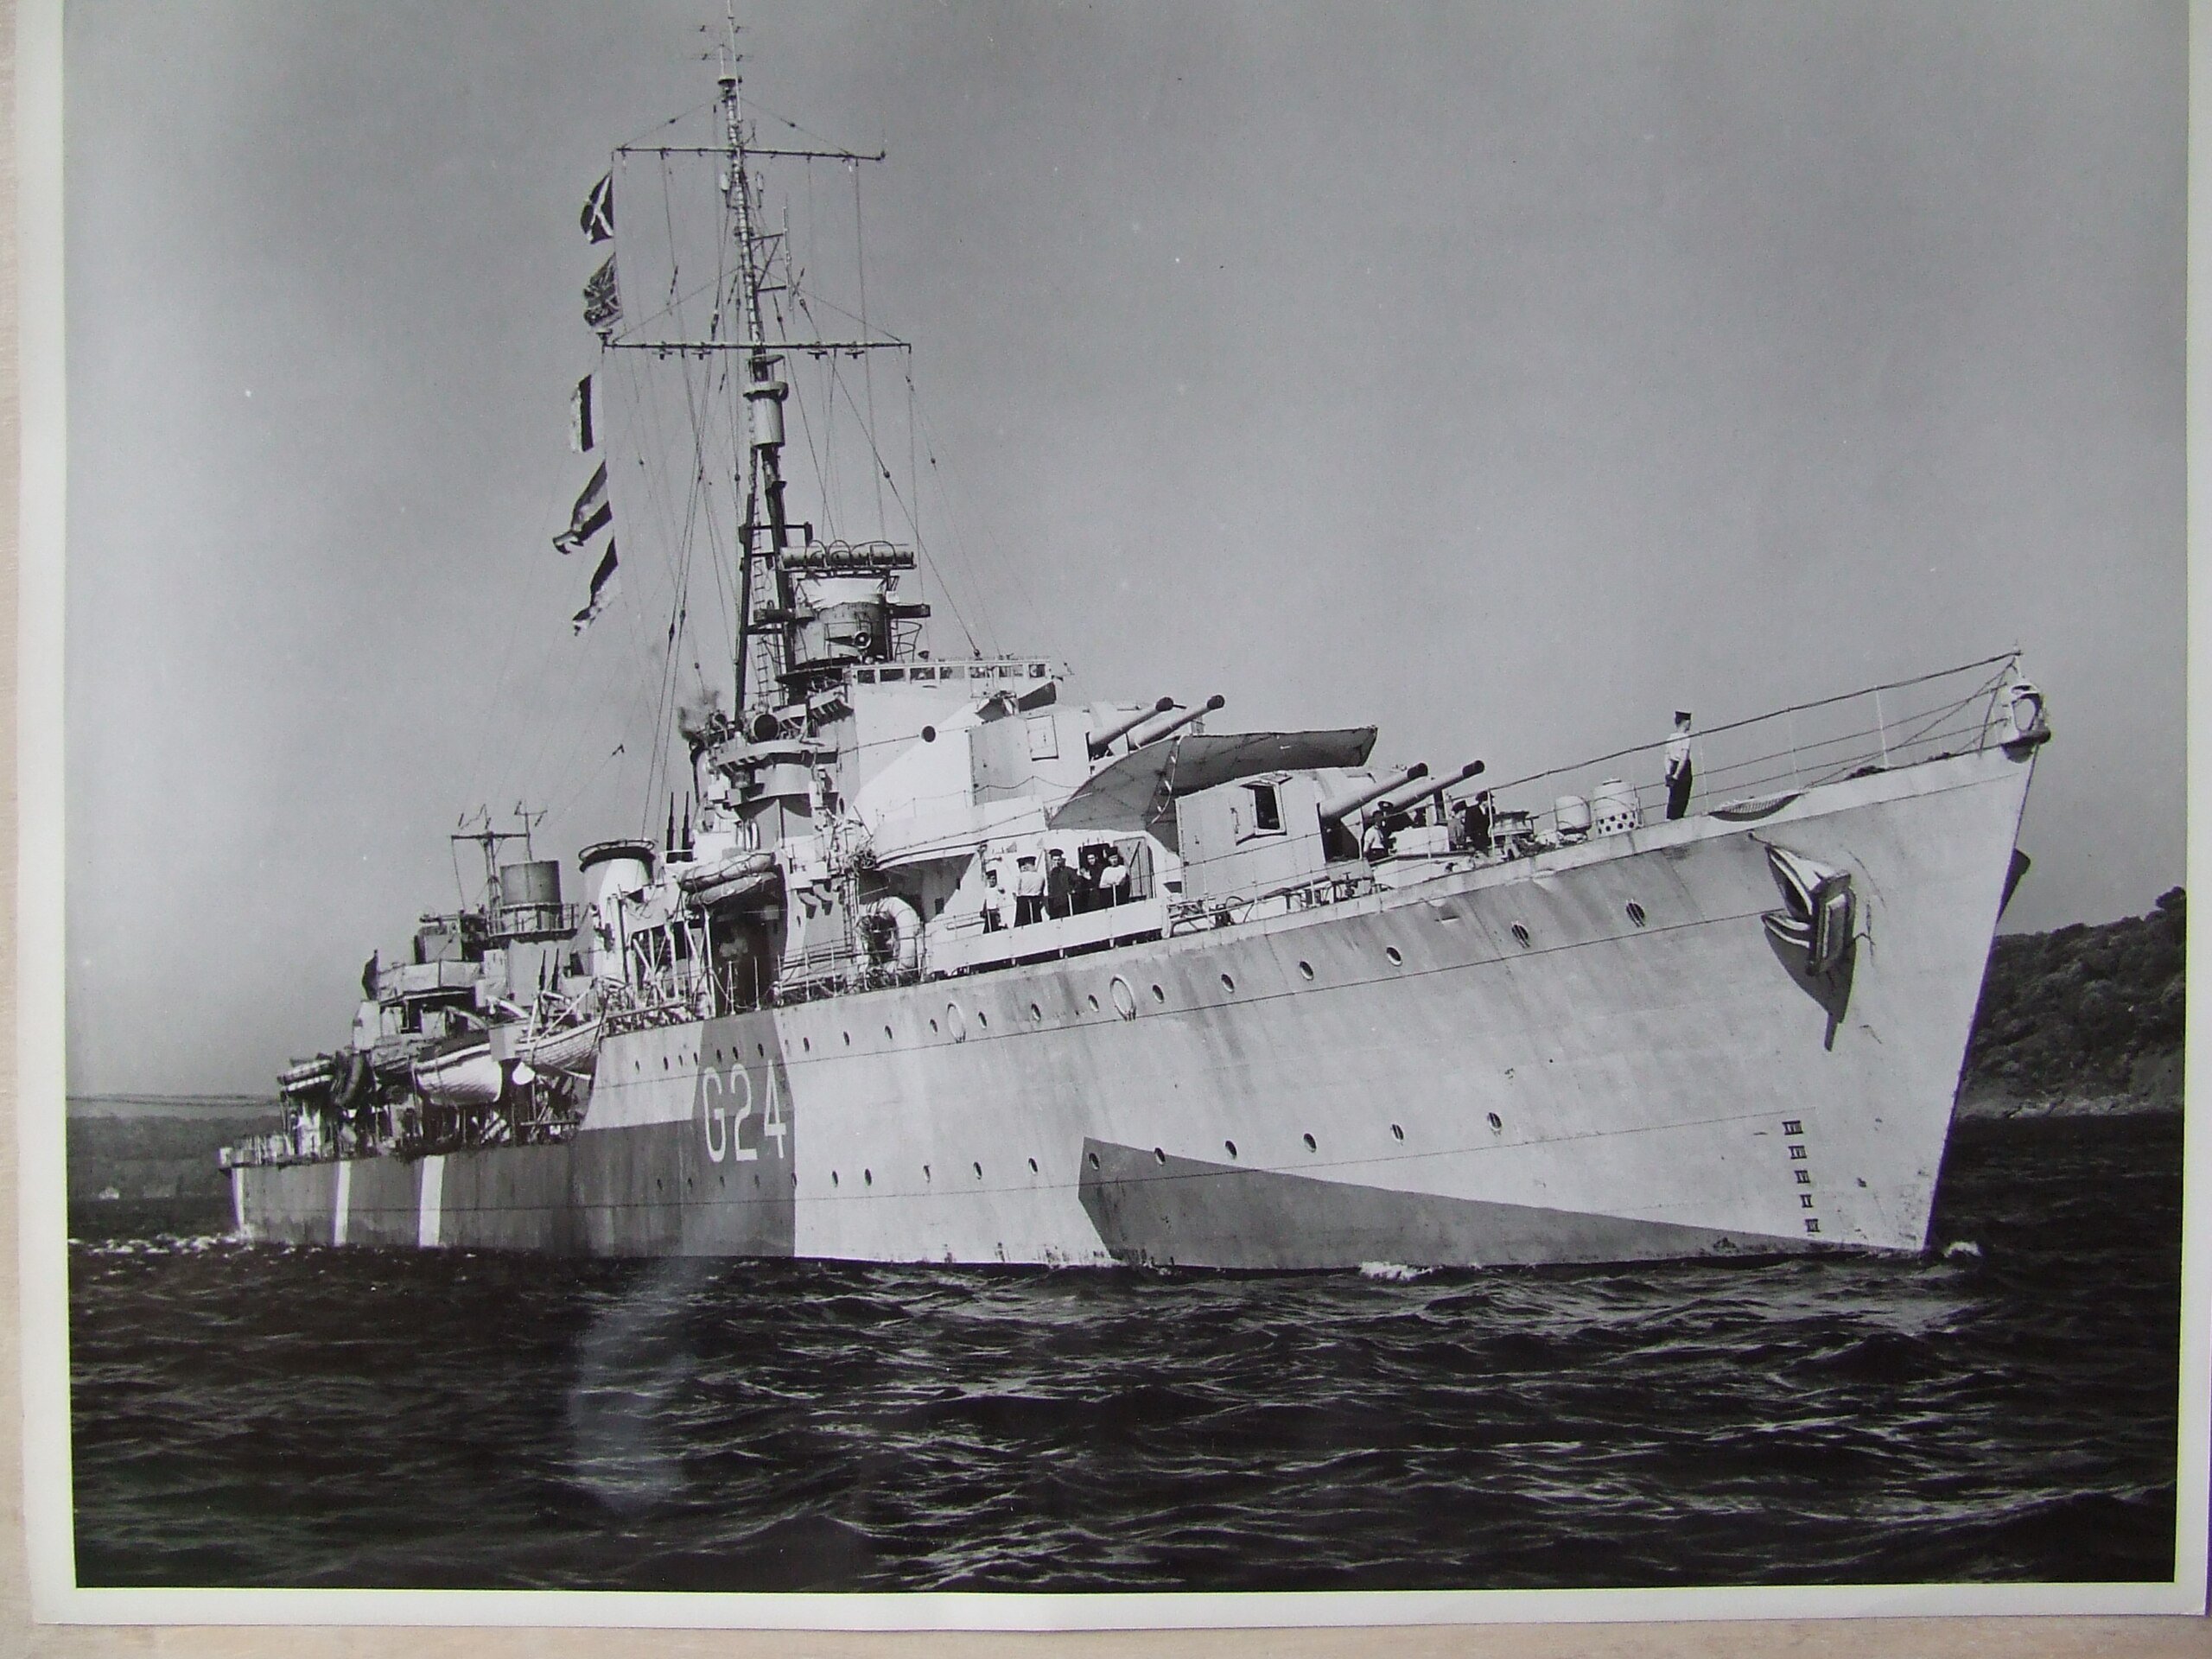
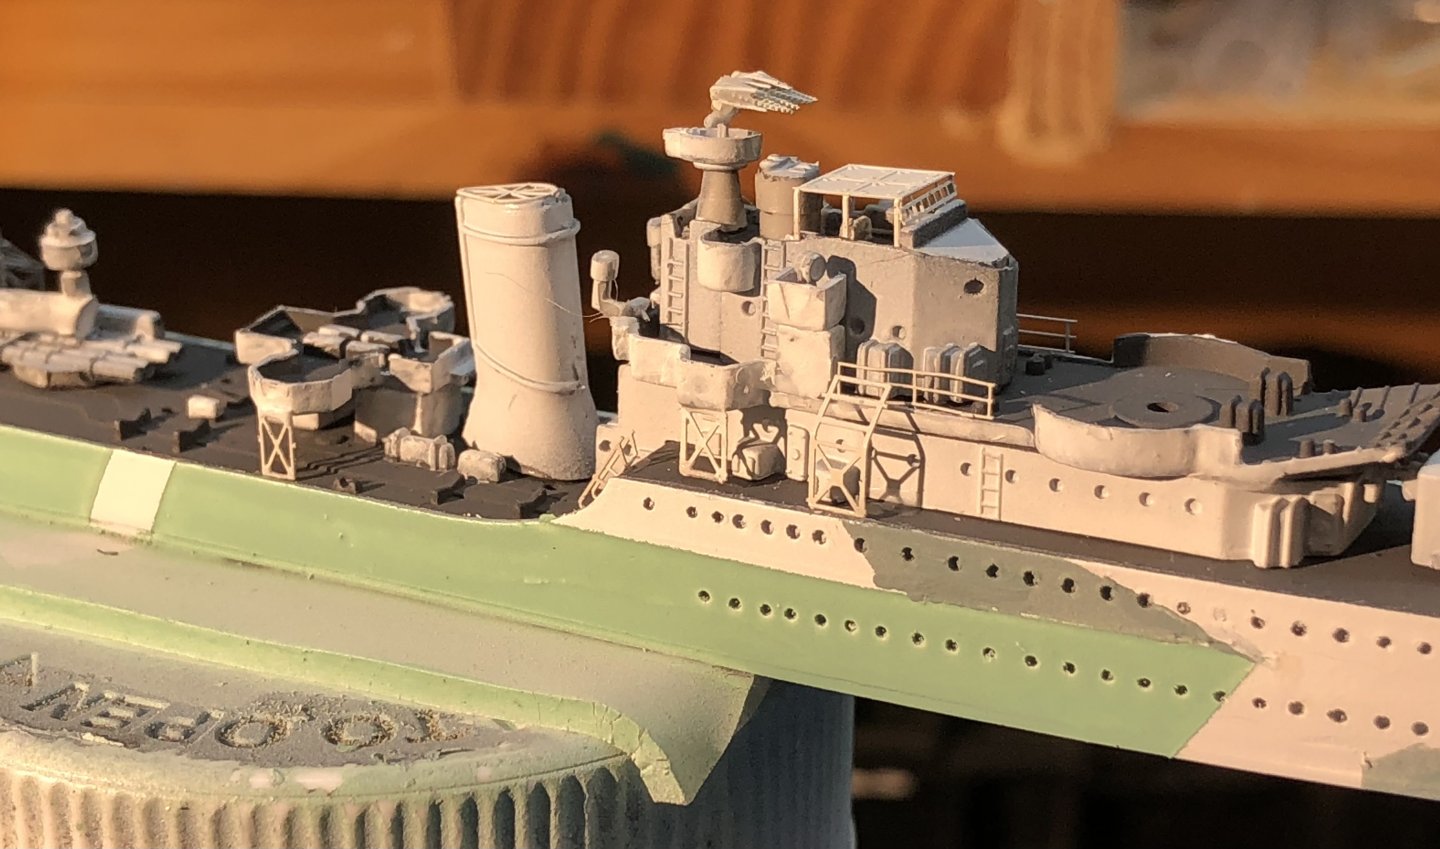
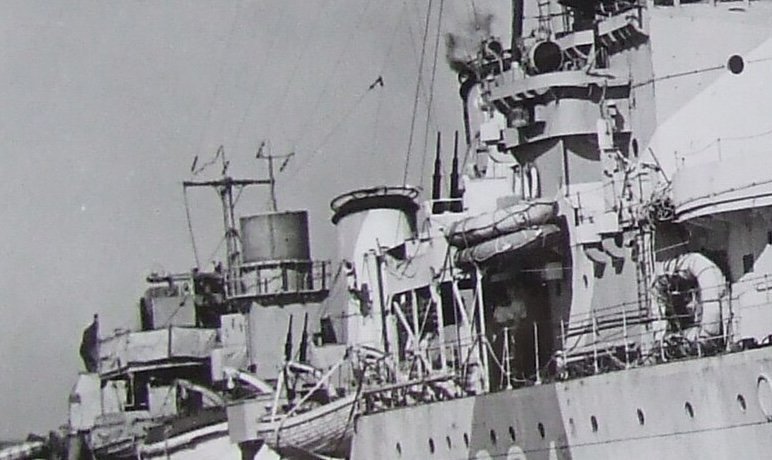
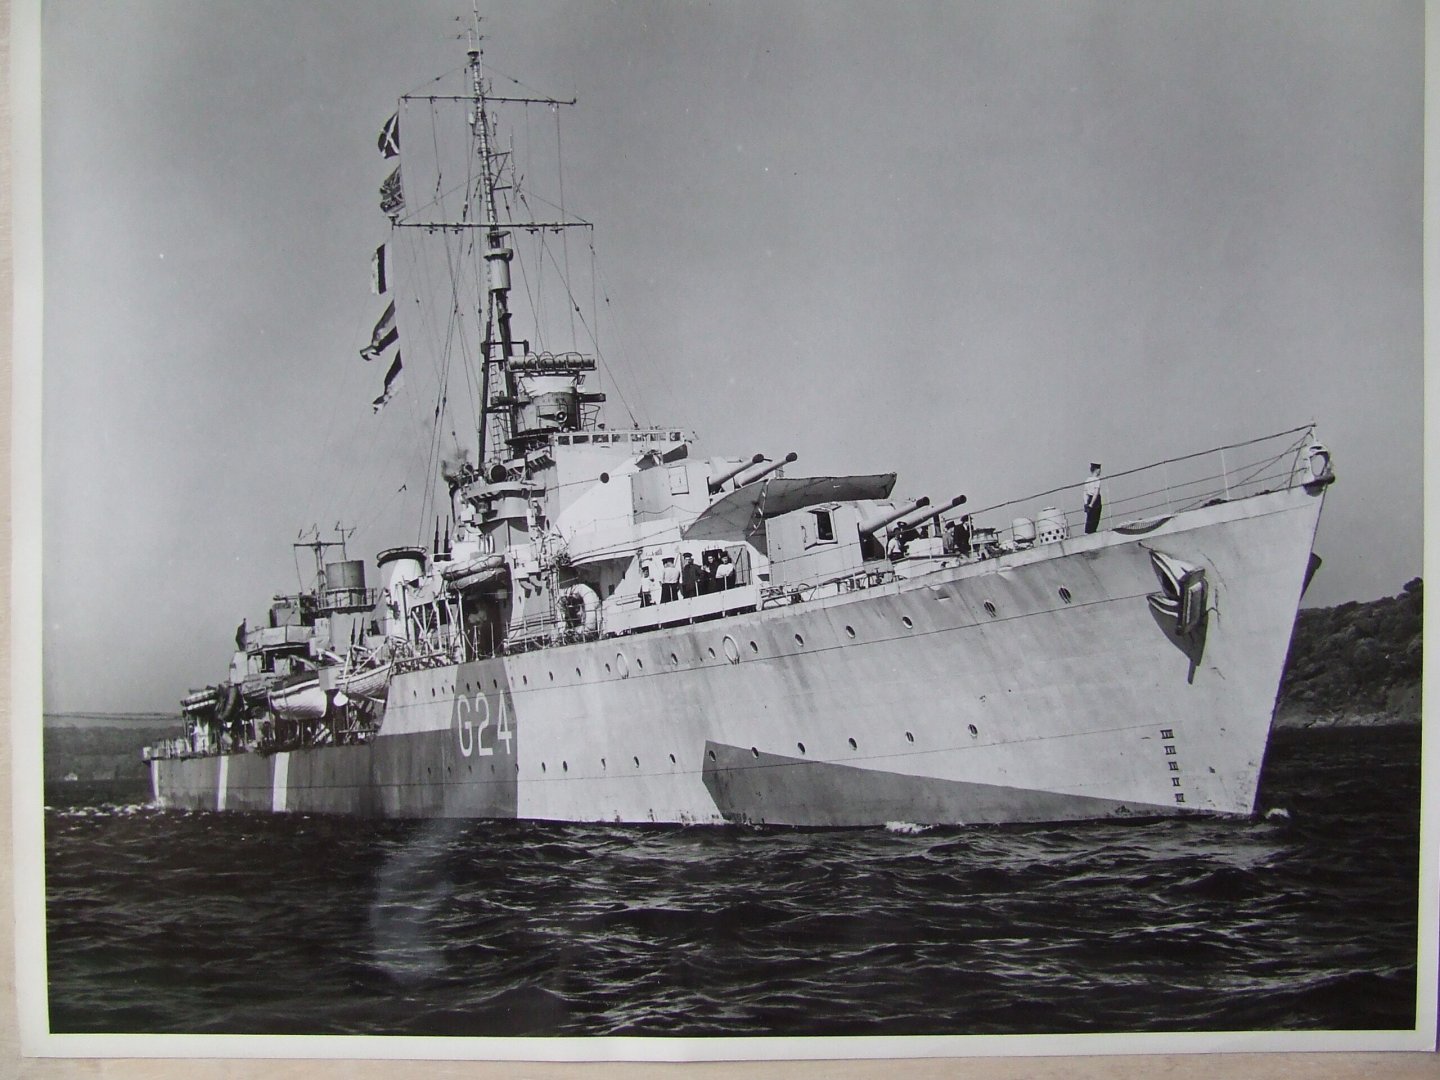
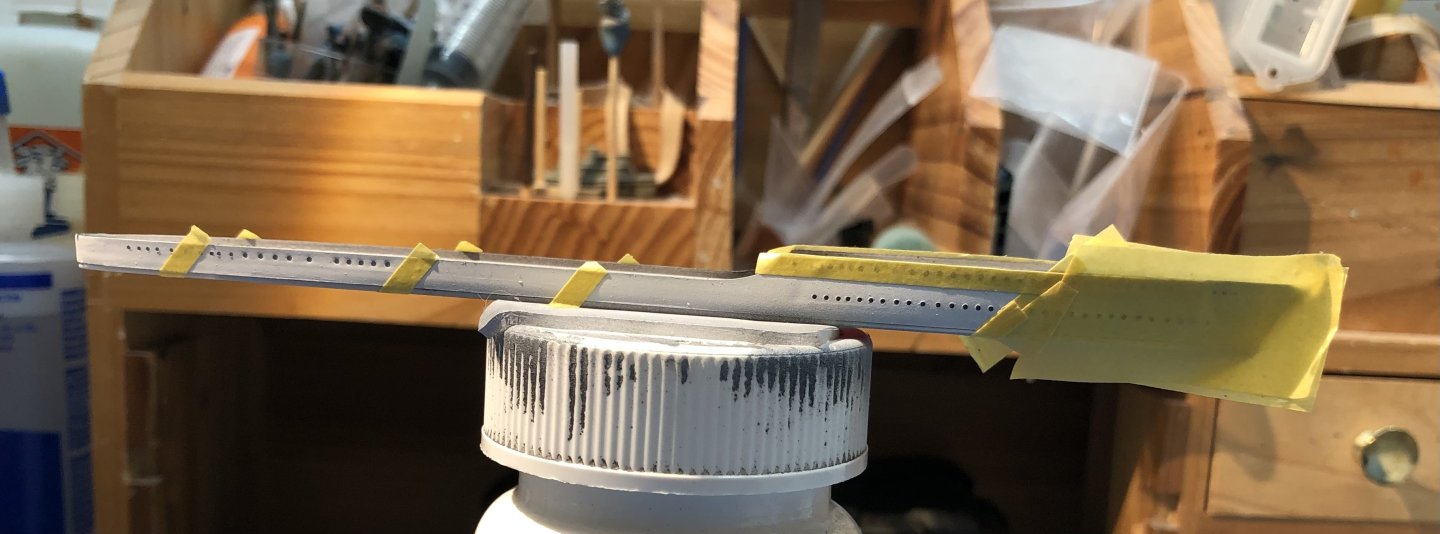
I’m spending a lot of time working through the various configurations of Huron through the war years. Trumpeter say that the kit reflects the ship in 1944 but the box art and the kit bits show a tripod mast ( early war years) whereas the WE PE provides a lattice mast which is the later configuration. Luckily I found this photo. This shows my chosen camouflage pattern and also a tripod mast in (I think) 1943. So with the hull camouflage complete I started building up the superstructures and edged into the PE to detail the bridge. I added the bridge windows and the canvas cover, then made up the Type 285 gun control radar which was very fiddly. Some of the WE PE is very small and probably beyond me. The quad pompoms are just too tiny and intricate. Thanks for looking in, the likes and comments. alan


-
Thanks OC, I struggle with deciding the order of painting and then remembering that the masks have to cover the bits you want left in the earlier colors. 😊 alan
-
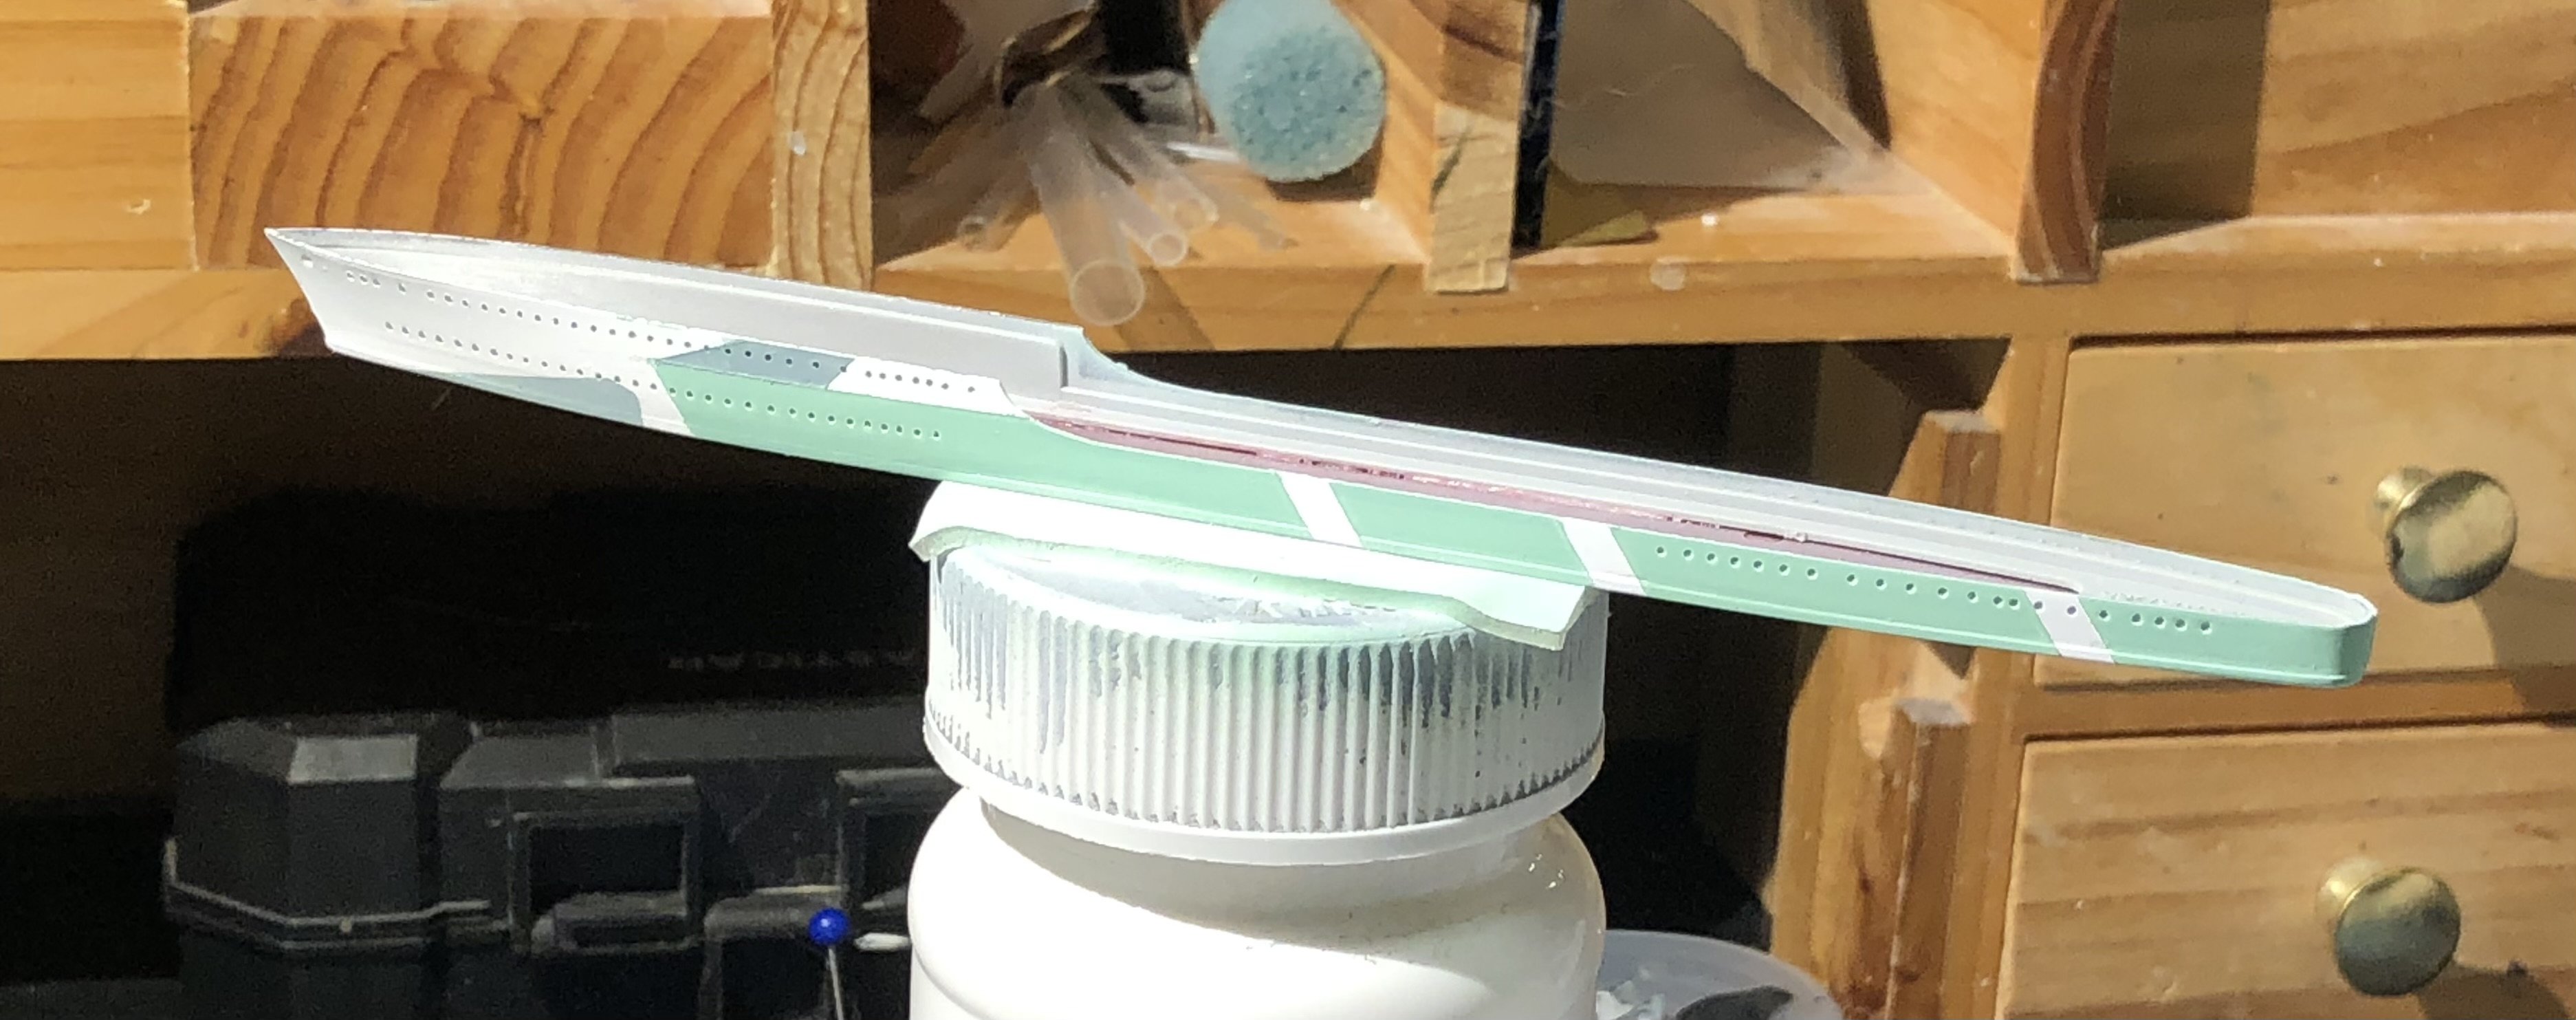
I managed to get the black primer and the directional white sprayed on. The filled areas look good so I think I am good to add glazes during breaks on Huron. for looking in, the likes and comments. alan

-
Thanks Ken Plenty of purple and gold on this one. All ready to come down on the fold. alan
-
Thanks Ken Plenty of purple and gold on this one. All ready to come down on the fold. alan
-
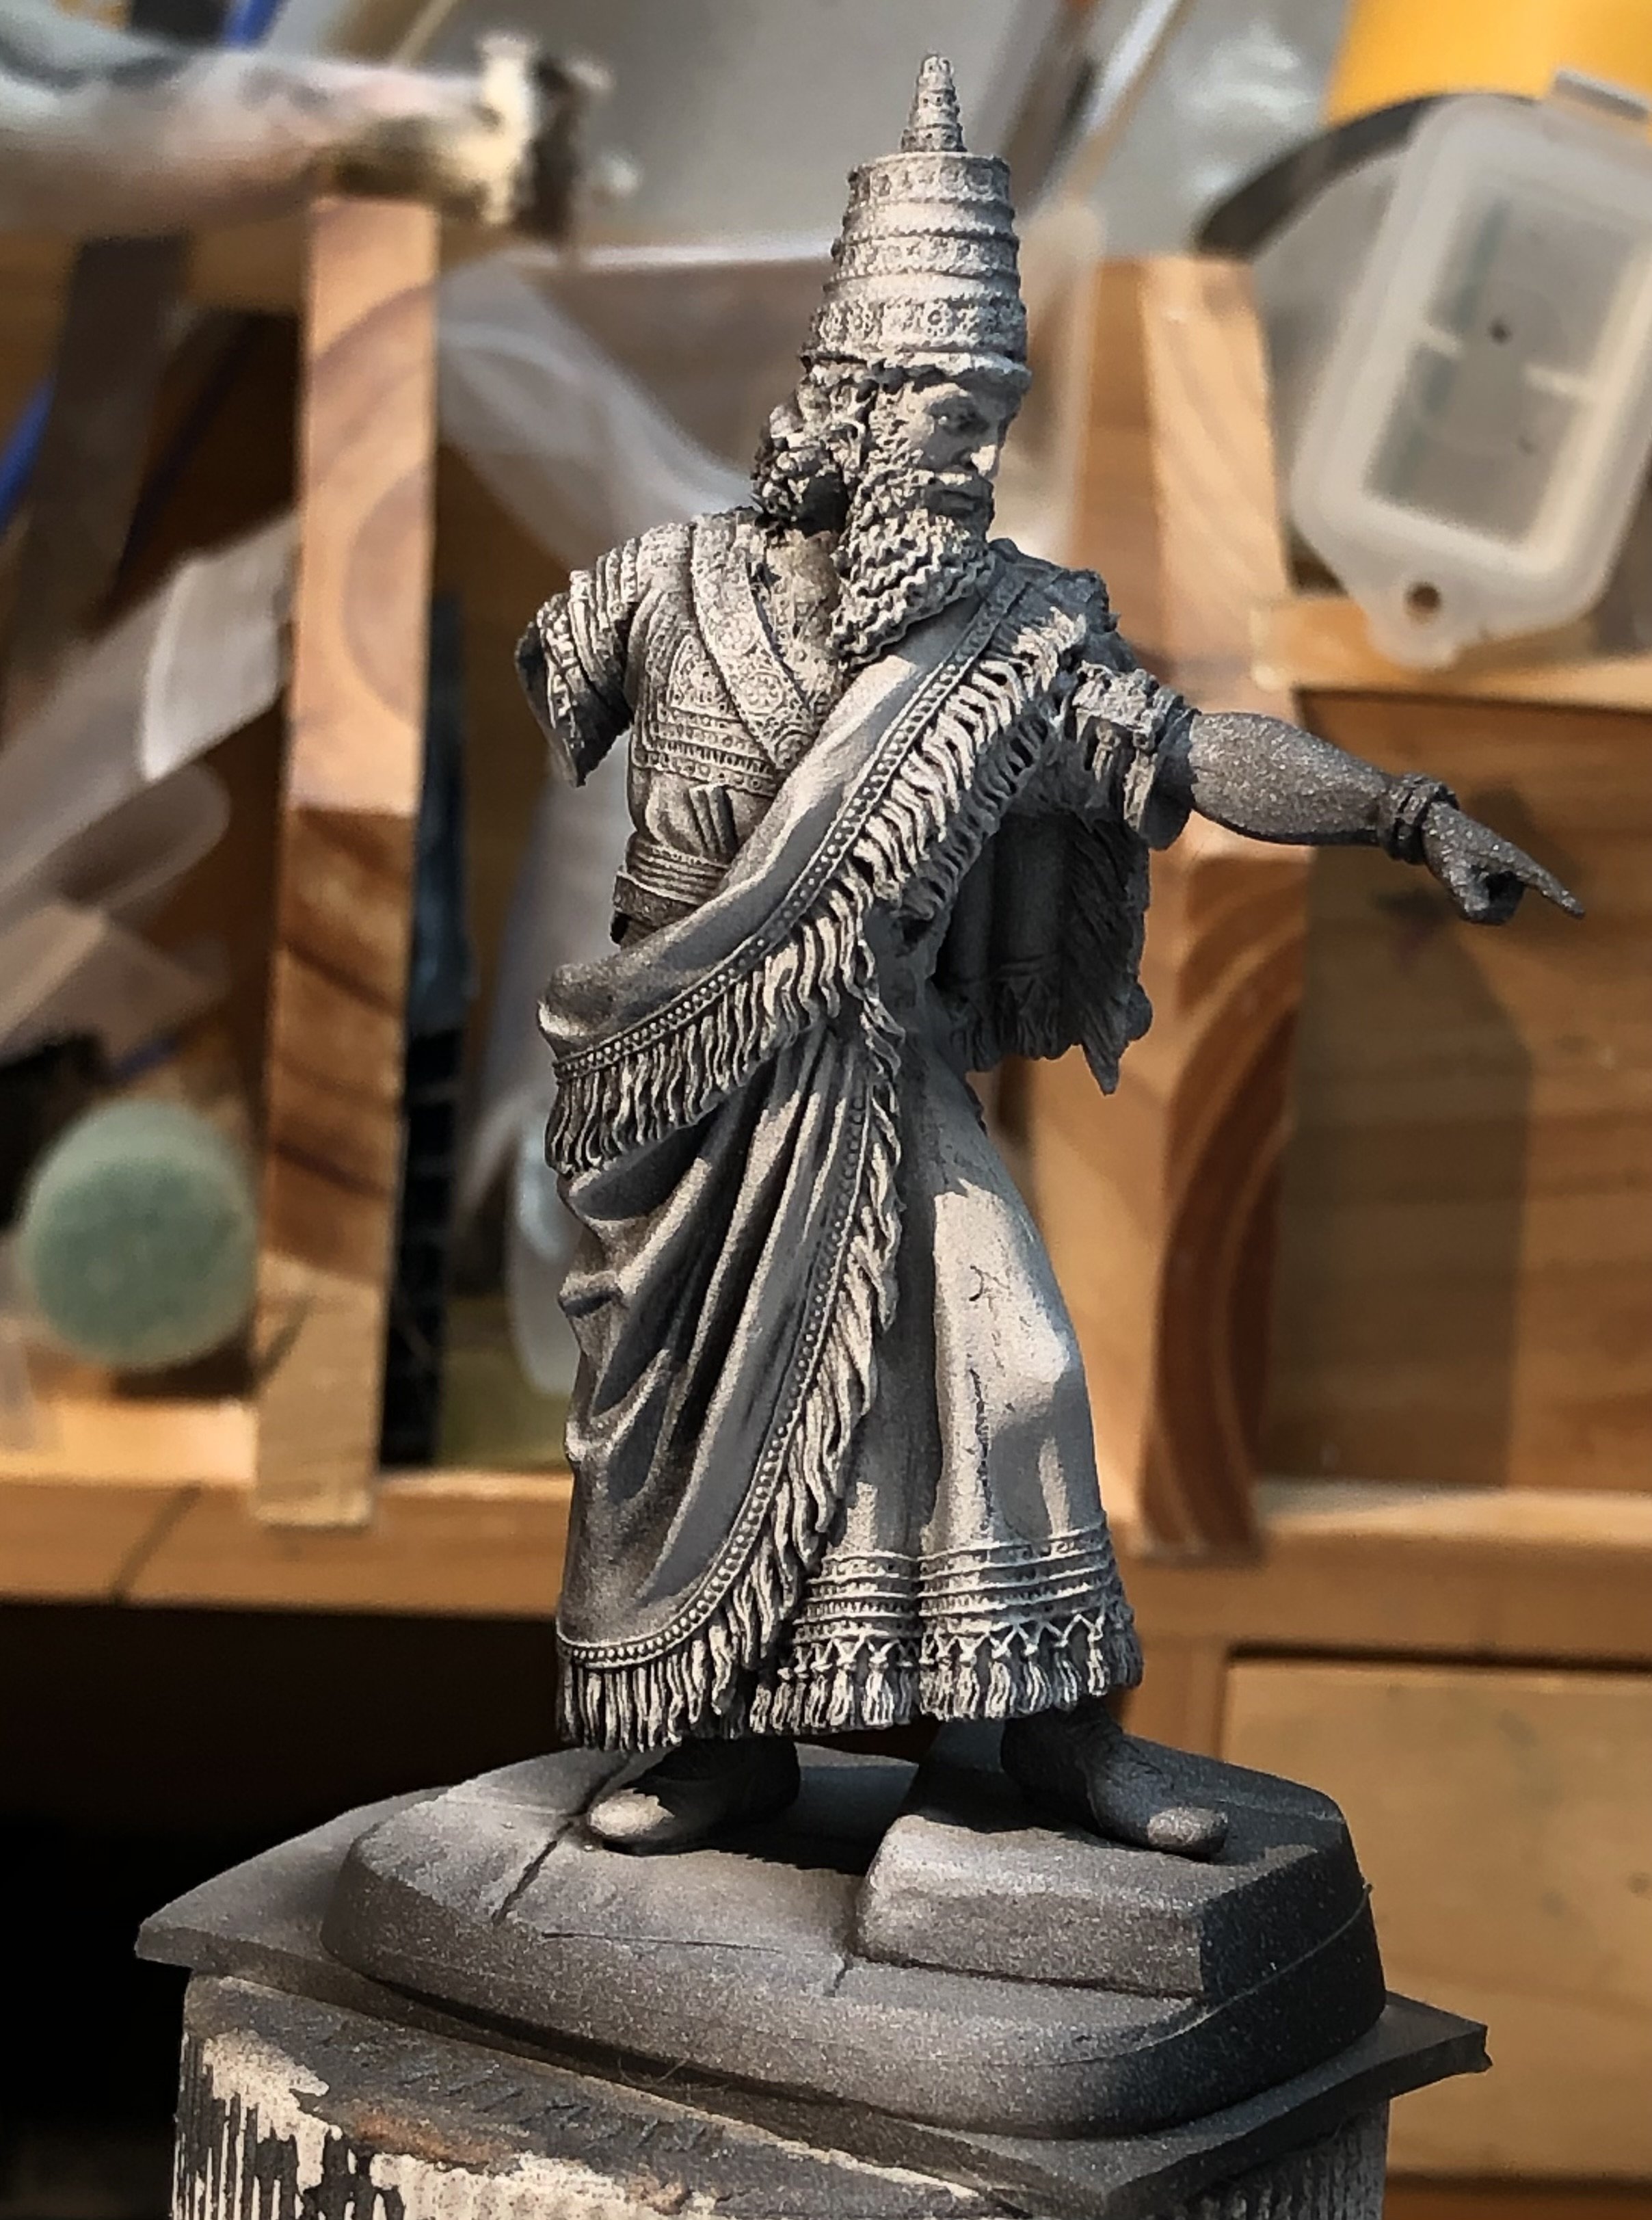
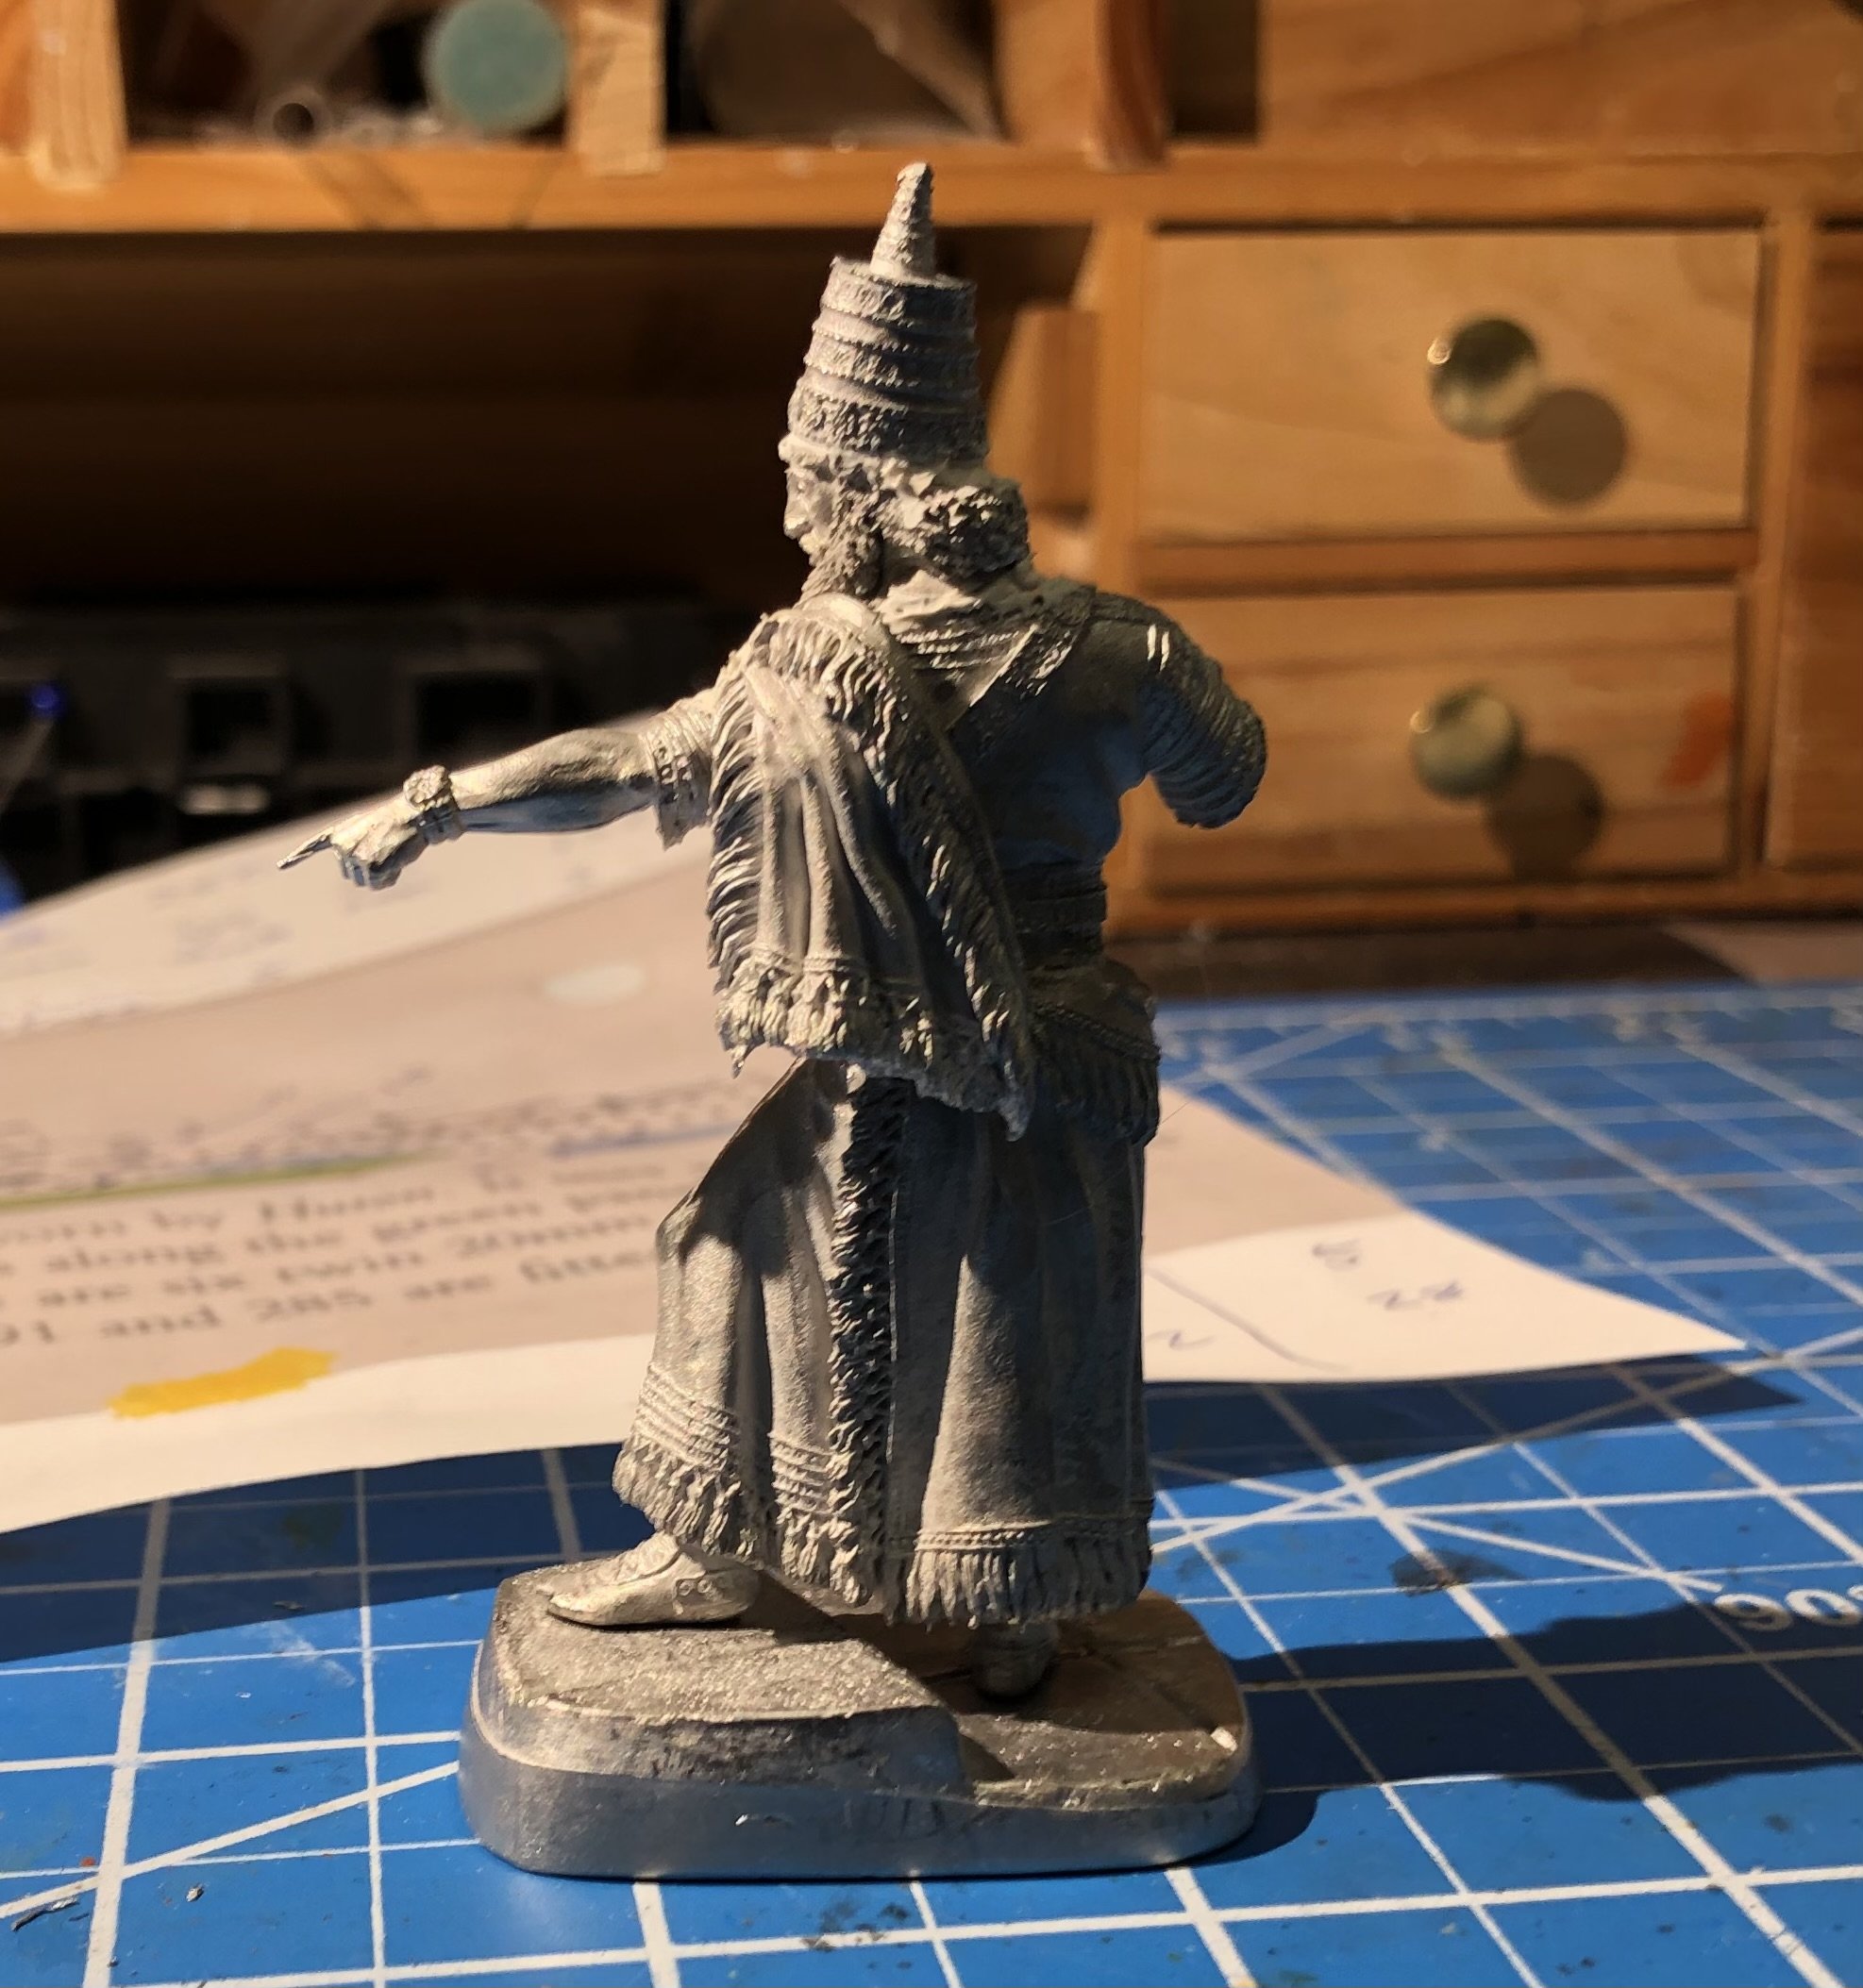
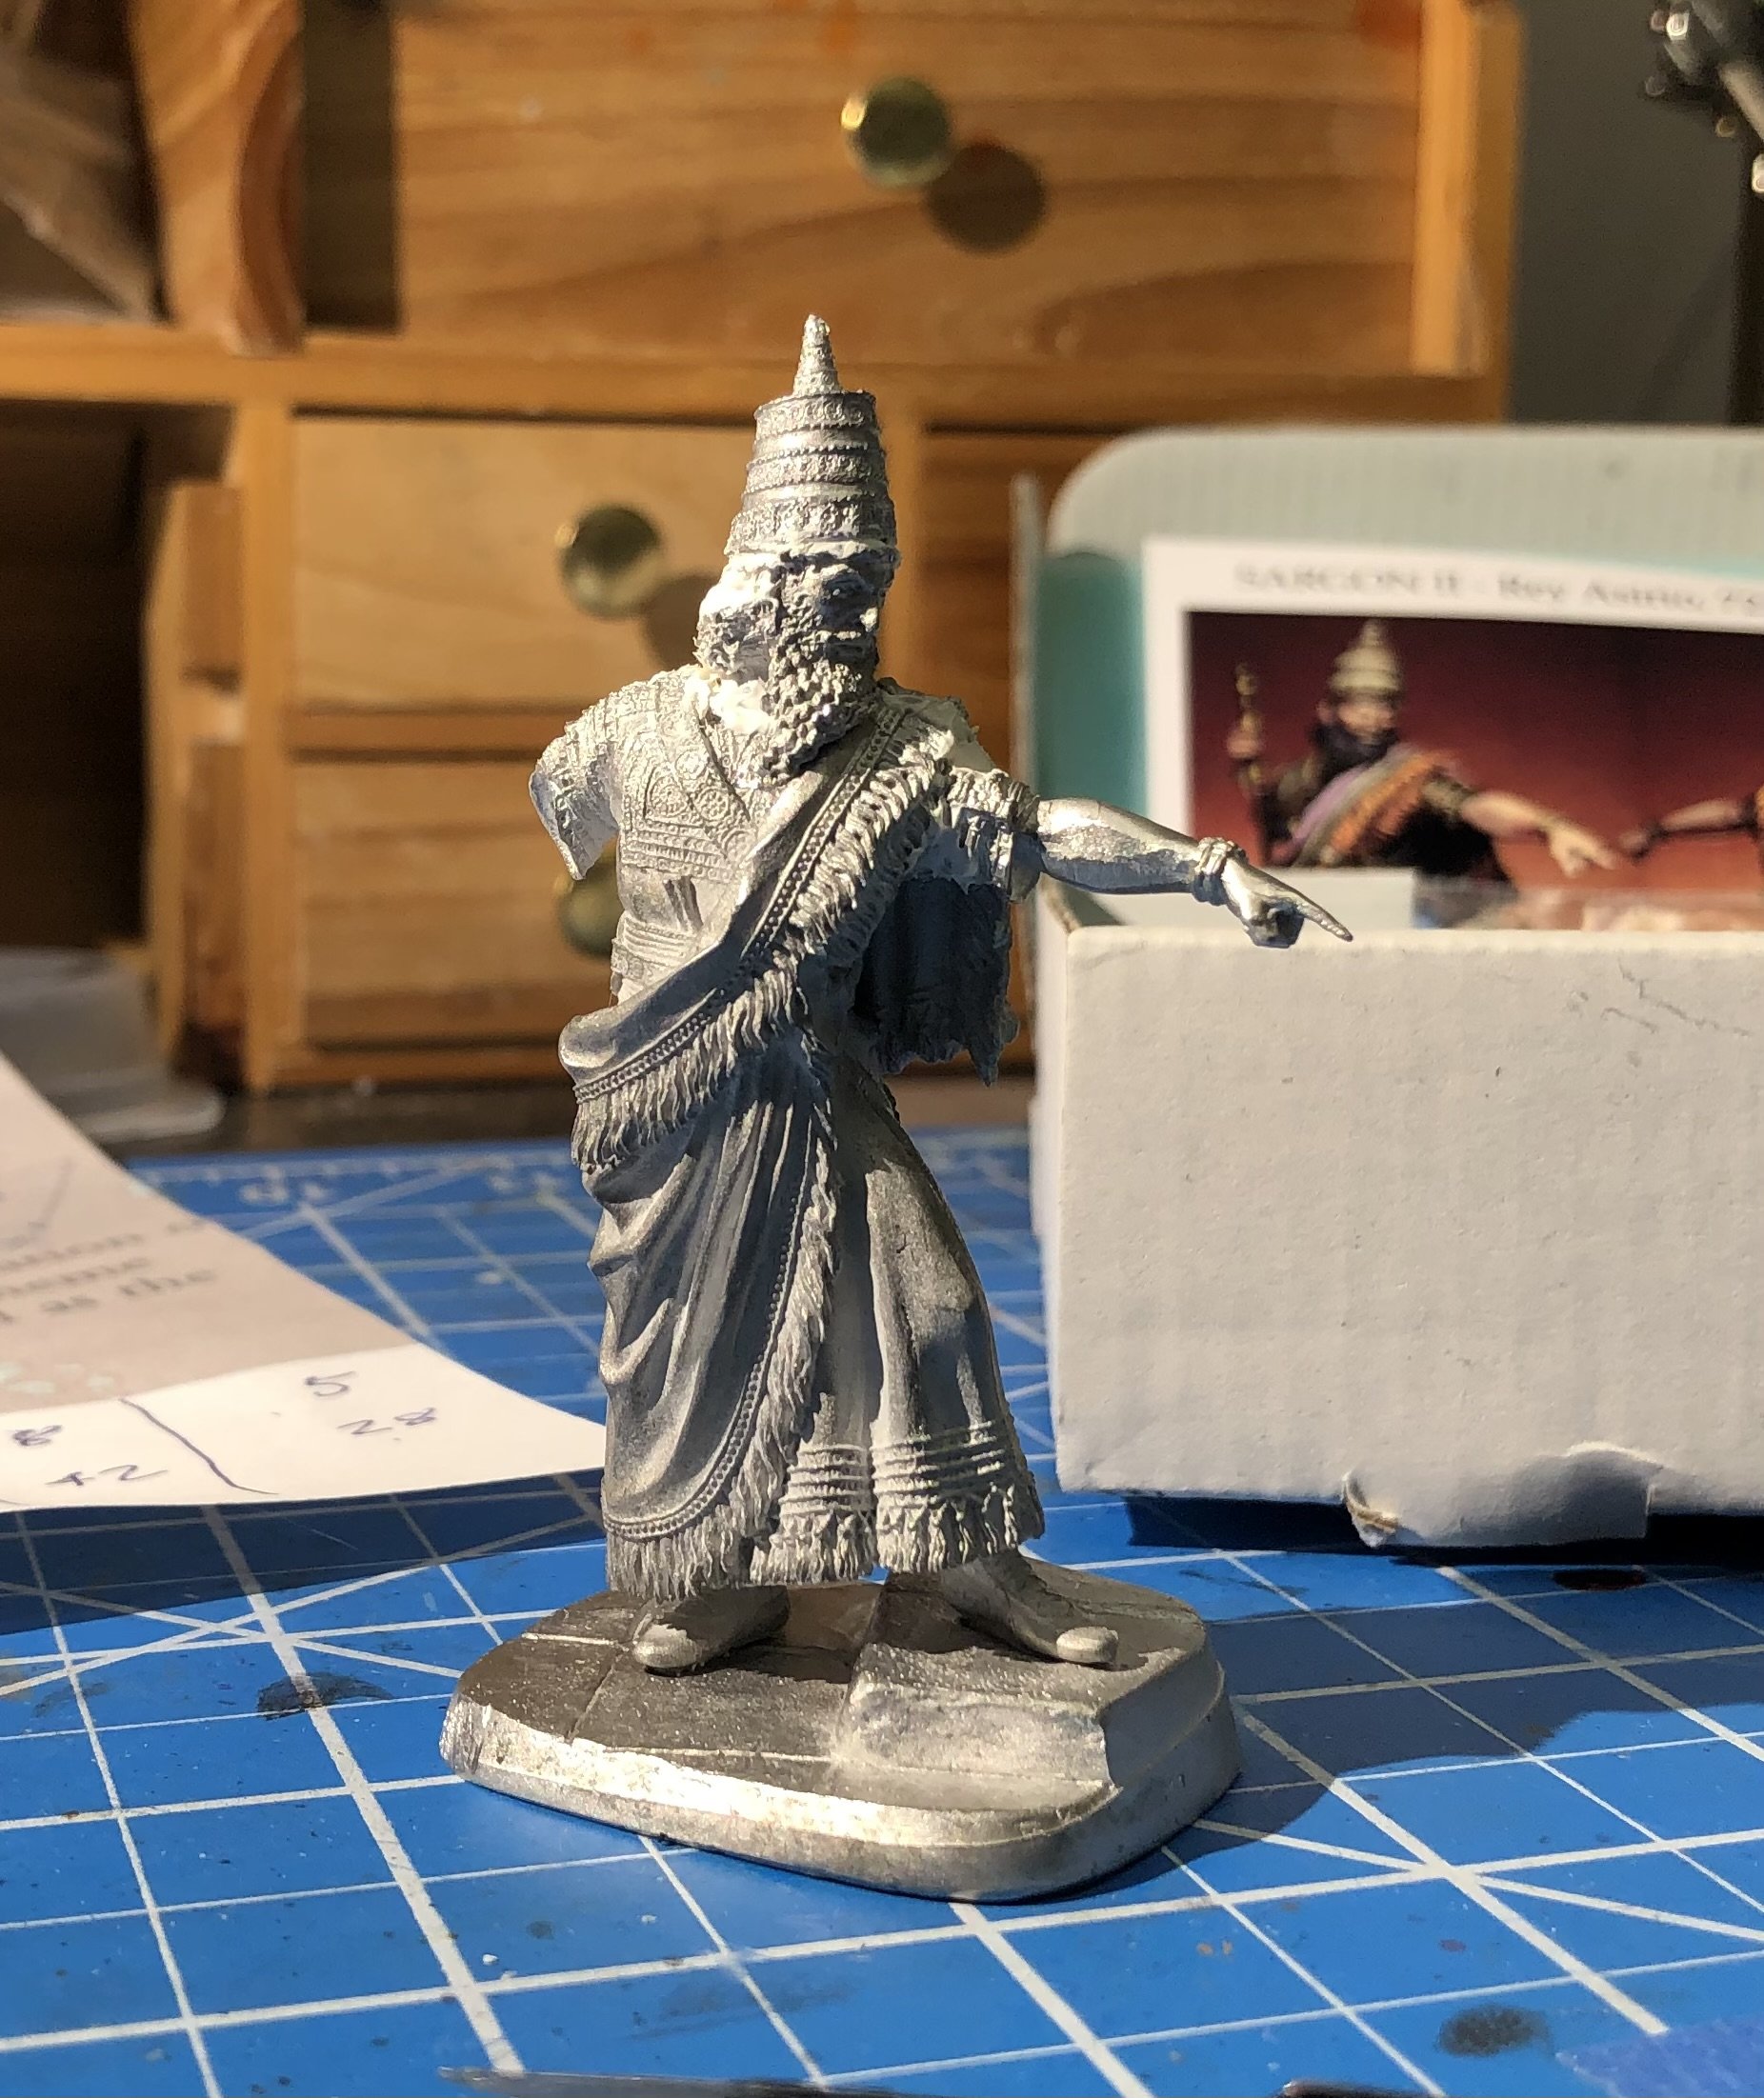
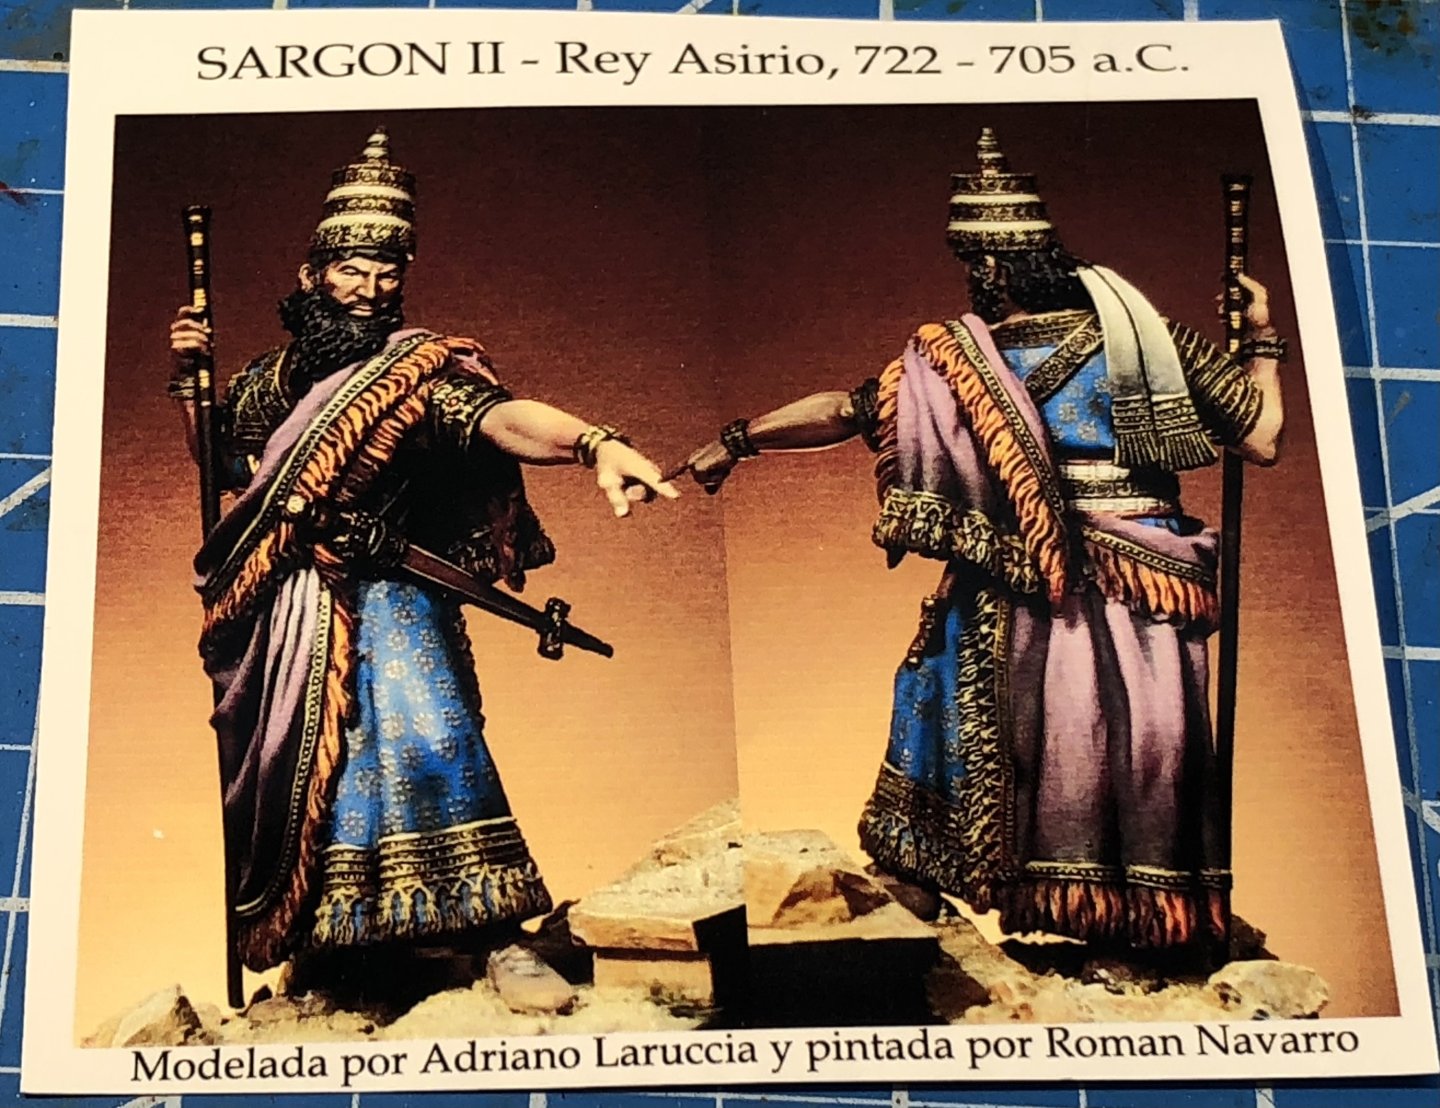
Thanks OC. My friend who is a professor of ancient history has sent me a couple of pictures of neo Assyrian costumes and the model looks quite accurate. alan
-
Thank you very much Phil. I’m really enjoying working on these miniatures. alan
-
I’m looking forward to seeing your build develop. Good luck Dave. alan
-
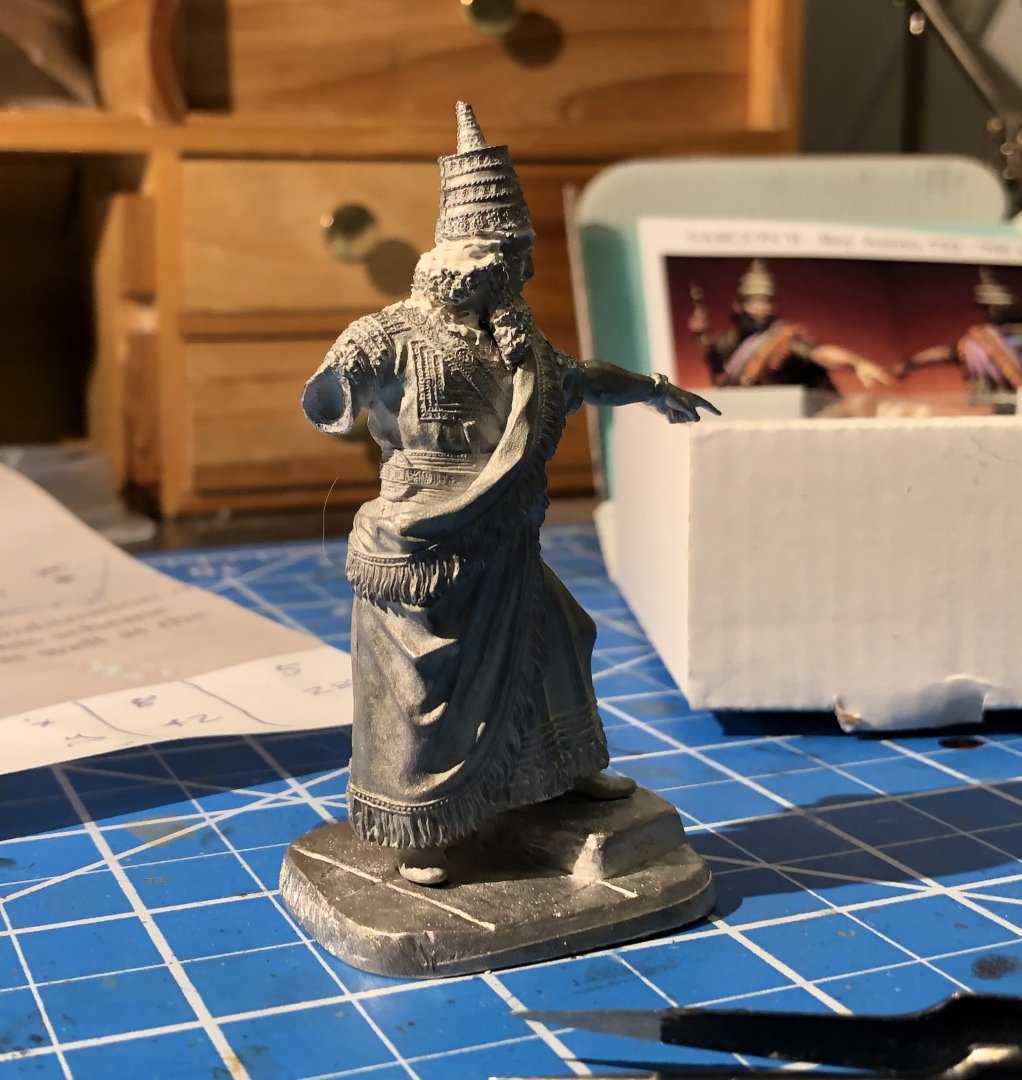
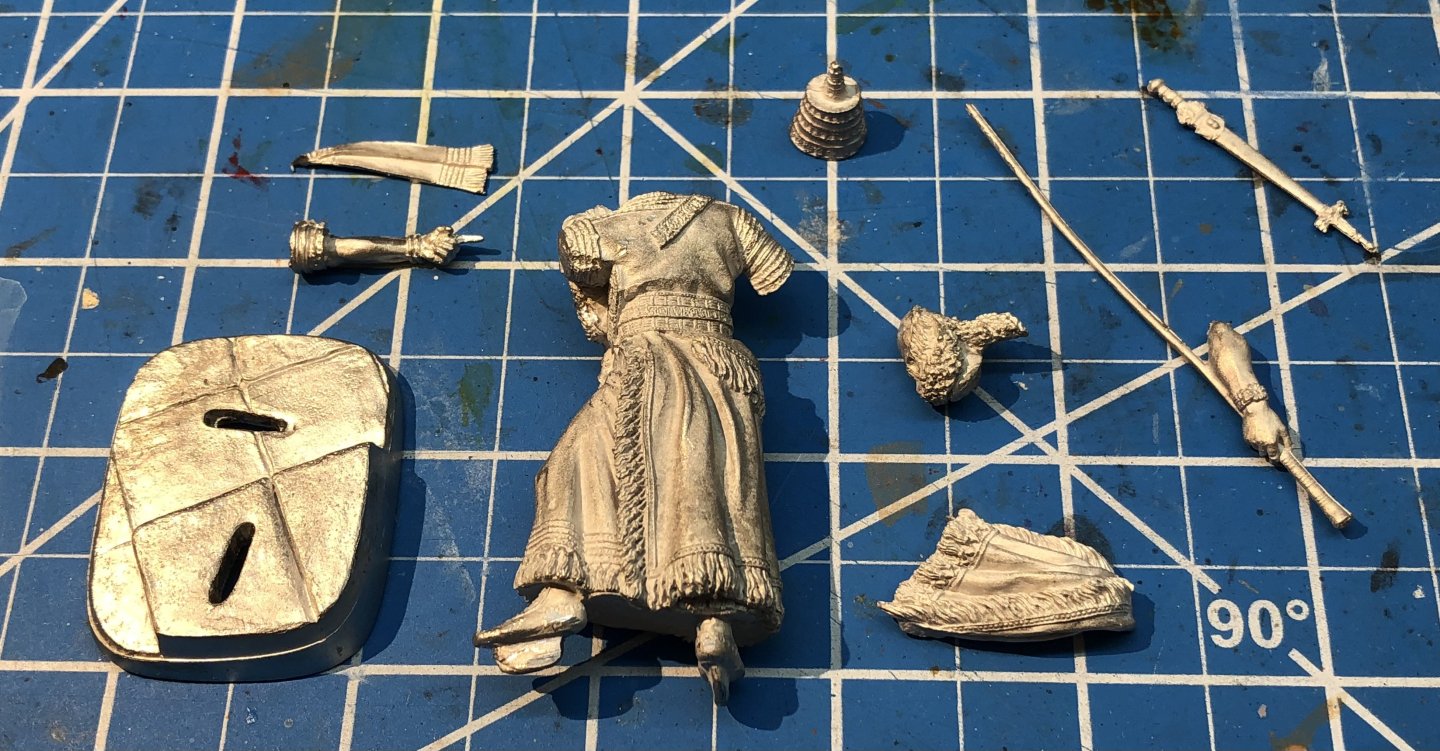
Something to occupy idle hands while stuff is setting elsewhere. Another nicely detailed 54mm figure from Art Girona. Sargon II was the king of the Neo-Assyrian Empire from 722 BC to his death in battle in 705. This is a nice figure but a nasty casting. All the joints are full of excess metal and a lot of filing was necessary before attempting to fit anything together. Even then I have had to use a lot of putty compared to other figures, generally I have hardly used any until this one. The major parts are assembled for priming and painting. Ive used ca glue again, it’s so much less messy than epoxy, at least for me. We’ll see how things look when primed. Thanks for looking in Alan


-
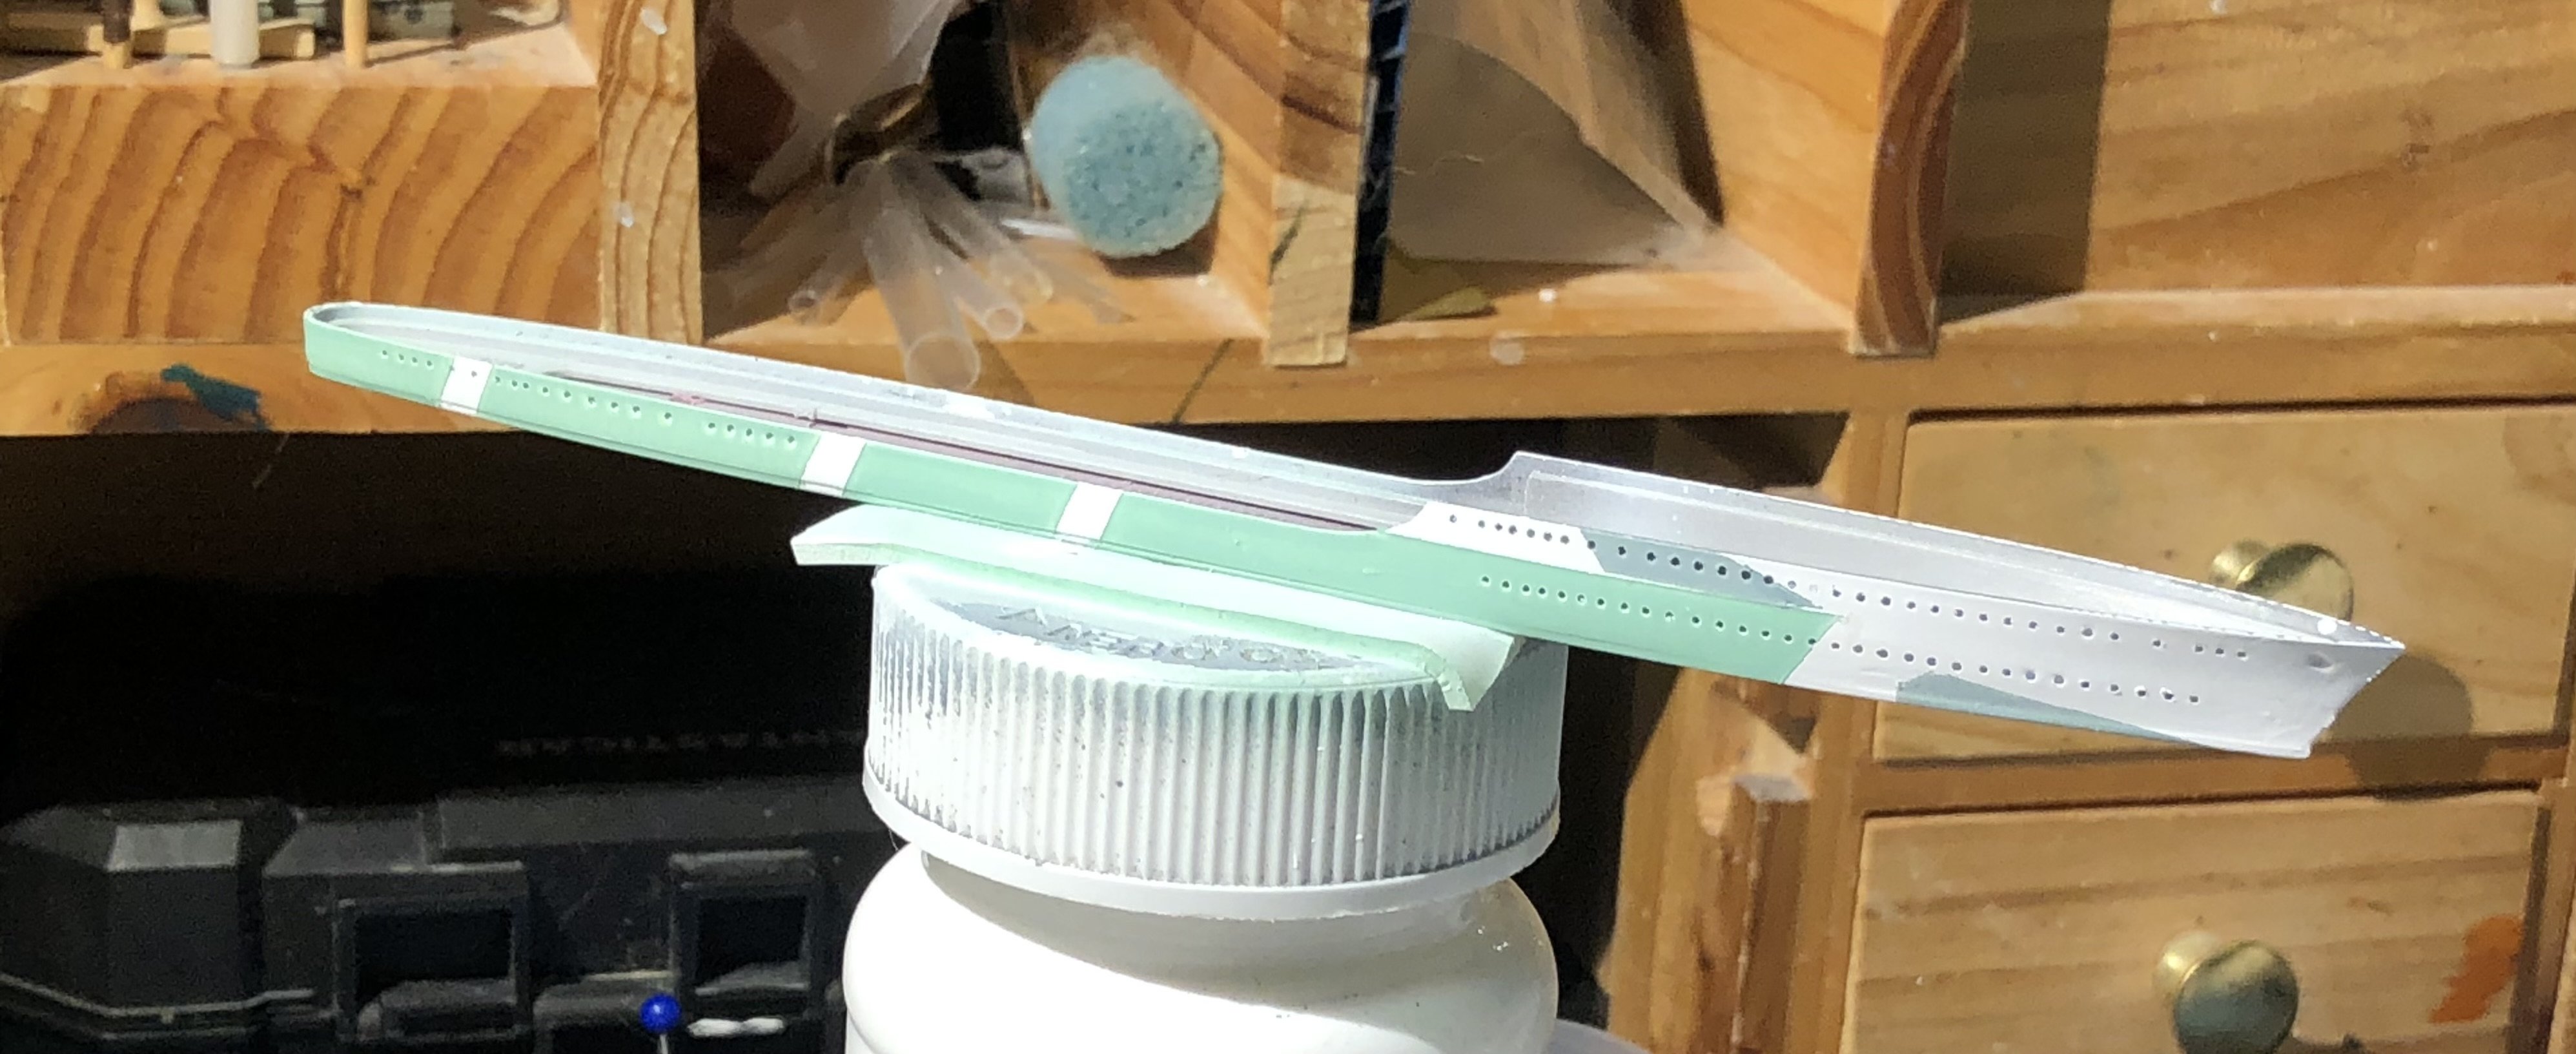
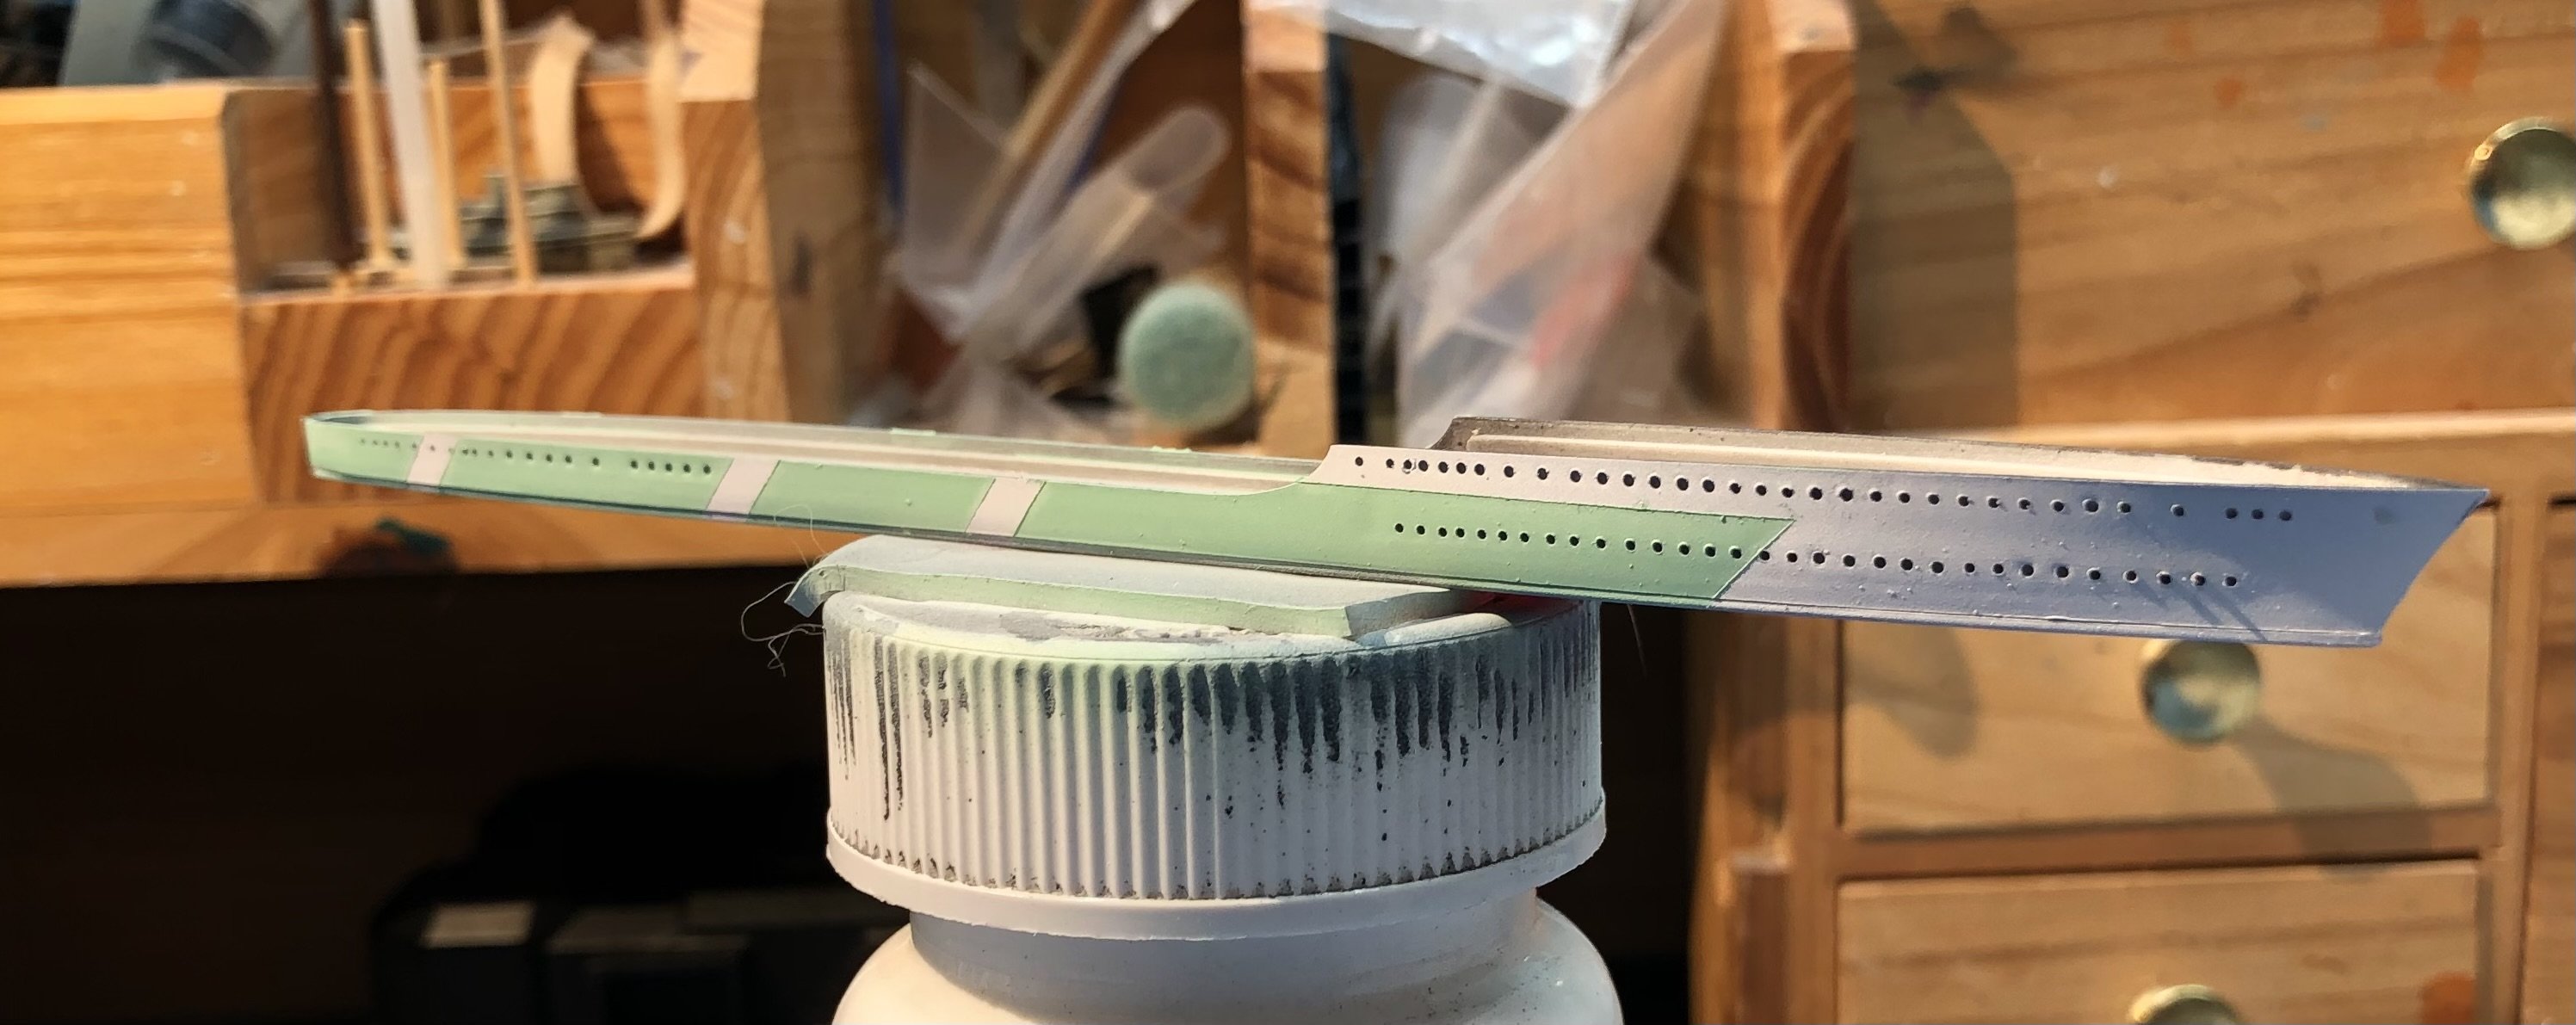
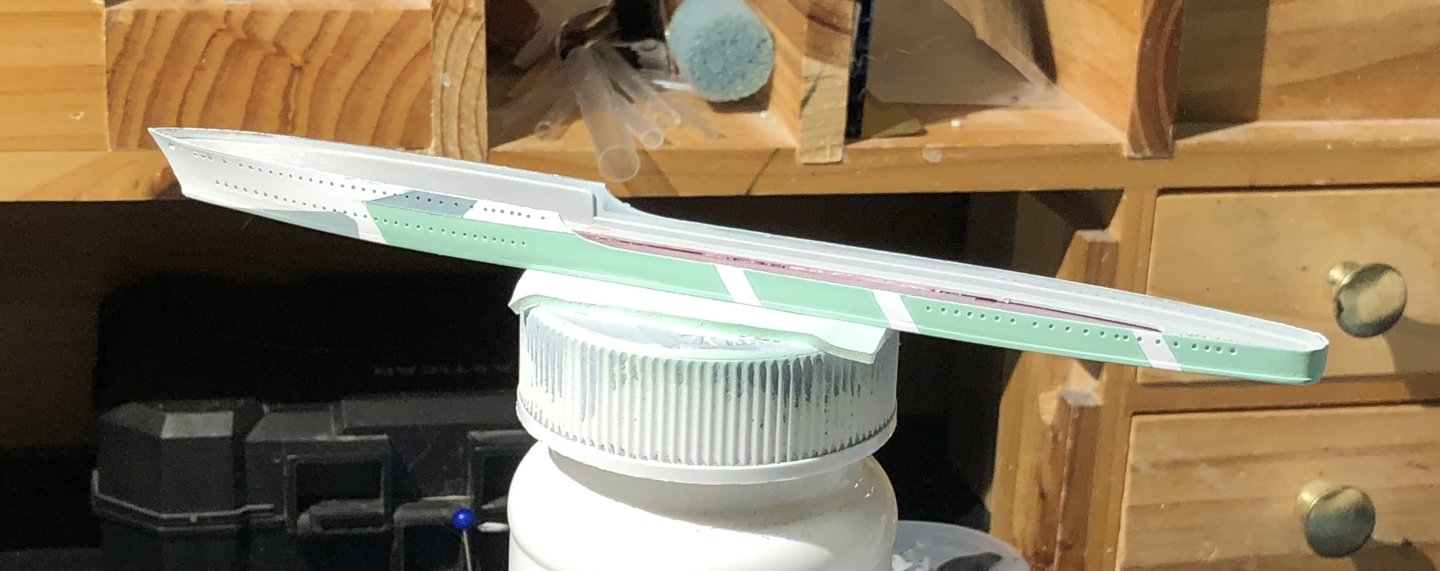
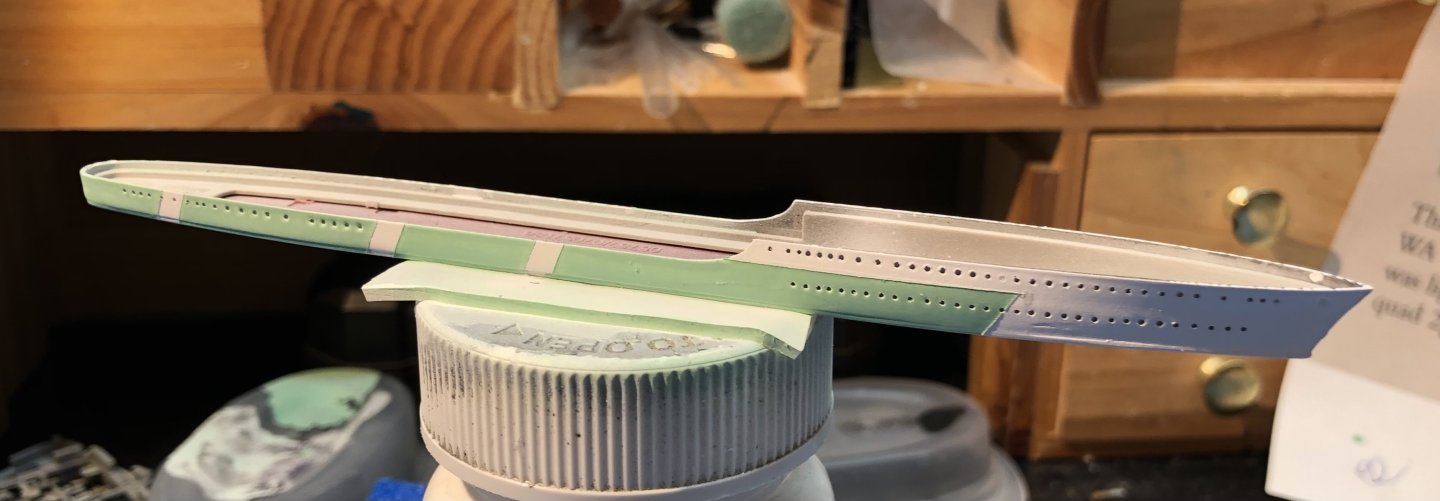
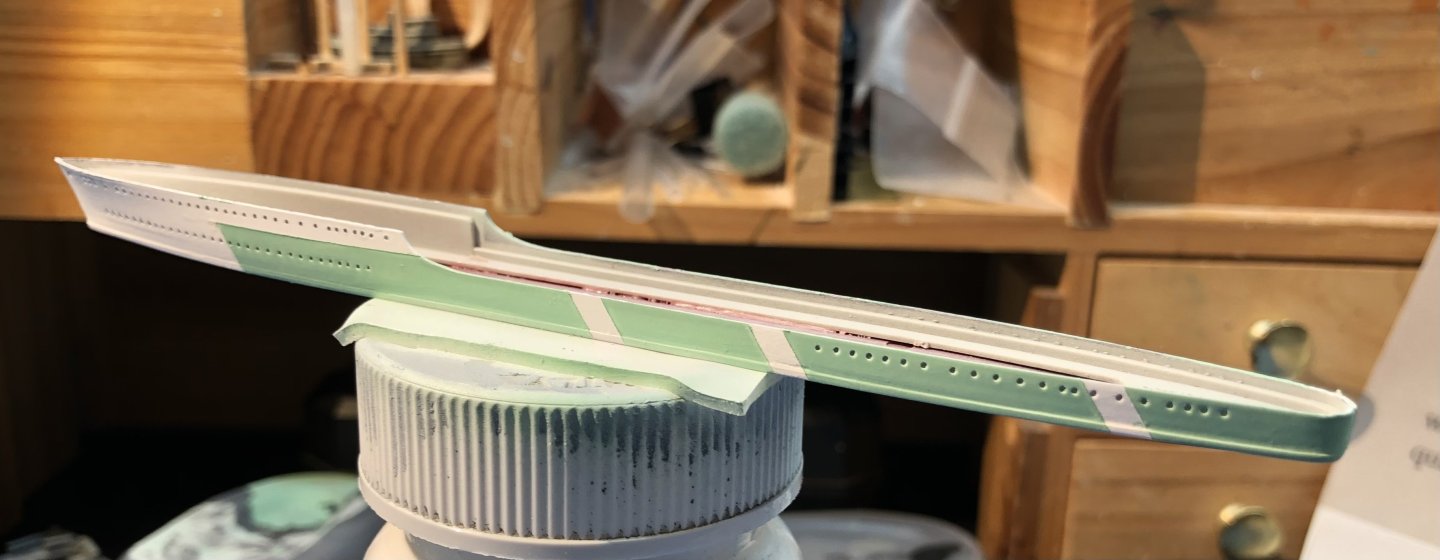
Another day, another masking session, for the blue this time. Fiddly thankfully there are only two blue sections per side. The masking remained watertight and the Tamiya paint dried quickly so the result was quite clean. The WW2 color photo of HMS Comet has similar colours so I think we’ll call that good. The deck has had a coat of dark grey. The superstructure is white with a little blue so I think I can start sticking bits together and thinking about the PE. Tribals seem to be a bit like Flower corvettes, they all a bit different so some of the PE is not going to be used but at least there are railings and ladders. Thanks for looking in and the likes and comments. alan

-
Splendid work Andrew. The Gannet looks really good and the folded wings make it a very distinctive model. Congratulations alan
-
I sprayed the am Western Approaches Green and it seemed to be better behaved today. I used less thinner this time. My working theory is that the longer drying time allows the paint to flow down surfaces and can cause streaks. It also means the paint is very prone to penetrating the masking. This time I got a good result in terms of color and masking. I’ll let the paint harden overnight and hopefully mask and spray the WA Blue tomorrow. The masking is going to be a bit intricate but the paint is Tamiya acrylic light blue so should be less of a problem. Thanks for looking in and for the likes and comments. alan
-
Looks very good. I’m amazed at the skills of card modelers. Well done alan
-
Not abandoned yet but a case of two steps forward and one step back. After deciding on the paint scheme I needed to sort out the paint. I have the AK Royal Navy set which includes Western Approaches Blue and Western Approaches Green. I was not totally happy with this set when I used it before but I thought I would try it again. I tested the WA blue and green. Although it looks a bit bright the green does resemble the color seen in a WW2 photo of HMS Comet wearing a similar scheme. The blue is another story, it’s almost white. I’m going to use Tamiya Light Blue which looks better. After painting everything except the decks with flat white I masked up the hull ready for the green part. I remembered the AK acrylics and water based and using.Tamiya or Vallejo thinner causes the paint to curdle. I have some AK acrylic thinner and that worked quite well. The green was sprayed on and the masks removed. I think the color is where I wanted and the masking worked well. Unfortunately the port side was not so nice. The green paint appears to have run down the white leaving the green areas mostly white with green streaks. Maybe I thinned the paint too much or used too heavy a coat. I did notice that the paint took a long time to dry even in my 85F garage. The coverage looked good at first but seemed to run during drying. I sanded the green back and then painted the hull all white again, a second coat was needed today and tomorrow should see us masked and trying the green again. At least the masking will go a bit quicker next time. Thanks for looking in, the likes and comments. alan

-
Some serious photo etch work there Mike alan
-
Super job with the washes Andrew. That’s a well used aircraft. Looks very nice. alan