king derelict
-
Posts
3,292 -
Joined
-
Last visited
Content Type
Profiles
Forums
Gallery
Events
Everything posted by king derelict
-
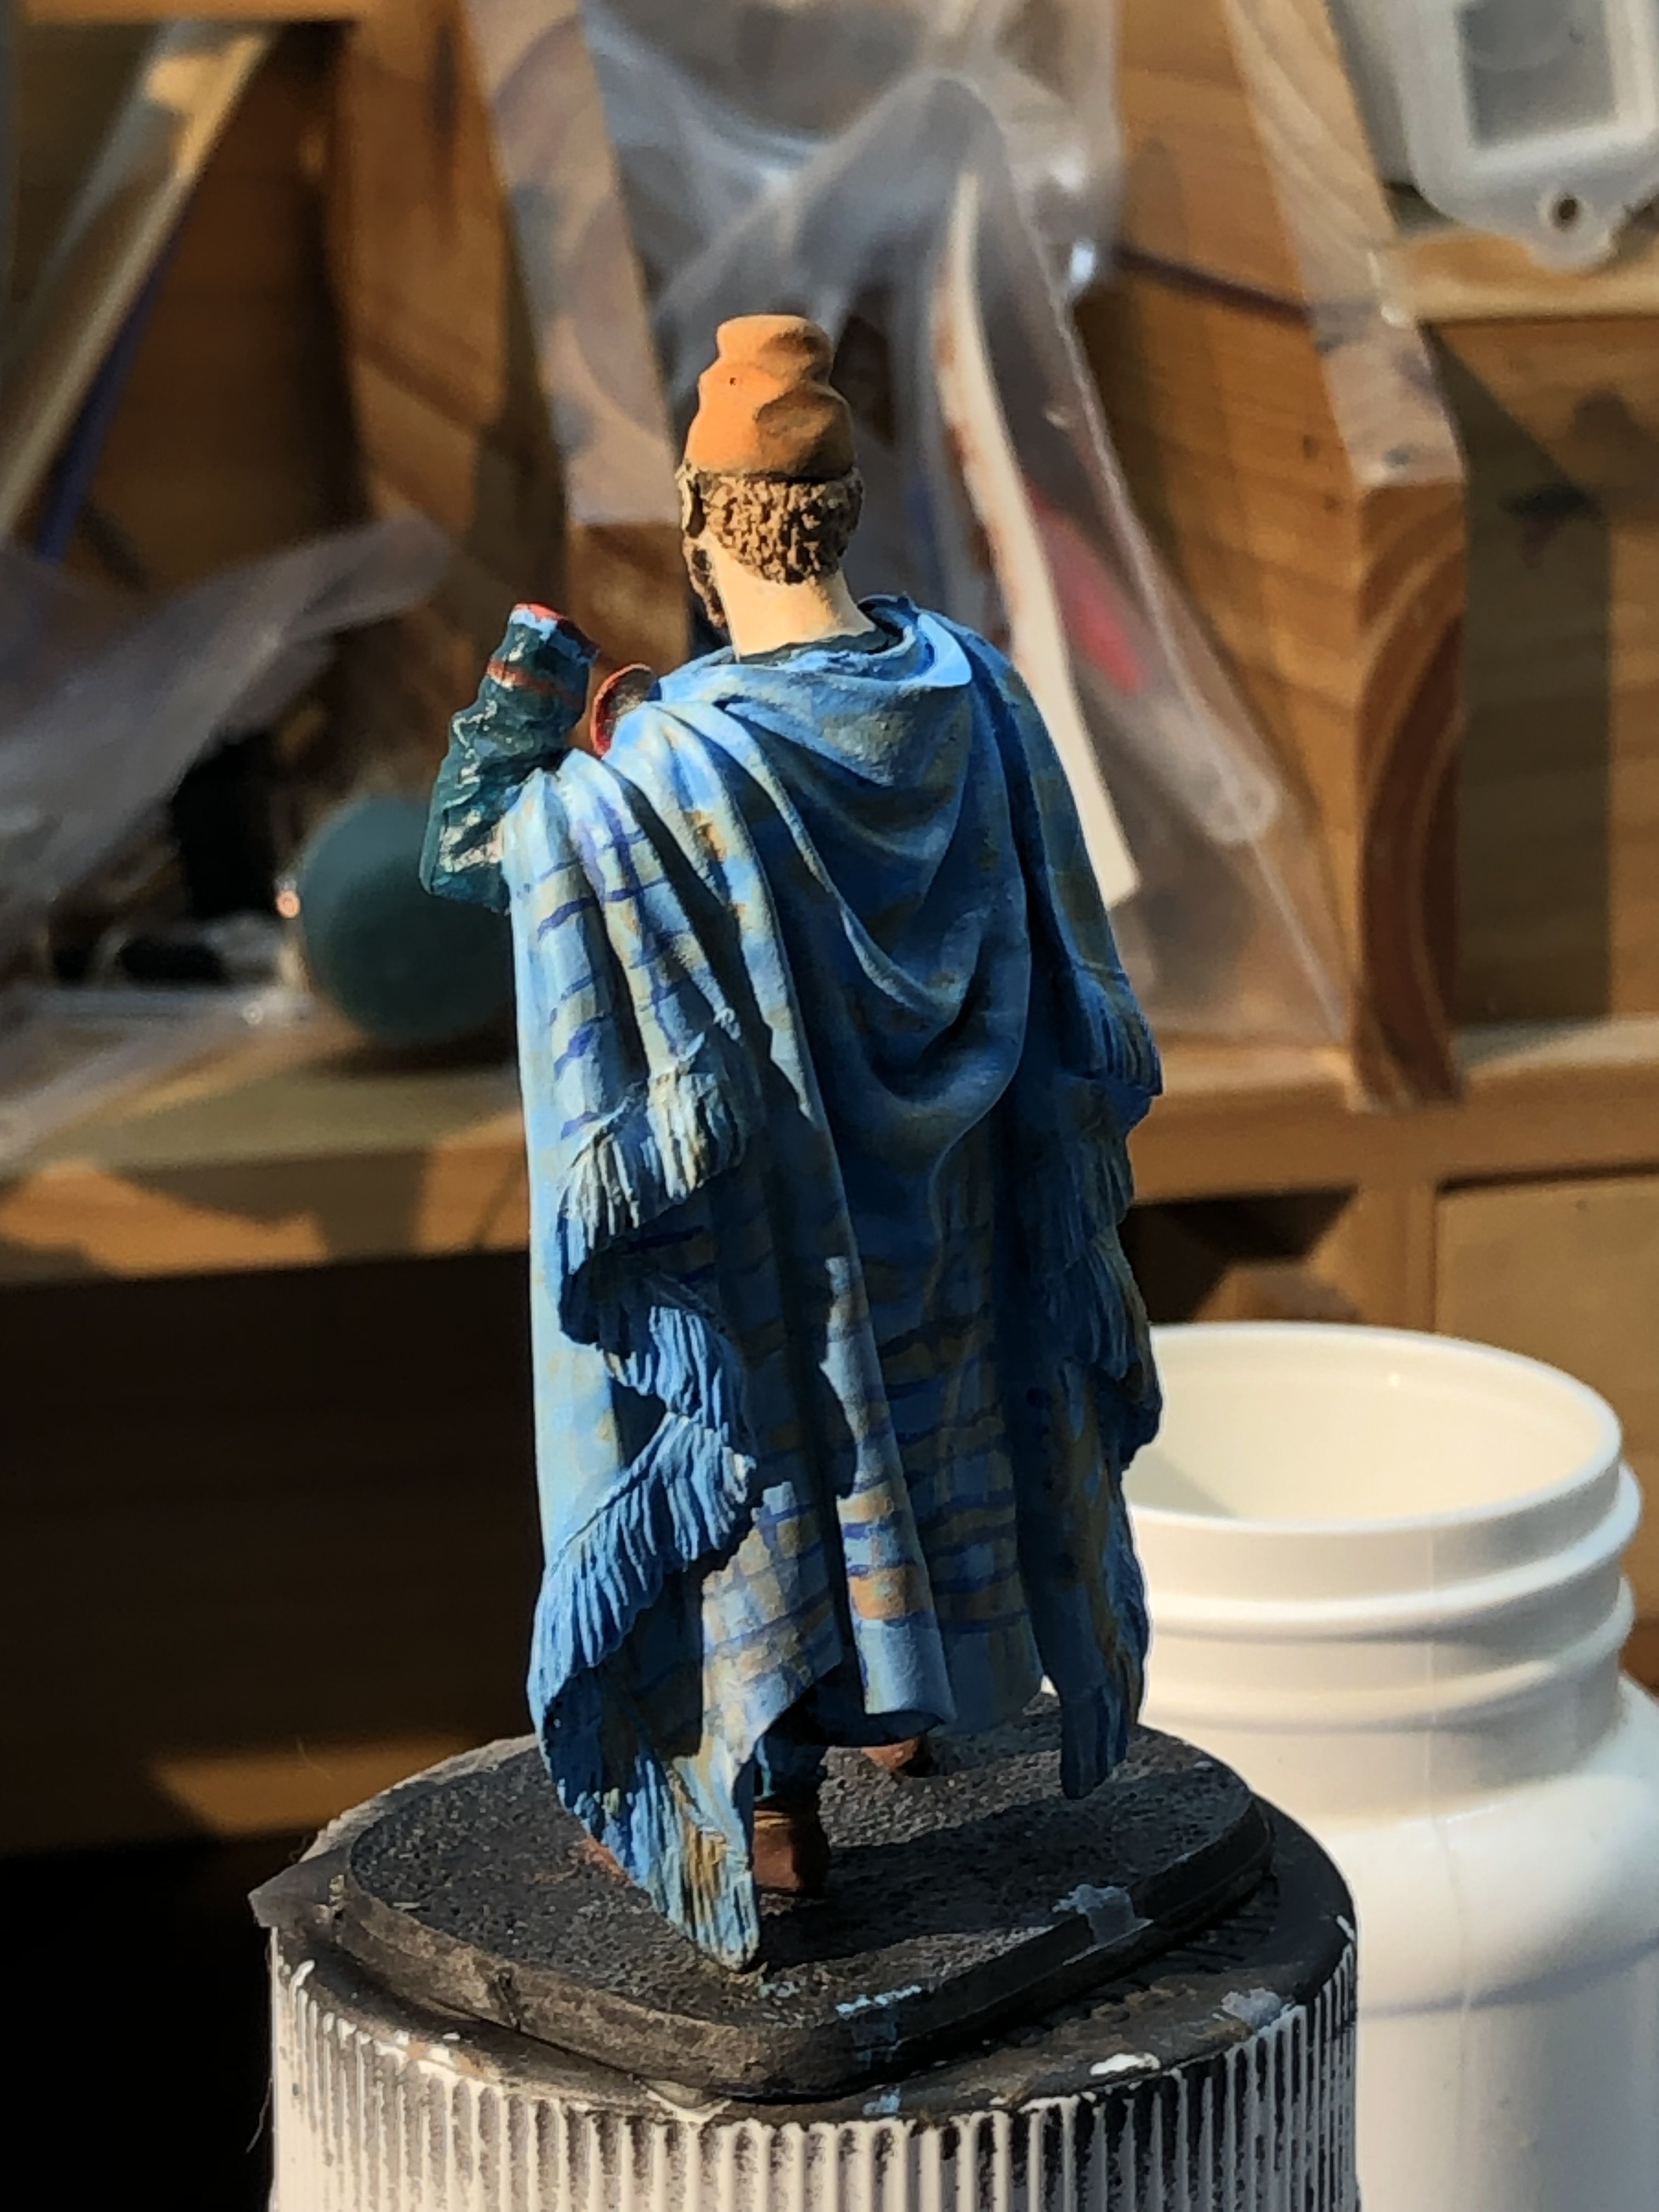
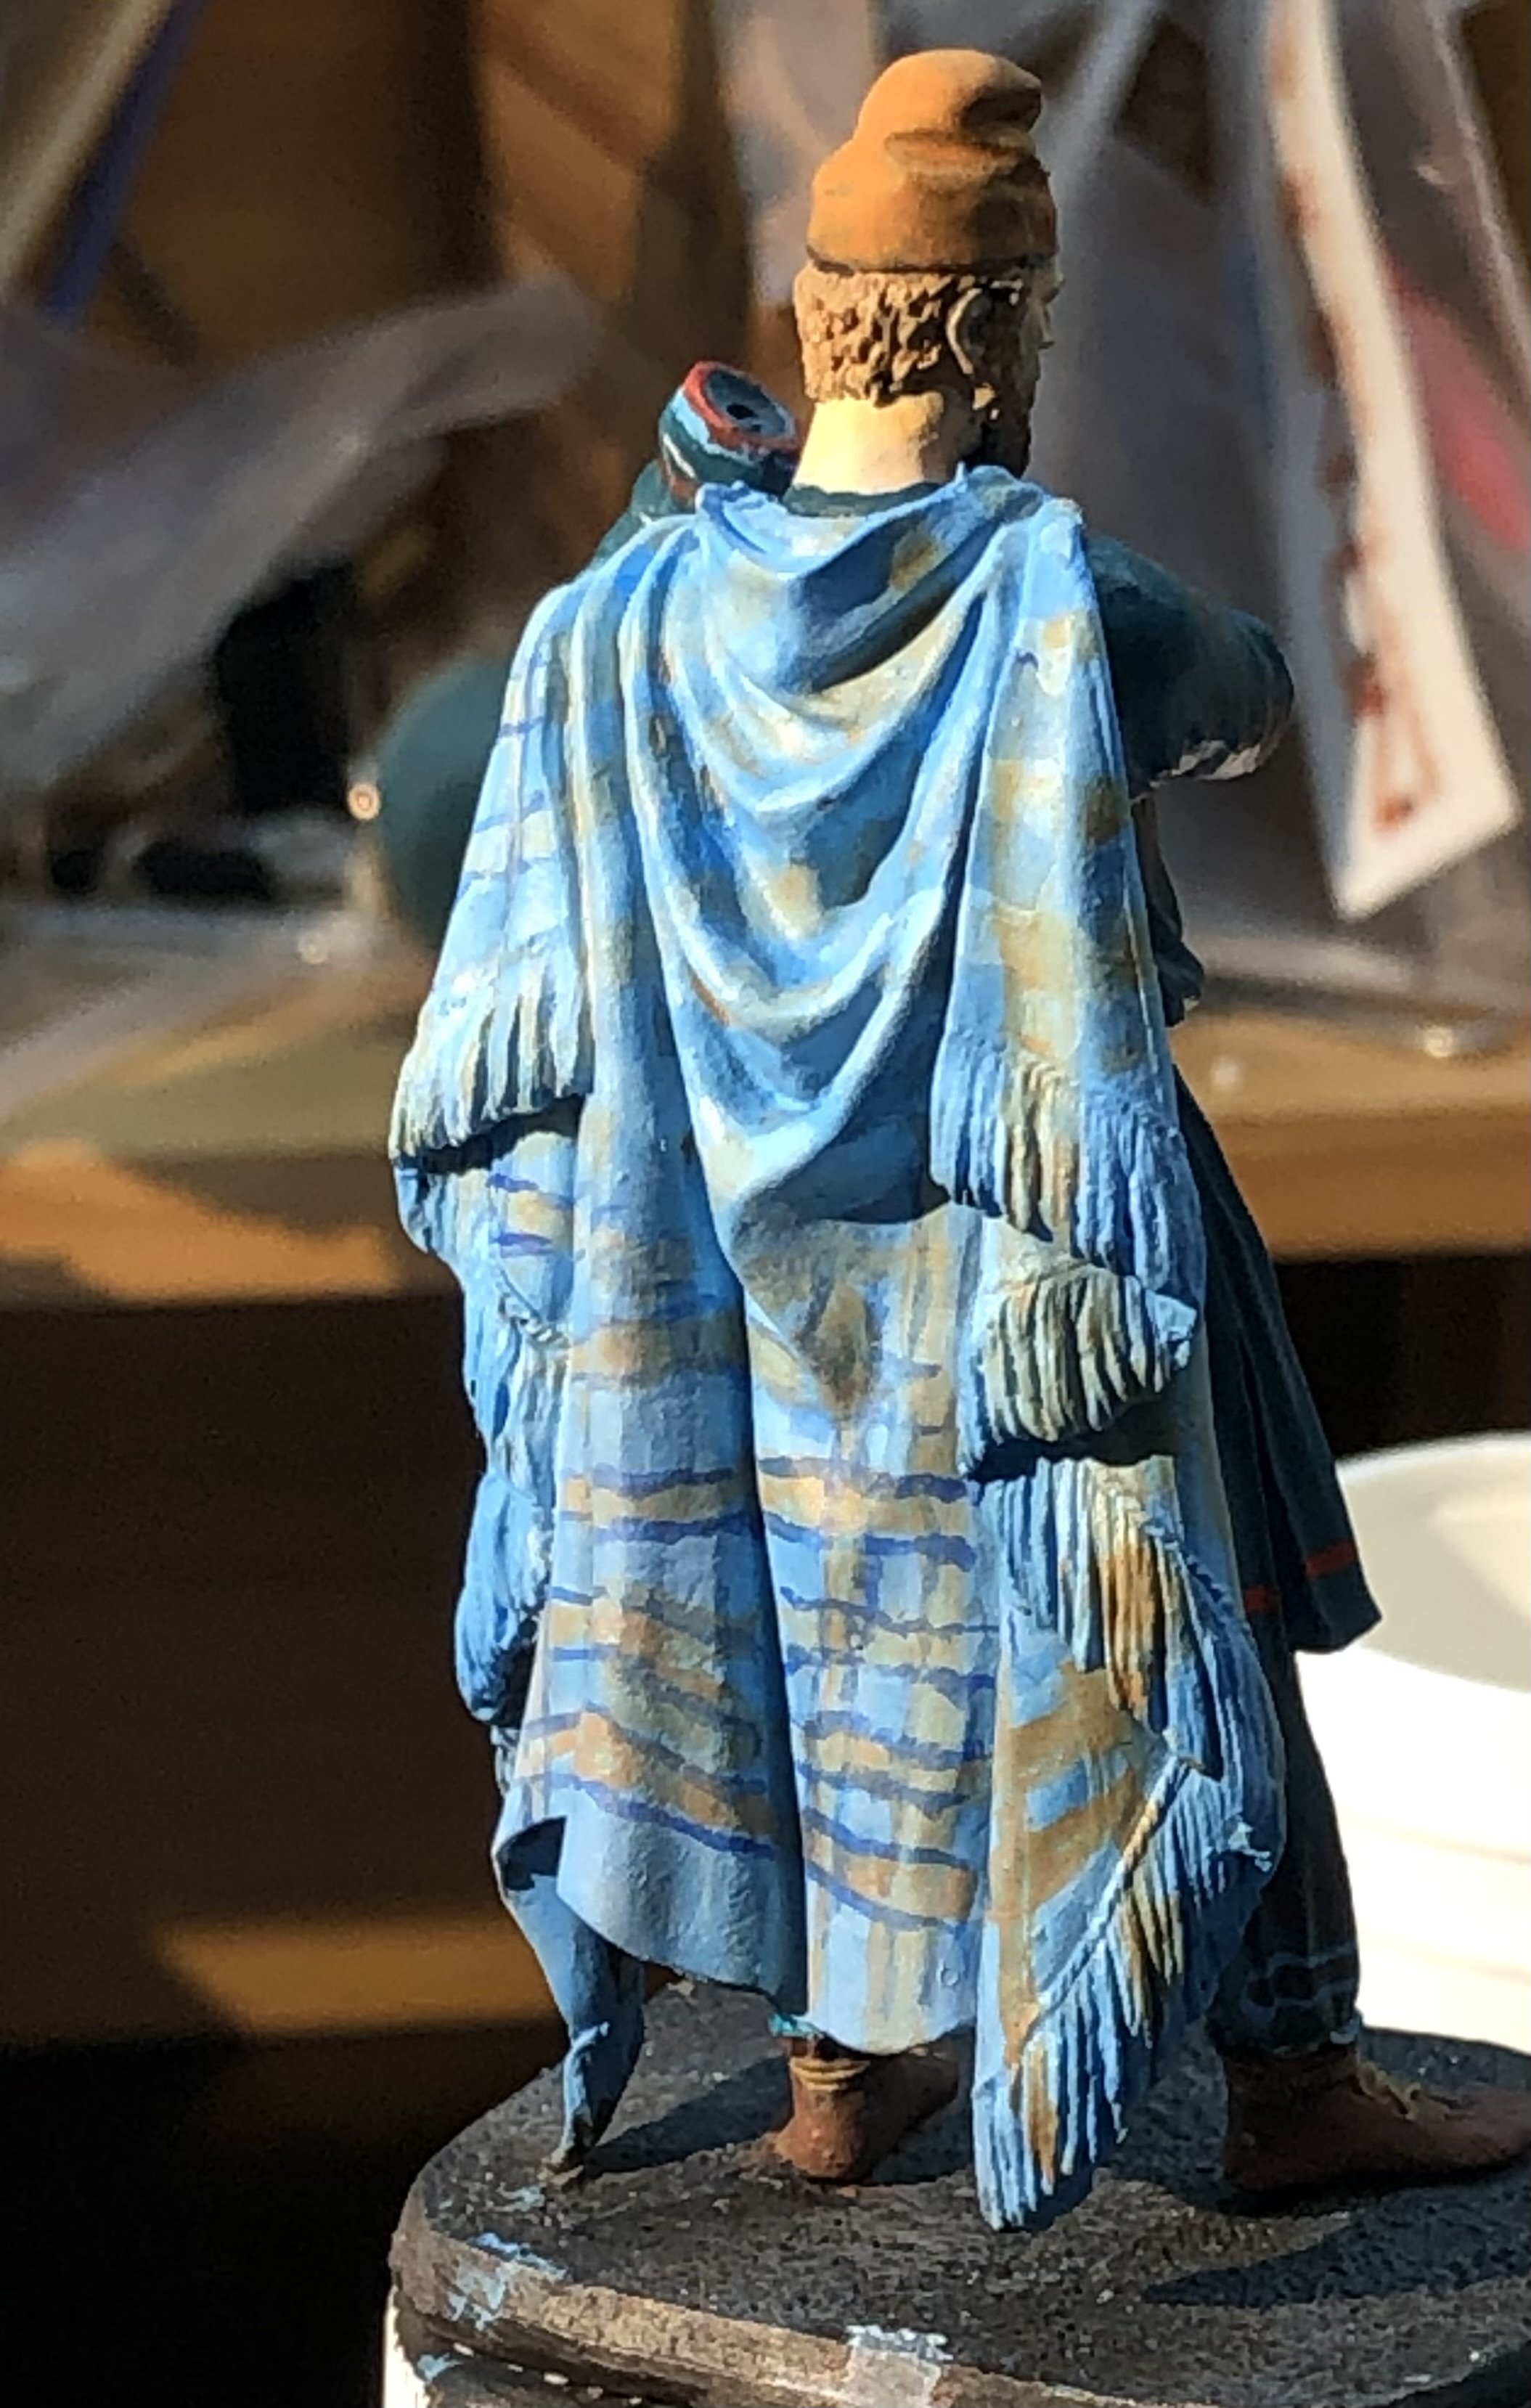
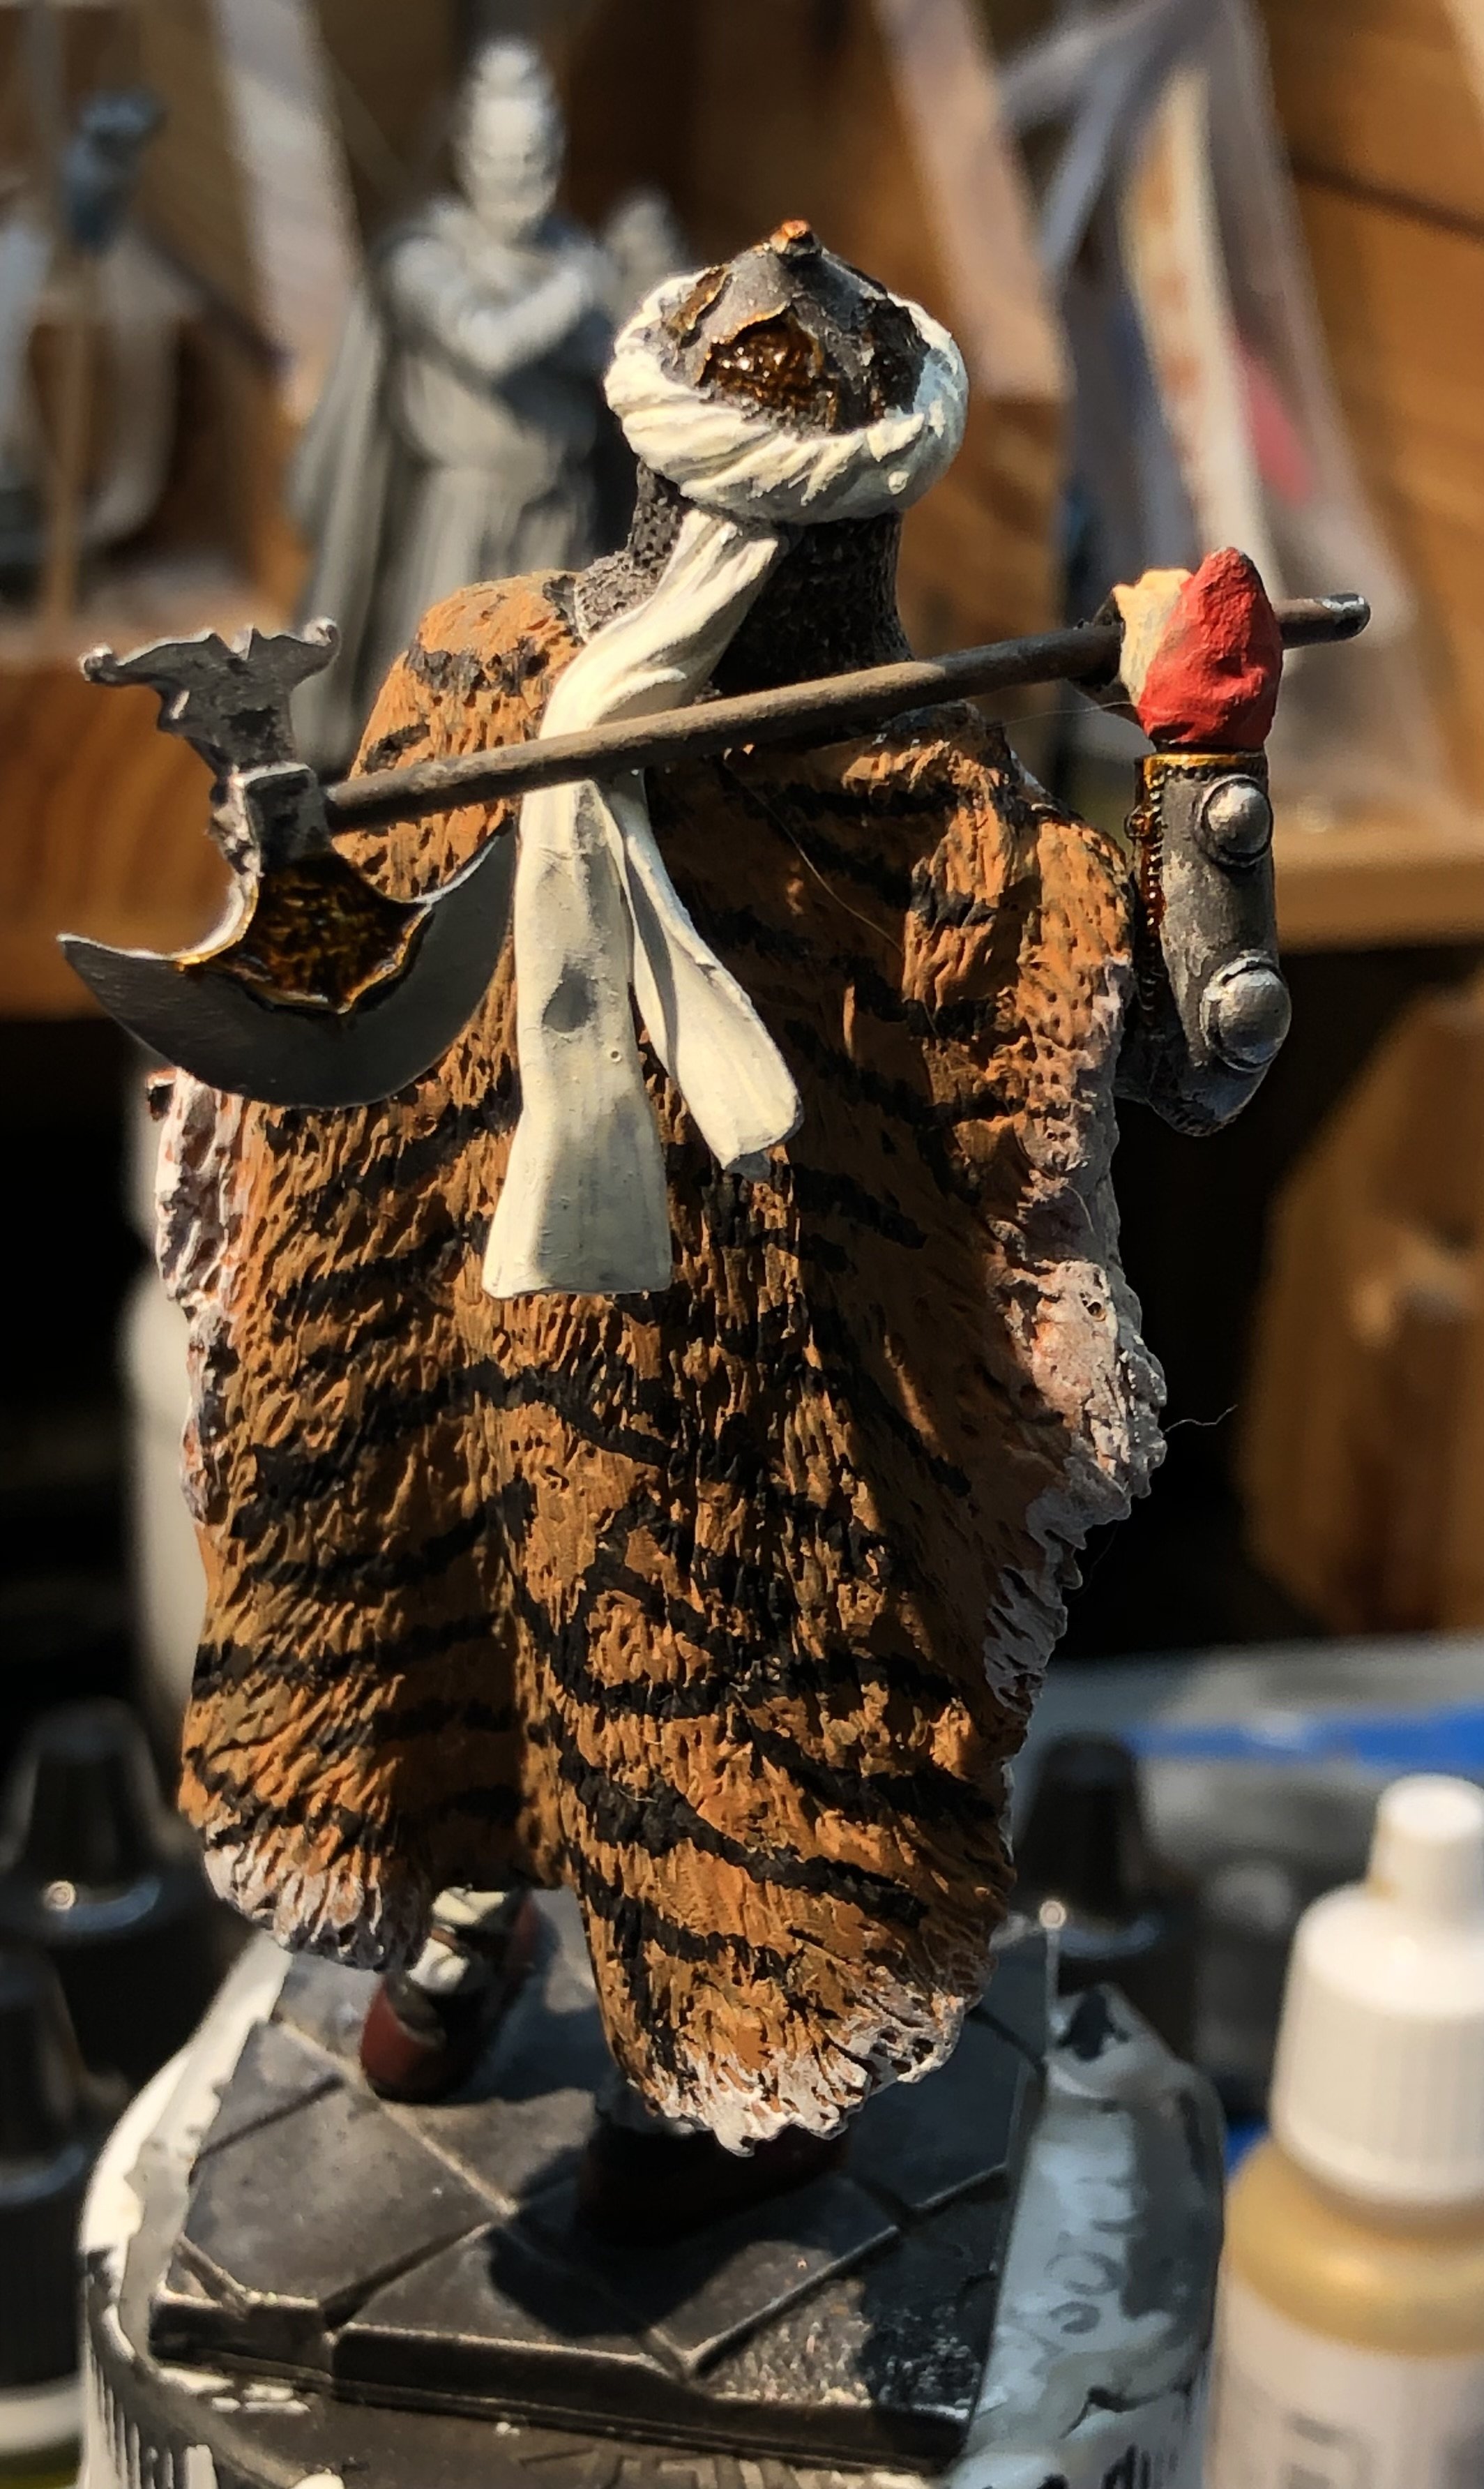
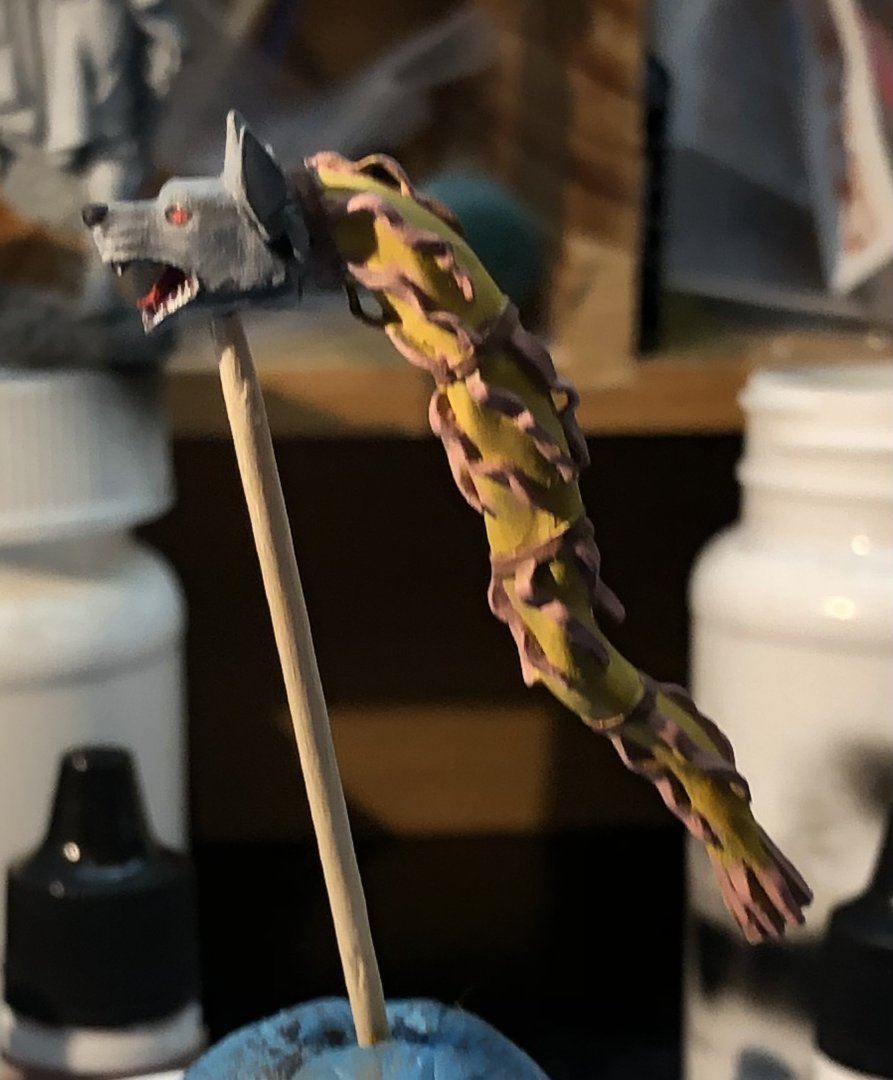
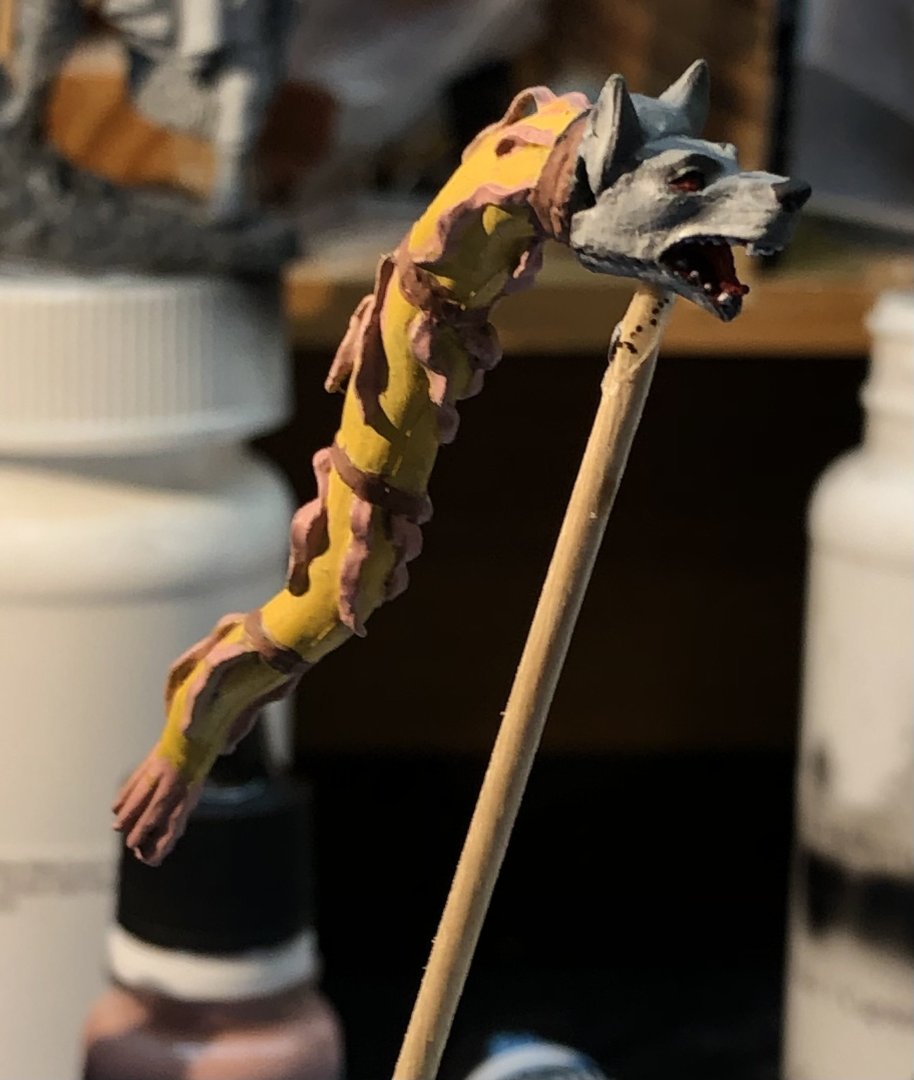
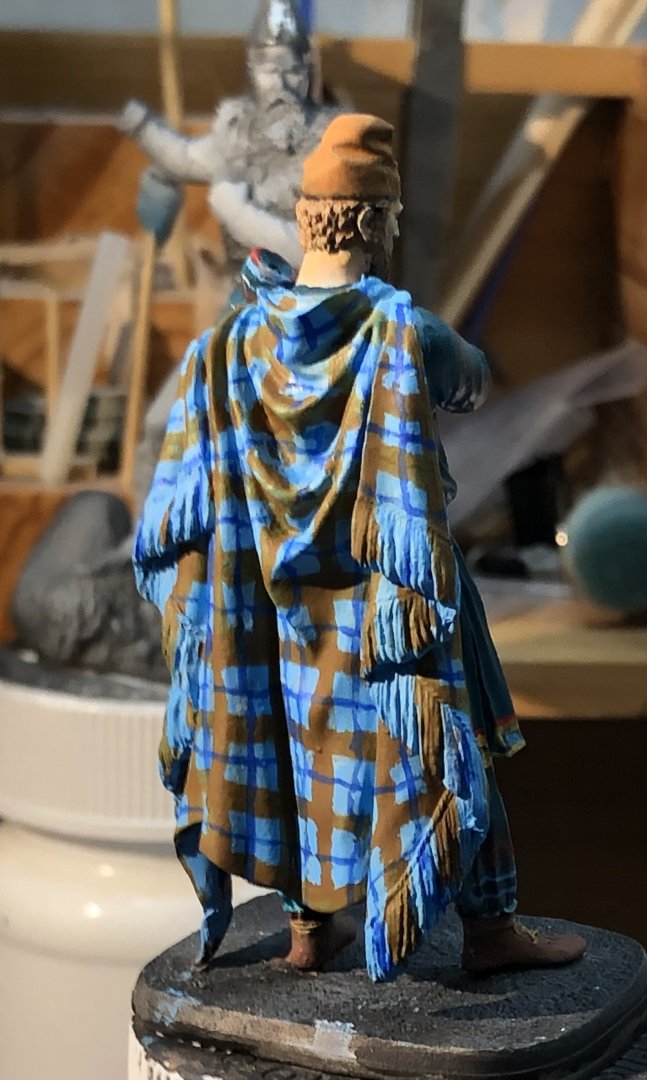
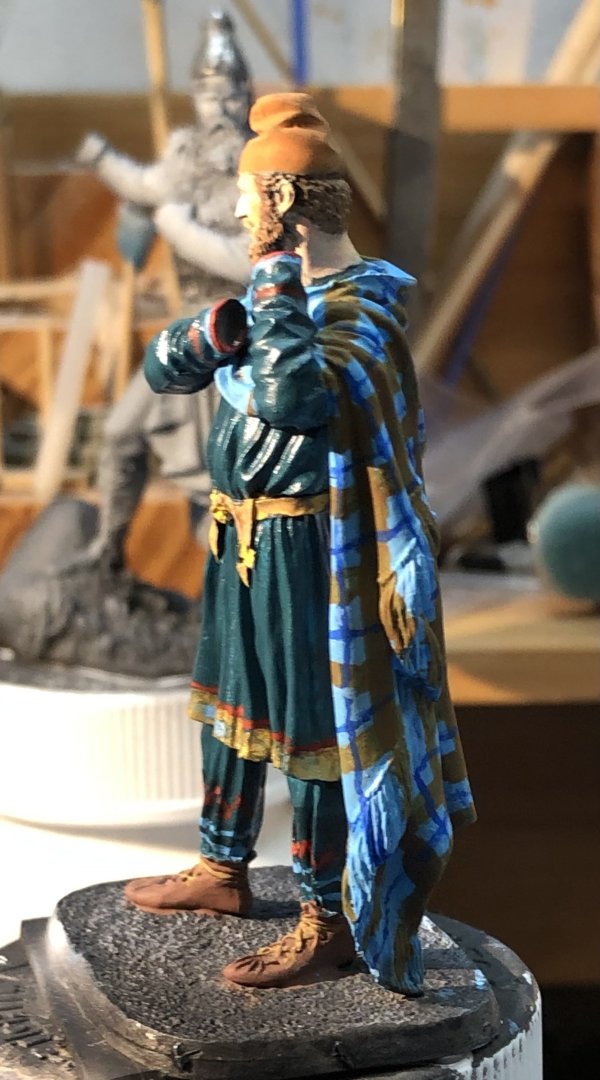
I spent some time experimenting with the plaid pattern on bits of scrap material. I discovered that the small flat brush was not really the best choice for the wide lines. I thought it would be easier to make consistent width lines but it wasn’t the case. Instead I chose a smaller round brush and used the side of the brush which also gave me more control. I also found that sketching out the placement of the lines with a pencil helped me to work on the pattern without getting too lost. So I painted over the first attempt and put the wide brown lines on and the thin darker blue ones. There are a few logic gaps but overall I think it’s acceptable. I have started refining the lines and then I am contemplating doing a pale blue or white wash to pull it all together I moved to a darker brown and I’m not sure I like it. Again the wash may help. I can’t wait to get some matte varnish on his tunic. For light relief I painted the fringe of his tunic and started on the Draco. According to the references the Dacians used the Draco as a standard. It took the form of a dragon or wolfs head with a perforated wind sock body. When faced into the wind it created a shrill sound. This is supposedly the origin of the Roman Draco. It’s fun to paint anyway. Thanks for looking in, the likes and kind comments. Alan

-
Spectacular alan
-
Thank you very much OC. The plaid is giving me fits at the moment but I’m trying some experimenting off the model to see if I can improve. alan
-
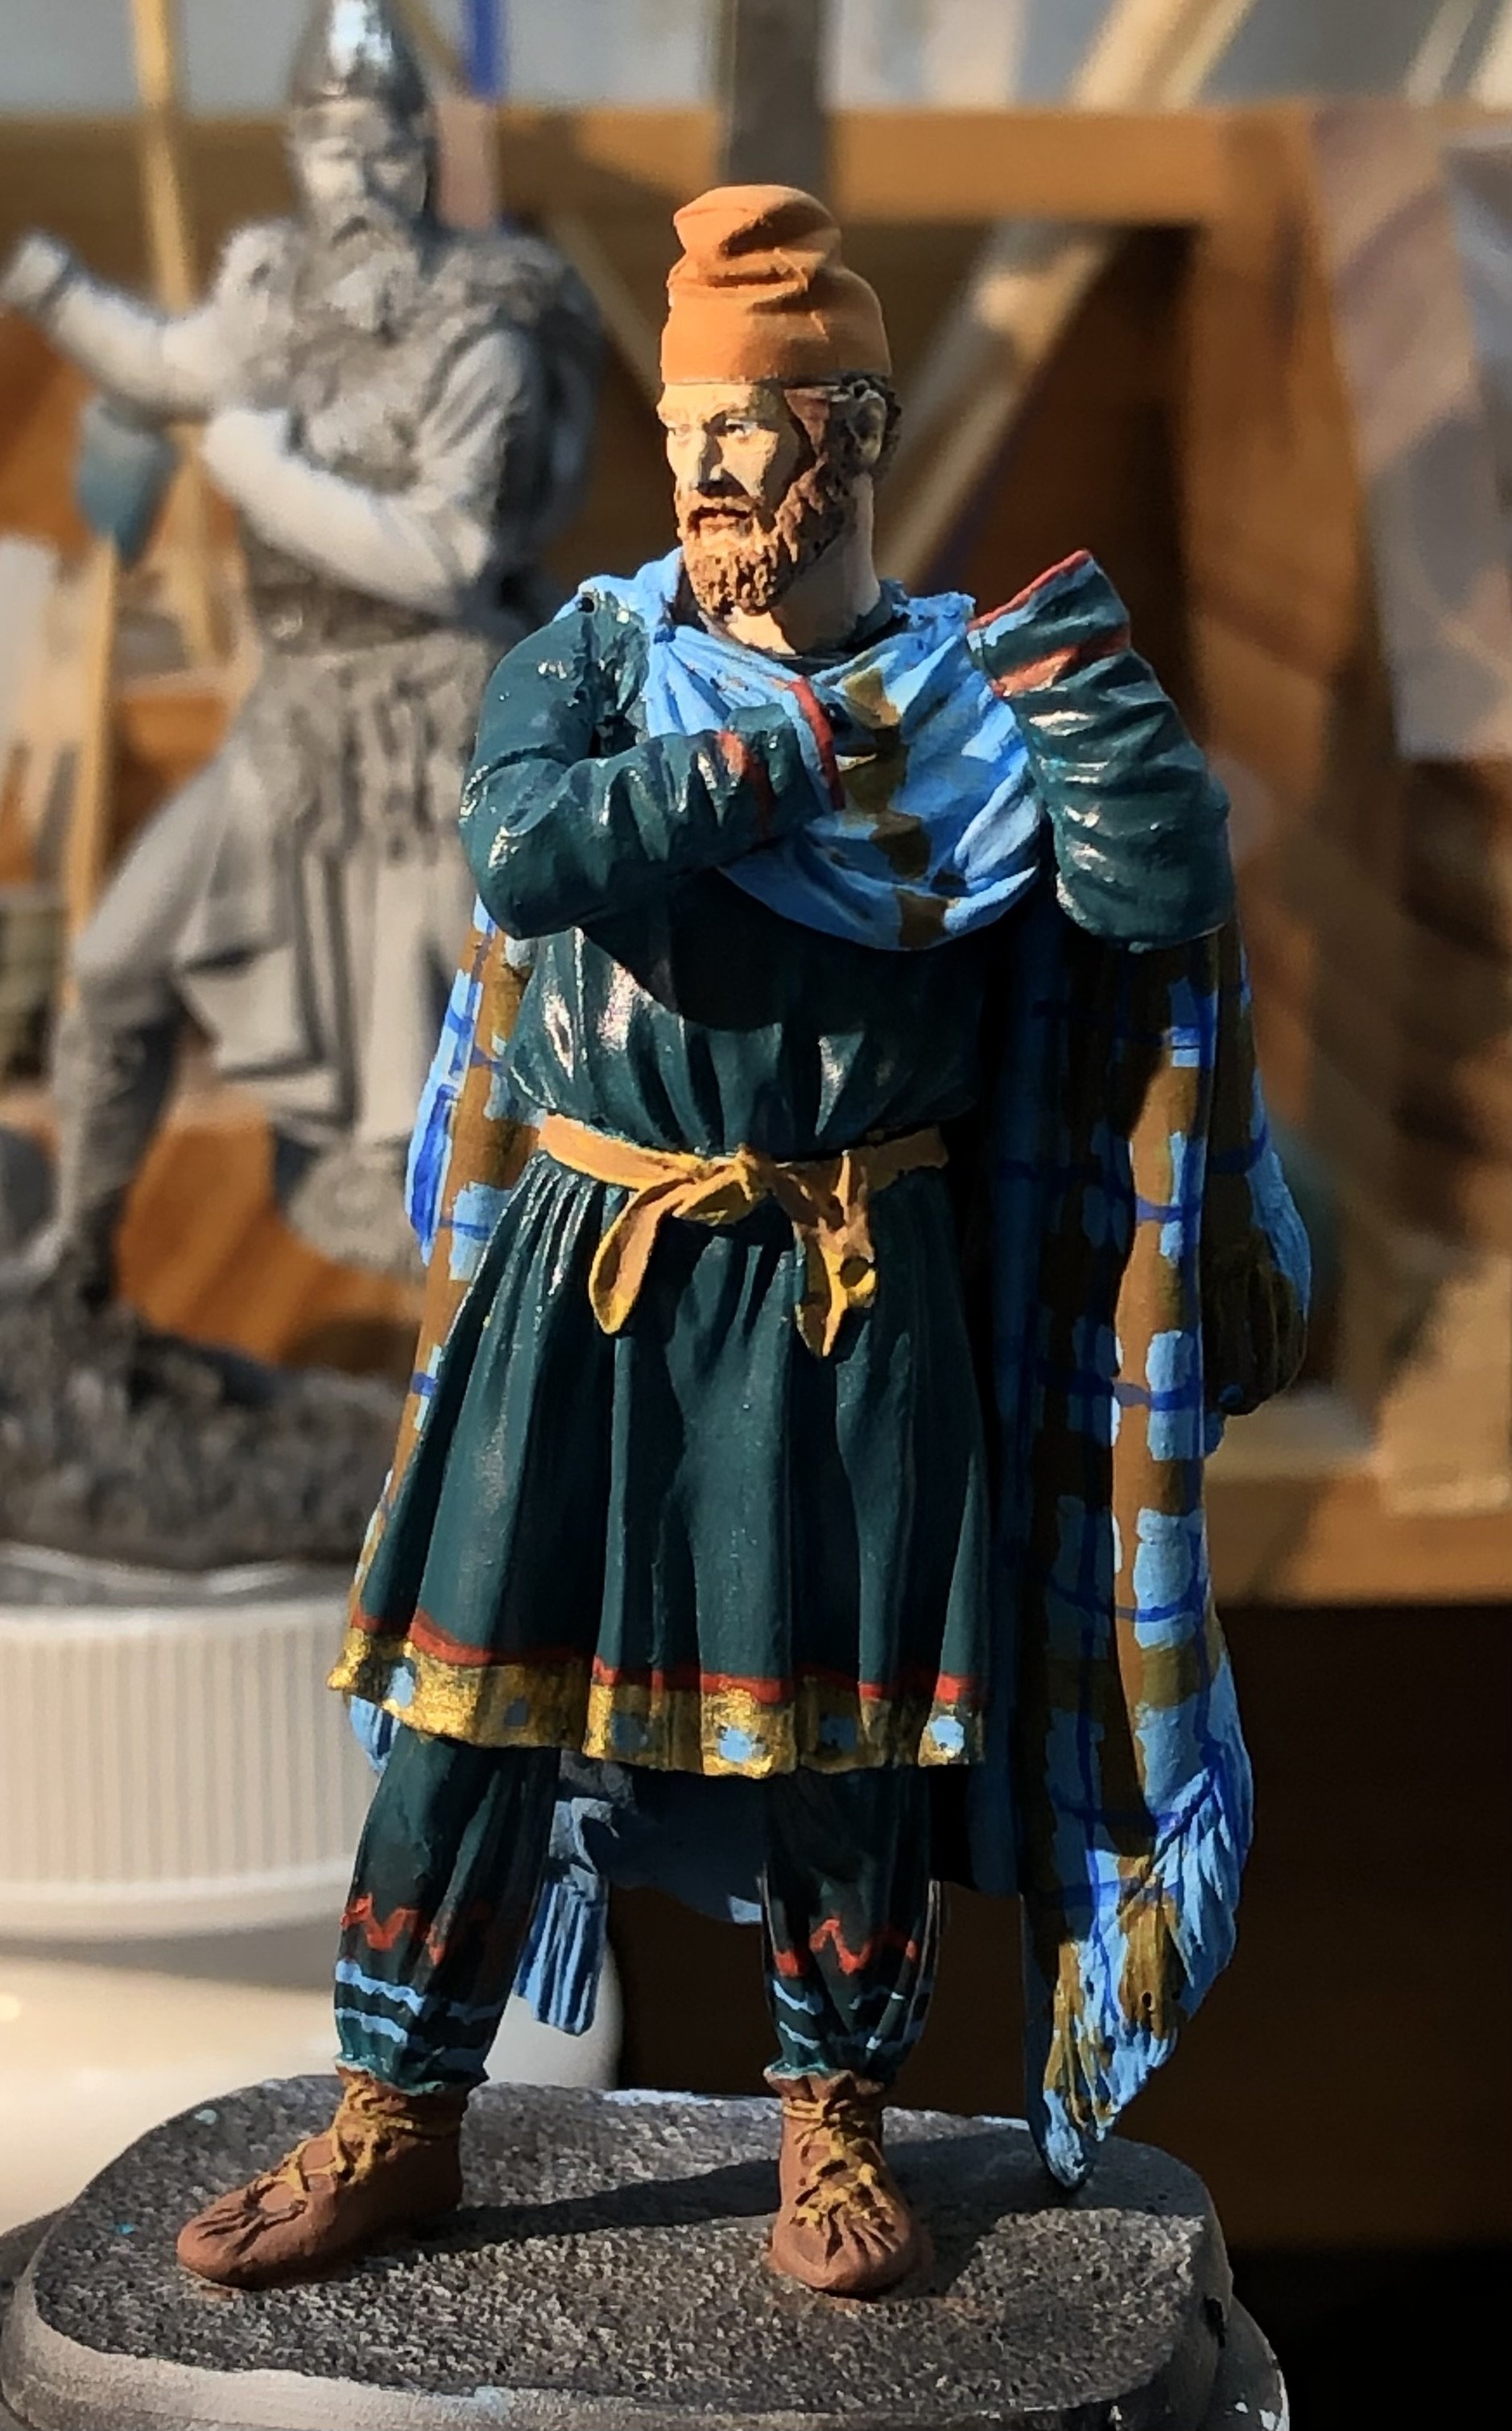
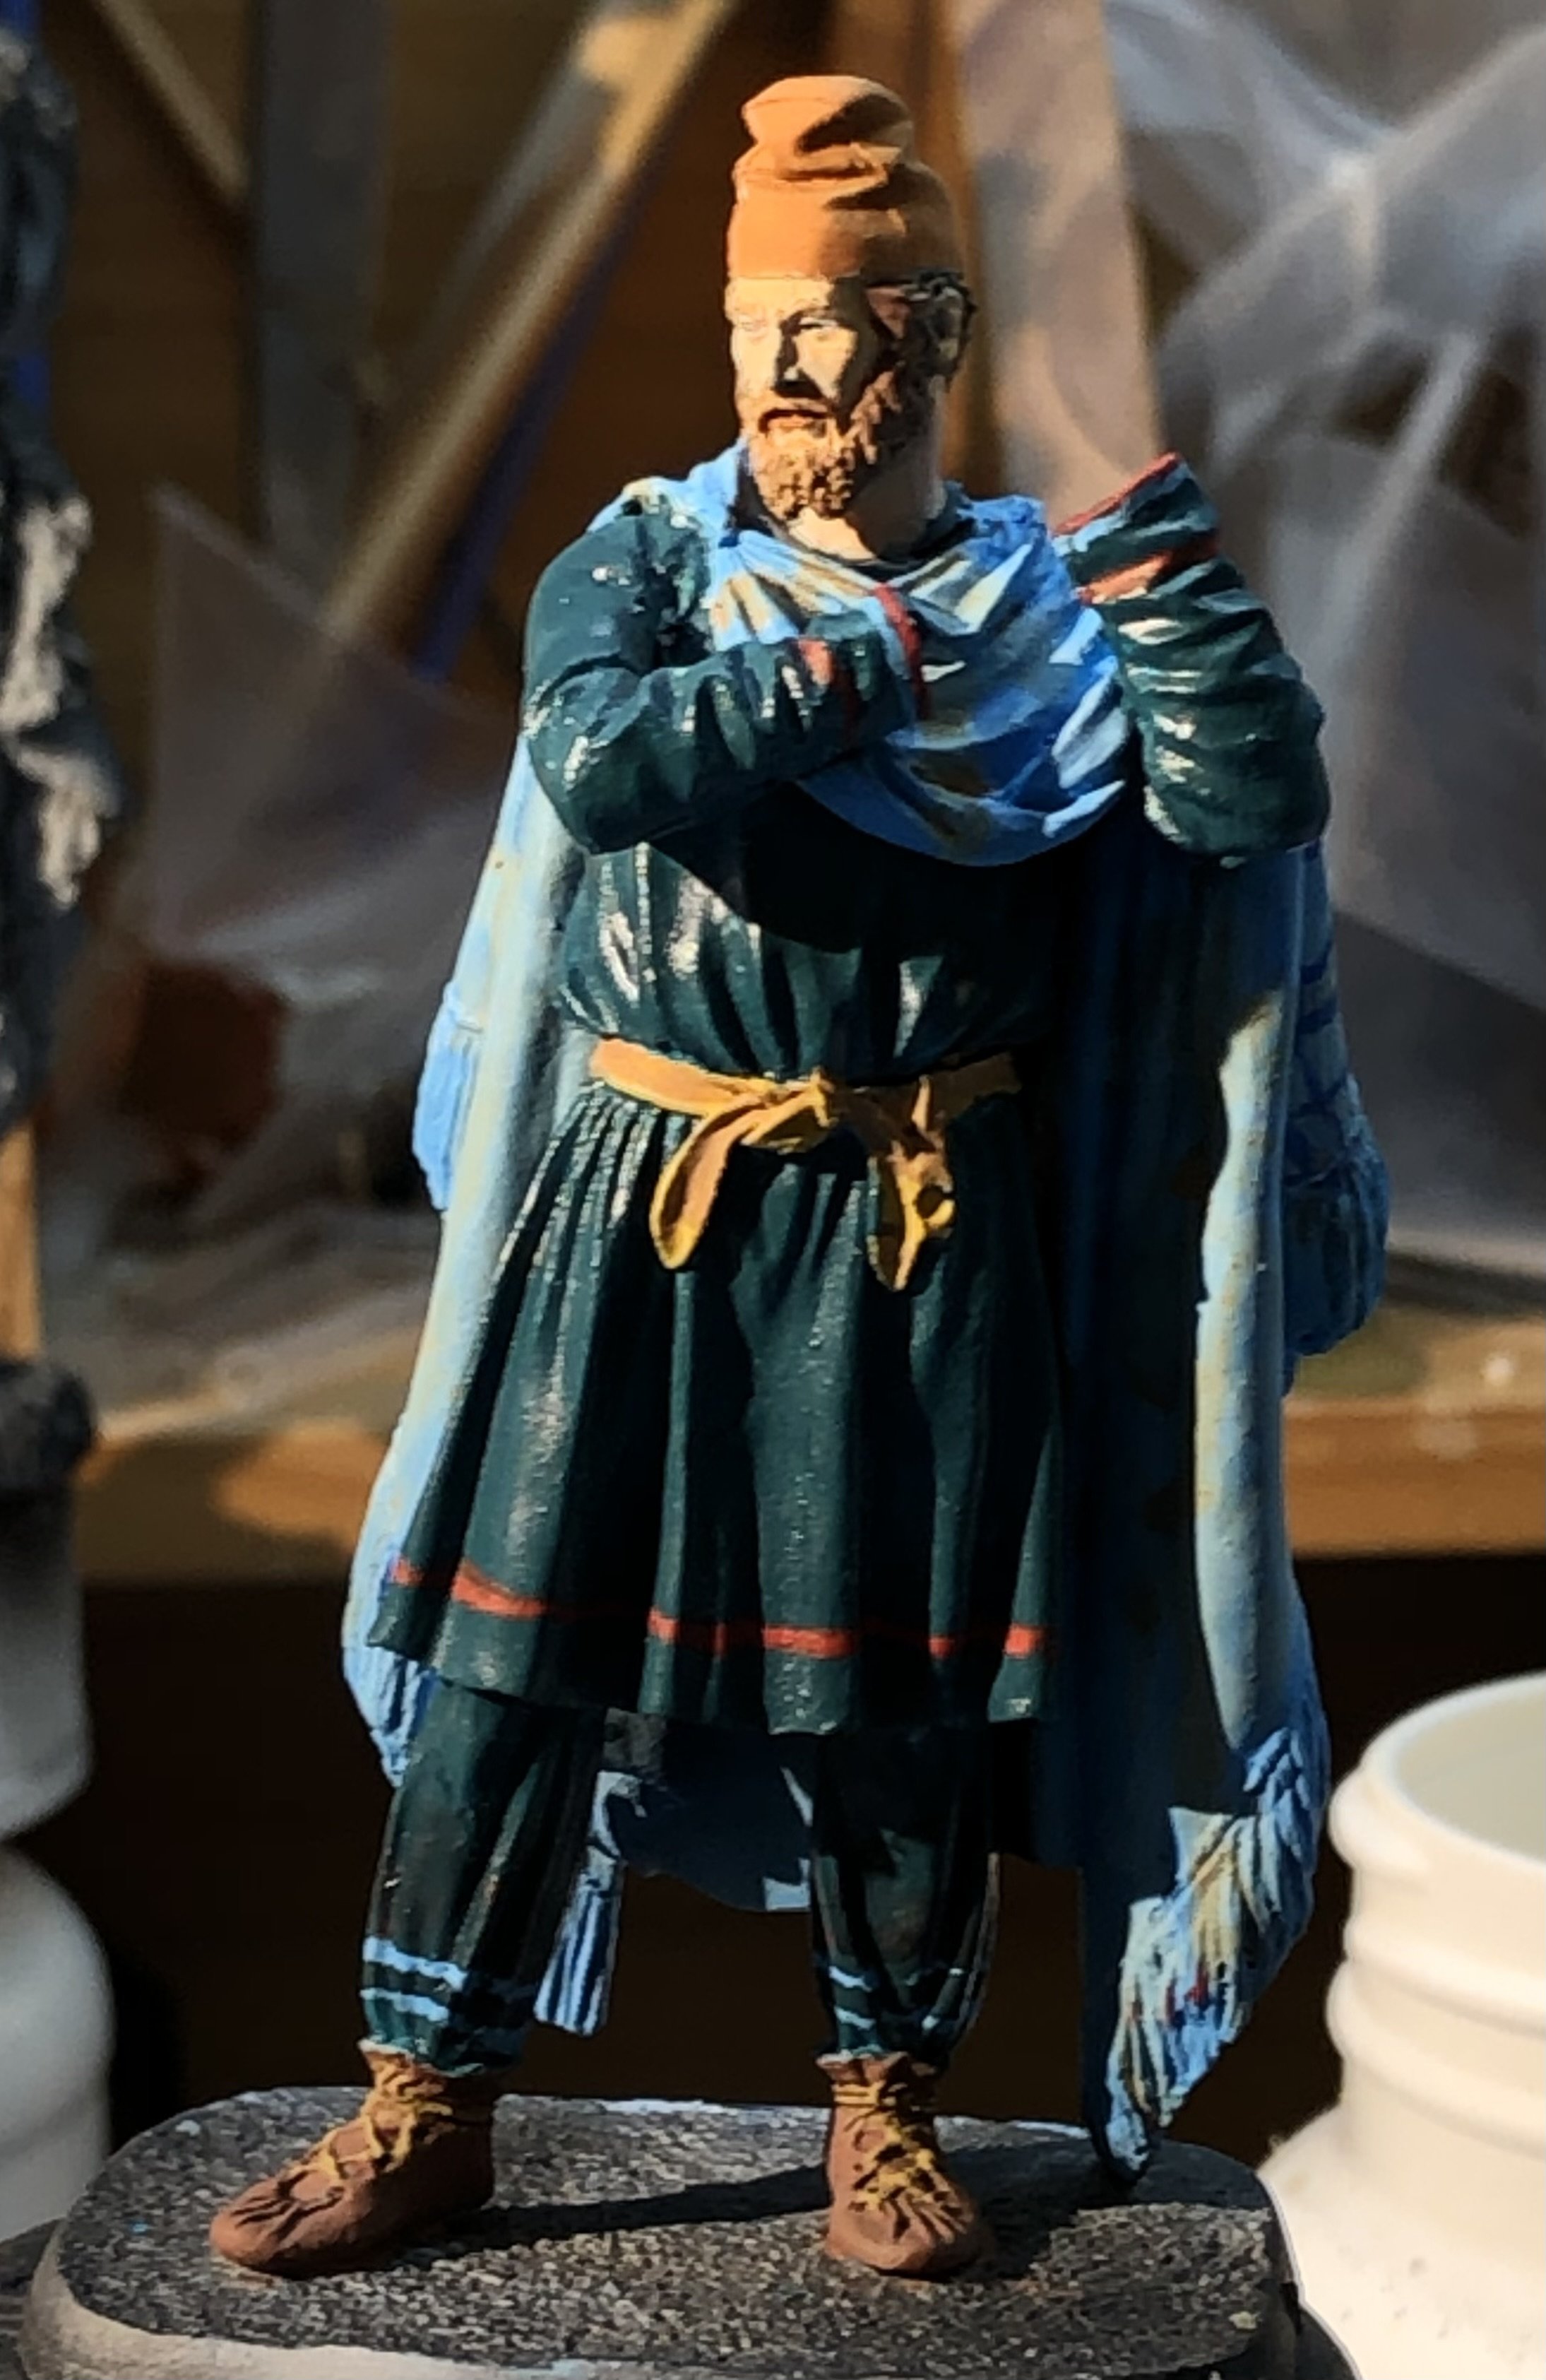
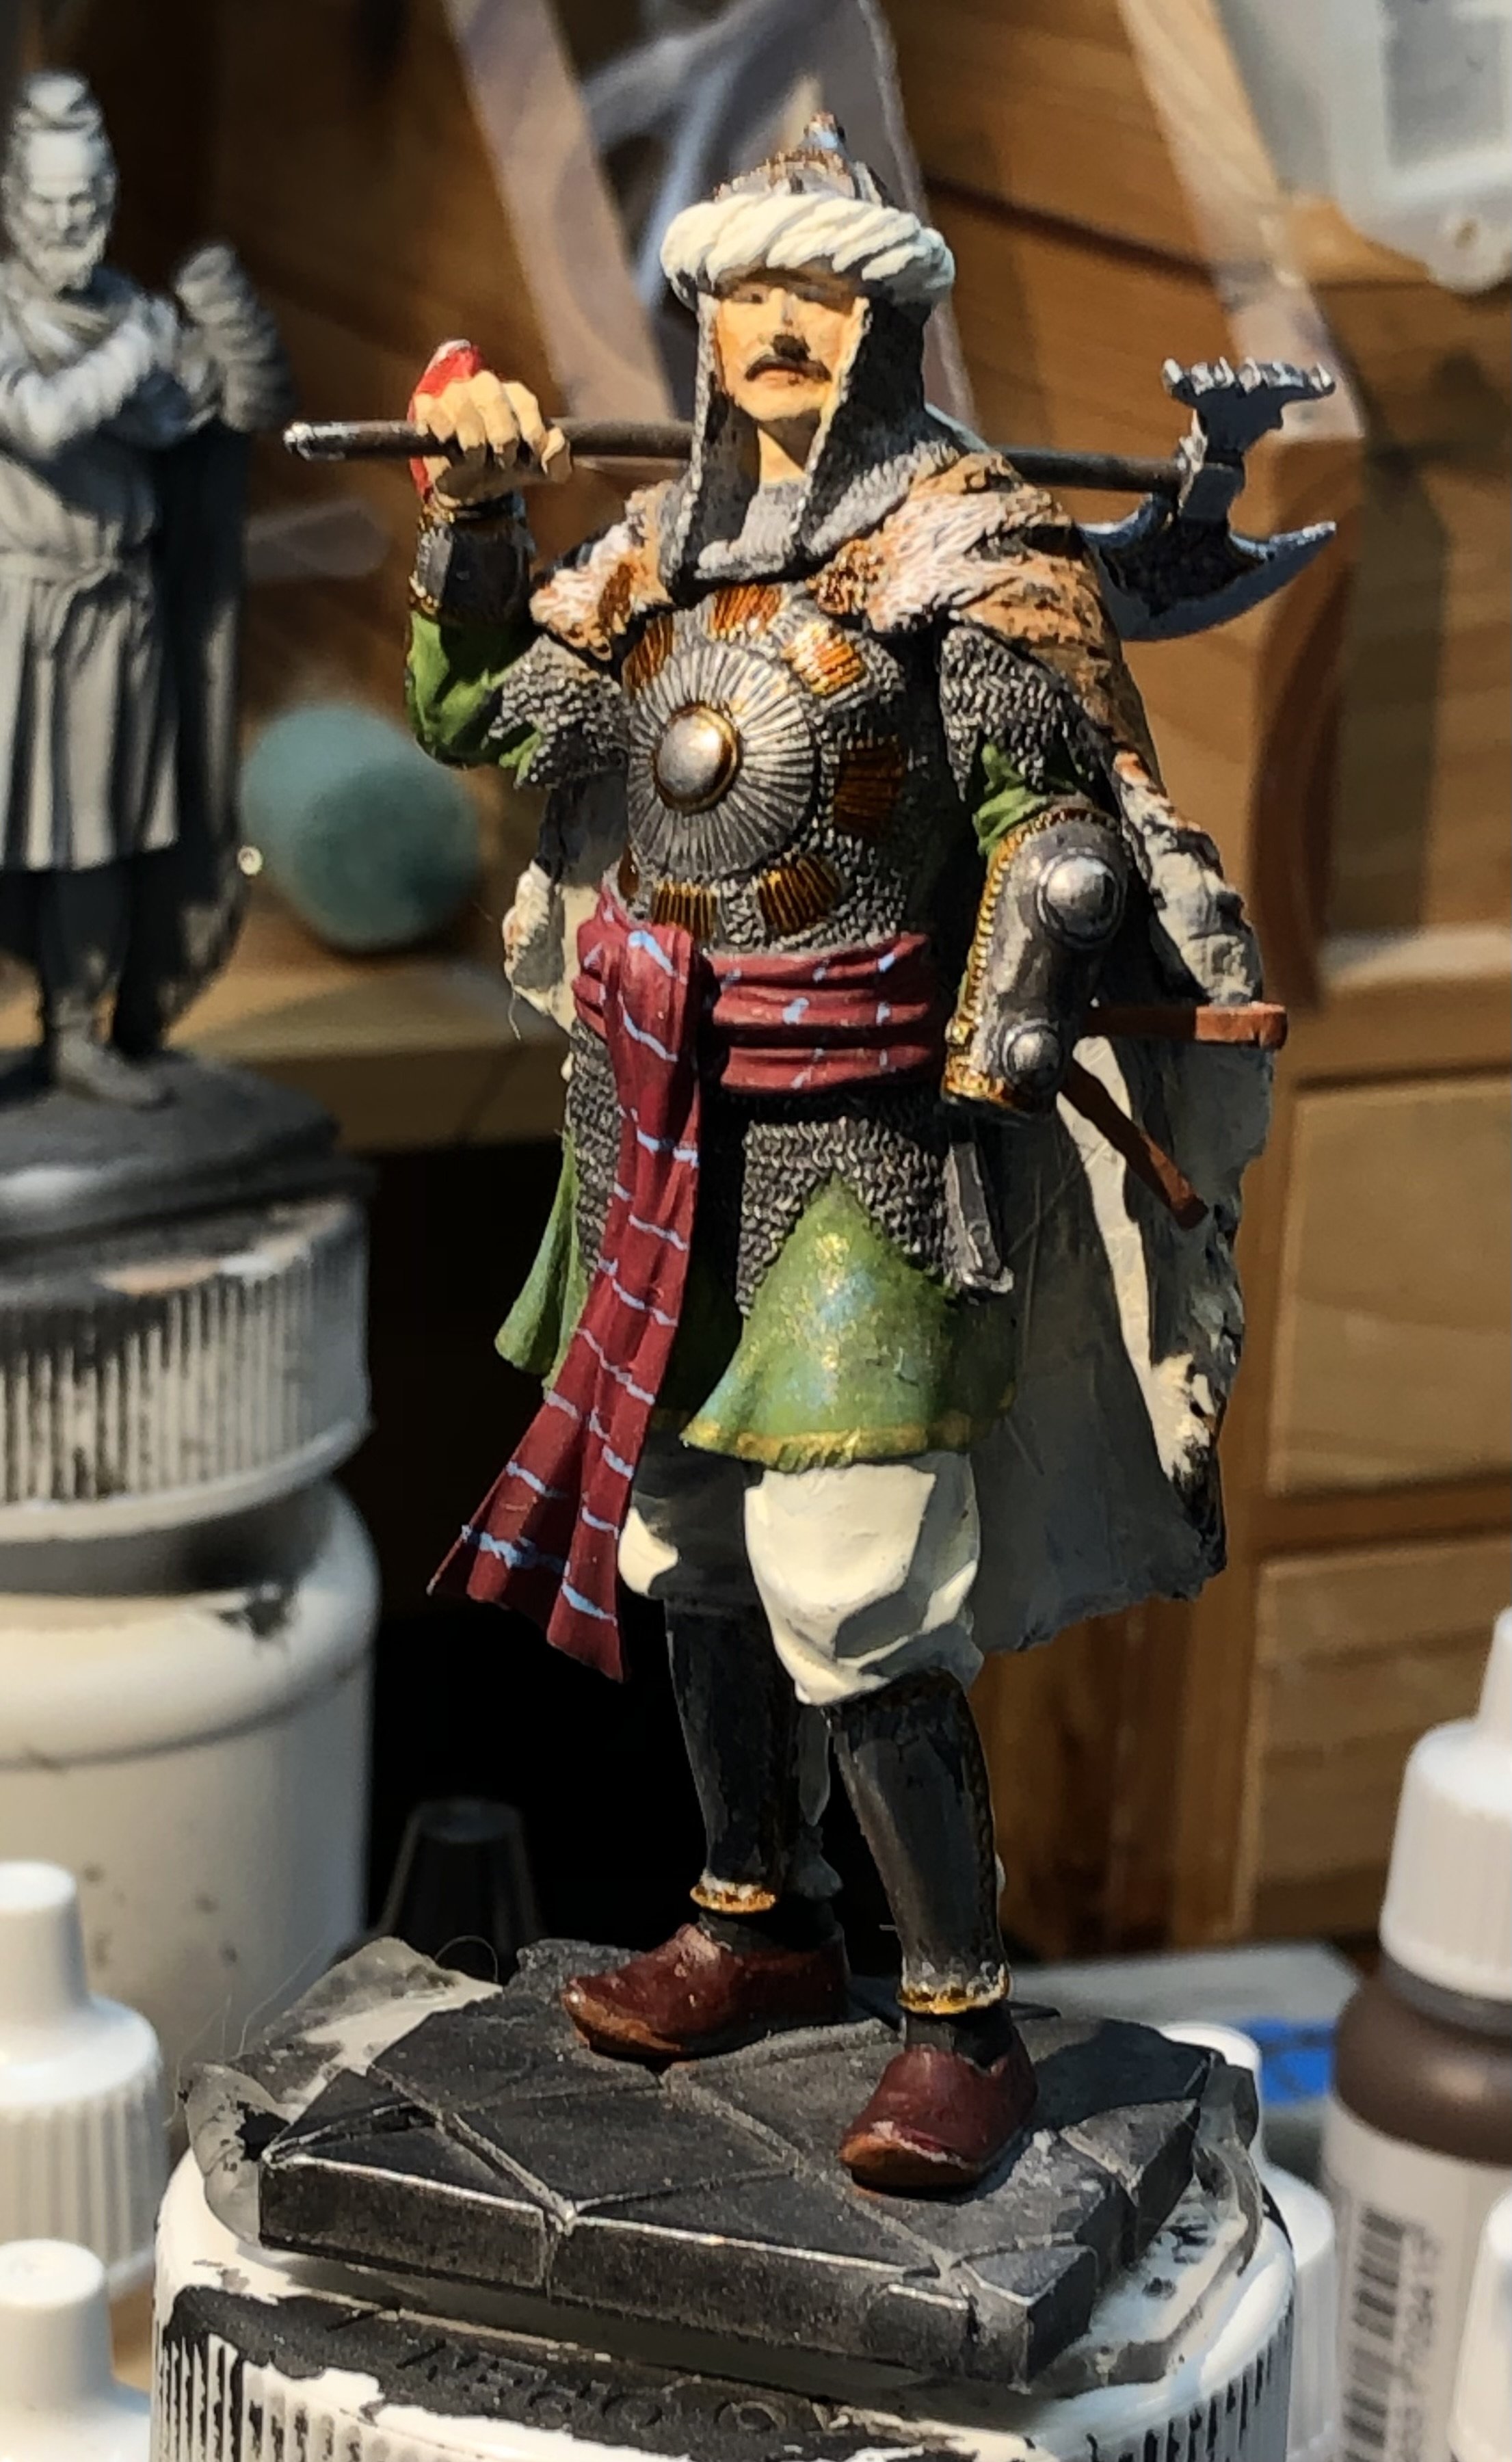
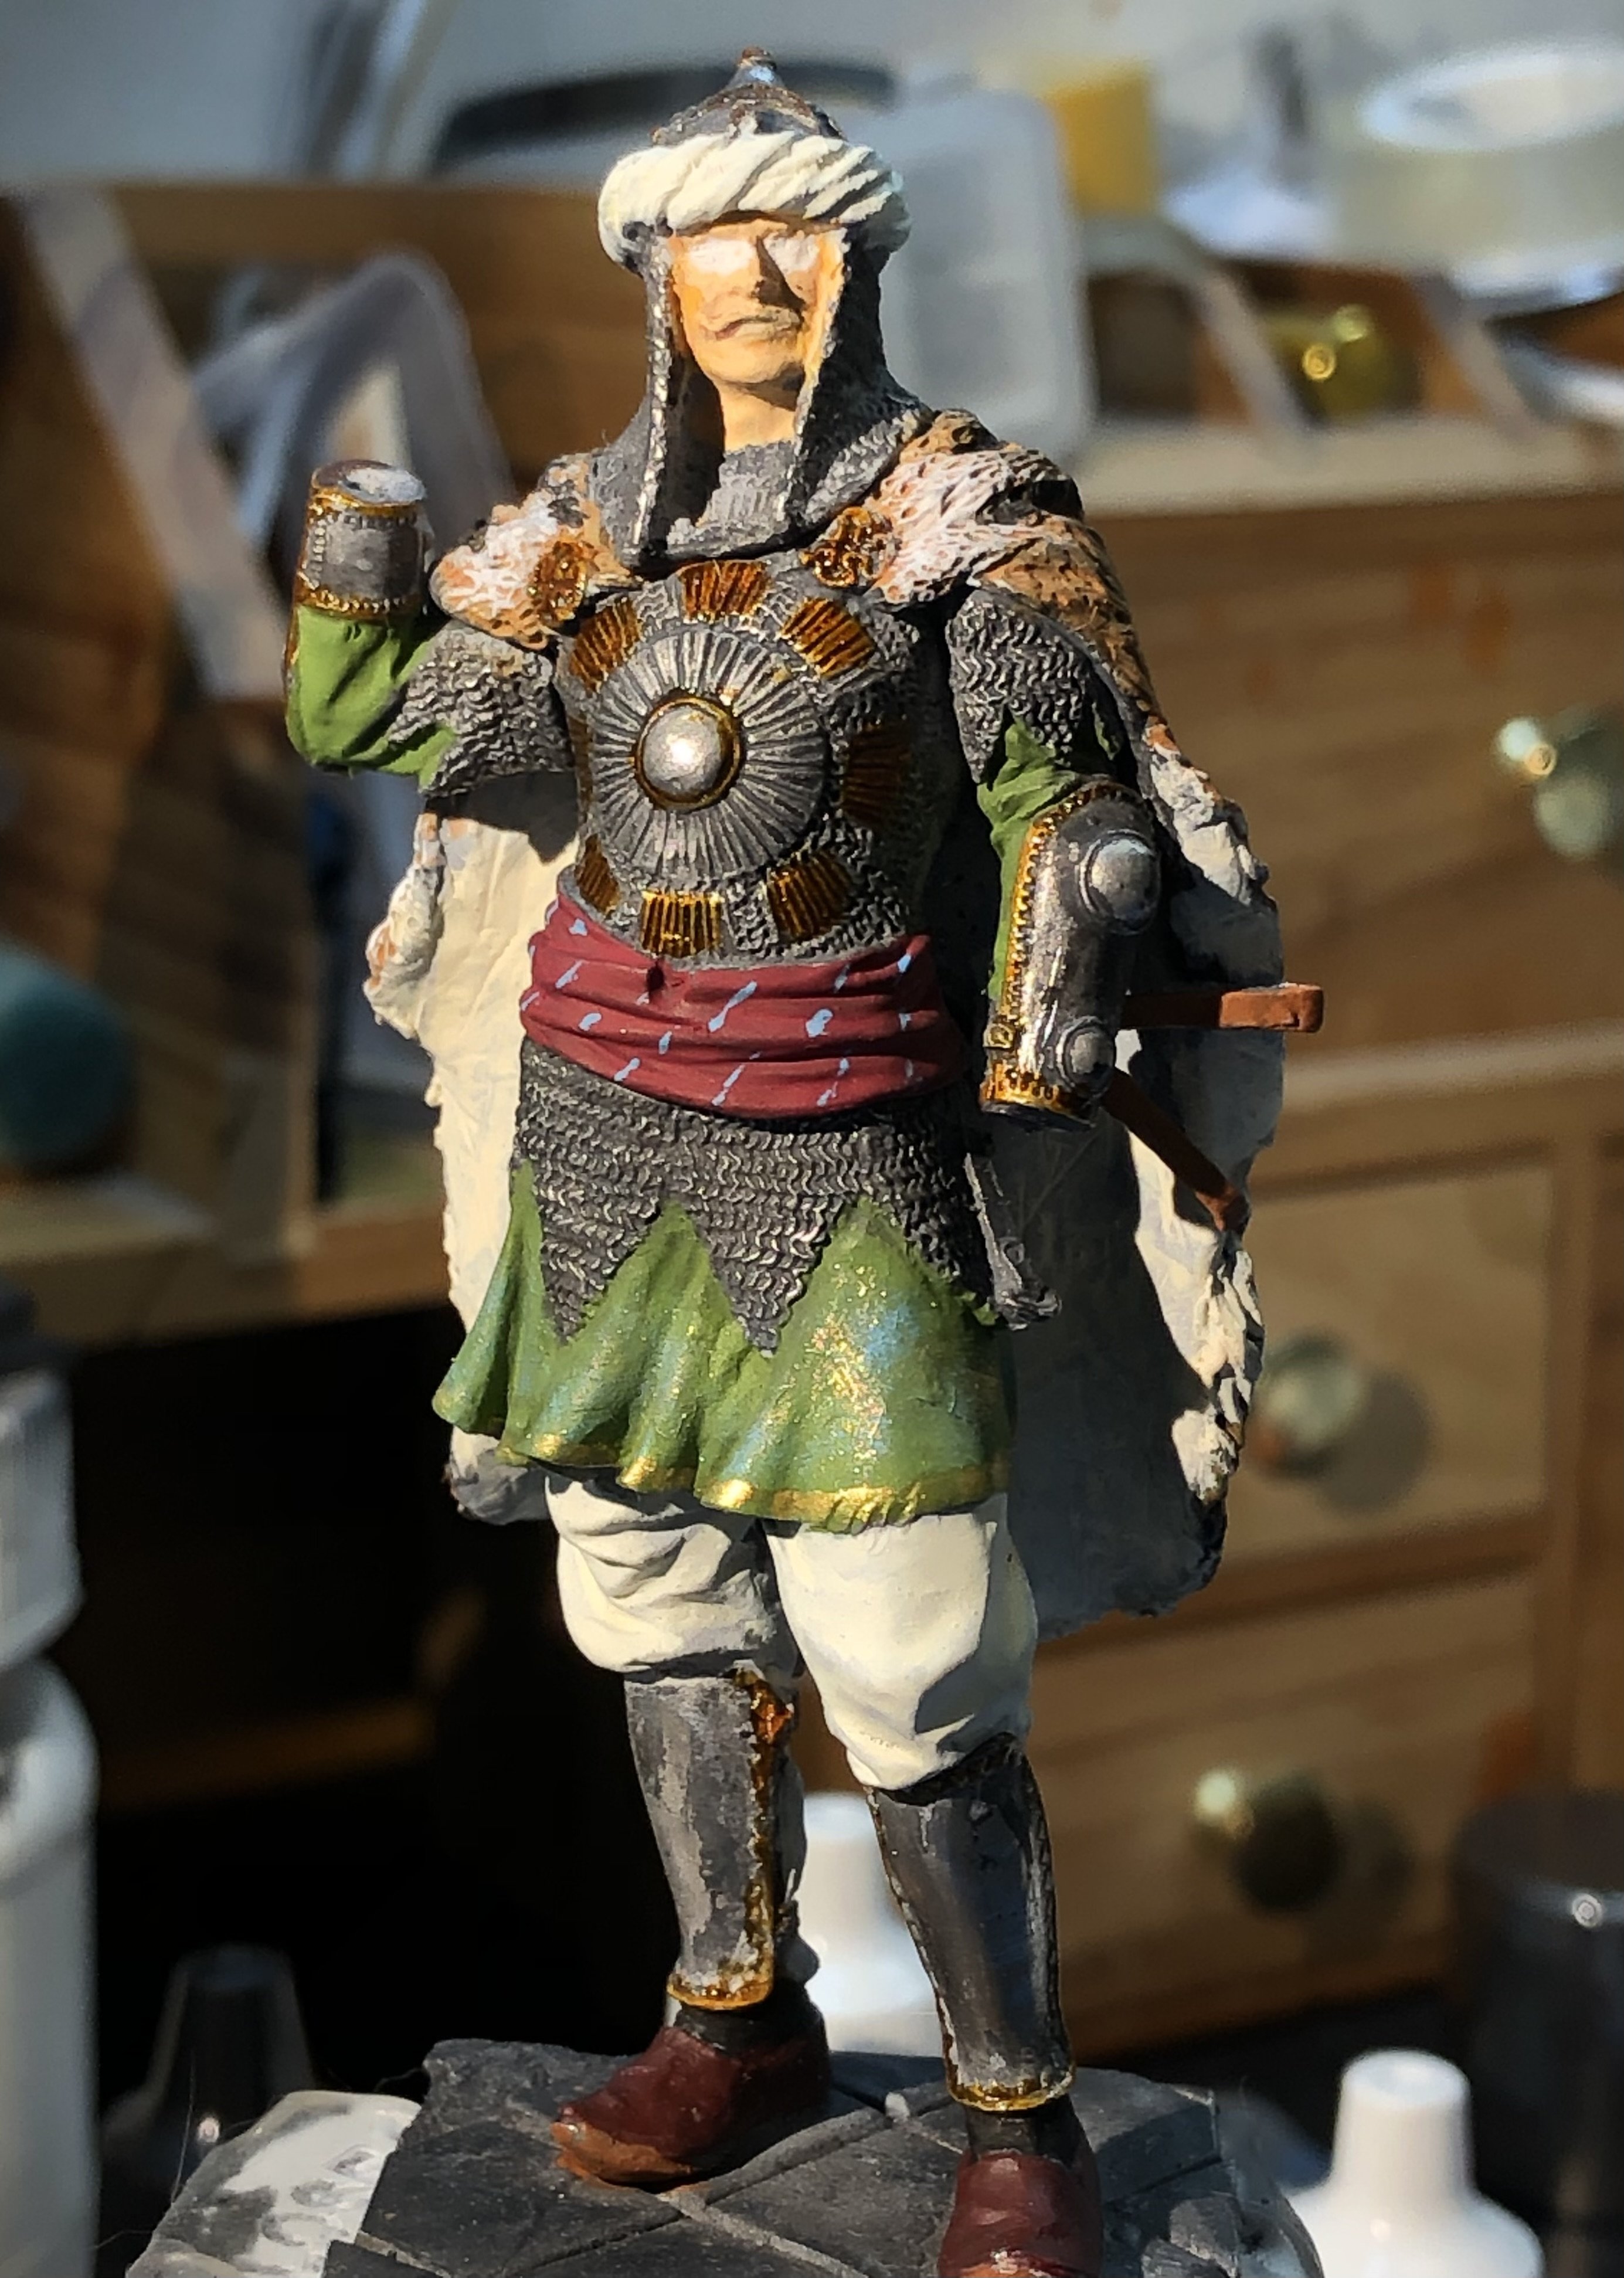
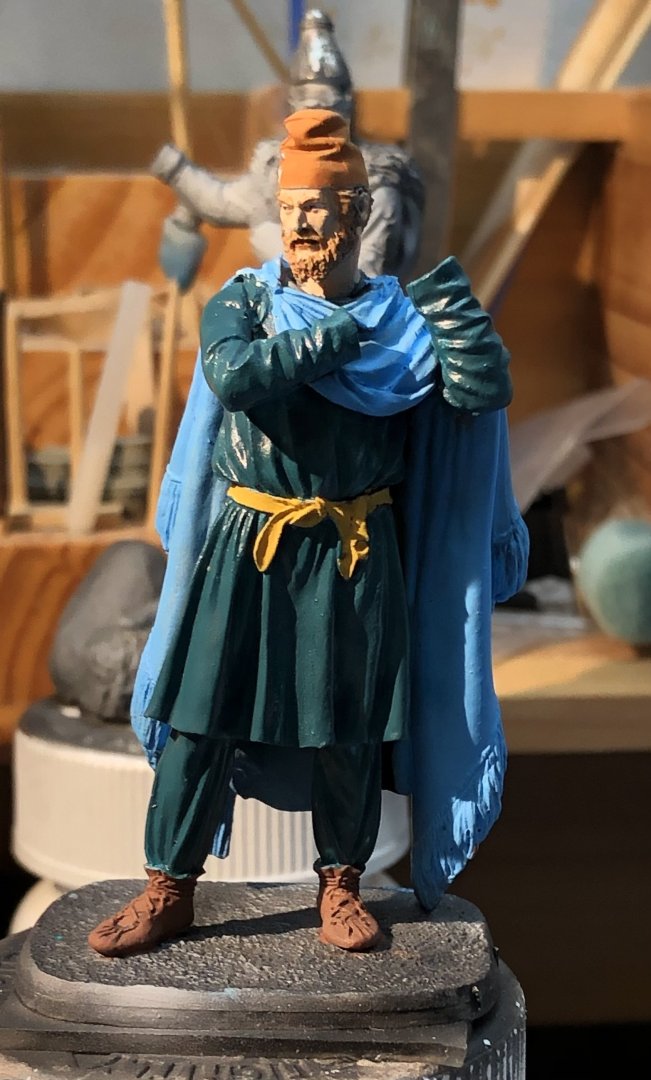
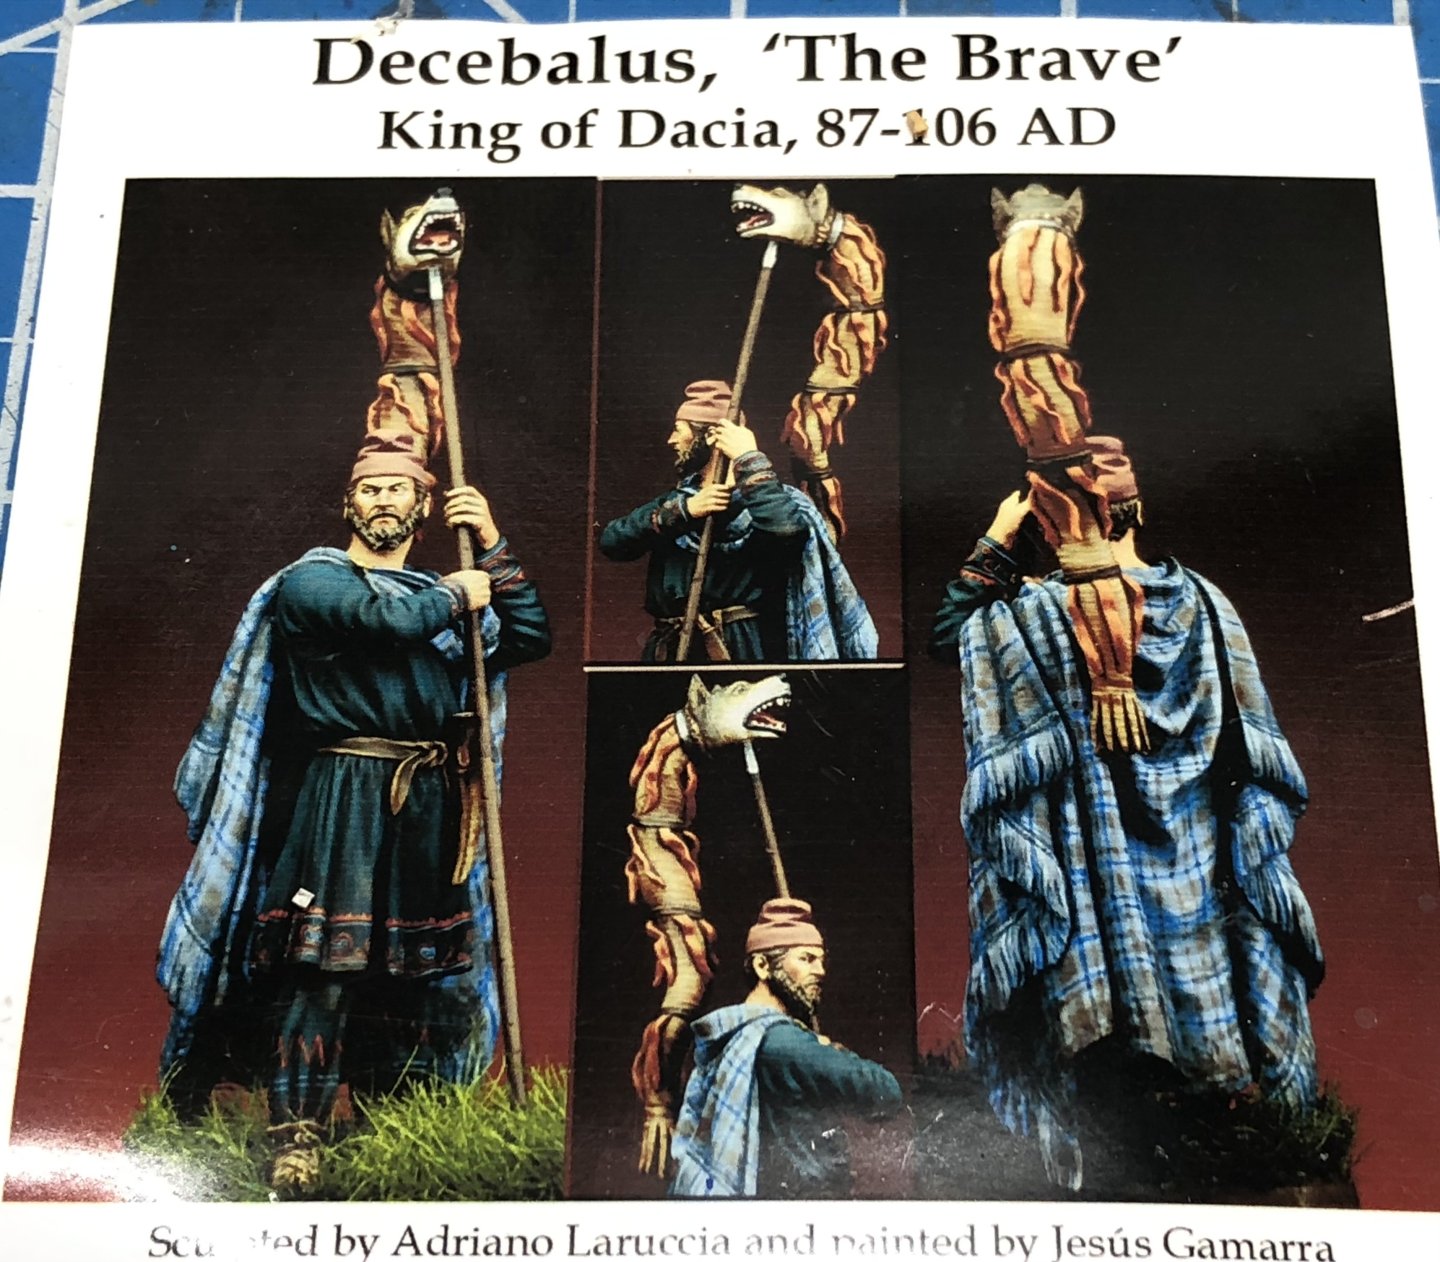
Back to an Art Girona model, as the title says, King Decebalus. He fought three wars against Rome losing the last one and, with his city destroyed he committed suicide. I thought I remembered him as a character in the Harry Sidebottom series of books “Warrior of Rome “. Excellent books by the way. painting guide can have limited historical accuracy but I like it enough to want to follow it as well as my abilities permit. There are some fine details on his tunic which will be a challenge and the plaid like pattern of his cloak is going to be a stretch. I got carried away and got into the painting and forgot to take photos. You only missed the black primer / white zenithal paint so nothing terribly interesting. The basic elements are done. The face was really nice to paint, excellent sculpting. For some reason the green paint has a shine which will need a matte coat at the end. i added some of the details on the tunic and pants, it’s tricky with all the folds but I will try for the red zigzag pattern on the pants next. i laid on the very light blue and buff shades as the base of the plaid and I’m not totally satisfied. I hoped that the thin dark blue lines would help but my brush control was not good enough. I put a white wash over everything to reduce the contrast which helps a bit. I’m in two minds about overpainting and starting again but I think I might go a bit further first. This is really about learning and improving. Thanks for looking in Alan


-
Thank you very much Ken. I don’t think these were people to mess with. Next up is Decebalus, king of Dacia around 80 AD. I thought he featured in one of the Warrior of Rome books but I’m having doubts. Nice subject though. I’ve actually started but I got carried away and forgot photos. alan
-
Thank you very much Dan. The Tamiya clear orange painted onto polished bare metal is a very convincing gold. I tend to use the Vallejo gold for clothing details. alan
-
Thank you very much Andrew. It’s a great sculpt and a joy to paint. Alan
-
Thank you very much OC. I think it was my most ambitious figure and I’m quite chuffed with how it turned out. He’s going to be at the front of the display case I think. Alan
-
Thank you very much Rob. I’m glad you enjoyed it. Let’s see if I can take the detail painting up a notch. There is a plaid pattern in my near future. Alan
-
Thank you Mike, yes, low part count but a lot of painting. I use the airbrush to put on the initial black primer and the zenithal white shading and then it’s all brush work. alan
-
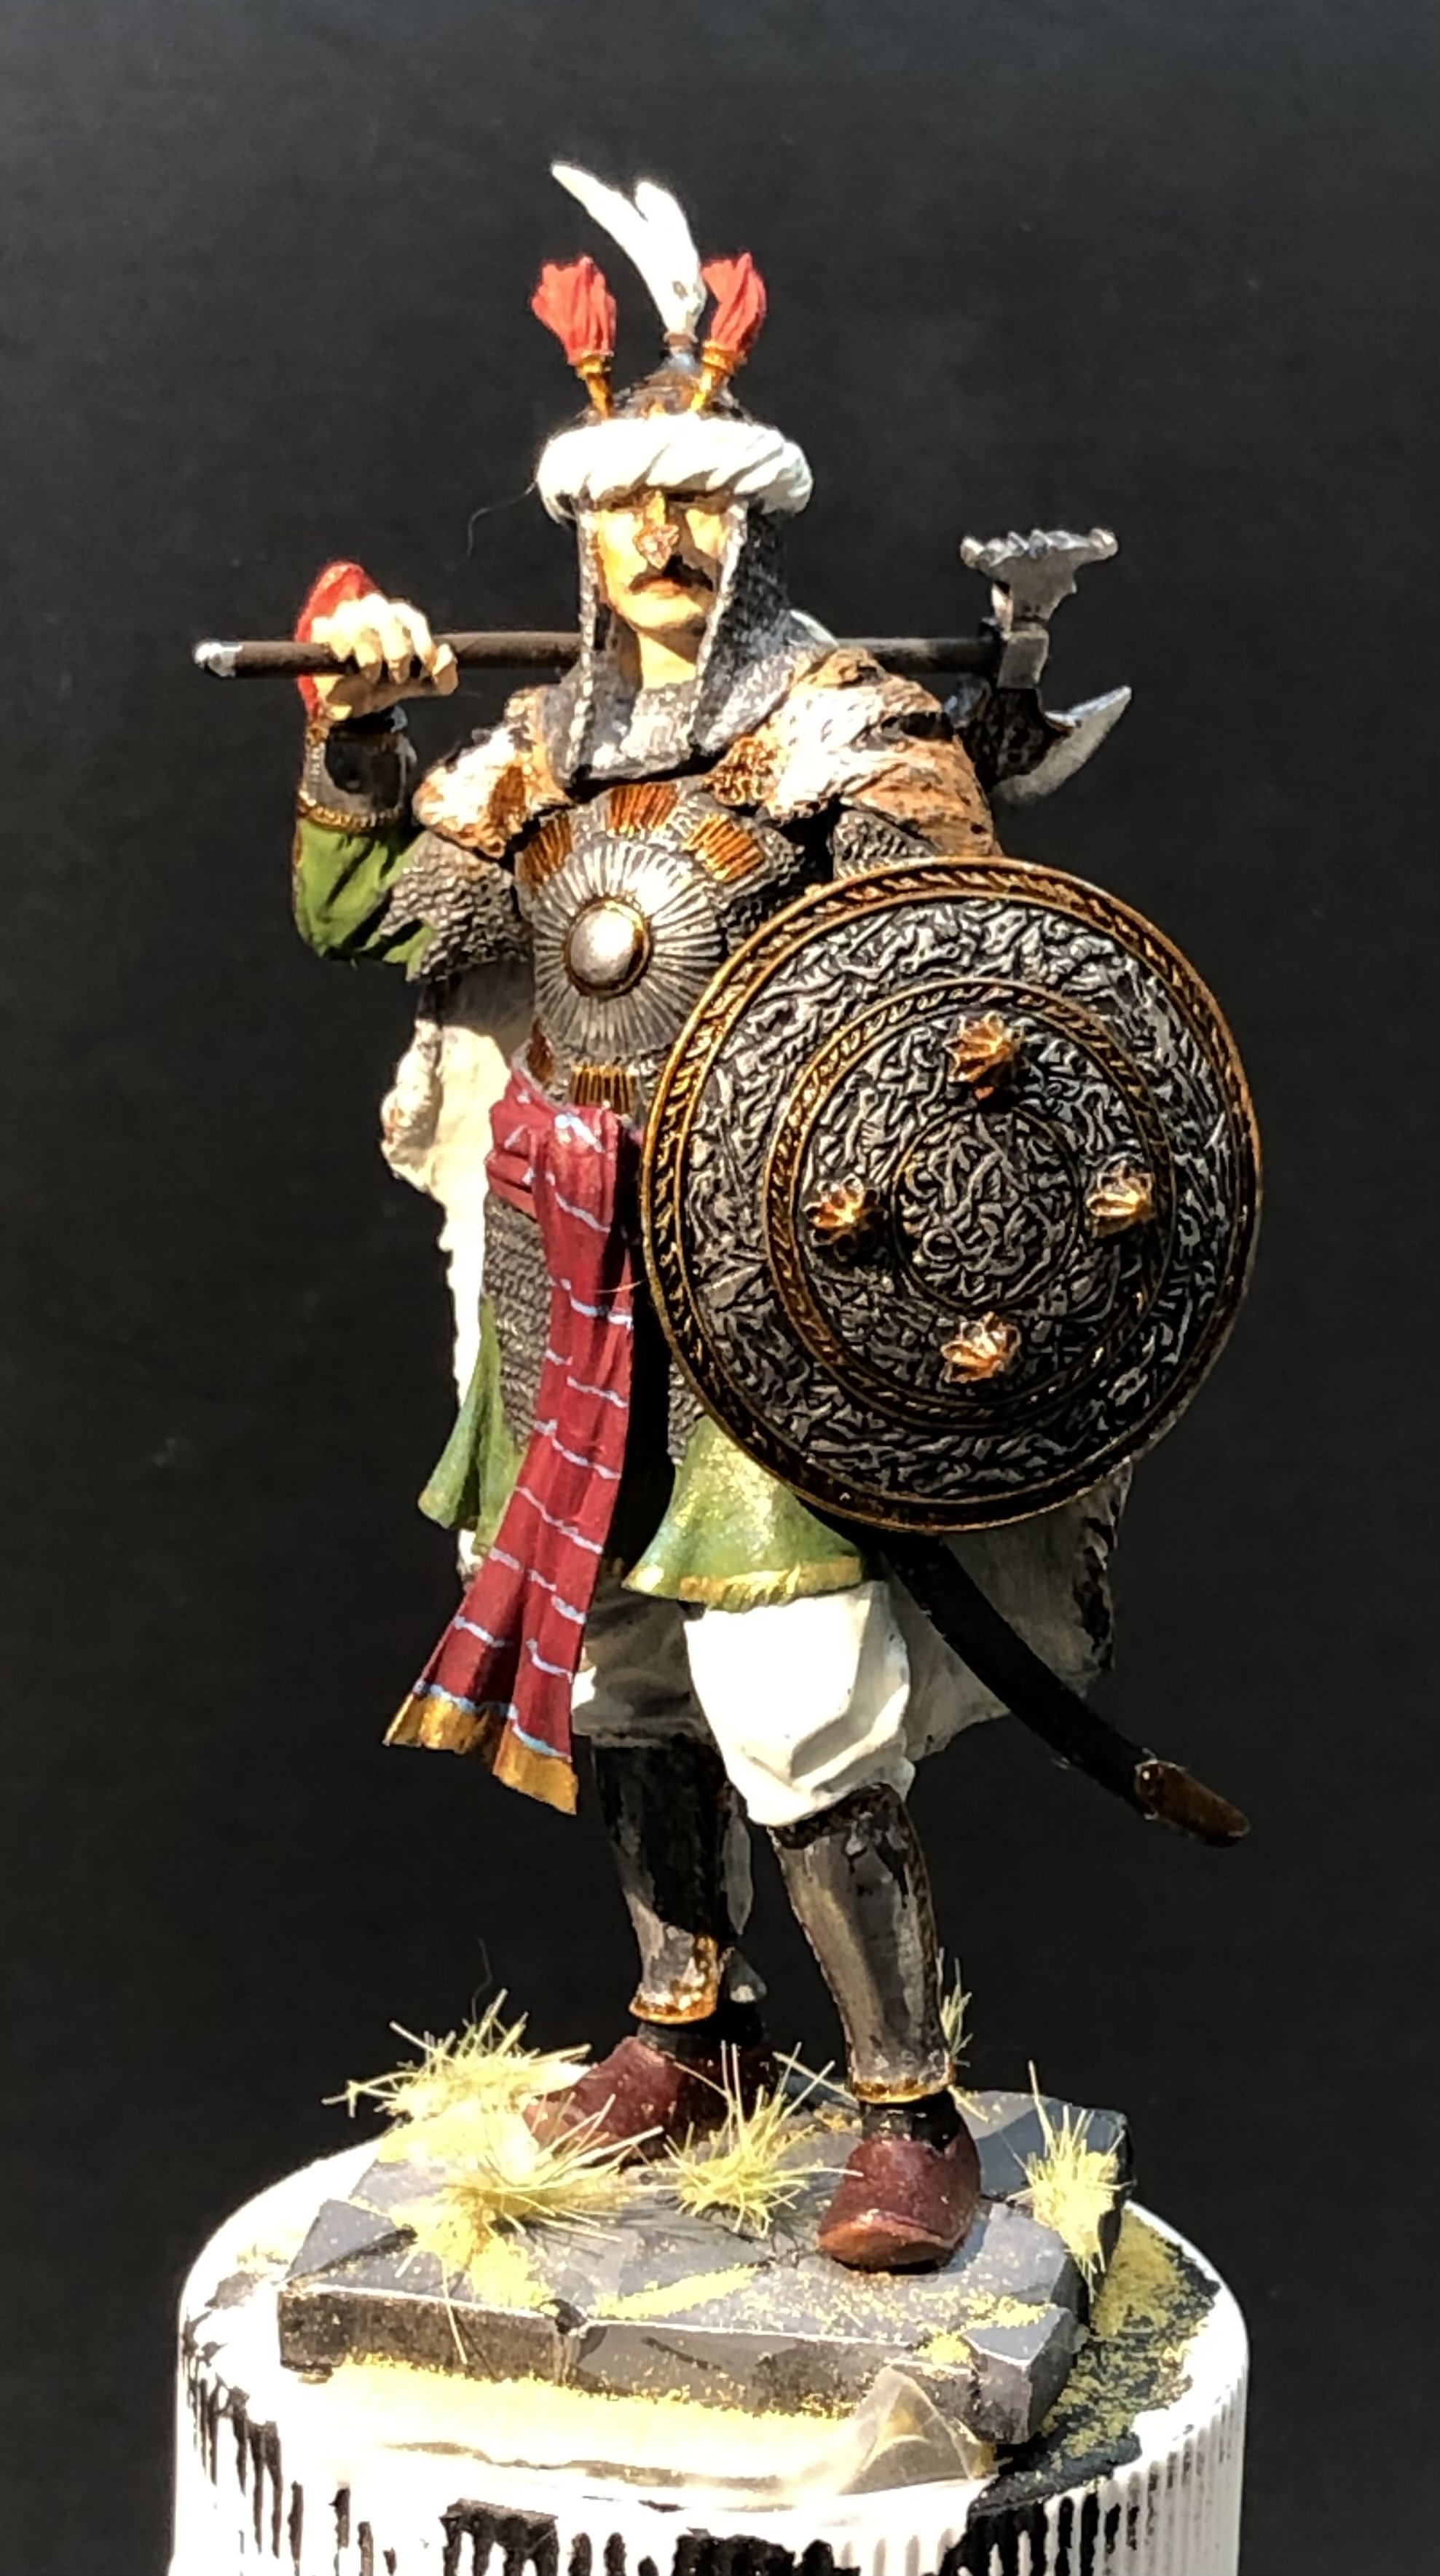
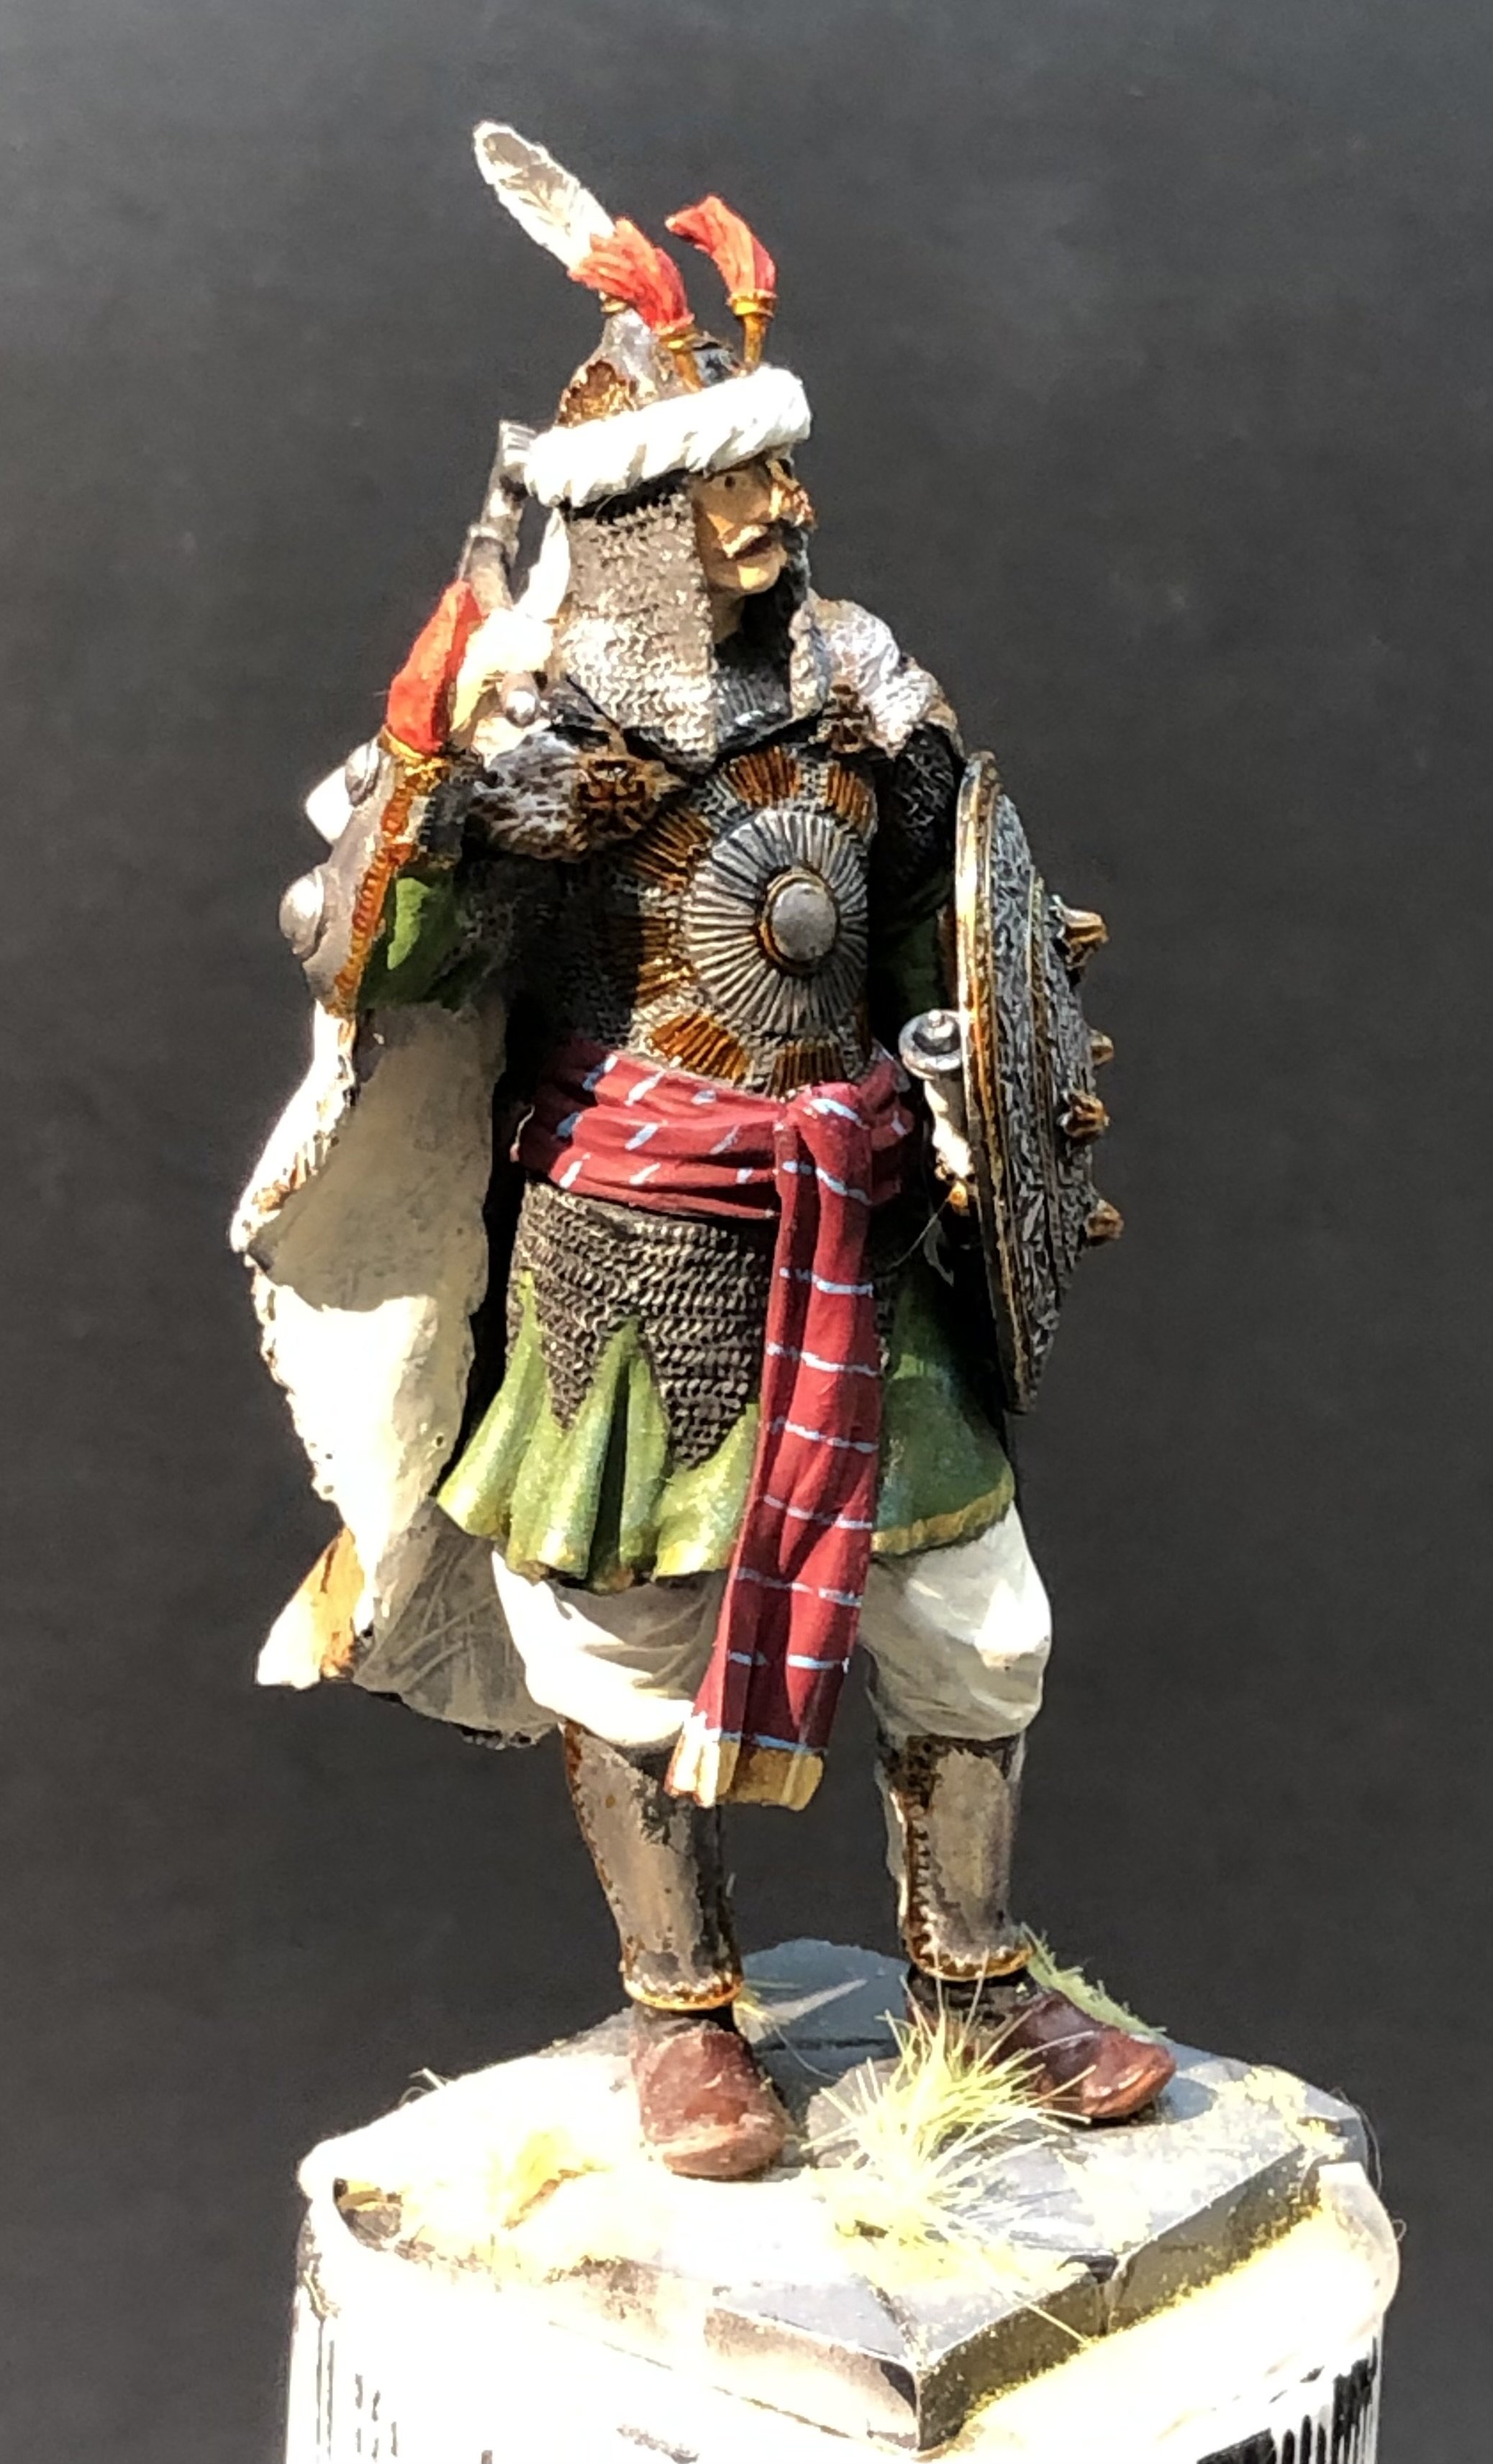
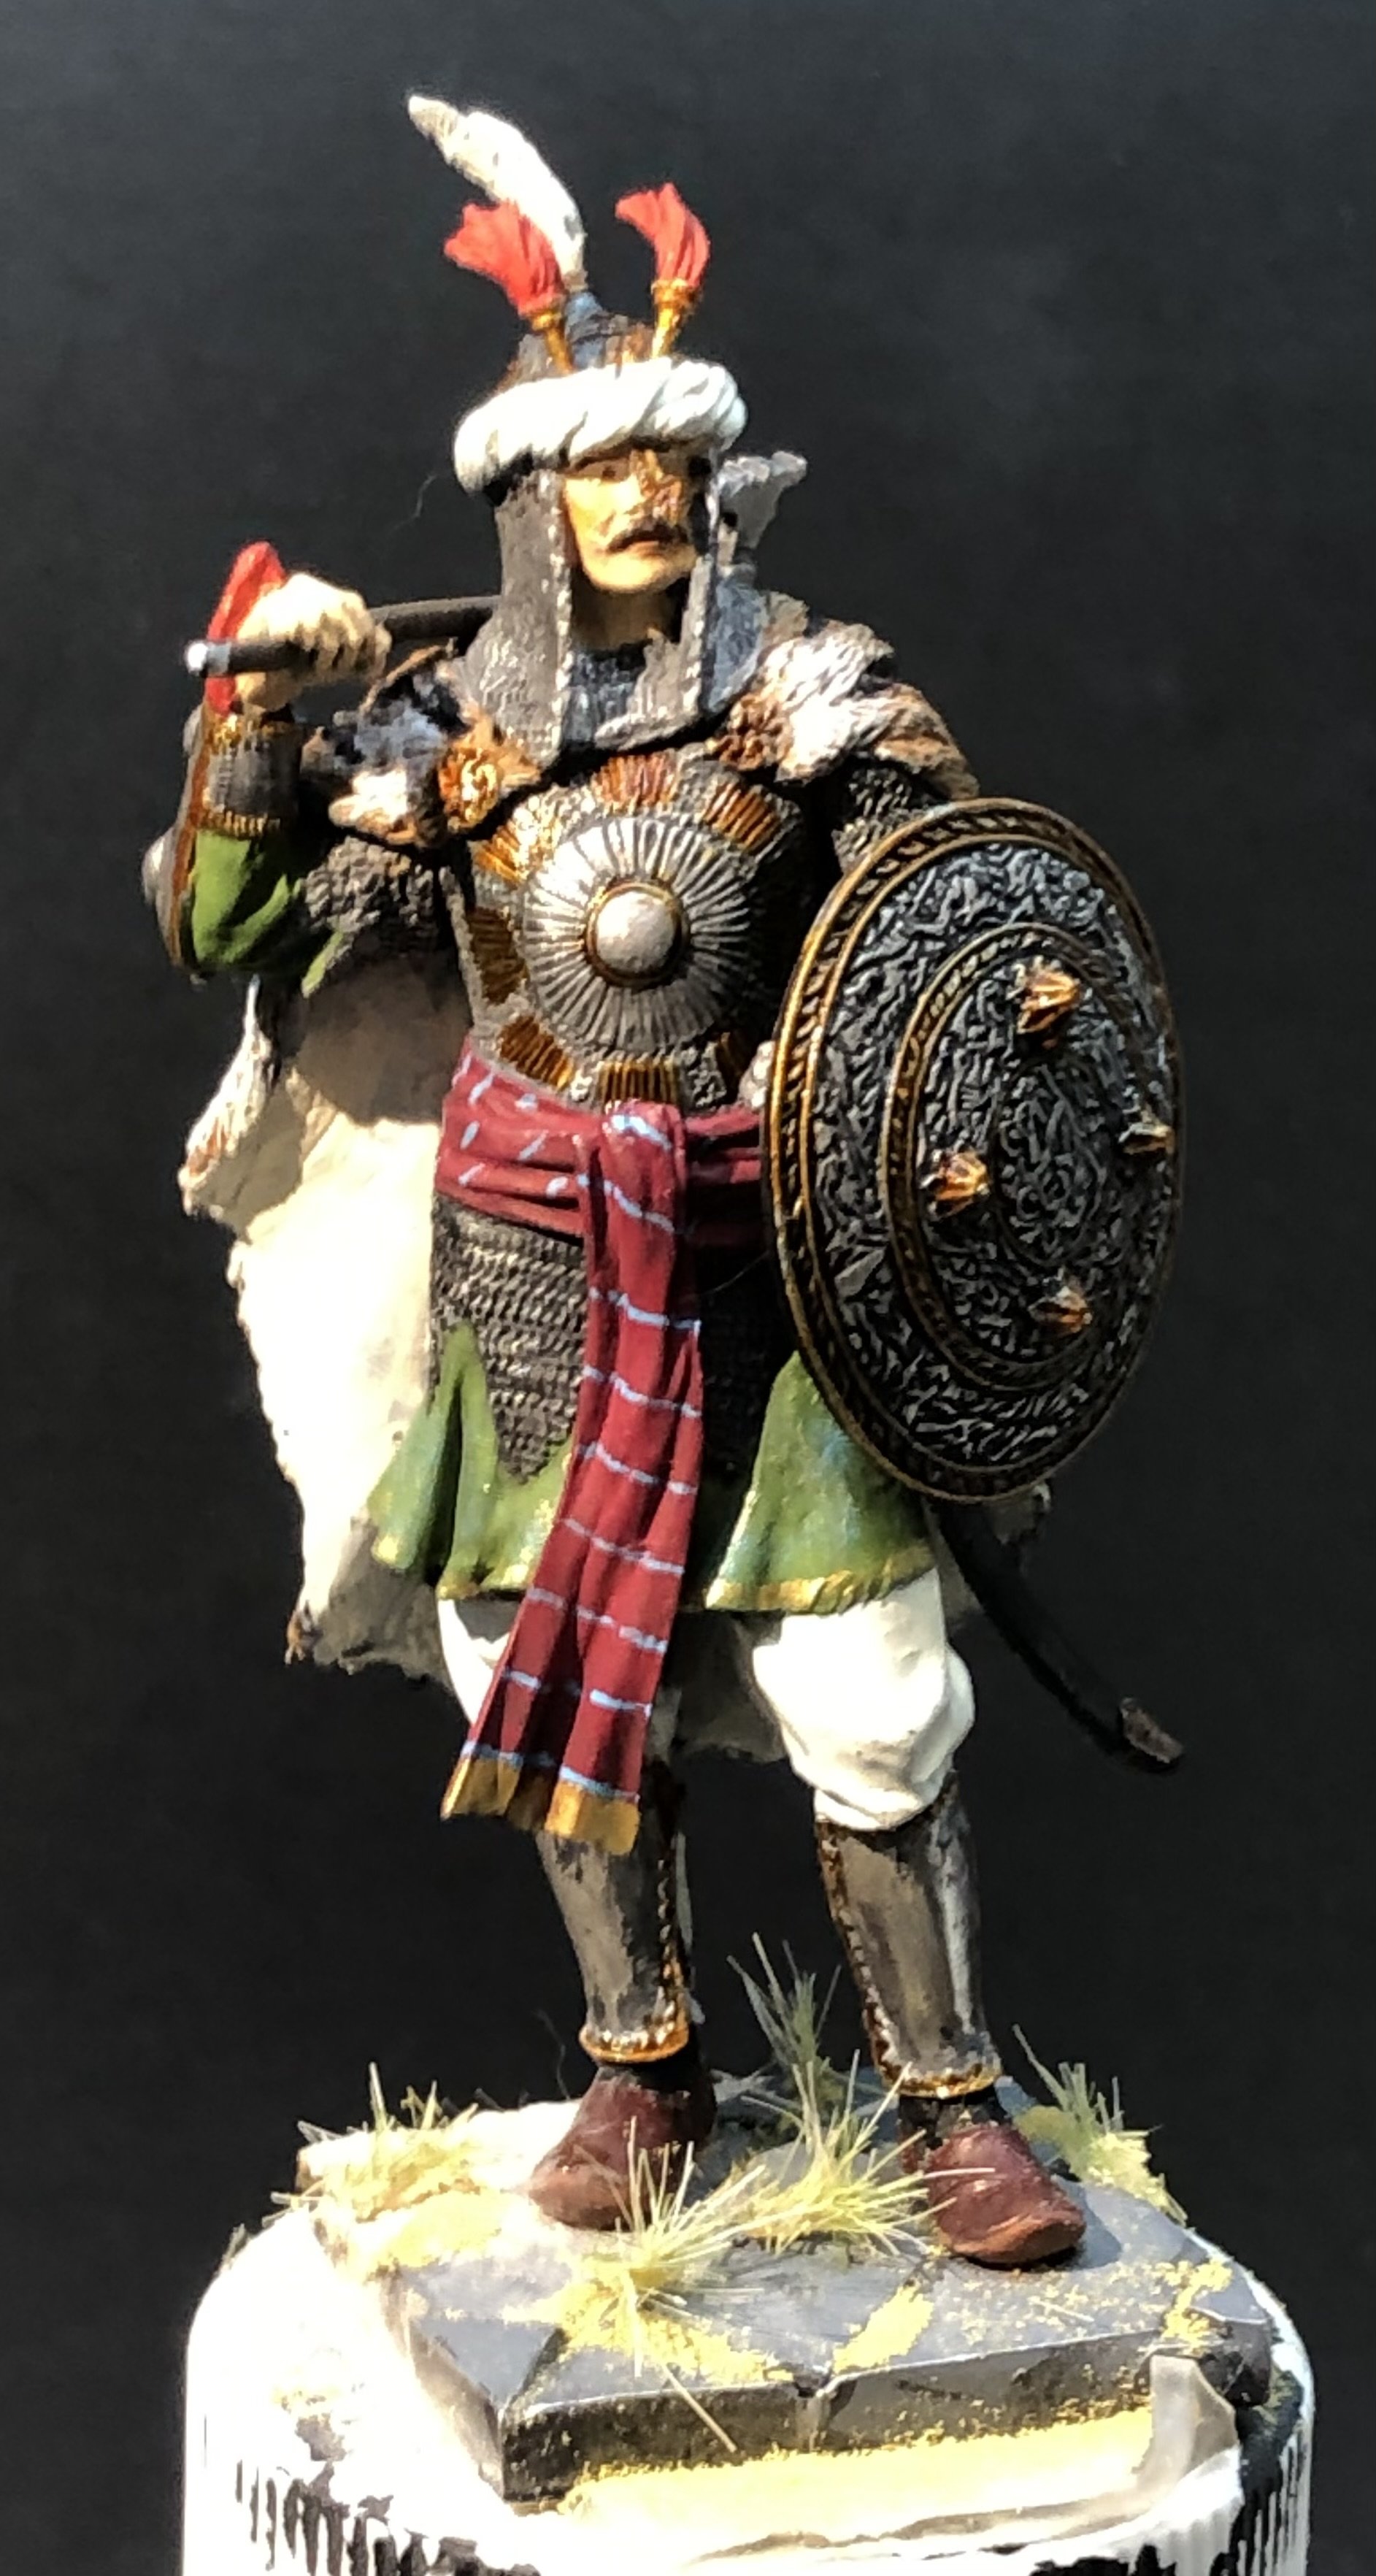
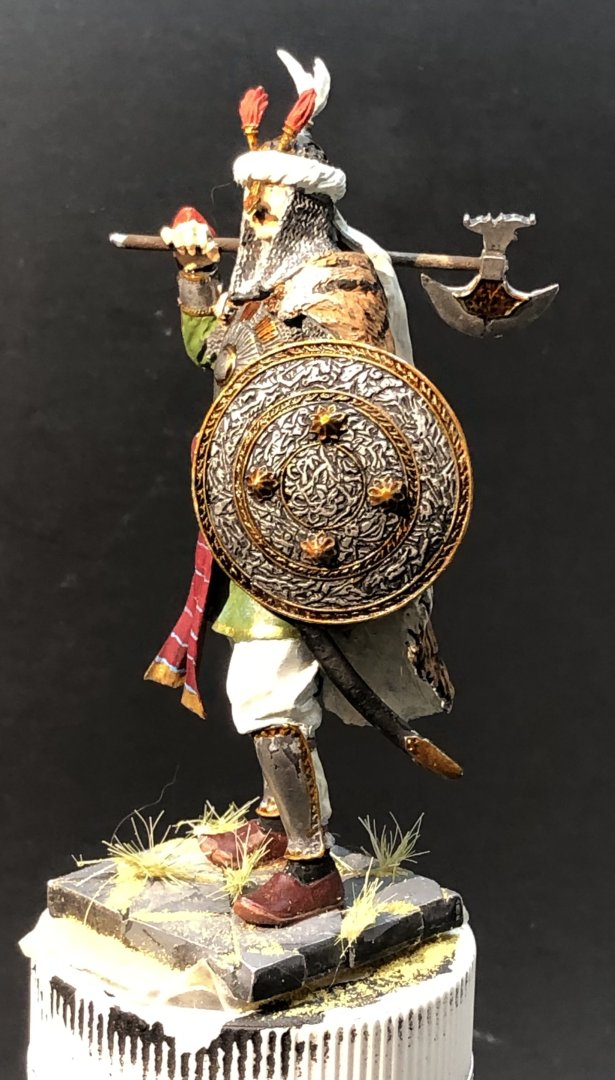
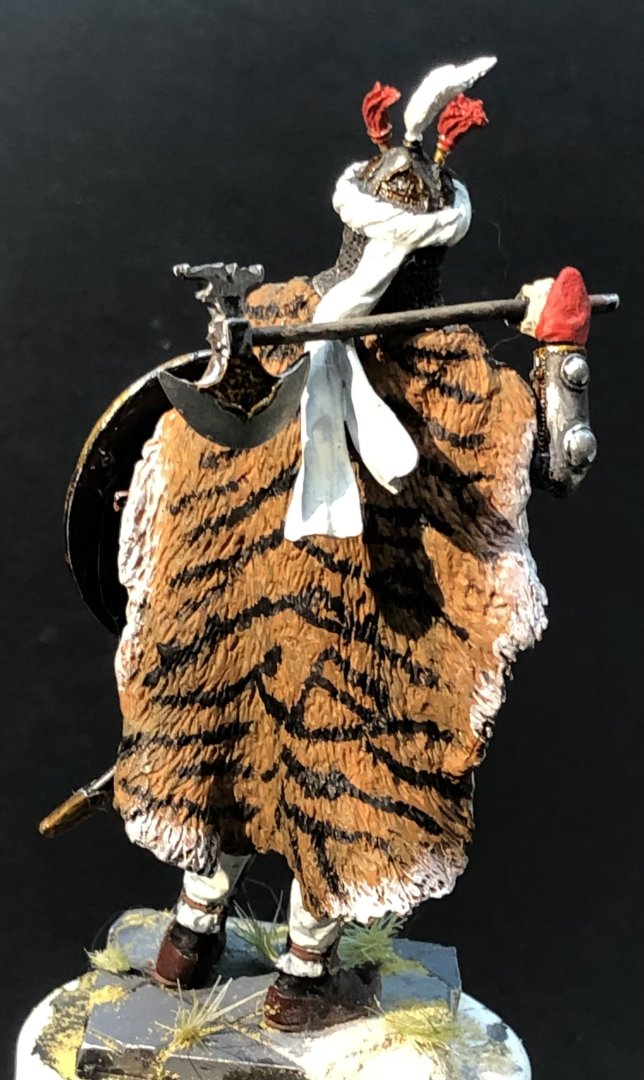
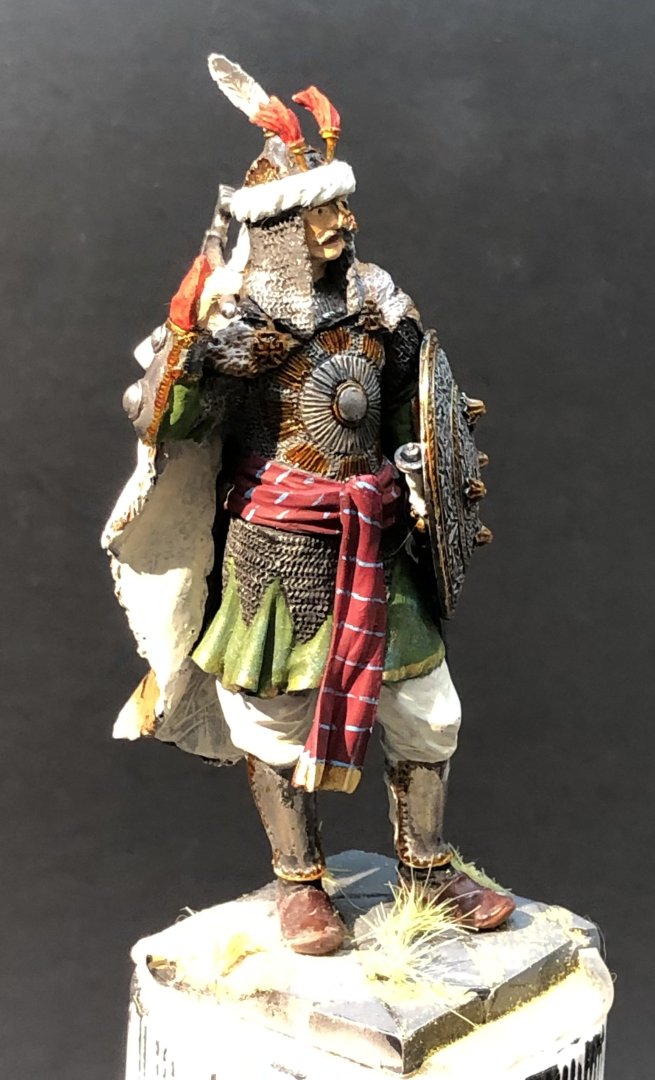
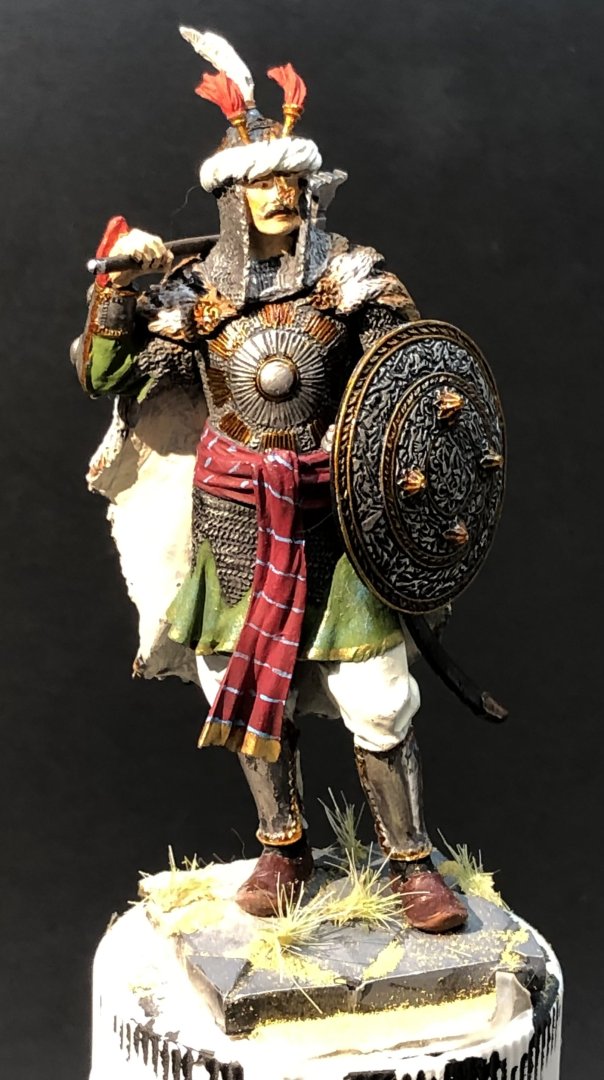
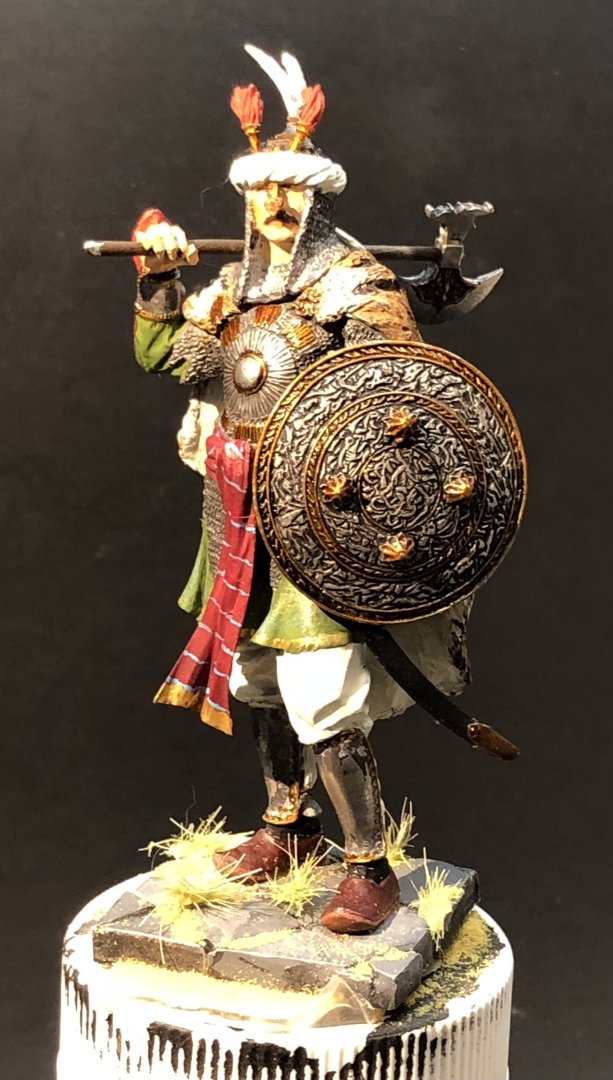
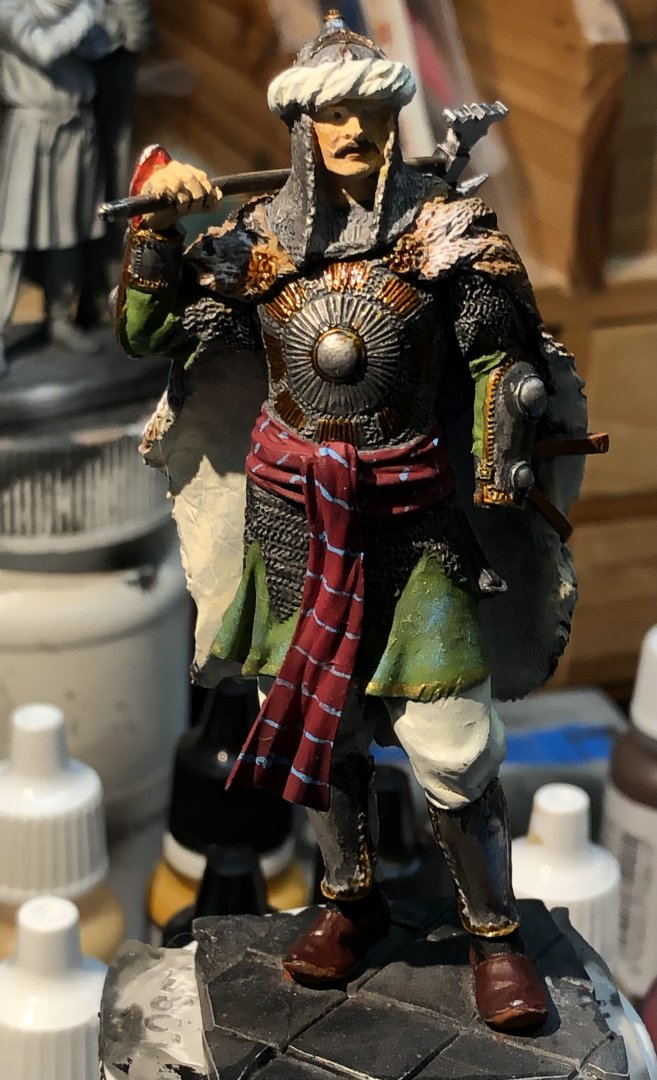
I think the Mughal is finished. I added the nose piece to his helmet. It rather spoils his face but it is supposed to be there so I’ll live with it. I also added the last pieces, the helmet decorations. They were very fiddle to attach, a very small contact area and their weight means that they have to be supported until the glue is completely dried. I switched to ca glue for these parts to stand a chance of success. I decided that the base depicted old paving stones so I added some sand and glued dry grasses into the gaps between the stones. This was a really enjoyable project and I pushed myself a bit trying harder with the details. I would have liked a darker face but I need to experiment more. I also met several Afghans with very light skin and even red hair so he is plausible. I think I will work on another figure before returning to the maritime subjects. Thanks for looking in, all the likes and kind comments alan


- 38 replies
-
- 12
-

-

-
Beautiful work Dan. The paint shading is so delicate and neat. congratulations alan
-
T-90 by Mikegr - FINISHED - AM - 1/72 - PLASTIC
king derelict replied to mikegr's topic in Non-ship/categorised builds
Nicely done Mike. Congratulations alan -
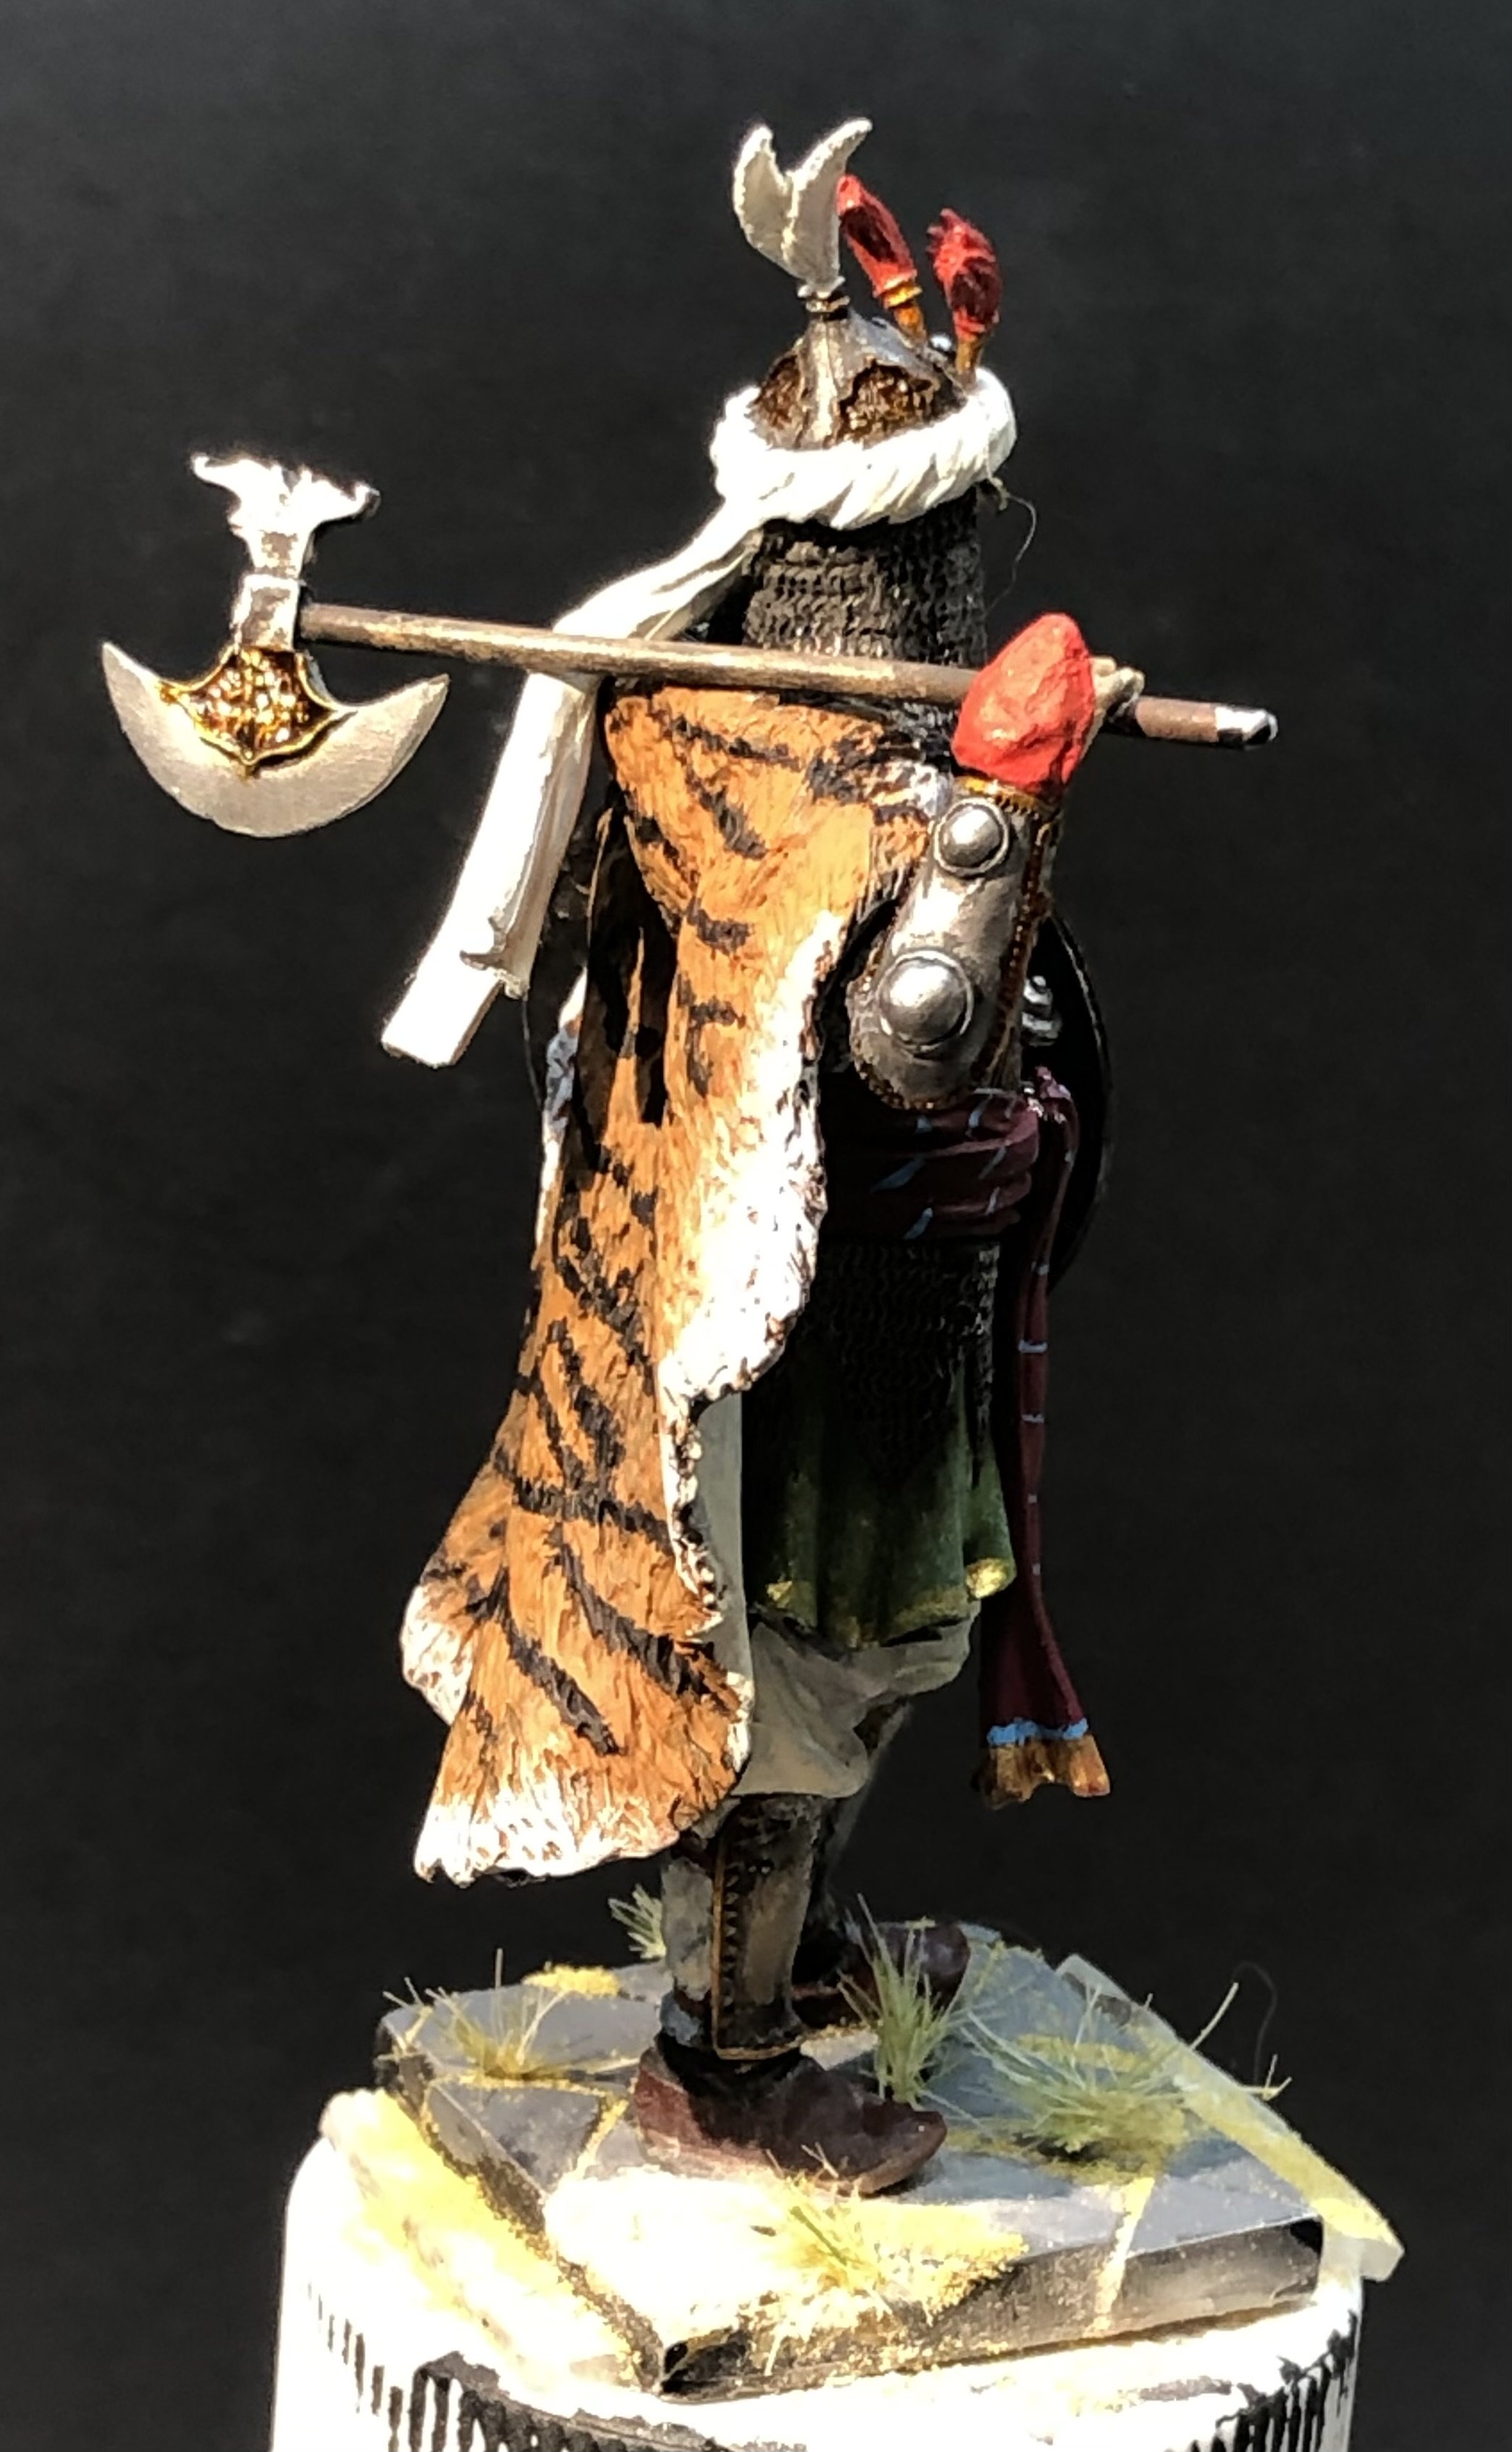
Today has been a learning experience. Adding parts to the figure increases the weight and becomes quite significant. So while I was struggling to get the sword into place I failed to notice the figure peeling off the adhesive tape. That is, until it fell off completely and lay on the workbench in several pieces. Luckily there was nothing bent or broken so the day was spent gradually putting it all back together. Then I finally got the tulwar (sword) where it belongs and added the shield. Back to touching up paint that had chipped during the free flight event and then the helmet decorations. as a bit of light relief I have few ideas to perk up the base a bit. Thanks for looking in and the likes and kind comments. alan

-
Thank you Mike. The figure is very nicely sculpted which really helps. alan
-
Thank you very much OC. This is a great subject to paint. alan
-
Thank you very much Jack, it’s a great figure to paint. alan
-
Nice work on the flight deck lines. They look great. alan
- 40 replies
-
- 4
-

-
-
- Five Star
- Akitsu Maru
- (and 1 more)
-
T-90 by Mikegr - FINISHED - AM - 1/72 - PLASTIC
king derelict replied to mikegr's topic in Non-ship/categorised builds
Looking very nice Mike. Great idea for the red lenses, I need to remember that. I just broke my moratorium on new kits and bought the Vespid Leopard. alan -
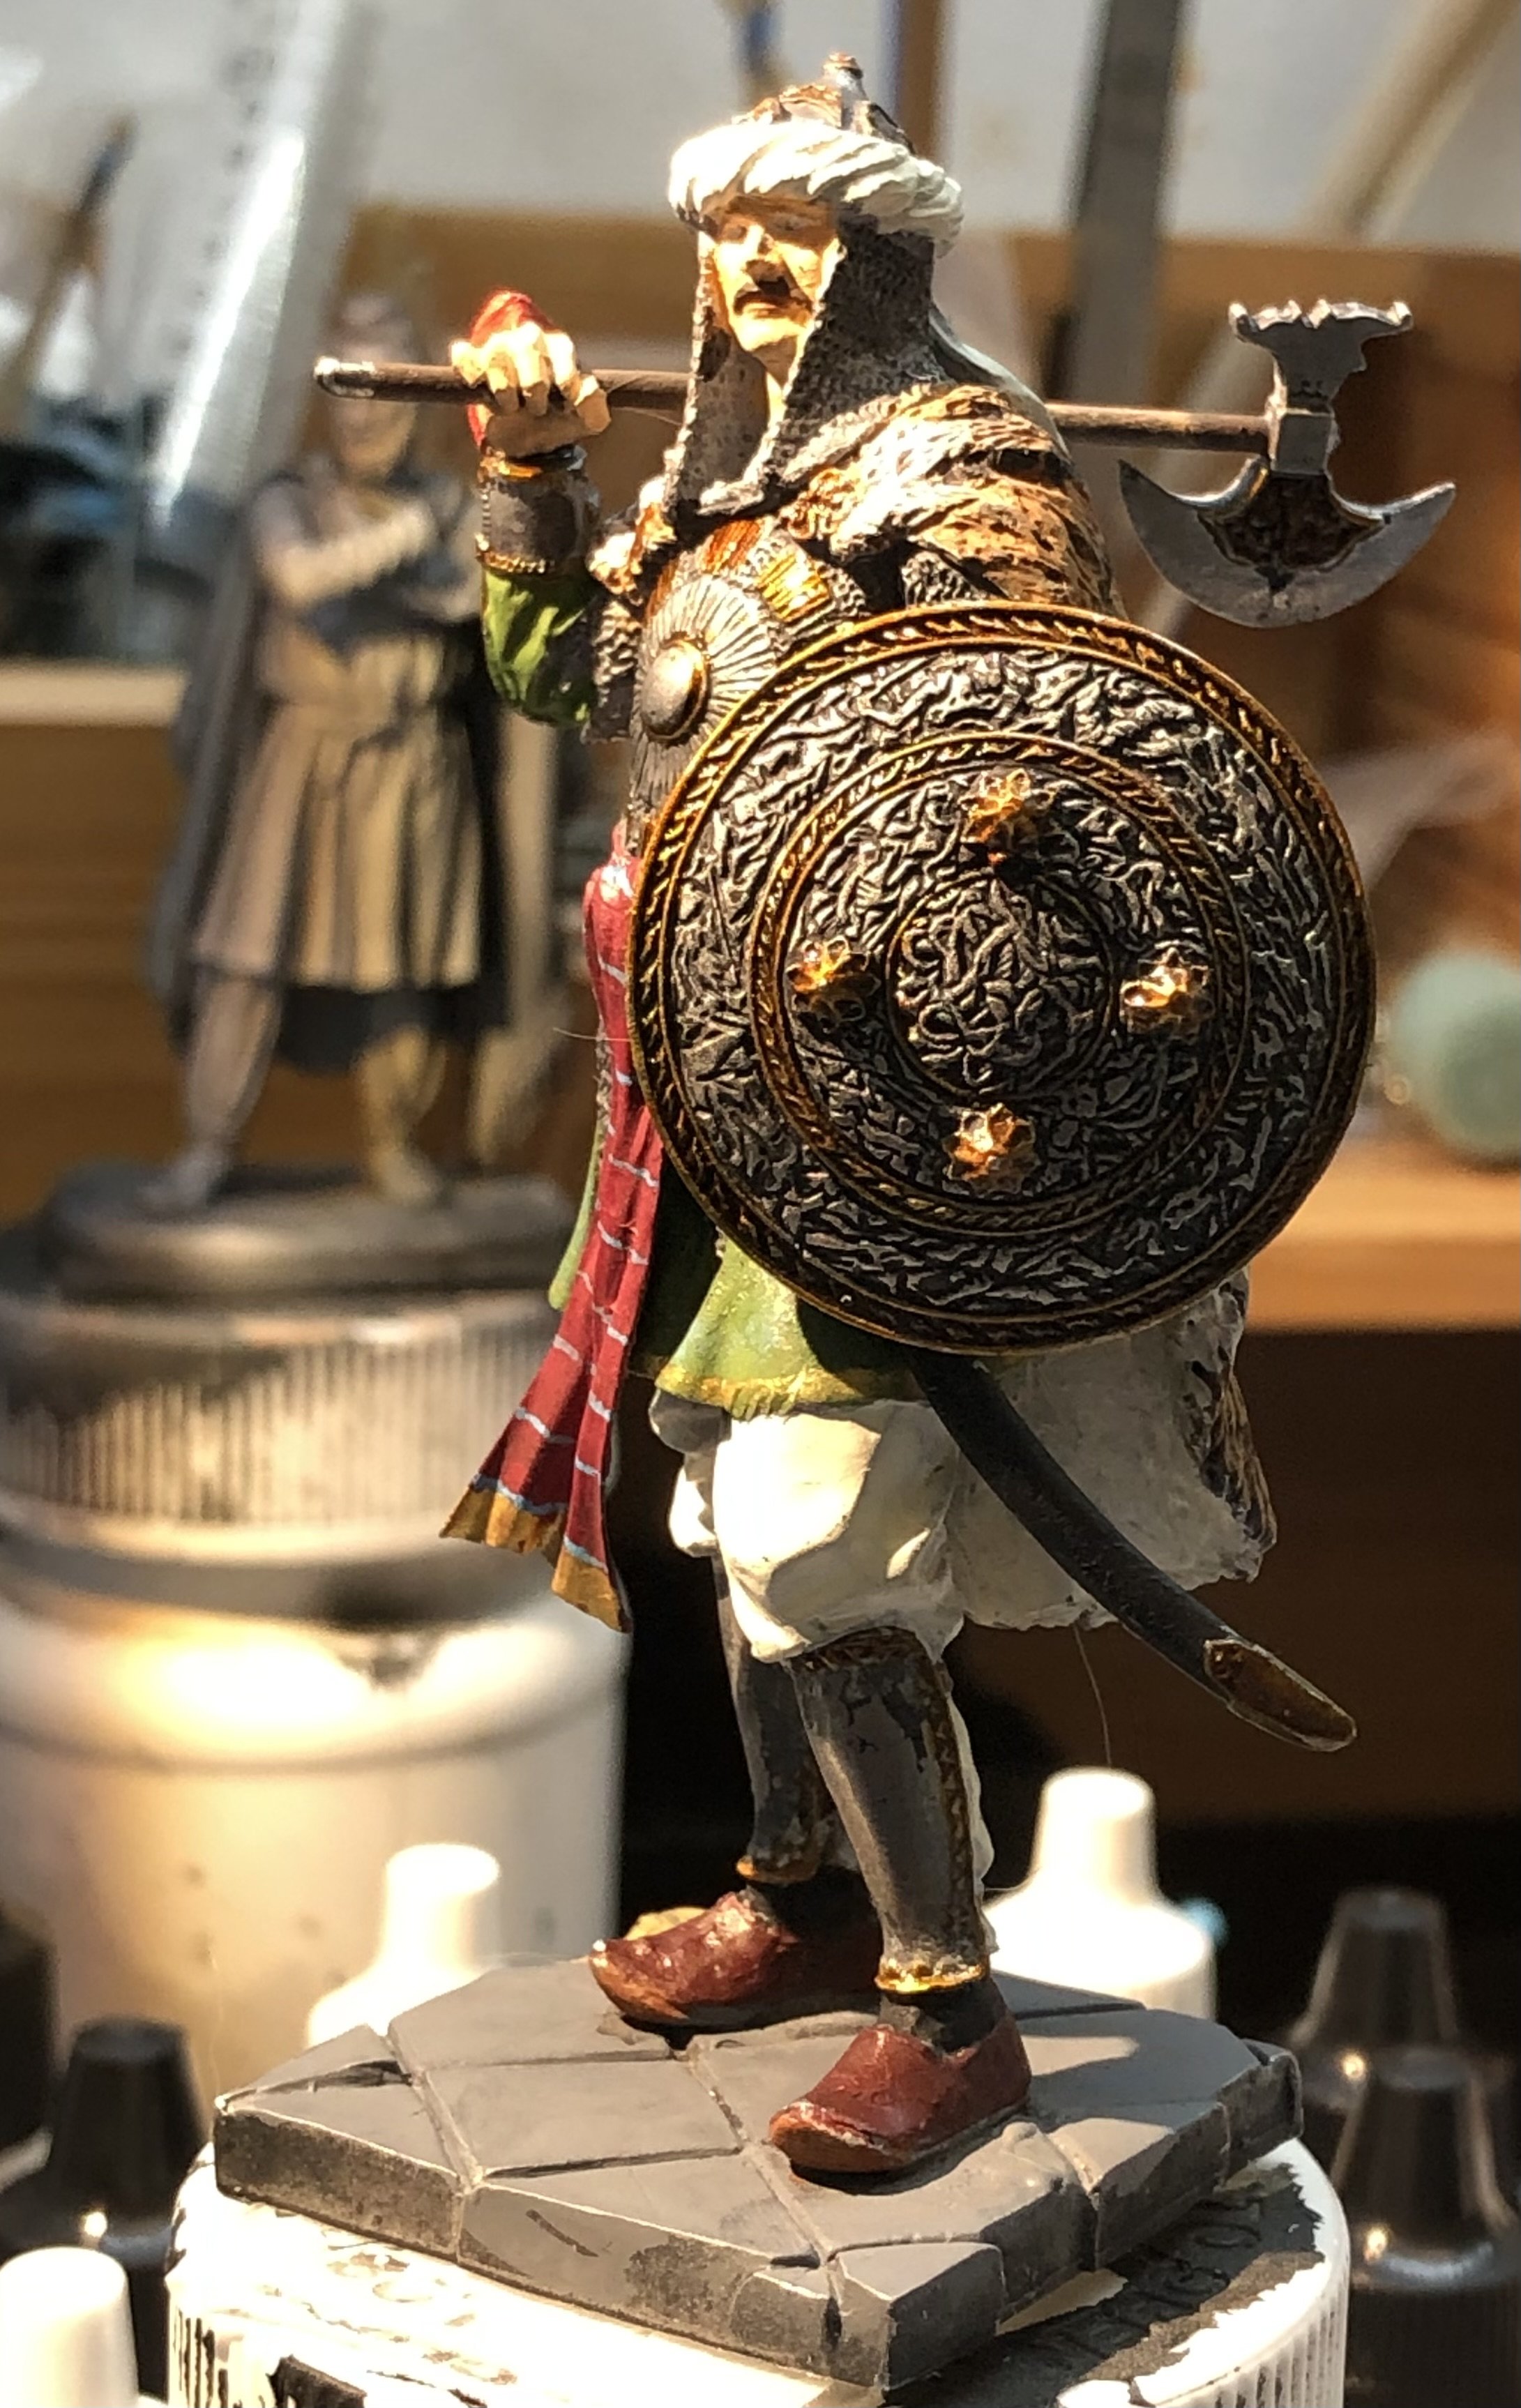
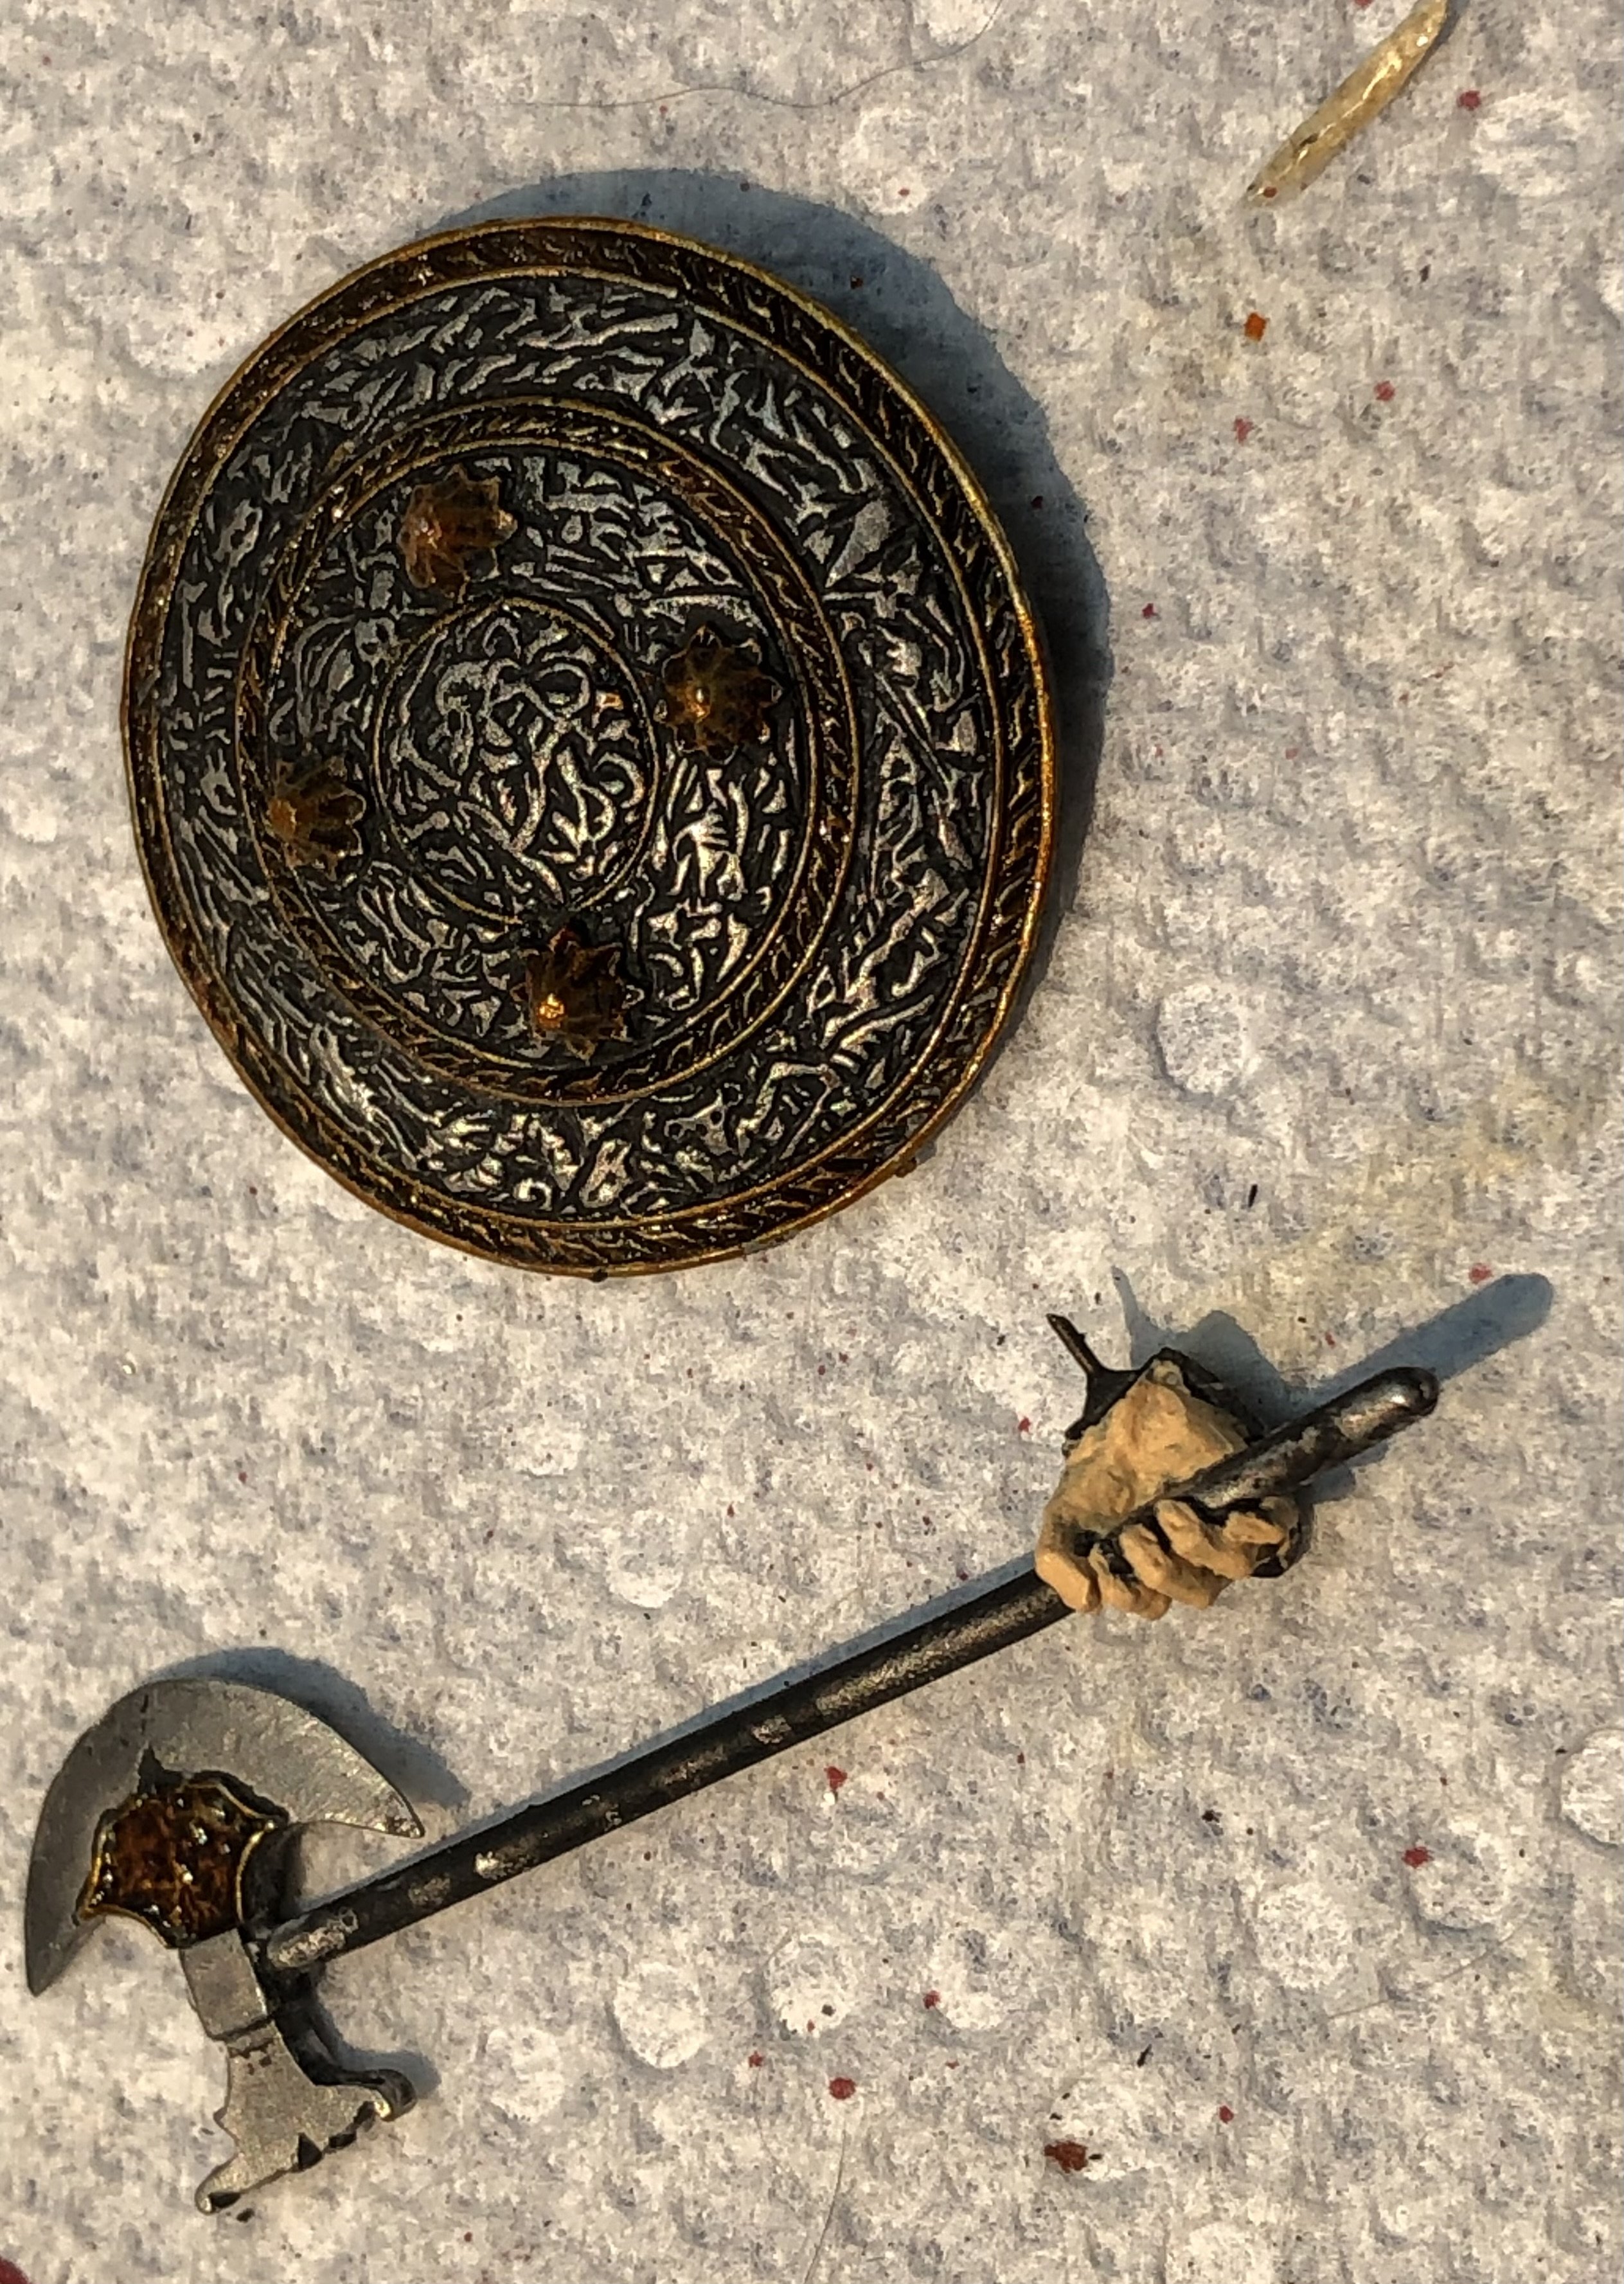
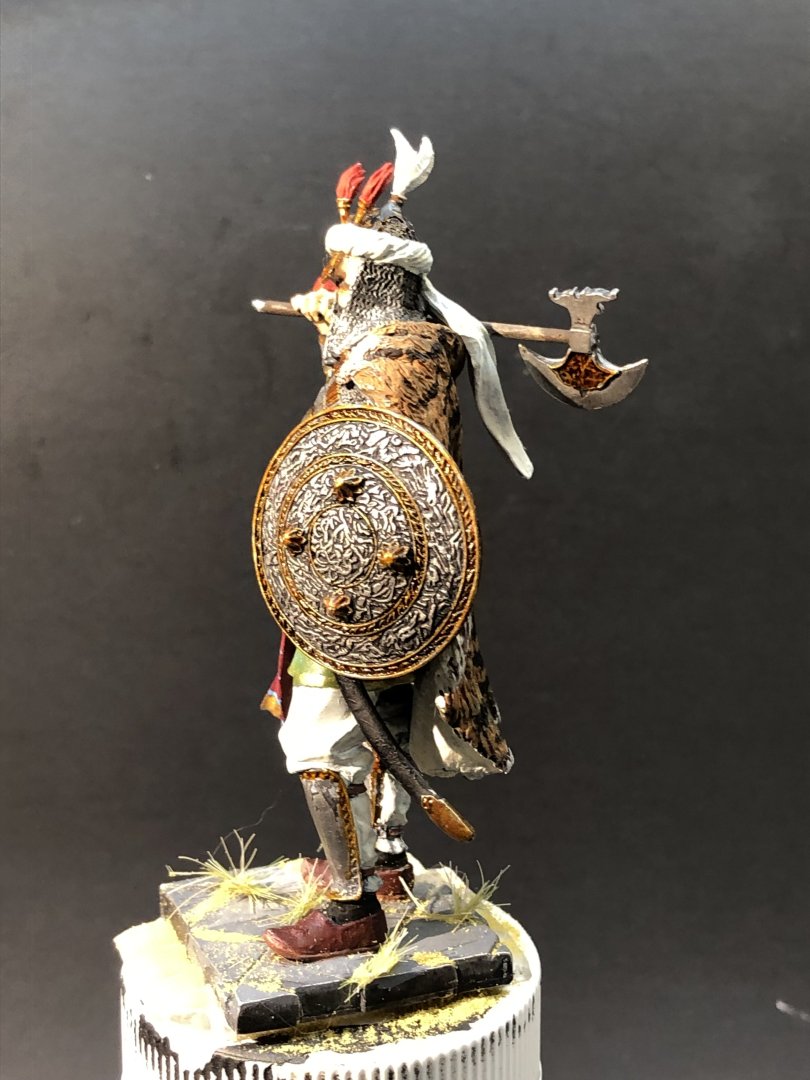
I added the ends of the sash and the tails of the helmet cloth. I continued painting the thin blue stripes on the sash. I was convinced that I would be unable to do this but I surprised myself. It needs a little more work but it’s not too bad for a first attempt. The new brush helps a lot too but it makes me feel that I can tackle figures that need this sort of details. The axe and his hand was added and some touch up will needed there. There are some small pieces to add to the helmet, the sword and shield to complete the figure. The base doesn’t lend itself to anything extravagant. Thanks for looking in, the likes and comments. Alan


- 38 replies
-
- 11
-
-
-
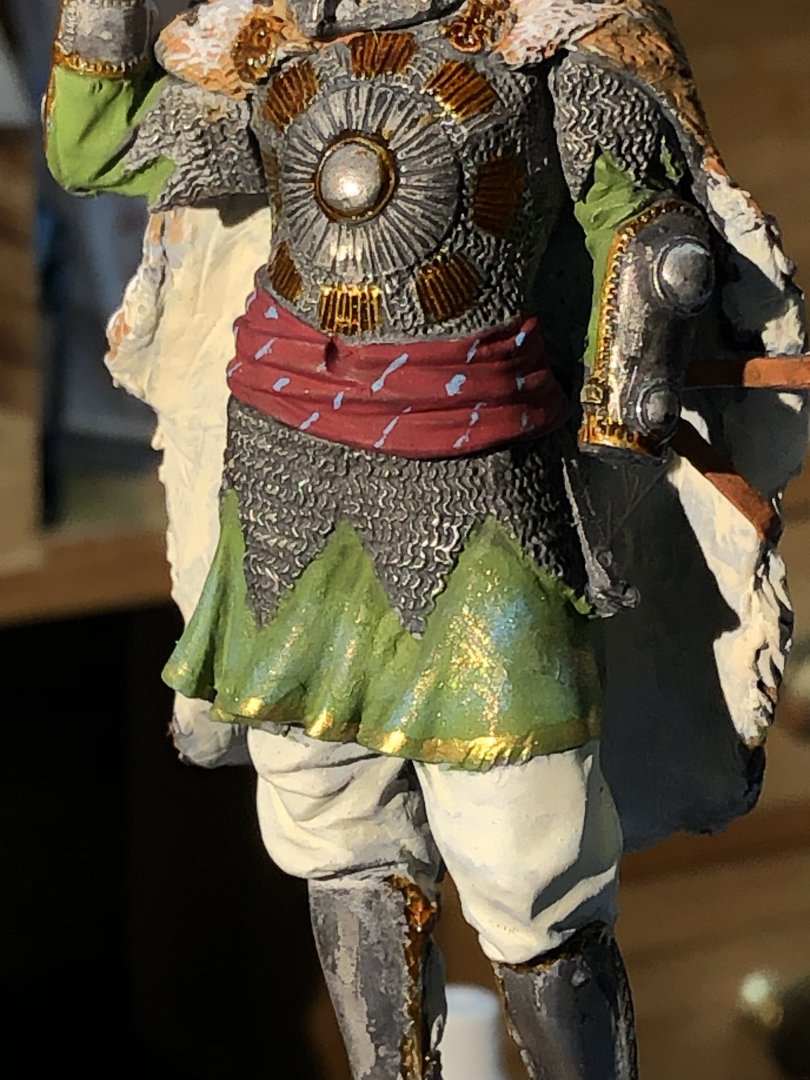
I returned the face back to the basic skin tone, prepared for the eyes and will try again tomorrow. i finished the shield and started on his battle axe which seems a fearsome weapon. I got brave and dry brushes a small amount of blue followed by slightly more gold onto the tunic. The intent was to simulate embroidered details on the cloth which I don’t think I can paint as individual lines. So far I’m happy with the result, I think it is better than the plain green but it’s a technique I need work on. I also added the stripes to his sash. A few lines will be tightened up tomorrow but overall not too bad. I’m not sure whether that color combination makes him an Old Etonian.😀 Thanks for looking in, the likes and encouraging comments. Alan


- 38 replies
-
- 11
-
-
Thank you very much Rob, Each figure is a new learning experience but it wouldn’t be much fun to just knock them out without trying to improve. Alan
-
Thank you very much Ken. It’s always good to have an expert weigh in 😎 Alan