HOLIDAY DONATION DRIVE - SUPPORT MSW - DO YOUR PART TO KEEP THIS GREAT FORUM GOING!
×


king derelict
-
Posts
3,250 -
Joined
-
Last visited
Content Type
Profiles
Forums
Gallery
Events
Everything posted by king derelict
-
Thank you very much OC. This is a great subject to paint. alan
-
Thank you very much Jack, it’s a great figure to paint. alan
-
Nice work on the flight deck lines. They look great. alan
- 16 replies
-
- 4
-

-

-
- Five Star
- Akitsu Maru
- (and 1 more)
-
T-90 by Mikegr - FINISHED - AM - 1/72 - PLASTIC
king derelict replied to mikegr's topic in Non-ship/categorised builds
Looking very nice Mike. Great idea for the red lenses, I need to remember that. I just broke my moratorium on new kits and bought the Vespid Leopard. alan -
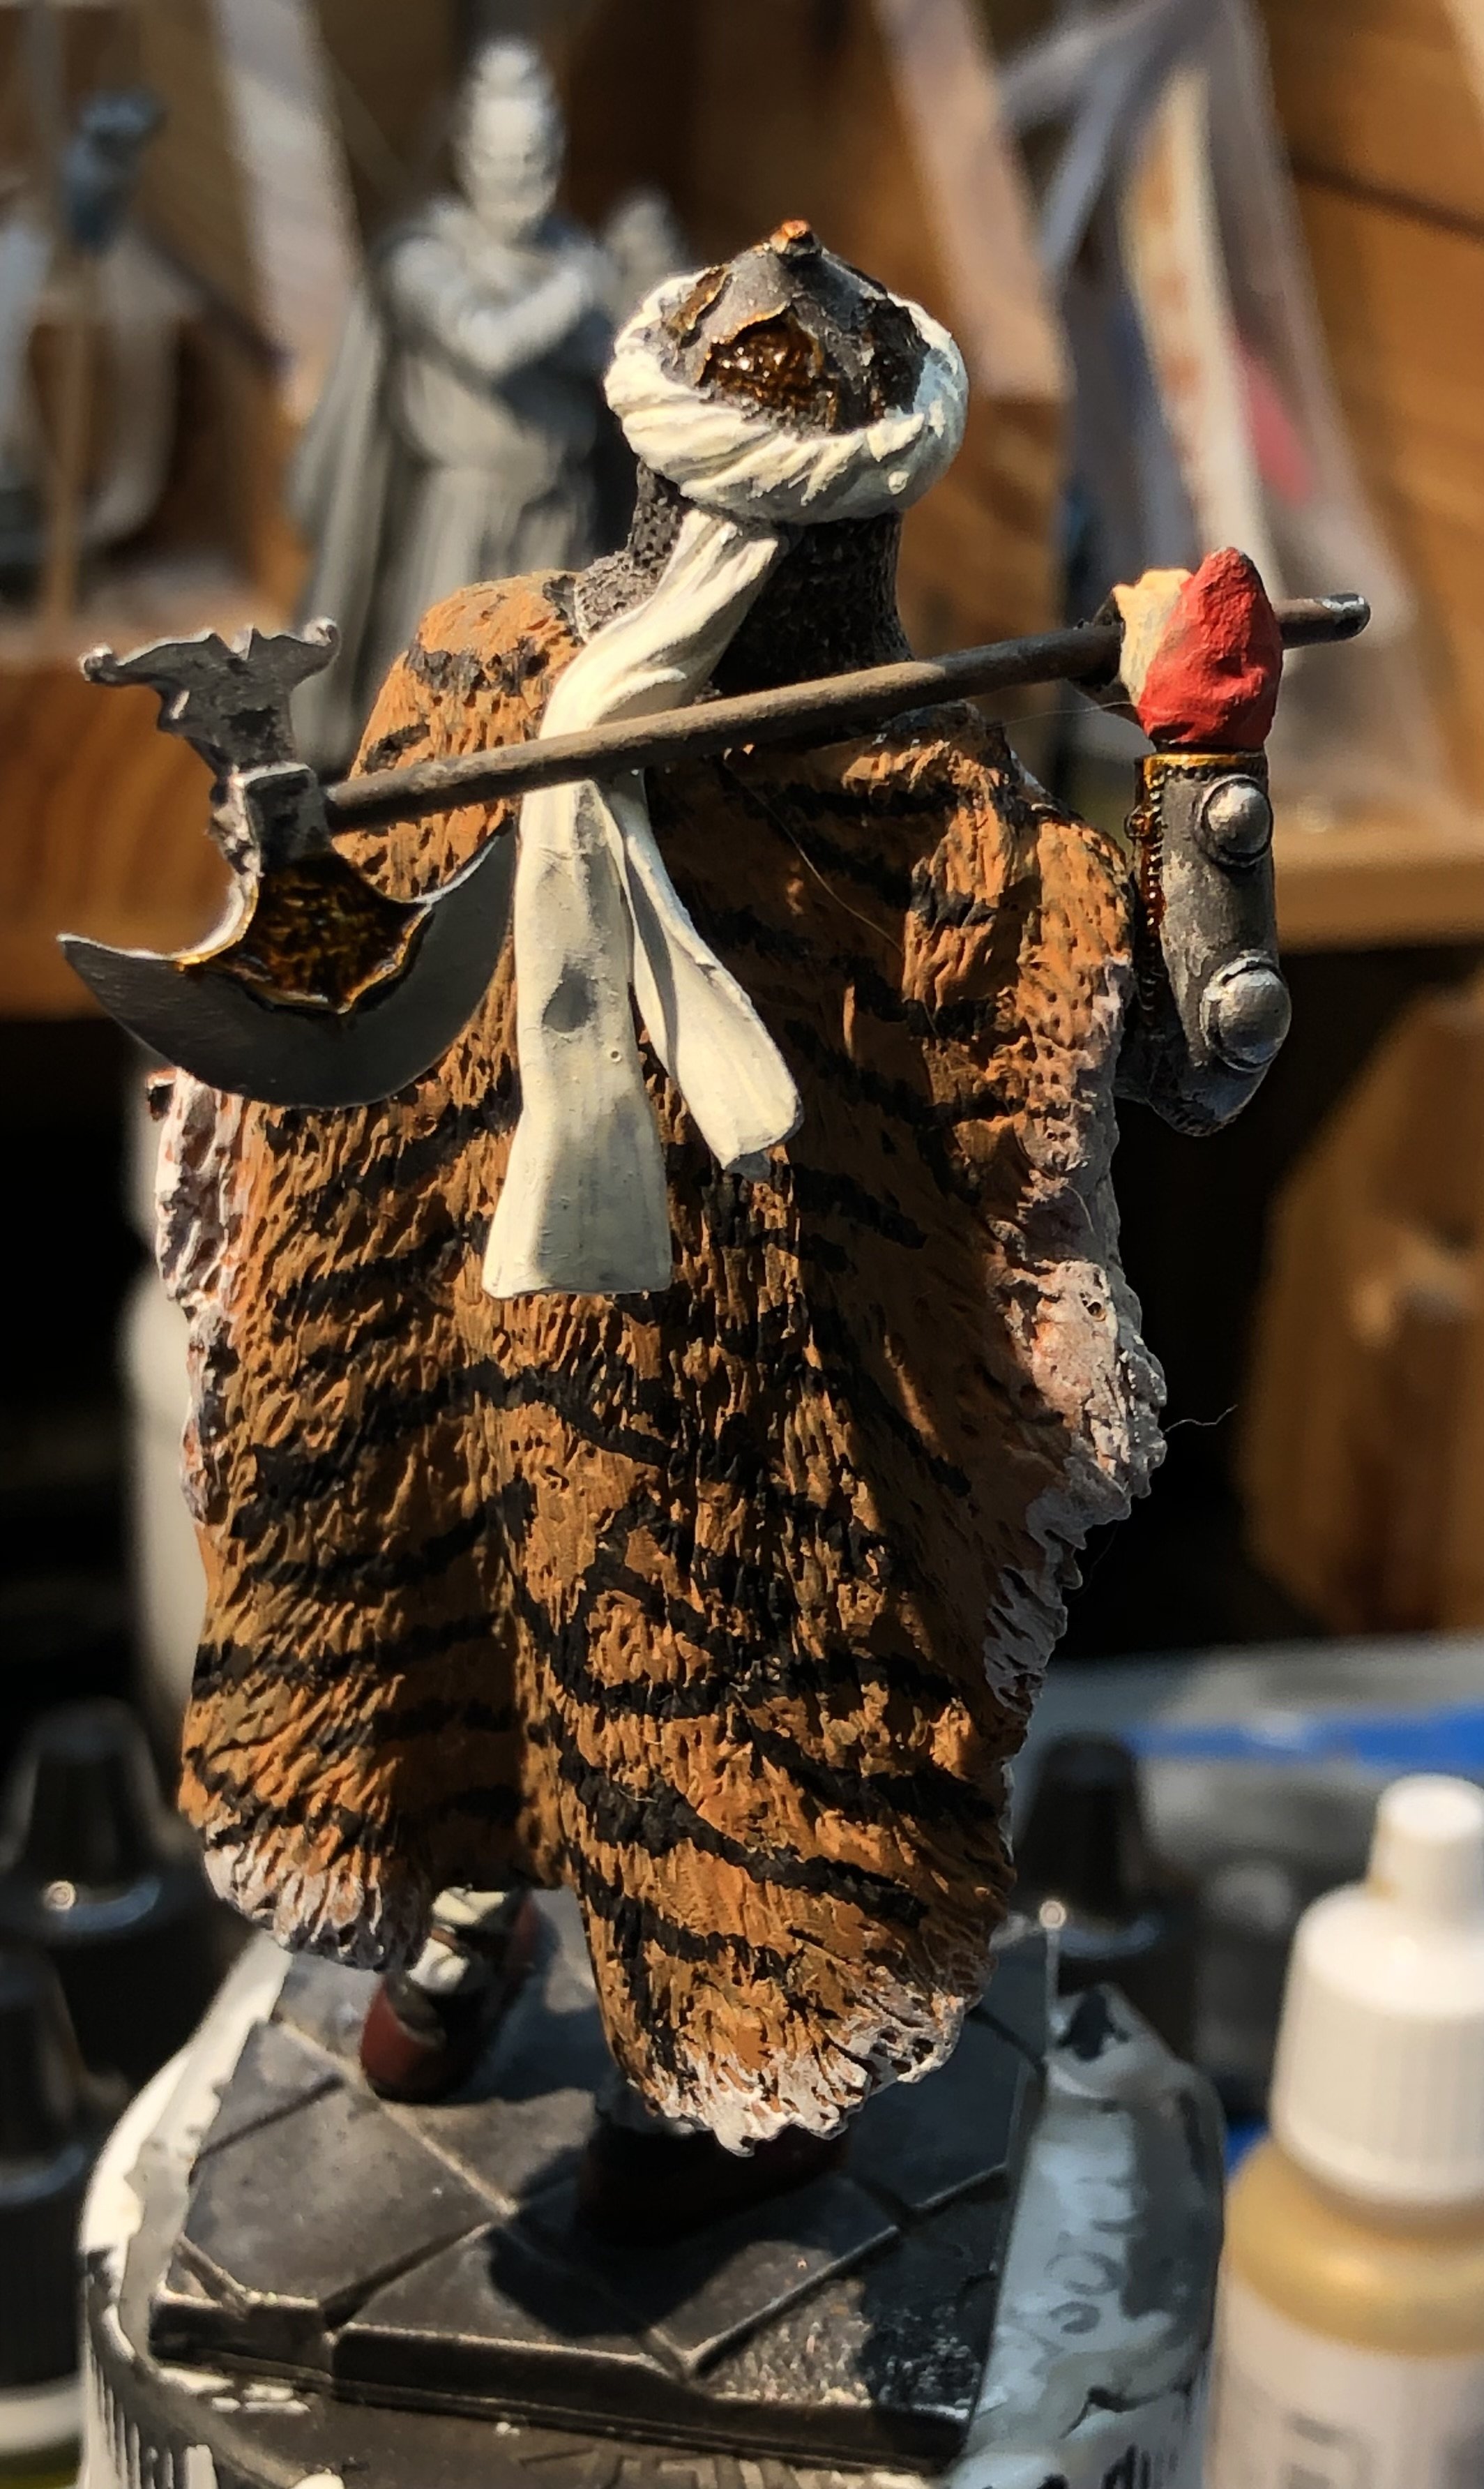
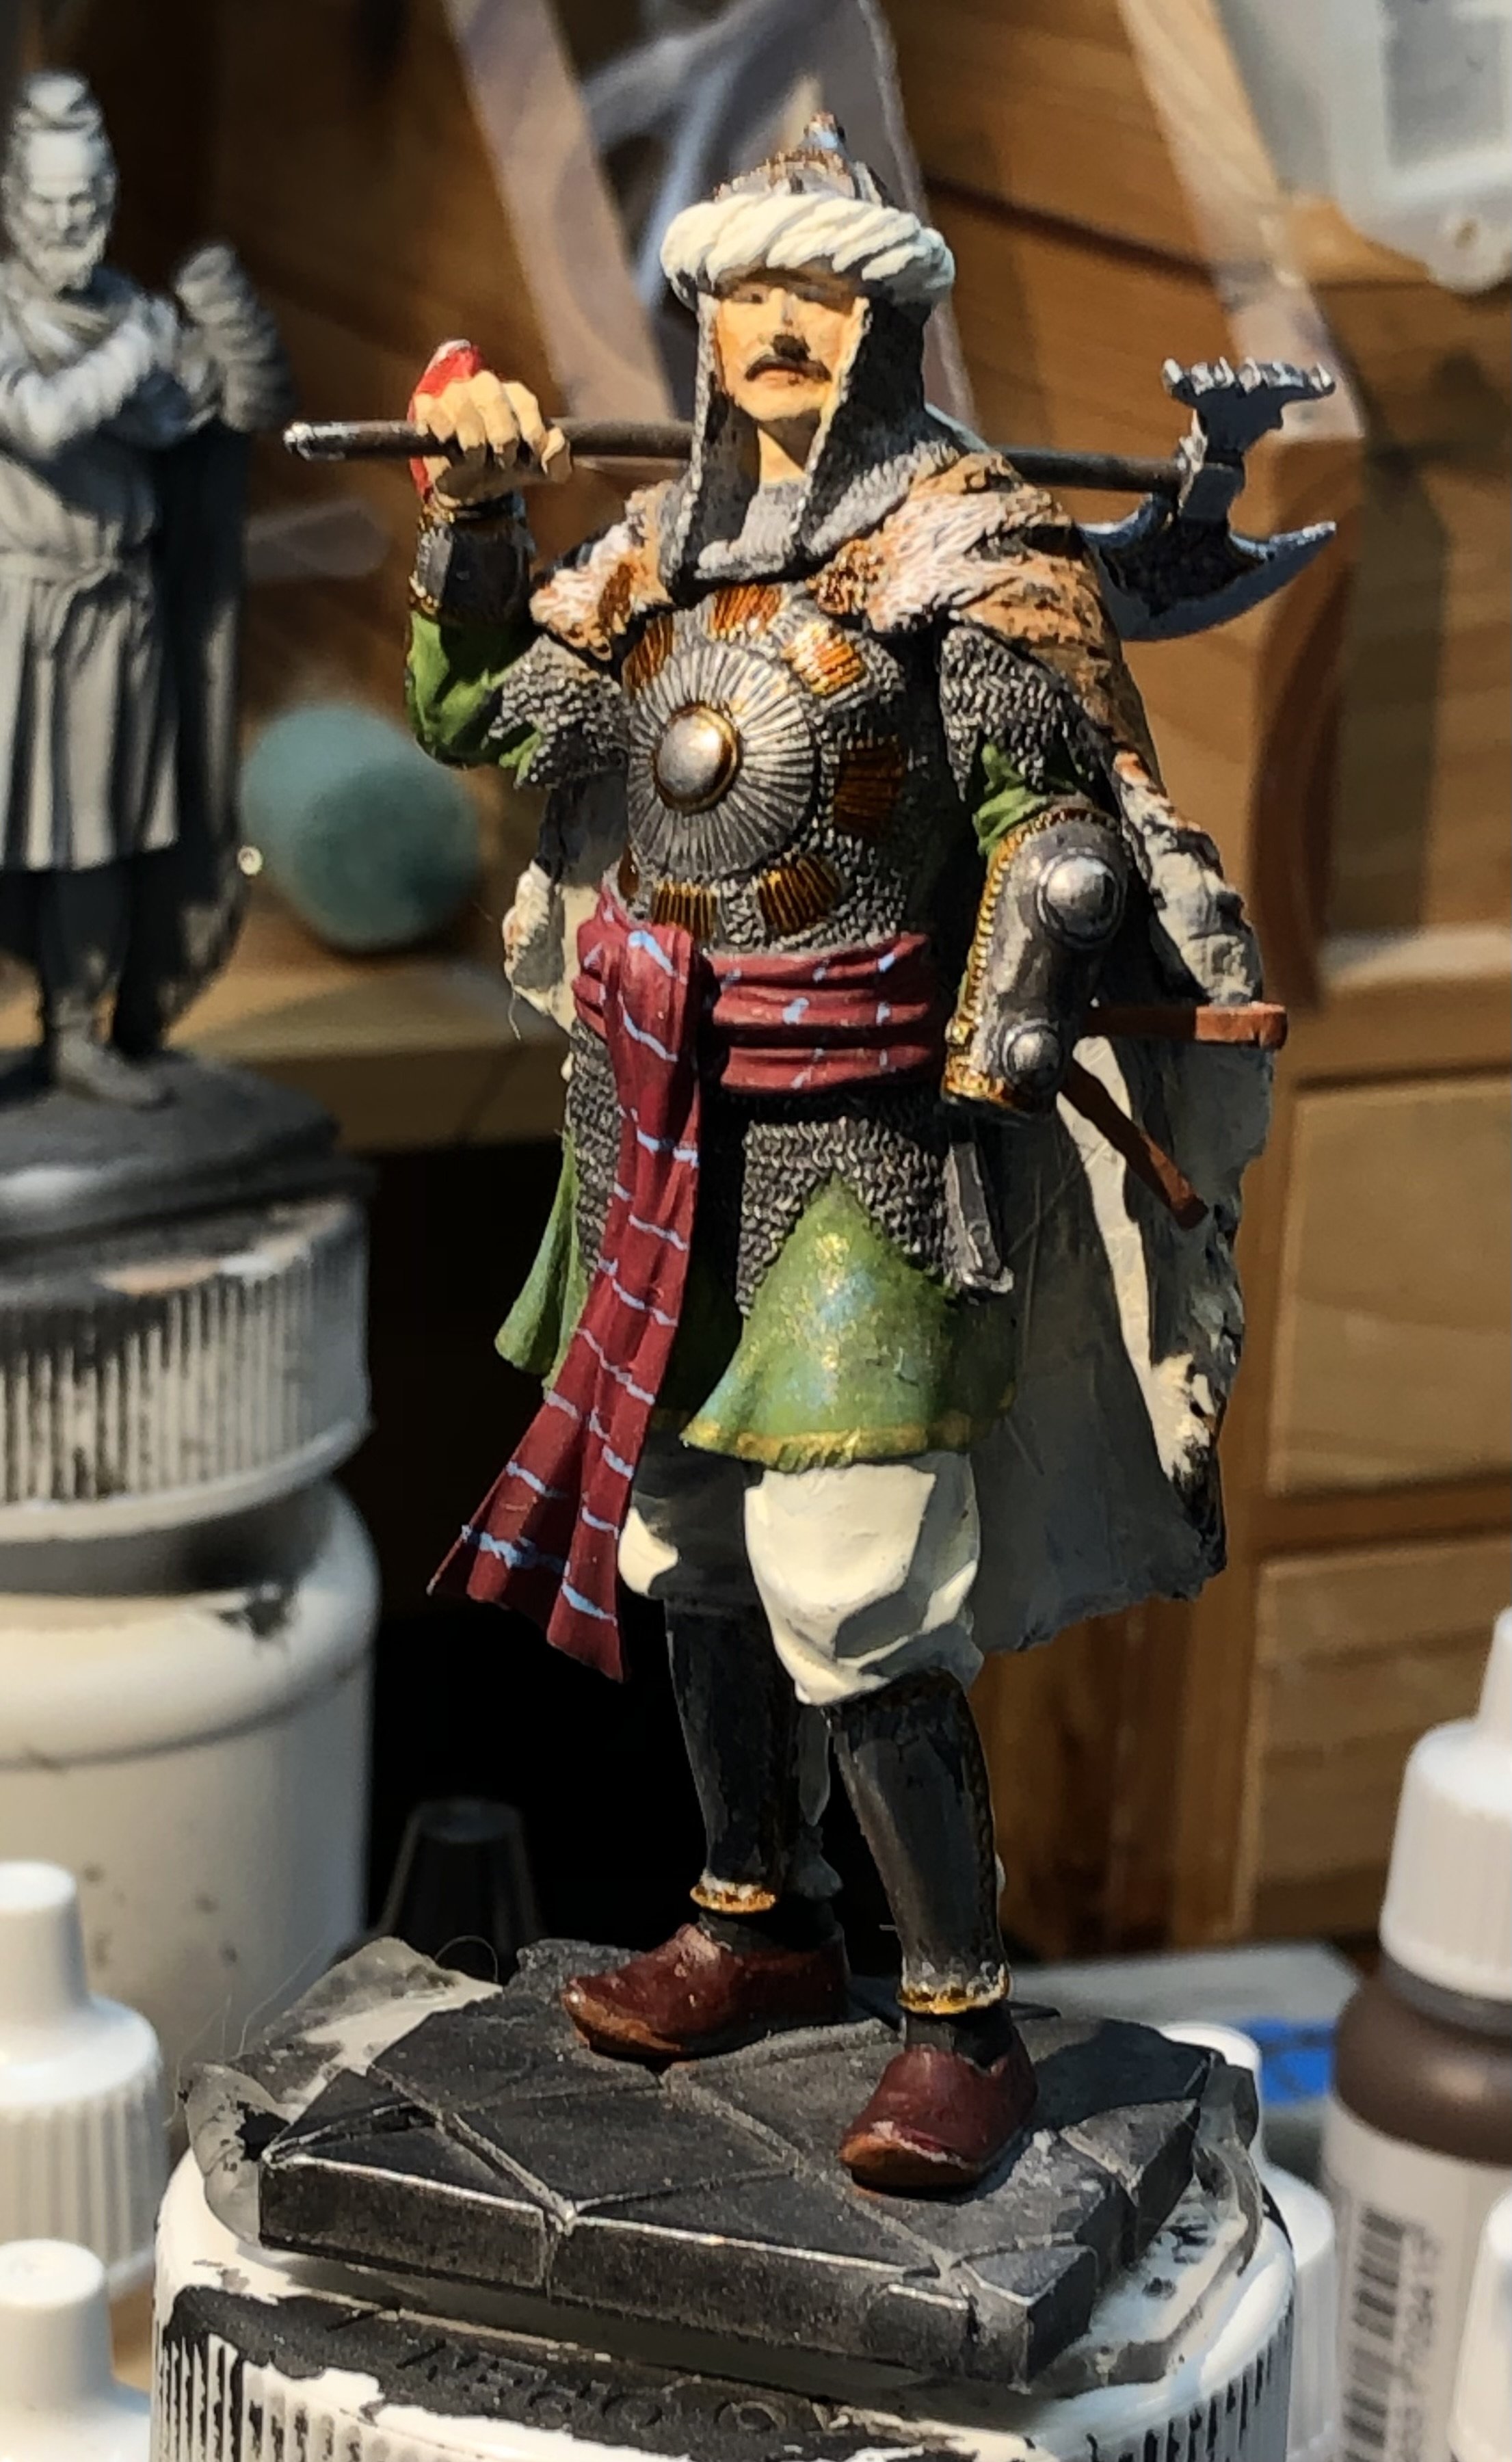
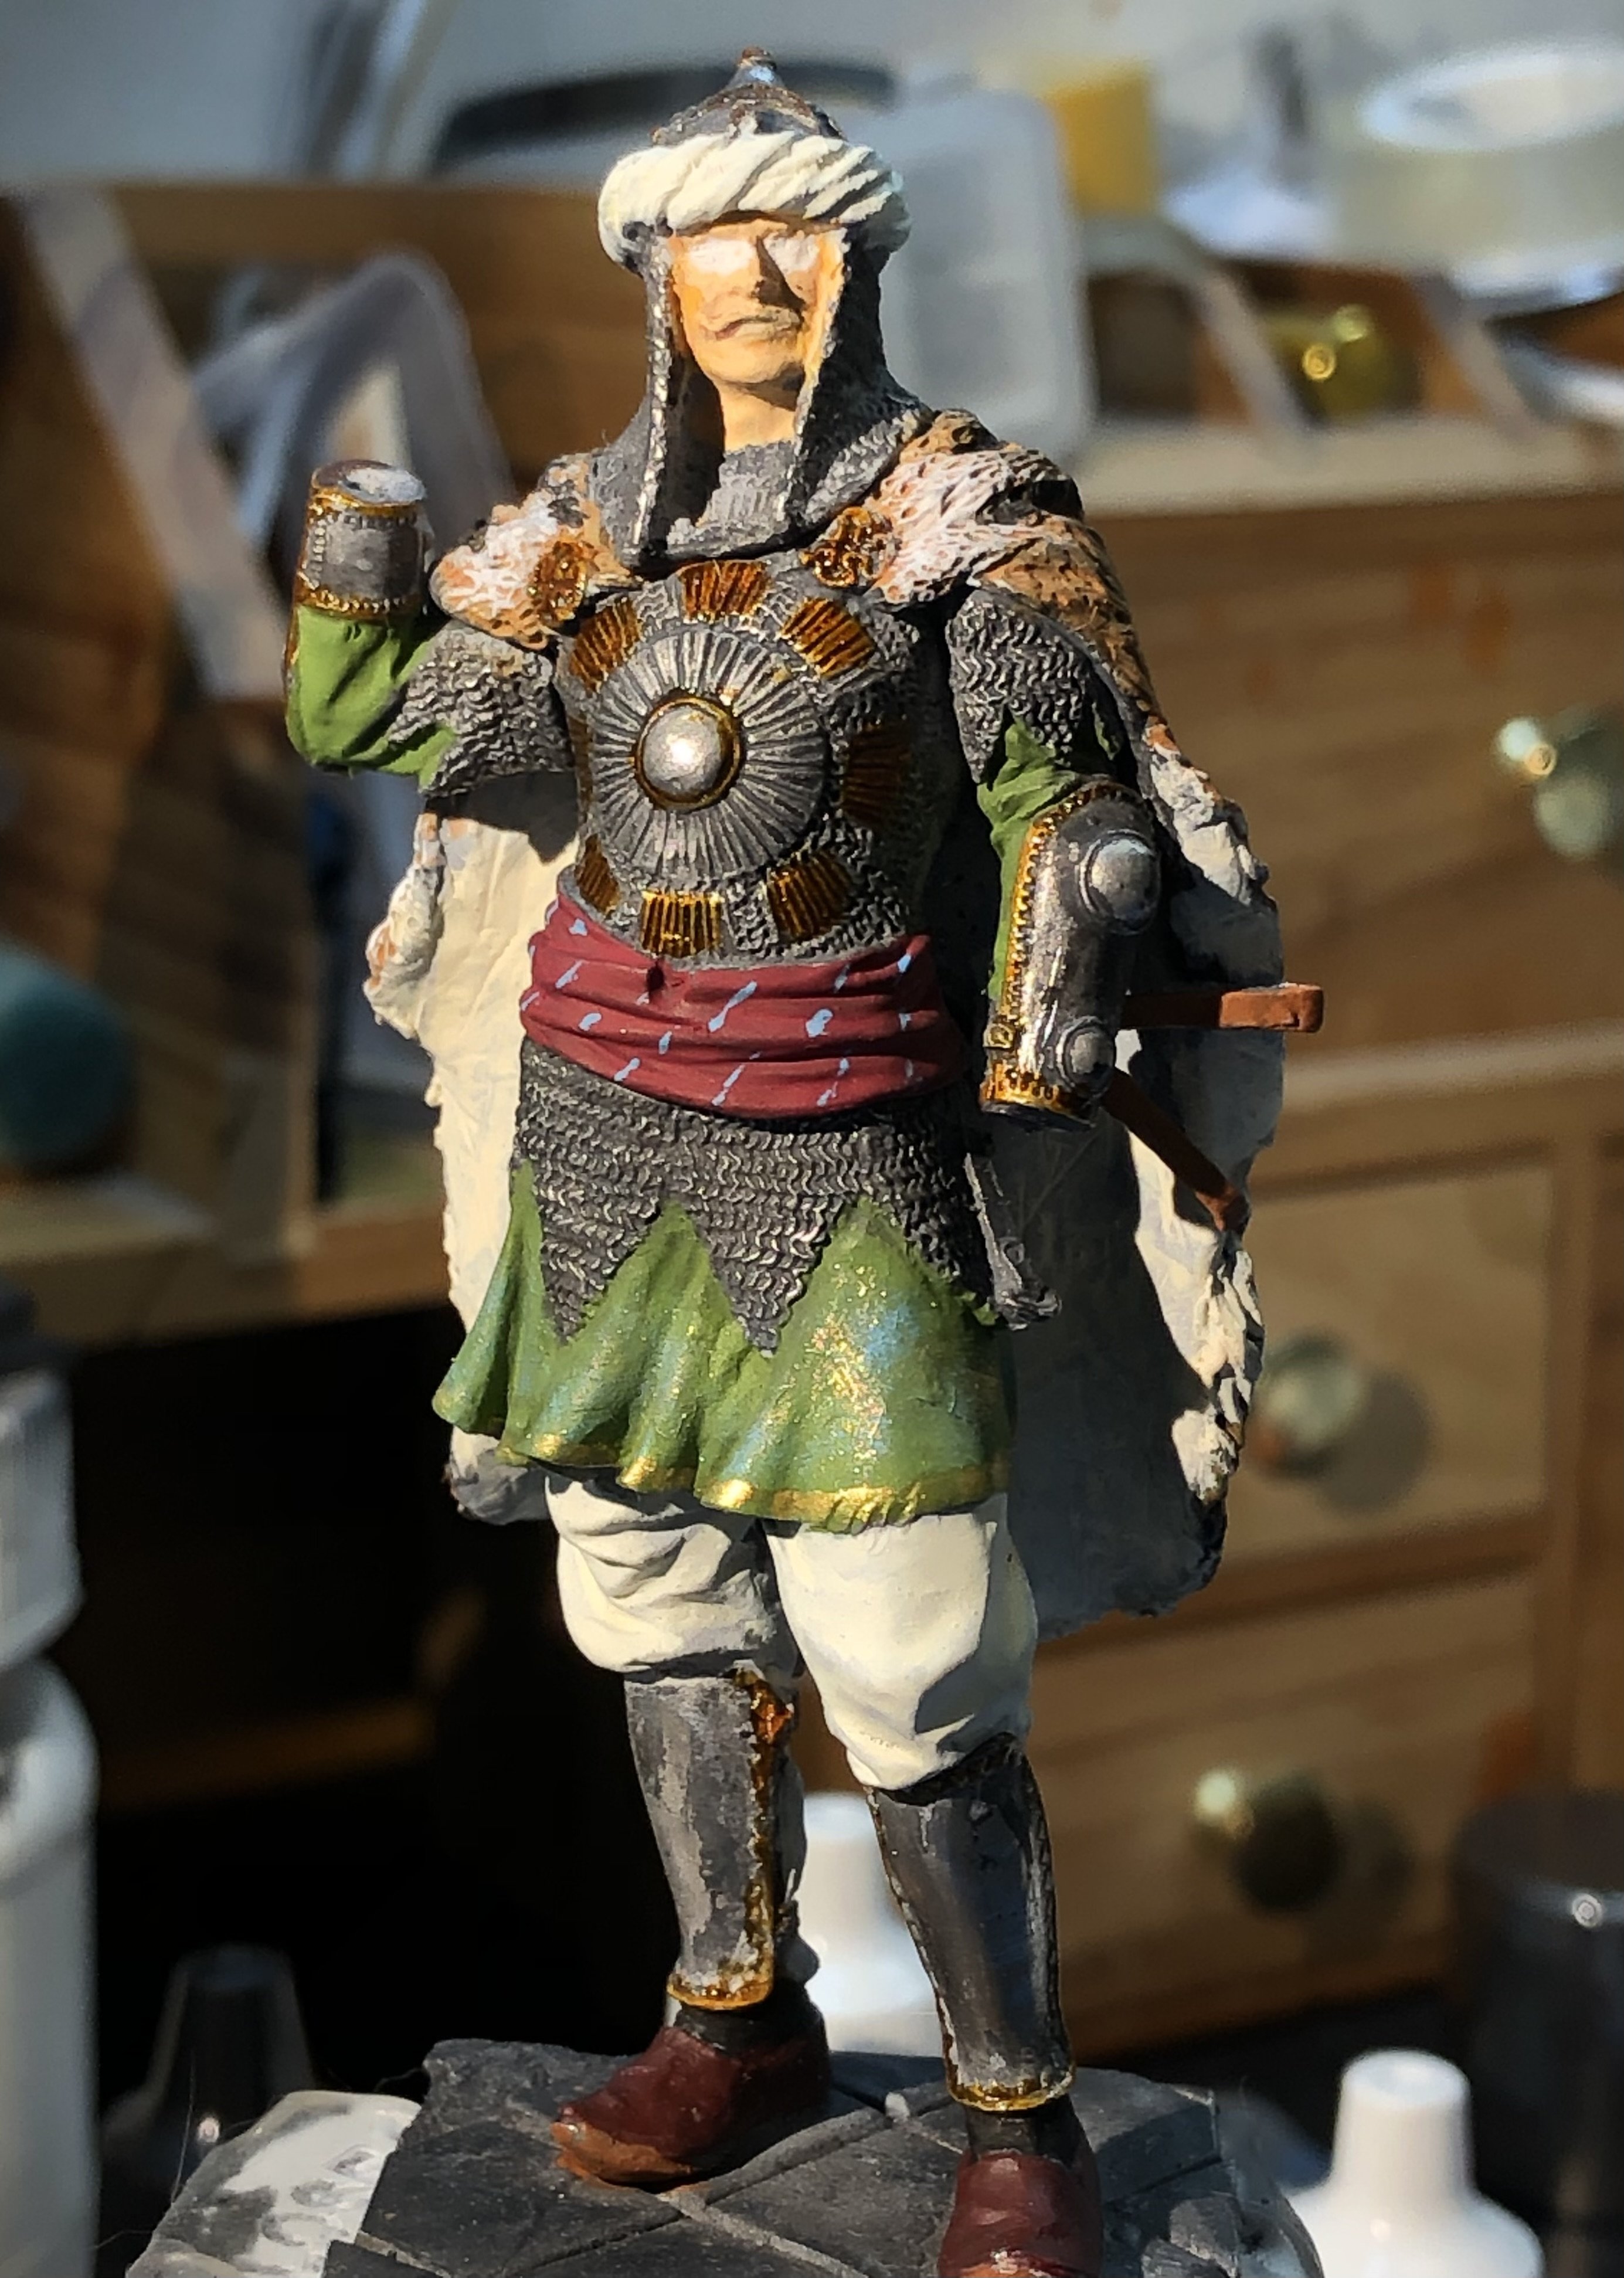
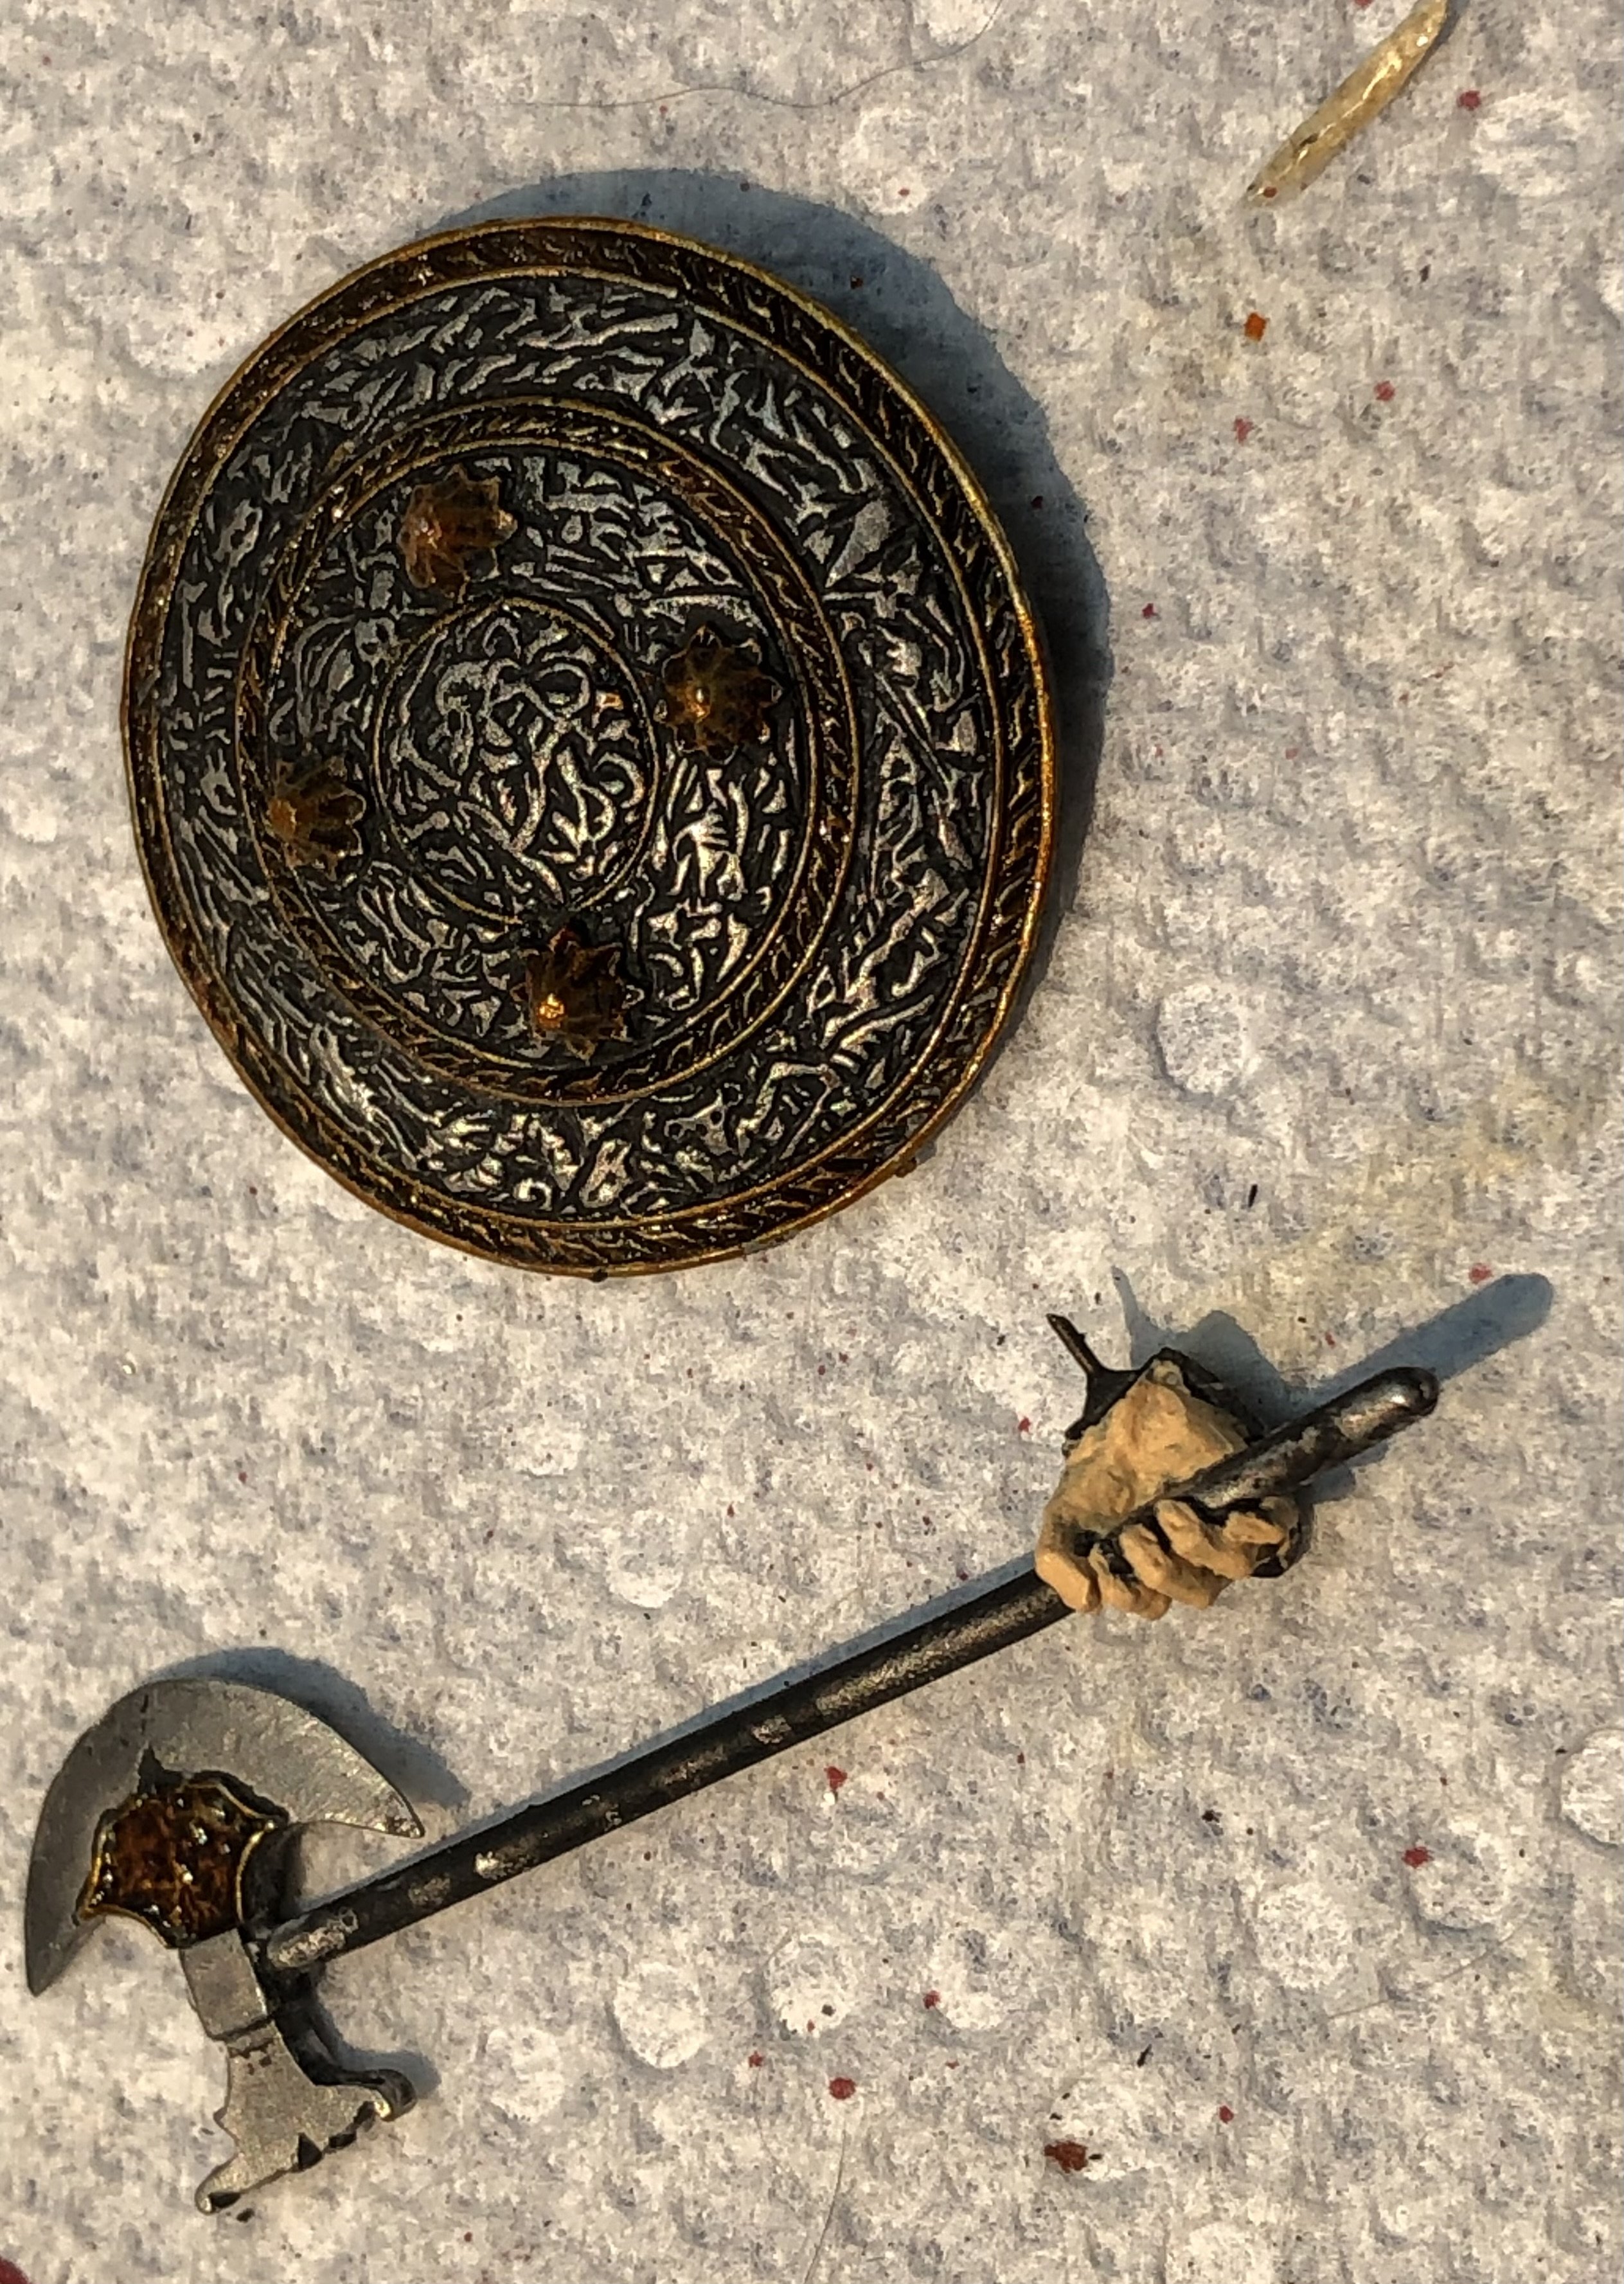
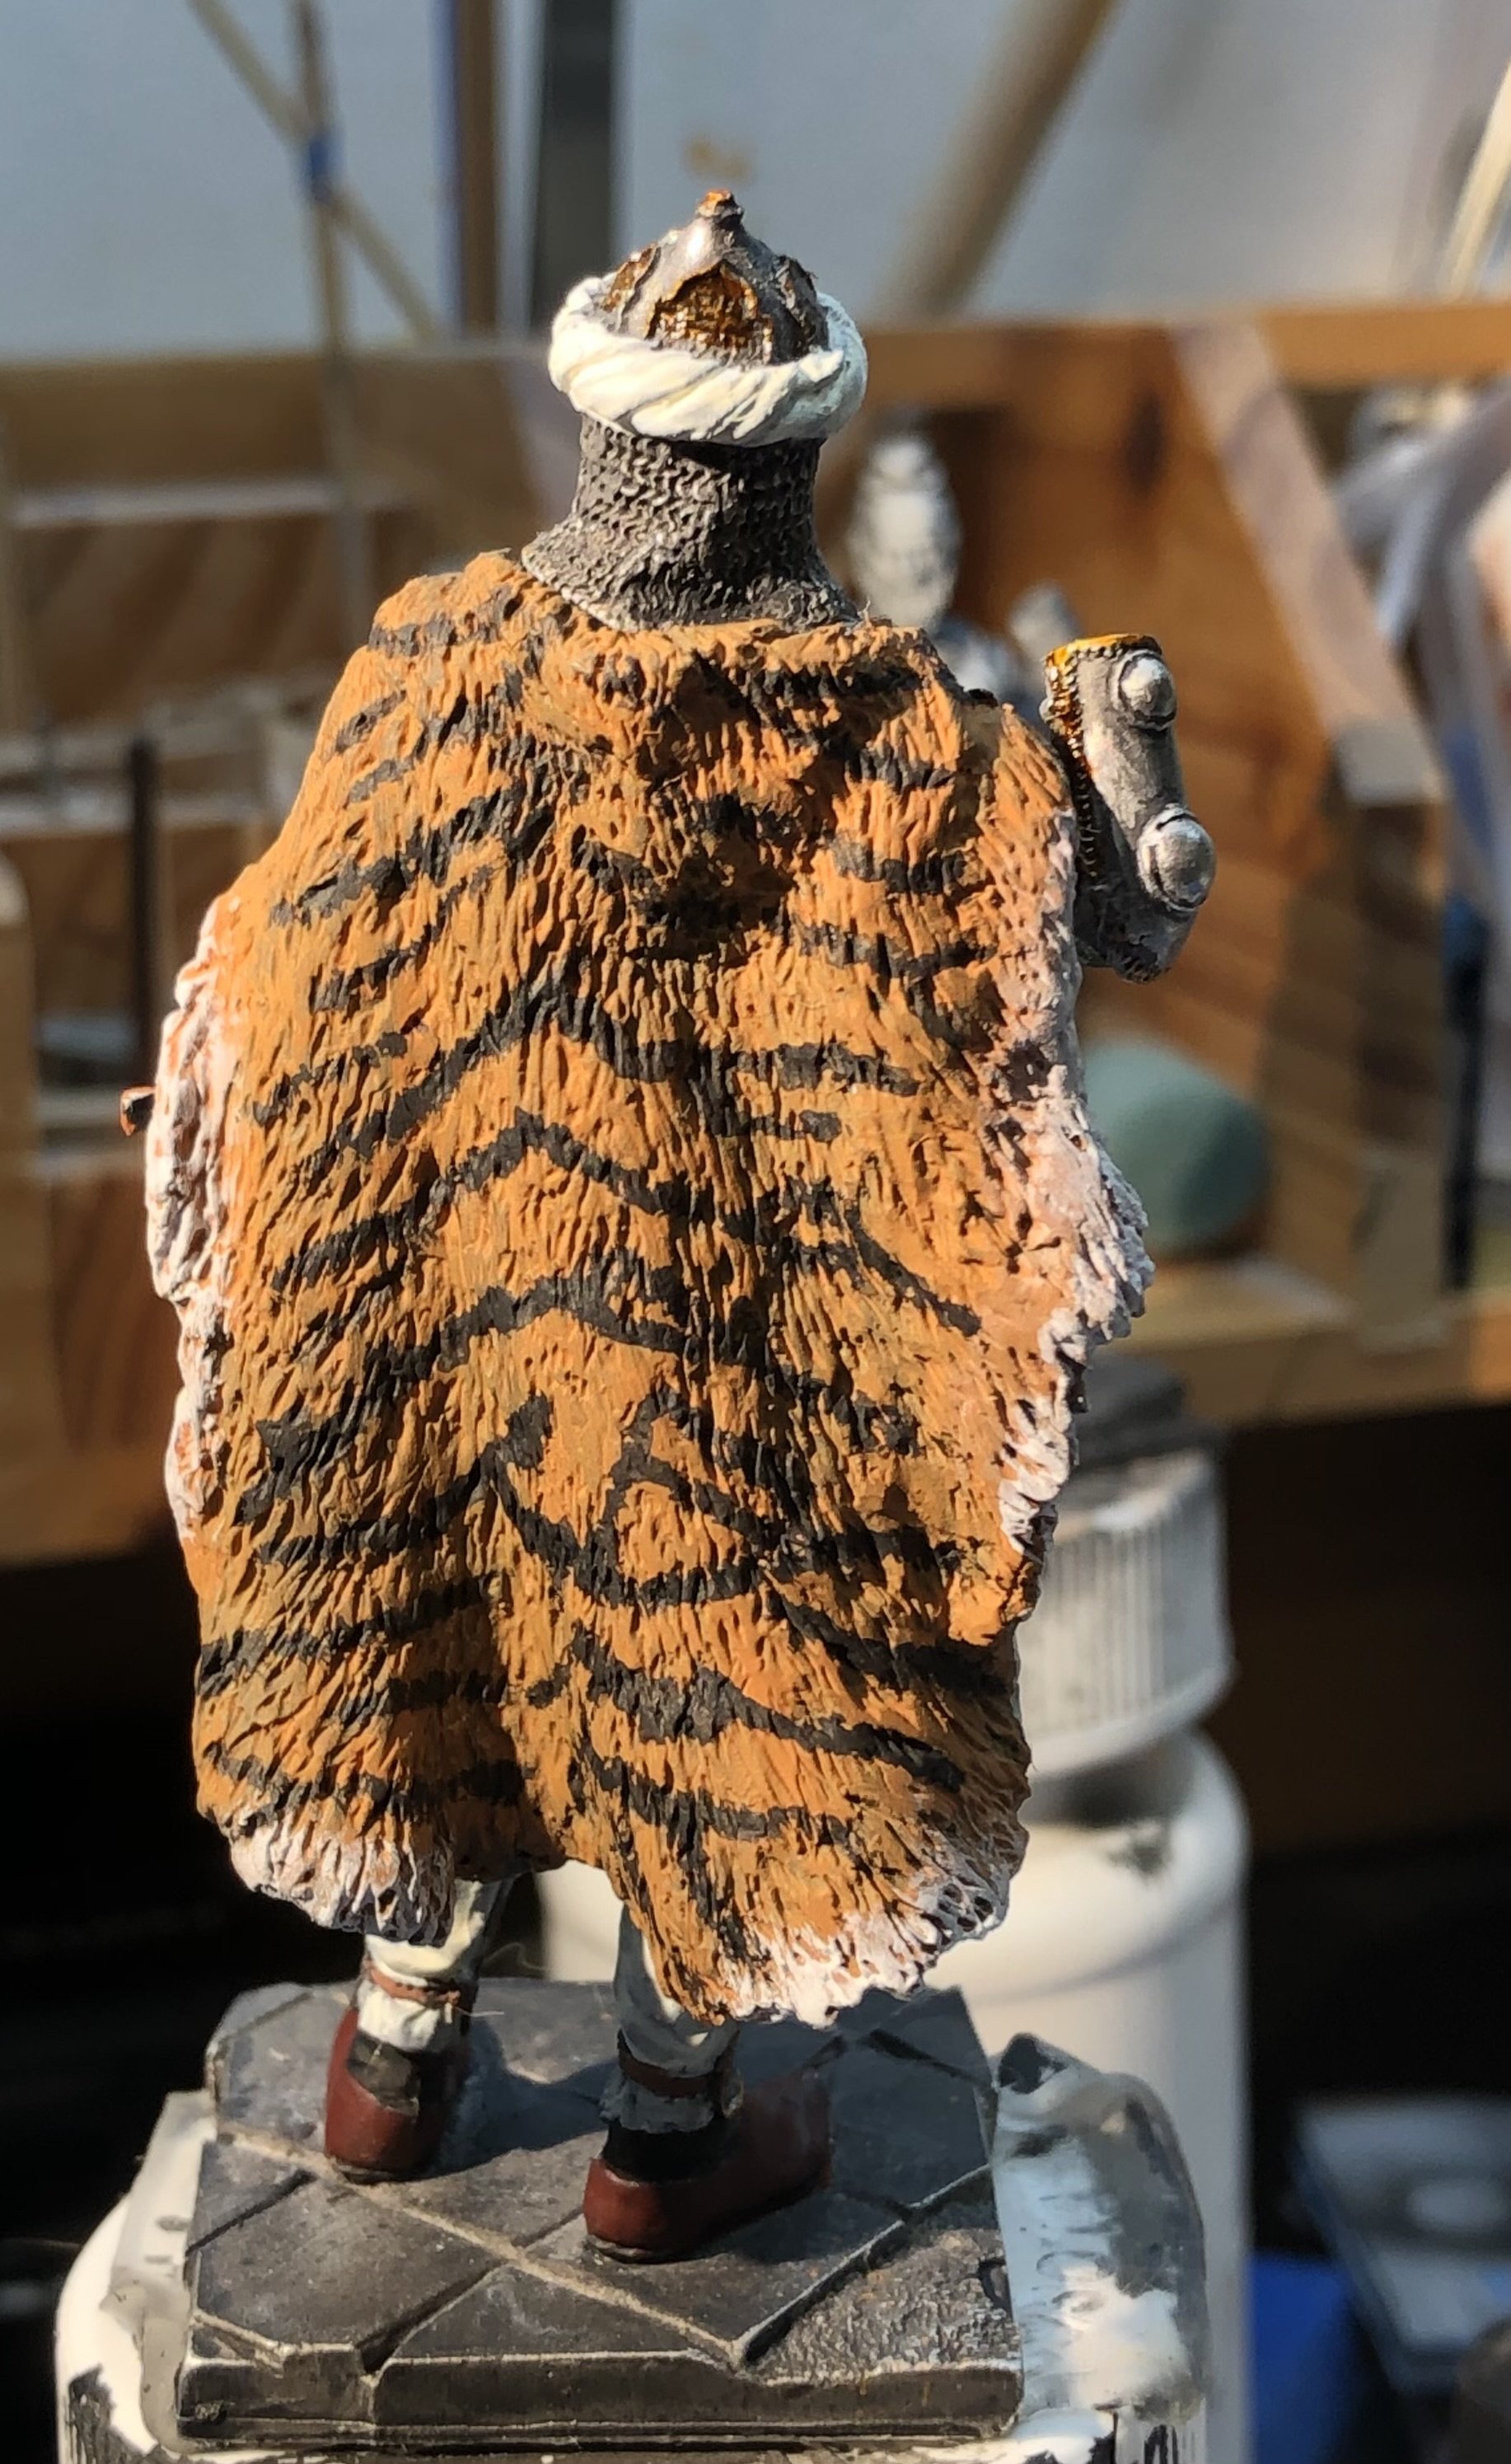
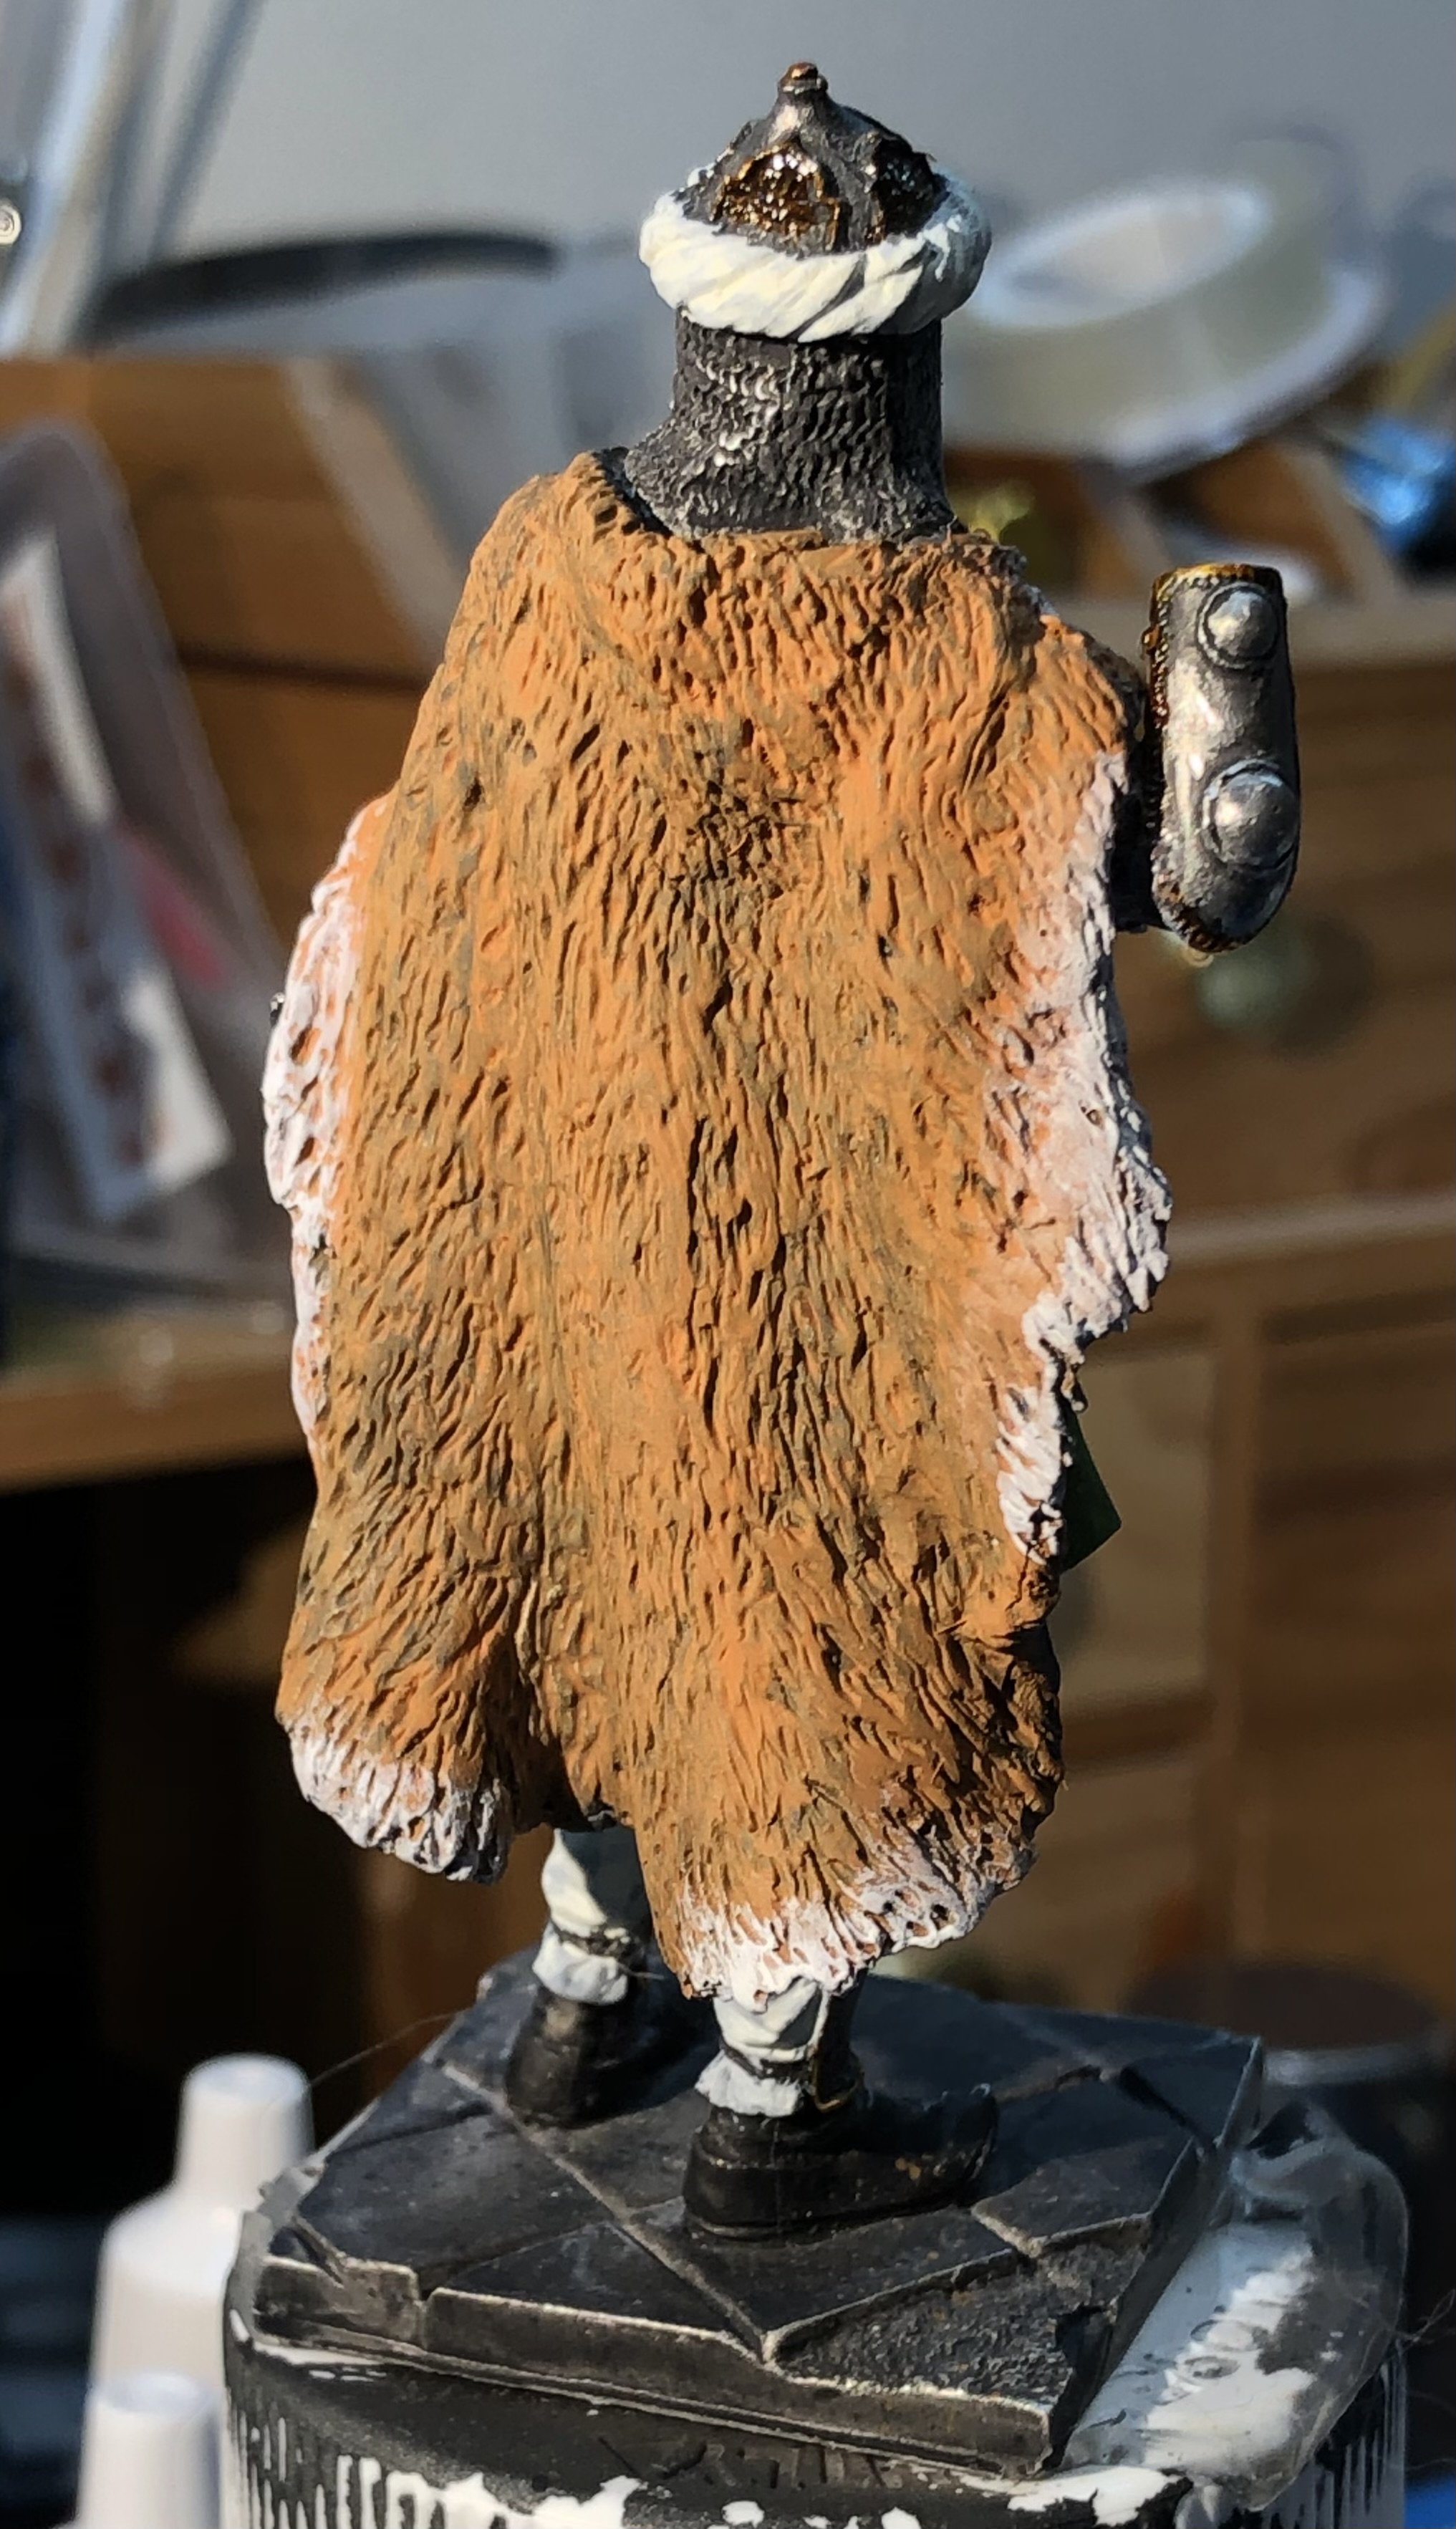
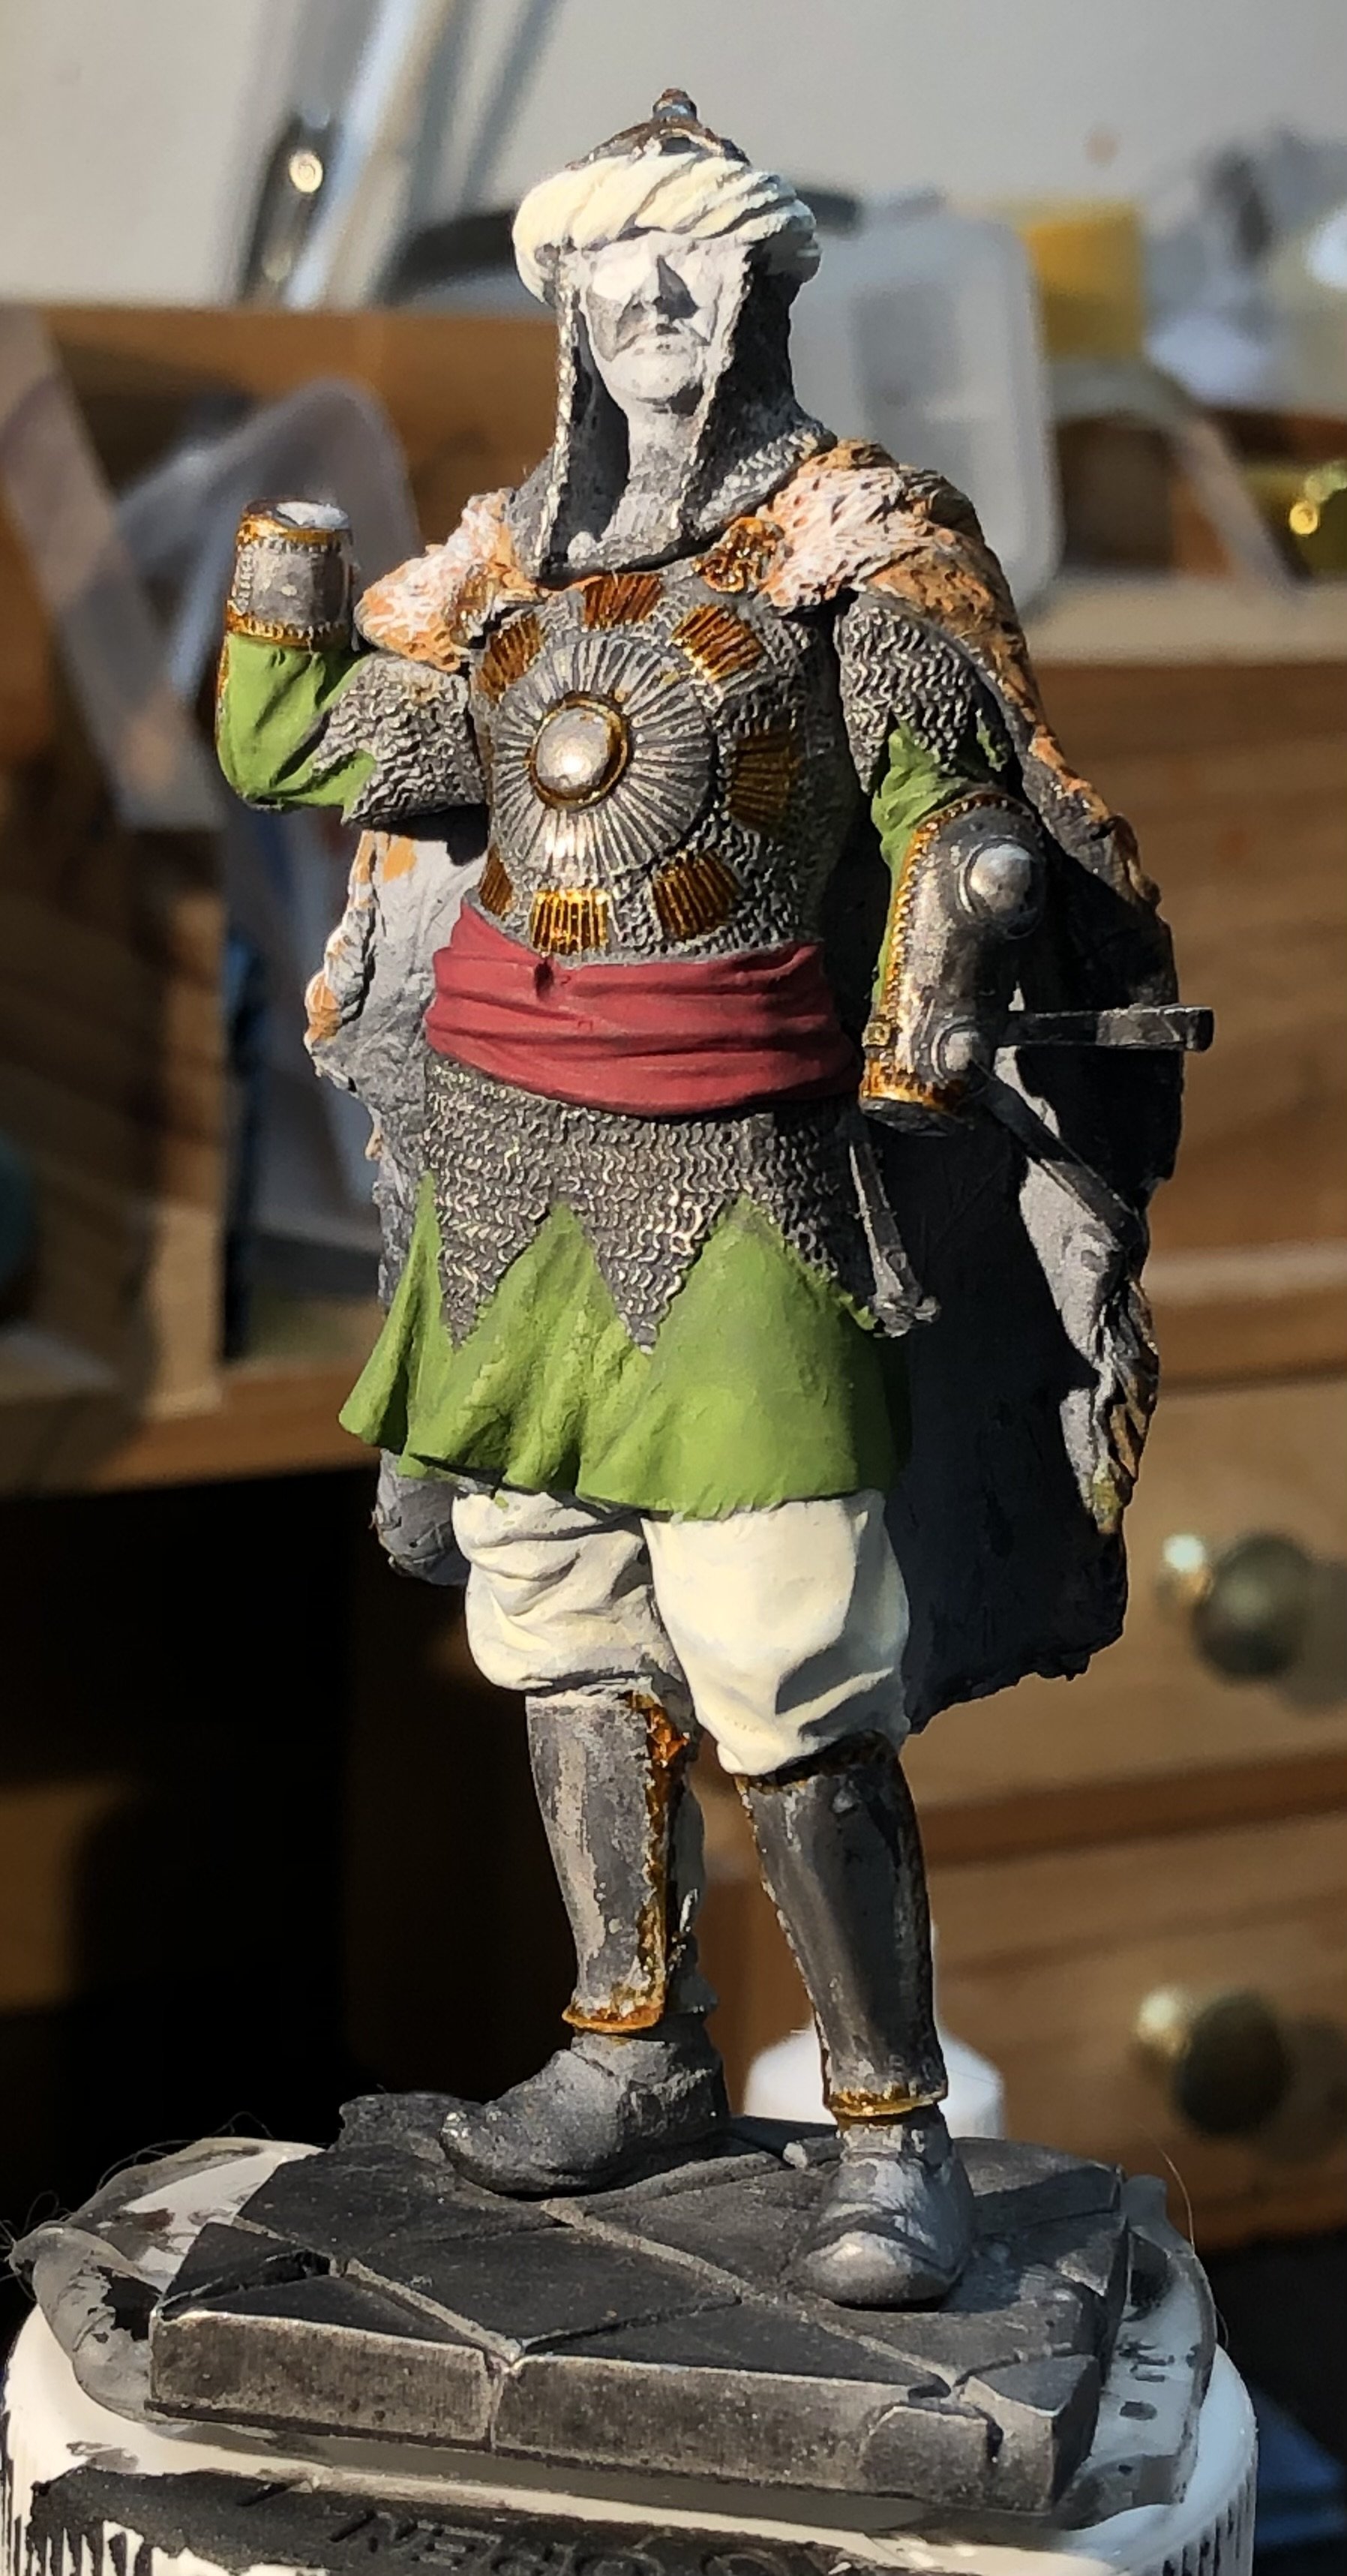
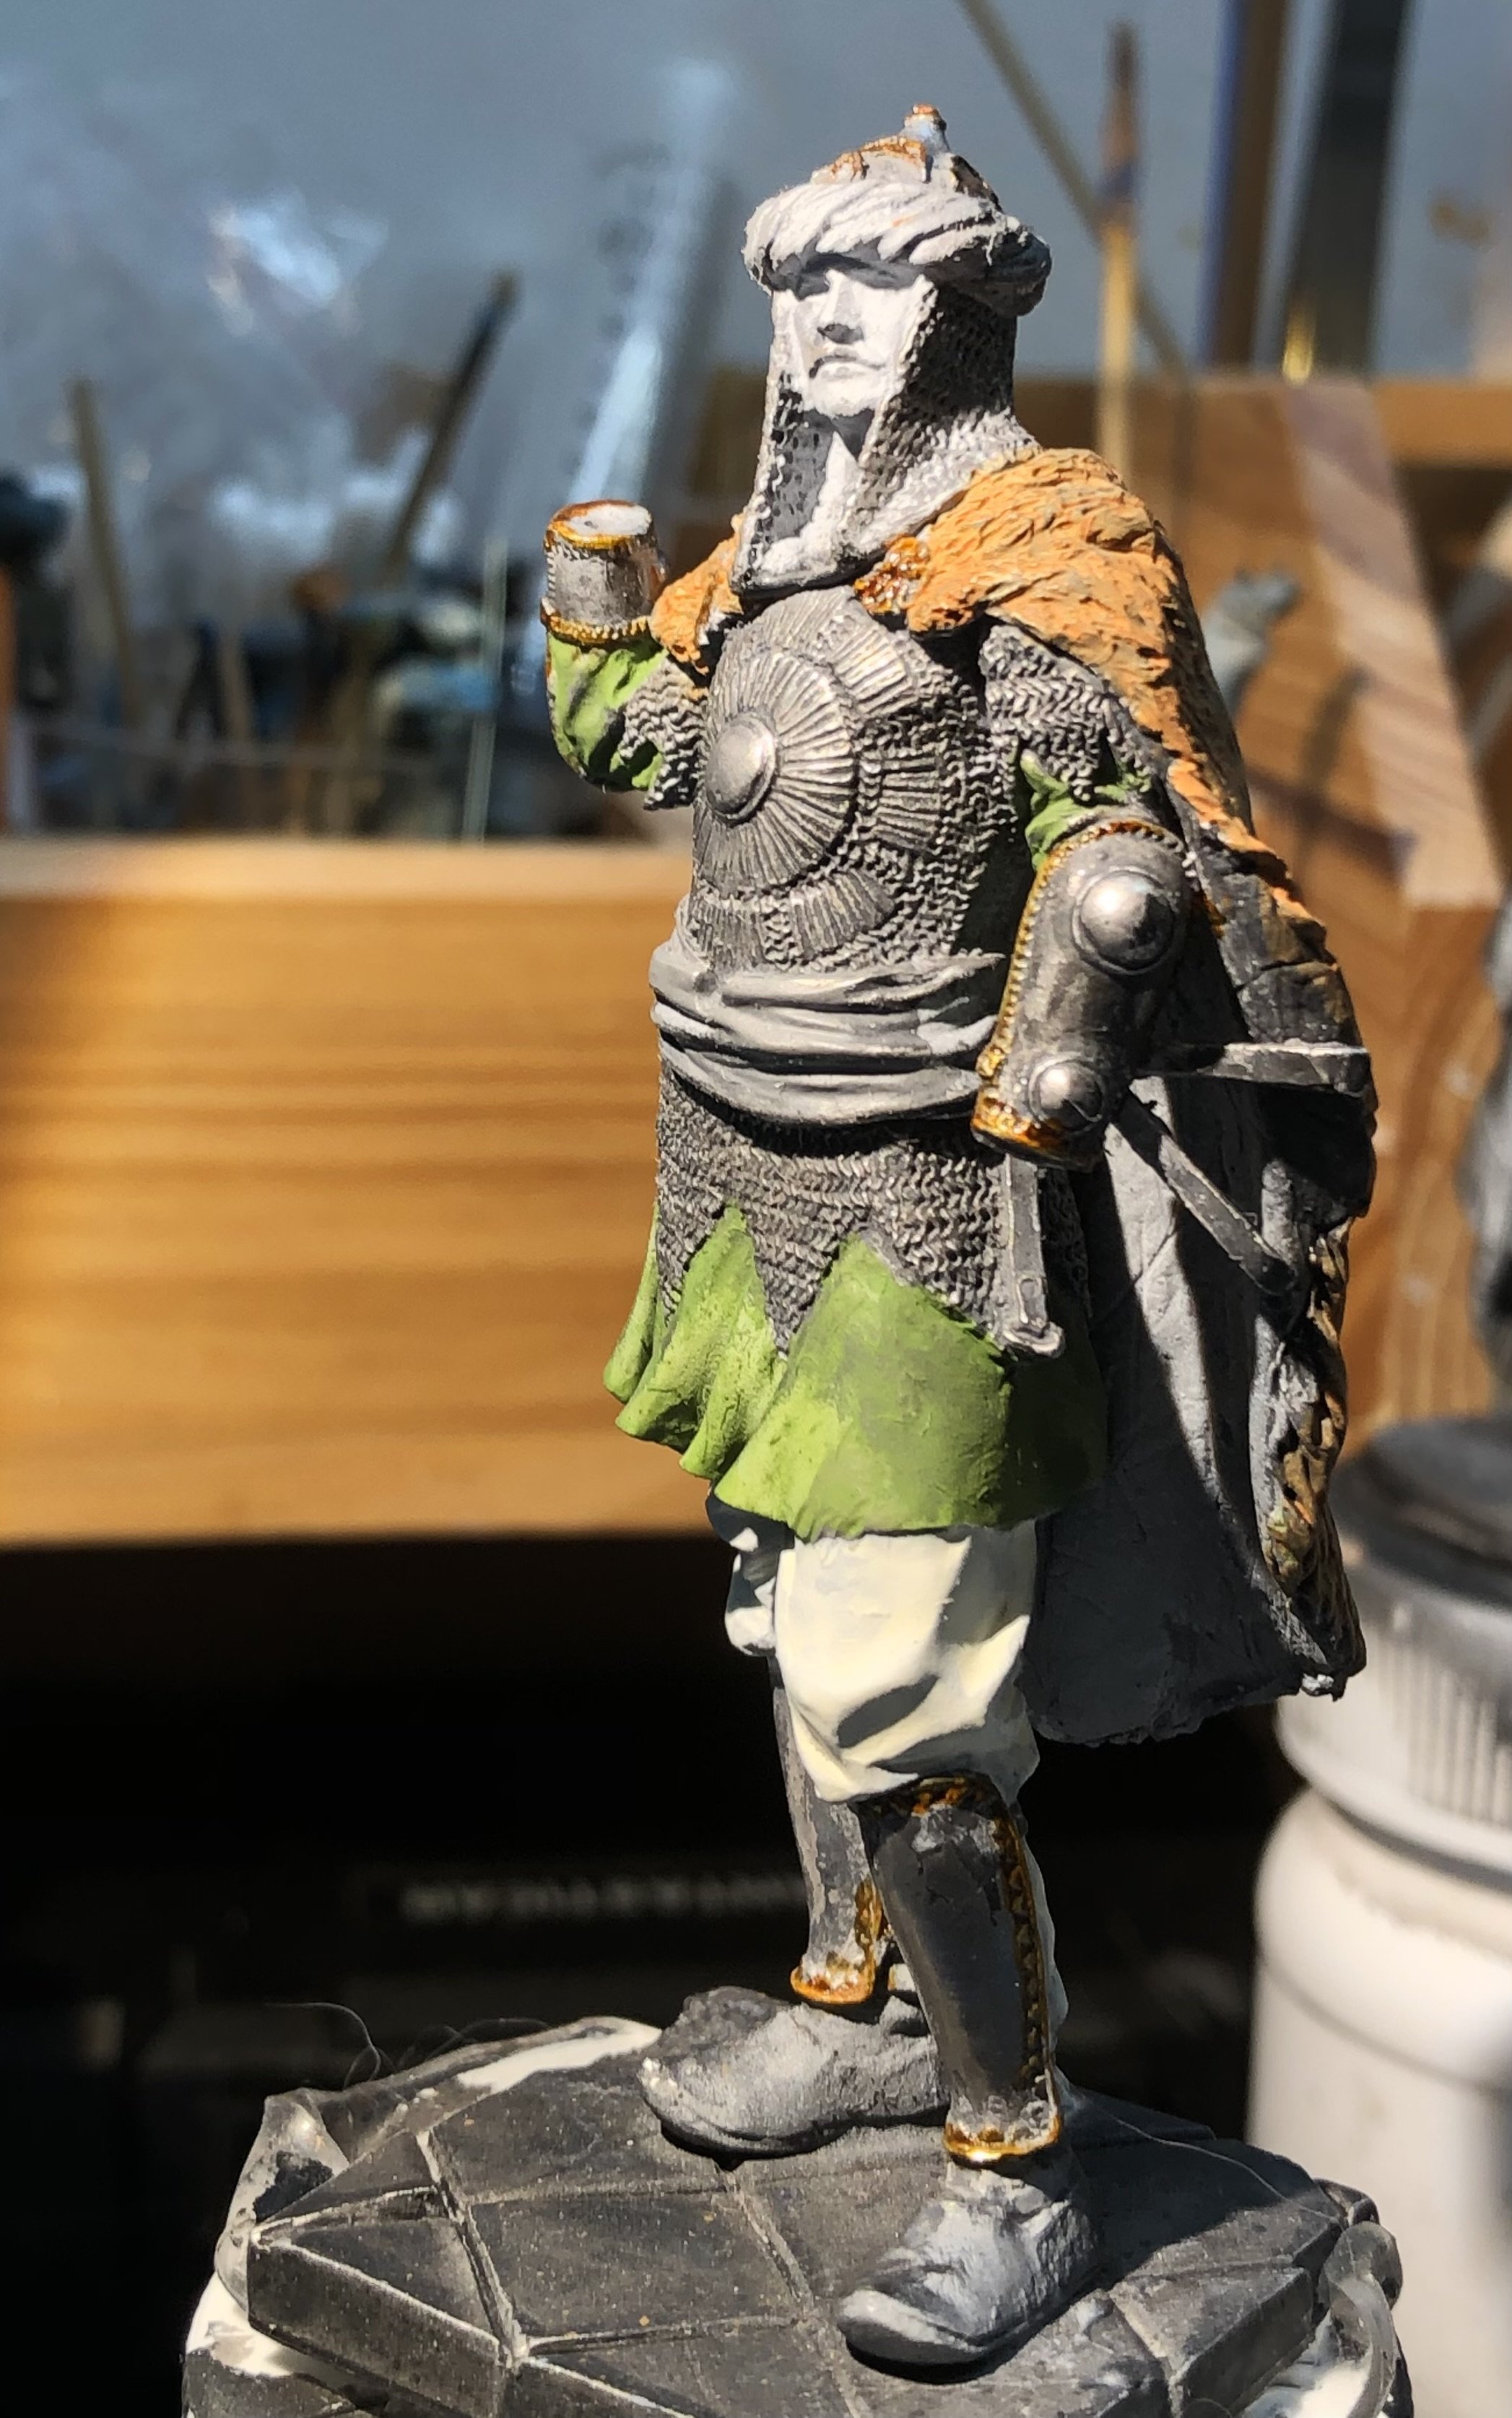
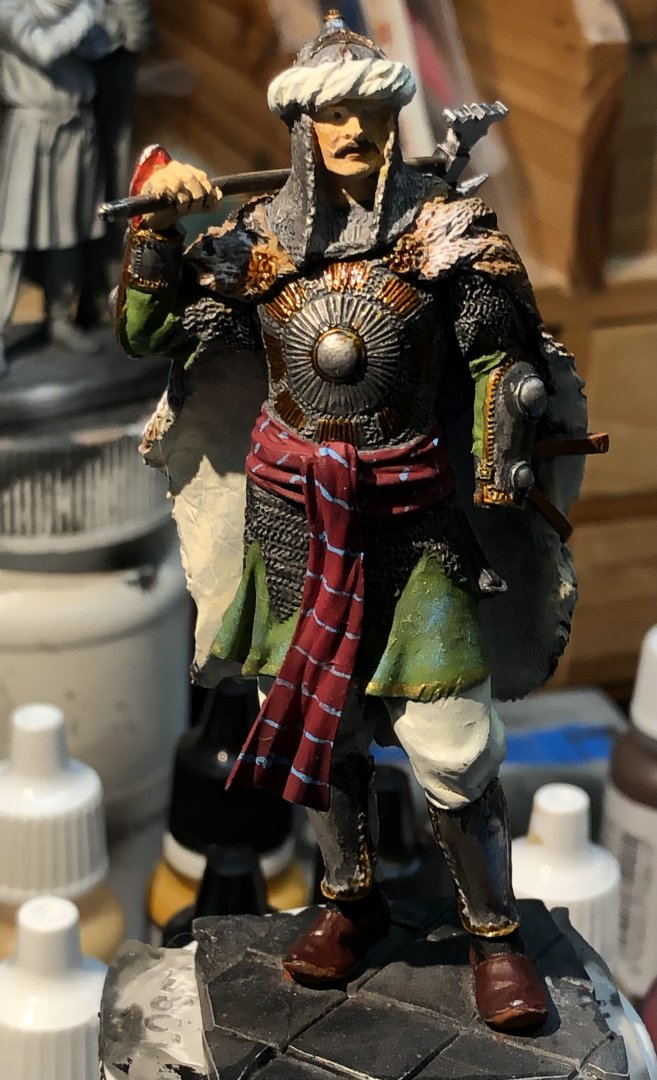
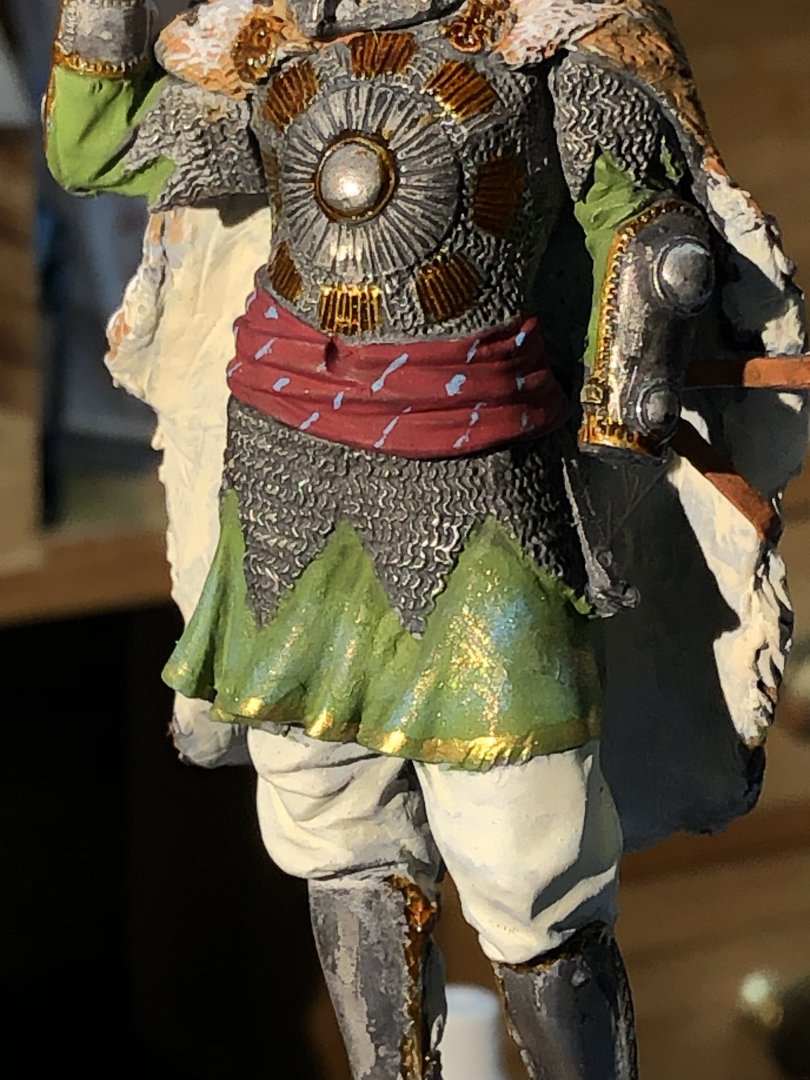
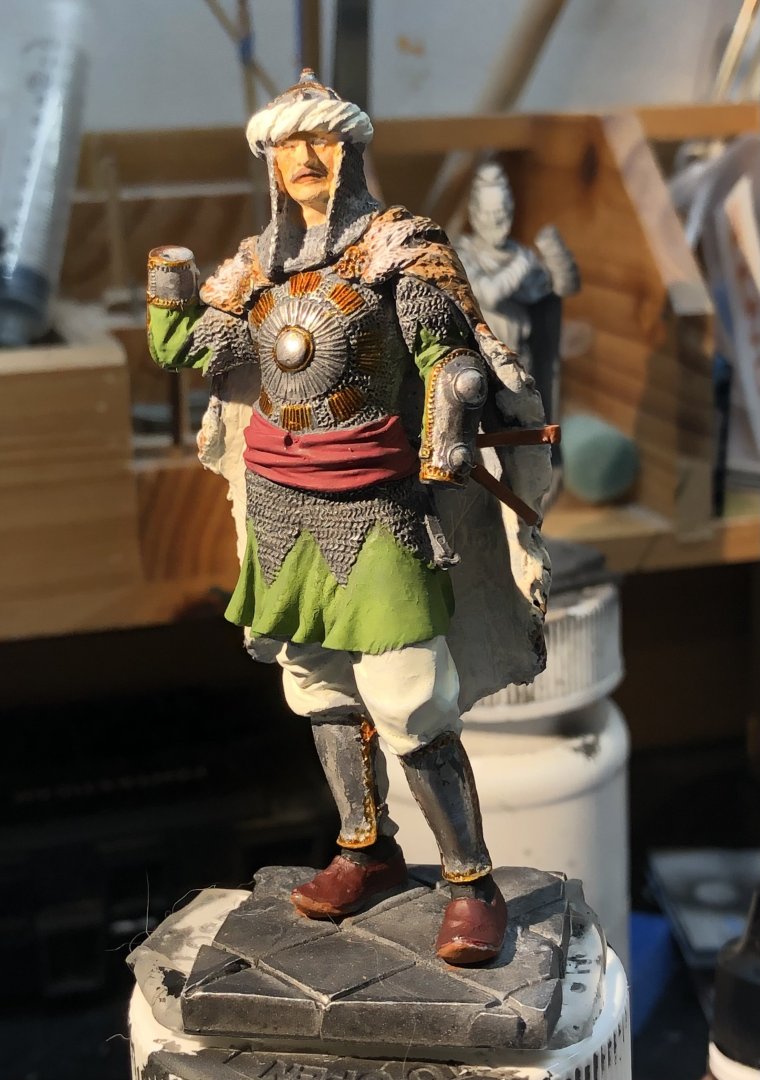
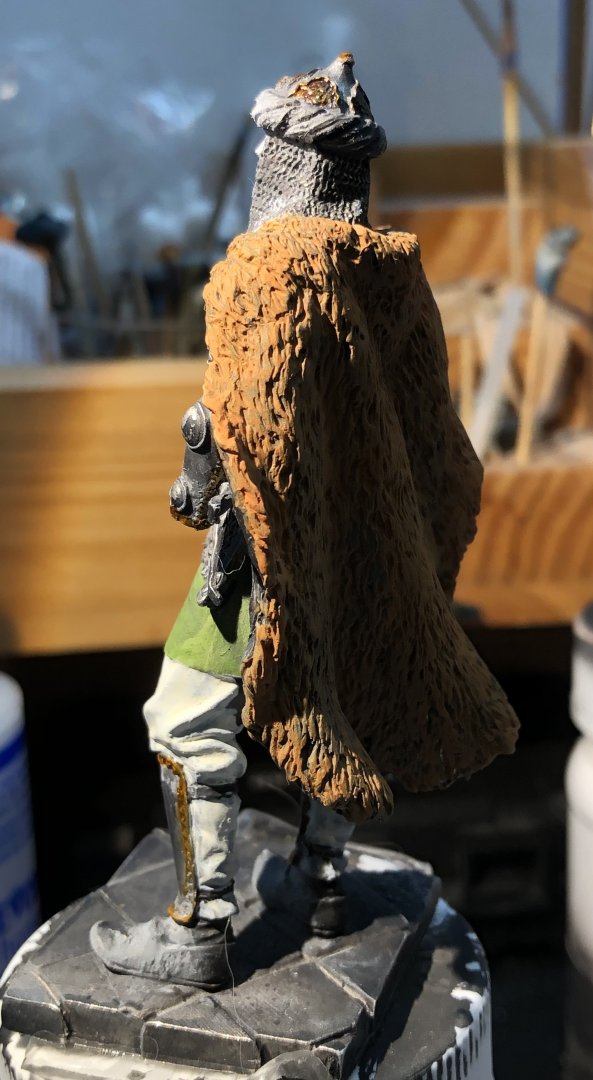
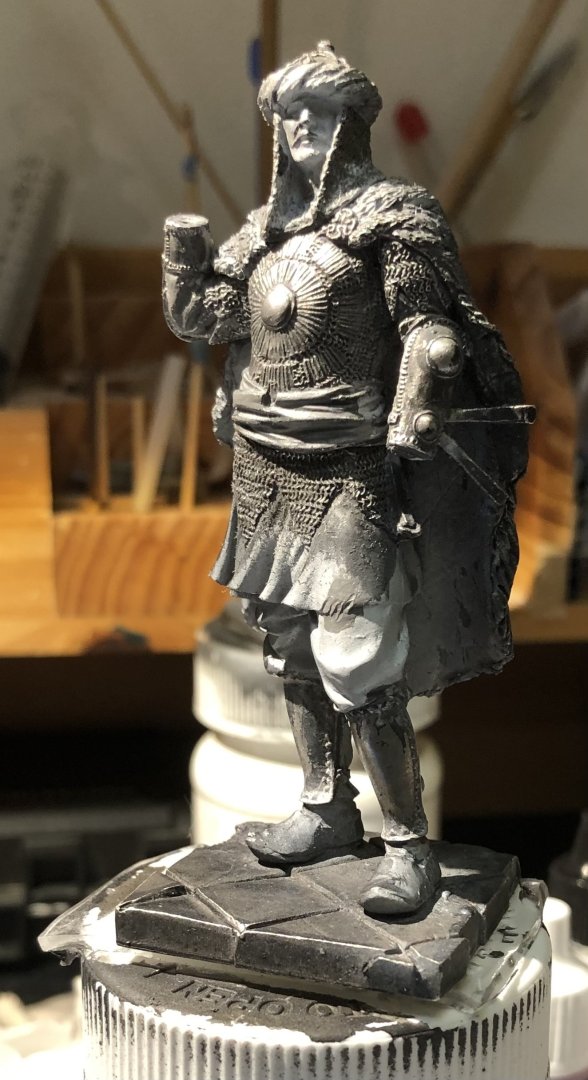
I added the ends of the sash and the tails of the helmet cloth. I continued painting the thin blue stripes on the sash. I was convinced that I would be unable to do this but I surprised myself. It needs a little more work but it’s not too bad for a first attempt. The new brush helps a lot too but it makes me feel that I can tackle figures that need this sort of details. The axe and his hand was added and some touch up will needed there. There are some small pieces to add to the helmet, the sword and shield to complete the figure. The base doesn’t lend itself to anything extravagant. Thanks for looking in, the likes and comments. Alan


- 38 replies
-
- 11
-

-
-
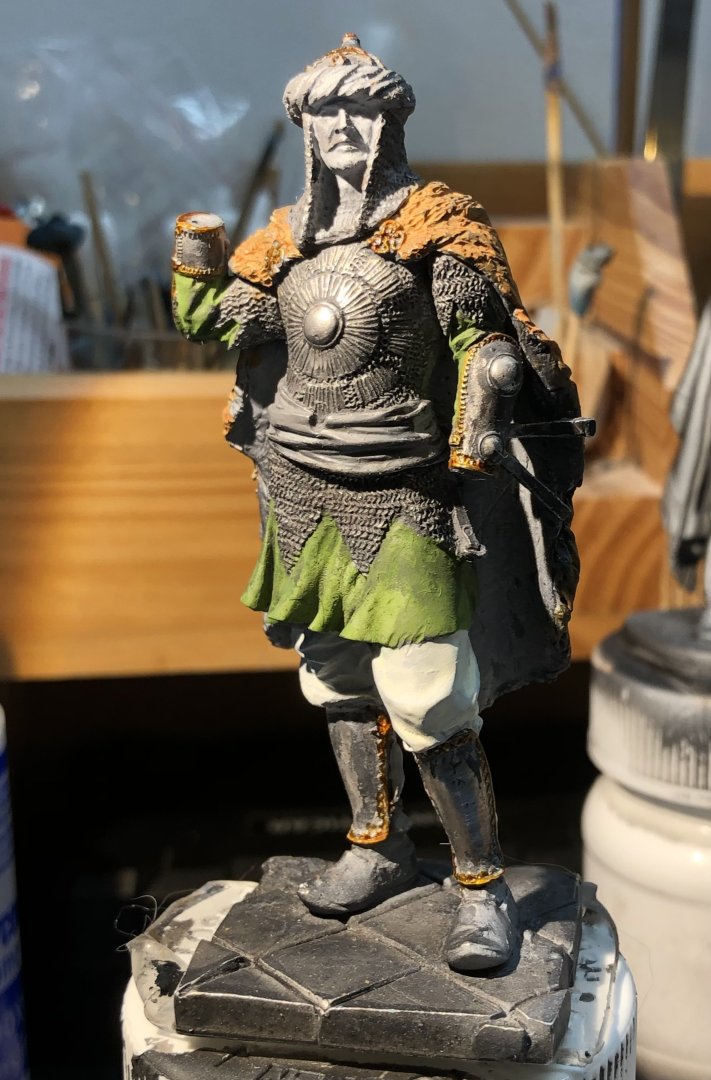
I returned the face back to the basic skin tone, prepared for the eyes and will try again tomorrow. i finished the shield and started on his battle axe which seems a fearsome weapon. I got brave and dry brushes a small amount of blue followed by slightly more gold onto the tunic. The intent was to simulate embroidered details on the cloth which I don’t think I can paint as individual lines. So far I’m happy with the result, I think it is better than the plain green but it’s a technique I need work on. I also added the stripes to his sash. A few lines will be tightened up tomorrow but overall not too bad. I’m not sure whether that color combination makes him an Old Etonian.😀 Thanks for looking in, the likes and encouraging comments. Alan


- 38 replies
-
- 11
-
-
Thank you very much Rob, Each figure is a new learning experience but it wouldn’t be much fun to just knock them out without trying to improve. Alan
-
Thank you very much Ken. It’s always good to have an expert weigh in 😎 Alan
-
T-90 by Mikegr - FINISHED - AM - 1/72 - PLASTIC
king derelict replied to mikegr's topic in Non-ship/categorised builds
The paint came out very nicely. alan -
A bit more progress today, filling in the blanks and starting the face. I bought a bottle of Vallejos dark flesh and I don’t like it, at least for this subject. It has a very yellow cast to it and is not the skin tone I would associate with a Moghul. I started shading it out but was too impatient and messed up the eyes and lips so tomorrow I will start over again with the basic skin tone and try again. Generally I think it’s coming together. And the big reveal for the day. I’m fairly happy with it. Certainly I’m not going to turn it into a bearskin and admit defeat. Decisions are now needed on the details in his tunic and sash. Probably need to practice first and see what I can accomplish with my smallest brush. Thanks for looking in and the likes and comments. Alan

- 38 replies
-
- 11
-
-
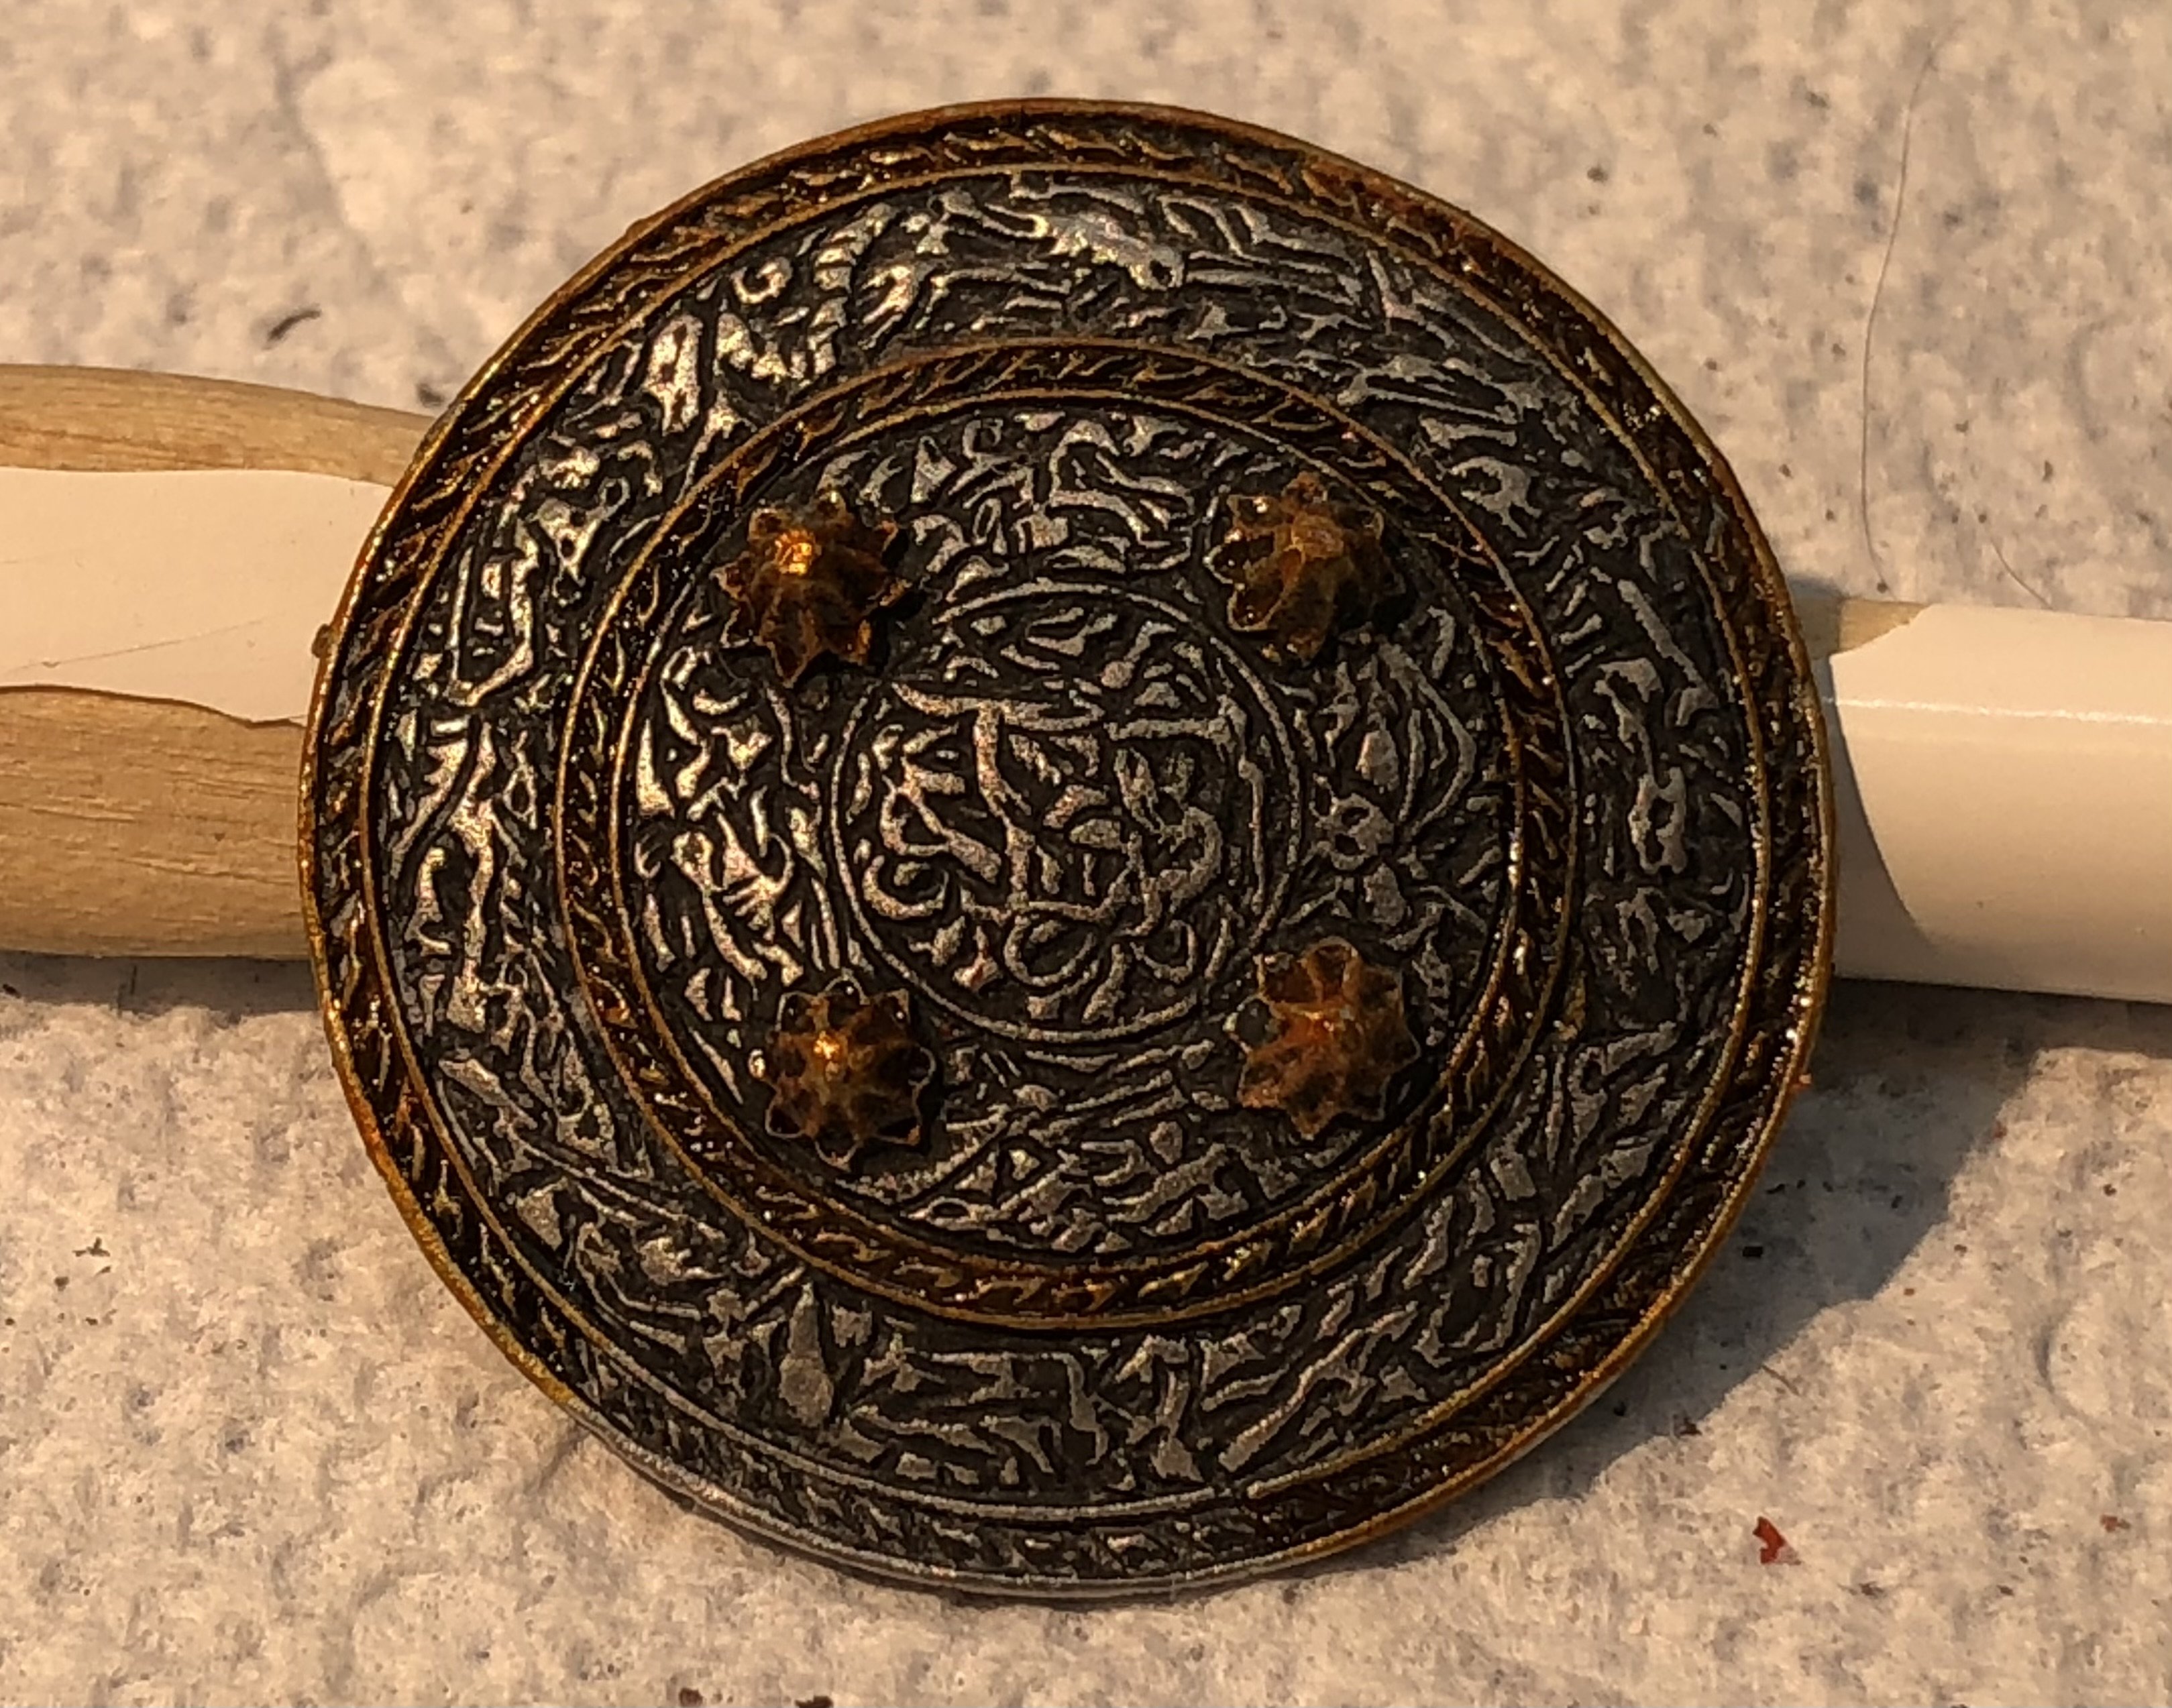
I completed the gold details on the breast plate and filled in a few more areas. The white on the face is the base for the eyes. After another coat of orange brown I added the white areas to the skin and it’s starting to look better. Next up will be the stripes! Thanks for looking in, the likes and comments. Alan

-
Thank you very much OC. There are some interesting details to work on- and the tiger skin. alan
-
Congratulations. You have created a beautiful model and it’s been fun watching it take shape. alan
-
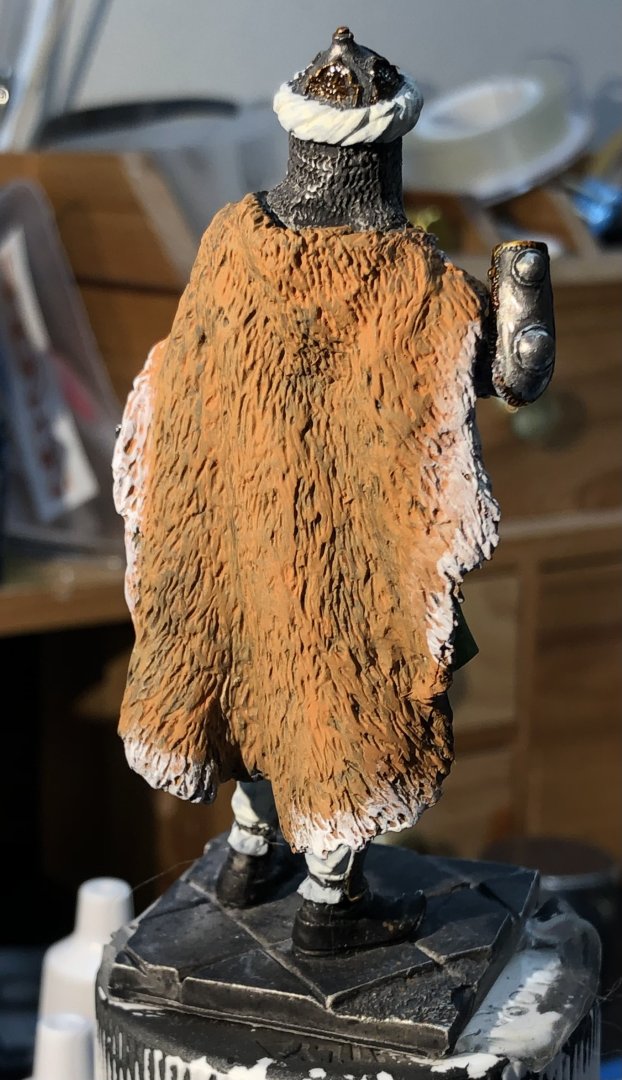
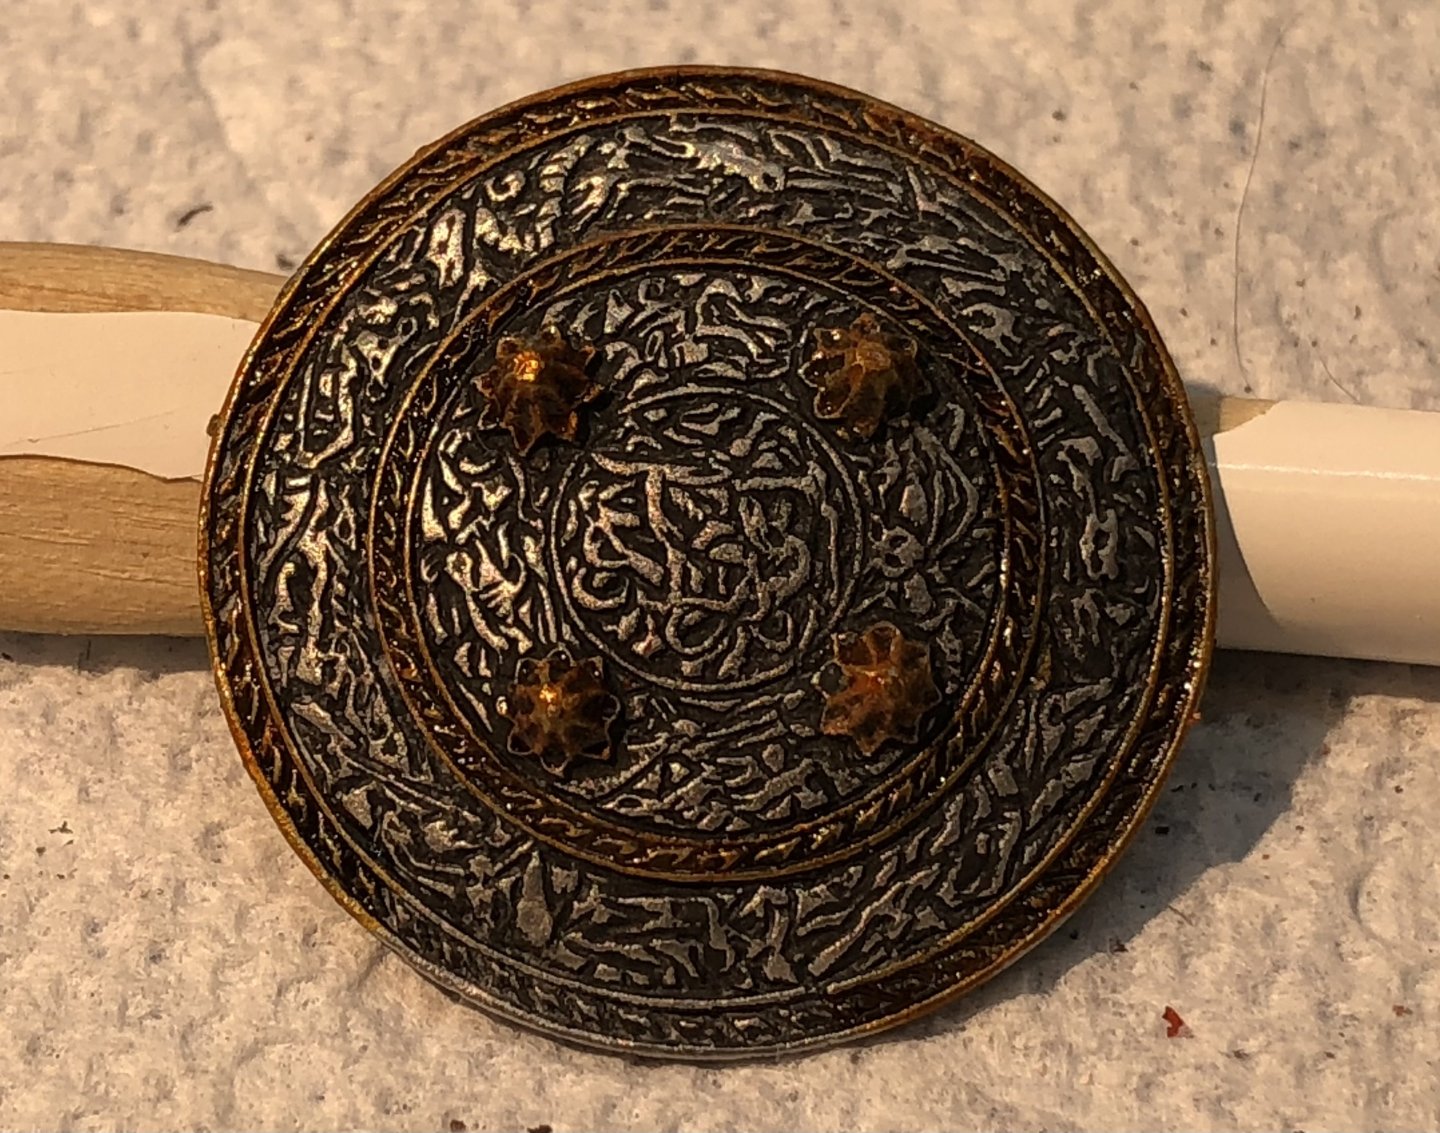
After polishing the armor I started the painting with the gold highlights on. As I've done before I used Tamiya clear orange rather than a metallic gold paint. I think it produces a deeper gold. The rest of the paints will be Vallejo acrylics. I will use their gold paint for gold fabric details. shield is almost complete. There is an inner ring and the bit of the outer that I was holding still to finish. I have started adding gold to the helmet, greaves and arms. The initial glazes are on the tunic and pants and then I got distracted and started on the cloak. Ive used Orange Brown and it may be a bit too orange. I’ll see how it looks with another layer or two and maybe try the stripes. So far this is proving to be very relaxing and enjoyable. Thanks for looking in and the likes and comments. Alan


-
Thanks OC. Some interesting challenges but it’s a very nice sculpt. alan
-
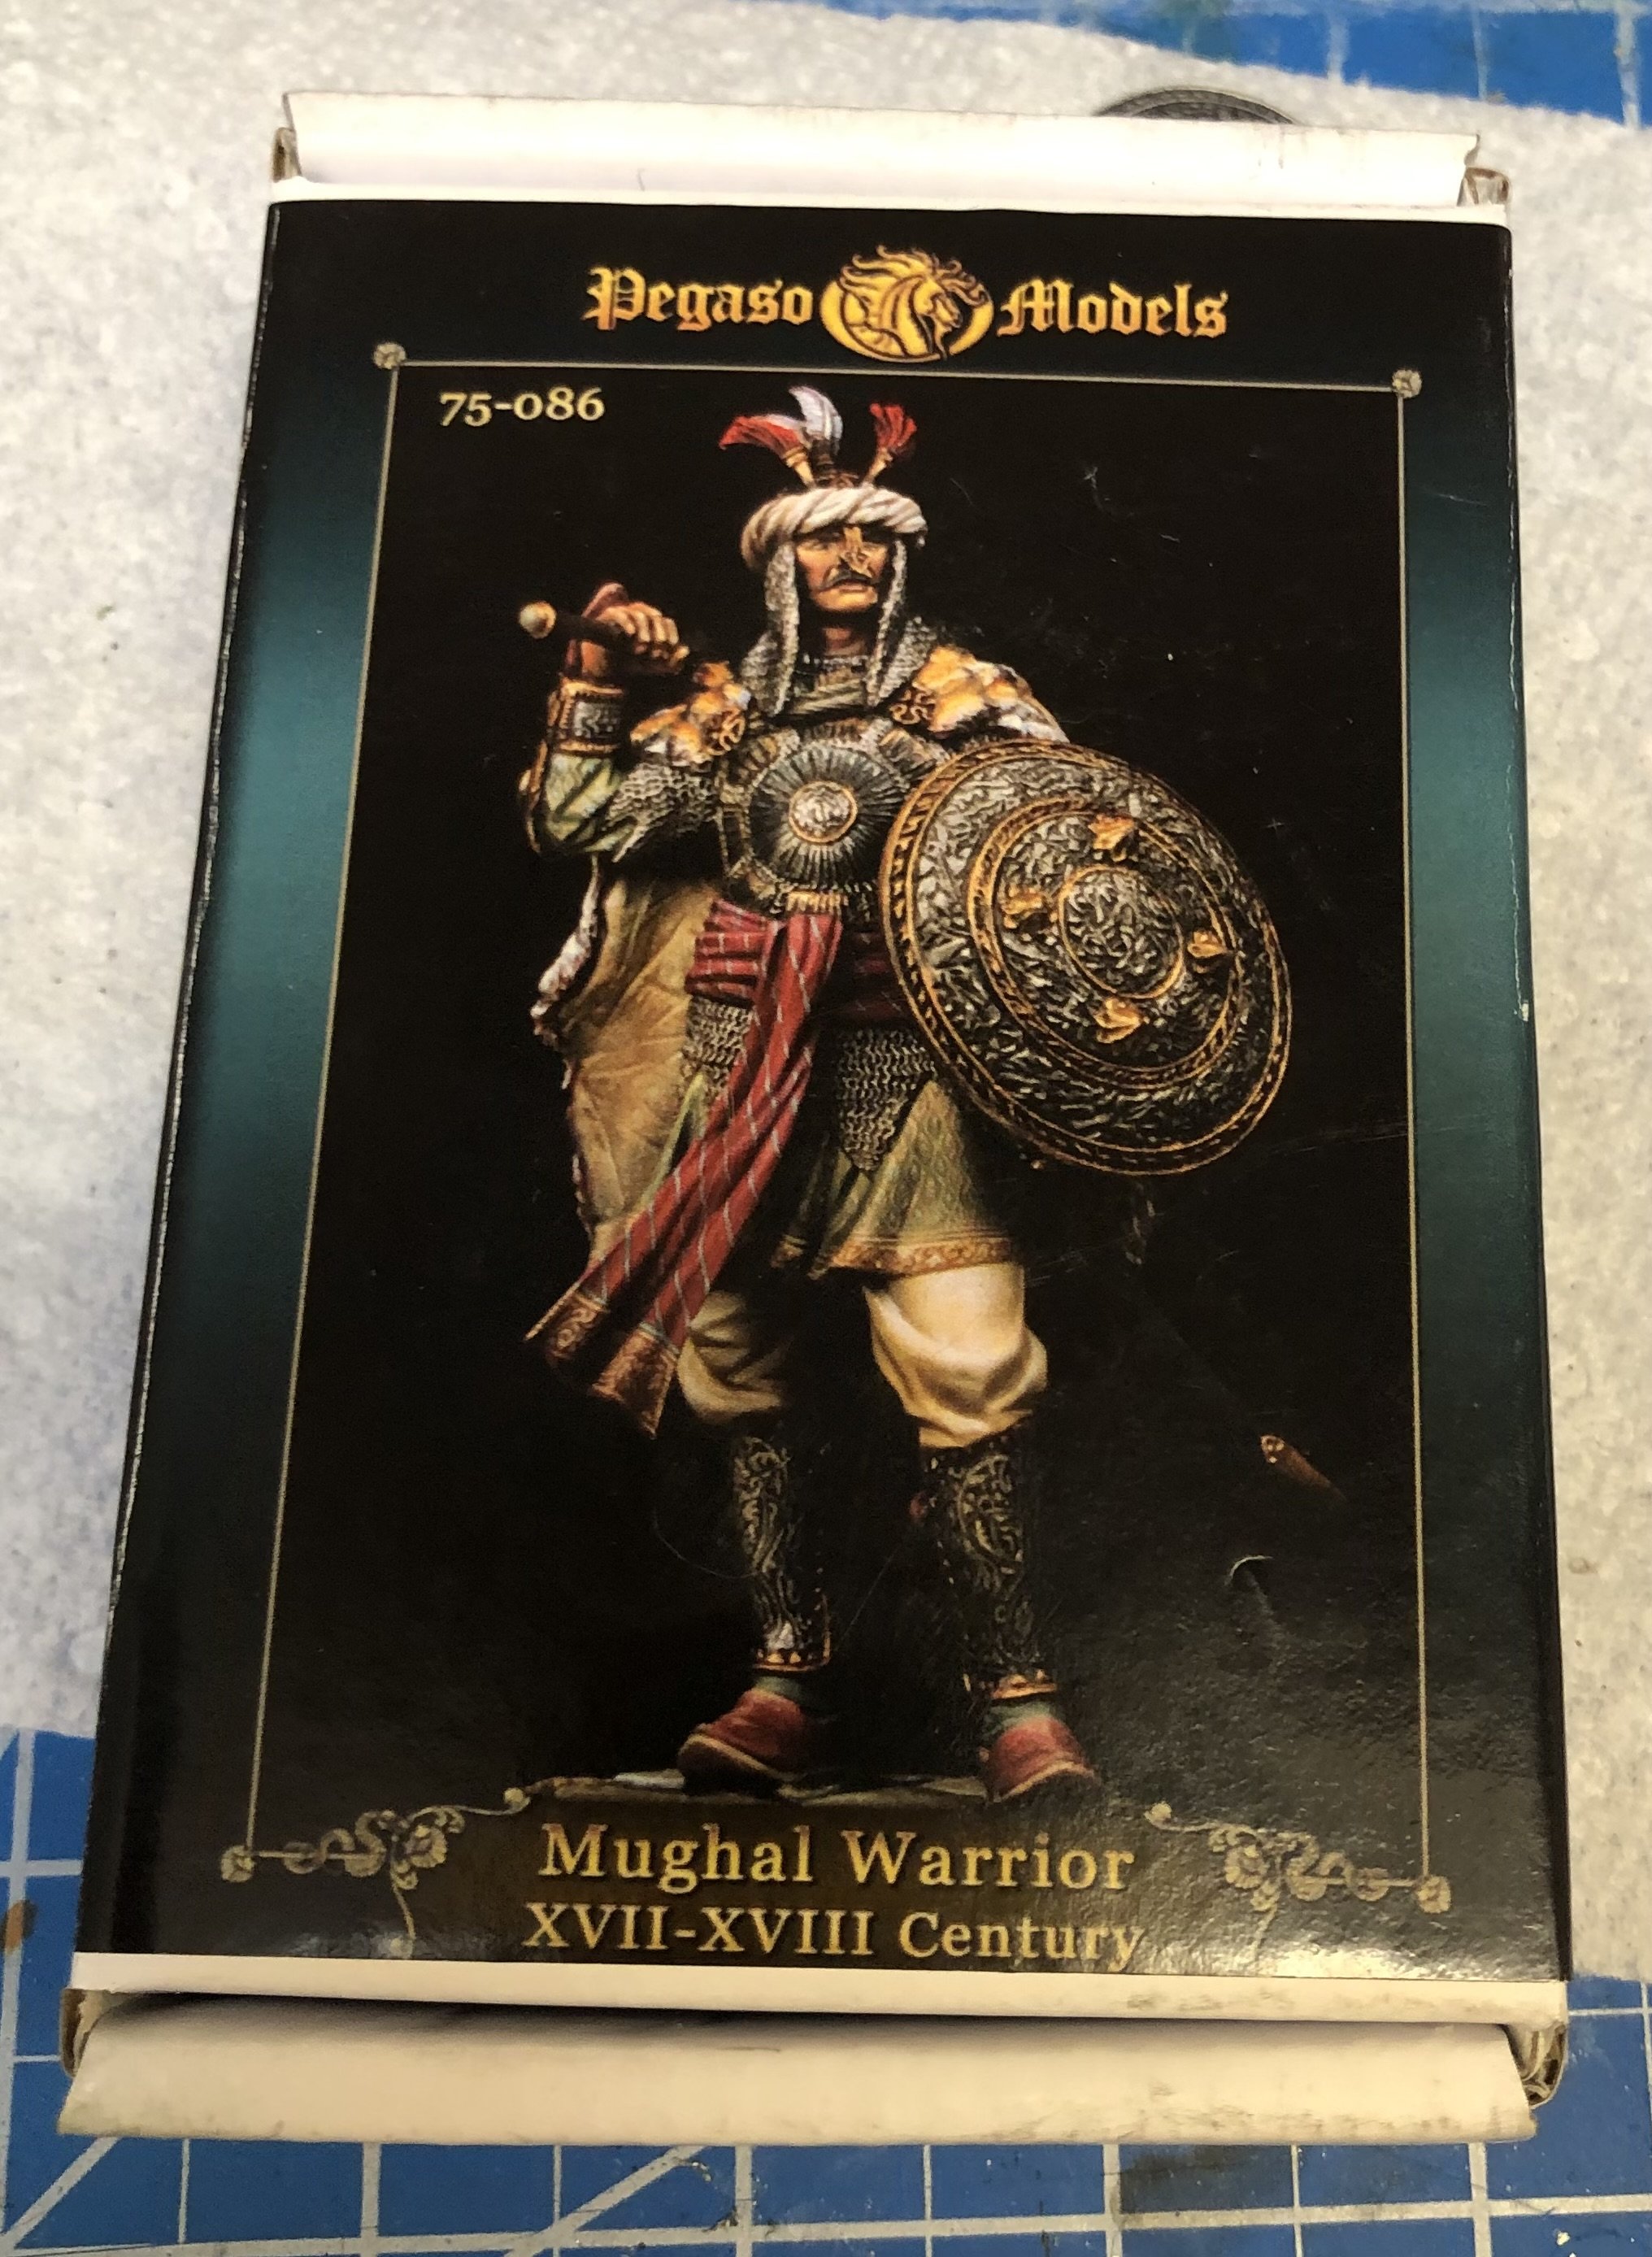
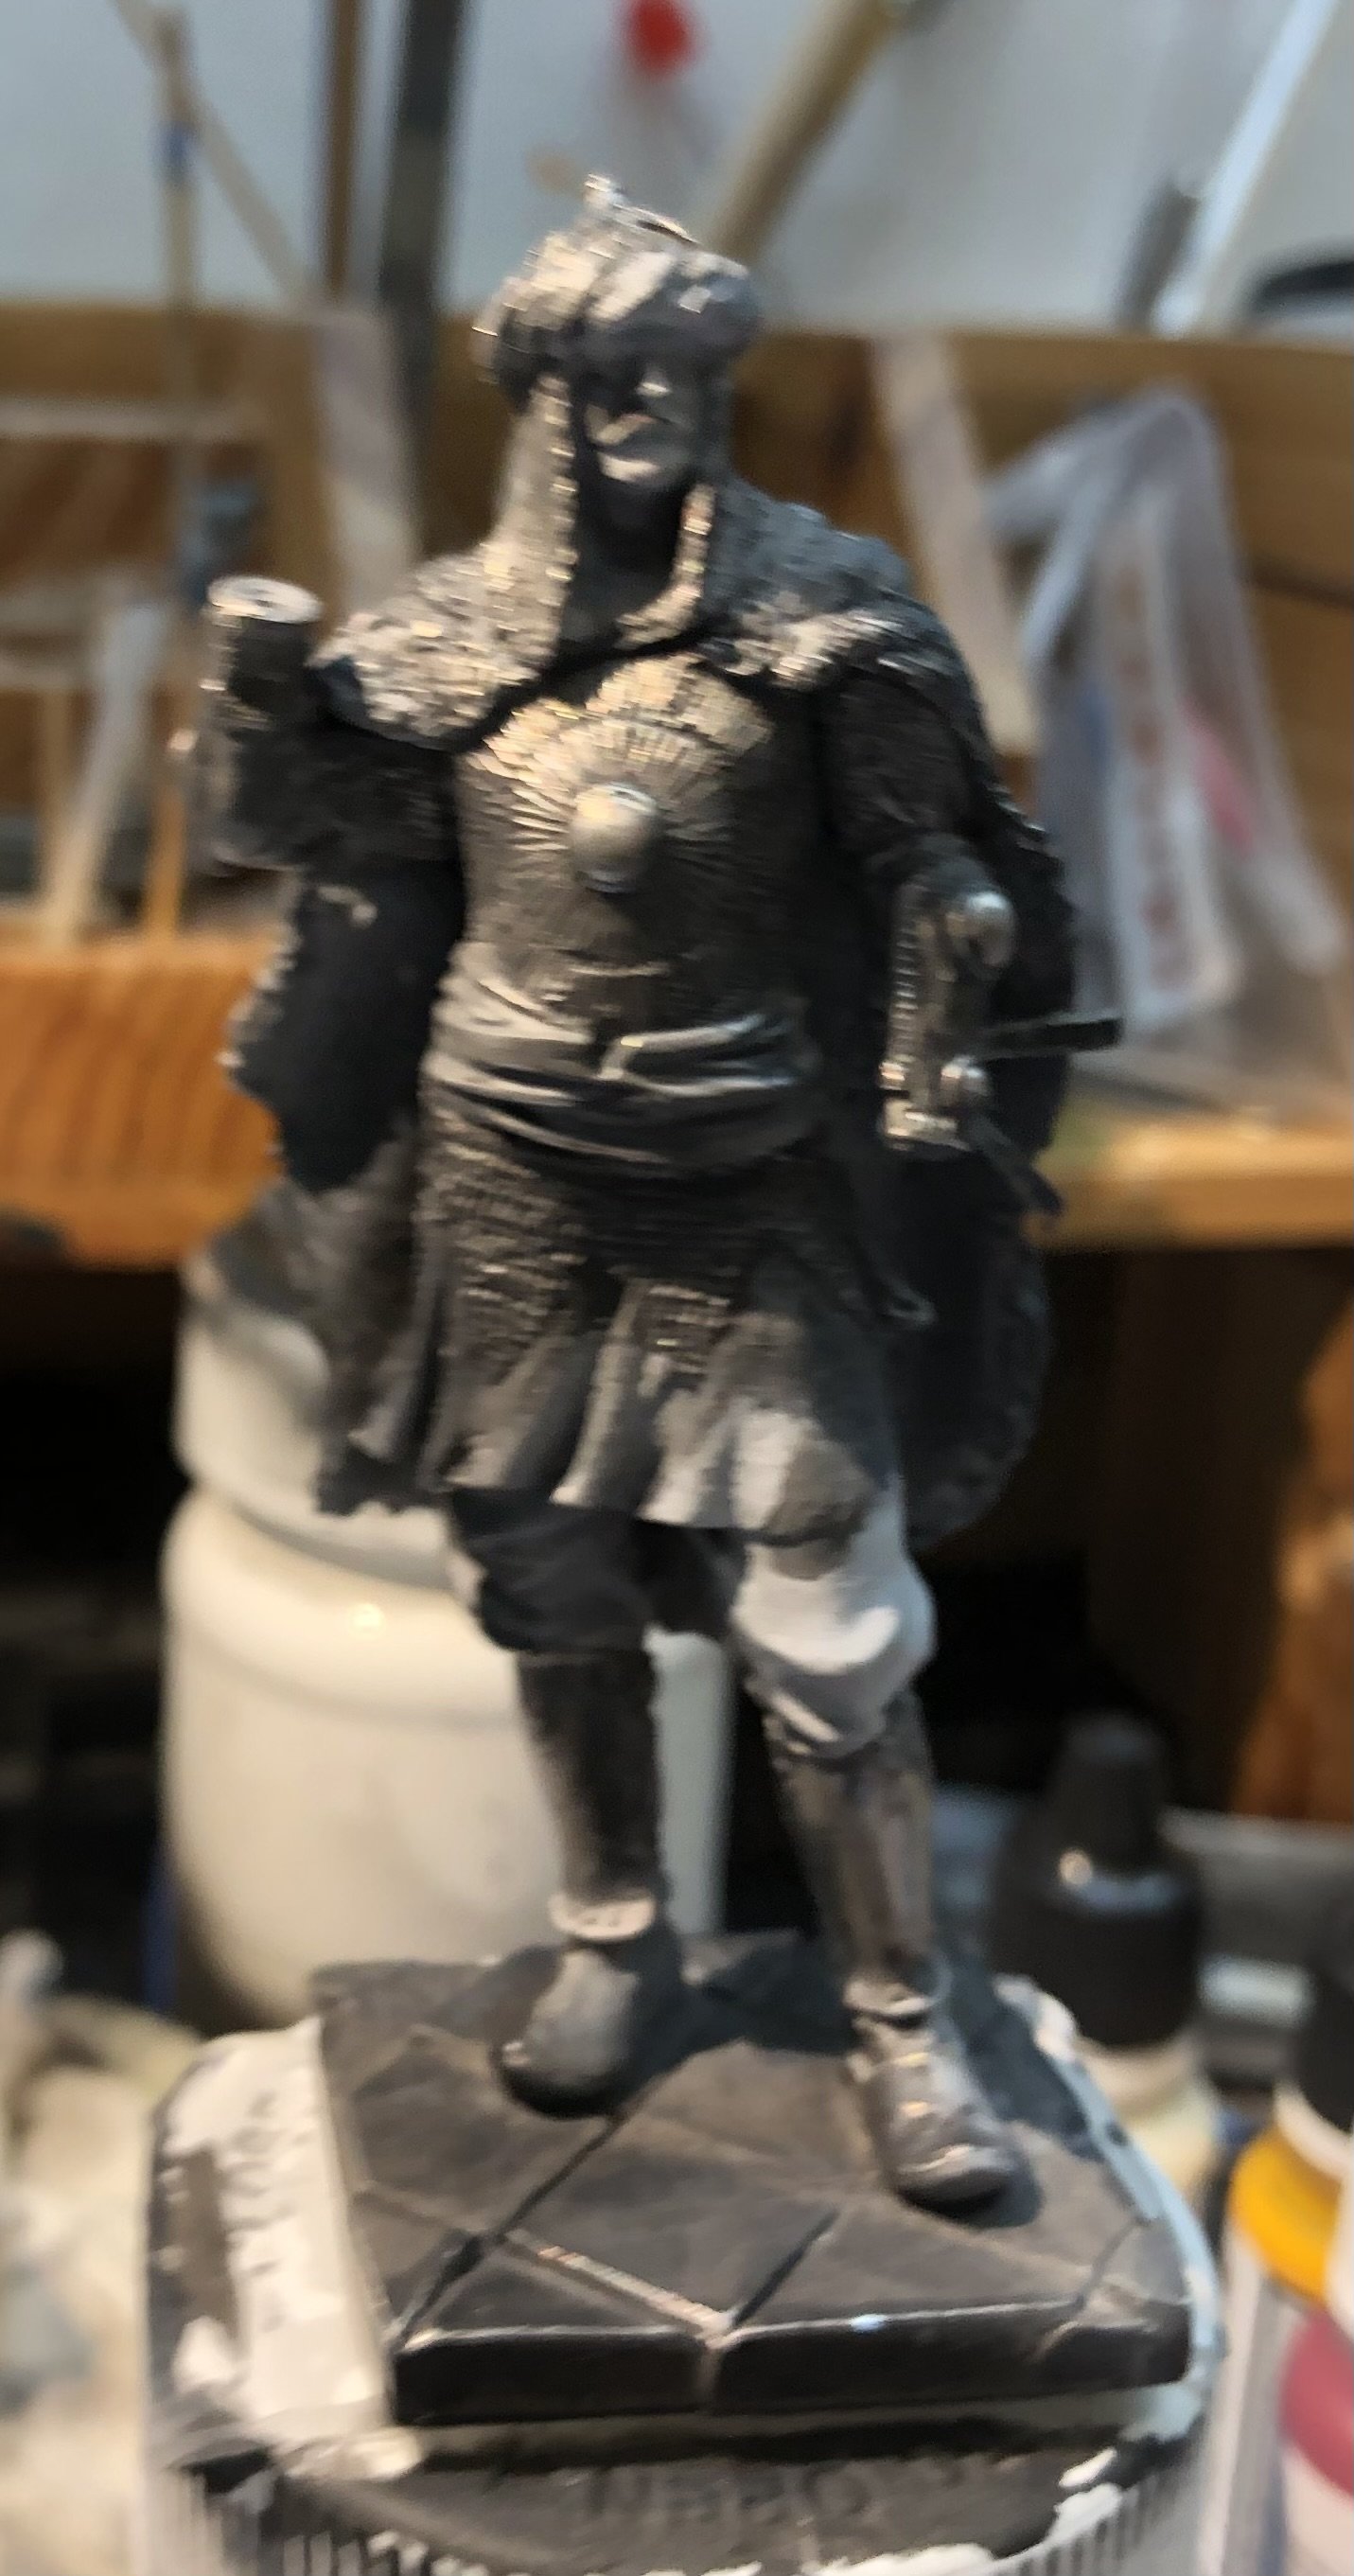
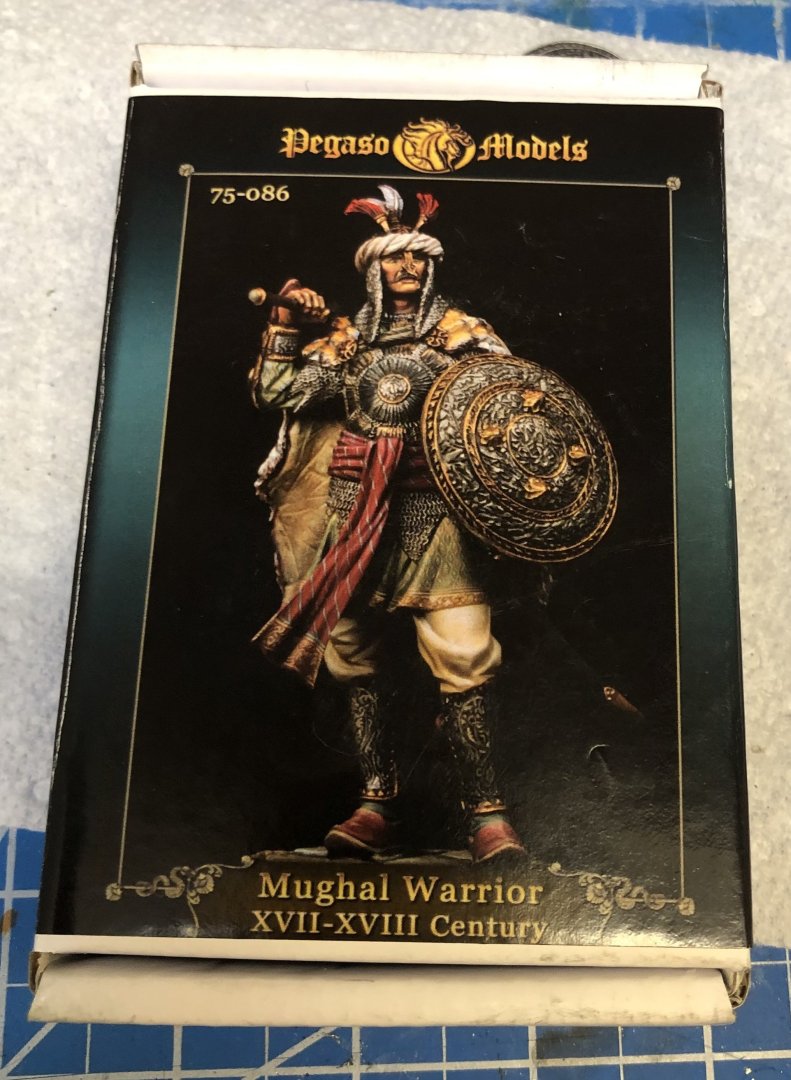
Here we go again. I find these figures to fun, interesting and relatively quick. What’s not to like. So, back to Pegaso and a slightly larger figure at 75 mm. A lot of meta armor to try to polish up and gild and something completely new- a tiger skin cloak to attempt. The painting guide calls out a bearskin cloak but the box art is definitely from a tiger, probably responsibly harvested. So there is a fall back if my painting skills fall short. The guide departs considerably from the box art but there are a lot of options. I like the box top scheme so we will start there and see what happens. I forgot to take the initial photos but it was the usual assembly of the main figure, black primer and white zenithal shading. I’ve started polishing the helmet, greaves, chain mail and body armor. This will then get details picked out in gold. Thanks for looking in Alan

-
T-90 by Mikegr - FINISHED - AM - 1/72 - PLASTIC
king derelict replied to mikegr's topic in Non-ship/categorised builds
That’s disappointing. It’s a seriously busy turret and a shame they seem to have dropped the ball alan -
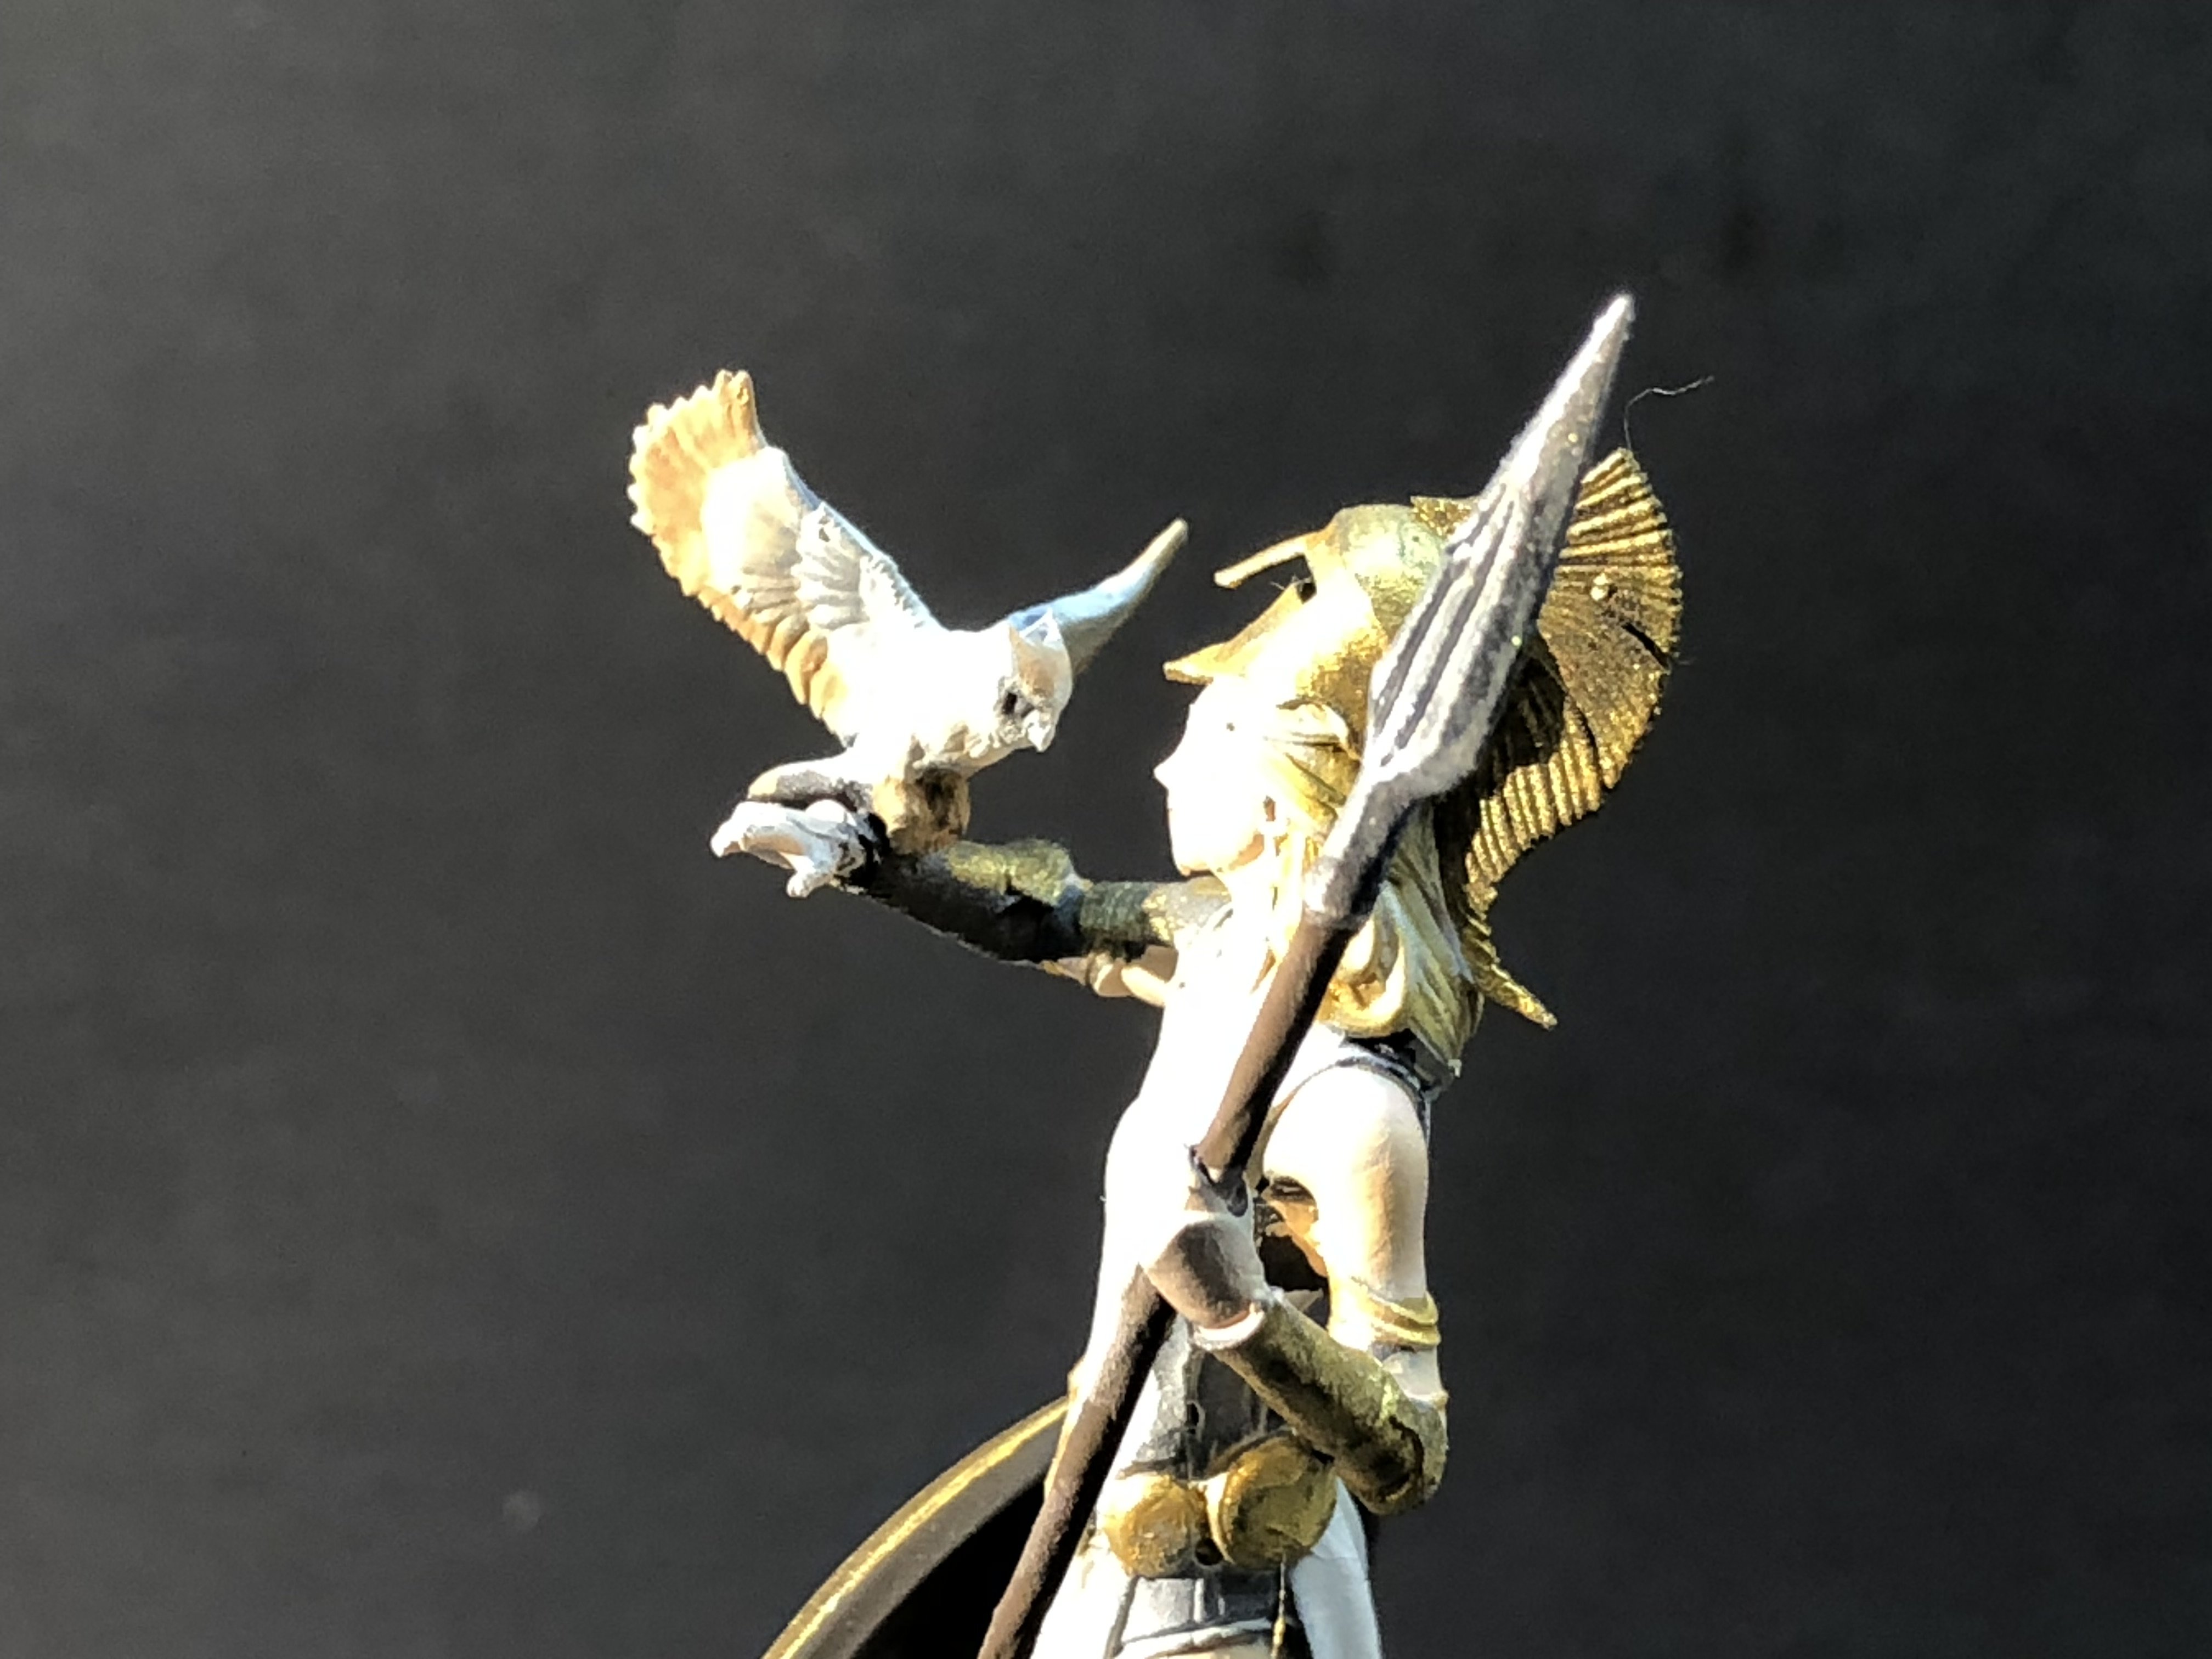
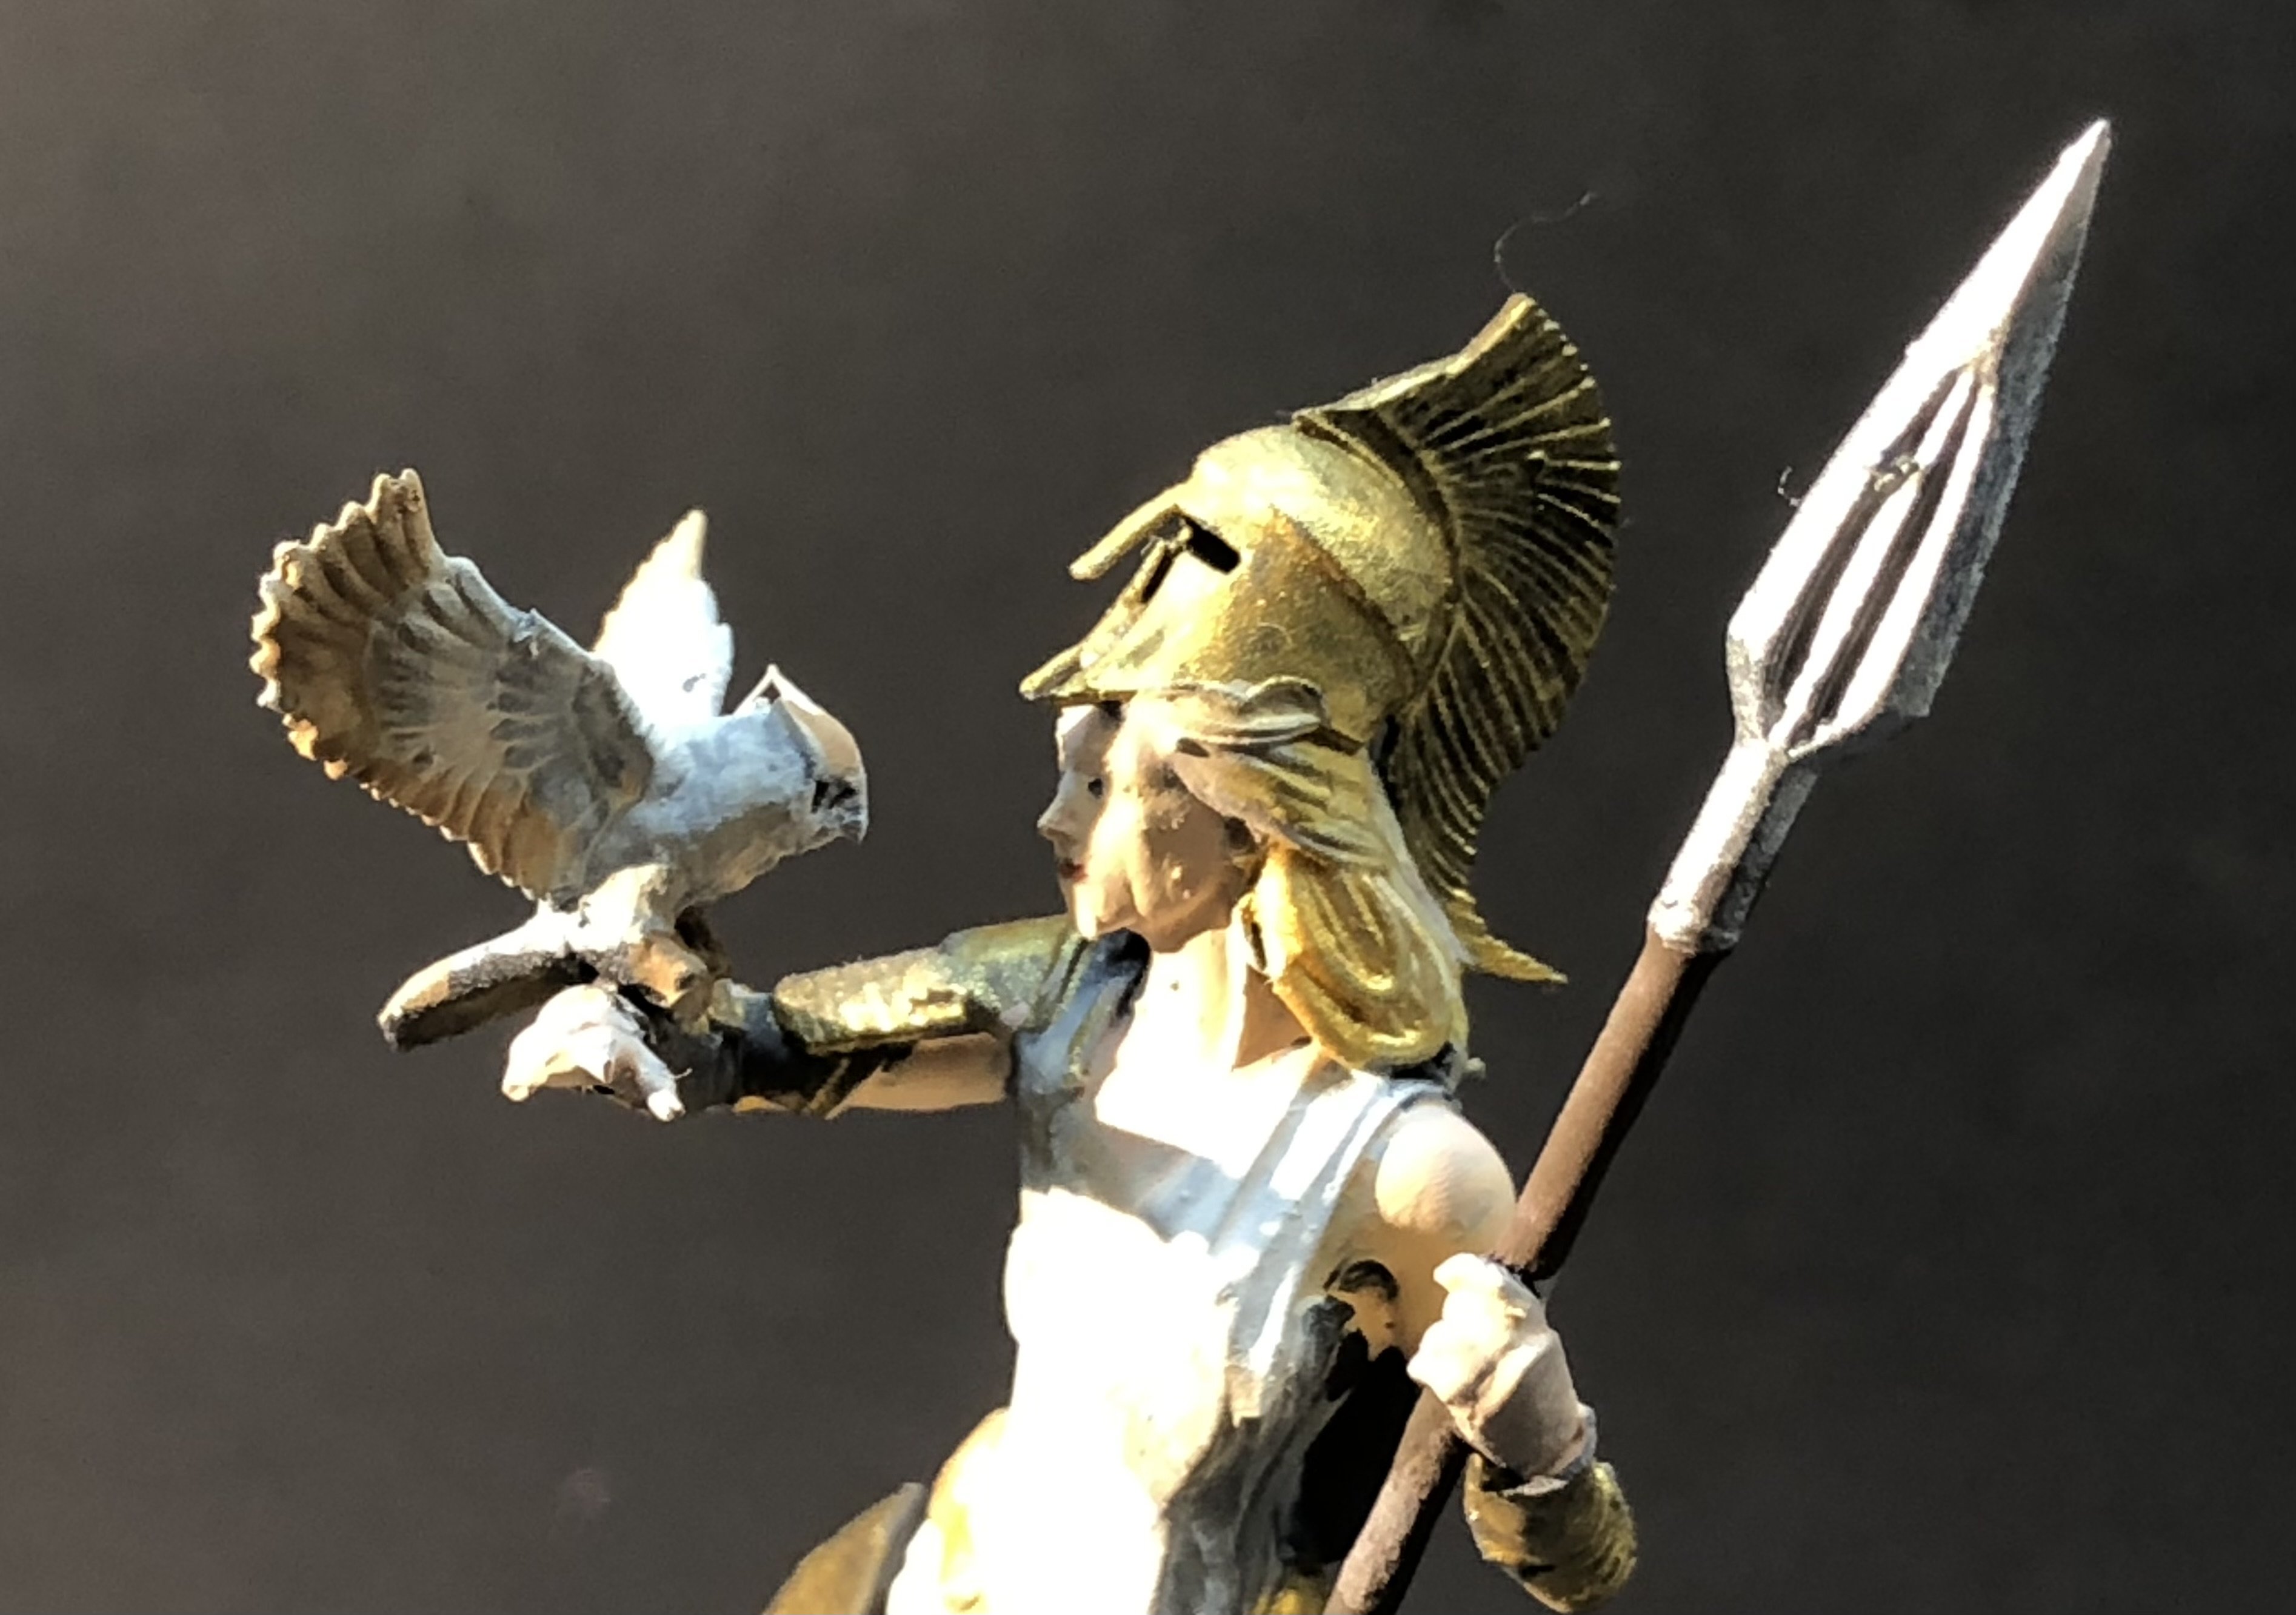
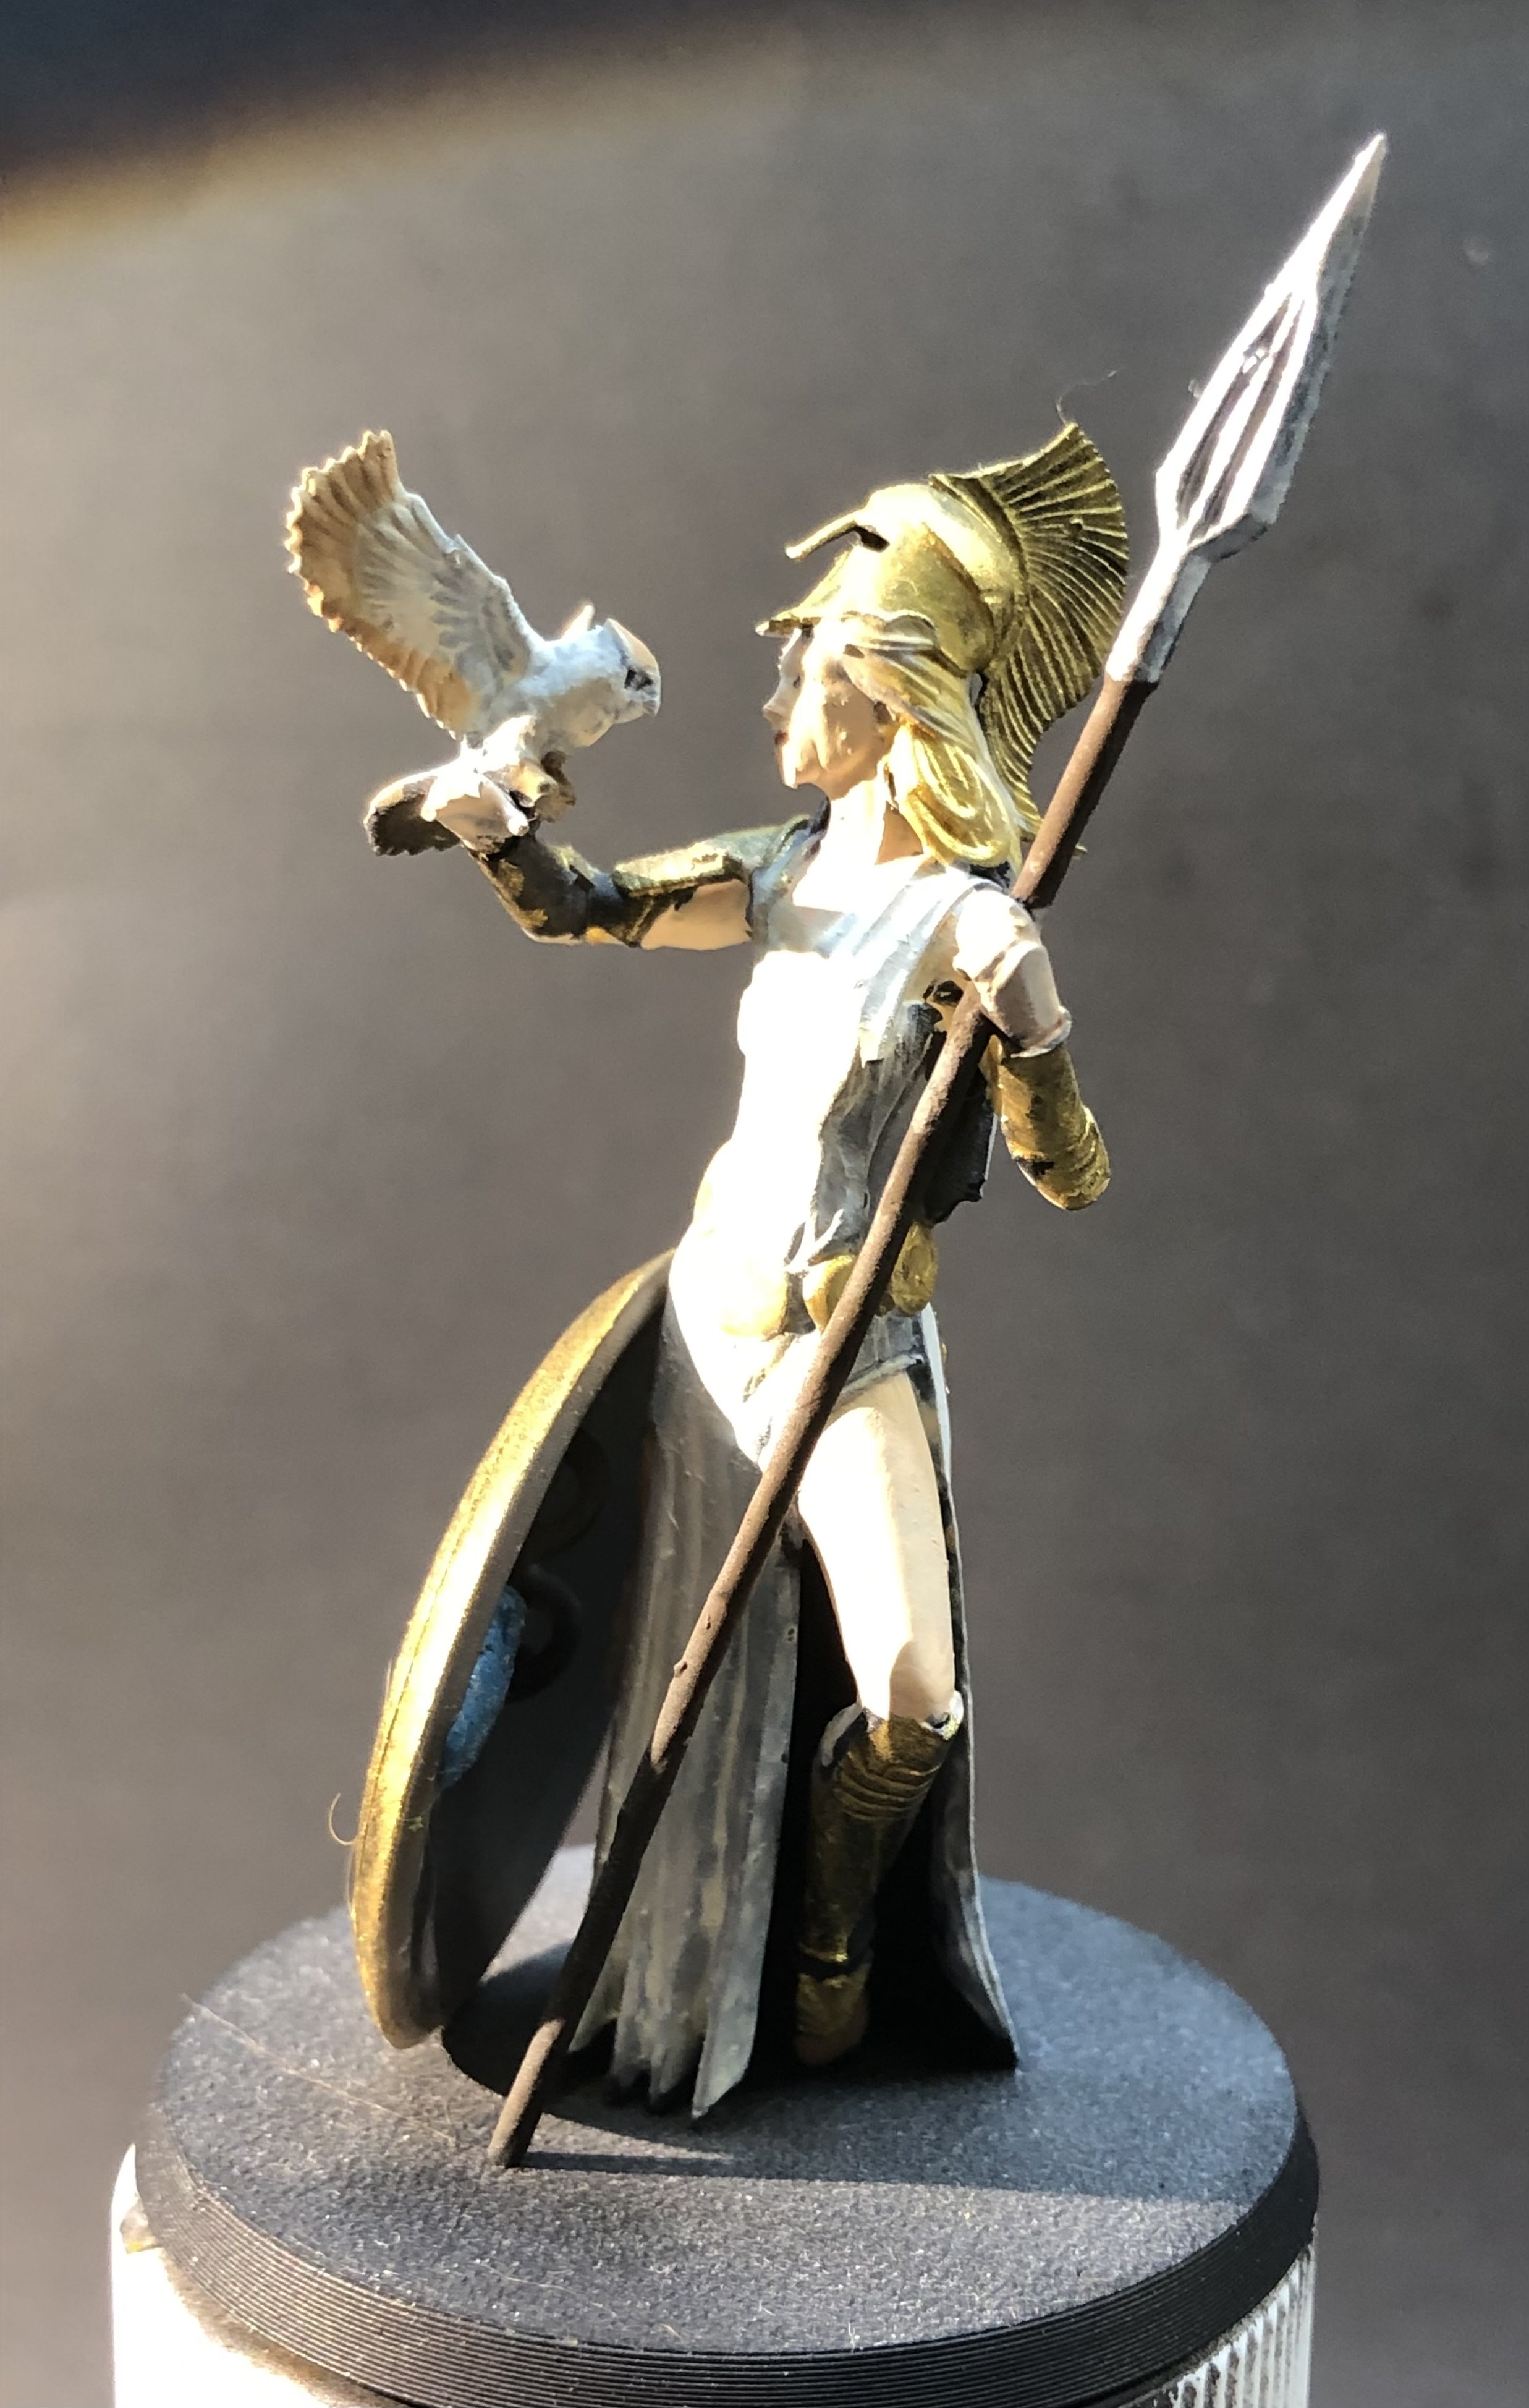
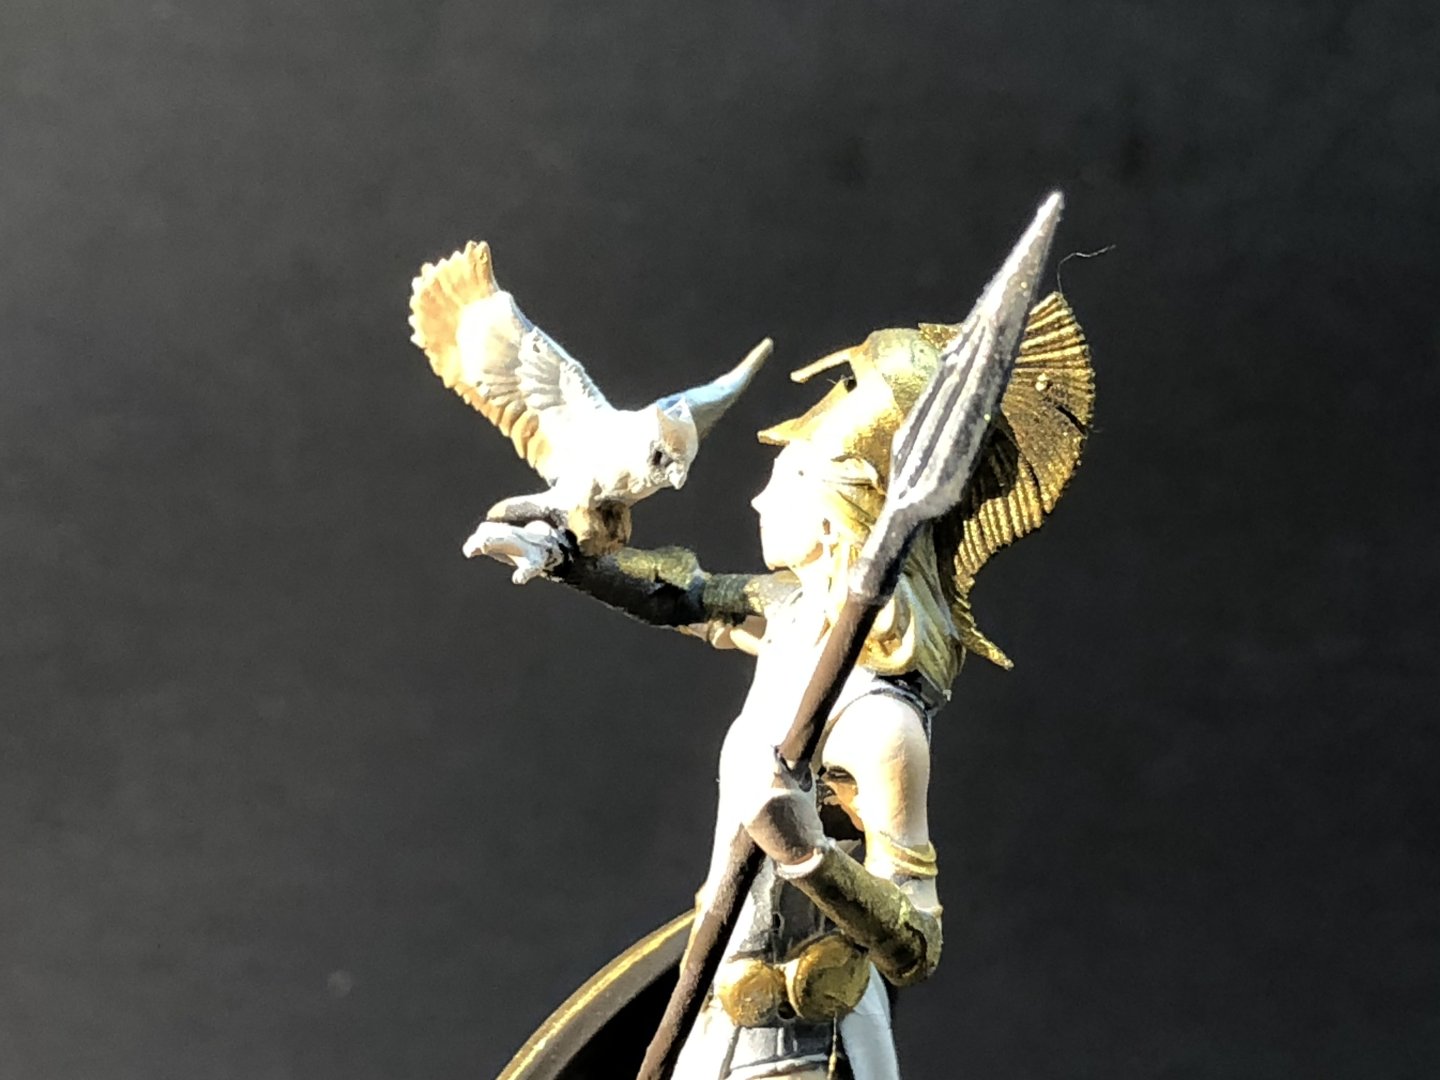
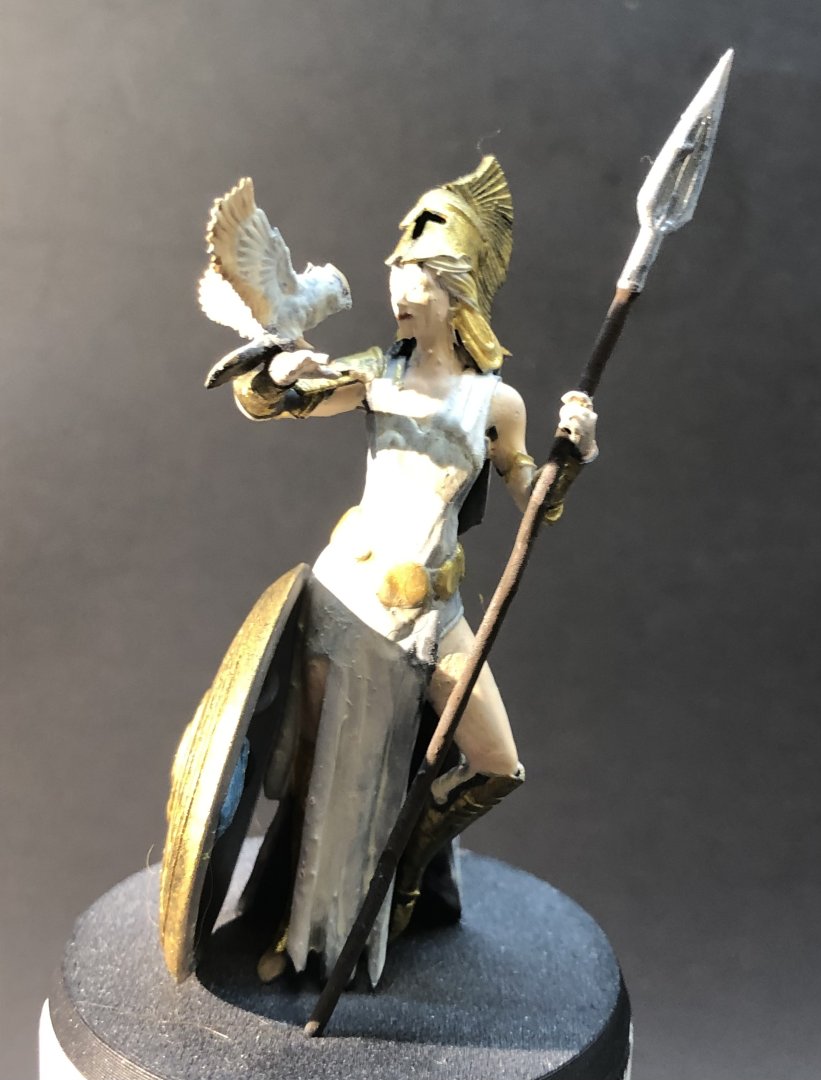
Thank you Jeff. The Athena figure was a bit of a disappointment, the details are very soft especially for the face. It’s hard to decide where armor ends, robes start and skin is revealed. I found the face to be rather out of proportion too and without features it was hard to do much with it. A learning experience I suppose and I will move on to something better. alan
-
Thank you very much OC. Uniforms with piping, buttons and facings are a real challenge for me. I don’t know how you did it at 28 mm Alan
-
Ron, that’s exactly what the base needs! 😎 And maybe a bag of boiled peanuts somewhere. Alan
-
I cycled the Katy trail several times during my St. Louis years. Your scenery is very evocative and brings back happy memories. alan
-
T-90 by Mikegr - FINISHED - AM - 1/72 - PLASTIC
king derelict replied to mikegr's topic in Non-ship/categorised builds
It’s amazing how many parts they can cram into a 1/72 tank. Looks like an interesting project and you should have a lot of fun with it. I do like 1/72 armor except possibly the tracks. alan -
And at risk of derailing my own build log I thought I’d share a few images of this figure seeing as it’s been lurking in the background of the photos for a while. It’s a generic resin print from Etsy bought on a whim. This is Athena and her wise owl. The print was a bit disappointing with a lot of blurred details but I wanted to try blonde hair so I thought I would give it a go anyway. The face has no features other than the nose so I struggled with eyes and mouth. I think the face is overly long but criticizing the gods might be impertinent. So this is the result. I might try another reprinted figure but I feel safer with the metal offerings. The blonde hair isn’t too bad for a first attempt but the owl is my favorite bit of the piece. Thanks for looking in Alan


-
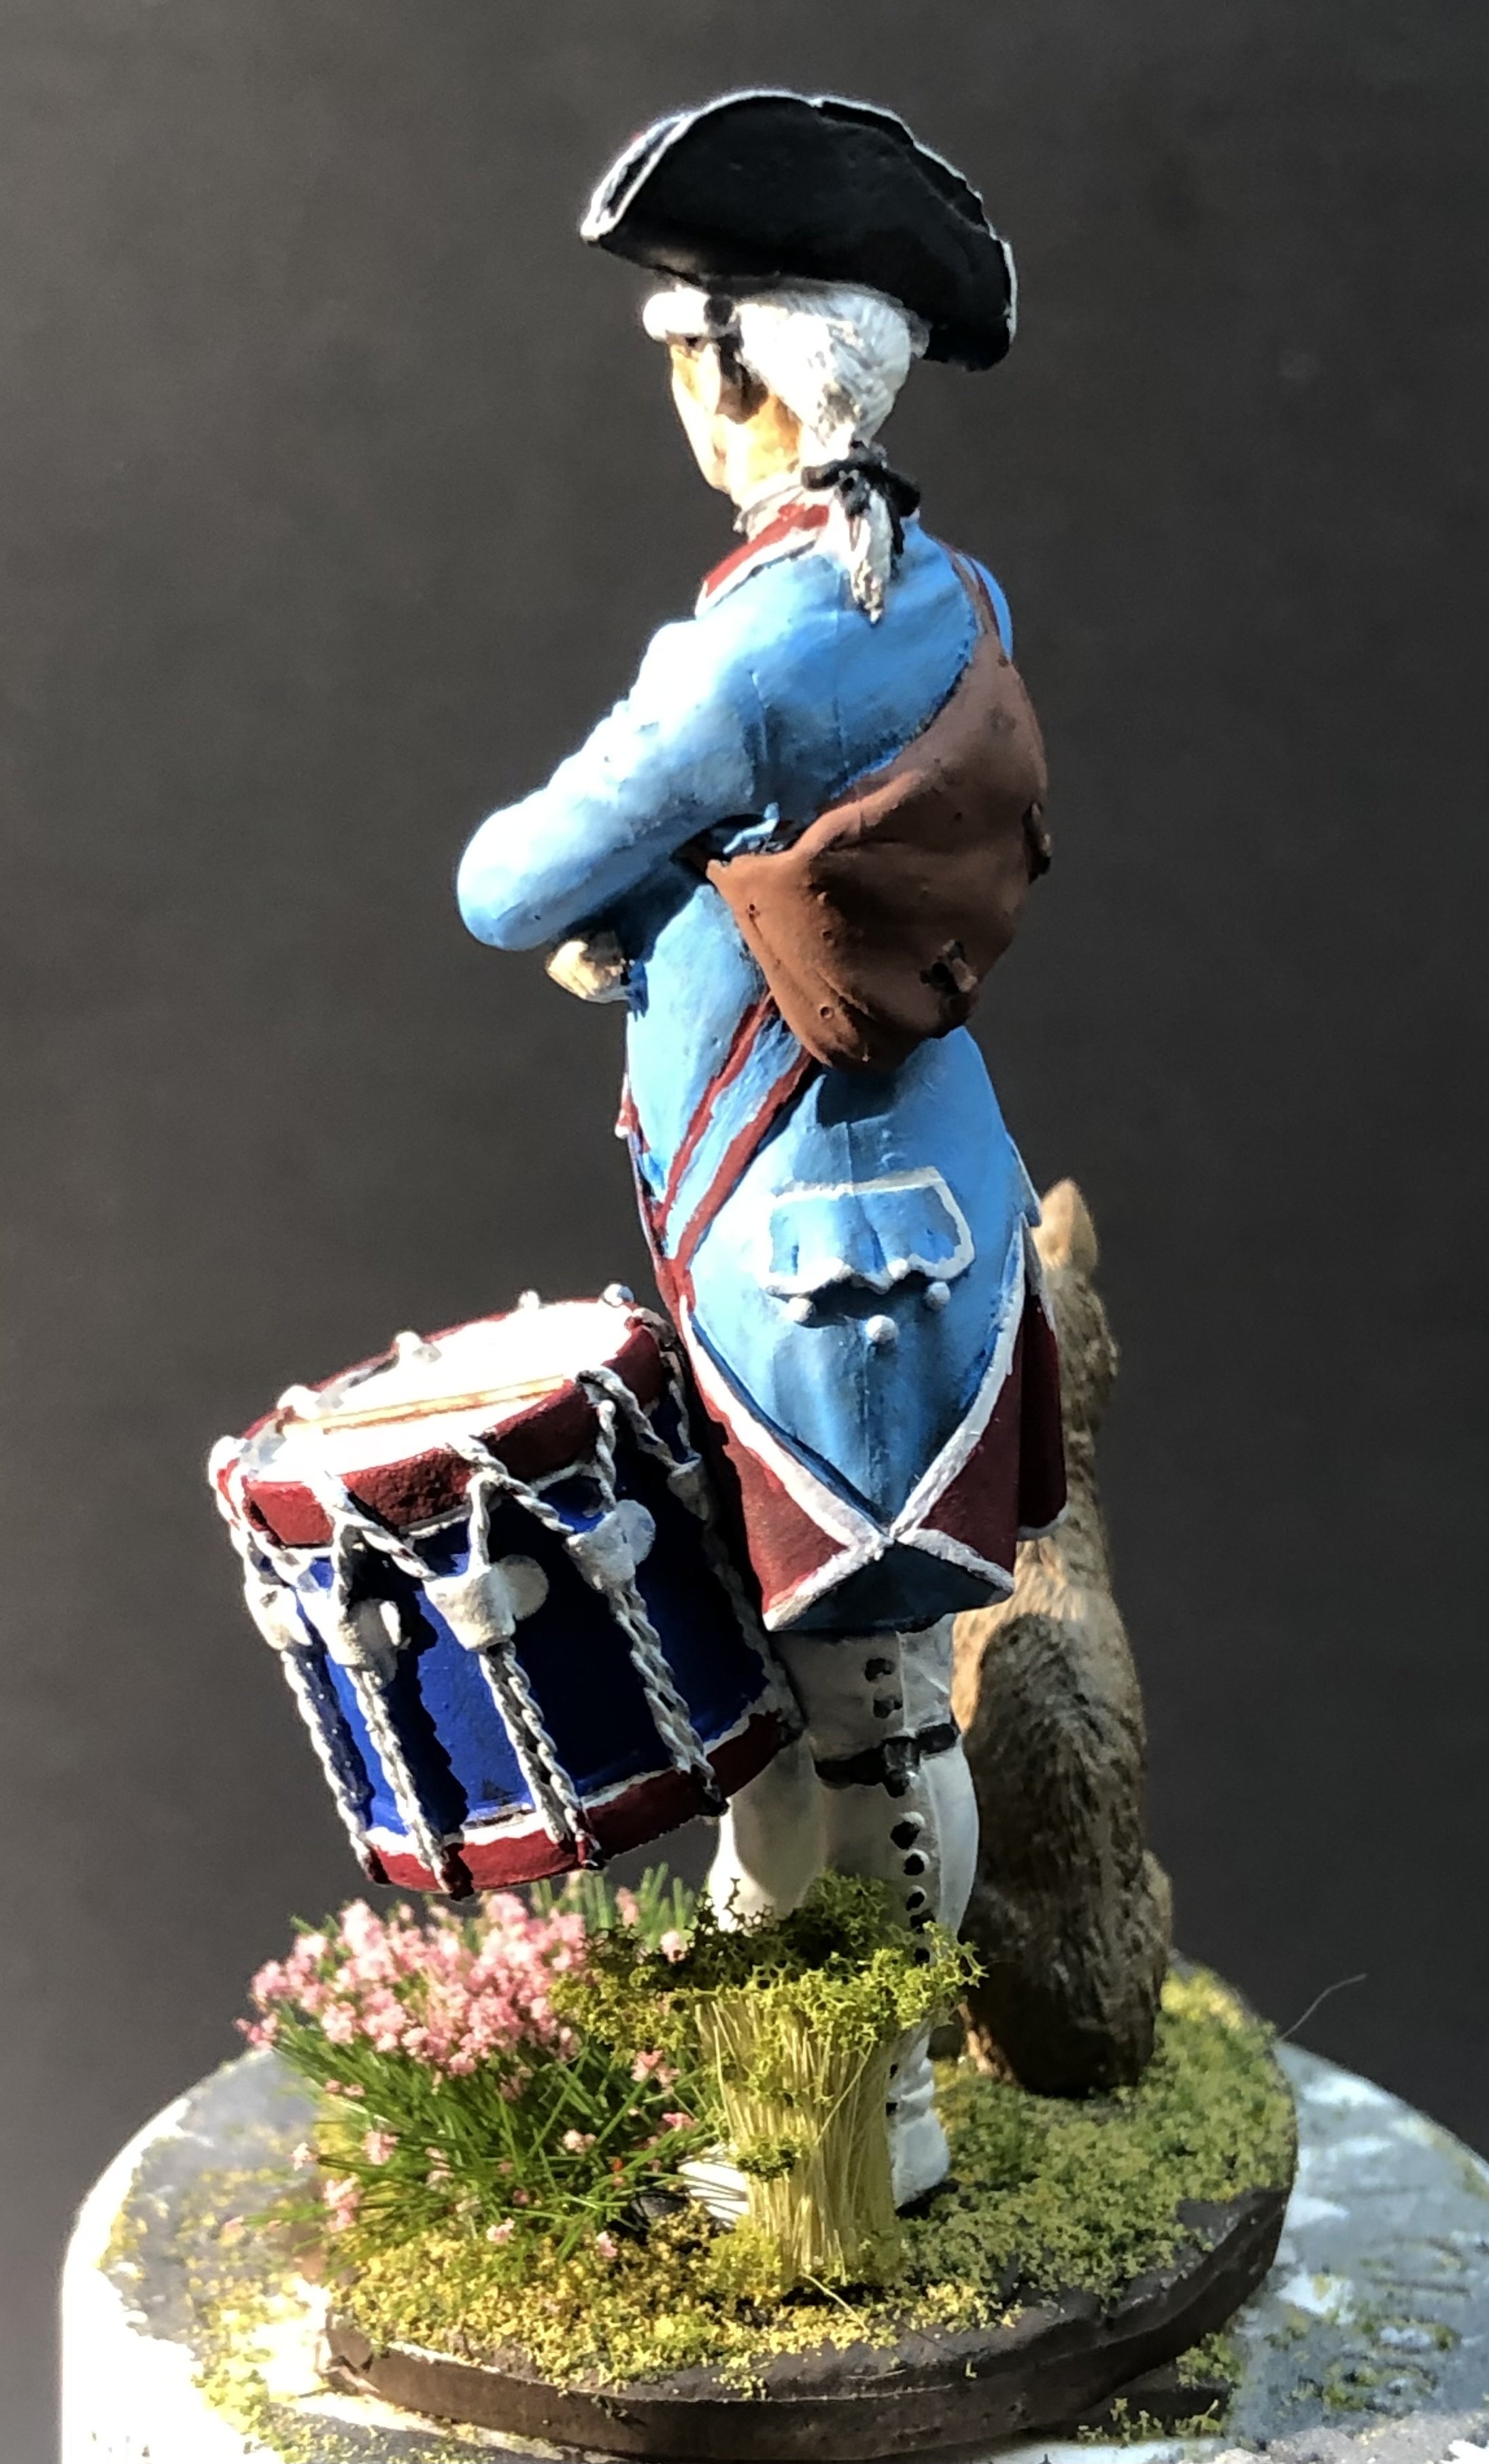
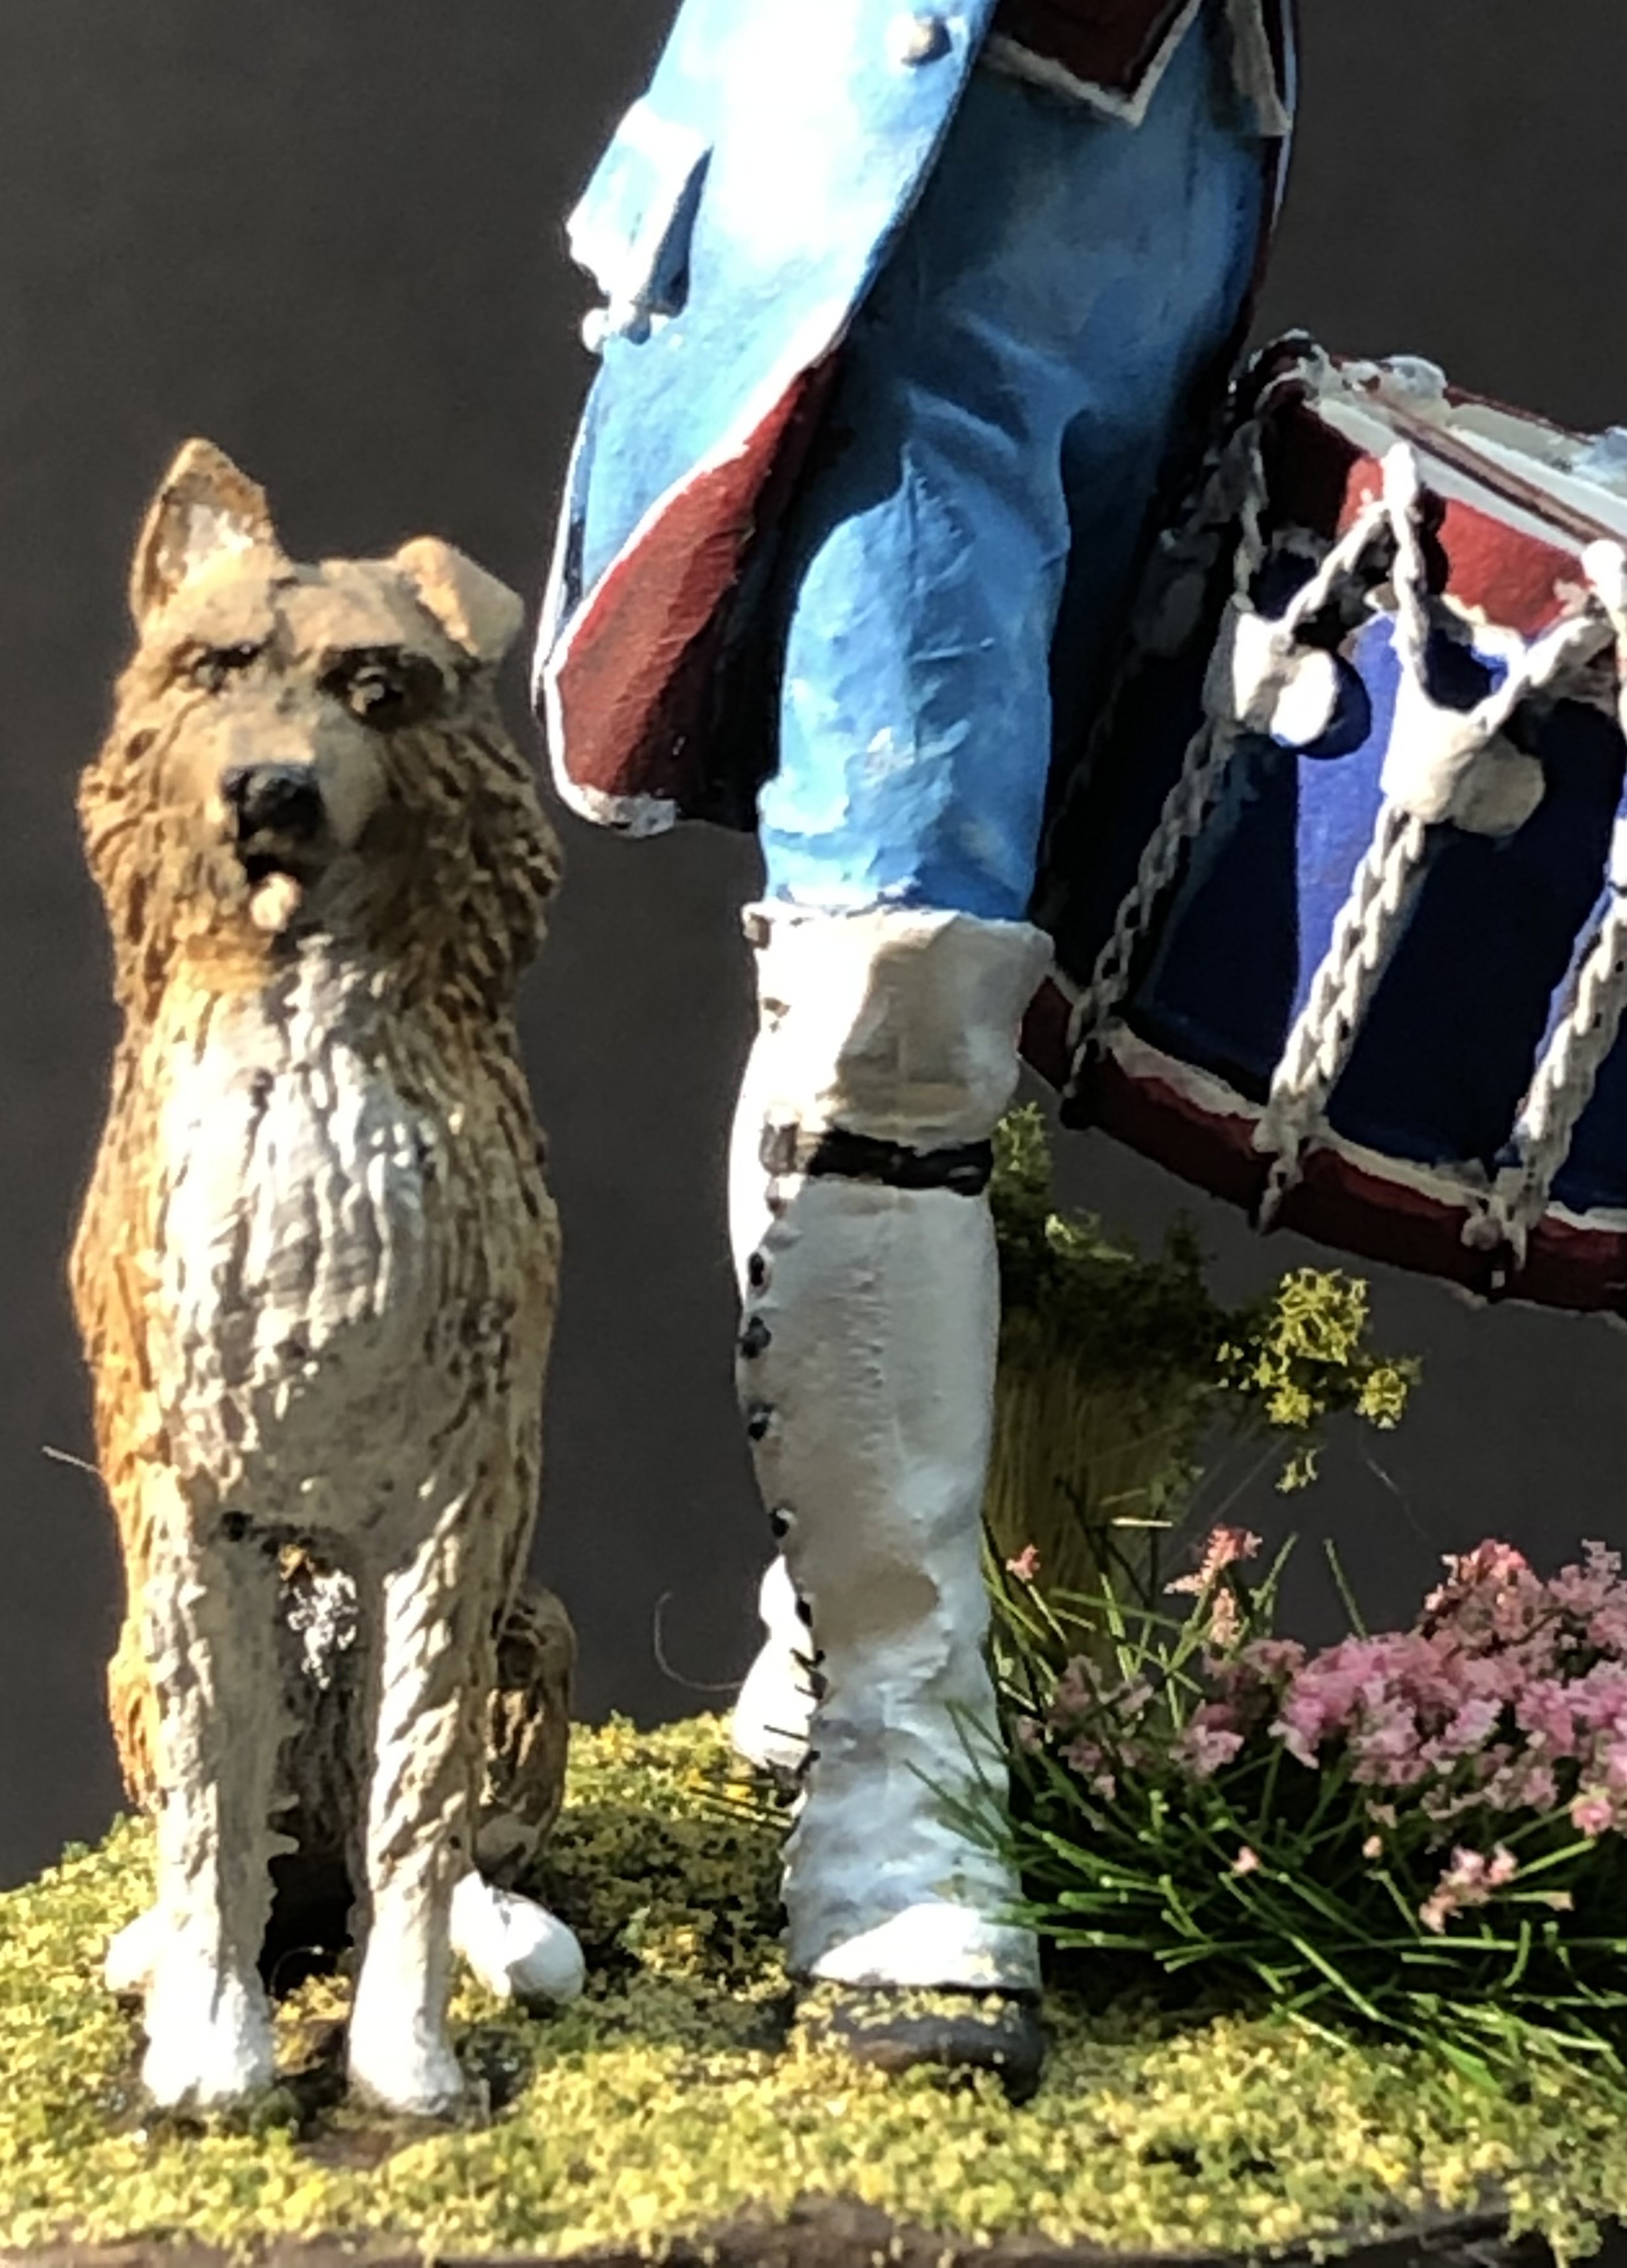
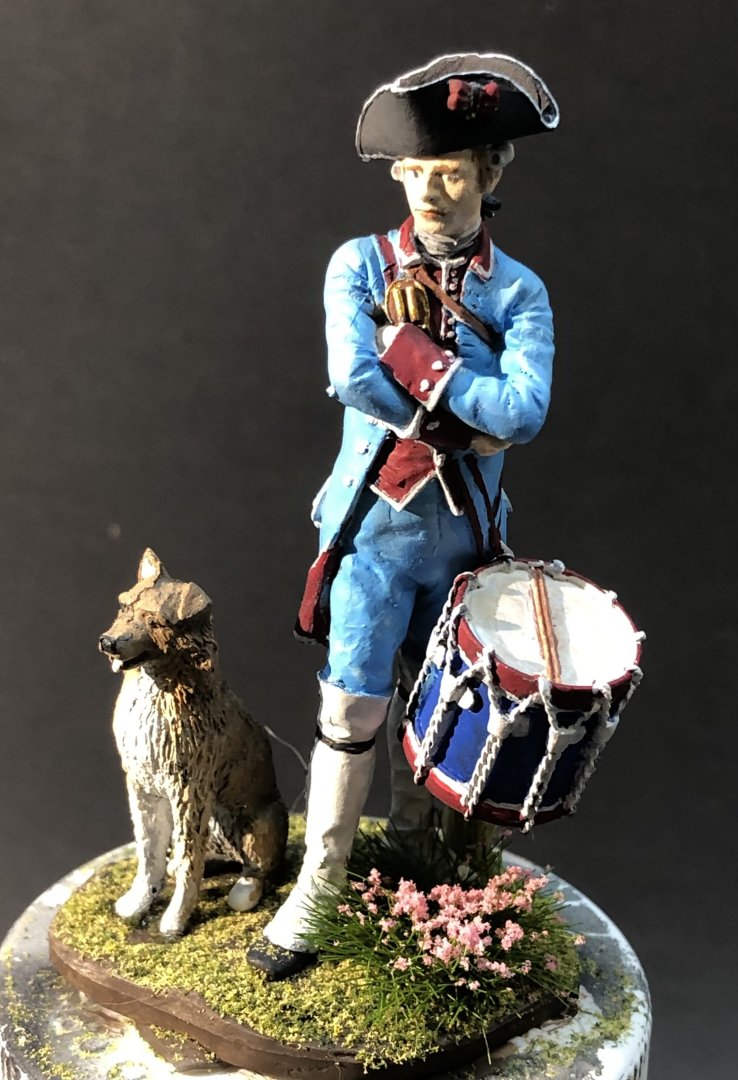
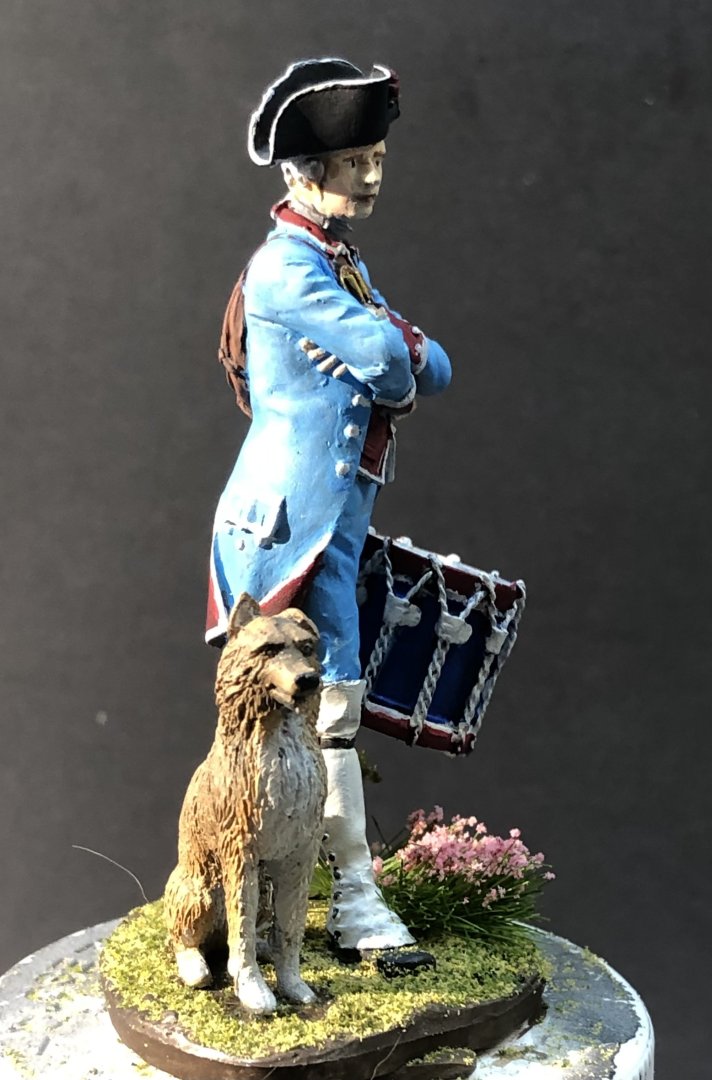
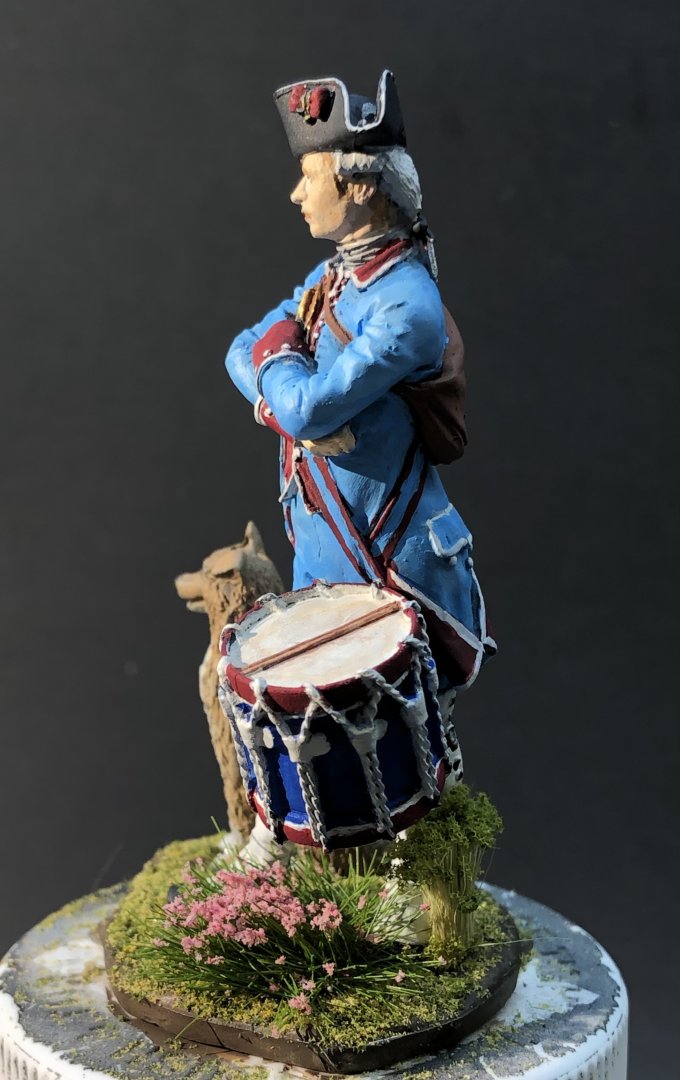
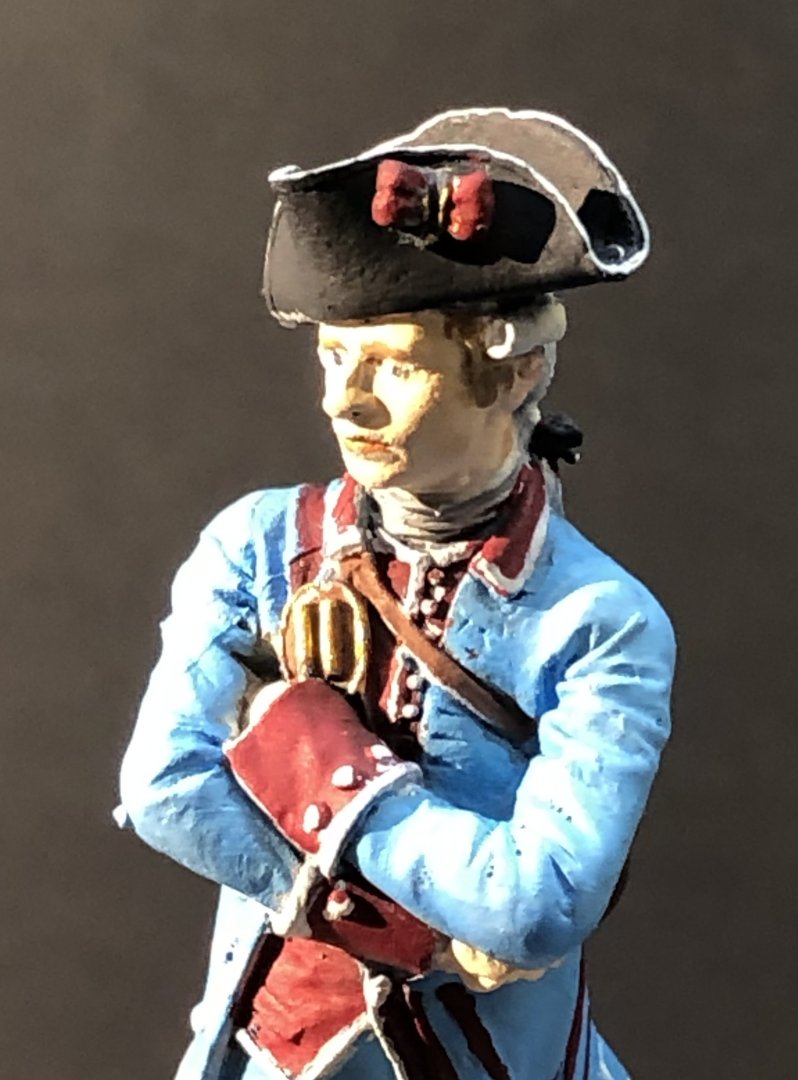
I finished tidying up the last details and epoxied the dog to the base and then added the drum. It’s suddenly starting to look quite nice. I painted the base with diluted white glue and shook Woodland Scenics grass on. After it dried I dumped the surplus and added a couple of tufts of vegetation. Ive left a bit of room in case the MiG tropical vegetation shows up in the near future. I’m quite pleased with the results. The Art Girona sculptor is not the one associated with the figures Ive painted so far. I don’t think he’s as good but it’s still a very nice piece. As always thanks for looking in, for the likes and encouraging comments. Alan


-
Thanks very much Andrew. I just realized that there are white buttons on his sleeves. Completely overlooked them whoops. Alan