HOLIDAY DONATION DRIVE - SUPPORT MSW - DO YOUR PART TO KEEP THIS GREAT FORUM GOING!
×


king derelict
-
Posts
3,266 -
Joined
-
Last visited
Content Type
Profiles
Forums
Gallery
Events
Everything posted by king derelict
-
Hi Ken You are right about the Yak-28 developing from the -27. All four missiles are included in the kit. I’m not sure if it makes sense to use any or all of them. I had a brief look at the engine nacelles and I need to save up my allowance of bad language for them.
-
Thanks Mike. I suspect there are some interesting issues ahead alan
-
Thanks OC. There seems to be a lot of time waiting for paint to dry and idle hands get into mischief 😃 alan
-
Lovely work and beautiful photographs. Alan
-
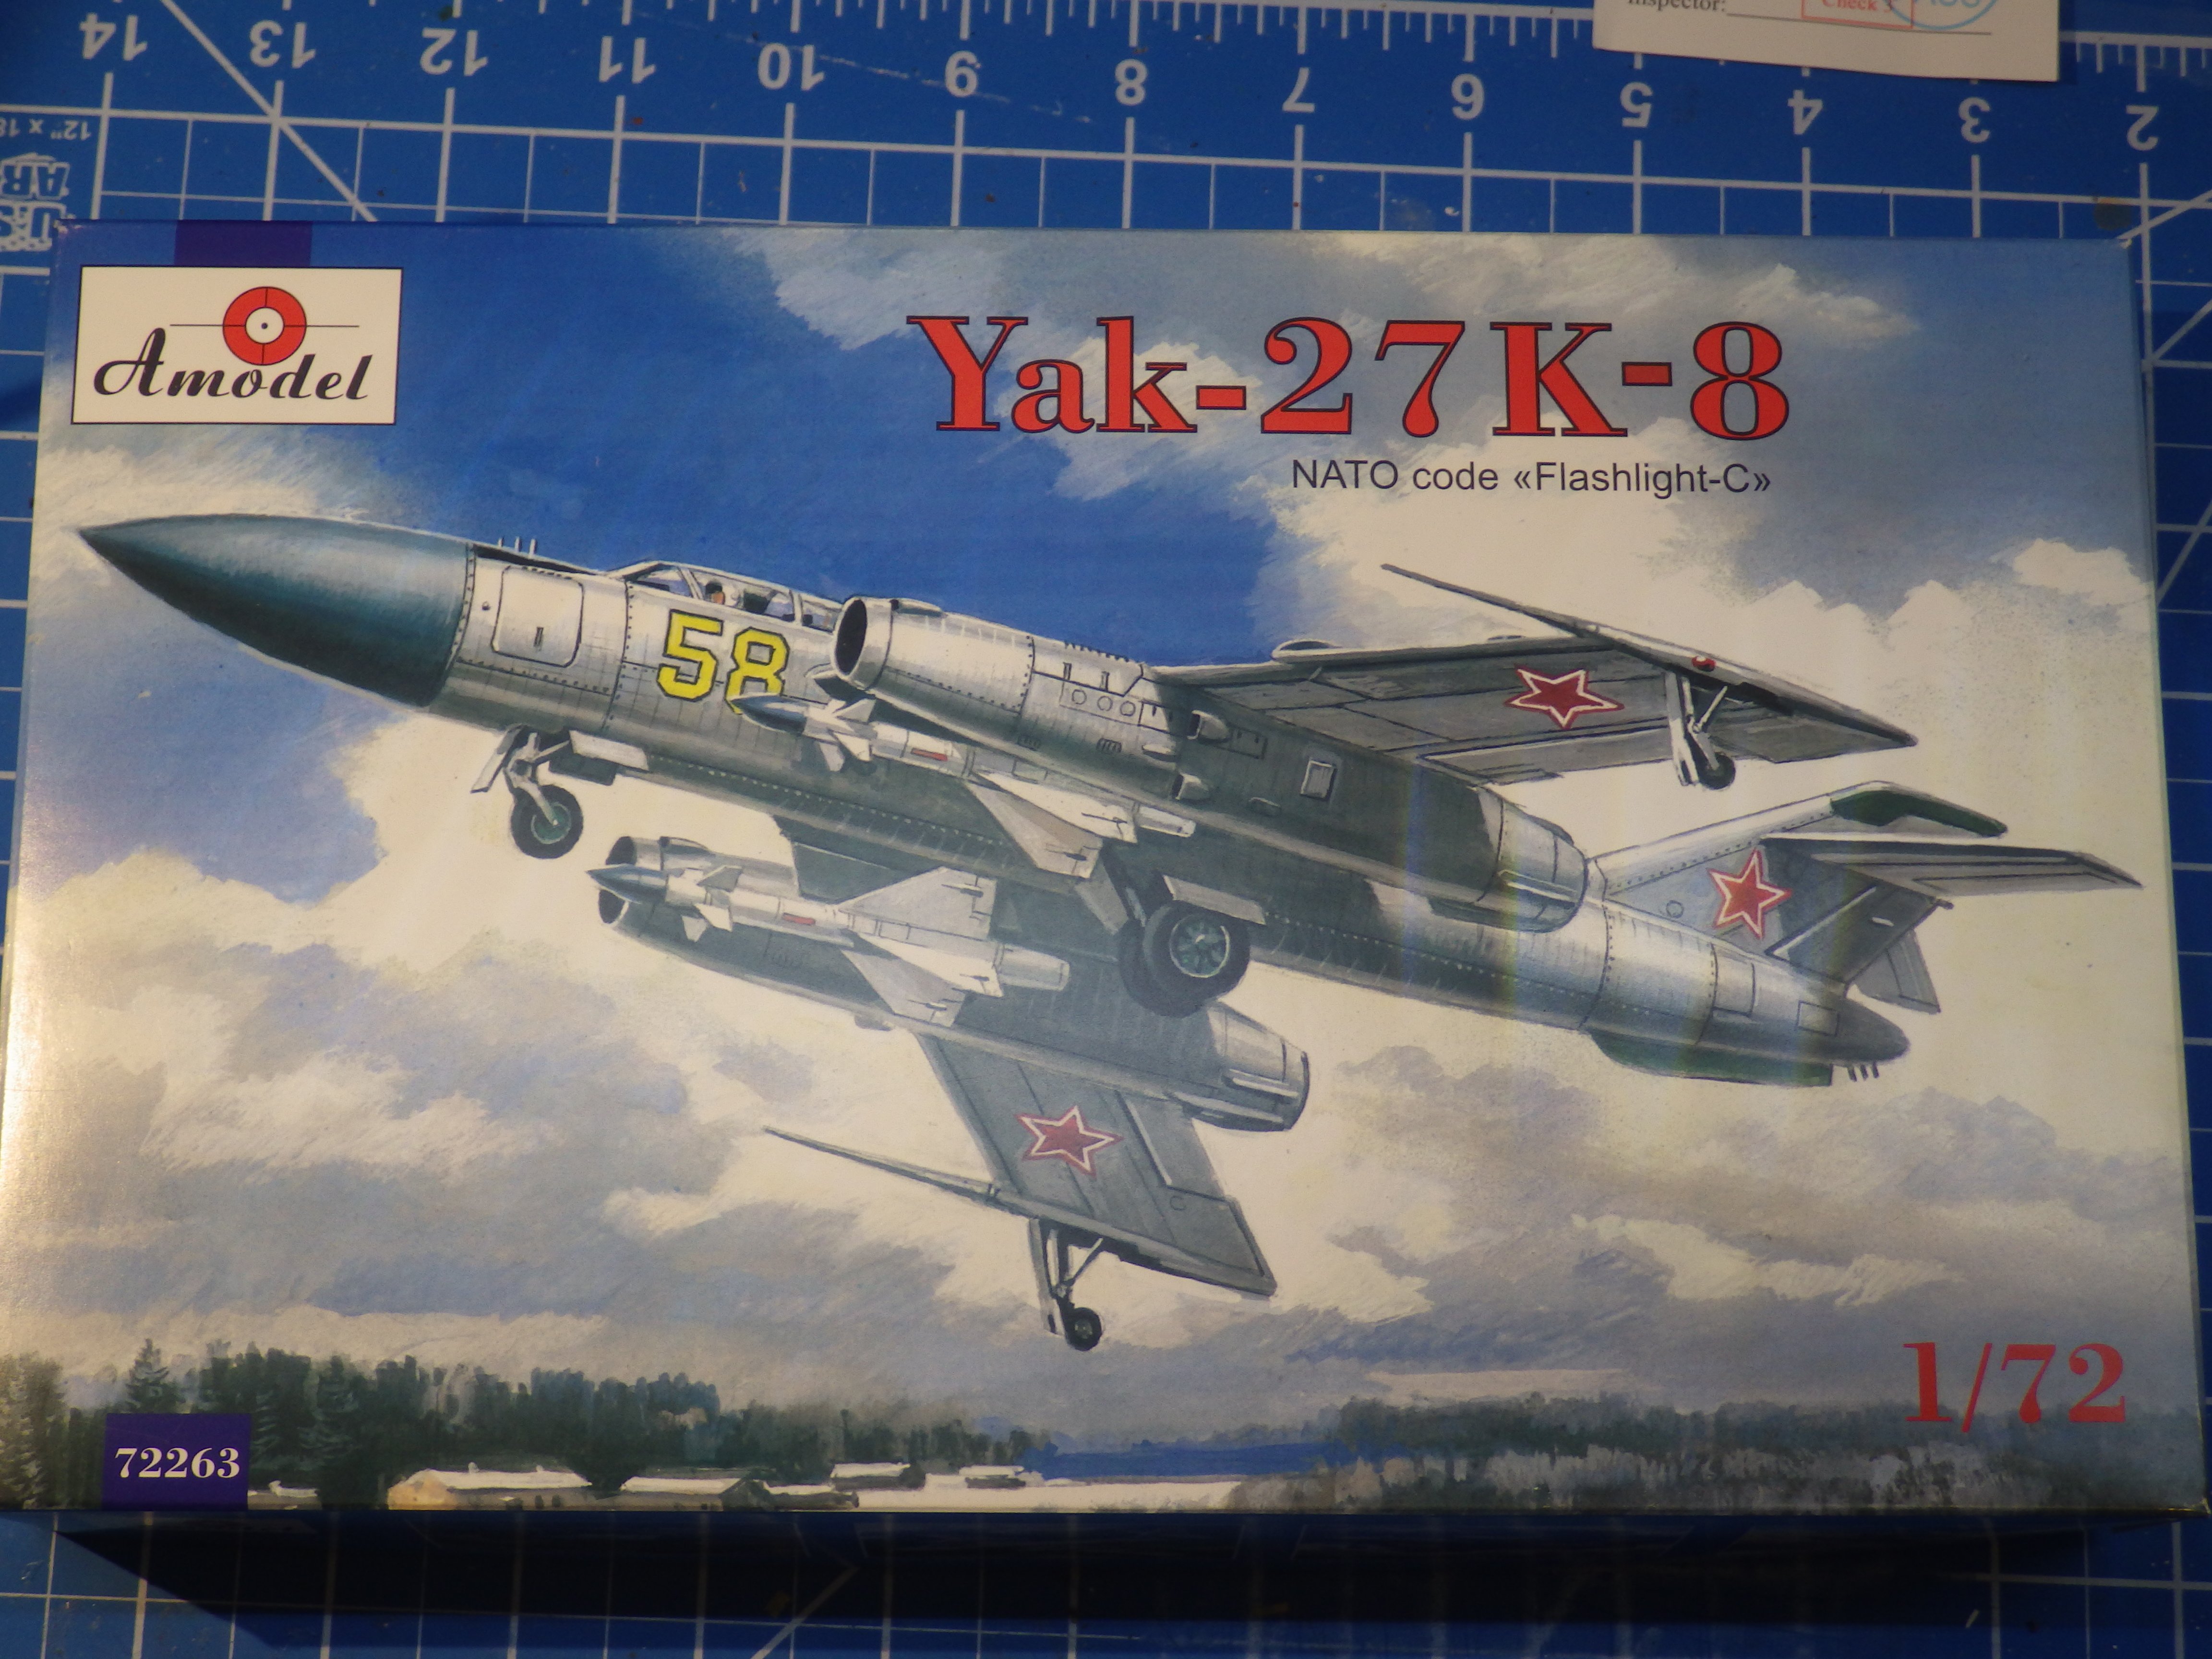
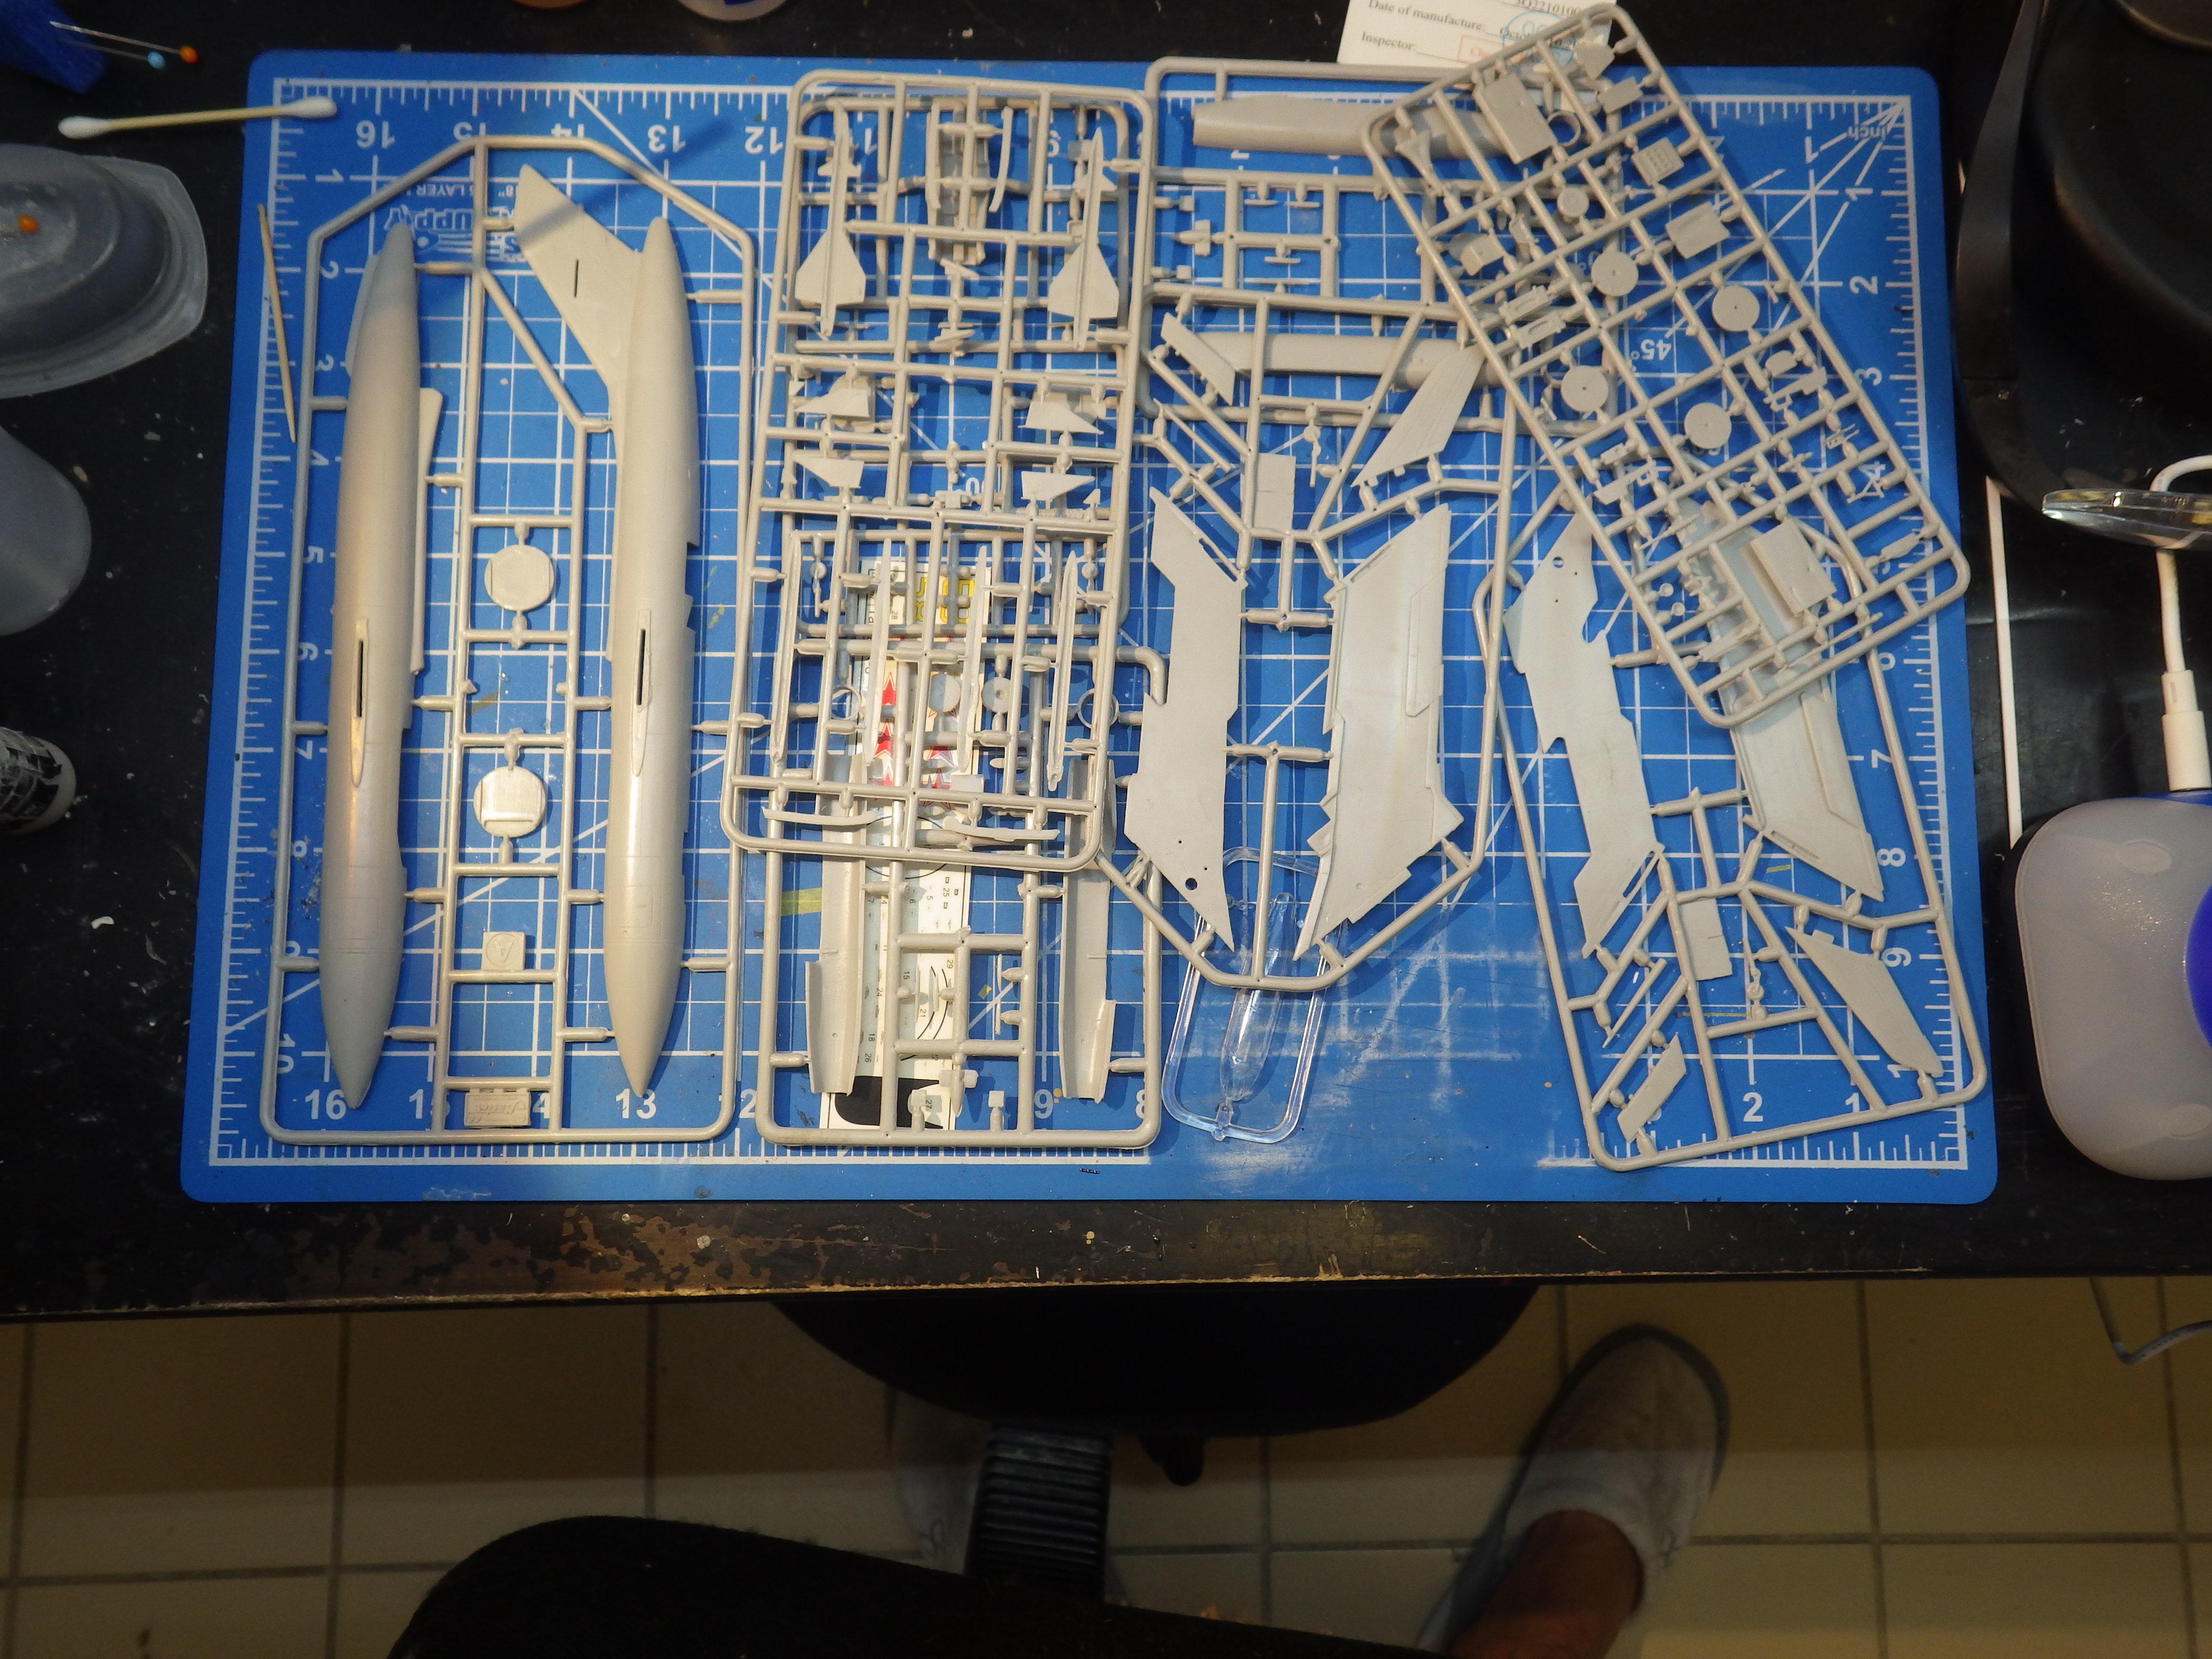
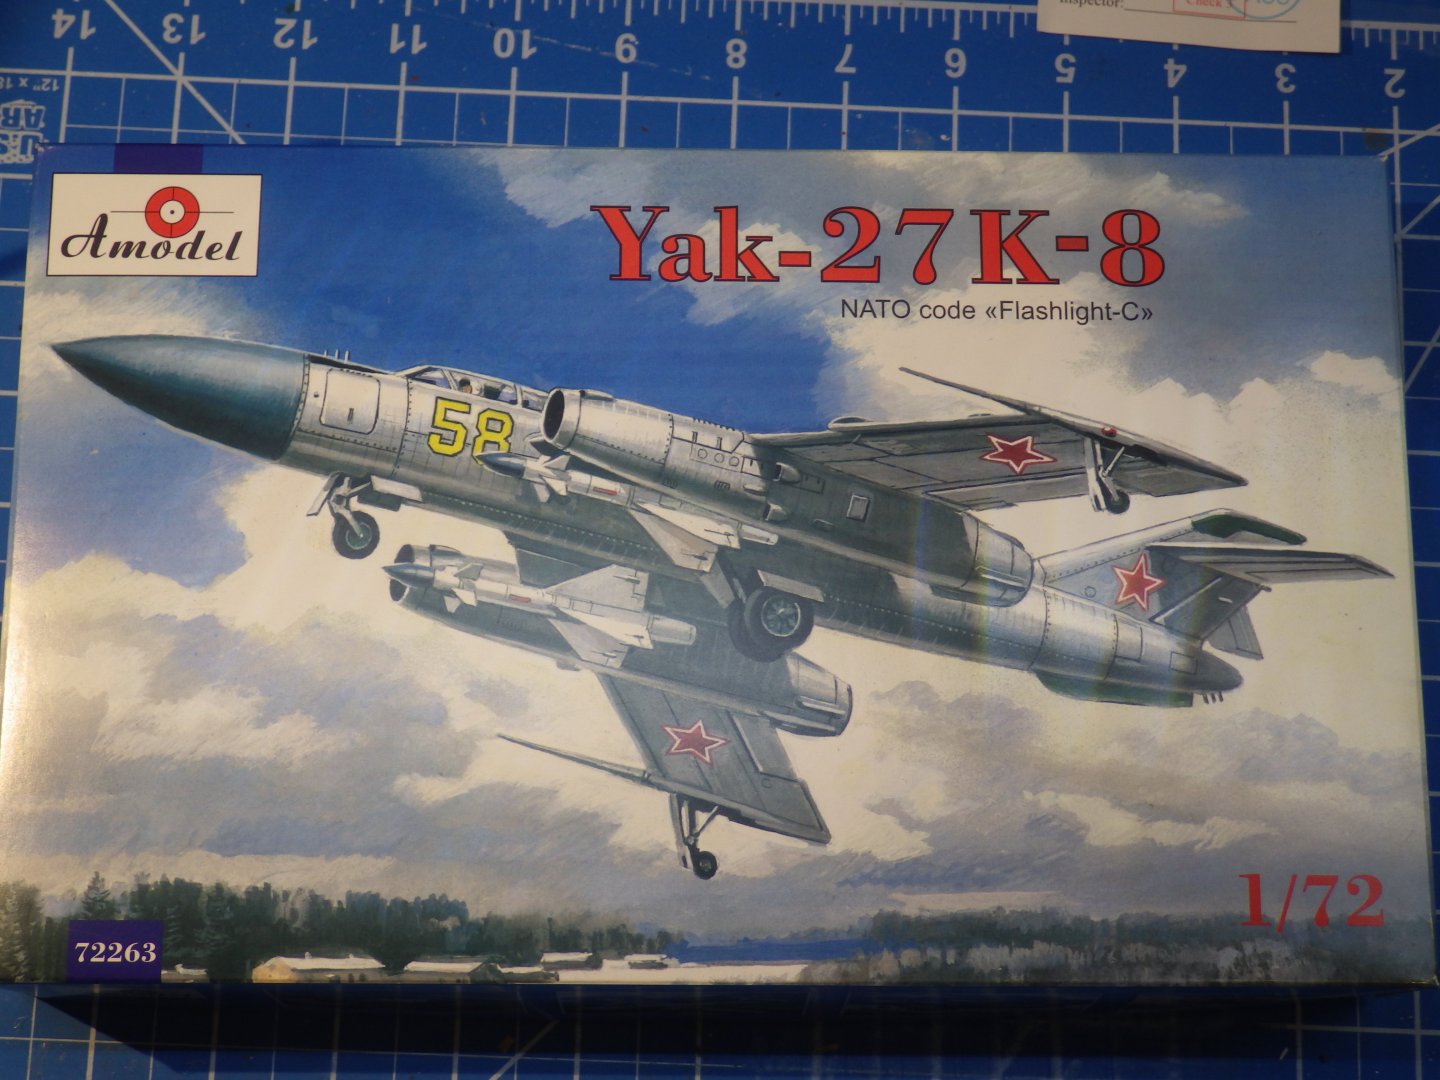
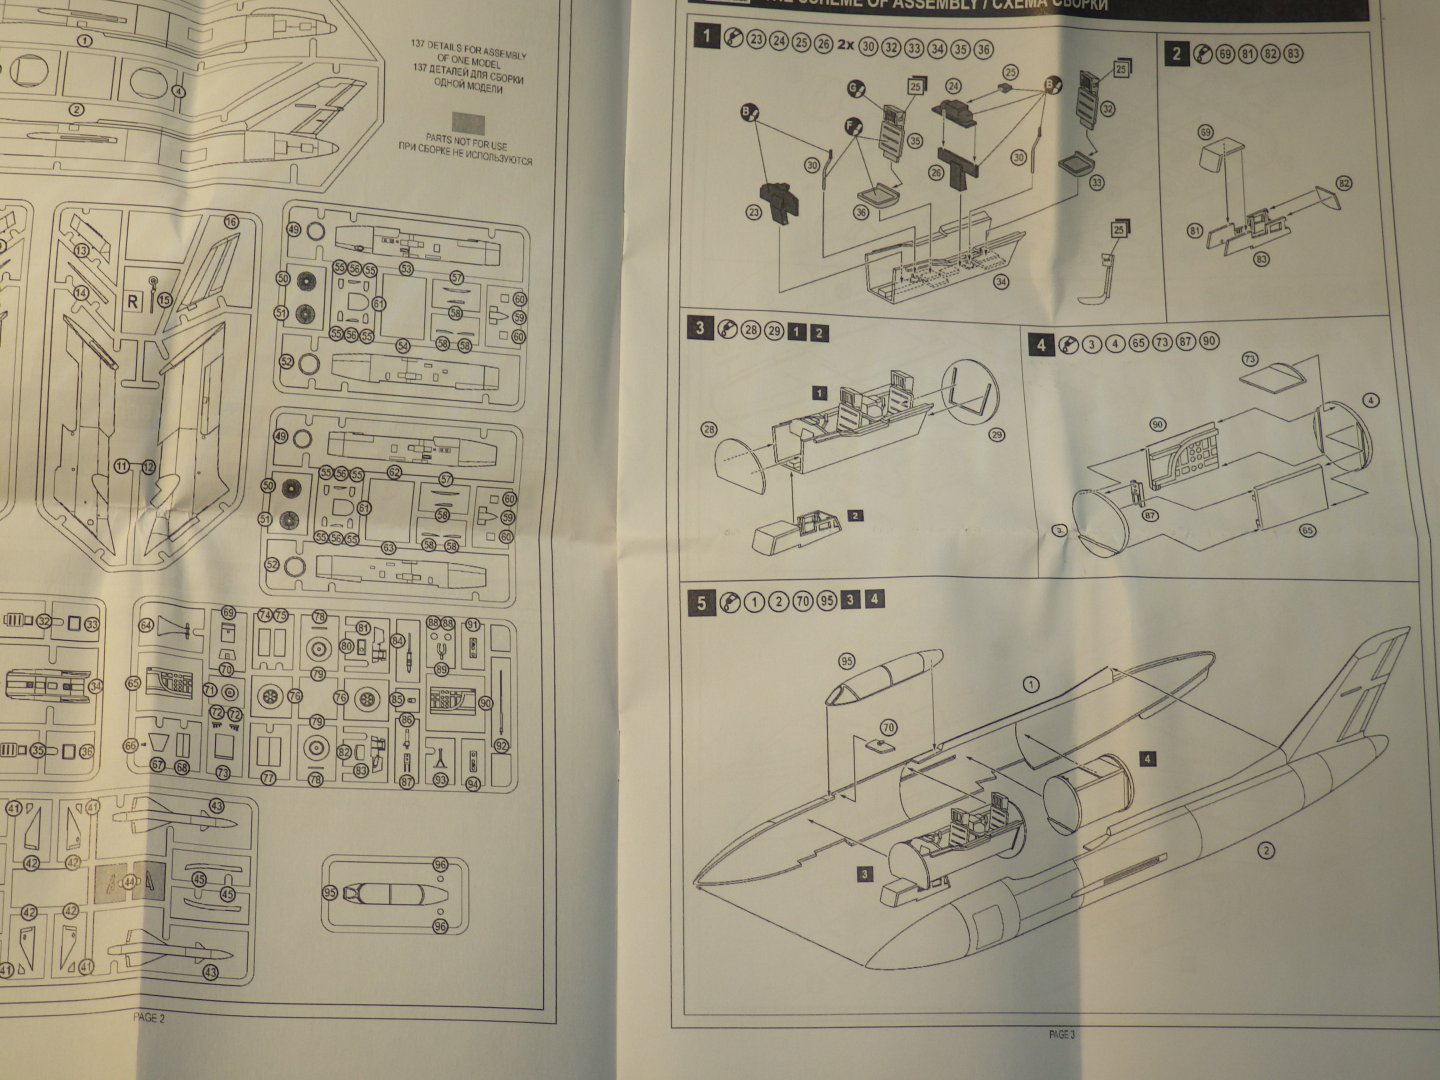
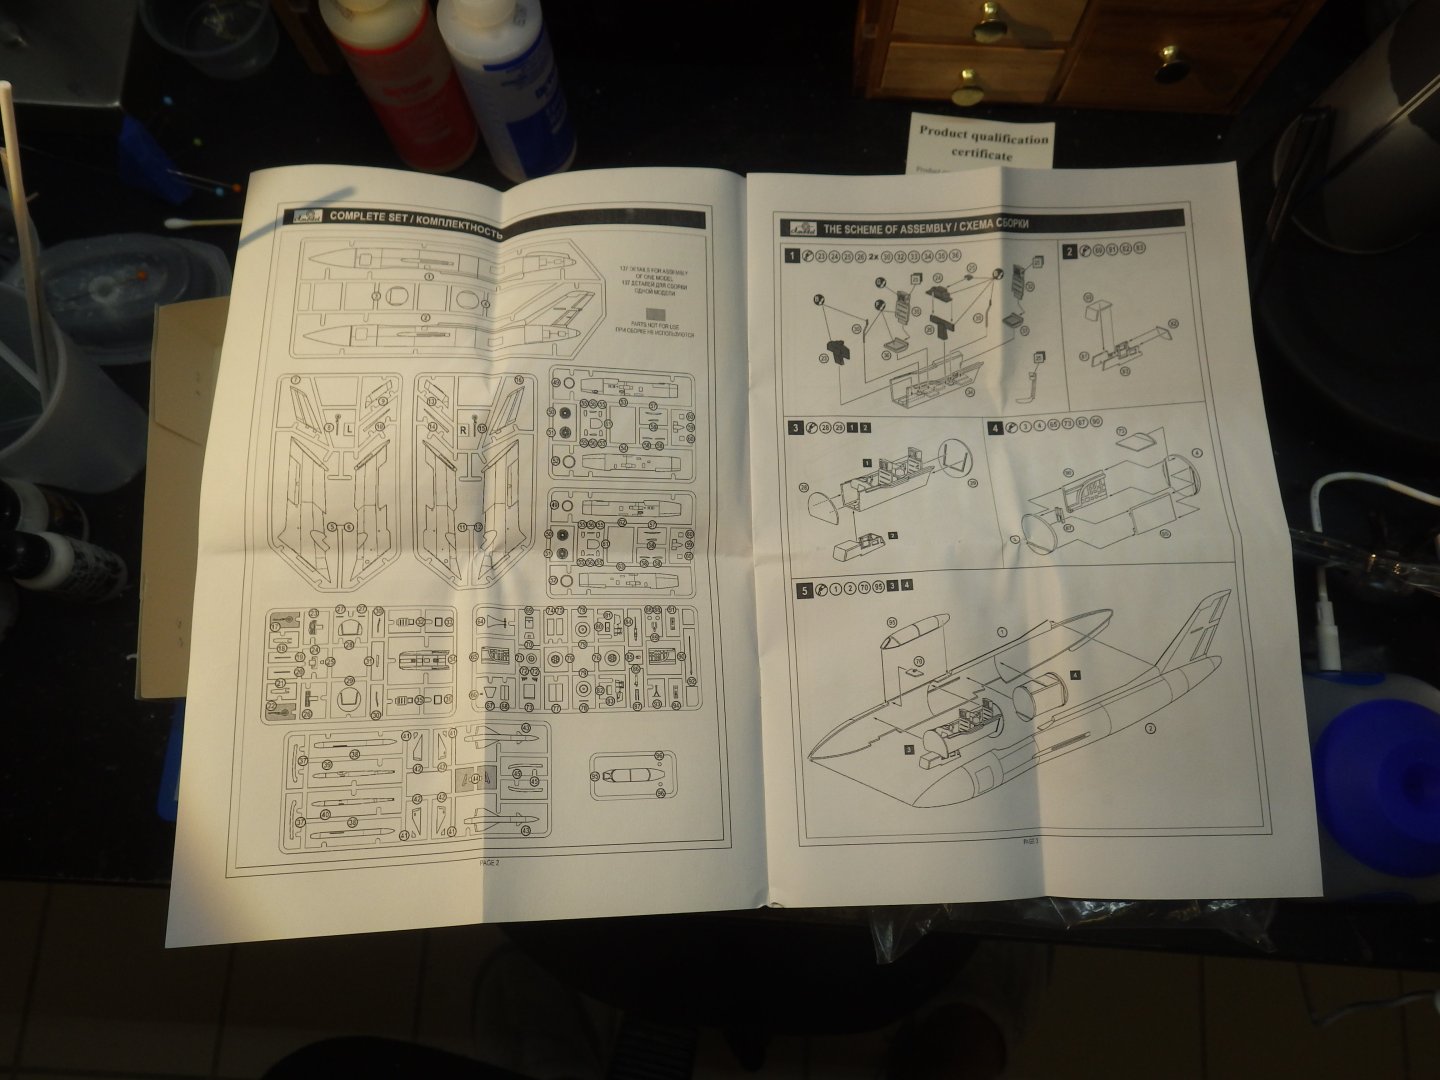
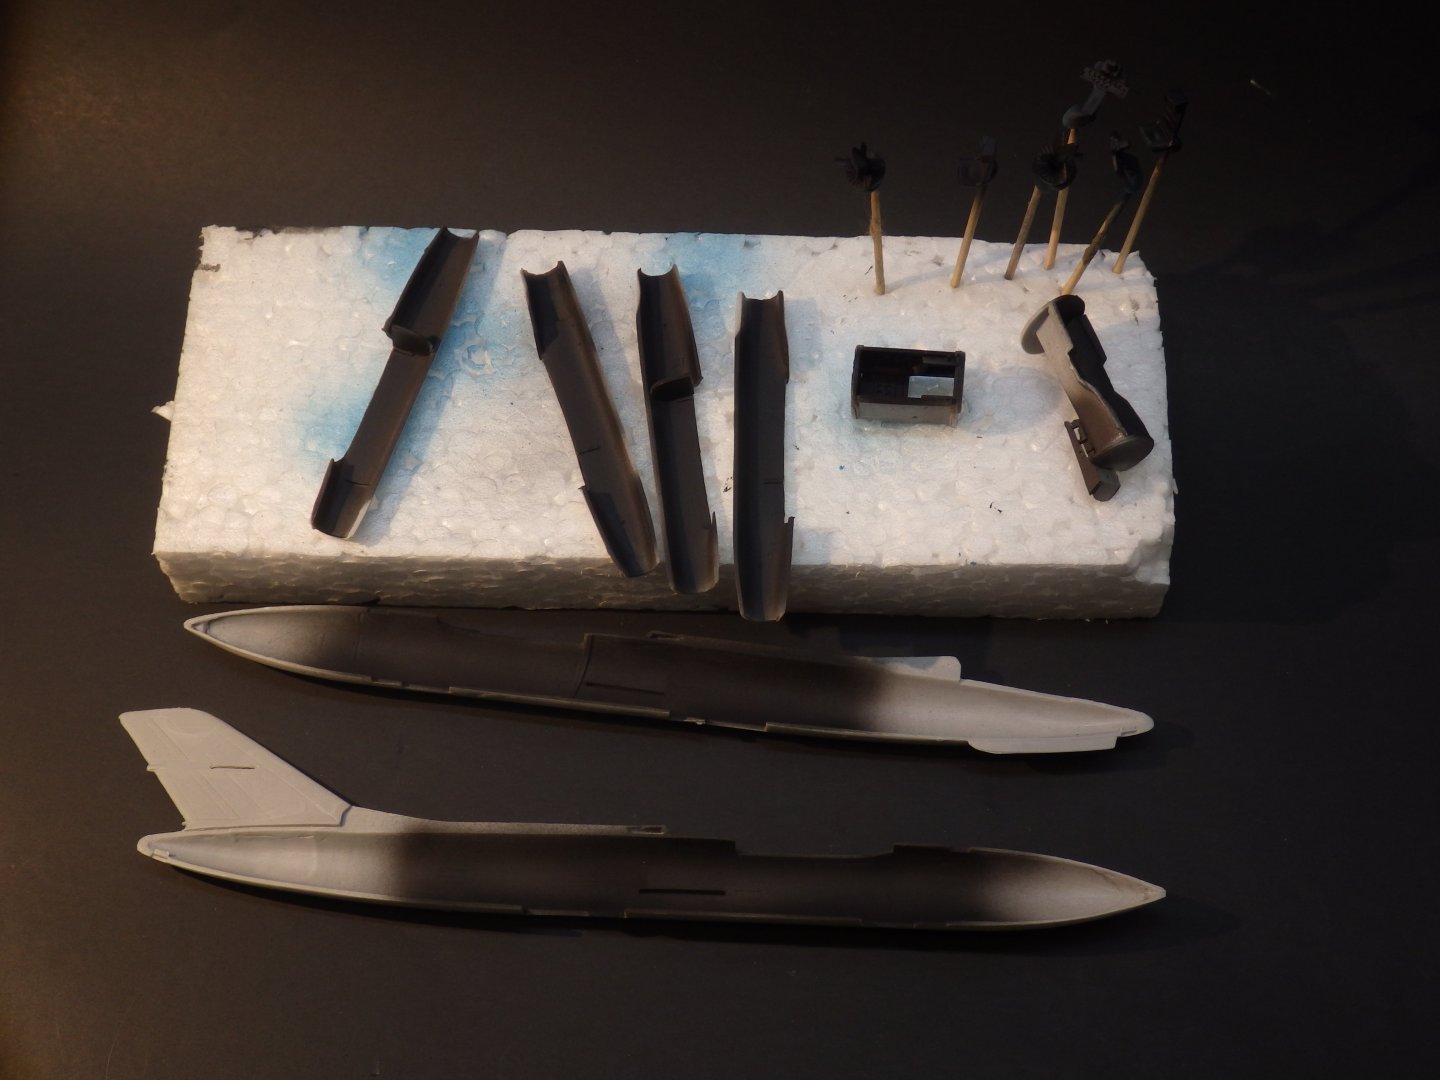
This is the third of my planned Eastern European kits and may be the most challenging. It was an impulse buy because I liked that 50s "supersonic" look. As I understand it the Yak 27K never made it beyond prototype although a reconnaissance did get in. to production. This was also planned to see if I could improve my metal finish skills without too much heartbreak. Having had a quick look in the box I think it may also define the cliff edge of my sanity. References are scarce and it seems that few models have made a public appearance. Lots of parts in the box, quite a bit of flash, some distorted looking parts, sink holes and no locating pins. No major warping at first sight tough. Instructions are somewhat vague and tend to indicate an approximate location of where to add parts Fuselage halves have been cleaned up and the cockpit bucket assembled. Primer added while I try to determine colours. As far as I can tell Yaks had dark grey cockpits in the 50s not the turquoise seen in most Soviet aircraft. I don't think much will be seen inside once the fuselage is closed up. The current overall plan is to complete the fuselage, add wings and tail surfaces then paint. The engine pods will be assembled and painted separately and then fitted. Obviously a lot of dry fitting before picking up the airbrush. I see a lot of filler in my future. Thanks for looking in. Alan

- 89 replies
-
- 11
-

-
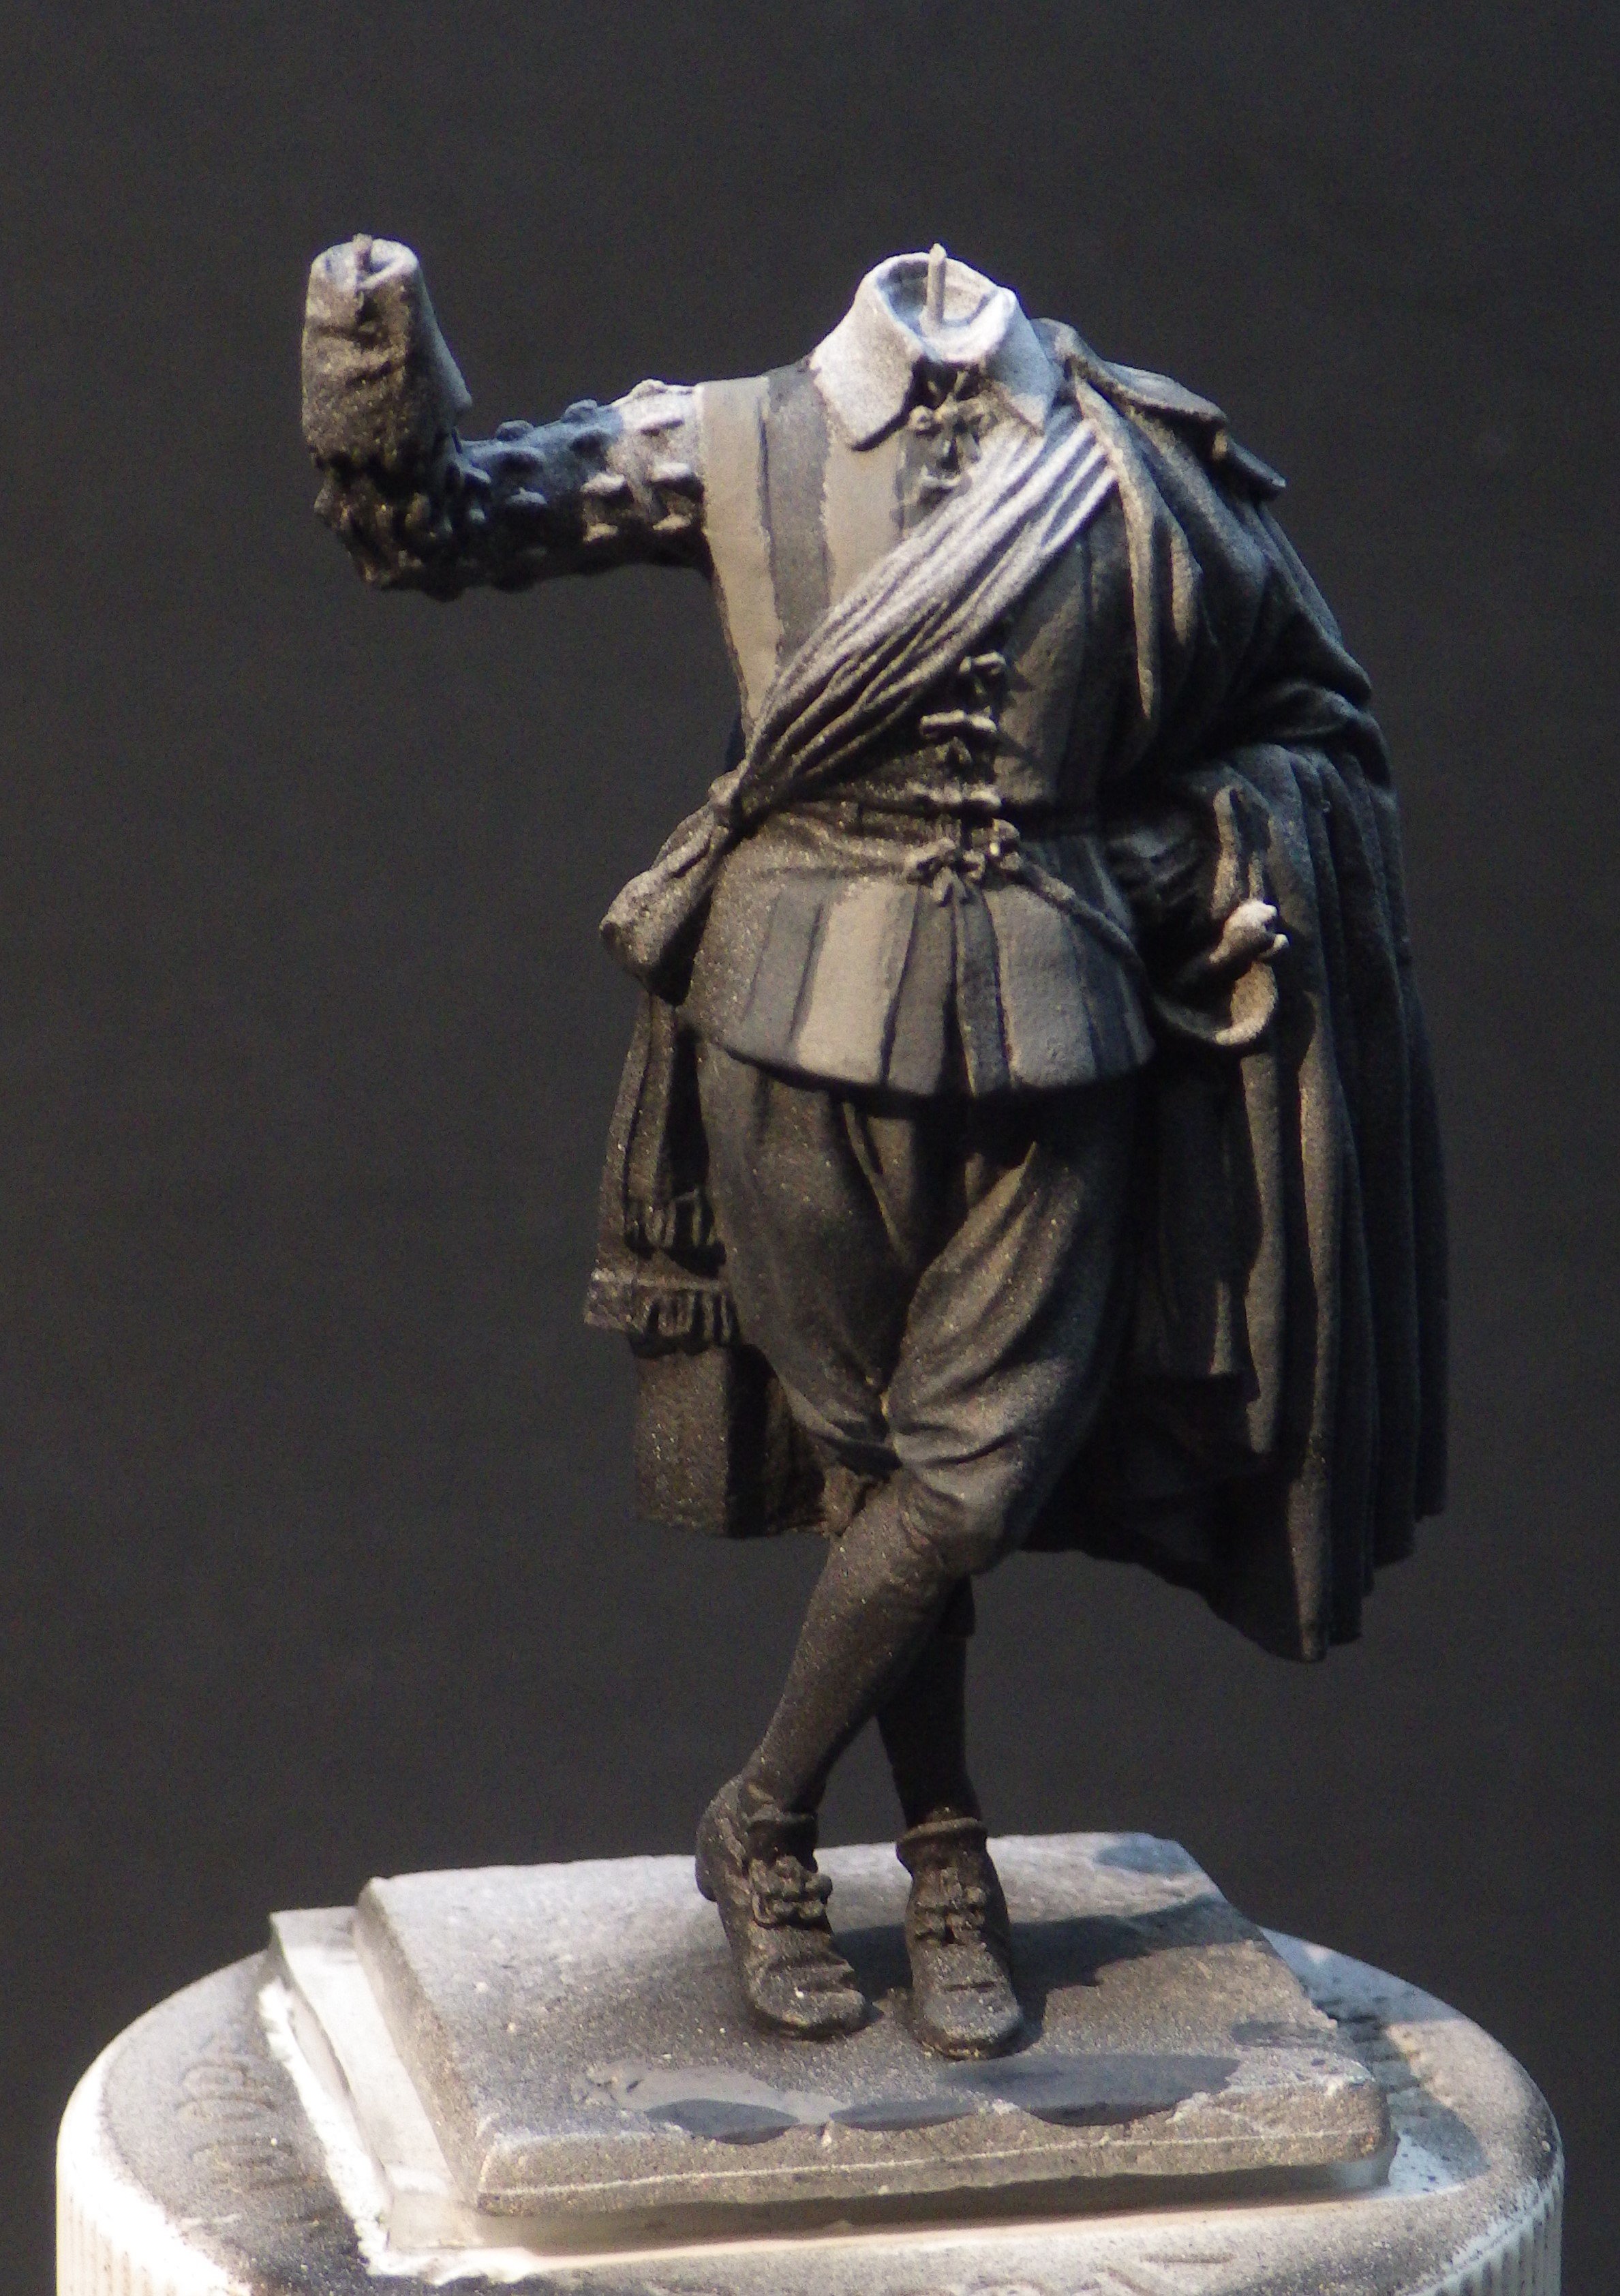
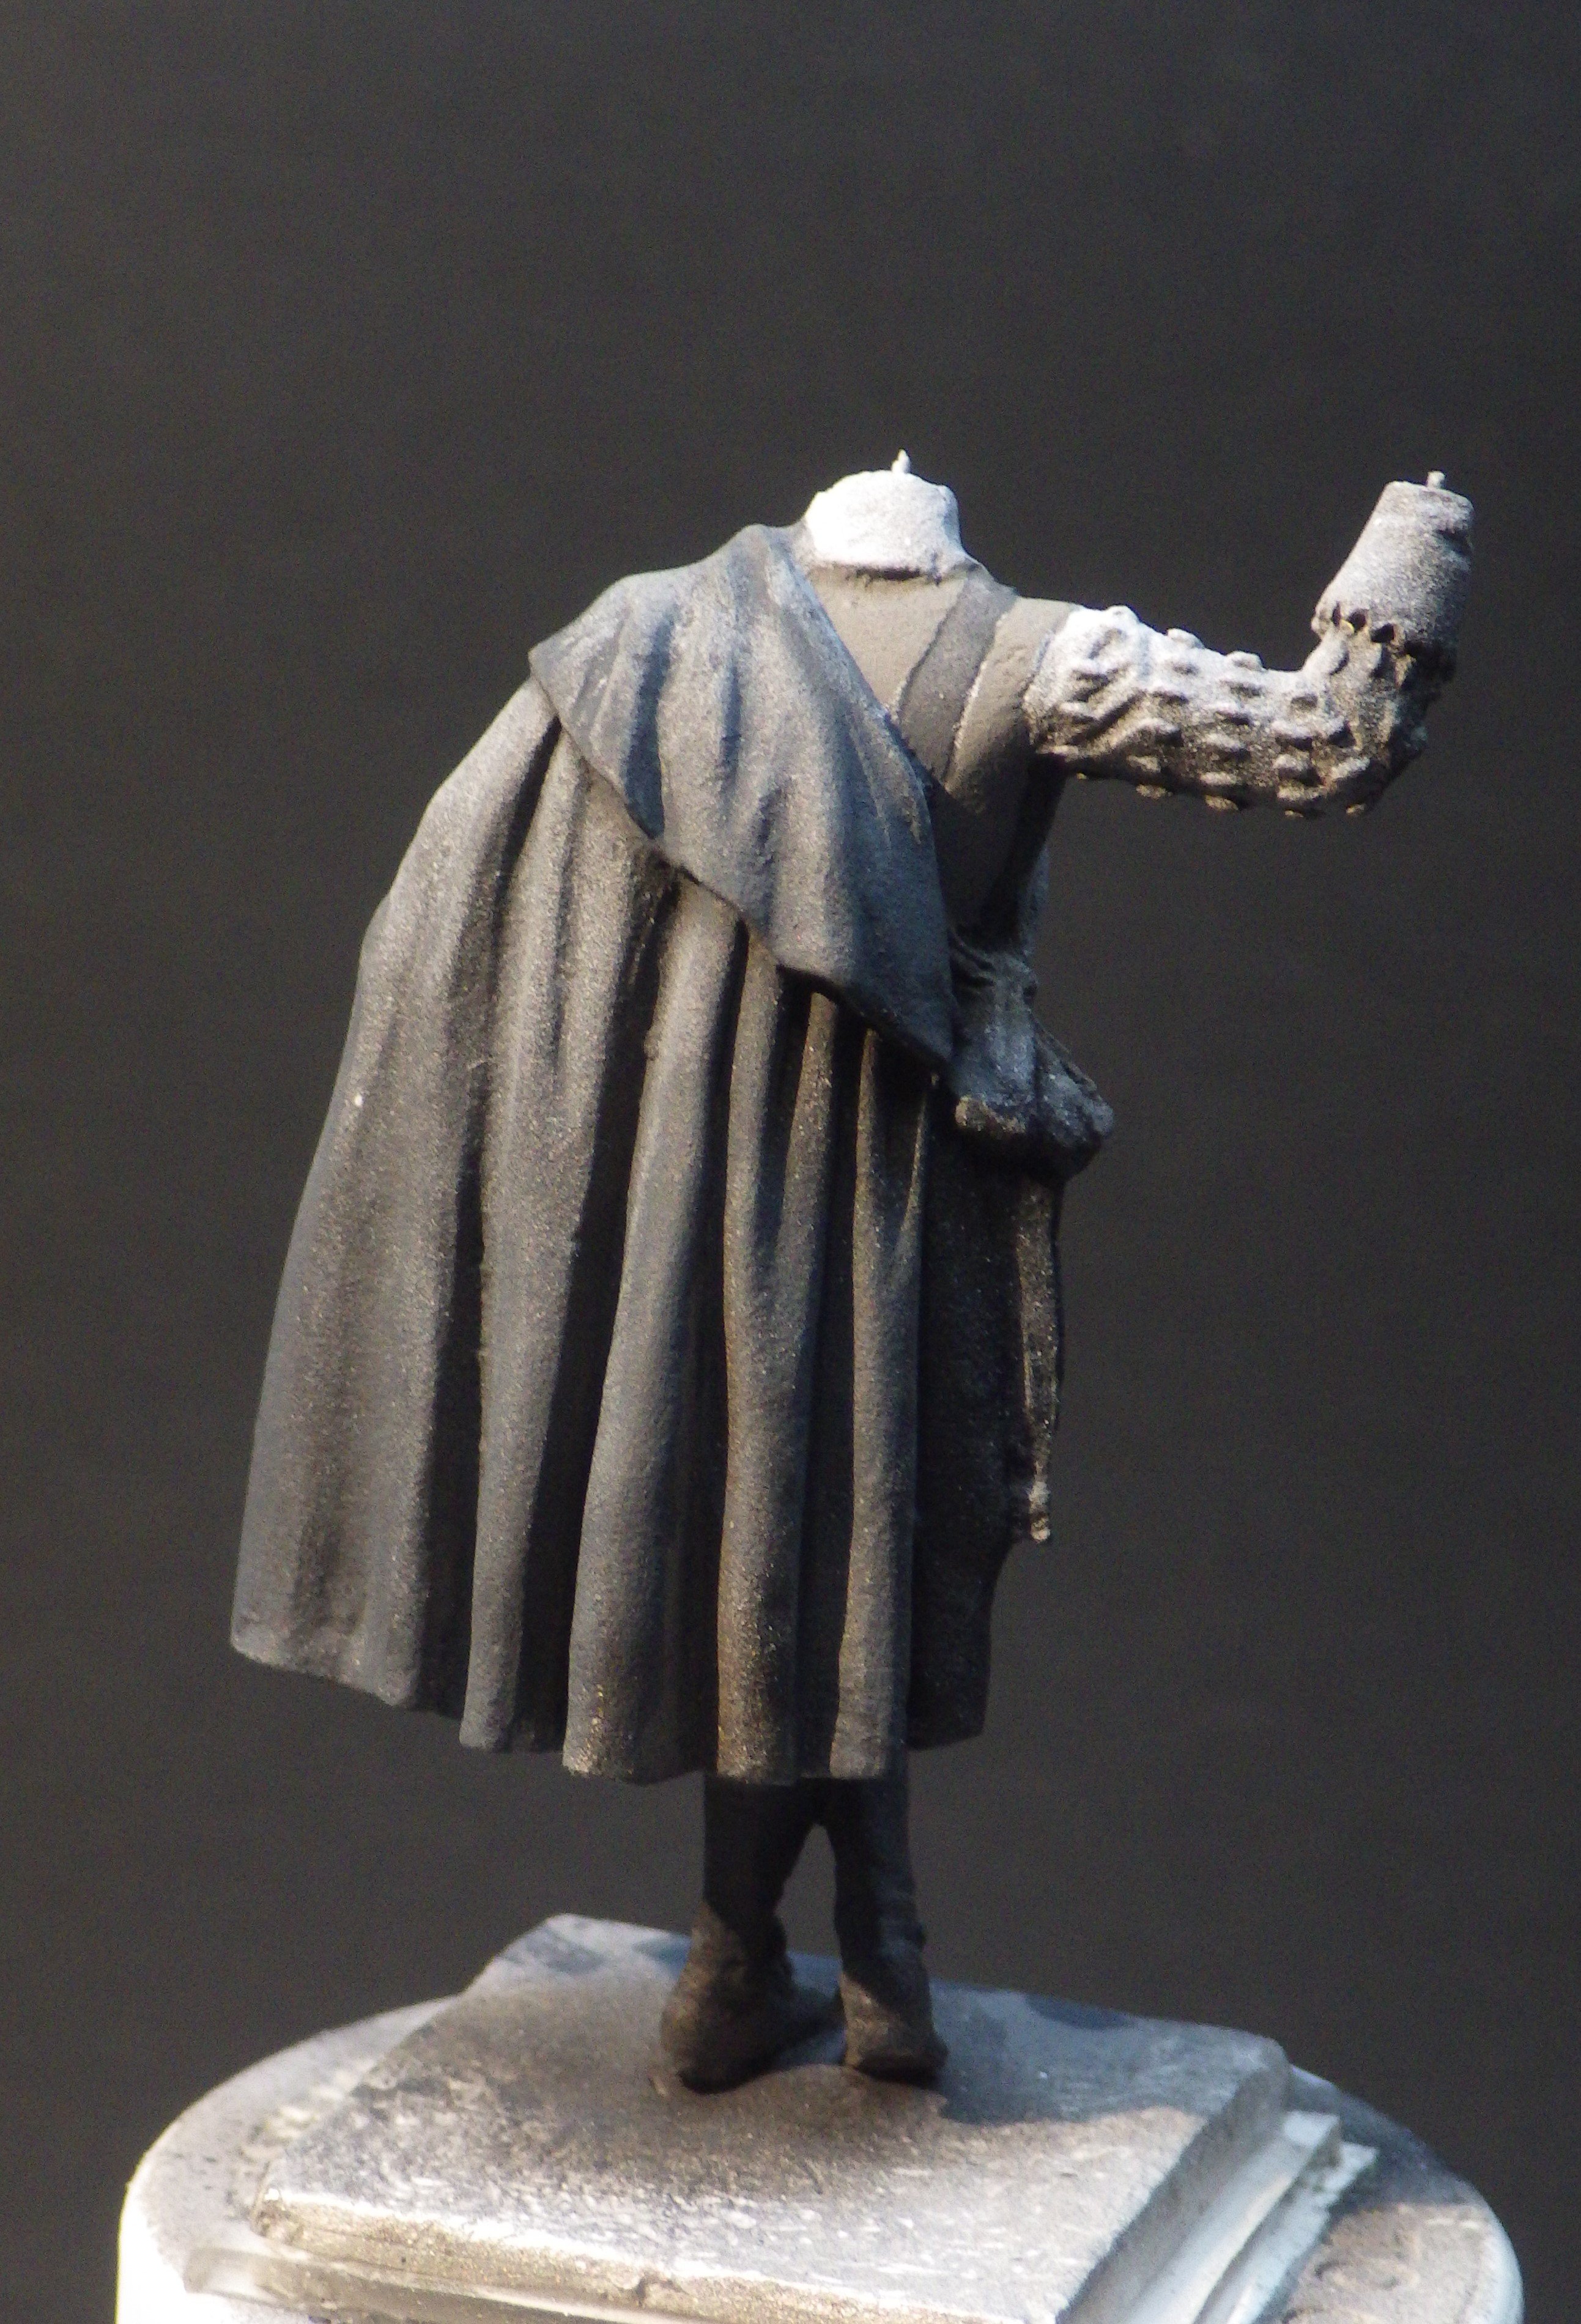
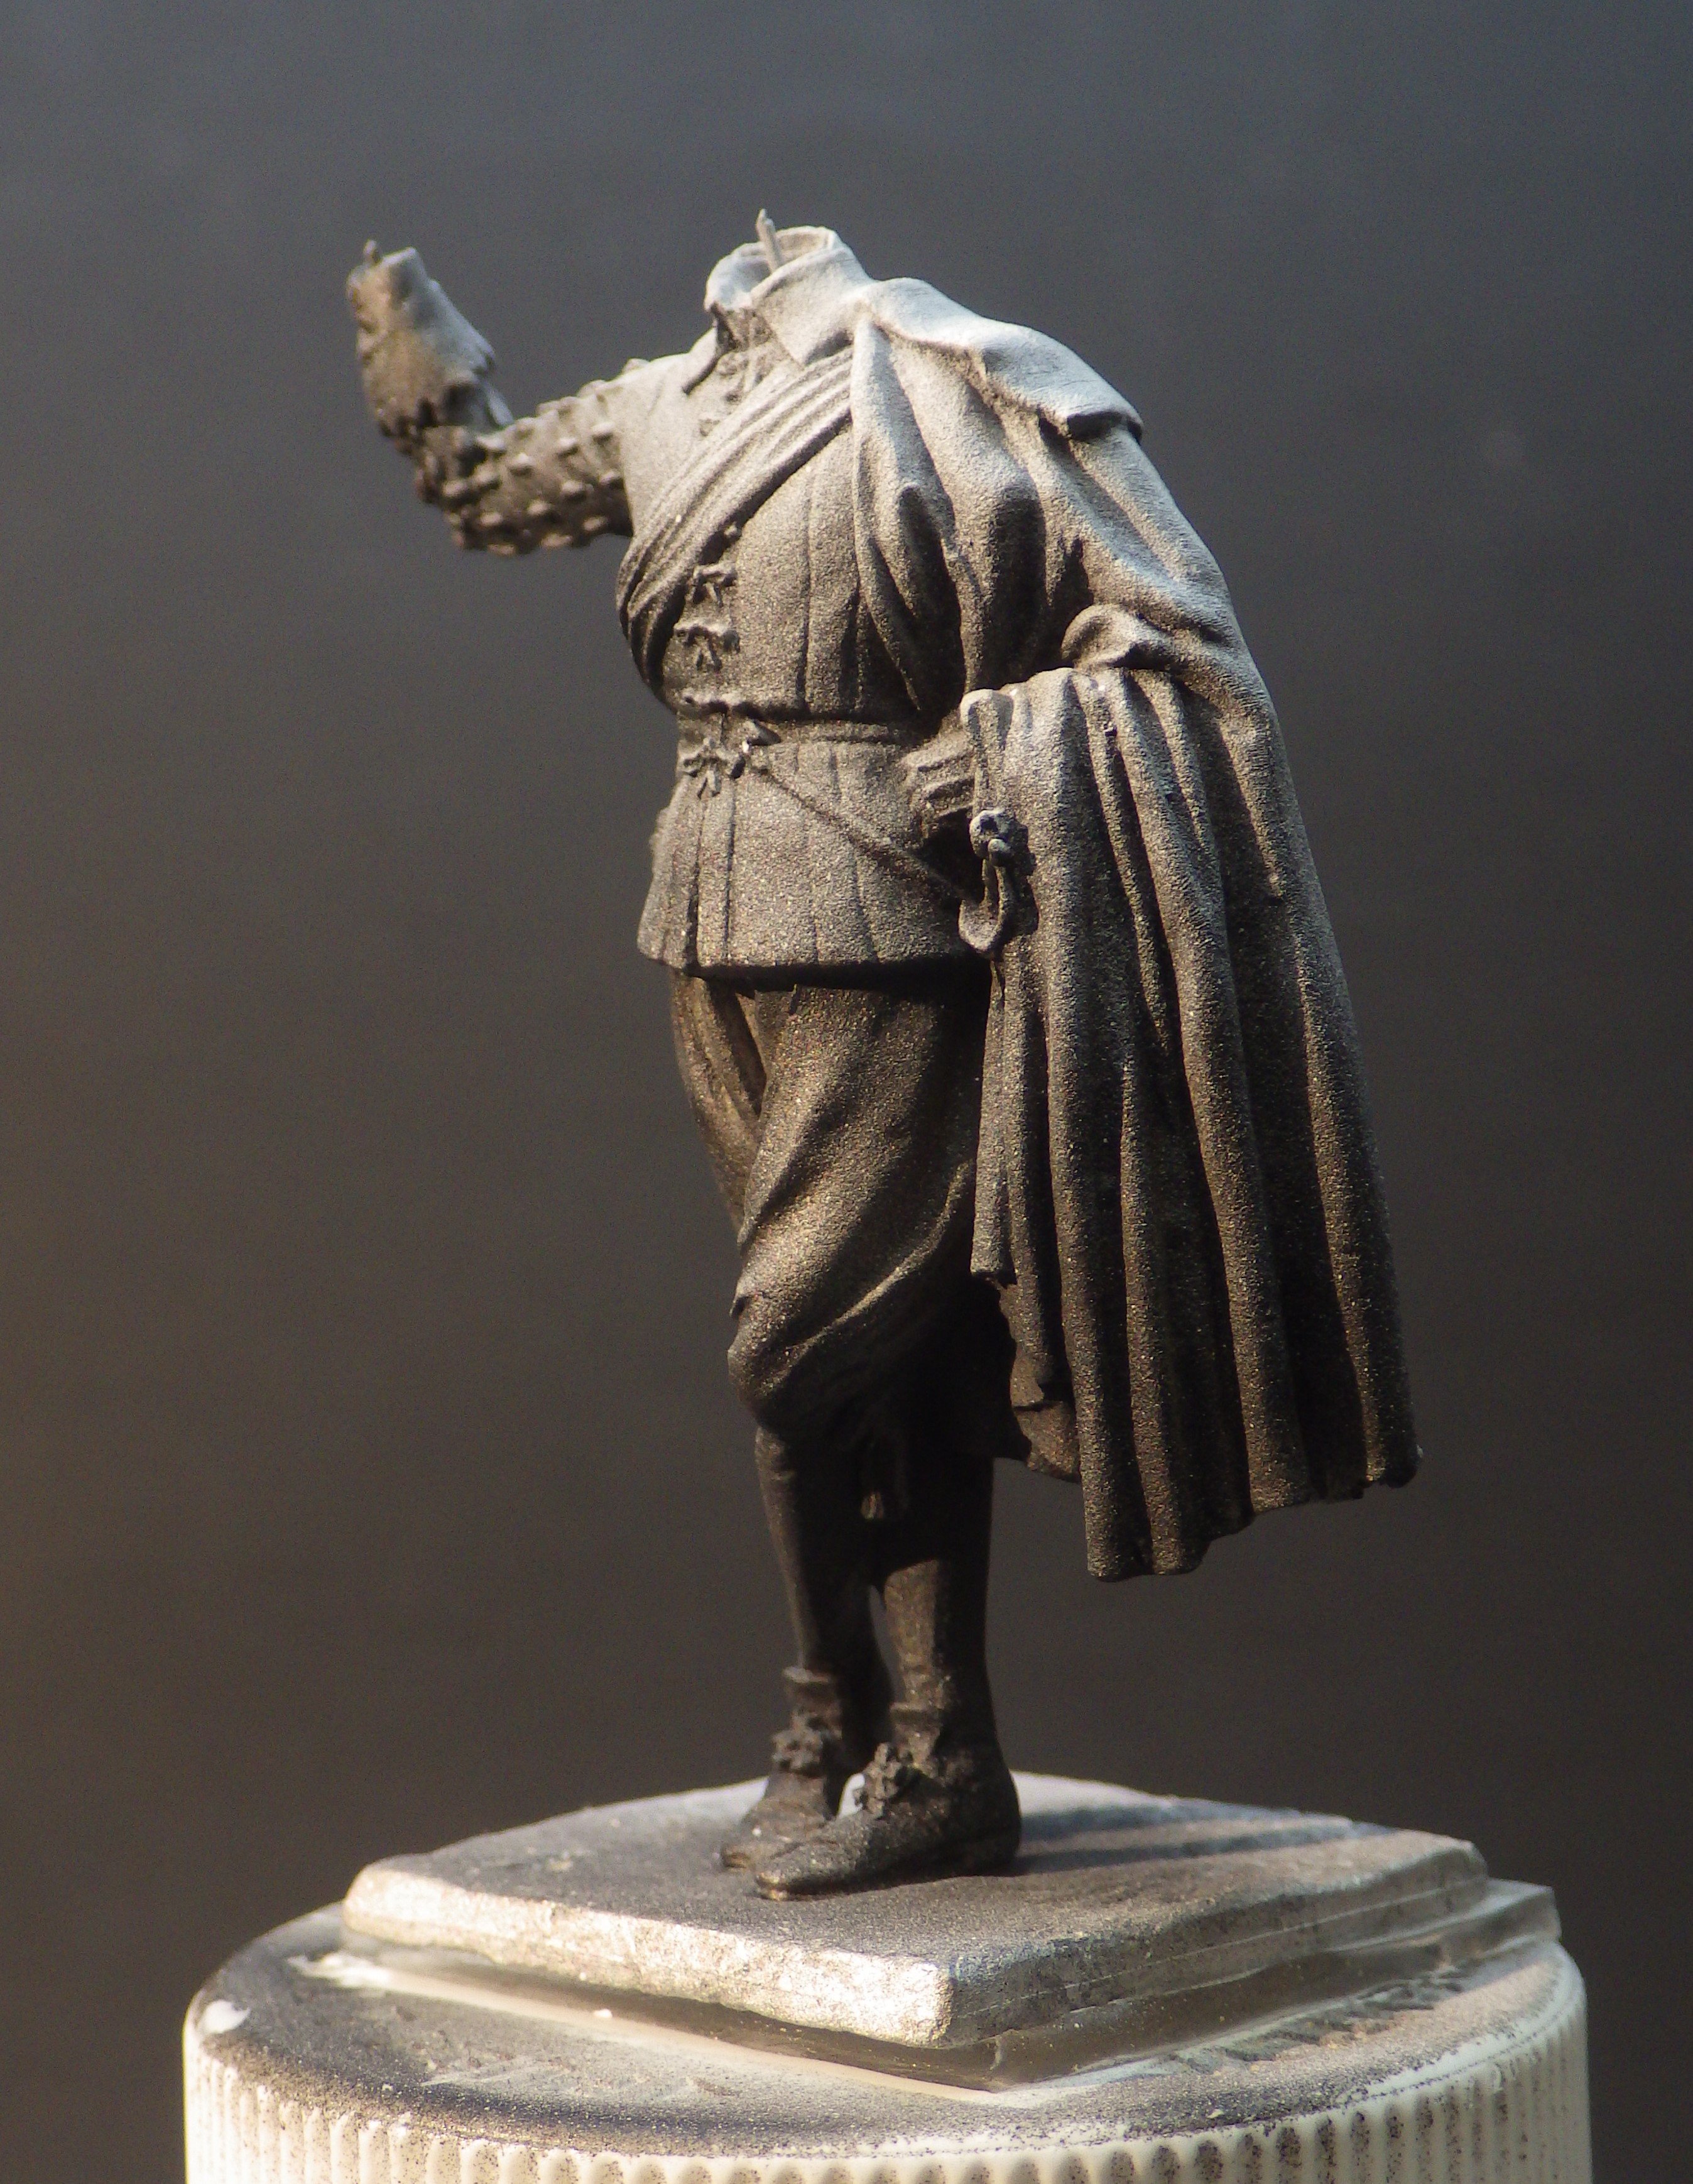
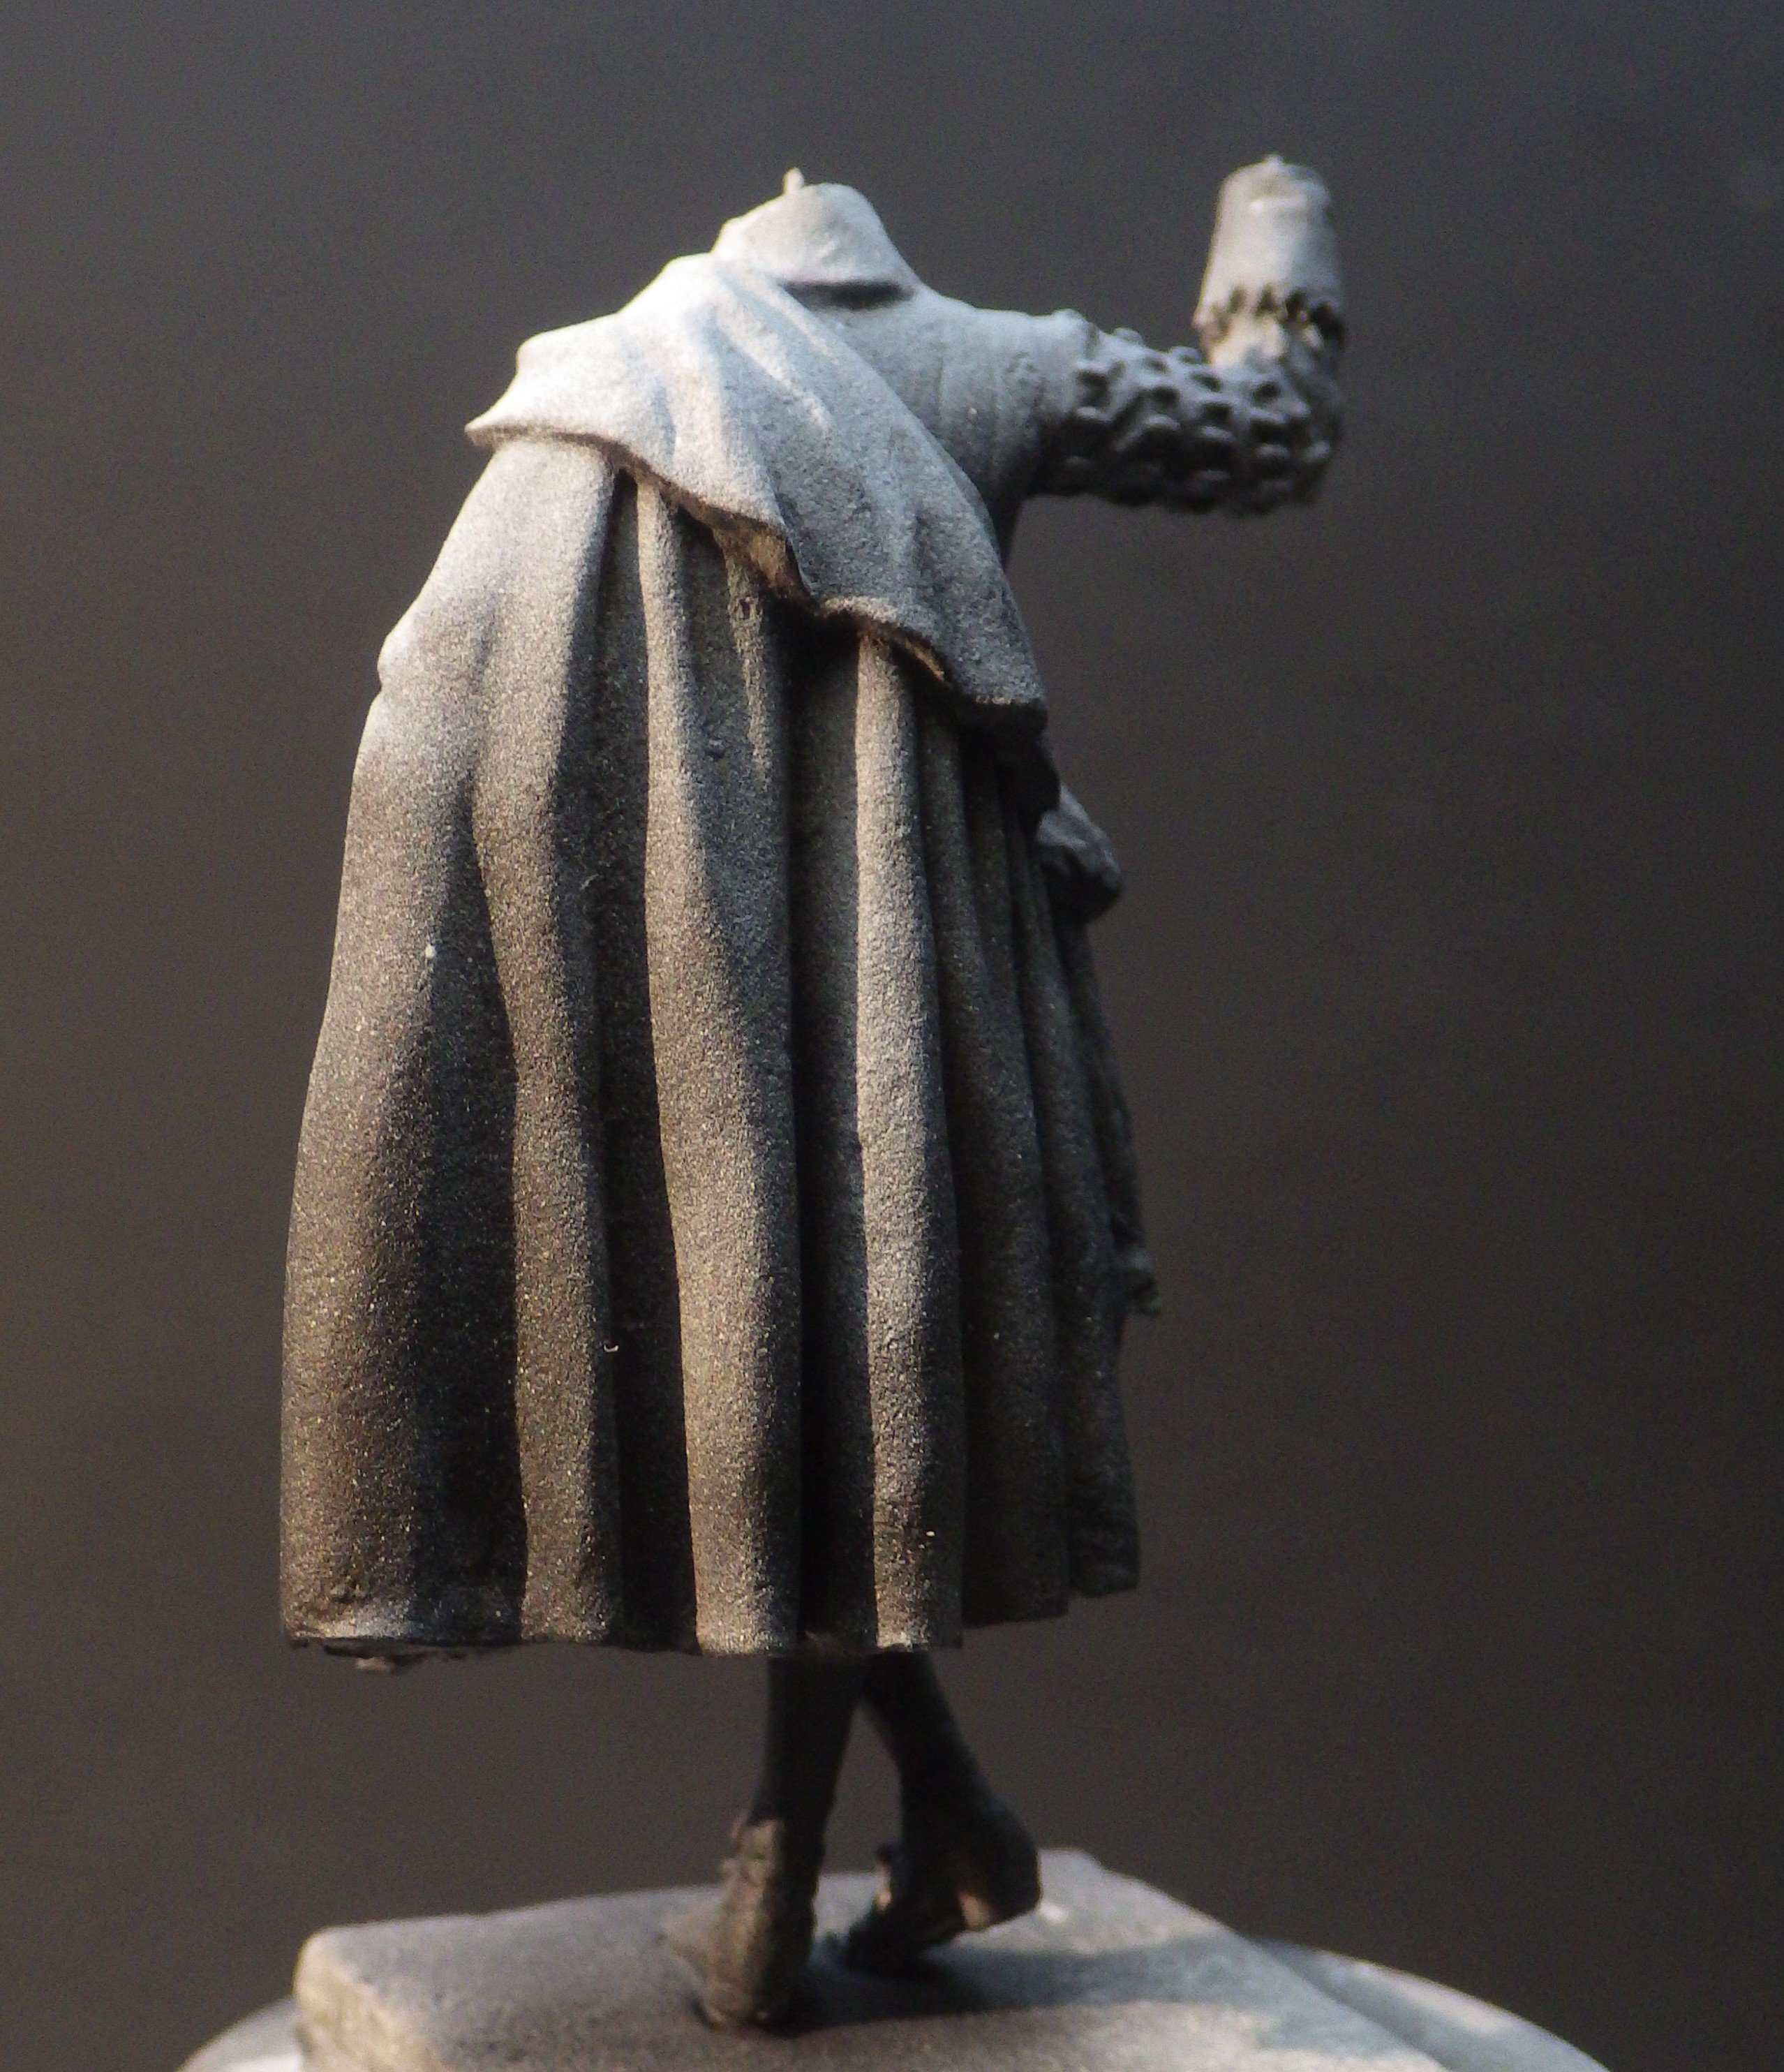
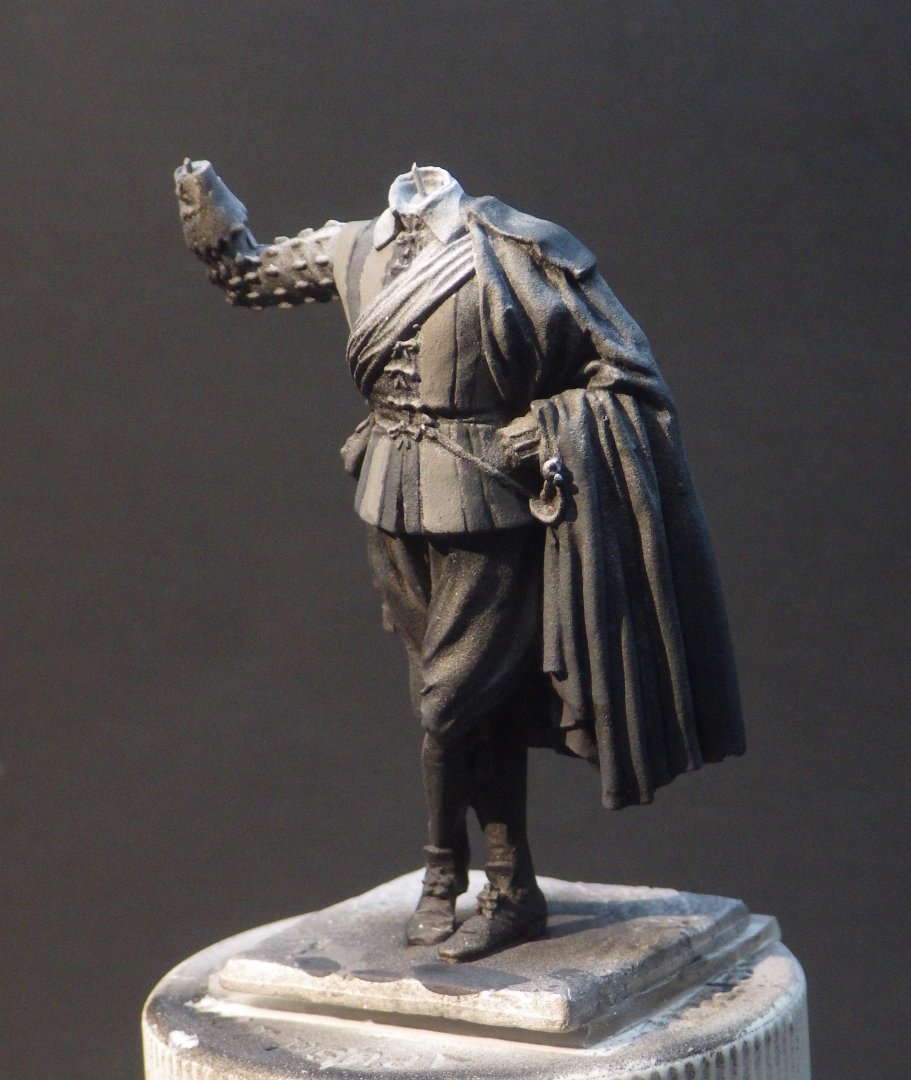
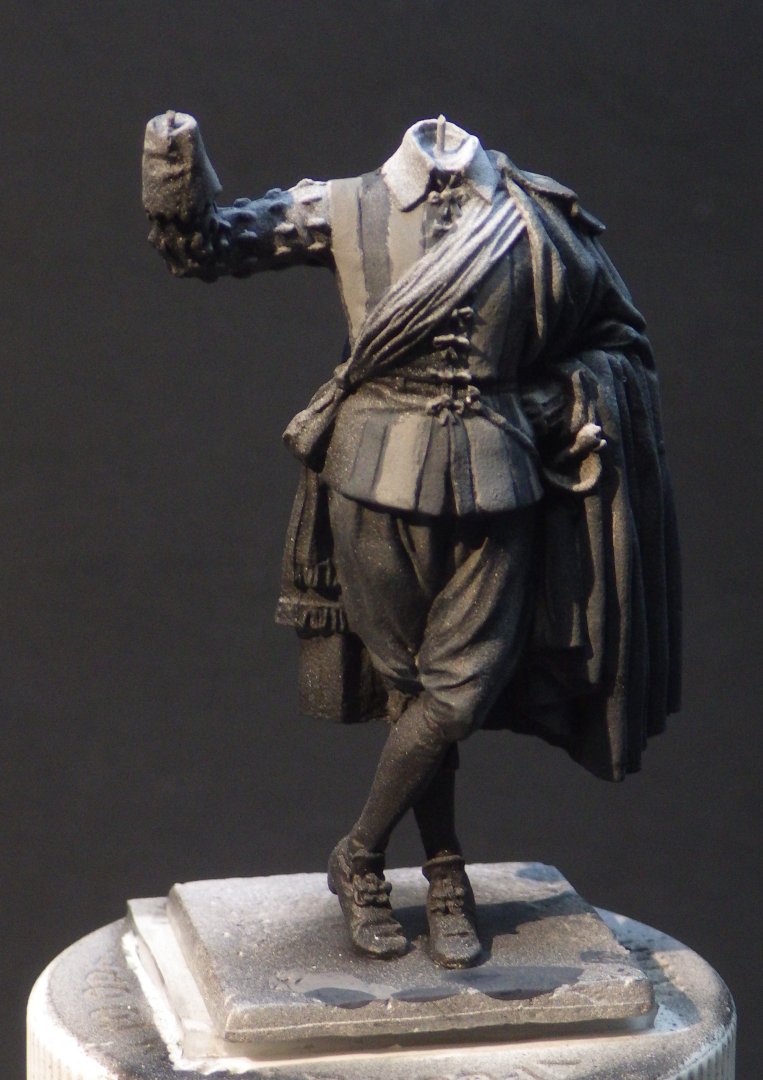
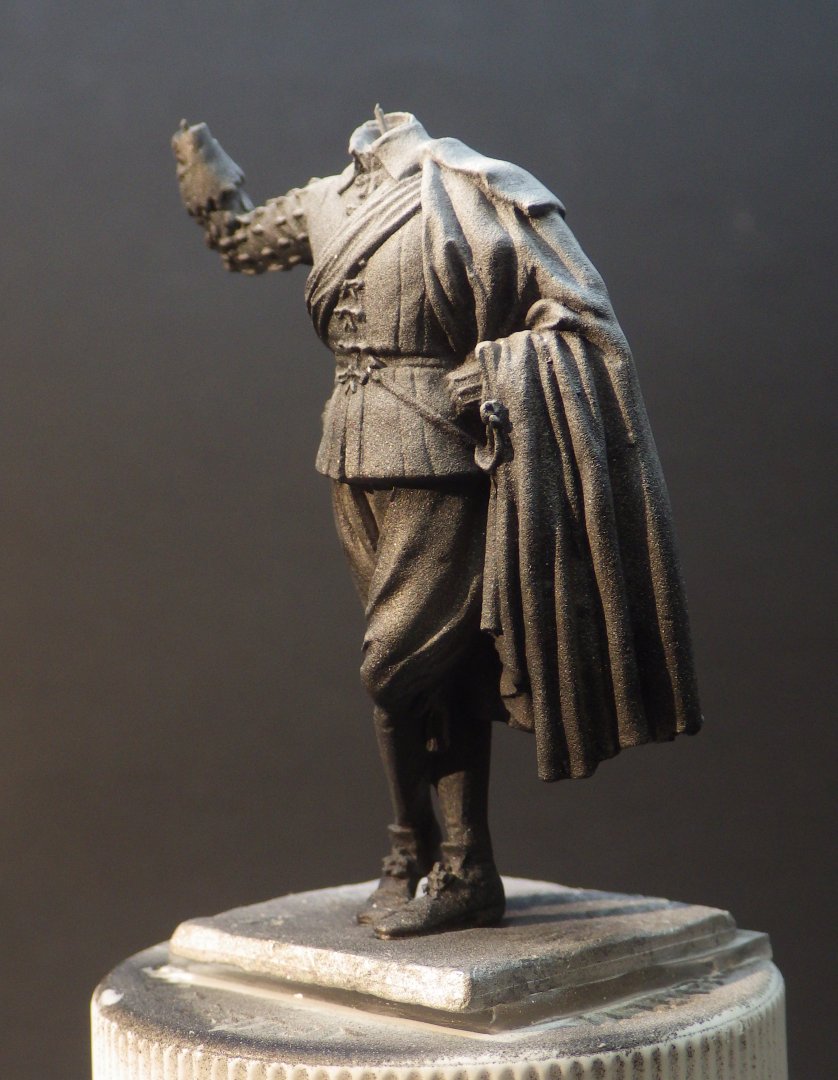
I made a start on the colour glazes. The colour guide on the back of the card with the figure states that cape, vest, breeches, hose are all black. The sample photo shows bands of grey on his vest and the figure actually has seams where the colour changes. I am reluctant to paint everything in black he is going to look like medieval panzer crew. Also the clothing will not be well efined. I actually think dark grey may be better which will become black in the folds and where the white shading isn't present. Curiously the guide also calls out "carmesi" for the sash and bows but that is crimson I think and the guide photo shows violet. Having just bought a bottle of Vallejo Dark Violet I will be going with that. I can't find any images to confirm / contradict. So the first coats of the mid grey and dark grey are on. The cape is going to need more; its a little too light at the top. I think I am going to leave the hose as black and maybe work a little grey into his shoes to demark them. Thanks for looking in and for teh likes and comments Alan

-
Definitely a touch of the D'Artagnan about him. Up for some serious swashbuckling.
-
An exercise in shades of grey. Going to be another learning experience. Alan
-
I can see him sniffing posies on the battlefield. Alan
-
Welcome OC. This looks like a nice figure. Alan
-
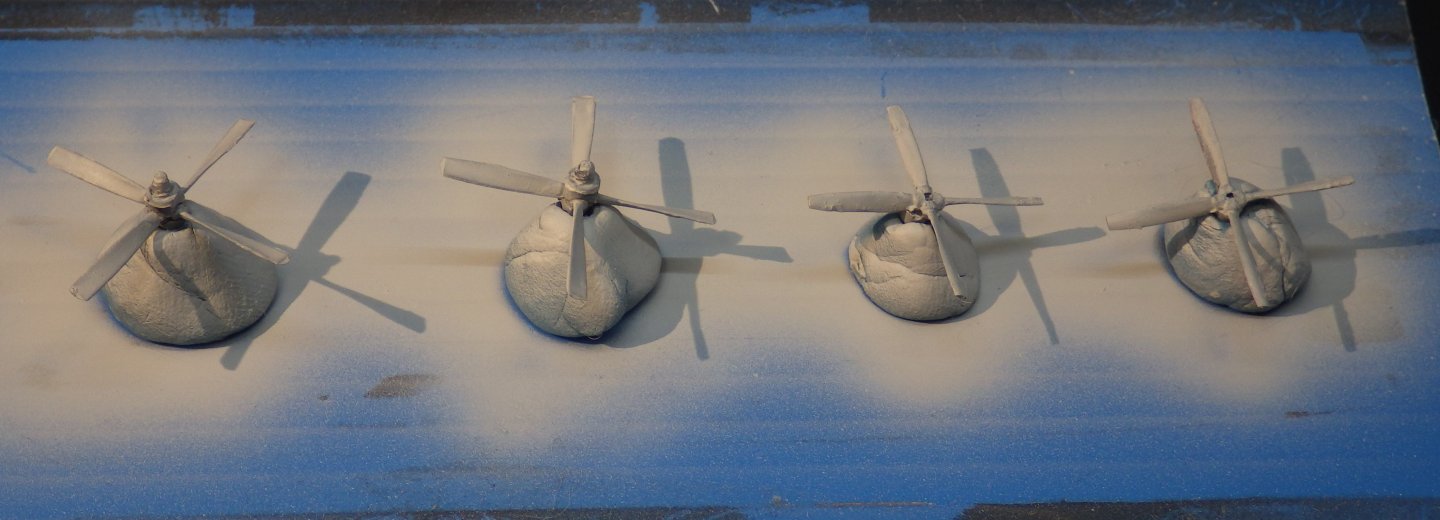
It looks so obvious when its off. I got the white sprayed on today. Tomorrow I mask and add the gray to the blades. Spend more time cleaning the airbrush than spraying paint. Alan
-
I use the same stuff (but matte). Seems to work well for wood, plaster but probably needs primer for plastic Alan
-
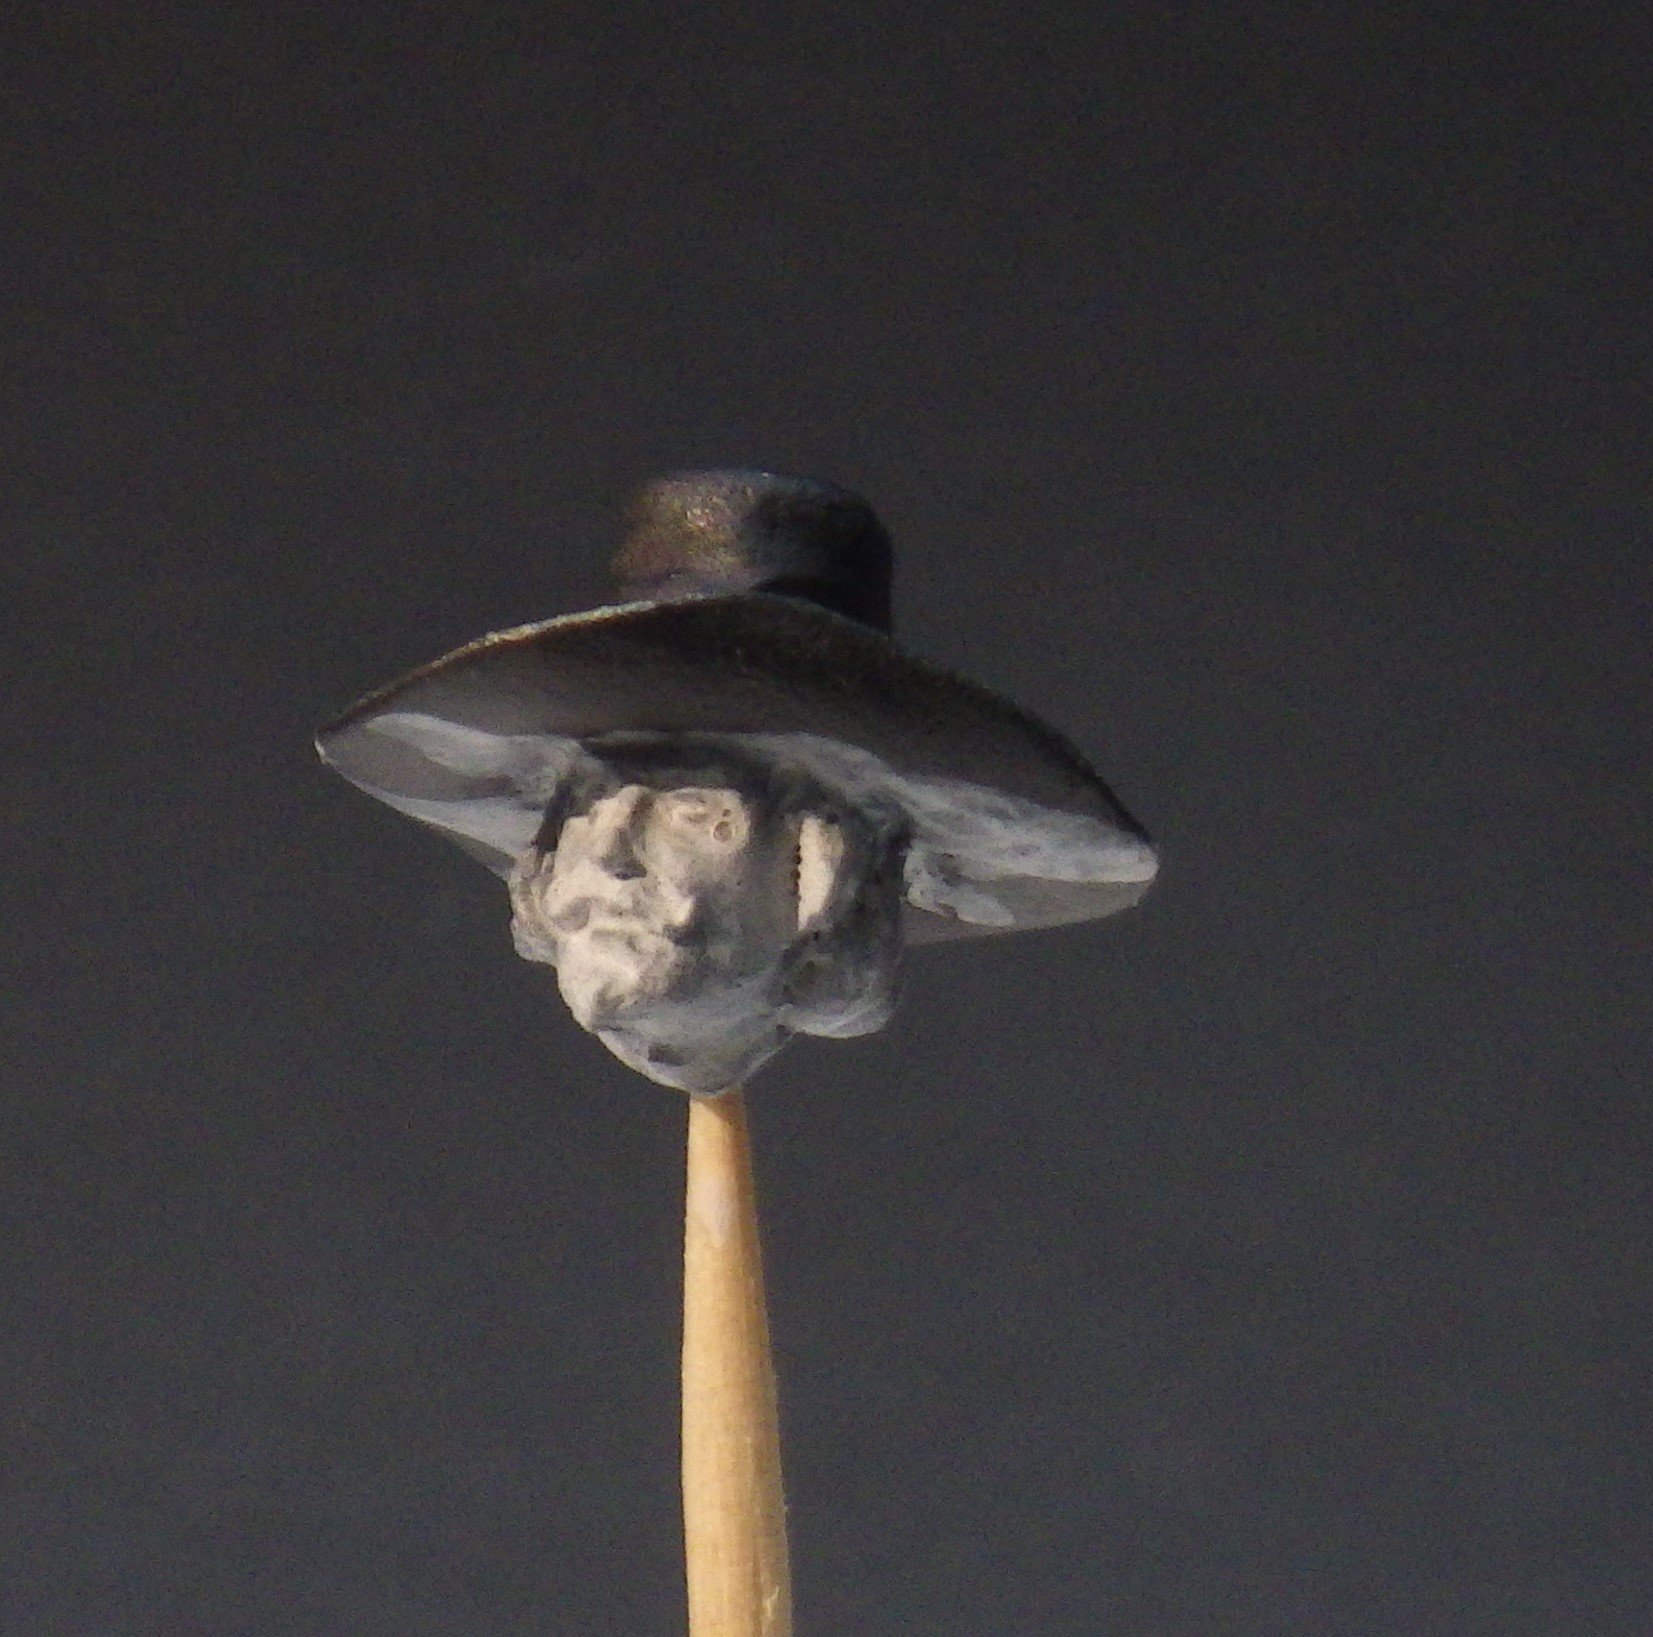
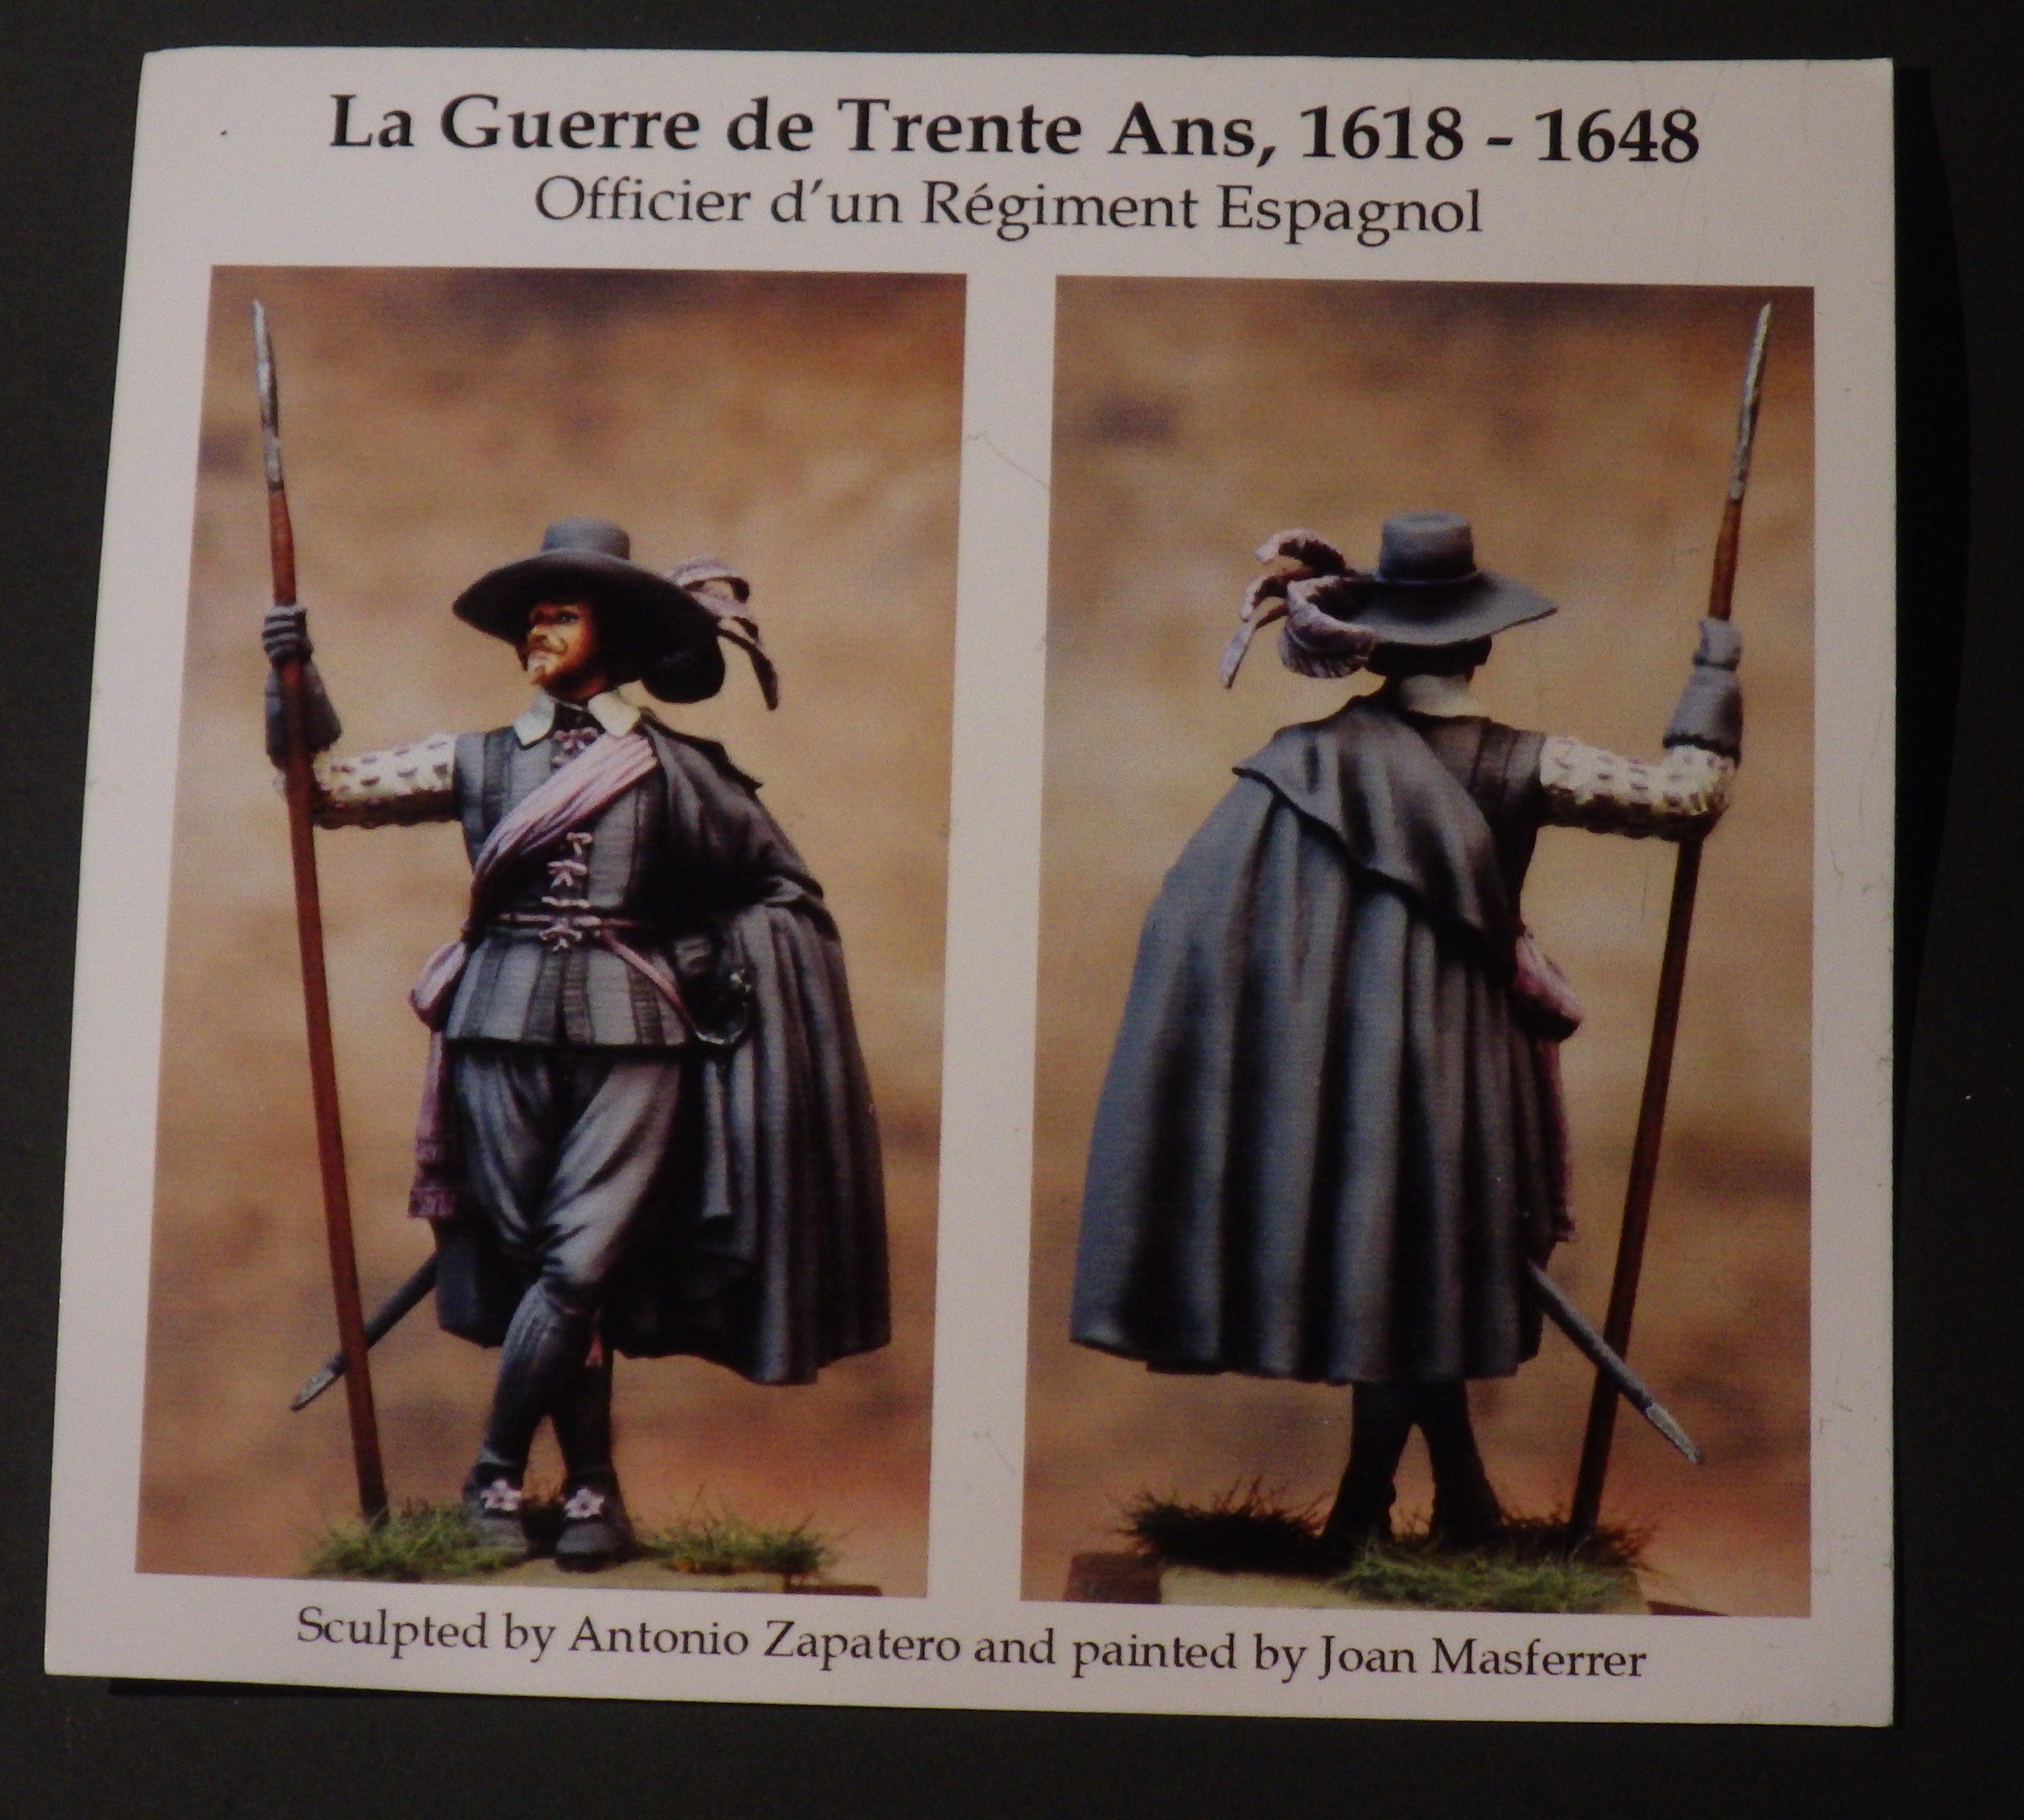
Something to occupy idle hands while paint is drying elsewhere. Another Thirty Years War subject from Art Girona. This time a Spanish Officer. I assume every war has its rear echelons but with his little shoes with violet bows this chap doesn't look like someone who plans on charging through the mud and unpleasantness of the front lines😄 The figure is the usual very nice sculpt from Art Girona. I added brass wire pins at the raised arm and neck to locate the head and hand. The usual black primer and the directional white shading before starting the colour glazes. Thanks for looking in. Alan


- 38 replies
-
- 10
-
-
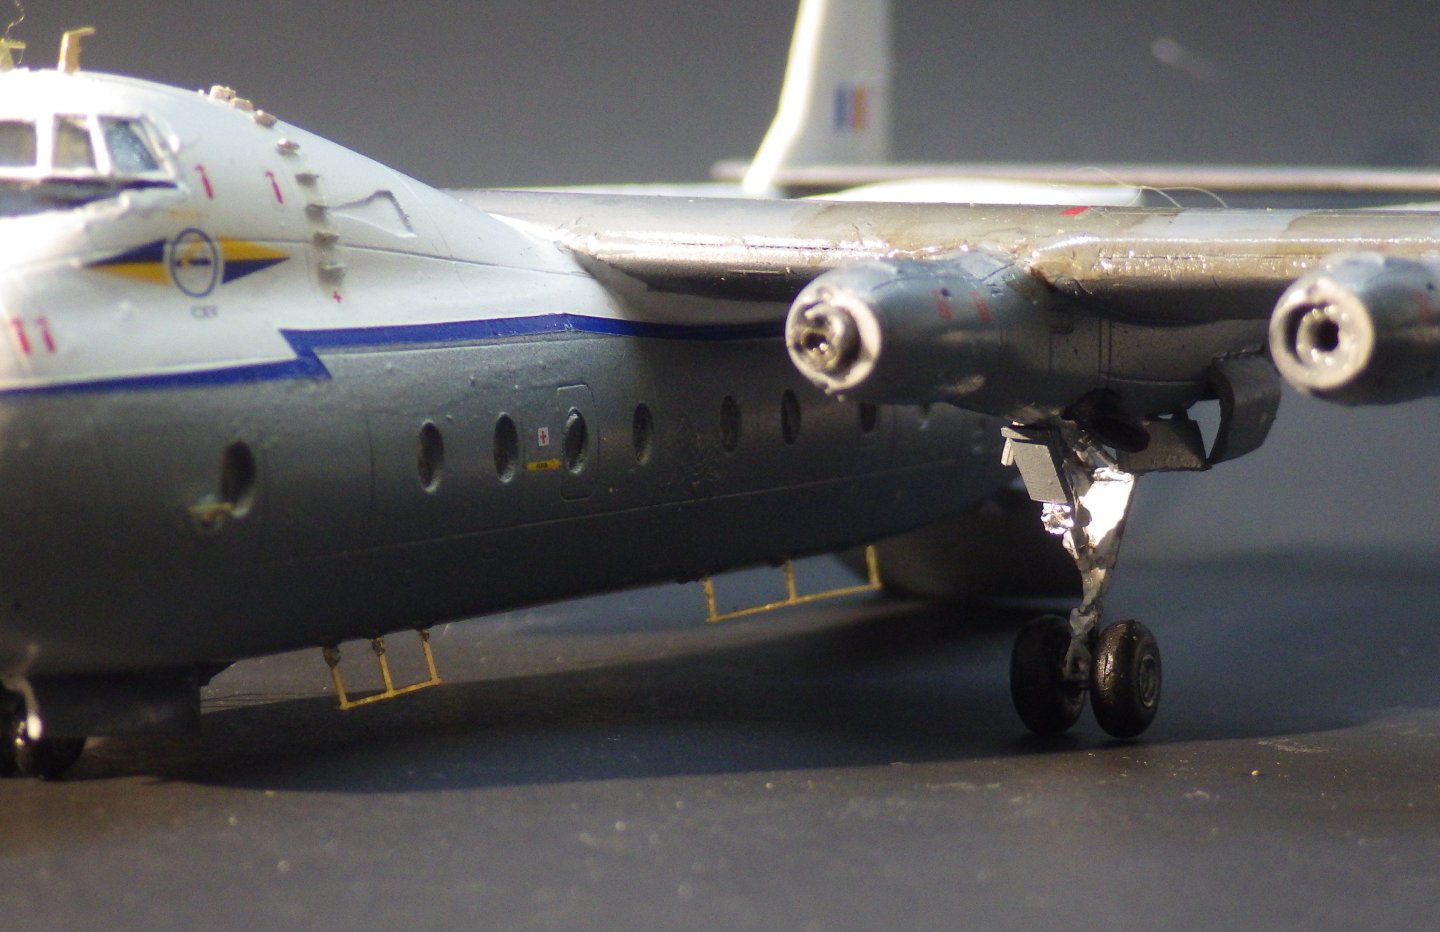
Progress is shamefully slow to finish this one. The second attempt to detail the prop tips were a miserable failure. The masking worked quite well but I seemed to suffer from incompatibility / inconsistency between the paint colours which were a mix of acrylics from Vallejo and Tamiya. The Tamiya colours didn't like being brush painted and the Vallejo either chipped off or peeled off with the masking. So its all been stripped off again and I am trying again using Tamiya and the air brush. The front and backs have now been primered and tomorrow I will mask and add the first colour. All this for a bit of red and white on the tips of teh blades. Thanks for looking in and the likes and comments. Alan
-
The luggage racks are so neatly made. Super work alan
-
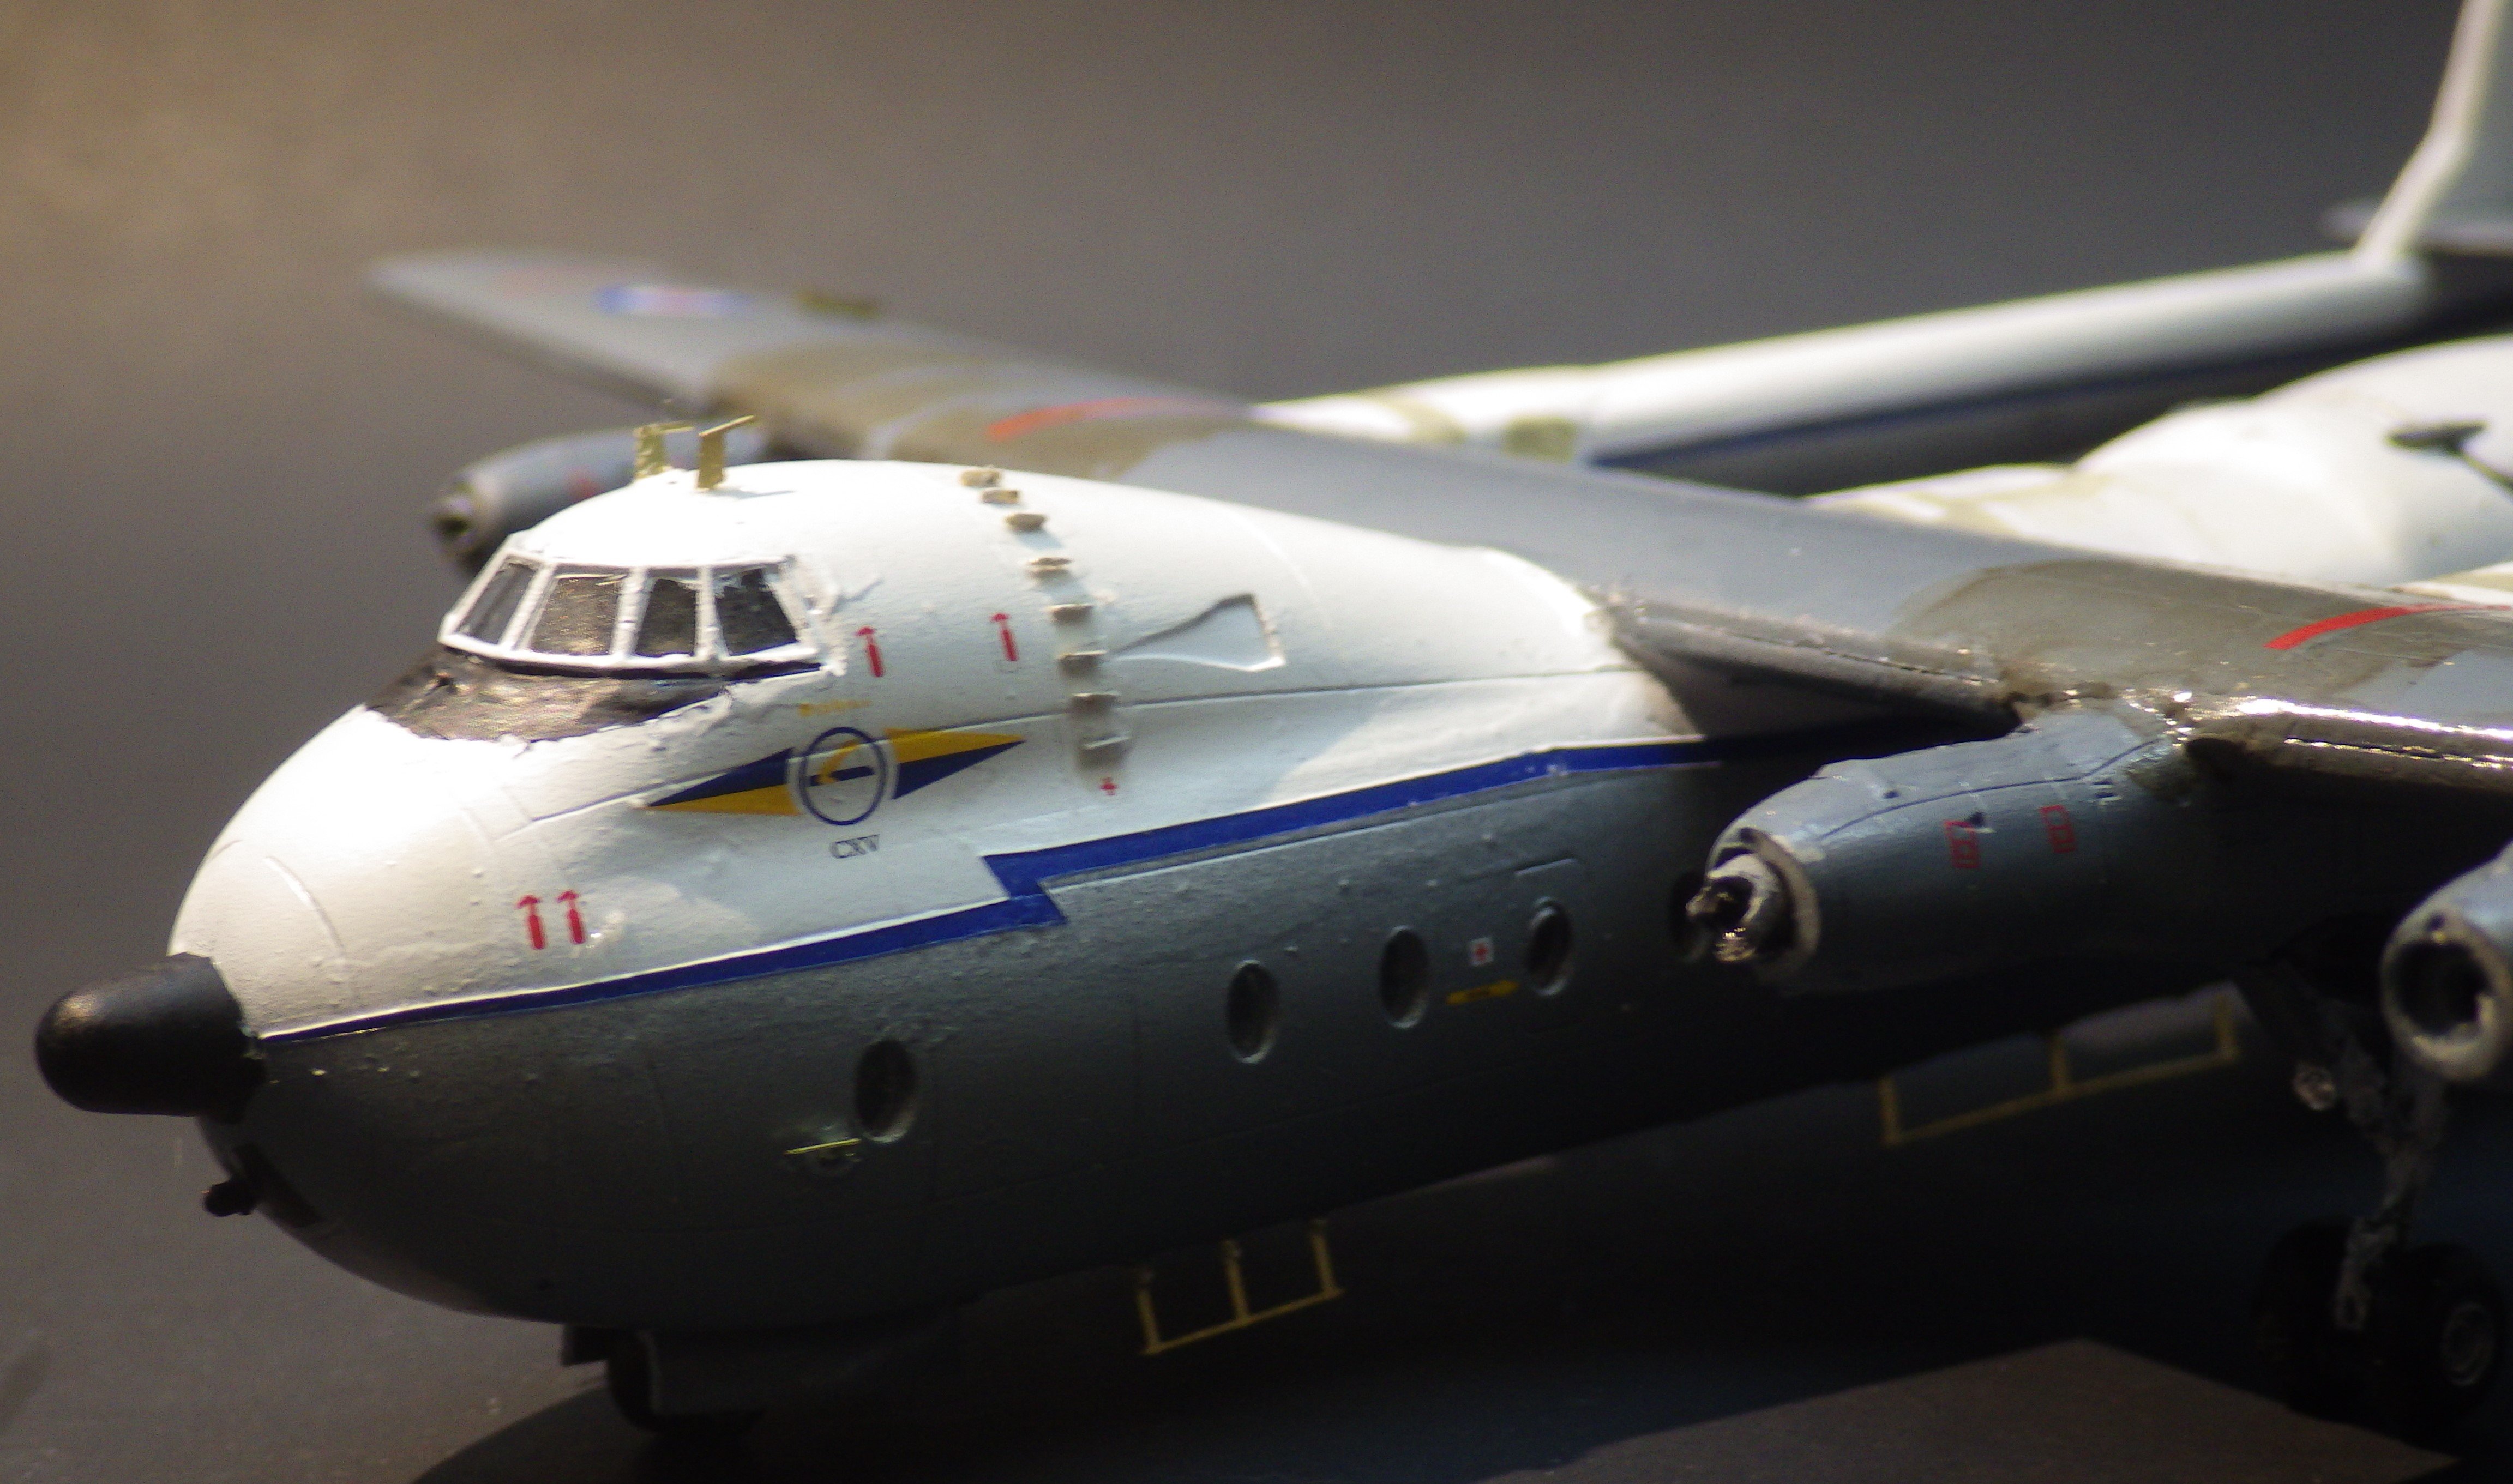
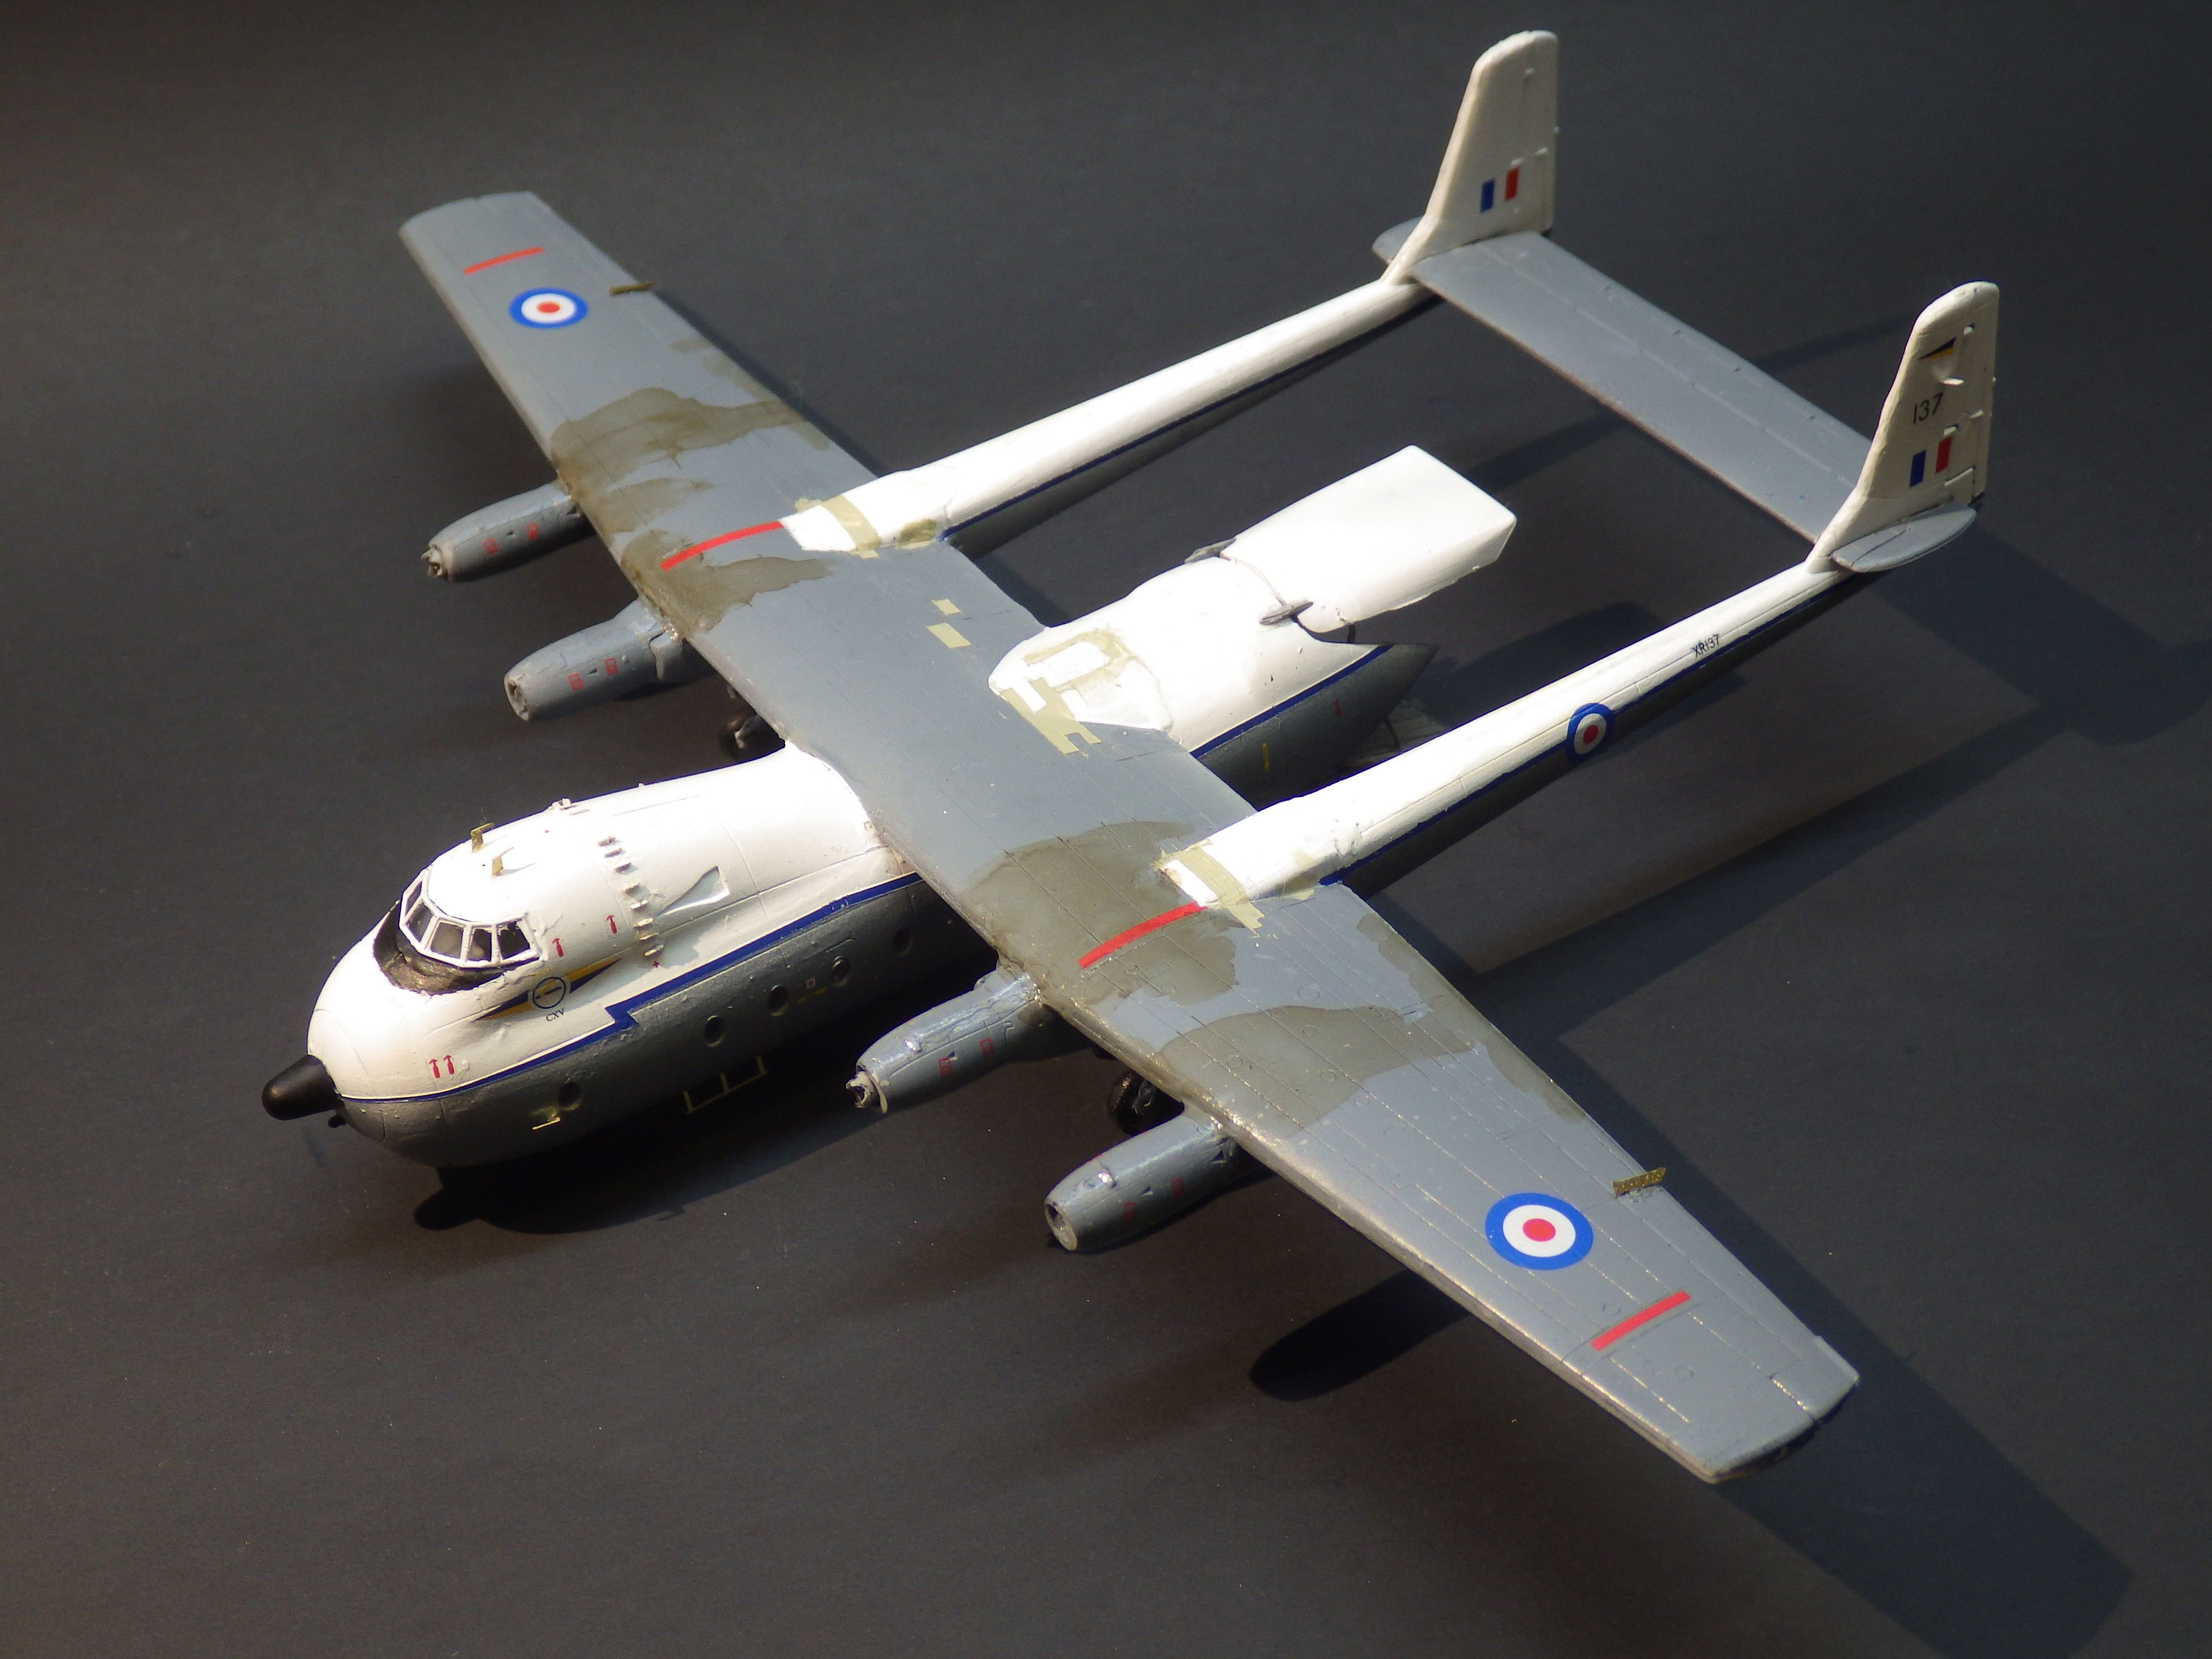
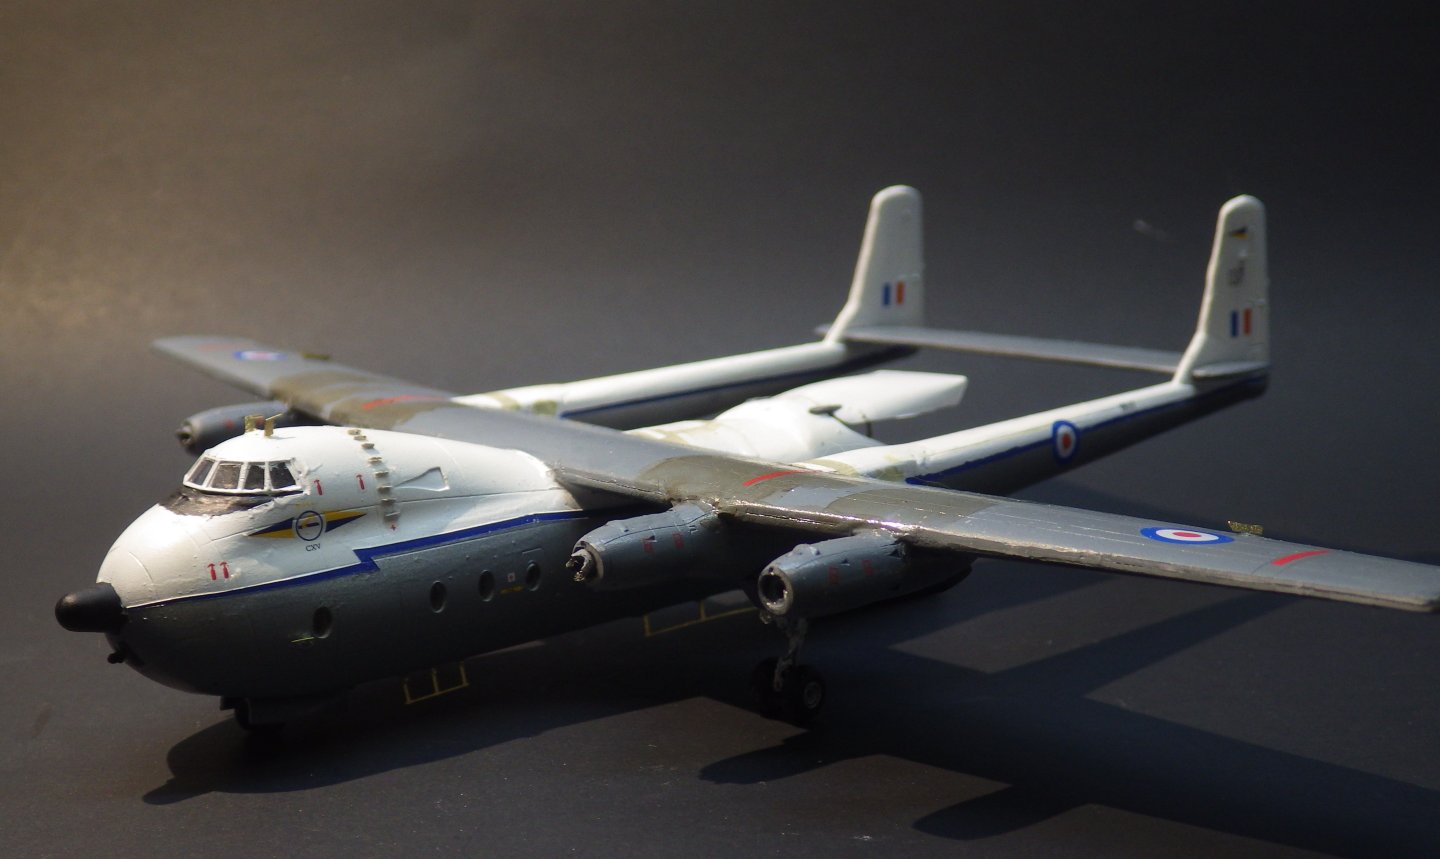
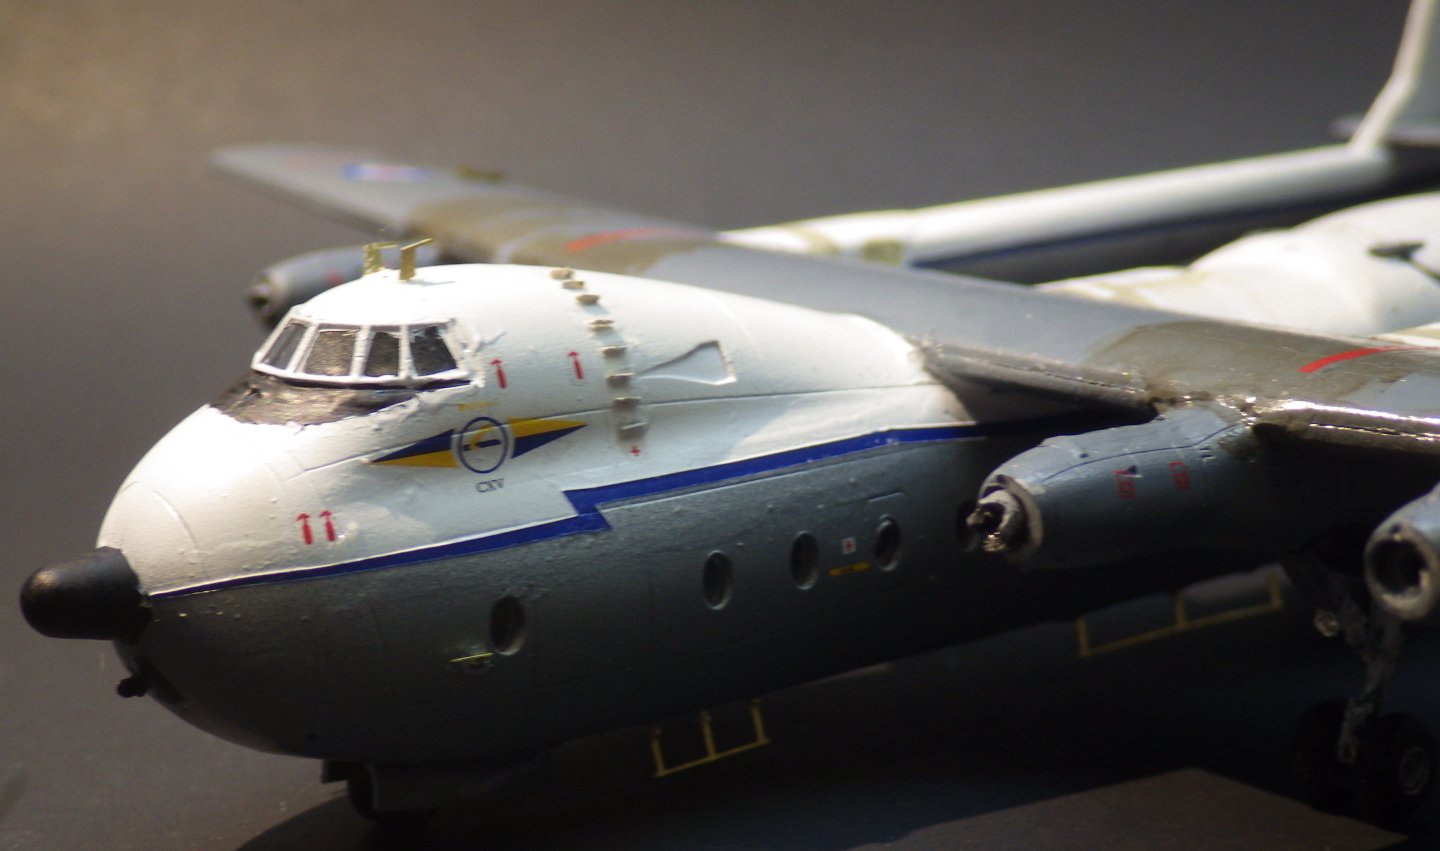
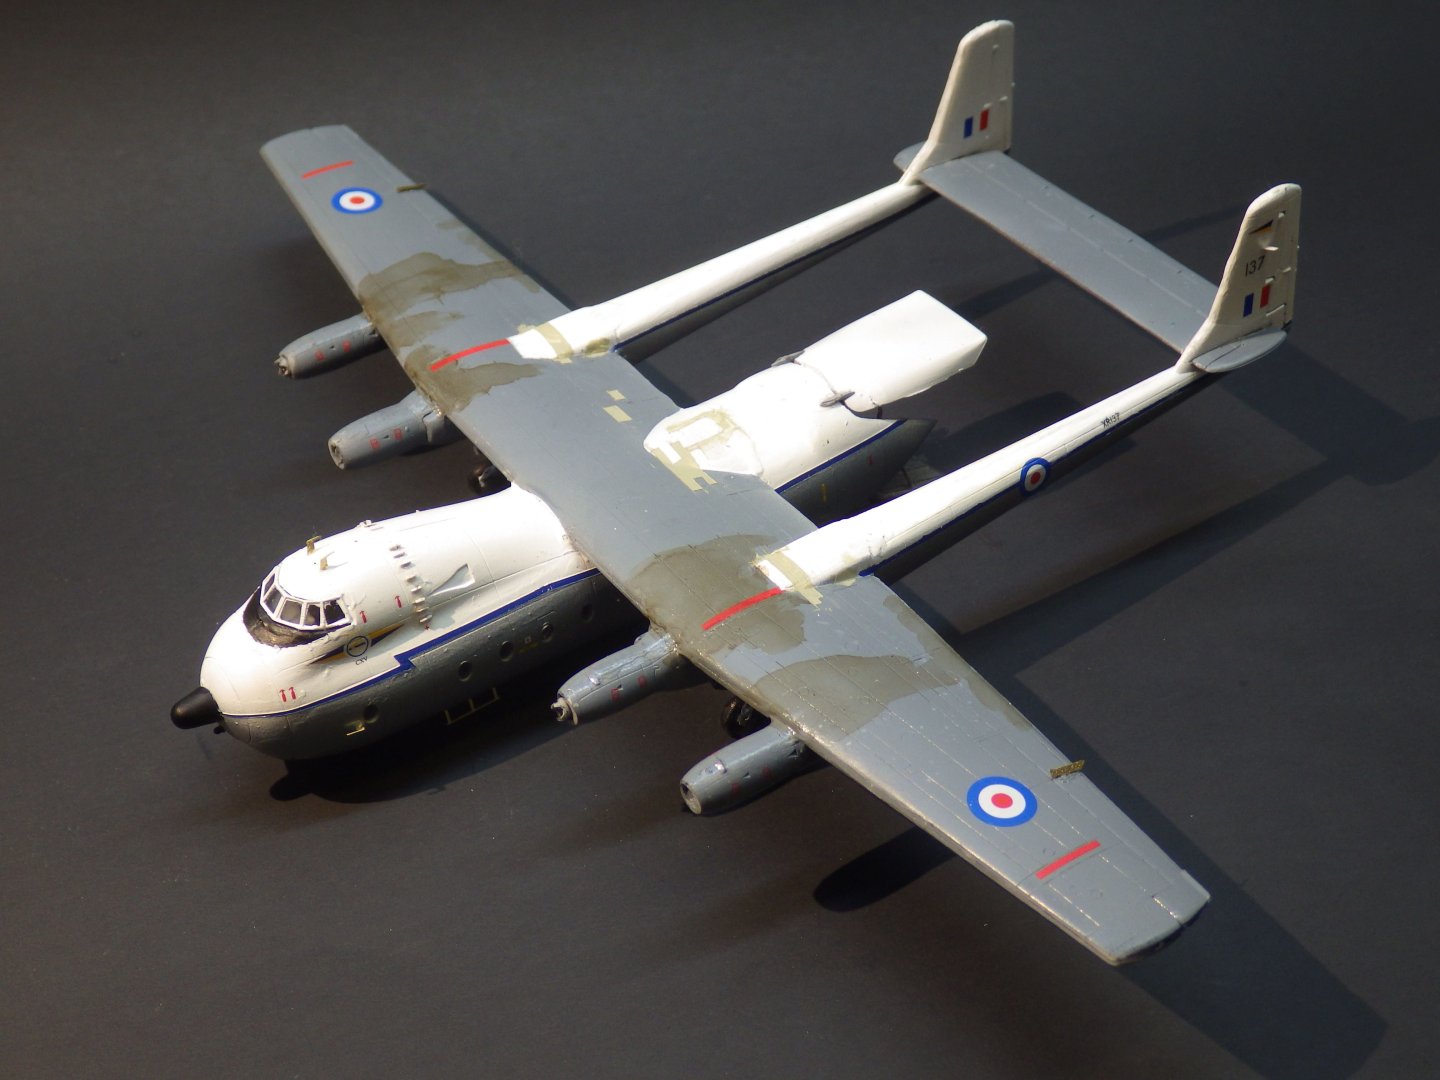
Thank you very much OC. This is a first venture into 1/144 scale and there is a learning process as always. I need to tidy up my paintwork. It looks okay to the eye but the camera shows up every flaw. There were some horrible parts in the kit and flash, fit and some deformed parts made it a challenge but I was very happy with the way the fuselage, wings and booms went together. It all locked into place with the booms square to the wings and parallel. I gather the Beverley is much worse. alan
-
So I went looking on Etsy. I didn’t see the exact same thing but I did buy an Athena figure- complete with owl
-
Thank you so much Mike. The Art Girona range has several more tempting subjects. alan
-
While I was trying to sort out the prop tips I took some time off and weathered the plane approximating to the real aircraft photo posted earlier. I used Ammo engine oil wash on the wings and masked up the panels that seem to have discoloration. Suitably grubby! I decided I wasn't making progress with the props - I just can't freehand the tips without something to rest my hand against. So I did what I should done at the start. I pulled them off (luckily I had used Gators Grip glue) and thankfully didn't break anything. They were stripped back and now will now be painted again, hopefully with a bit of precision. It possibly worked out for the best because I decided that it was a good time to add the PE details and I don't think I could have fitted a lot of it without bumping the prop blades. The turbulence control vanes over the flight deck were horrible to install; they are just so small (and there are 16 of them). Everything else was fairly respectable to work with but there are now few places that the model can be handled. Reinstall the props and touch up the paint and I think we will be done. I added landing lights made from discs of aluminium foil and a dot of glue for the lense. Thanks for looking in, the likes and comments Alan

- 52 replies
-
- 11
-
-
Nice! The eyes are very tidy Alan
-
Good stuff OC. Interesting times certainly Alan
-
Its a terrible thing. I just wanted to paint Nabopolassar as a gift for a friend and now I've got half of Vallejos paint range and more brushes that I know what to do with along with yet another from Art Girona on the way. Its all worth it for the inner tranquility that it brings Alan
-
Thank you kindly Craig. I think it’s helpful for developing better paint brush skills although you wouldn’t guess looking at the argosy prop tips. It’s a nice distraction from heavy going in another kit and they don’t take up much space. i just ordered a couple more for the shelf alan
-
Thank you very much OC. I gather he survived Edgehill and the round ups after the Restoration eventually died peacefully in old age. alan