
HOLIDAY DONATION DRIVE - SUPPORT MSW - DO YOUR PART TO KEEP THIS GREAT FORUM GOING! (Only 24 donations so far out of 49,000 members - C'mon guys!)
×


king derelict
-
Posts
3,273 -
Joined
-
Last visited
Content Type
Profiles
Forums
Gallery
Events
Everything posted by king derelict
-
Hi Craig This is really shaping up to be a hot summer. Working out on the test stand is miserable especially when the sun has warmed up the metal surfaces. Thankfully most of the time I'm in the air conditioned control rooms which are cooled to the point of needing a fleece jacket at times. I'm hoping to be back on the site a bit more regularly now as testing slows down. Its been frustrating watching time drift away doing real world tasks. Thanks for the good wishes. Alan
-
Hi Andrew Thank you for the good wishes. All is well but work has been overwhelming. The promised 20 hours a week has been 45 - 50 hours partly as we have been doing crash investigation testing which always has the whips out for progress. I think we are coming to the end of it now and I hope to be a lot more active here. I've read some of the builds and am green with envy. Some wonderful stuff out there. Regards Alan
-
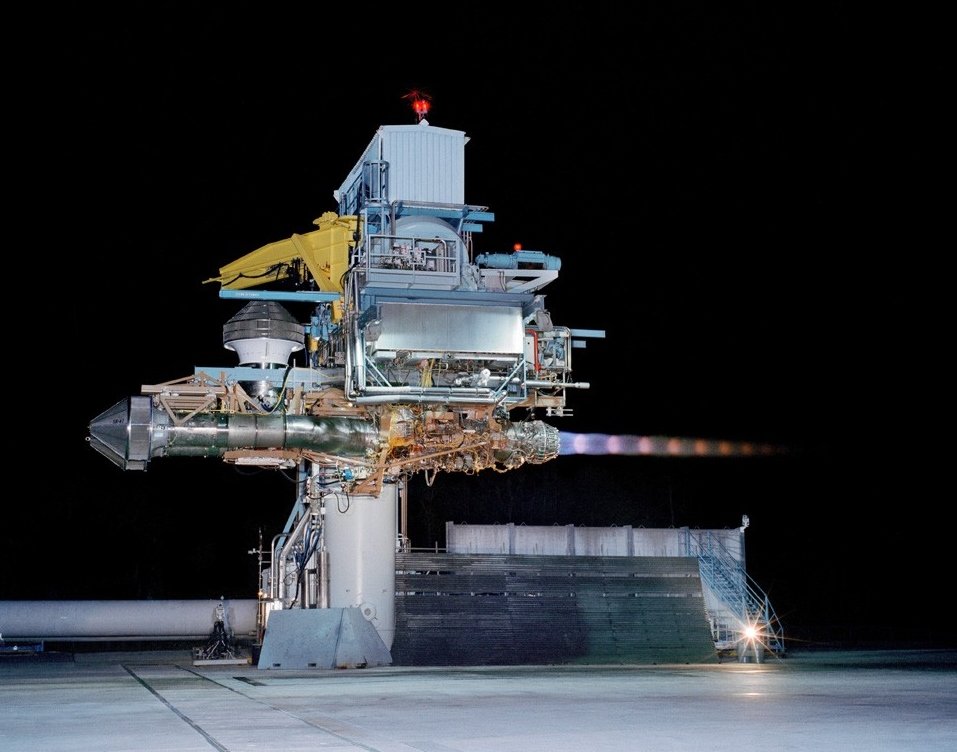
We are out in the swamp at the Pratt and Whitney test facility at West Palm Beach. This is the F35B STOVL engine. You can see the unusual vertically mounted inlet. That's on top of the Liftfan for vertical thrust. I'm the photo it's running in conventional more at full AB but I have one in STOVL with the nozzle bent down. On still nights I can hear it at home 25 miles away but the alligators don't seen to mind. Yep, suddenly I'm working full time,trying to get a few house projects done and troy off to various appointments. It will make model time more precious when it comes around again Alan
-
I haven't given up on this project but time to work on it has become rather scarce. That part time consulting role has become a sixty hour week working all seven days. So I'm doing a lot more of this instead of adding blocks to the Castillo Loarre. It has had the effect of recharging my interest and I'm looking forward to getting back into this in the near future. So, apologies for the lack of progress and updates. I hardly have time to check a few threads and as usual be amazed at what everyone is doing. I'm also jealous of course. At least I hope to pass on the benefits of working to Sprue Brothers shortly. Alan
- 462 replies
-
- 12
-

-

-
Try something from the Flyhawk range. I think they are excellent kits for details,got and design. My first kit was the Flyhawk HMS Lance and it was a rude shock opening the box on my following Trumpeter kit Alan
-
Looking forward to this one a lot. A great piece of nostalgia here. Buccs and Phantoms landing on with the Ark in the 70s. Big jets small deck. Great stuff. Alan
-
Thank you Mike I'm looking forward to the landscaping. The bag of blocks has become noticeable lighter. I'm hoping that I have enough. So far morale is holding up but I'm not looking forward to building the inner walls next. Alan
-
Thank you very much Andrew. Its quite restful adding the blocks and seeing the walls grow but shaping the blocks does require a bit of determination to continue Alan
-
Absolutely beautiful work. Its a stunning model. The crew makes it stand out but I think the wonderfully realistic sails make this a spectacular boat. Congratulations Alan
- 206 replies
-
- 3
-
-

-
- Vanguard Models
- Brixham trawler
- (and 2 more)
-
US 6” gun by RGL - FINISHED - Panzer Concepts
king derelict replied to RGL's topic in Non-ship/categorised builds
I really like a lot of the subjects that Rosen produce and I have build some of their 1/72 kits. Some detail is excellent but in other areas flash is horrible and swamps the part Alan -
I'm not looking forward to those inside curves. I foresee a lot of custom filing in my future. I work for Rolls-Royce supporting the Lift System that bolts to the P+W engine. Liftfan, swivel duct and roll system. All the unconventional stuff. Alan
-
Thank you OC. This build is going much better than the Rochelle Towers. All the feedback and help and likes keeps morale up and actually I think its easier to see progress on this one. I'm still keen to push ahead instead of sticking it out of sight for a while Alan
-
Ive always loved the Seven and the early Lotus offerings, Elan and Europa Alan
-
The details look really good. Its going to be a great and different model Alan
-
Sorry for the dolorous progress. Real like has been intruding badly these last days. Partly its self inflicted. I was asked to come back and consult for a couple of engine tests and I (possibly foolishly) agreed. It will keep the wolf a few paces away from the door and doubtless improve sales at Sprue brothers et al. Its also good to hear the howl of an F135 at full throttle again Anyway, in quiet hours some progress has been made and the outer faces of the walls have been finished Now I have to turn it around and do it all over again on the inside. Some of the blockwork on the inside of the towers is going to be interesting.. I had planned to take a break at this point but I'm enjoying it too much and playing with engines will provide enough diversion so I'll try to keep going. Its going to be slow though so get comfy and lay in plenty of snacks and adult beverages Thanks for all the support, likes and comments Alan
.jpg.38804488dcaf14fd143f5c7d74e4d56c.jpg)
.jpg.8cee19e97754ca366b255759a4fd62fd.jpg)
- 462 replies
-
- 18
-
-
Thanks Ken The figures are very nice but a few mould lines need to be filed down. I'm very impressed with them. Alan
-
Thanks EG Looks like there is other howitzer activity on the board too Alan
-
Thank you OC. Thank you for the advice regarding the figures. I am amazed at the detail. You can see beards on faces and individual fingers on hands. Alan
-
Gators Grip and the similar product from Mig Ammo have similar properties. They give you time to get a good placement of the PE. They also dry with some flexibility which means the part doesn't break off as easily as when glued with .CA which is brittle. I like the GG thin version best. Alan
-
Really beautiful Mike. The panel lines are really nice and you did a masterful job of the folded wings. Alan
-
Absolutely stunning Mike. You did a great job and the dio really sets it off very well. The mechanic really sets the scene. Looking forward to the next one Alan
-
Absolutely stunning OC. The details on the uniforms is so precise Alan
-
In my flow of build I end up painting the main deck before painting the superstructure so I tend to 1 assemble hull, deck and main structure elements 2 Prime 3 paint the main deck 4 Mask the main deck 5 paint hull and structures if they are the same colour 6 Mask hull and paint structures if they are different 7 Add details and touch up. I'm not claiming this is the most efficient way but it works for me Alan
-
US 6” gun by RGL - FINISHED - Panzer Concepts
king derelict replied to RGL's topic in Non-ship/categorised builds
This is going to be spectacular Alan
