


jthemanjack
-
Posts
112 -
Joined
-
Last visited
Content Type
Profiles
Forums
Gallery
Events
Posts posted by jthemanjack
-
-
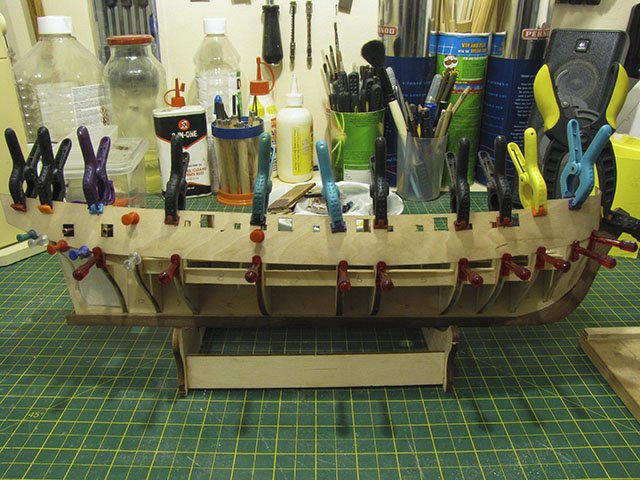
Glued both Gun-port strips into place, what I did was soak and then clamp everything in place overnight to dry, I find these ply patterns easier to glue if they are formed into shape beforehand . The instructions say "The top edge of the strips should be level with the top edge of the Bulkheads" but I wouldn't go by just that, what I did was clamp the strip into position, and then use a gun carriage to check that the Gun-ports are at the right height in respect to the main deck. When I was happy that it was in the right position, I drilled a few guide holes to help with the positioning when gluing. I also drilled 3-4 small holes around the base of the bulkhead tabs that are left above deck level, these need snapping off once the first planking is done, in my experience they don't just 'snap off, it can turn into rather a brutal affair. It's also good idea at this point to drill for the dummy barrels in the two stern Gun-ports, you'll need the strips in place to make sure the barrels are centred .
-
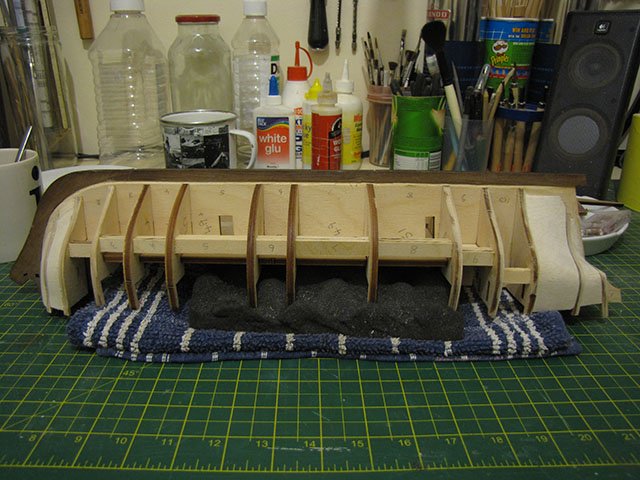
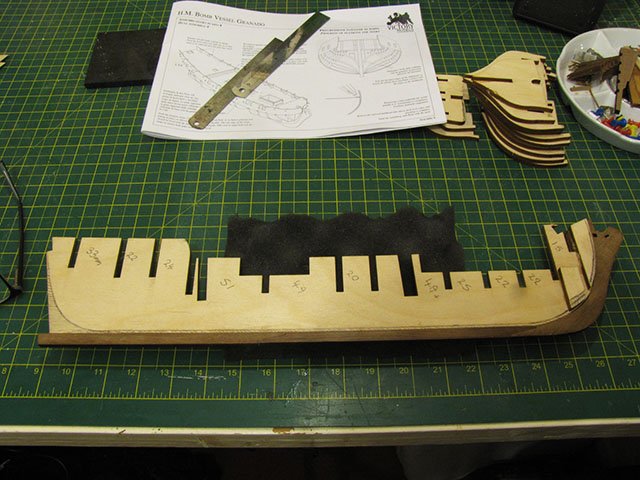
Managed quite a bit in the week , fixed the bulkheads and Balsa'd at the bow and stern , I cannot believe the price of balsa wood now ... I was around 10 or 11 the last time I bought any mind you. Everything shaped and ready for the decks and gunport strips . The gunports need soaking for a while as per the instructions , I use a thermos and hot water, so it's more of a 'steam' than a soak . Spot the 'not so' deliberate mistake at the stern , that comes from not studying the instructions and looking a few steps ahead ... Doh !
- Canute, GrandpaPhil, Ronald-V and 3 others
-
 6
6
-
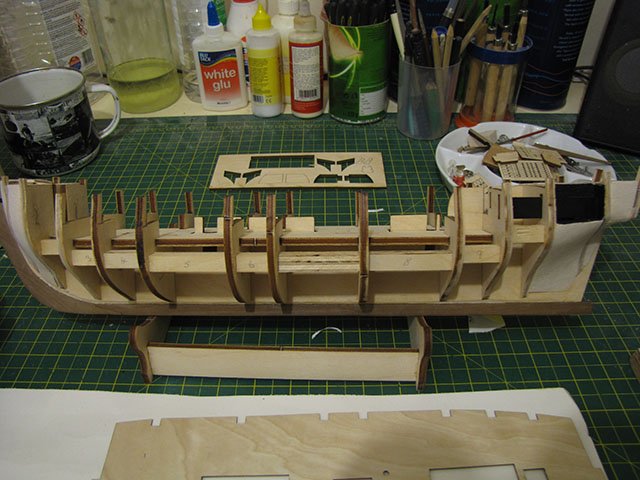
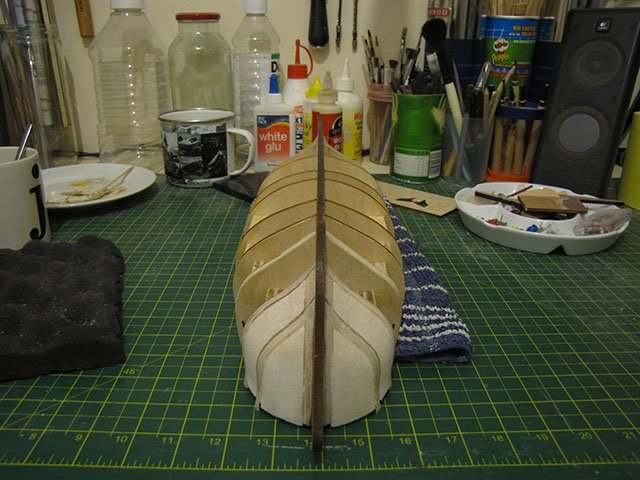
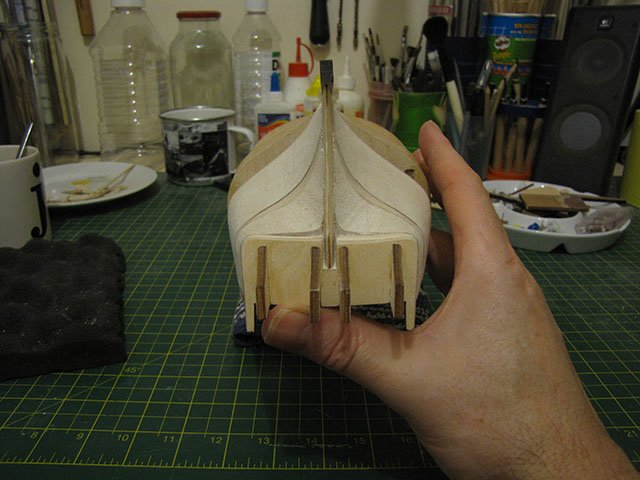
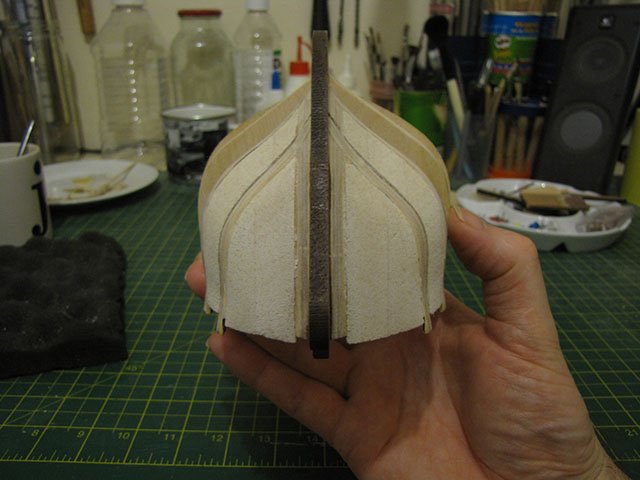
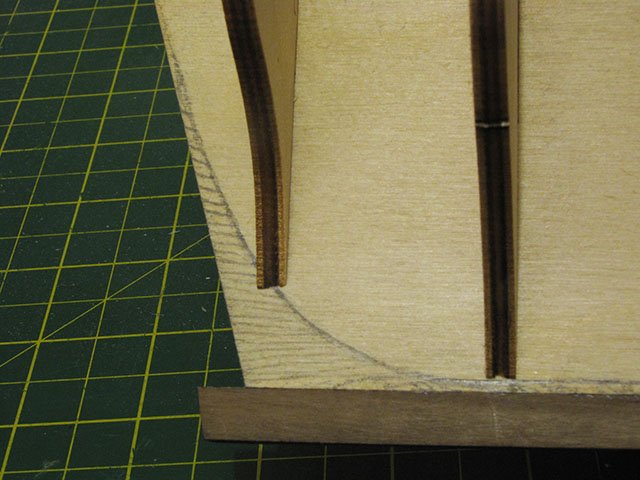
Marked off bearding line and rabbet , going to be conservative in the amount I take off for now, can always take a bit more off when I strake . Measured in between bulkheads for inserts and decided to use balsa inserts at prow and stern ... planking to that transom looks like it's going to be fun . dry fitted all the bulkheads and deck and apart from No4 which needs dropping a tad (about 1mm) all seems good
- ccoyle and GrandpaPhil
-
2
-
Making a start, Keel, rudder post and Prow being glued .

- ccoyle, Ryland Craze, GrandpaPhil and 1 other
-
4
-
Hi Guys
Starting a Granado build and thought a Build Log would be fun ... and helpful ! I've only built Panart models up to now ( Royal Caroline , Armed launch and the Open Whaler ) So a Victory model is my first kit away from Panart . I know there's been an awful lot of Granado builds on this forum, and from Modellers with an awful lot more skill than me, but really it's to get ongoing advice from you Guys and it just 'might' be of help to somebody in the future. Look forward to hearing from you Chaps and please if there is anything on my log that doesn't seem right I would welcome Advice .
-
Hi everyone , Picked up a great deal on Ebay last month , got the Grando by victory models and a part finished USS Constitution for a snip . The Constitution is incomplete and you can't get parts now so I have some spare parts going gratis, so if anybody has the mamoli kit but is missing parts get in touch and I'll see if I can help ,depending on the cost of postage for free .
-
-
-
Hi Mobbsie,
Coming along nicely ,Built her myself a few years ago and really enjoyed the build (apart from the triple Planking ) which is needed for stability of the Hull but is a little bit tedious,also did the Open Whaler from Panart which is great fun to build .
Will follow with interest .
Jack
-
Those 1mm x 1mm fillets sound very fiddly to me Alan but like you I can't see any other way around it ,maybe you could Email Caldercraft and describe the problem....I hear they are very good at sending replacement parts when there is a problem with parts , might be worth a try .
Jack
-
Hi there Izzy,
Will be keeping tabs on your build as I have a soft spot for the Will Everard as she was my first build,at some time I think I will revisit the build to do a better job of her.
Interesting idea to caulk the hull planking...are you going to make her into a working model ? and I may be mistaken but wasn't she steel hulled...... I don't suppose it matters about authenticity as long as you are happy with her and enjoy the build.
good luck
Jack
-
Looking good Alan .....Will start posting again after a long break ,I am a little bit ahead of you but only just so we will both be building together ,
Jack
-
Looking very nice Timmo ......will do something very similar I think if not an exact copy (nothing patented I hope).
Gonna have to get myself a Jewellers saw I think...... looks very handy.
Cheers
Jack
-
Dan..... all i can say is that you a braver man than me,
I think MSW should create an honours system, whereby anybody showing bravery beyond the call of duty would be suitably rewarded.....maybe (The MSW order for Gallantry) , I for one would put your name forward for this very Galllant and kind act.
I cant help feeling sorry that the old gentleman in Question will not see the finished ship though.
Cheers
Jack
-
Somewhere in between i think Gil.
Jack
-
Looking great Mike..... she was my favourite and most enjoyable build ,after i finish my current build i am going to revisit the build and fit the bowsprit and jib ,i am also going to colour the sails red ,i hope you don't mind me posting an image in your log but something like this ! (if you do mind simply send me a pm and i will remove it)
Cheers
Jack

-
-
Getting there Dave........even though the first layer of planking does not get seen it is still very important as it governs the shape of the eventual hull, it might be an idea to put in the balsa fillets as Alistair suggests as this help you get a nice rounded shape to the bow.....i know i didn't but that is just me being lazy.
The first layer is also an opportunity to try out the planking scheme you are going to use on the second layer and iron out any problems therein ,
As for the burglary i am afraid that is your own fault for showing off with your build board (someone was bound to try for it ) I will pm you the plans for a really good anti burglar device that i invented free of charge...it is very easy to build and cheap to make , all that you will need is a length of rope ,two springs,two three foot lengths of 1 x 5 inch pine and various screws........oh......and a double barrelled shotgun...... also a body bag and maybe a bag of lime (the bag of lime will depend on how you are planning to get rid of the body).
Cheers
Jack
-
Very nice work Rusty........looking at the how structurally sound these vessels had to be to withstand the punishment from the mortars you can understand why they were so popular with the Arctic explorers.......i am pretty sure both the Erebus and the Terror were ex mortar vessels,both of which withstood years of being icebound until they finally succumbed to pressure of the ice.
Great build and very nicely done.
Cheers
Jack
-
Hi John, Pretty much decided she will be my next build so i will be keeping tabs.......you seem to be doing a fine job there .
With the deck planking its an idea to try and simulate the caulking that weatherproofs the joints,,,,this can be done lots of different ways the easiest of which is to use a soft leaded pencil to darken the edges, its not critical but gives the planking a nice effect .
Good luck,
Jack
-
Love it ........you are doing something I find very difficult to do, and that is to simulate ware and tear ,my overriding impulse is to keep everything as pristine as possible.
At what stage do you simulate the ware and tear....and what is it that you apply to give it that aged look.
Thanks for posting,
Jack
-
Hi Julian,
Ditto everything above......enjoy what you are doing and learn from your mistakes, when i look at some of my early models i see tons of mistakes and things i would now do differently , the main thing is to enjoy what you are doing.
Cheers
Jack
-
-
Looking good Dave........looks like you may have drummed up a little business on the side.
Cheers
Jack

Granado by jthemanjack - Victory Models
in - Kit build logs for subjects built from 1751 - 1800
Posted
Thanks for the input Joe . I did wander about them as well, I know they weren't part of the normal set-up on-board, but during conflicts I wouldn't be surprised to see them used as Gun-ports, instead of the 'Anatomy of a Ships' description 'Ports (used as cabin lights)' or 'windows' in common speech . Looking at the drawings they were set low and could be used as Gun-ports . I'll wait and see how I feel about them, they're only 'screw ins' and can be removed at any point . The Boy in me thinks you can't have too many Cannons though ... nice to hear from you .
Jack