DONATION DRIVE - SUPPORT MSW - DO YOUR PART TO KEEP THIS GREAT FORUM GOING!
×


JpR62
-
Posts
699 -
Joined
-
Last visited
Content Type
Profiles
Forums
Gallery
Events
Everything posted by JpR62
-
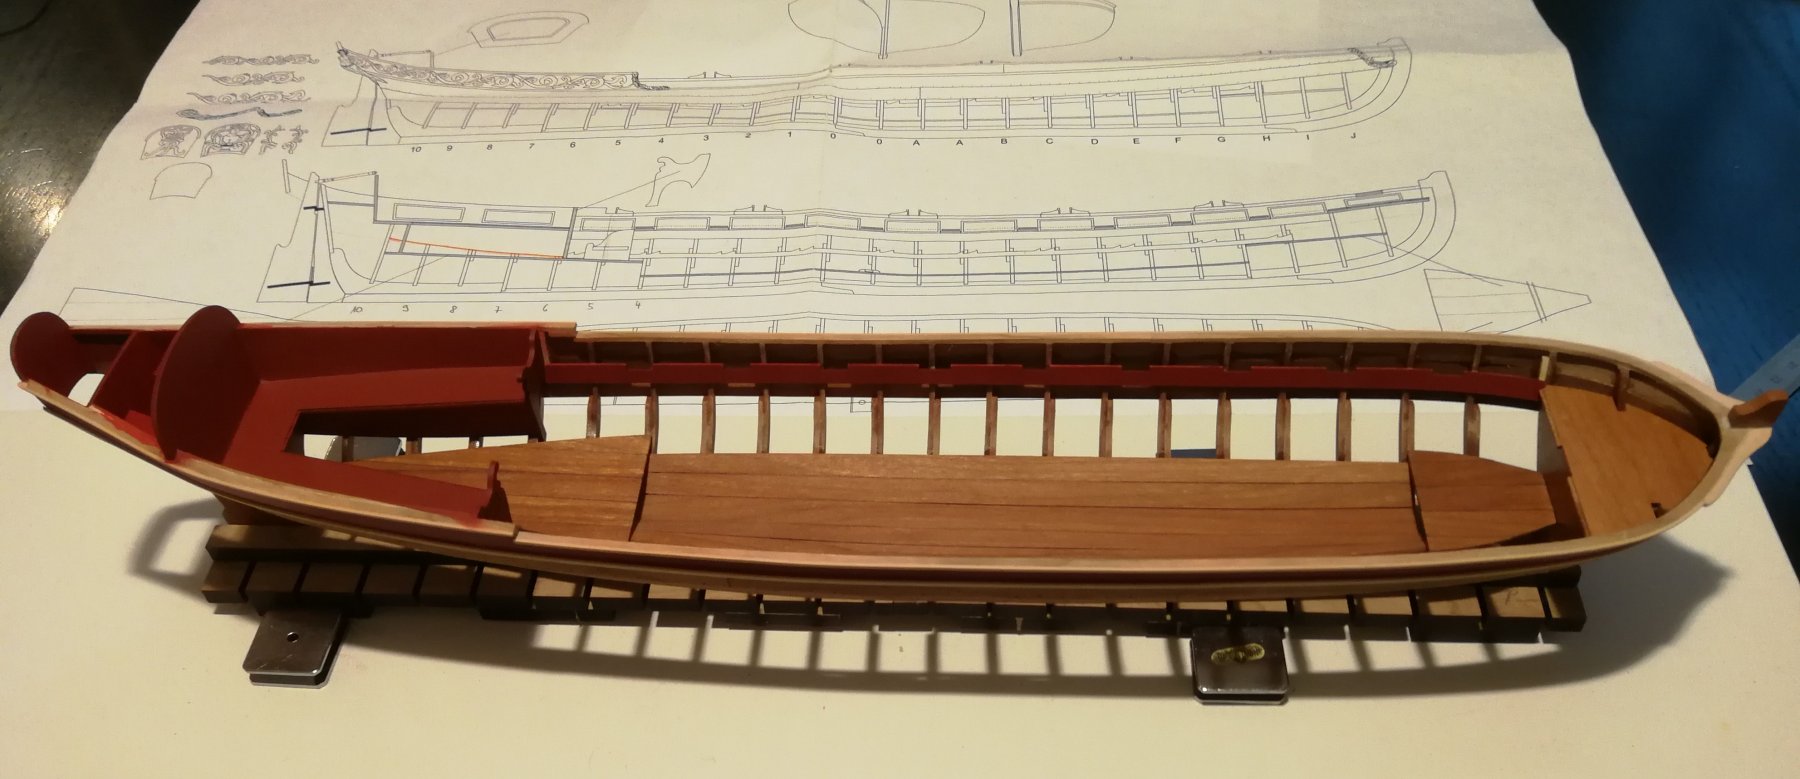
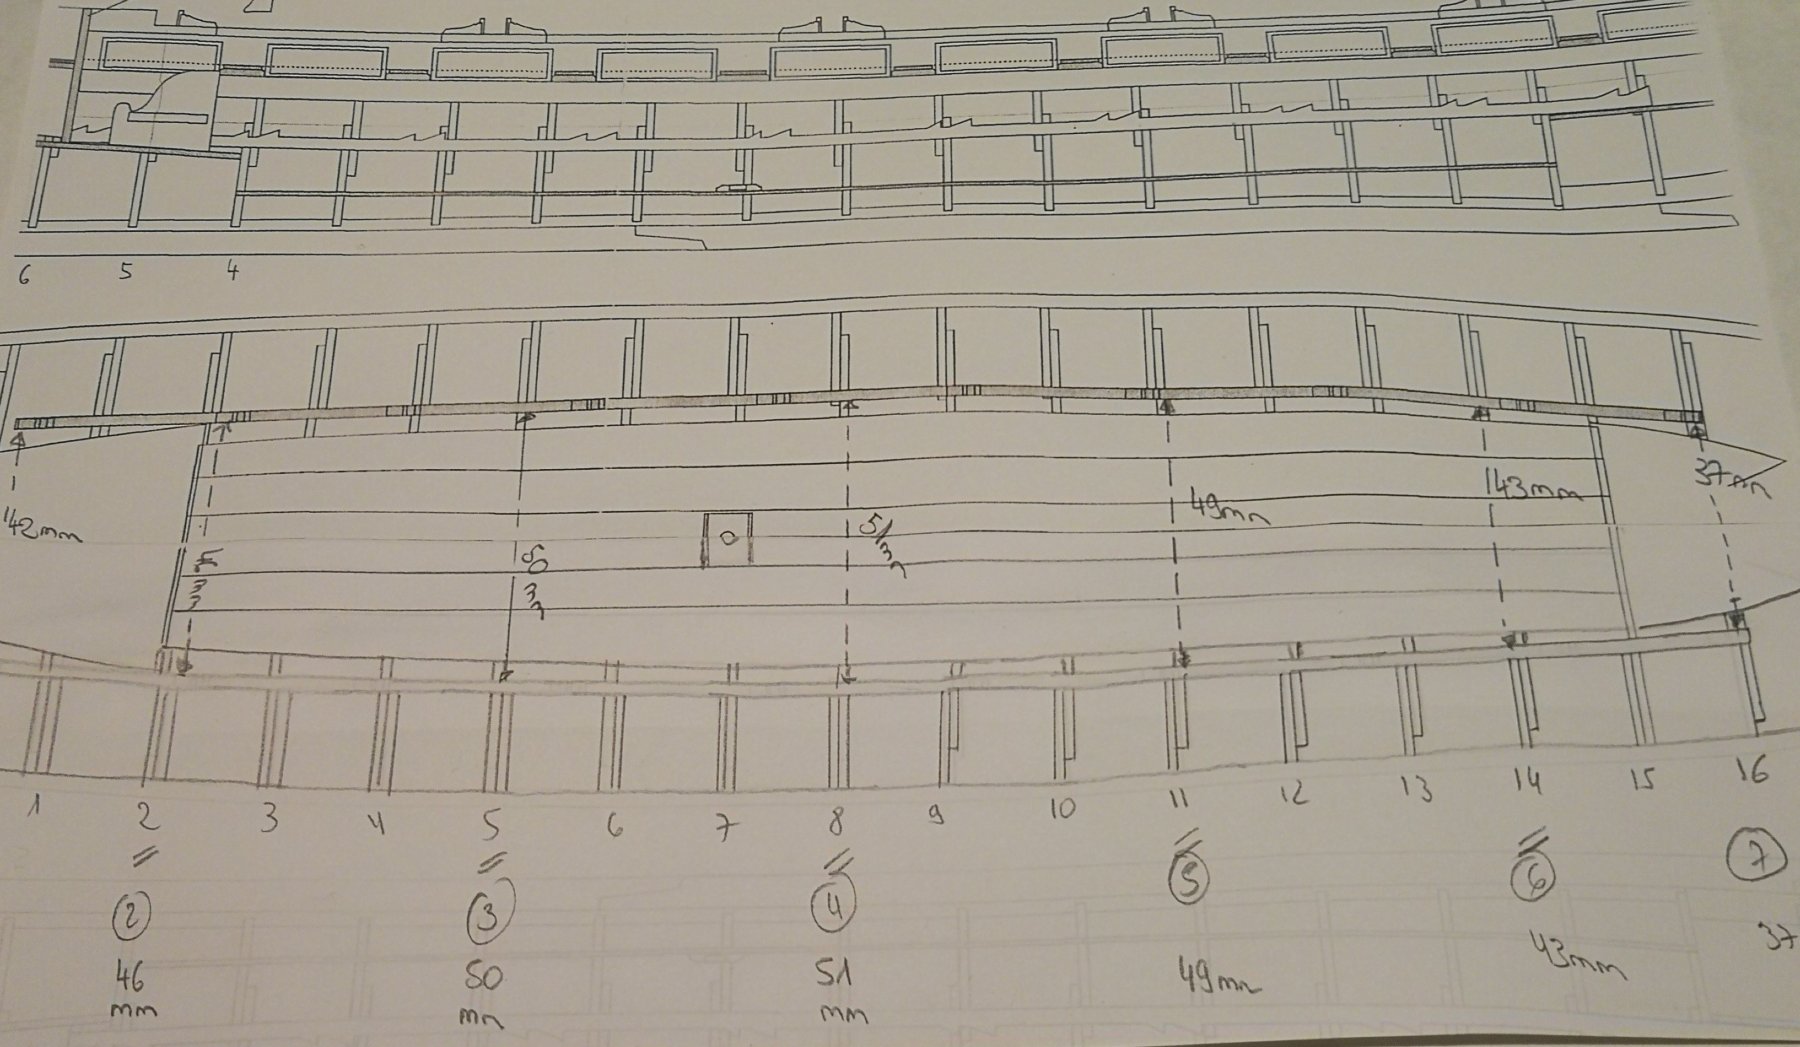
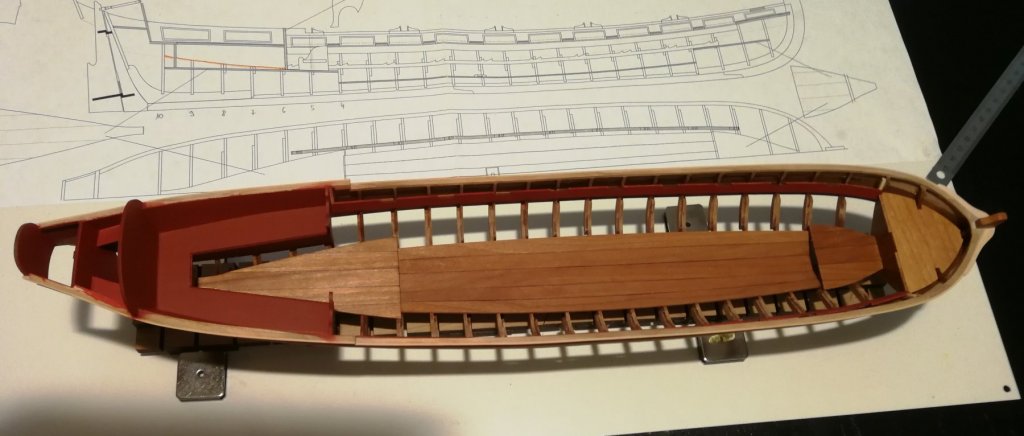
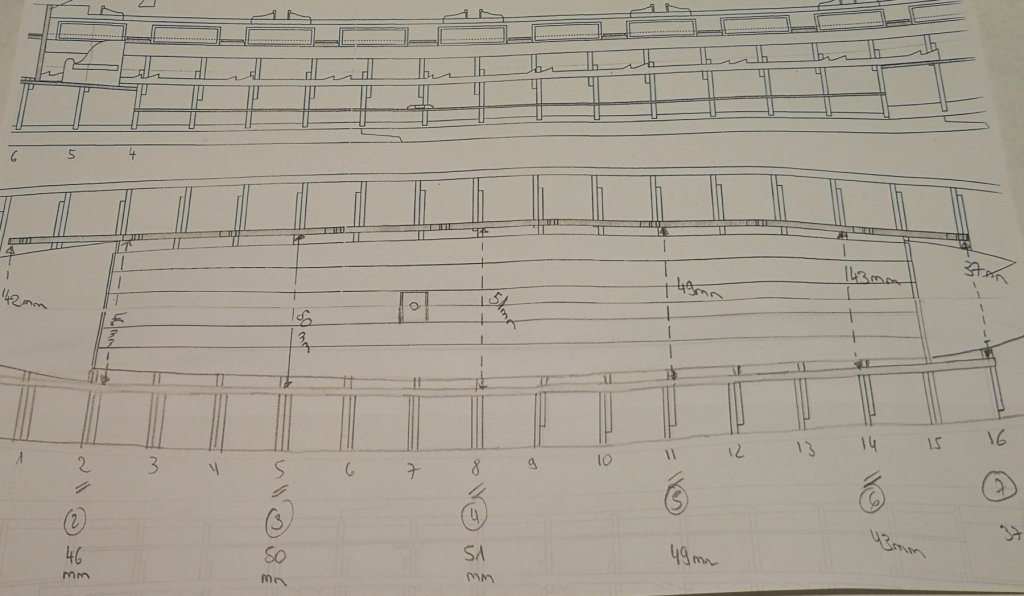
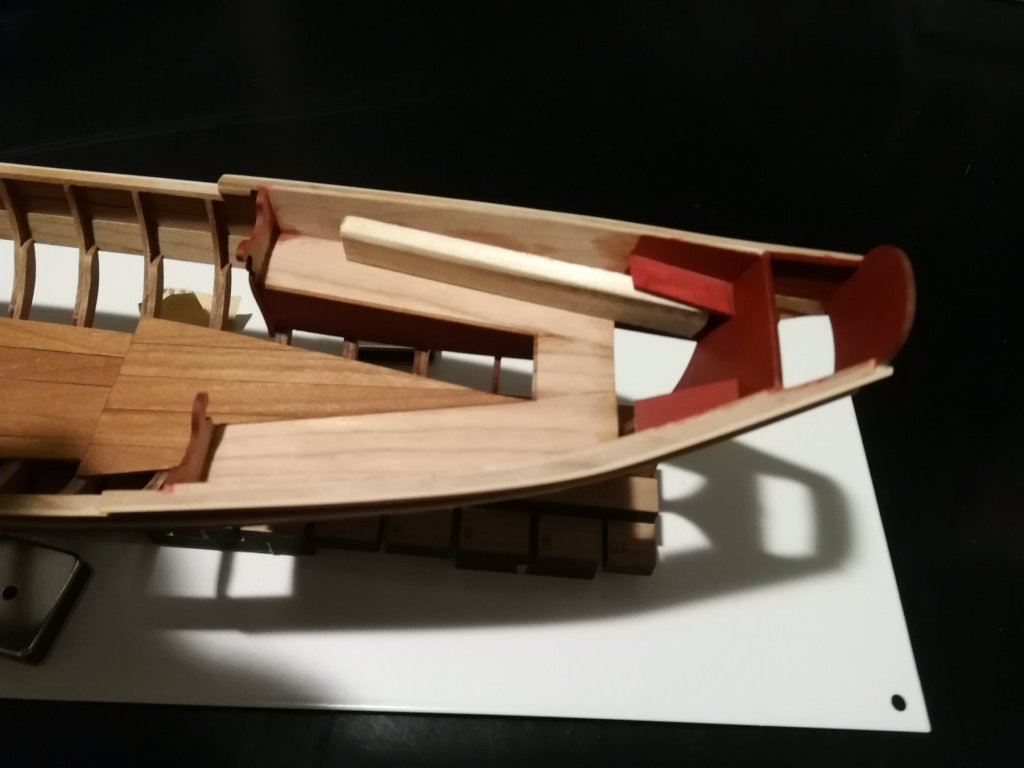
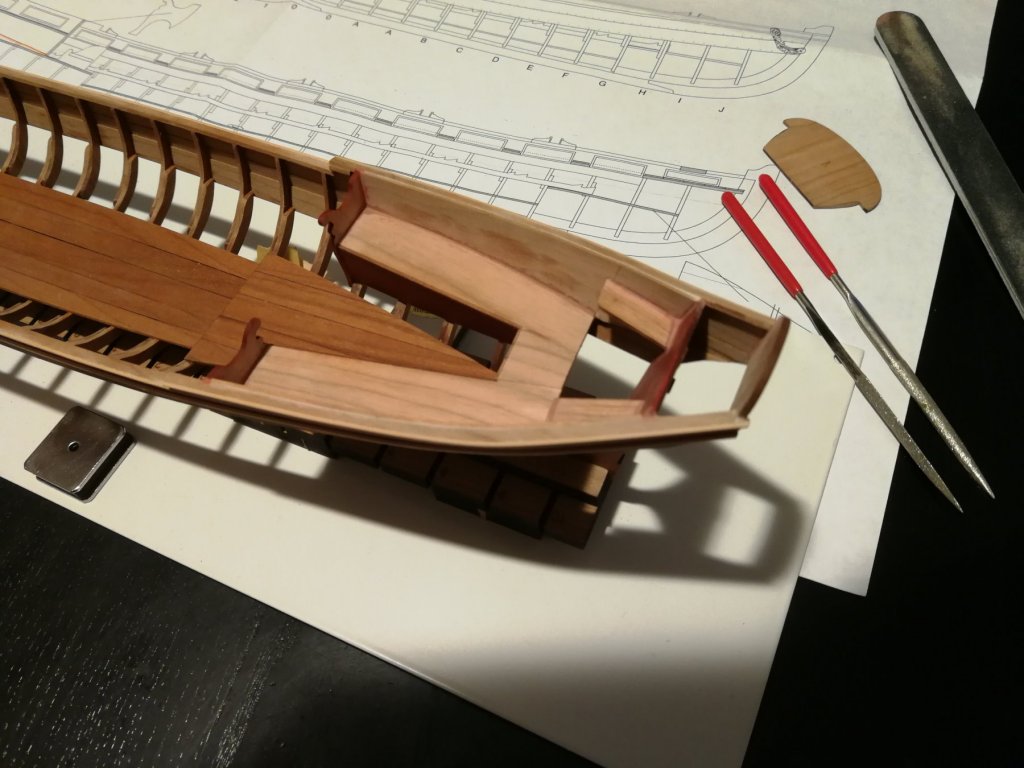
 The work on the bench seat back is done. I continued the painting work by applying many thin layers of paint. The risers have also been installed and the forward platform added. I will add now the stretchers. I must first place on each side a long thin timber. To find the right position and especially to be able to give these two timbers the good shape, I prepare a jig. After photocopying the plan and establishing the complete floor situation, I determined the position of the timbers at six locations. I hope to be able to preform the two timbers using this jig... It will be for tomorrow, once the glue dries...
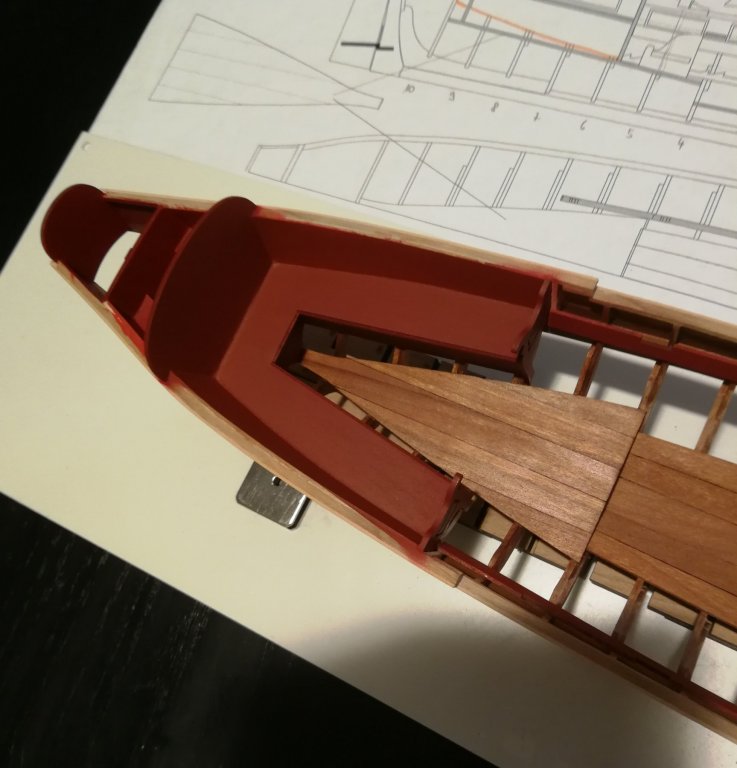


- 103 replies
-
- 8
-

-
- queen anne barge
- Syren Ship Model Company
- (and 1 more)
-
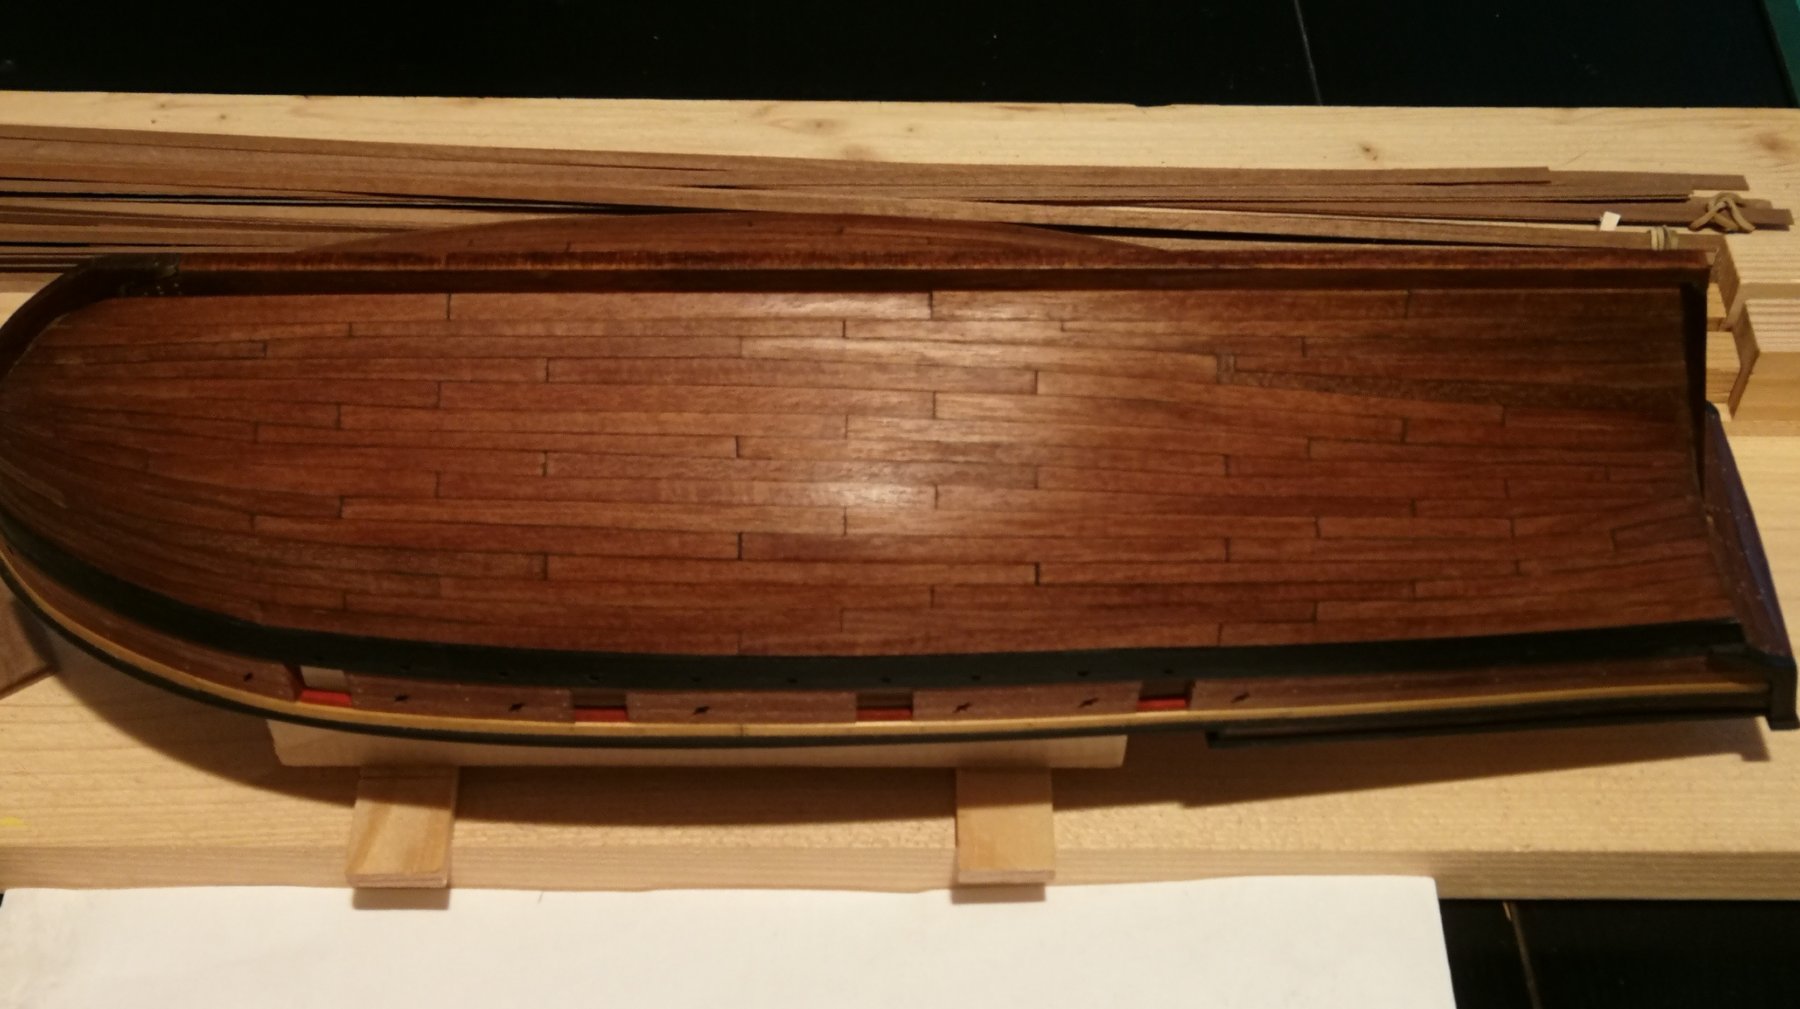
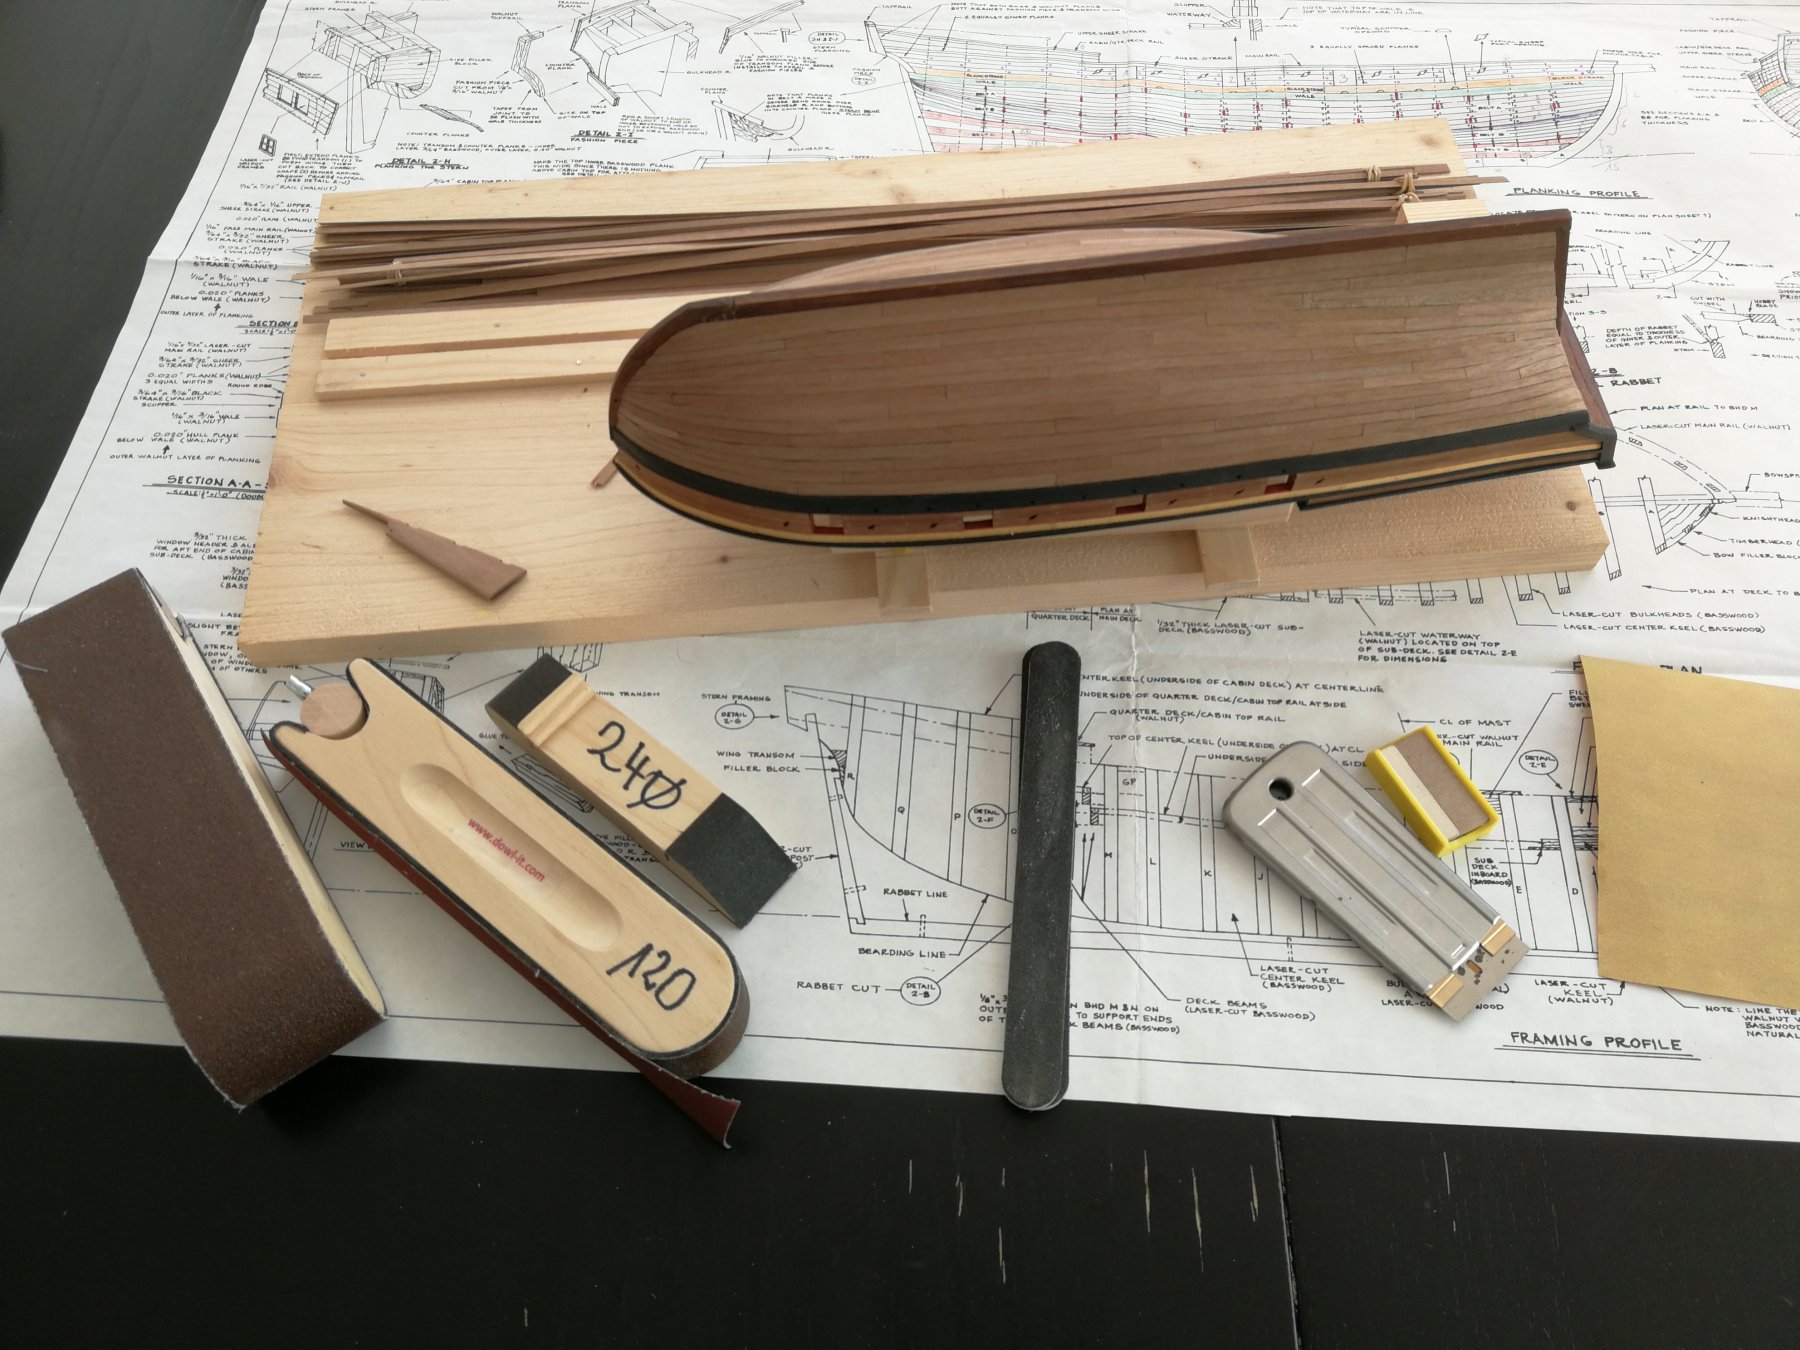
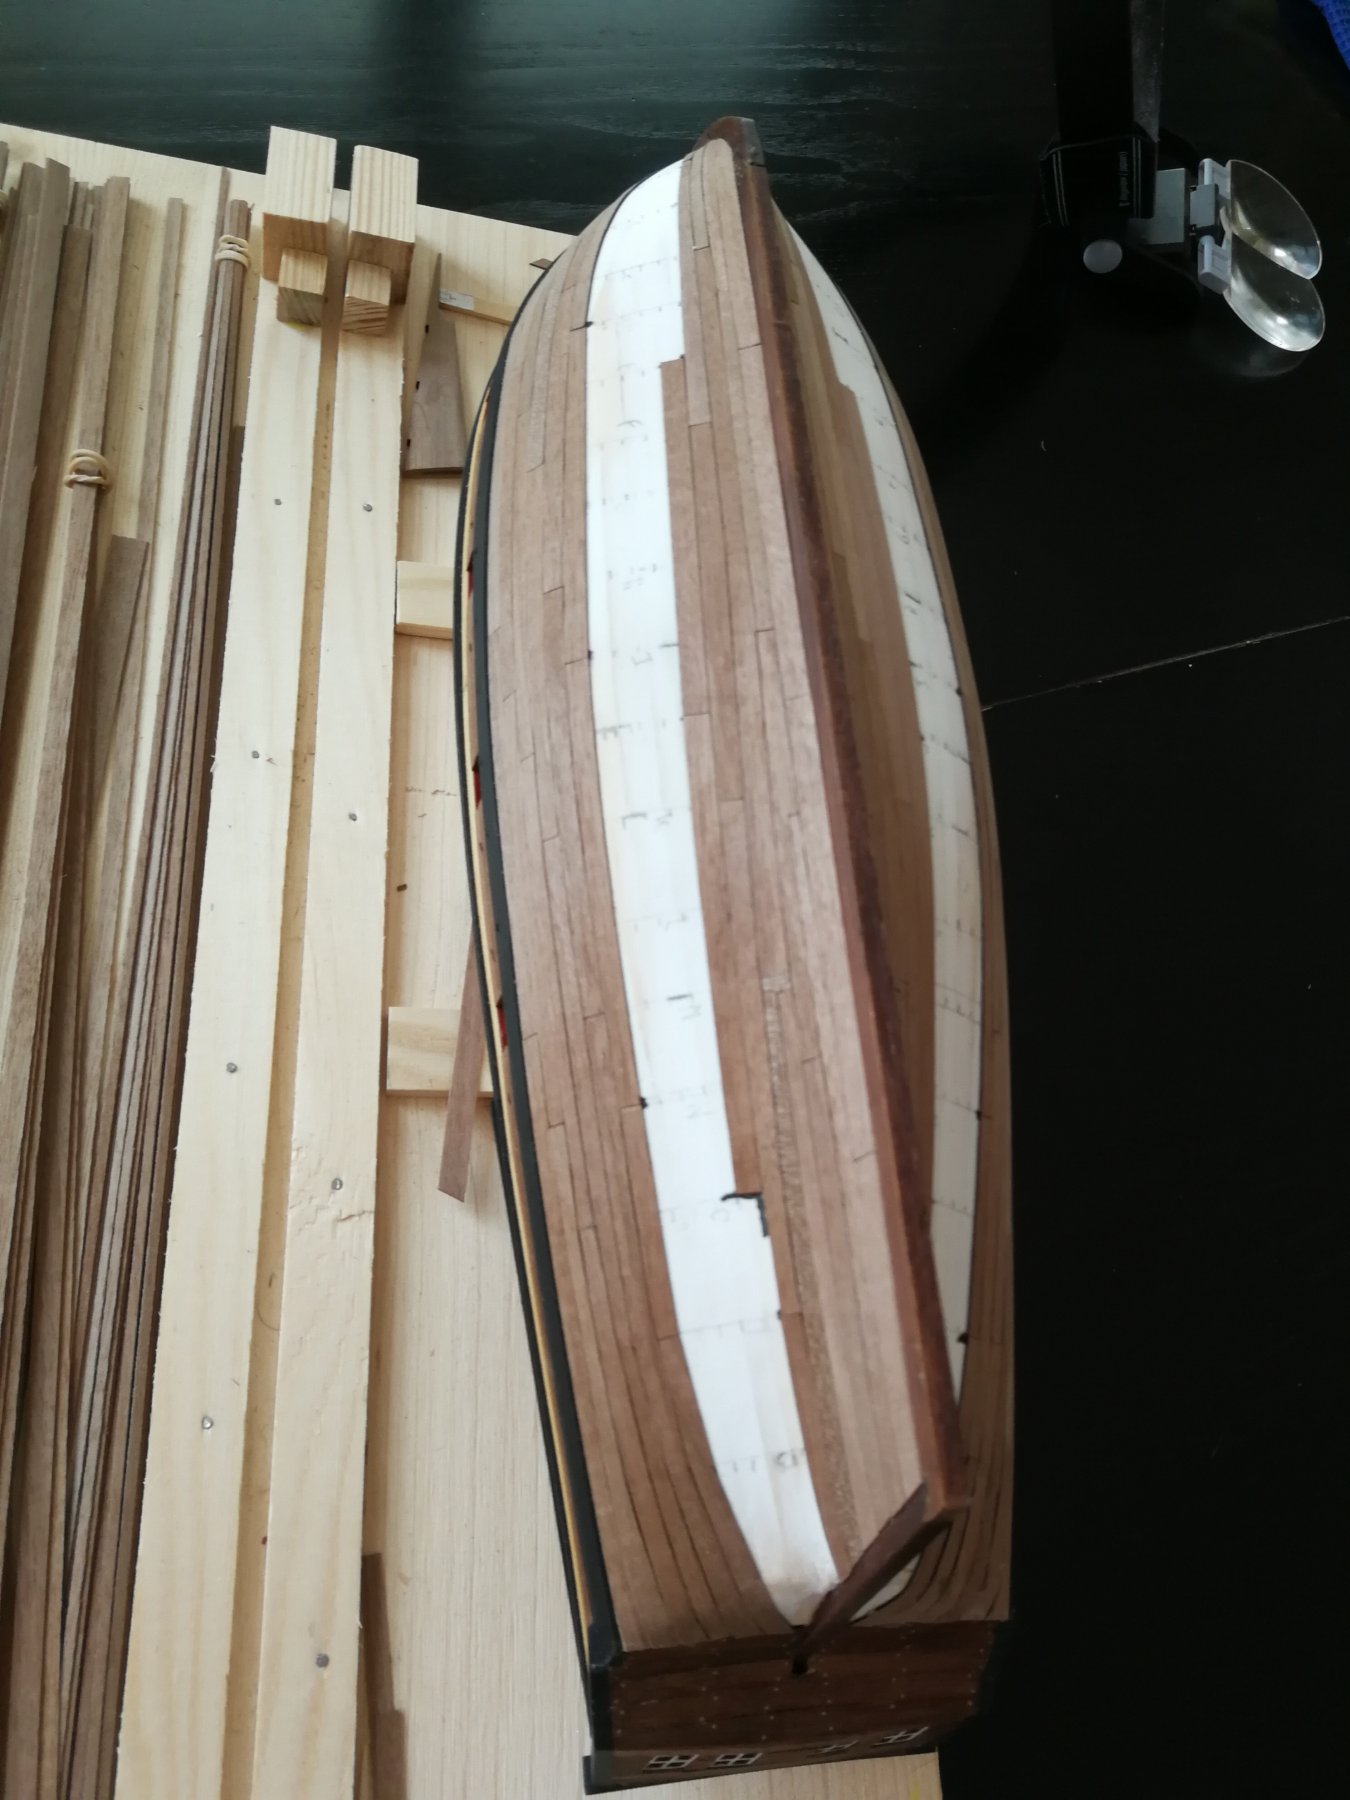
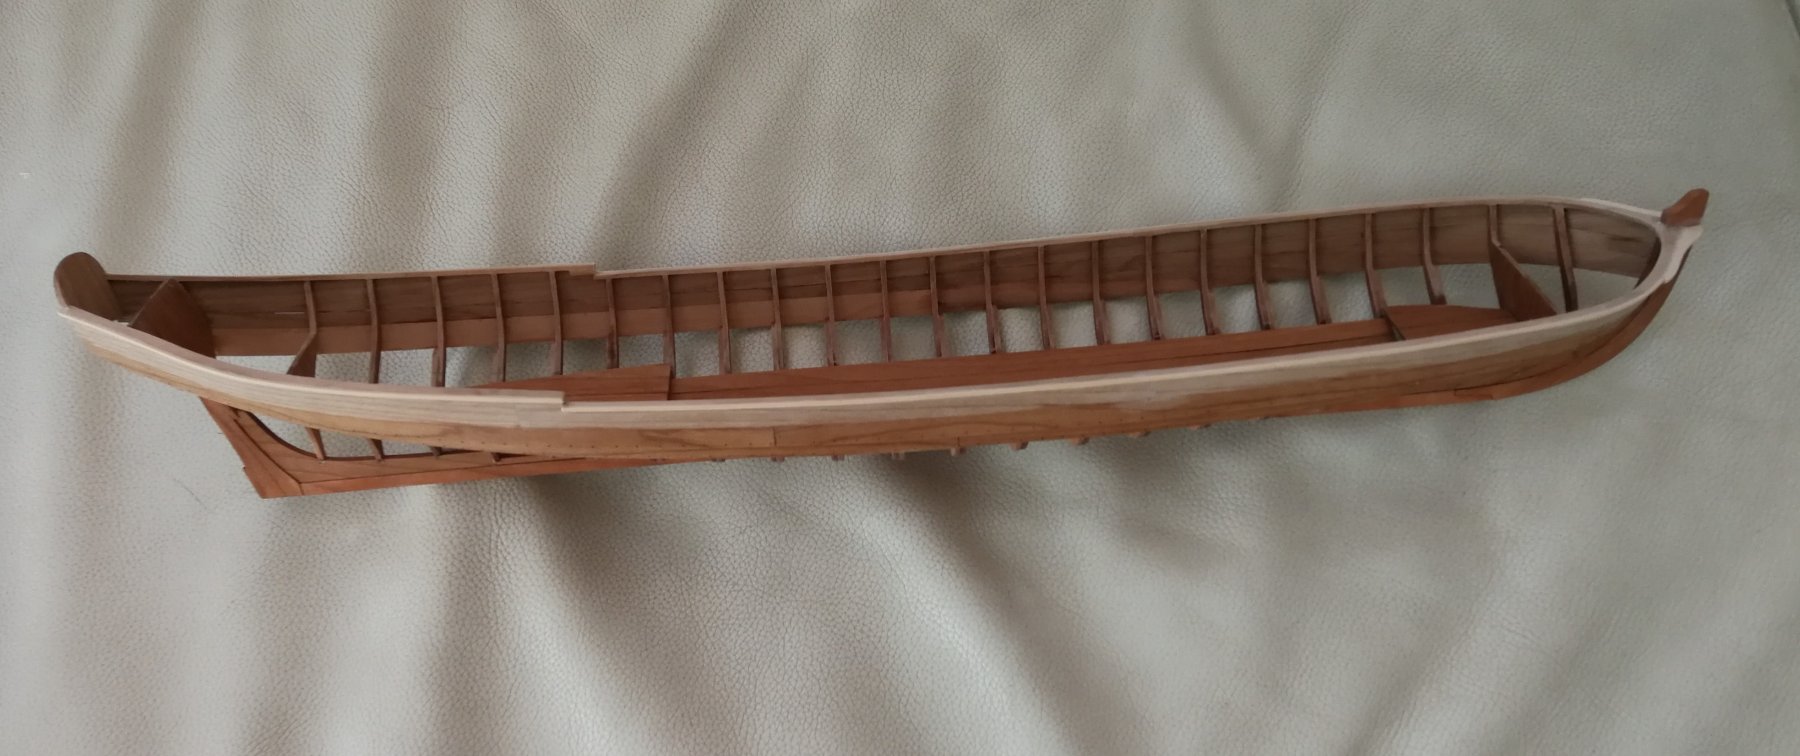
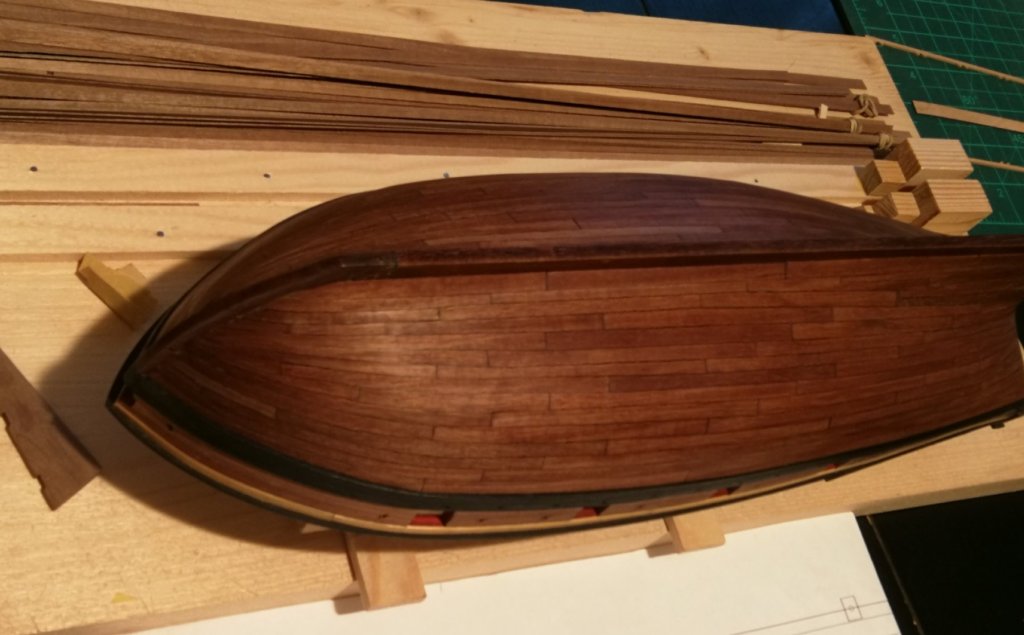
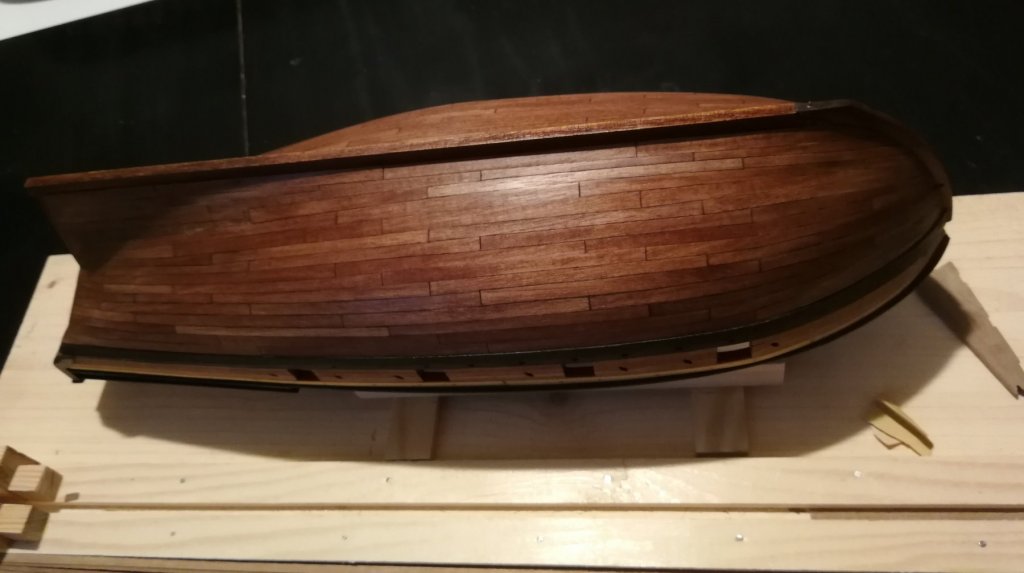
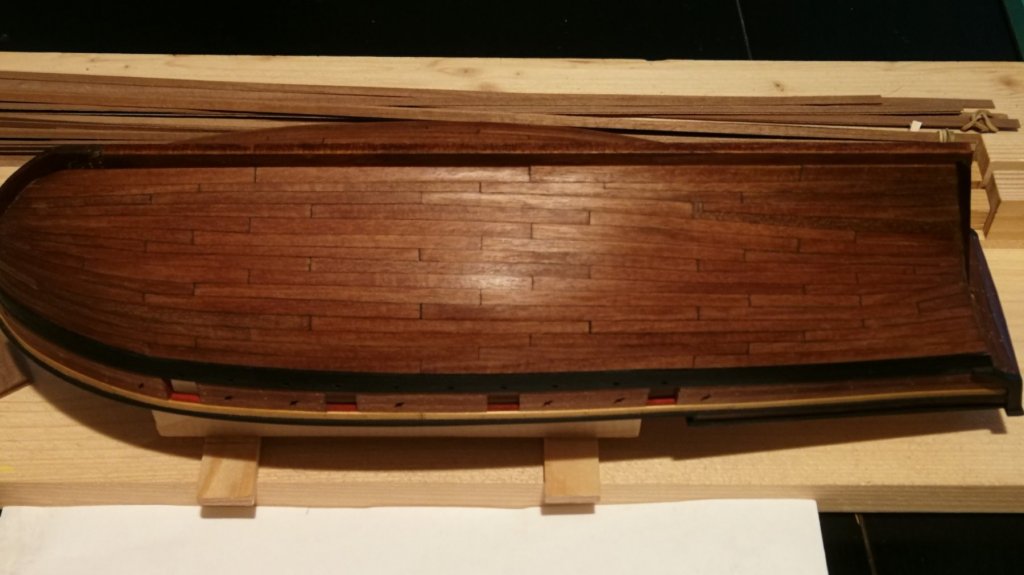
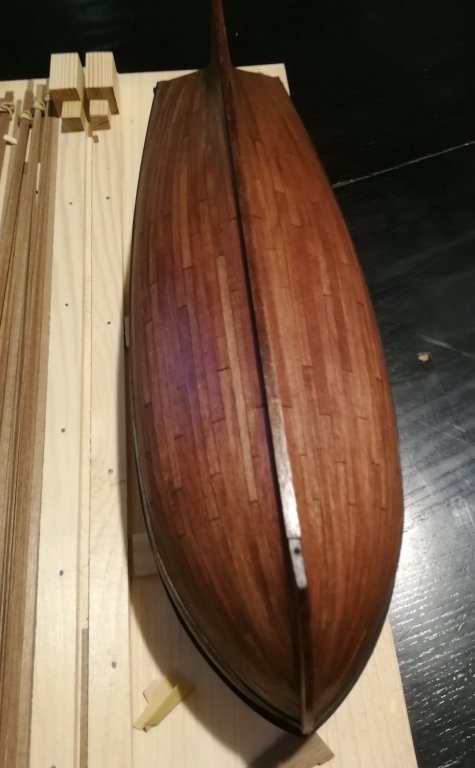
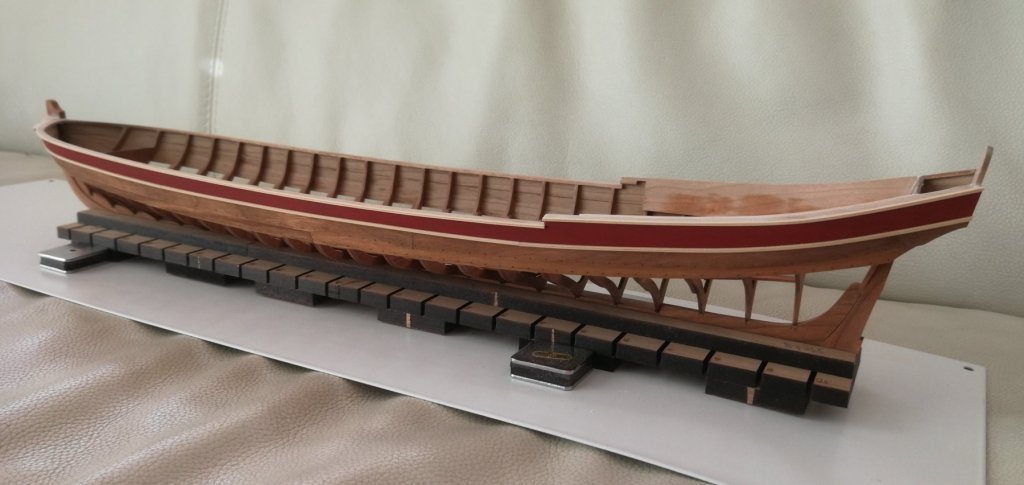
The sanding steps are done. I begin with 240 grit, than with 320 grit. Then I applied a fine layer of Liberon teak oil I finished with a last sanding using fine 00 steelwool pad before applying a second coat of teak oil. Not unhappy to have completed this step of the build. And now I can work on the deck... Merry Christmas to everyone !
- 164 replies
-
- 18
-
-
- first build
- model shipways
- (and 2 more)
-
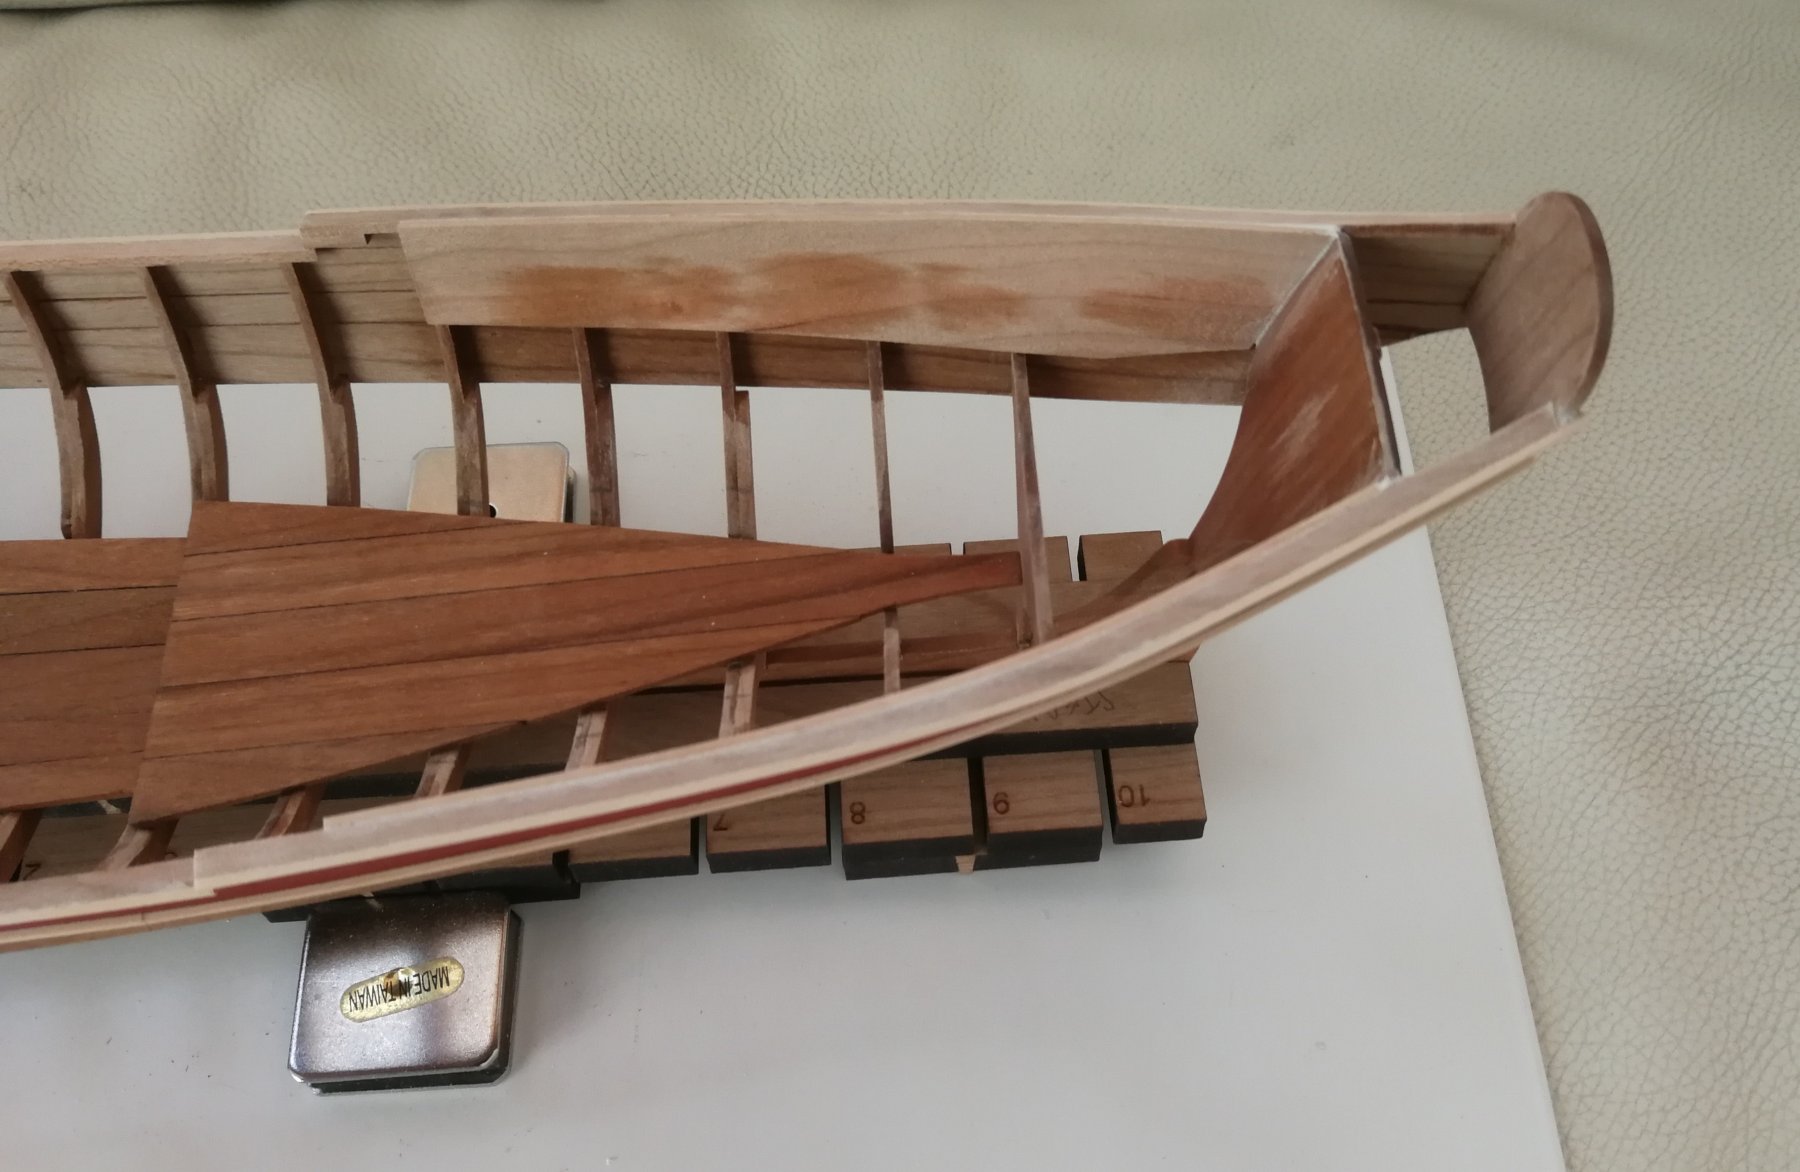
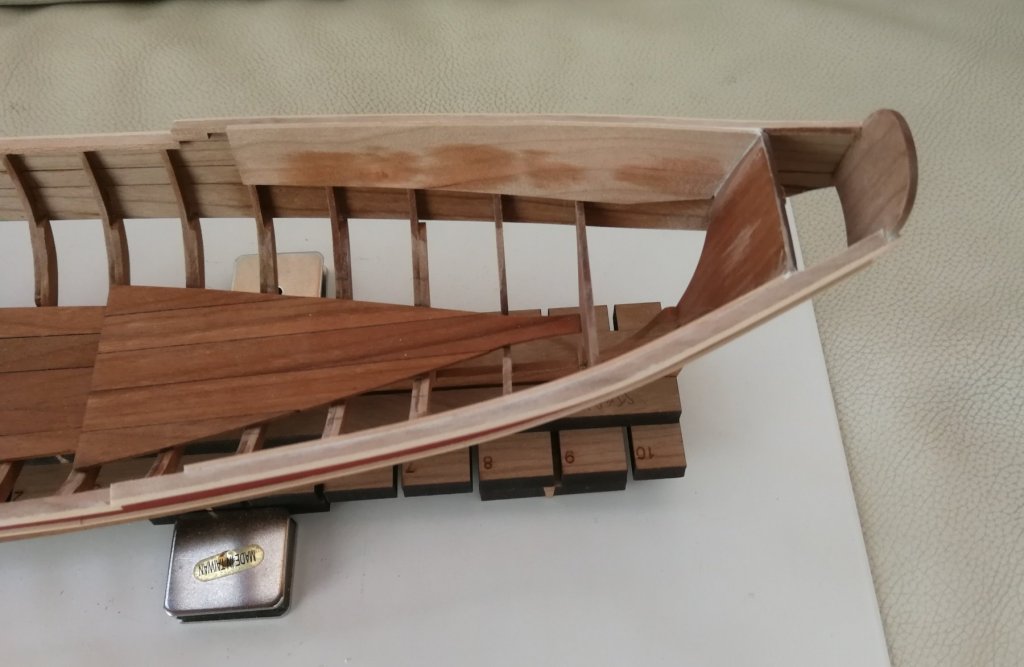
Thanks to all the 'Likes'. Chuck it's a real pleasure to build this barge and I try to do it as well as I can. Yes, Chuck, I also find it easier to position the seat back with the two coxswain seats in place. In addition, I was able to use a small wooden piece to glue the seats to the correct height and in the same angle as the bench tops. The job paint is in progress...


- 103 replies
-
- 8
-
-
- queen anne barge
- Syren Ship Model Company
- (and 1 more)
-
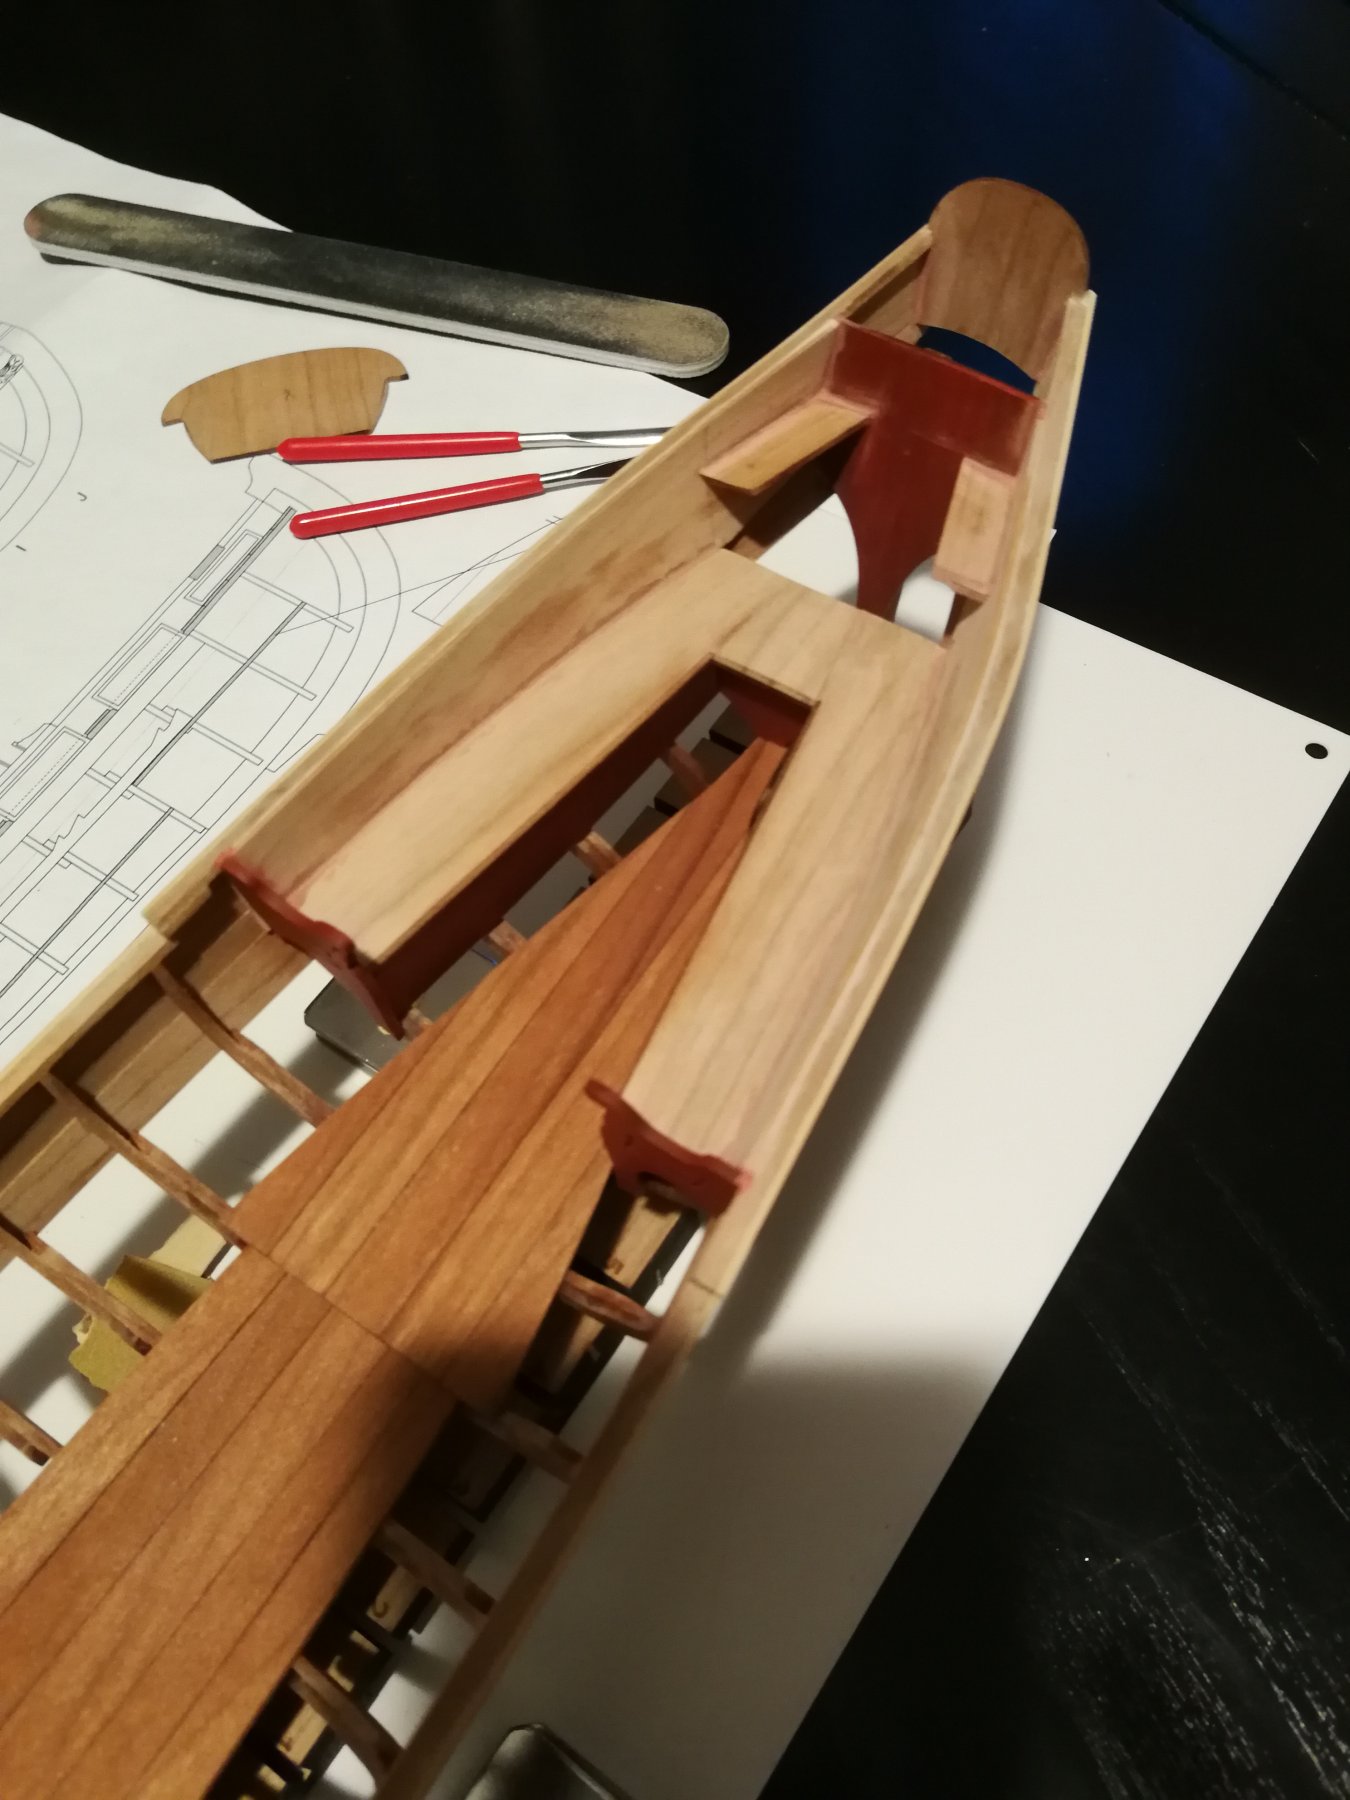
Thanks to all the 'Likes'. I have begin to work on the two benches. I just made a small change in the sequence of the steps. I preferred to glue the two coxswain seats before to add the bench seat back. I found that it was easier to fill any gaps on this two seats without the presence of the bench seat back. I will paint now all the whole back part at the back of the bench seat before to glue it. Nothing to see with this build log but a good news for me. My son is back home after ten months in the Swiss air force army. He was crew member on super puma helicopter with the rank of sergeant. A little photo that I took during the parent's day. Glad he did his obligatory military service. 😎 Sign that time is passing... I performed my military service more than thirty years ago in the military band.


- 103 replies
-
- 11
-
-
- queen anne barge
- Syren Ship Model Company
- (and 1 more)
-
Thanks guys for your advice and thanks to all the 'Likes' I know now how to continue. Time for sanding...
- 164 replies
-
- 1
-
-
- first build
- model shipways
- (and 2 more)
-
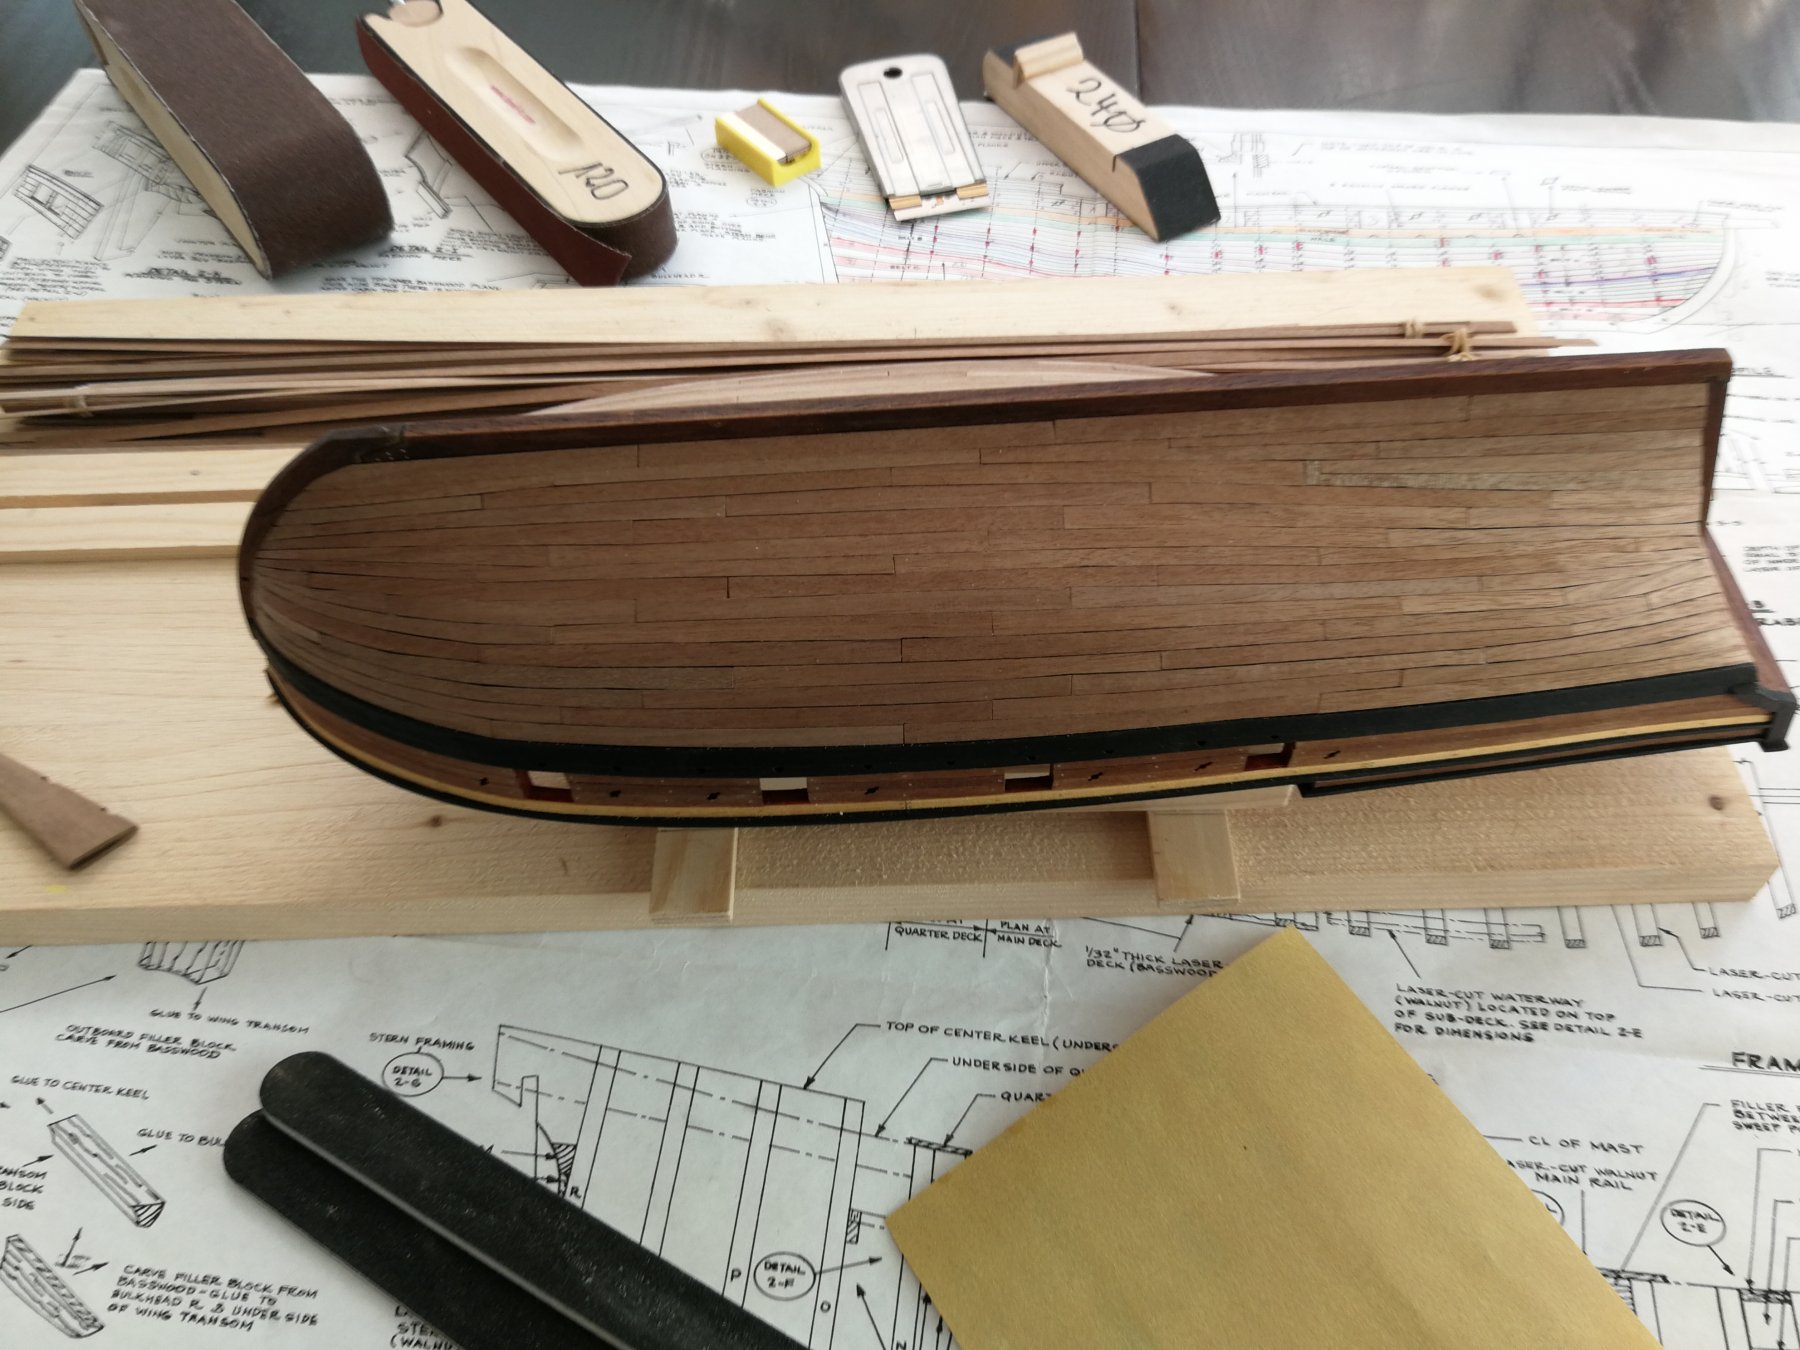
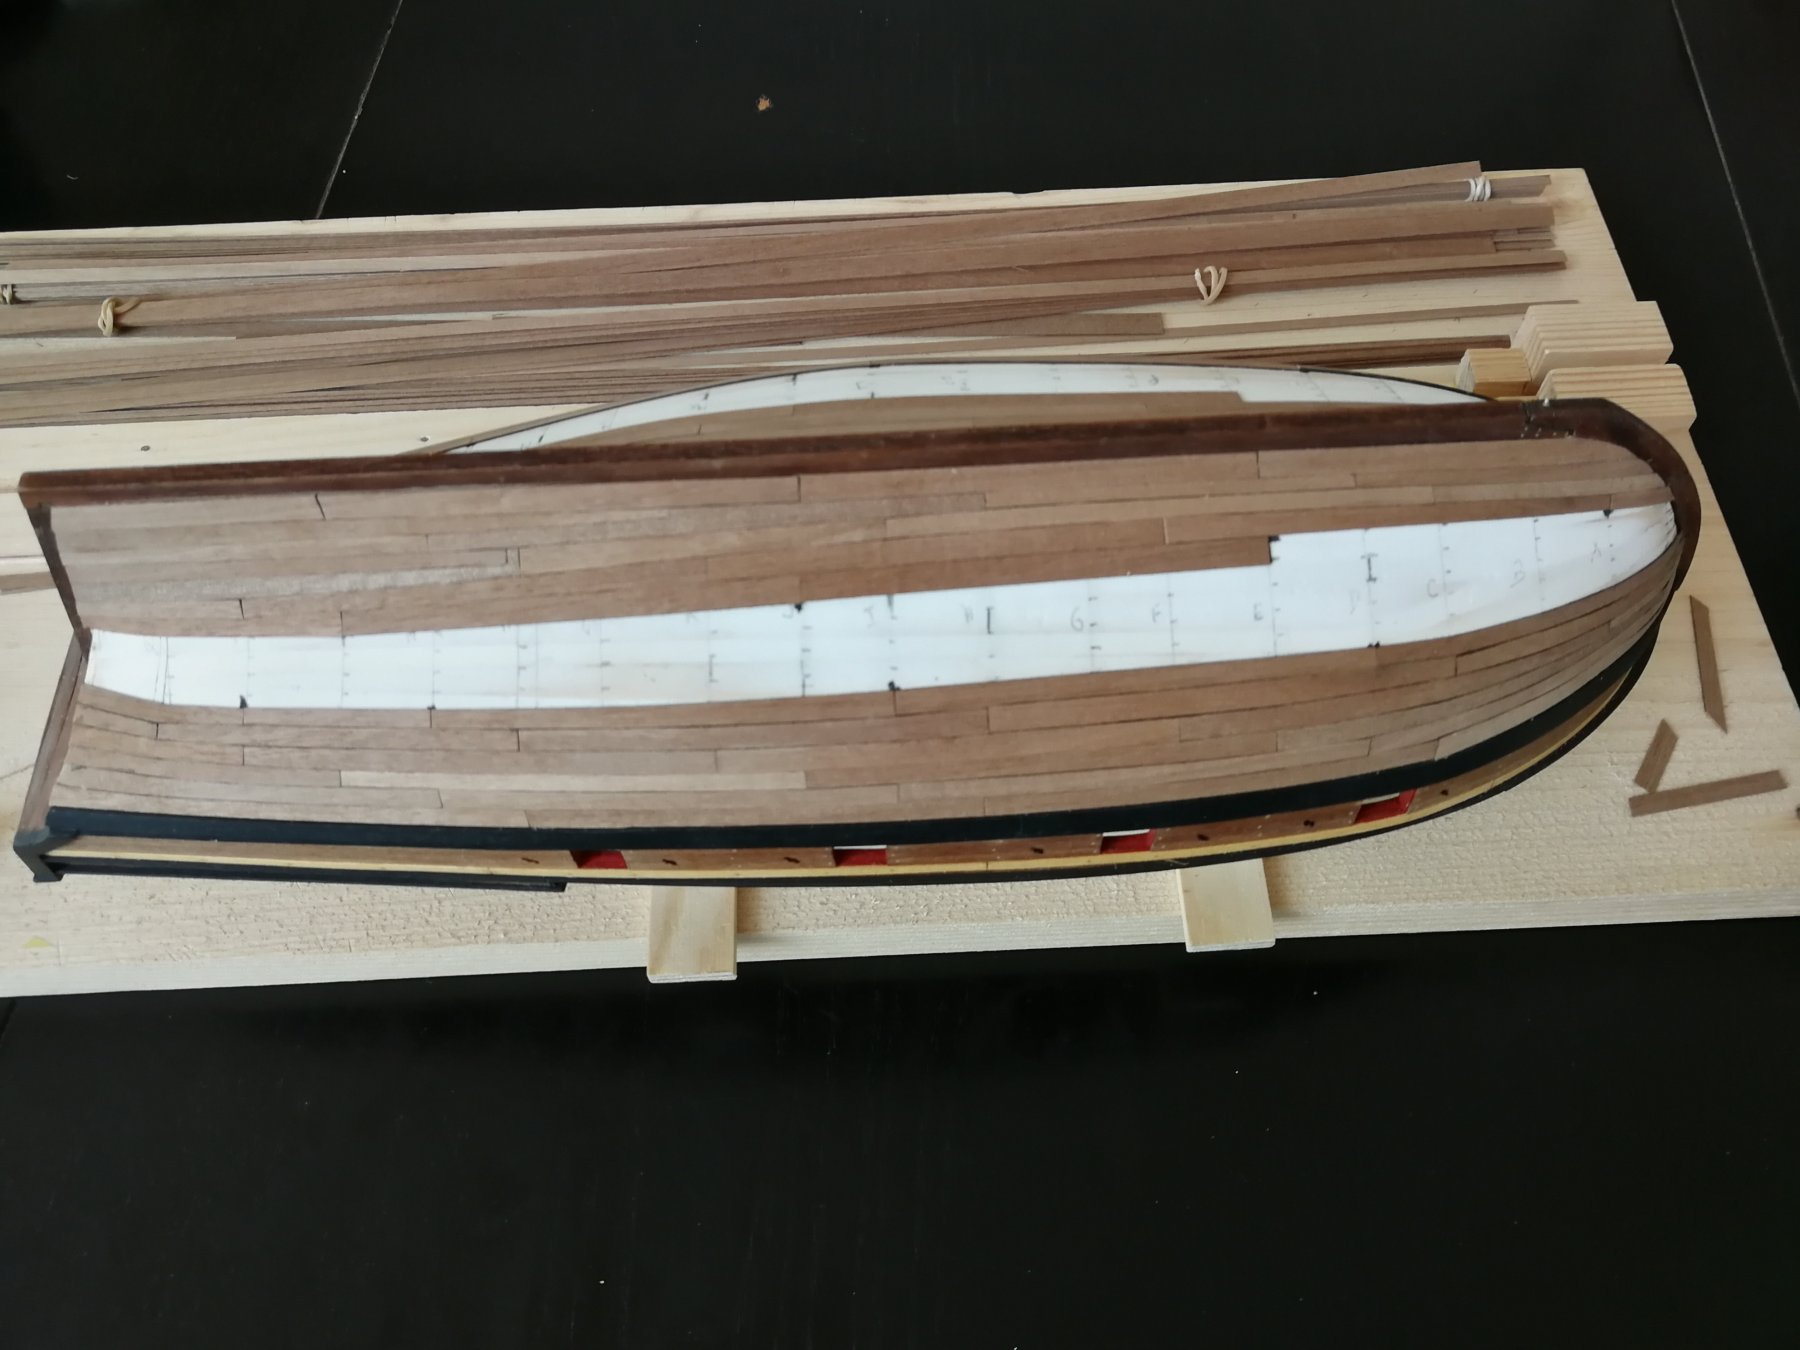
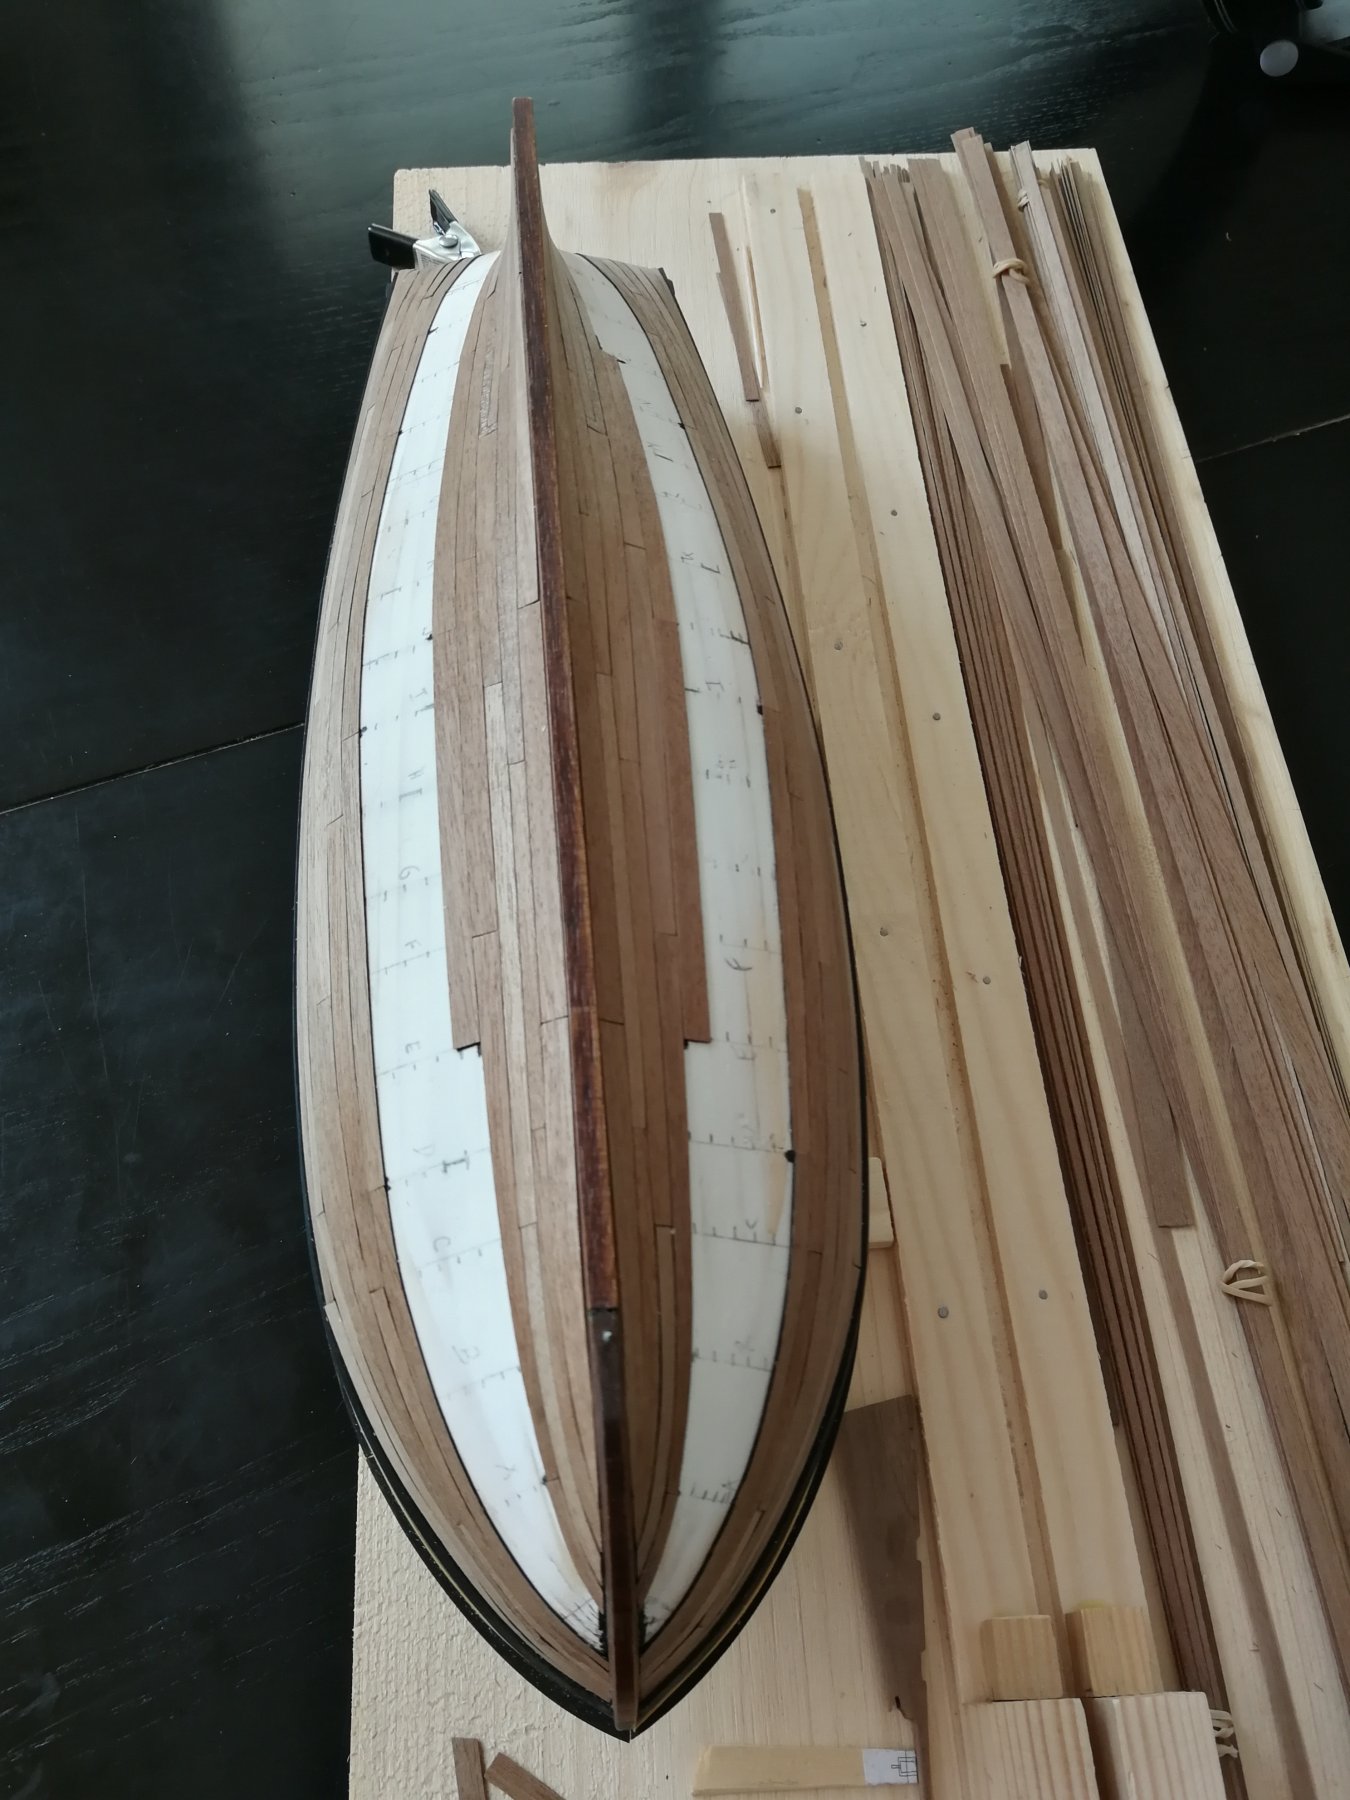
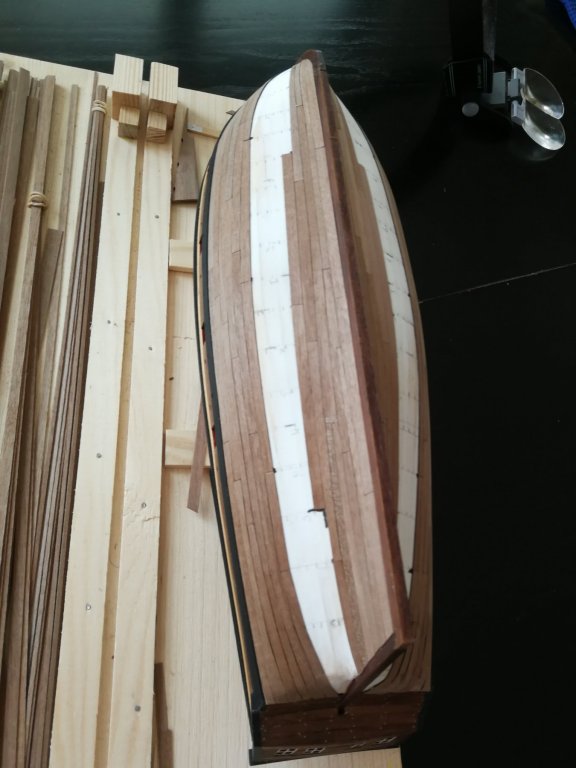
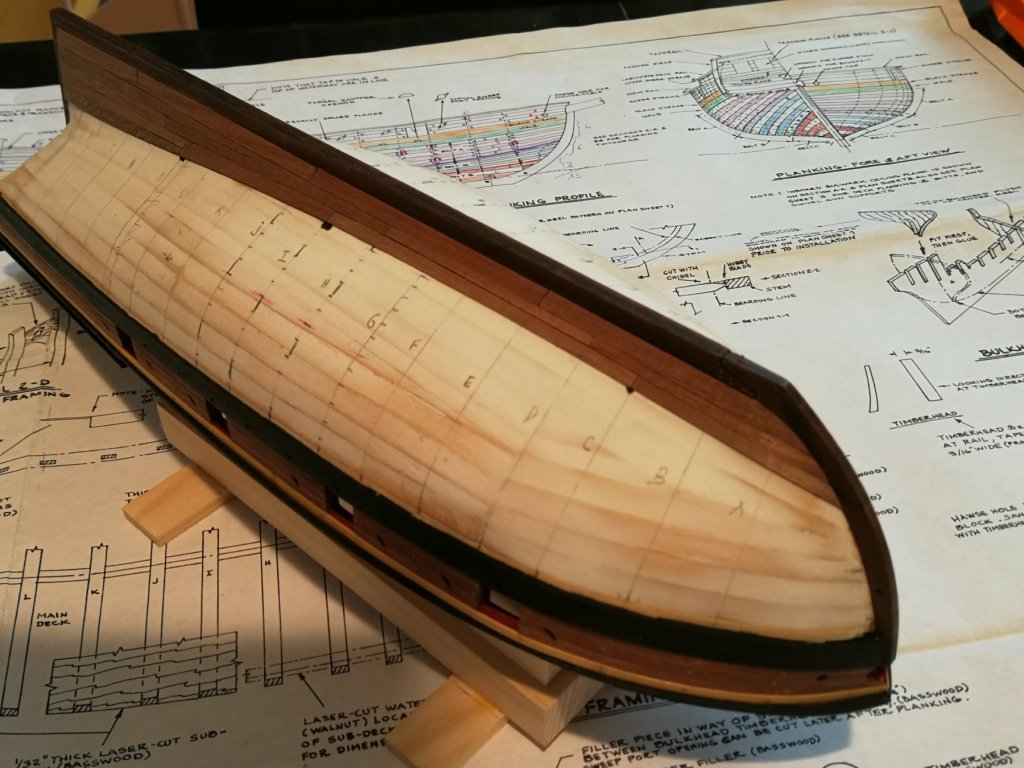
The second planking is finished. Now it's time to sand a little. I need some advice for the next step. What should use to sand the hull ? Some sandpaper, or a sanding sticks, or a scrapper, or a sanding block ? Which grain should I use ? 220 ? 300 ? Thank You in advance for your advice.


- 164 replies
-
- 11
-
-
- first build
- model shipways
- (and 2 more)
-
Wonderful job. A great inspiration for my build. As I will soon begin to work on the deck planking, I will try to get inspired by your fantastic work. Thank You for sharing !
- 231 replies
-
- 1
-
-
- model shipways
- armed virginia sloop
- (and 1 more)
-
Thanks for Your answer. I'm not a big fan of CA glue and I also prefer to use Titebond. The CA sticks my fingers more often than it should 😂
-
Hello Mike, Superb work on these first planks ! What kind of glue did You use ? Medium CA or wood glue ? I know that Chuck recommends using medium CA. Thanks in advance for Your answer.
-
As usual with kit from Syren Ship Model Company, everything is perfect. Looking forward to receiving mine...
- 152 replies
-
- 5
-
-
- medway longboat
- Syren Ship Model Company
- (and 1 more)
-
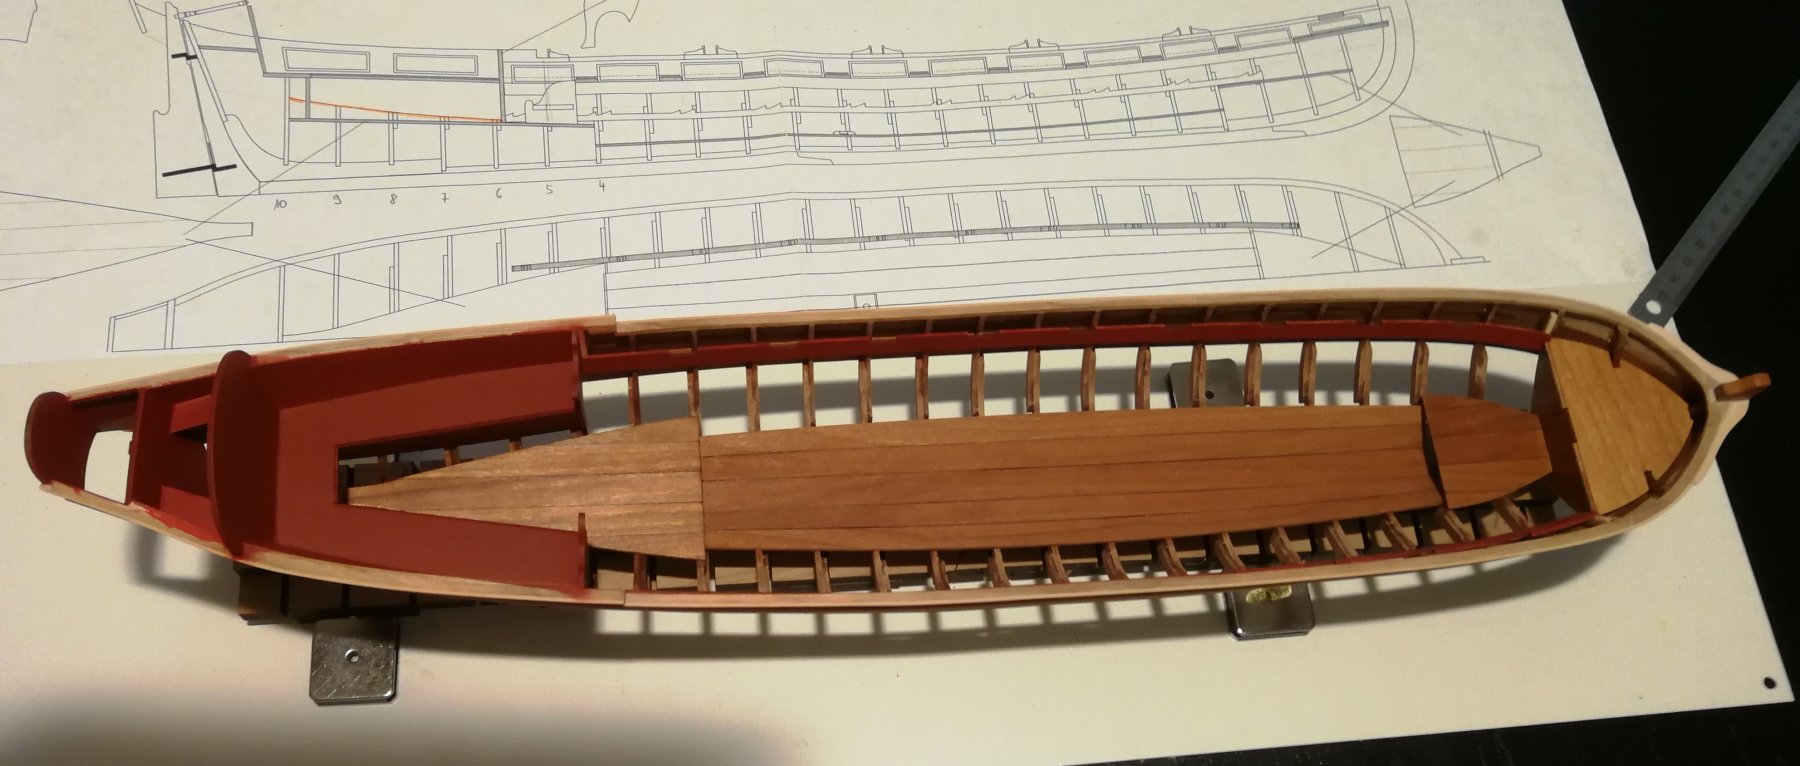
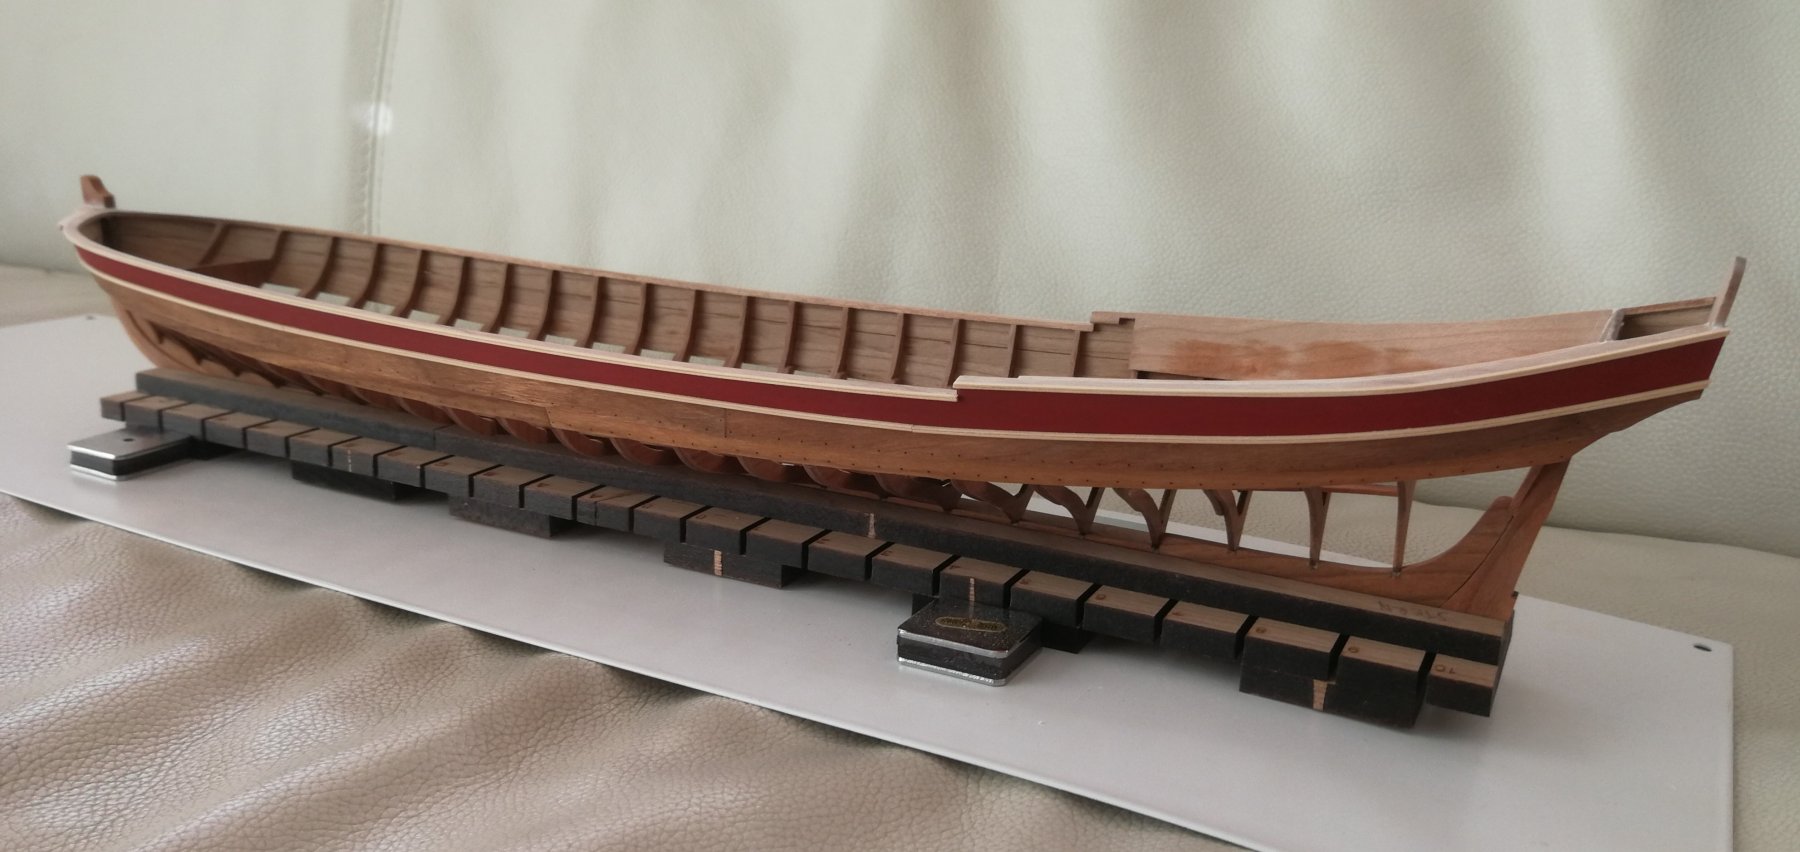
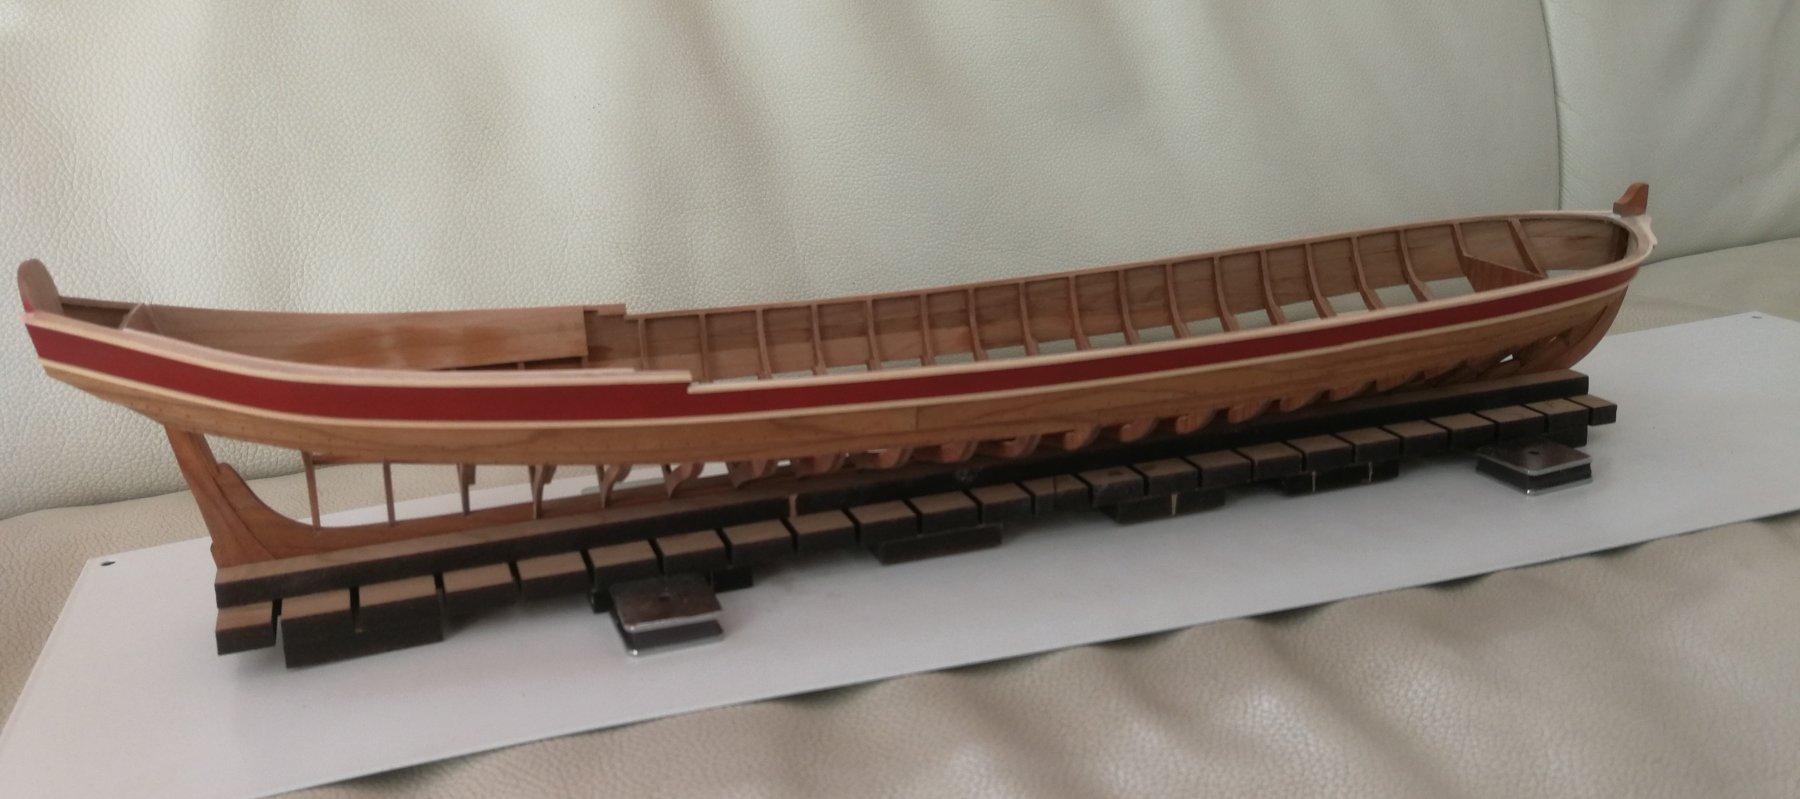
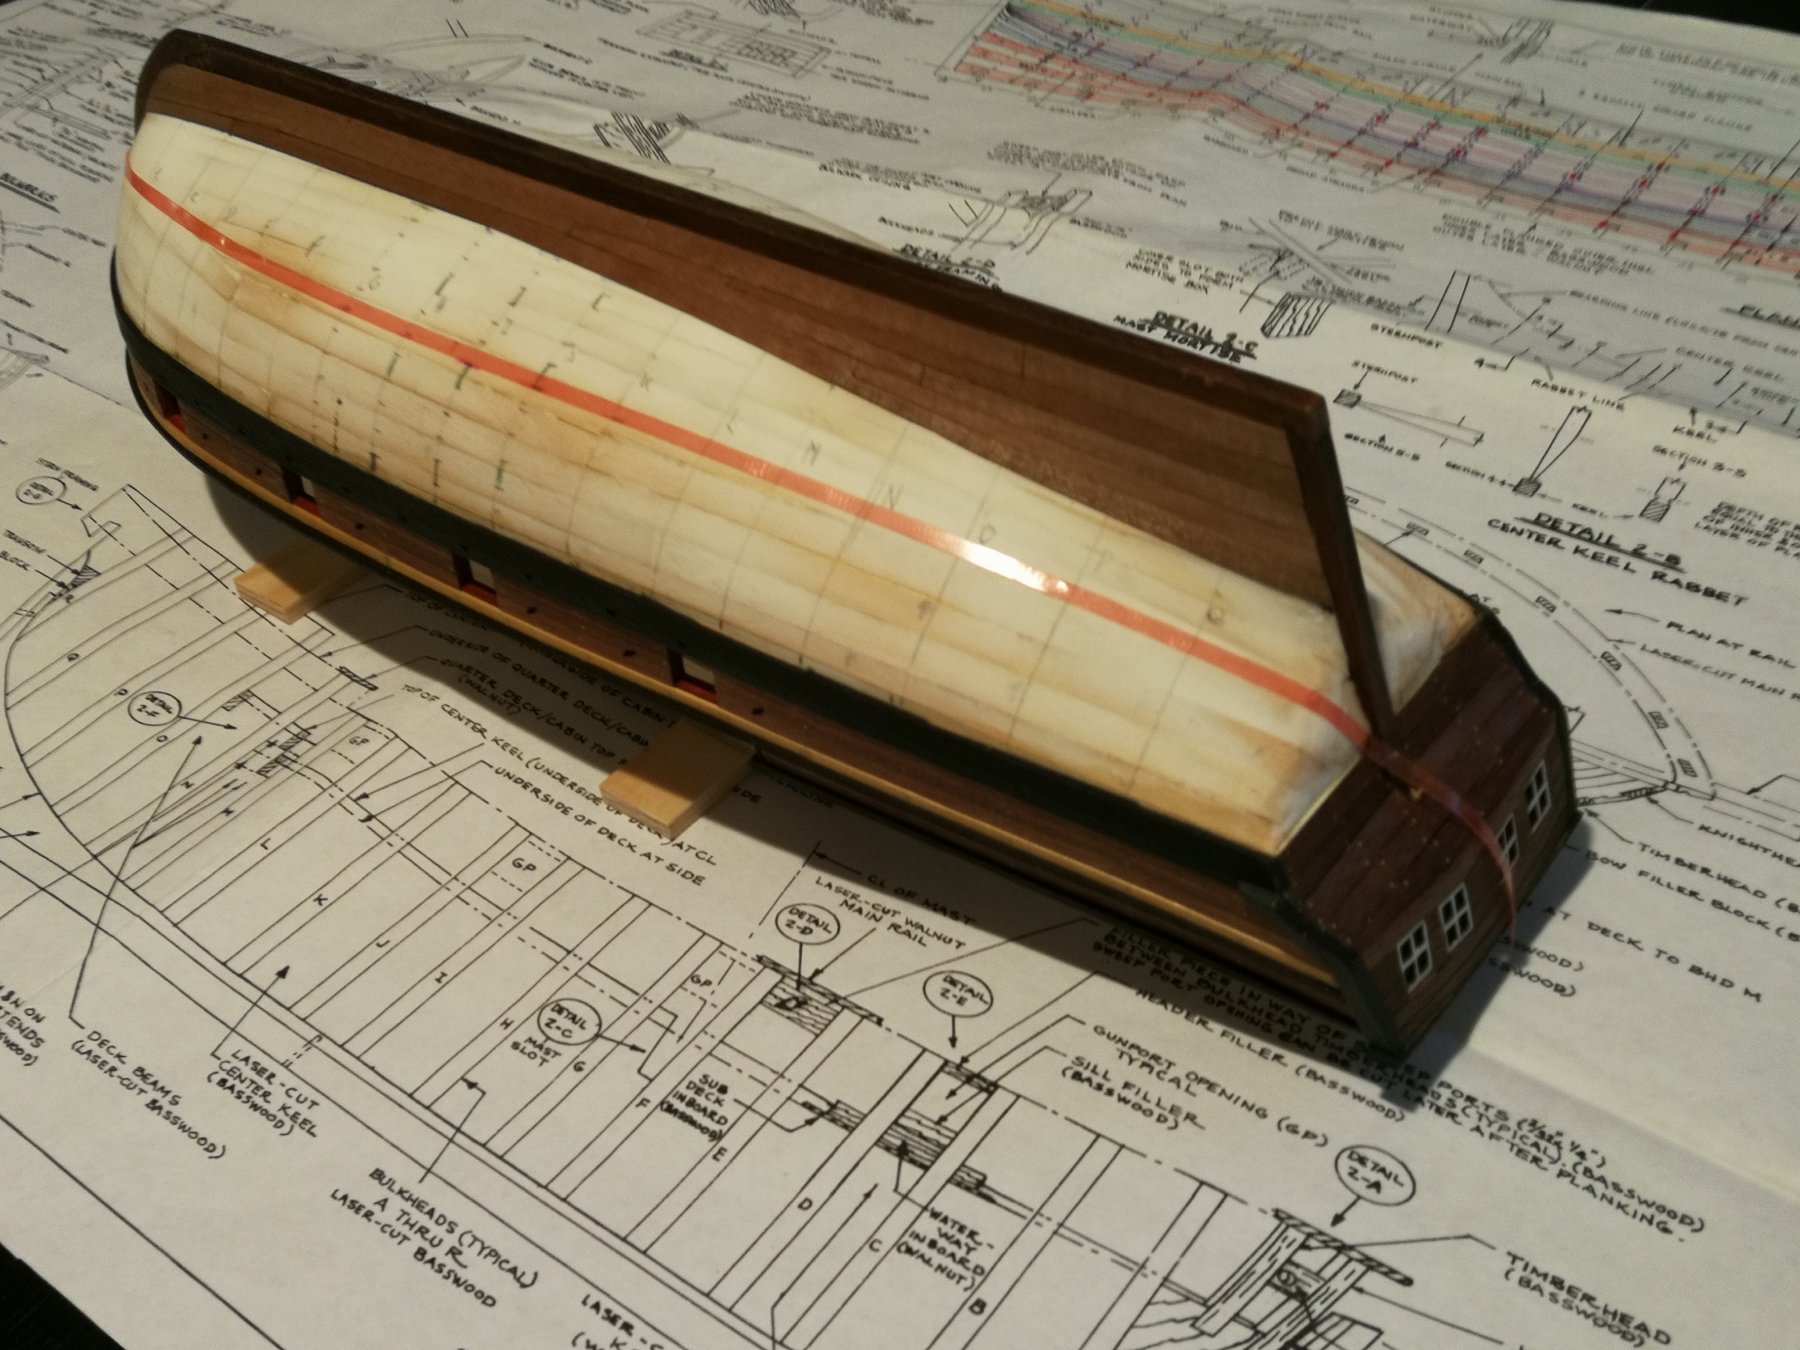
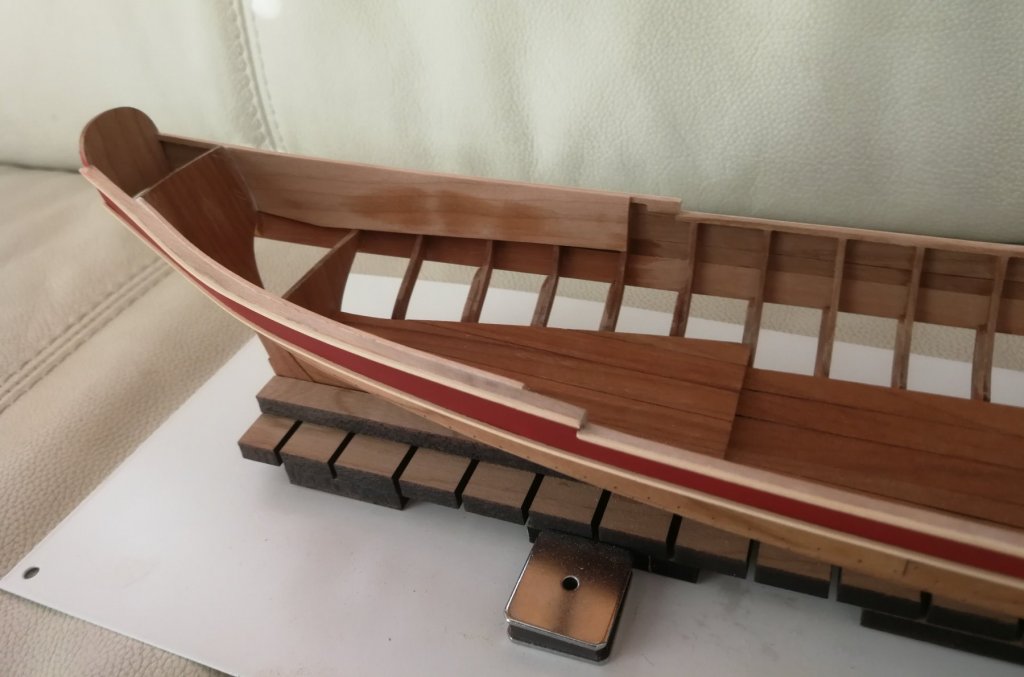
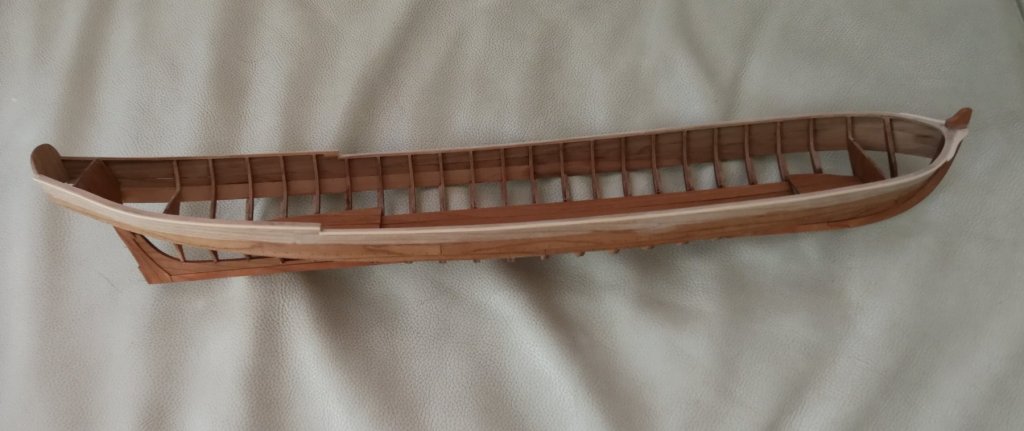
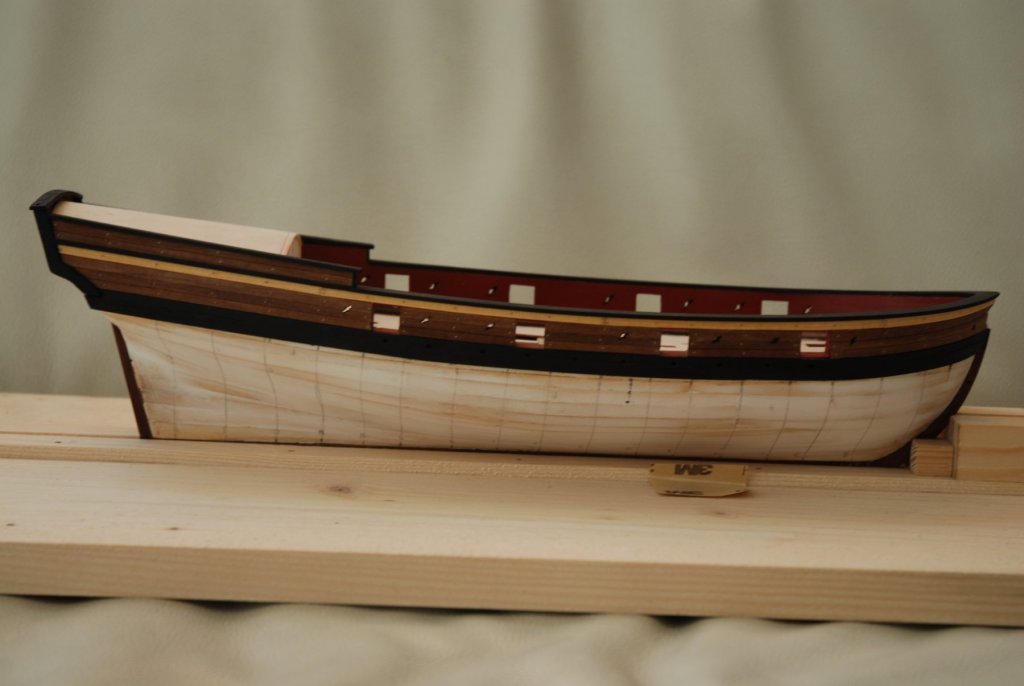
The lower moldings were added after some painting job. I also started to glue the interior planks. I sanded the top edge flush with the top of the cap rail after using some lightweight filler to fill the little gaps. The building is really fun 😊


- 103 replies
-
- 12
-
-
- queen anne barge
- Syren Ship Model Company
- (and 1 more)
-
I'm on board too. This is the first message of my log on the Medway Longboat build. Impatient to learn new techniques. Sure it will be very rewarding.
-
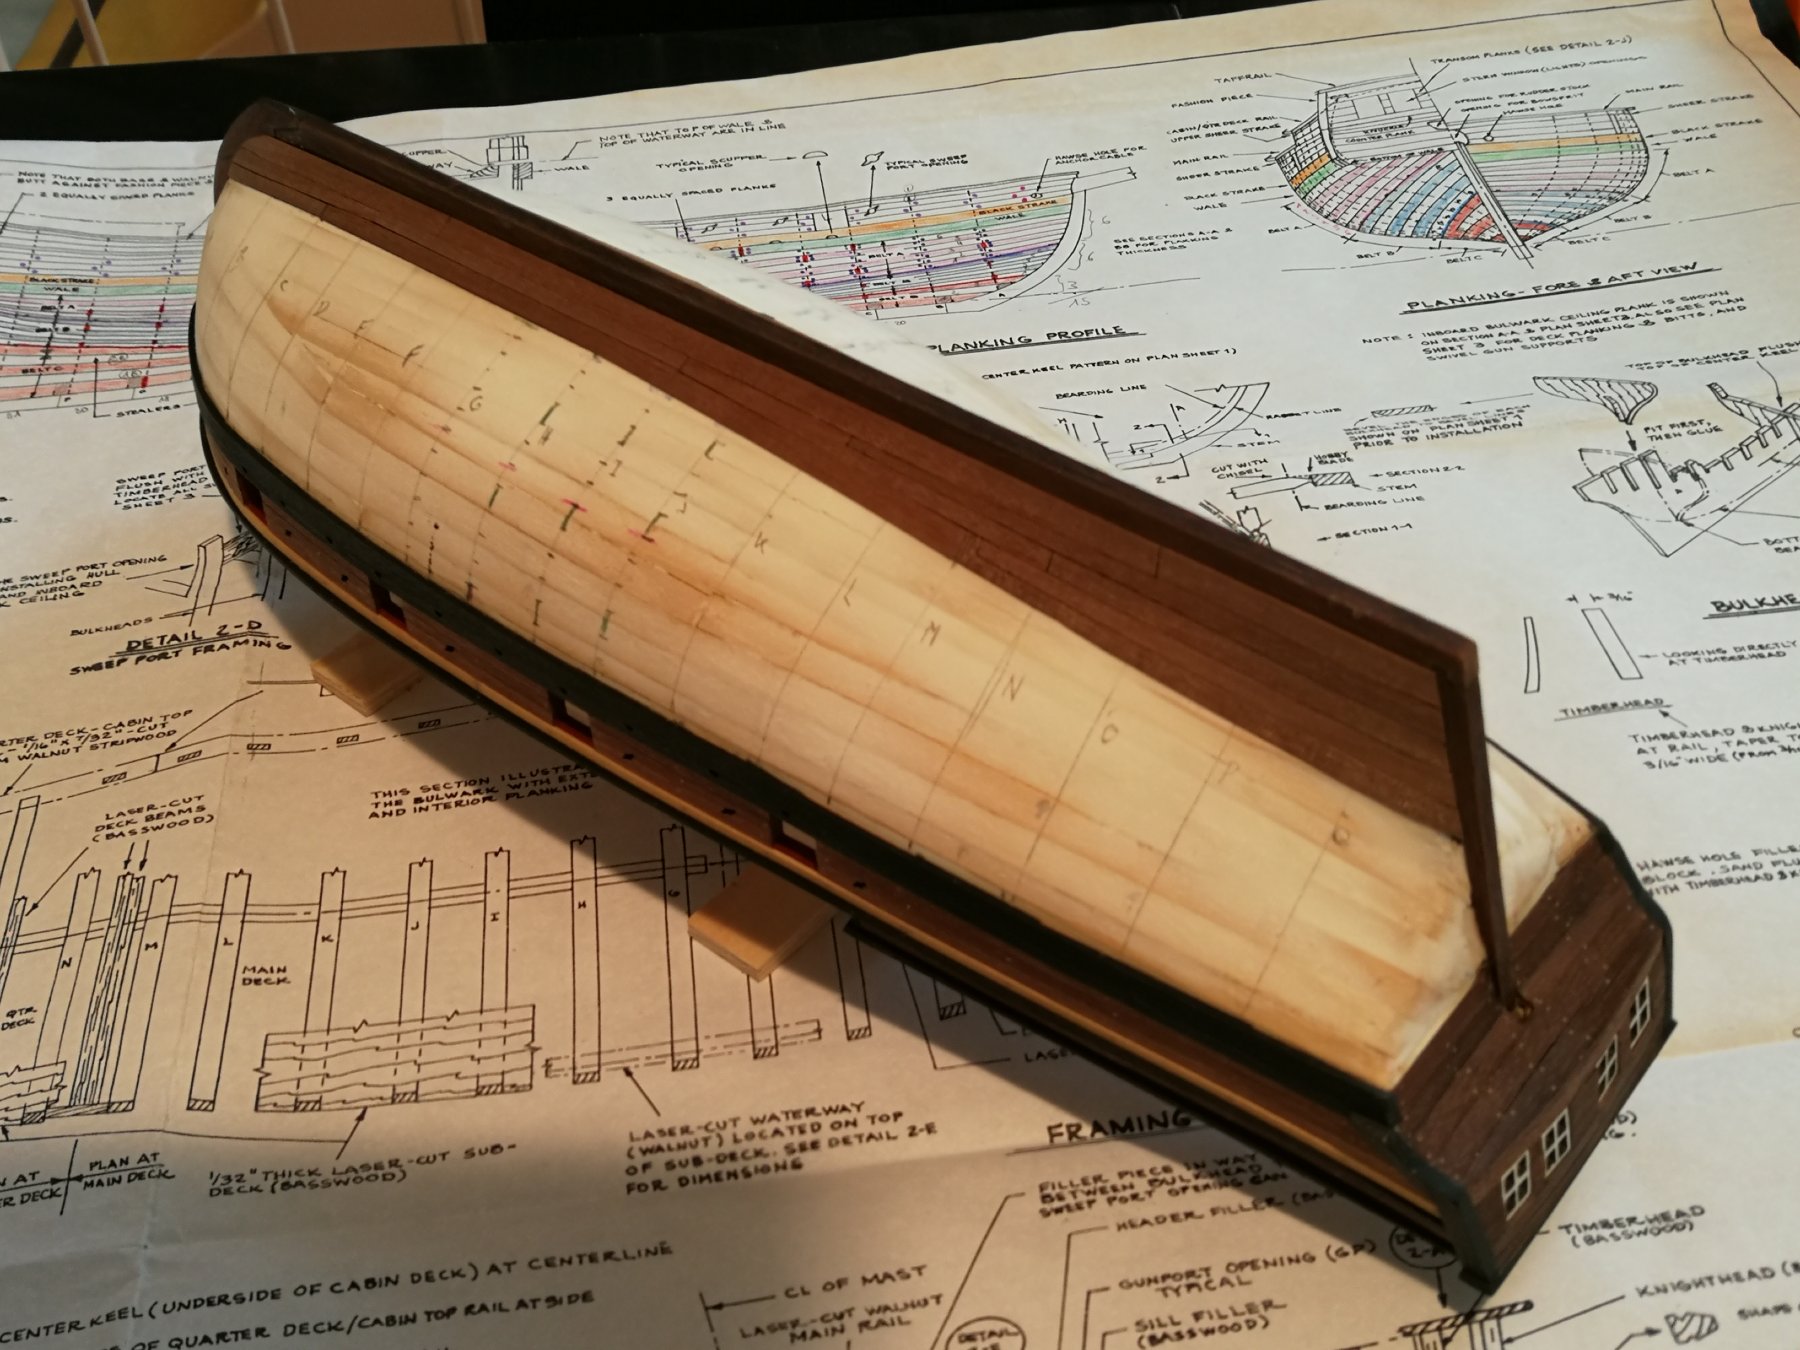
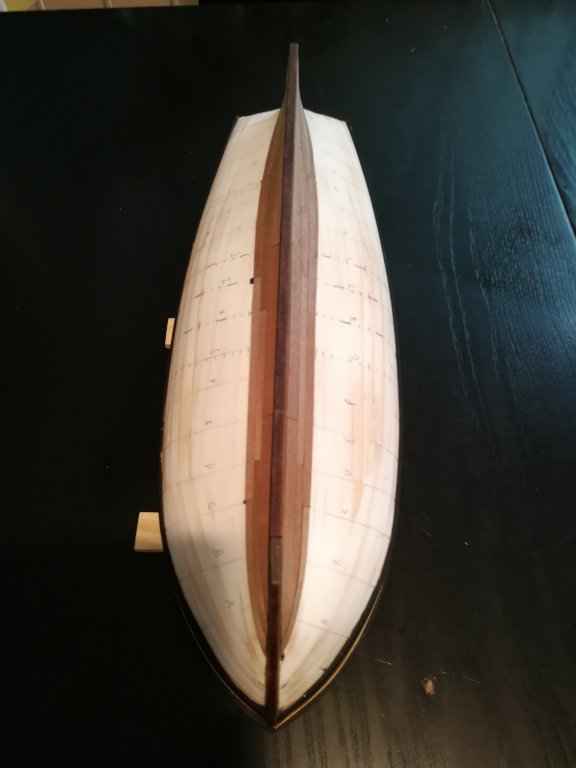
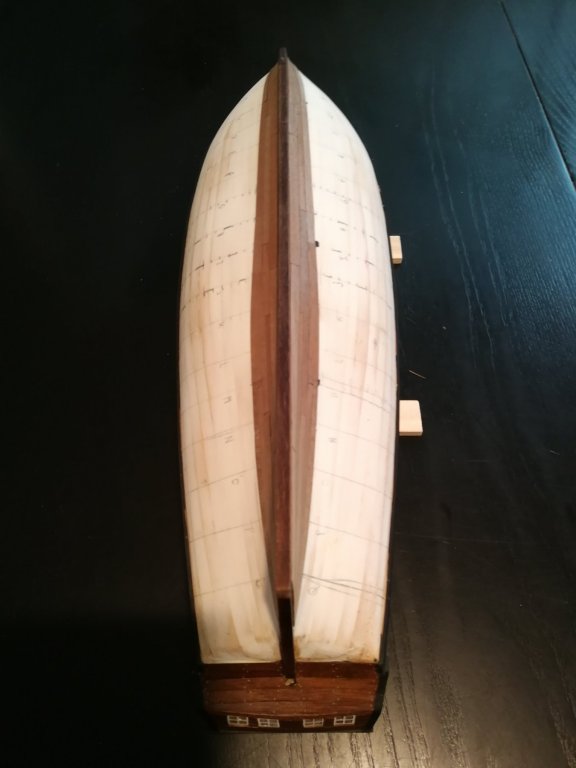
The second planking continues slowly but surely. Belt A is now complete and I started working on belt B. Since I don't like to work with cyanoacrylate and I only use wood glue (Titebond), the process takes time... Nothing is really finished. It's just glued and there are many small gaps to fill and a lot of sanding. But this will be done once the second layer is completed.


- 164 replies
-
- 11
-
-
- first build
- model shipways
- (and 2 more)
-
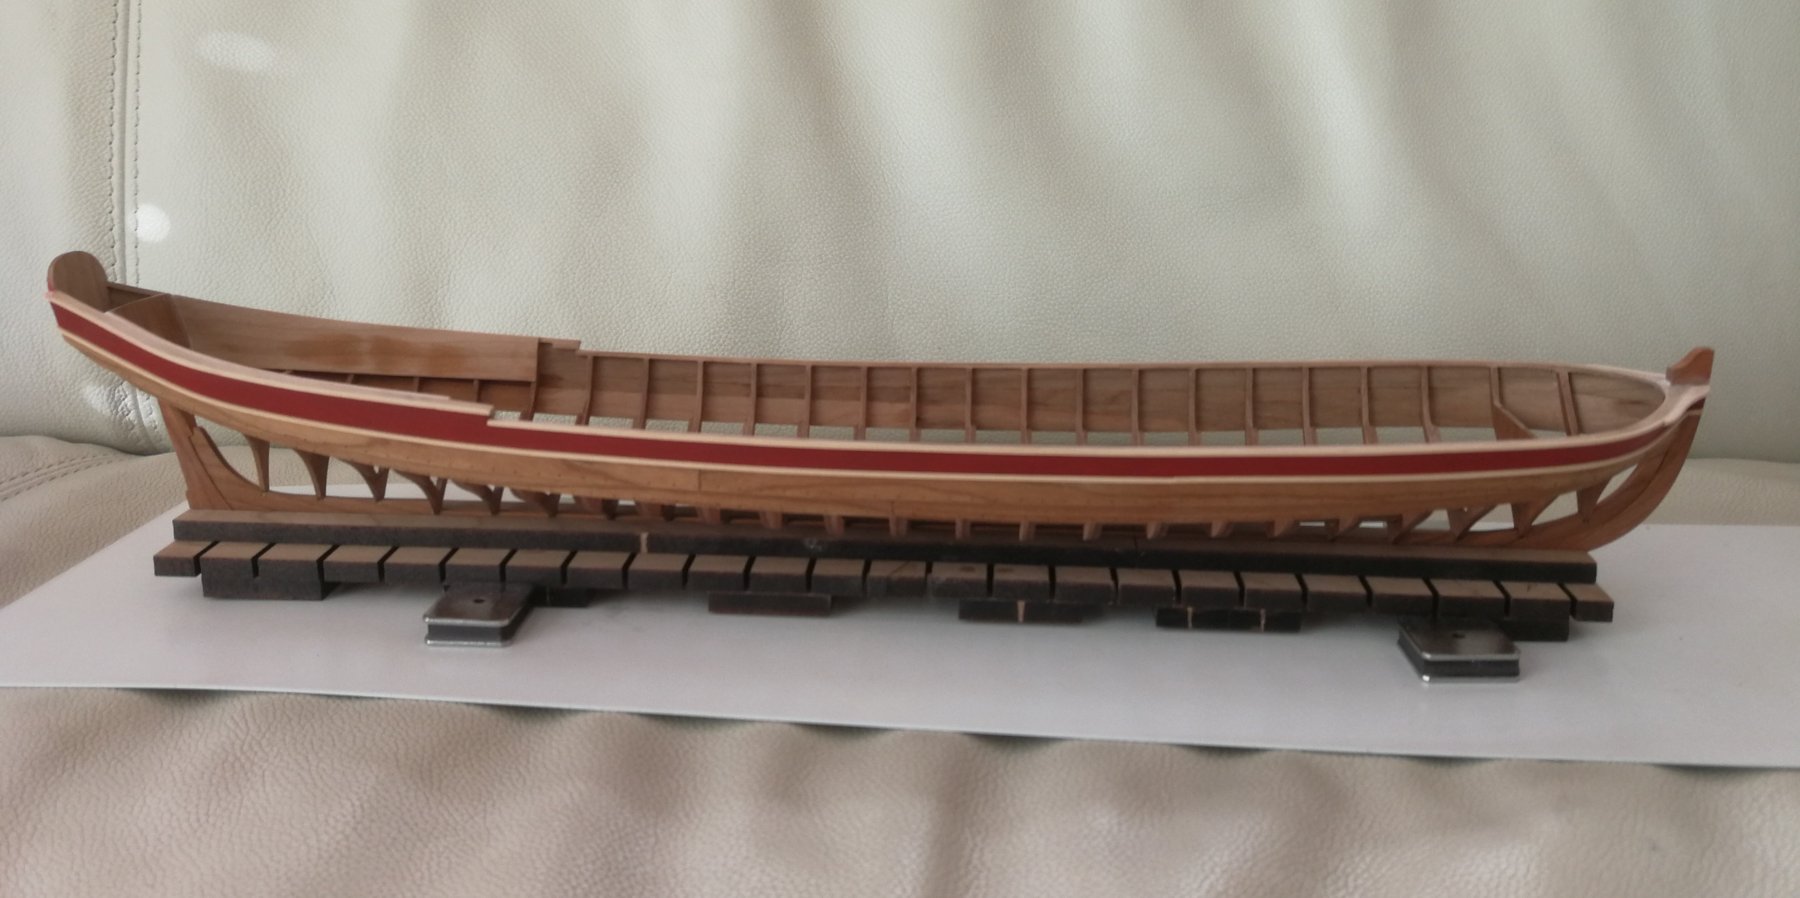
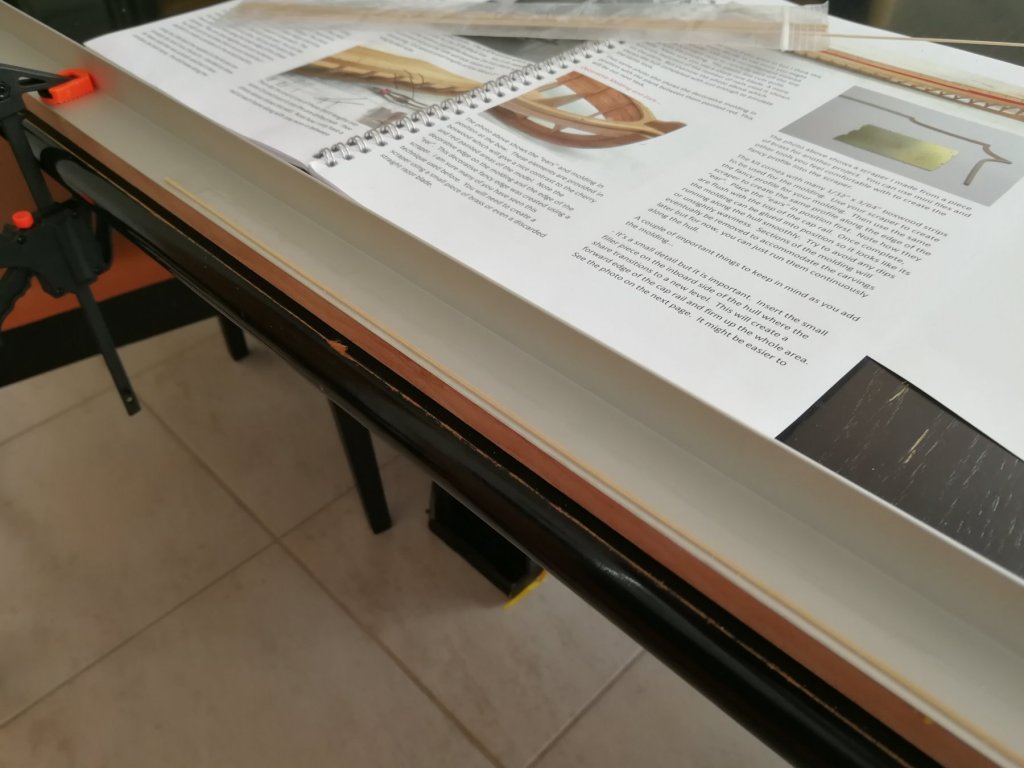
Small advance of the week. Top molding was glued. All the small interstices between the molding and the cap rail were filled and were sanded using a 320 sheet of sandpaper. I will now paint the space between the upper and the future lower molding. Its seems easier with only one molding in place. The lower molding will be added once the painting is done.


- 103 replies
-
- 11
-
-
- queen anne barge
- Syren Ship Model Company
- (and 1 more)
-
Oops... Sorry... Just a little too late... The same idea at the same time... 😂
-
And they will also publish a monograph on a traditional Mediterranean Fishing Vessel : S. Caterina - a Pointu Méditérranéen - 1759 It would be a smaller project but equally interesting. https://ancre.fr/en/monograph/92-s-caterina-pointu-mediterraneen-1759.html
-
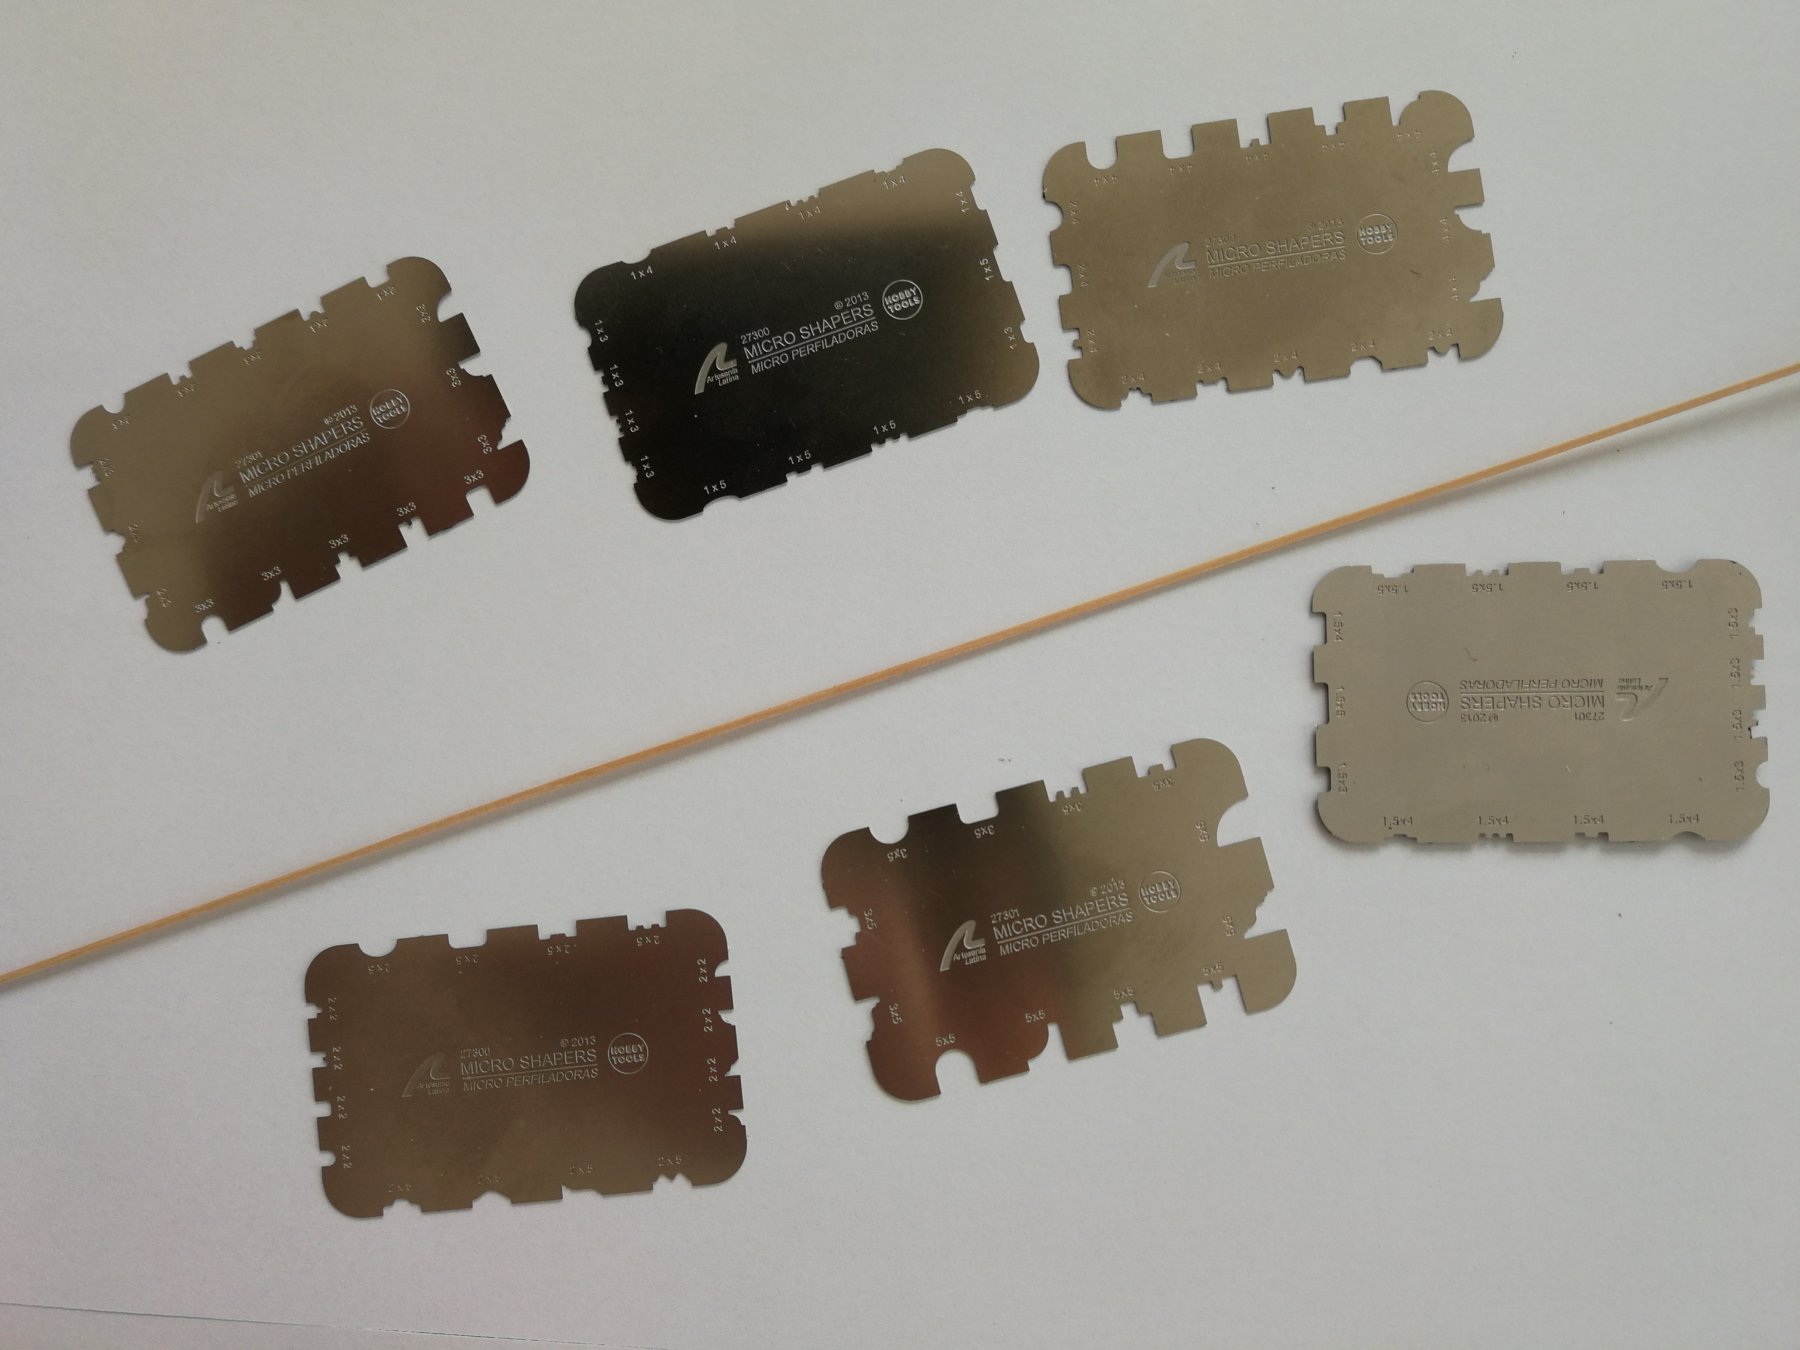
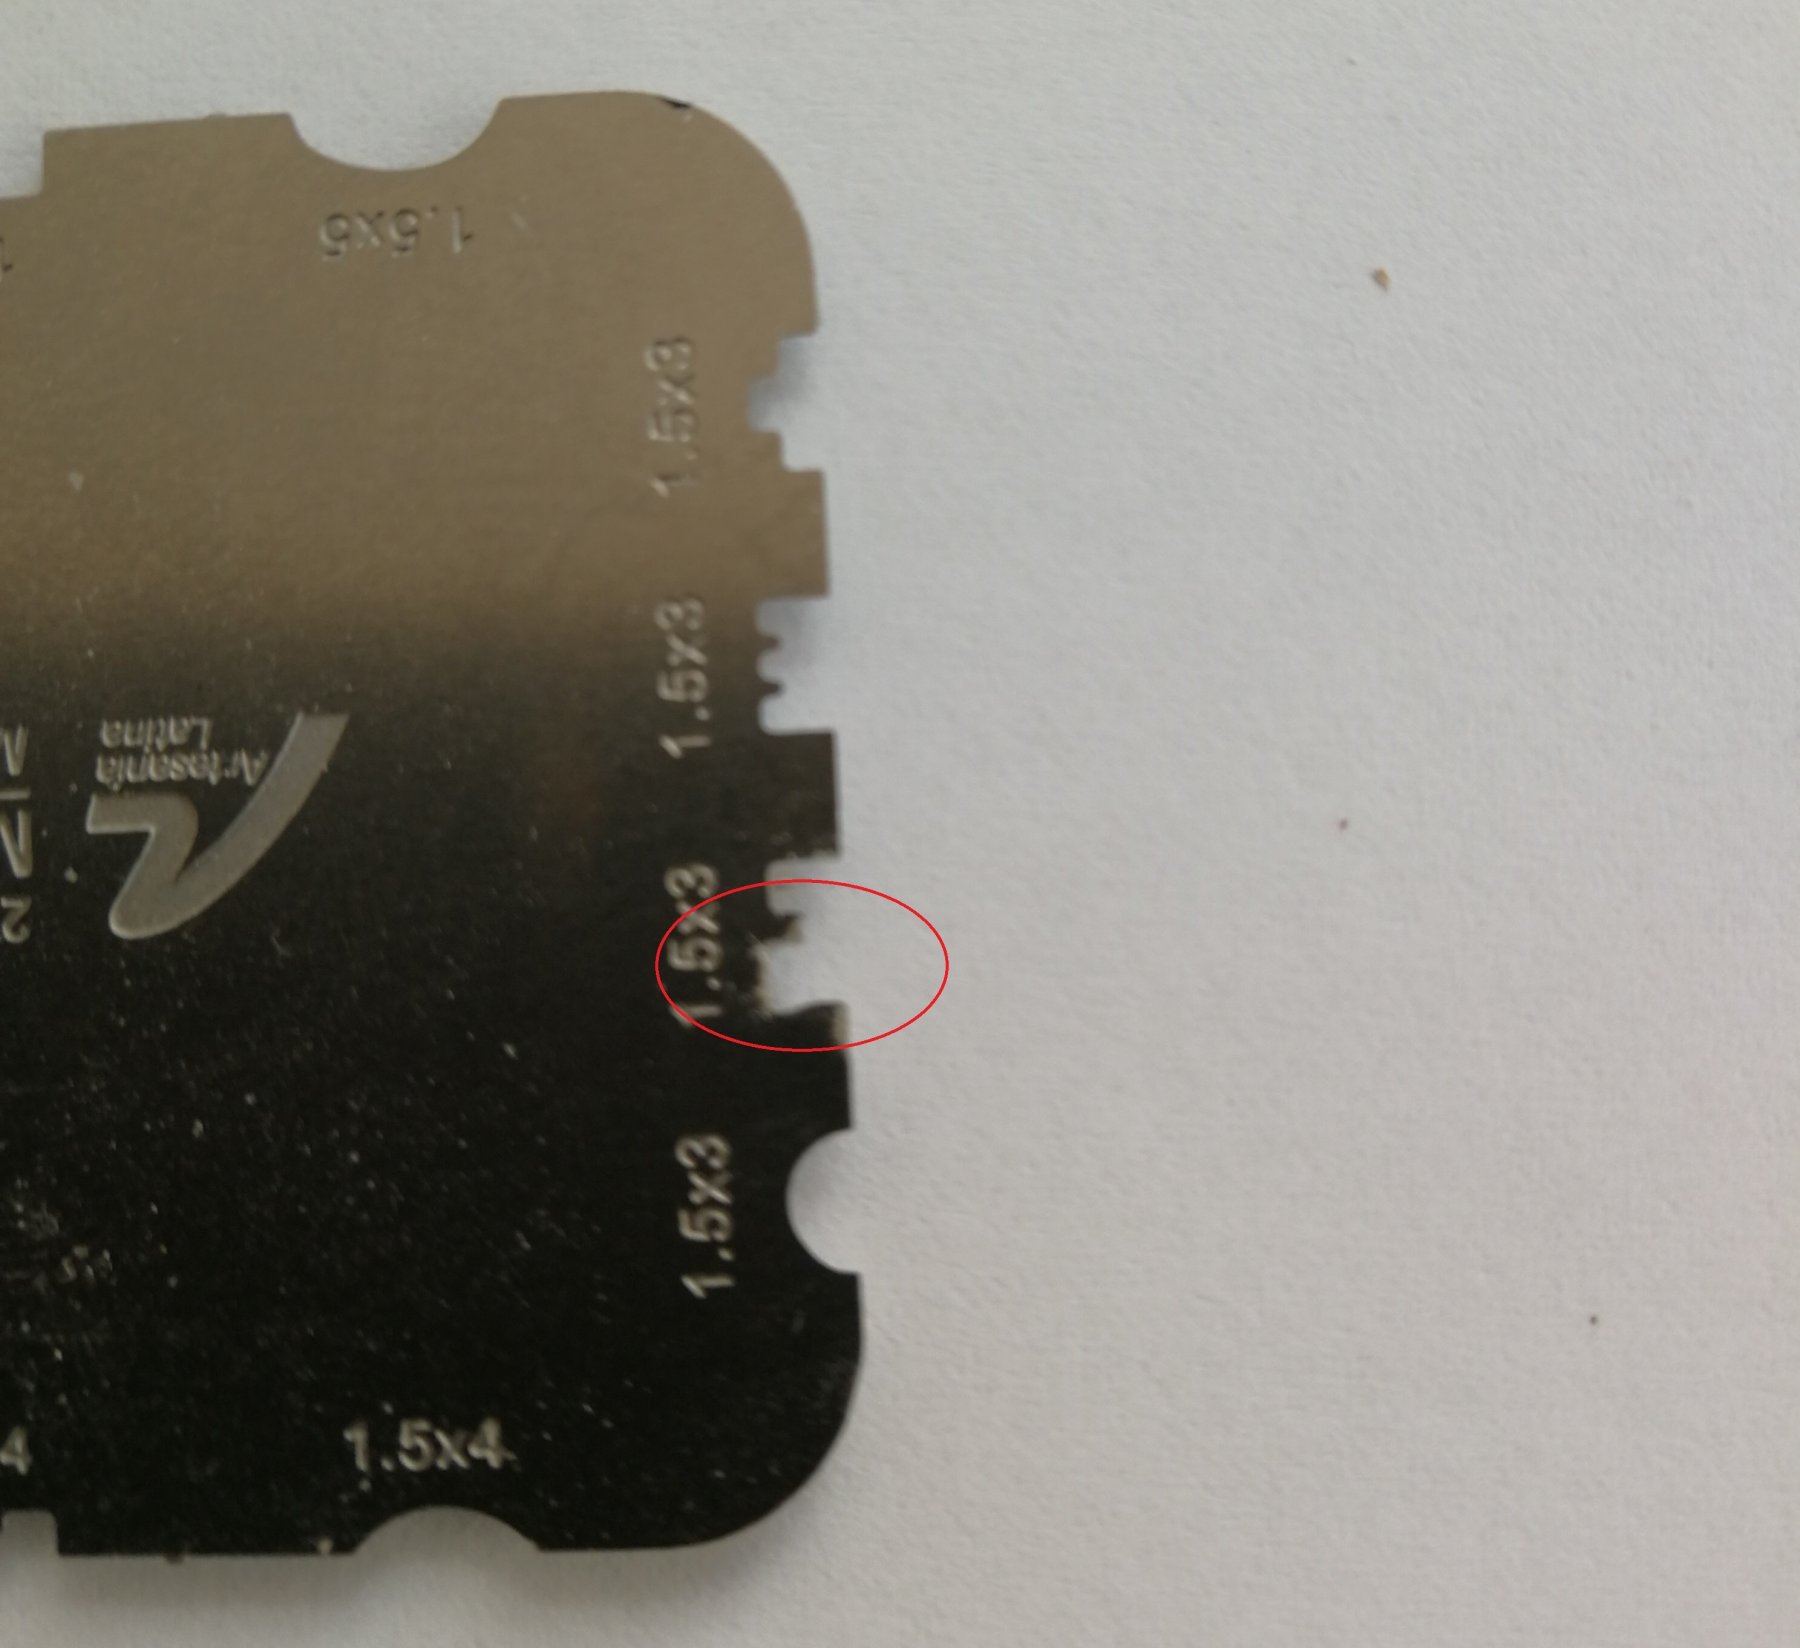
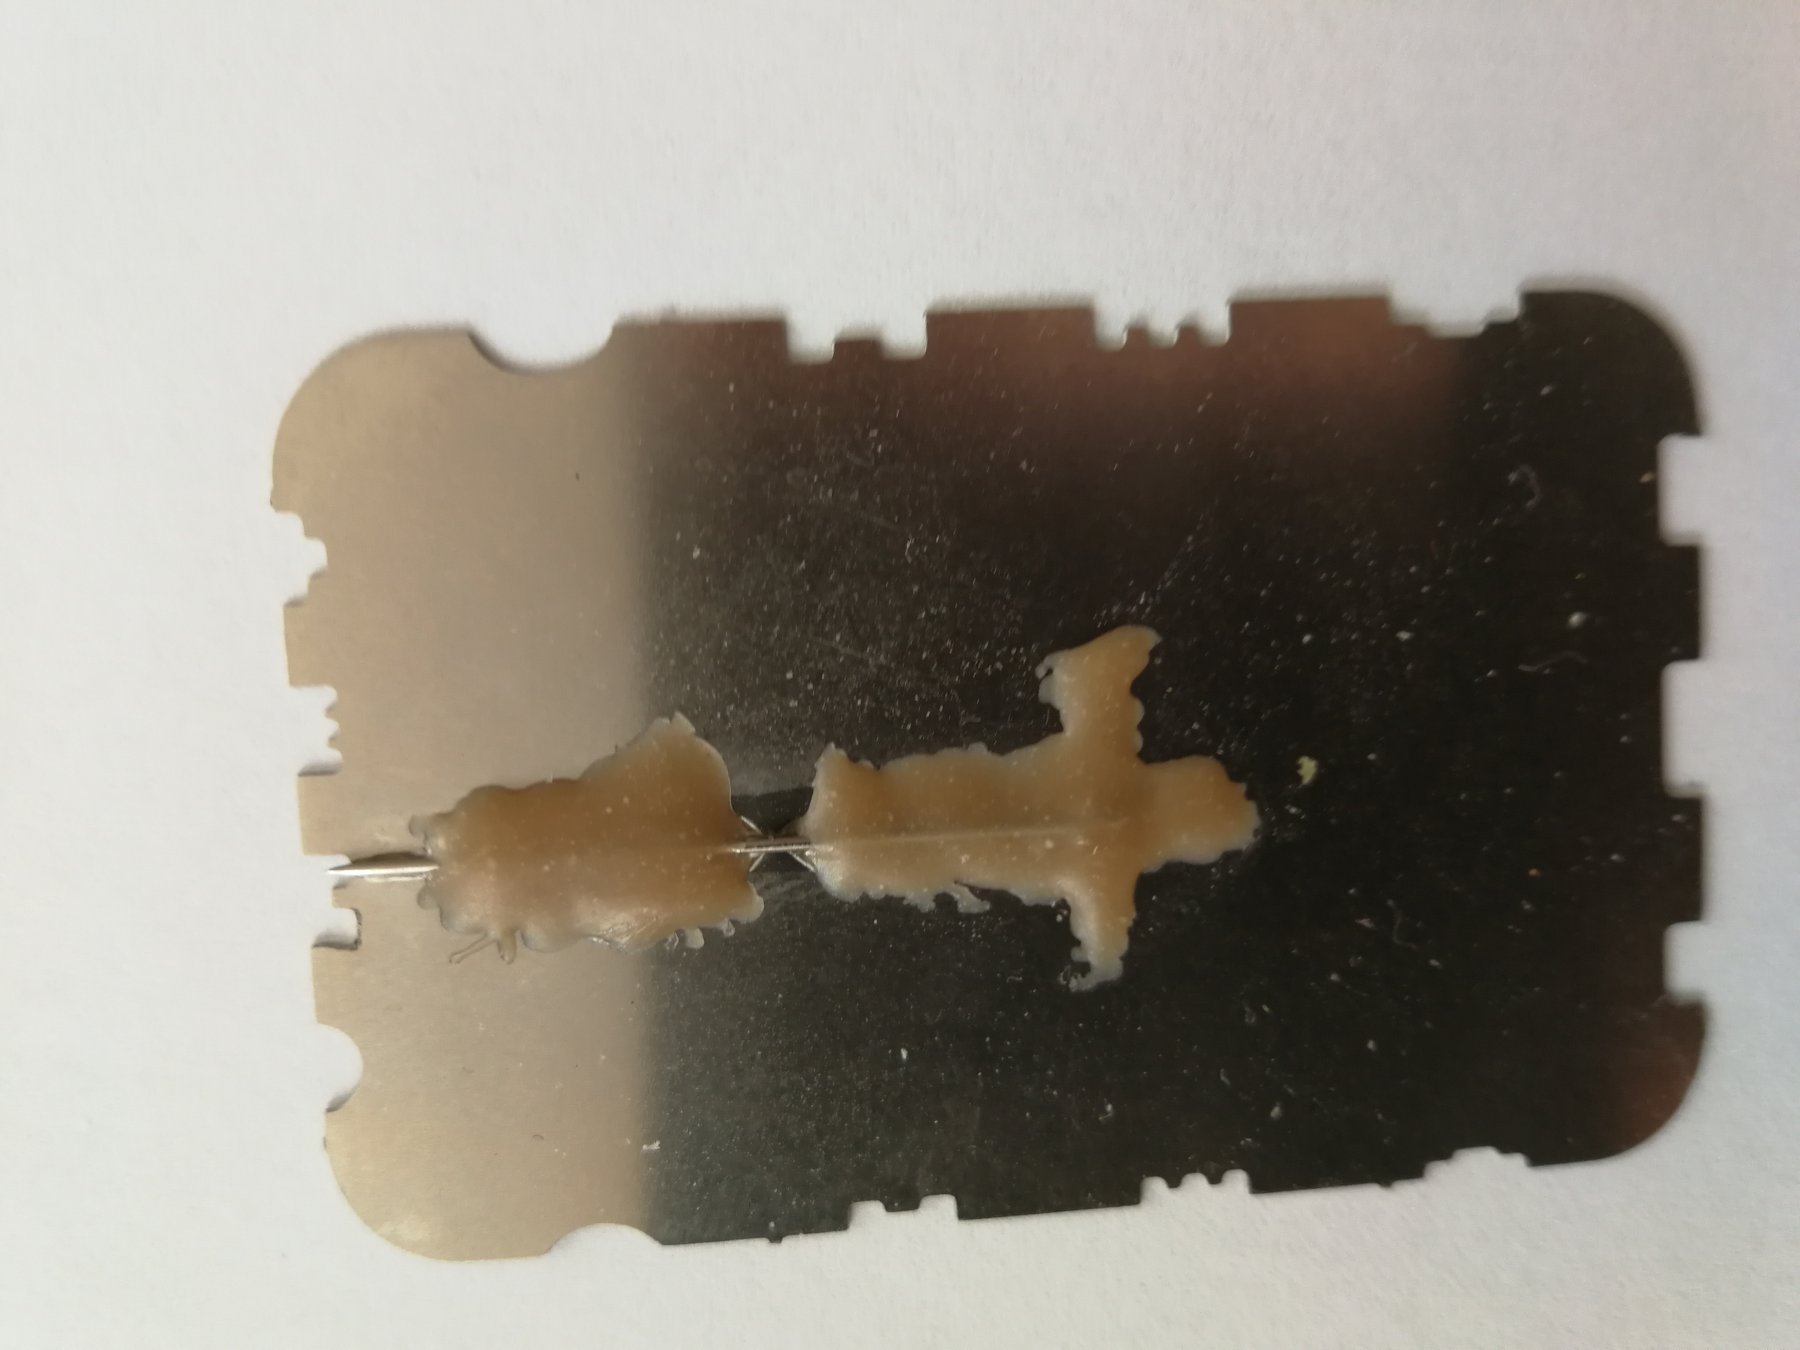
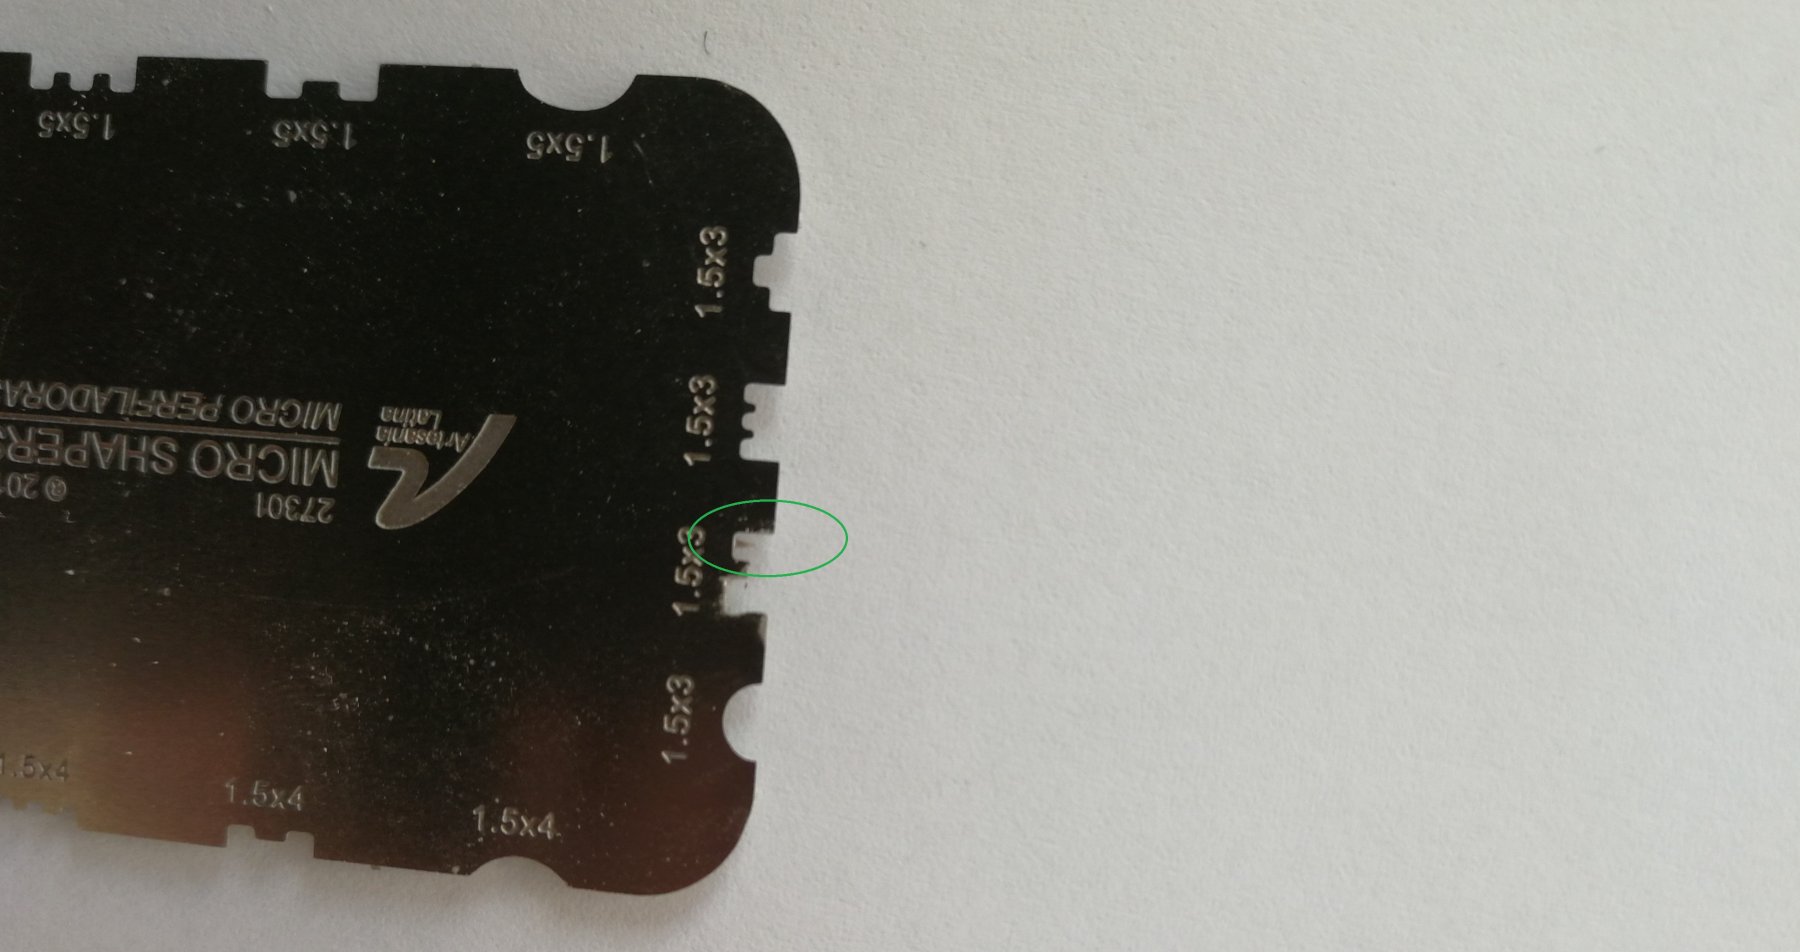
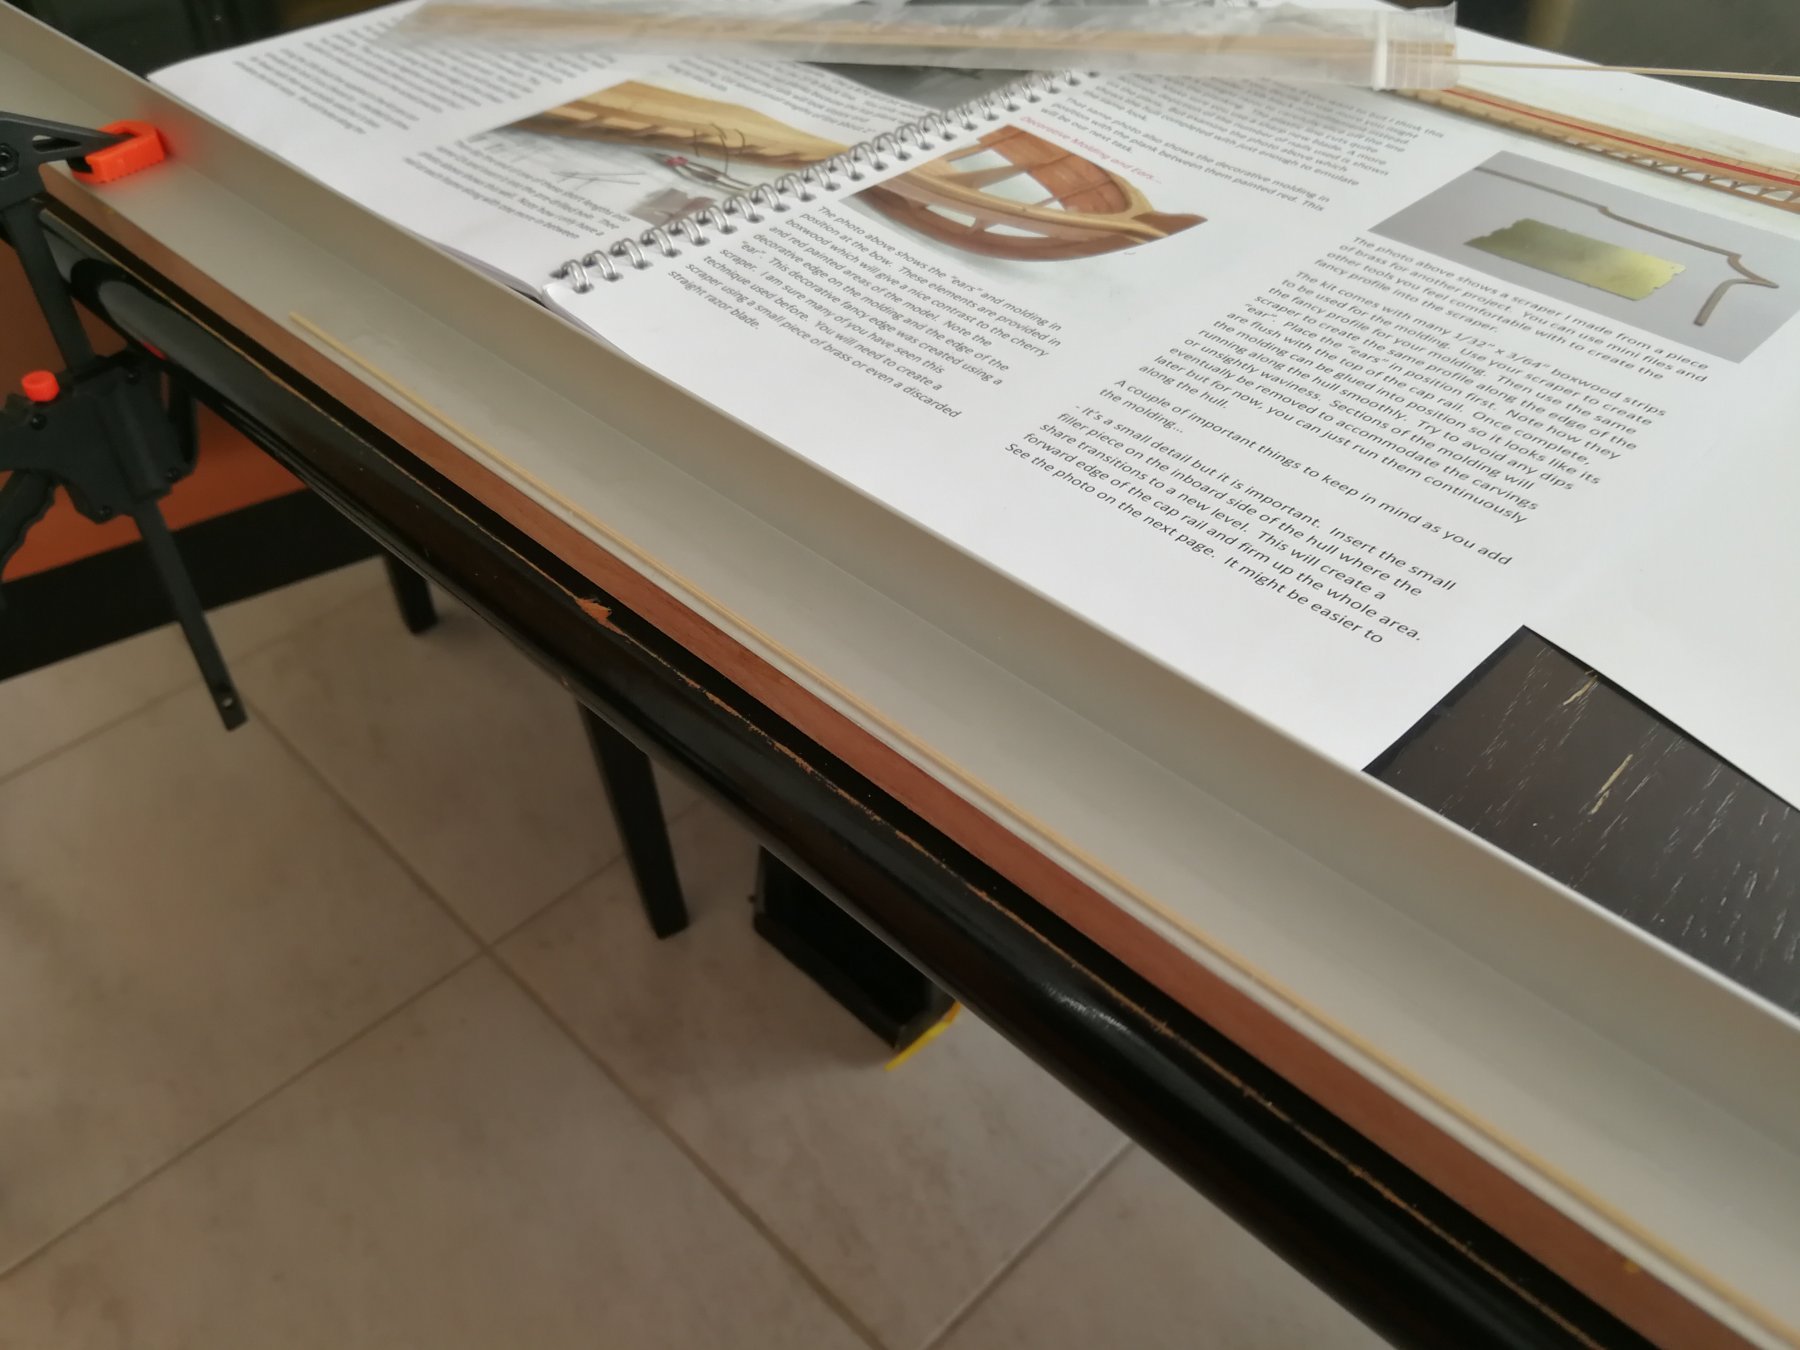
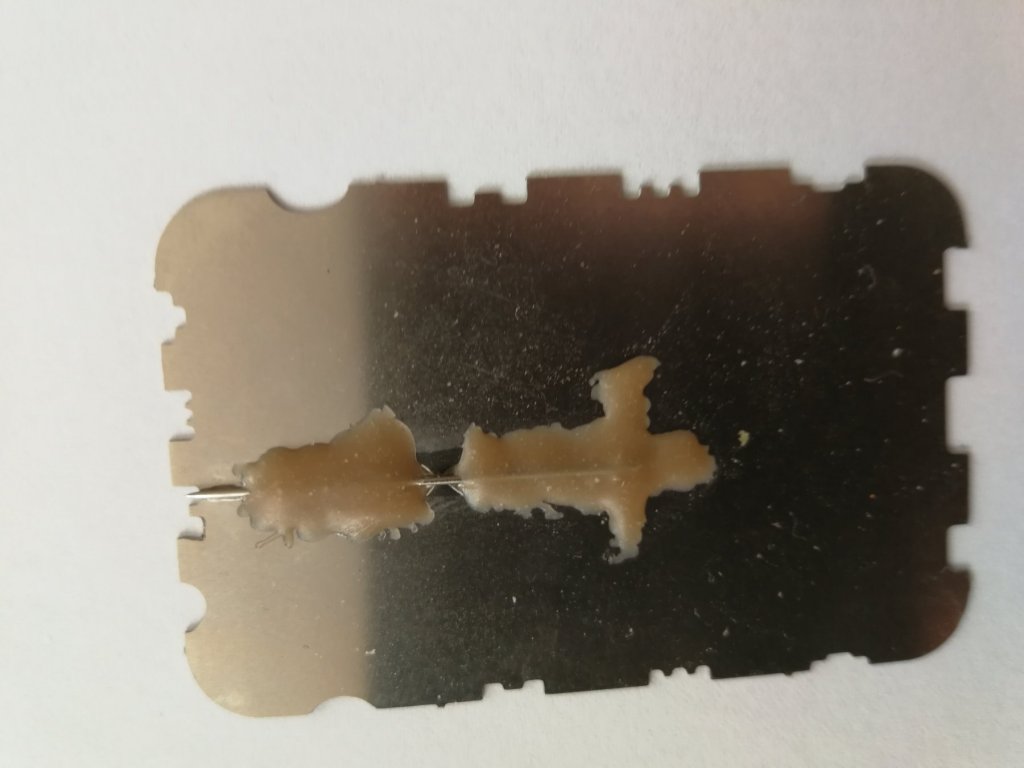
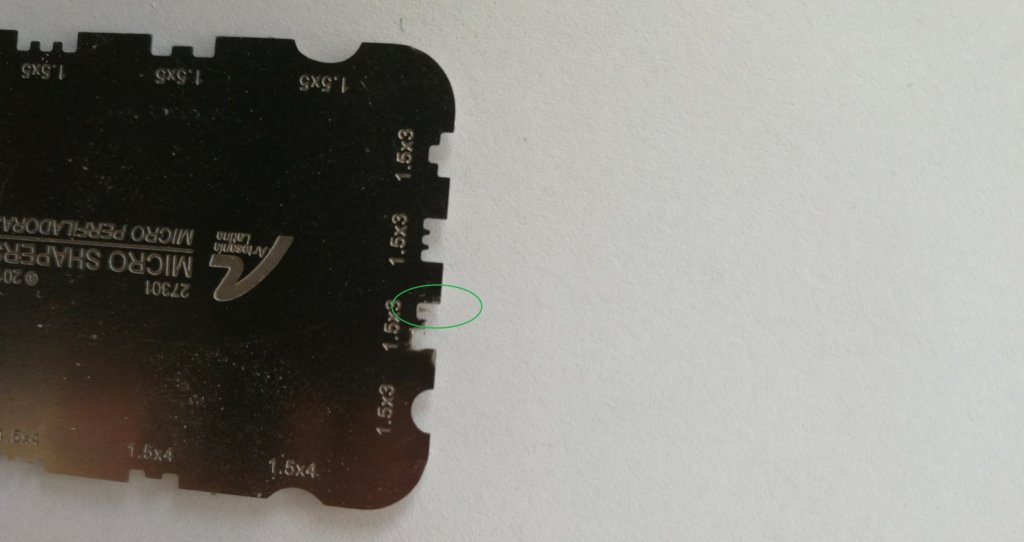
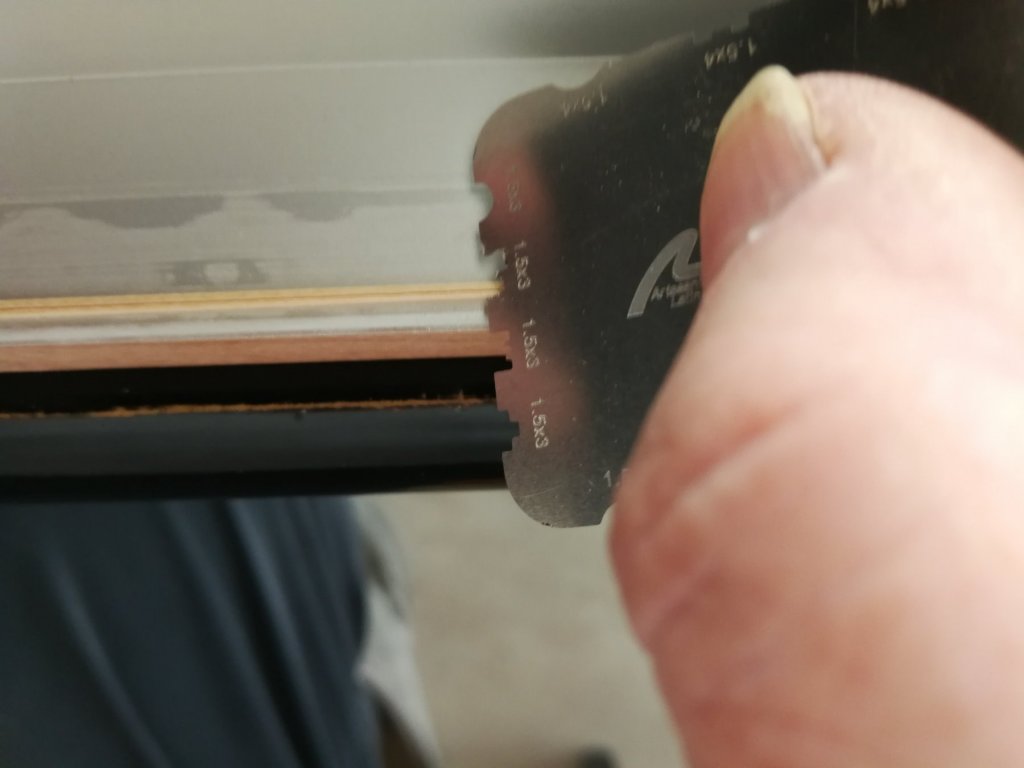
As I'm working on the second planking on my Armed Virginia Sloop, I'm just thinking of a solution to produce the moldings for the Barge. As this moldings are found on most ships, I decided to order a set of Micro Shapers from Artesiana Latina. They will be useful very often. When I received them, I was a little disappointed because no one has the right size... They are all too large for the 1/32" x 3/64" boxwood strips. I first try to modify one of the scraper but the metal is too hard and my files too big... The result is disastrous and unusable... So I solve the problem by an another way and I glue a needle on the back of the Shapers using a two-component epoxy glue. I fix a boxwood strip on a metal jig using double-sided tape. and I can use the scraper to create the molding passing several times slightly. Now that the tool is available, I will finally be able to move forward...


- 103 replies
-
- 9
-
-
- queen anne barge
- Syren Ship Model Company
- (and 1 more)
-
Still interested. This longboat is a beauty !
- 421 replies
-
- 4
-
-
- medway longboat
- Syren Ship Model Company
- (and 1 more)
-
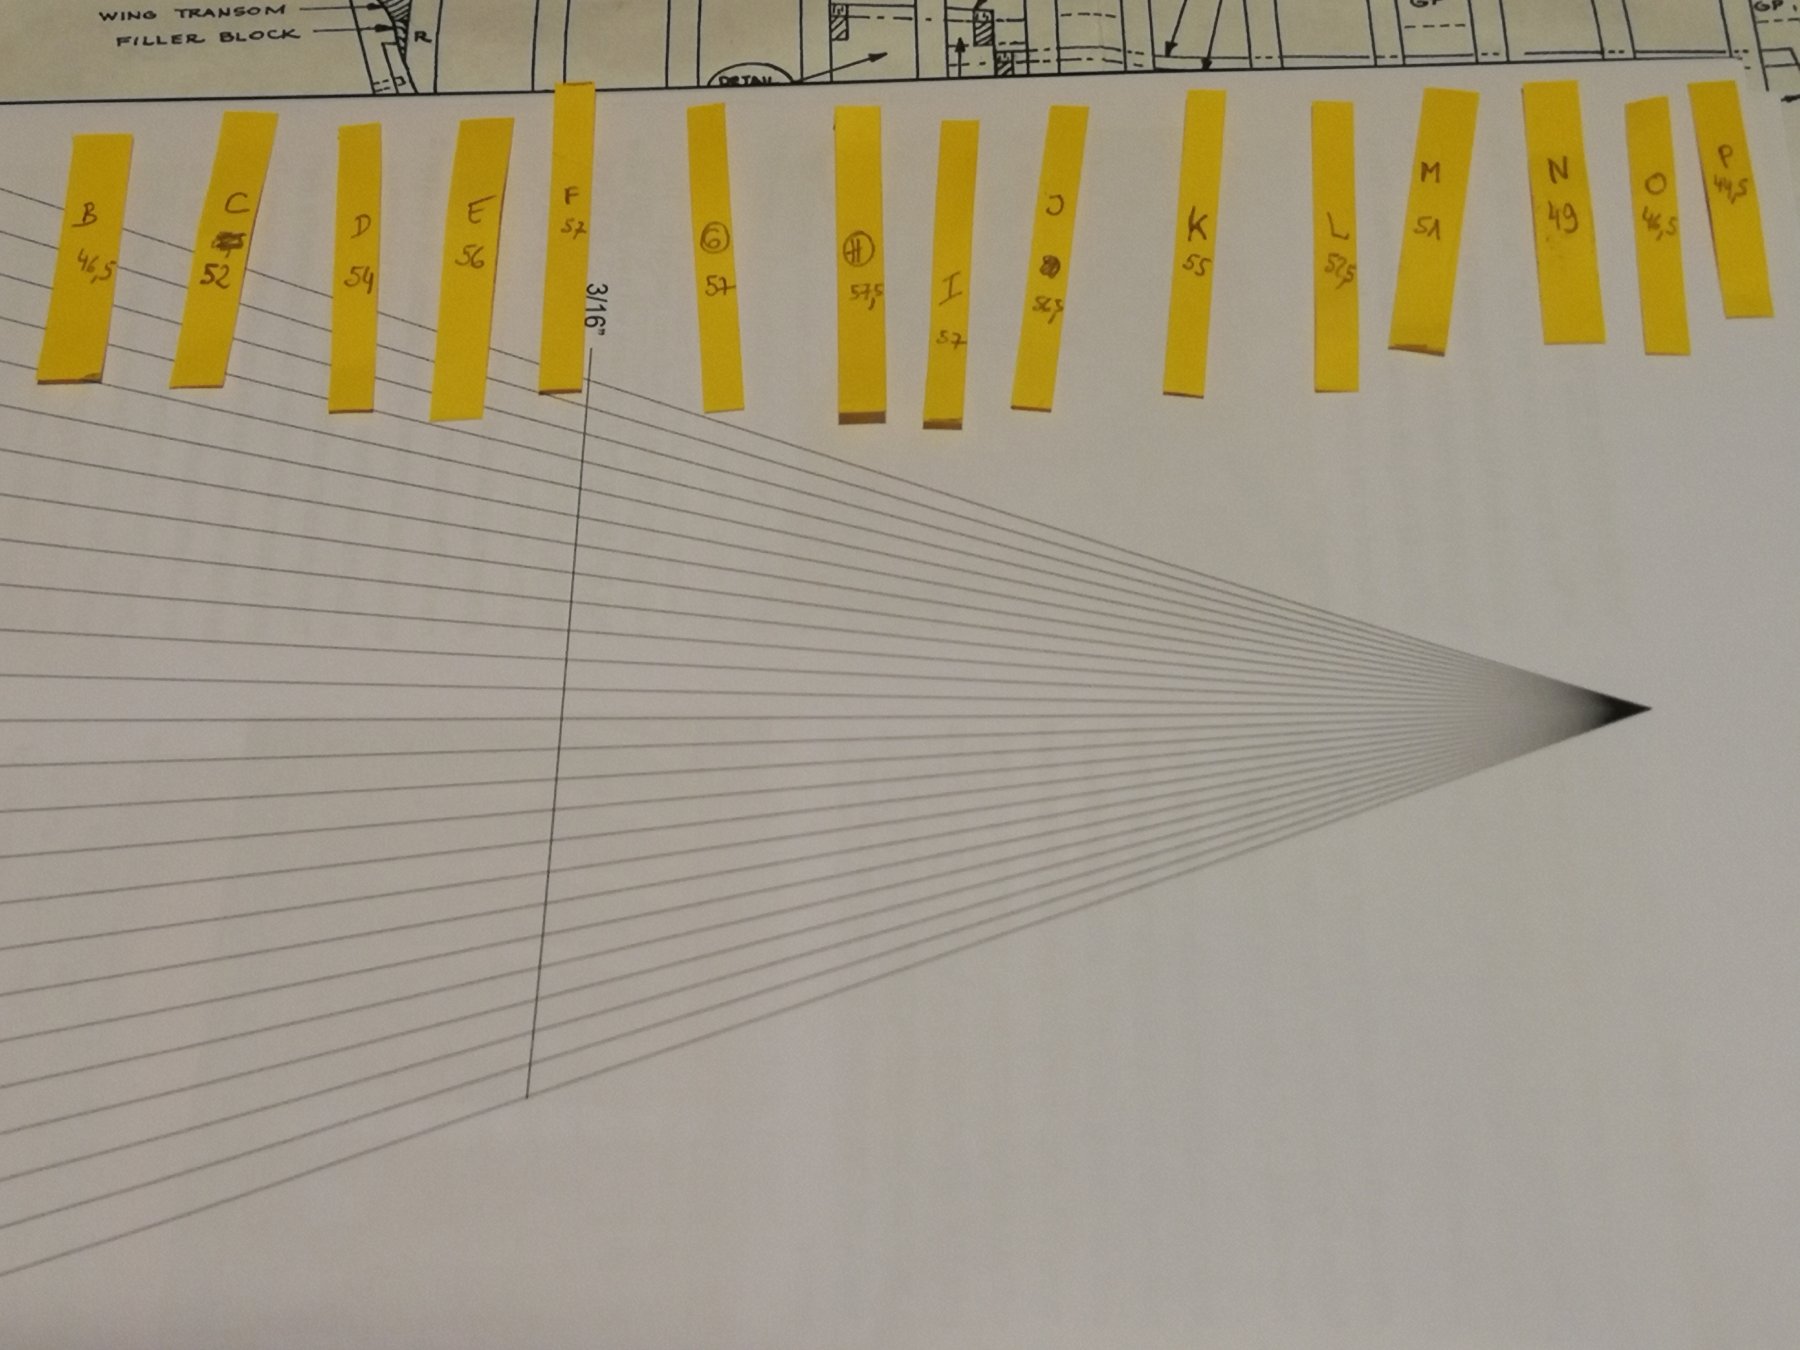
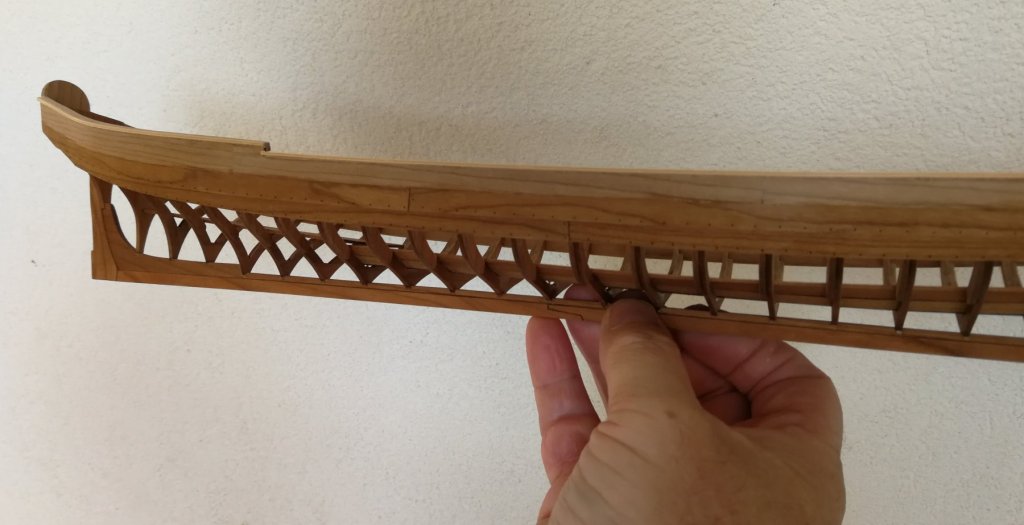
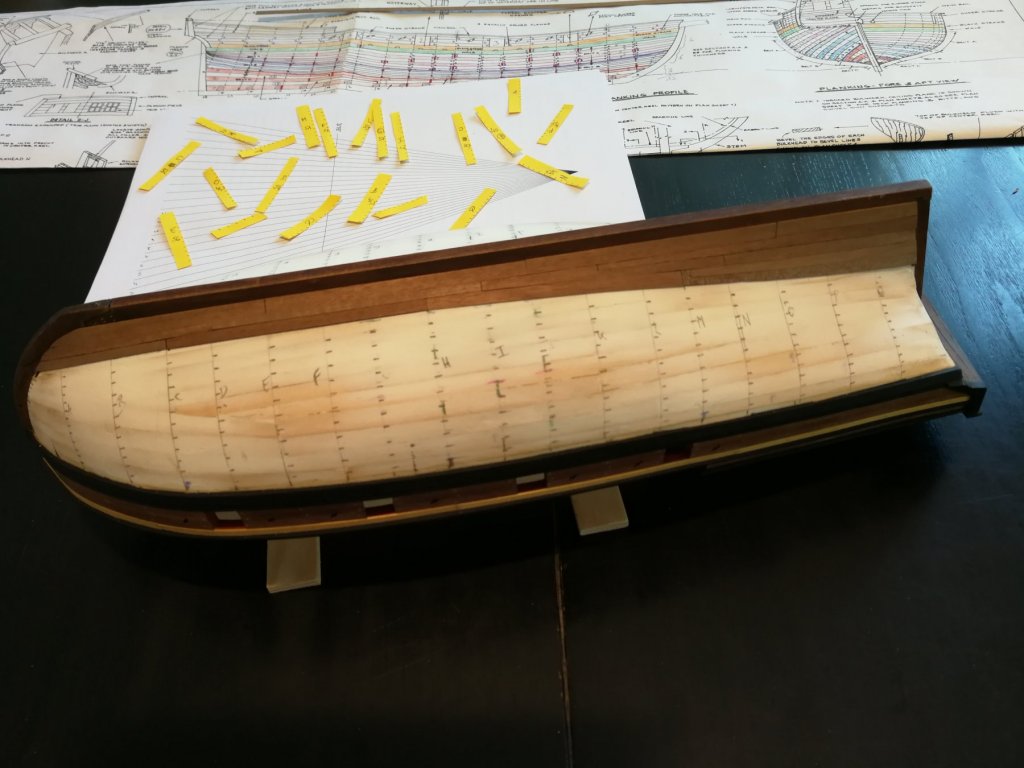
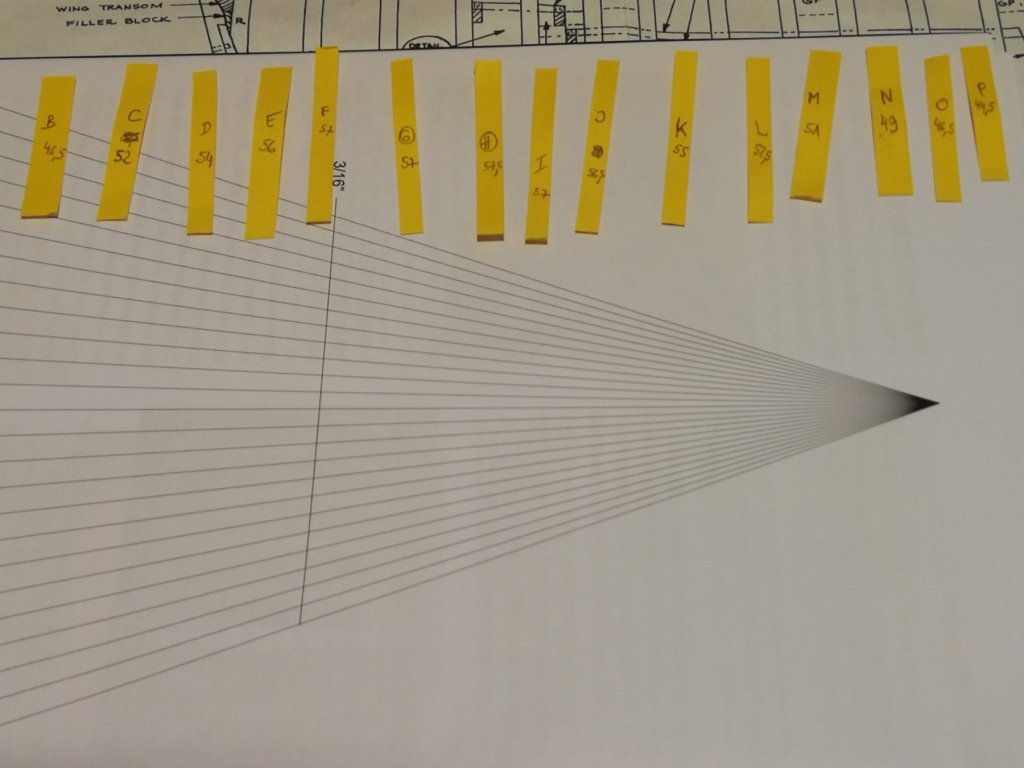
Using the tick strip method, I divide each strip in 12 sections of the same width. The planking fan greatly facilitates the task. All the marks were reported on each bulkhead. Time to spill the planks...
- 164 replies
-
- 6
-
-
- first build
- model shipways
- (and 2 more)
-
Thanks Brian for your help. I will follow the tic strip method. This advice confirms what I thought.
- 164 replies
-
- 2
-
-
- first build
- model shipways
- (and 2 more)
-
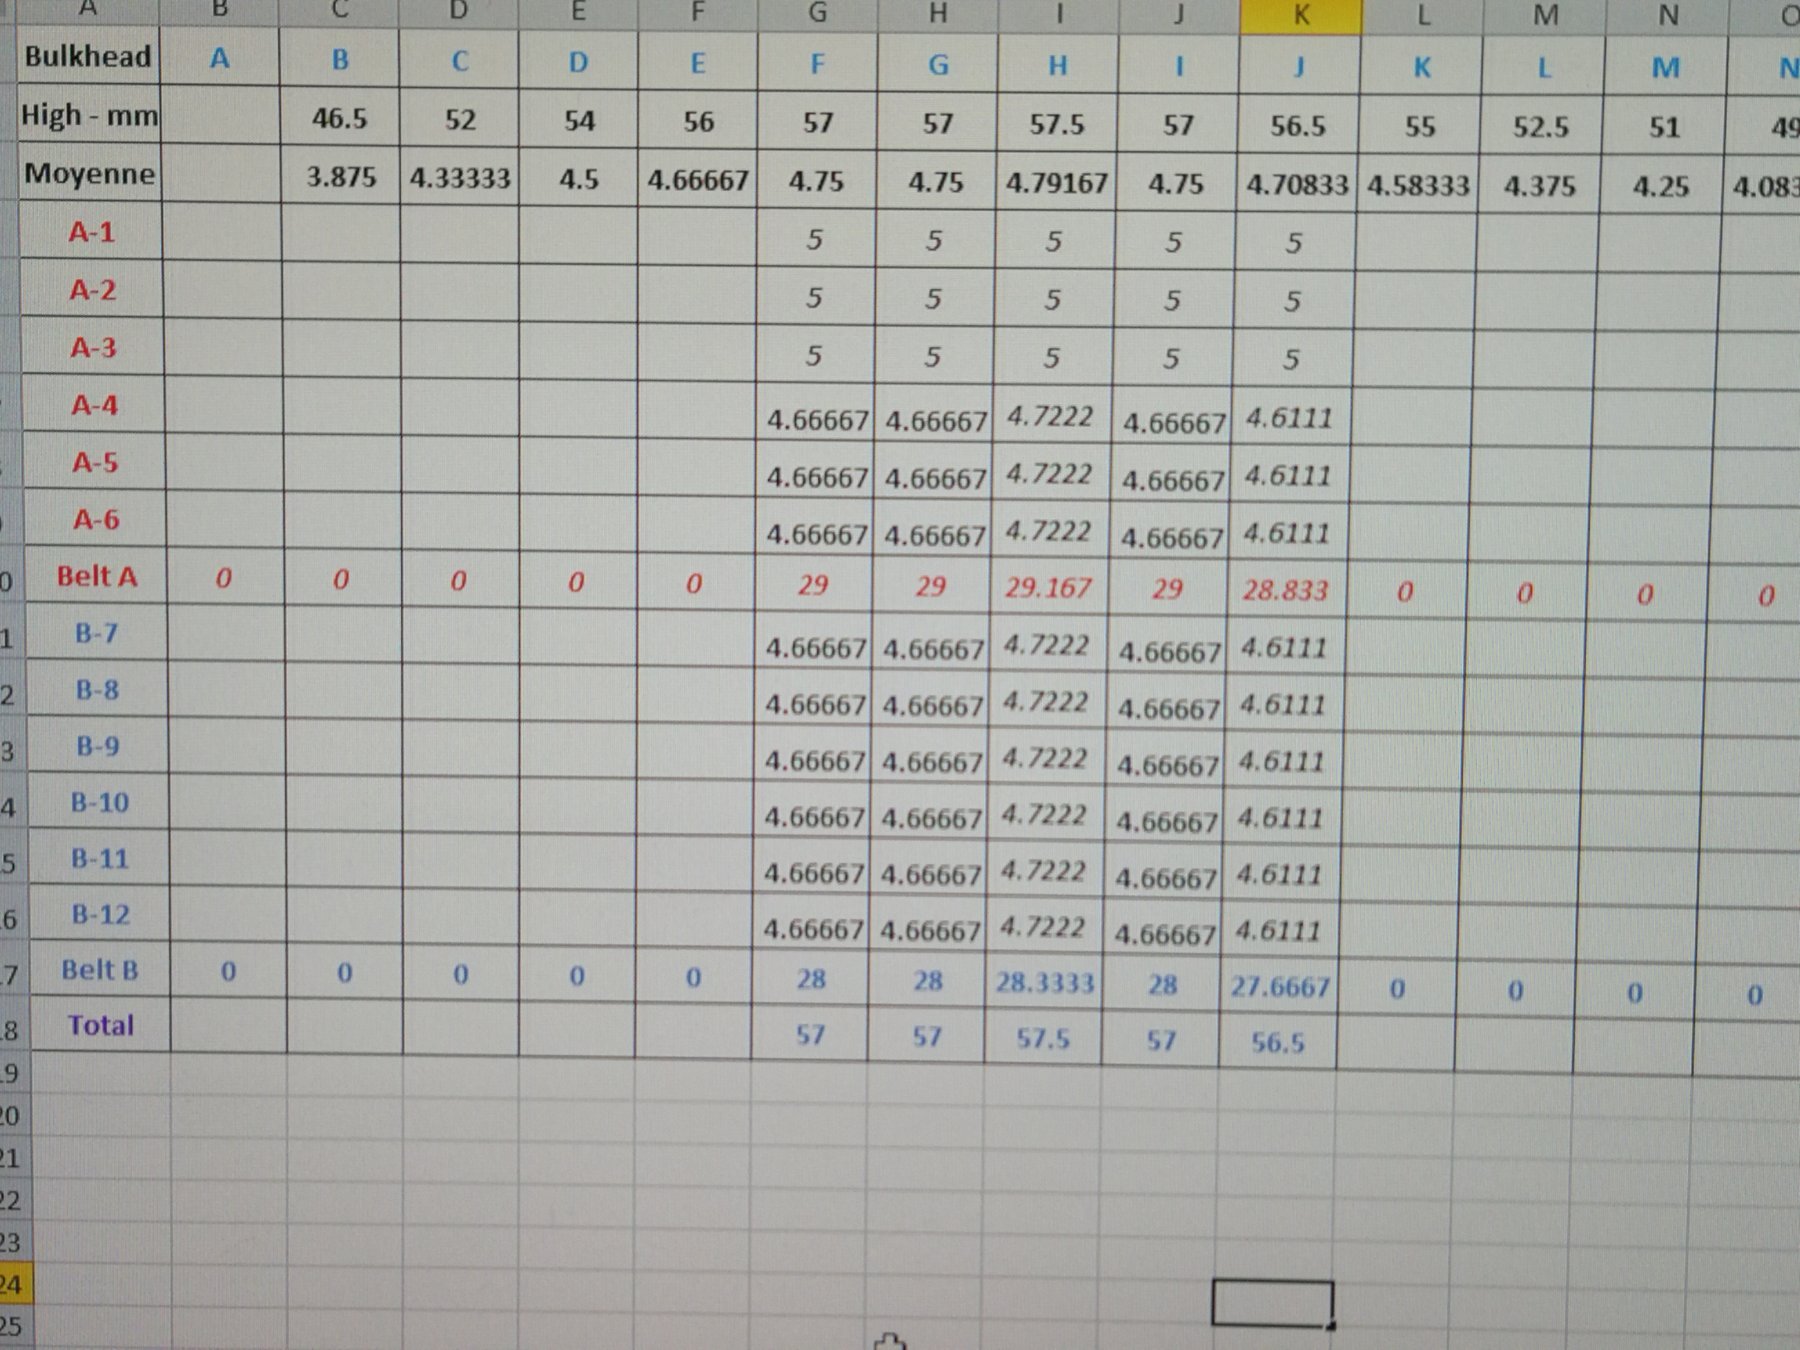
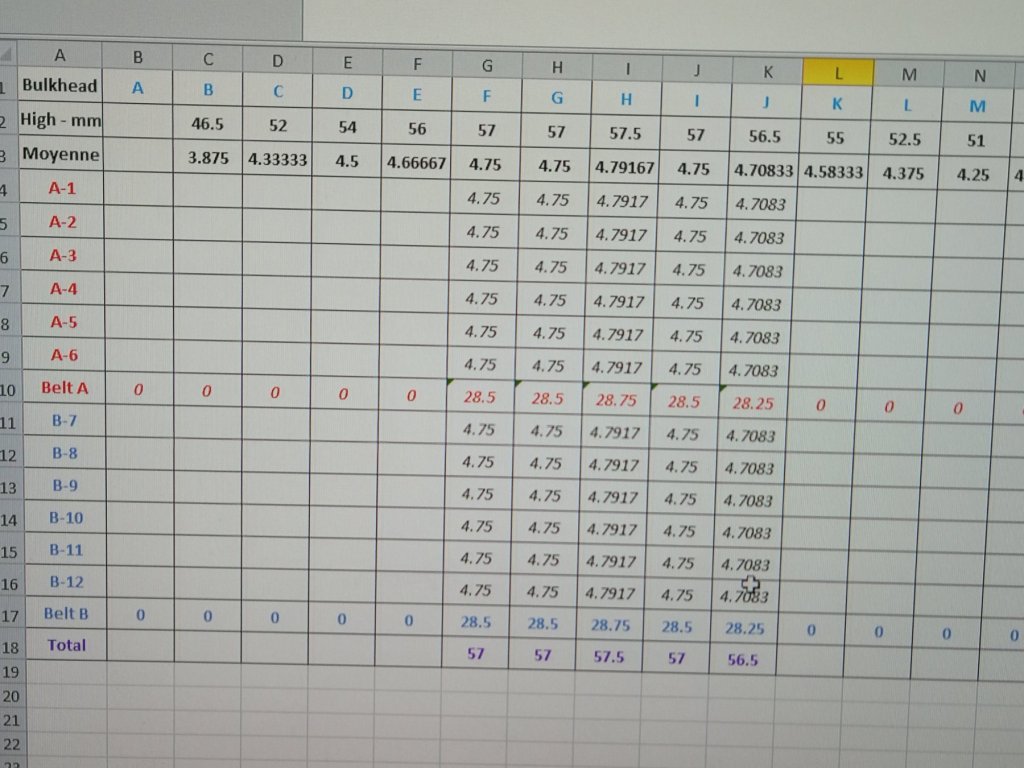
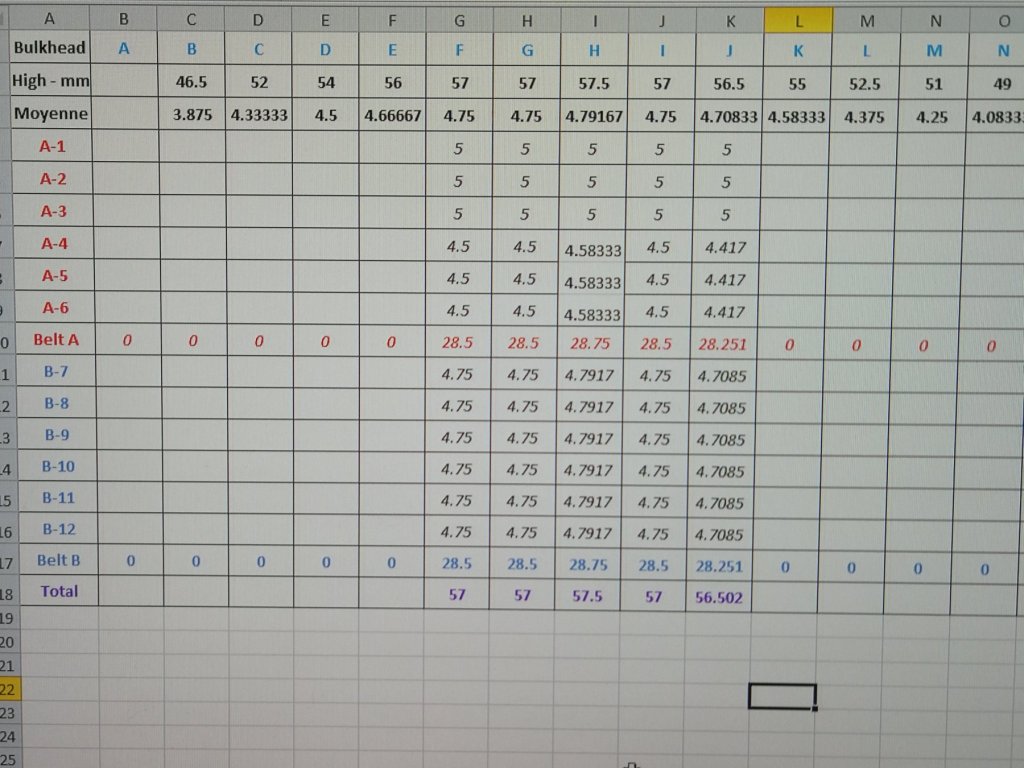
Thanks for all the 'likes'. I need an advice on the way I must work on the belts A and B. I know approximately the shape of the two belts. Based on the plan, I positionned a strip of tape to separate the two belts. I will use the method described by Chuck Passaro in the Cheerful instruction manual. So I measured using paper strips the size of the work area at each bulkhead. I just need to trace the separation between the twelve planks. Normally I must separate the area (in the center of the hull) into twelve equals bands The result implies that the width of the planks do not correspond to standard widths (4 mm or 5 mm). Each board should be debited to the correct size... I have two others options. I can use standard strips of 5 mm for the three first rows under the blake strake and : Option 1 : if I need to have two belts of the same size, the last 3 rows for the belt A will be of a different size of the 6 rows of belt B Option 2 : I divide the 9 remaining rows in 9 rows of equal width. The belt A and the belt B will be of different width. My question : which option to choose ? The first one seems to me the most adequate...


- 164 replies
-
- 5
-
-
- first build
- model shipways
- (and 2 more)
-
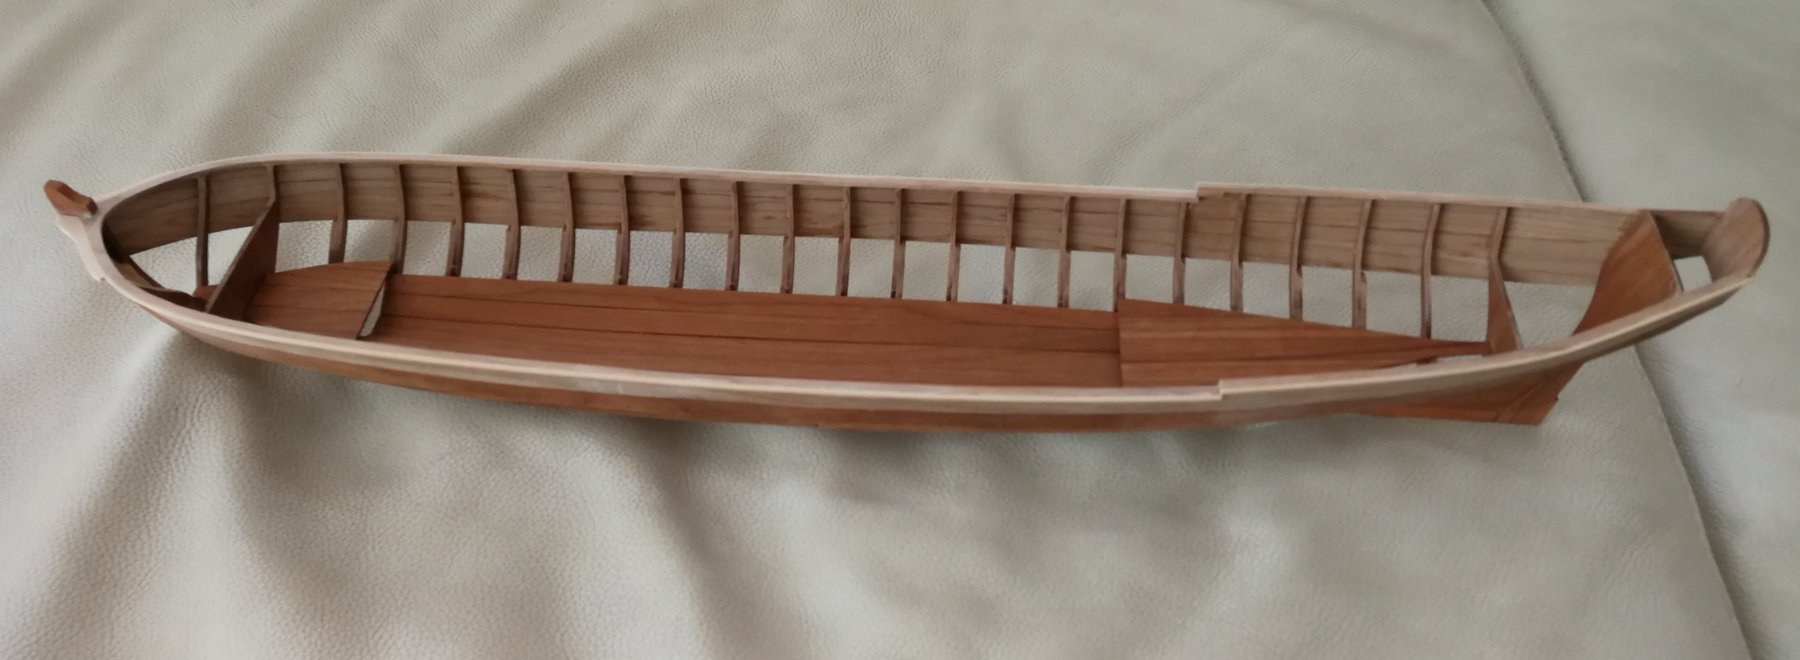
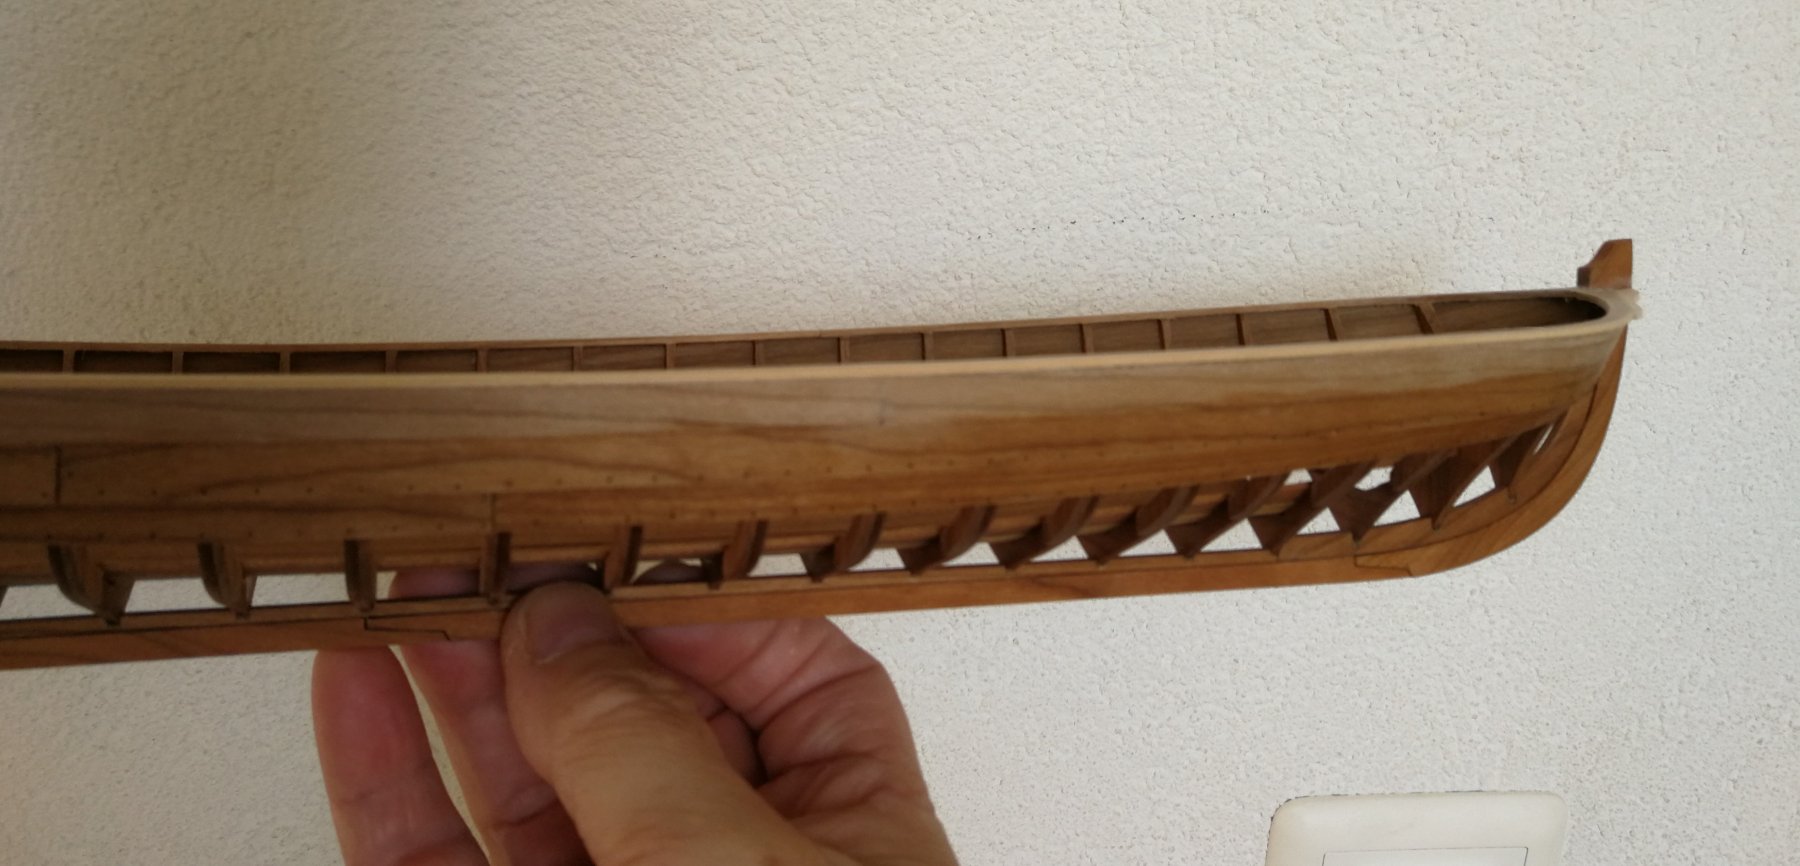
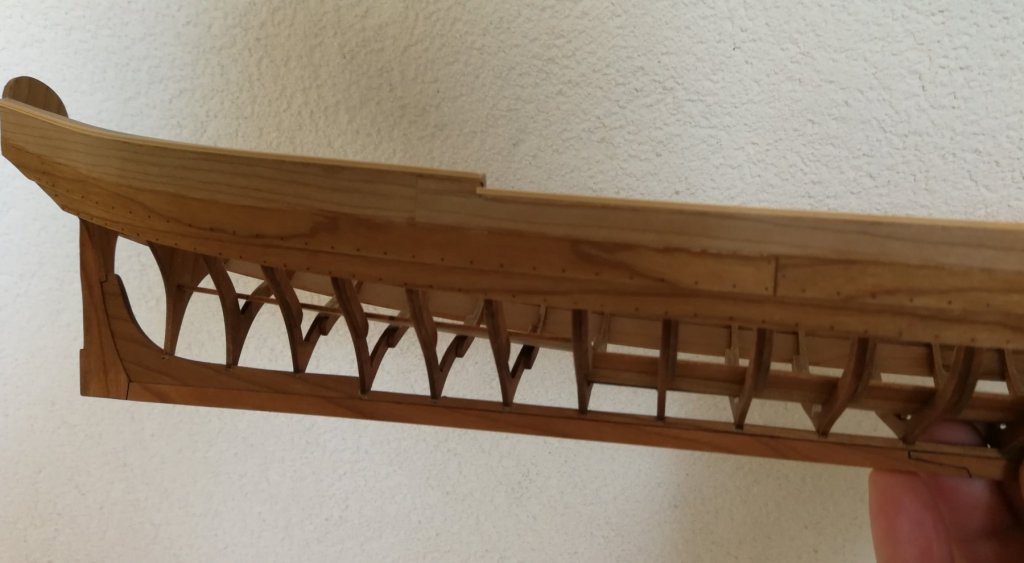
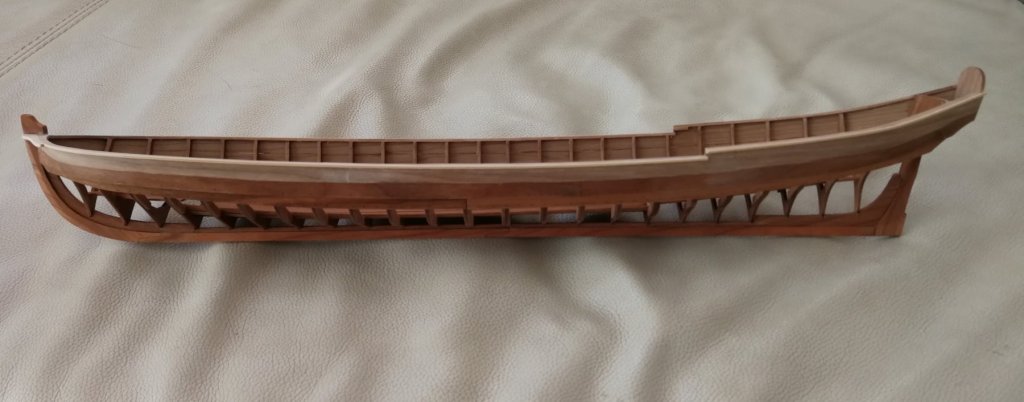
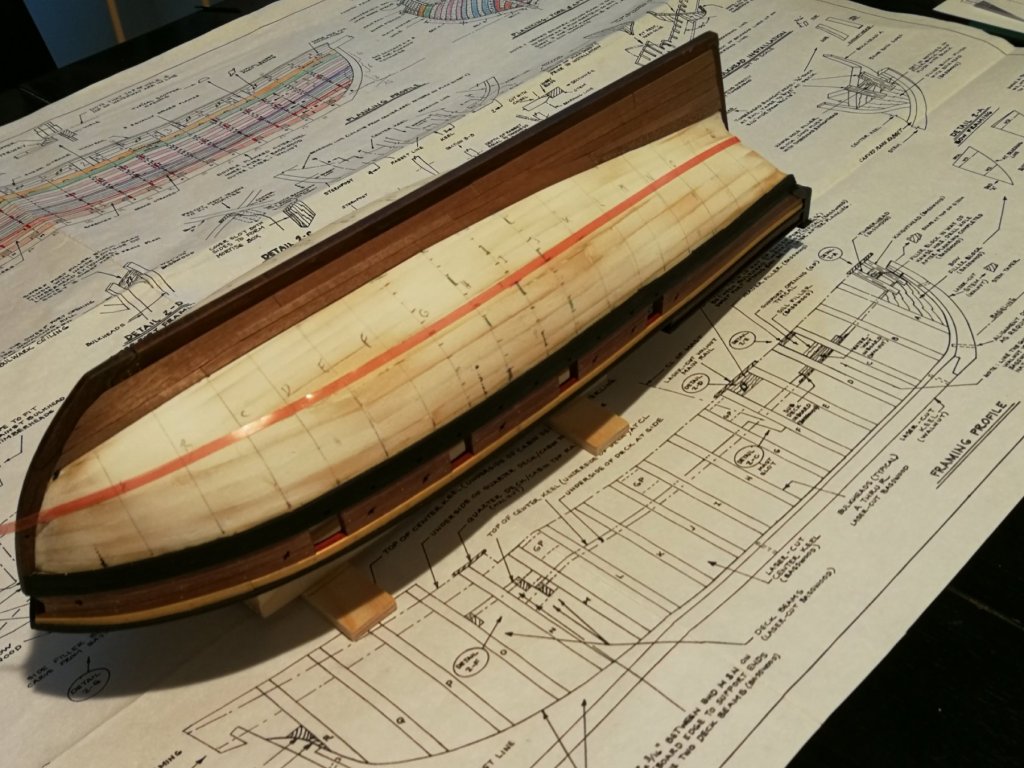
The final planking of the belt C is done. I started by building a small support so I could work with the keel upside down. Then I tried for this belt to follow precisely the plan. At the stern, I inserted two stealers in accordance with the plan. I will now work on the belt A


- 164 replies
-
- 12
-
-
- first build
- model shipways
- (and 2 more)
-
Thanks Brian and all the Likes. Brian, I will follow your advice and I will make the adjustments when the deck is finished. Normally this should be ok because a test was done with a piece of scrap wood (thickness of the deck planking) for the location of the quoin. I will sand the bottom of the trucks if necessary. Thank You for following my build.
- 164 replies
-
- 6
-
-
- first build
- model shipways
- (and 2 more)
-
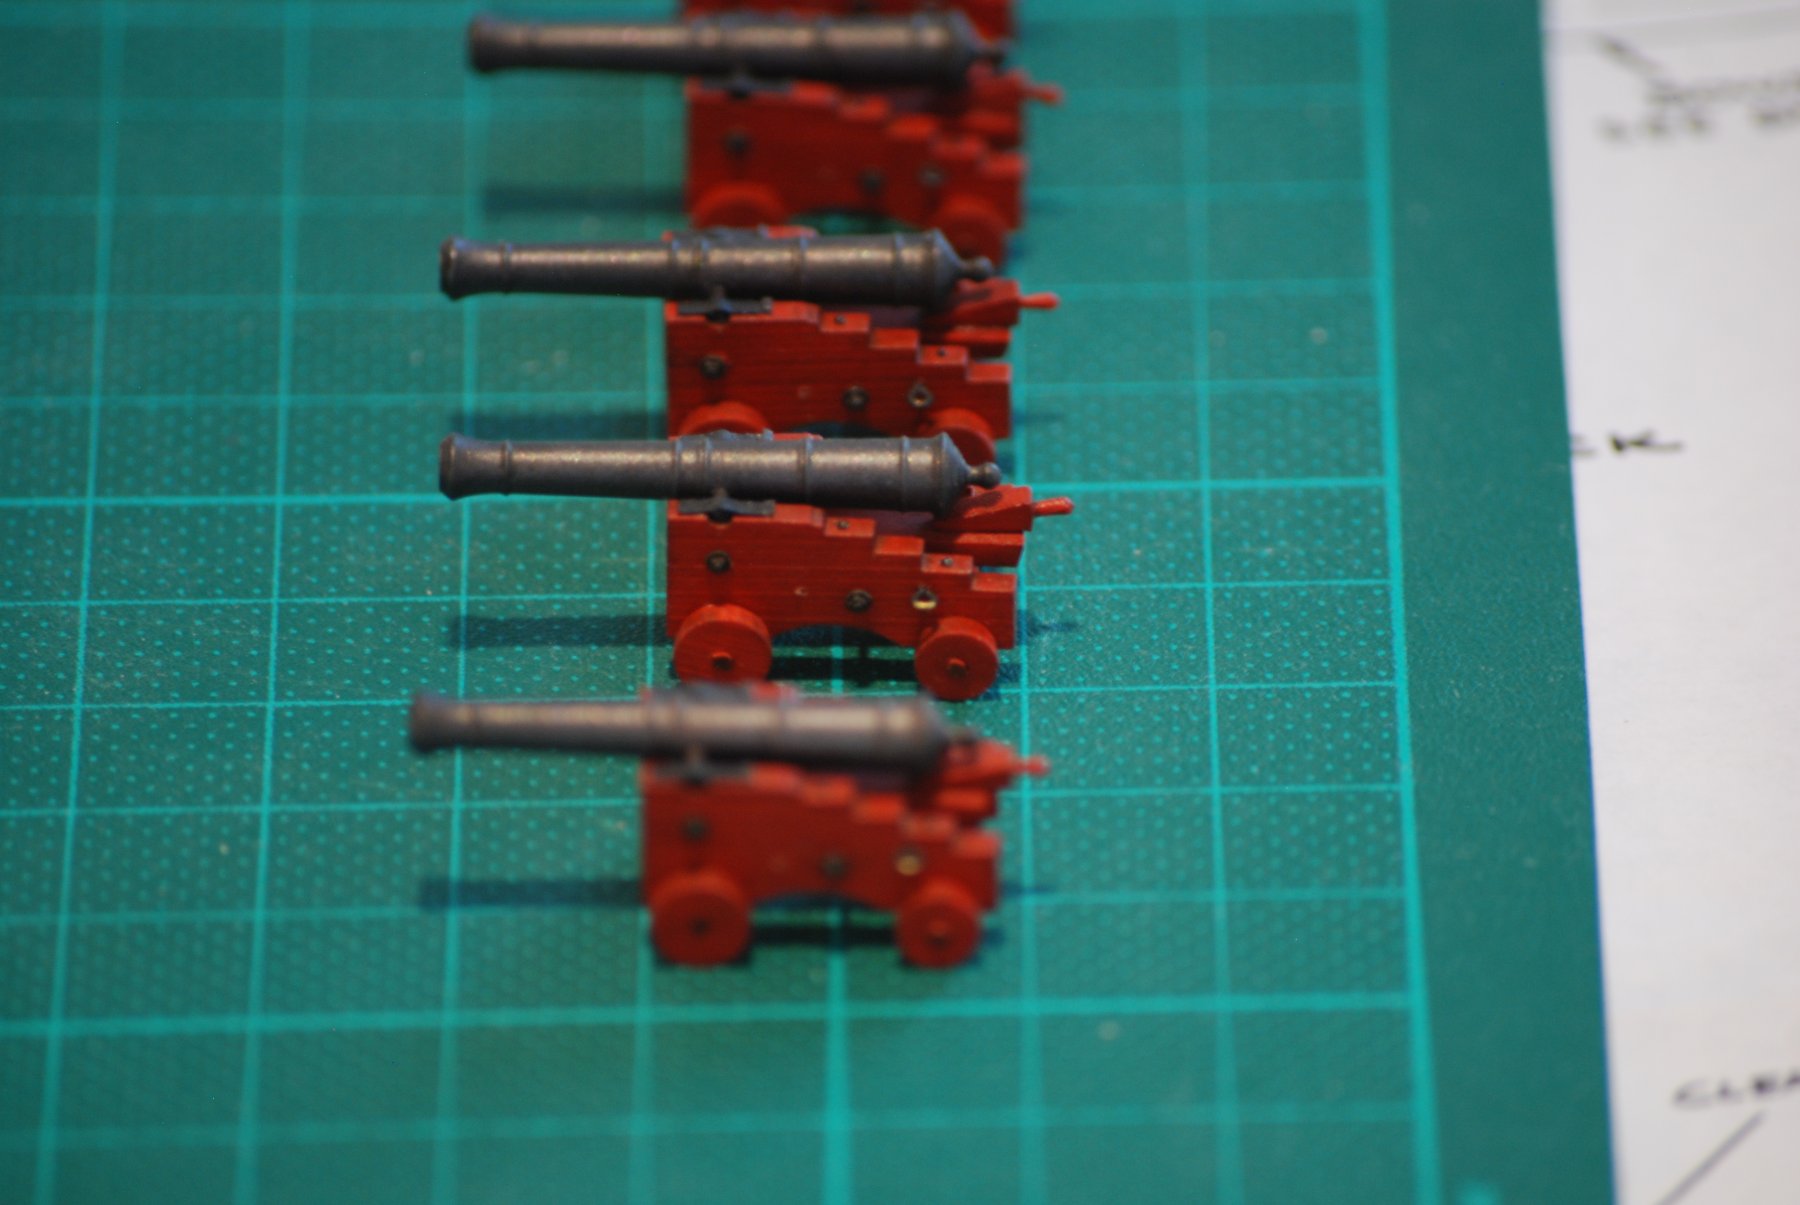
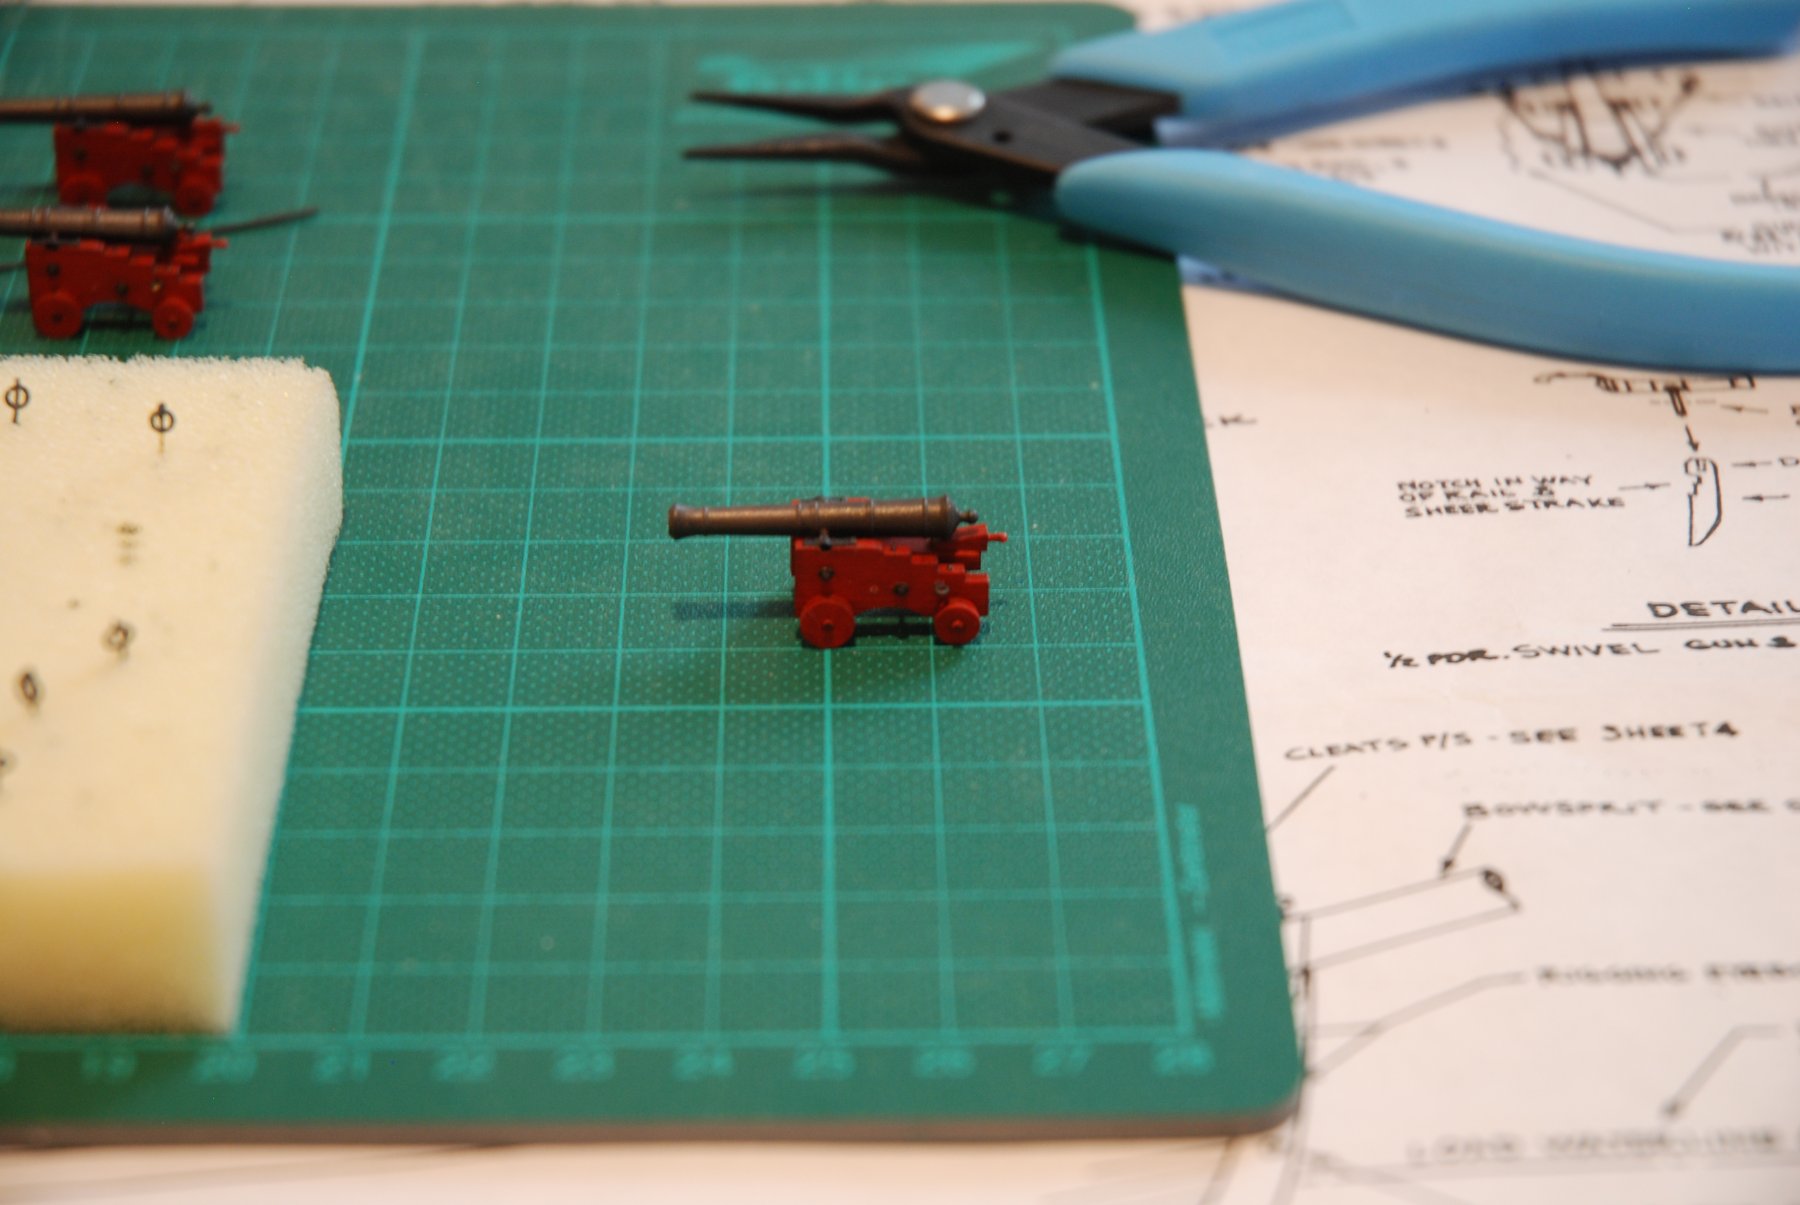
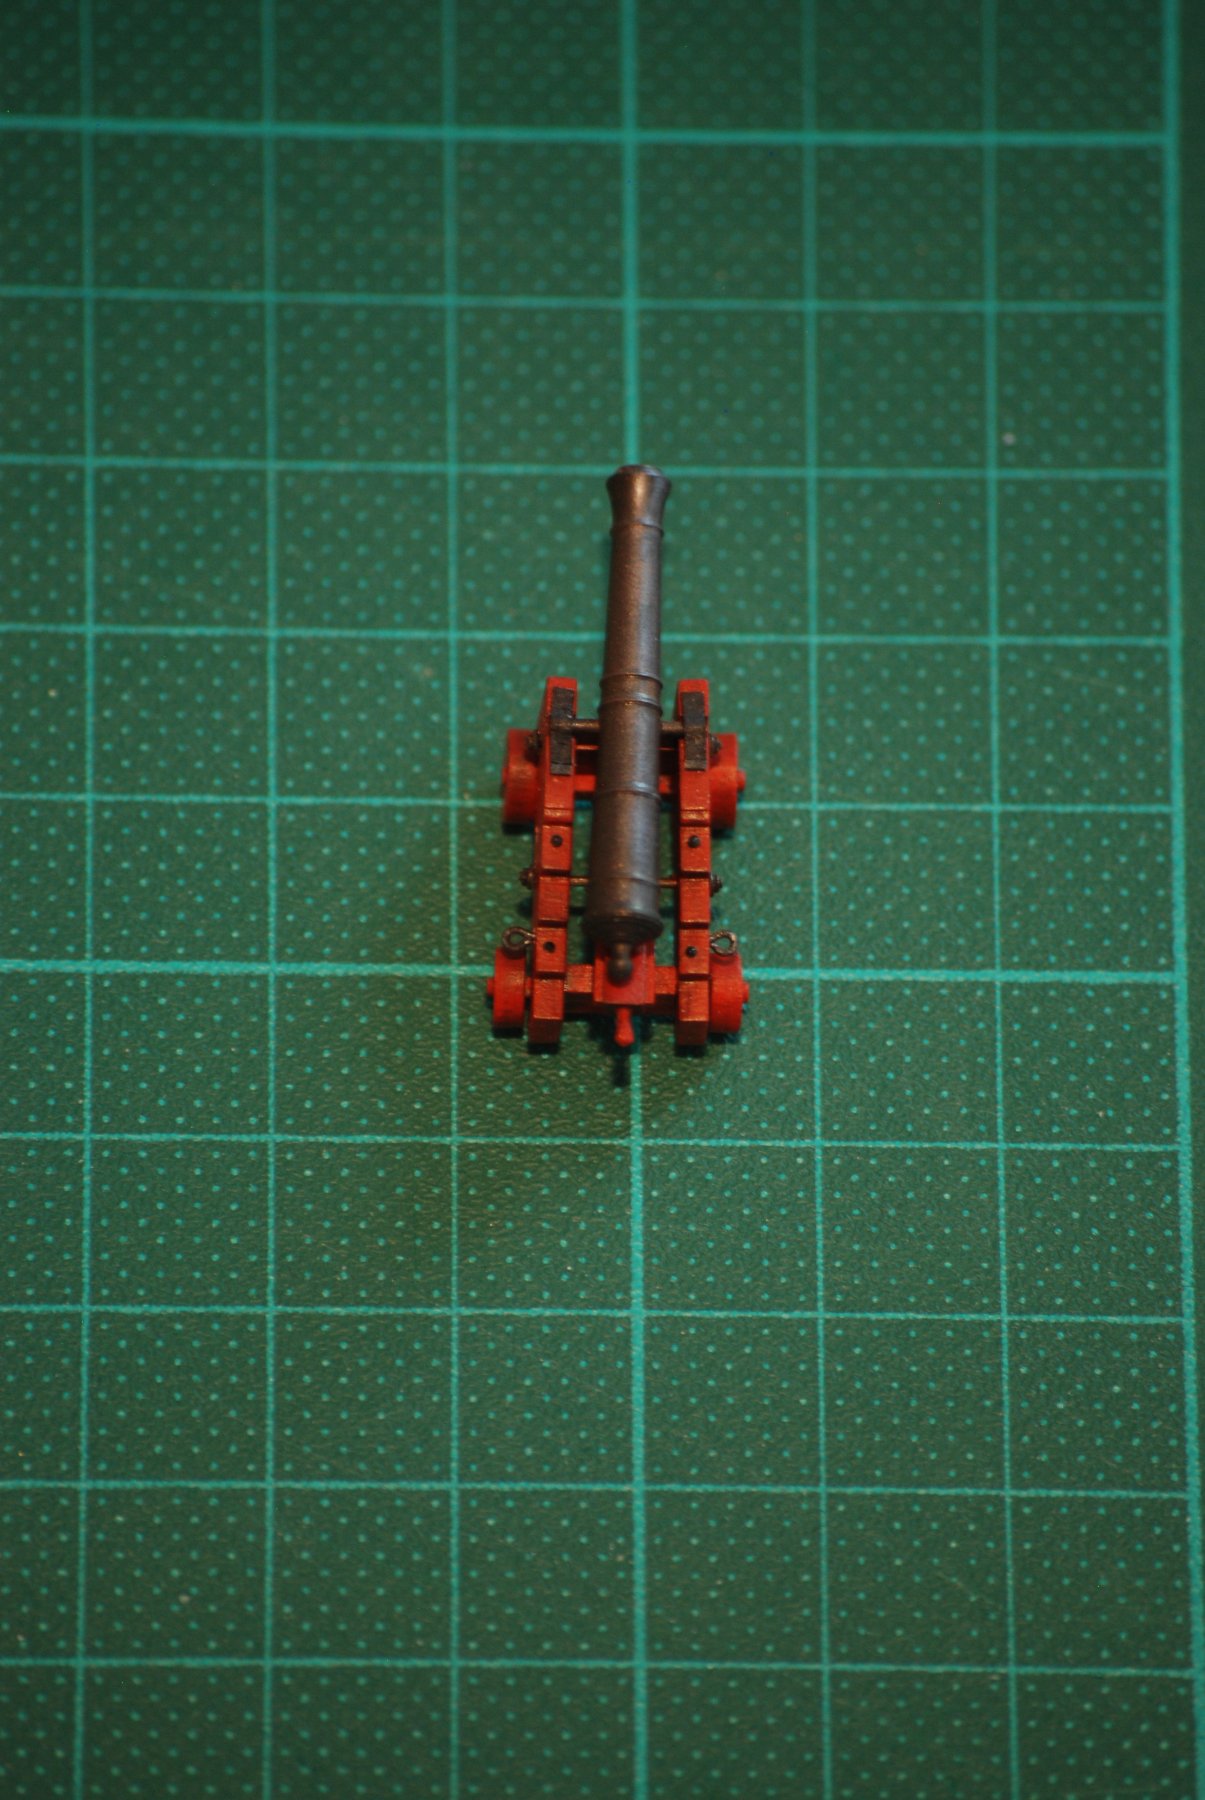
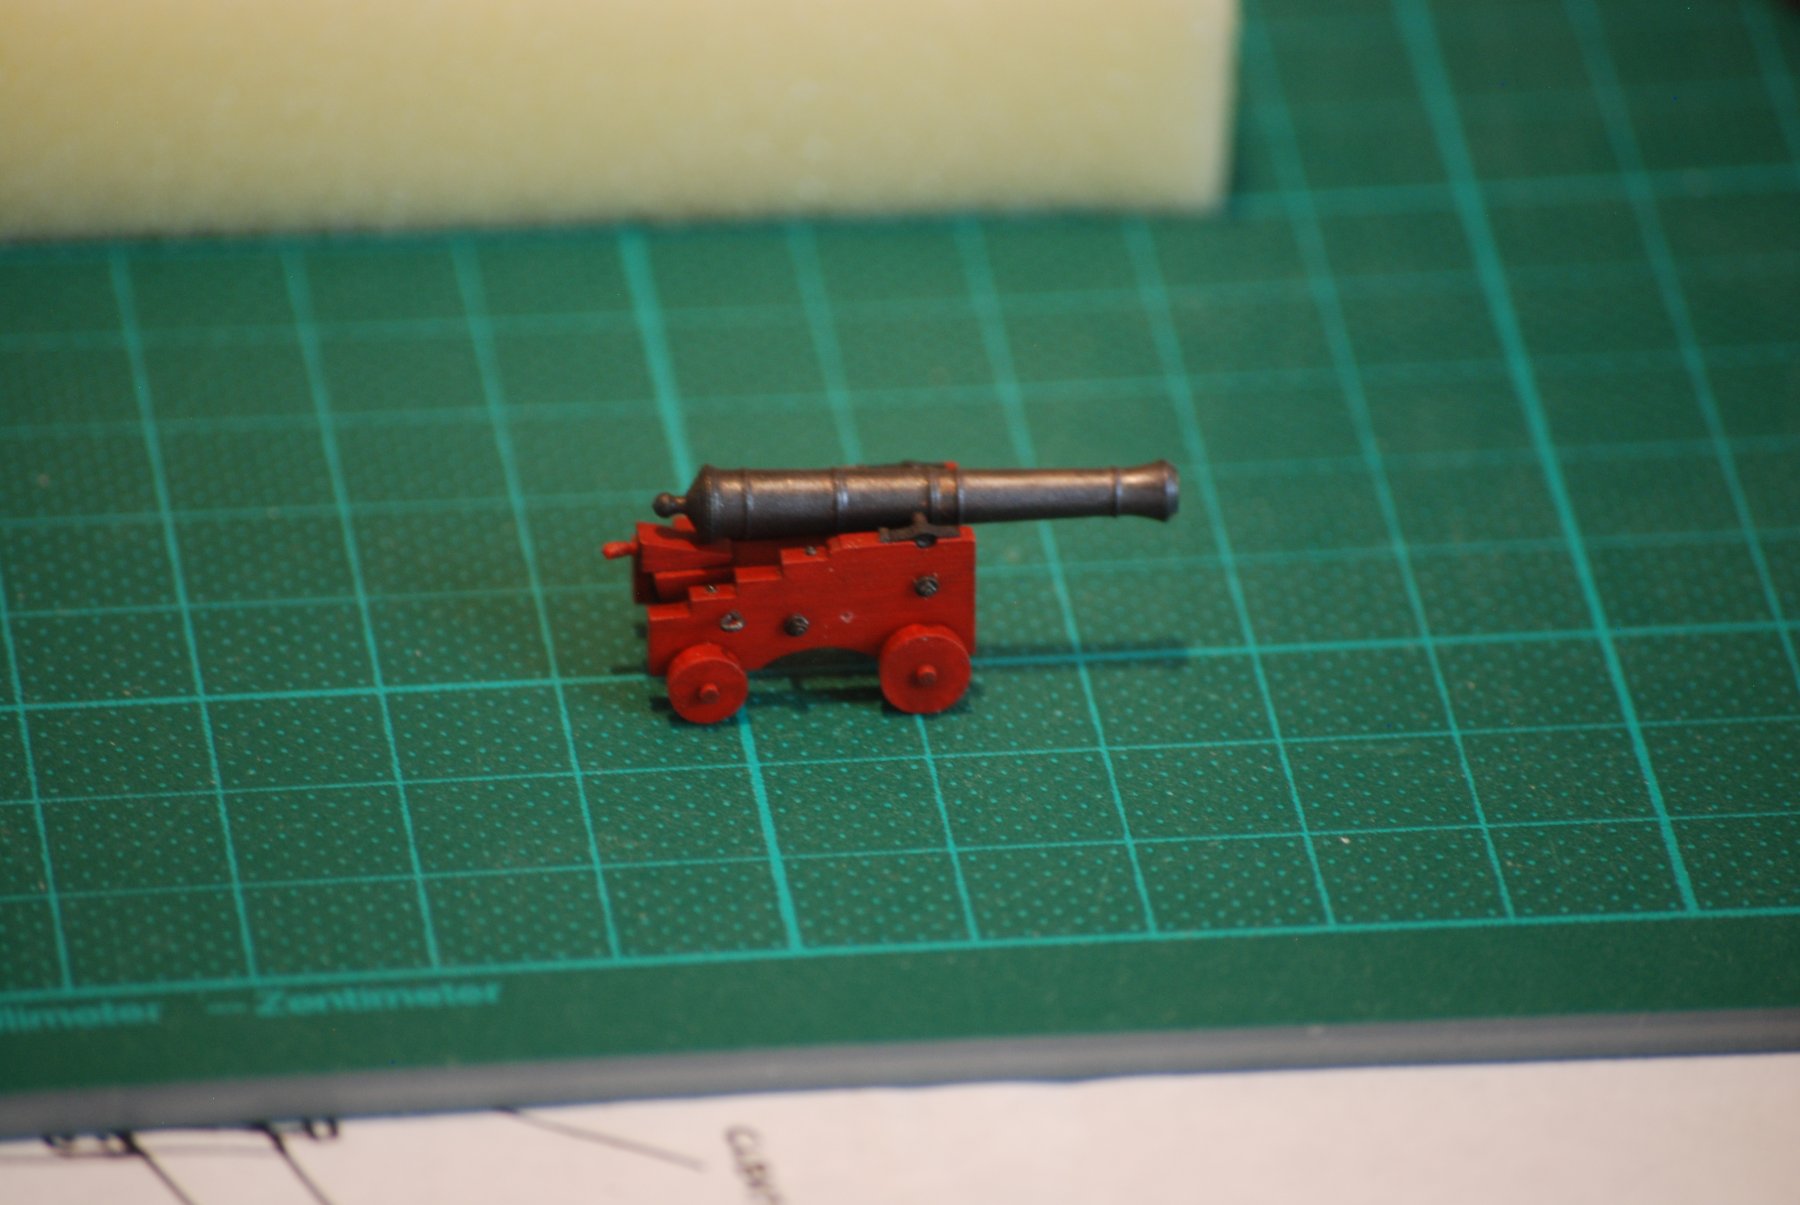
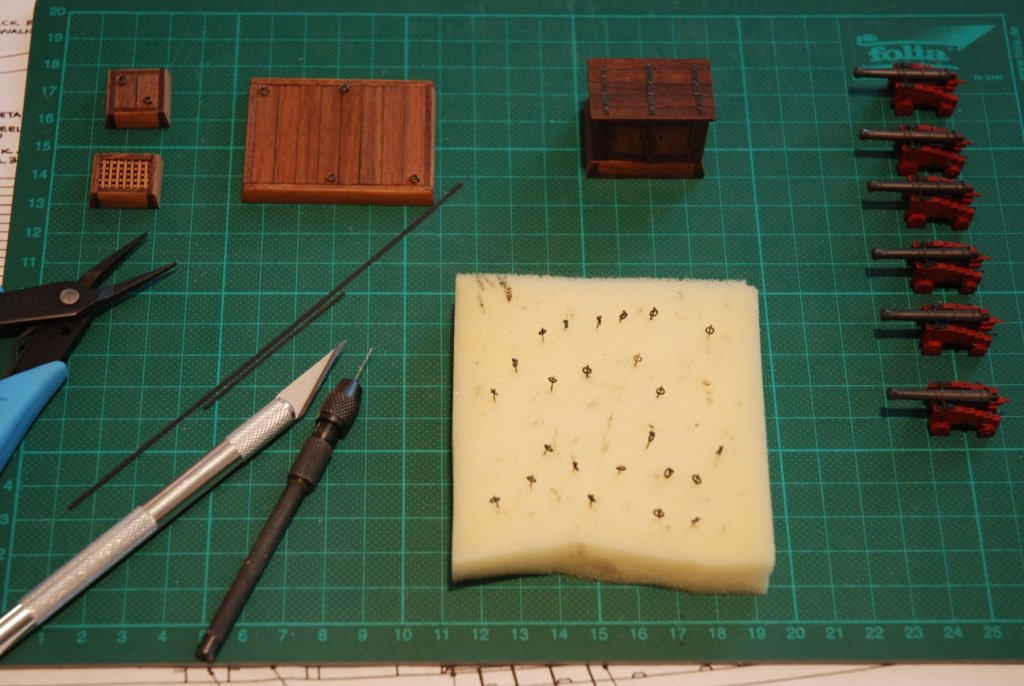
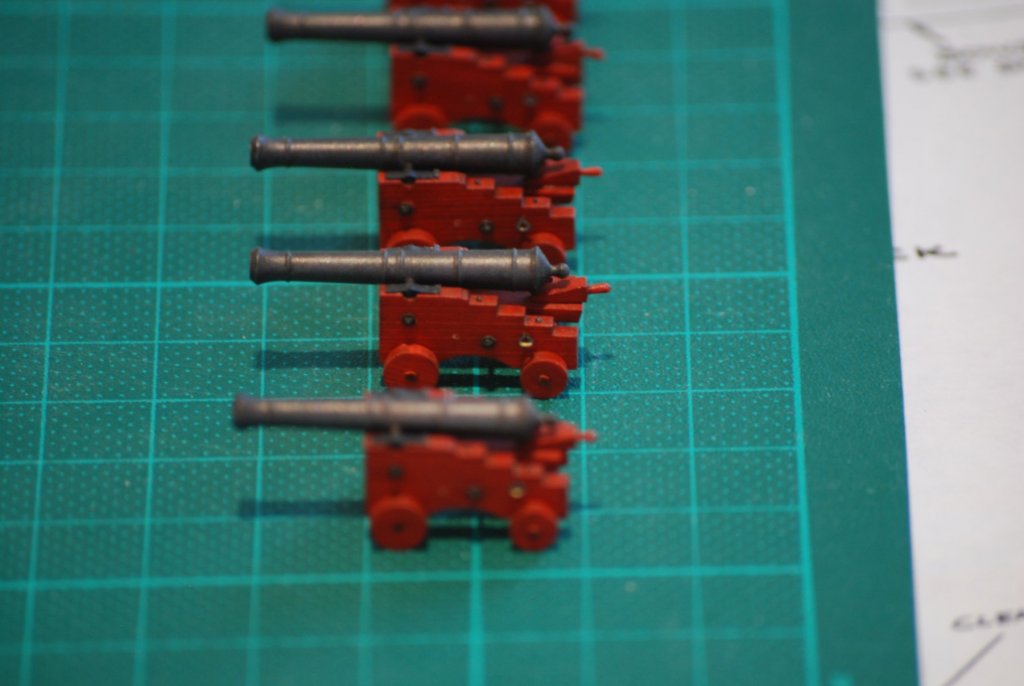
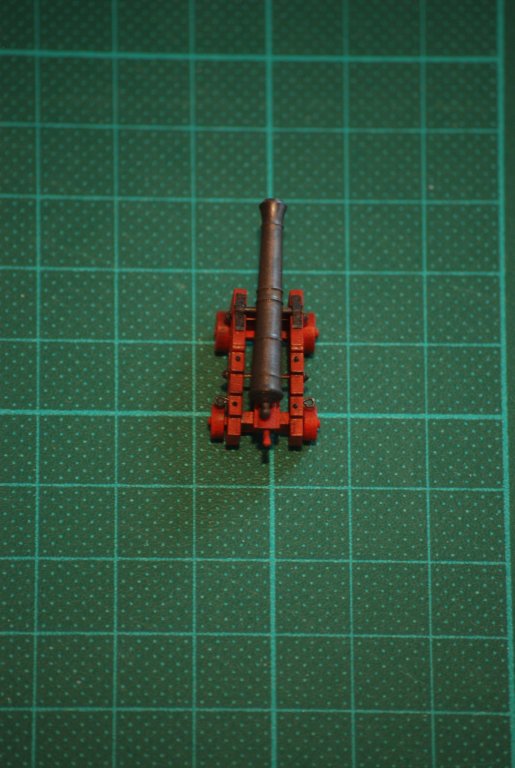
Back from the holidays. My daughter is returning to school and my son is still in the swiss army for his obligatory service. Back to the workshop. All guns are now completed. It was really a part of pleasure. Very pleased with the quality of the guns from the Syren Ship Model company. Thanks Chuck. Now it's time to finish the hull...


- 164 replies
-
- 14
-
-
- first build
- model shipways
- (and 2 more)
-
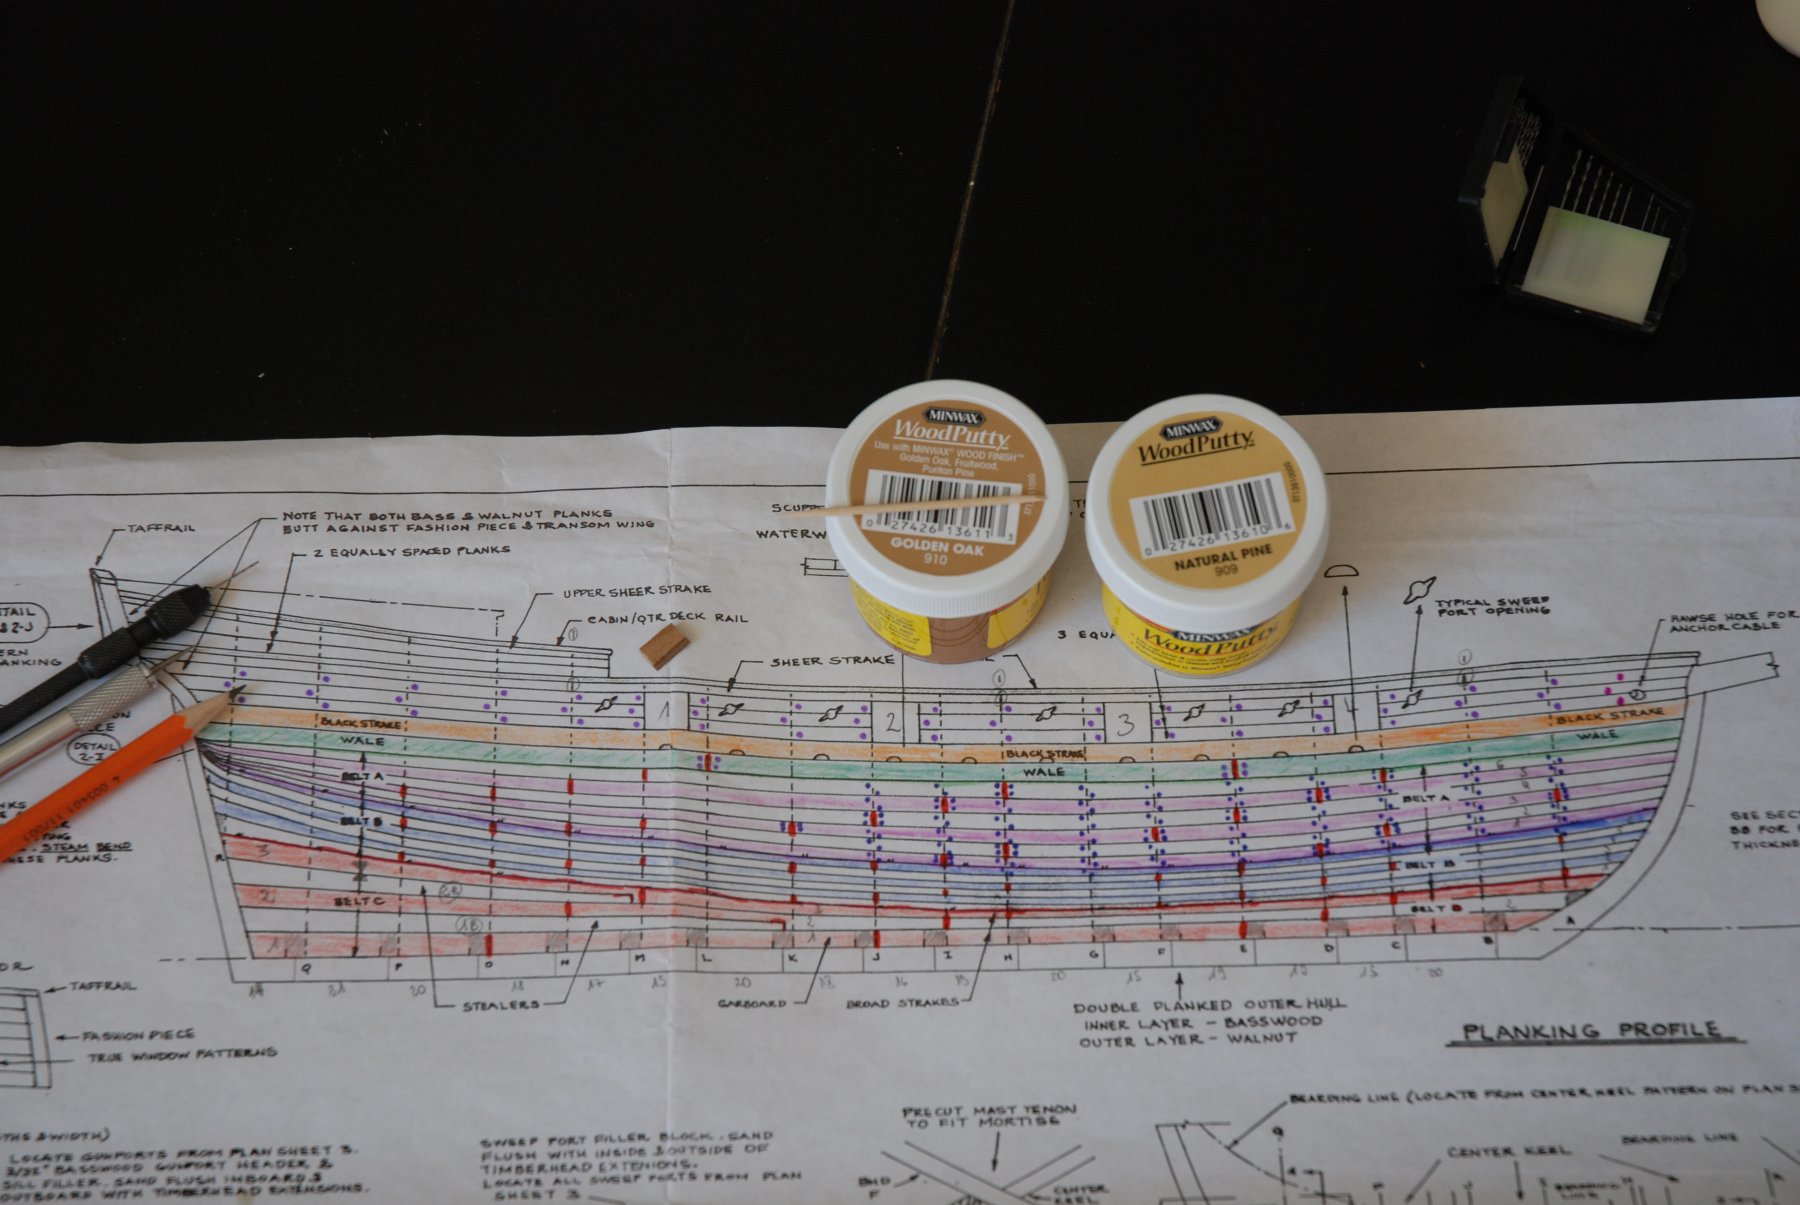
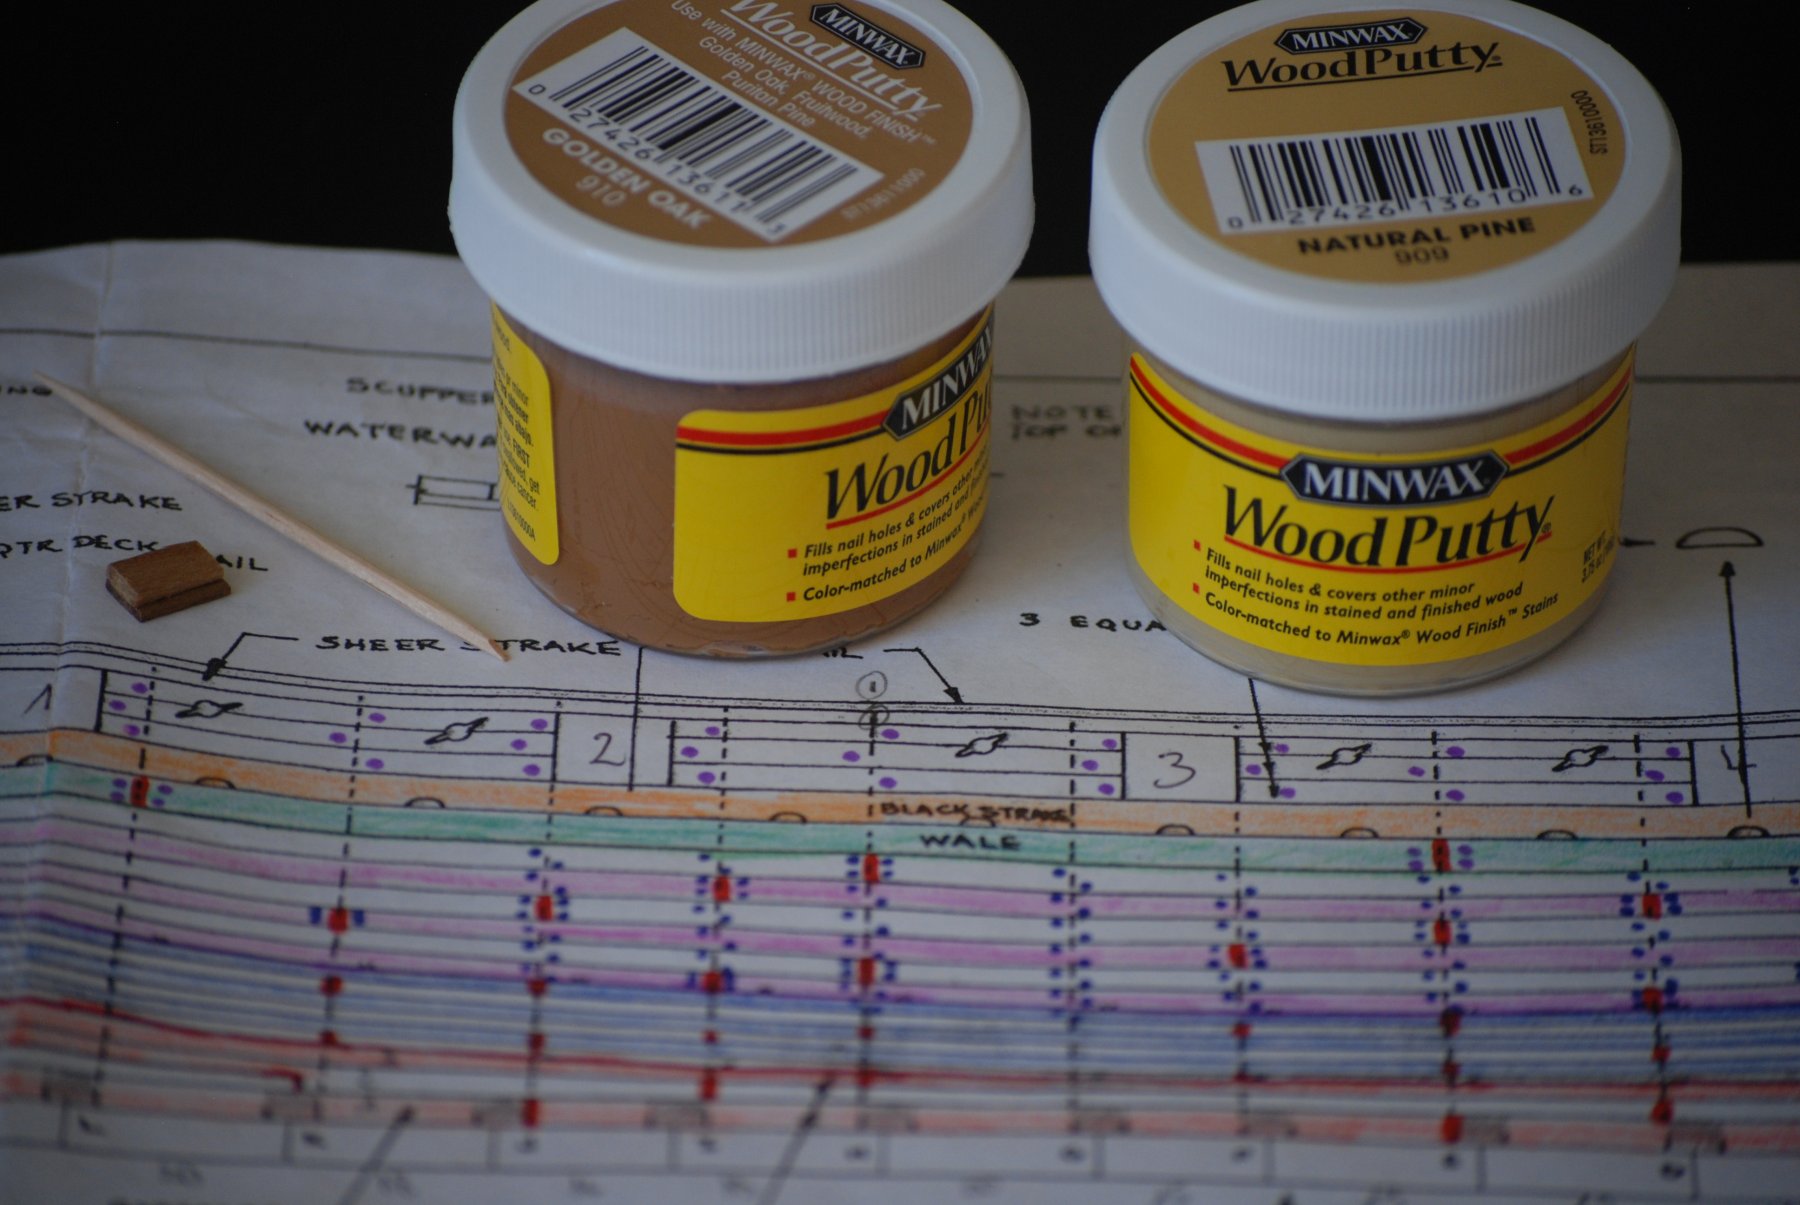
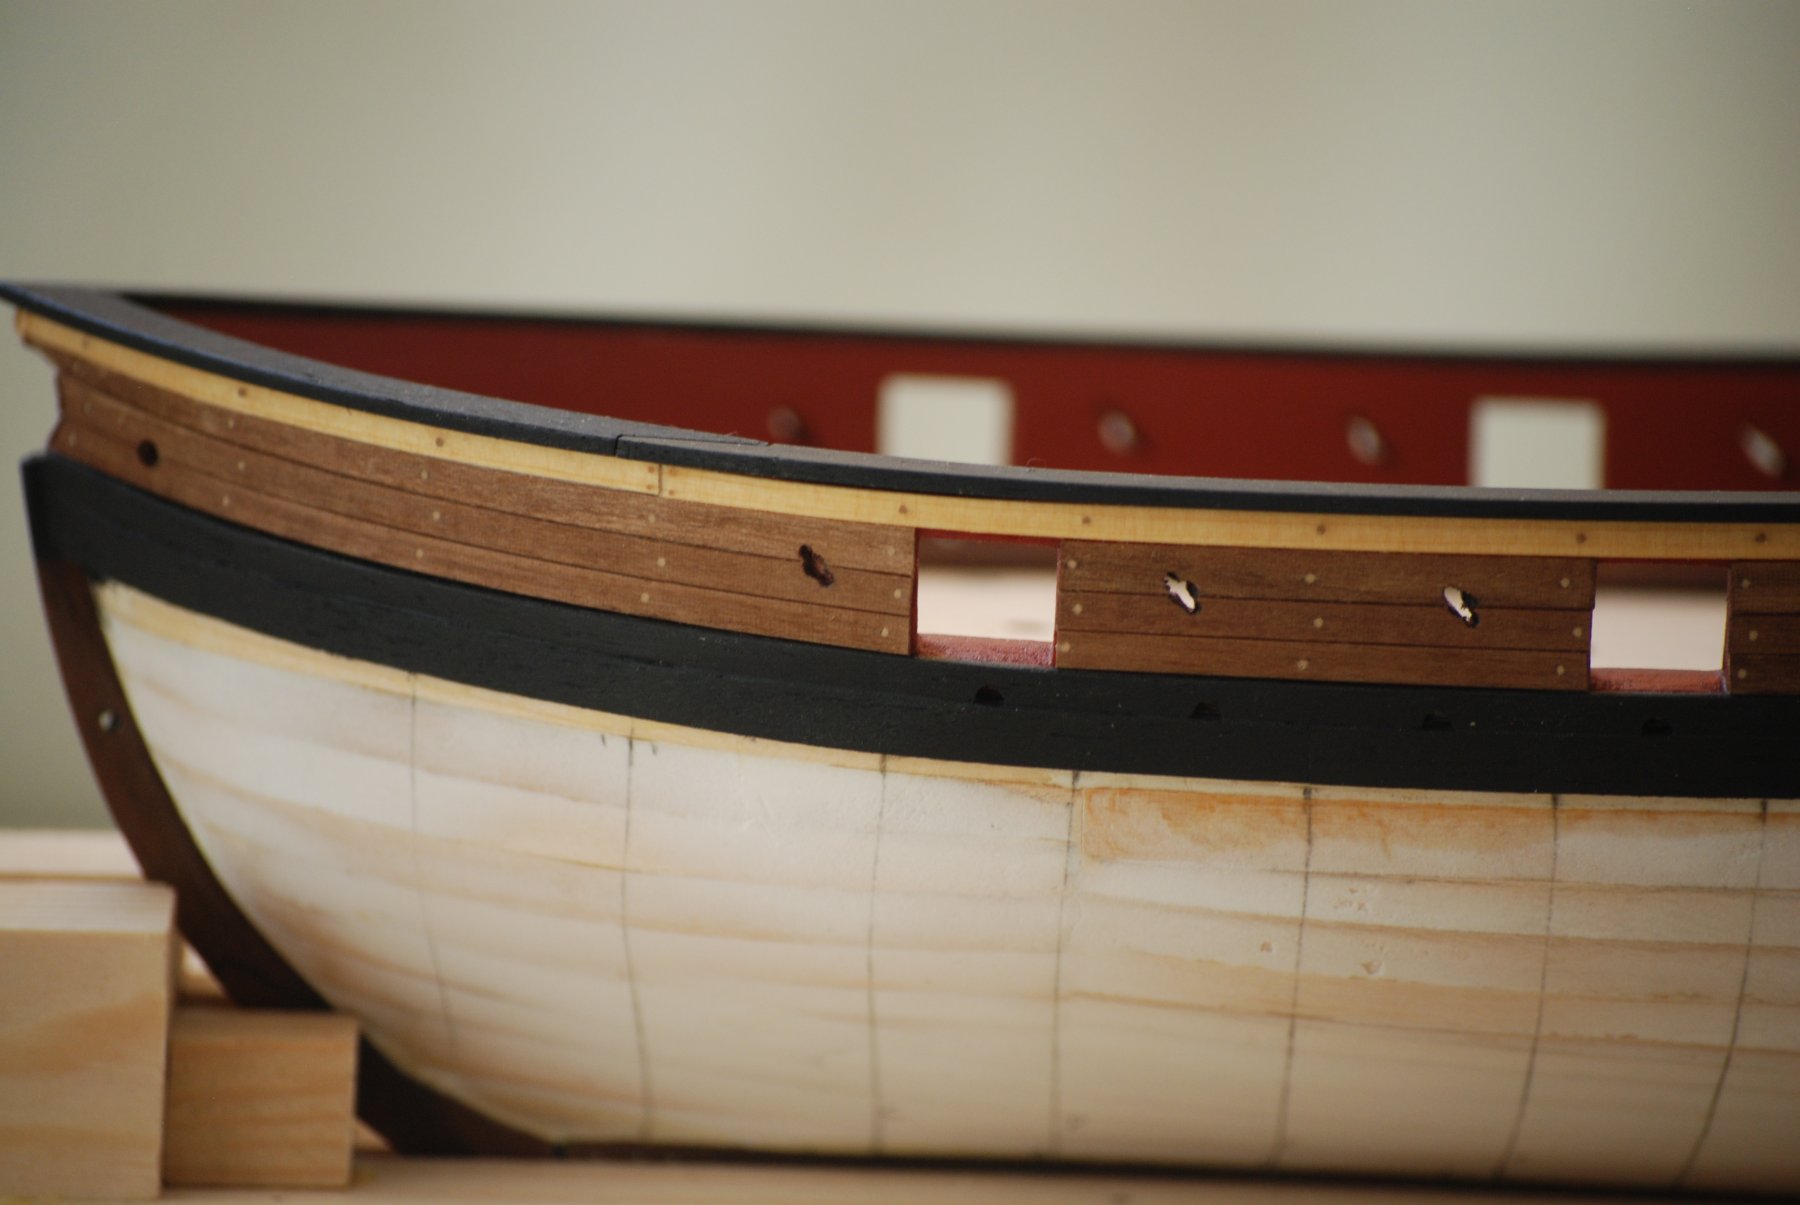
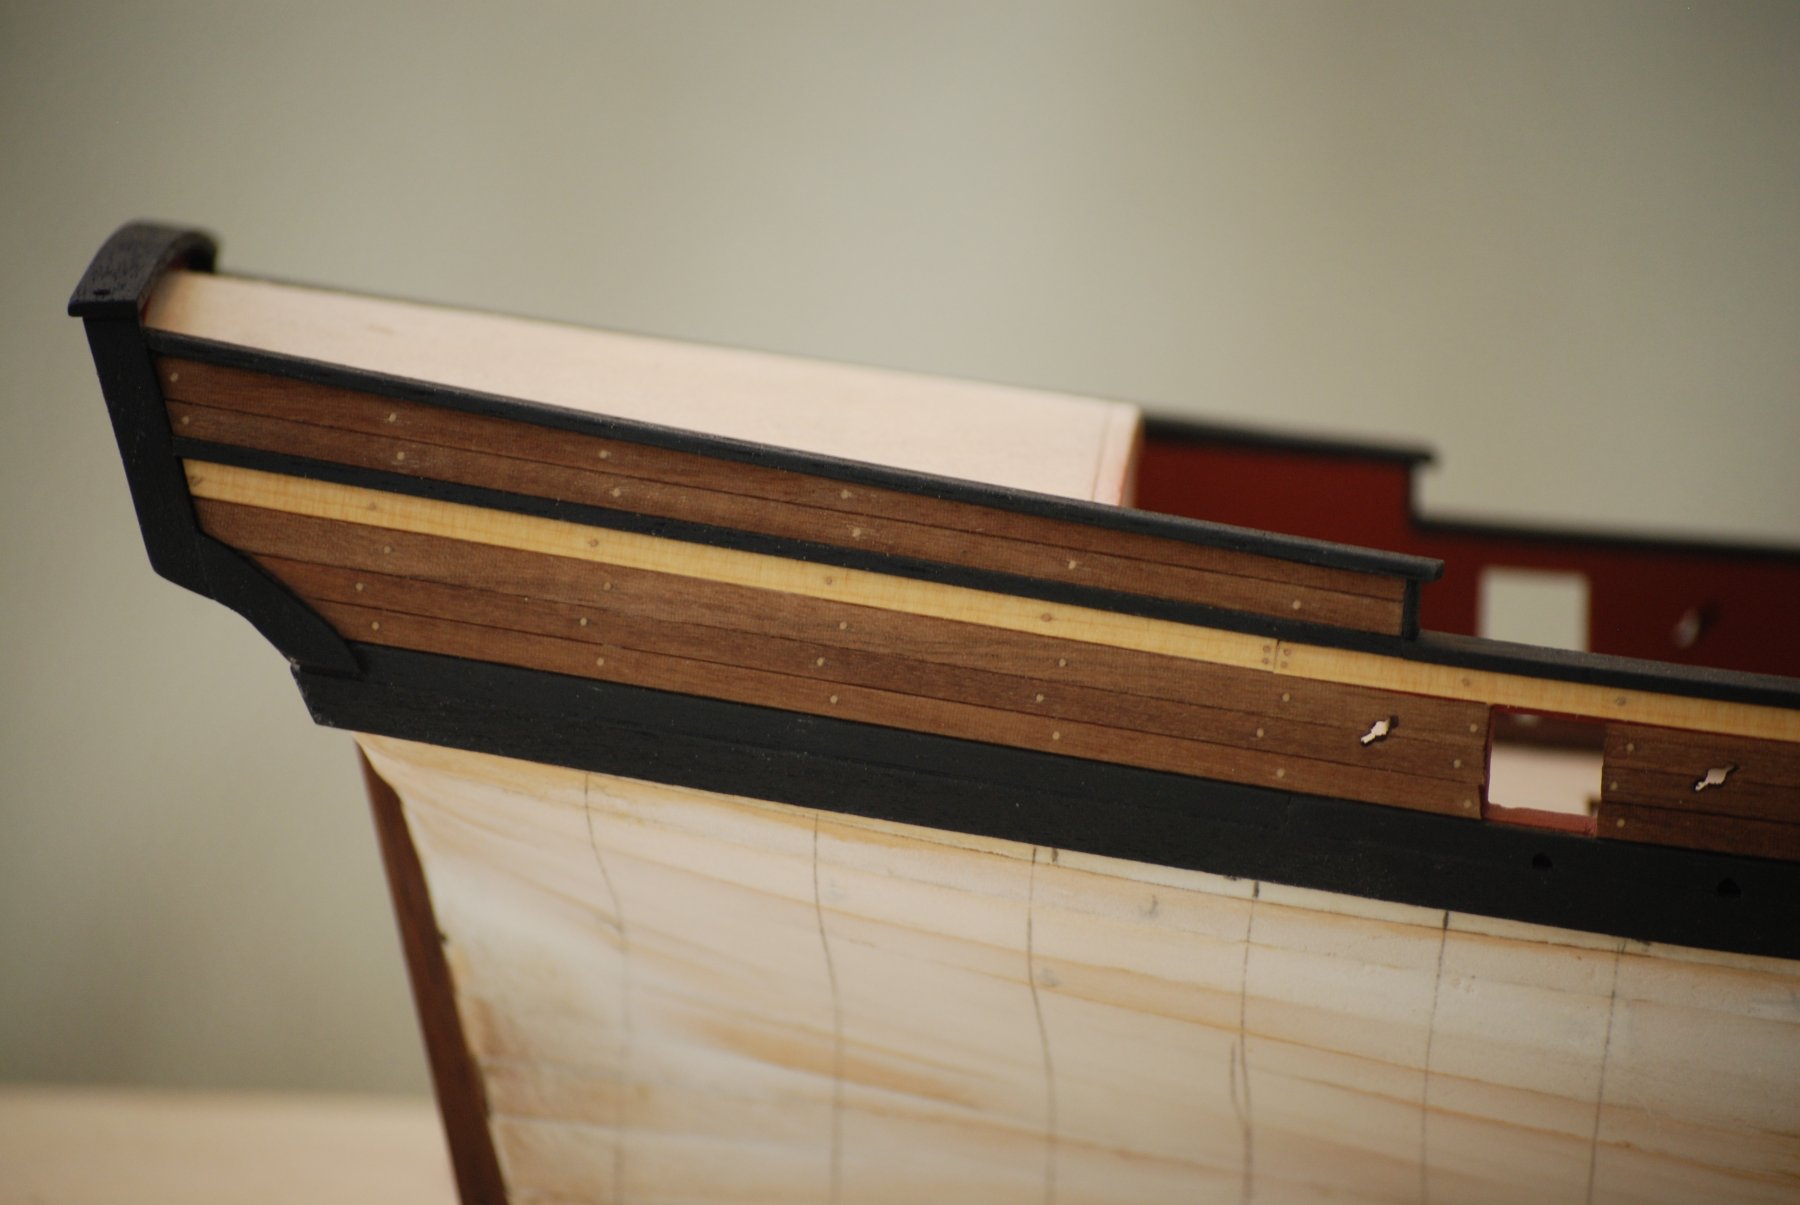
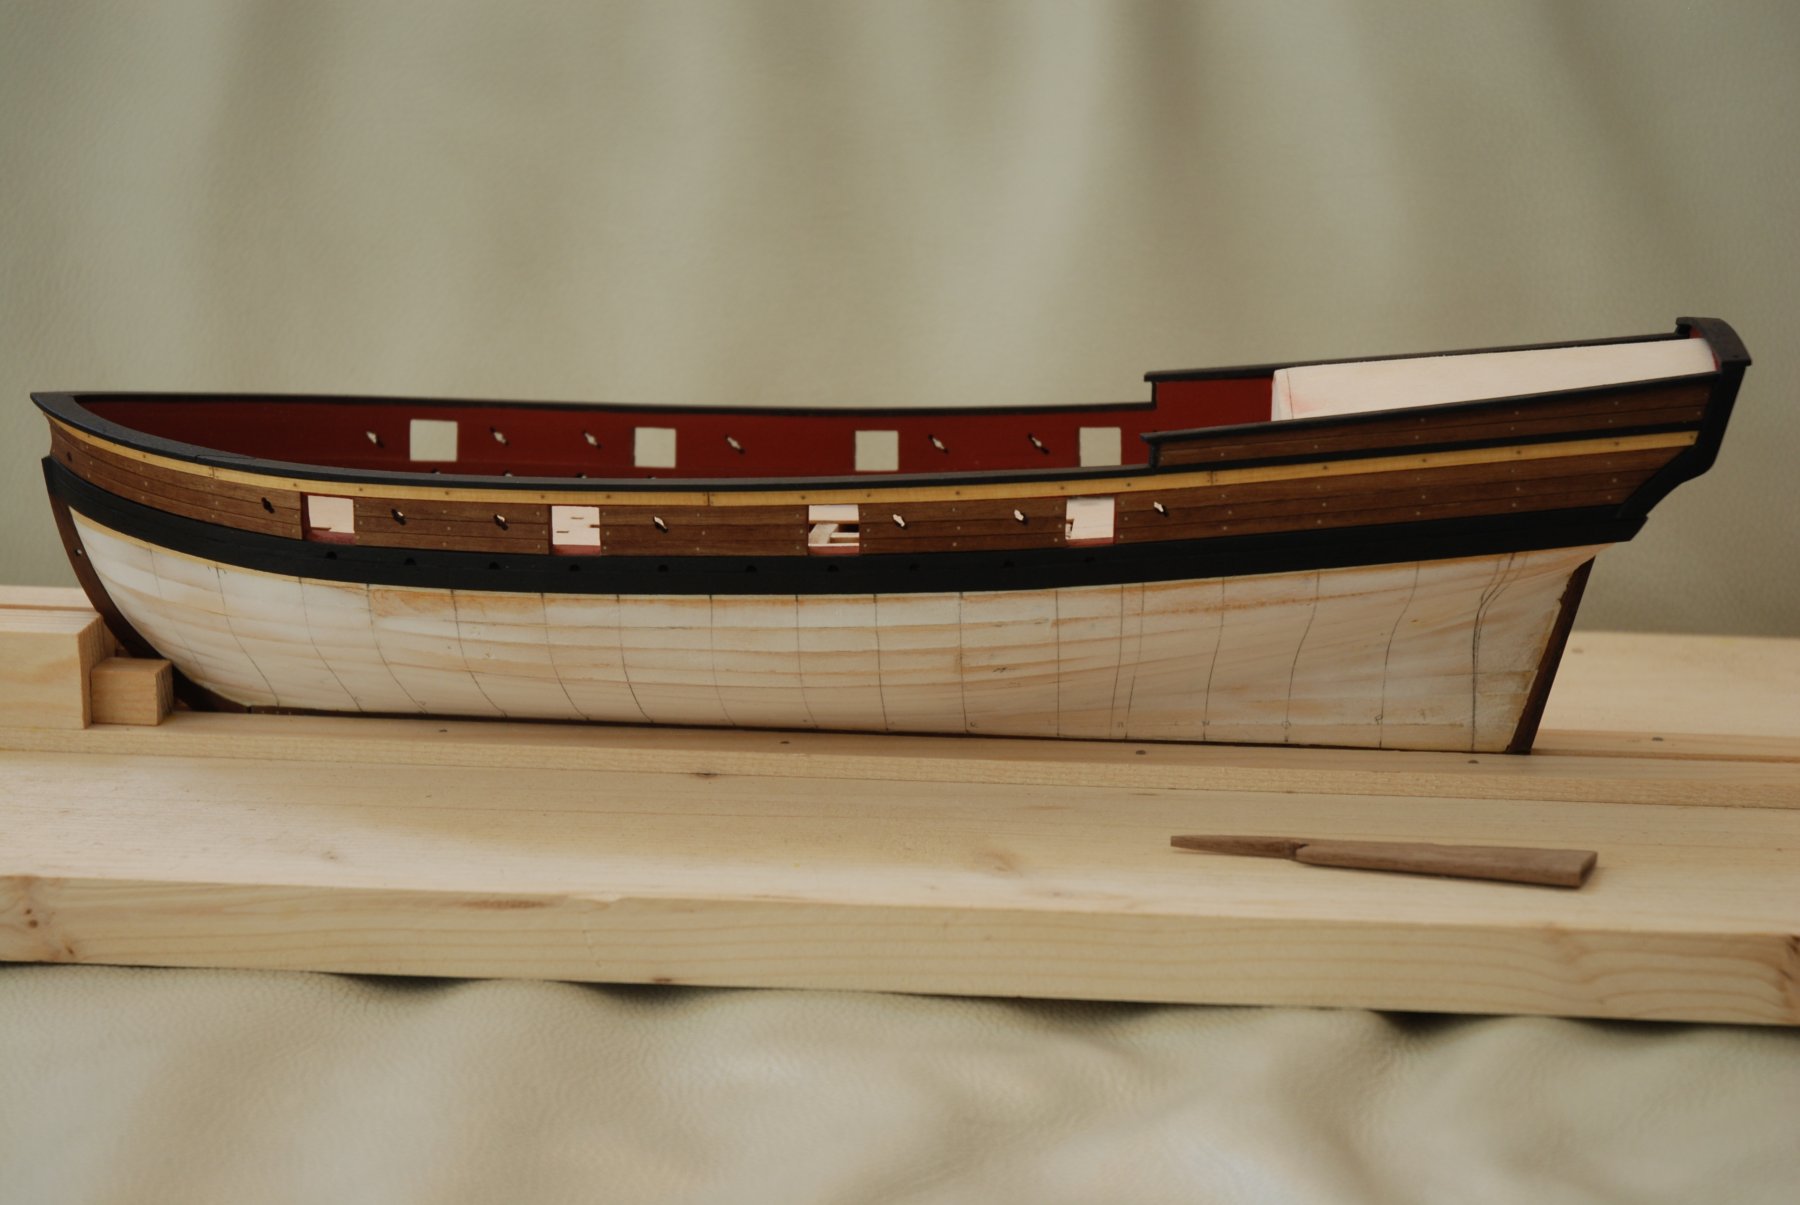
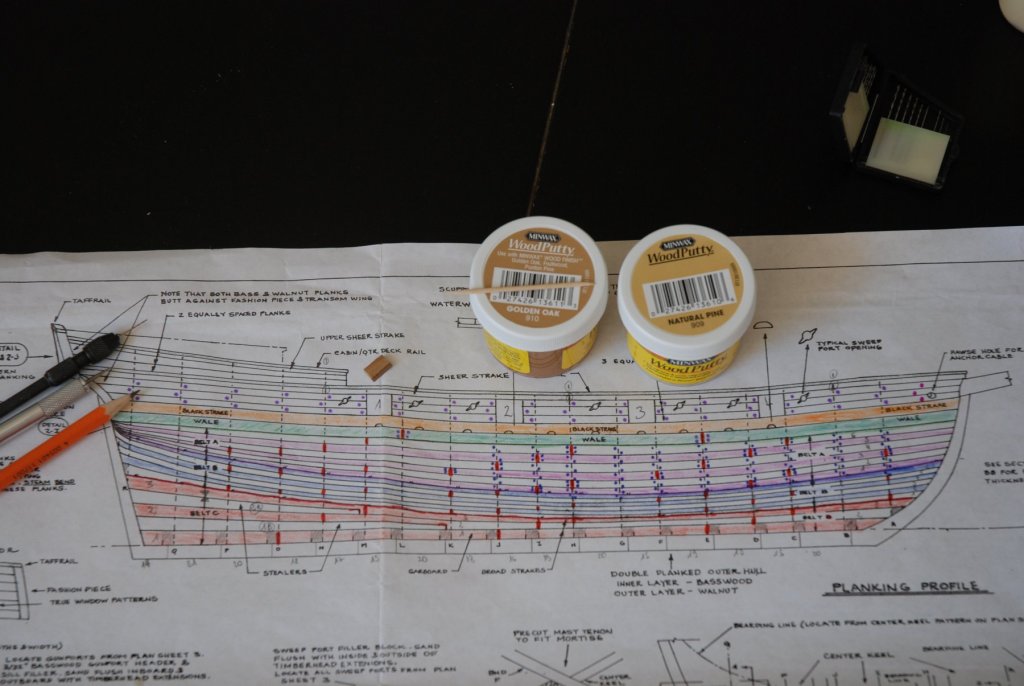
As I was on the way of trenailing on the queen Anne barge, I decide to continue the same job with the Virginia Sloop. But this time, I try to apply the method described by Chuck in the Cheerful instruction manual. For the schema, I referred to the photos in Clayton A. Feldman's book 'Modeling an armed Virginia Sloop'. This book is truly a source of first rate information ! For the choice of the color of the wood putty, I hesitated between two shades: Golden oak or Natural Pine. Finally, I mixed the two shades in equal parts to obtain the color that seemed to me the most balanced. In order to better position the holes, I recovered the little jig used when working on the queen barge. I simply cut it to the length corresponding to the height of the gun ports. The method is simple: using the little jig, I mark the location of the future holes with the needle holder. The holes are drilled with a 7 mm drill bit. I round the hole with the tip of a sharp pencil. The there is more to fill the cavity with the wood putty using a toothpick beveled.


- 164 replies
-
- 10
-
-
- first build
- model shipways
- (and 2 more)