


Antonio Vasquez
-
Posts
108 -
Joined
-
Last visited
Content Type
Profiles
Forums
Gallery
Events
Posts posted by Antonio Vasquez
-
-
Don’t drop them! Mine fell off the desk today tips first into a small rug. They were stuck and I had to wiggle them a bit to get them out of the rug. At a distance of 28” those tips went through the rug , hit the cement and bent. I had to sand the bent tips and reface them.
- mtaylor, monkeysarefun, Canute and 1 other
-
 4
4
-
I’m pretty sure I have that same set. Ordered them a few months ago. I love these tweezers, way better than any I was using before.
- Canute, monkeysarefun, pythagoras and 2 others
-
5
-
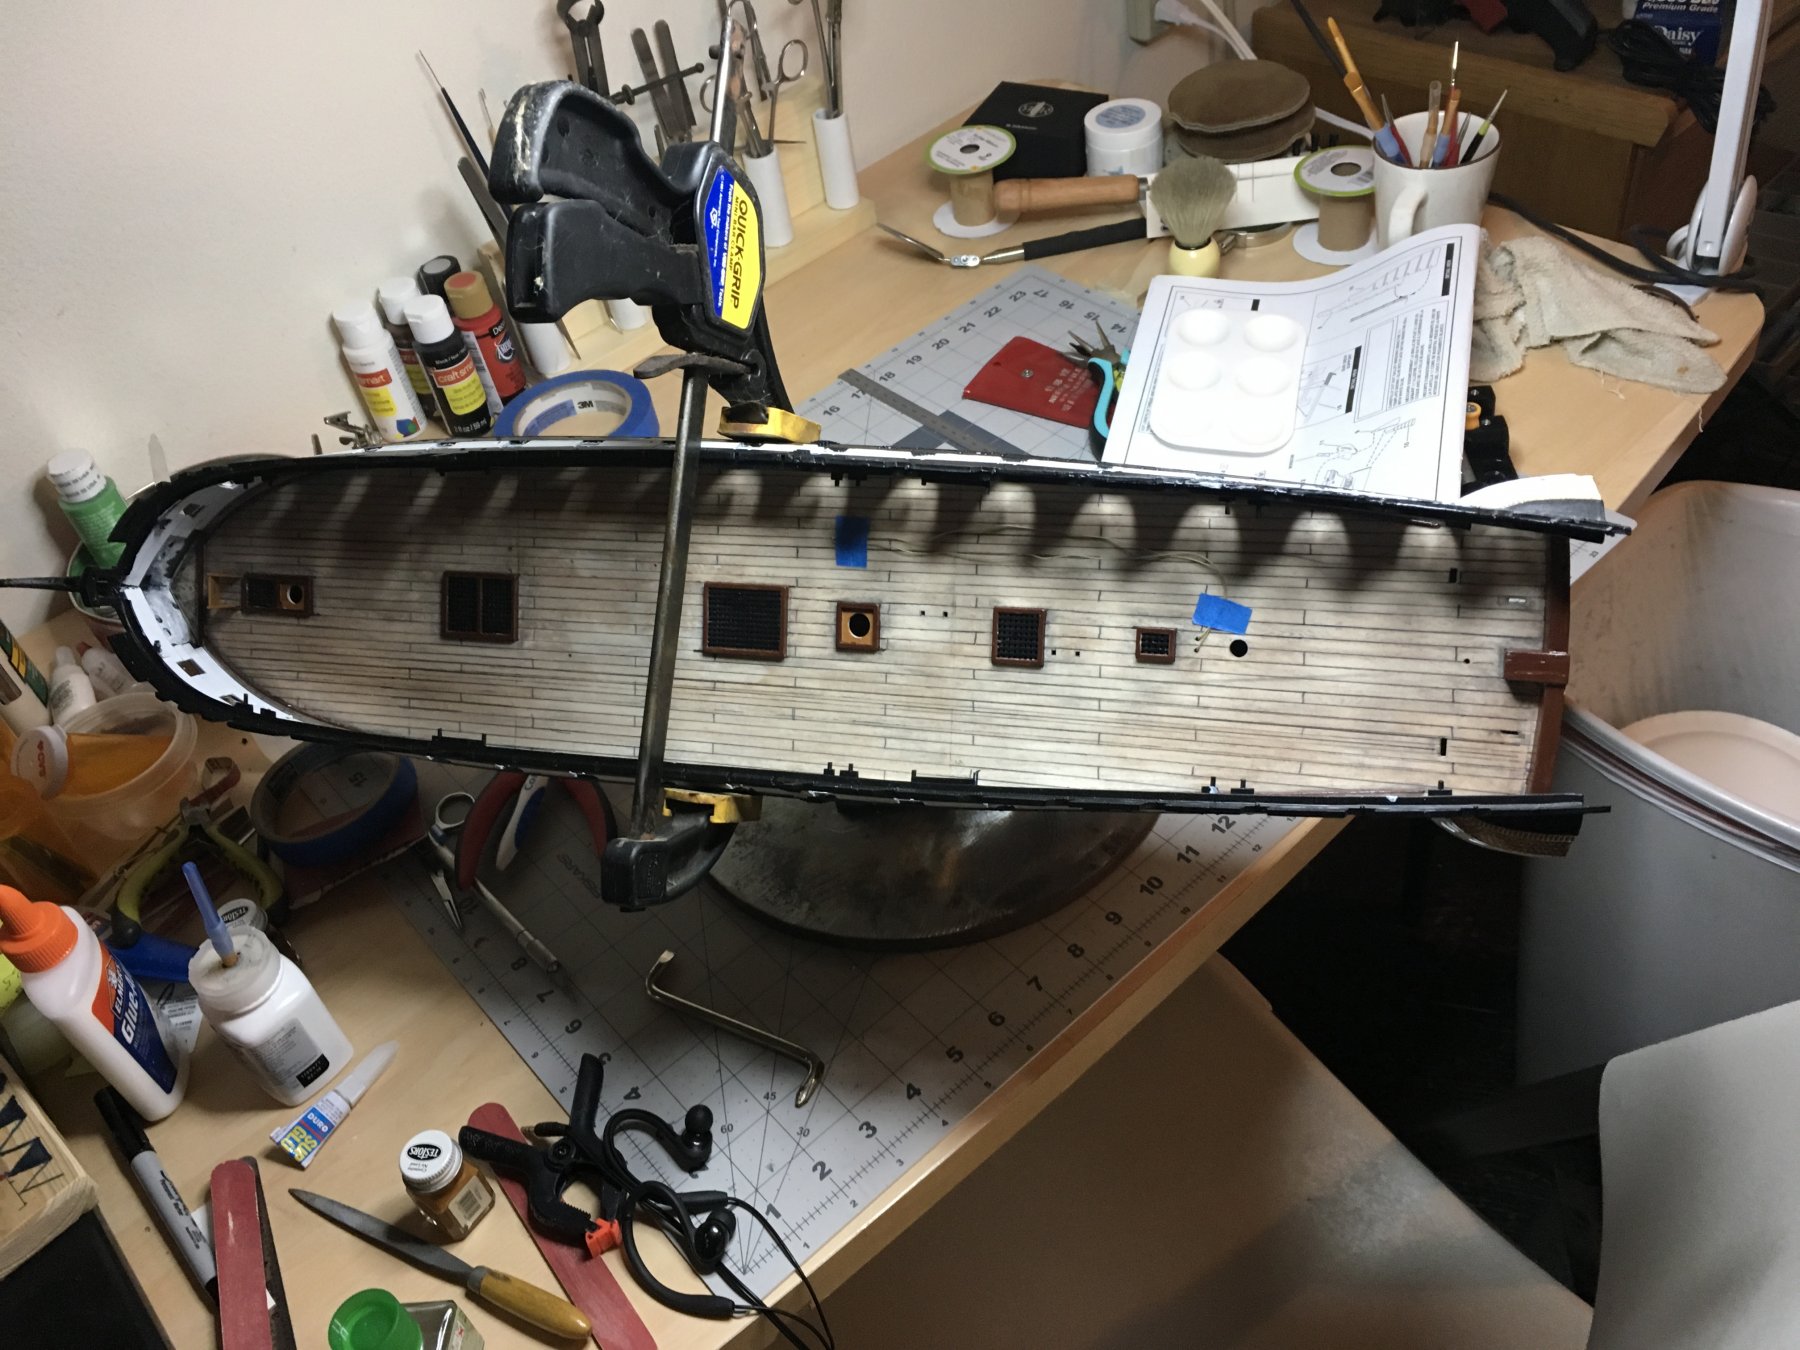
Getting the gun port covers on. I can’t wait to see how many I break off before I am done with this build.

- russ, popeye the sailor and coxswain
-
3
-
I’ve never tried an airbrush before and I have a new one coming in the mail next week. I was wondering how much overspray they normally produce? Would it be possible to paint small parts indoors without having overspray getting on other stuff in the room?
-
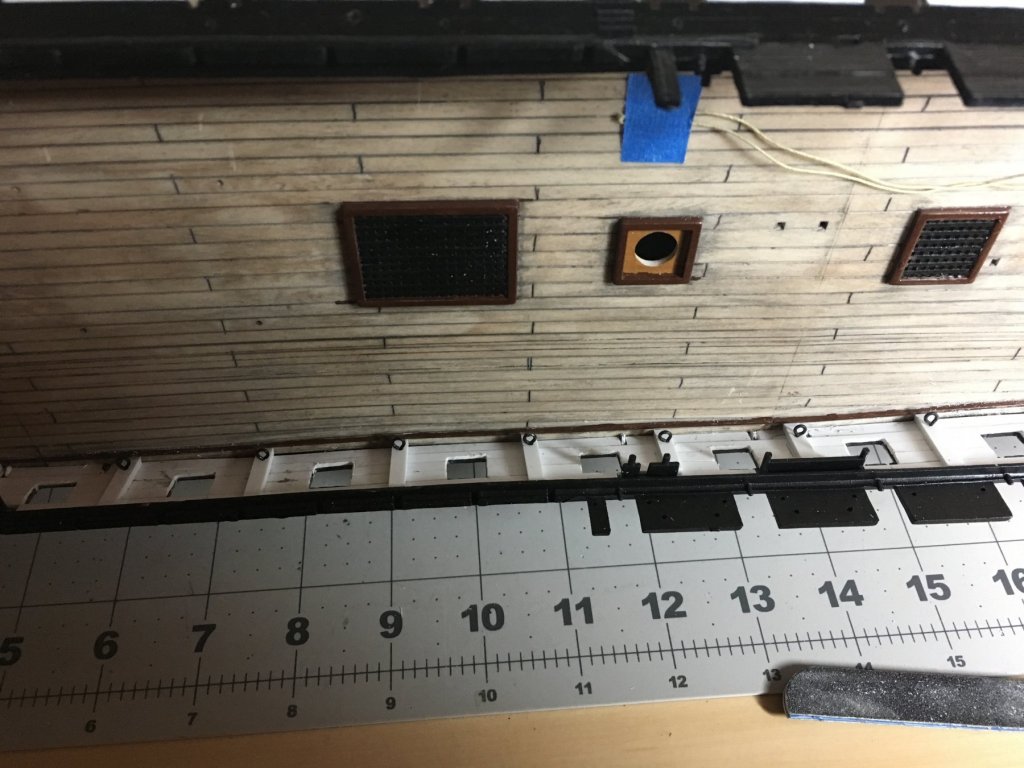
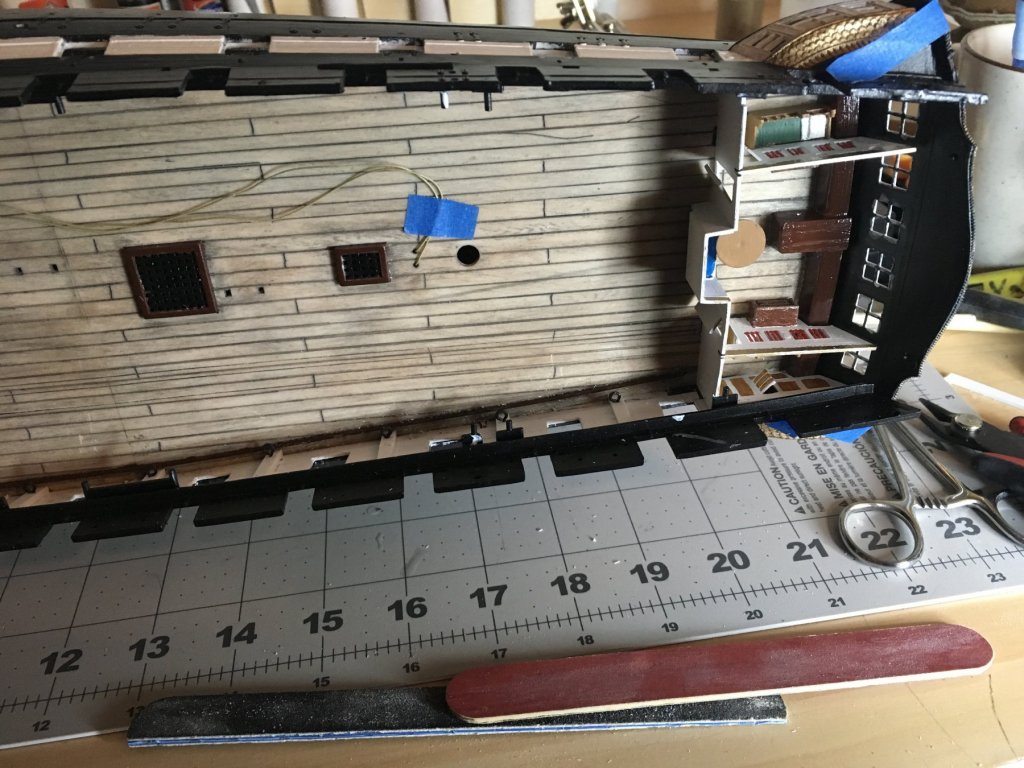
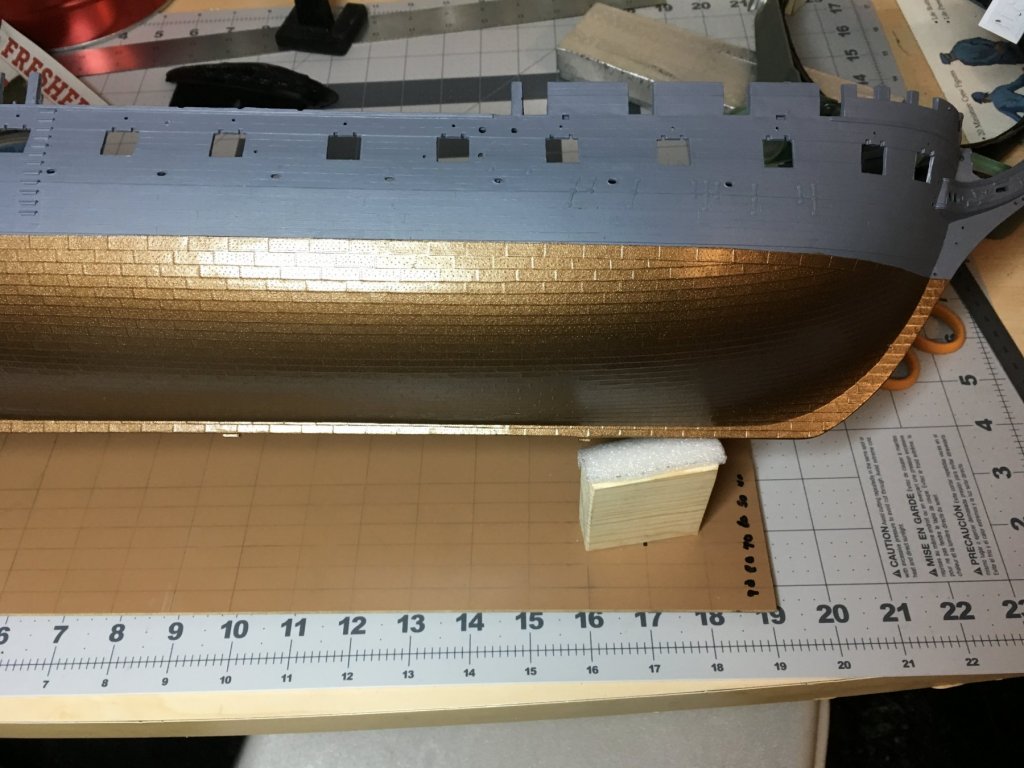
I got a lot of ideas from seeing the way the other builders have done the sides of the gun deck . I try to make those rings as small as I could get them they still look a little large. I think this will work out better than those little pins that were molded into the side of the side of the hull.

- popeye the sailor, Fright, demetri and 1 other
-
4
-
I am having a heck of a time getting the sides to stay glued to the deck. They keep popping out.


-
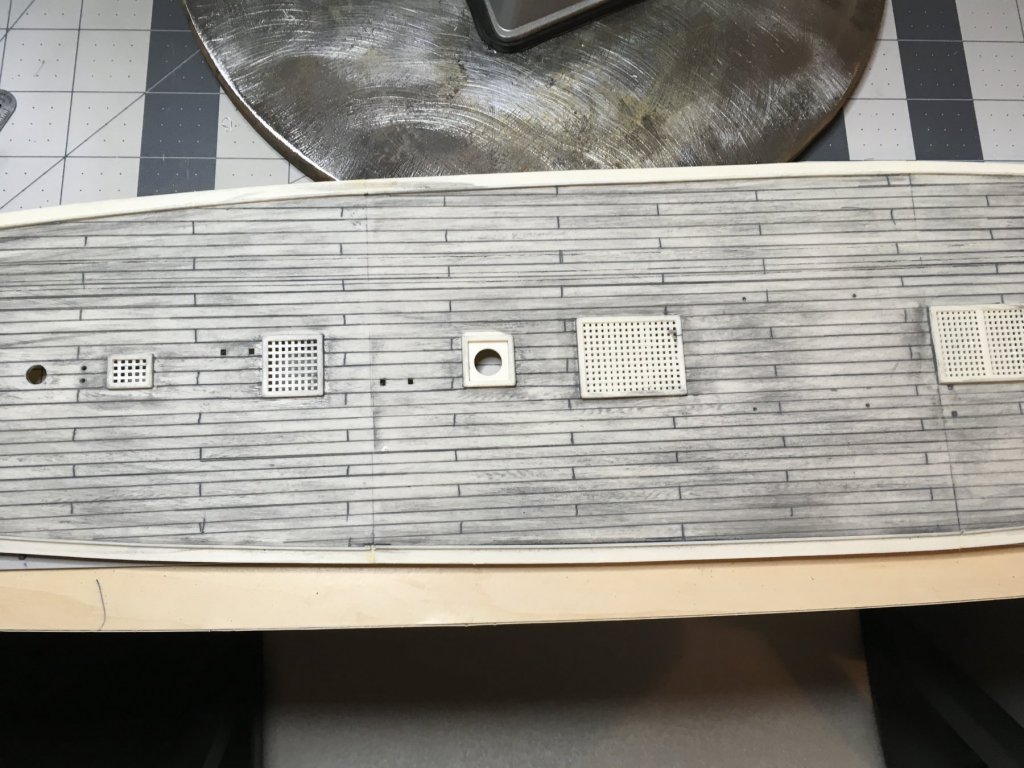
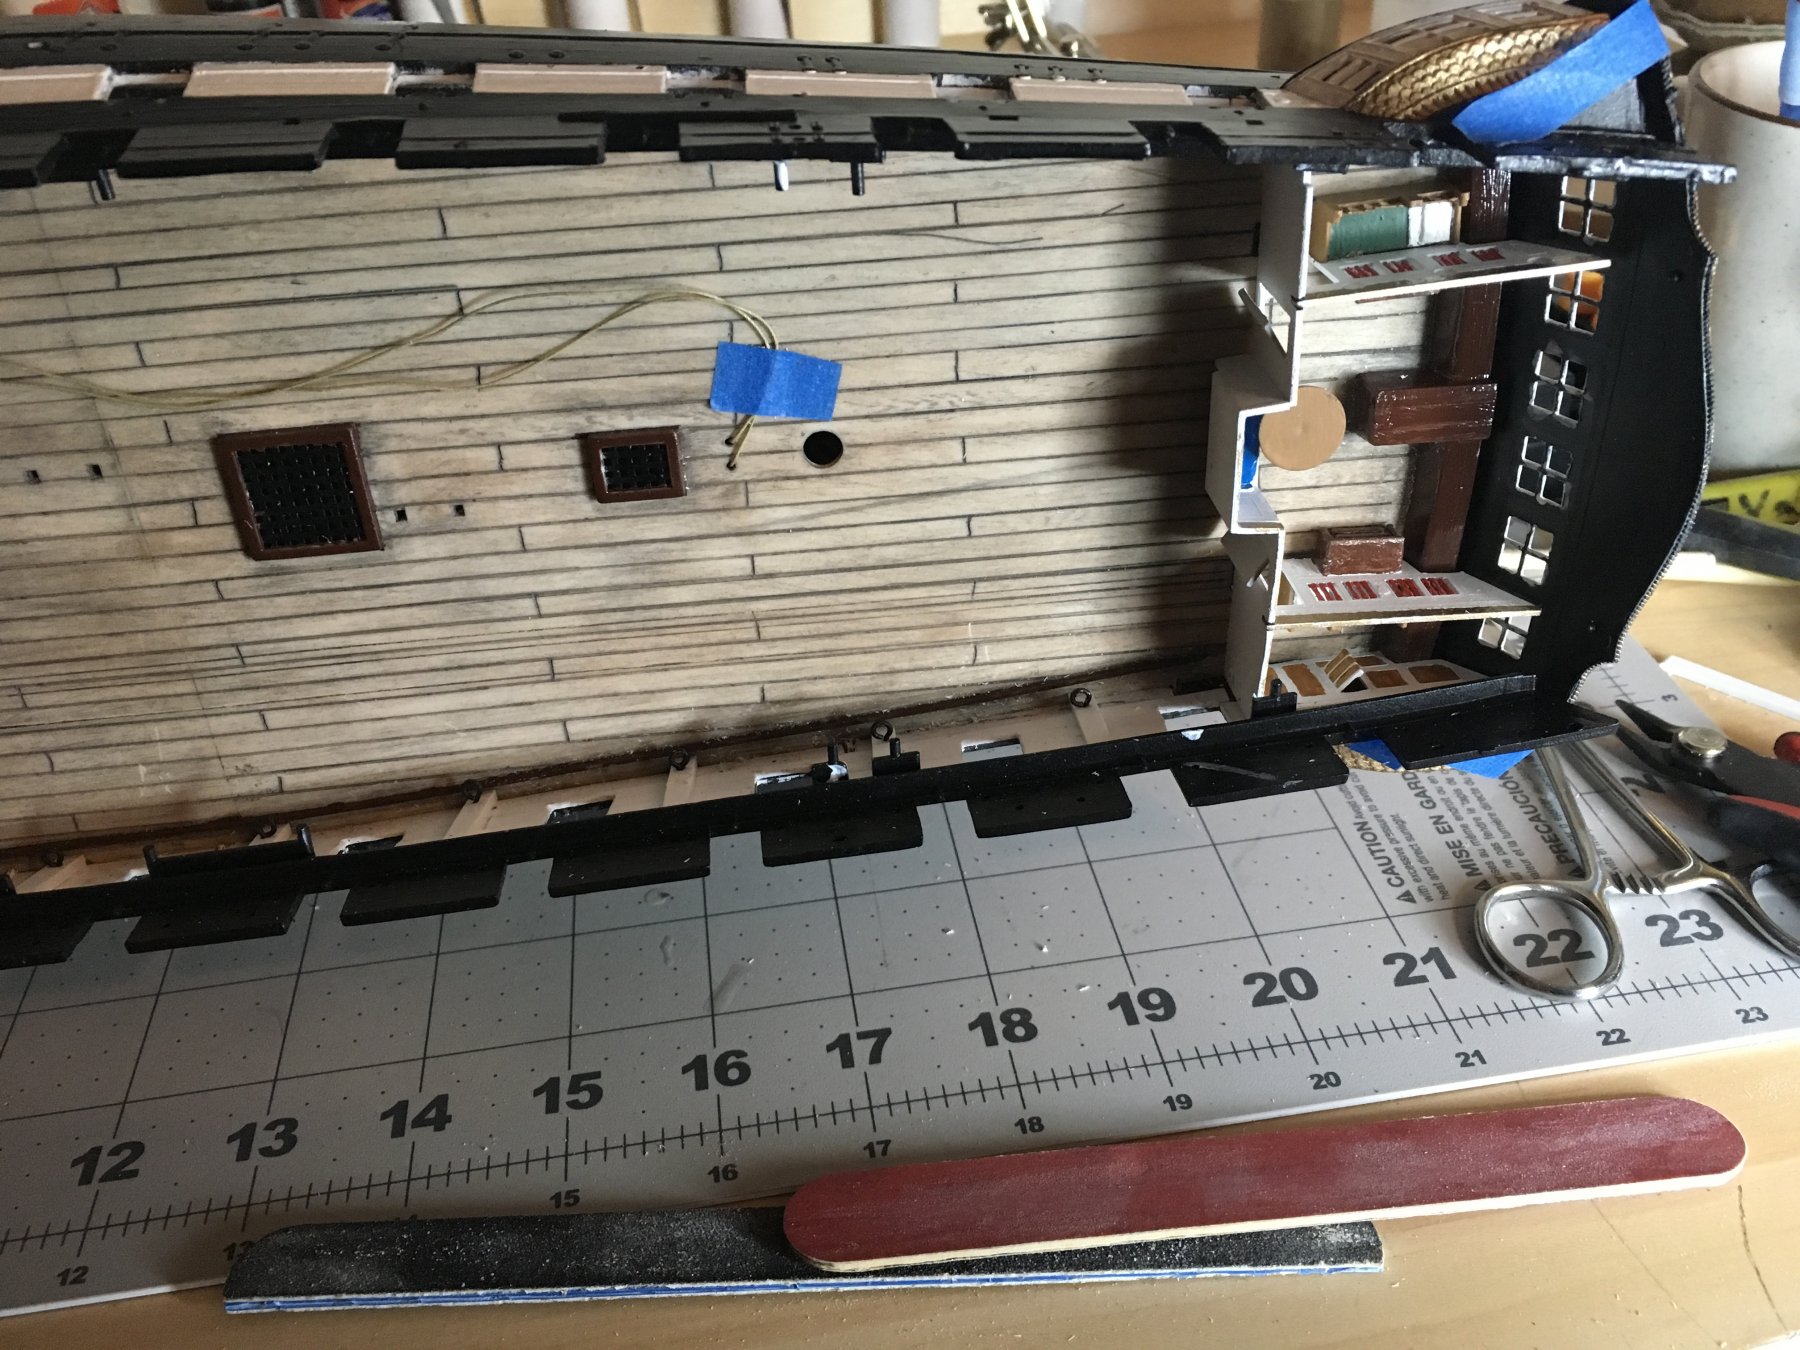
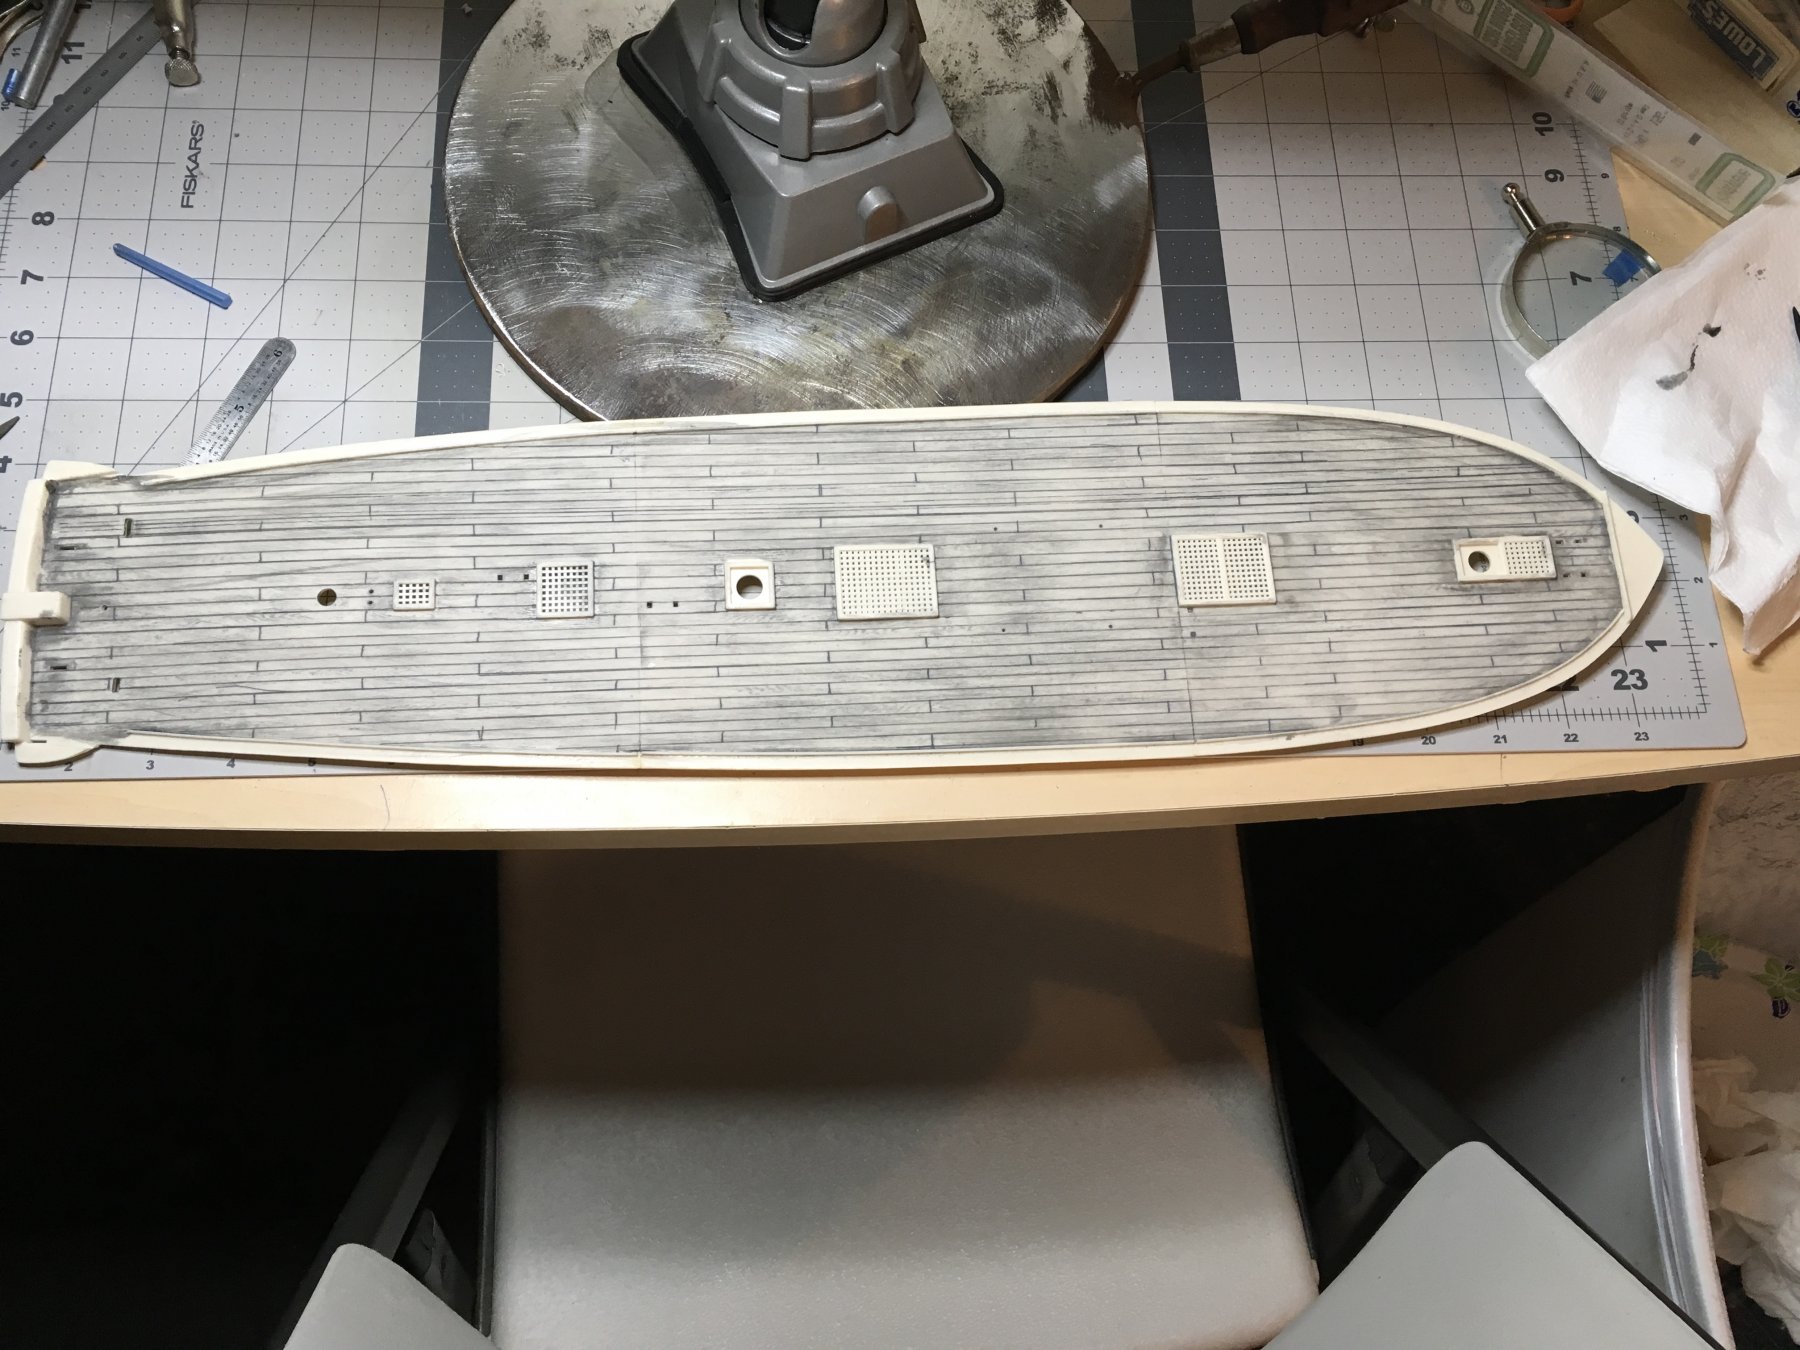
Working on lower deck. Lines were scribed and deck was washed with diluted black paint then light sanded. When I did the Cutty I did the same th ing on that deck except that I went. over the black wash with a brown wash to darken it up. I wasn’t happy with the way it turned out, so I will probability sand this deck a little more and leave it the way it is.

-
-
3 hours ago, jwvolz said:
You are much better off trying to get some proper hobby paints, rather than "craft" paints. They are weak in pigment, and it is also larger in particle size so they just don't lay out smoothly. As you found, they are also thick, and when you have to thin them to brush or airbrush consistency they get weaker still and don't cover well.
I'd recommend Tamiya, Vallejo and Model Master acrylics. All much better options.
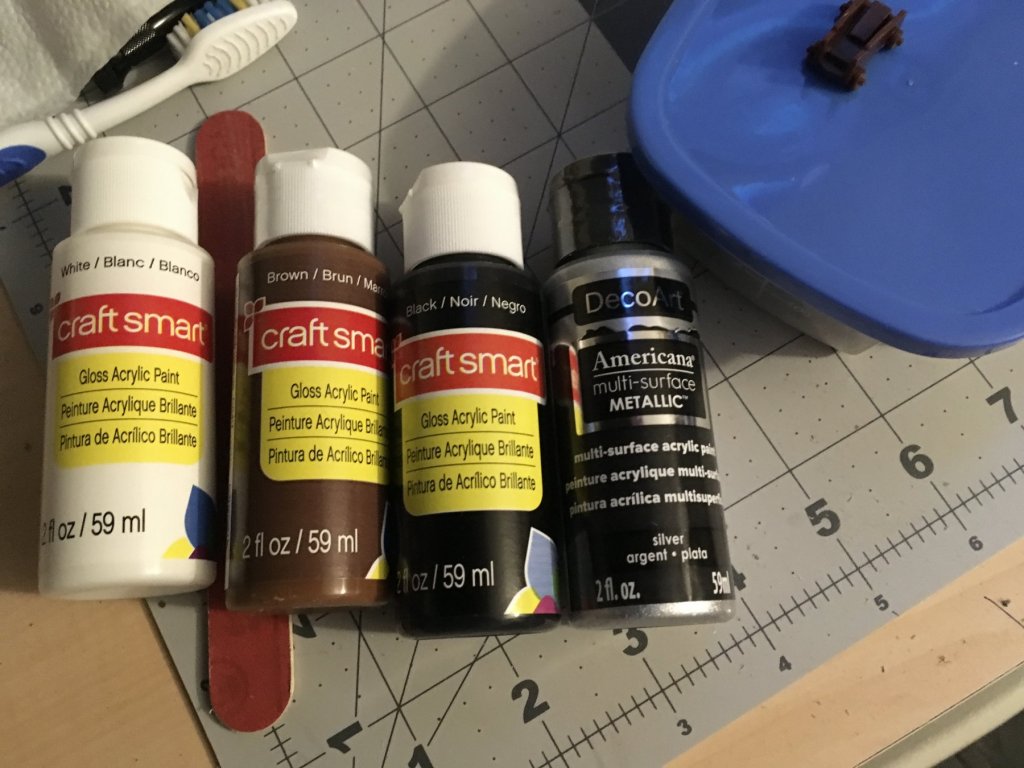
Yeah I would have to order those pants from Amazon or from an online hobby store, I picked up the pants that I got there from the local Michael’s I realize that they’re probably not that great for painting plastic. The testor enamels that I have do cover better. I like the soap and water cleanup of the acrylics.
- thibaultron, jwvolz and Canute
-
3
-
4 hours ago, jwvolz said:
Which acrylic paints are you using?
These are the acrylic paints that I was able to get from our local Michael’s.
- Canute and thibaultron
-
2
-
2 hours ago, popeye the sailor said:
did you use an airbrush? they'll give you a thin even coat......does take some getting used to. depending where you bought the kit, and how old the kit is, those dents can be popped back out without too much trouble. the Revell 1:96 series kits are really nice....they are the right size and they look good when built.....I built around four of them. back in the day, you could send a missing parts request to Revell USA, but I think they stopped honoring them.......Revell Germany still does though. I have extra sails for the Cutty......got two of thee three sheets by doing this.
I noticed you used gray primer......good, but with today's paint selection, you could have bought flat black primer, which would have been a better choice. be careful with rattle can sprays too......some are automotive grade, and the harsher chemicals can eat or distort the plastic. try to stay with flats rather than gloss.
the decks are the Achilles's heel of this series of kits......the section lines are the devil to get rid of.....even harder to line up. I've even tried adding a tab under one side, for the mating edge to sit on...to stitch them together.....any warpage, and they look out of sync
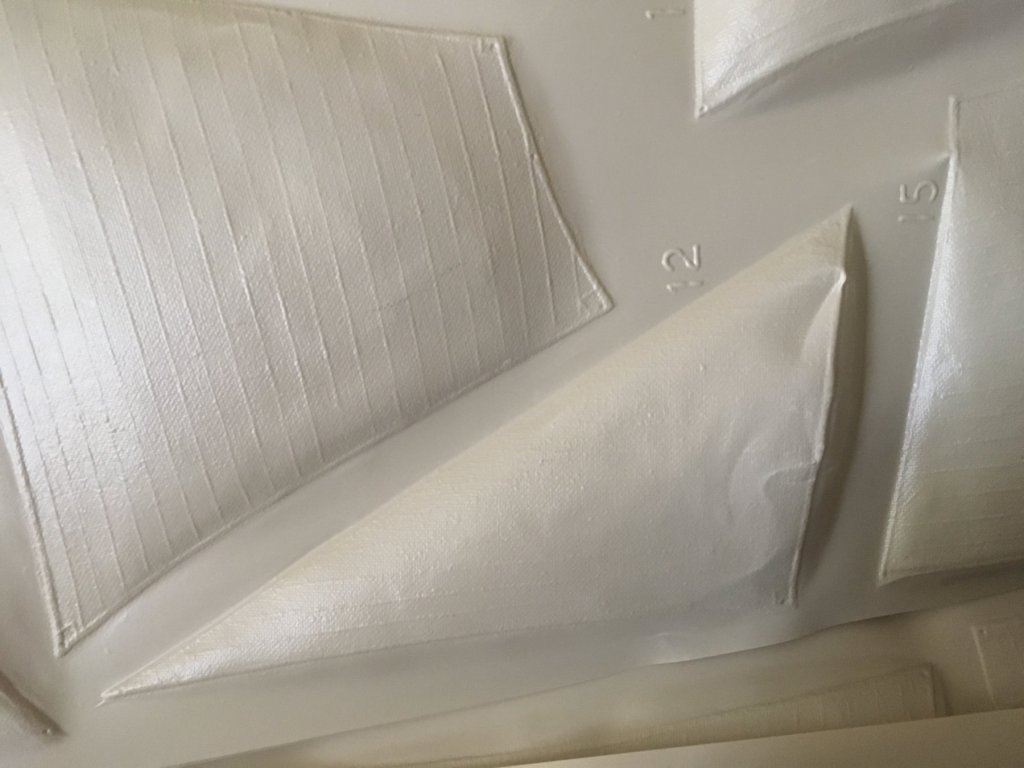
 I have a second kit of the U.S.S. United States...this one I made the decks out of wood and planked them {there is a log here...haven't touched it in a few years though}. the best way is to assemble the sections first, fill the mating line with plastic putty, removing the excess with your finger before it totally dries. when dry, rub it with a folded up cotton cloth....it will buff off the excess....paint to taste. I recently bought my second kit of the Constitution...not sure if I want to go through the trouble of making a wood deck for that one....they do make a wood veneer for this model {and for the cutty too}......I have a link somewhere in my bookmarks. I could swear that the picture of your sail sheets showed the jib sheet a lighter color that the other sail sheets. I had that problem too with the Cutty......the sheets I got to replace them were more of a beige color, than the ones supplied in the kit. I painted them in a flat light gray...and all sins were forgiven.......again....don't use an automotive primer or paint, or they will melt before your eyes. {actually they tend to shrivel up....been there
 ") }
}
if you chose to go with the veneer decking ..whether you go with a decking kit:
http://www.scaledecks.com/our-story.html {look in the shop}
....or one plank at a time {been there, done that}, you could use CA to glue it down. be careful how much you apply. check out contact cements too.
I’m going to try to scratch the deck planking in to the plastic that comes with the kit . I’m going to have a hell of a time seeing the lines in the deck, even with my magnifier on.
I had thought about using Veneer strips And gluing them to the deck but I wasn’t sure what type of adhesive I’d be able to use effectively. I also was not sure how I would cut the veneer to the thin strips that I would need, I have never worked with veneer before.
I have been toying with the idea of getting an airbrush but I have to admit I’ve never used one .
-
On 1/4/2018 at 4:10 AM, Canute said:
To add to what Druxey says, reds and yellows are usually the most translucent/transparent colors. I'd use a white or light gray primer if applying onto a dark surface.
I’m thinking I should have used a white primer, oh well, live and learn.
- Canute, thibaultron and mtaylor
-
3
-
3 hours ago, Thistle17 said:
Antonio I used Tamiya Acrylic paint in a brush on mode straight out of the bottle. I had primed on a light grey and the white just didn't cover. I then sprayed on Tamiya white primer and it still took 4 coast of the white overcoat to satisfy me. I too could still see a slight grey through the white primer. The thinning just didn't work for me. I did not apply heavy coats
Here is a reference to a painting guide via model railroaders that we posted on our web site:
https://www.modelshipwrightguildwny.org/resources-shopnotes
See Painting Shop Note and look at the second PDF. I would give you the direct reference address but I forgot how I got it. It is a free publication.
Joe
Thanks for the info, it was very informative
- Canute, mtaylor and thibaultron
-
3
-
59 minutes ago, semorebutts said:
I just started airbrushing to I use Tamiya acrylics. I thin it 2 parts paint to 1 part thinner, but I always put the thinner in the airbrush first and that seems to work for me. I don't prime but the I don't think it would show through. sorry I can't be any more help.
I’m not airbrushing, aside from the large areas I’m painting by brush.
- Canute, mtaylor and thibaultron
-
3
-
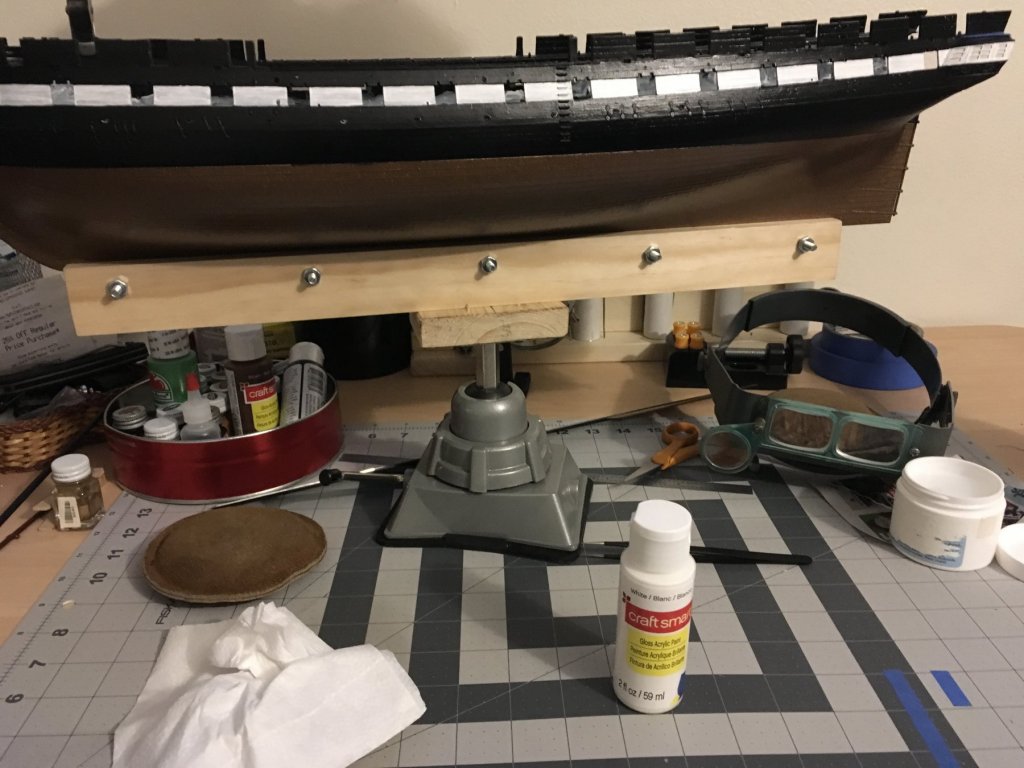
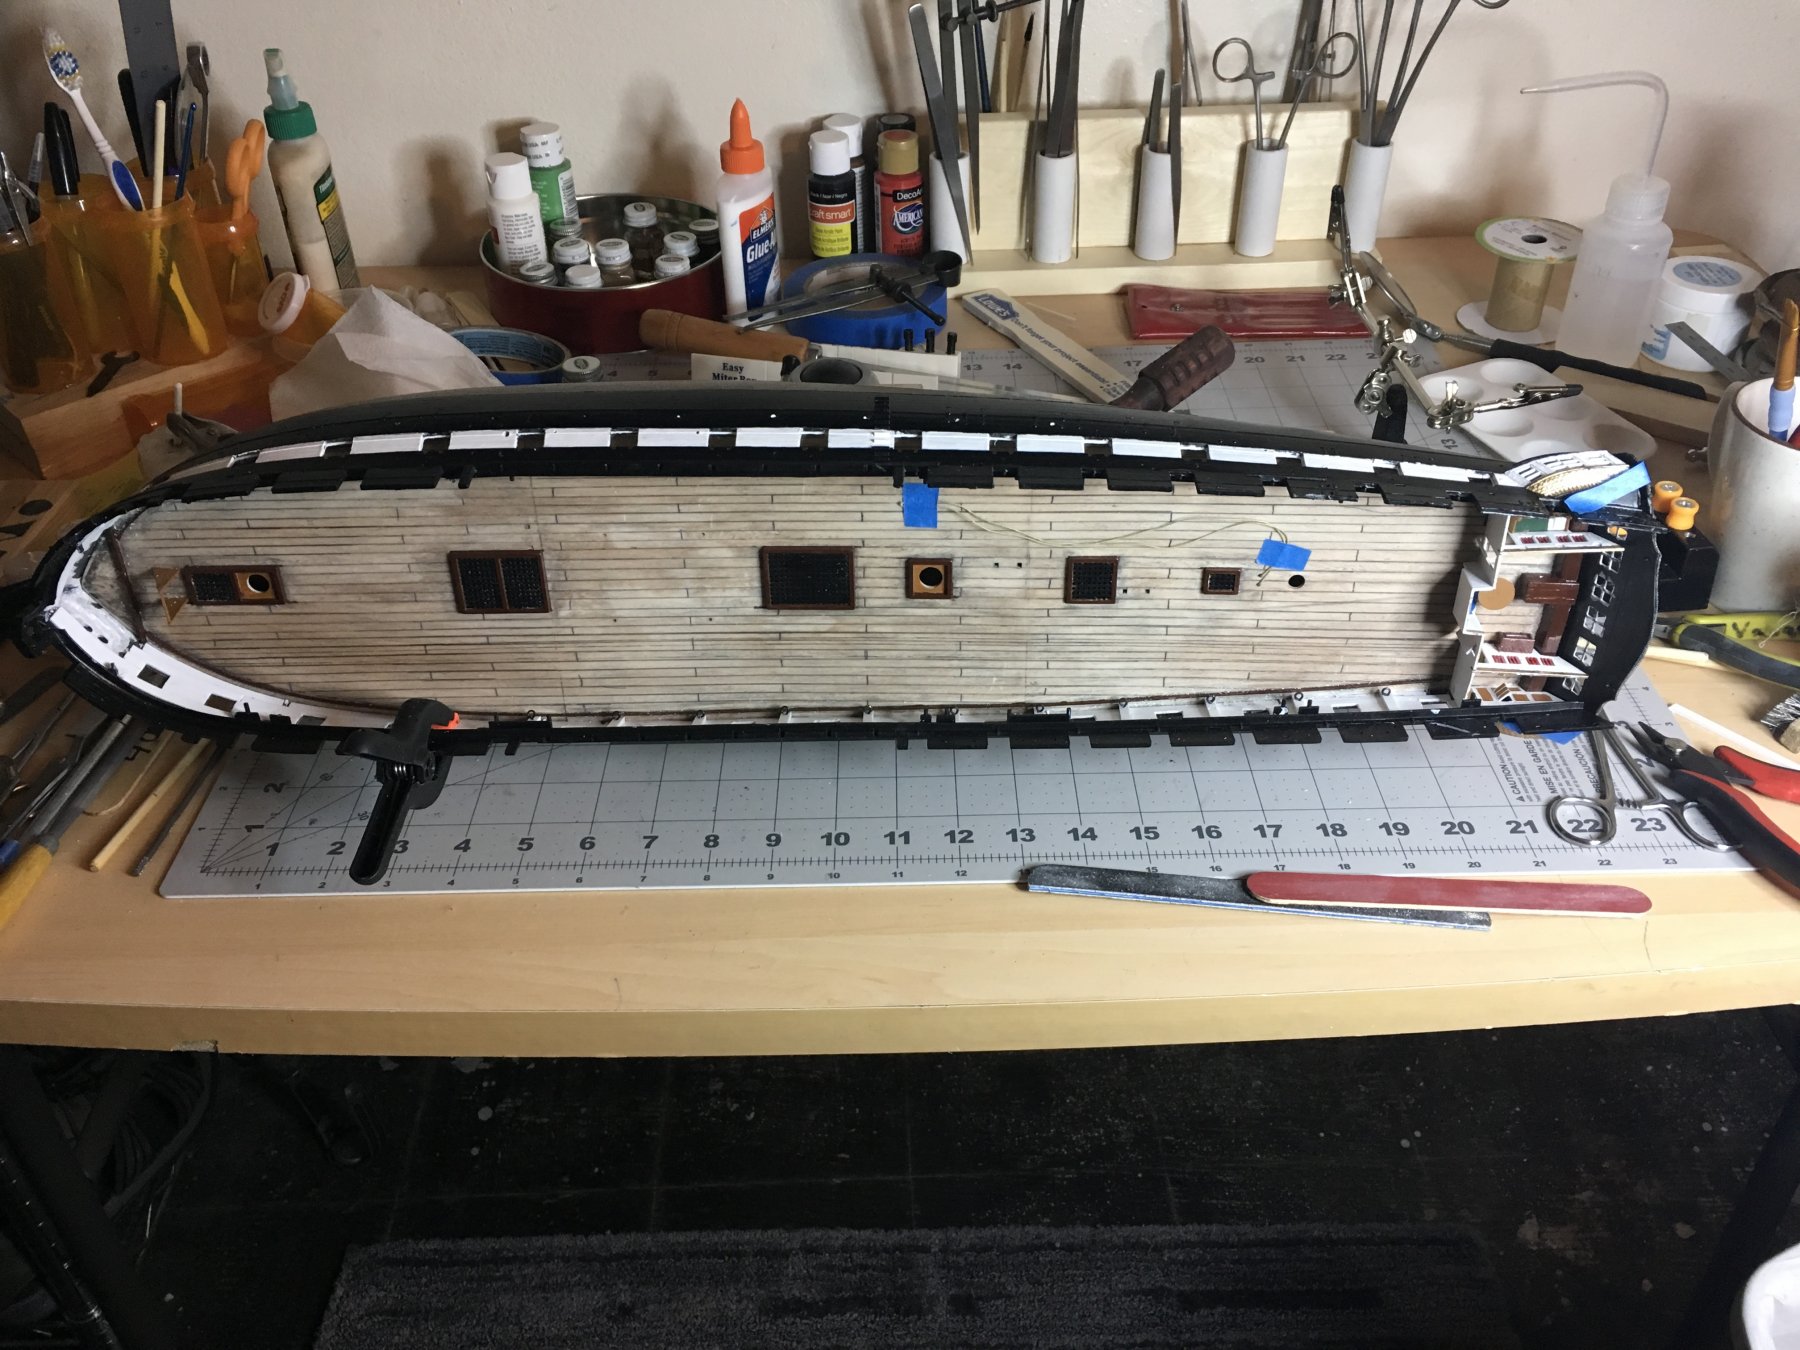
It is taking a lot of coats of white paint to cover up primer between the gun ports. I am at four coats already and I can still see some of the primer beneath the paint . I’m not sure if that’s normal or not .
-
On 12/29/2017 at 5:43 AM, ScottRC said:
Smart move on laying down good primer coat, it will make your overall finish much more easier. About the decks, I chose to fill and sand the gaps, and then re-scribed the deck lines with a small strait edge and . If I was to do it again, I would probably re-plank the decks with a thin veneer.
Scott
I am thinking very seriously about covering the decks with the Veneer. I’m not real sure what type of adhesive to use .
-
I’m using a gloss acrylic paint for the first time normally I use testers enamel. I have been thinning the paint about 75 percent paint 25% water. After about four coats I can still see the primer through the paint. Is it normal to have to put a lot of coats on? The paint coming out of the container is very very thick so I am having to thin it . From the tutorials I have seen on YouTube they say thin the paint to the consistency of milk. I am thinning it a little thicker than that but it is still very transparent when I apply it.

-
17 hours ago, DCooper said:
I am very much going to enjoy watching how your build progresses. I hope you are having fun as this is a wonderful old kit. Just don't get too bogged down on those three part decks.
Dan
The lower deck pieces are really miss matched as far as edge thickness goes. I saw one of the other builds where he made the deck planks more visible as well as the nail heads. I’ll have to look into that. Meanwhile I will have to get the deck assembly together nice and flat.
-
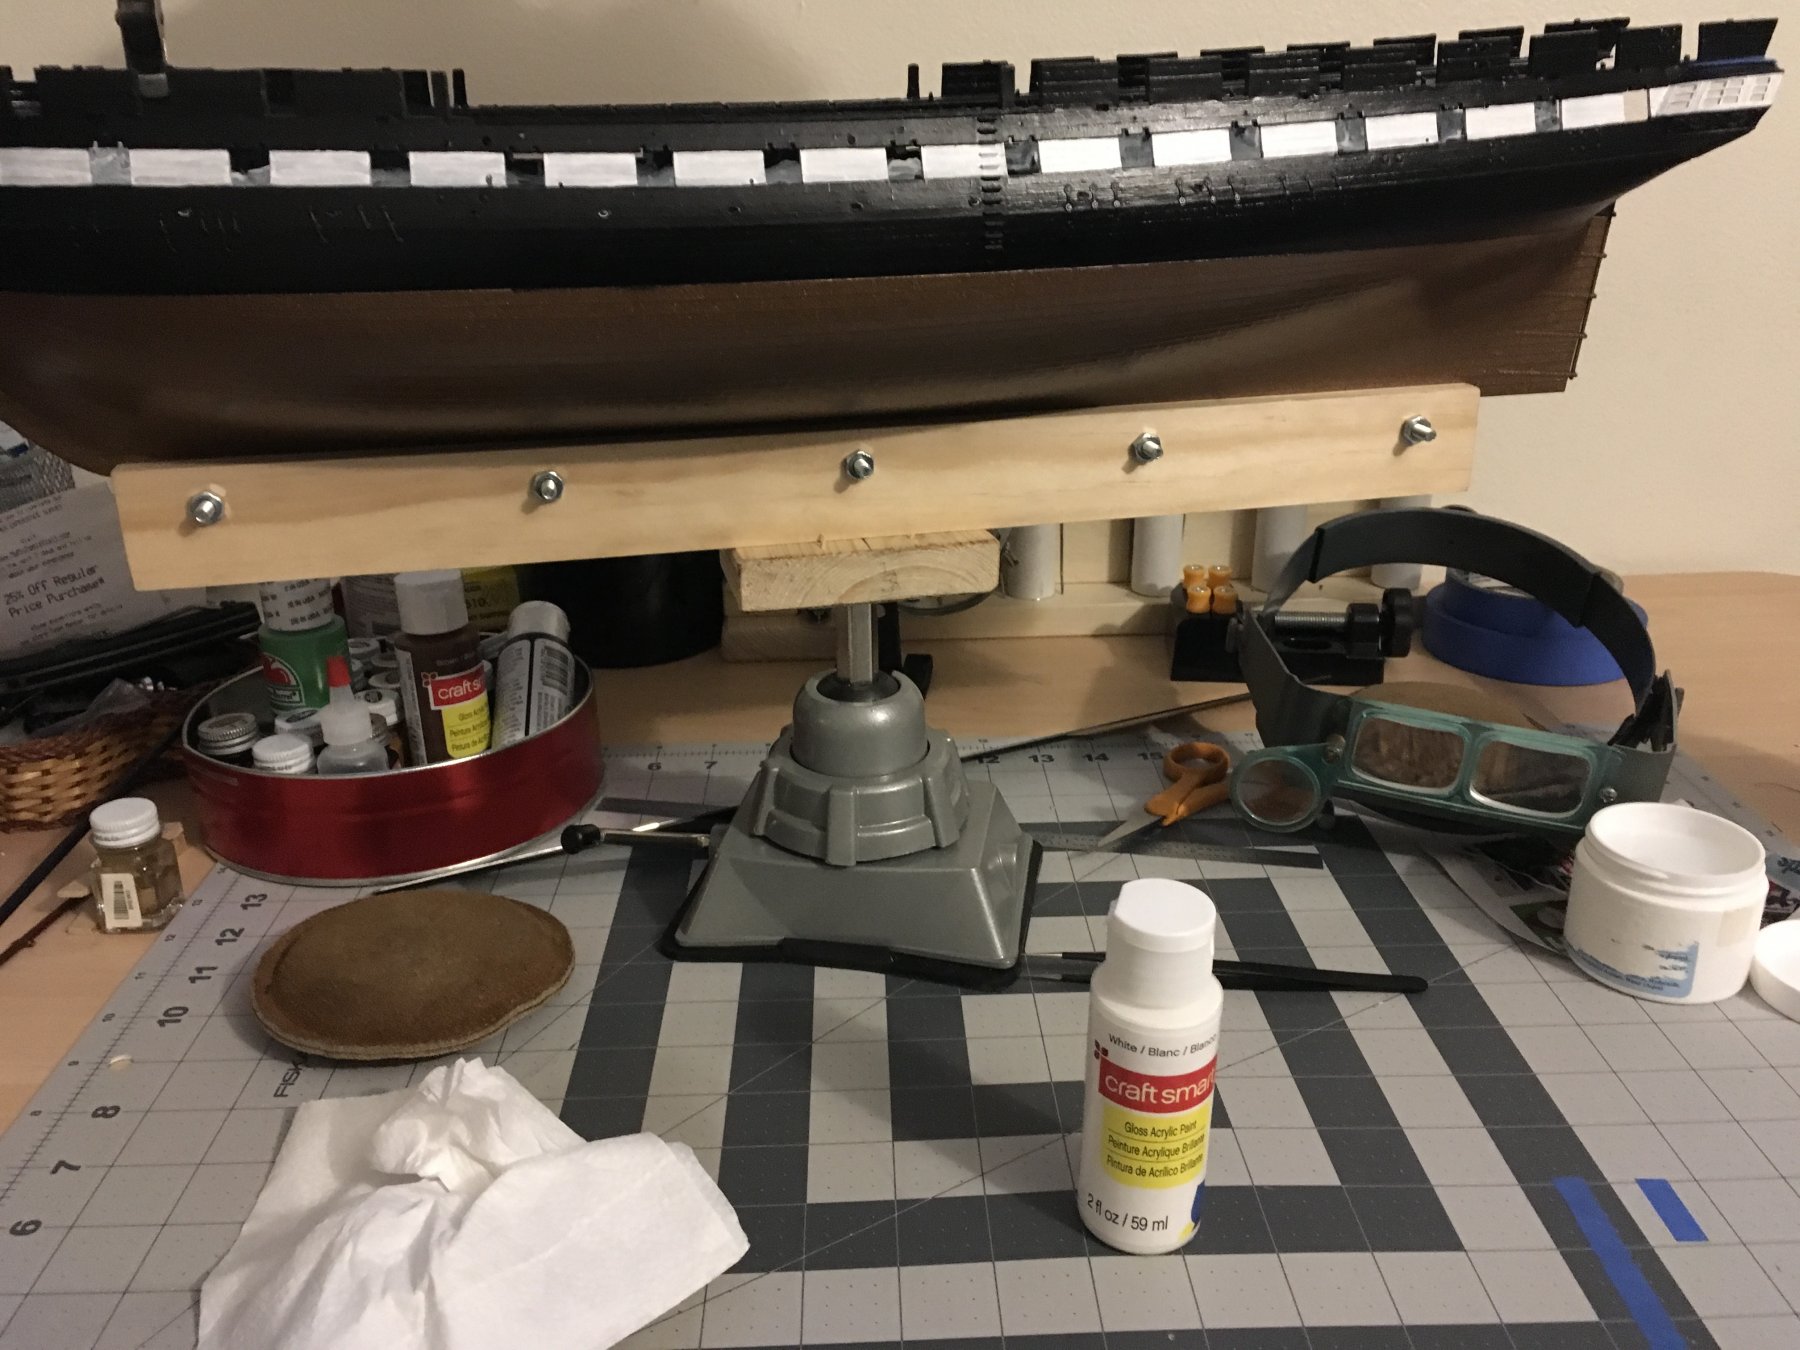
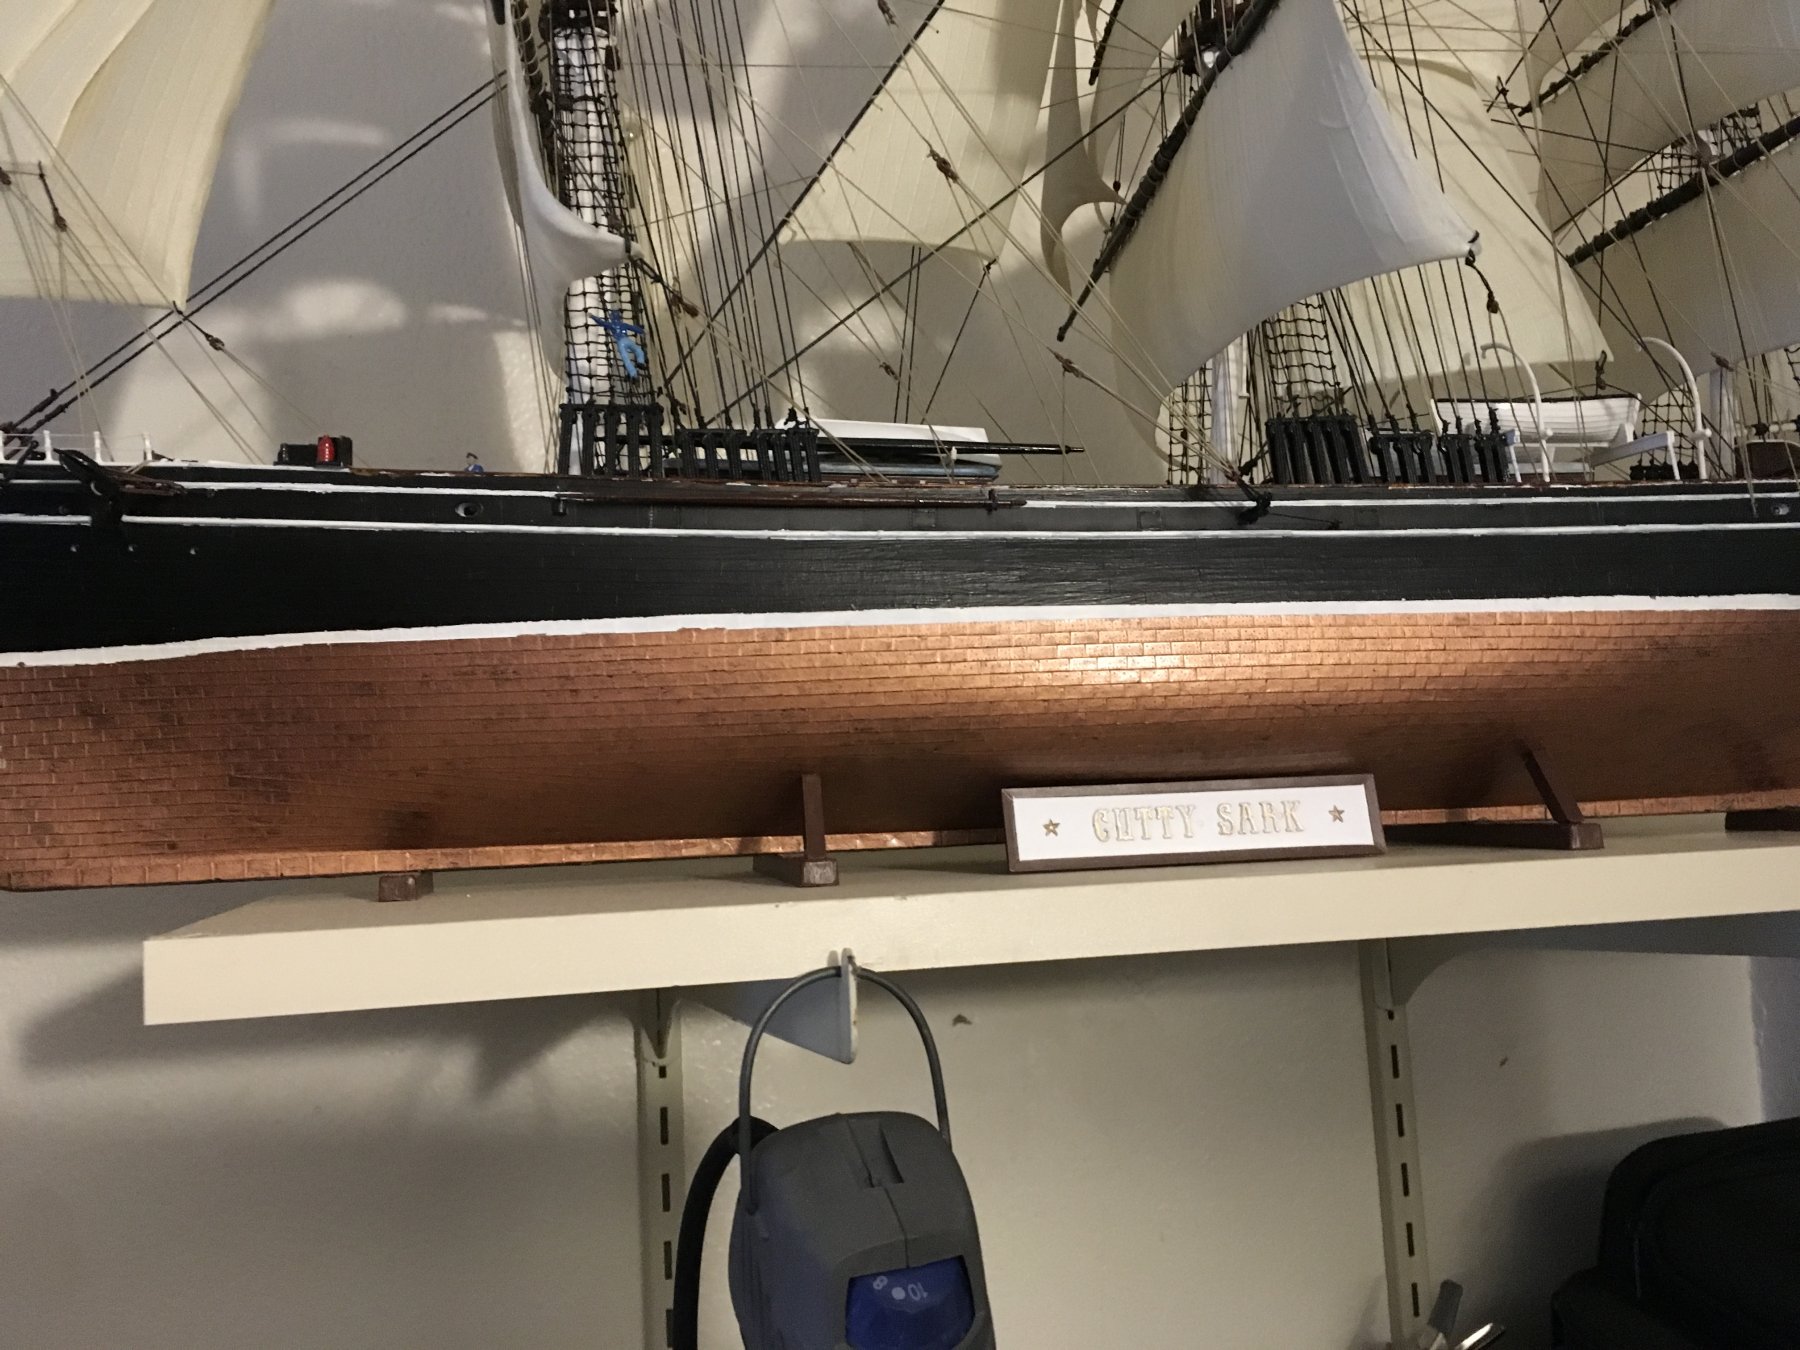
I am primering everything I paint this time. The copper paint I used this time was a spray paint and it came out a little darker than I would’ve liked. The testers brush on paint that I used on the Cutty Sark came out a lot lighter.

- demetri, CaptainSteve, zappto and 2 others
-
5
-
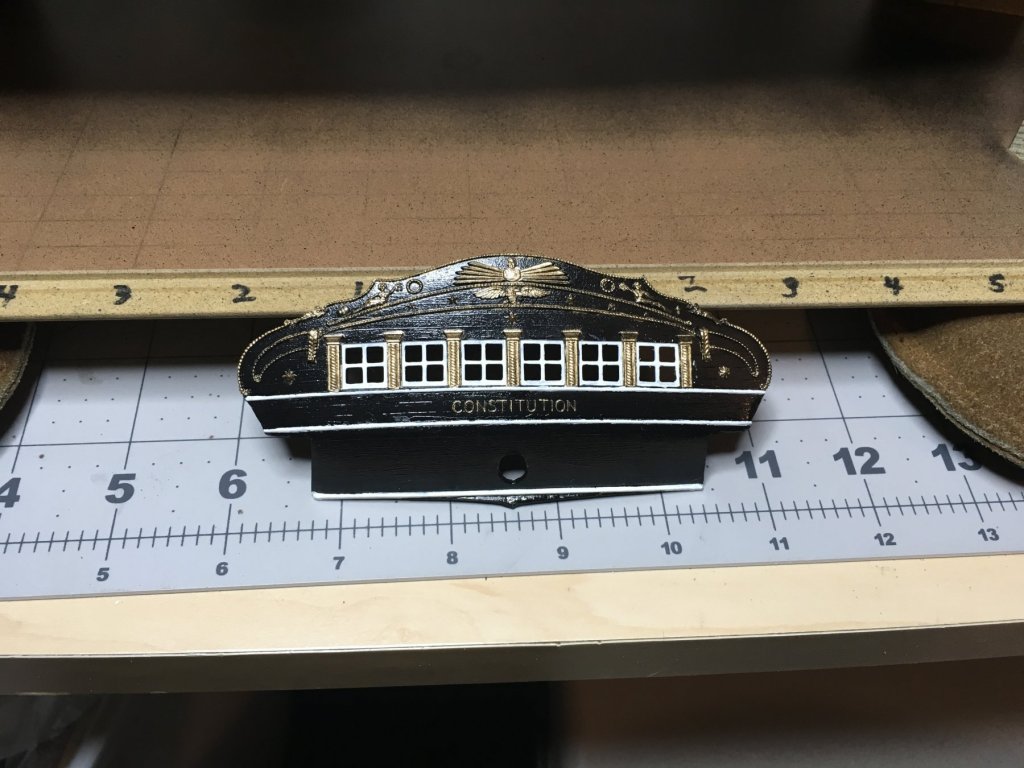
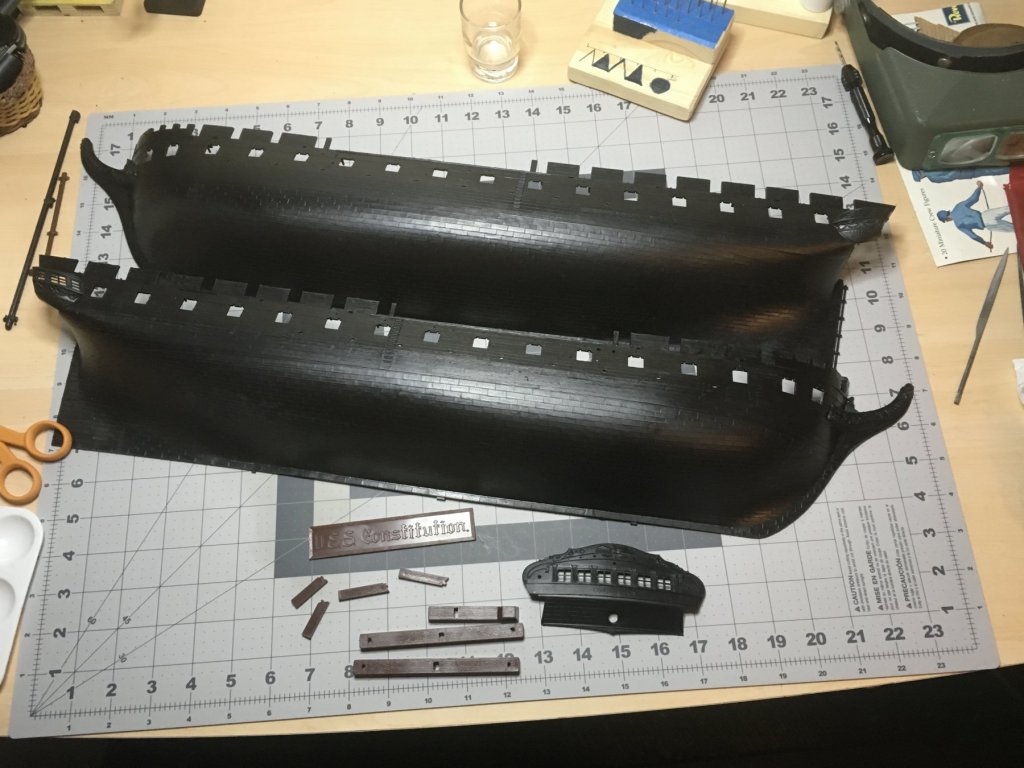
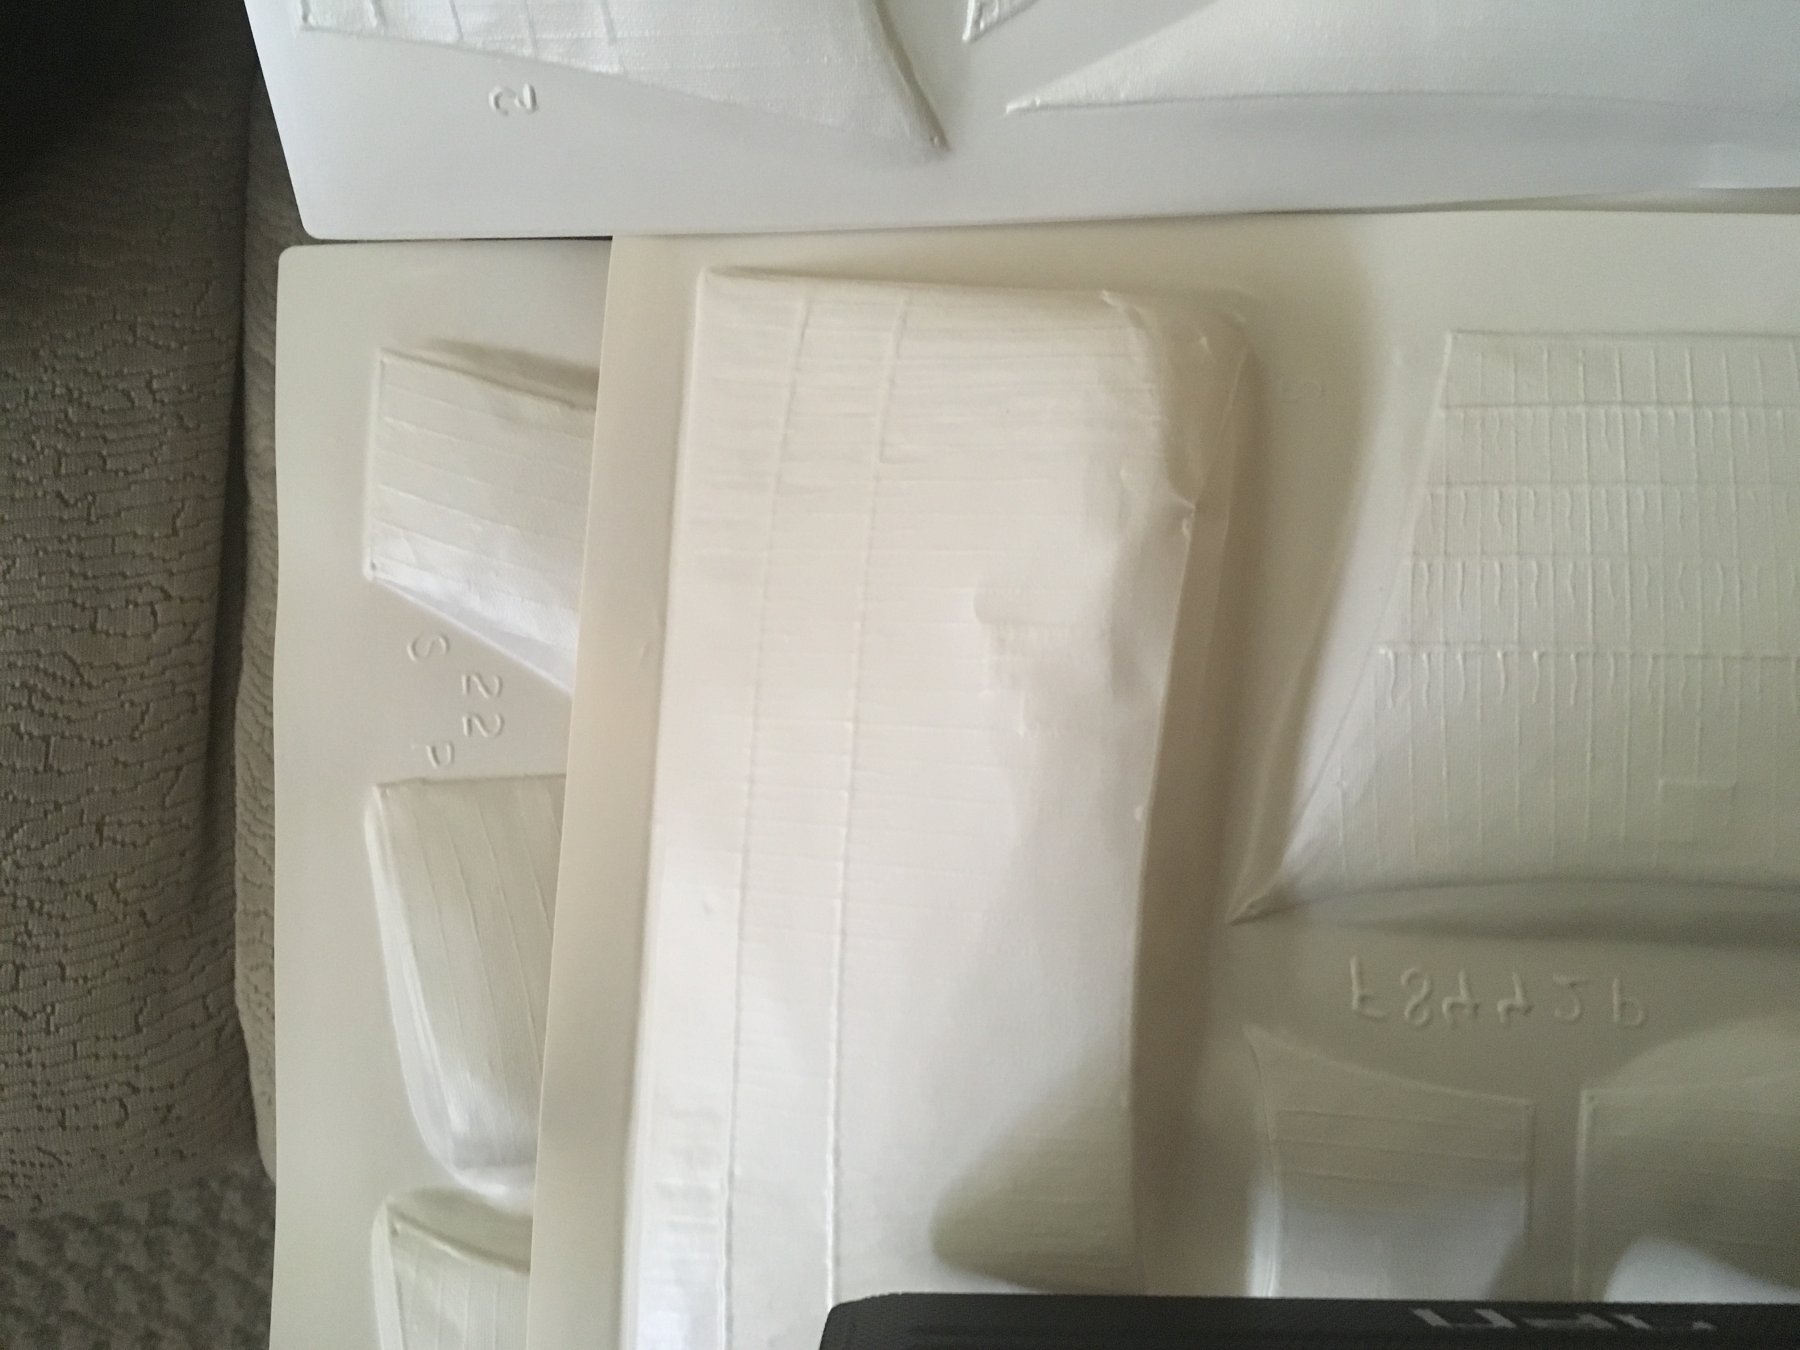
I just unboxed everything and found at the sails were squashed in some spots. When ahead and broke loose to hull halves, the stand , and the gallery stern. I washed all the pieces and cut off all the burrs. I am assuming that I should primer the hull before I paint it but this is something I did not do on my last build which was the Cutty Sark . The painting on the gallery stern looks like it is really going to be a challenge . I am definitely going to have to look at some pictures to see how that part gets painted. Any tips you can throw my way are welcome .

-
Hi, I just finished the 1/96 Cutty Sark and have received the 1/96 Revell Constitution for Christmas this year. The Cutty was a blast to build , it took seven months to build. After seeing some of the other builds online I wish I would have gone slower and put a little more detail in. I plan to look at a lot of pictures of the Constitution before I start my build.
I have been into woodworking for over 20 yrs and would love to try a wooden ship. I am smart enough to realize that a wooden ship will require special skills that I may not yet possess. I want my first wooden build to be a learning experience so I don’t mind a beginner ship kit.
There certainly is a lot of great information on this site . Any recommendations that members can give me as far as what my first wooden ship should be or tips on my constitution Build would be greatly appreciated .
thank you.
- mtaylor, Peter Bloemendaal and geoff
-
3


USS Constitution by Antonio Vasquez - Revell - scale 1/96 - PLASTIC
in - Kit build logs for subjects built from 1751 - 1800
Posted
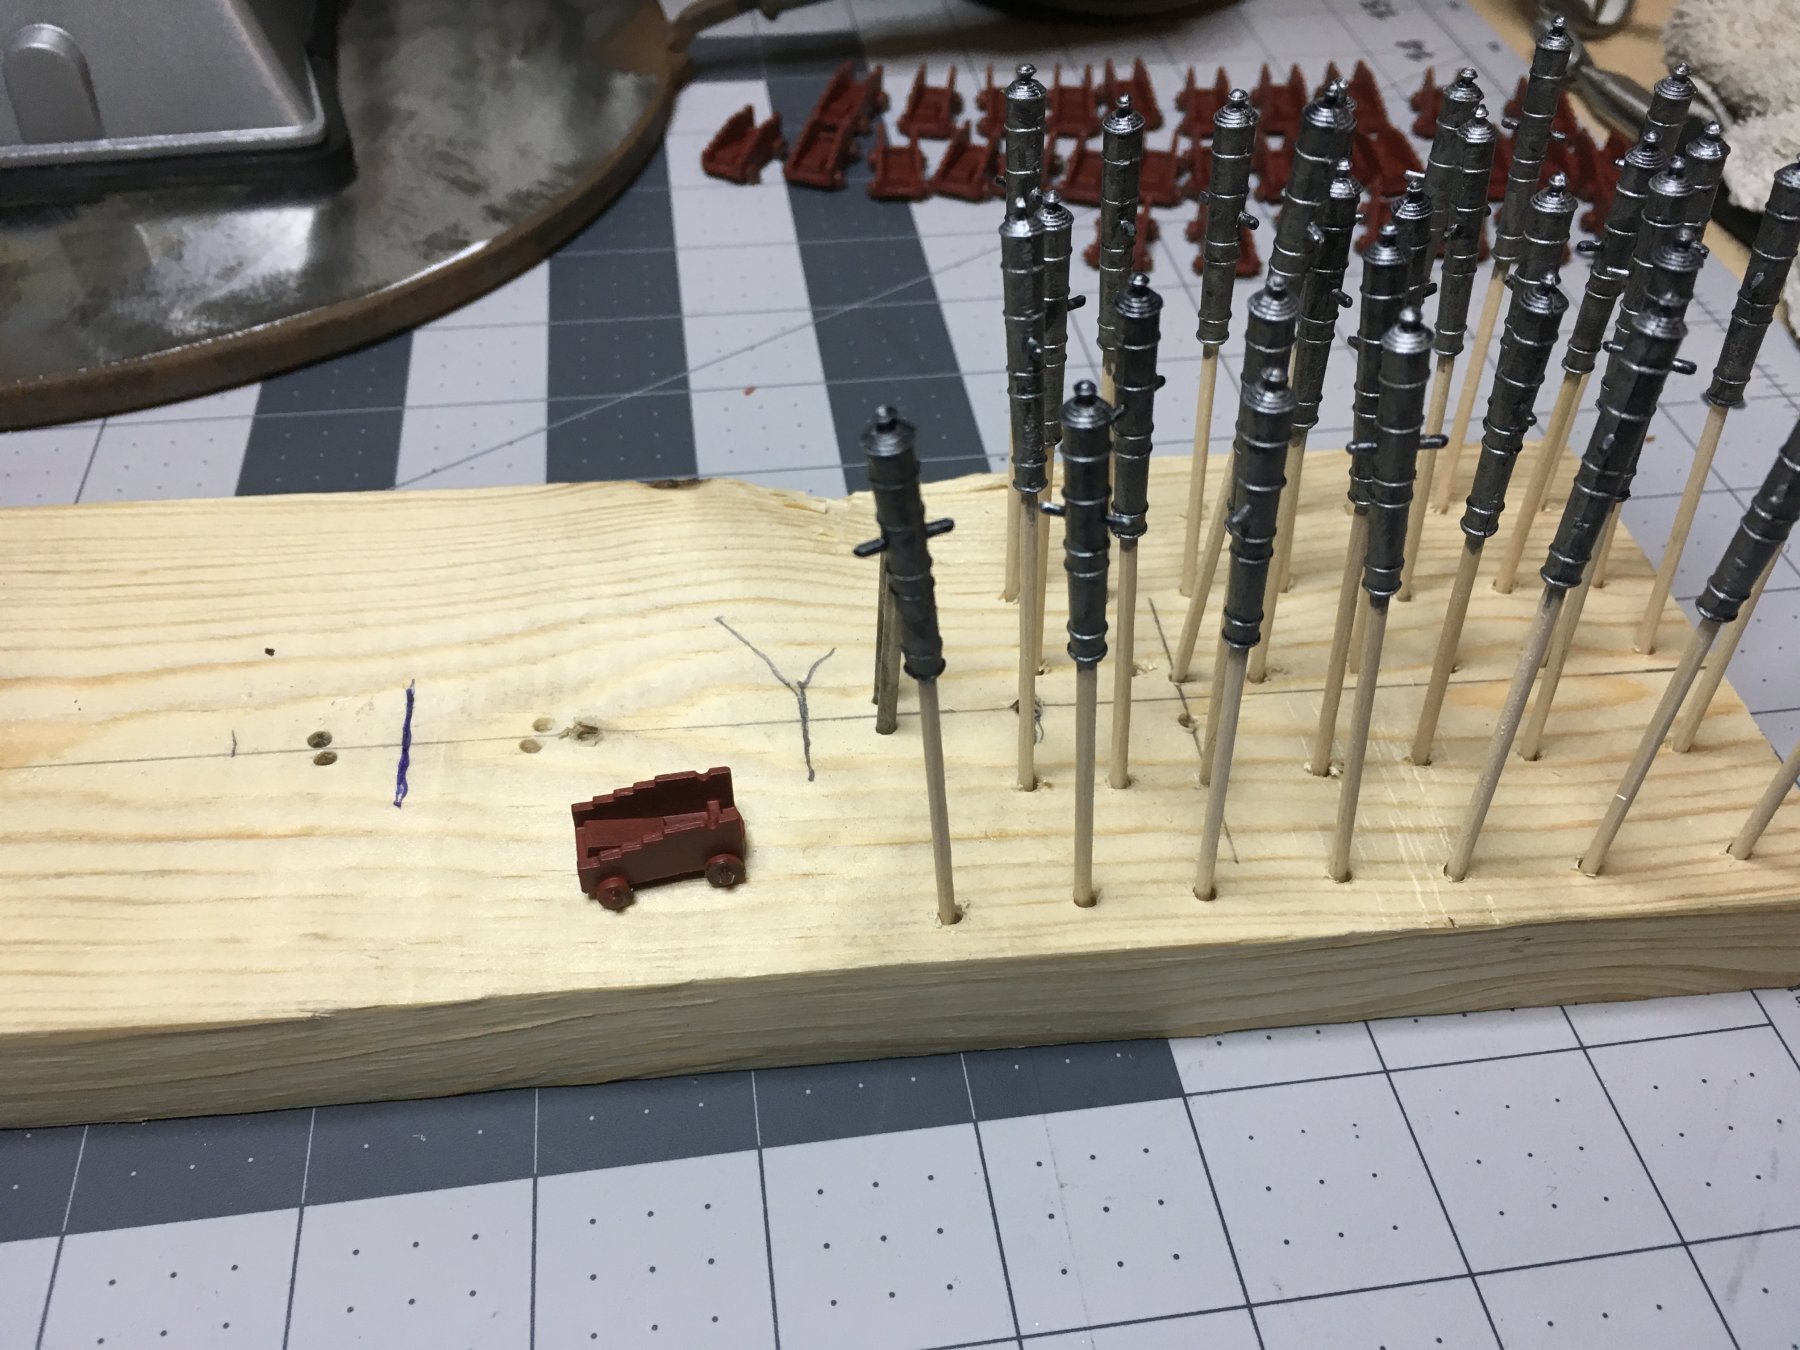
I finally got all the cannons mounted. I made some small rope by using my drill. I don’t have a rope walk.