vulcanbomber
-
Posts
396 -
Joined
-
Last visited
Content Type
Profiles
Forums
Gallery
Events
Everything posted by vulcanbomber
-
Just caught up on your build Danny. Fantastic, absolutely fantastic, she's going to be a first class model when she's finished.
-
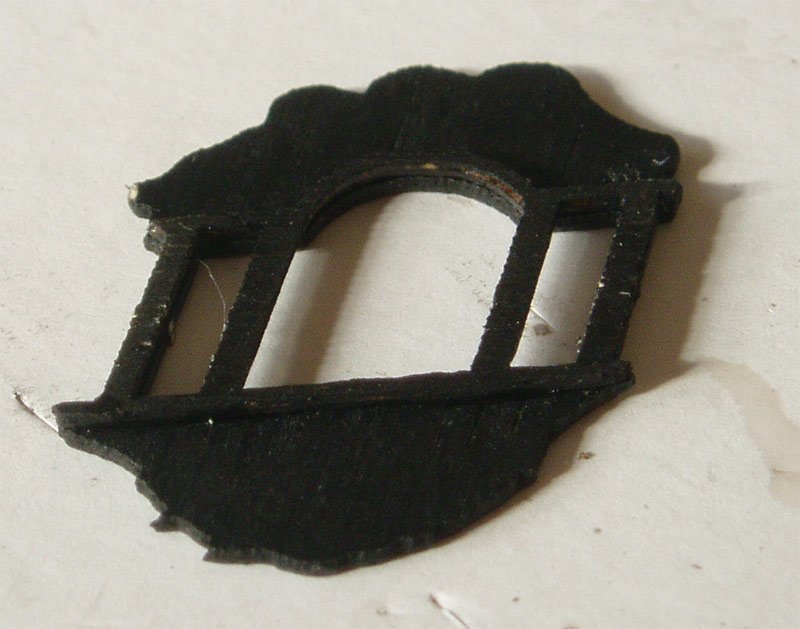
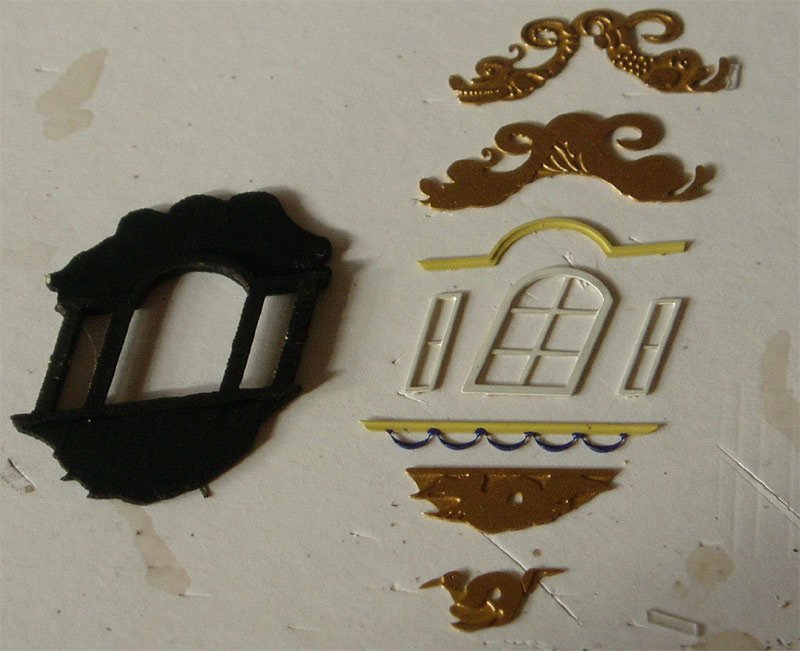
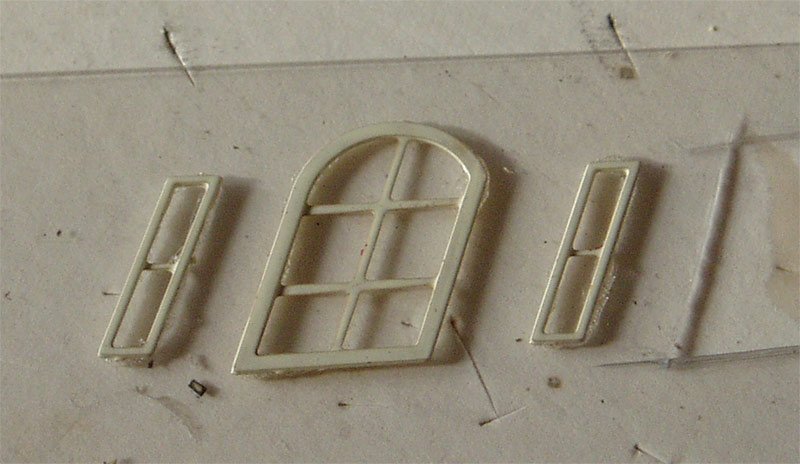
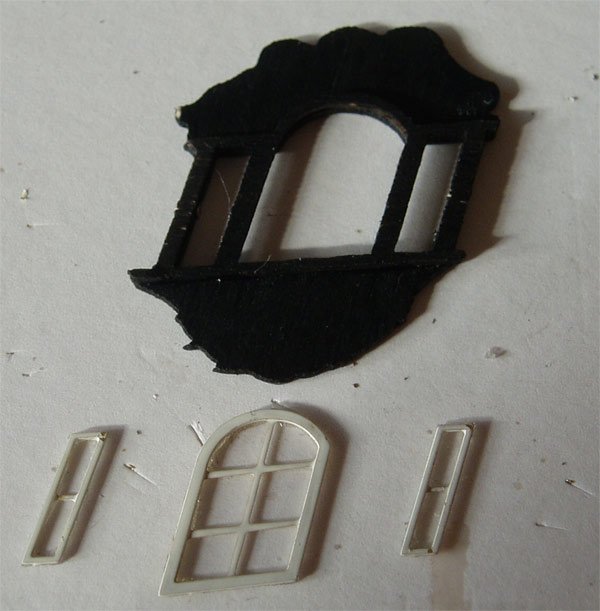
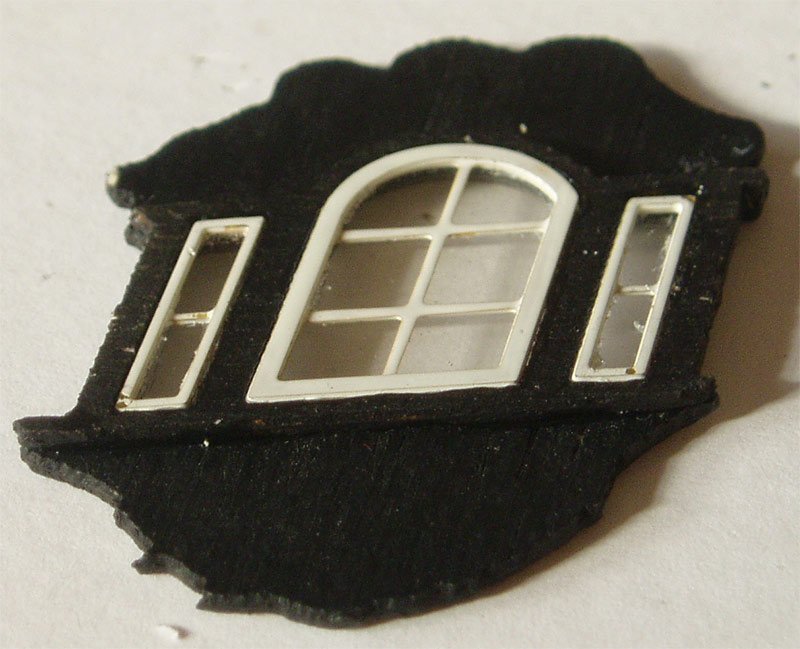
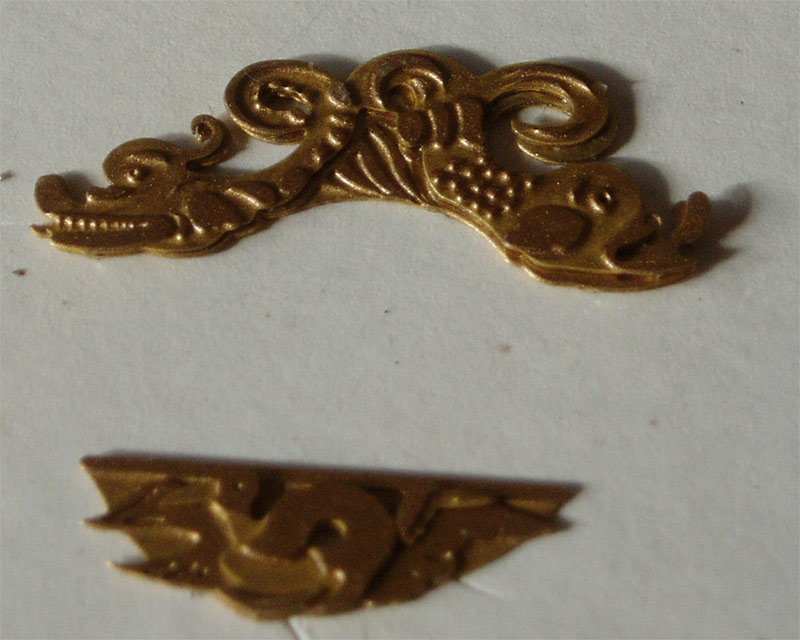
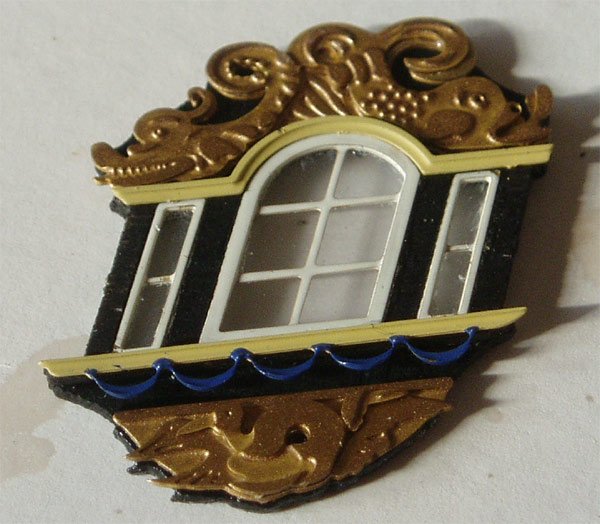
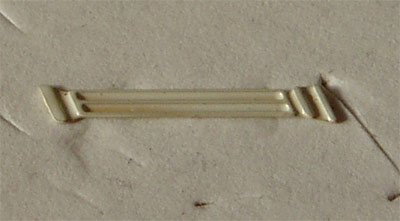
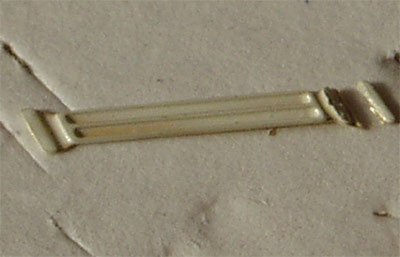
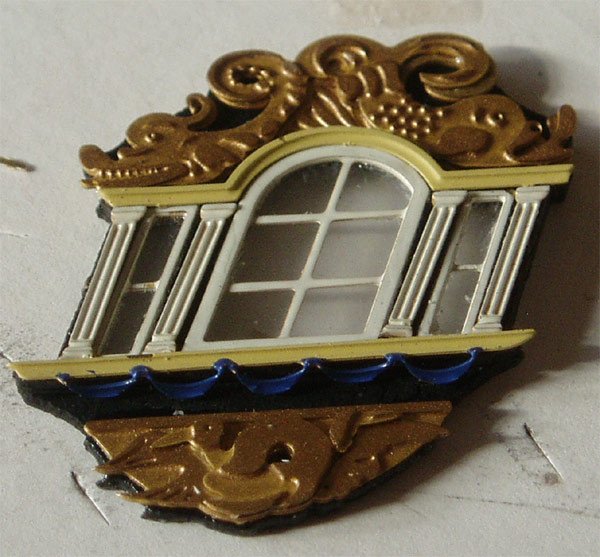
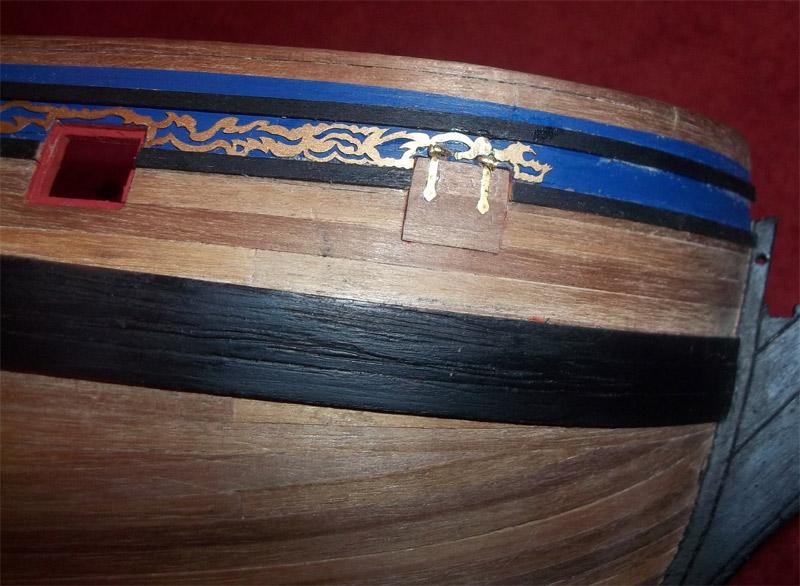
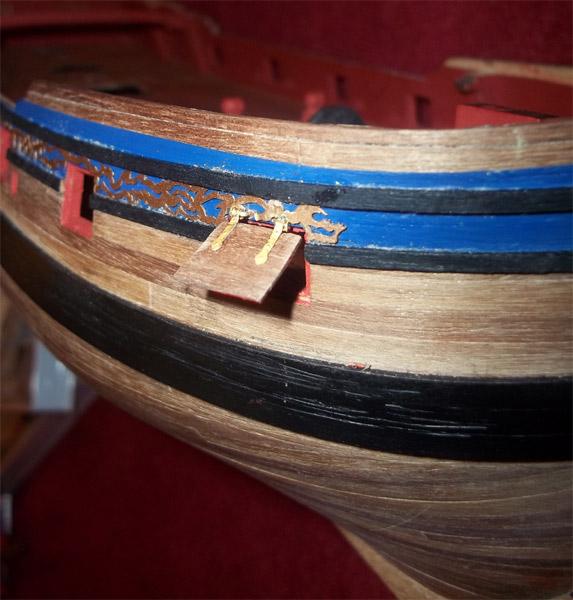
Well, I've been busy beavering away on Pegasus. I'm working on a couple of different parts. I wanted the get the rubbing rails complete so made the quarter badges. They were really easy to make and look so effective. The first two parts are wooden and painted black, here they are glued together: The rest is of brass etch painted white, gold and ochre: I glazed the windows, a piece of clear plastic is included in the kit for this. I found it easiest to cut a piece a bit larger then the window part I was glazing. I then used bostic all purpose glue, and with a pin, spread it on the back of the brass window and stuck it down on the clear plastic. When stuck, I used a sharp knife and cut around the window. any glue strands that showed through could be easily scraped off with a pin: Glazed windows ready to attach to the wooden surround: Make sure the windows are flush with the surface: The two pieces for the top and bottom parts of the quarter badge are stuck together: Then attached to the unit along with the two other parts: Next were the posts that went between the windows. check the fit on these before you stick them on. I found some were too long to go in the space and had to trim the bottom off: The finished quarterbadge:
- 161 replies
-
- 5
-

-
- pegasus
- victory models
- (and 1 more)
-
I'm sure you'll get the transom worked out and fitting well, heck - you're halfway there aleady. Solving these problems is all part of the fun. Just wait 'till you start getting the urge to make furniture for the cabins!
-
Just caught up with your build Sjors. She's looking great and I think you made the right decision on scratching a new transom. I'm sure you'll make a good job and it'll look fine. Keep up the good work.
-
Hi Sjors, never mind, there's always next year! by the way, I like the signature, I may have to pinch that!
-
Hi Sjors, unfortunately, I only received one cake.... and that had a man appearing out of it!!!!
-
Thanks guys. I've had a lovely day.
-
Thanks everyone for the birthday wishes. It's good to know I have so many friends from all around the world.
-
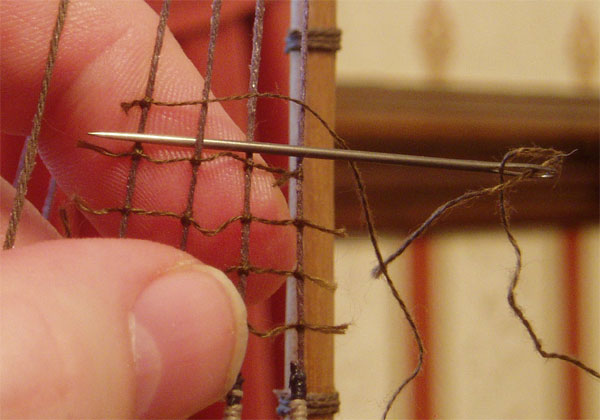
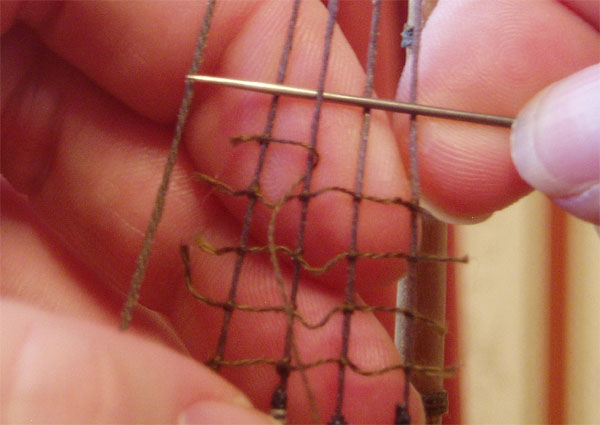
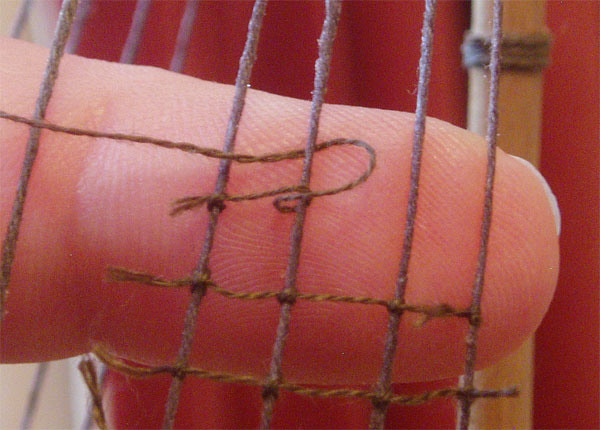
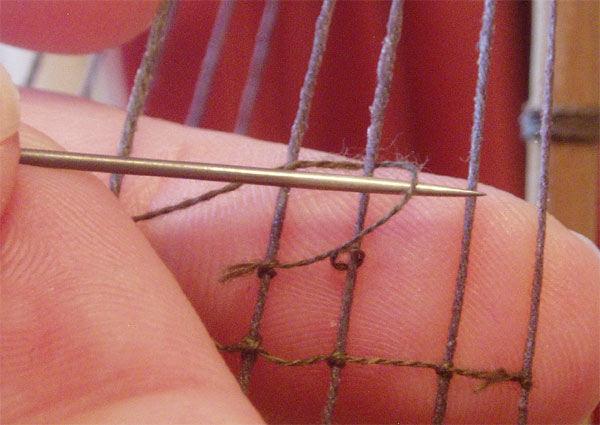
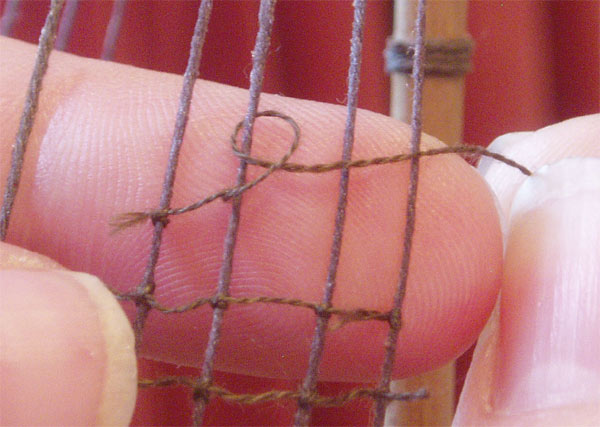
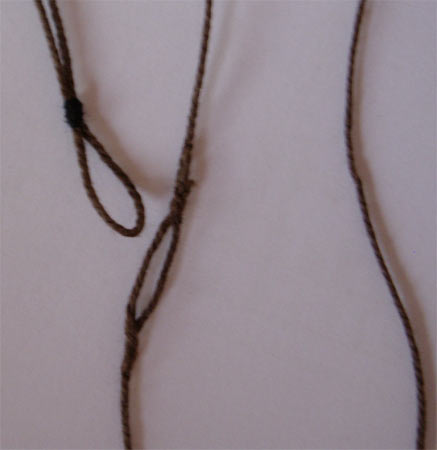
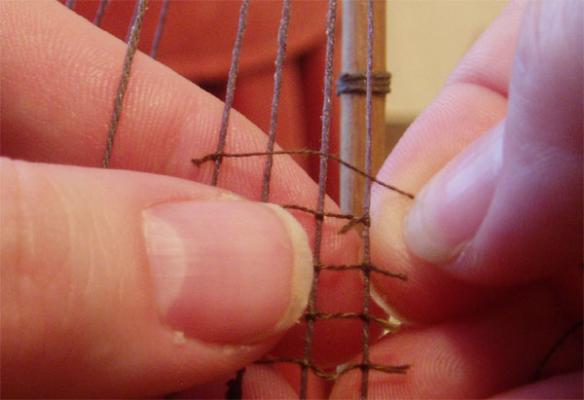
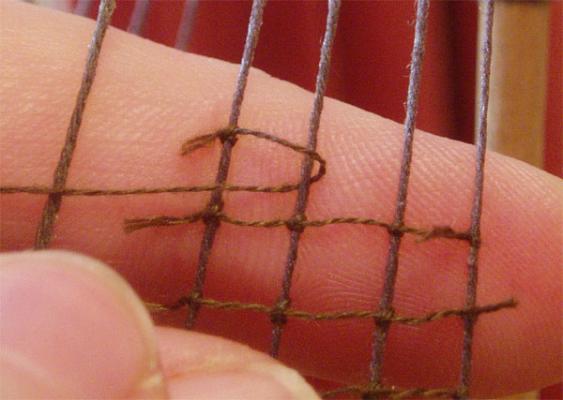
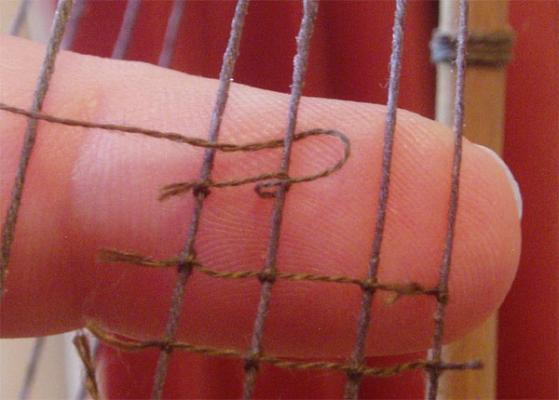
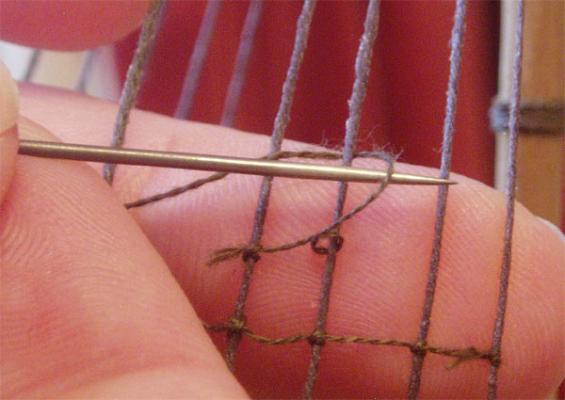
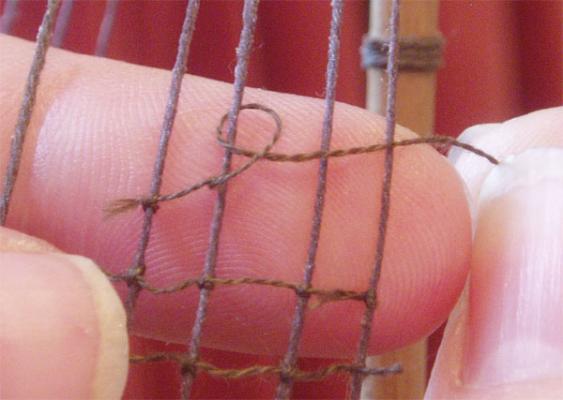
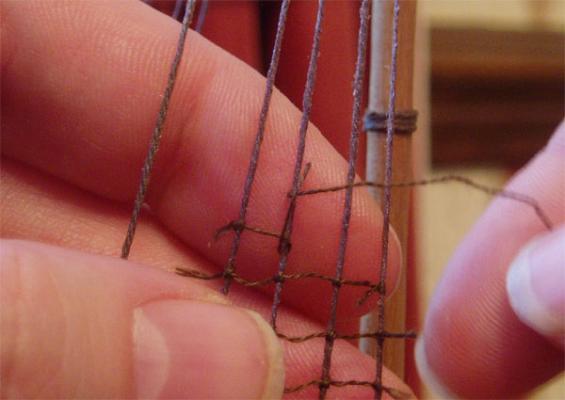
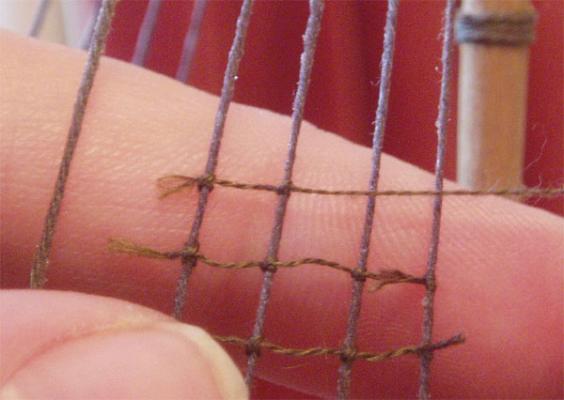
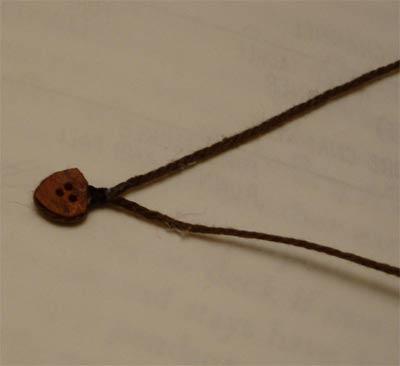
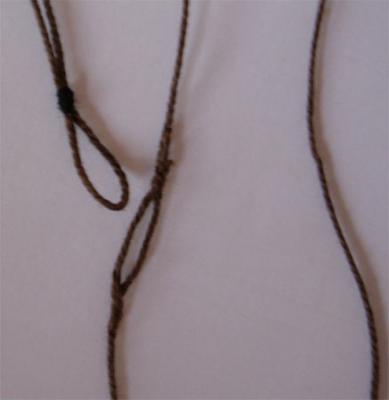
I've taken some more pics of how I tie ratlines, hopefully they'l make the process a little easier to understand. Thankfully, I found my original tutorial text posted elsewhere, so I have managed to keep that the same, unfortunately, the original photos, except for the first one, were no longer accompanying the text, but never mind, I'm pleased that I managed to find some of my original work. EDIT: Now found the original photo's Here's how I made my clove hitches: Photo 1. I started at the left hand side and with the end of the thread held to the left took the rest of the thread, with the needle, across to the right in front of the shrouds. Photo 2. With the thread across the shroud take the needle and place it from right to left behind the shroud and under the thread that is across the front. Photo 3. The thread should now go around the shroud and come out under itself. Photo 4. Now take the needle and place it from right to left behind the shroud and over the thread, DON'T pull it tight, but leave a small loop. Photo 5. Take the needle and from the left thread the needle through the loop and pull all the way through. (Make sure the needle passes in front the shroud, NOT behind it.) Photo 6. The knot stretched out so you can see how it goes around the shroud. Photo 7. Ease the knot together and tighten it to the shroud, before you tighten it completely to the shroud, ease it into place with the point of the needle and then pull it to lock it into place. When I've done several rows I coat all the knots, ratlines and shrouds with dilute pva glue to hold them in place, you can also use the point of the needle to put 'droops' into the ratlines and then when the glue is dry they keep their shape.


- 122 replies
-
- 2
-
-
- finished
- artesania latina
- (and 1 more)
-
Thanks Anya, I did a clove hitch tutorial in my old San Fran log, with step by step by step photos I took of the process to show others how I did it, it's these pics I'm hoping someone has downloaded as I'd like to re-create the tutorial again in this log. If no one has, I'll take some new photos somehow! Thanks Wayne, next job is trying to get my little ratline tutorial up again.
-
Thanks for looking in Sjors. I think I'm one of the minority who really likes rigging, infact before MSW 1 went down rumours were going around that I was the rigging fairy!! Help! I've been trying to find my pics I took of how I did the clove hitches for the ratlines, but I've lost them. If anyone happened to download them from MSW1 please let me know, otherwise I'll try and do some new pics somehow. Thanks.
- 122 replies
-
- 1
-
-
- finished
- artesania latina
- (and 1 more)
-
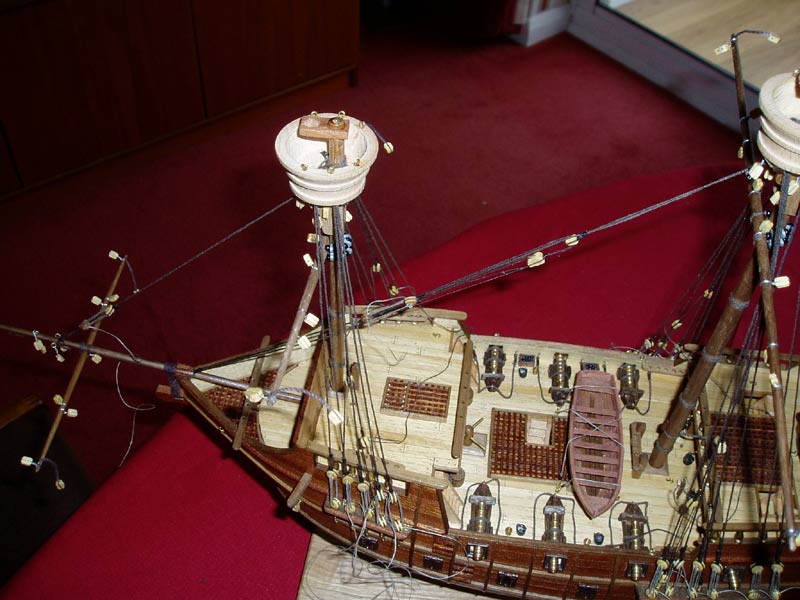
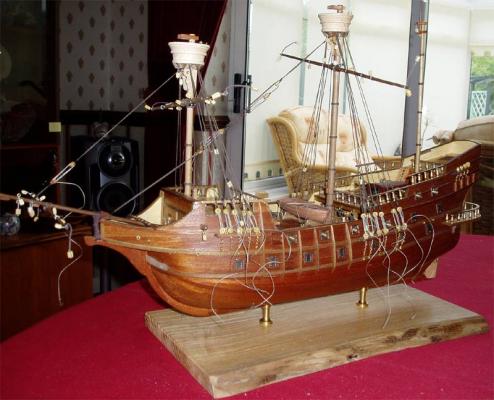
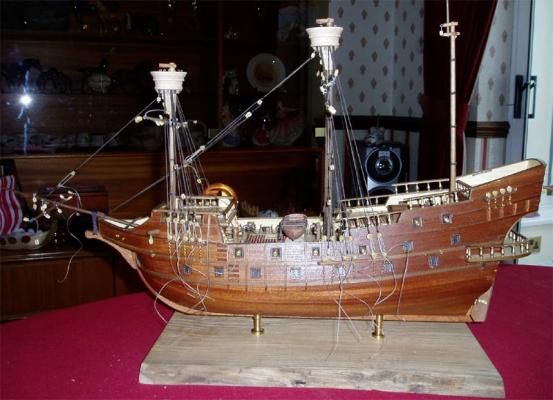
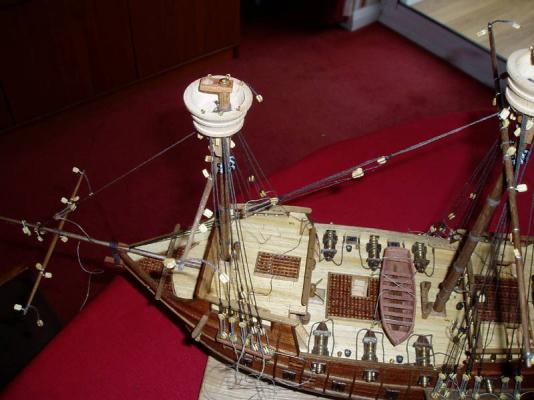
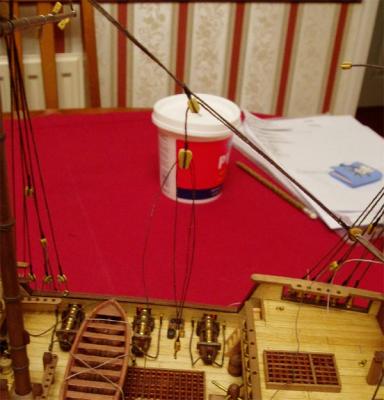
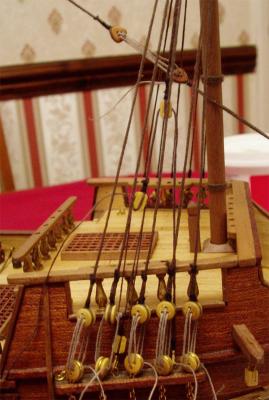
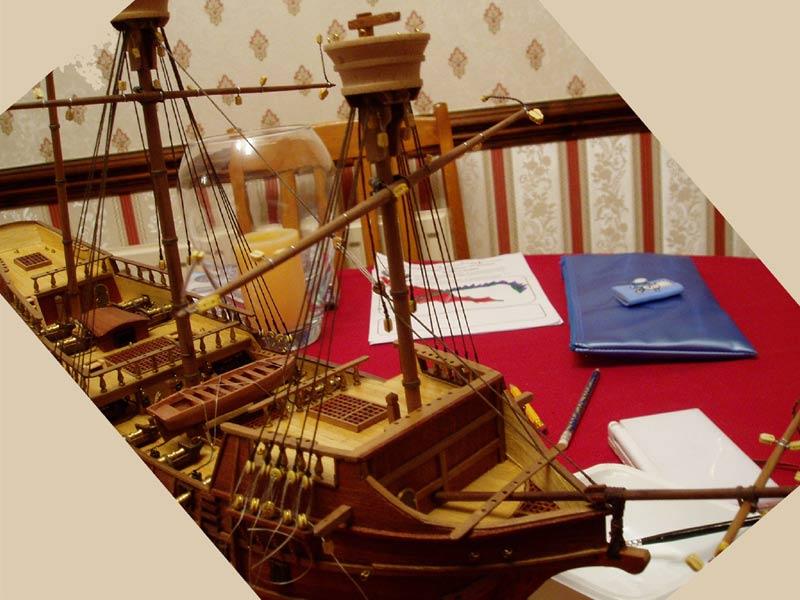
A few photos of where it is at now the stays, shrouds, pendants and tackles (NOT in kit plans) and garnet and tackles (NOT in kit plans) are in place: Next is the top masts and ratlines.

- 122 replies
-
- 3
-
-
- finished
- artesania latina
- (and 1 more)
-
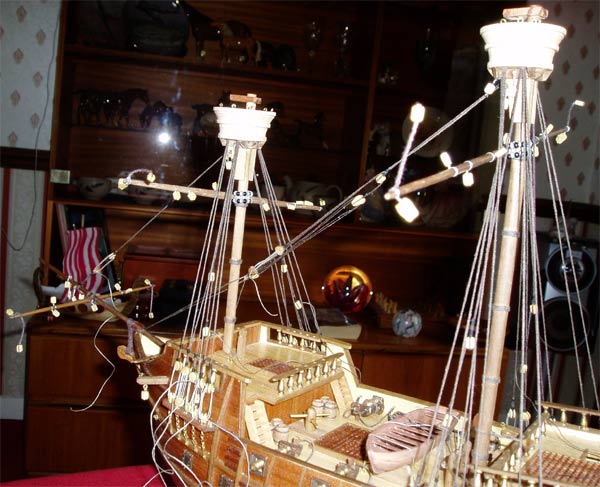
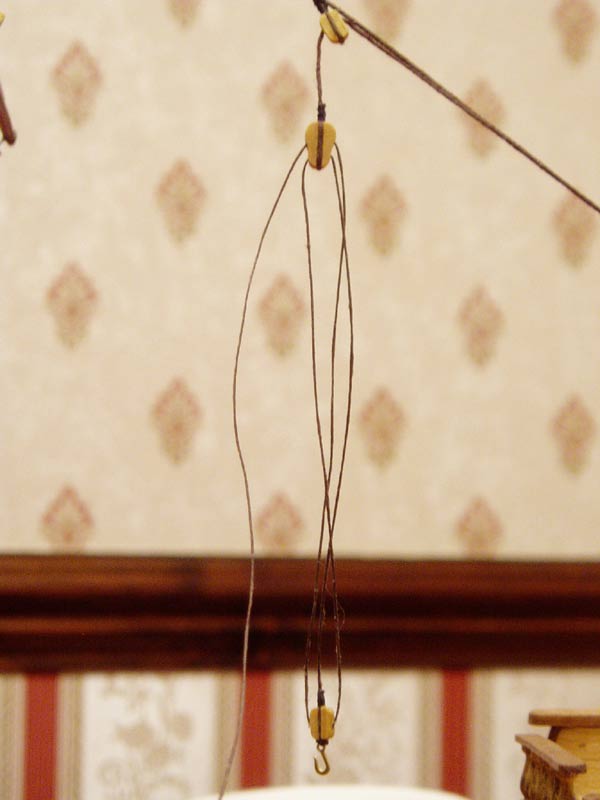
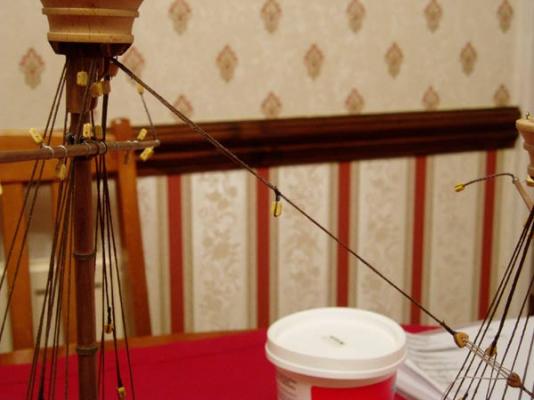
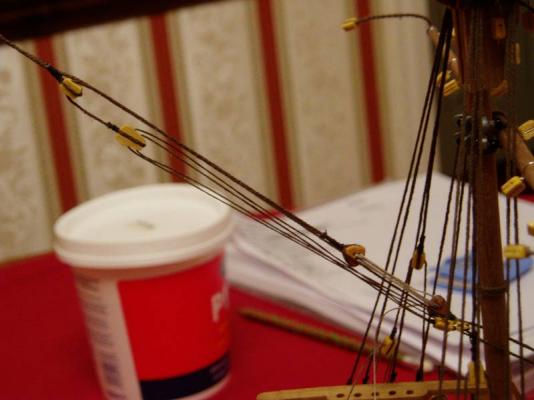
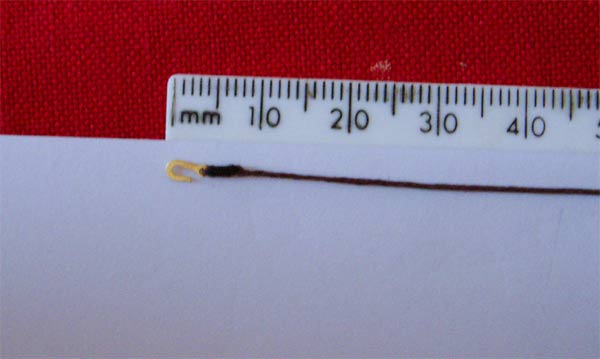
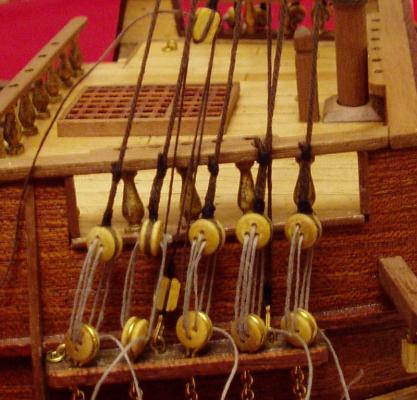
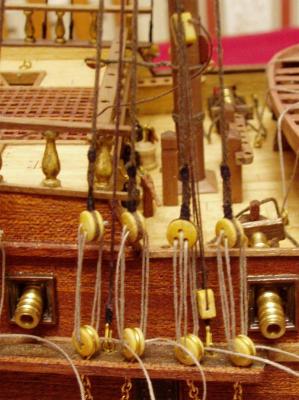
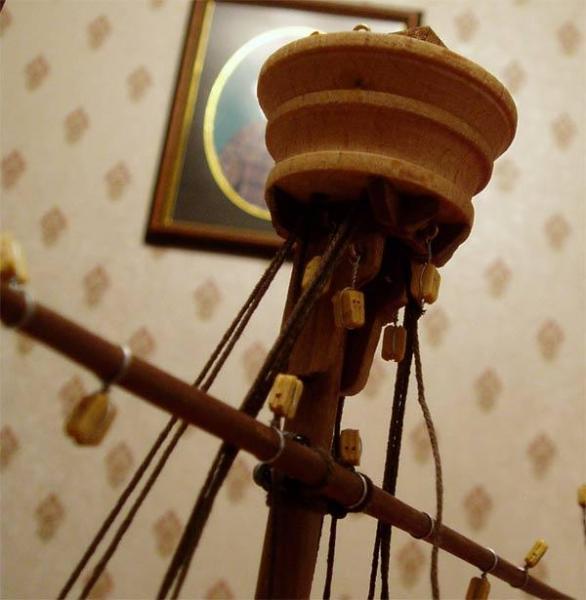
Next I created the garnet, along with the pendants, runner and lifts, this wasn't included in the rigging instructions either. This is set up in a similar way to the pendants and tackles made previously. First a single block was siezed to the main stay roughly over the main hatch (don't forget to take note of where the block for the forebraces go as they will be very close together): Next I made the runner. A brass hook was siezed to one end and a violin block to the other. The runner needed to be long enough, so that when the hook was hooked behind the main stay's triangular deadeye by the foremast, the block hangs down by about an inch: A longer thread was used for the lift, a single block with a hook is siezed to one end. The free end was threaded through the lower hole of the violin block at the end of the runner, taken down to the hole of its own block and back up through the upper hole of the runner's violin block: The lift block is hooked to the same place as the hook on the runner. The free end of the lift I poked down behind the triangulay block of the stay:


- 122 replies
-
- 3
-
-
- finished
- artesania latina
- (and 1 more)
-
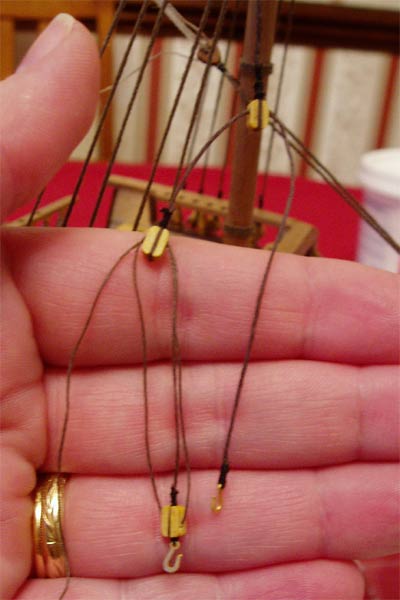
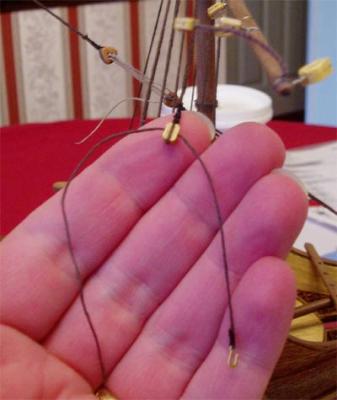
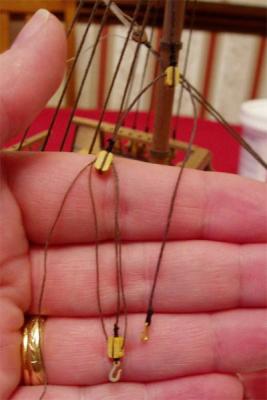
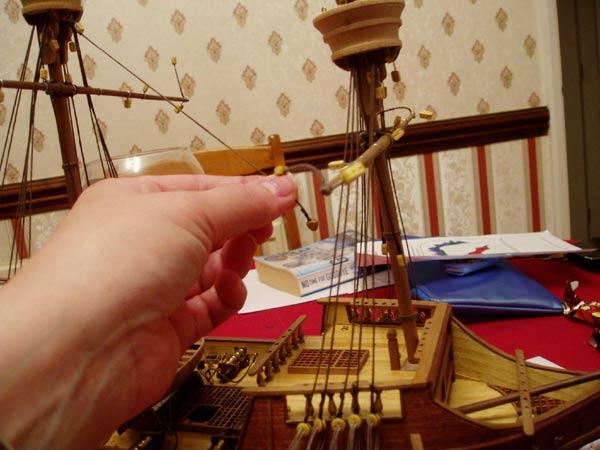
Thanks for your looking in, your comments are appreciated. It's been a while since I've been able to update this log, but I'm back now. I'll try and explain about the rest of the rigging I added to my San Fran as much as I'm able to remember.... it's been nearly two years since I finished her, I've been asleep since then! This is how I made the tackles which are attached to the pendants hanging on both the main mast and fore mast. First I took a length of thread slightly less than the thickness of the pendant (this is the runner) and siezed a brass hook to one end: I threaded the free end of the runner through the pendant's block, making sure the hook end was towards the bow for the fore mast and the hook was towards the stern on the main mast: Next I siezed a double block to the other end of the runner. the length of the runner was about the same as the pendant: Next I made the lifts and purchase, this was made of a thread a bit thinner than the runner. A single block was siezed to one end with a hook. The free end was threaded through one hole of the double block at the end of the runner, taken down to the hole of its own block and back up through the second hole of the runner's block: I added two eyes to the channels. The hook on the runner was hooked into the front one and the hook from the lift was attached to the back one. I then adjusted the lift until it sat nicely and wrapped the free end around the timberhead: Fore mast Main mast, note the hook on the runner is at the rear

- 122 replies
-
- 3
-
-
- finished
- artesania latina
- (and 1 more)
-
Thanks for looking in guys, hopefully I'll be able to get back to Pegasus in the not too distant future. Adrieke, with difficulty, it's a good job my eyesight is still good! Vths, there will be lanterns hanging infront of the led's in the great cabin so they will diffuse the light a bit, also they are a soft yellow light so are not too glaring. Rosmarie, Thanks for looking it and commenting. I'm pleased with how it's come out. Arthur, yes, it will be coppered, I know it's a shame to cover up the planking, but my thinking behind it was if I made a hash of it, it would be covered up. Still the upper part of the hull planking will still be seen. I have had the poop deck on and had a look to see what could be seen, and it looks quite good, especially when the lights are on. Popeye, glad I inspired someone to have a go too. Hopefully, I'll get back to her soon. Thanks Mark, No, I haven't seen any sign of Laerte either, I miss him, wonder if he's registered. Thanks Randy, I'm glad my photos help, I try to be clear with what I'm doing. Hi Frank, I have enjoyed trying my hand at making some changes on my Pegasus. Thanks Sherry, what can I say, I like a challenge!
-
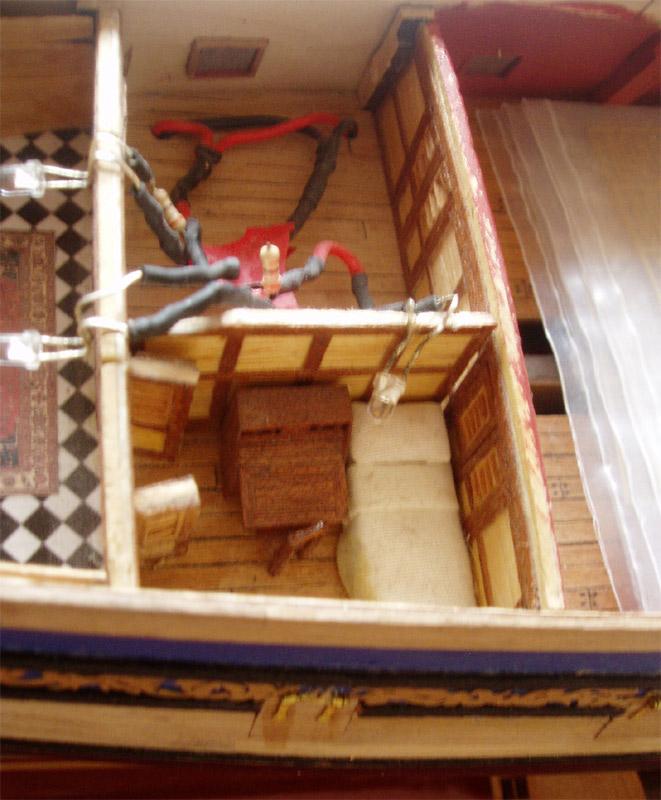
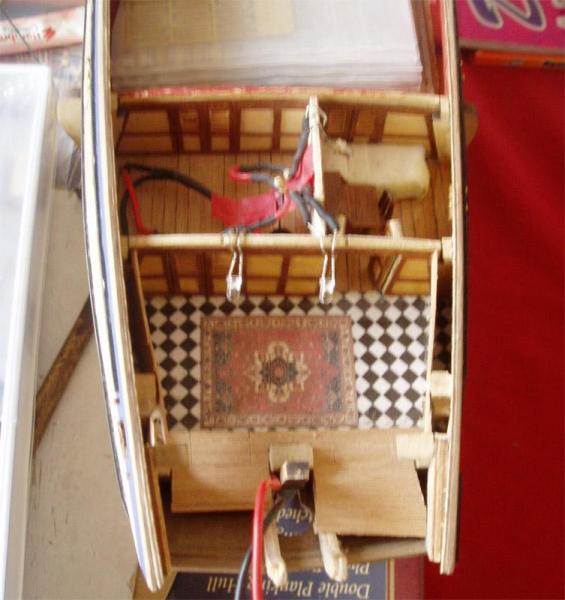
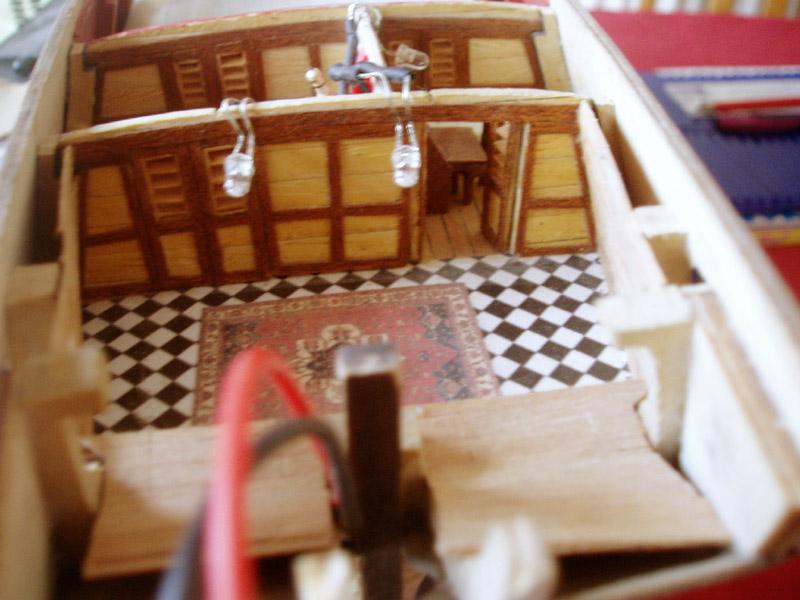
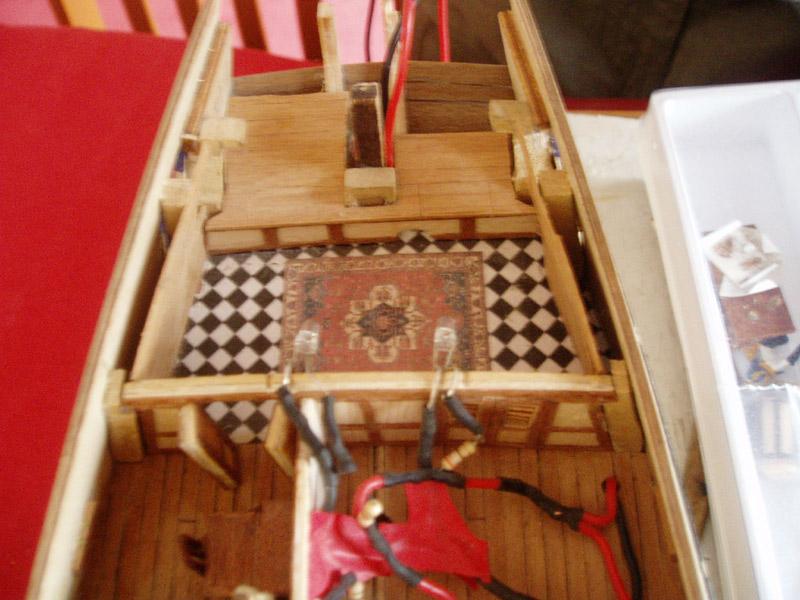
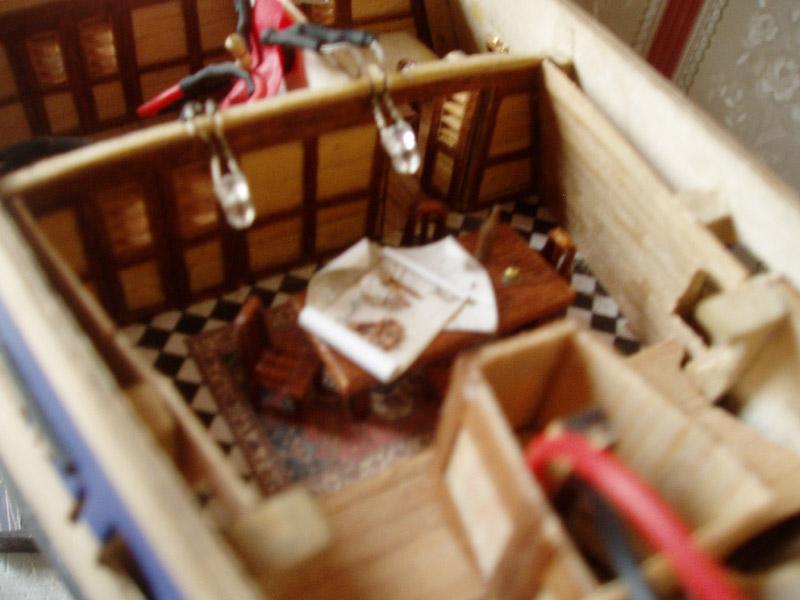
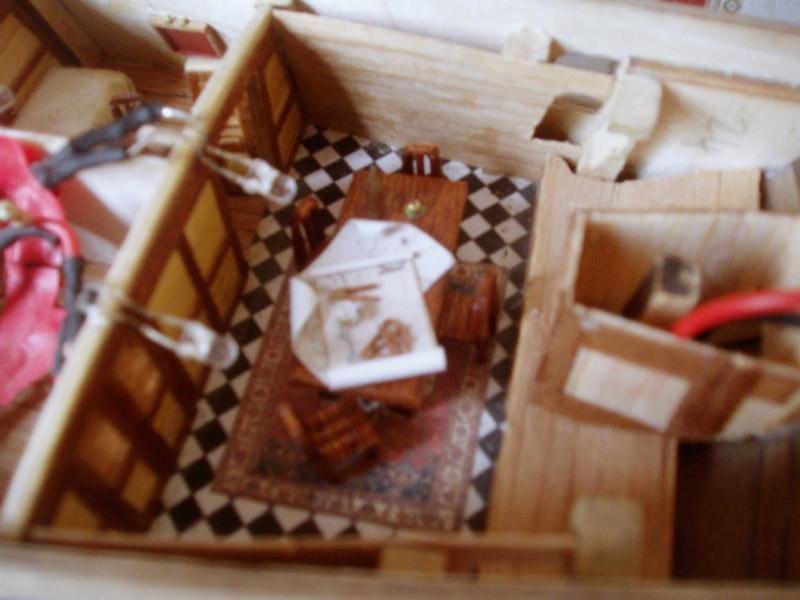
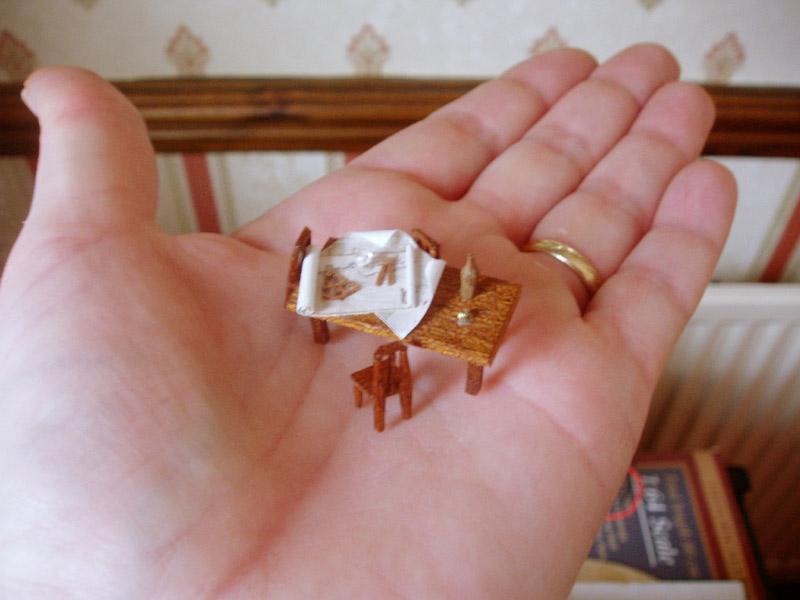
Thanks Mark, yes, the darkside does beckon to me from time to time! Thanks for the compliment Aldo. I took some photos of the great cabin and the captains cabin I created. I made the furnitre to fit and when I posted it back in my old build log, my friend Laerte jokingly suggested I put a map, sextant, calipers, wine bottle and glasses on the table. I took him up on the challenge and created what you see now! The Great Cabin: The Captains Cabin: The table and chairs: Furniture in Great Cabin:

- 161 replies
-
- 5
-
-
- pegasus
- victory models
- (and 1 more)
-
Hi Crackers, My latest Aggie update was made the other day, the project is now completely up to date, as soon as I finish the current section I will post a new update. Thanks Derek, I quite enjoyed using scale lengths on the second planking and would do it like that again on any furture builds.
- 161 replies
-
- 1
-
-
- pegasus
- victory models
- (and 1 more)
-
Thanks Adrieke!
-
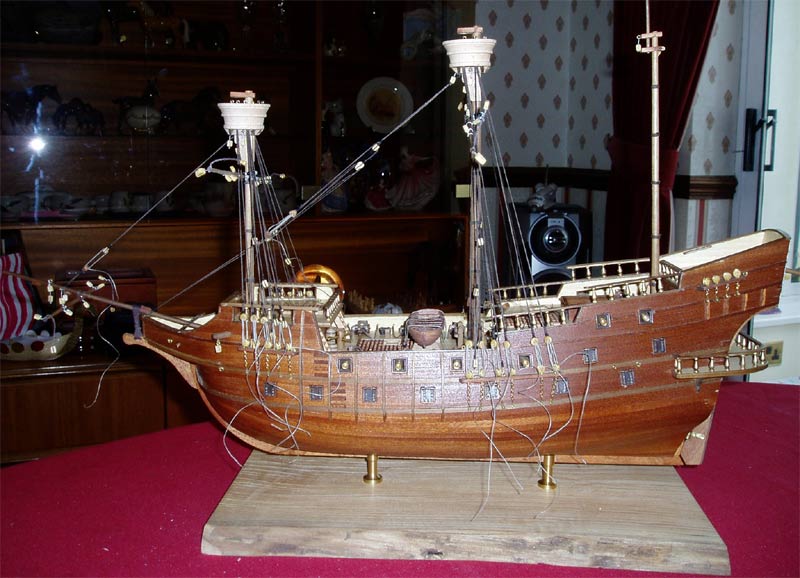
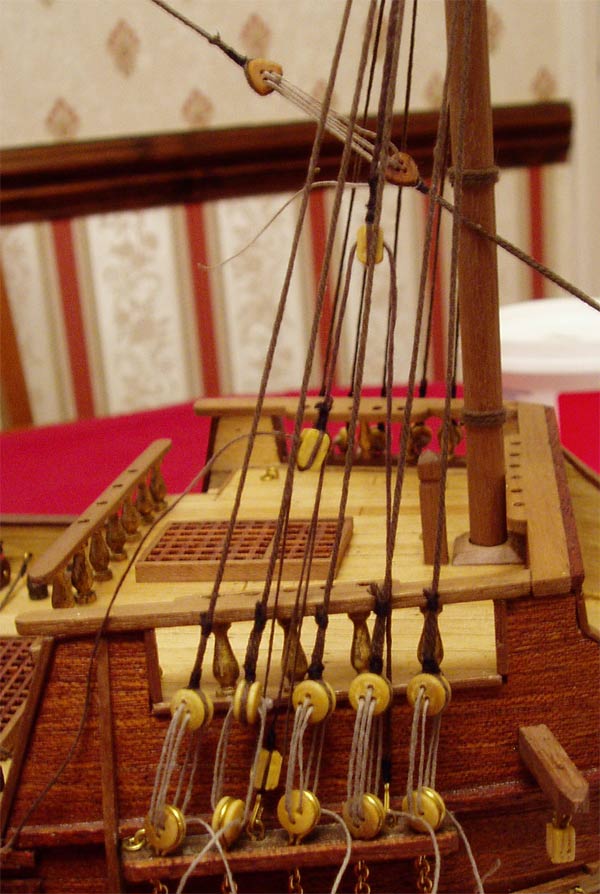
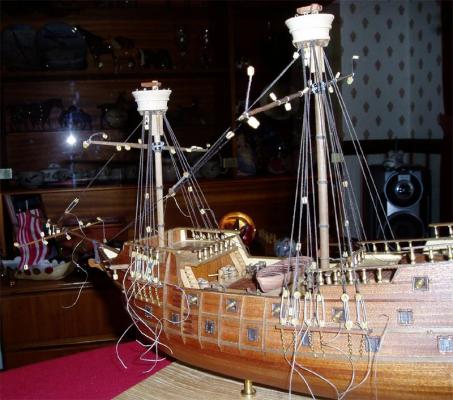
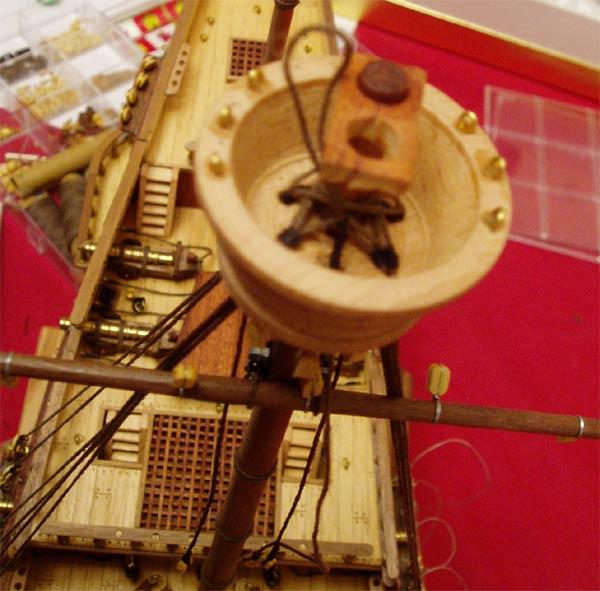
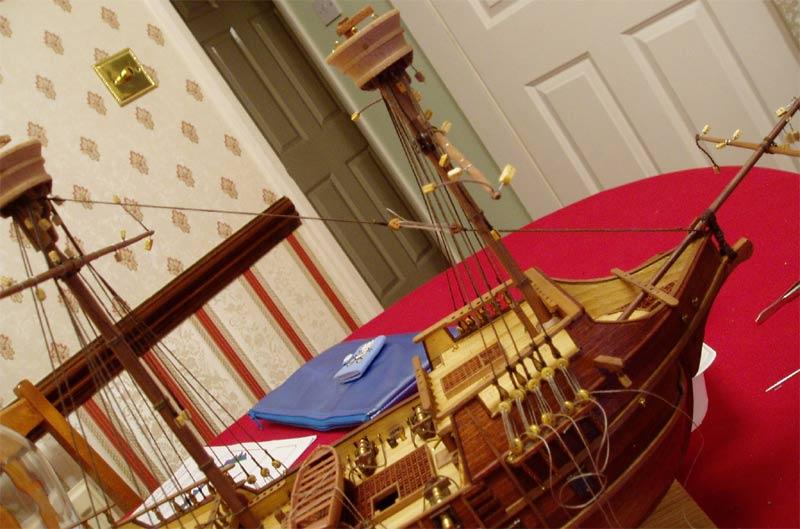
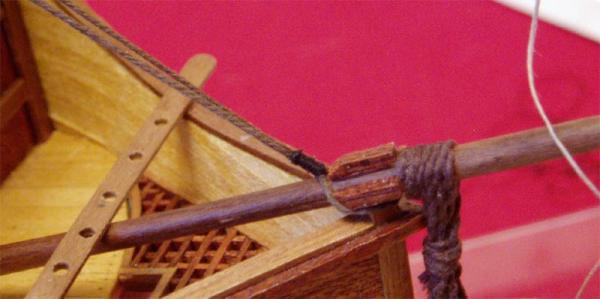
The masts and spars made and in loosely place. To make the masts and spars I used my craft knife to pare off the excess wood then I placed in into a drill and used a piece of sandpaper (very carefully, if your not careful the sandpaper can be snatched from your hand) to fine tune the shaping. I didn't glue the masts in, they are held in place by the shrouds, at this stage I did a lot of research into what type of rigging would be likely to be on a ship of this type and era, as I wasn't happy with the rigging diagrams that came with the kit, to me it was too basic. One of my first additions were the tackles and pendants which can be seen hanging down alongside the main mast, they were also added to the fore mast. The lanyards were left loose until the last minute: The shrounds were put on in pairs, one pair to the left, the next pair to the right and so on. The last shroud on the port was spliced to the last one to the starboard as they were both singles. Spliced shroud: It gets a bit crowded! A more detailed explination of how I attached my shrouds can now be found here The triangle block for the main mast stay siezed into place: Main stay in place on the mast: Main stay attached to the bowsprit with lanyard, in the second and third pictures you can see the stay passed on both sides of the fore mast, this is not indicated in the instructions, but in my research, it appeared this is the way it would probably have been: The stay now siezed around the bowsprit:
- 122 replies
-
- 2
-
-
- finished
- artesania latina
- (and 1 more)
-
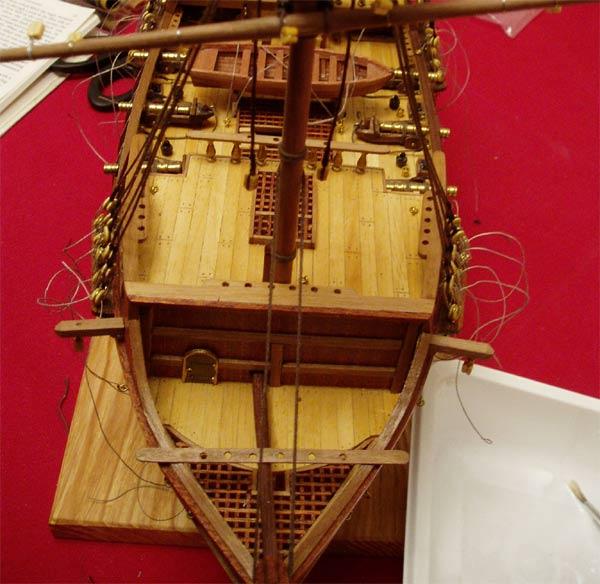
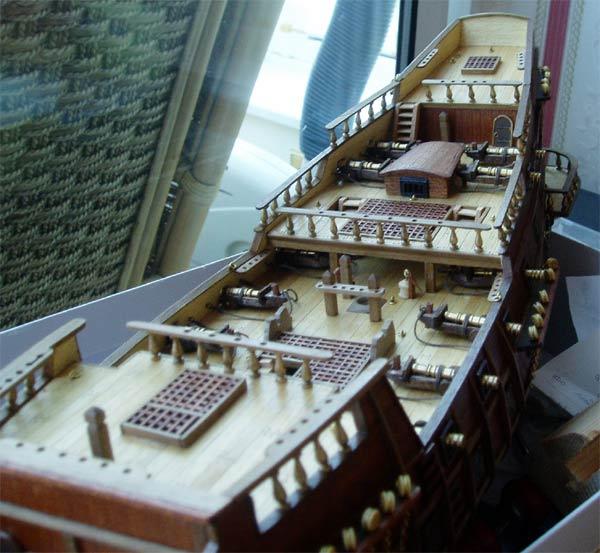
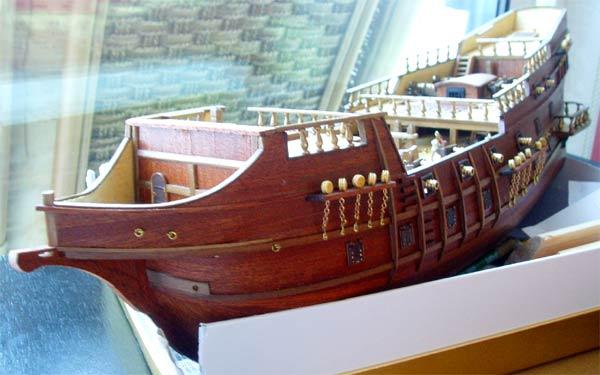
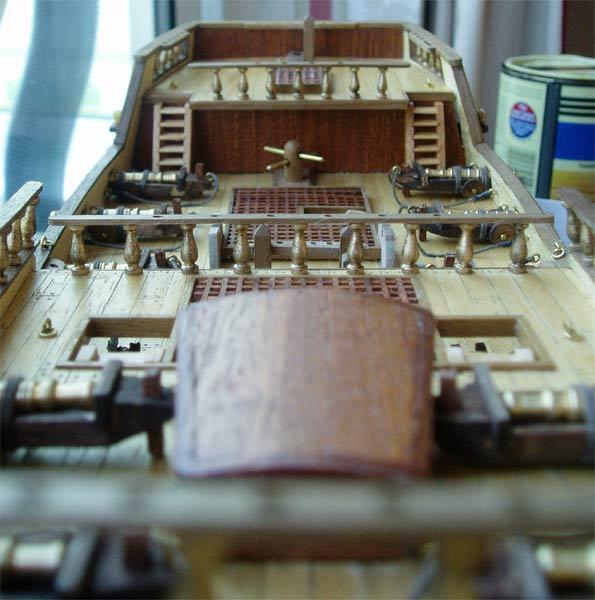
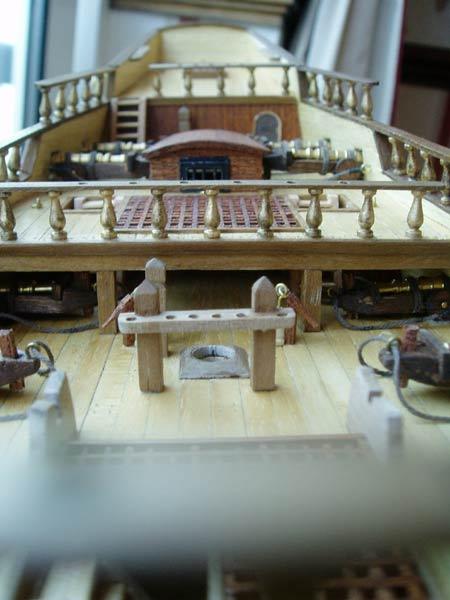
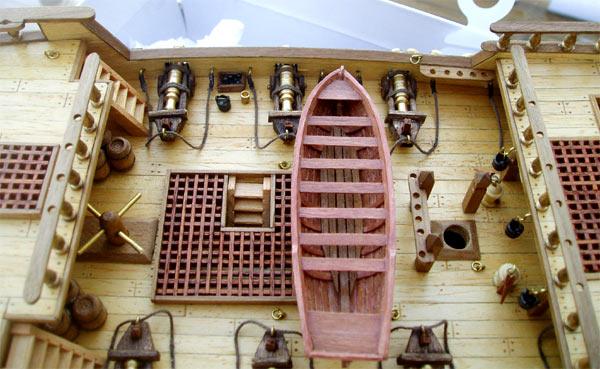
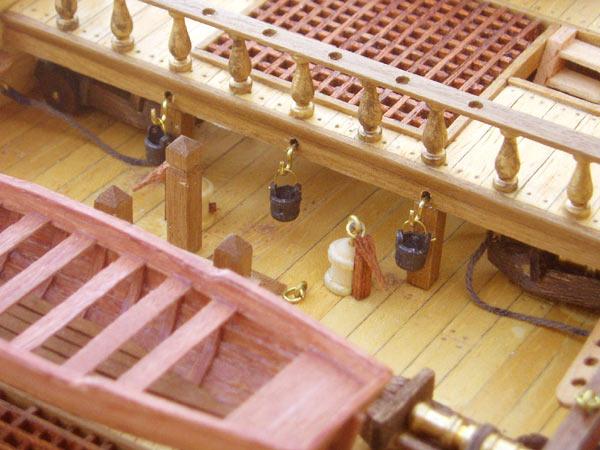
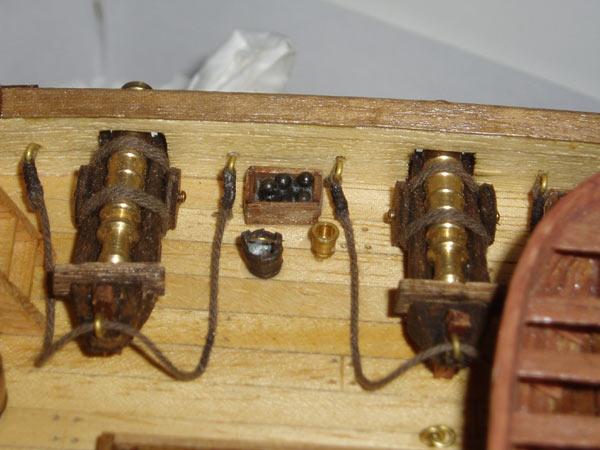
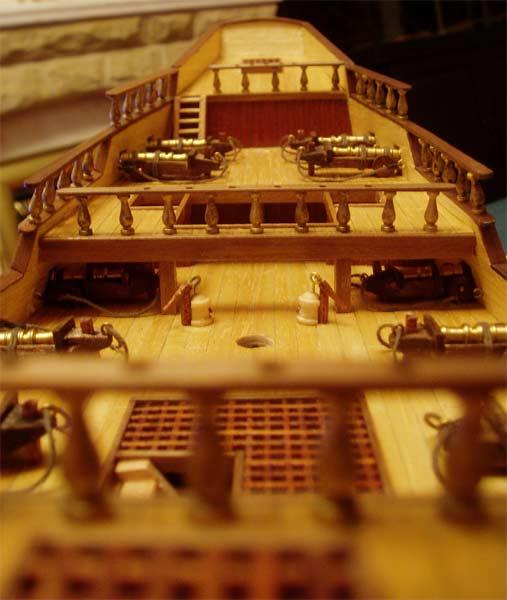
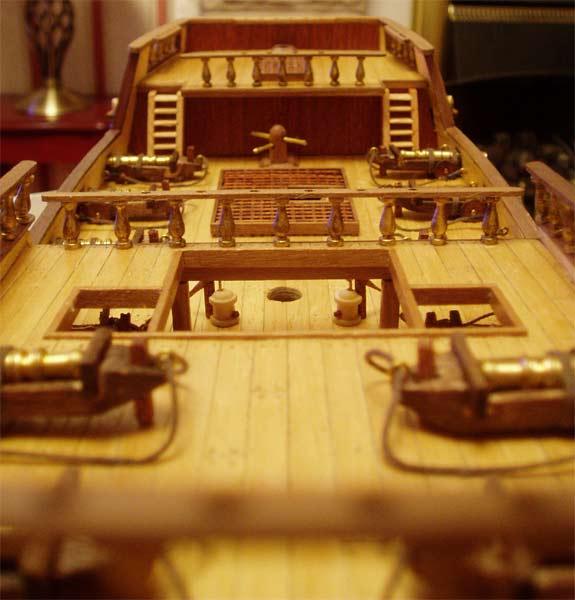
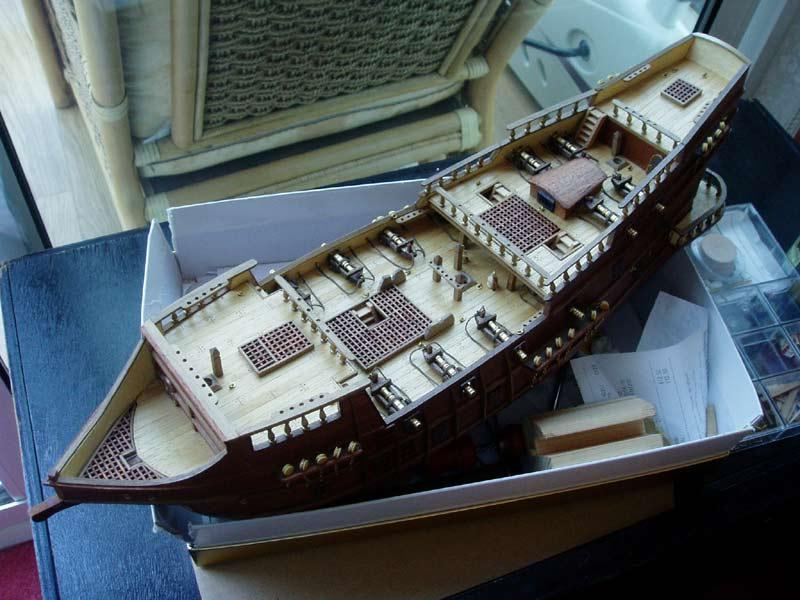
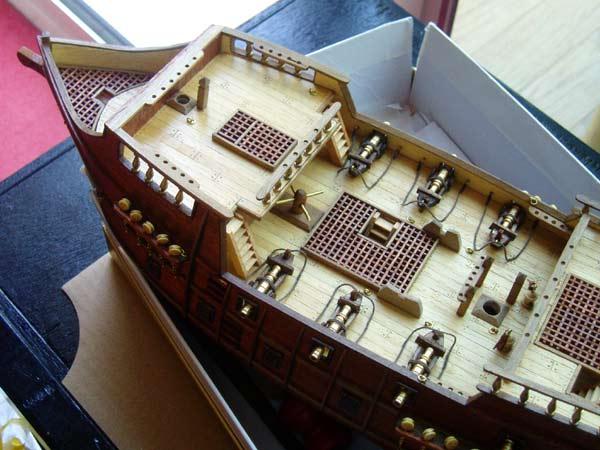
General overview, now ready to start on making the masts: I loved making and adding the extras: Ship's boat in place: Fire buckets: Cannon balls and water buckets with cannons: Barrels:
- 122 replies
-
- 2
-
-
- finished
- artesania latina
- (and 1 more)
-
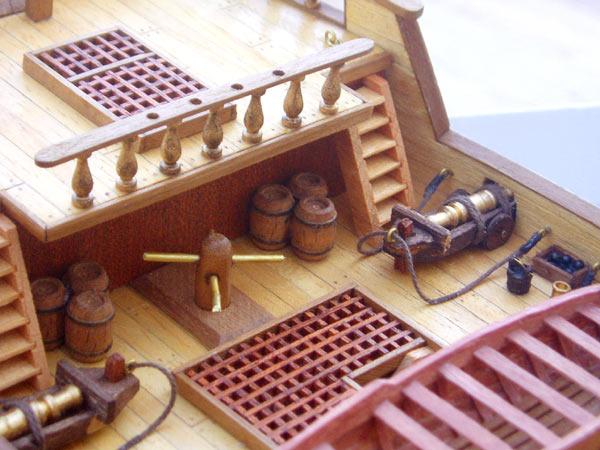
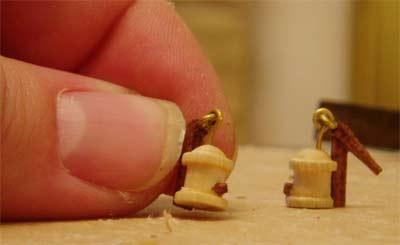
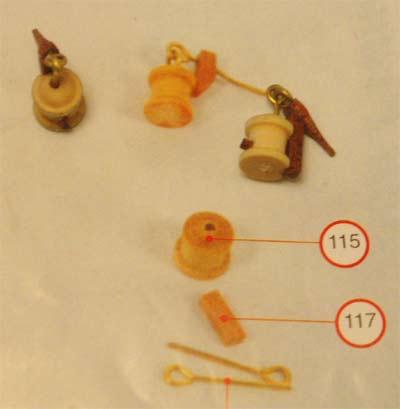
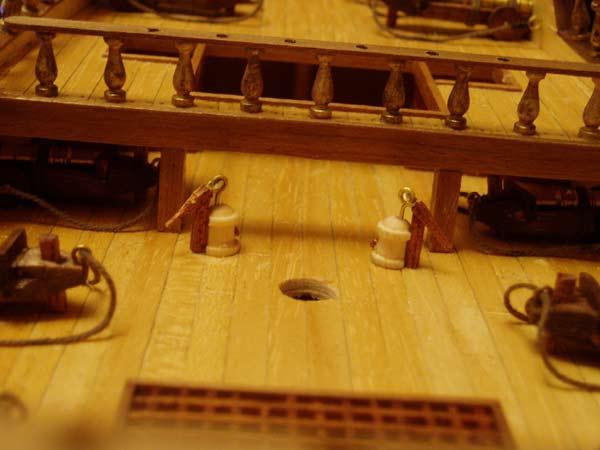
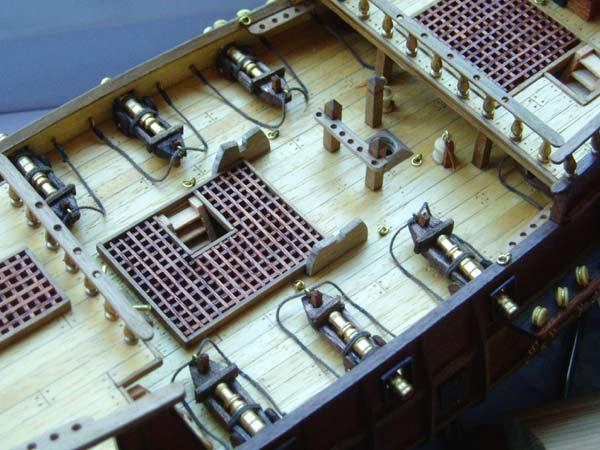
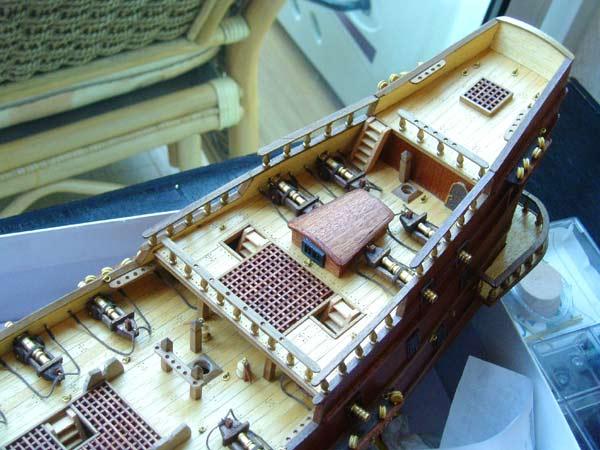
Hi Wolf, thanks for your lovely comment, not sure about that final chapter though! I glad that my log inspired you Sokrates, have you chosen your 3rd build yet? Thanks for looking in Gary. Next I made the pumps, with only a little modification: In place on the deck: Other deck furniture in place:
- 122 replies
-
- 2
-
-
- finished
- artesania latina
- (and 1 more)
-
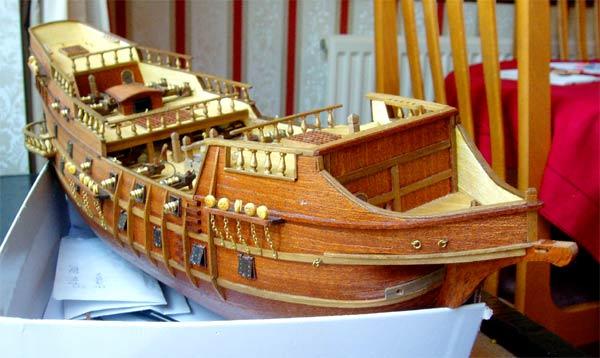
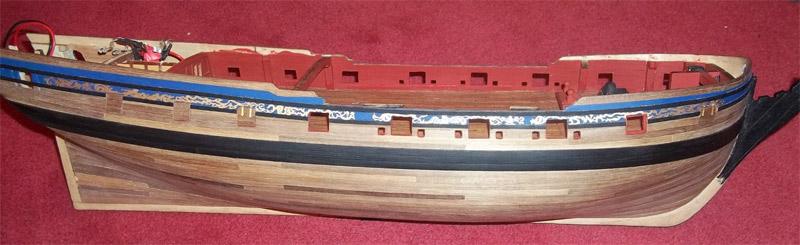
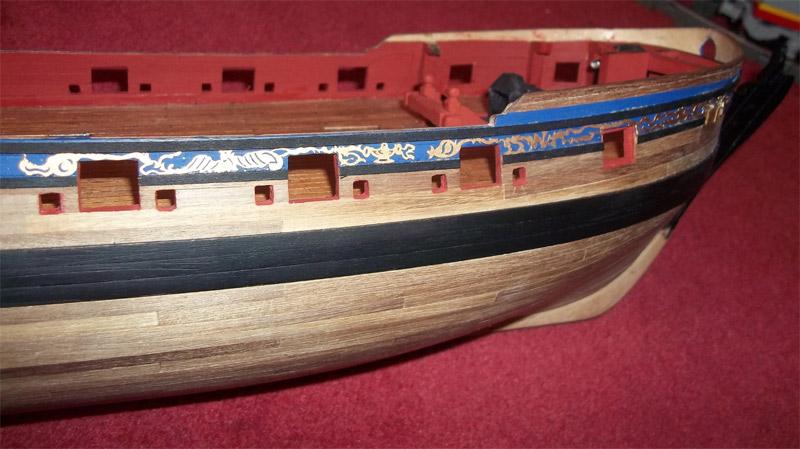
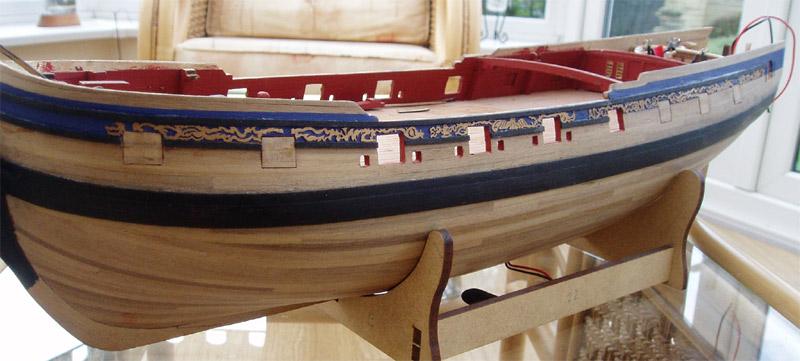
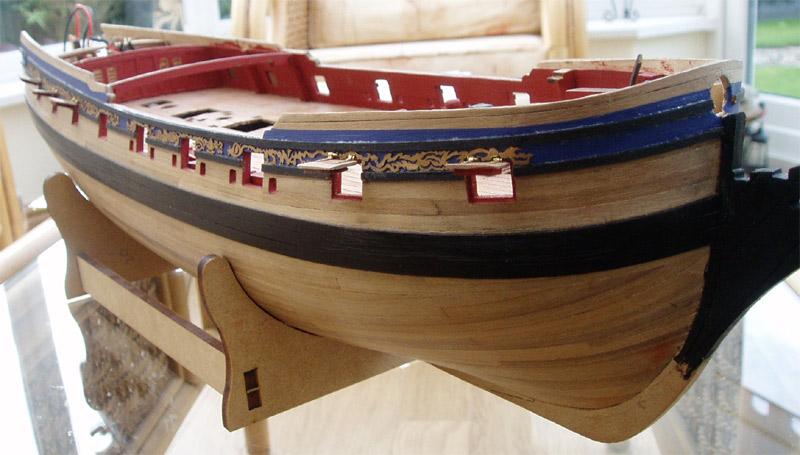
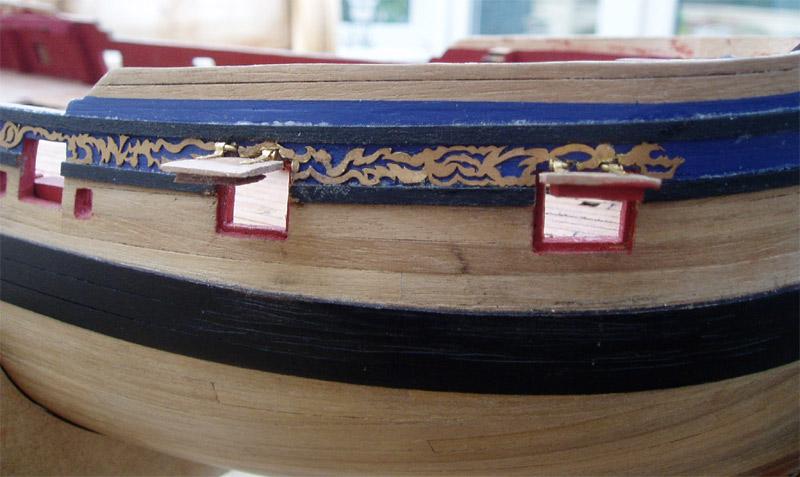
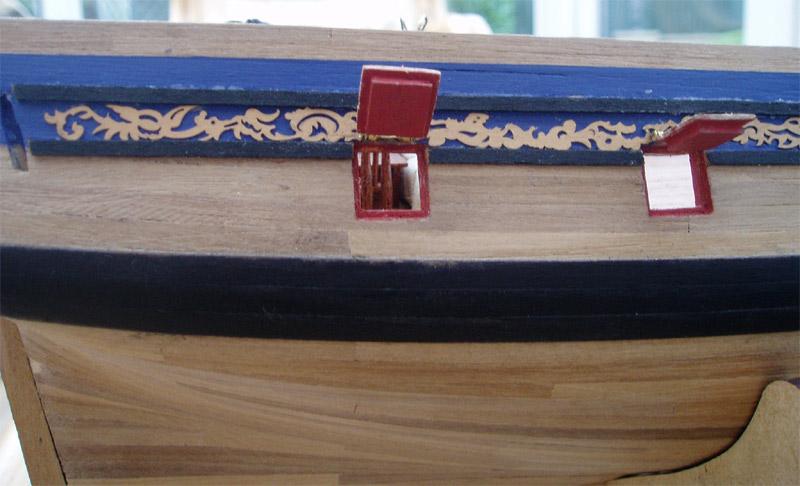
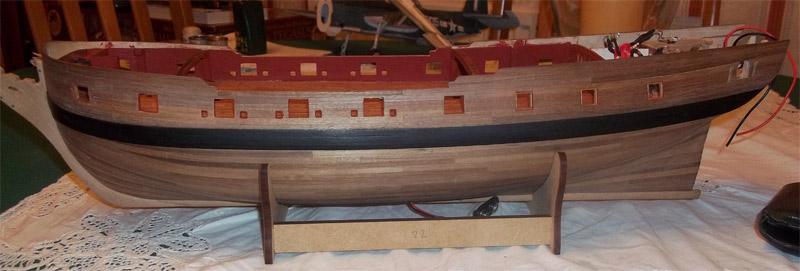
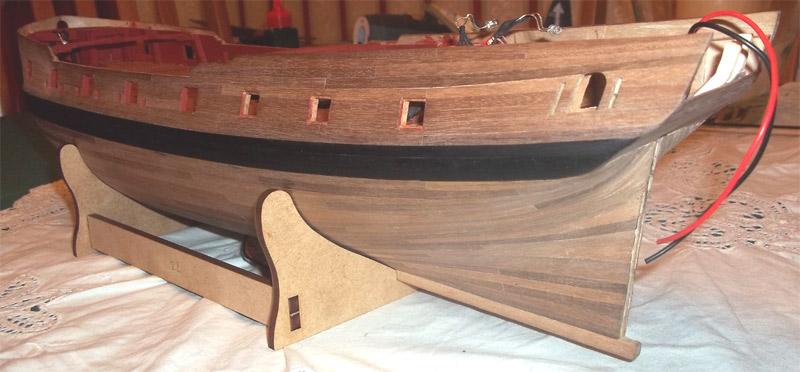
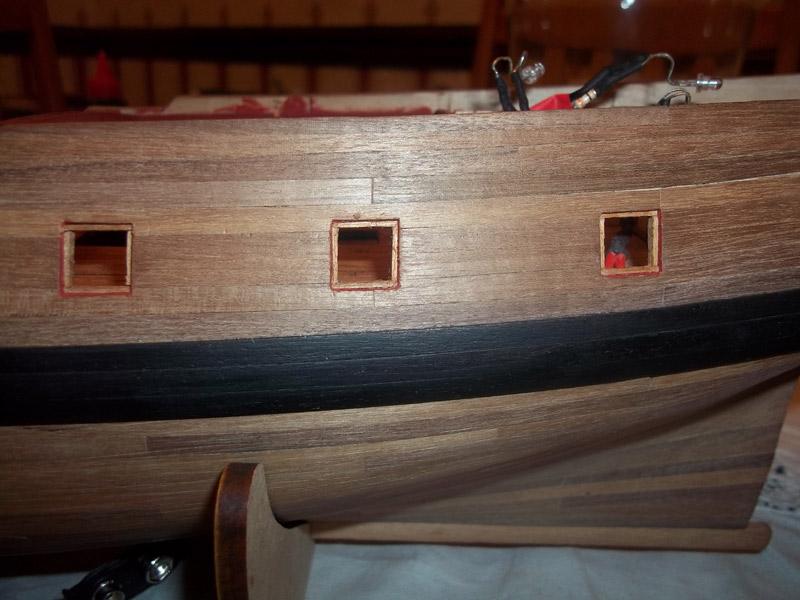
Next I masked of the areas to be painted blue and got my paintbrush out, after using the brass scrollwork as a guide, attached the thin black strips, once these were stuck, I glued on the decorative brass: I made gunport lids and modified the provided brass hinges so that they would open and close: Port gunports made and waiting for their hinges: Starboard gunports complete with their hinges: Here is where I am currently at at the moment. I have made and attached the hinges for the gunports on the port side except for one.
- 161 replies
-
- 3
-
-
- pegasus
- victory models
- (and 1 more)
-
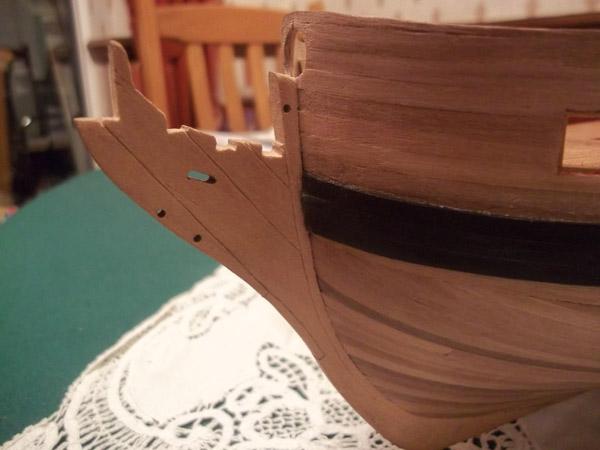
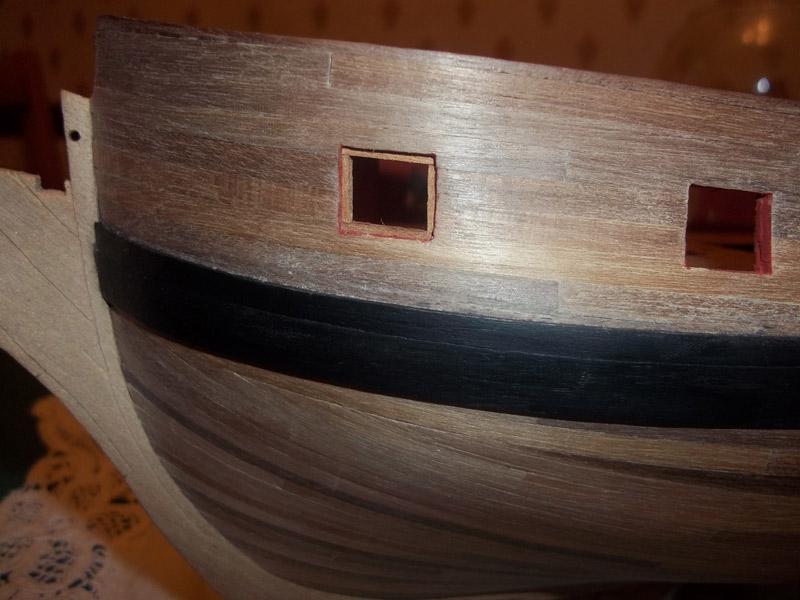
Port side wale and the scoring to simulate the sections of the knee, as suggested by Dan Vad - thanks Danny! : Next I lined the gunports:
- 161 replies
-
- 2
-
-
- pegasus
- victory models
- (and 1 more)
-
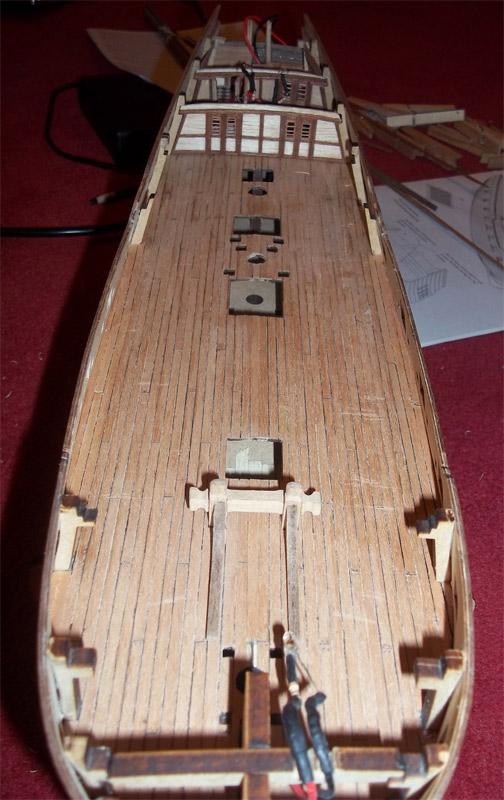
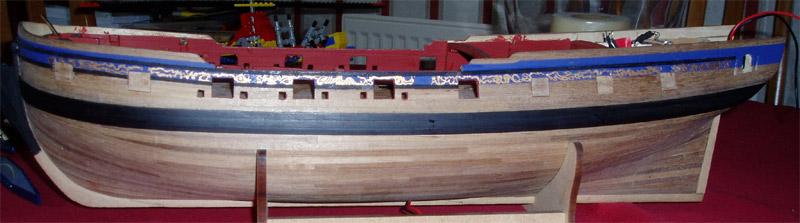
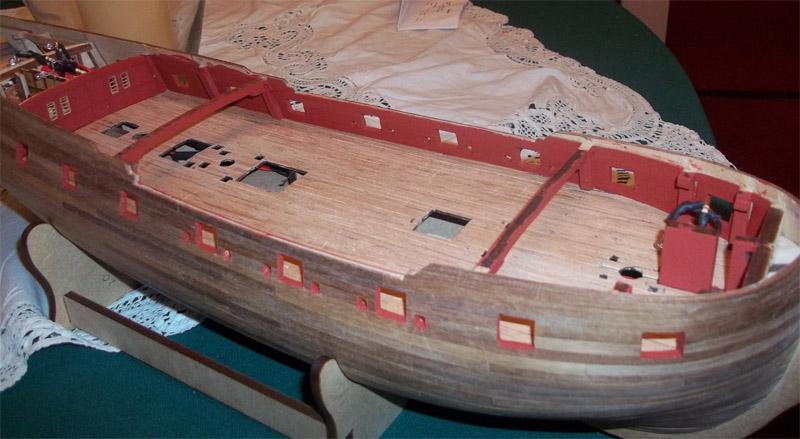
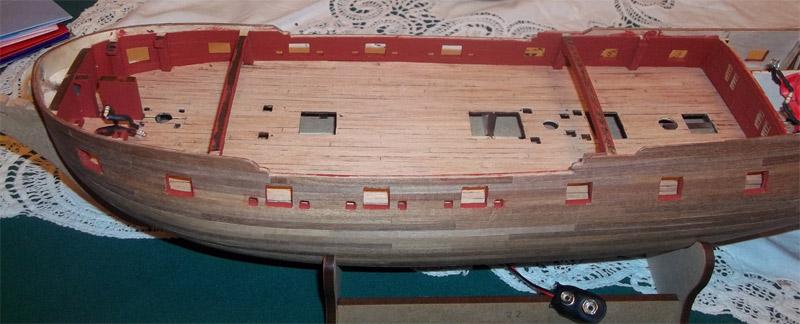
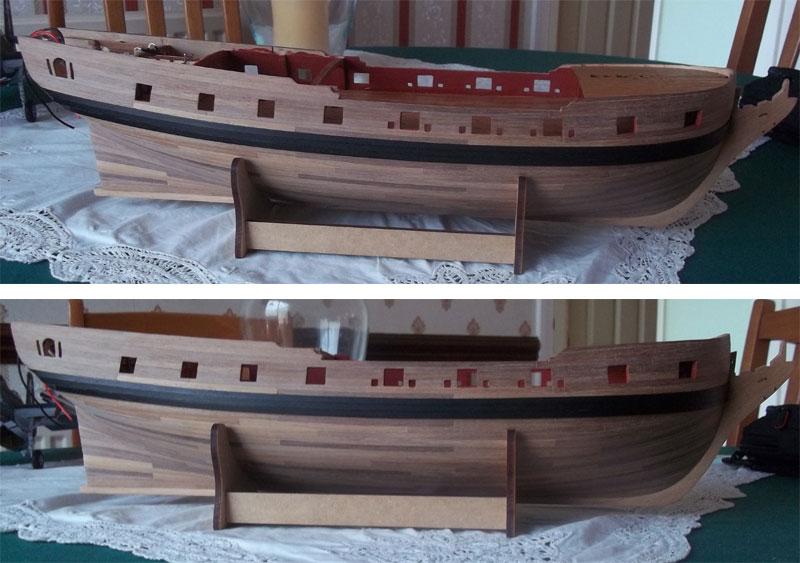
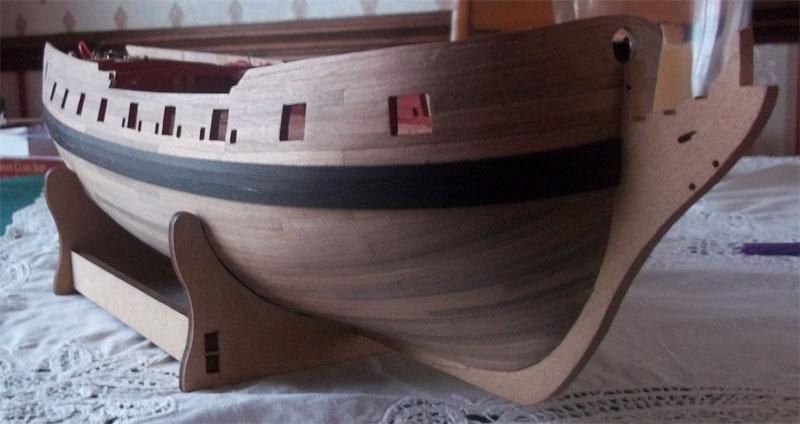
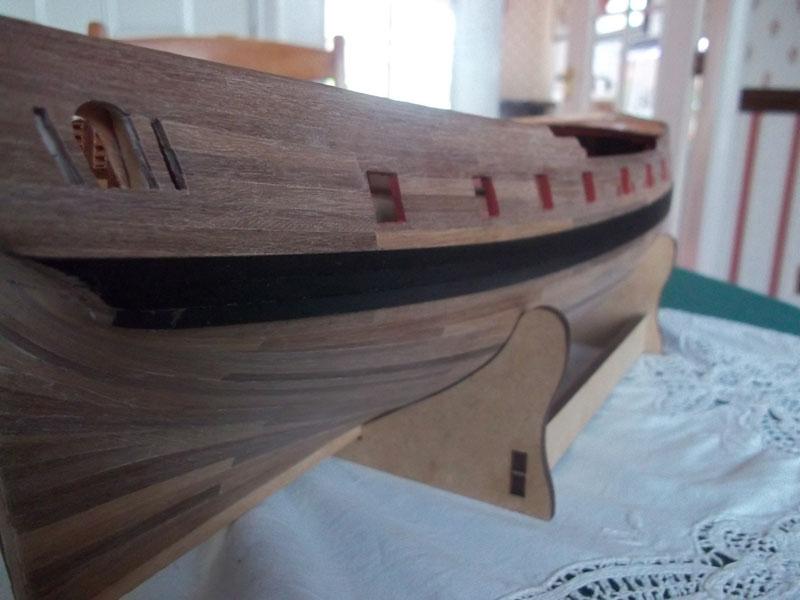
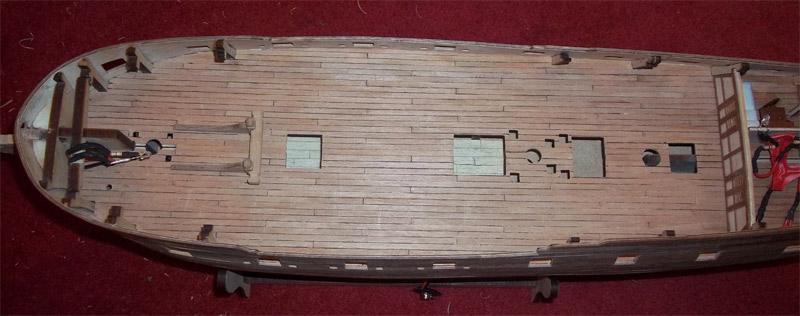
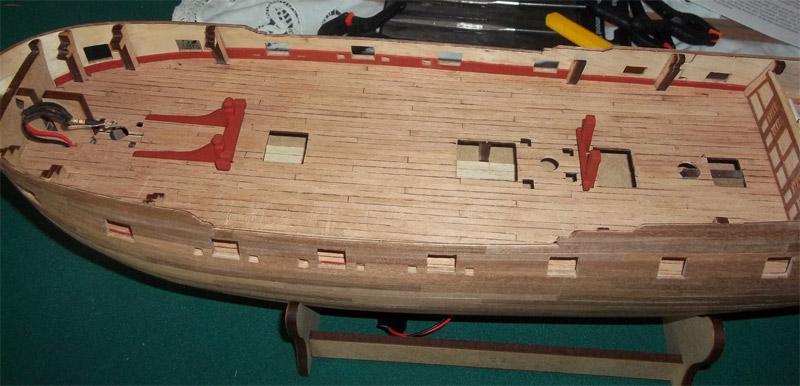
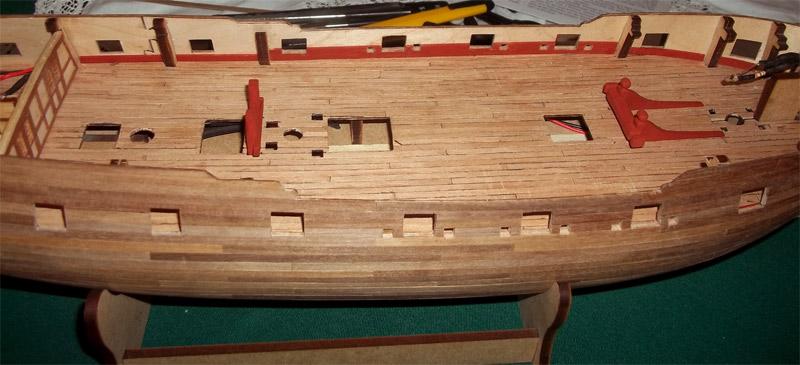
The quarter deck and forcastle deck planking underway: The bulwarks have a second coat of paint and other elements are painted: The wales are attached - three planks were painted black, while they were drying, I marked where the edge of the top most plank should be onto the hull using the plans as a guide, and once the paint had dried, attached them to the hull:
- 161 replies
-
- 5
-
-
- pegasus
- victory models
- (and 1 more)
-
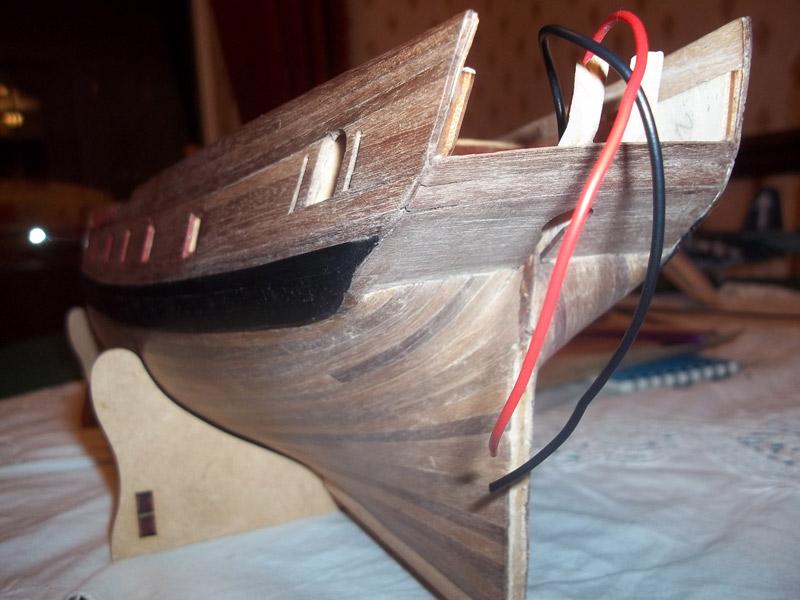
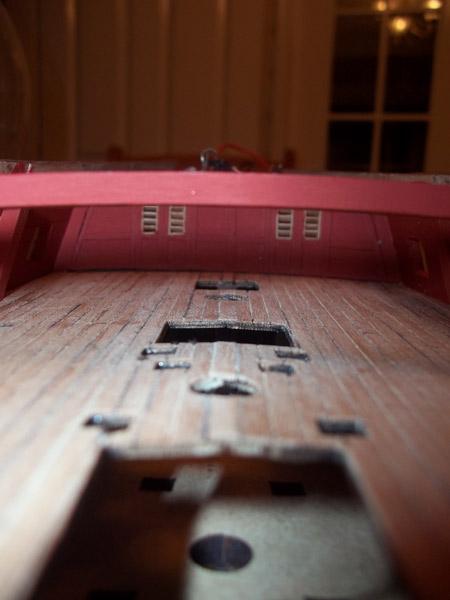
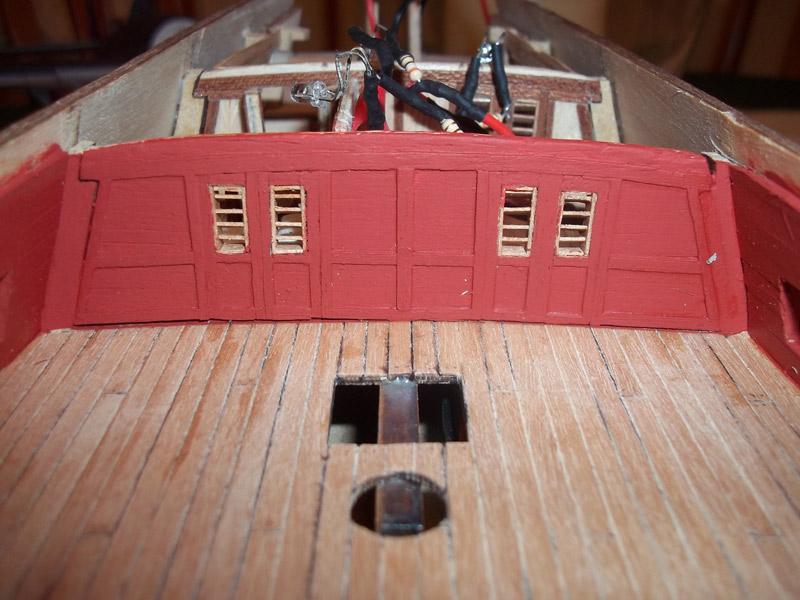
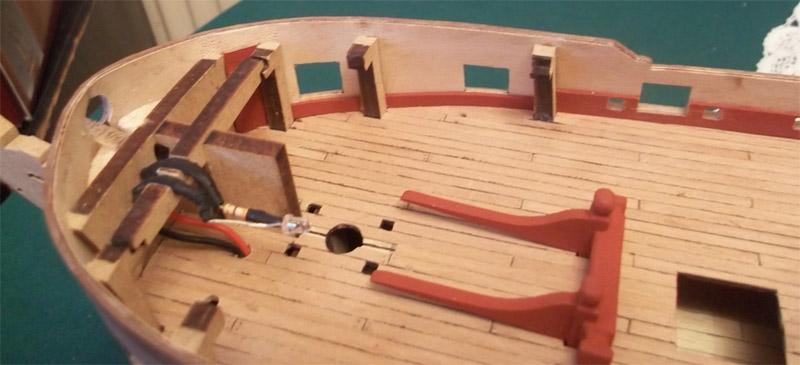
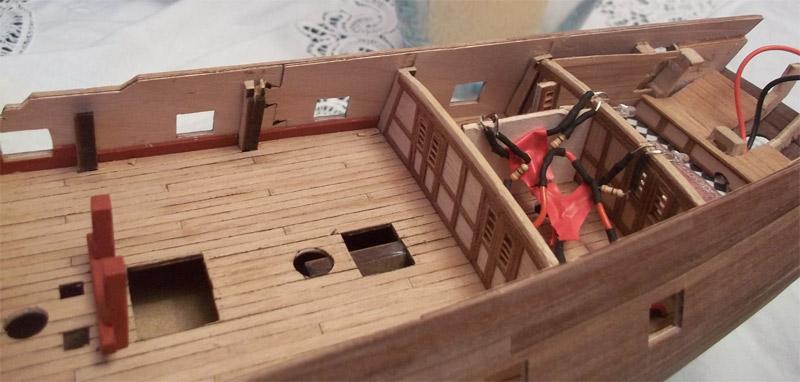
Now the second planking was completed, I could remove the tops of the bulkheads: View of the length of the ship, showing the two internal walls I made: Inner bulwarks planking in progress, I first painted several lengths of planking before attaching them to the bulwarks: Stern showing part of my modifications and the lighting installed in the great cabin and captains cabin:


- 161 replies
-
- 4
-
-
- pegasus
- victory models
- (and 1 more)