DONATION DRIVE - SUPPORT MSW - DO YOUR PART TO KEEP THIS GREAT FORUM GOING!
×
vulcanbomber
-
Posts
396 -
Joined
-
Last visited
Content Type
Profiles
Forums
Gallery
Events
Everything posted by vulcanbomber
-
The best thing is... Murphy will get fed up hounding you at some point and go find someone else... hang on in there, you'll soon get through it. Good work on the rigging by the way.
-
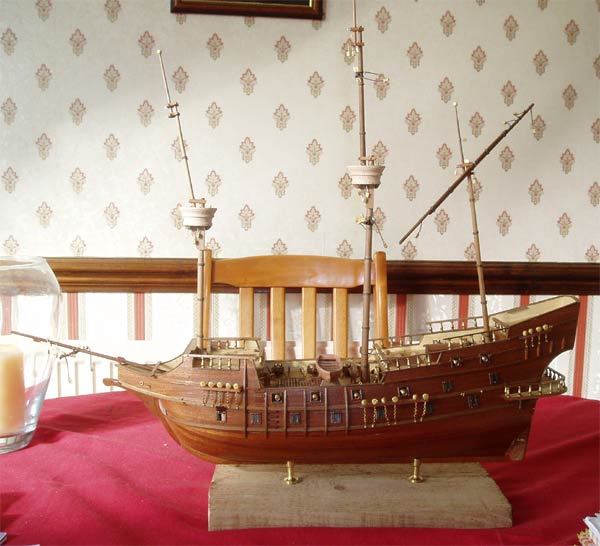
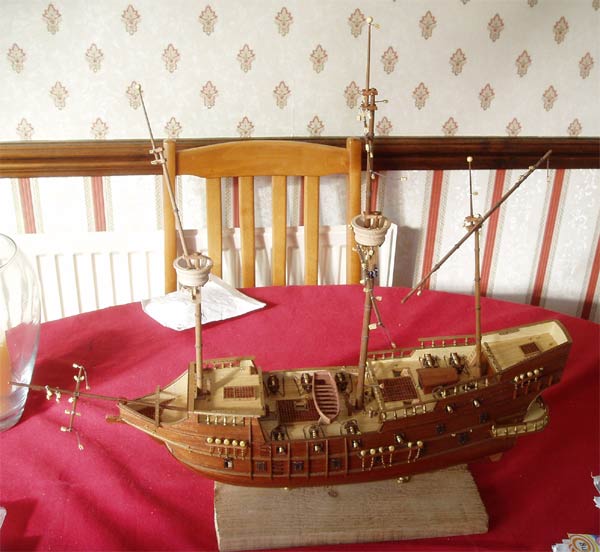
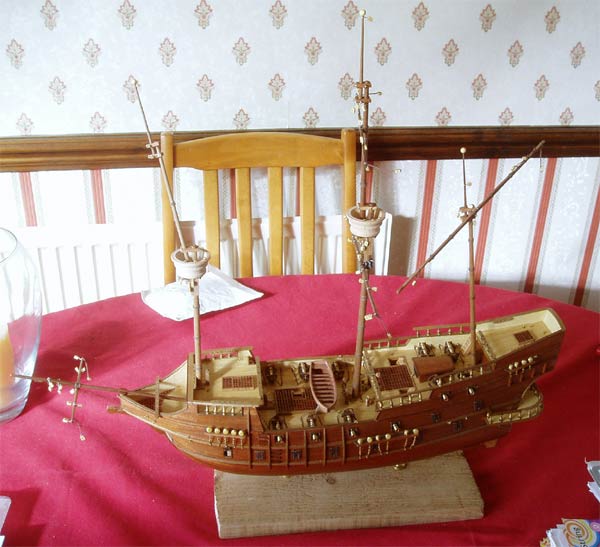
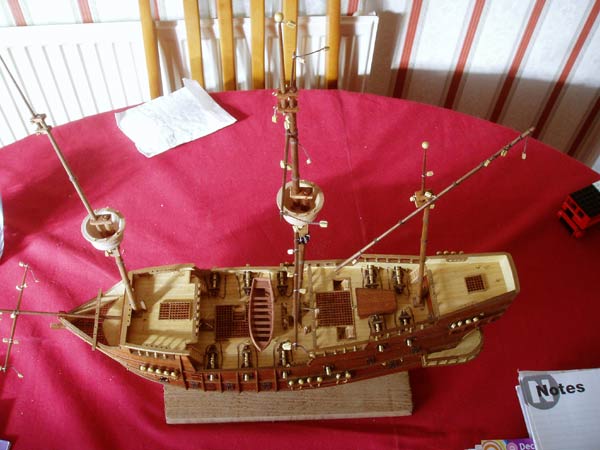
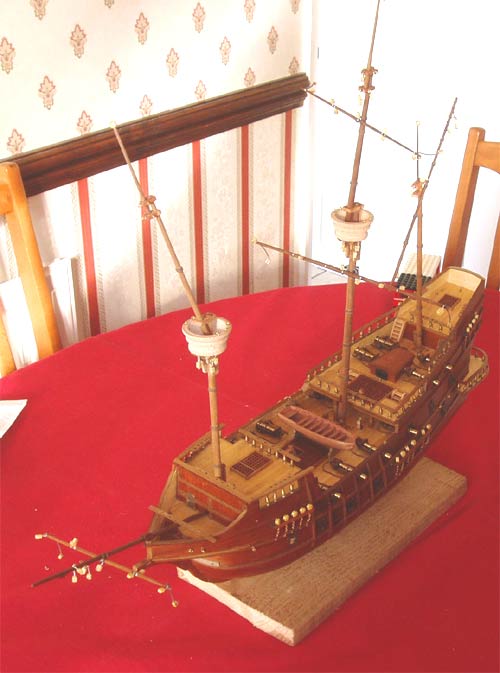
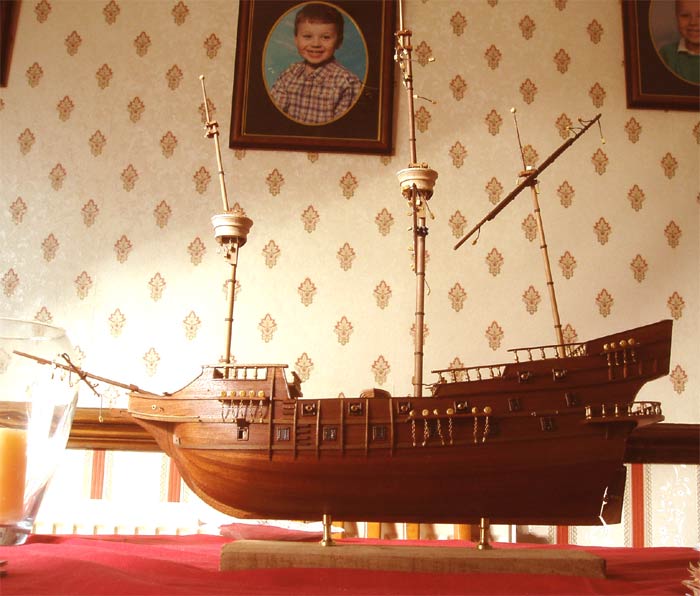
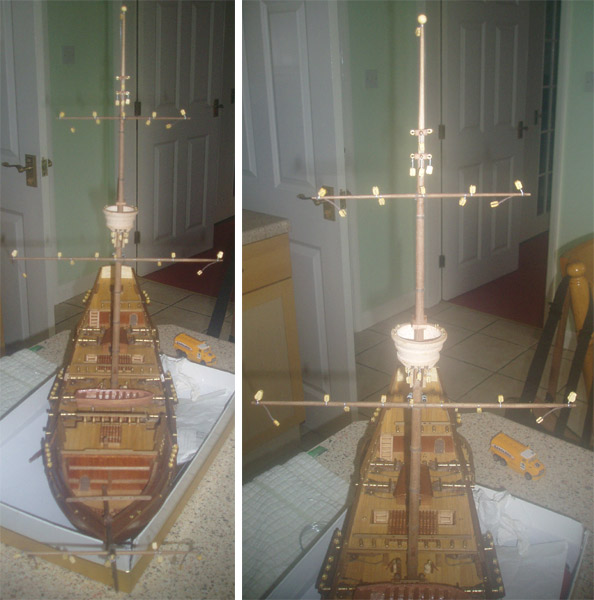
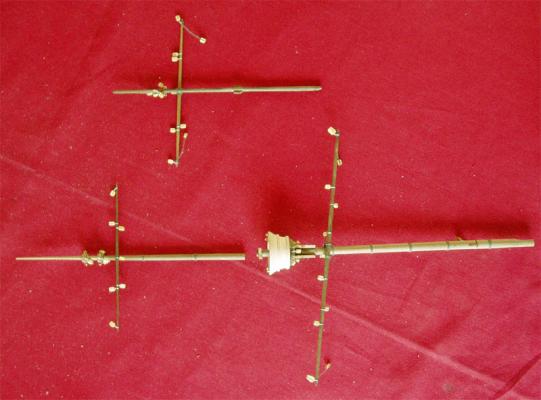
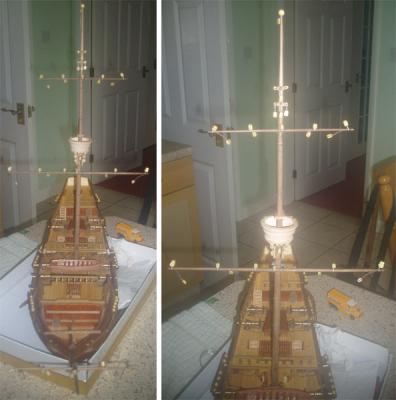
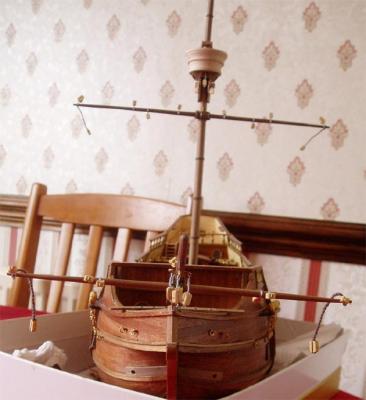
Main mast, main top mast, bowsprit and their yards: Main masts in place: Main mast and yard: Main mast crows nest and it's blocks: Front Rear Bowsprit in place;


- 122 replies
-
- 2
-

-
- finished
- artesania latina
- (and 1 more)
-
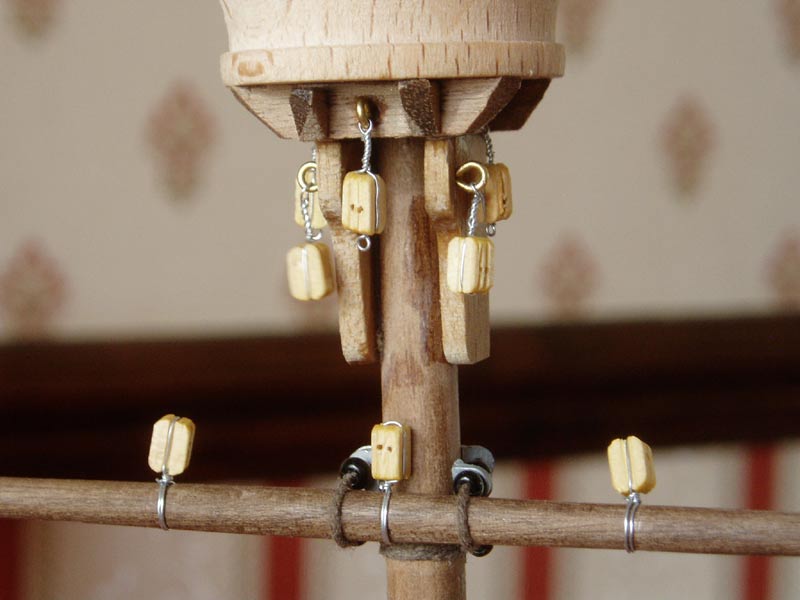
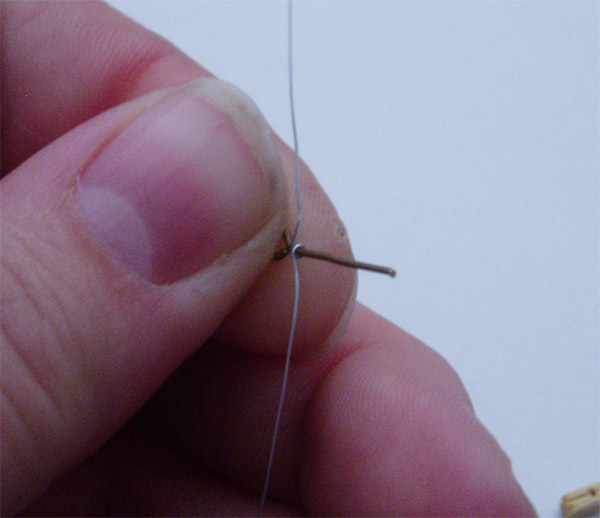
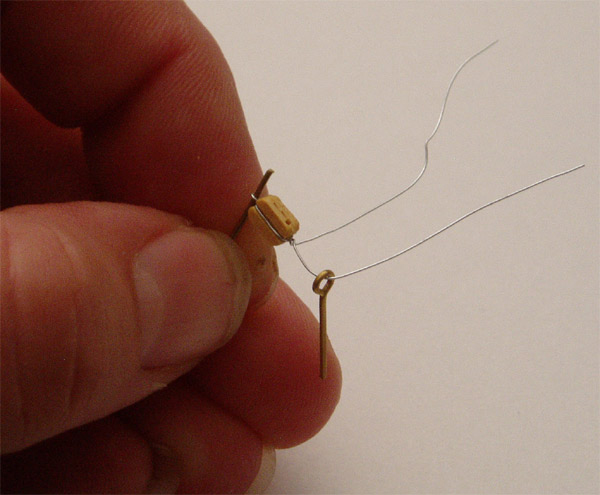
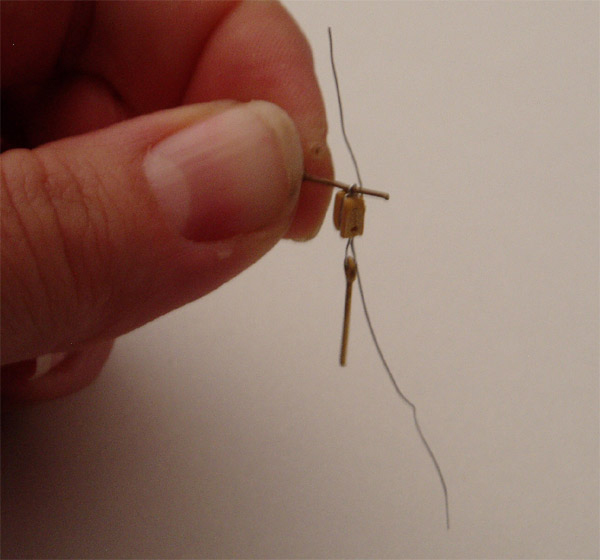
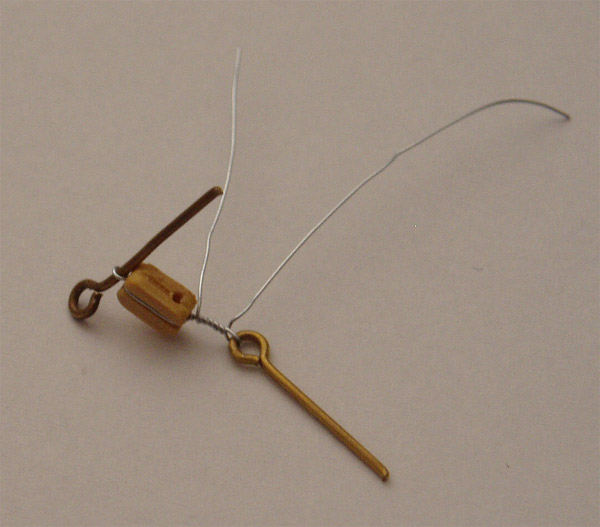
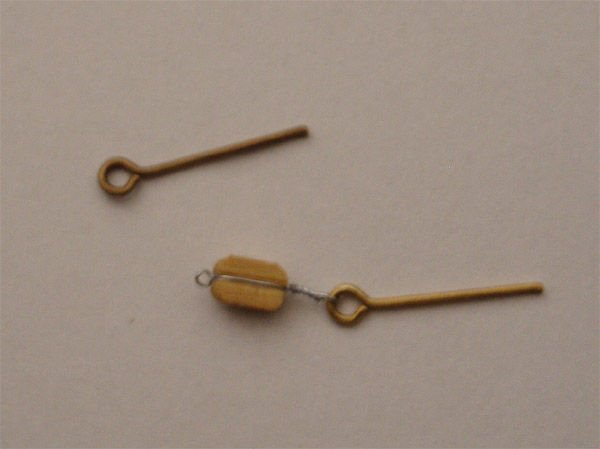
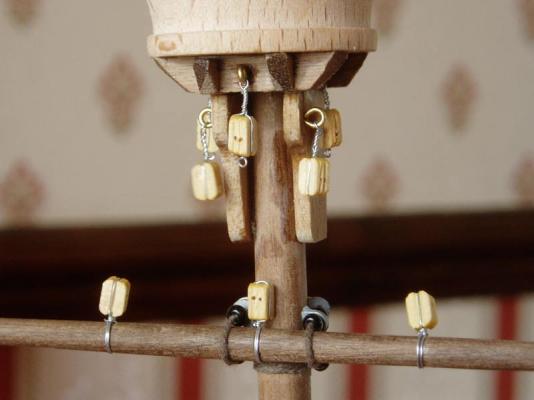
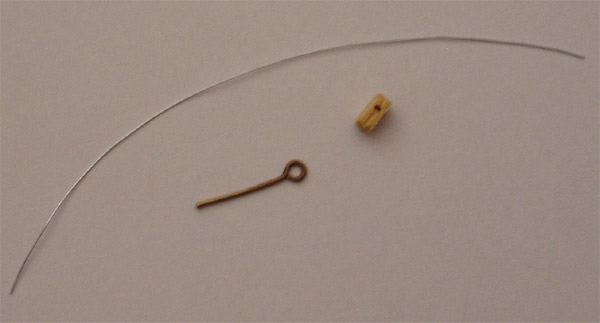
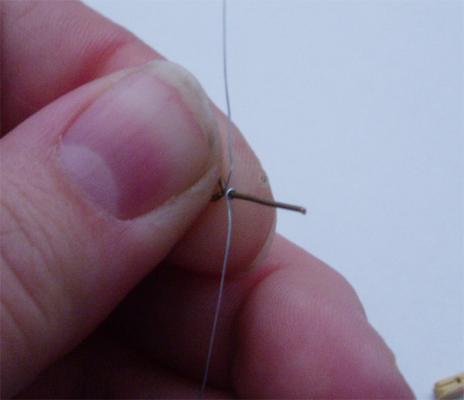
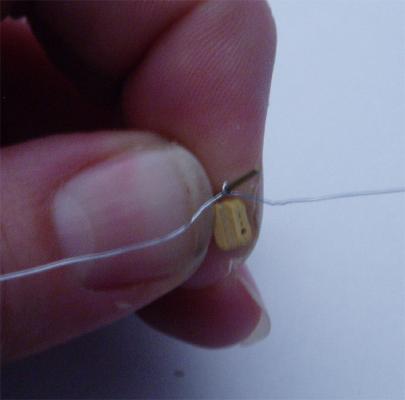
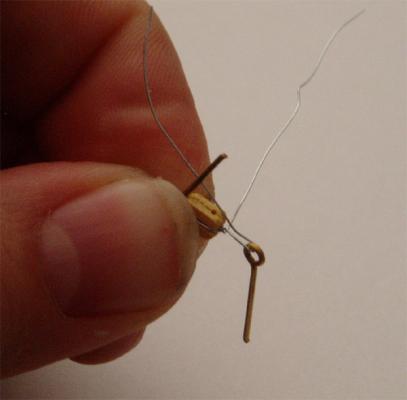
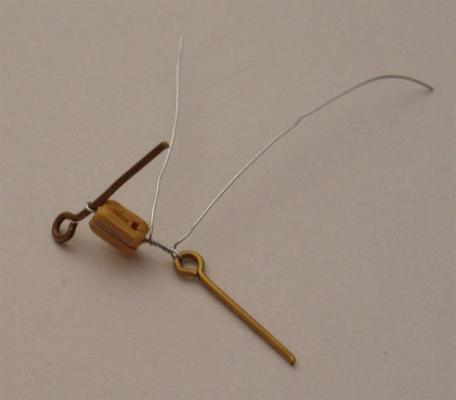
This is how I made the blocks that have a long strop and are attached to the bowsprit by an eye. First I took a length of the wire provided in the kit, a single block and an eye: Taking the eye, I wrapped the middle of the wire around it to make the loop at the top of the block: Next I placed the block under the 'loop' Take the ends of the wire and place one on each side of the block and twist the together once to lock the block in place; Next take a second eye and thread one wire end through it: Leave a short length and bend the end back up towards the block: Keep this end up towards the block and bend the other wire end down towards the eye: Now twist the eye around so the wires twist together: Finally trim the ends and remove the eye from the loop:


- 122 replies
-
- 5
-
-
- finished
- artesania latina
- (and 1 more)
-
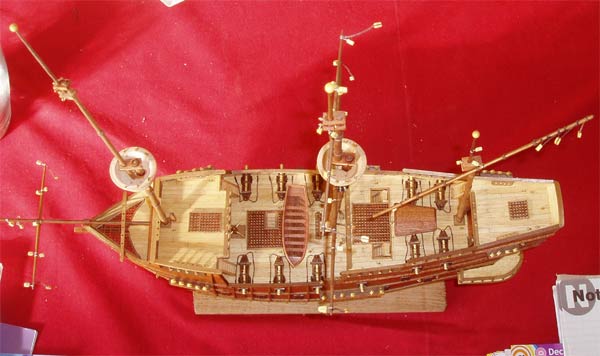
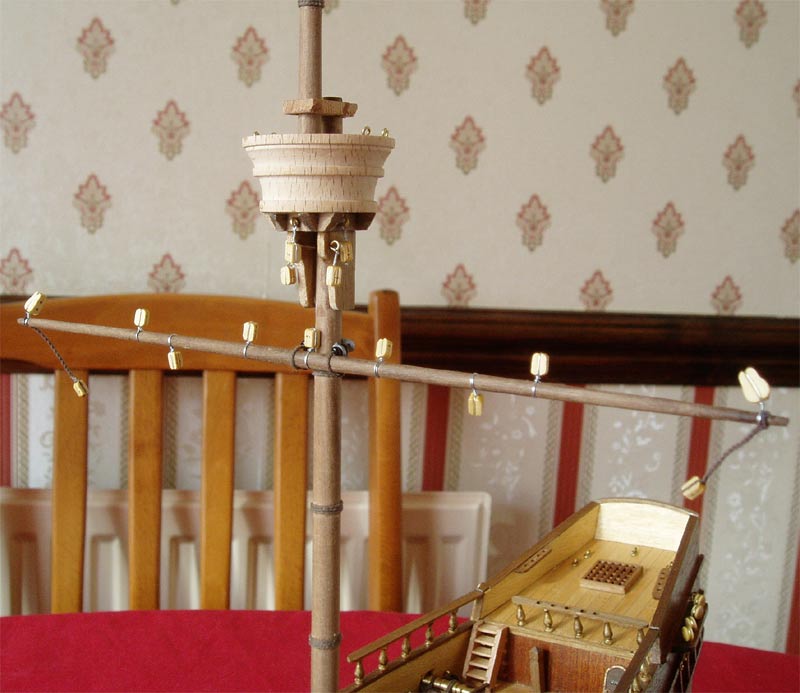
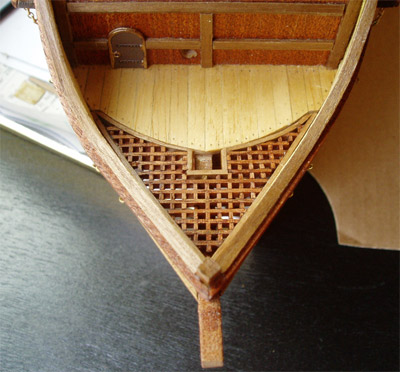
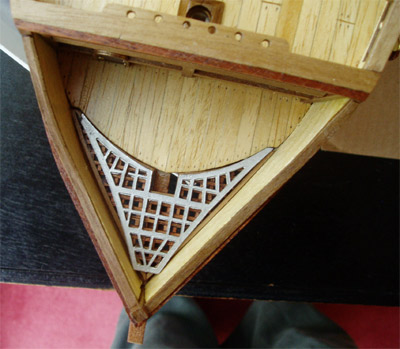
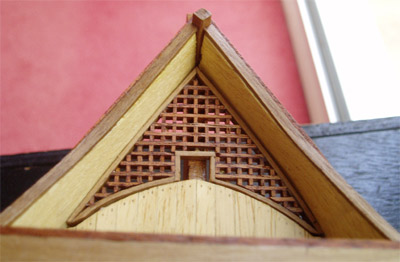
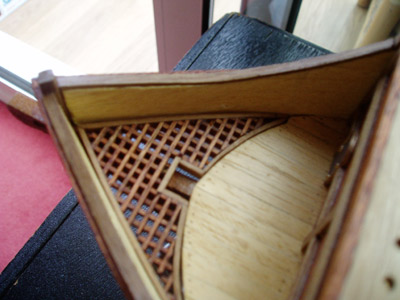
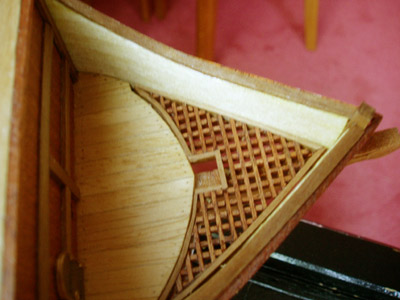
I've found some of my lost photos on our son's PC, so even though it's going back a bit in time, I still think they'll be useful. I replaced the nasty metal grating with a wooden one made from the extra grating material left over. The post in place at the tip of the beak and the trim and rings installed: The bowsprit with blocks and yard attached; In the next post I'll describe how I attached the blocks.


- 122 replies
-
- 3
-
-
- finished
- artesania latina
- (and 1 more)
-
Hello Wolf. Yes, my log on mSW1 did have more detail on the rigging. I'm slowly trying to recreate the log, but have lost a lot of the photos I had, (though I've just recently found a whole bunch of ones I'd forgotten on our old PC, that our son is now using, and will have a look through them). I will try to get the same level of detail, but you'll need to be patient, especially as I'm building Pegasus too!
-
Really impressed Sjors, she's looking excellent.
-
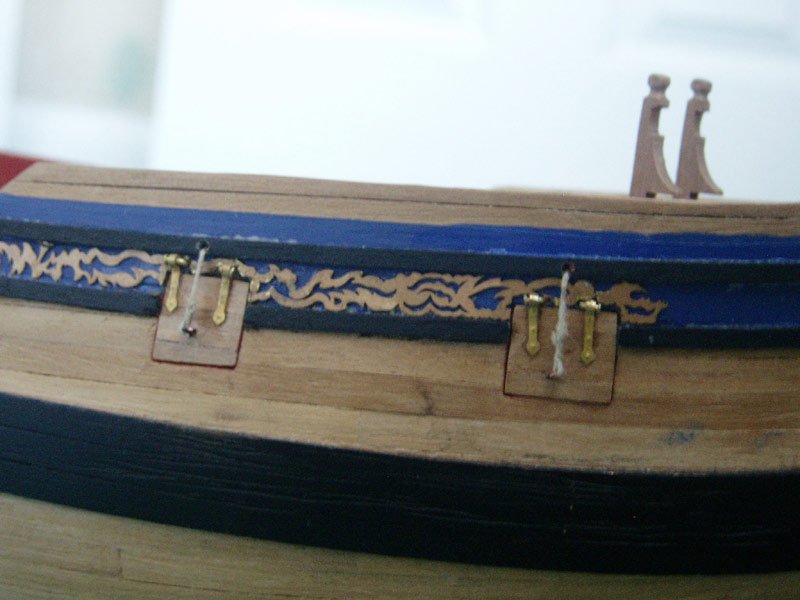
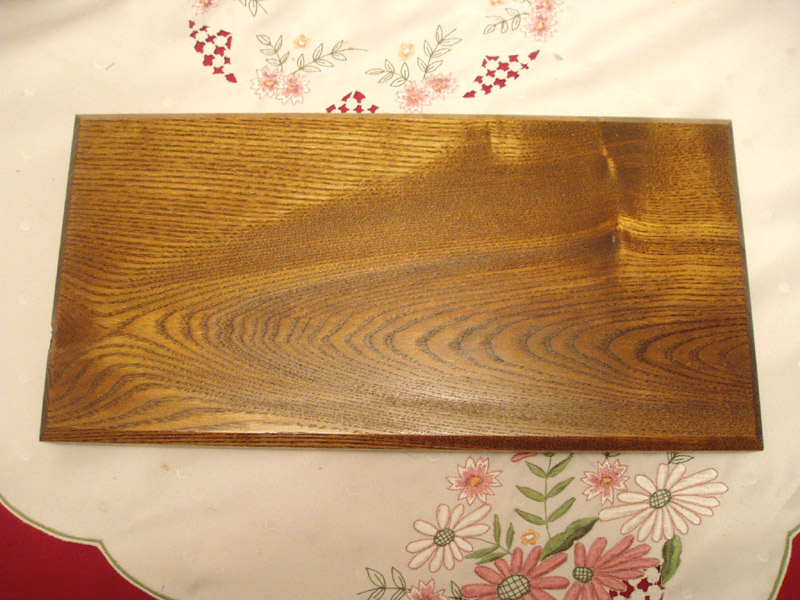
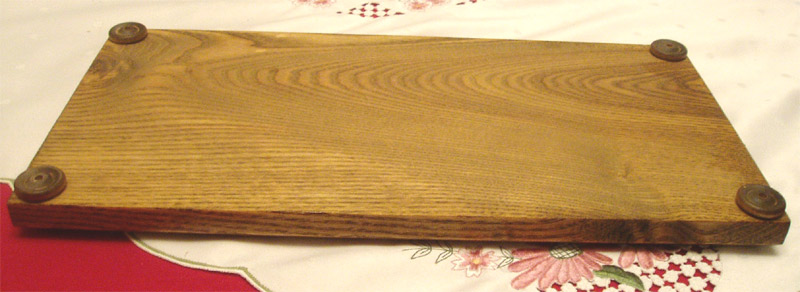
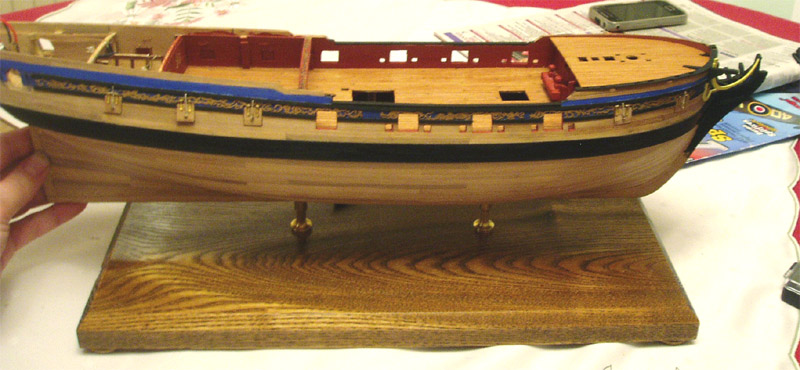
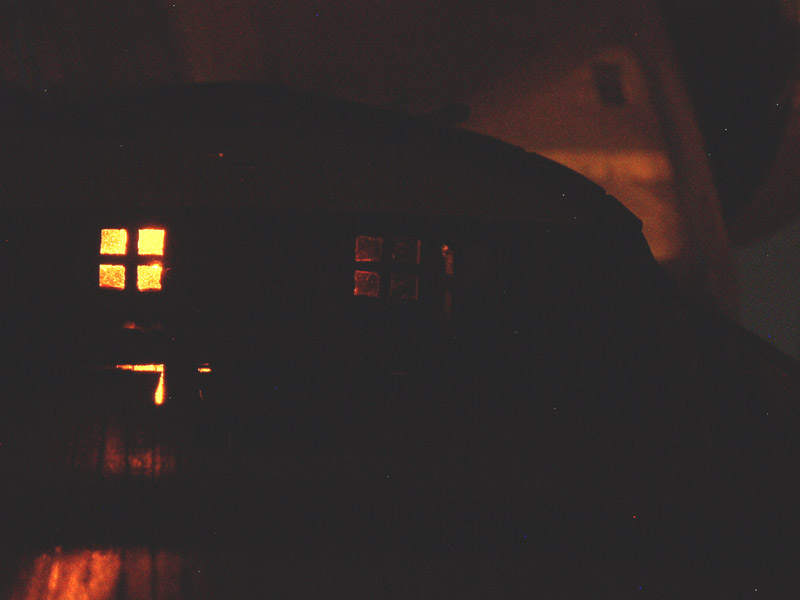
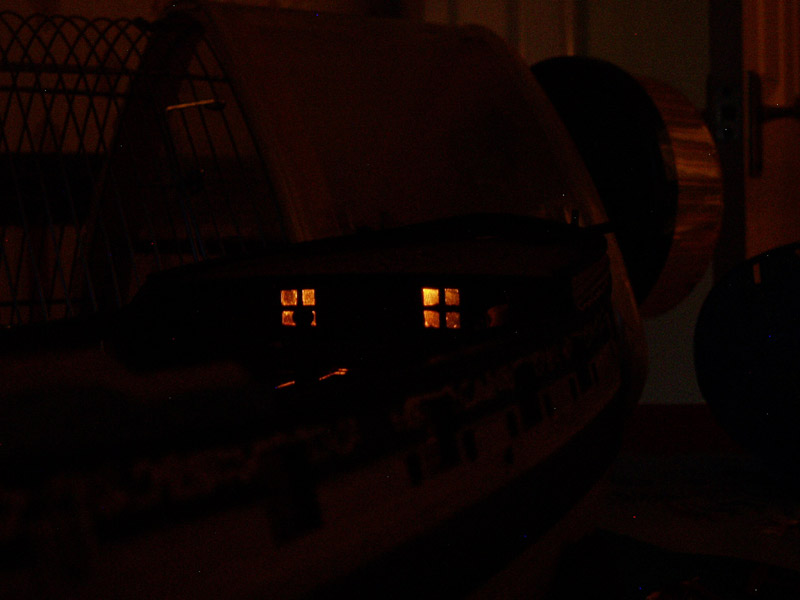
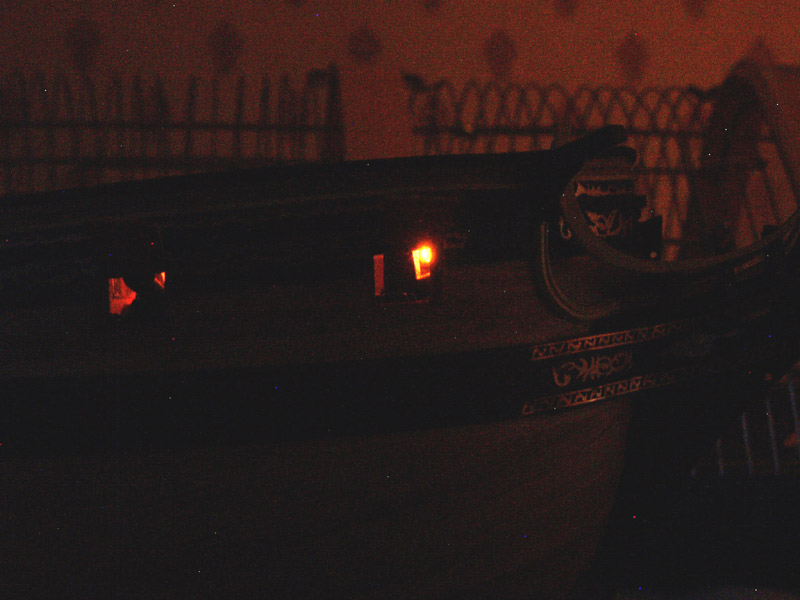
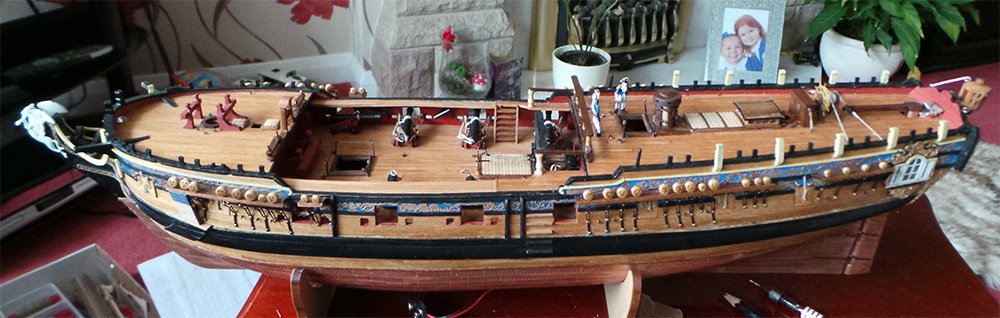
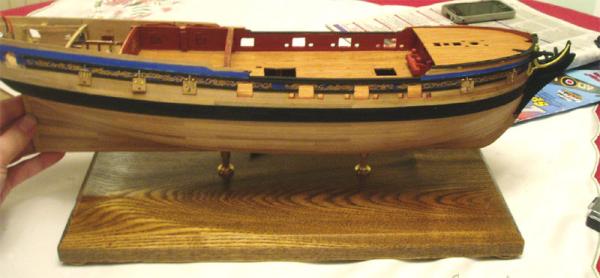
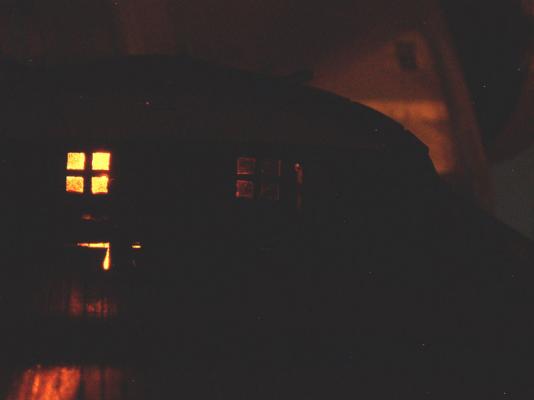
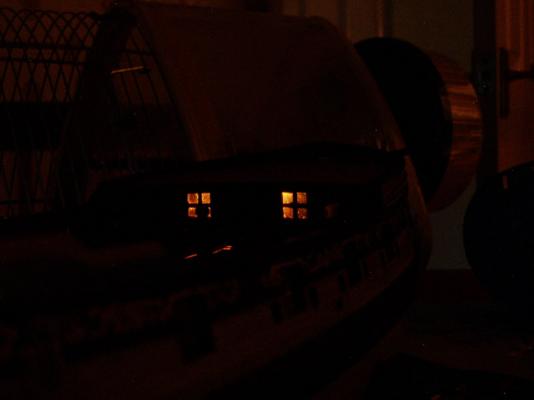
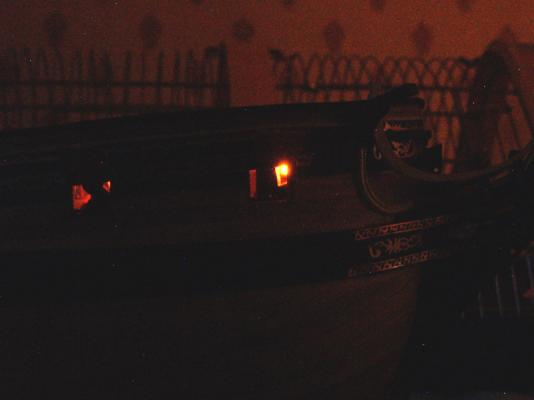
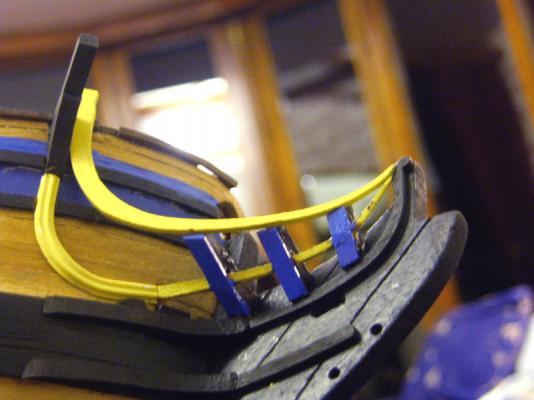
I ordered a plinth for Pegasus to be displayed on, it is ash with a danish oil finish. I'm really pleased with it. I've also taken a few pics of the bow with the light on under the foc'sle:

- 161 replies
-
- 6
-
-
- pegasus
- victory models
- (and 1 more)
-
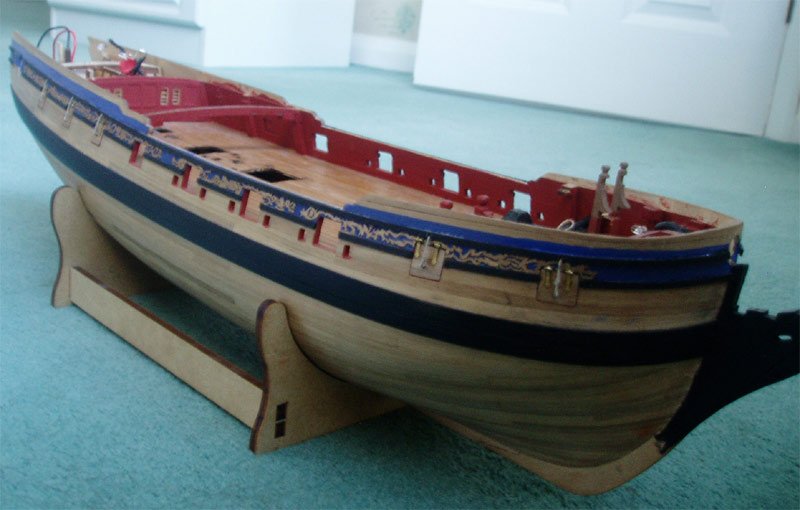
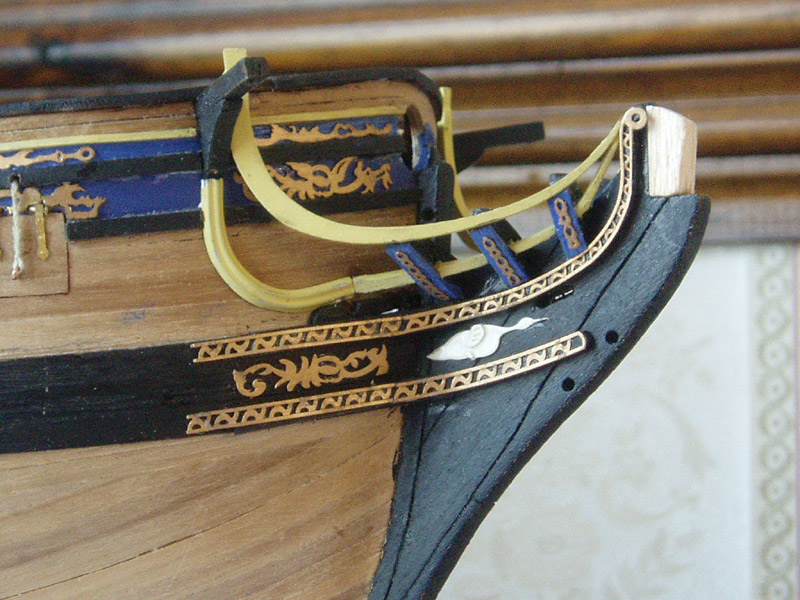
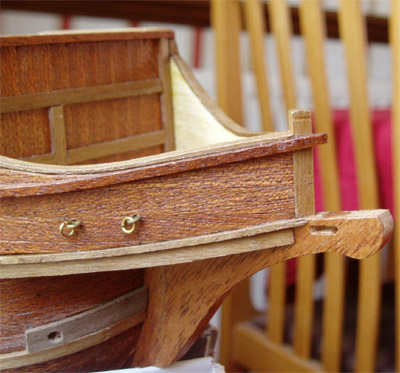
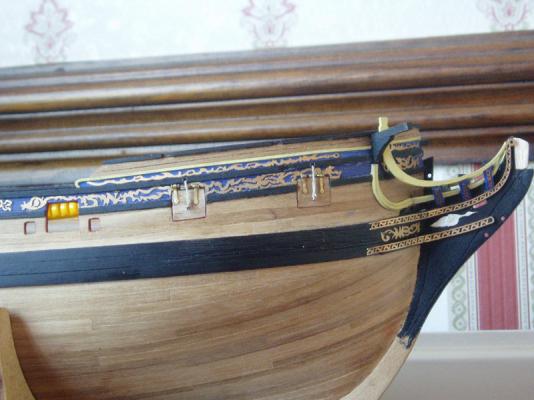
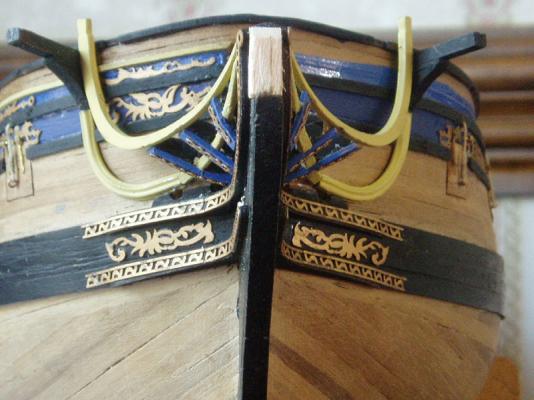
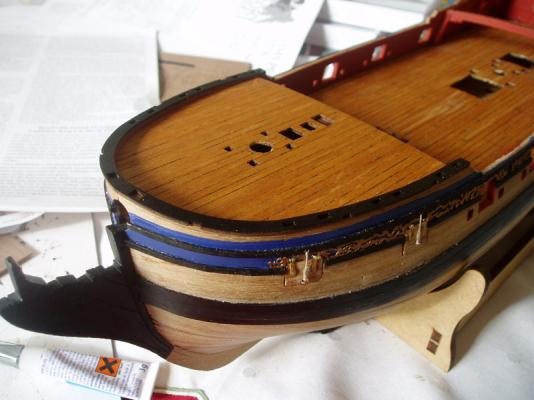
Thanks for looking in Mobbsie, Marktime and Popeye, part of the fun is solving problems and the sense of acheivement when they have been solved. I have done a little more work on the bow, the starboard side headworks are completed and I've almost finished them on the port side. The unpainted bit at the stem is the filler bit behind the pegasus figurehead. Finished headworks: Added the ochre coloured rubbing rail (?) in this area: Port side as she stands: Bow on view:

- 161 replies
-
- 1
-
-
- pegasus
- victory models
- (and 1 more)
-
Colours never do seem to be how you want them do they? I've been using Humbrol enamels as recommended in the instructions on my build, they seem to work quite well. Anyway, your progress is good. Keep it up.
-
Some lovely detail work there, she's coming on very nicely.
-
Just caught up with your build Popeye, she looking great, nice work on the bowsprit.
-
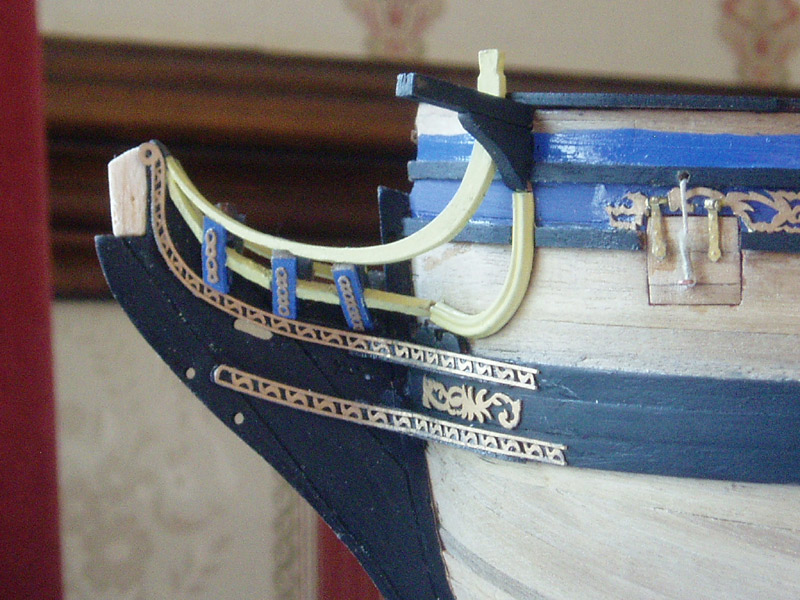
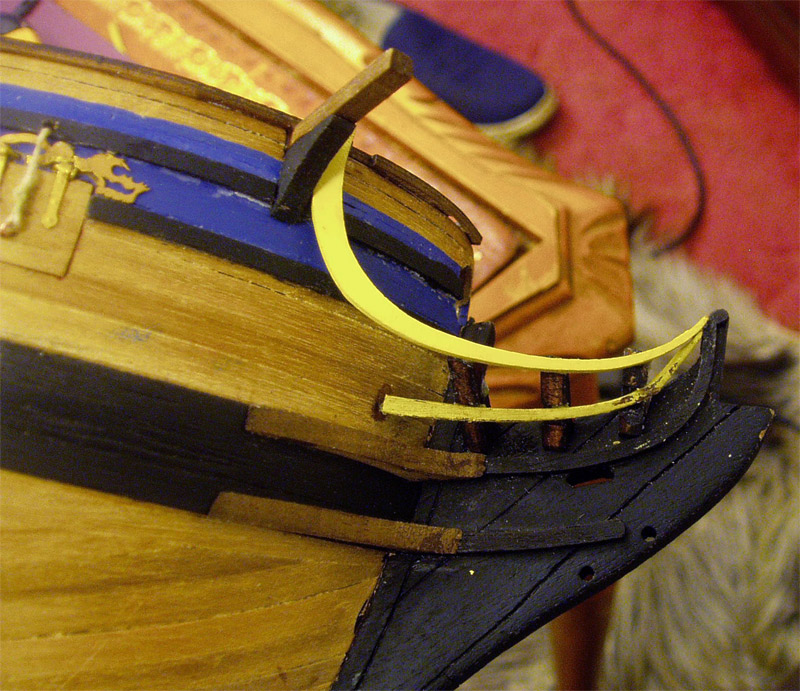
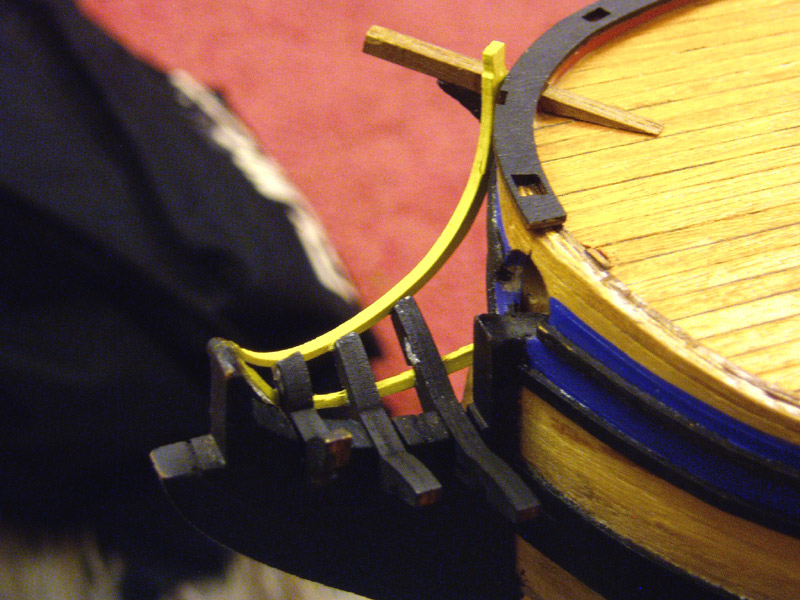
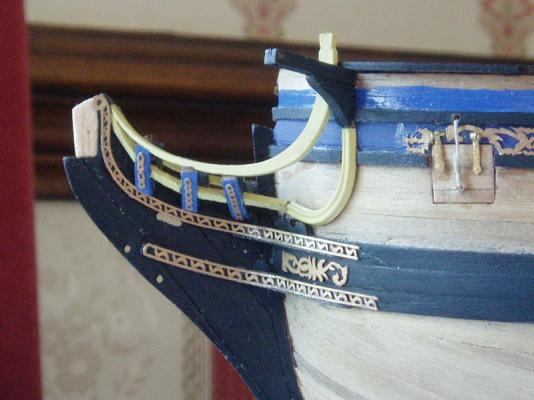
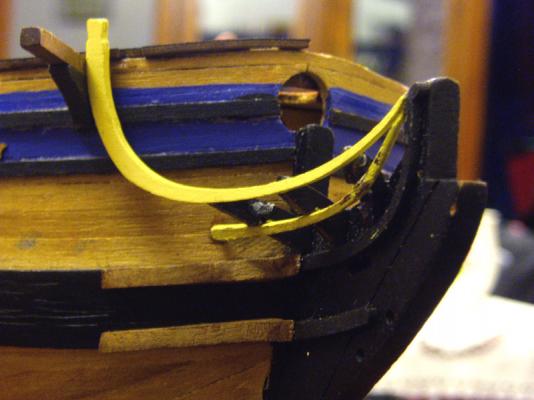
Hi Popeye, Adrieke, You could, but it would be difficult. I was lucky and was able to remove the capping rails without any damage. I just wanted to warn any future builders. The next bit I did was fitting the headrail and cathead on the starboard side. Well I invented some quite unique expletives while tackling this bit, not very ladylike at all, surprised my husband no end!!! First I glued the upper prow rail (part 127) and lower prow cheek (126) and the head timbers (25, 26 and 27) in place, no problems there: Next I bevelled the edges of the two bow cheeks (54) they needed quite a bit of shaping to get them to sit flush against the prow and the wale. Next I put the top rail temporarily in position so I couls see where I needed to cut the bulwark to accomodate the cat head. I was so glad I'd been able to remove the capping rail here otherwise it would have been really awkward. As mentioned earlier I had to alter the slope on the cathead where it sits on the deck to get it to fit comfortably under the capping rail as angles upward slightly. After that was accomplished I glued the upper rail in place. Then it came to the inventive language section with fitting the lower bow rail (125). The thing is so fragile I lost count of how many times it broke and I stuck it back together again, it ended up in such a mess I decided there was nothing for it but to cut some new ones using the other intact one as a template. Eventually I managed to manipulate one into position. The main problem is that it is too delicate to get it to sit flat in the slots of the head timbers and then twist slightly up to the prow. But I wasn't going to let it beat me, so I beat it into submission! Once that was finally in place I could fix the cathead and it's support and then the extended rail a section of decorative brass stripwhich runs from lower bow rail to the cathead support. The last bit to do was to cap the outer edges of the head timbers. I had to file some of the lower bow rail to get the caps to lie flat against the head timbers.


- 161 replies
-
- 5
-
-
- pegasus
- victory models
- (and 1 more)
-
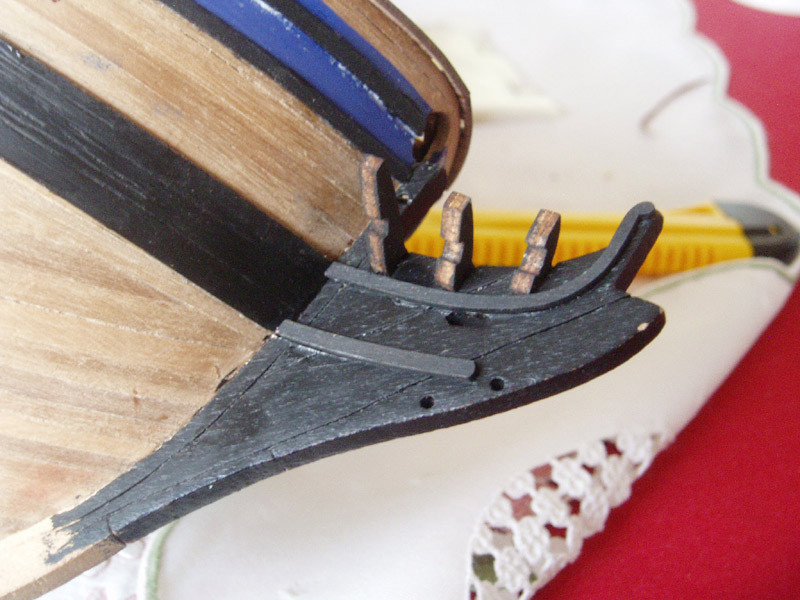
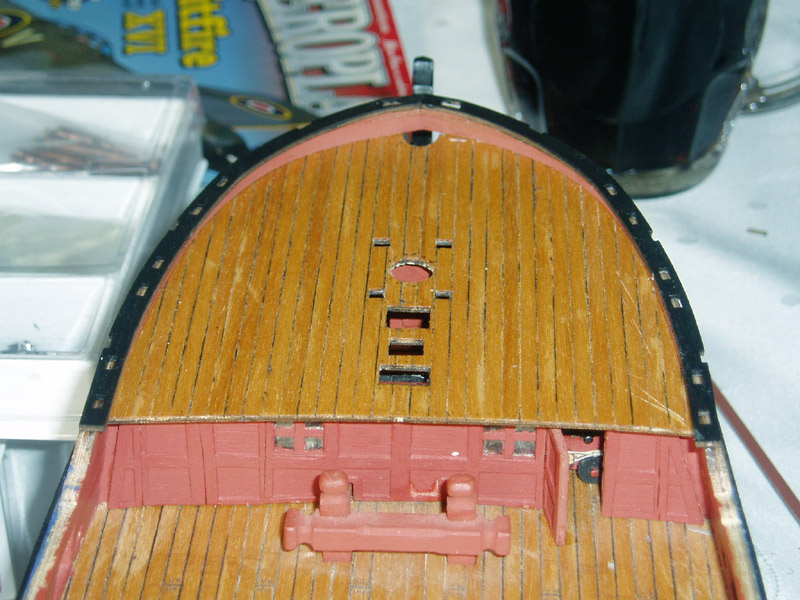
The foredeck and bulkhead wall is in place now. Next I made a mistake. Reading the instructions I put the capping rails on next........... DON'T!!!!! A small section of the bulwark has to be cut out for the catheads, this needs to be done BEFORE the capping rail is attached. A note on the catheads (Thanks Blue Ensign!) the sloped bit sits on the deck, BUT it needs to be altered so that is fits nicely on the deck AND goes under the rail confortably.
- 161 replies
-
- 1
-
-
- pegasus
- victory models
- (and 1 more)
-
Yes, I echo Andy, just the first planking for the rabbet and twice the thickness for the bearding line.
-
If you can fit in the balsa, I would, you'd be glad you did when it comes to the planking.
-
Hi Ray, I think at the moment I'm leaning to mainly stowed, certainly the waist ones will be stowed sideways against the gunport. I like to be a bit different.
- 161 replies
-
- 2
-
-
- pegasus
- victory models
- (and 1 more)
-
Hi Andy, I thought I'd make a comment on your build now all the wierdness is almost over (I think!) I've been following your build and I think you're doing a wonderful job. Keep up the good work. Caroline
-
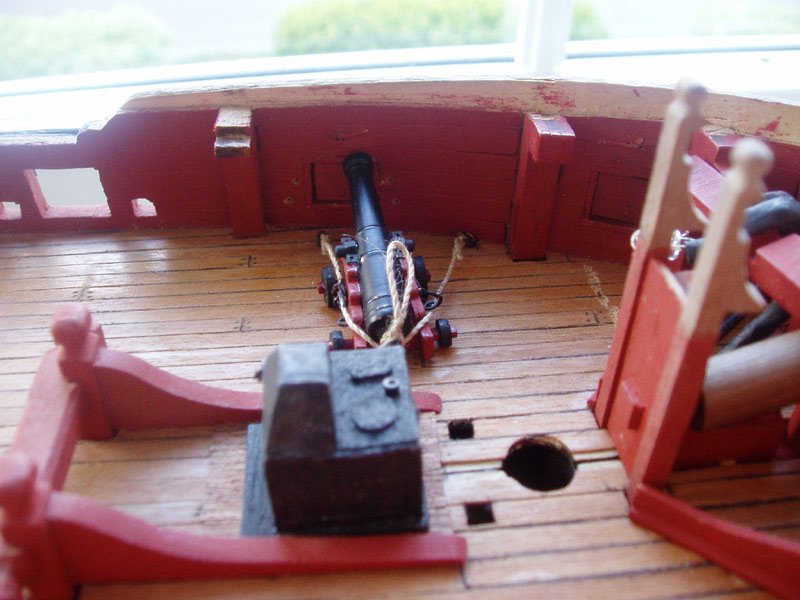
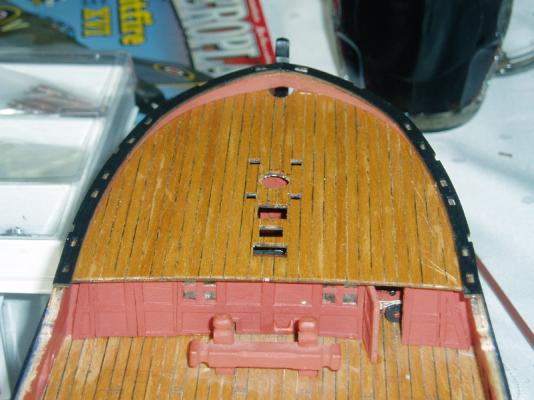
Thanks ZyXuz Thanks for your tip Arthur. I have attached the two bow cannons in place and added some sacks and barrels to the bow area. The bulkhead wall is in place and I've 'opened' one of the doors. I've checked the lighting and it still all works fine. I'll now glue the fordeck into place and get the bow completed.

- 161 replies
-
- 6
-
-
- pegasus
- victory models
- (and 1 more)
-
Hello Dave, Glad to see another Pegasus build. One thing I would suggest is to fill out the bow with some balsa, it will help you a lot when you come to do the planking. You can see how I did my planking in my build log if it is of any help. Keep up with the good work. Caroline
-
Tim, No I haven't used a wood sealer, just used the recommended blue enamel colour given in the instructions. The unpainted wood will have a clear satin varnish added at a later date. Thanks for looking in Popeye, I haven't seen Dafi's Victory build, I'll go and have a look, thanks! Thanks David, I really enjoy making the little extra's; it's what really makes a build truly your own.
-
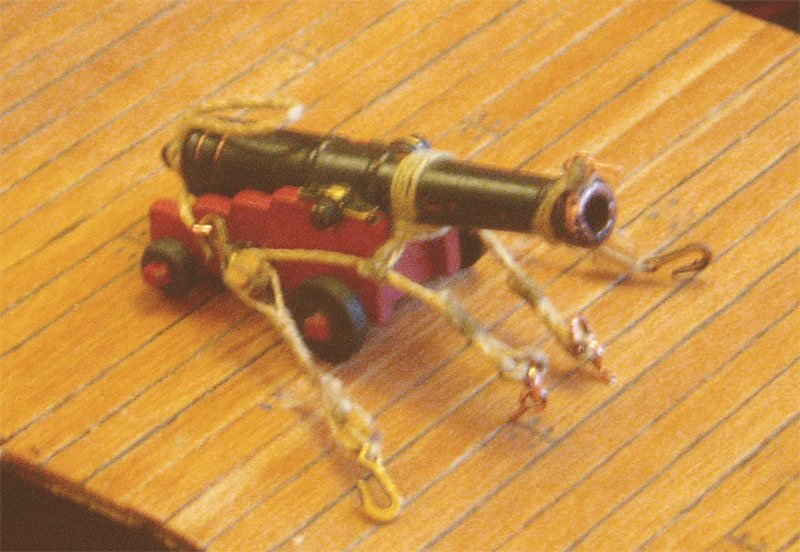
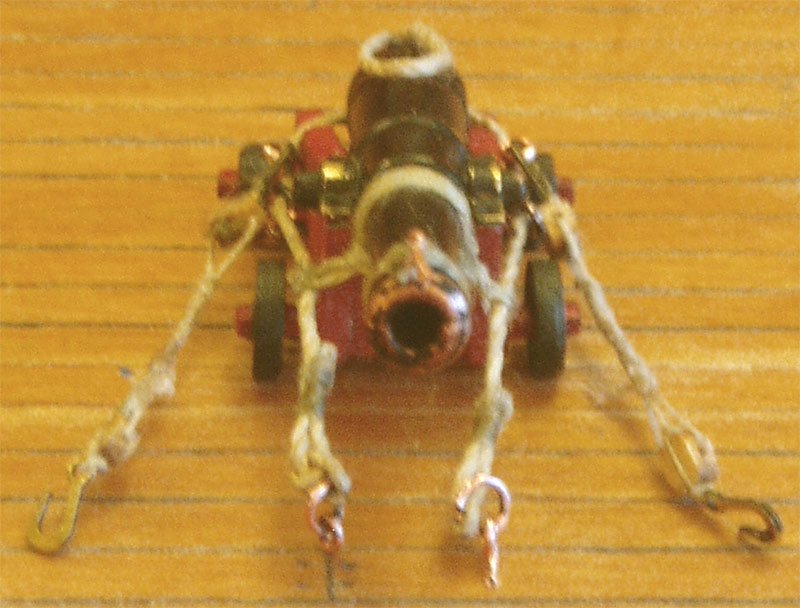
Thanks! I really enjoyed making the cannon rigging, even though it was really fiddly.
-
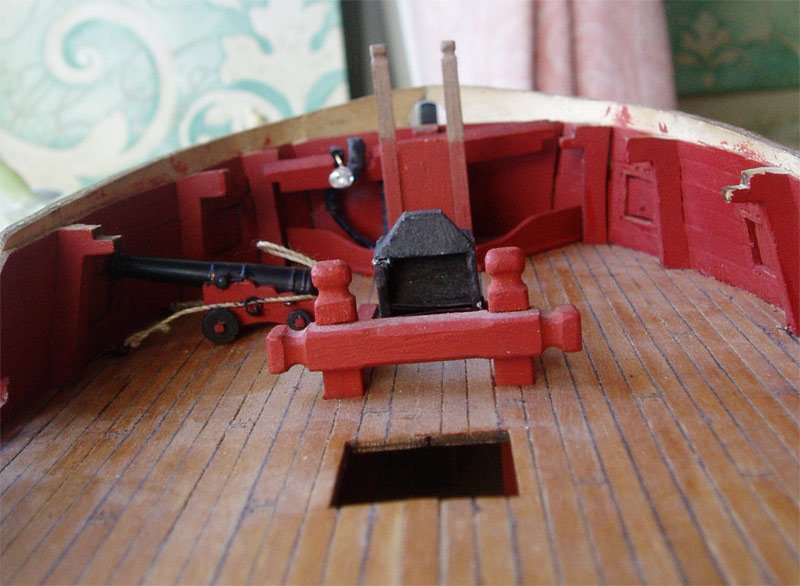
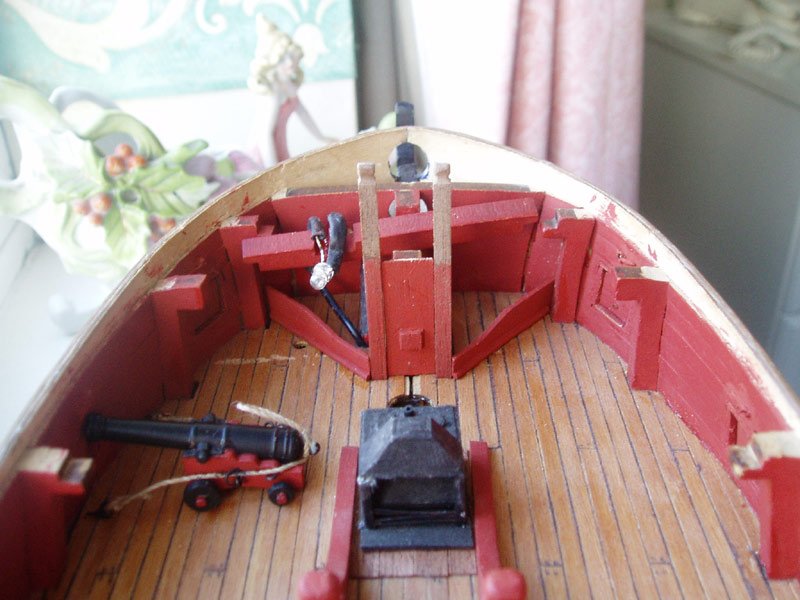
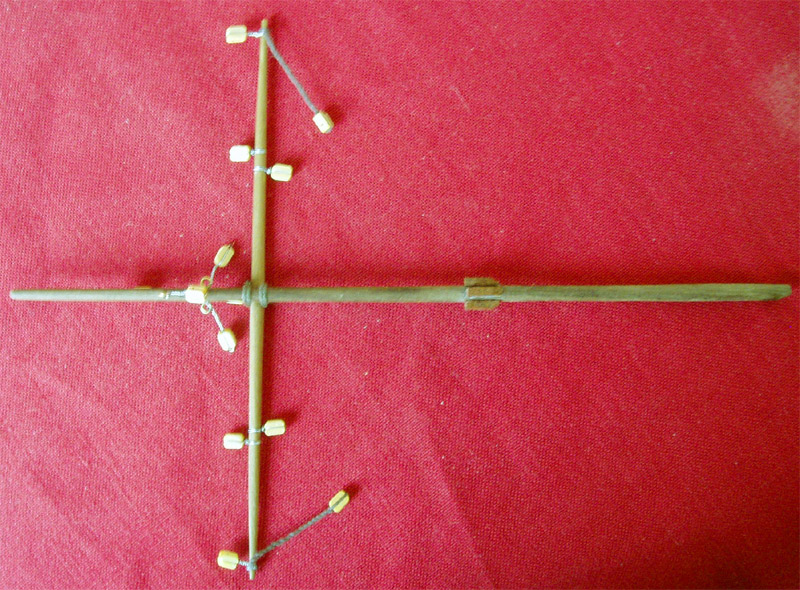
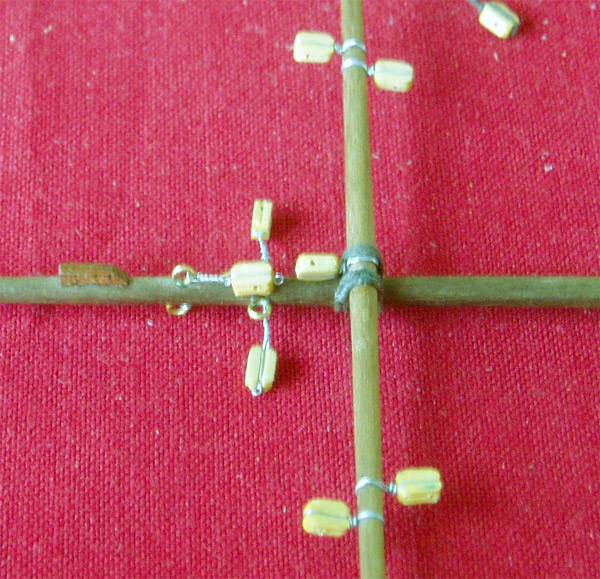
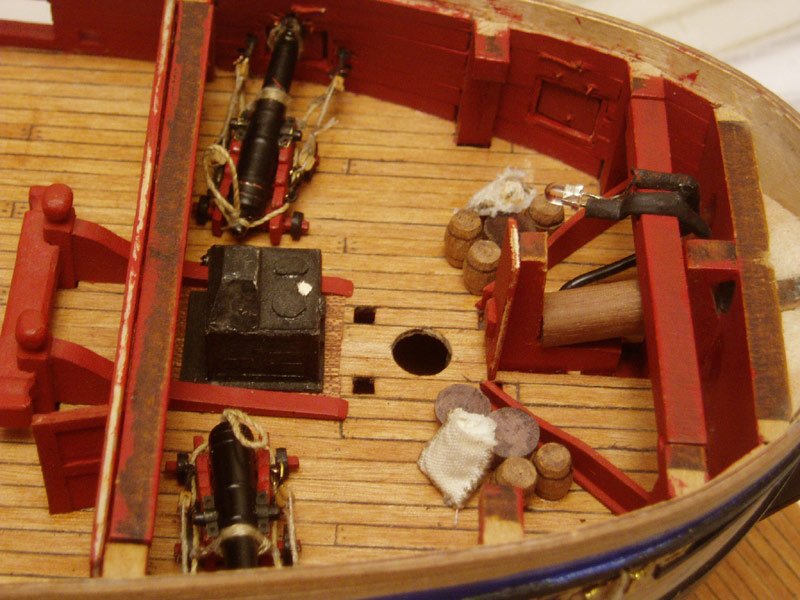
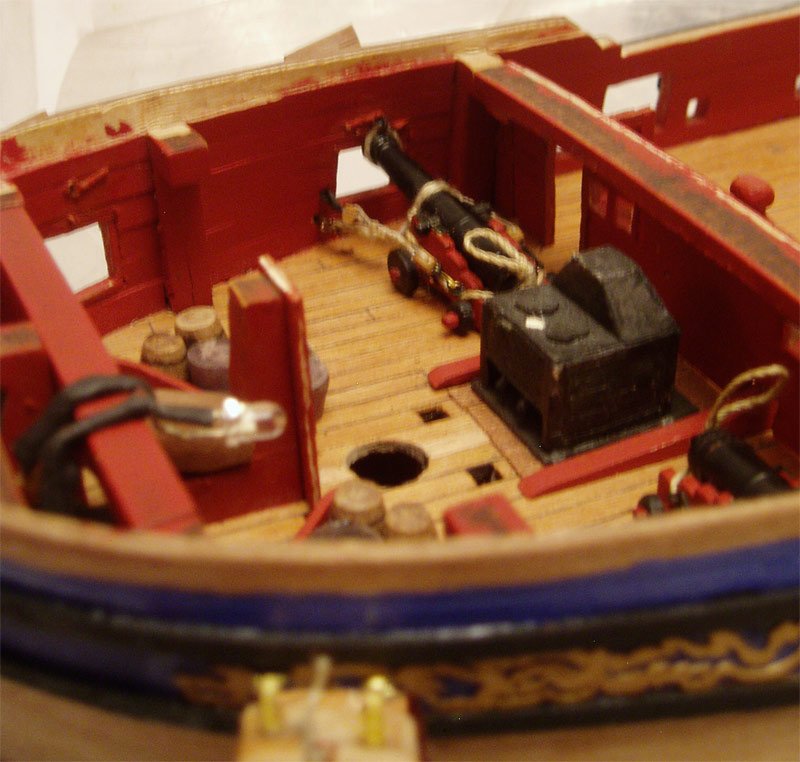
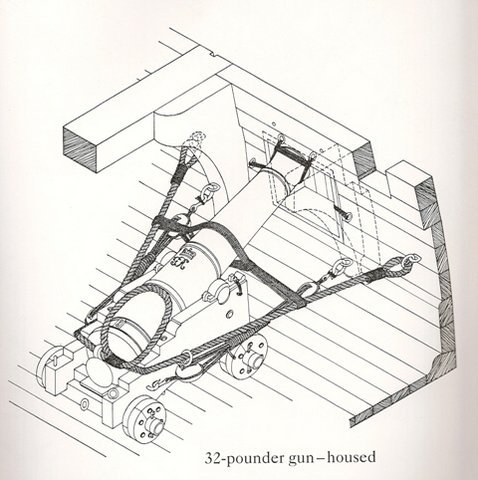
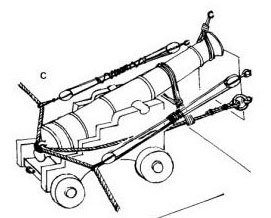
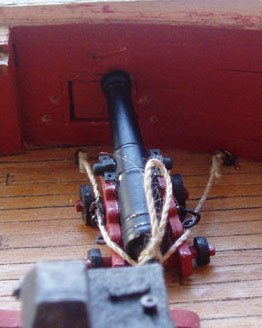
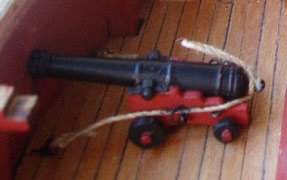
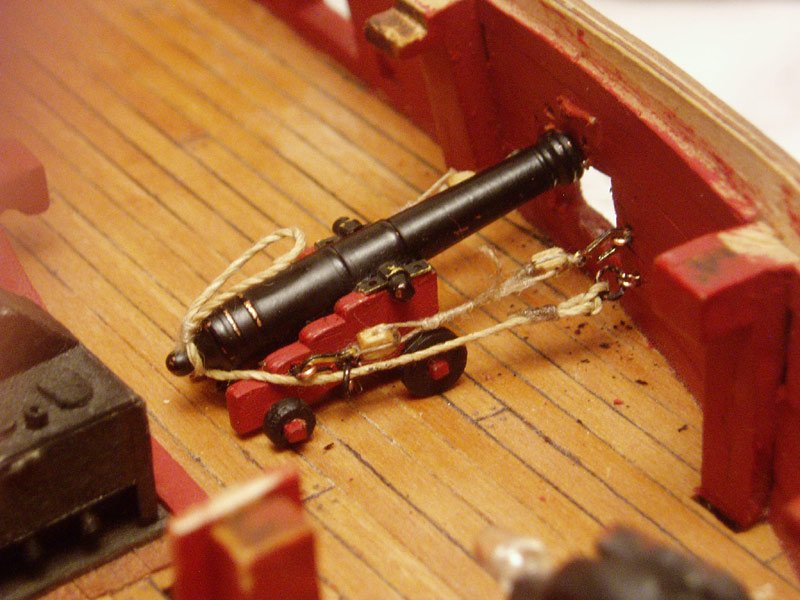
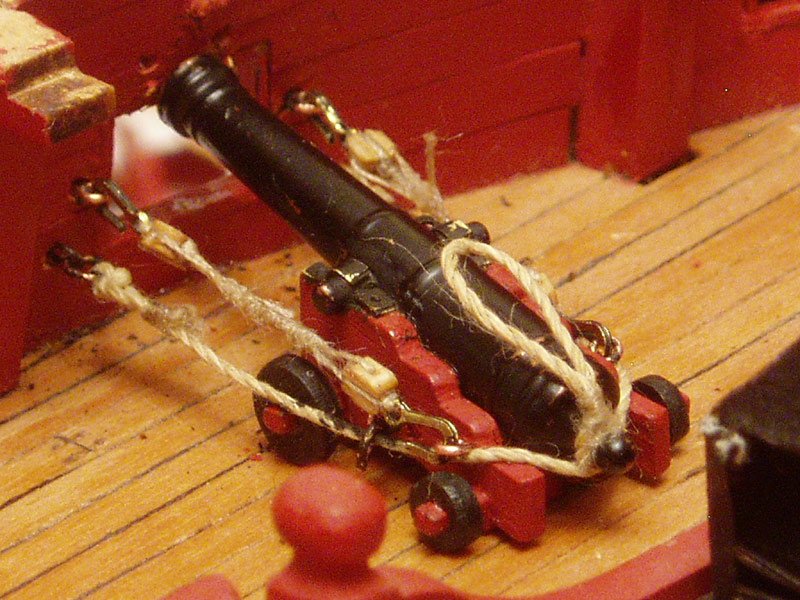
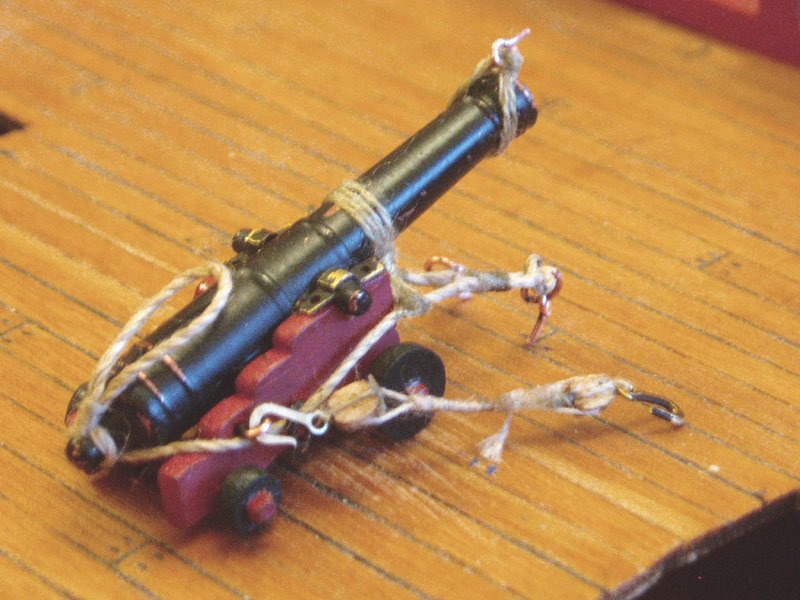
Next I worked on the first of the guns located under the forcastle. I wanted to have them in the stowed position so after some research I made a start. I used two pictures as guides: First I made the Breech rope, knotting and siezing one end to a ring then it was threaded through a ring on the carriage body and looped around the cascabel knob. Here a long loop was created by placing a bit of siezing above the cascabel. It was then threaded through the ring on the other side of the carriage and knotted and siezed onto the final ring. Then I made the side tackles in the usual way, but instead of the free end coiled on the deck, it was wound around the tackles themselves: Next I added the other 'strapping' type ropes to the barrel:

- 161 replies
-
- 1
-
-
- pegasus
- victory models
- (and 1 more)
-
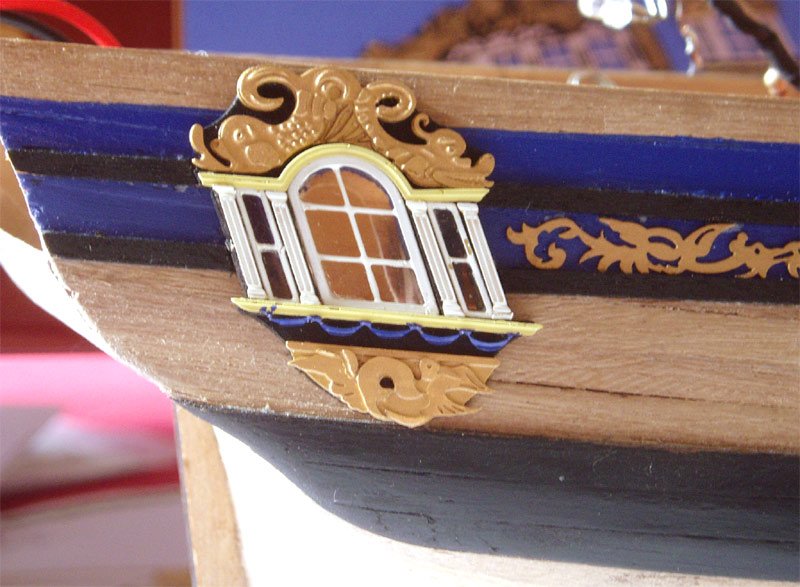
Thanks all, your comments are really appreciated. Here is the quarter badge just balanced in place at the stern. It's not glued on yet: I worked on the bow of the ship next. I liked what Blue Ensign created under the forcastle with his Pegasus so much I decided to adapt the idea to mine, especially as I am planning to add barrels. buckets and sacks to the area too, I thought it best to get it looking a bit more like it should. Next I added the ropes to the gunport lids as I'd forgotten to do them earlier: