vulcanbomber
-
Posts
396 -
Joined
-
Last visited
Content Type
Profiles
Forums
Gallery
Events
Everything posted by vulcanbomber
-
You're doing well, she's coming along beautifully.
-
The doors look great. Nice work.
-
You're doing well, I really like your curved staircases, they look a treat.
-
Wow Sjors, how have I missed this? She looks great. very neat work.
- 1,616 replies
-
- 2
-

-
- caldercraft
- agamemnon
- (and 1 more)
-
Hello Sjors, I'll try not to stay away for so long again, but I can't promise! It's hard to remember how I did everything to San Fran, It's so long since I completed her now, and I'm struggling to remember what was in the kit plans and what wasn't. Maybe a glass of wine will help me remember?!!
- 122 replies
-
- 3
-
-
- finished
- artesania latina
- (and 1 more)
-
Thanks John, it's been a long time coming! Think I'll stop here for a while (hopefully not as long as before!), next I'll show how I made the 'Martnets' for the main sail and foresail, these were not in the original kit plns either, but were a complicated bit if rigging to help furl the sails.
- 122 replies
-
- 4
-
-
- finished
- artesania latina
- (and 1 more)
-
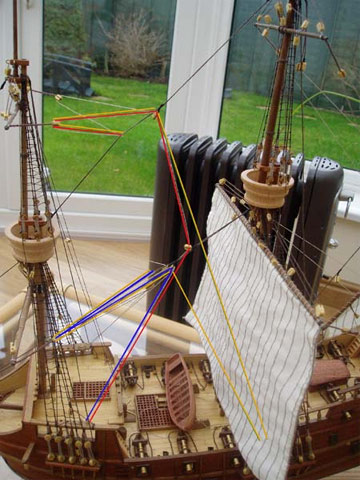
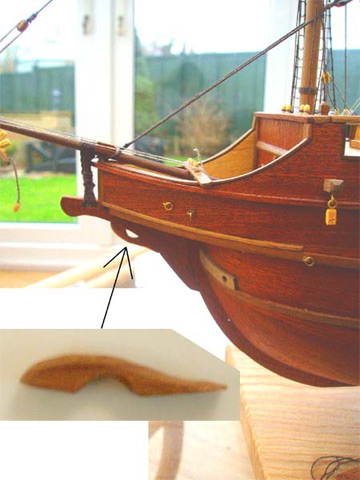
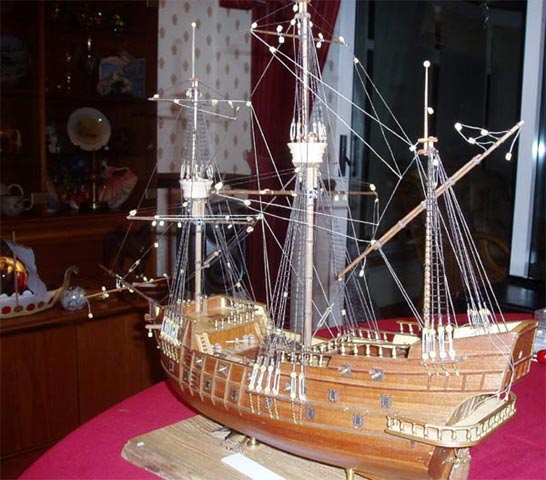
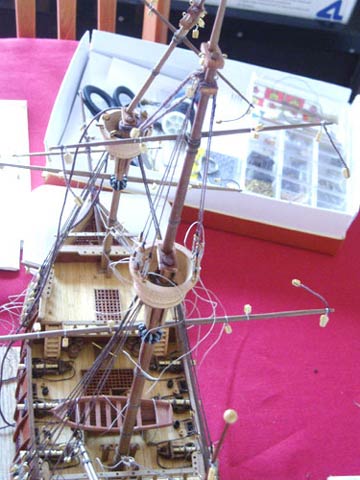
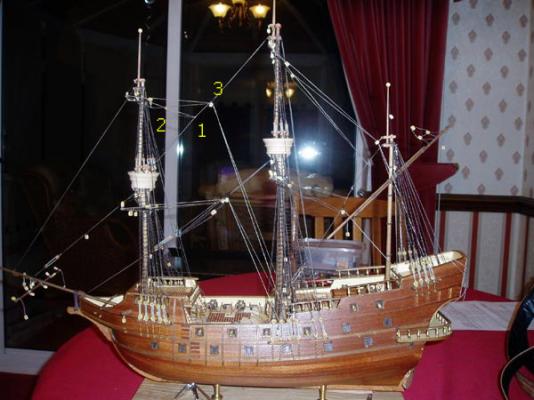
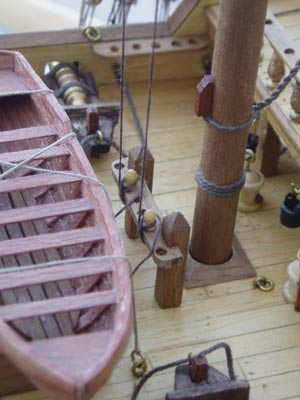
Hi Sam and Nils, thought it was about time I did some more updating to San Fran, it's long overdue! After I fitted the braces, I didn't like the position the kit plans said to belay them. it would interfear too much with the sails when fitted. So I altered them slightly to position theme they they wouldn't be so much of a hinderence. The yellow lines show the original route of the braces, the blue line shows my altered route of the fore braces, and the red line shows my route for the top fore braces. Another part of the rigging I wanted to add that wasn't in the kit plans were the tacks. The tacks for the foresail passed under the stem. so I created a small curved piece of timber to fit the stem to create a hole for the tacks to pass through.


- 122 replies
-
- 5
-
-
- finished
- artesania latina
- (and 1 more)
-
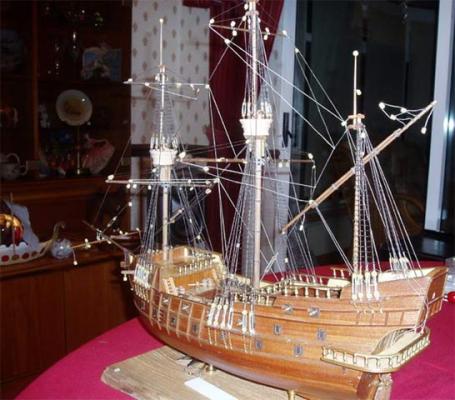
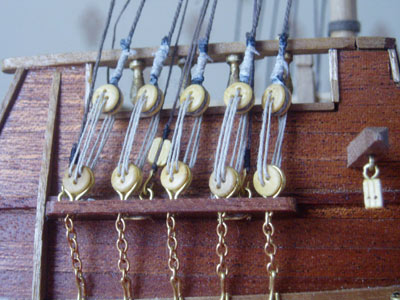
Next I attached the braces to the yards. They were all started by: 1. hitching the middle of a length of thread to the stays infront of the siezed double blocks, 2. threading the ends through the blocks on the long strops attached to the ends of the yards, then 3. passing them through the double blocks siezed to the stays and belaying them to the pinrails as indicated by the kit plans. All the braces fitted. .


- 122 replies
-
- 6
-
-
- finished
- artesania latina
- (and 1 more)
-
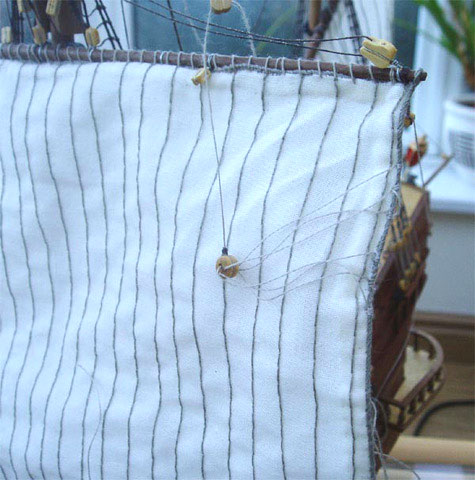
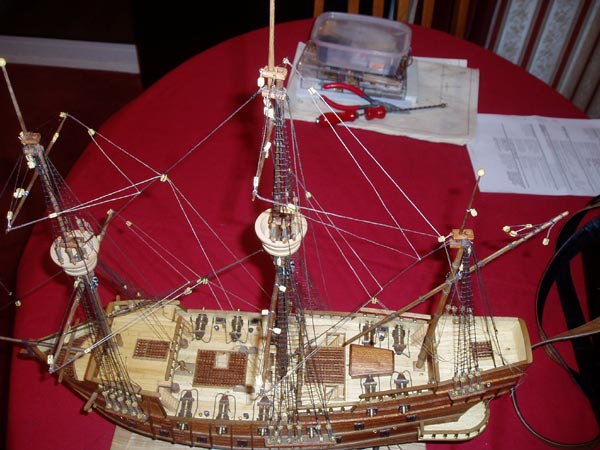
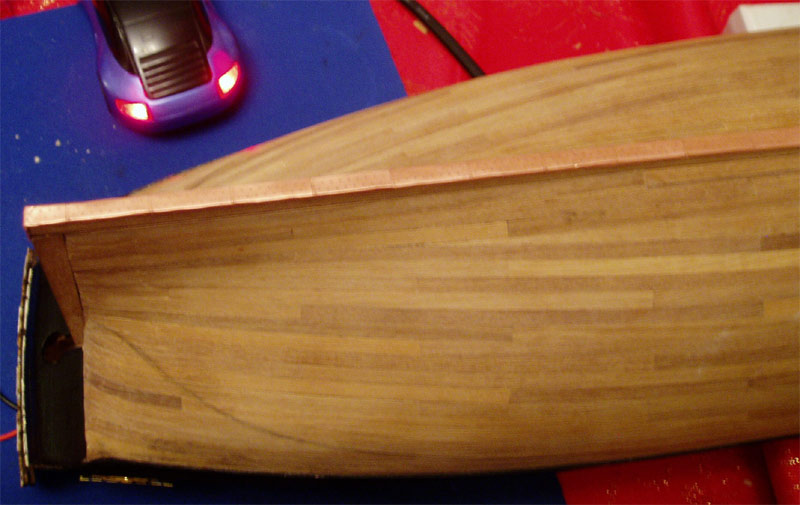
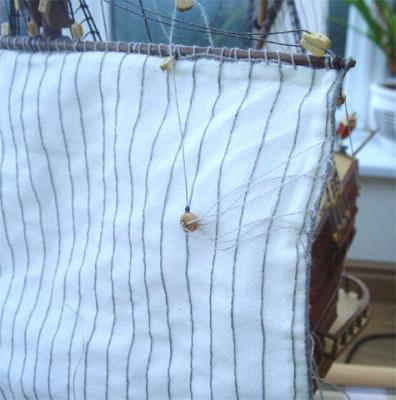
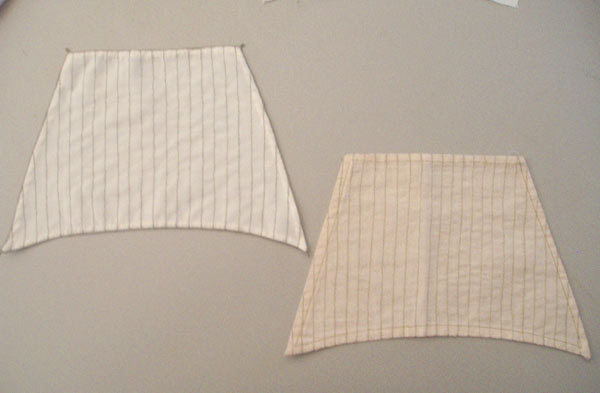
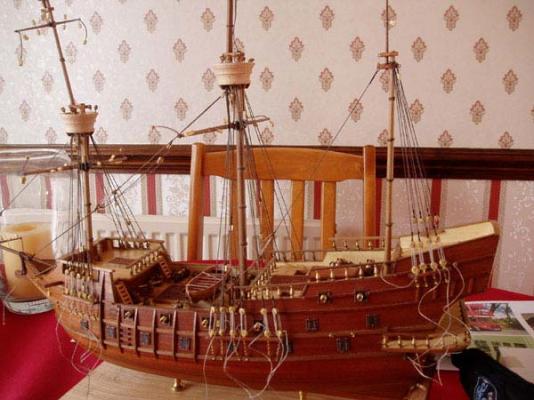
I had a break from the rigging and turned my attantion to the sails. I didn't like the sails provided with the kit, so I found an old cotton sheet which was perfect. Is was very soft and supple and quite a fine weave. I used the kit sails as a template and cut new ones. I hand stitched lines down the sails and hemmed them all around, attaching a cord all around the edge to represent the boltrope. The paler one is my sail; the darker lower one, the kit provided sail.

- 122 replies
-
- 5
-
-
- finished
- artesania latina
- (and 1 more)
-
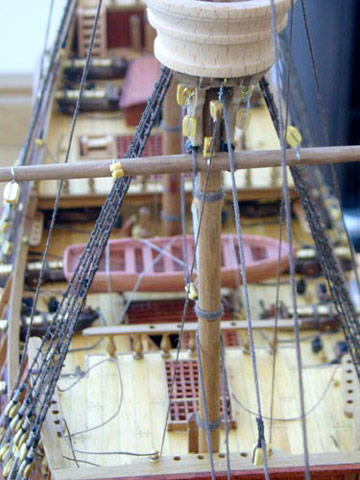
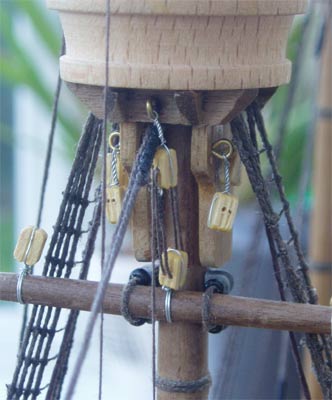
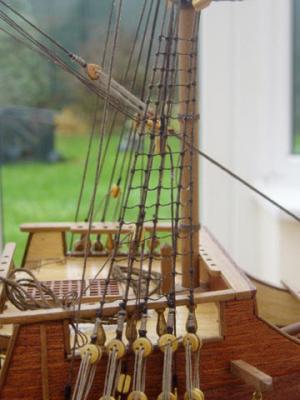
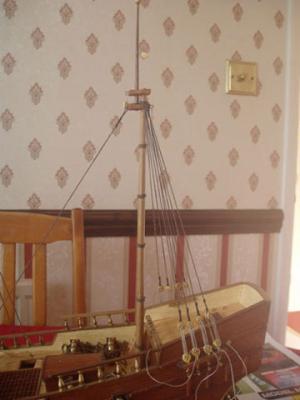
Next I attached the halyards to the main mast and main top mast spars. The halyard on the main lower mast was started by siezing a length of thread to the small loop at the bottom of the double block attached to the underside of the crows nest. the thread was taken down to the back of the right hand hole in the double block attached to the yard, then up to the front of the right hand hole in the double block attached to the crows nest, next repeat with the left hand holes in the blocks. Repeat in a similar way for the halyard on the top mast. The halyards were then tied of to belaying pins on the main fife rail. Halyards on the foremast and foretop mast.


- 122 replies
-
- 6
-
-
- finished
- artesania latina
- (and 1 more)
-
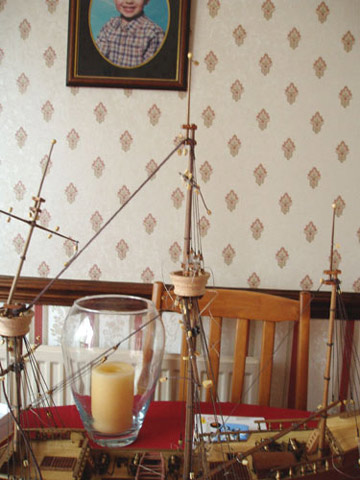
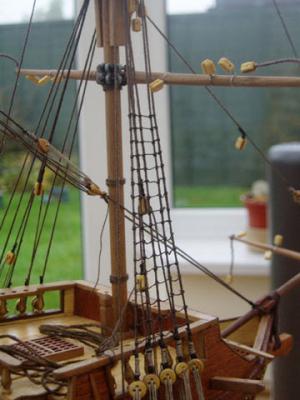
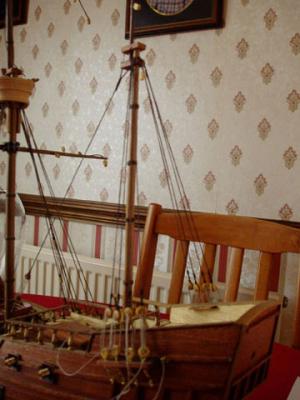
Next the lanyards were tensioned and siezed to each shroud. A touch of cyano ensured they would not unravel. All ready for tying the ratines. I realise I've put how I tied the ratlines too early in this log. my description can be found here. The first ratlines done on the foremast. Ratlines completed.


- 122 replies
-
- 5
-
-
- finished
- artesania latina
- (and 1 more)
-
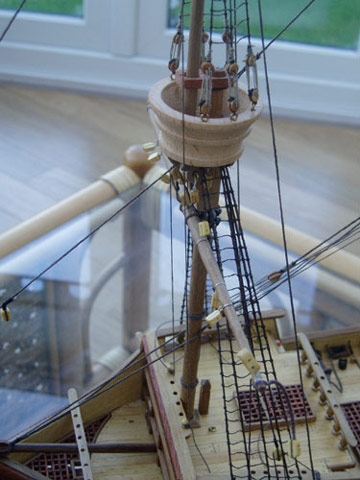
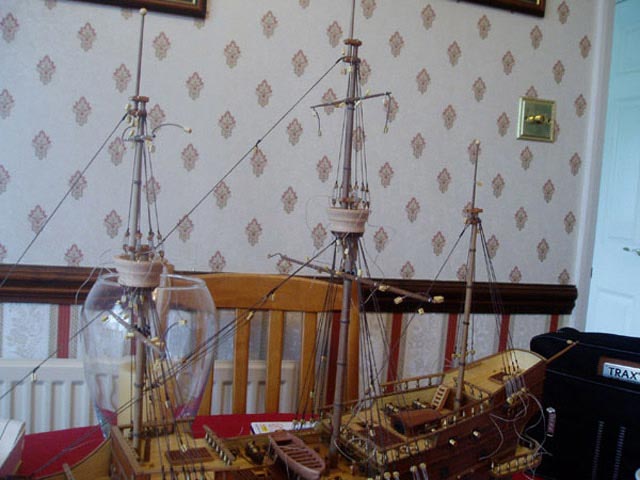
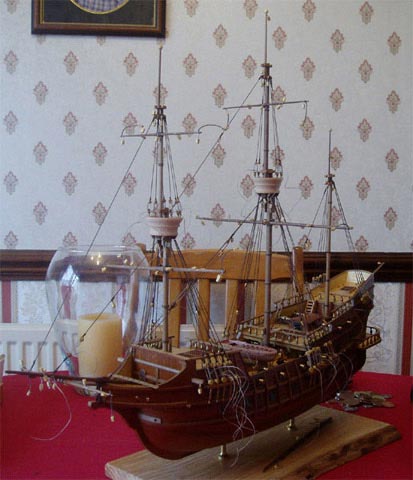
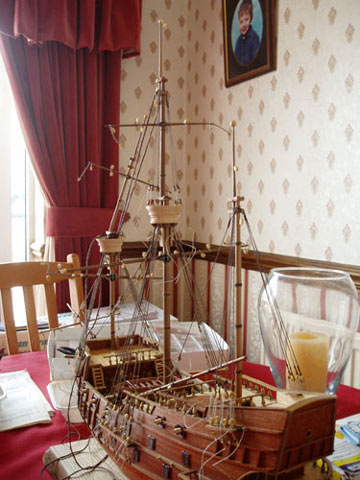
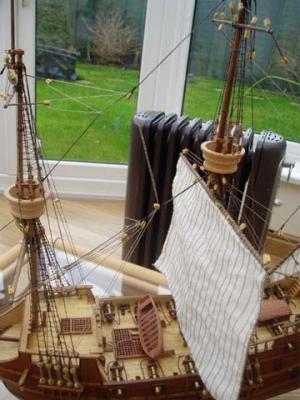
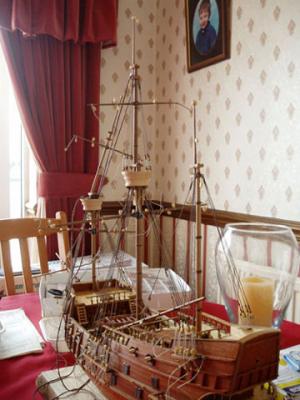
Once I attached the lanyards to the shrouds, I installed the stay properly. A block was stropped to the top stay about halfway, similar to the main stay below it. The fore top mast with stay and shrouds attached. View of all three masts and topmasts with stays and shrouds.


- 122 replies
-
- 5
-
-
- finished
- artesania latina
- (and 1 more)
-
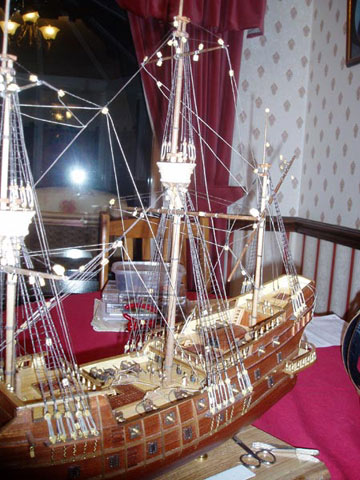
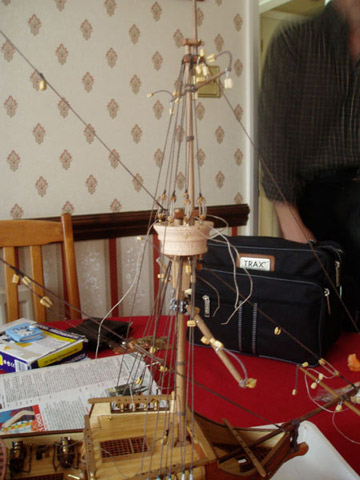
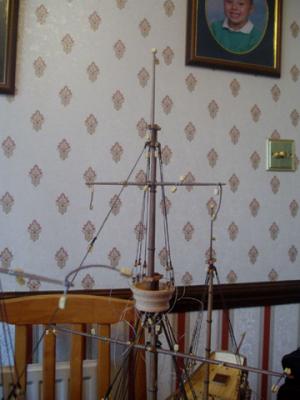
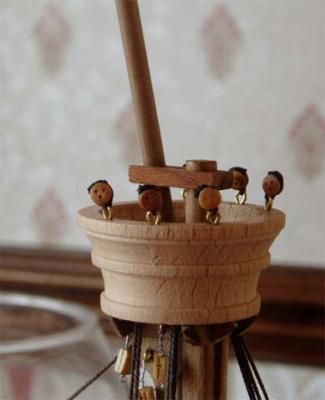
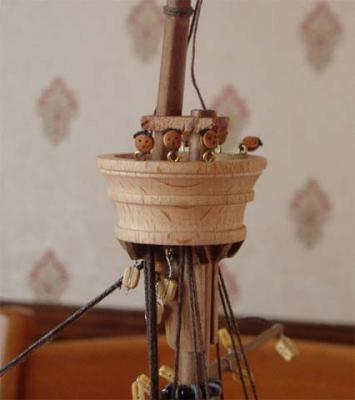
Finally getting round to finishing this build log! The last few pages went back over how I'd attached blocks to the spars and the lanyards on the shrouds, these were slightly out of sync with where I'd been in the reposting the build log as I hadn't found the images for them. Now I'm returning back to where I'd left off attaching the stays and shrouds to the mizzen masts and the top masts. Stay and shrouds attached to the mizzen mast. View of all three masts with their stays and shrouds. Attaching the deadeyes to the rim of the crows nest. A small hole was drilled and a shortened eyebolt was glued with a touch of cyano. Once dry, a deadeye was attached with a length of thread, a touch of cyano was used to ensure it wouldn't come loose. Spar and shrouds attached to main topmast. Note: the stay is only temporary at this time. It will be fitted properly at later stage.


- 122 replies
-
- 6
-
-
- finished
- artesania latina
- (and 1 more)
-
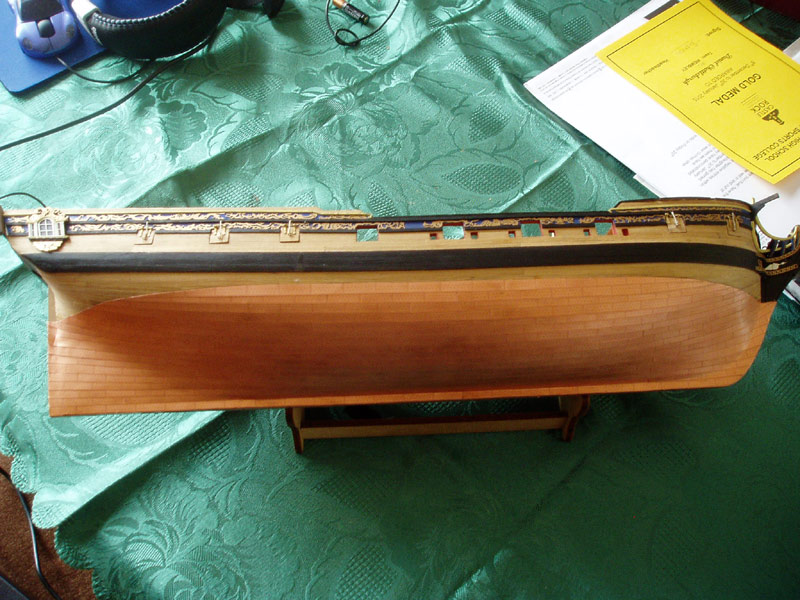
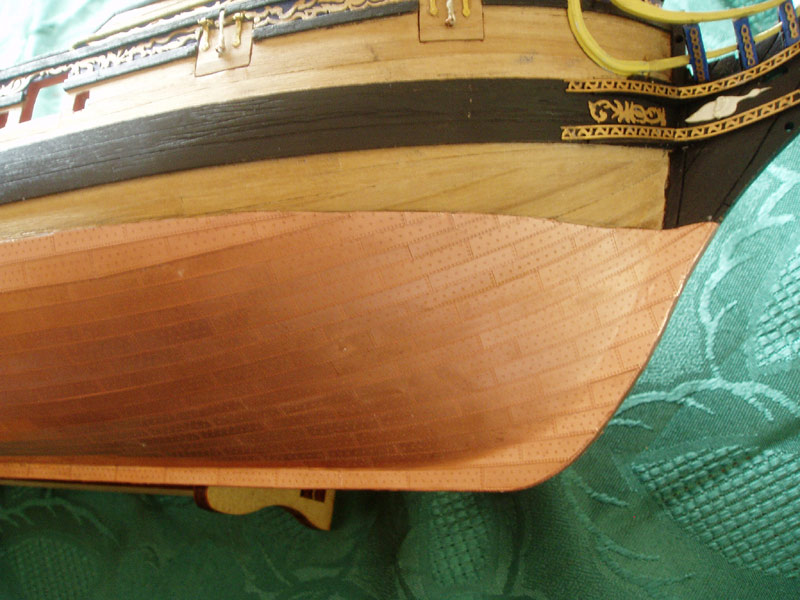
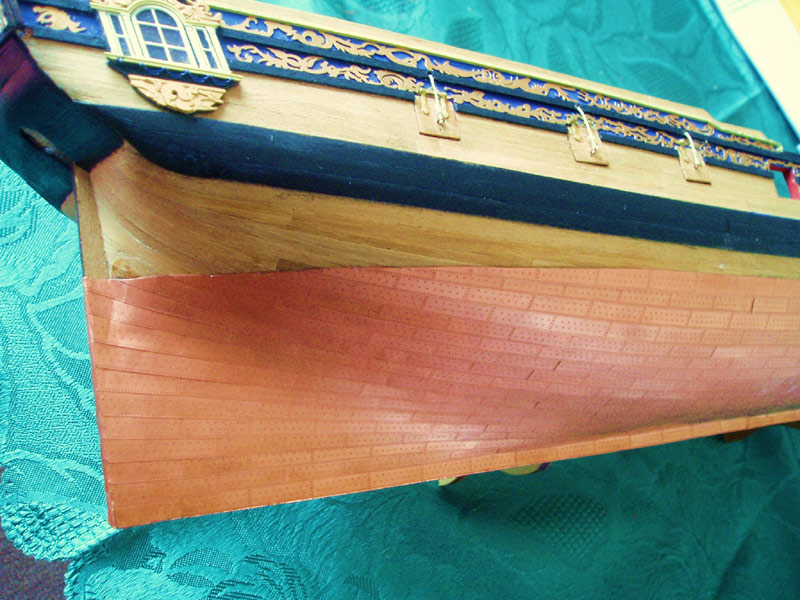
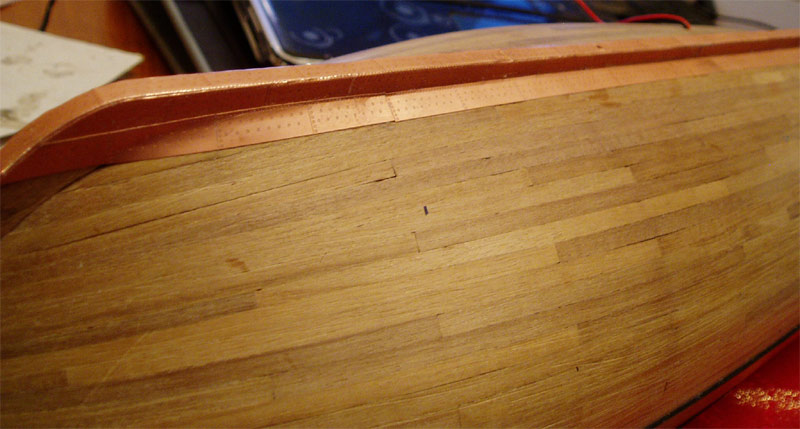
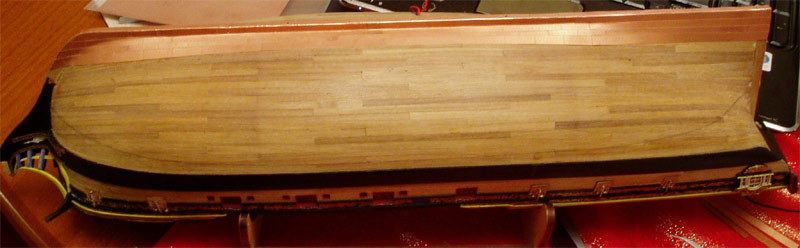
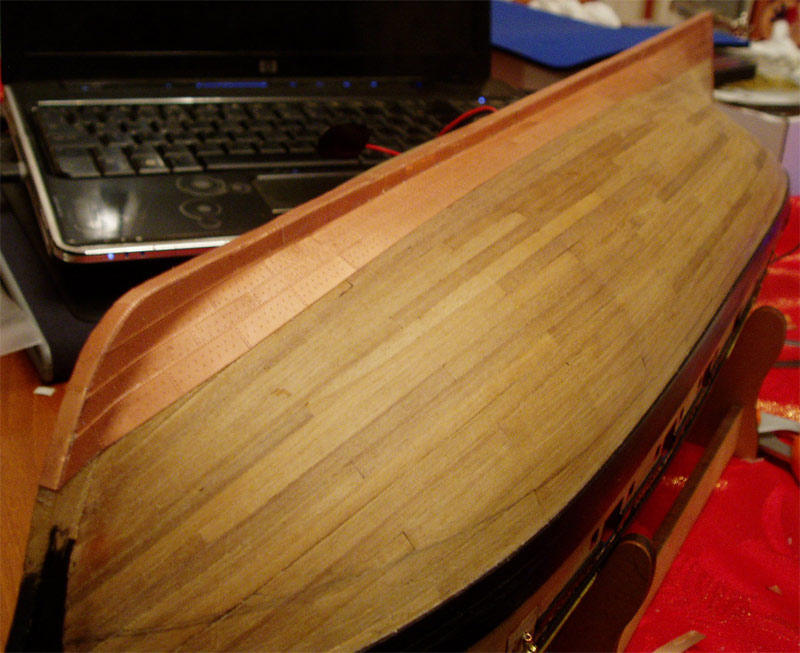
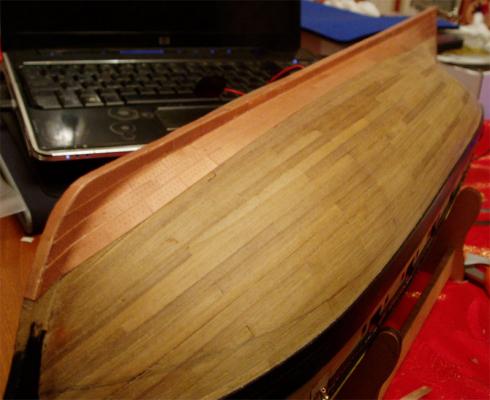
Well, I've completed the coppering on one side. Not as perfect as I'd like, but for my first attempt it's not too bad, hopefully the other side will be better. I kept the tiles in their strips for the longer runs. The rows overlapped quite a bit at midships, then curved upwards towards the bow and stern. I found it quite difficult to try and keep the rows level in places and I had to be careful not to let the plates 'buckle' when trying to lay the row. Not too keen on this first experience of coppering, maybe after the other side is done i may feel a bit more confident.


- 161 replies
-
- 8
-
-
- pegasus
- victory models
- (and 1 more)
-
Vulture is looking fantastic Danny.
-
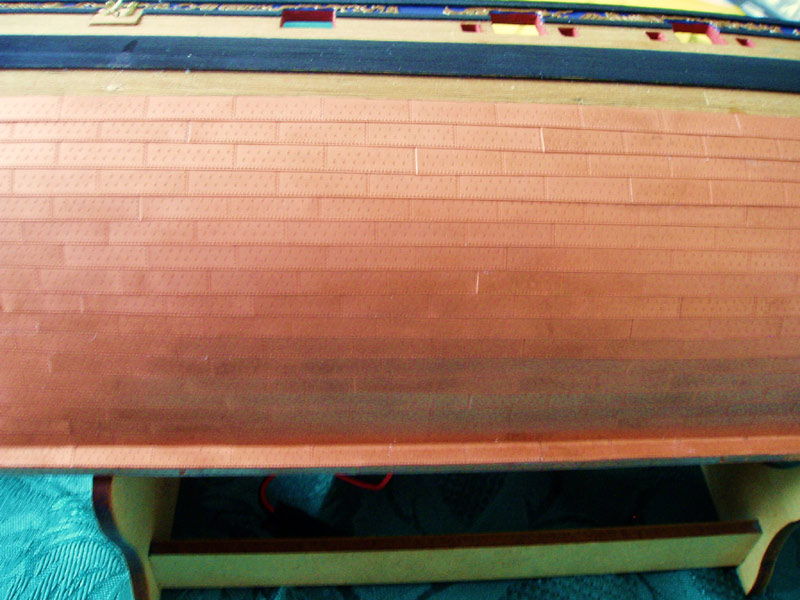
Okay - have started the coppering and it is something I don't like, I think I'll stick to planking hulls - that I can do! The kit has etched sheets for the coppering, it was easy to seperate them into strips - no cutting needed, simply bend along the 'score lines' and they easily come apart. I marked the waterline using my trusty 'helping hands': First I put copper strips along the keel bottom edge. I found sticking a strip centrally along the keel the overlapping edges could be bent down easily. I did this first for a neater finish: Then I planked the sides of the keel: Then I proceeded with the first row of plates: After three rows:


- 161 replies
-
- 8
-
-
- pegasus
- victory models
- (and 1 more)
-
Hi Alistair, Thanks for the info, I've had a look at your coppering and it looks great, there is a lot of useful information. Yes, that would be great if you could take a few pics of your coppering, it would help me greatly. It felt like walking into the unknown with a blindfold on - with your help that blindfold has been lifted!! Thanks for looking in Popeye!
-
I'm finally trying to get my head around coppering Pegasus' hull. Whats the best way to go about this? I've looked at a few build logs and I'm not sure how to work it all out with the triangular fillers, how do I know where to start these? HELP!! I'm about ready to crawl back into my hole!!
-
Hello Crackers and Alistair, thanks for looking in. Crackers, I have just updated my Aggie stitch log here. It was overdue for an update! Alistair, I've had a look at your log and you've done some lovely work. I have also seen some refinements in Andy's log I'd like to try and incorporate into my build. You are both producing some amazing work.
- 161 replies
-
- 1
-
-
- pegasus
- victory models
- (and 1 more)
-
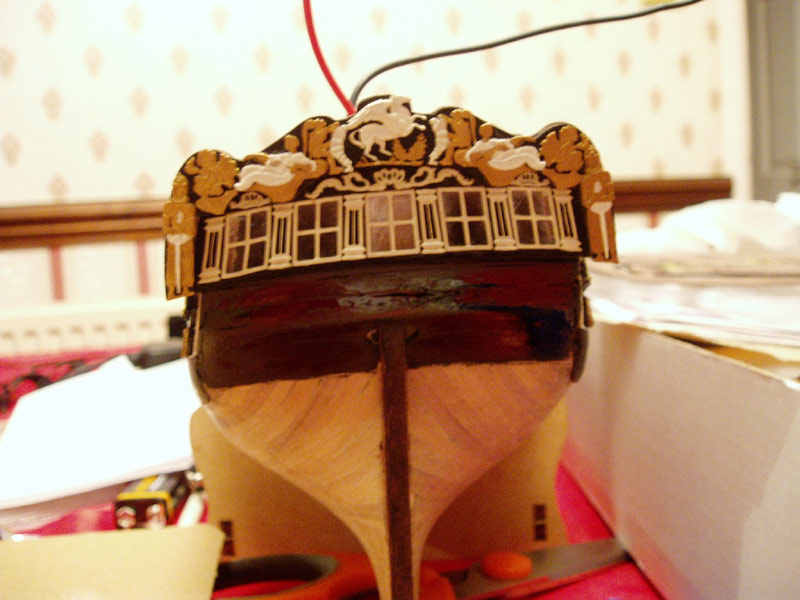
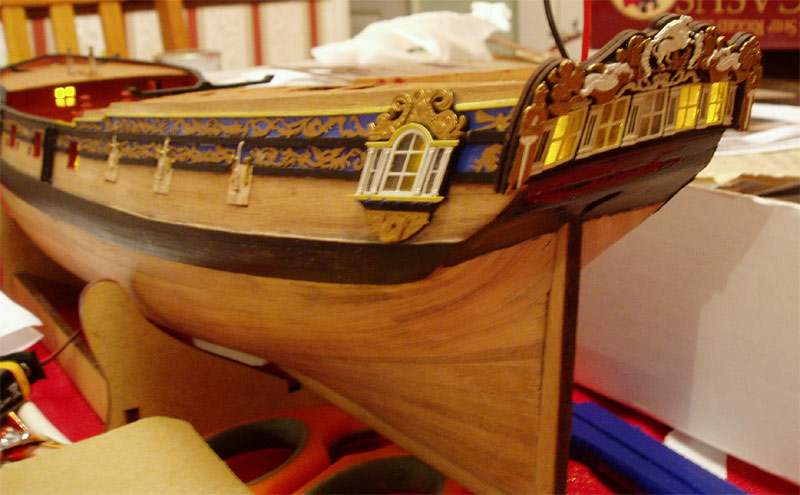
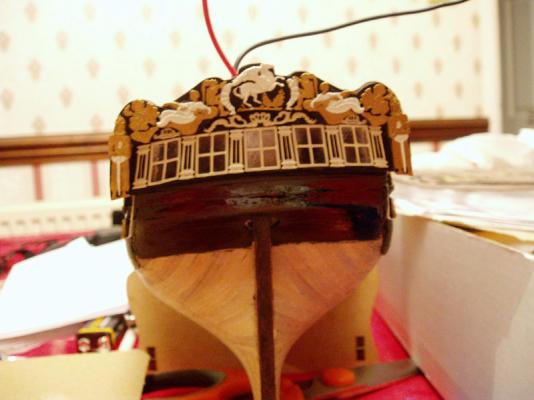
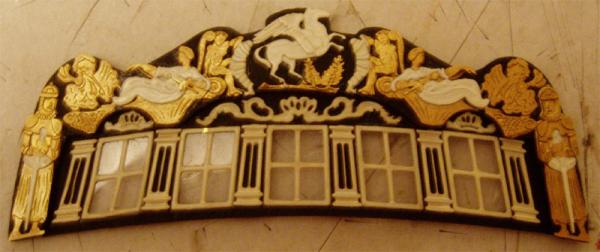
Thanks for the comments Nils, John & Steve. Steve, I used Humbrol and Revel enamels, Black is Revell SM302, White is Humbrol 22 and Gold is Revell 94. Hope this helps. Have now attached the stern facia: With lights on:

- 161 replies
-
- 9
-
-
- pegasus
- victory models
- (and 1 more)
-
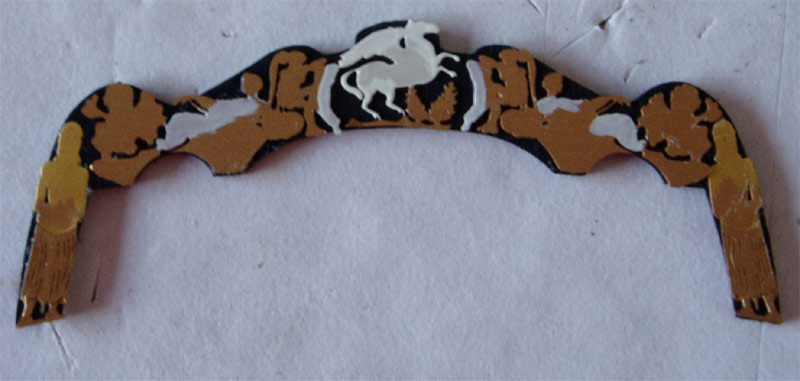
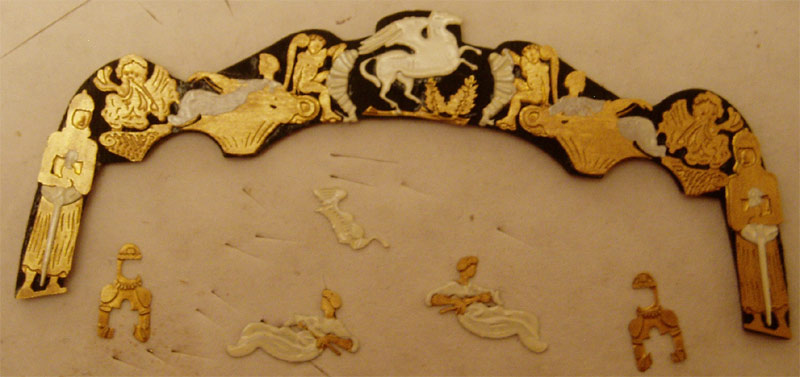
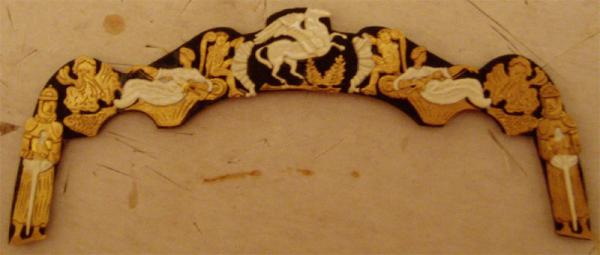
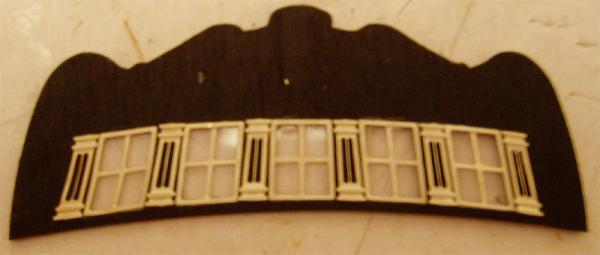
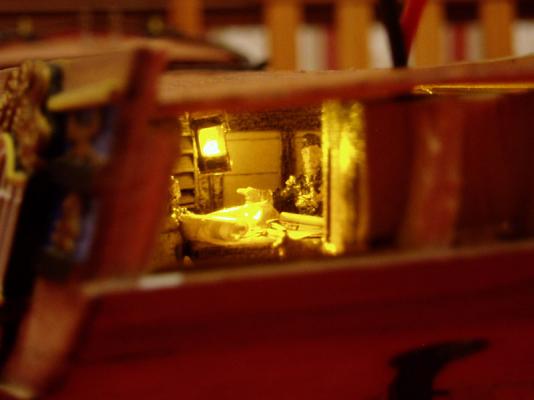
Made up the stern facia. First layer of brass etch glued into place on the window surround: Second layer of brass etch applied with third laid out ready: Third layer applied: Windows and columns added to facia: Window surround added to facia. Now complete. Finally a pic of the cabin with the lights on:


- 161 replies
-
- 14
-
-
- pegasus
- victory models
- (and 1 more)
-
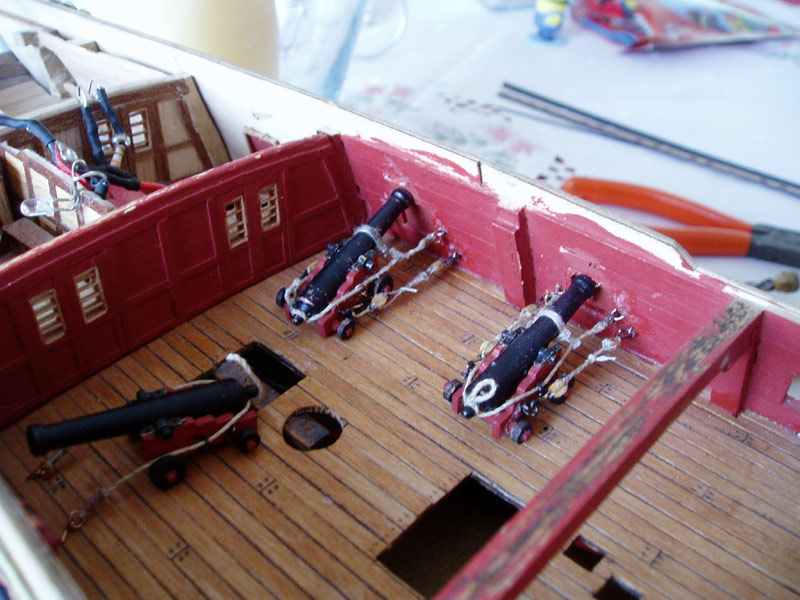
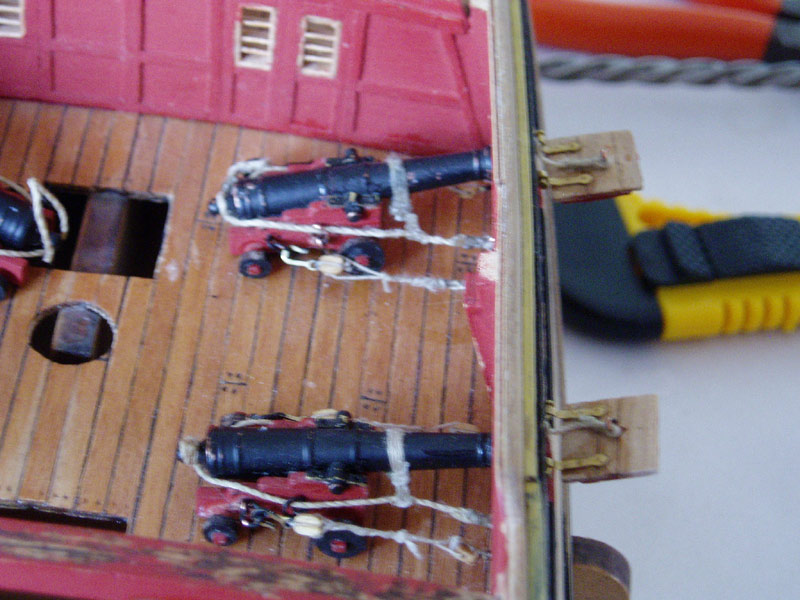
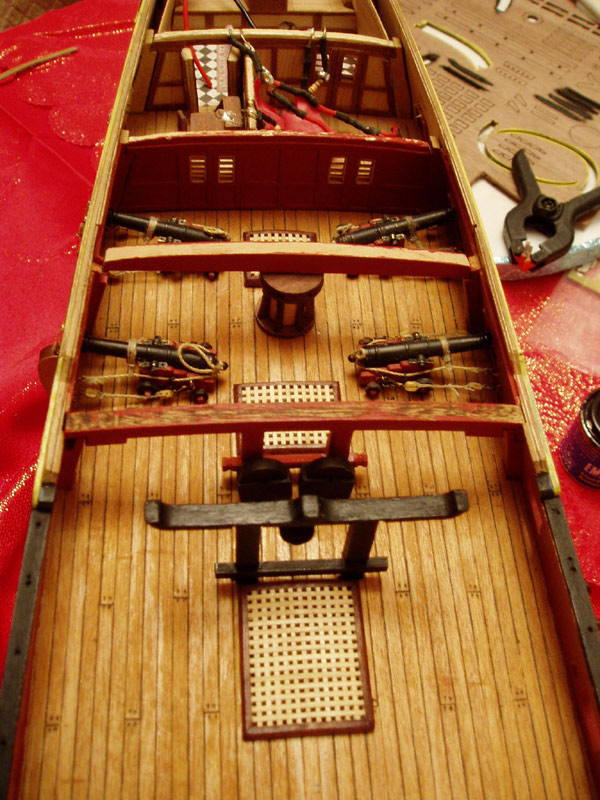
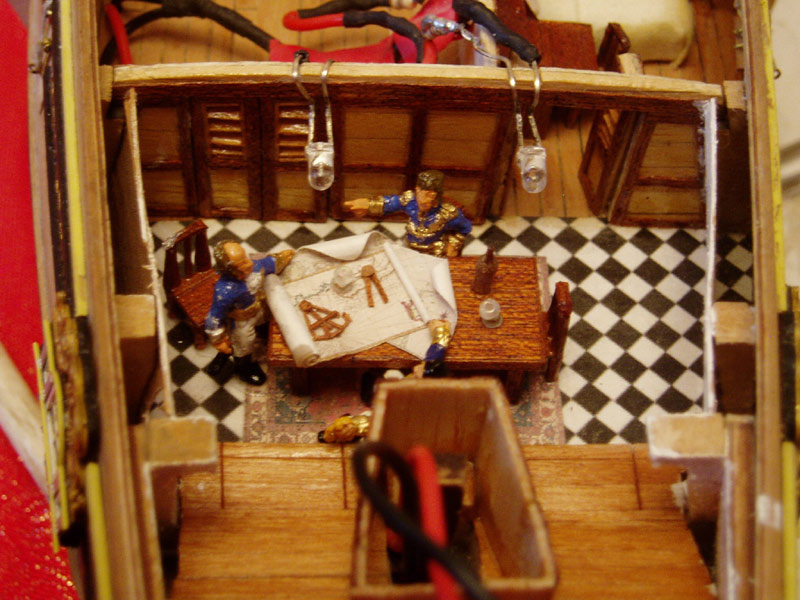
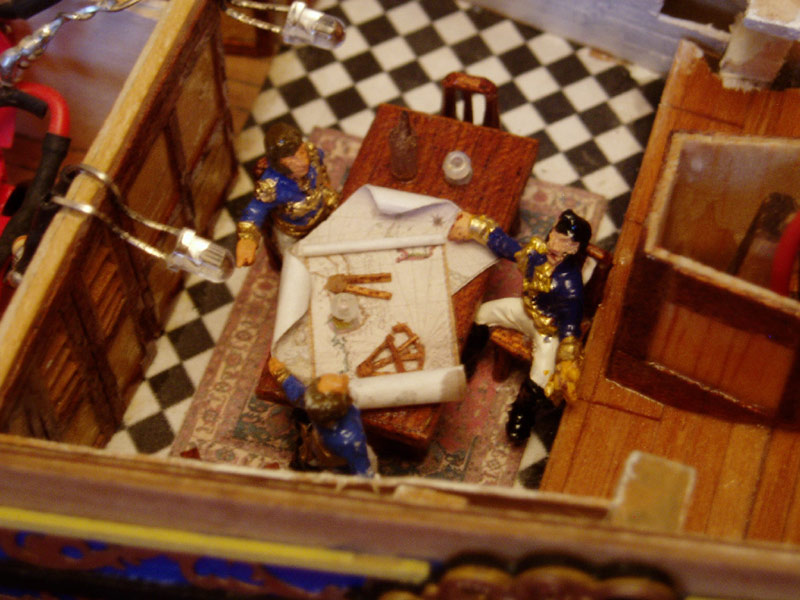
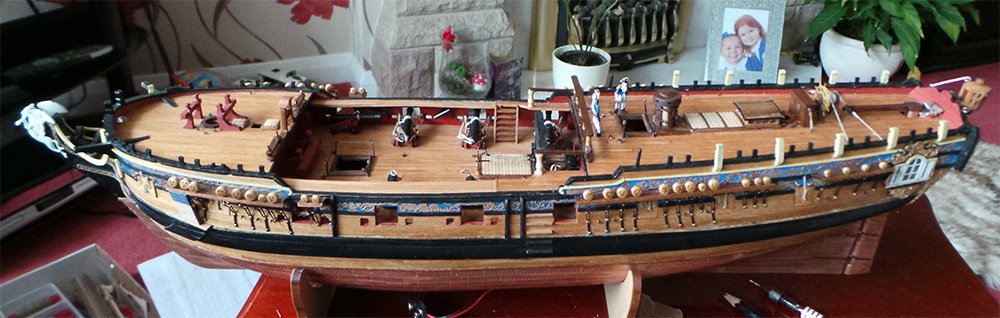
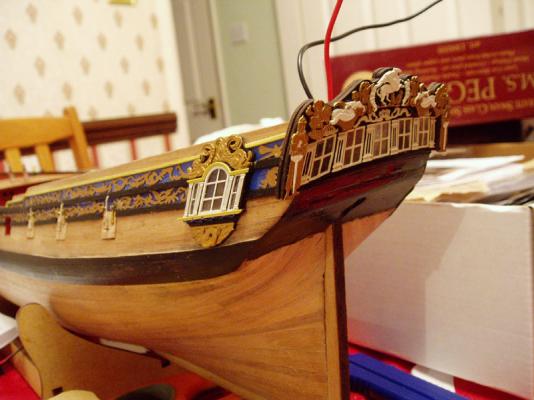
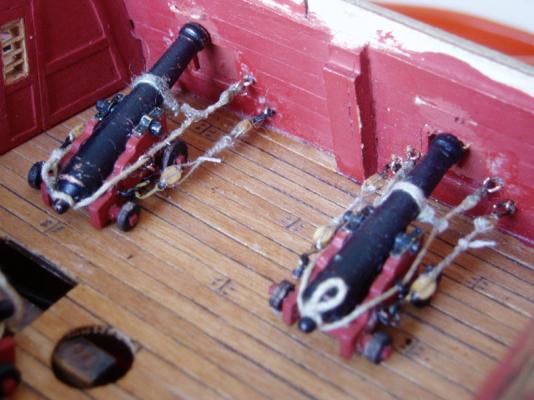
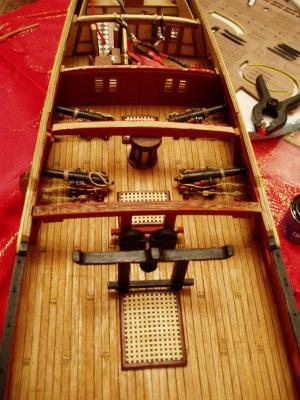
Have finally managed to spend some time on Pegasus. Fitted the 'stowed' cannons in place under the deck: Glued some of the deck fittings in place: Permanently added the captain and his officers into the cabin. (would love to be a fly on the wall and know what they're talking about!!):


- 161 replies
-
- 8
-
-
- pegasus
- victory models
- (and 1 more)
-
No, real life is getting in the way at the moment, I keep looing at pegasus and wishing I could find some more time to work on her, she sits there looking at me rather forlornly! Hopefully will find some time soon.
- 1,873 replies
-
- 1
-
-
- occre
- san ildefonso
- (and 1 more)
-
She's looking great Sjors, nice work on the crows feet and ratlines. Keep up the good work.
- 1,873 replies
-
- 1
-
-
- occre
- san ildefonso
- (and 1 more)
-
Hi guys, thanks for your comments. I am still around - have no fear, I will be back!! Life is just very busy at the moment, we've had a few things happening - some good, some not so - and life has changed for us at the moment. I have managed to fit two guns under the quarterdeck and have started on the third one. Will take some pics when I can.
- 161 replies
-
- 7
-
-
- pegasus
- victory models
- (and 1 more)