vulcanbomber
-
Posts
396 -
Joined
-
Last visited
Content Type
Profiles
Forums
Gallery
Events
Everything posted by vulcanbomber
-
I've not looked in for a long time and all I can say is WOW Danny, she is really beautiful, your craftsmanship is simply amazing.
-
A great job on those ratlines Randy, perseverance pays in the end. Hope you feel better soon.
- 384 replies
-
- 1
-

-
- san francisco ii
- artesania latina
- (and 1 more)
-
Lovely job on the ship's boat Sjors. San Ildefonso is looking a treat.
-
I did the same thing too - forgot to plank the inner bulwarks, had to remove them and do it, luckily the glue hadn't had too long to set! You're doing really well Mark. She's coming on nicely.
-
A really good idea, I am also jumping on the band wagon to follow your progress, I think you may need a large wagon to accommodate all us passengers!
-
Hi Michael, thanks for looking in. I didn't colour the wire, I quite liked it silver. Hi Sjors, glad it's understandable now and I know you're always around, I have the tea and biscuits on hand always (rum is securely locked away)! .

- 122 replies
-
- 3
-
-
- finished
- artesania latina
- (and 1 more)
-
I say let them wonder! They'll probably get the gist of it all by reading the posts. For those that don't: I made a typing error in my lanyard instructions, it was spotted by my trusty followers, who I'd confused slightly and they were trying to establish if I'd gone wrong, but when reading through it again, found it was a typing/reading error. I have now corrected it so it reads better. Howz zat????!!! :D
- 122 replies
-
- 1
-
-
- finished
- artesania latina
- (and 1 more)
-
Thanks Arthur! I think it happens to all of us, the times I've read something and then gone on auto pilot without reading the rest properly, then wonder why things haven't turned out as expected.
-
Hmm, that is warped. One solution might be to wet it slightly. Like the underside of a shriveling leaf, the plywood’s concave side has lost moisture and shrunk. Reversing the warp can be accomplished by adding moisture to this concave side and drying the convex humped side. Use a sponge to wet the concave side of the plywood (hot water works best). Then lay the sheet, moist side down. A heavy book on top will help to flatten it as it dries out.
-
Happy Birthday Randy! Your San Fran is looking excellent. Keep up the good work.
- 384 replies
-
- 1
-
-
- san francisco ii
- artesania latina
- (and 1 more)
-
No problem Mark, glad I could help.
-
Looking great Robbyn. You're not the only one who forgot to drill holes in the crows nest before fitting them either !!!
- 773 replies
-
- 1
-
-
- san francisco ii
- artesania latina
- (and 1 more)
-
Hi Arthur, I started in the bottom left hole in the top deadeye, the one attached to the shroud. )I called it the shroud deadeye, thinking it would be clearer, maybe using upper deadeye and lower deadeye would be better?) I made a typo, and said right hole, I've corrected it now. The second pic is a bit misleading, I hadn't noticed that before, I'd moved the top deadeye out the way when I was threading the lanyard through the bottom deadeye in the second move. That's a good pic, Arthur, and shows the order quite well. I agree with you on the second one, I would have thought the end should have passed over the others.
-
Forgot to say, the foredeck I planked in single lengths.
-
Hi Dave, I got a little mixed up with the planking, I was thinking hull planking! The length of deck planking was usually between 20 and 30 foot, I don't think there was a hard and fast rule of how long they had to be. I went for a 26 foot length, which scaled down was 125mm. I used a 5 butt shift, with a 25mm stagger. Arthur's (AEW) deck planking calculator is quite useful. Also there is a deck Planking Tutorial by Ulises Victoria which explains how to plank the deck using the butt shift patterns. Both can be found in the MSW Database.
-
Hi Mike, Welcome to the San Francisco club! There are quite a few builders here and I'm sure you'll find all the help and advice you need. My San Fran was an older version and was double planked. I had plenty of materials provided in my kit, quite a bit was left over. Not sure how good Artesania Latina's after sales service is.
-
Looking very good Sjors, and I like the cannons brass, I left them brass on my San Francisco.
- 1,873 replies
-
- 1
-
-
- occre
- san ildefonso
- (and 1 more)
-
Hi Dave, I have pics of the planking for Pegasus in my log, The lengths and planking pattern was taken from the Swan series of books, another member helped me with the research. I can't remember off hand the length and the pattern used, but I'll go measure and draw out the pattern for you.
-
I'm trying to remember what I did with my deck planking, I know I mentioned what I did on my old log on MSW1, but unfortunately, I've lost the first 100 or so photo's of the beginning of the log. I think I planked the two halves of the main deck off the ship, but left the centre row down the middle and the bulwark sides of the deck unplanked. Thinking about it, I'm pretty sure that's what I did because it is quite a squeeze to fit it in which is why it's in two halves. Once i'd planked most of it I stuck it into place and then attached the gunport patterns. Once that was done, I removed the bulkhead bits indicated (by the way, now is the time to cut partway through those bulkhead extensions, it will make them easier to remove when the time comes.) After removing the bulkhead extensions, I completed the planking on the main deck. The foredeck and the quarterdeck I planked off the ship, in fact I've only just fitted the foredeck in place, the quarterdeck is still lying fully planked in the box! To simulate the calking I used one strand of dark brown embroidery thread between the planks. Hope this helps.
-
Hi Sjors, that's correct the lanyard ends on the bottom deadeye and then is taken up to the shroud. I hitch it onto the shroud with a clove hitch to hold it in place and then seize it, but that shouldn't be done until all the standing rigging is completed.
- 122 replies
-
- 1
-
-
- finished
- artesania latina
- (and 1 more)
-
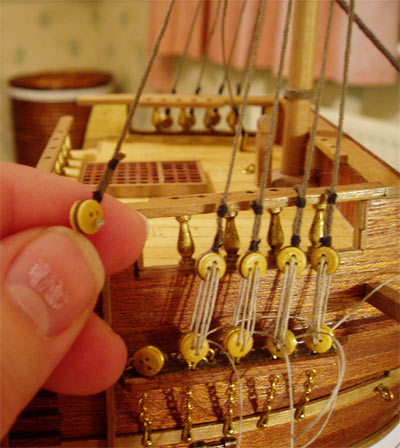
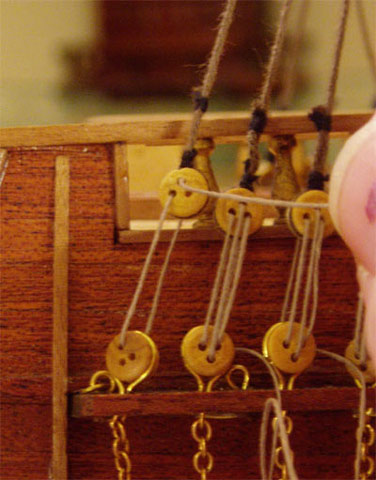
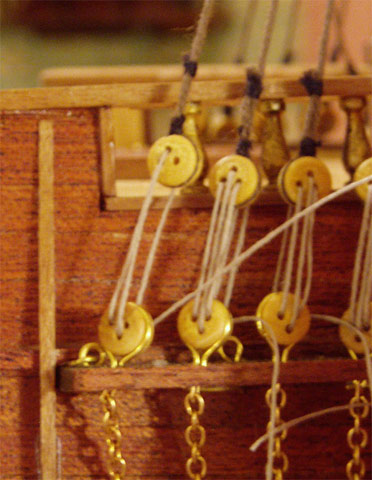
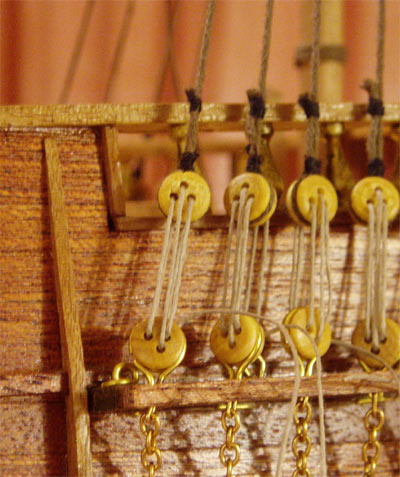
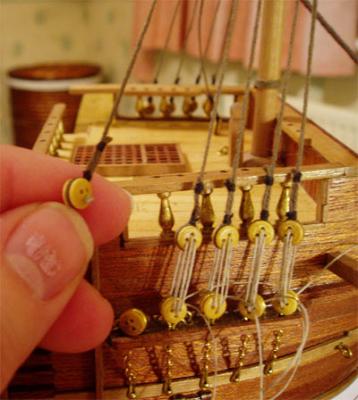
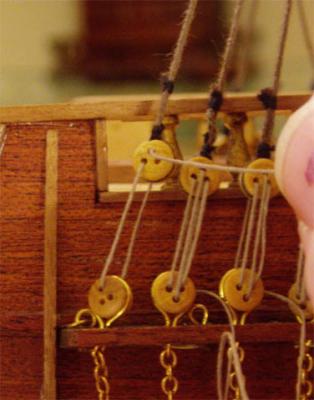
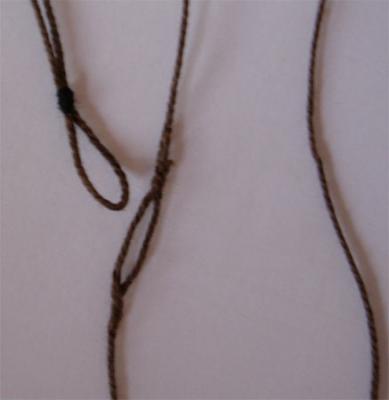
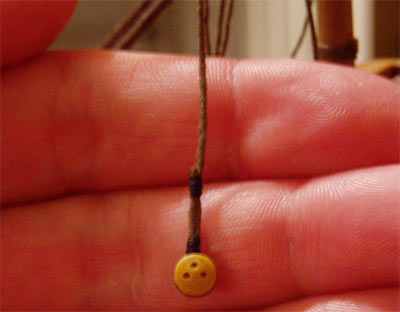
Now to attach the lanyards. These ones are on the foremast. First, make sure the deadeyes are the correct way up! The holes are in a 'triangle', the top of the triangle should point down for the deadeyes on the channels and on the shrouds it should point up. Next, take a length of thread and knot the end. Make sure it's big enough not to get pulled through the hole, but small enough not to be noticed. From the back of the shroud (Top) deadeye, thread it through the bottom left hole (Note this pic is the BACK of the deadeye): The thread now goes through the front of the top left hole in the channel (bottom) deadeye: Now take it up and thread it through the back of the top hole in the shroud deadeye: Now through the front of the bottom hole on the channel deadeye: Next through the back of the bottom right hole in the shroud deadeye: Lastly through the front of the top right hole in the channel deadeye: Gently tension the lanyards so the deadeyes are all level: Shrouds and lanyards on the main mast: DO NOT TIE THEM OFF YET, they will still need tensioning when the standing rigging is complete.


- 122 replies
-
- 6
-
-
- finished
- artesania latina
- (and 1 more)
-
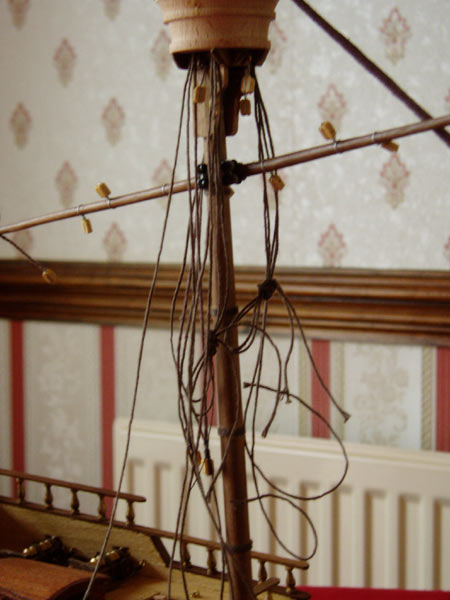
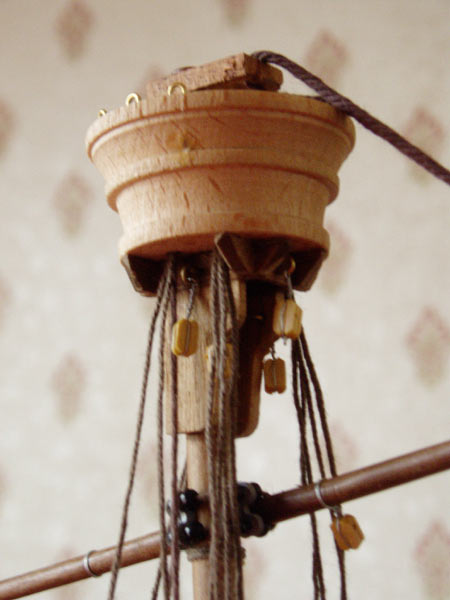
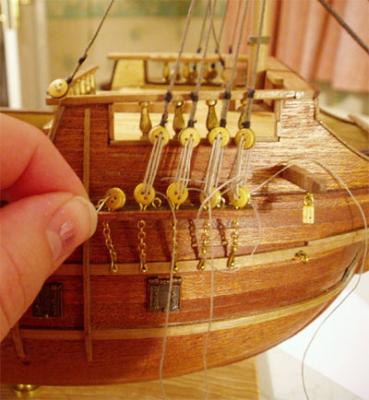
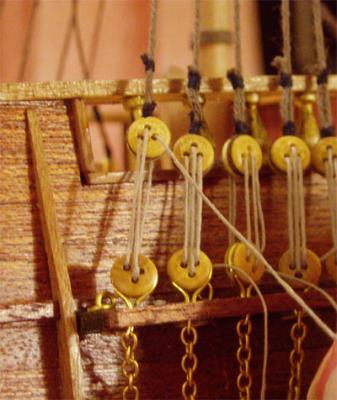
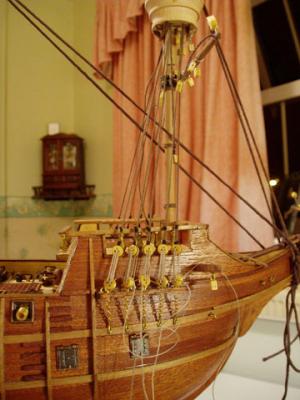
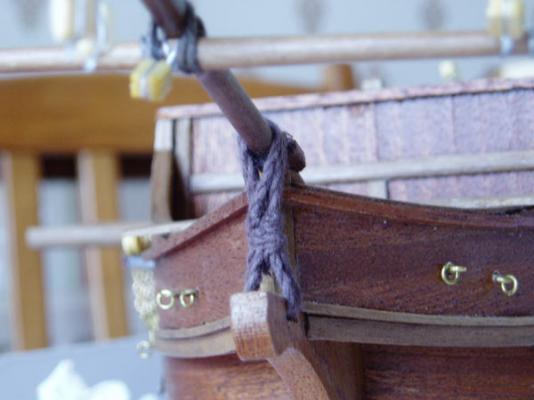
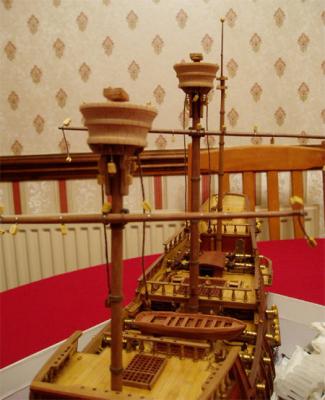
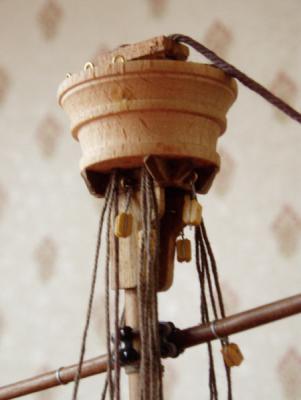
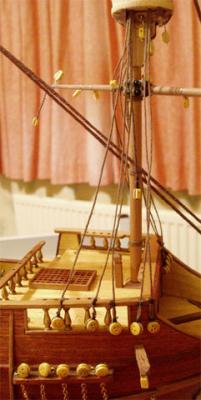
The gammoning: I'm repeating myself slightly here, but since I've found some of my missing pic's I can explain how I installed my shrouds in more detail. I first mentioned them and how I make the pendants and tackles here. The pendants are placed first, they are spliced together: To keep the mast straight, I temporarily fitted a stay. Next was fitting the shrouds, as mentioned earlier in this log, they are put on in pairs, one pair to the left, the next pair to the right and so on. The last shroud on the port was spliced to the last one to the starboard as they were both singles. On the main mast the first two pairs on both sides were put through the front hole in the crow's nest, the pendant and last shrouds through the back hole; A lot of builders use a jig for getting the shroud's deadeyes all the same distance, it usually consists of a piece of wood with pins set at both ends, one end would fit into the deadeyes on the channels and the other end for the deadeye on the shrouds, it would be held in position while the shroud was attached to it. I found it got in the way and found it easier to do it without one. The first one was attached to the spliced shroud and the others were attached and leveled by eye; First deadeye seized to a shroud; Deadeyes in place on the foremast, all leveled by eye, they will get evened out more by the lanyards


- 122 replies
-
- 5
-
-
- finished
- artesania latina
- (and 1 more)
-
Hi Sjors, It's really surprised me just how much was in my original log!
-
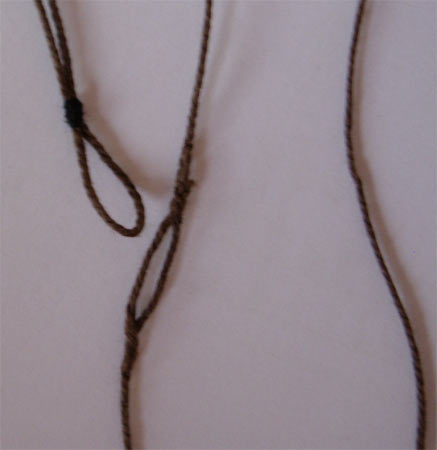
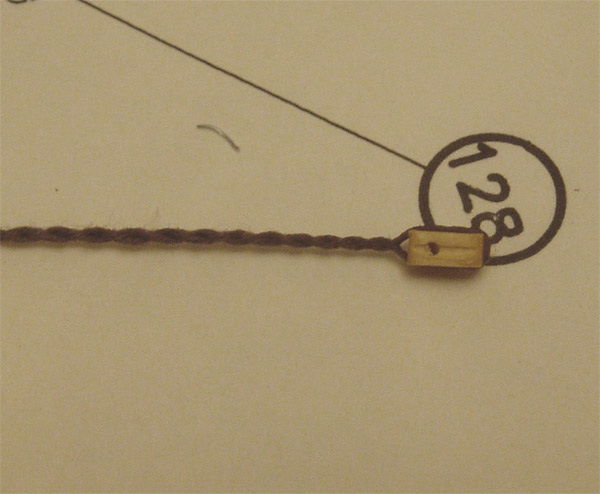
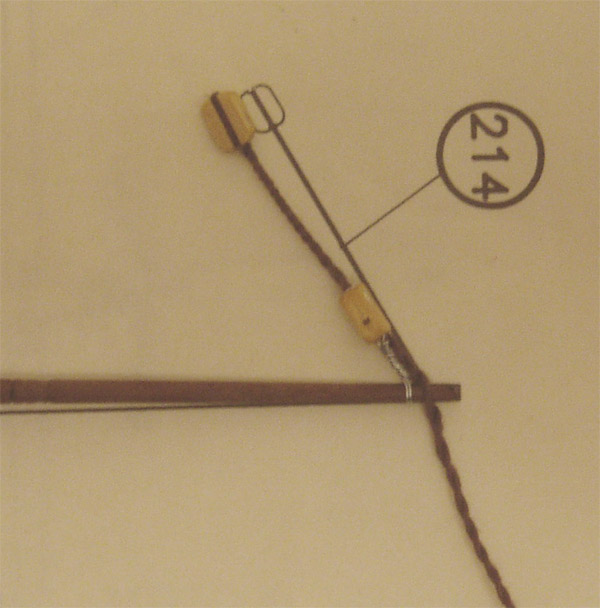
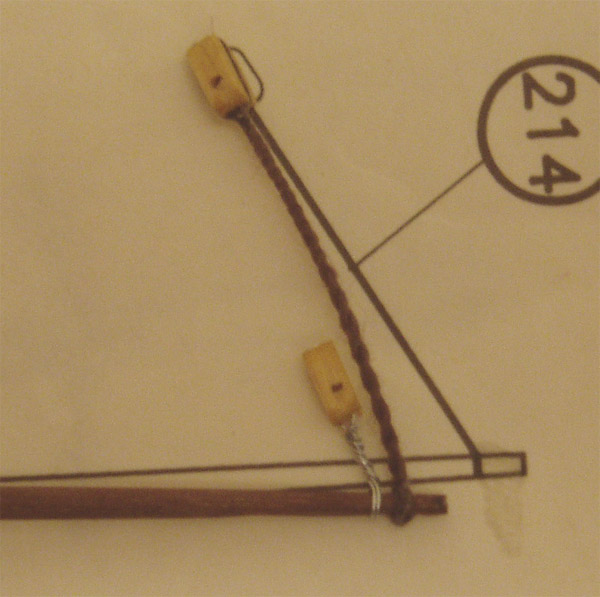
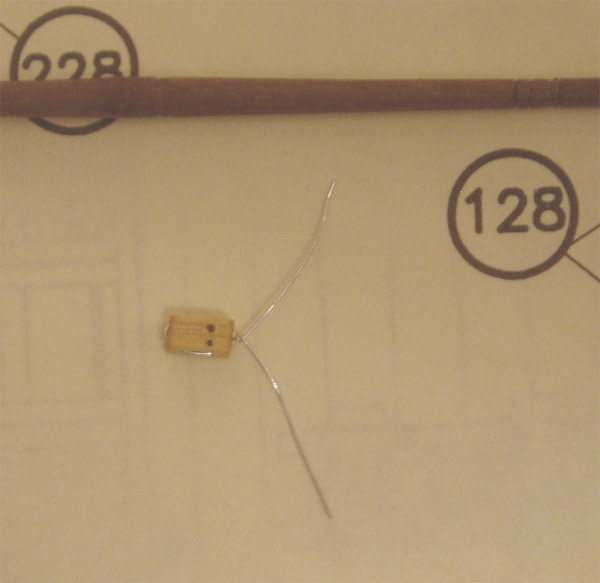
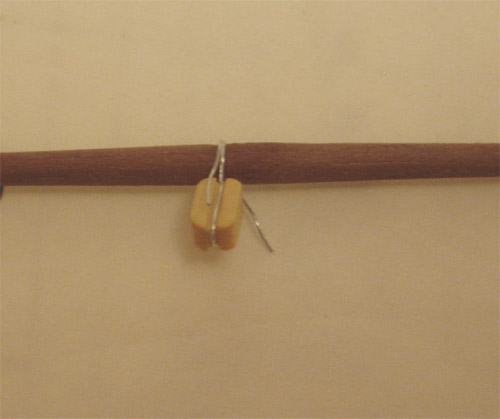
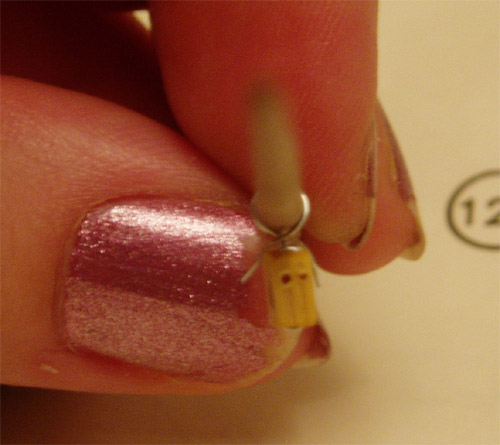
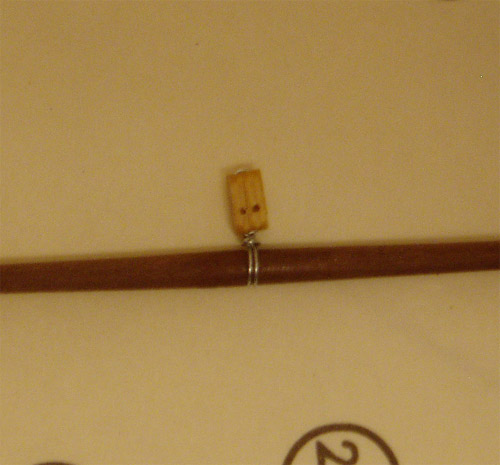
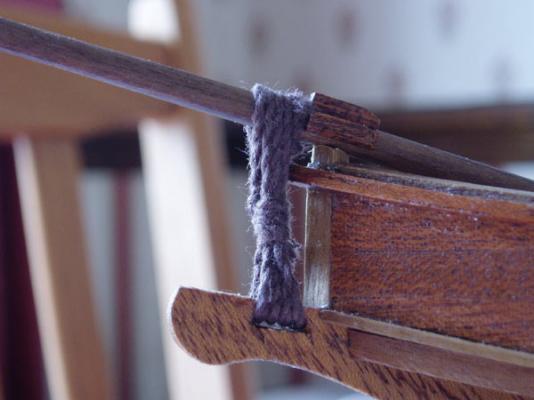
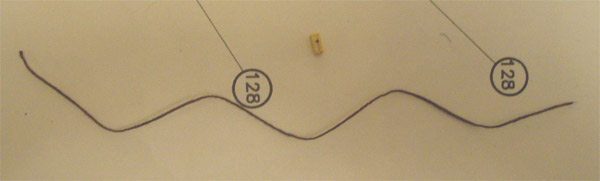
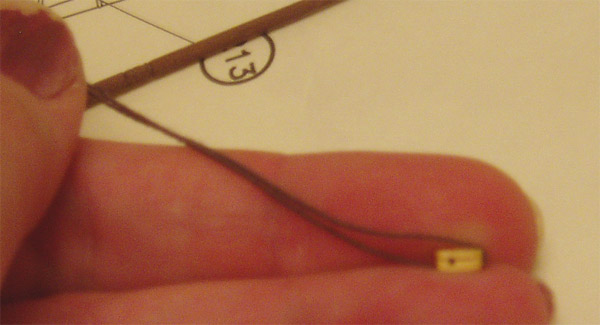
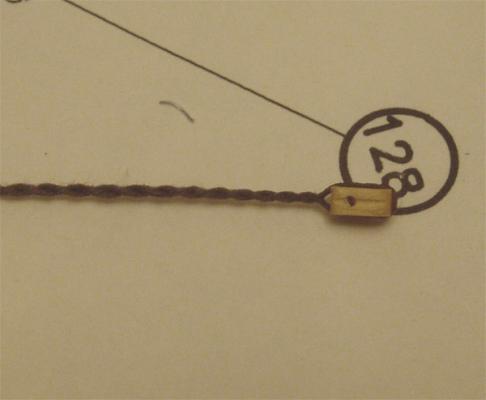
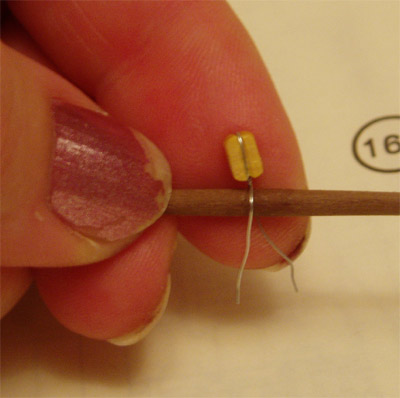
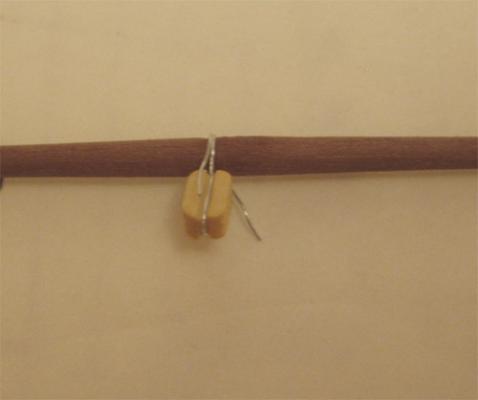
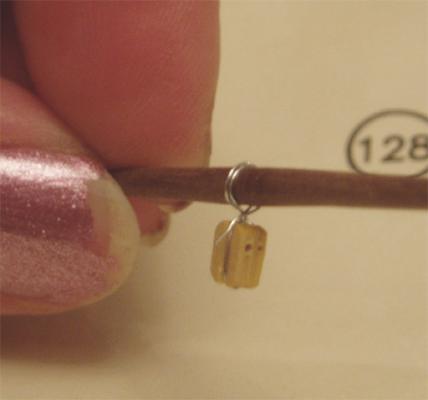
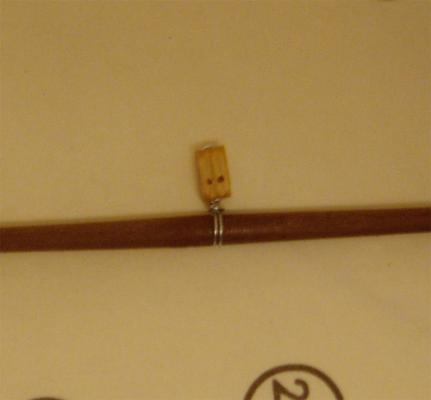
Next is how I made the braces (the long bits at the ends of the yard, used to rotate the yard around the mast); First I took a length of cord just under three times the length of the brace and a block: I wanted the brace to twist so it held the block: To do this I stretched out the cord between my hands and twisted the length, making sure to twist it the right way so it wouldn't unravel, then when I brought the two ends together the cord would twist around itself and hold the block in place when placed in the middle of the cord, a dab of cyano (superglue) ensures the block is secured to the cord: Next I placed the yard on the plans and attached the brace to the end by slipping the yard through one of the twists, adjusting it until it was the length indicated on the plan: Once happy again a dab of cyano held is securely onto the yard, once dry it was easy to trim; Next is how I attached a block directly to a yard with the wire provided in the kit. First I scored a slight grove into the yard where the block was to go, this would help keep it in the correct place. Next i took a block (in this case a double) and a length of wire, wrapping the wire around the block, and twisting the ends together once, at the bottom of the block to secure it: Next take the yard and place the block and wire in the grove: Wrap one end of the wire clockwise around the yard and the other end anti-clockwise, bringing both end up alongside the block: Now, take one end and pass it between the block and yard so it end up on the opposite side. do the same with the second end: view on end so you can see the crossover just made: Now taking the block and the two ends firmly, and very carefully (it breaks easily) twist the block around twice so it is locked onto the yard, then trim the ends.


- 122 replies
-
- 4
-
-
- finished
- artesania latina
- (and 1 more)