


hamilton
-
Posts
1,780 -
Joined
-
Last visited
Content Type
Profiles
Forums
Gallery
Events
Posts posted by hamilton
-
-
I'm finding Chuck's method very effective so far - it seems like a slight modification on the approach laid out in David's primer - if I were working with wider sheet wood instead of strip stock I would probably try to spile the planks in the strakes above the waterline at least, but since this is the first layer, I'm more interested in building up a solid foundation - I have some 1mm walnut sheet stock that I might use to spile planks above the waterline in the second layer, since it is a decent colour match with the strip wood supplied by Corel, but I'll have to consider this.
So far, using Chuck's method I'm nowhere near needing any drop planks at the bows, so it seems to be working. I also think that a much more attentive fairing job has contributed to this....in the past I've tended to rush through that part of things, so I hope that I've finally learned my lesson! Maybe in a few builds from now I'll actually be able to not stress out too much about hull planking!
hamilton
-
Hello Alan
Yes - I hope to be able to emulate period practice here as much as I'm able. Though the photo shows a pretty rough planking job the first go around, this is actually quite an improvement on some of my previous attempts - most of which I had to treat cosmetically (i.e., lots of filler, sanding and knife-work to soften some clinkering edges) to produce a decent result. I've been following Chuck's procedure as laid out in the planking vids posted elsewhere on MSW and trying to be more methodical about it and patient with the process. At this stage - and I imagine this isn't an entirely uncommon thing among modellers - I usually become pretty impatient and start just slapping planks on the hull just to get it done!
Anyway - back to packing!! Bye for now
hamilton
-
A very quick update - I've been away with the family for the last two weeks, and I'm taking my sons to visit with my dad back East tomorrow for the next week, so not much time at the bench at all - when I'm back I'm also heading back to work, though it'll be a relatively slow start (I hope!) and I'm really hoping to finish the first layer of hull planking before things kick back in come September.
In any case it's nothing spectacular - finished the first band of hull planking - looks pretty pocked and gappy, but it's coming together ok - some filling sanding and so on will result in a good enough base layer, so I'm trying to do things carefully while not beating myself too much about the results.
Here's a photo to show the progress. Back later!
hamilton
-
-
Thanks for stopping by Robert! This kit has been pretty fun so far, though admittedly I'm taking it very slowly (partly out of care, partly out of distraction, partly out of the impossibility of avoiding other people's demands!). I got my kit on a deal from Model Expo I think back in 2012 - I knew I wasn't ready for it back then, but the deal was too good to pass up!! In truth, that's how I've got most of my kits! But now I'm being embargoed (by myself) and after buying the CAF Grenado as a Christmas present for myself (sheesh!!! Any excuse will do!!) I am not allowed to buy any more kits until I have finished the 4 that I'm "currently working" on.......and 2 of the unopened kits in the pile.....As the signature suggests, I feel like I have enough models to keep me going for a while.......now if only I can finish one.....
hamilton
-
On 7/4/2022 at 8:50 AM, Bill Morrison said:
I have just found your HMS Bellona here. You are doing a marvelous job! I also suffered flooding in my basement several years ago and had to undergo a hiatus from building. It looks like you have recovered nicely. Your Bellona looks great so far!
Bill
Thanks for coming by Bill - not sure how I missed this comment before!! Water is the worst!! But yes - things are more or less back to normal, thankfully!
hamilton
-
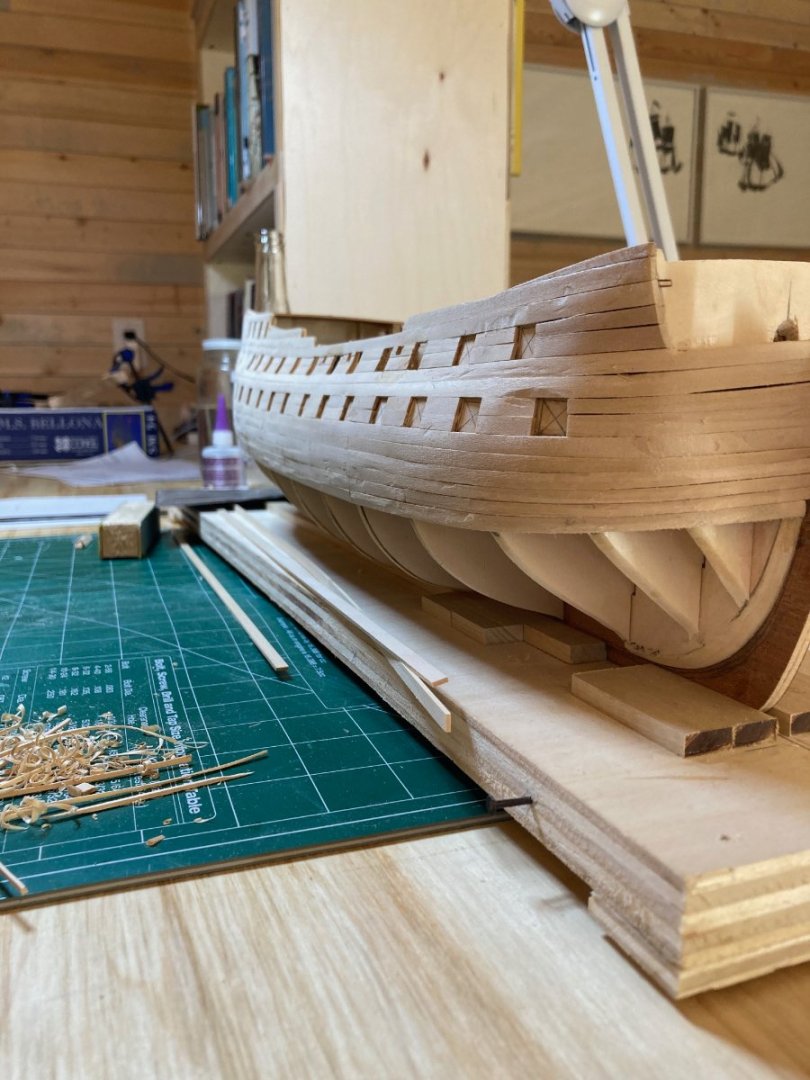
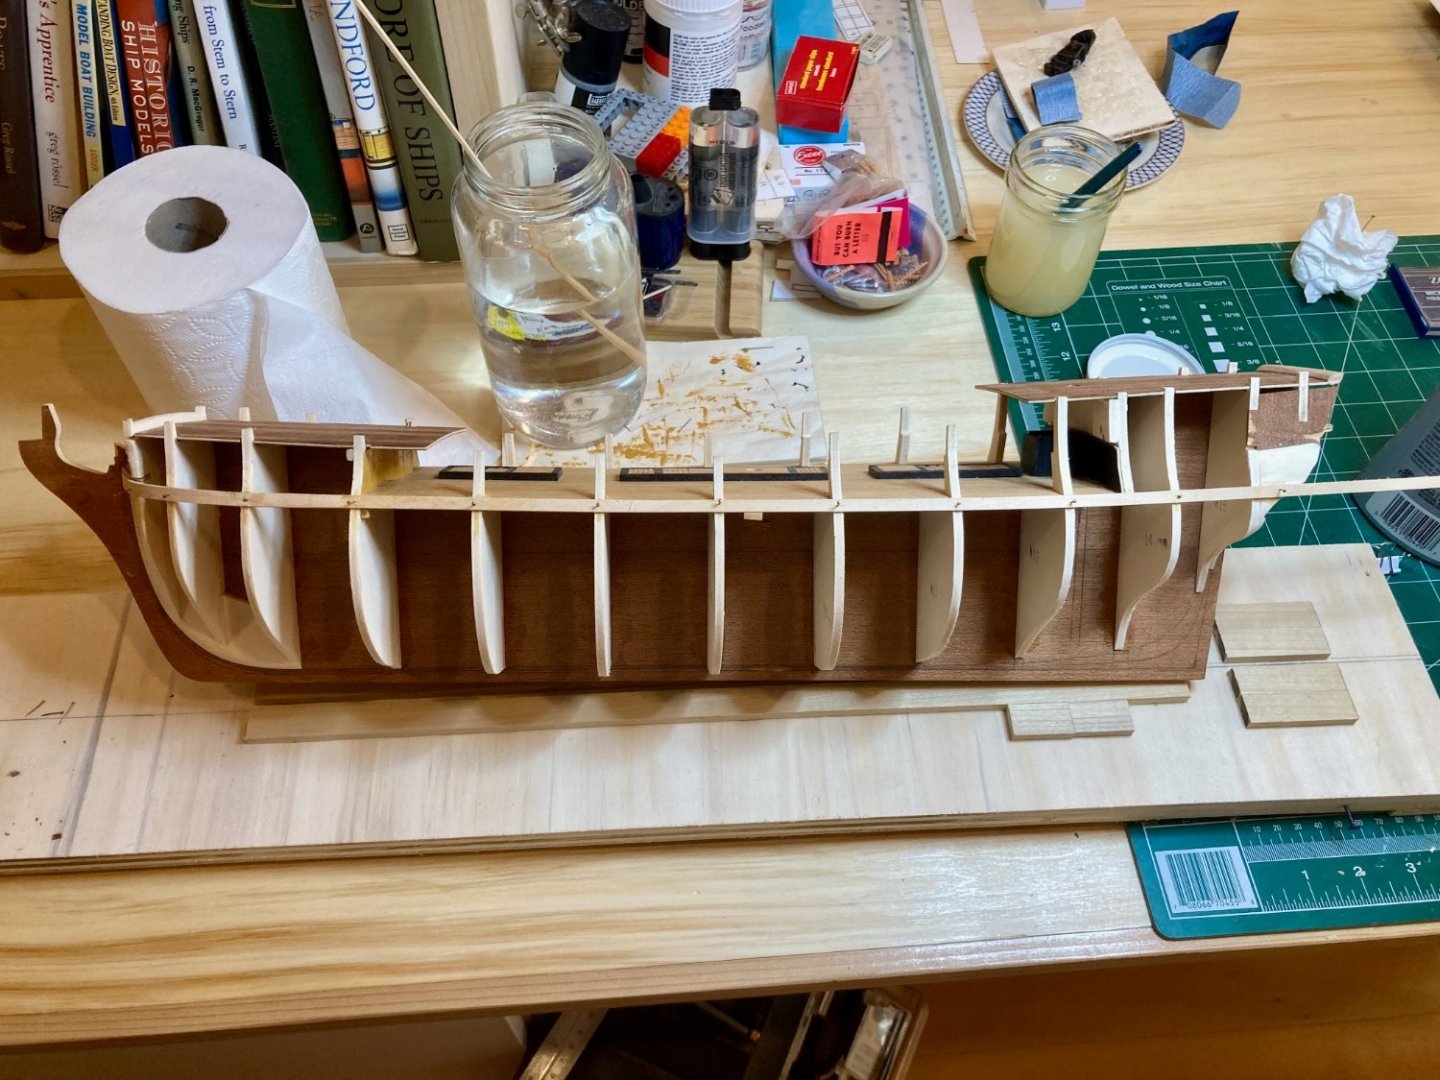
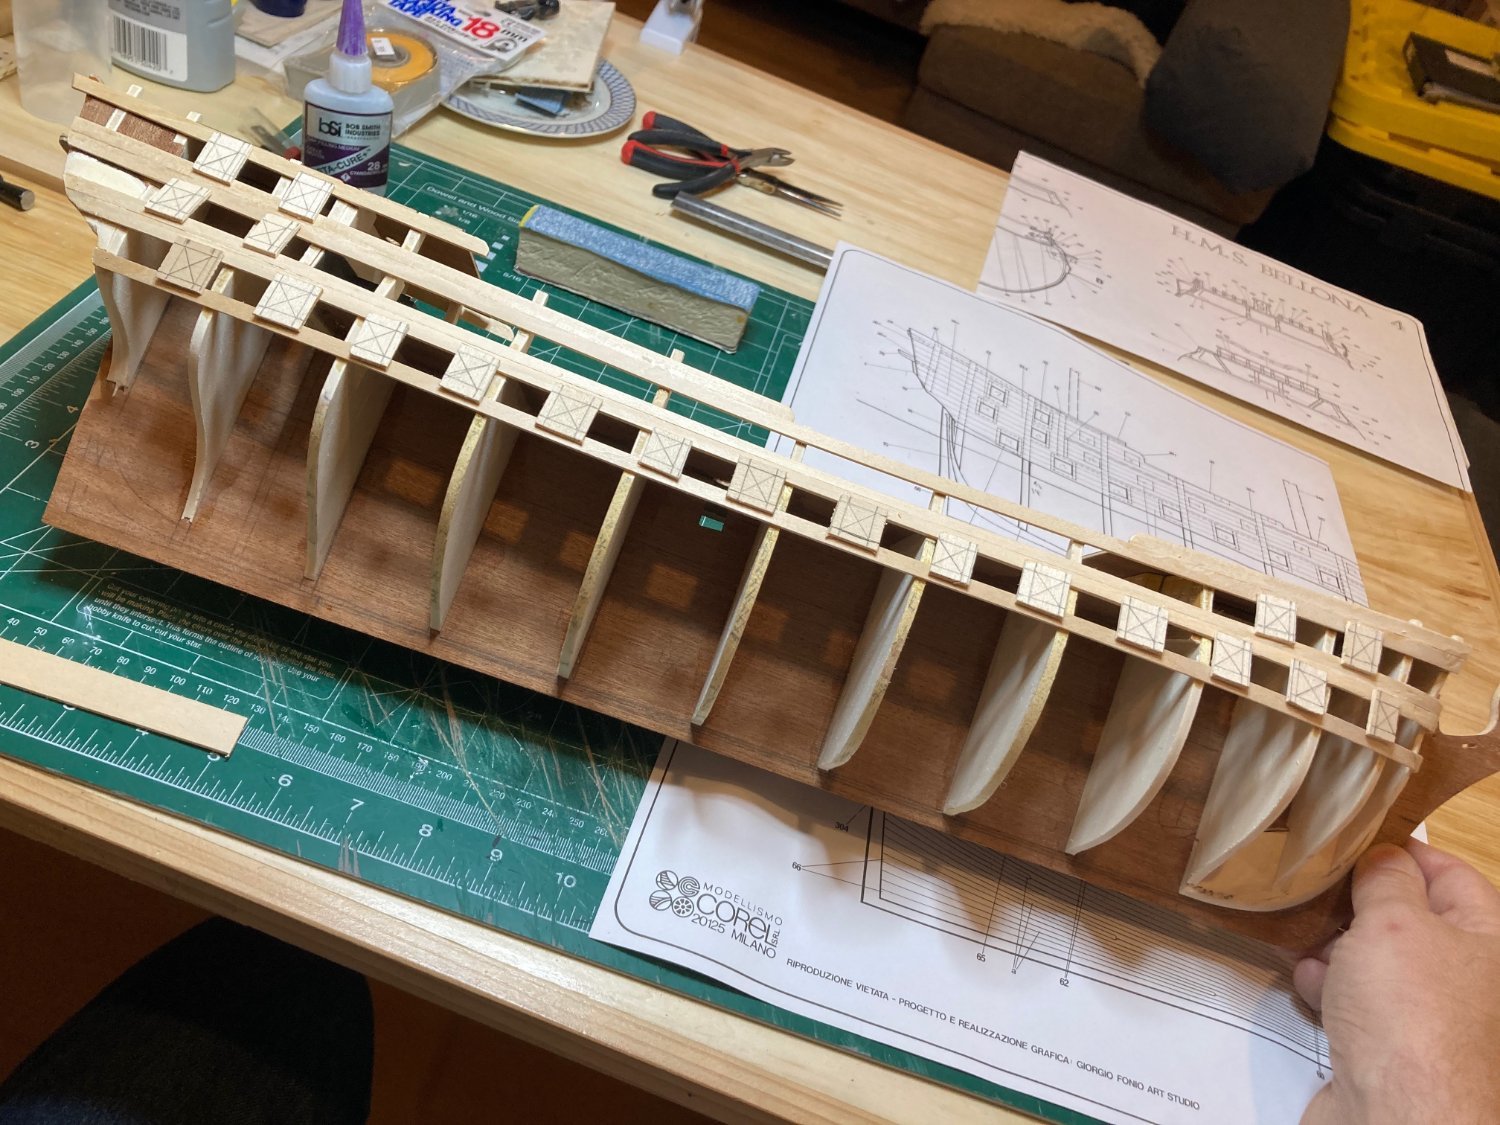
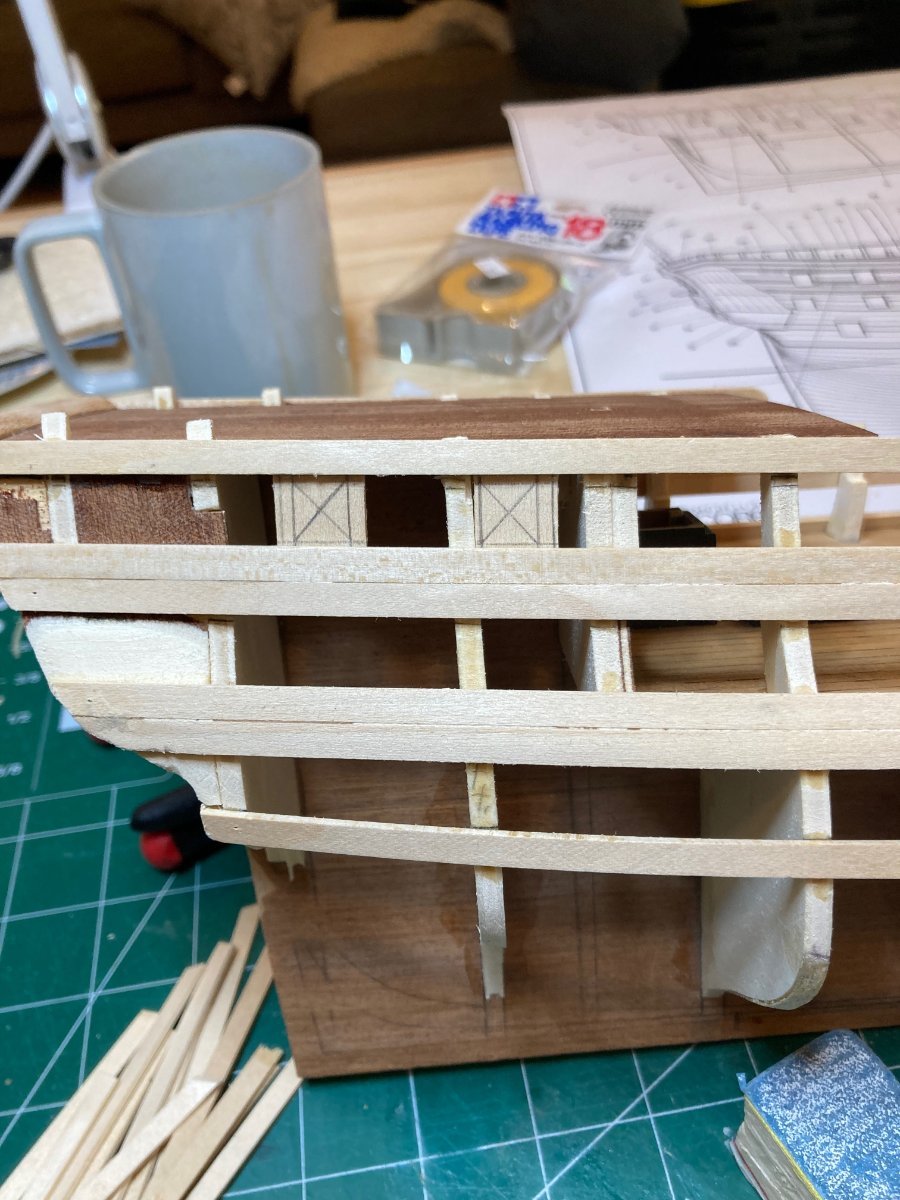
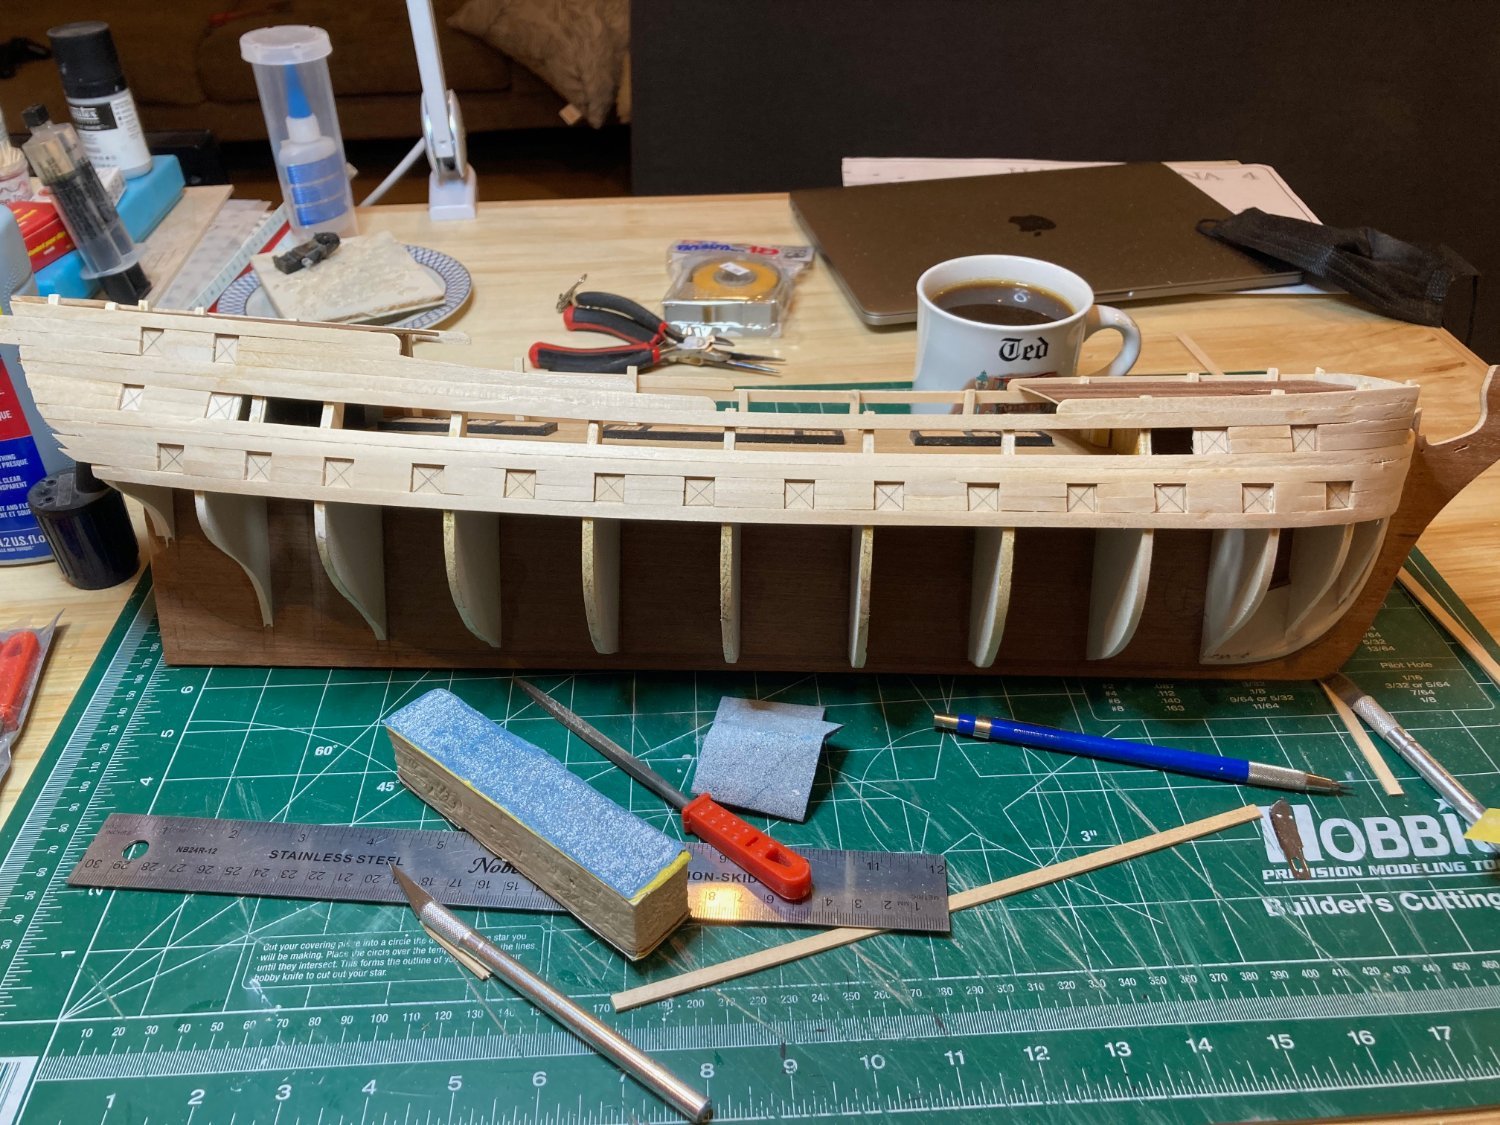
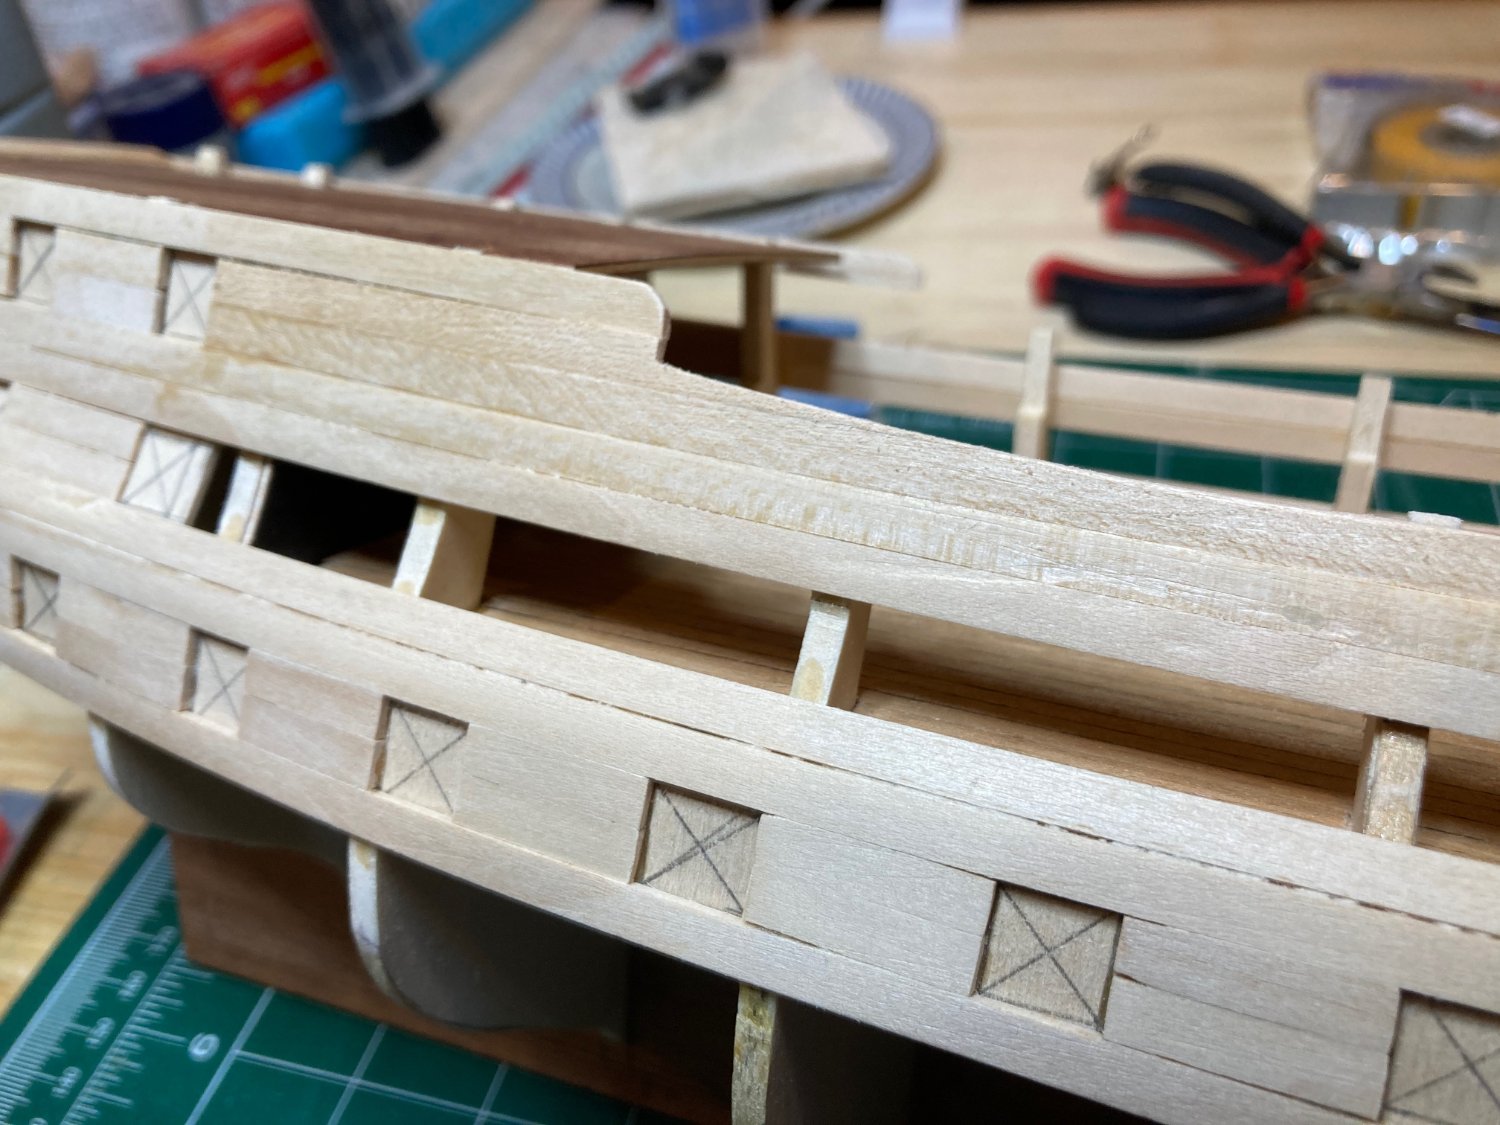
The last few days have seen a start on the first layer of hull planking - specifically the topsides.
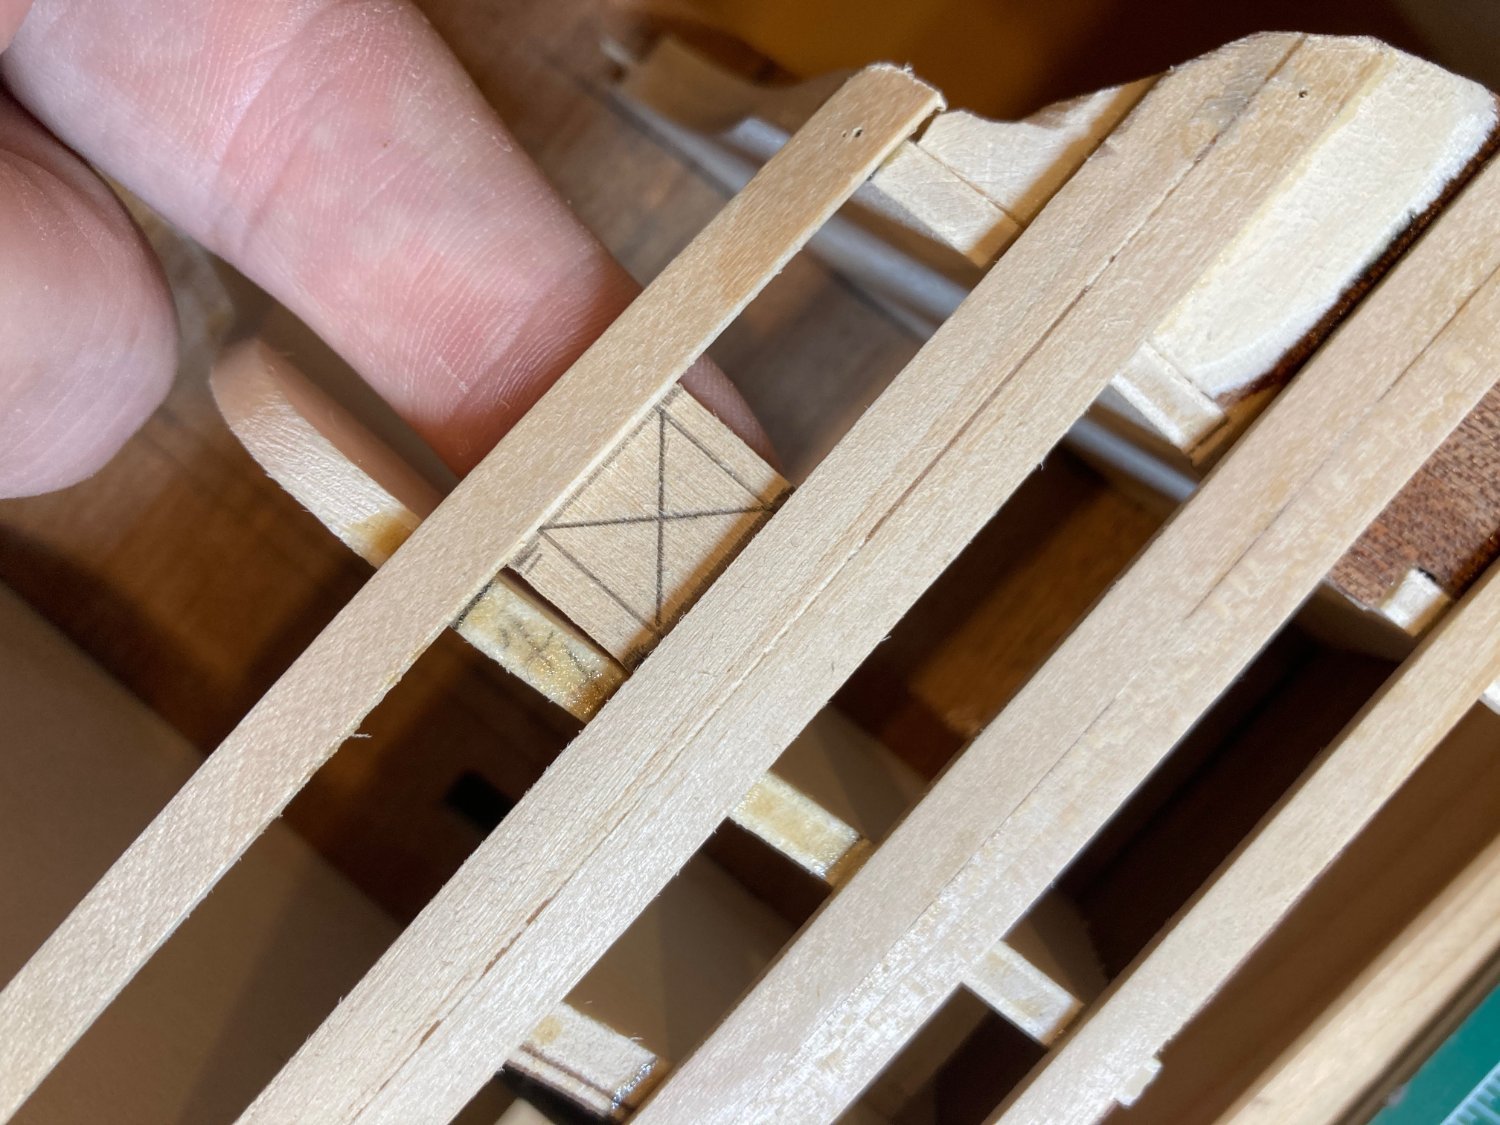
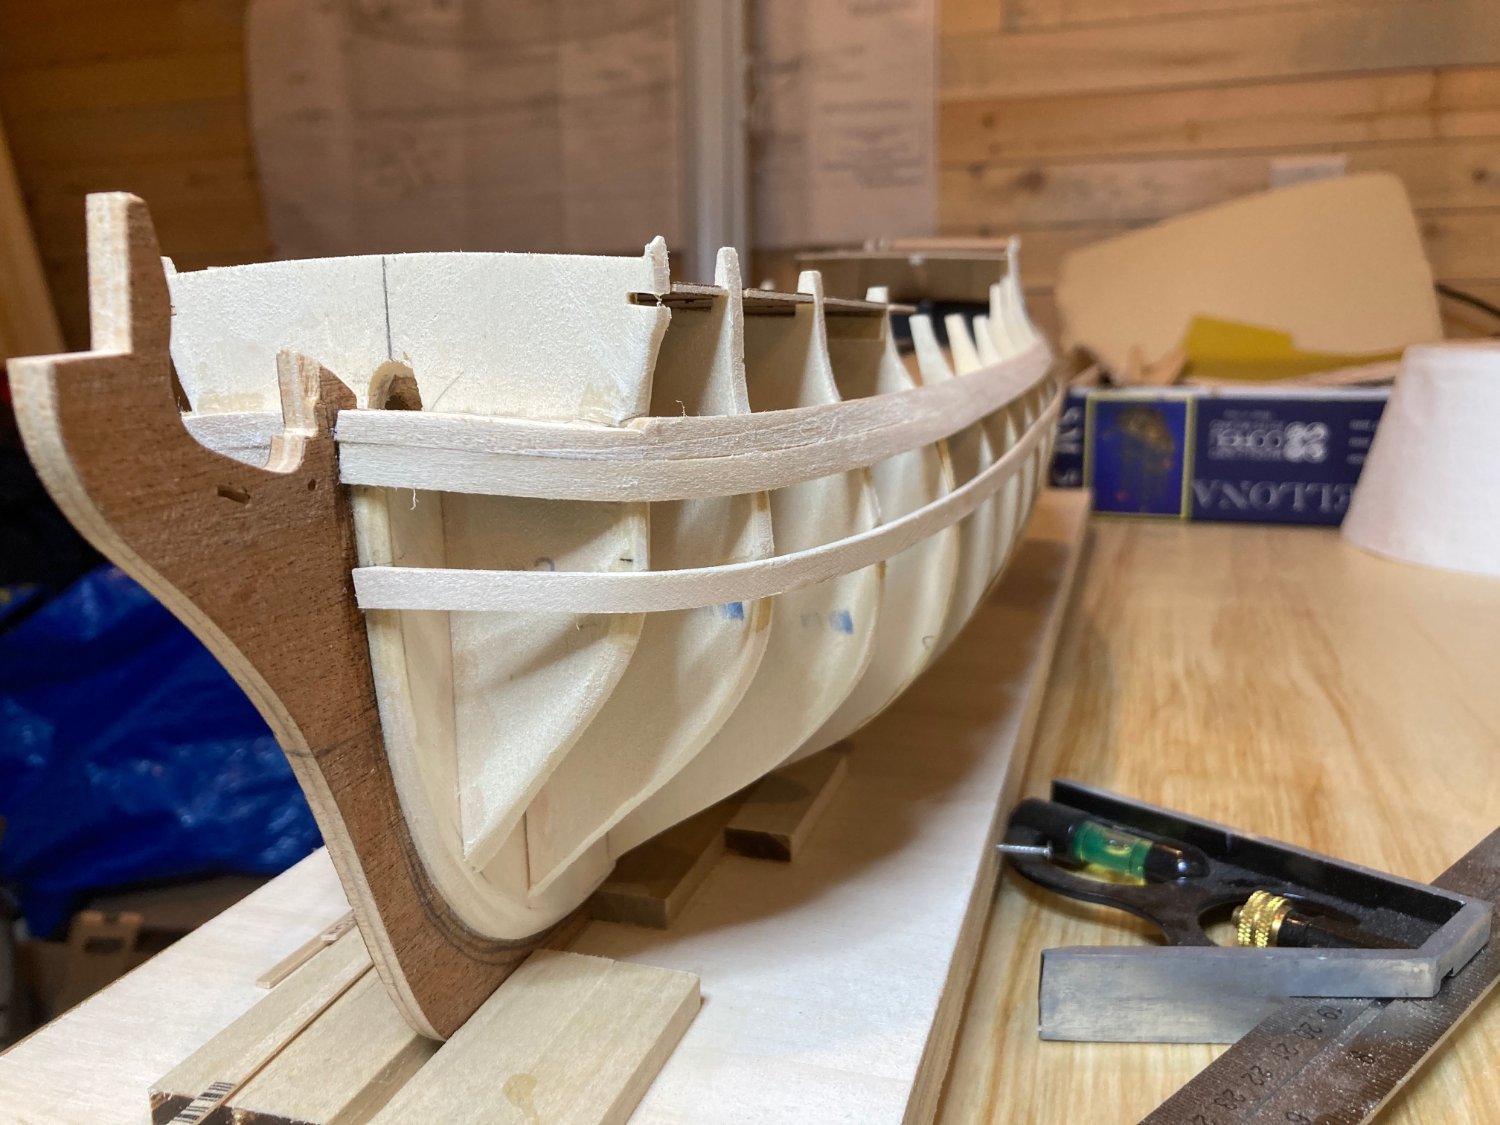
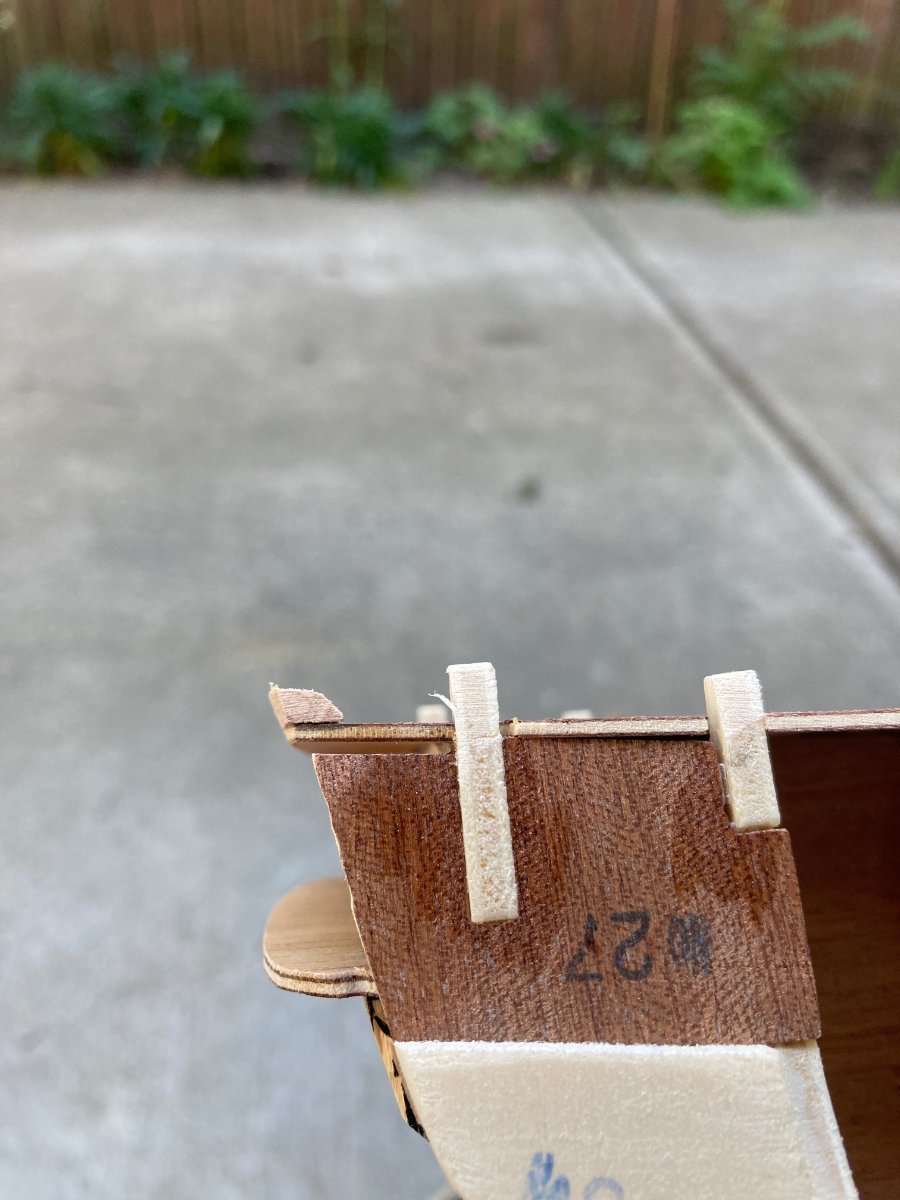
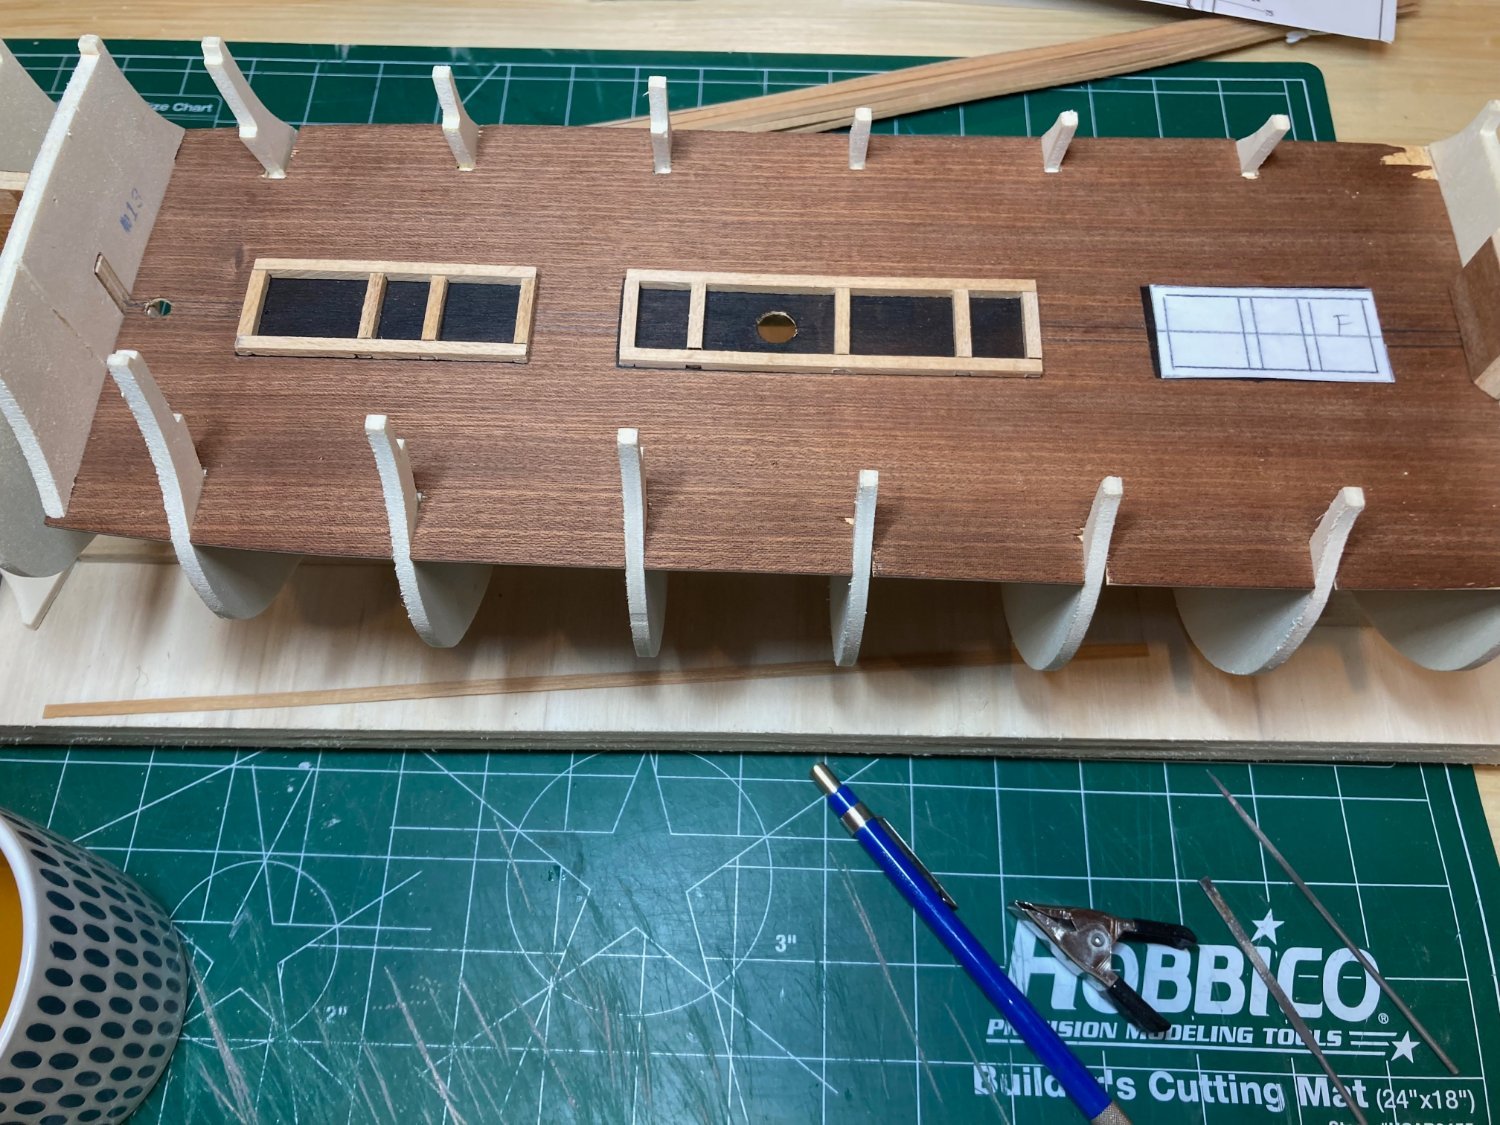
I'm not sure if I noted this previously, but my plan is not to include any of the half-barrels that Corel includes with the kit and to represent closed gunports on any area of the model where fully rigged guns can't be included - that is, all the gunports on the gun deck, 4 aft and 4 forward on the main deck and 4 aft on the quarterdeck. For these, I took measurements of the ports and made backing strips from a sheet of 1/16" lime. Using the table saw, I ripped a couple of 15mm strips from which I cut the port backings. I did this individually, labelling each according to its location. The backings were cut 3mm long at top and bottom to provide a surface to fix them to the planking strips already installed and that mark the sills and lintels of the gunports.
Once the backings were installed, I added short planking strips around them, and longer lengths in those areas where the open gunports will be cut out later. A bit of shaving and sanding cleaned the roughest of the rough edges - though you'll see plenty of rough spots remaining below! I'll clean this up further with filler and more sanding once the first layer is done.
Next steps involve lining off and planking the lower hull (one of my least favourite tasks....), and then cutting out the open gunports on the main and upper decks. It's nice to see the ship emerging from its skeleton!
hamilton


- yvesvidal, Robert Taylor, allanyed and 4 others
-
 7
7
-
-
Yes Alan - I will only be doing the upper hull for now and then lining off the hull in preparation for the lower planking. Not my first rodeo! Though admittedly I'm no rodeo champ.....
Happy 4th of July to you and all south of 48 (and up north and way out west too)
hamilton
- allanyed and Bill Morrison
-
2
-
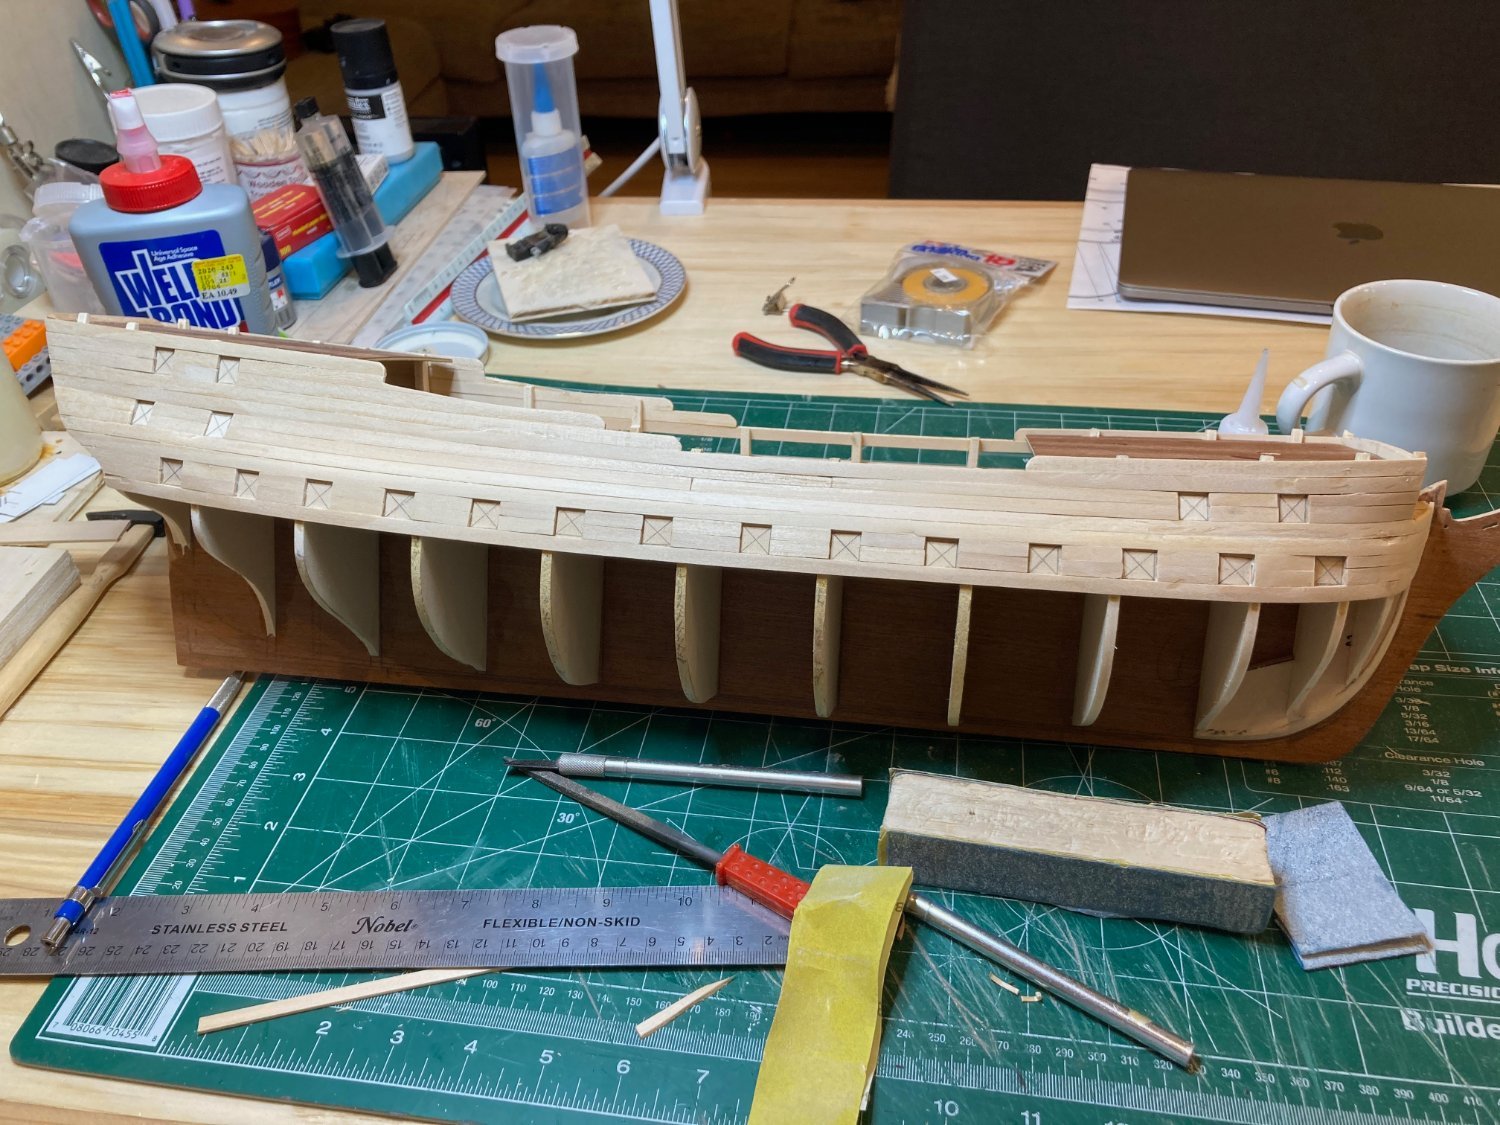
OK - one more attempt to push this log onto page 2!
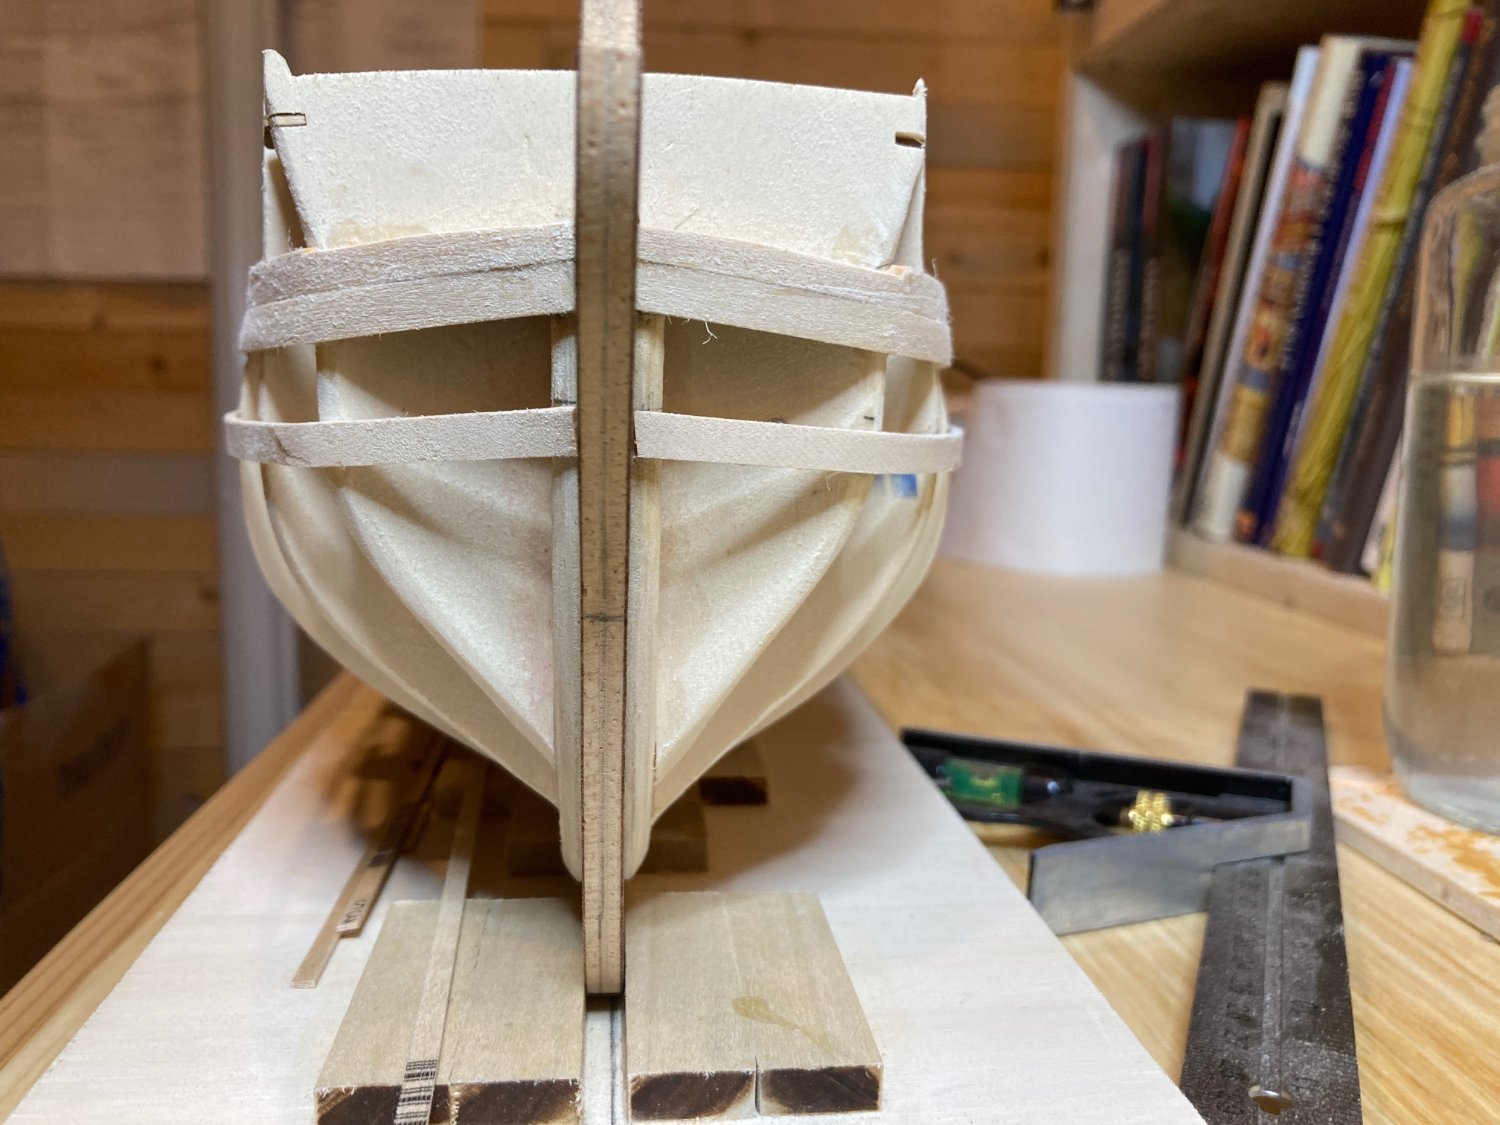
I spent the weekend with a variety of sanding blocks and leftover .5mm wood strips sanding and shimming my way to a decently fair hull. As noted above this process is a bit mysterious to me, but I think I achieved a good result - the first planking strakes run nicely in any case, so I'll hope for the best....
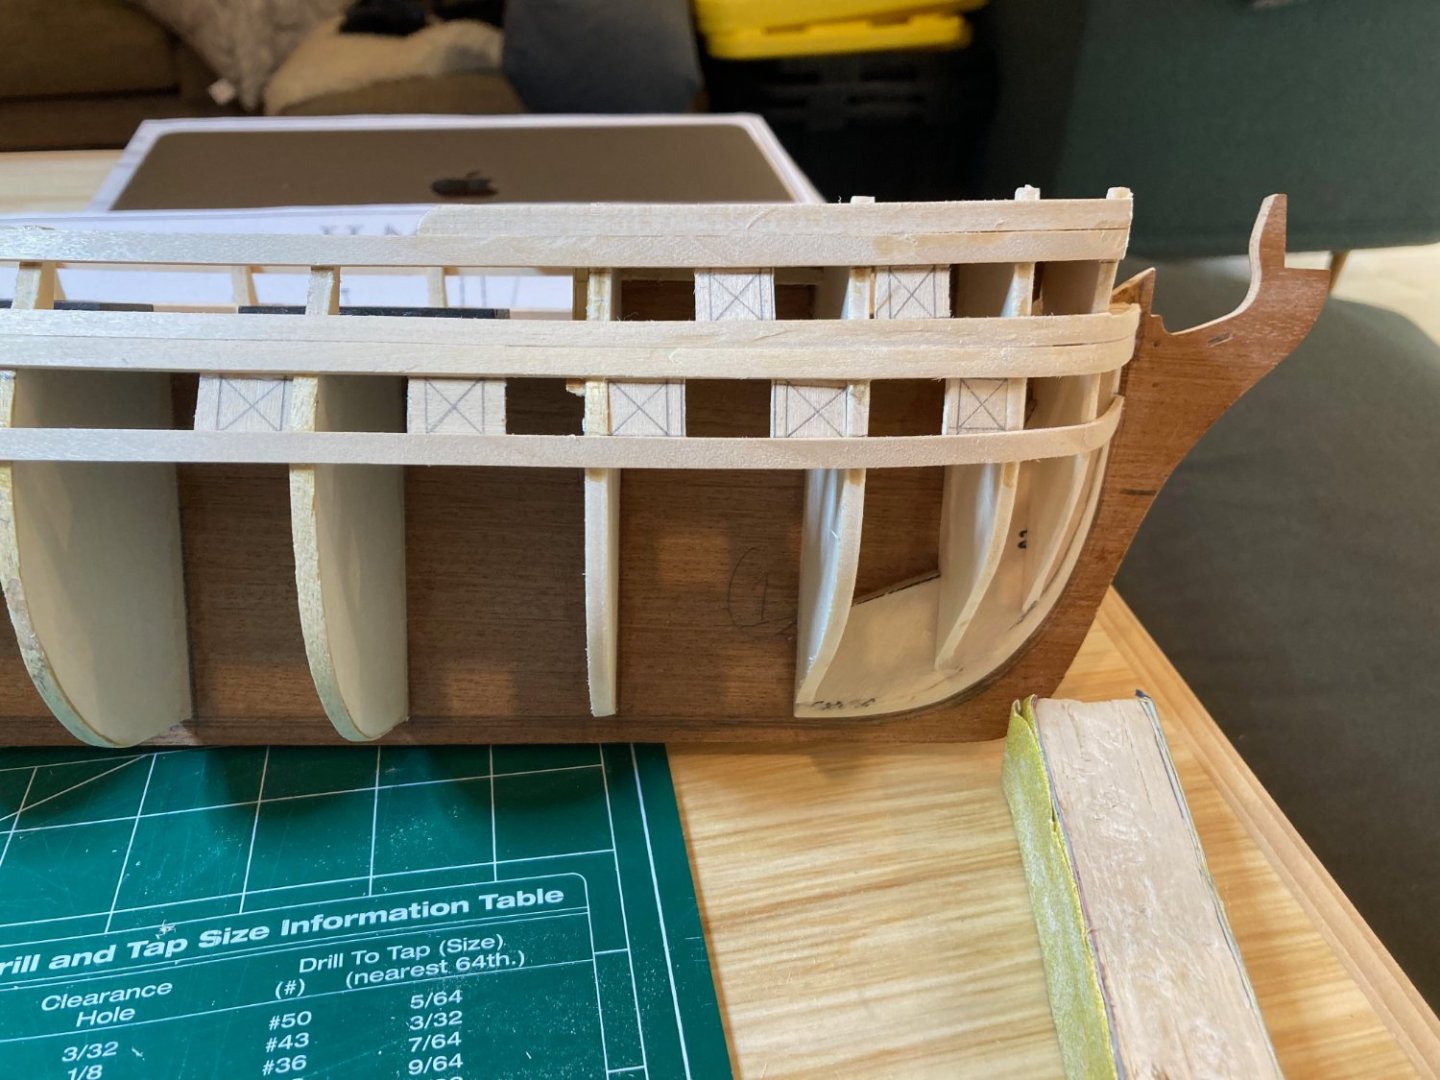
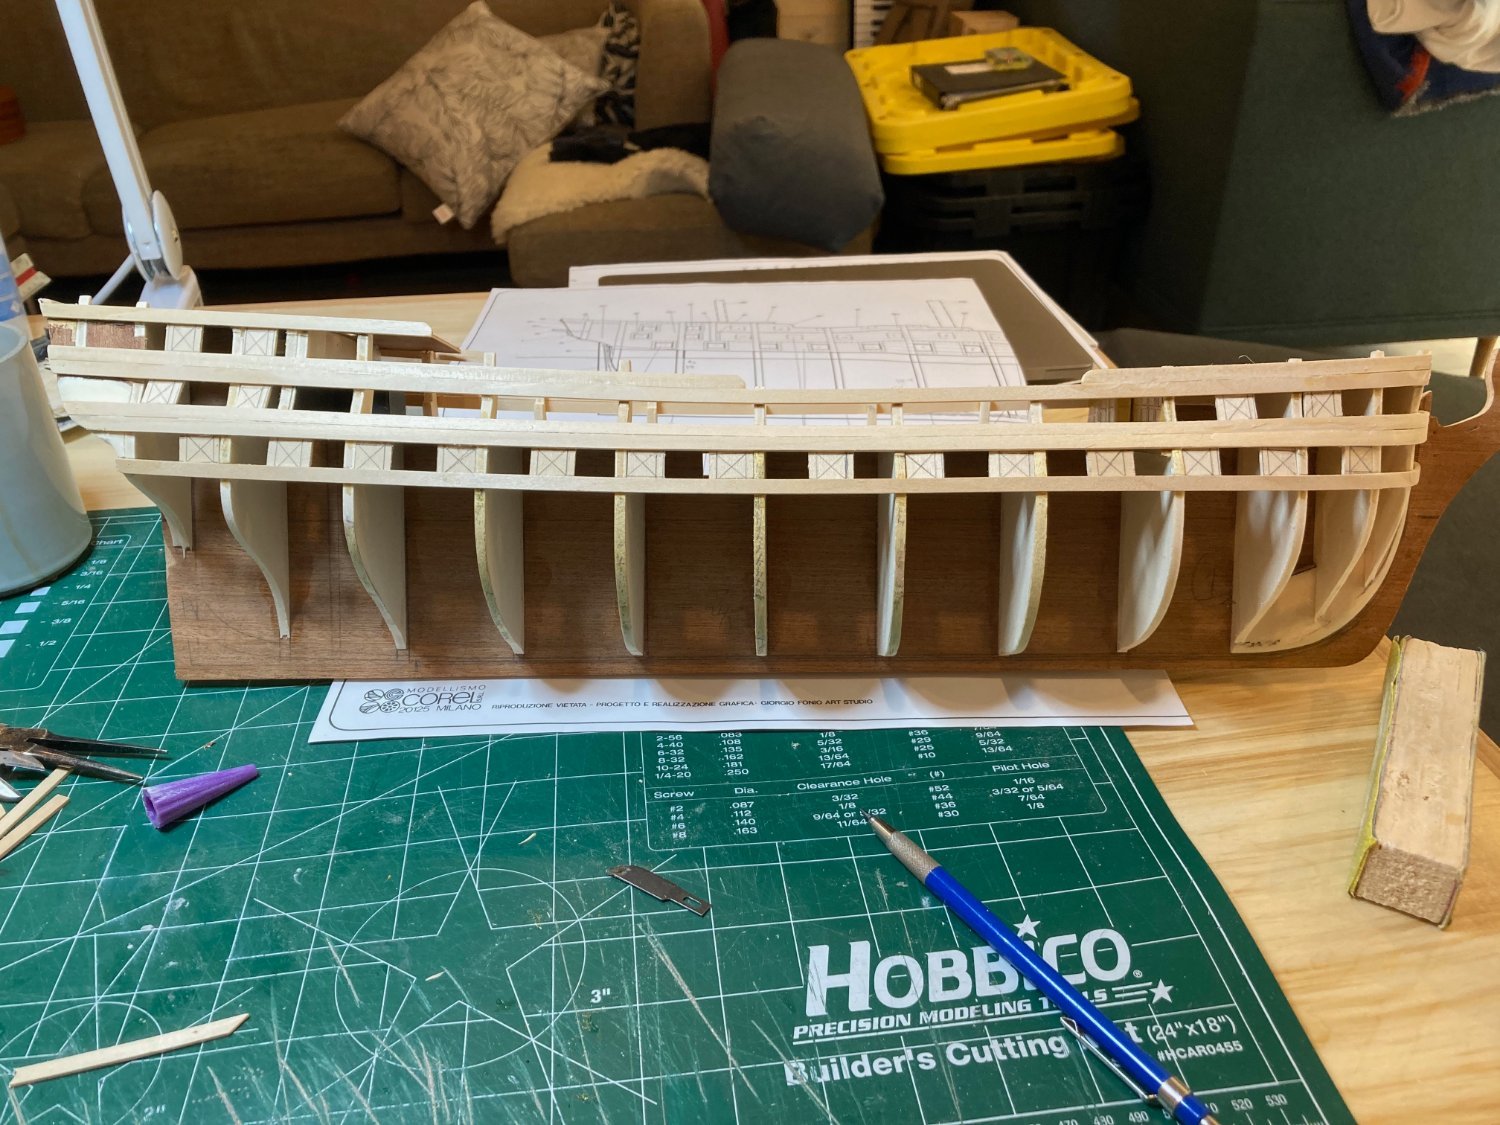
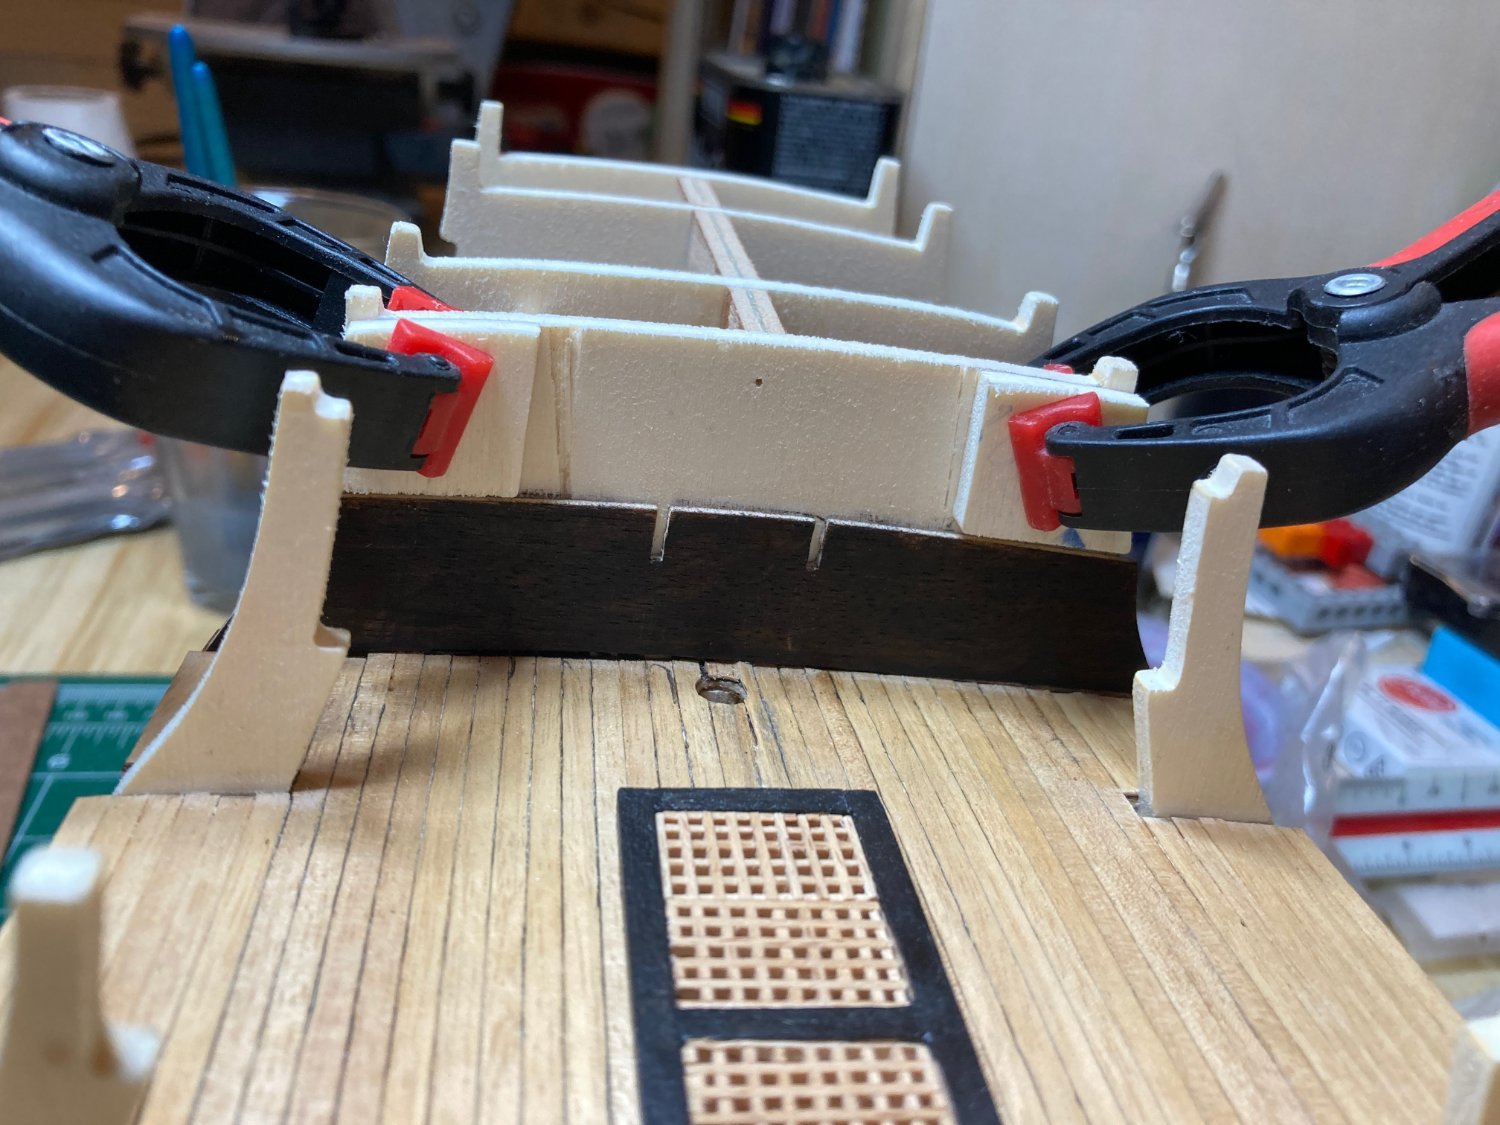
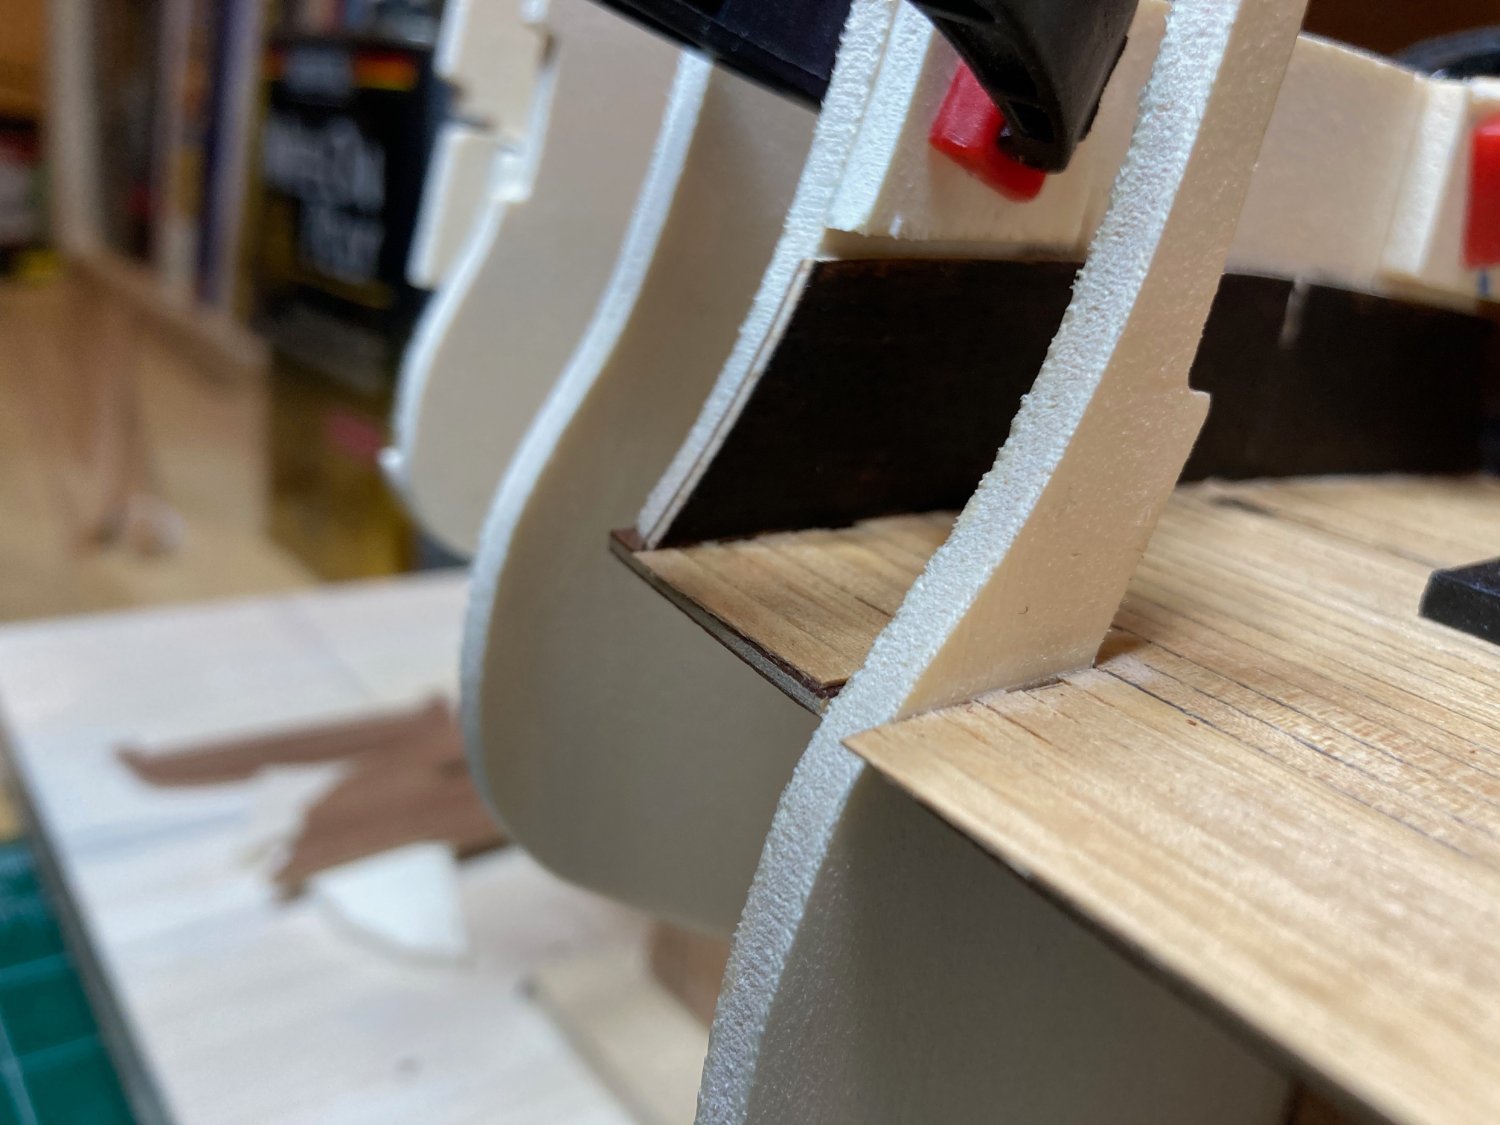
The first plank laid is along the line of the main deck. The sheer of the hull brings the forward end of this plank about 2-3mm below the level of the bow platform. This first plank marks the lintels of the gunports on the gun deck. I made a tick strip to the height of the gunports and used this on the bulkhead edges to mark the height of the gunport sills on the gundeck. The second plank is laid with the top edge along this line. A third plank was then laid above the first to mark the sills of the main deck gunports. The tick strip method will then be used to mark off the position of the main deck gunport lintels and a fourth plank laid upon that line.
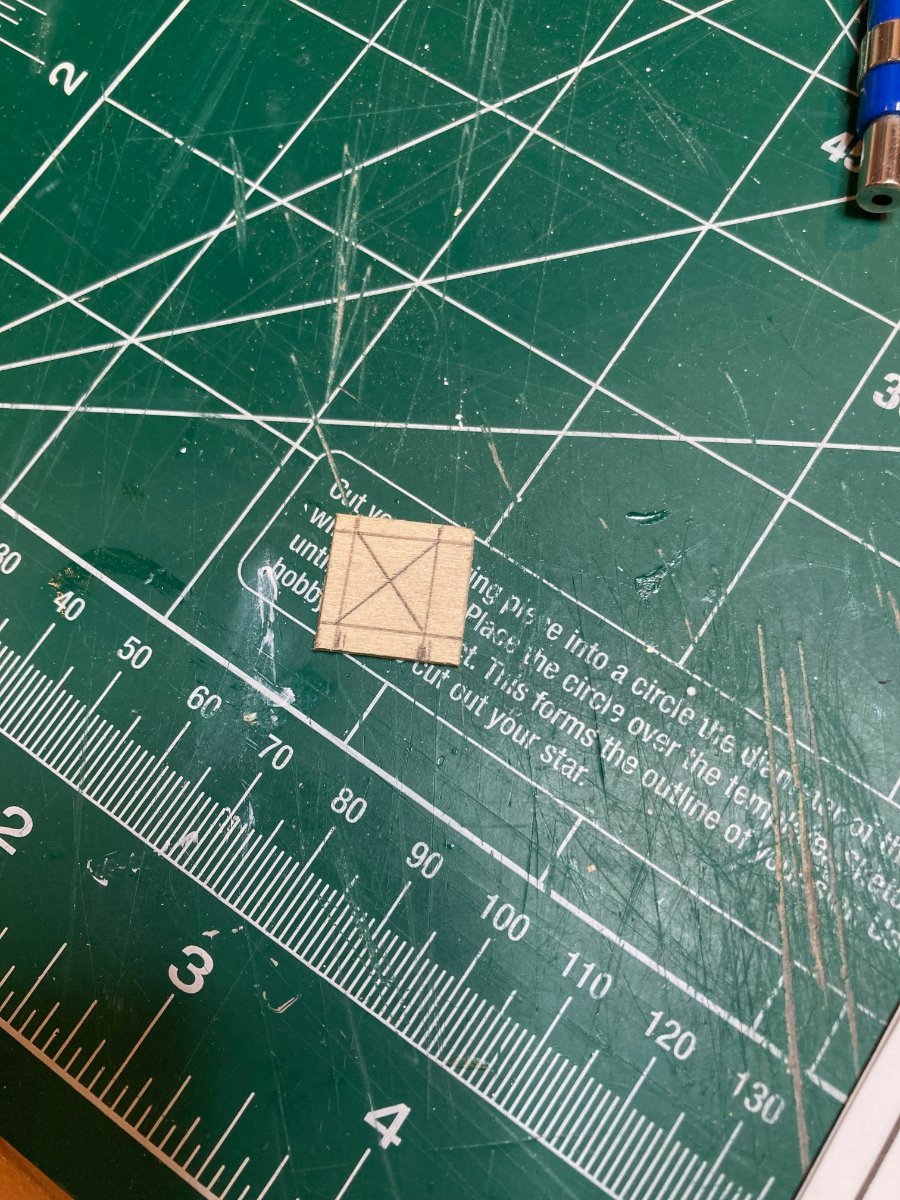
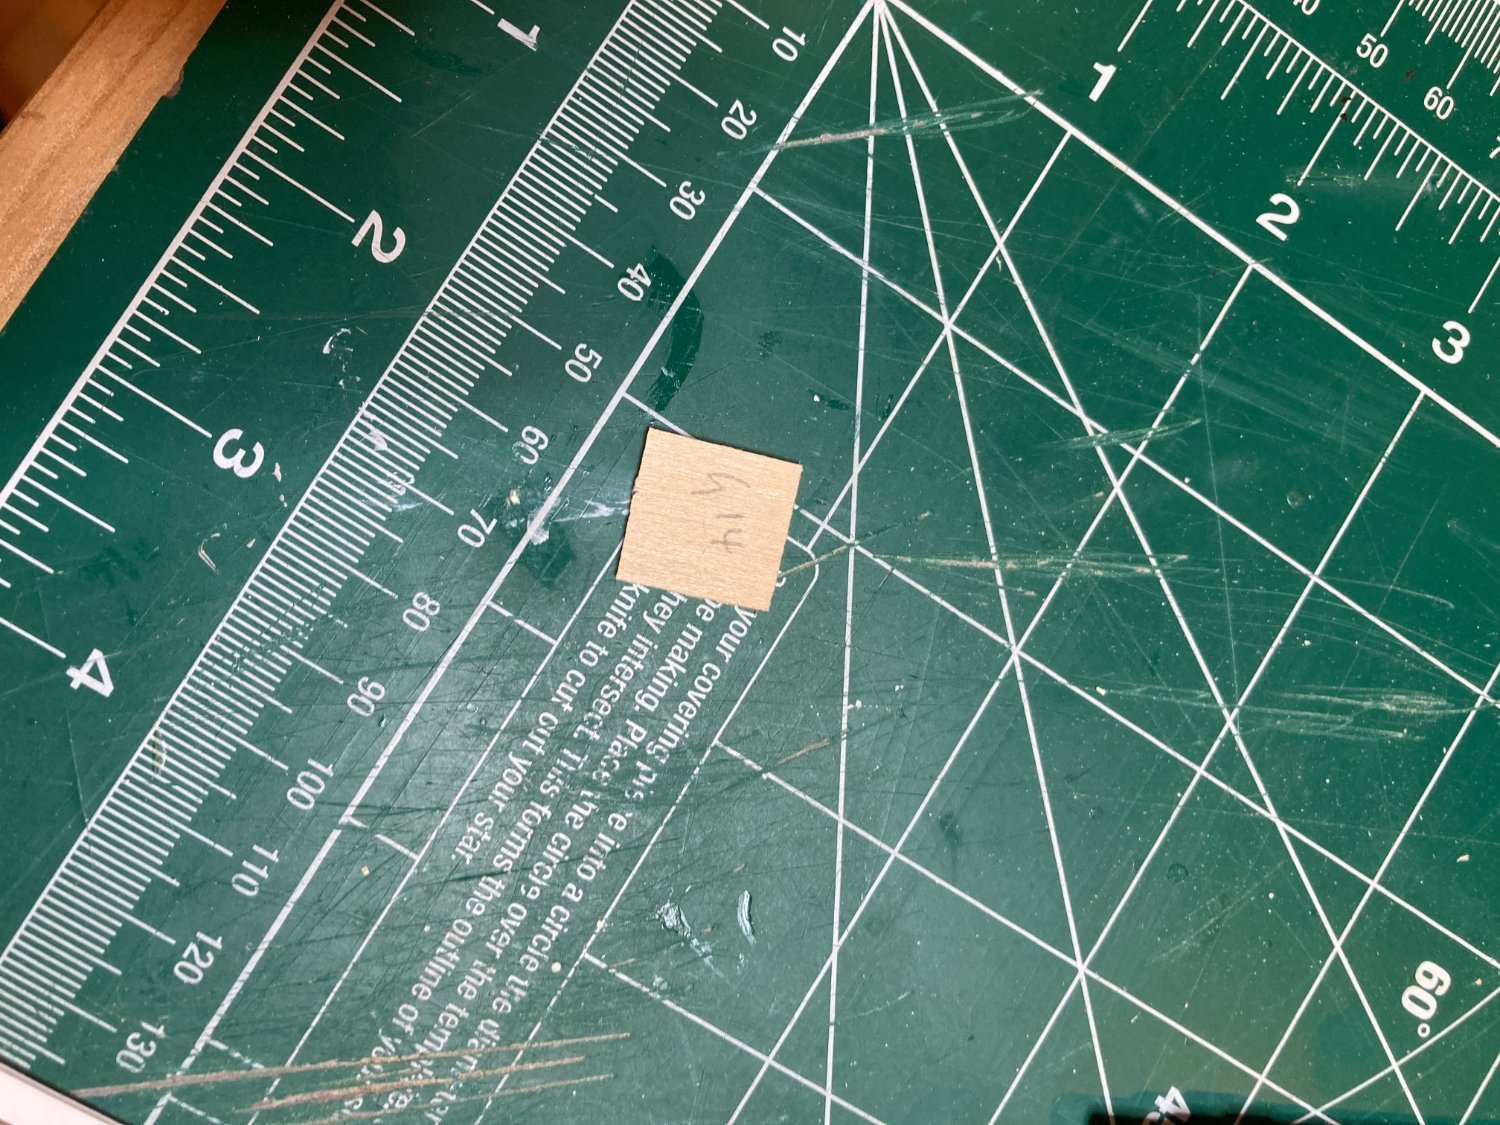
The kit includes metal gunport lids, and half-barrels for the gun deck cannons, but I will definitely not be using these as I do not like the way they look. The gun deck gunports will be closed on this model, and the port lids scratch built following drawings in Lavery's AOS. To accommodate these, I'll add limewood backing at the positions of the gunports - this will just be 1/16" lime dimensioned a little larger than the gunports (14mm x 14mm) so they can also serve as a landing place for the short planking strakes between the gunports. Once the framing planks for the gunports are installed this will be the next stage before completing the upper and then the lower hull planking.
Enjoy the photos and bye for now
hamilton


- yvesvidal and Bill Morrison
-
2
-
Arghhh!! I totally forgot about this, Allan......It's something I've done on other models, but slipped my mind for this one.... I'm not sure how tough it will be to achieve this with the model at its current stage, but I'll see what can be done.....
hamilton
- Bill Morrison and allanyed
-
2
-
Hello:
This log is starting to remind me of the 90s internet - insane scrolling required!! Not sure when this is going to roll onto Page 2 finally, but hopefully soon to save us all from some serious RSI.
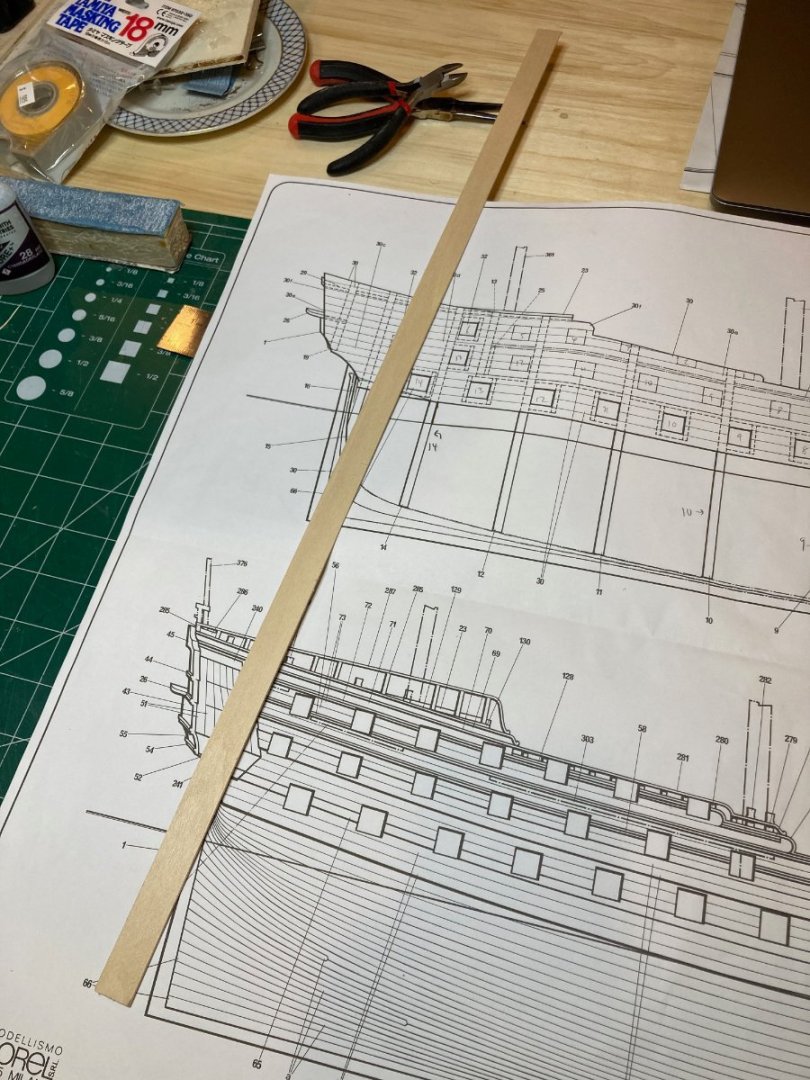
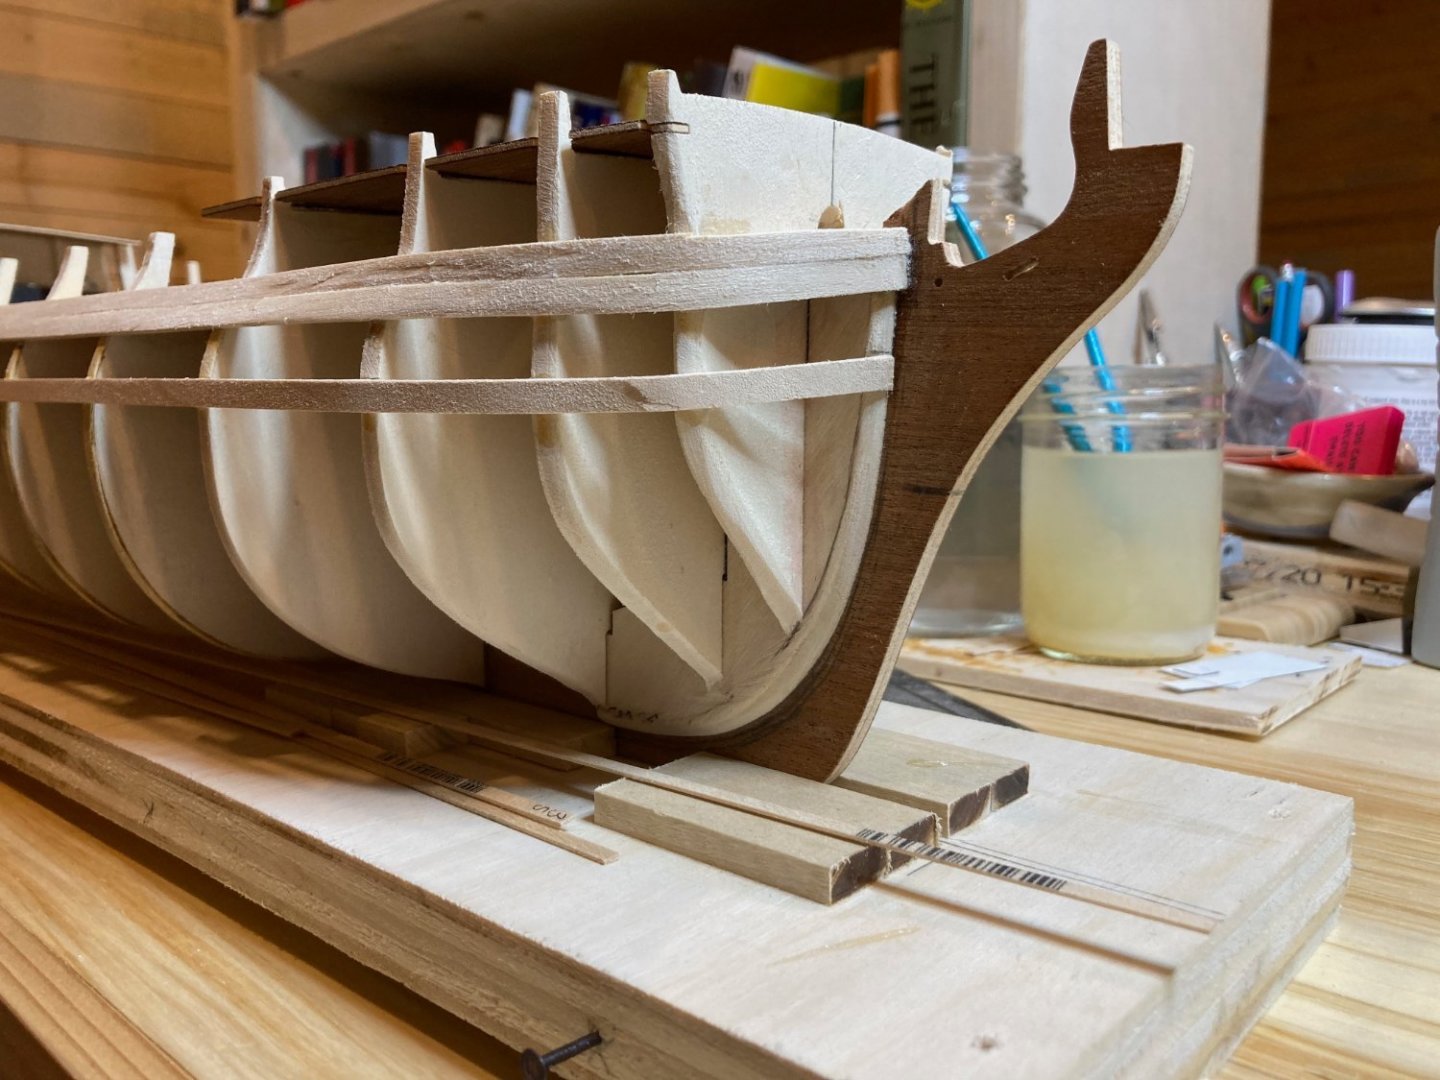
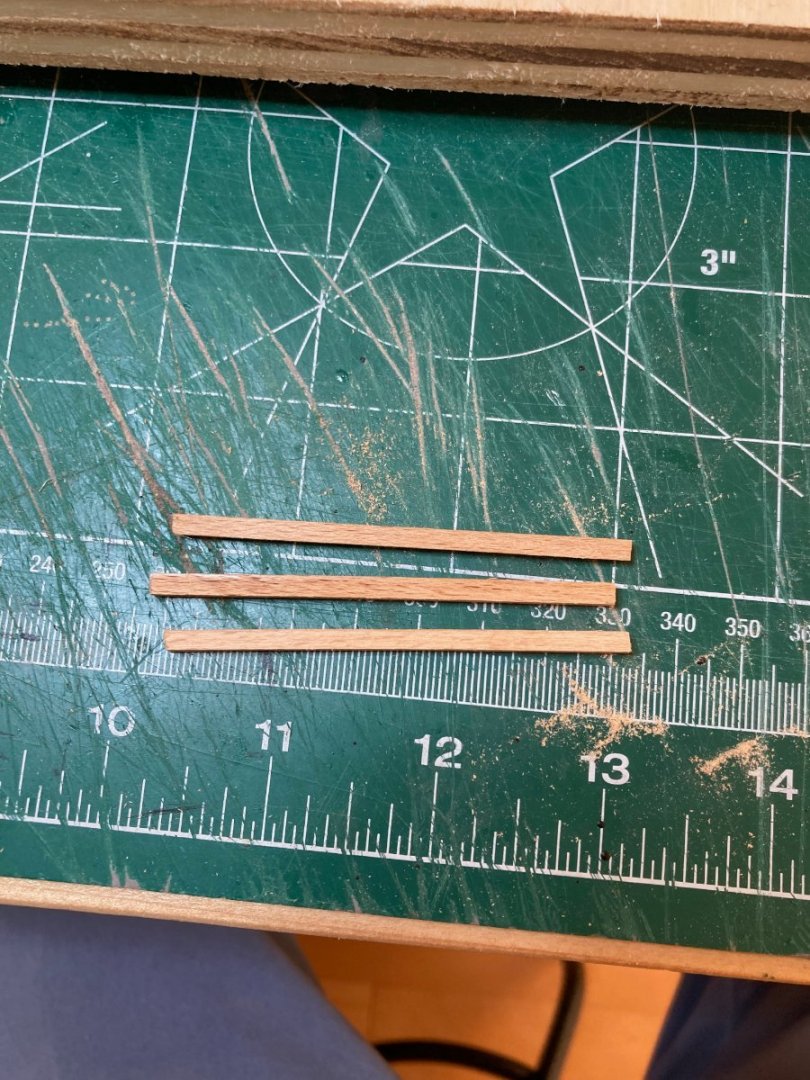
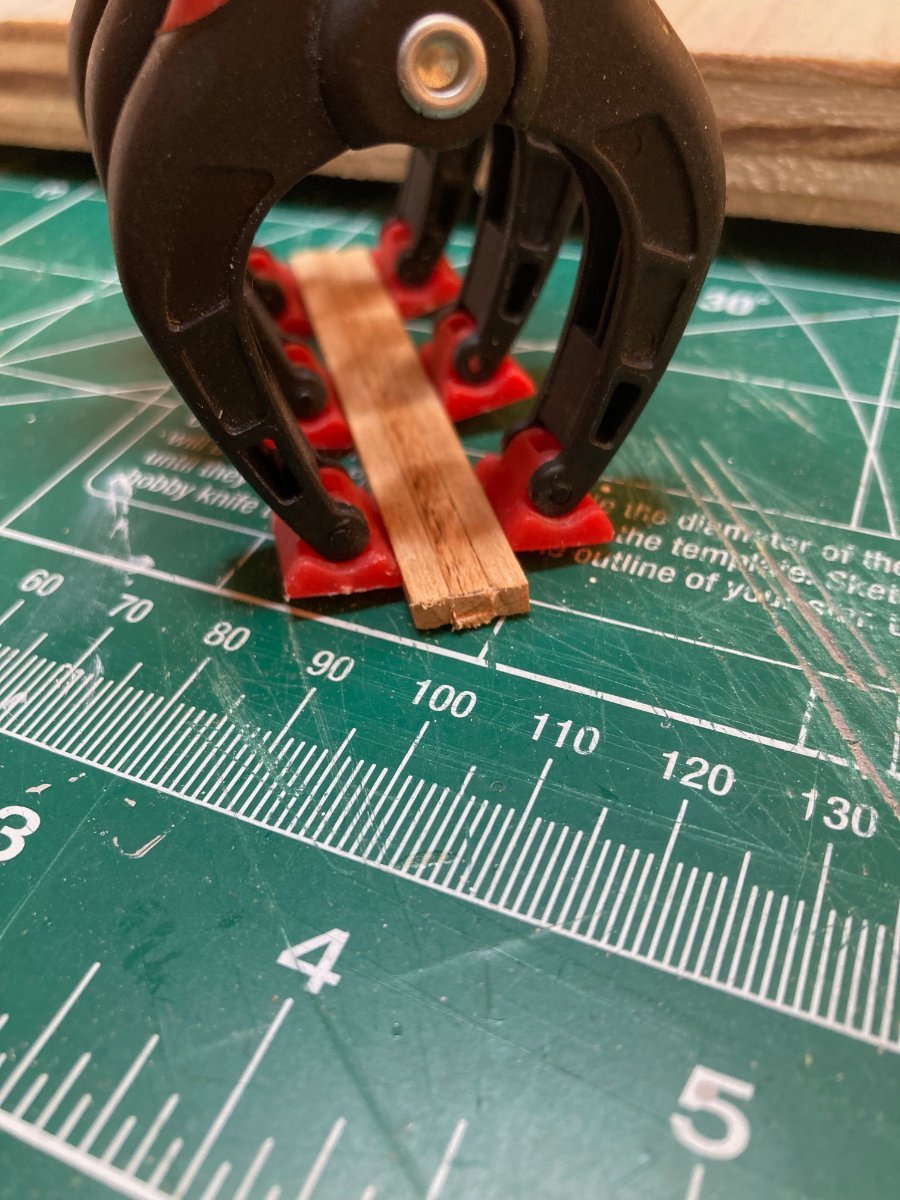
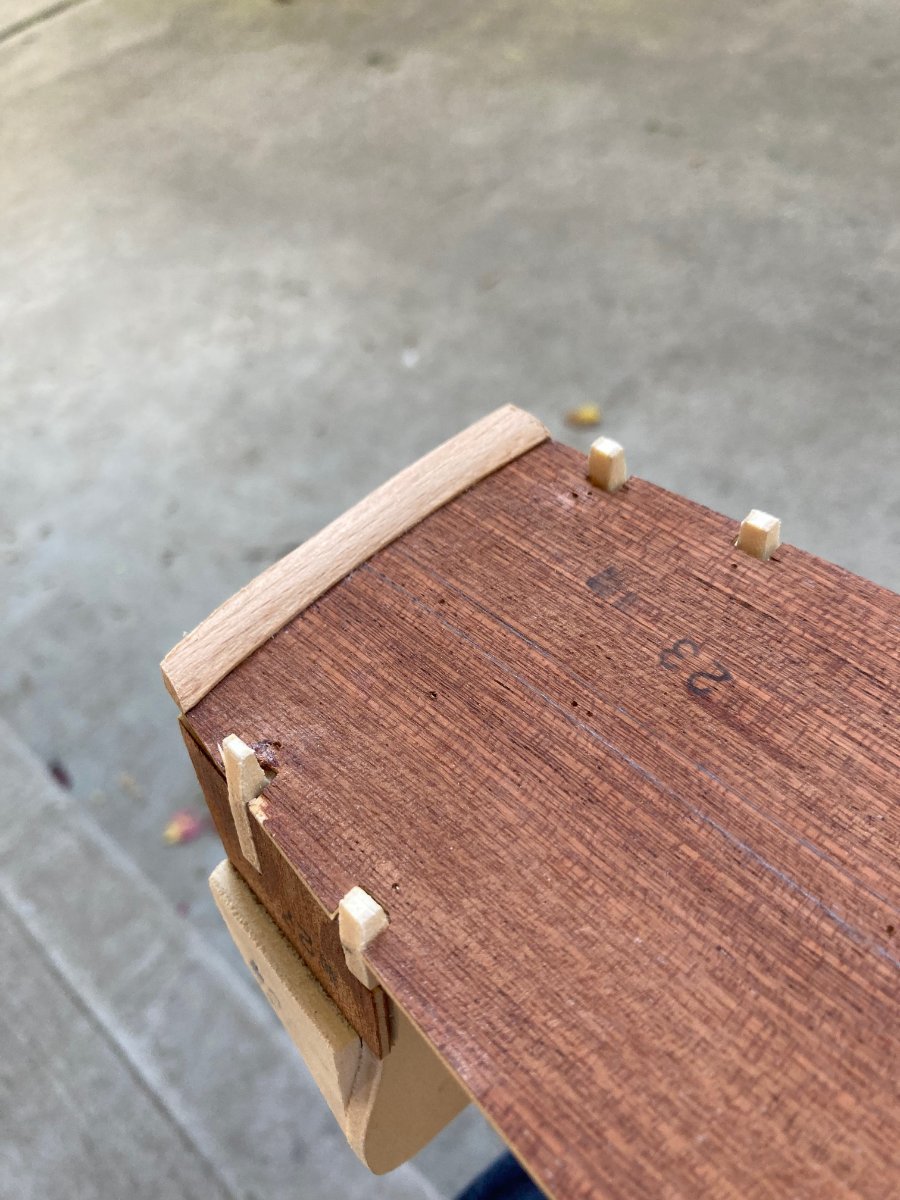
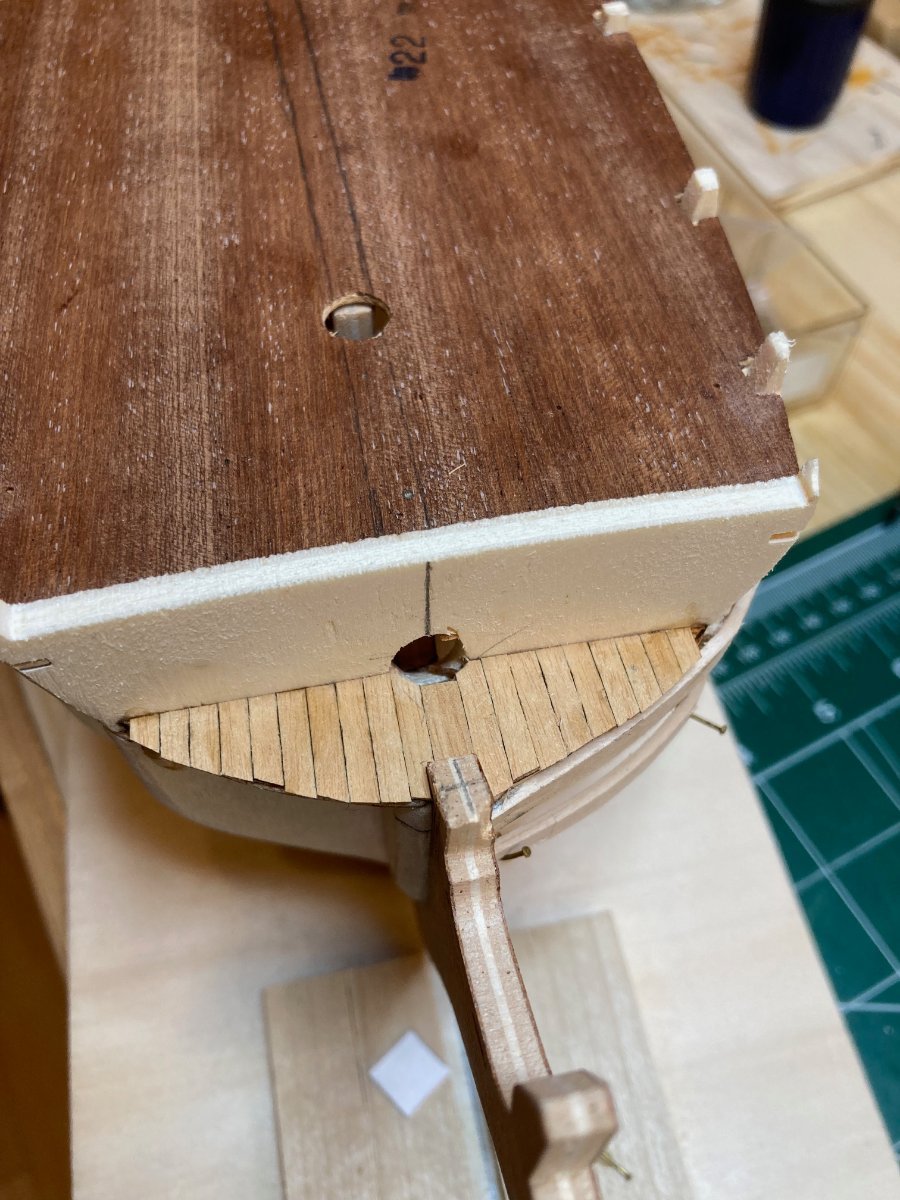
In any case a couple of small updates. I've fixed the f'csl now and also fashioned what the plans call the "false cove", though I'm not sure that term applies - or what the meaning of "cove" and "false" are in this context - any enlightenment would be appreciated. The piece was formed by gluing three 3mm x 3mm strips together along their long edges. I then dry fit the piece on the aft edge of the poop deck and traced the aft profile on from there. It was then a question. of rounding the piece over to thin it along its forward edge and give it a convex surface. With the aid of the Dremel and disc sander this was a pretty straightforward procedure.
I also planked the bow platform - something I will have to redo because I used medium thickness CA and it ended up being a poor choice for this purpose - it's Canada Day up here so my local hobby store is closed and can't get the thin stuff I normally use for this.....waaahhh...the photo below shows it mostly planked - right before I realised it was not going to work!
I spent a bit of time over the last couple of days fairing the frames and noting places where adjustments were needed for planking. I have to say that even though I get the principles involved in doing this it always confuses me. I run a batten along the frame edges and note where dips or protrusions happen - but if there are dips and protrusions how do I tell if the protrusion or the dip is the problem - is one bulkhead too wide or is the adjacent bulkhead too narrow? I've been trying to gauge from the level of the main deck, where everything should cinch up nicely. This approach seems to work ok, since it provides a stable reference point along all of the bulkheads from which to determine whether shaving or shimming of the bulkhead edges is required.
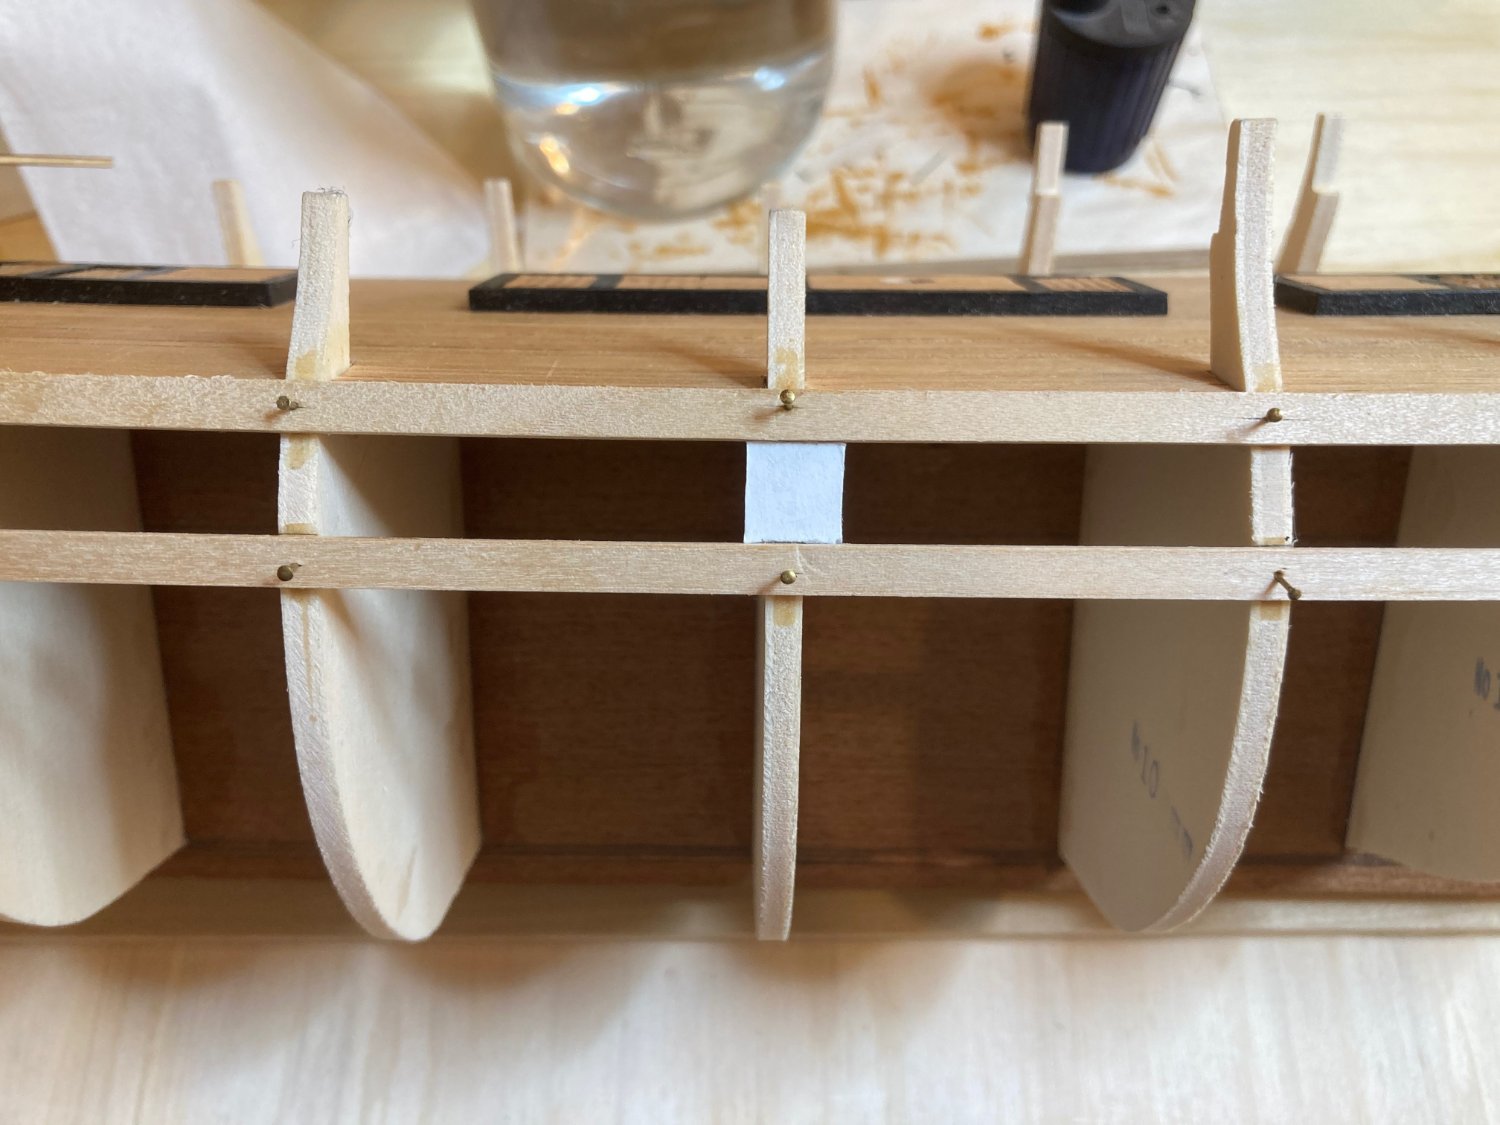
I also pre-emptively attached (and then removed) two strakes of first planking (1.5,, x 5mm) on the port side just to test the approach I've planned to the hull planking and gunports. This also revealed that there is A LOT more fairing to do before planking can begin in earnest....so for the final pictures below please note that these planks were subsequently removed and the bulkhead edges marked out for fairing.
Finally, the f'csl and bow platform both needed re-fastening in a couple of places for a tight fit - the glue bond was not strong enough to hold them so some reinforcement was necessary - in both cases I added scrap strip wood below to which the subdecks were then secured.
Hope everyone is doing well out there and bye for now
hamilton


-
Thanks for dropping in Harlequin and Nearshore!
Nearshore - so far this has been a very enjoyable build - I hope you start a build log when the time comes!
hamilton
-
Hello again.
It has been a long while since I've updated here or worked on Bellona. We had to move out of our house on April 1 to accommodate some restoration work and were out for 2 months, which also coincided with a very busy time at work. We moved back home on May 31 and then work calmed down a couple of days after that as a colleague and I finished off a major year-long project.
The last month we've been trying to catch up on the garden, which we're getting a very late start on this year, and settle back in. But now, at long last, as I settle into a bit of a break from work, I can finally return to the bench! Today was my first day back and I have to say that almost three months is a long time to take off - it took a bit of studying just to remember what threads there were to pick up on the Bellona!
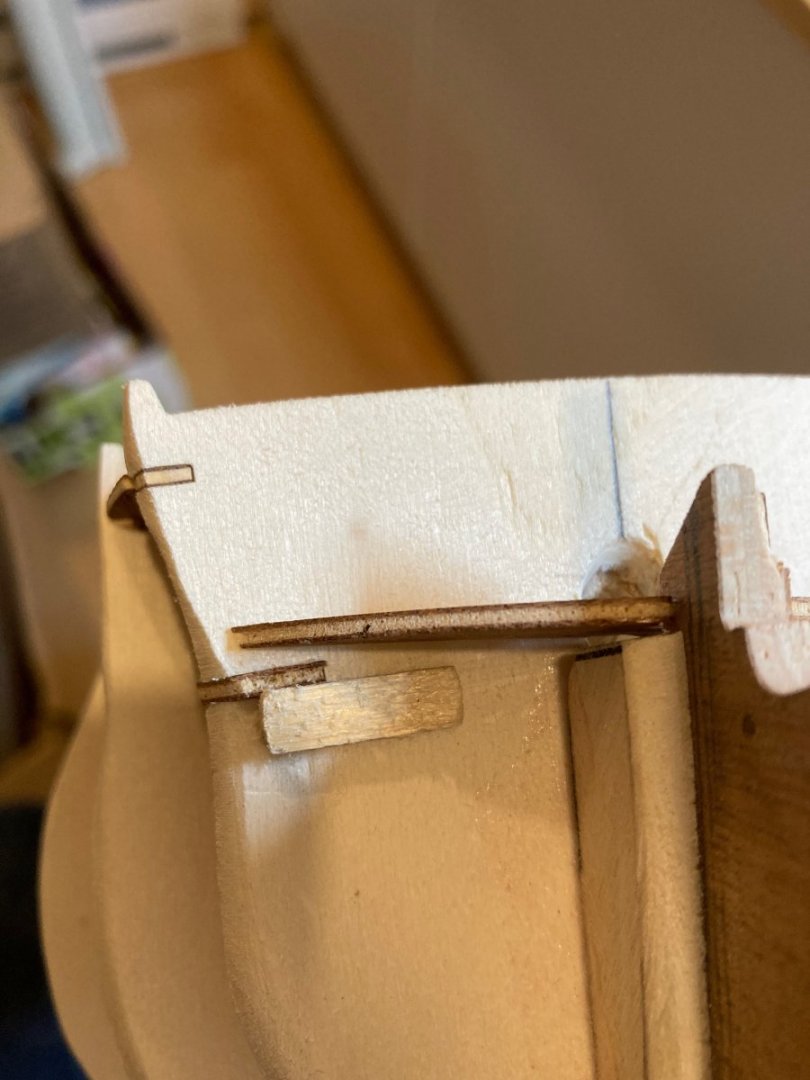
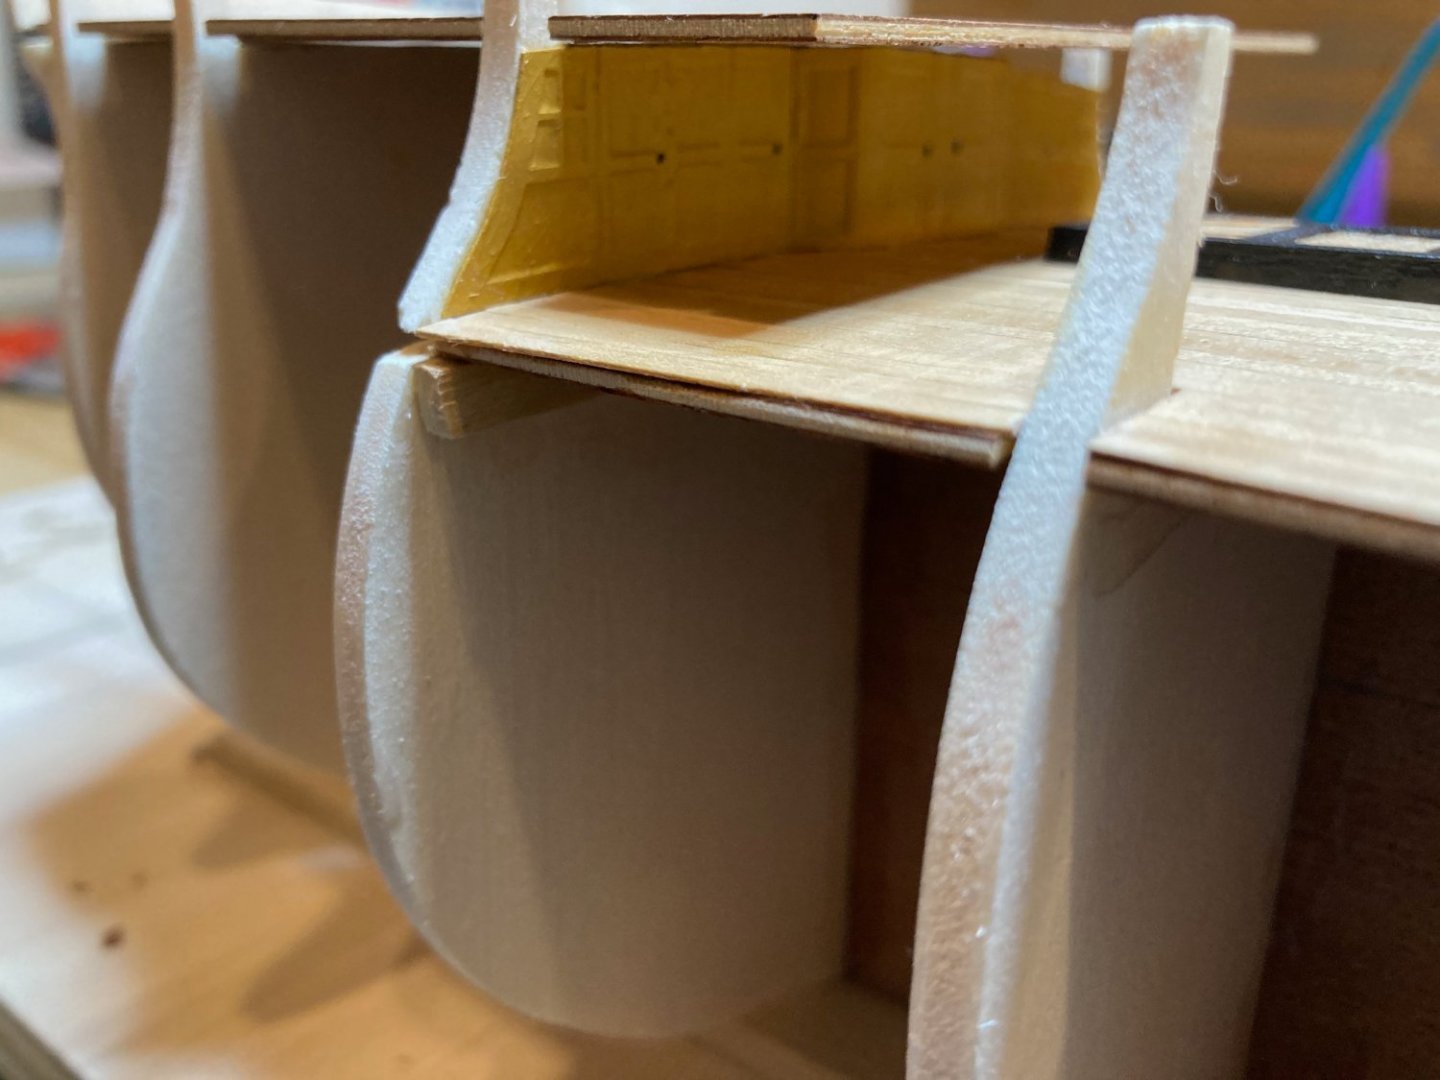
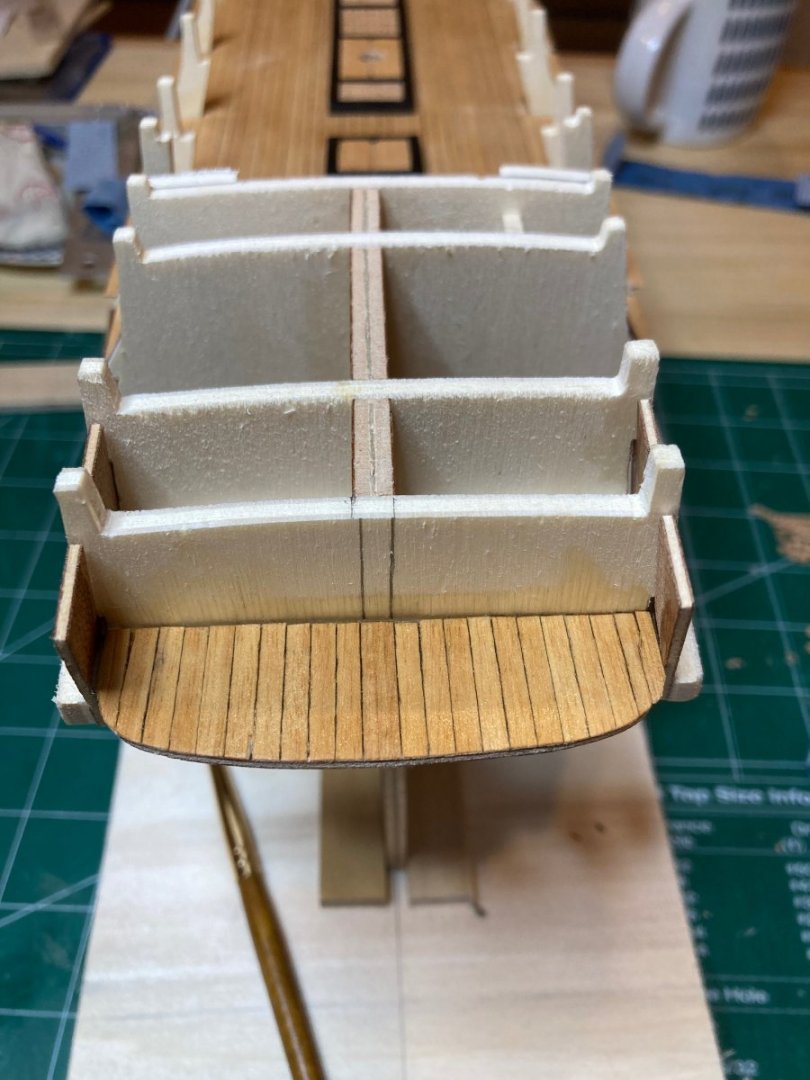
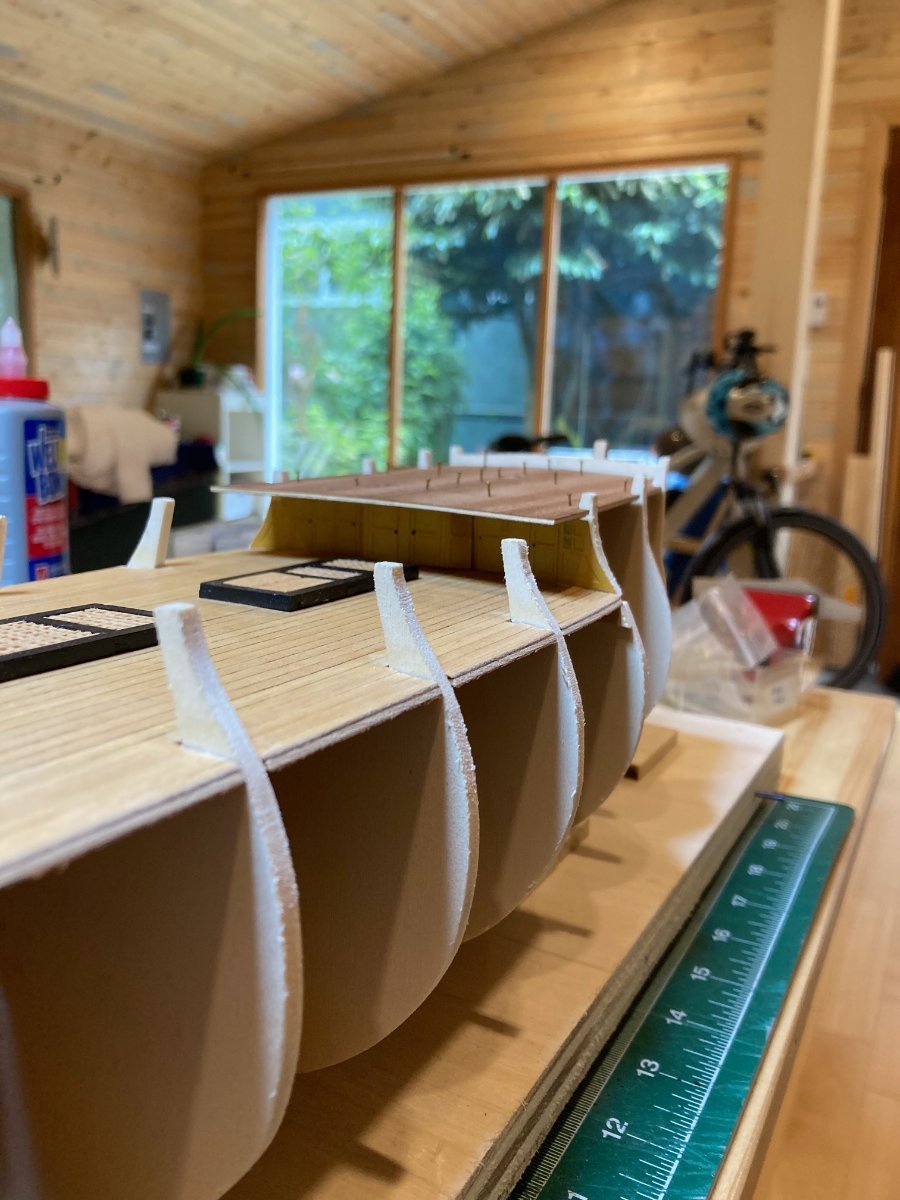
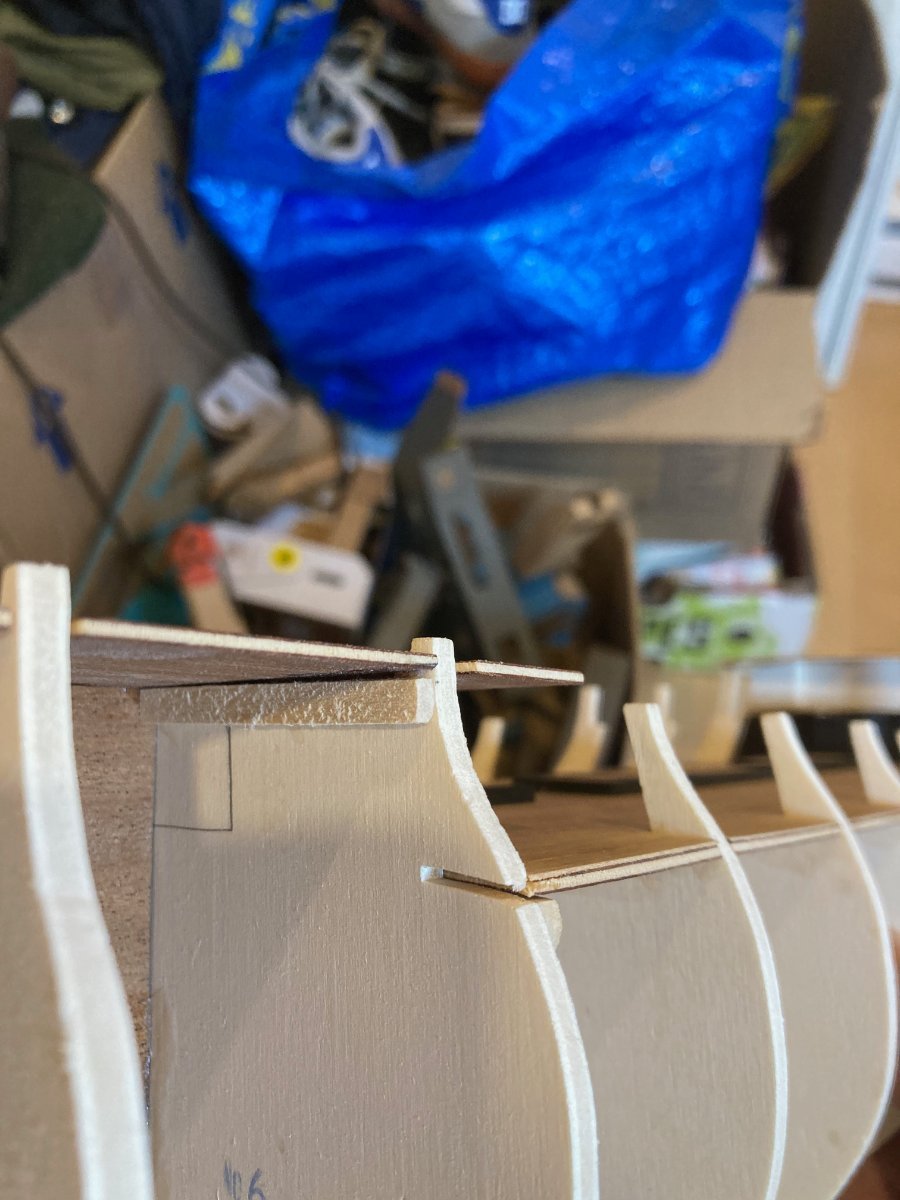
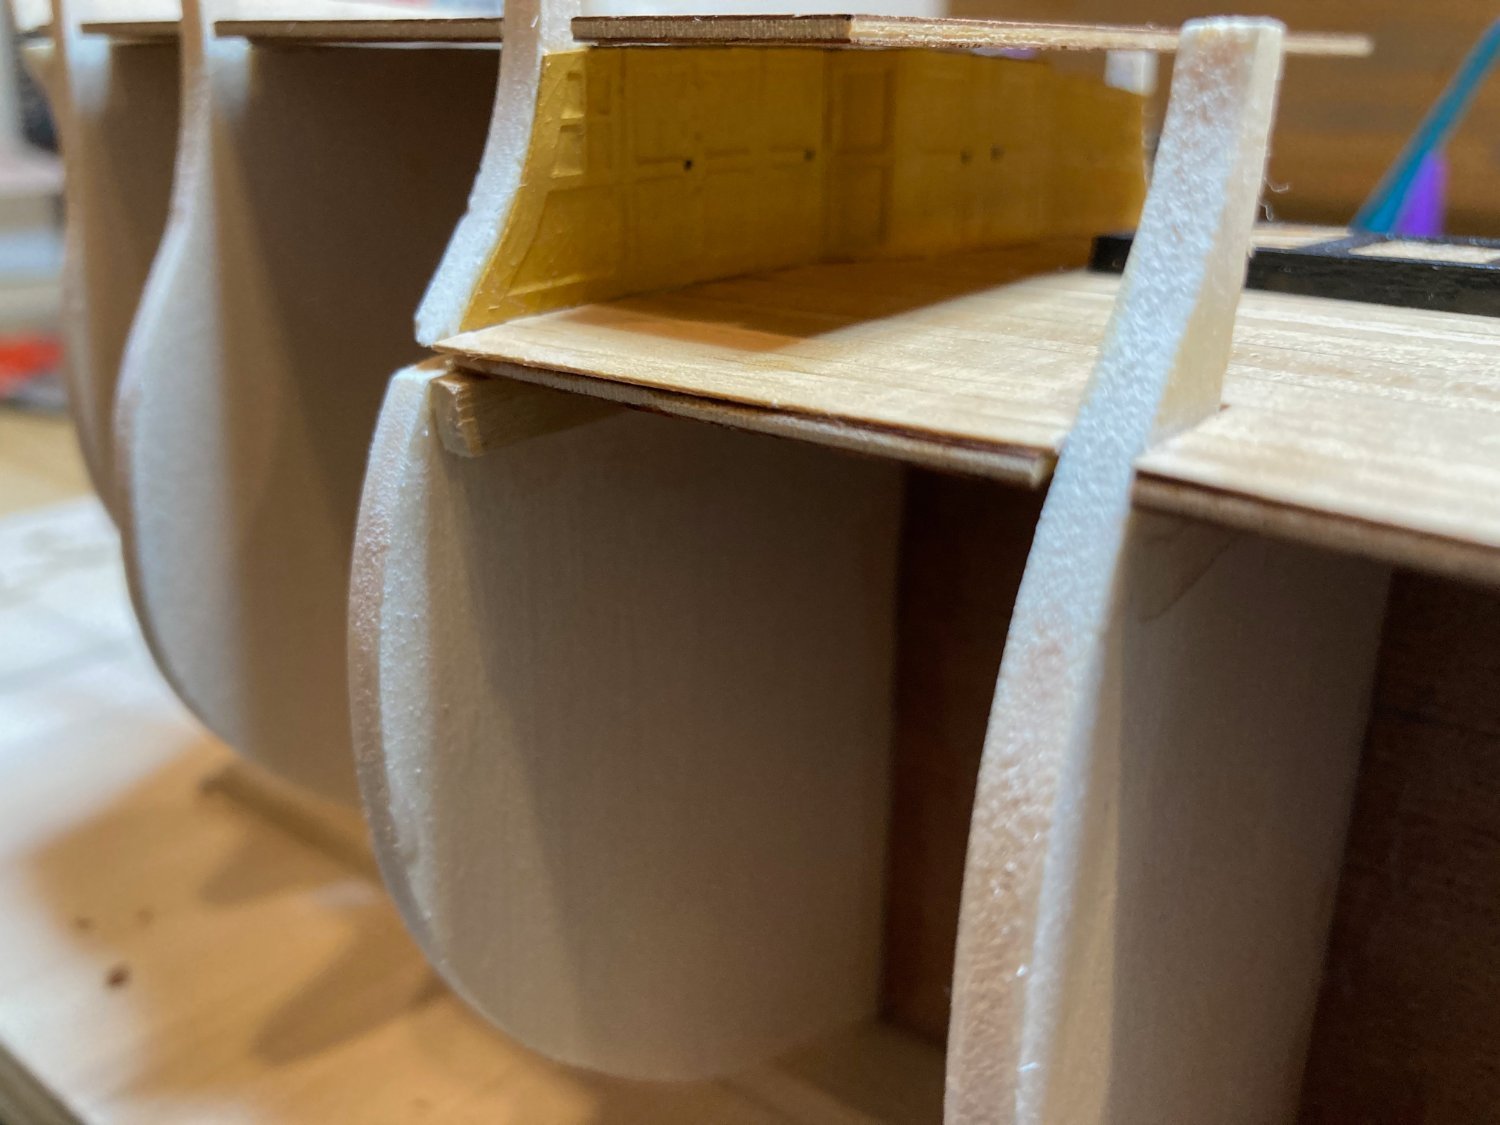
Today I did some repairs on and installed the pantry, which also acts as a support for one of the quarterdeck beams later on. Once this was in, I foolishly installed the poop deck - foolishly, because I have now to install a brass bulkhead part under the poopdeck, which I anticipate will be a bit tricky....same thing with the stern balcony bulkhead, which now must be gently wedged into the cove created by the balcony below, the quartergallery frames on the sides and the poop deck above...hopefully this won't be too frustrating when the time comes!
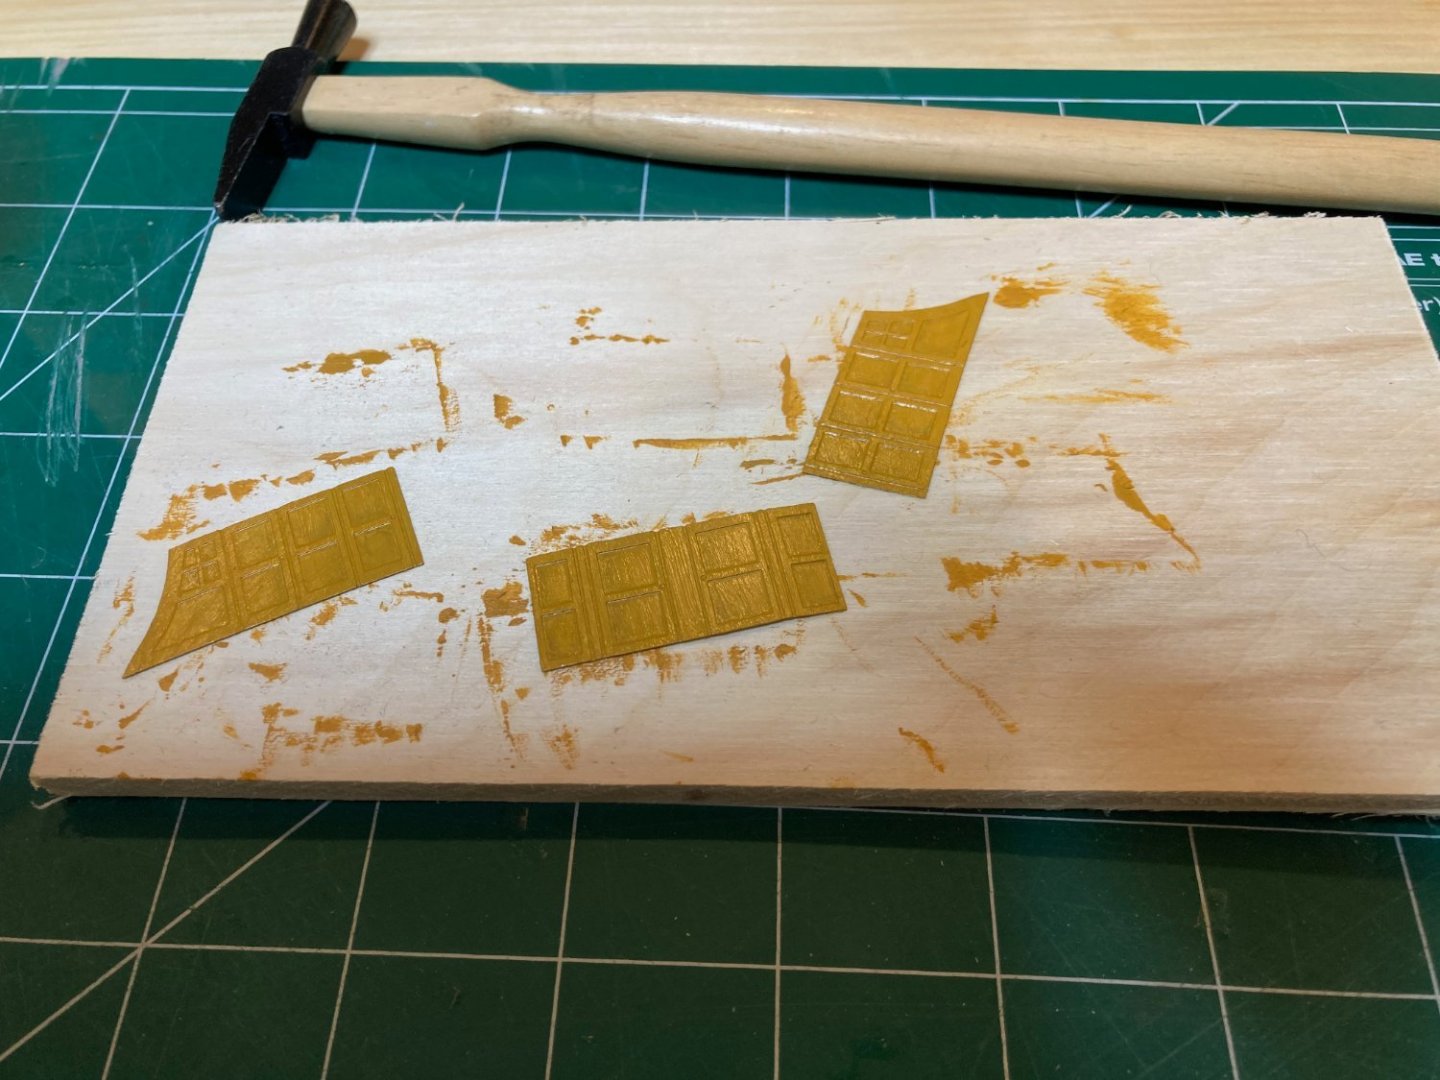
I also did a bit of fairing on the starboard side - the first in what undoubtedly will be a number of sessions of sanding and sneezing....The final step today was to finish and install the forward bulkhead on the aft fact of bulkhead 6. I bathed the part quickly in acetone, rinsed it in water, then brushed it lightly with some very fine steel wool. I then very gently brushed on 4 coats of yellow ochre, undiluted - I use Golden acrylic artist paints and a very fine brush for the purpose. The first shot shows only the first coat applied - the final finish looks much better - I use the side of a small round brush to lightly feather the surface - this reduces the more obvious brushstrokes, though it cannot produce the same even finish as an air brush. Regardless, I'm not displeased with the results. I used a toothpick dipped lightly in carbon black acrylic to render the door knobs.
It feels nice to be back at it! Enjoy the photos and happy modelling
hamilton


- GrandpaPhil, Nearshore, yvesvidal and 3 others
-
6
-
-
Built your San Juan kit many years ago and enjoyed building it immensely - nice to see there's a place for updates here
hamilton
- Canute, mtaylor and Artesania Latina
-
3
-
-
Hello Chief
When I built Corel's Greyhound kit (as Blandford) some years ago, I ended up ripping off the first planking from the wales up - though my issues were a bit different from yours. It pained me to do it, but it is actually one of the less tricky (if most frustrating) things to correct - if you have enough material left to finish covering the hull. Then you can do the additional fairing once the bulkheads are exposed again. I still tend to underestimate how much fairing is needed - especially at the bows and "buttocks" - to get a clean run, and I'm also usually quite disappointed in my planking...
Another possibility is, as Alan suggests, to just sand, fill and scrape the heck out of it. I've used a scalpel blade to cut down plank edges that stand proud and put a lot of elbow grease with some 80 grit sandpaper and managed to get a decent hull shape as a result - requires time and patience but like Alan says you can get a decent foundation for the second layer - this is the one that will be visible anyway, so if the first layer is a bit of a mess it won't matter too much.
In any case, I think you're making great progress - I'll be rejoining you soon! Work is just dragging at the moment but our home restoration is moving along and we should be back home and set up again by the end of May - then my work schedule quiets down for the summer and I can finally turn back to modelling - at least when the Admiral doesn't have me pushing a wheelbarrow or building more garden beds!! Fortunately we're running out of yard space so I might be able to eke out some more time at the bench!
hamilton
-
-
-
Hello Yves
I checked out the link to the copper foil - when I first looked at the photo you posted with this product, I thought it was the same copper tape that comes with copper-bottomed ship models like the Shipways Constitution or Syren....is this a different product? Or is it more or less the same.....? It definitely has a slightly different look (in the photos) than I've familiar with from the tape I've used in the past - but i wasn't sure if this was because it is a different product or if this effect was a result of a treatment you gave to it.....thanks!
hamilton
-
-
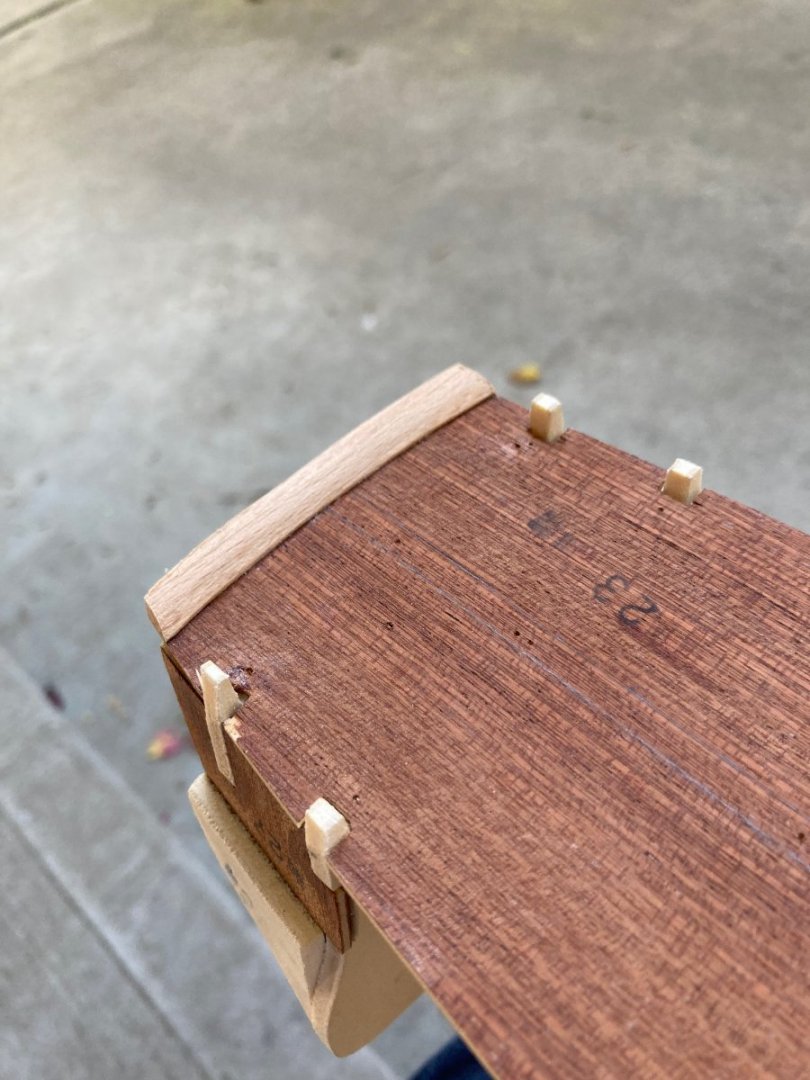
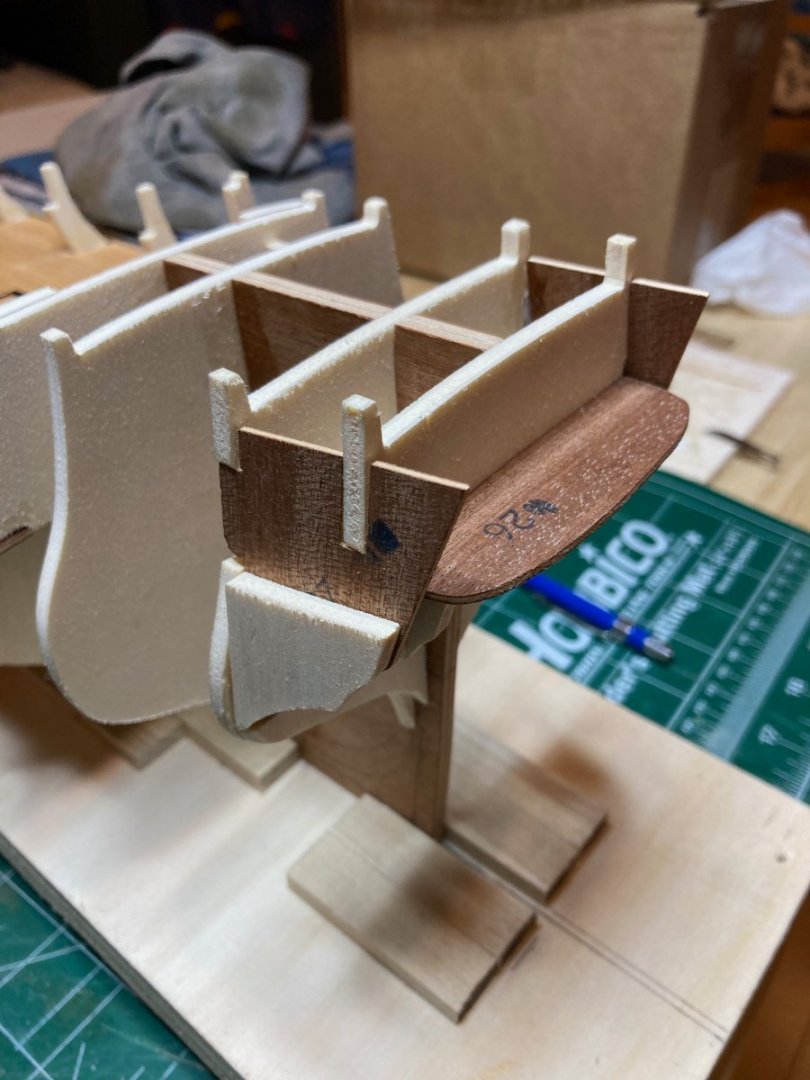
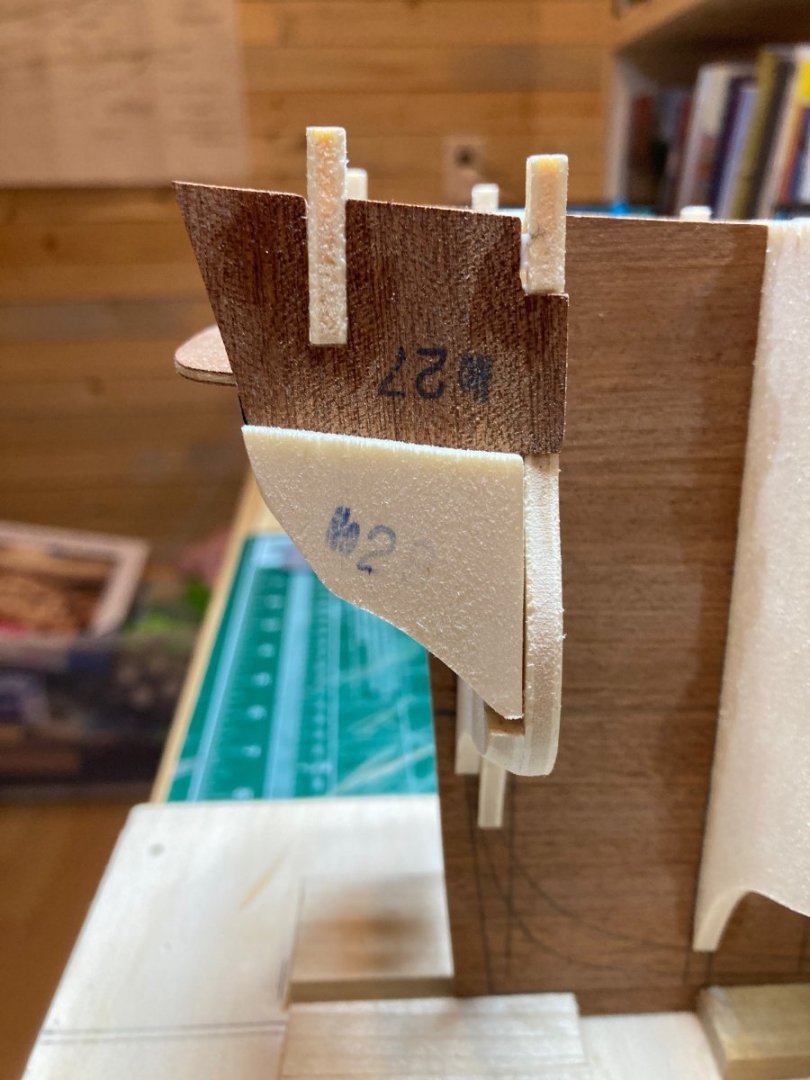
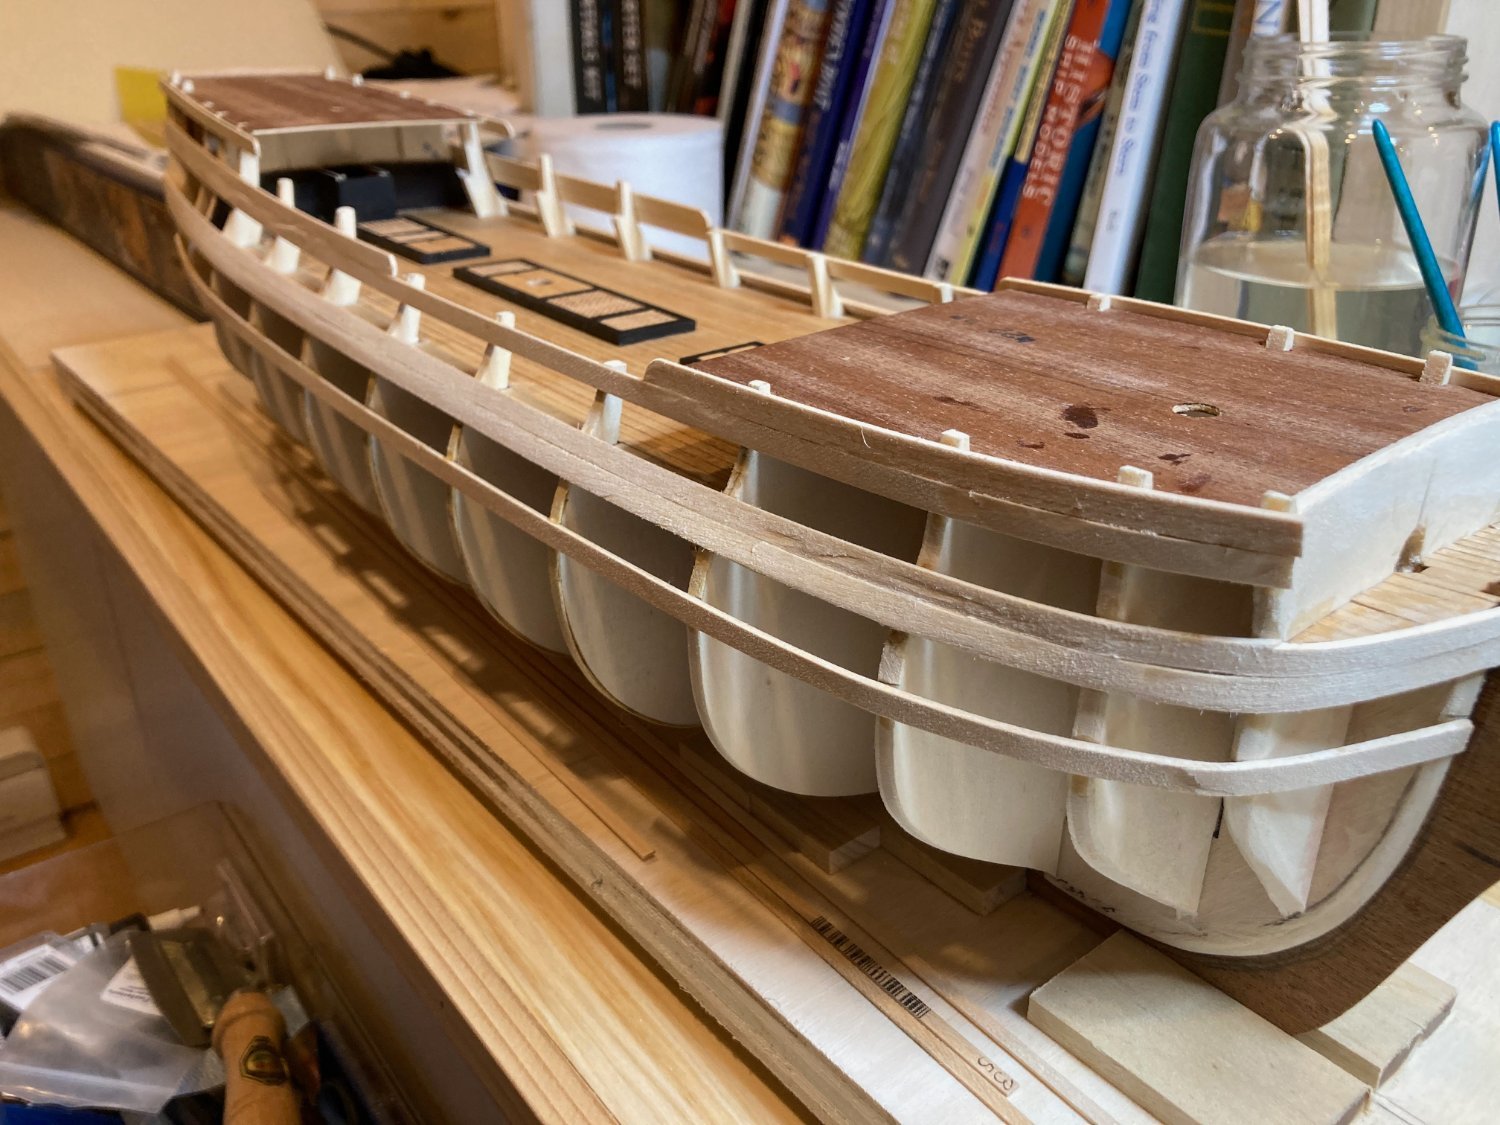
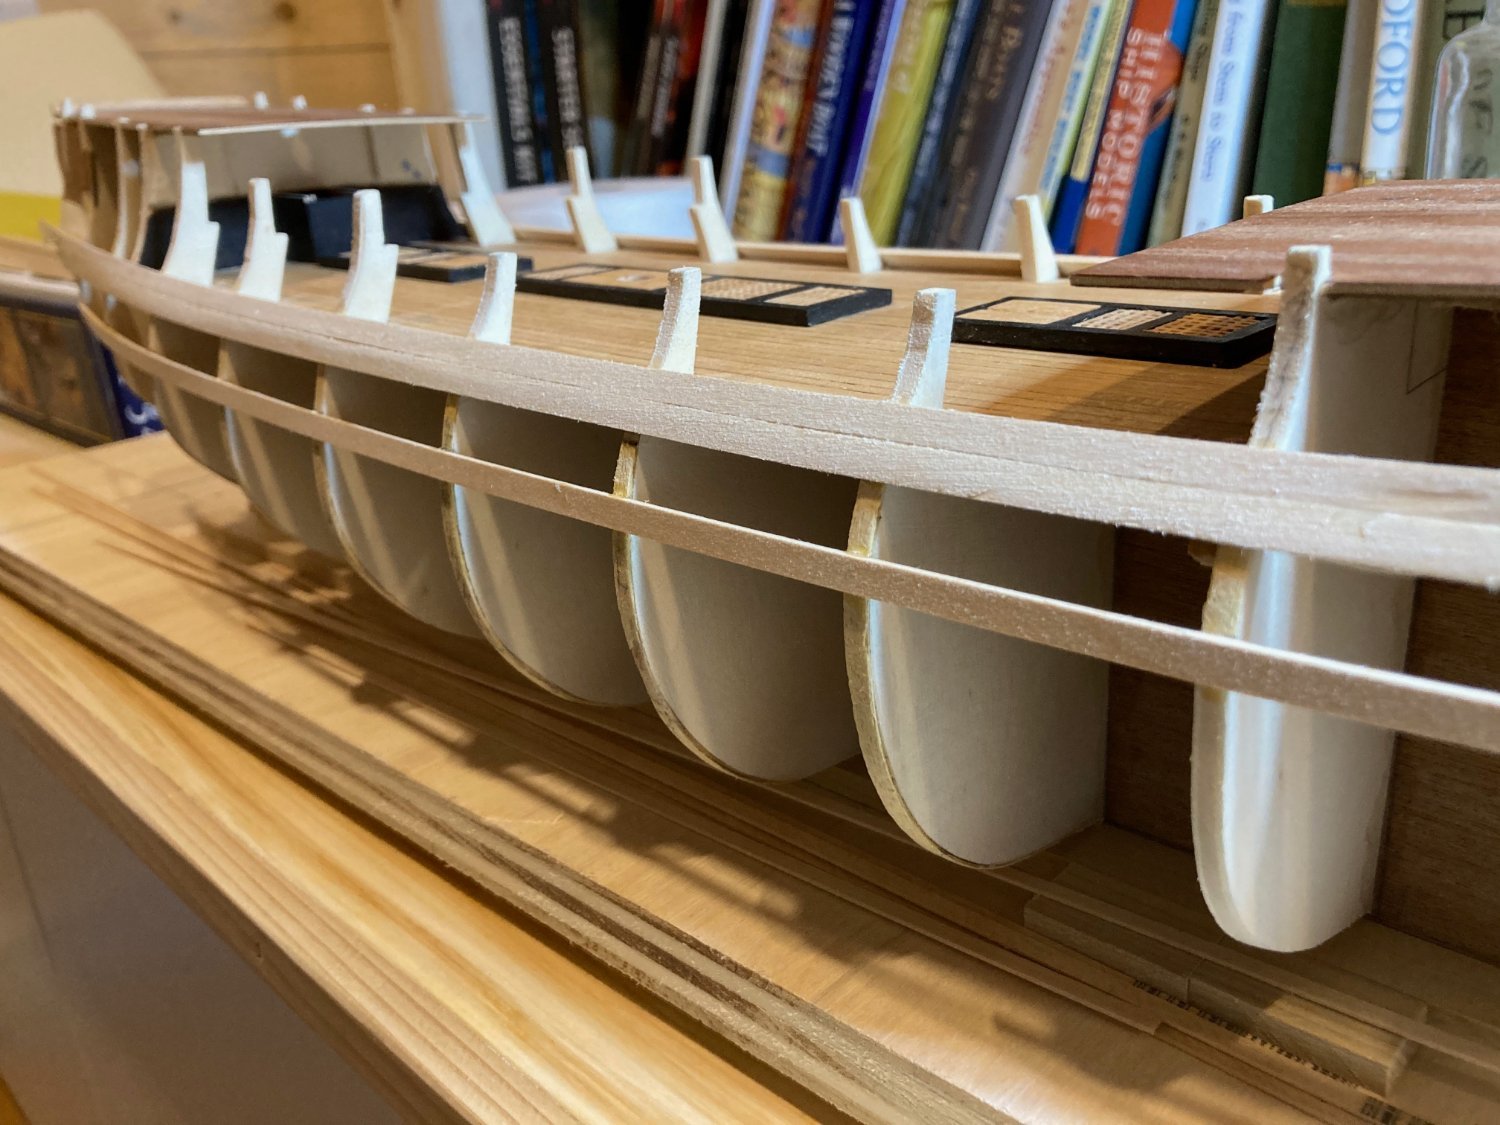
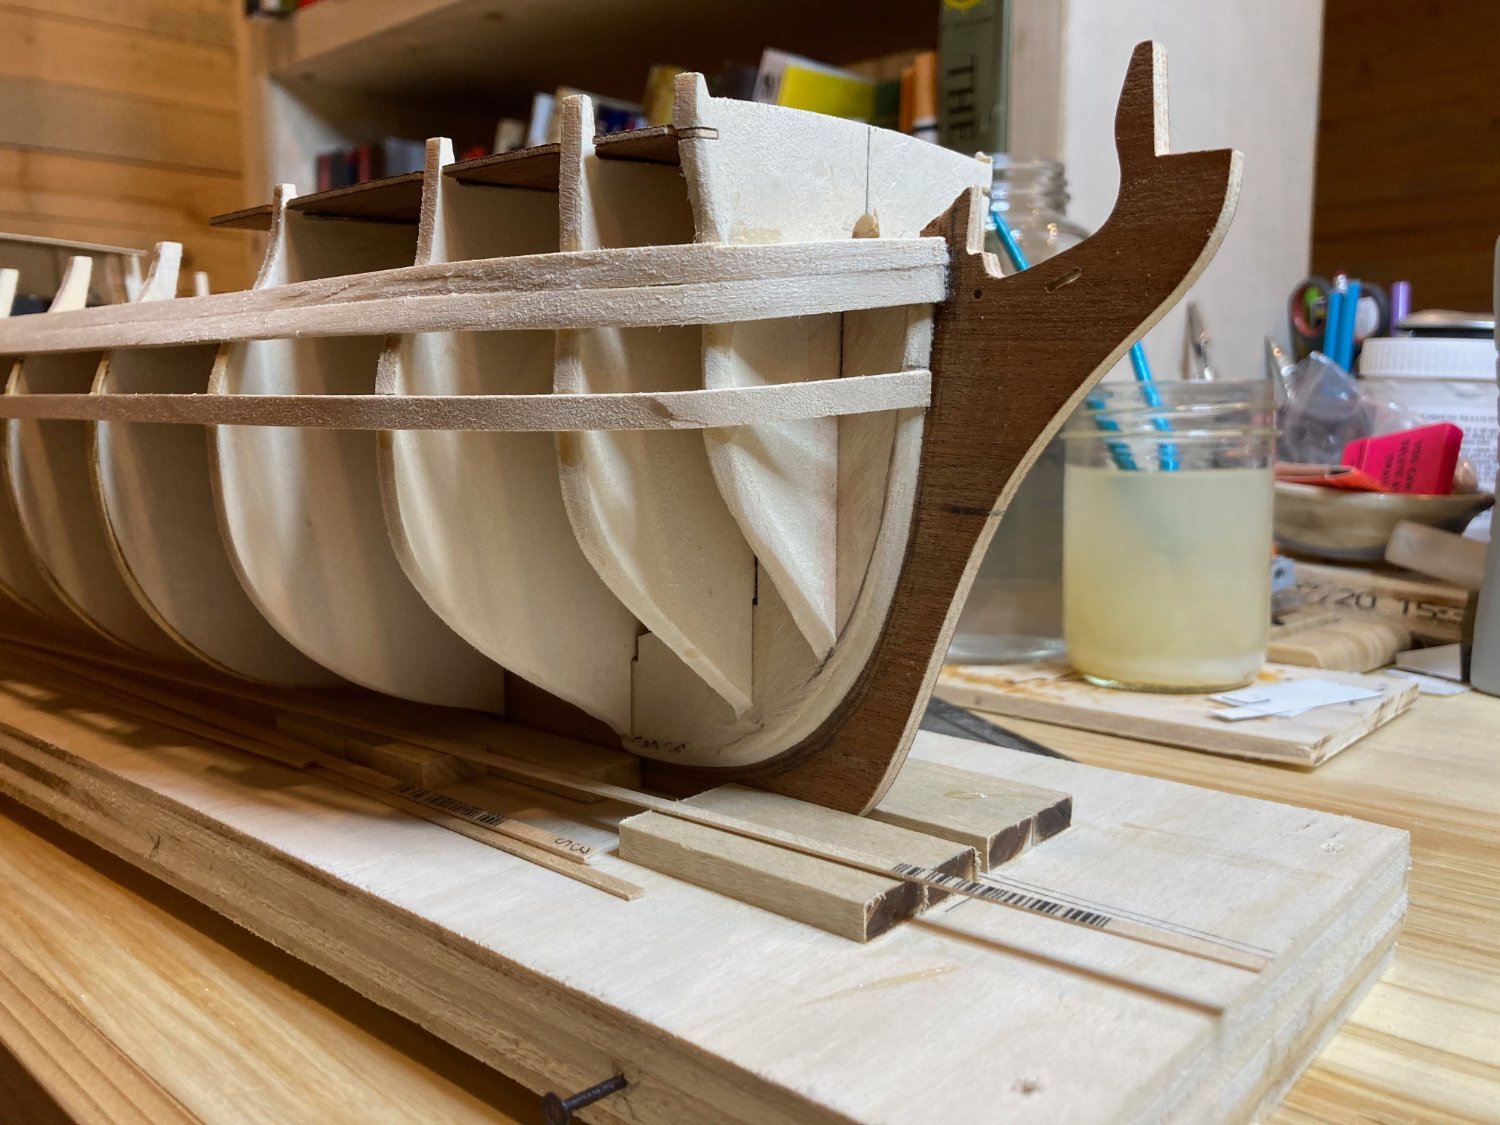
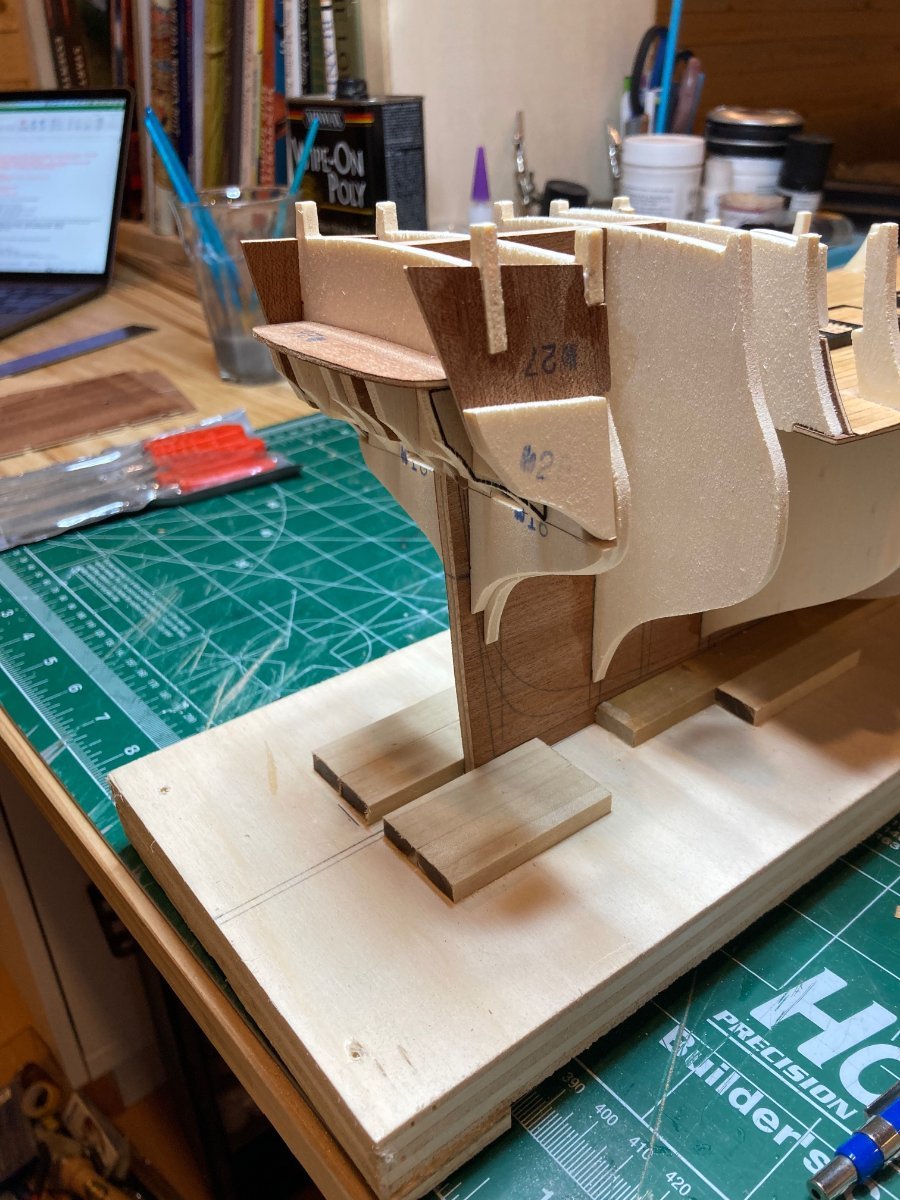
Alright - well I think this post will catch the log up to the current build progress - this one will document some miscellaneous additions to the framework and the completion of the stern framing.
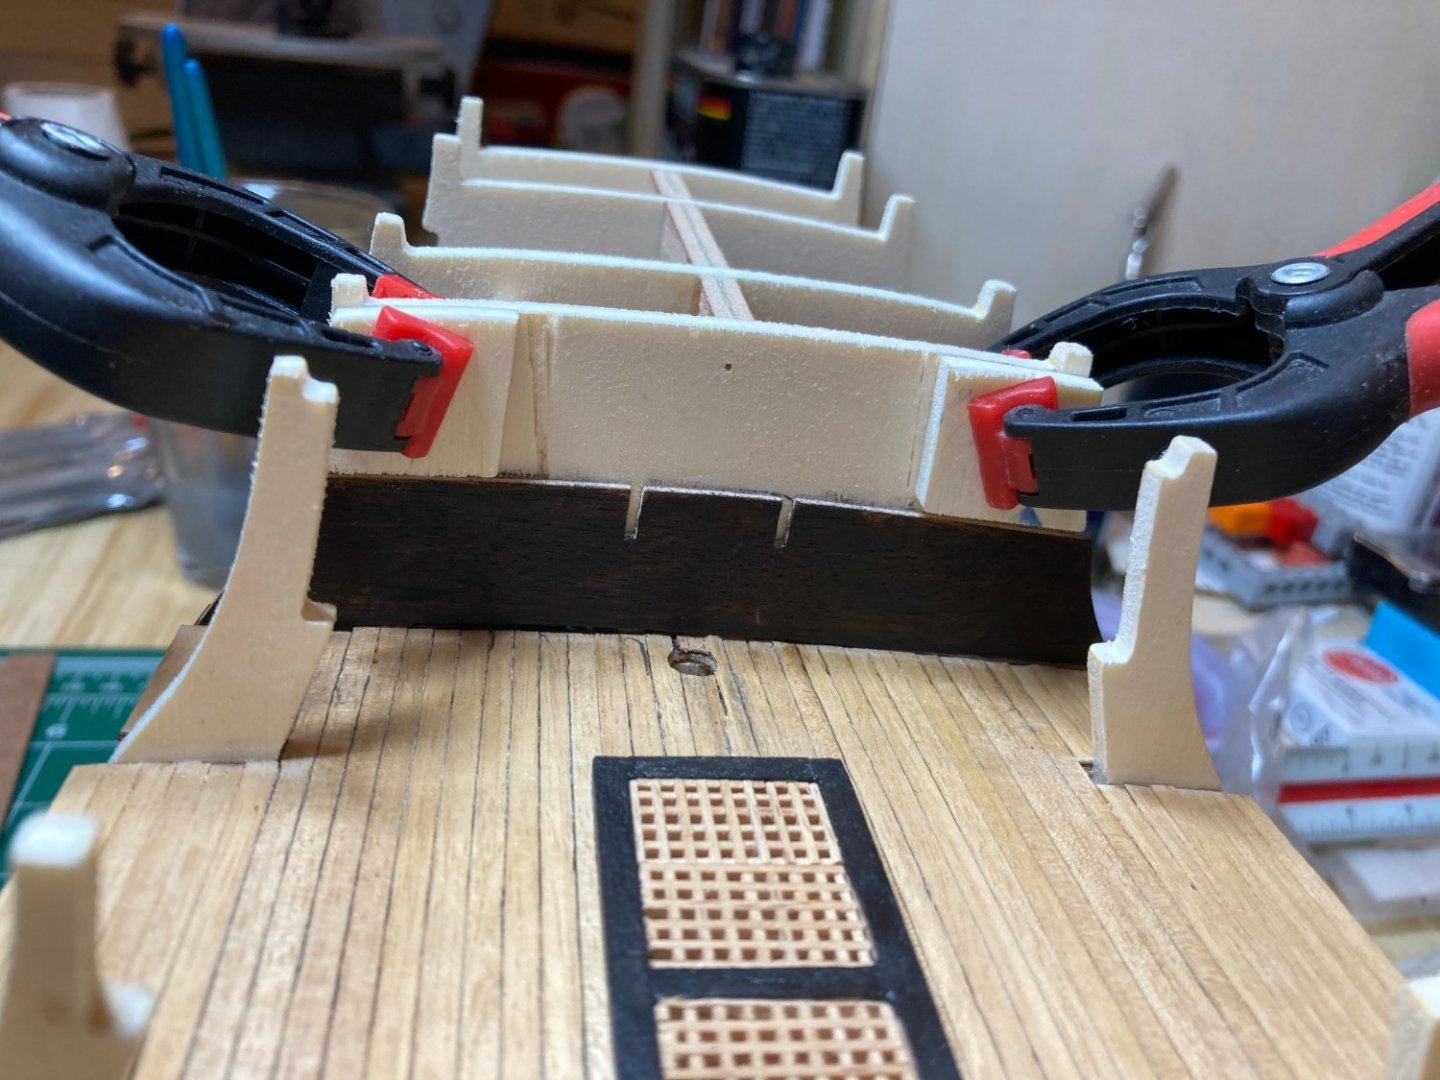
First, there is a filler piece (1/16" thick) that fits on the forward face of bulkhead 13 - it acts as support for the aft edge of the quarterdeck and the two slots are for tabs that extend from the pantry sides to centre that feature (this will be added later). I finished this filler piece black, though I doubt that any of it will be visible once the quarterdeck is installed.
There are also two small filler blocks that fit to port and starboard along the top part of bulkhead 13. They fit atop the quarterdeck, and technically should have been installed later after the quarterdeck, but I thought that since the poop would already be installed, this might be tricky - so I dry fit the quarterdeck, positioned these blocks, installed them and then removed the quarterdeck halves once they had set.
The last part of this stage involved installing the stern balcony and the quartergallery filler pieces port and starboard. These all required a little bit of adjustment for fit, but were relatively straightforward to install. The balcony is planked with a 4mm wide king along the centre line and 3mm wide planks to complete. Again - pretty straightforward. There is a slight camber to the balcony which I have not yet achieved - I have temporarily pinned the balcony down onto the p/s stern frames underneath but need to add some thin shims on the outboard frames to get the camber right and then will fix the balcony fully in place.
That's it for now - and for a while! We're vacating our home for 2 months to have the floors redone and though I may find some time to come back to work on Bellona (since the workshop is now in our garage), it may be a while before real progress happens on this one. In the meantime, enjoy!
hamilton


-
Hello all
Time for what will probably be the second to last update before this log catches up to my build progress. We had some flooding in our house last spring and after quite a lot of dithering and delaying (on our part, the insurance company's part and the contractors' parts) are now about to begin the restoration work - new floors and some repairs to baseboards, electrical door frames, etc.). We will have to move out for a couple of months - looks like in April and May. This means we have to start packing up all of our belongings through the rest of this month - this, in combination with my job will leave no time for modelling, unfortunately, and likely not until June, so once this log catches up to the actual progress, I'll have to go on hiatus here for a bit....which is annoying because I'm really starting to enjoy this build.....
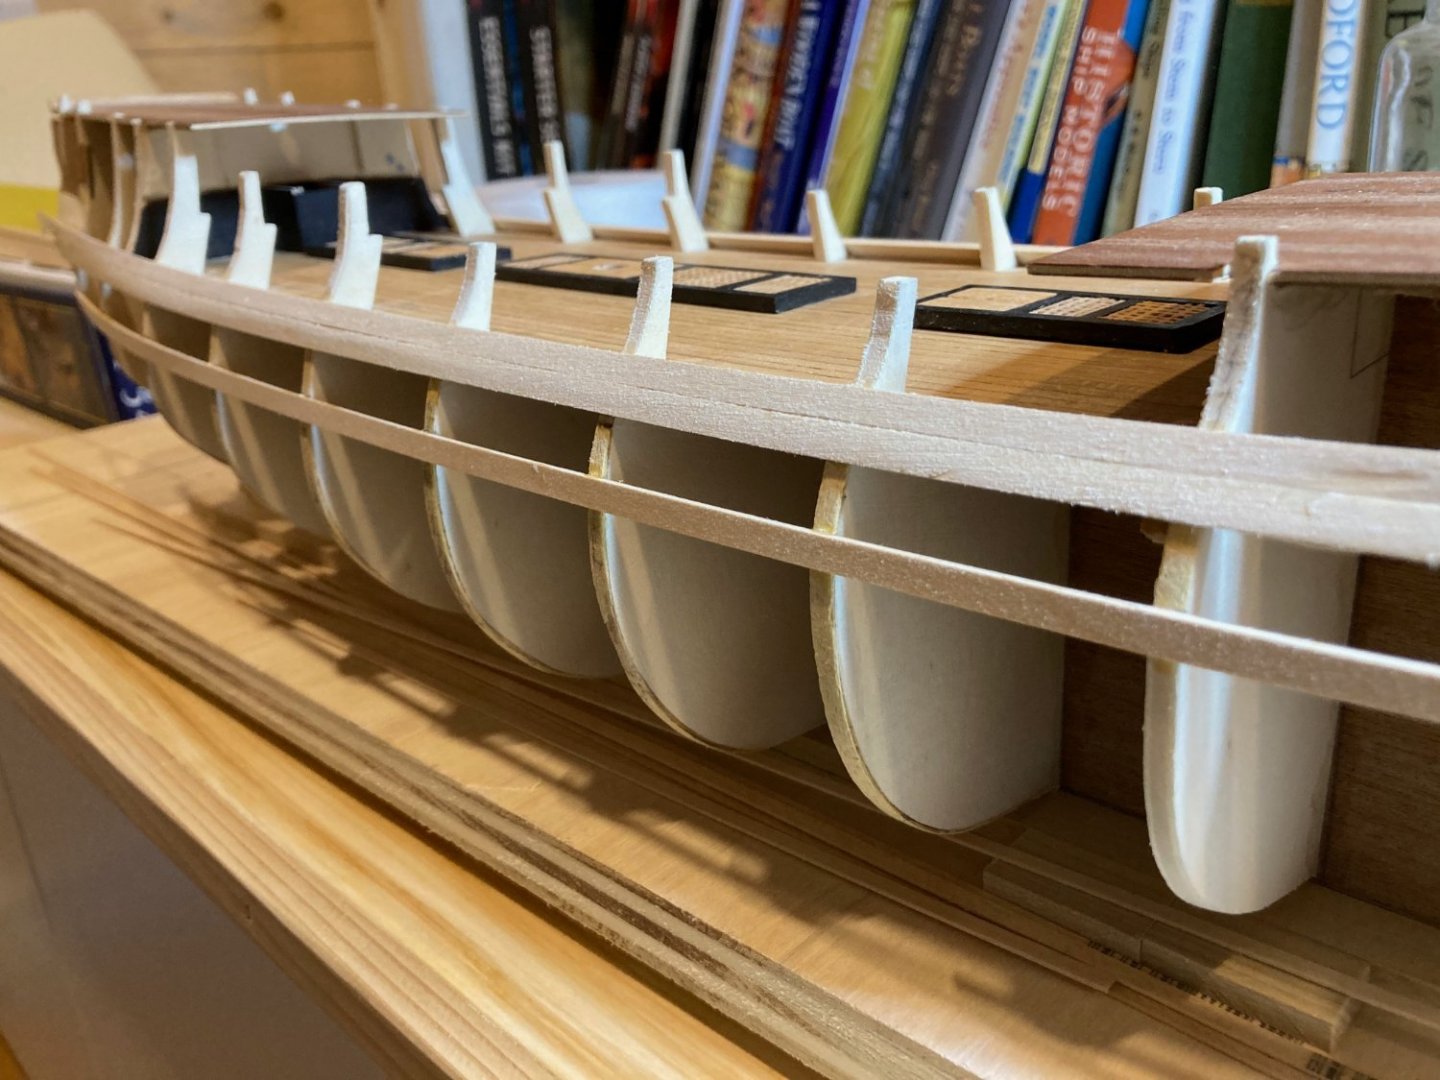
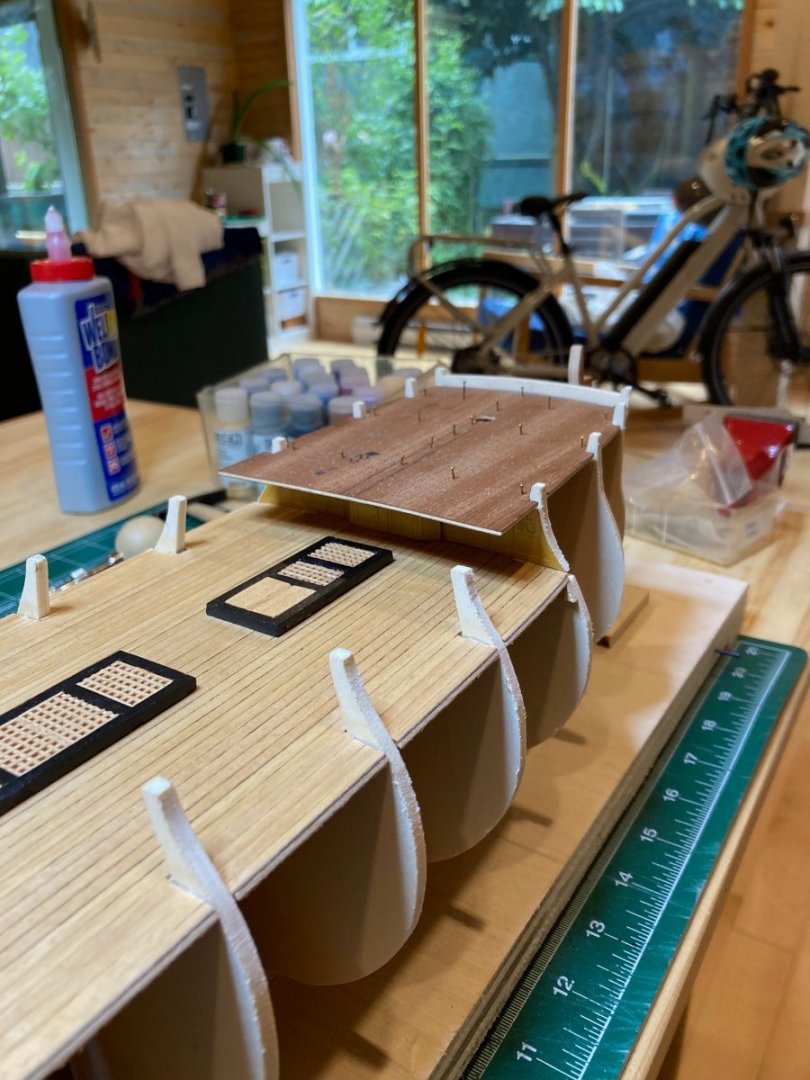
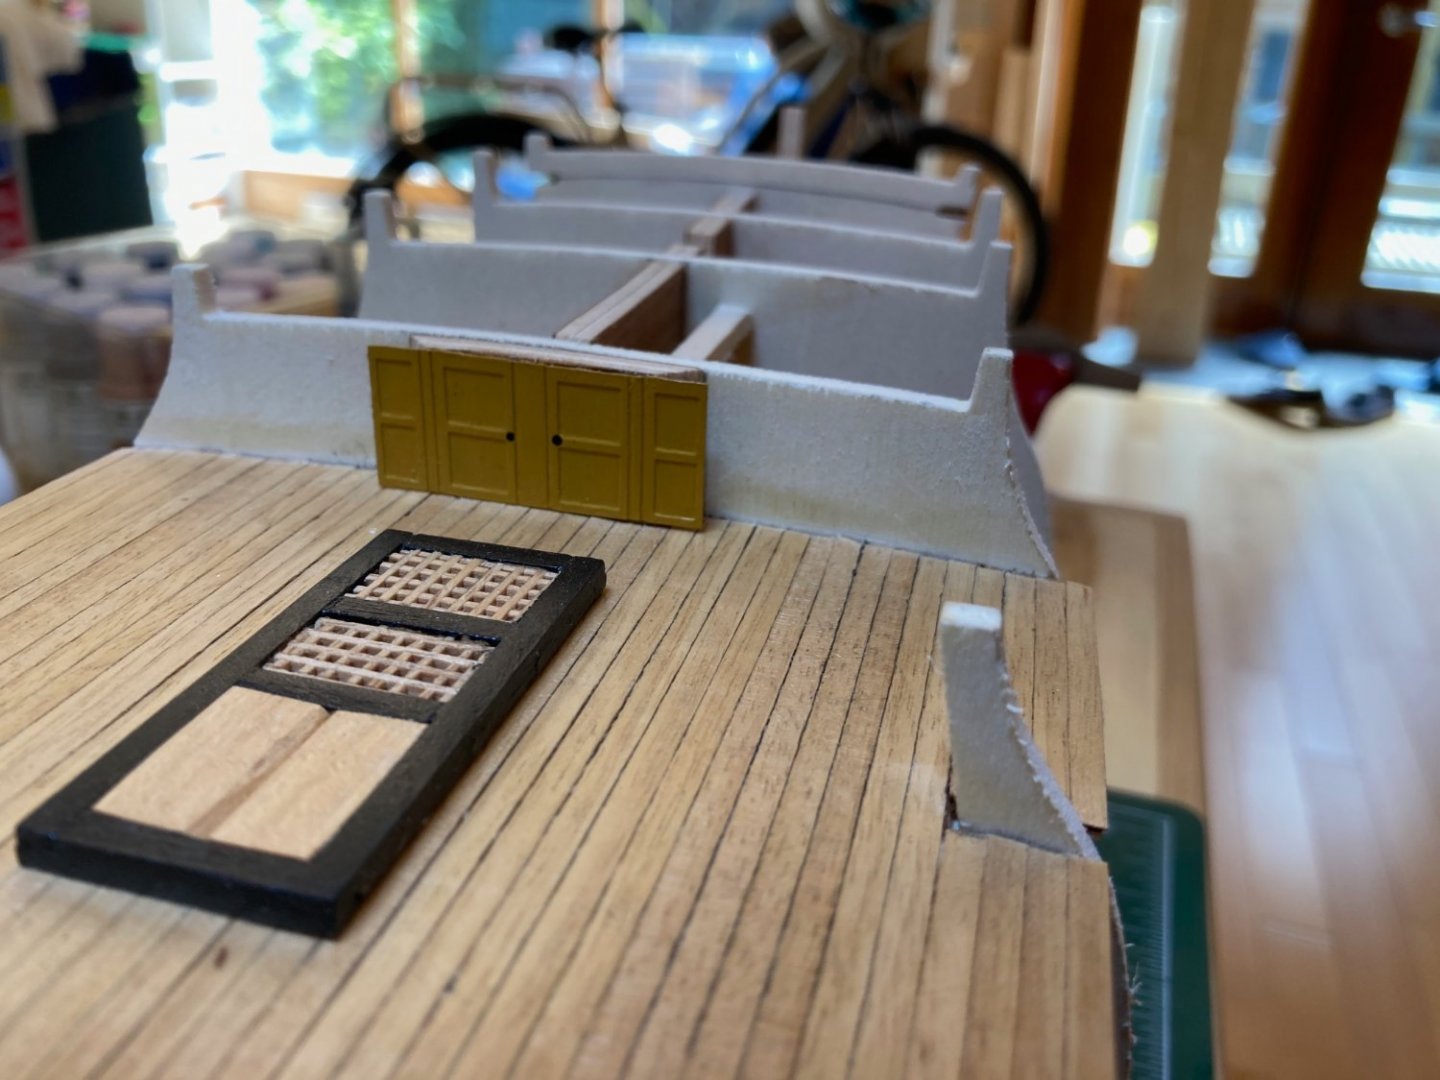
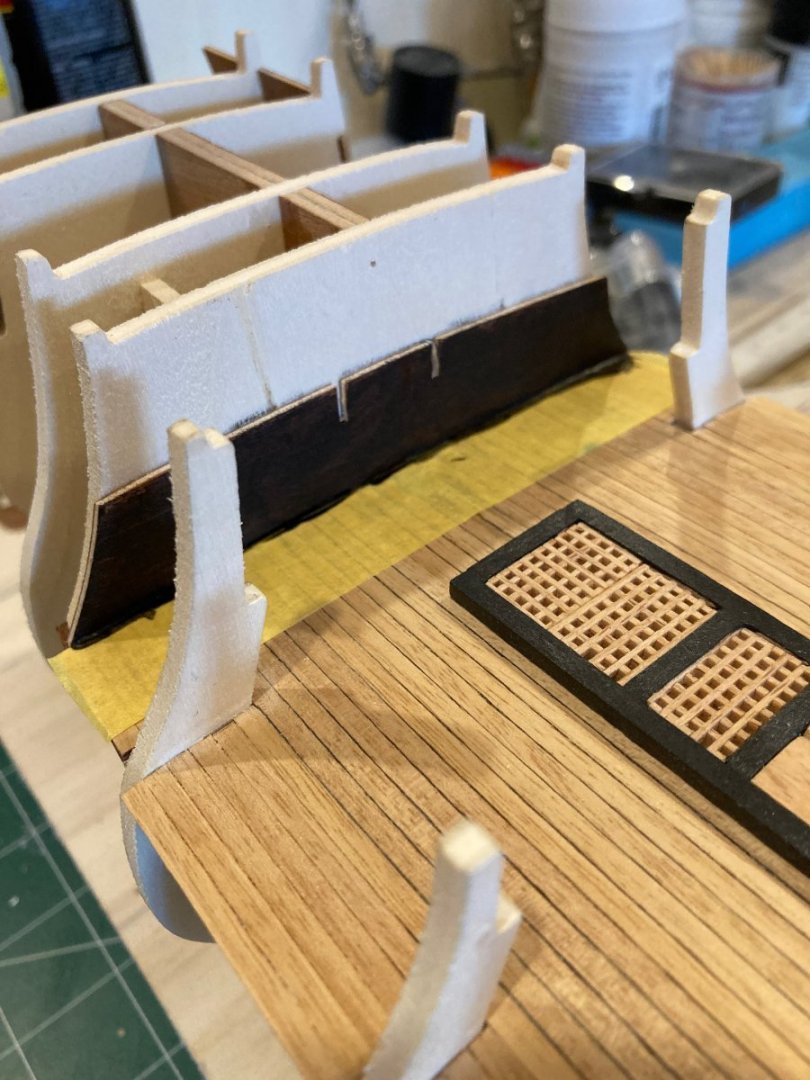
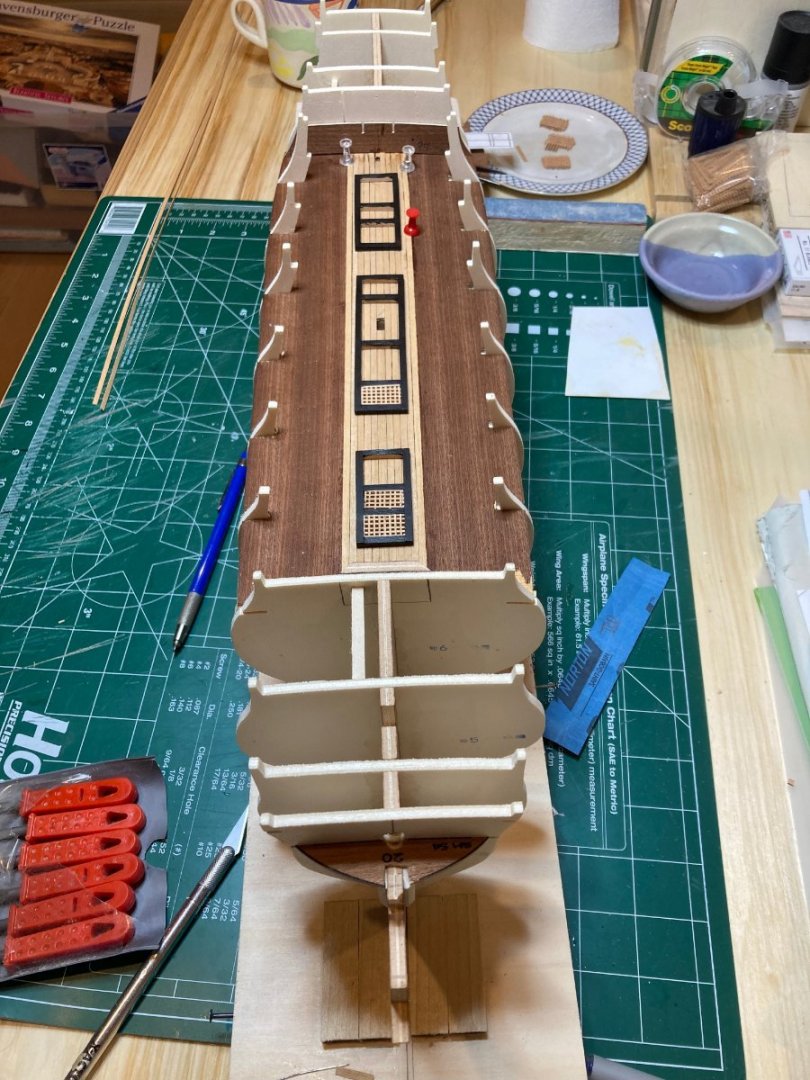
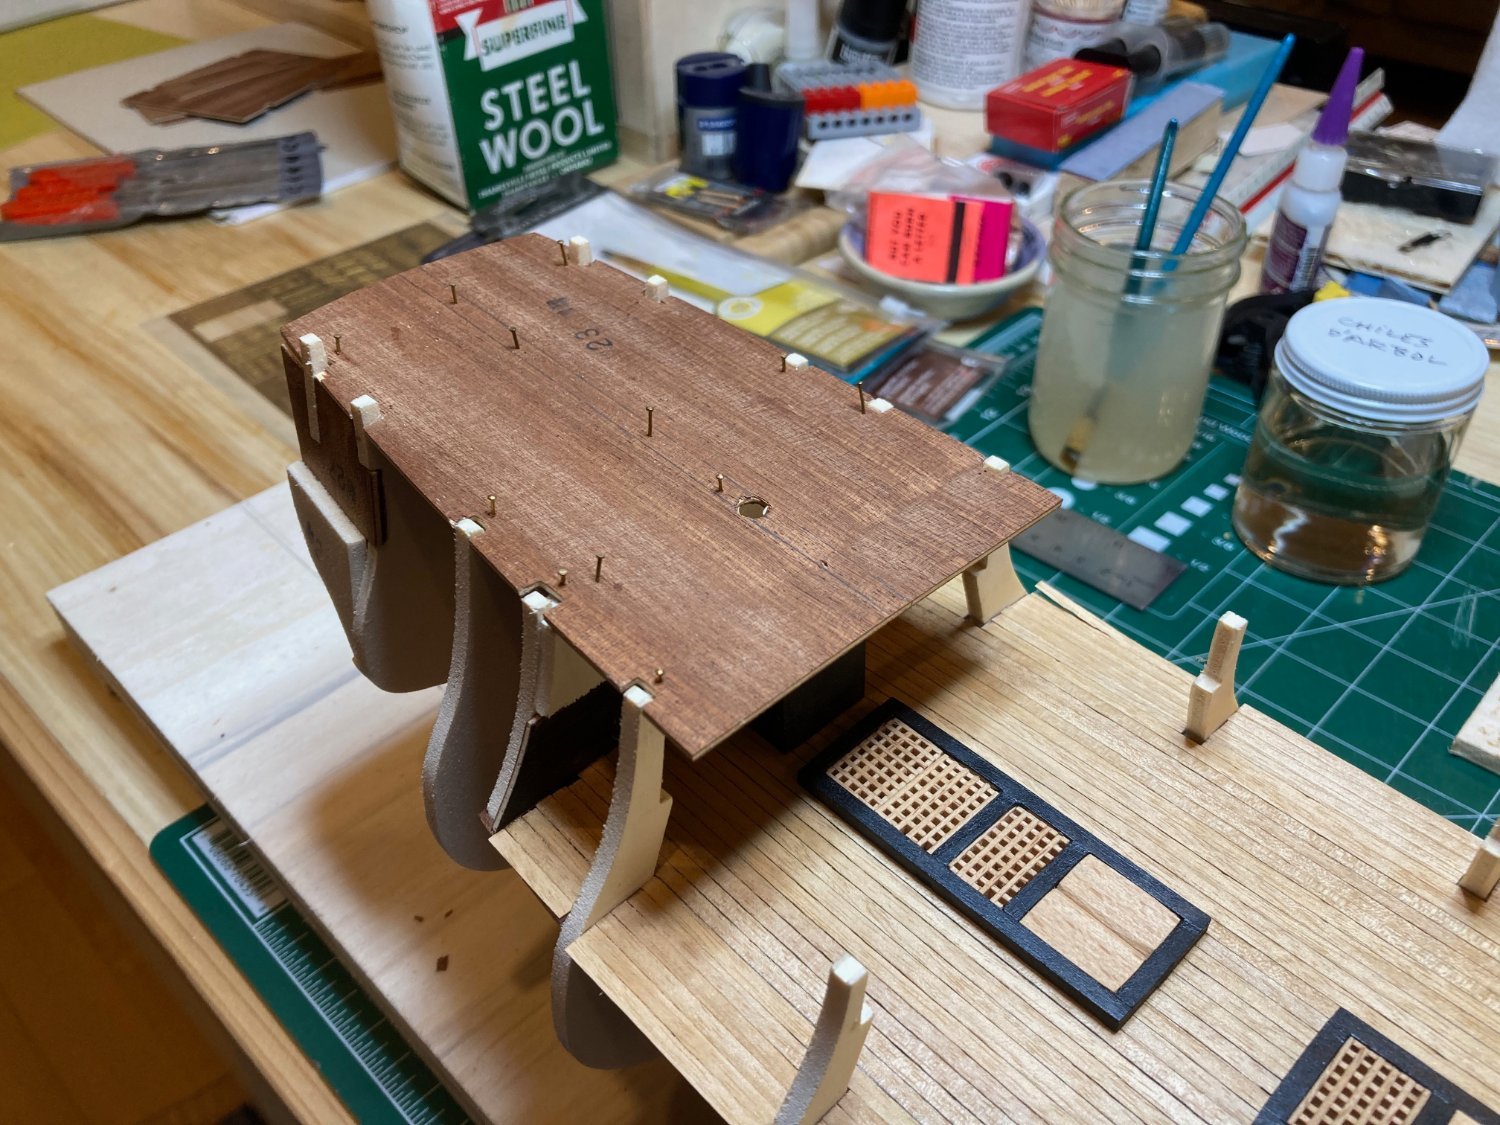
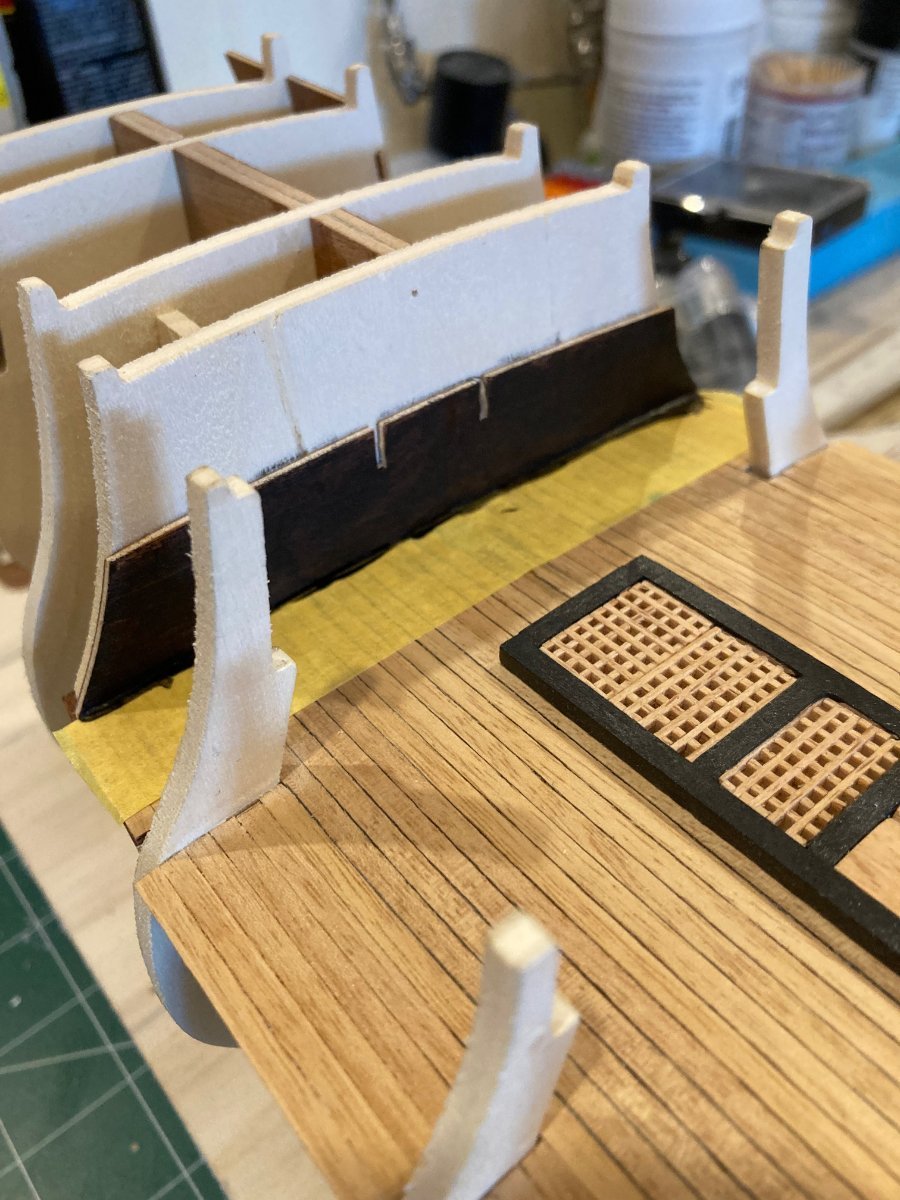
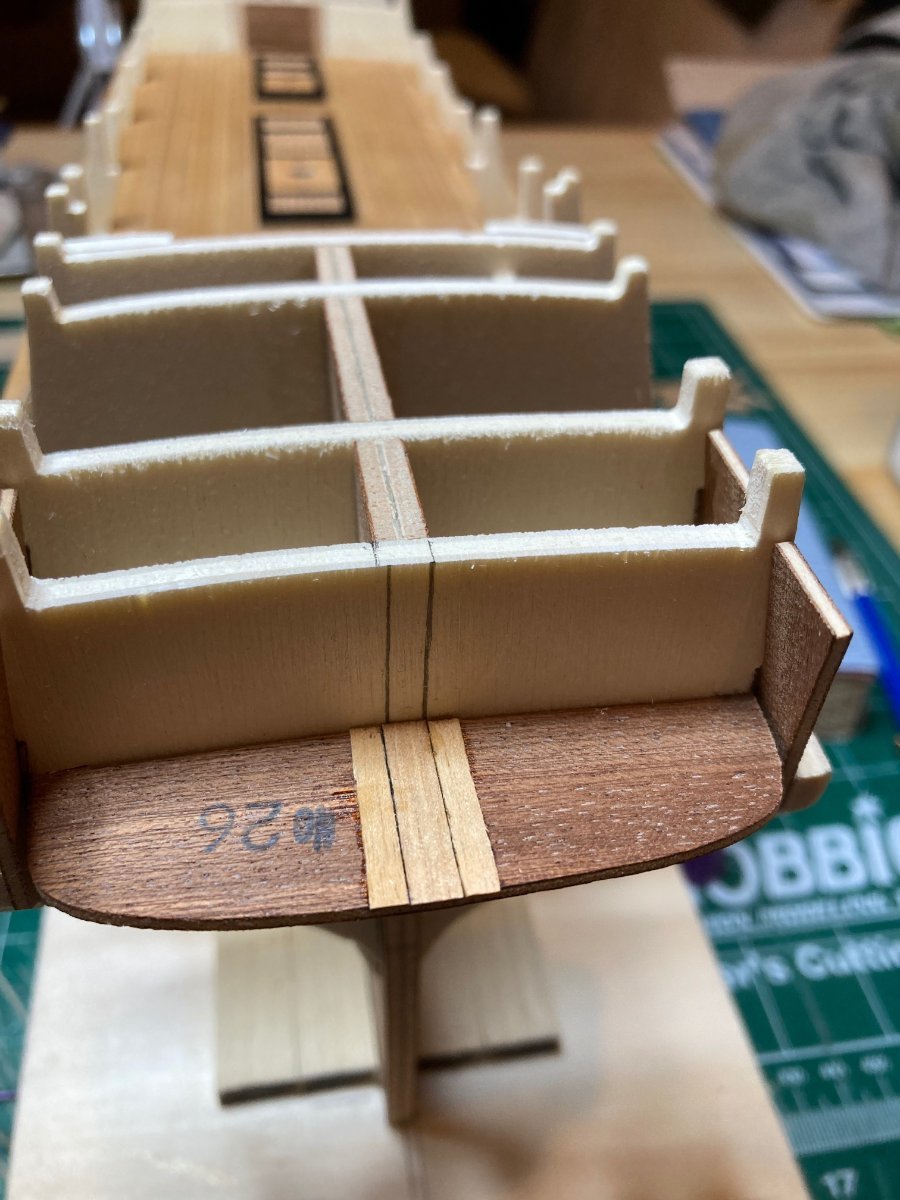
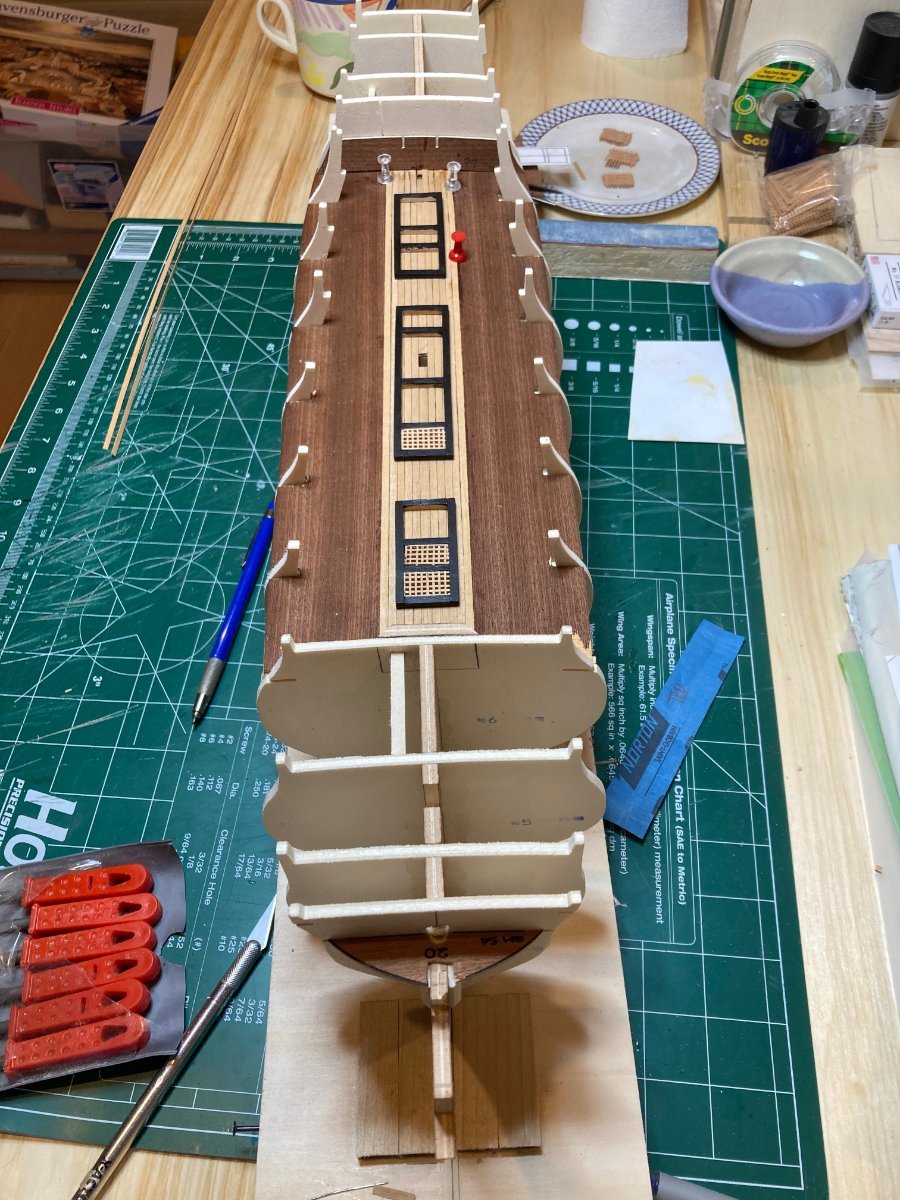
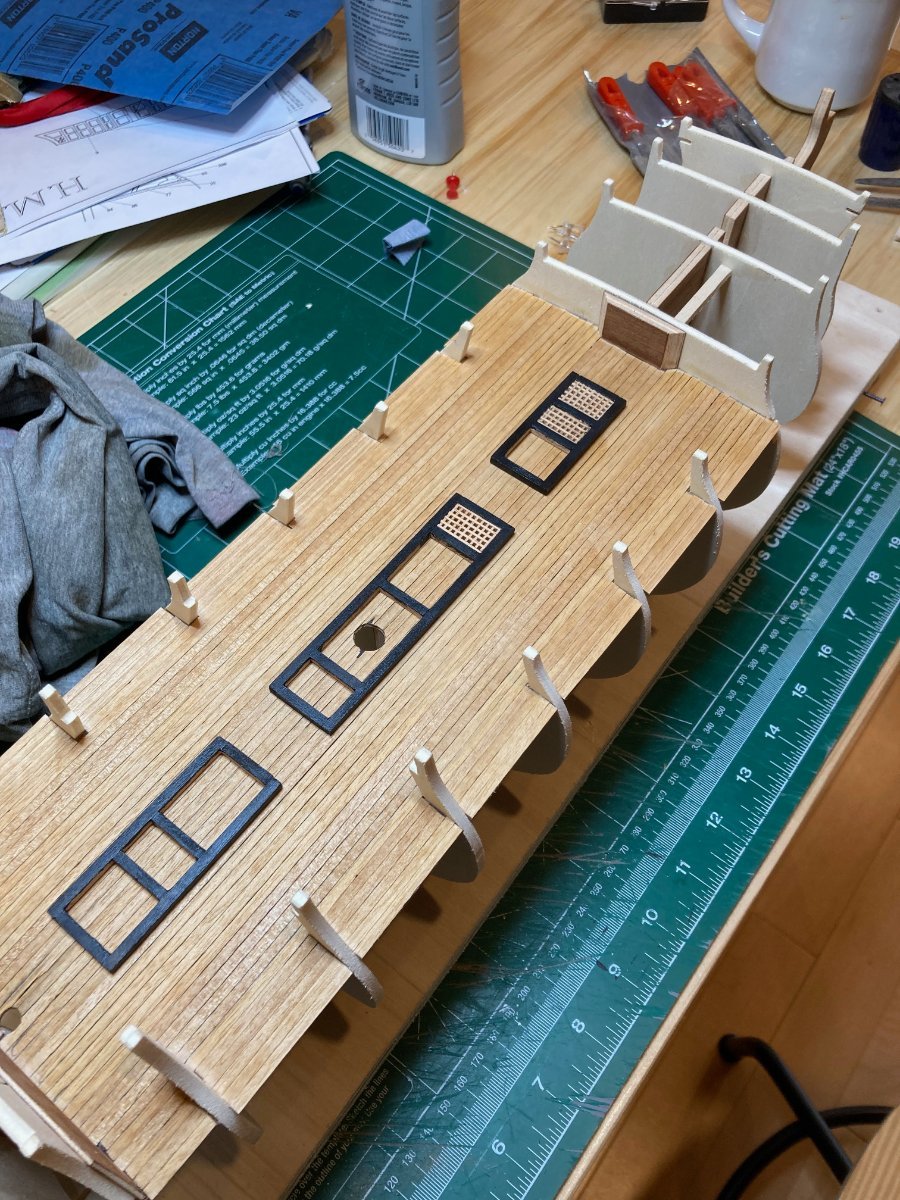
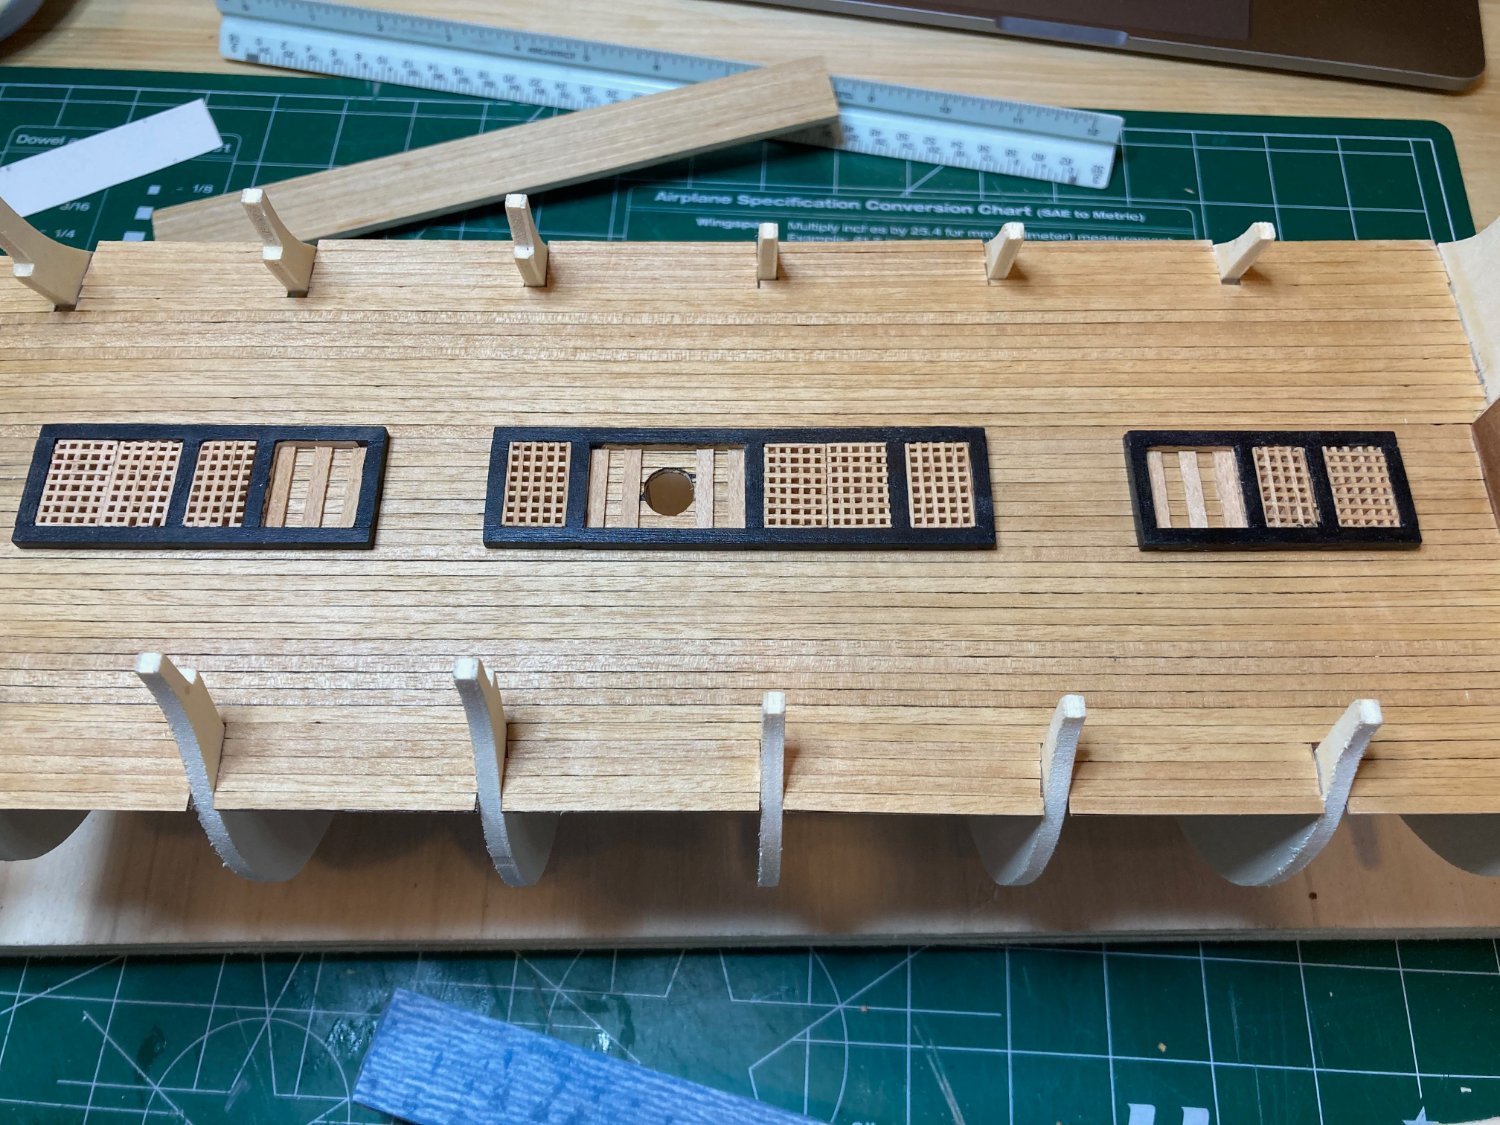
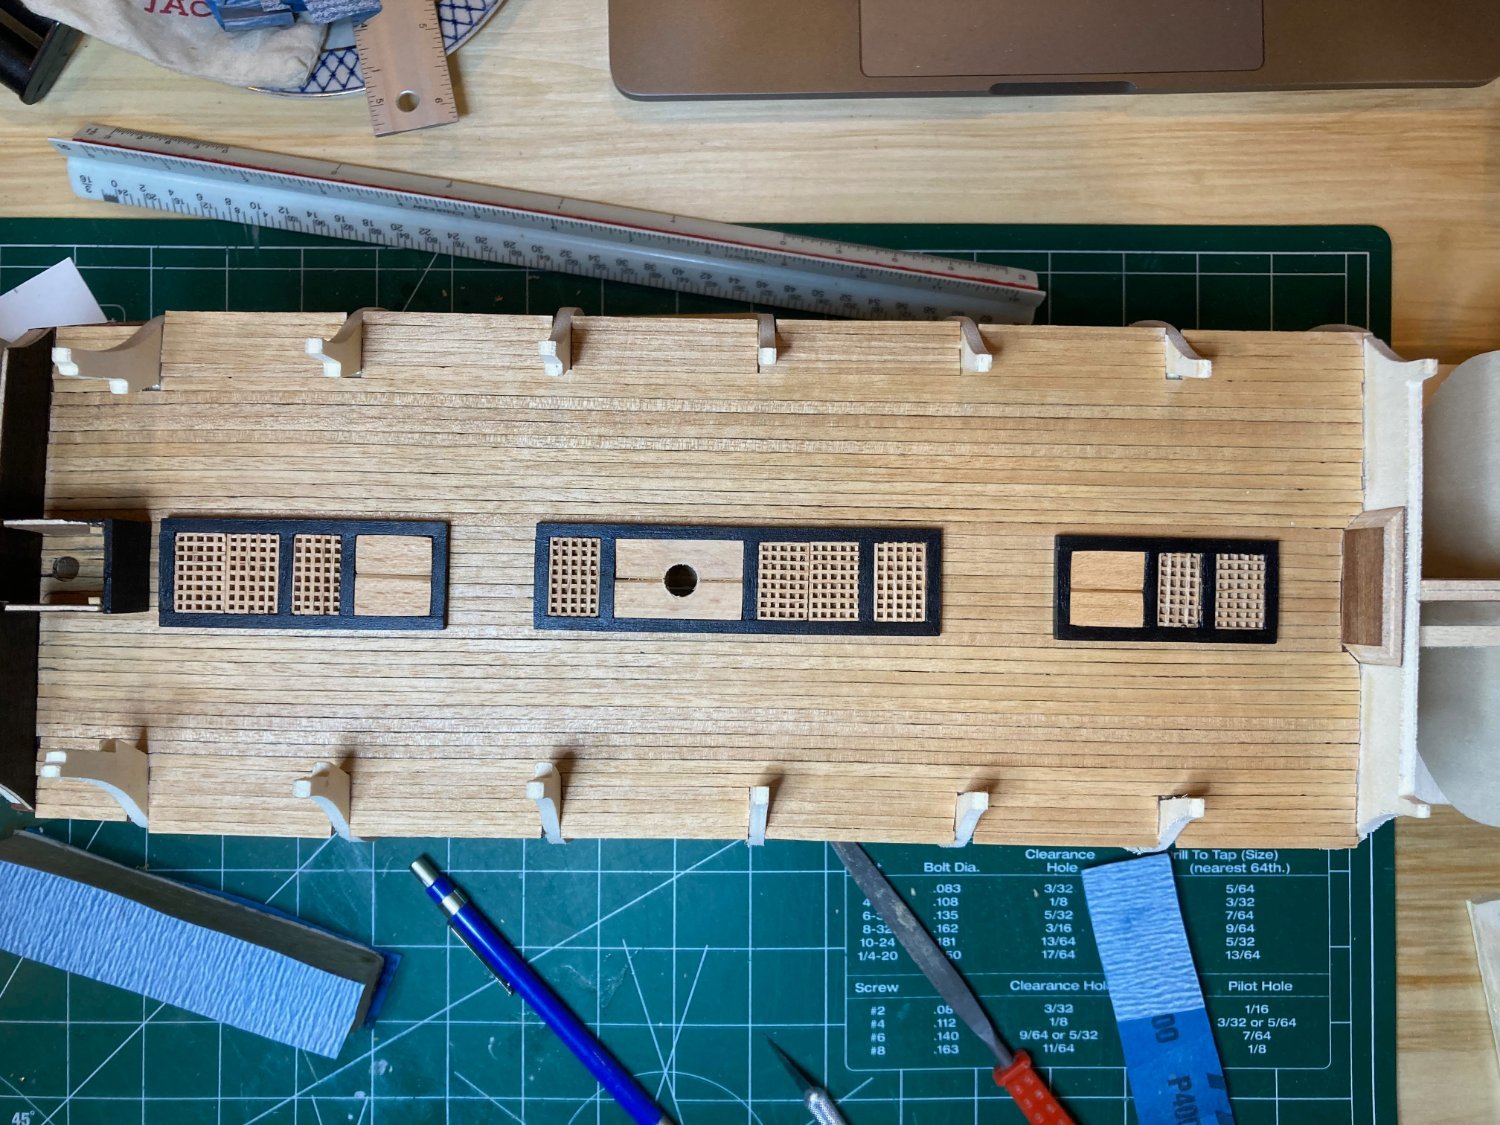
In any case, this post documents the hatches on the main deck. As mentioned above, I originally thought I'd nest the hatches into the decking. Some of the photos below were taken at a time when I still thought that way, which is why you sometimes see the hatches on the bare false deck and other times atop the planking.
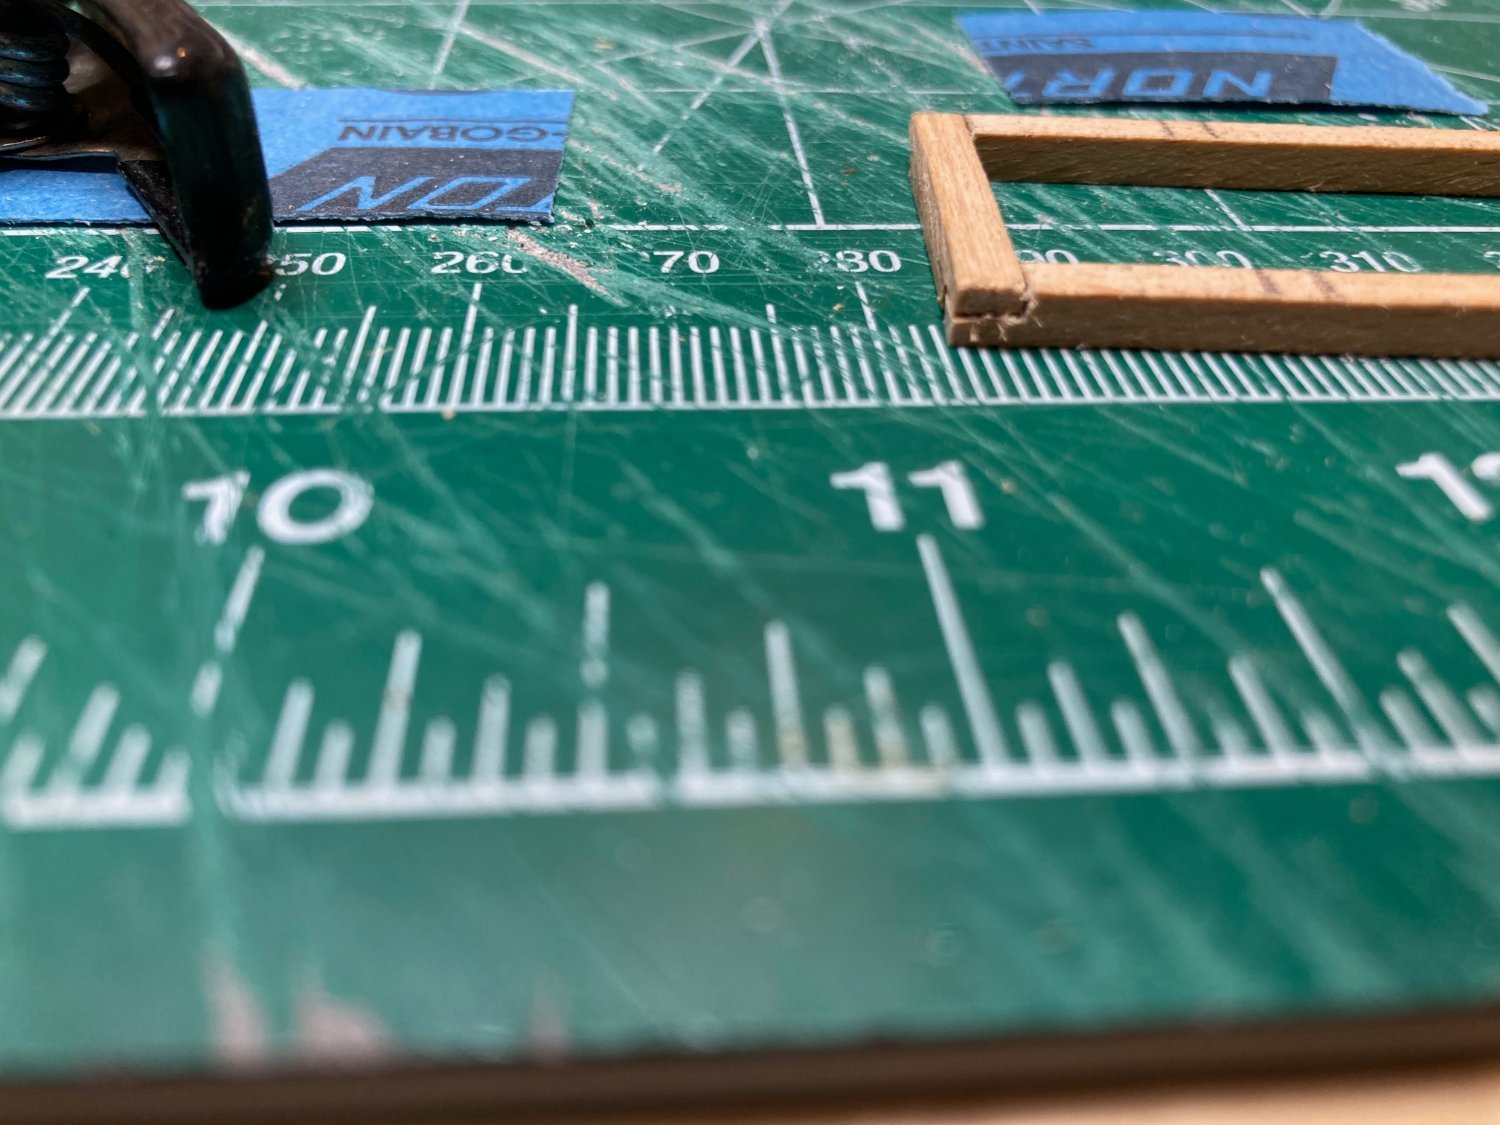
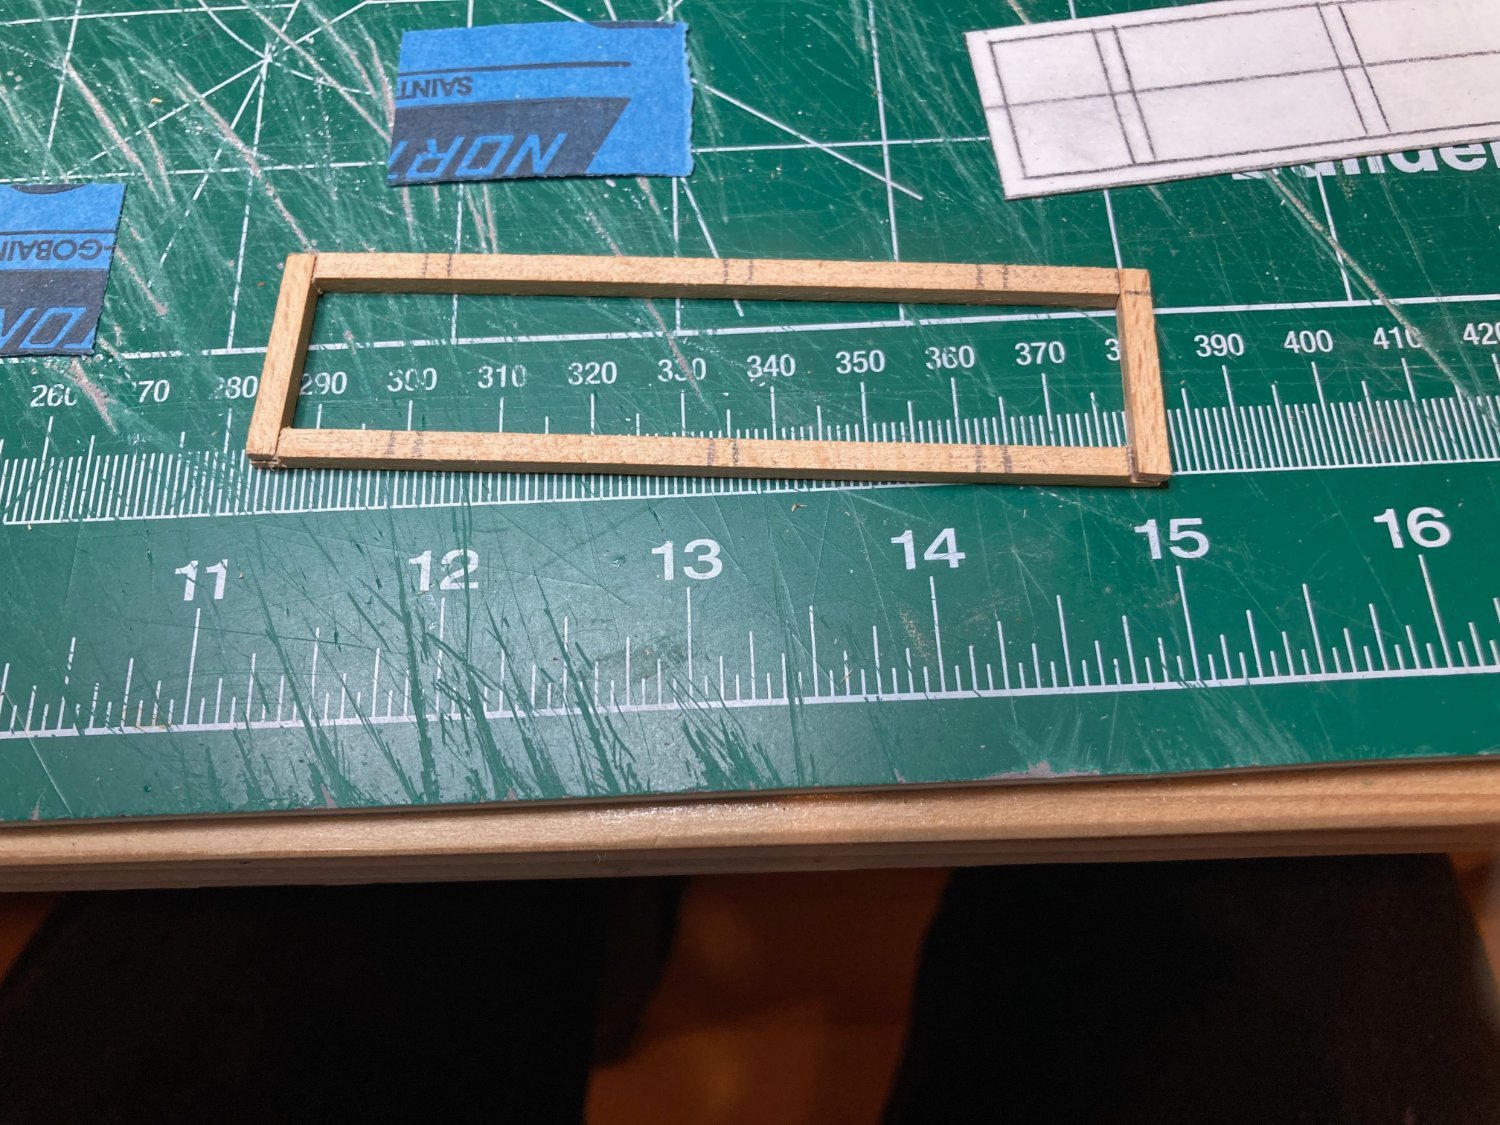
The hatch was assembled from 2mm x 4mm beechwood strips, lap jointed together. The first photo below shows a rather hairy looking joint, as I was working it in. I made templates from the plans out of card paper and used these to both measure out the individual pieces and assemble the hatches. The process was relatively straightforward though it required a bit of trial and error with the joints.
I decided to finish the coamings black. I don't know if this is historically accurate, but I've seen it other builds here and I like the look....The hatch gratings were more or less easy to assemble, but I feel like there must be a better process than mine for making them look neat and tidy....I assumed that because I had assembled the hatch coamings to the same dimensions given on the plans that the hatch gratings could be assembled as depicted there and then they would just slide in perfectly!! Ha!
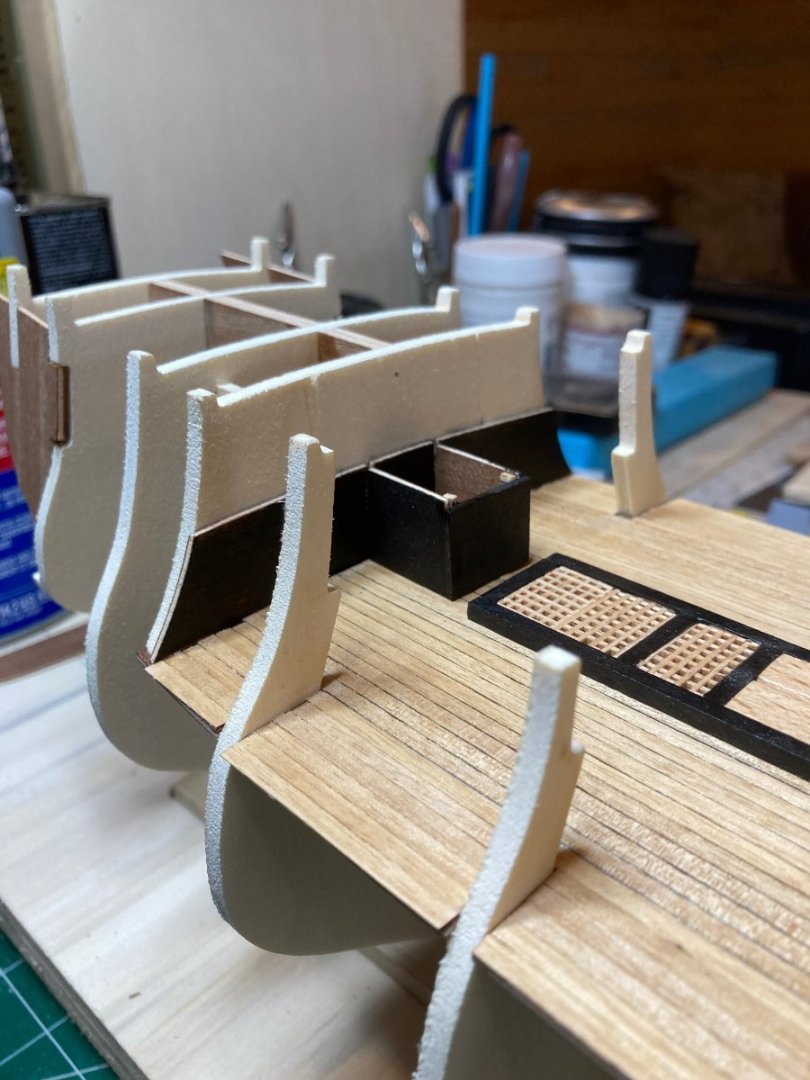
The material provided for the hatch gratings is not great - the strips are both unrefined and very soft and fragile. It doesn't take much to assemble them, but I feel like they just don't look very good once I sand down their edges to get them to fit into the coamings - I imagine it would be better (or at least look nicer) to assemble the coamings around the hatches - is this what most people do?
Anyways, the other components here are some 1mm x 3mm strips that act as supports for the mast partners and capstan platforms, and the the partners and platforms themselves, which are made from 2mm x 10mm beech. I chamfered off the inside edges of these for appearance, but am realising that this would make no sense as a structural feature of the vessel....unfortunately, these are installed permanently now, and re-doing them does not appeal to me - once again, this part of the model is going to be largely buried, so I'm happy to try to concentrate my mistakes or mis-steps here.
In the last photo, you can also see the pantry off to the left, which at this point is assembled and finished, but not installed.
That's pretty much it. Enjoy the photos and happy modelling!
hamilton


HMS Bellona by hamilton - Corel - 1:100 - 1780 refit
in - Kit build logs for subjects built from 1751 - 1800
Posted
Good tip, Alan! We're pretty starved for exotic wood supply at my local hobby stores, but I'll see what I can source - another option would be to use a stock of boxwood that I have to mill some sheets for planking material, but I want to keep this precious stuff in reserve for a future project I have in mind...
hamilton